
Apollo 500 - Tente Vango - Notice d'utilisation et mode d'emploi gratuit
Retrouvez gratuitement la notice de l'appareil Apollo 500 Vango au format PDF.


| Type de produit | Tente de camping |
| Marque | Vango |
| Modèle | Apollo 500 |
| Capacité | 5 personnes |
| Dimensions (L x l x H) | Environ 600 x 280 x 210 cm |
| Superficie au sol | Environ 16,8 m² |
| Poids total | Environ 15 kg |
| Matériau du toit | Polyester enduit PU |
| Matériau du sol | Polyéthylène renforcé |
| Arceaux | Fibre de verre |
| Indice d'imperméabilité | 2000 mm |
| Nombre de portes | 2 |
| Nombre d’absides | 2 |
| Fonctions principales | Abri de camping, protection contre les intempéries |
| Entretien et nettoyage | Nettoyer à l'eau claire, sécher complètement avant rangement |
| Sécurité | Ne pas utiliser près de flammes nues |
| Pièces détachées et réparabilité | Arceaux, sardines et haubans disponibles en option |
| Informations générales | Conçue pour le camping familial |
FOIRE AUX QUESTIONS - Apollo 500 Vango
Questions des utilisateurs sur Apollo 500 Vango
0 question sur cet appareil. Repondez a celles que vous connaissez ou posez la votre.
Poser une nouvelle question sur cet appareil
Téléchargez la notice de votre Tente au format PDF gratuitement ! Retrouvez votre notice Apollo 500 - Vango et reprennez votre appareil électronique en main. Sur cette page sont publiés tous les documents nécessaires à l'utilisation de votre appareil Apollo 500 de la marque Vango.
MODE D'EMPLOI Apollo 500 Vango
TENT PITCHING INSTRUCTIONS – APOLLO (EN)
natural_image
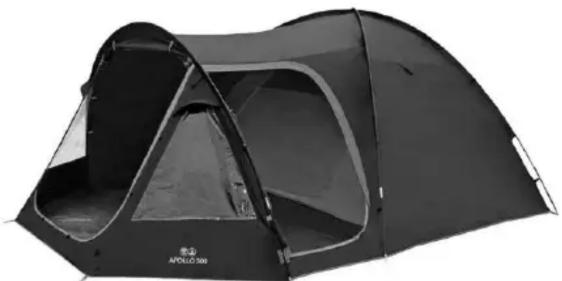
Black camping tent with open lid and visible branding (no text or symbols on tent itself)Flysheet First Pitching
- Assemble the 3 poles and lay them on the ground.
- Open out flysheet and position in required direction.
- Insert the diagonal poles through the pole sleeves on the outside of the flysheet.
- Locate one end of each pole on one side of flysheet, into the Ring & Pin system at the base of the tent. Make sure poles locate into correct pin system (all poles follow corresponding flysheet seams to pin system).
- Push poles into an arch from opposite ends and locate pole ends into corresponding metal pin to create the dome.
- Insert front pole, push the pole into an arch and locate the ends of the pole into the metal pin system.
- Tighten the tension adjusters located on the Ring & Pin webbing.
- Start pegging out the main corners at one end of the tent using the pin pegs provided.
- Pull the tent forward until taut and peg out the main corners at the other end of the tent, again with the pin pegs.
- Ensure the tent is in a straight line.
- Secure the tent using the pin pegs through the ring & pin system (See fig 2).
- Peg out ALL guy lines, ensuring that they are in line with the pole or seam they are attached to.
Inner Attachments
- Open out inner tent inside flysheet and position doorway to correspond with the porch entrance of the flysheet.
- Starting from the rear corners of the tent, attach the hooks on the groundsheet to corresponding rings on the base of the flysheet.
- Suspend the inner by attaching hooks of inner tent with rings on inside of flysheet. Start at the rear and work forwards.
- Attach hooks on front of groundsheet, to corresponding rings on base of flysheet.
- Attach porch groundsheet using the hooks to attach to the rings at the base of the poles and at the front of the tent.
The inner tent and flysheet can remain attached when pitching or packing. However, in humid or very wet weather, the underside of the flysheet may be coated with condensation. If this occurs, it may be advisable to detach the inner and pack it separately to avoid the inner tent becoming wet.


Marque : Vango
Modèle : Apollo 500
Catégorie : Tente