Animal Crossing (GameCube) - Jeu vidéo NINTENDO - Notice d'utilisation et mode d'emploi gratuit
Retrouvez gratuitement la notice de l'appareil Animal Crossing (GameCube) NINTENDO au format PDF.


| Type de produit | Jeu vidéo |
| Plateforme | Nintendo GameCube |
| Genre | Simulation de vie |
| Date de sortie | 2002 |
| Mode de jeu | Solo, multijoueur (jusqu'à 4) |
| Classification ESRB | E (Everyone) |
| Support | Disque optique GameCube |
| Dimensions du boîtier | 14.2 x 12.4 x 1.5 cm |
| Poids | Environ 100 g |
| Alimentation | Non applicable (pas d'alimentation électrique) |
| Fonctions principales | Personnalisation du village, pêche, chasse aux insectes, fossiles, interactions avec les animaux, événements saisonniers |
| Entretien et nettoyage | Nettoyer le disque avec un chiffon doux, éviter les rayures |
| Sécurité | Tenir à l'écart des liquides et des aimants |
| Pièces détachées et réparabilité | Le jeu est un tout, aucune pièce détachable. En cas de dommage, remplacer le disque. |
| Informations générales | Nécessite une carte mémoire GameCube pour sauvegarder |
| Nombre de joueurs | 1-4 |
FOIRE AUX QUESTIONS - Animal Crossing (GameCube) NINTENDO
Questions des utilisateurs sur Animal Crossing (GameCube) NINTENDO
0 question sur cet appareil. Repondez a celles que vous connaissez ou posez la votre.
Poser une nouvelle question sur cet appareil
Téléchargez la notice de votre Jeu vidéo au format PDF gratuitement ! Retrouvez votre notice Animal Crossing (GameCube) - NINTENDO et reprennez votre appareil électronique en main. Sur cette page sont publiés tous les documents nécessaires à l'utilisation de votre appareil Animal Crossing (GameCube) de la marque NINTENDO.
MODE D'EMPLOI Animal Crossing (GameCube) NINTENDO

Nintendo®
NINTENDO AUSTRALIA PTY. LTD.
Scoresby Industrial Park, 804 Stud Road,
Scoresby Victoria 3179 Australia
http://www.nintendo.com.au
NEW ZEALAND AGENT MONACO CORPORATION LTD
10 Rothwell Avenue, Albany, Auckland
EmuMovies

* 4 7 3 8 1 0 2 0 0 *
INSTRUCTION BOOKLET
WARNING: PLEASE CAREFULLY READ THE PRECAUTIONS BOOKLET INCLUDED WITH THIS PRODUCT BEFORE USING YOUR NINTENDO HARDWARE SYSTEM, GAME DISC OR ACCESSORY. THIS BOOKLET CONTAINS IMPORTANT SAFETY INFORMATION.
IMPORTANT SAFETY INFORMATION: READ THE FOLLOWING WARNINGS BEFORE YOU OR YOUR CHILD PLAY VIDEO GAMES

WARNING-Seizures
- Some people (about 1 in 4000) may have seizures or blackouts triggered by light flashes, such as while watching TV or playing video games, even if they have never had a seizure before.
- Anyone who has had a seizure, loss of awareness, or other symptom linked to an epileptic condition should consult a doctor before playing a video game.
- Parents should watch when their children play video games. Stop playing and consult a doctor if you or your child have any of the following symptoms:
Convulsions
Altered vision
Eye or muscle twitching
Involuntary movements
Loss of awareness
Disorientation
To reduce the likelihood of a seizure when playing video games:
- Sit or stand as far from the screen as possible.
- Play video games on the smallest available television screen.
- Do not play if you are tired or need sleep
- Play in a well-lit room.
- Take a 10 to 15 minute break every hour.

WARNING - Repetitive Motion Injuries
Playing video games can make your muscles, joints or skin hurt after a few hours. Follow these instructions to avoid problems such as Tendinitis, Carpal Tunnel Syndrome or skin irritation:
• Take a 10 to 15 minute break every hour, even if you don't think you need it.
- If your hands, wrists or arms become tired or sore while playing, stop and rest them for several hours before playing again.
- If you continue to have sore hands, wrists or arms during or after play, stop playing and see a doctor.

WARNING - Electric Shock
To avoid electric shock when you use this system:
- Use only the AC adapter that comes with your system.
- Do not use the AC adapter if it has damaged, split or broken cords or wires.
• Make sure that the AC adapter cord is fully inserted into the wall outlet or extension cord. - Always carefully disconnect all plugs by pulling on the plug and not on the cord. Make sure the Nintendo GameCube power switch is turned OFF before removing the AC adapter cord from an outlet.

CAUTION - Motion Sickness
Playing video games can cause motion sickness. If you or your child feel dizzy or nauseous when playing video games with this system, stop playing and rest. Do not drive or engage in other demanding activities until you feel better.

CAUTION - Brightness of TV Screen
The brightness of the TV screen differs with each TV but can typically be adjusted. Always play games with the appropriate brightness setting. Excessive brightness or darkness can cause discomfort. If necessary, please refer to the instructions manual of your TV for guidance on adjusting the brightness of your TV.
CONTROLLER NEUTRAL POSITION RESET
If the L or R Buttons are pressed or the Control Stick or C Stick are moved out of neutral position when the power is turned ON, those positions will be set as the neutral position, causing incorrect game control during game play.
To reset the controller, release all buttons and sticks to allow them to return to the correct neutral position, then hold down the X, Y and START/PAUSE Buttons simultaneously for 3 seconds.

This seal is your assurance that Nintendo has reviewed this product and that it has met our standards for excellence in workmanship, reliability and entertainment value. Always look for this seal when buying games and accessories to ensure complete compatibility with your Nintendo Product.
Thank you for selecting the Animal Crossing™ Game Disc for your NINTENDO GAMECUBE® System.
Please read this instruction booklet thoroughly to ensure maximum enjoyment of your new game. It also contains important warranty and hotline information. Always save this book for future reference.

THIS GAME SUPPORTS ALTERNATING GAME PLAY WITH ONE, TWO, THREE OR FOUR PLAYERS AND CONTROLLERS.

THIS GAME CAN BE USED WITH THE e-READER™.

THIS GAME REQUIRES A MEMORY CARD FOR SAVING GAME PROGRESS, SETTINGS OR STATISTICS.
THIS GAME CAN BE USED WITH THE GAME BOY ADVANCE™.
Please refer to the Nintendo GameCube instruction booklet for direction on how to format and erase Memory Card files.
Nintendo
ALL RIGHTS, INCLUDING THE COPYRIGHTS OF GAME, SCENARIO, MUSIC AND PROGRAM, RESERVED BY NINTENDO.
TM. AND THE NINTENDO GAMECUBE LOGO ARE TRADEMARKS OF NINTENDO. © 2001-2003 NINTENDO. ALL RIGHTS RESERVED.


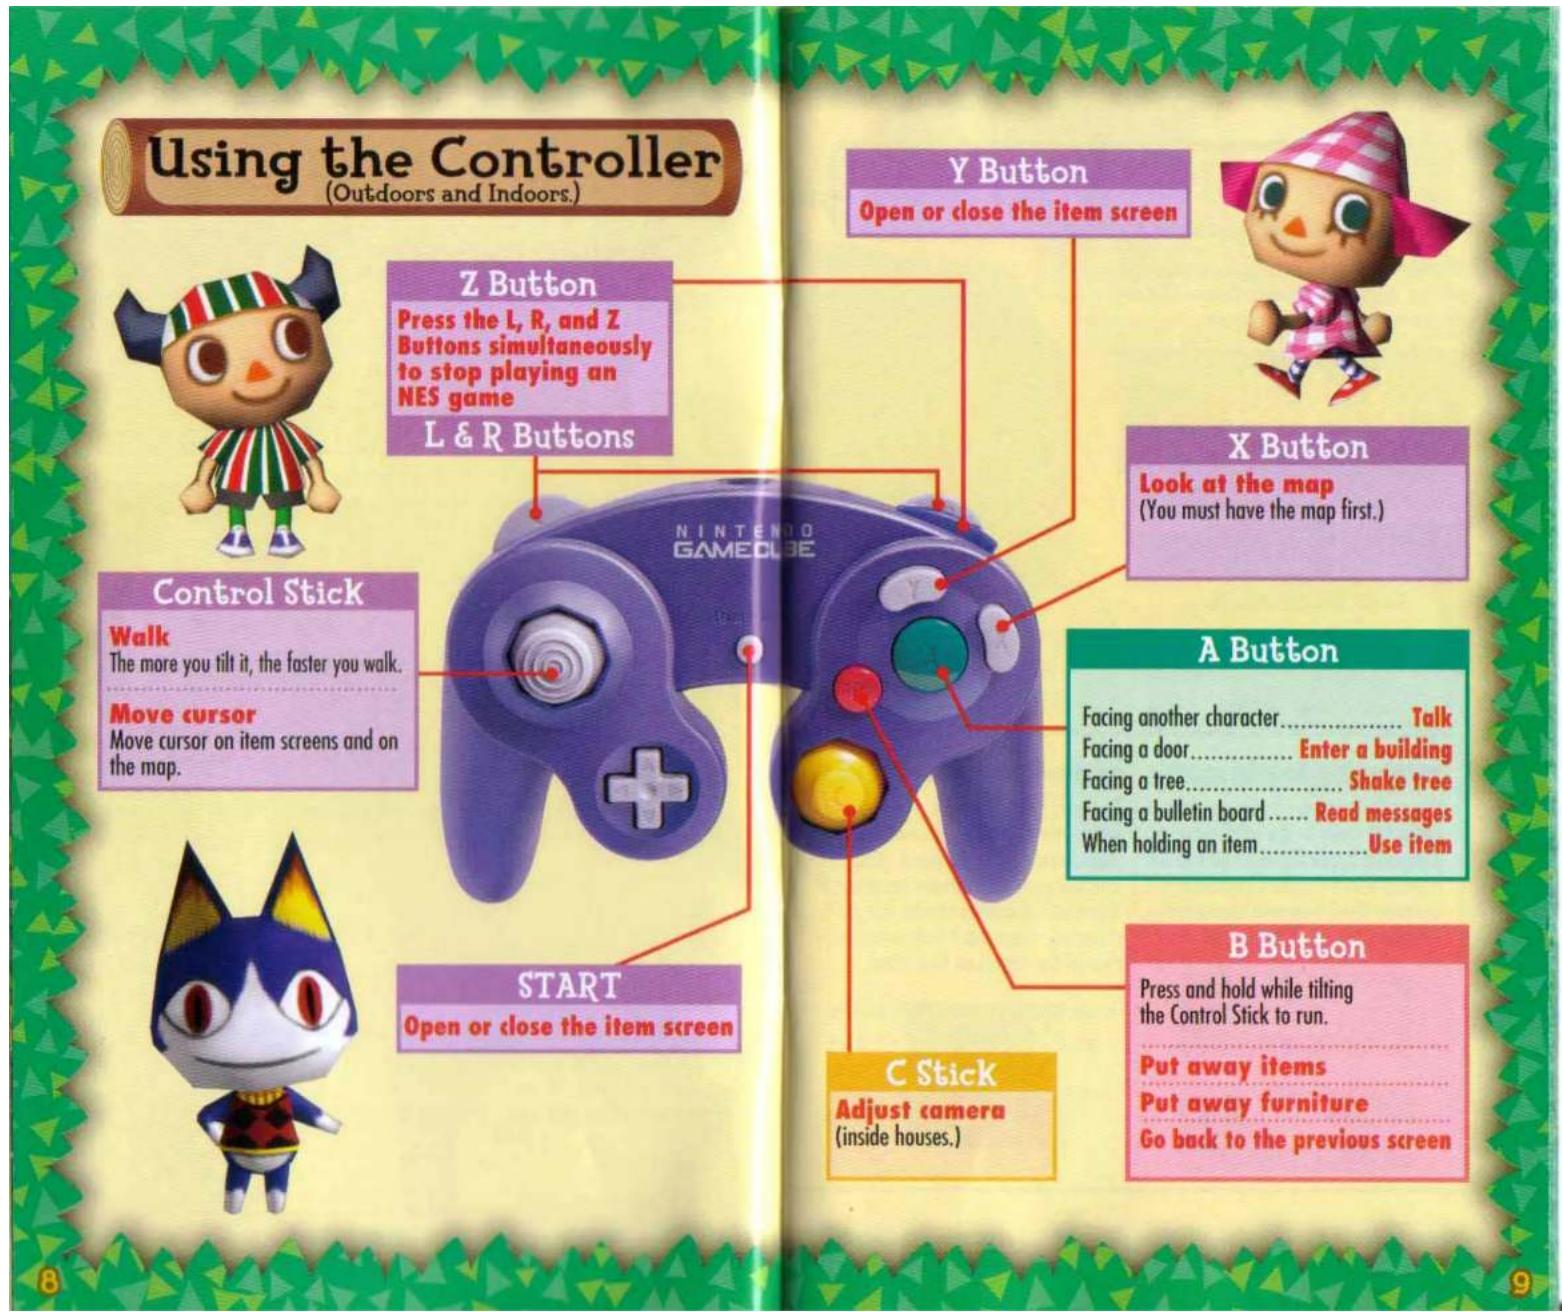
Using the Controller (Typing)
Whenever you have to enter a name, write a letter, or type anything in Animal Crossing, this keyboard screen will appear.
L Button
Caps lock/unlock
Control Stick
Choose a letter

natural_image
Close-up of a purple NINTE GAME controller with red indicator lines and a plus button (no readable text or symbols)+Control Pad
Move cursor across the page
R Button
Insert space
Z Button
Change key layout

natural_image
Cartoon illustration of a blue and white dog wearing a patterned shirt (no text or symbols)Y Button
Switch keyboard
X Button
Accent letter
A Button
Type letter
B Button
Delete letter
- Changing Key Layout
You can arrange the letters on your keyboard screen in the same order as a standard keyboard, but if you're not familiar with a standard keyboard, just press the Z Button to rearrange the letters in alphabetical order.

- Accenting Letters
To change the accent on certain letters, simply select a letter and press the A Button to type it. An icon will appear on-screen near the X Button if the letter can be accented. Press the X Button to change the accent on that letter.
START
Finish typing
• Switching Keyboards
You can use three different keyboards to write your letters: the letter keyboard, the punctuation keyboard, and the icon keyboard. Press the Y Button to switch between the three.
• Editing
Use the + Control Pad to move the cursor to any spot you want to change, and then just type or delete letters as needed.
• Spaces and Carriage Returns
To type a space, you can either press the R Button or select SP on the keyboard and then press the A Button. To enter a carriage return, either press down on the + Control Pad or choose ← on the letter keyboard and press the A Button.
Outdoor Controls

Walk
The more you tilt the Control Stick, the faster you walk. To tread lightly, tilt the Control Stick slightly.

natural_image
Cartoon character with blue horns and yellow outfit, standing on green steps (no text or symbols)


Run
Hold the B Button while walking.

Action
Here are just a few of the things the A Button lets you do:
•Talk
Stand in front of someone and press the A Button to start a conversation.


- Enter a House
Press the A Button in front of the door to enter a house.
• Use an Item
Press the A Button to use the item you're holding.

- Read a Sign
Press the A Button to read any sign you're standing in front of.

- Shake a Tree
Press the A Button to shake the fruit from a tree.
If you stop walking for a moment, the current date and time will appear in the bottom-right corner of the screen.

Pick Up Items
Pick up any item at your feet by pressing the B Button. If your inventory is full, you can either leave the item on the ground or make room for it by dropping another item.
You can also use the B Button to pick weeds.


Check the Map
Look at the map of the entire town. Use the Control Stick to move the cursor over the map. This way, you can see the names of all the buildings and animals in each acre.
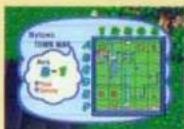
There's a World of Fun Outdoors!
Walk around outside to discover new and exciting things every day. You'll meet new animals, find strange marks on the ground, see all sorts of insects and fish... Be sure to pay attention while you roam around the town!

Item Screen Controls
Press the Y Button or START to bring up the item screen. This is your inventory. You can carry up to 15 items (not including the item in your hand) and 10 letters at any time.

Move the cursor

Display submenu
While selecting an item

Return to last screen
Name of town
Bells
Letters
Current outfit
Personal Designs
Choose this tab to see any patterns you've created. (See page 16 for details.)
Cursor
Information pops up when you move the cursor over a slot that contains an item or letter.

Items
Switch screens
Some major icons:
Furniture
Clothes
Stationery
Press the A Button on these tabs to see lists of the fish and insects you've caught. You can also press the R Button to scroll through these screens.
Selecting Multiple Items
Press the X Button to select multiple items simultaneously. If you press the A Button on any of the items you've selected, you can sell them all at once.

Menu Commands

Different menu commands allow you to use or move items. Menu commands change depending on your current location or the item you've selected. Listed below are some commonly used commands.
• Grab
Grab an item and move it around within the item screen. Use this command to swap or sort items on the screen. You can also use this command to place a tool in your hand or attach items to your letters.
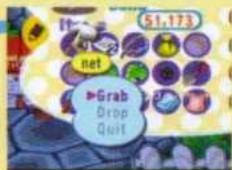
Press the L Button to grab an item without pulling up the submenu commands.
• Drop
Drop a selected item on the ground. Items left on the ground may remain there for days, but they might disappear. Sometimes, you can find them in the lost & found at the police station.
- Throw Away
Delete letters. Once you throw away a letter, it's gone for good, so think carefully before you delete a letter.


Change Your Clothes!
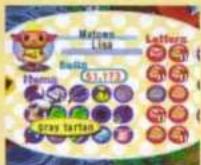

Select your outfit with the Control Stick.
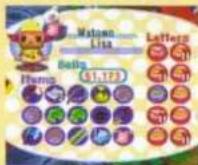

Drag the outfit onto yourself and press the A Button.

Now you're wearing the outfit!
The outfit you were wearing goes back into your inventory.

Use Your Own Designs!
Try pasting a pattern you've created onto clothes and umbrellas (See page 25 to learn how to design your own patterns).

Press the A Button here to display the design page.
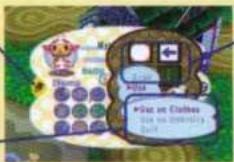

A Select a pattern with the A Button.

Select Use to decide where to use the pattern.
• Use on Clothes, Use on Umbrella
Works Anywhere!
Use on Clothes
Use the selected pattern on your clothes. Your old outfit goes back into your inventory.
Use on Umbrella
Fold the selected pattern up and use it as an umbrella. You don't need to have an umbrella in your inventory to do this.

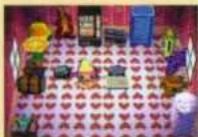
• Use on Walls, Use on Floor.... Works Only in Your House!
Paste the selected pattern on the wall or floor. The wallpaper or carpet you were using goes back into your inventory.
natural_image
Cartoon character with blue head, white ears, and yellow dress (no text or symbols)However...
You can't use patterns on your clothes, walls, or floor if your inventory is full.

- Drop in Your House....Works Only in Your House!
Drop as Clothes
Show off your pattern as an outfit in your room.
Drop as Umbrella
Show off your pattern as an umbrella in your room.

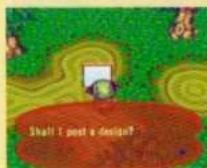
• Post a Design......Works on Signs!
After you erect a signboard outside, you can stand in front of it and press the A Button to post one of your patterns on it.

- Use Your Tools!
You can follow the same steps for changing clothes to pick up a tool, such as a shovel or a fishing pole. To put the tool away, go to the item screen. Place the cursor over your name, and press the A Button to grab the tool. Then just put it back into your inventory.
•Shovel
Use your shovel to dig holes in the ground. You can also use it to fill holes or bury items.
• Fishing Pole
You'll need a fishing pole to catch any fish. Every fish you catch is recorded in your fish list.
•Net
Use your net to catch insects. Every insect you catch is recorded in your insect list.
Presents Sent with Letters
If you receive a present in the mail, press the A Button on the letter and select Present. Then move it to your inventory, where you can open it.
Money Bags
You can move money bags from your inventory to your wallet. Just press the A Button to grab them and carry them up to where your total number of Bells appears on the item screen. Then press the A Button to add them to your funds.
Indoor Controls
Place Furniture
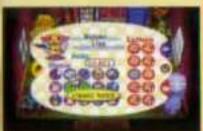
Choose a piece of furniture you want to place in your house...
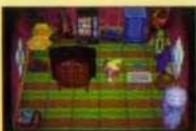
...then select Drop to set it down.
You can't drop furniture if there isn't enough space. You can't open grab bags in your house.
• After Placing Your Furniture...
Pick up
Stand in front of the piece of furniture you want to put away, and press the B Button. The item will go back into your inventory.
Use
You can use some items by pressing down on the A Button or tilting the Control Stick while facing the item.
Play NES Games!
If you find a Nintendo Entertainment System, place it in your room and press the A Button to play your game. To quit, press the L, R, and Z Buttons simultaneously.
Adjust Camera
Use the C Stick to change your viewpoint inside the house.
Move Furniture
Tilt the Control Stick while holding the A Button to move or rotate furniture in your room. You must have enough space to do this.

If you've grabbed an item from the front...


Push it!


Pull it!


Rotate it!
Letter Writing!
1 Choose Your Stationery and a Recipient
Select some stationery from your inventory and choose Write Letter. When your stationery pops up on-screen, choose the recipient's name from the list.
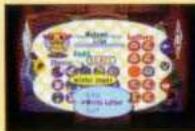
2 Write Your Letter
Enter your message. (See page 10 to learn how to type.) Once you finish writing the message, you will return to the item screen. The letter you wrote will appear as a blue letter icon in your letter inventory.

Attach a Present
If you want to include an item in a letter, grab it from your inventory, drag it to the letter and press the A Button.

Rewrite a Letter
You can rewrite letters you've finished writing. To change the recipient, place the cursor next to the recipient's name and press right on the + Control Pad.

3 Take Your Letter to the Post Office
Drop off the letter at the post office, and you're done! The recipient might even send back a response.

Tom Nook's Store
You can do much more than just shop at Tom Nook's store! Talk to Tom to see what the options are.

Shop
Press the A Button while standing in front of the item you want to purchase. Tom Nook will explain the item and its price. (If you're buying clothes, wallpaper, or flooring, he'll even show you what it looks like.) Select "I'll buy it!" to purchase the item or "Never mind..." to decline.
Can't Find What You Want?
The store changes its stock every day. If you don't find anything you want, try coming back the next day!
Sell Items
Sell your unwanted items to make some money. Once you've sold an item, you can't cancel the transaction, so be careful. Make your selection with the A Button, or use the X Button to select multiple items and sell them at all once.
Catalog
See a complete list of items you've purchased or received in the past. Select an item from the list to place a special order. Select the tabs on the right or press the R Button to switch the type of items being displayed.

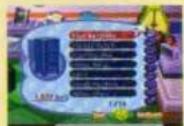
Turnip Prices
Check the price of turnips—it changes daily. Be sure to check the price before you make the sale—if you're not careful, you could wind up losing out!
Creating Your Own Secret Codes

Sometimes, you want to give your friend an item that you have, but you just can't deliver it in person, and your friend isn't able to pick it up. That's when Tom Nook's shipping service comes in handy.
You can take any item you have in your catalog to Tom Nook's shop and trade it in for a secret code that you can tell to your friend. Your friend will then be able use that code at Tom Nook's shop in his or her town and receive the item in exchange.
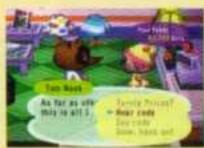
Creating Secret Codes

Choose "Other Things" and then choose "Hear Code." Tom will ask you for the item and the town and player name that your friend is using. He will then give you a secret code that only your friend in that town can use! Of course, once you give an item away, it's gone for good!

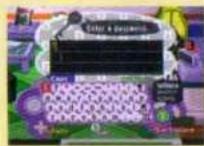
Using Secret Codes

If your friend gives you a secret code for you to use in your town, simply visit your local shop and talk to Tom Nook. Choose "Other Things" and choose "Say Code." After you say the secret code, Tom Nook will give you the item.
The Post Office
You can send letters and pay off your home loan at the post office. Go to the counter and talk to the clerk to bring up the menu.

Mail a Letter
To hand a letter to the clerk, select it from the letter list on the item screen. If the shelf behind the counter is full, you can't send any more letters. Come back later and ask again. You can send letters from your post office only to the residents of your town or to the Farway Museum.

Pay Off Your House
Select "Deposit" to pay off part of your loan. Decide how much you want to pay with the control stick, and select "End" to pay off your house.
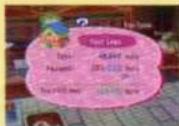

When You've Paid Off Your Loan...
Talk to Tom Nook once you've finished paying off your loan. He'll be thrilled to upgrade you to a bigger house!
Save Your Letters
You can save up to 160 letters on one town's Memory Card.

The e-Reader™

reader

Your local post office has its very own e-TM, or e-Transfer Machine. This nifty machine will decode the data on your Animal Crossing e-Reader cards (sold separately) and transfer it to the Nintendo GameCube game, allowing you to receive letters and presents from some of your favorite characters.
The e-TM is easy to use. First, insert the e-Reader into your Game Boy Advance and connect it to your Nintendo GameCube using a Nintendo GameCube Game Boy Advance cable. (The Game Boy Advance, e-Reader and Nintendo GameCube Game Boy Advance cable are all sold separately. See the e-Reader Instruction Booklet for detailed instructions on connecting the e-Reader to your Nintendo GameCube.)
Next, stand in front of the e-TM and press the A Button. You must prepare your e-Reader to scan your Animal Crossing e-Reader cards, so choose "Prep e-Reader" from the menu. Once you have downloaded the card reading program to your e-Reader and Game Boy Advance, you can use it to scan e-Reader cards anywhere in Animal Crossing as long as you don't turn your Game Boy Advance off.
Once the e-Reader is ready, choose "Read Card." Prepare the e-Reader to scan your card, and then just swipe the card. The e-TM will then decode the data on the card and mail it to your house. Remember, you can scan each card only once per day!

natural_image
Purple handheld device with a screen and black strap, next to a purple rectangular object (no visible text or symbols)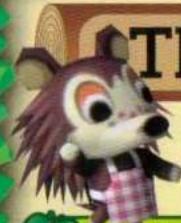
natural_image
Cartoon hedgehog character wearing a plaid shirt and checkered skirt (no text or symbols visible)The Tailor's Shop
Design and display your own patterns at the tailor's shop. You can carry up to 8 patterns.
Check the Patterns on Display
Press the A Button in front of a pattern on display to see the following commands.
• Display!
Display your pattern at the store.
Sure!
The pattern displayed at the store is replaced with your creation.
Exchange
Swap your pattern for one displayed at the store.
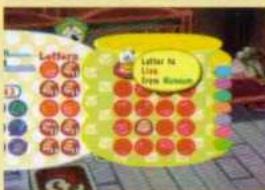
• I'll Take It
Choose this to take the pattern you've selected. However, you must delete a pattern you are currently carrying.
• Exchange
Exchange your pattern for one displayed at the store.
NOTE
If you change the original pattern, you'll also change the pattern of any item using that same design. However, outfits and umbrellas displayed at the store won't change, and neither will the flag on your island.
See page 16 to learn how to use your patterns.

Design Cards

reader
Creating detailed designs can take some time. But if you happen to have an Animal Crossing e-Reader design card (sold separately), you can immediately get a fine design straight from the e-Reader card!
First, insert the e-Reader into your Game Boy Advance and connect it to your Nintendo GameCube using a Nintendo GameCube Game Boy Advance cable. (The Game Boy Advance, e-Reader and Nintendo GameCube Game Boy Advance cable are all sold separately. See the e-Reader Instruction Booklet for detailed instructions on connecting the e-Reader to your Nintendo GameCube.) Next, go to the Able Sisters tailor shop. Talk to Mabel and choose Other things. You'll have to get your e-Reader ready to transfer design data, so choose "Prep e-Reader." Follow the instructions on your Game Boy Advance screen, and then swipe your card through the e-Reader! You can transfer the design from the e-Reader card to your Nintendo GameCube game by dropping it onto one of your 8 available patterns. Just remember—youll have to sacrifice one of your 8 designs to save it.
If You Talk to Mabel...
- Create a Pattern

Select a place to store your pattern. This will erase one of the patterns on your item screen.
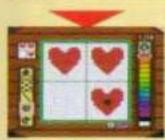
Using the design tools, create your own pattern. (See page 26 to learn how to use the design tools.)

When you finish the pattern, give it a name. You can enter up to 16 characters. When you finish, you will pay a fee.
Any Suggestions?
Select this to get a recommendation from Mabel on the patterns displayed at the store.

- Save Pattern
You can save up to 96 patterns on a Memory Card.
• Game Boy Advance Design
Load your patterns into the Game Boy Advance, where you can edit them and create new patterns. (See page 37 about designing patterns.)

Design Your Own Pattern!
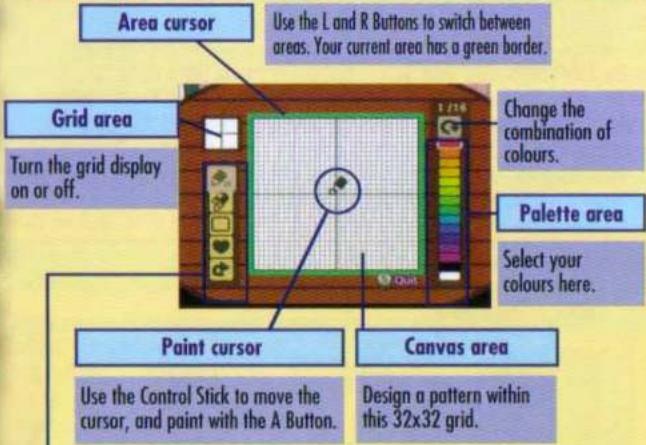
Tool area


When the Area Cursor Is On the Canvas:

Other Locations
Police Station
Every police station has a lost & found department, which can store up to 20 lost items. If more than 20 items come in, the older items disappear. Feel free to reclaim any lost goods there. Also, you can get valuable information on upcoming events from the policemen.


When You Visit Another Town... Be sure to stop in at the local police station when you're visiting a friend's town. Officer Copper will give you a map of the town, good for whenever you visit.

See page 32 to learn more about visiting other towns.
Wishing Well
If you can't complete a delivery because the recipient has moved away, place the item in the wishing well, where you can apologize for not delivering it. The wishing well can also tell you about the state of your town.

If You Find Out Where the Recipient Has Moved...
If you know where the recipient lives, you can hand over the item by visiting that town. It's always better to complete a delivery than to apologise for not completing one.

The Dump
Drop off items you no longer need here. They'll stay in the dump until the next garbage-collection day.


Museum
You can donate your fossil, painting, fish, or insect collection to the museum. Any items you donate will be put on display, where you and your friends can see them at any time.


Town Bulletin Board

Anyone can post a message on the bulletin board. The bulletin board can hold up to 15 messages. Older messages get deleted as new messages are posted. Once you post a message, you can't delete it, so be careful what you write! Any special town events will be posted on the bulletin board, so be sure to check it frequently.


Town Tune Bulletin Board

You can compose and change the tune that plays every hour in your town and whenever you talk to the other townsfolk. Press START and choose "Yes" to use the music you composed or choose "Throw it out" to undo your changes. When you change the music, the previous tune is deleted. Press START to exit the bulletin board screen.

Play town tune
Erase town tune

Rest

Extend the preceding note

Play a random note

Town Tune Cards

reader

Sometimes, trying to think up a nifty new town tune can be difficult. However, if you have an Animal Crossing e-Reader card with town tune data on it, you can change your town tune easily!
First, insert the e-Reader into your Game Boy Advance and connect it to your Nintendo GameCube using a Nintendo GameCube Game Boy Advance cable. (The Game Boy Advance, e-Reader and Nintendo GameCube Game Boy Advance cable are all sold separately. See the e-Reader Instruction Booklet for detailed instructions on connecting the e-Reader to your Nintendo GameCube.) Next, stand in front of the town tune bulletin board and press the A Button.
When the bulletin board screen appears, press the R Button to use your e-Reader. Choose "Prep e-Reader" from the menu to prepare your e-Reader to transfer data. Once the e-Reader is ready, choose "Read Card." Follow the instructions on your Game Boy Advance screen and then just swipe a card whenever you're ready. Your town tune will be changed automatically.

Gyroids and Saving Your Game!
Save
Before you quit the game, always talk to the Gyroid in front of your house to save your game. You can save only onto the Memory Card you started the game with. You cannot copy this data to another Memory Card.
Gyroid
• Save and quit
Save the game and go back to the title screen.

- Save and continue
Save the game and continue from where you left off.
- You need at least 57 blocks on a Memory Card to save Animal Crossing data.
- You need 1 block to record your NES game score (separate from Animal Crossing data).

Do not remove Memory Card while the save screen is displayed. It could result in corrupted save data, forcing you to start your town from so
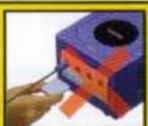

The passage of time between when you last played the game and when you play again is calculated by the Nintendo GameCube's internal clock. Changing the internal clock on your GameCube (see page 17 of the Nintendo GameCube user's manual) will affect the time-passage calculations in the game.
Store an Item
Grab an item from the item screen and drag it to your Gyroid. You can leave up to four items with your Gyroid. Items you leave with the Gyroid can be seen and bought by other players.


• Give Away
Give this item to another player for free.
- Set Price
Sell it to another player. You set the price.
• Display
Show off your item. No one else can take it.

Other Things
Paste or remove a pattern on your door.

- Paste Pattern
Paste your own pattern onto the door.
- Remove Pattern
Take down your pattern from the door.


Set Message
You can create a personal greeting message that other players will see when they visit while you're away. (See page 10 to learn how to type.)

•The Mailbox
Any new letters you receive will be waiting for you in your mailbox. The mail icon blinks on and off when you have mail.

natural_image
Game scene with character on a hexagonal path, red house, and numbered UI elements (no readable text or symbols)Visit a Friend's Town!
Every town is unique, so when you visit a friend's town, you'll notice that its layout and residents are quite different from yours. If you ever want to meet new people and see new places, you can visit another town using a Memory Card that contains a friend's town data. There are two ways to travel to another town.
Talk to Porter
If you want to take a trip, go to the train station and talk to Porter, the attendant.
Before you travel, check your Animal Crossing clock and Nintendo GameCube system clock to make sure the time settings between your town and your destination are roughly the same. If the two time settings are very different, your turnips might go bad or an item you've sent might not reach its destination.
What's Different in Other Towns?
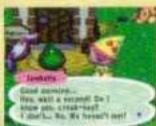
The townsfolk

The items at Tom Nook's store

The fruit on trees
Look for other differences. Some things in other towns may seem similar to those in yours.
Go Home
When you are ready to head back to your town, go to the train station and talk to Porter again. When you get back home, be sure to talk to your Gyroid and save your progress!

NOTE
If you reset or quit without saving after you return from traveling, you will lose all of the Bells and items you were carrying. Always talk to your Gyroid and save after you've been traveling.
Travel Method 1
- For this method, you need two Memory Cards, one with your town data and one on which you can save travel data.

flowchart
graph LR
    A["Slot A"] -->|Your town data| B["Slot B"]
    B -->|Your travel data| A
    C["Slot A"] -->|Your friend's town data| D["Slot B"]
    D -->|Your travel data| C
• Step 1: Create travel data
Talk to Porter and create "travel data" on the Memory Card in Slot B. (This requires 3 empty blocks.) Your town data is saved automatically.
• Step 2: Travel to your friend's town
Insert the Memory Card containing your friend's town data in Slot A while the Memory Card containing your travel data is in Slot B. You're all set to visit your friend's town!
Animal Crossing will automatically overwrite your old travel data before your next trip.

Travel Method 2
- For this method, you need two Memory Cards, one with your town data and one with a friend's town data.
• Step 1: Load your town data
If you talk to Porter while the Memory Card with your friend's town data is inserted into Slot B, you'll enjoy a short train ride to your friend's town. Your own town is saved automatically.
• Step 2: Travel to your friend's town
After the train ride, you will arrive in your friend's town. Enjoy your stay!
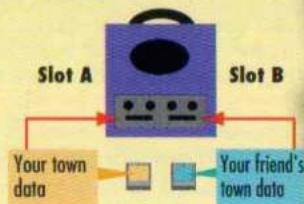
flowchart
graph TD
    A["Slot A"] -->|Your town data| B["Slot B"]
    B -->|Your friend's town data| A

Connect with the Nintendo GameCube Game Boy Advance Cable
You can connect your Game Boy Advance to the GameCube using a Nintendo GameCube Game Boy Advance cable (sold separately). See page 40 to learn how to connect the cable to your Nintendo GameCube.
When you turn off your Game Boy Advance, any Animal Crossing data you had in the Game Boy Advance will be erased. See page 39 for details. - You don't need a cartridge to download onto your Game Boy Advance.
Visit a Tropical Island! (Nintendo GameCube)


Talk to Kapp'n
Go to the pier near the beach while your Game Boy Advance is turned on and connected to your Nintendo GameCube. You'll find Kapp'n waiting there, ready to take you to a tropical island. (If this is your first visit to the island, you will get the opportunity to name it here.)


Once You're on the Island...
Take some time to visit your island native, go fishing, catch some insects, or decorate your island bungalow. It's always summer on your tropical island, so it's nice to go there when the weather in your town is bad.
You can also paste your own pattern onto the island flag.


When You're Ready to Go Home...
To return to your town, just talk to Kapp'n again. When you get back home, be sure to talk to your Gyroid and save your progress!
When you save your town data, your island data will be saved as well.
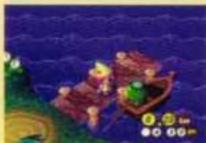
Cross the Ocean and Travel to an Island! (Game Boy Advance)
When you return to your town from the island, you can save your island's data onto the Game Boy Advance. This way, you can watch your island's resident while you're away.


Button Assignment (Game Boy Advance)
+ Control Pad Move cursor
START
SELECT Sleep Mode
See page 39 to learn about Sleep Mode.

A Button Tap Zoom in
B Button Zoom out Link mode

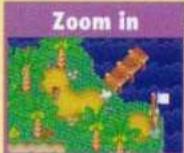

Playing with the Islanders
While you are zoomed in, use the + Control Pad to move the cursor and press the A Button to perform various actions. See what happens when you make your islander happy!
• Tap on your islander

Are you looking at me?
• Tap an item

Pick it up and move it around
- Tap on the hut

Someone was in there!

Exchange Your Island with a Friend
Use a Game Boy Advance Game Link cable to connect two Game Boy Advance systems and exchange your island with a friend.

Using a Game Boy Advance Link Cable
You will need to have
- Two Game Boy Advance systems
• One Game Boy Advance Game Link cable
Trade Islands
- Press the B Button while in Normal View from the island to trade your island with a friend.
- Select "Yes" to see a screen like the one to the right. Connect the Game Link cable to each Game Boy Advance Ext. port while this screen is displayed.
- Once you've connected the Game Link cable, follow the instructions on-screen and execute the exchange.
- When the exchange is finished, follow the instructions on-screen and disconnect the Game Link cable.


Some notes on using the Game Boy Advance Game Link cable
Under the following circumstances, the link might fail, create an error, or erase the data you saved on your Game Boy Advance:
- A cable other than the Game Link cable was used.
• The Game Link cable was not connected properly.
• The Game Link cable was disconnected during the exchange.
• The Game Link cable was connected to the connector box. - Three or more Game Boy Advance systems are linked together.
• The Game Link cable was disconnected before the instructions to do so appeared.
• A Game Pak was inserted while the power was on.
Create Your Own Patterns on the Game Boy Advance!

Talk to Mabel at the tailor's shop while your Game Boy Advance is connected to the GameCube with the power turned on. Select "Design Advance" to download the design tool or load your own patterns from the Game Boy Advance.

Loading the Tool

flowchart
graph TD
    A["1 Select a location to store your pattern"] --> B["2 Design your pattern"]
    B --> C["3 Name the pattern"]
First, you will have to load the design tool onto your Game Boy Advance. This will also load any patterns you are carrying. Follow the same steps you do on the Nintendo GameCube to create a new pattern.
• Using the Design Tool
Check the controls below. The Game Boy Advance design tool works much like the one on the Nintendo GameCube.

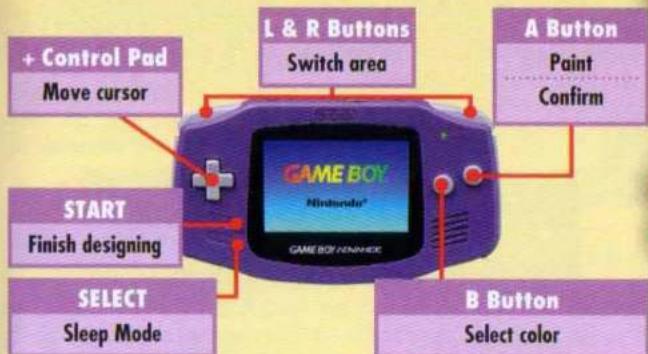
flowchart
graph TD
    A["+ Control Pad\nMove cursor"] --> B["GAME BOY\nNintendo®"]
    C["START\nFinish designing"] --> B
    D["SELECT\nSleep Mode"] --> B
    E["L & R Buttons\nSwitch area"] --> B
    F["A Button\nPaint\nConfirm"] --> B
    G["B Button\nSelect color"] --> B
See page 39 for information on Sleep Mode.
- Naming Your Pattern
Follow the button assignments below to enter characters, following the same steps as on the Nintendo GameCube.
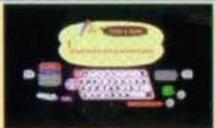


Load Design
Talk to Mabel at the tailor's shop while your Game Boy Advance is connected to the GameCube and the power is turned on. Select "Other things," "Design Advance," and then "Load design." The patterns you created on the Game Boy Advance will be sent to the Nintendo GameCube. The new patterns are saved on your pattern list in the item screen.

Choose a pattern to send to the Nintendo GameCube...


...then select a location to store it.

Sleep Mode

When you're done playing your Game Boy Advance, press SELECT to enter Sleep Mode. Sleep Mode turns the screen off while keeping the power on, helping to save battery power.
- Entering Sleep Mode
Press the SELECT to bring up a screen like the one on the right. Select "Yes" to enter Sleep Mode. If you select "No," the game will resume. If no selection is made after the screen has been displayed for ten seconds, or if there is no other activity for five minutes, the Game Boy Advance will automatically enter Sleep Mode.
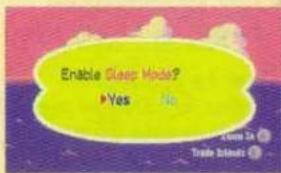
You Can't Enter Sleep Mode if...
- You are exchanging information with a GameCube or another Game Boy Advance.
• The warning message after the title screen is displayed.
• The game is switching to another screen.
• Returning to the Title Screen
Press the L Button and SELECT simultaneously while in Sleep Mode to bring up a screen like the one on the right. Select "Yes" to go to the title screen and "No" to resume Sleep Mode.
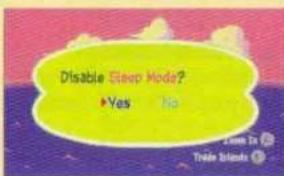
NOTE
If you turn the power off or the batteries run out while your Game Boy Advance is on or in Sleep Mode, any data on the Game Boy Advance will be lost. To save your progress, load your Game Boy Advance data onto the Nintendo GameCube and save at your Gyroid. If you want to disconnect either a Game Boy Advance Link cable or Nintendo GameCube Game Boy Advance cable from a Game Boy Advance that has game data saved on it, be sure to do it while the power is on.
Linking a Nintendo GameCube and Game Boy Advance
What you need:
1 Nintendo GameCube system
1 Animal Crossing Game Disc
1 Game Boy Advance system
1 Nintendo GameCube GameBoy Advance cable
How to connect
- Follow the instructions on page 7 to start the game.
- When the game begins, connect the Game Boy Advance cable in controller port 2, 3, or 4.
- With the power on the Game Boy Advance turned on, connect the cable to the Game Boy Advance.
- See page 34-39 for more details.
The Nintendo GameCube Game Boy Advance cable will operate as long as it is connected to controller port 2, 3, or 4.
Do not connect the Game Boy Advance cable or a Game Boy Advance you won't be using.

natural_image
Illustration of a purple Nintendo 3.0 console with two controllers and a digital display (no text or symbols visible)Game Boy Advance/Nintendo GameCube/Nintendo GameCube Game Boy Advance cable connection diagram
Notes on linking:
The following circumstances might cause a communication error or erase the data you saved on your Game Boy Advance:
- A cable other than the Nintendo GameCube Game Boy Advance cable is used.
- There is a cartridge inside the Game Boy Advance.
- There is a loose connection.
- The Nintendo GameCube Game Boy Advance cable, Game Boy Advance, and Nintendo GameCube are not connected properly.
- The Nintendo GameCube Game Boy Advance cable is pulled out while exchanging information.
- The power on the GameCube or Game Boy Advance is turned off while exchanging information or the GameCube's RESET Button is pressed.
Animal Crossing Staff Credits
Producer
Takashi Tezuka
Director
Katsuya Eauchi
Hisashi Nogami
Character Animation Ryuji Kobayashi
Character Design
Noriko Ikegawa
Yoshihisa Morimoto
Screen Design
Toki lida
Interior Design
Aya Sumimoto
Field Design
Jun Takamura
Shinko Konishi
Effect Design
Masanao Arimoto
Event Design
Naoki Mori
Design Support
Michiho Hayashi
Kazumi Yamaguchi
Taeko Sugawara
Tomoaki Nakahara
Atsushi Miyagi
Yumi Yoshimi
Sound Director
Kazumi Totaka
Field BGM
Kenta Nagata
Indoor BGM
Toru Minegishi
Event BGM
Shinobu Tanaka
Sound Effects Programming
Taro Bando
Sound Support
Yasushi Ida
Script
Makoto Wada
Kunio Watanabe
Kenshirou Ueda
Programming Director
Yuhiki Otsuki
Programming
Masaru Nii
Kunihiro Komatsu
Gentaro Takaki
Hiromichi Miyake
Kenzo Hayakawa
Shigehiro Kasamatsu
Takamitsu Kuzuhara
Kenji Matsutani
Atsushi Nishiwaki
Takafumi Noma
Masatoshi Ogawa
Atsushi Sakaguchi
Masaro Sakakibara
Makoto Sasaki
Nobuhiro Sumiyoshi
Yoshitaka Takeshita
Hiroshi Umemiya
Yuichi Yamamoto
Shigeki Yoshida
NES Emulator Program
Tomohiro Kawase
Hideaki Shimizu
Technical Support
Takao Sawano
Library Support Team
NOA Localization Team
English Translation
Tim O'Leary
Scot Ritchey
Bill Trinen
Maki Yamane
English Writing & Editing
Rich Amtower
Nate Bihldorff
Localization Management
Jeff Miller
Leslie Swan
NOA Engineering Team
Raychole L'Anett
Robert Crombie
Kirk Buchanan
Dan Simpson
Miho Hattori
Sean Sakuma
Randy Shoemake
Andrew Becraft
Debug Support
Hironobu Kakui
Yoshito Yasuda
Debug
Super Mario Club
Special Thanks
Toshihiko Nakago
SRD
Executive Producer
Satoru Iwata
Important
REV-A
WARNING: Copying of any Nintendo game is illegal and is strictly prohibited by domestic and international intellectual property laws. "Back-up" or "archival" copies are not authorized and are not necessary to protect your software. Violators will be prosecuted.
This Nintendo game is not designed for use with any unauthorized copying device or any unlicensed accessory. Use of any such device will invalidate your Nintendo product warranty. Nintendo (and/or any Nintendo licensee or distributor) is not responsible for any damage or loss caused by the use of any such device. If use of such device causes your game to stop operating, disconnect the device carefully to avoid damage and resume normal game play. If your game ceases to operate and you have no device attached to it, please contact Nintendo Customer Service.
The contents of this notice do not interfere with your statutory rights.
This booklet and other printed materials accompanying this game are protected by domestic and international intellectual property laws.
12 MONTH WARRANTY FOR NINTENDO GAMECUBE® (GAME DISC)
REV-0
You may only require simple instructions to correct a problem with your product, therefore we recommend the following services:
NINTENDO HELPLINE
190 224 1001
Set-up, connection and gameplay assistance together with hints and tips for a wide range of Nintendo products.
Live Games Experts available between 12 noon and 7pm, every day of the year.
Recorded information on our most popular titles available 24 hours per day.
INFORMATEL ONLINE CALL RATE AT \$1.98 PER MINUTE INCLUDING GST
(Calls from mobile and public phones attract a higher rate)
NINTENDO WEBSITE
www.nintendo.com.au
Troubleshooting, warranty and service/repair information.
CONDITIONS OF WARRANTY
The benefits conferred by this Warranty are in addition to all other conditions and warranties in respect of this product, which the consumer may have under the Trade Practices Act 1974 of the Commonwealth of Australia and/or similar State, Territory or Country Laws.
Nintendo Australia Pty Limited warrants this GameCube (GAME DISC) to be free of defects in materials, workmanship and manufacturing to the original purchaser for a period of twelve months after the date of purchase and upon presentation of purchase receipt.
-
Nintendo Australia Pty Limited will at its option and subject to the terms and conditions stated below, repair or replace free of charge this GAME DISC or any component part, which upon examination by Nintendo Australia Pty Limited is found to be defective.
-
This Warranty shall not apply:
(a) If the GAME DISC has been subjected to misuse, abuse, accident or want of care.
(b) If the GAME DISC has been modified and/or tampered with.
(c) If a repair has been made or attempted by the purchaser or their agent.
(d) The following are not covered by this Warranty:
(i) Liquid damage;
(ii) Scratched or damaged discs;
(iii) Wear and tear.
(e) If the GAME DISC fails due to causes unrelated to defective materials or workmanship.
- Nintendo Australia Pty Limited accepts no liability pursuant to this Warranty for any cost or consequential damage or economic loss whether direct or indirect, to any person or property, arising from breakdown or failure of this product and no responsibility is to be implied or accepted over and above the replacement value of the product.
This Warranty is given by Nintendo Australia Pty Limited and no other person or organisation is authorised to vary its provisions and conditions.
Before returning a Nintendo GameCube® GAME DISC for service, contact:
Nintendo Customer Service on (03) 9730 9822
Warranty and Repair information and all other general enquiries.
Hours of operation: 8:30am to 5:30pm Monday to Friday (EST).
NINTENDO AUSTRALIA HEAD OFFICE
Scoresby Industrial Park, 804 Stud Road, Scoresby Victoria 3179 Australia
Passwords
Use this space to write down any passwords you receive from friends, magazines, or other sources!

natural_image
Colorful cartoon character park scene with multiple animals and trees, no visible text or symbols

natural_image
Illustration of colorful cartoon animals in a garden setting with trees and flowers, no text or symbols present.
- Nintendo®
- EmuMovies
- WARNING-Seizures
- WARNING - Repetitive Motion Injuries
- WARNING - Electric Shock
- CAUTION - Motion Sickness
- CAUTION - Brightness of TV Screen
- CONTROLLER NEUTRAL POSITION RESET
- Nintendo
- Using the Controller (Typing)
- L Button
- Control Stick
- +Control Pad
- R Button
- Z Button
- Y Button
- X Button
- A Button
- B Button
- - Changing Key Layout
- - Accenting Letters
- START
- • Switching Keyboards
- • Editing
- • Spaces and Carriage Returns
- Outdoor Controls
- Walk
- Run
- Action
- •Talk
- - Enter a House
- • Use an Item
- - Read a Sign
- - Shake a Tree
- Pick Up Items
- Check the Map
- There's a World of Fun Outdoors!
- Item Screen Controls
- Selecting Multiple Items
- Menu Commands
- • Grab
- • Drop
- - Throw Away
- Change Your Clothes!
- Use Your Own Designs!
- • Use on Clothes, Use on Umbrella
- Use on Clothes
- Use on Umbrella
- • Use on Walls, Use on Floor.... Works Only in Your House!
- However...
- - Drop in Your House....Works Only in Your House!
- Drop as Clothes
- Drop as Umbrella
- • Post a Design......Works on Signs!
- - Use Your Tools!
- •Shovel
- • Fishing Pole
- •Net
- Presents Sent with Letters
- Money Bags
- Indoor Controls
- Place Furniture
- • After Placing Your Furniture...
- Pick up
- Use
- Play NES Games!
- Adjust Camera
- Move Furniture
- Letter Writing!
- Choose Your Stationery and a Recipient
- Write Your Letter
- Attach a Present
- Rewrite a Letter
- Take Your Letter to the Post Office
- Tom Nook's Store
- Shop
- Can't Find What You Want?
- Sell Items
- Catalog
- Turnip Prices
- Creating Your Own Secret Codes
- Creating Secret Codes
- Using Secret Codes
- The Post Office
- Mail a Letter
- Pay Off Your House
- When You've Paid Off Your Loan...
- Save Your Letters
- The e-Reader™
- The Tailor's Shop
- Check the Patterns on Display
- • Display!
- Sure!
- Exchange
- • I'll Take It
- • Exchange
- NOTE
- Design Cards
- If You Talk to Mabel...
- - Create a Pattern
- Any Suggestions?
- - Save Pattern
- • Game Boy Advance Design
- Other Locations
- Police Station
- Wishing Well
- If You Find Out Where the Recipient Has Moved...
- The Dump
- Museum
- Town Bulletin Board
- Town Tune Bulletin Board
- Town Tune Cards
- Gyroids and Saving Your Game!
- Save
- • Save and quit
- - Save and continue
- Store an Item
- • Give Away
- - Set Price
- • Display
- Other Things
- - Paste Pattern
- - Remove Pattern
- Set Message
- •The Mailbox
- Visit a Friend's Town!
- Talk to Porter
- What's Different in Other Towns?
- Go Home
- Travel Method 1
- • Step 1: Create travel data
- • Step 2: Travel to your friend's town
- Travel Method 2
- • Step 1: Load your town data
- Connect with the Nintendo GameCube Game Boy Advance Cable
- Visit a Tropical Island! (Nintendo GameCube)
- Talk to Kapp'n
- Once You're on the Island...
- When You're Ready to Go Home...
- Cross the Ocean and Travel to an Island! (Game Boy Advance)
- Button Assignment (Game Boy Advance)
- Playing with the Islanders
- Exchange Your Island with a Friend
- Using a Game Boy Advance Link Cable
- You will need to have
- Trade Islands
- Some notes on using the Game Boy Advance Game Link cable
- Create Your Own Patterns on the Game Boy Advance!
- Loading the Tool
- • Using the Design Tool
- - Naming Your Pattern
- Load Design
- Sleep Mode
- - Entering Sleep Mode
- You Can't Enter Sleep Mode if...
- • Returning to the Title Screen
- Linking a Nintendo GameCube and Game Boy Advance
- What you need:
- How to connect
- Notes on linking:
- Animal Crossing Staff Credits
- Producer
- Director
- Important
- MONTH WARRANTY FOR NINTENDO GAMECUBE® (GAME DISC)
- NINTENDO HELPLINE
- INFORMATEL ONLINE CALL RATE AT \$1.98 PER MINUTE INCLUDING GST
- NINTENDO WEBSITE
- CONDITIONS OF WARRANTY
- Passwords
Marque : NINTENDO
Modèle : Animal Crossing (GameCube)
Catégorie : Jeu vidéo