
Model 3 Roof Rack - Porte-bagages TESLA - Notice d'utilisation et mode d'emploi gratuit
Retrouvez gratuitement la notice de l'appareil Model 3 Roof Rack TESLA au format PDF.


| Type de produit | Porte-bagages de toit |
| Marque | Tesla |
| Modèle | Model 3 Roof Rack |
| Matériau | Aluminium anodisé |
| Dimensions (L x l x H) | 120 cm x 15 cm x 10 cm |
| Poids | 5 kg |
| Charge maximale | 75 kg |
| Compatibilité véhicule | Tesla Model 3 (2017 et ultérieur) |
| Type de fixation | Montage sur rails de toit ou points de fixation dédiés |
| Fonctions principales | Transport de bagages, skis, vélos (avec accessoires optionnels) |
| Aérodynamisme | Conception profilée réduisant le bruit et la traînée |
| Verrouillage | Système de verrouillage intégré pour sécuriser la charge |
| Entretien et nettoyage | Nettoyer avec un chiffon doux et de l'eau savonneuse; éviter produits abrasifs |
| Sécurité | Vérifier les fixations avant chaque trajet; ne pas dépasser la charge maximale |
| Pièces détachées et réparabilité | Pièces de rechange disponibles via le service Tesla |
| Garantie | 2 ans |
| Instructions de montage | Incluses dans la notice; nécessite serrage au couple spécifié |
FOIRE AUX QUESTIONS - Model 3 Roof Rack TESLA
Questions des utilisateurs sur Model 3 Roof Rack TESLA
0 question sur cet appareil. Repondez a celles que vous connaissez ou posez la votre.
Poser une nouvelle question sur cet appareil
Téléchargez la notice de votre Porte-bagages au format PDF gratuitement ! Retrouvez votre notice Model 3 Roof Rack - TESLA et reprennez votre appareil électronique en main. Sur cette page sont publiés tous les documents nécessaires à l'utilisation de votre appareil Model 3 Roof Rack de la marque TESLA.
MODE D'EMPLOI Model 3 Roof Rack TESLA
Model 3 Roof Rack
Owner's Manual
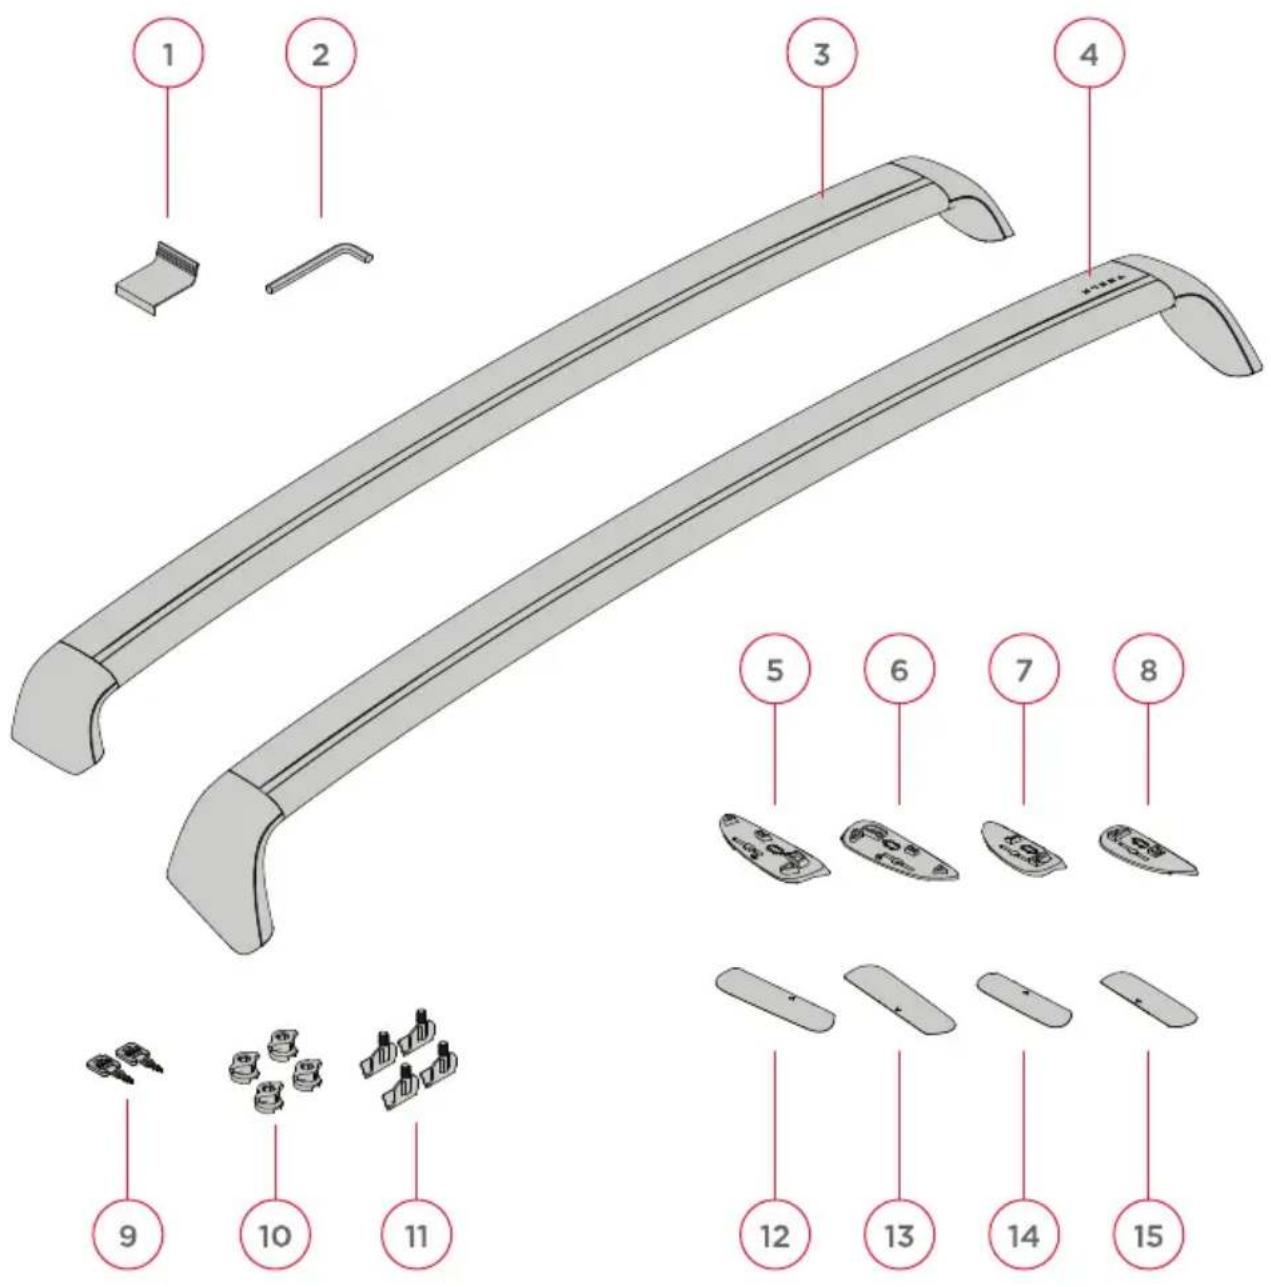
- Clip Tool
- Hex Wrench
- Rear Crossbar
- Front Crossbar
- Front Driver Side Pad
- Front Passenger Side Pad
- Rear Driver Side Pad
-
Rear Passenger Side Pad
-
Keys x2
- Wingnuts x4
- Clips x4
- Anti-Abrasion Tape (front driver)
- Anti-Abrasion Tape (front pass.)
- Anti-Abrasion Tape (rear driver)
- Anti-Abrasion Tape (rear pass.)
natural_image
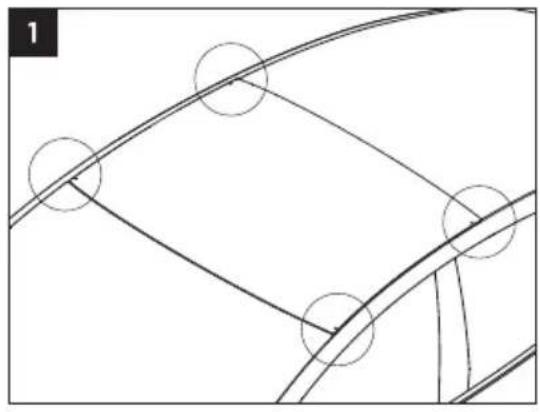
Pure geometric line drawing with intersecting curves and circles, no text or symbols presentThoroughly clean vehicle's roof around the location of the arrows on the glass.
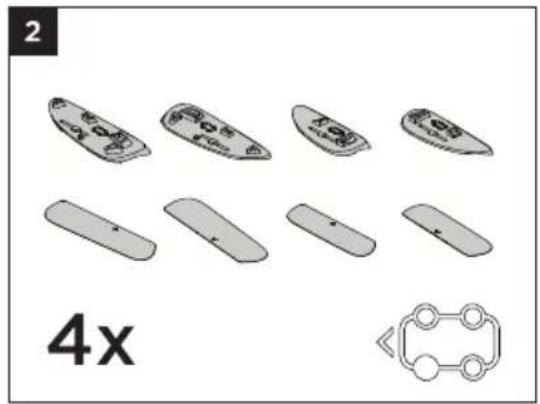
Use the icon on the footpads (5-8) to help identify the appropriate position on the vehicle and match anti-abrasion tape (12-15) to footpad (5-8).

Apply anti-abrasion tape (12) to the front driver side of the vehicle by aligning the arrow on the glass with the arrow on anti-abrasion tape (12), and aligning the edge of the tape with the edge of the trim line.
Repeat for the other three corners of the car.

natural_image
Hand holding a small object on a surface, no text or symbols visibleUse the clip tool (1) to carefully retract the rubber gasket at the arrow location.

natural_image
Line drawing of two hands inserting a small object into a device (no text or symbols)Keeping the clip tool in place, carefully insert a clip (11) at the arrow location.

natural_image
Illustration of hands using a tool to cut or install a piece of paper or tape, with an arrow indicating rotation (no text or symbols present)Remove the clip tool (1), being sure the clip (11) is engaged in the metal receiver under the glass. Pull up and wiggle the hook to be sure it's properly engaged. Be sure the center of the hook aligns with the arrow.
Repeat steps 4 to 6 to install a clip (11) on the other three corners of the car.
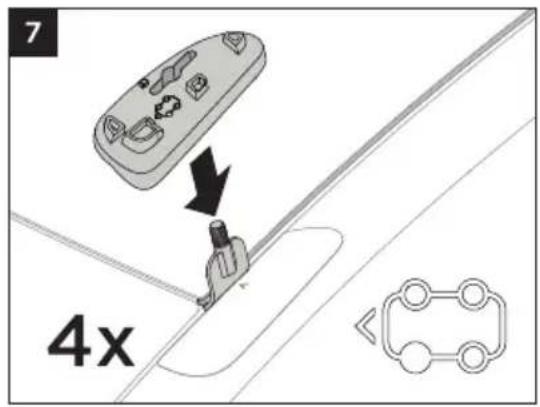
Place the front driver side pad (5) over the clip on the front driver side. Use the icon to help identify and install the correct pad (5-8) in the proper location.
Repeat to install the remaining pads (6-8) at the other three corners of the car.

Remove the crossbar covers by pulling from the top edge, then grasping the sides and pulling them from the crossbars (3-4).
natural_image
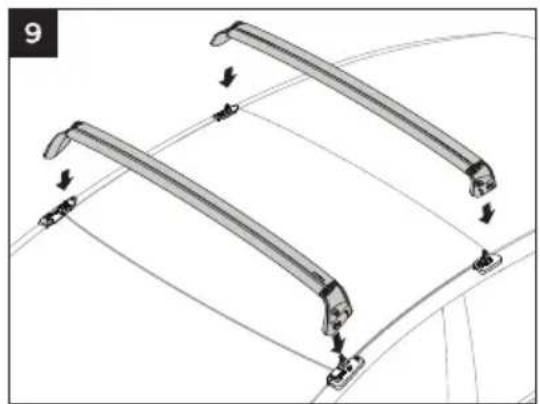
Technical diagram of a mechanical assembly with two curved components and directional arrows indicating motion (no text or symbols)CROSSBAR INSTALLATION:
Ensure all four clips are engaged, properly aligned (steps 5-6), and in the upright position. Then, carefully place the front and rear crossbars (3-4) over the pads.
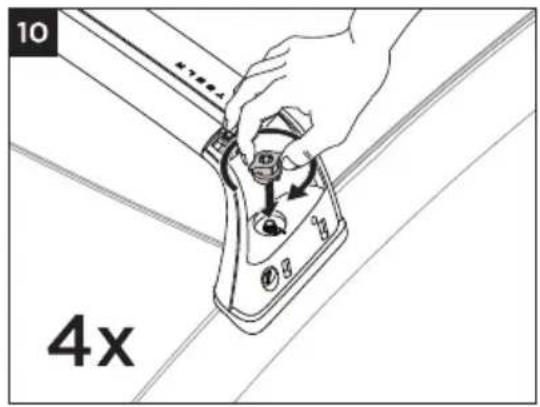
Install the wingnut (10) and hand tighten onto each of the towers.

Tighten the wingnuts with the hex wrench (2) until the tower is firmly affixed to the vehicle. We recommend tightening to 8.0 +/- 1.0 nm. To confirm the tower is properly installed, pull in all directions and ensure there's no movement. In order to lock the system, the mark on the wingnut must align with the mark on the tower (see fig. 1).
* Overtightening will result in broken glass.

Use the key (9) to lock each tower.

natural_image
Line drawing of a person adjusting a car frame with directional arrows (no text or symbols)Test that the front and rear crossbars are securely installed by pulling vigorously in all directions.

Replace the covers. Start with the bottom edge then press the top into place.
Model 3 Roof Rack Owner's Manual
www.shop.tesla.com
TESLA
Marque : TESLA
Modèle : Model 3 Roof Rack
Catégorie : Porte-bagages