
DHI-NVR4104HS-W-S2 - Magnétoscope Dahua Technology - Notice d'utilisation et mode d'emploi gratuit
Retrouvez gratuitement la notice de l'appareil DHI-NVR4104HS-W-S2 Dahua Technology au format PDF.


| Type de produit | Magnétoscope réseau (NVR) 4 canaux |
| Marque | Dahua Technology |
| Modèle | DHI-NVR4104HS-W-S2 |
| Dimensions (L × P × H) | 260 mm × 200 mm × 44 mm |
| Poids | Environ 1,5 kg |
| Alimentation | Adaptateur secteur 12 VCC, 2 A |
| Consommation électrique | Moins de 10 W (sans disque dur) |
| Canaux d'enregistrement | 4 canaux IP |
| Compression vidéo | H.265+ / H.265 / H.264+ / H.264 / MJPEG |
| Résolution d'enregistrement | Jusqu'à 5 MP (caméras compatibles) |
| Alimentation PoE | 4 ports PoE (IEEE 802.3af/at), jusqu'à 25 W par port |
| Stockage interne | 1 baie SATA pour disque dur 3,5" (jusqu'à 10 To) |
| Ports réseau | 1 port RJ45 10/100 Mbps |
| Fonctions principales | Enregistrement continu, détection de mouvement, accès à distance via SmartPSS ou navigateur, lecture en local et à distance, sauvegarde USB |
| Sécurité | Protection par mot de passe, accès multi-niveaux, cryptage des données |
| Entretien et nettoyage | Nettoyer avec un chiffon doux sec ; éviter les produits abrasifs ou liquides ; maintenir une ventilation adéquate |
| Pièces détachées et réparabilité | Disque dur remplaçable ; ventilateur interne ; adaptateur secteur externe |
| Informations générales | Température de fonctionnement : -10 °C à 55 °C ; humidité : 10 % à 90 % |
FOIRE AUX QUESTIONS - DHI-NVR4104HS-W-S2 Dahua Technology
Questions des utilisateurs sur DHI-NVR4104HS-W-S2 Dahua Technology
0 question sur cet appareil. Repondez a celles que vous connaissez ou posez la votre.
Poser une nouvelle question sur cet appareil
Téléchargez la notice de votre Magnétoscope au format PDF gratuitement ! Retrouvez votre notice DHI-NVR4104HS-W-S2 - Dahua Technology et reprennez votre appareil électronique en main. Sur cette page sont publiés tous les documents nécessaires à l'utilisation de votre appareil DHI-NVR4104HS-W-S2 de la marque Dahua Technology.
MODE D'EMPLOI DHI-NVR4104HS-W-S2 Dahua Technology
Mini 1U Series NVR Quick Start Guide
Welcome
Thank you for purchasing our NVR!
This quick start guide will help you become familiar with our NVR in a very short time.
Before installation and operation, please read the following safeguard and warning carefully!
Important Safeguard and Warning
● All installation and operation here should conform to your local electrical safety codes.
- We assume no liability or responsibility for all the fires or electrical shock caused by improper handling or installation.
- We are not liable for any problems caused by unauthorized modifications or attempted repair.
- Improper battery use may result in fire, explosion, or personal injury!
- When replace the battery, please make sure you are using the same model!
Note: All the installation and operations here should conform to your local electric safety rules.
1. Check Unpacked NVR
When you receive the NVR from the forwarding agent, please check whether there is any visible damage. The protective materials used for the package of the NVR can protect most accidental clashes during transportation. Then you can open the box to check the accessories.
Please check the items in accordance with the list. (Remote control is optional). Finally you can remove the protective film of the NVR.
2. About Front Panel and Rear Panel
The model number in the stick on the bottom of NVR is very important; please check according to your purchase order.
The label in the rear panel is very important too. Usually we need you to represent the serial number when we provide the service after sales.
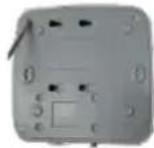
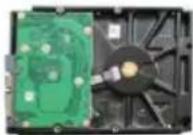
3. HDD Installation
This series NVR has only one SATA HDD. Please use HDD of 7200rpm or higher.
You can refer to the User's Manual for recommended HDD brand.
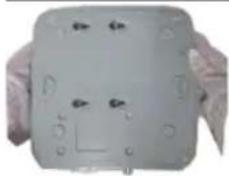
Please follow the instructions below to install hard disk.
All figures listed here are for reference only.

-
Loosen the screws of the upper cover and side panel.
-
Fix four screws in the HDD (Turn just three rounds).
-
Place the HDD in accordance with the four holes in the bottom.


-
Turn the device upside down and then turn the screws in firmly.
-
Fix the HDD firmly.
-
Connect the HDD cable and power cable.

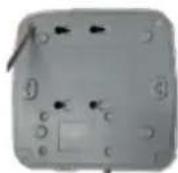
Figure 1
Please refer to the following sheet for detailed information.
| SN | Name | Function |
| 1 | HDD status indicator light | The red light becomes on when HDD is abnormal. |
| 2 | Power indicator light | The red light becomes on when the power connection is OK. |
| 3 | Network status indicator light | The red light becomes on when the network connection is abnormal. |
5. Rear Panel
The rear panel is shown as below. See Figure 2 (Picture for reference only).
Figure 2
Please refer to the following sheet for detailed information.
| Port Name | Connection | Function |
| USB2.0 port | USB2.0 port. Connect to mouse, USB storage device, USB burner and etc. | |
| Network port | 10M/100Mbps self-adaptive Ethernet port. Connect to the network cable. | |
| HDMI | High Definition Media Interface | High definition audio and video signal output port. It transmits uncompressed high definition video and multiple-channel data to the HDMI port of the display device. HDMI version is 1.4. |
| VGA | VGA video output port | VGA video output port. Output analog video signal. It can connect to the monitor to view analog video. |
| GND | Ground end | |
| Power input port | Input DC 12V/2A. | |
| MIC IN | Audio input port | Bidirectional talk input port. It is to receive the analog audio signal output from the devices such as microphone, pickup. |
| MIC OUT | Audio output port | Audio output port. It is to output the analog audio signal to the devices such as the sound box.● Bidirectional talk output.● Audio output on 1-window video monitor.● Audio output on 1-window video playback. |
6. Local Login
After system booted up, default video display is in multiple-window mode.
Click Enter or left click mouse, you can see the login interface. See Figure 3.
System consists of three accounts:
- Username: admin. Password: admin. (administrator, local and network)
- Username: 888888. Password: 888888. (administrator, local only)
- Username: default. Password: default(hidden user)
Note:
For security reason, please modify password after you first login.
Within 30 minutes, three times login failure will result in system alarm and five times login failure will result in account lock!
Figure 3
7. Smart Add
When the network camera(s) and the NVR are in the same router or switch, you can use smart add function to add all network cameras to the NVR at the same time.
There are two ways for you to go to the smart add interface. From the startup wizard, click Smart add button. Or on the preview interface, right click mouse and then select Smart add. See Figure 4.

Figure 4
Please refer to the user's manual for detailed information.
8. Web
Open IE and input NVR address in the address column. For example, if your NVR IP is 10.10.3.16, then please input http://10.10.3.16 in IE address column.
System pops up warning information to ask you whether install Web plug-in or not. Please click Install button.
After installation, the interface is shown as below. See Figure 5.
Please input your user name and password.
Default factory name is admin and password is admin.
- This quick start guide is for reference only. Slight difference may be found in the user interface.
● All the designs and software here are subject to change without prior written notice. - All trademarks and registered trademarks mentioned are the properties of their respective owners.
- If there is any uncertainty or controversy, please refer to the final explanation of us.
- Please visit our website or contact your local service engineer for more information.
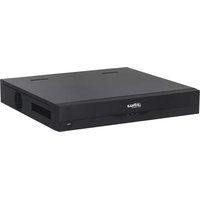
Marque : Dahua Technology
Modèle : DHI-NVR4104HS-W-S2
Catégorie : Magnétoscope