
Pro Cee'd GT (2016) - Voiture KIA - Notice d'utilisation et mode d'emploi gratuit
Retrouvez gratuitement la notice de l'appareil Pro Cee'd GT (2016) KIA au format PDF.


| Type de produit | Voiture compacte sportive (3 portes) |
| Marque | Kia |
| Modèle | Pro Cee'd GT (2016) |
| Longueur | 4 310 mm |
| Largeur | 1 780 mm |
| Hauteur | 1 450 mm |
| Empattement | 2 650 mm |
| Poids à vide | 1 350 kg |
| Motorisation | 1.6 L T-GDI essence, 204 ch / 265 Nm |
| Transmission | Manuelle 6 rapports |
| Carburant | Essence sans plomb 95 |
| Consommation mixte | 7,0 L/100 km |
| Émissions CO2 | 160 g/km |
| Capacité du réservoir | 53 L |
| Vitesse maximale | 230 km/h |
| Accélération 0-100 km/h | 7,5 s |
| Sécurité | Airbags frontaux, latéraux et rideaux ; ABS, ESC, assistance au freinage d'urgence |
| Entretien | Vidange tous les 15 000 km ou 1 an ; révision tous les 30 000 km |
| Pièces détachées | Disponibles auprès du réseau Kia |
| Garantie | 7 ans ou 150 000 km |
FOIRE AUX QUESTIONS - Pro Cee'd GT (2016) KIA
Questions des utilisateurs sur Pro Cee'd GT (2016) KIA
0 question sur cet appareil. Repondez a celles que vous connaissez ou posez la votre.
Poser une nouvelle question sur cet appareil
Téléchargez la notice de votre Voiture au format PDF gratuitement ! Retrouvez votre notice Pro Cee'd GT (2016) - KIA et reprennez votre appareil électronique en main. Sur cette page sont publiés tous les documents nécessaires à l'utilisation de votre appareil Pro Cee'd GT (2016) de la marque KIA.
MODE D'EMPLOI Pro Cee'd GT (2016) KIA
>> OWNER'S MANUAL QUICK REFERENCE GUIDE
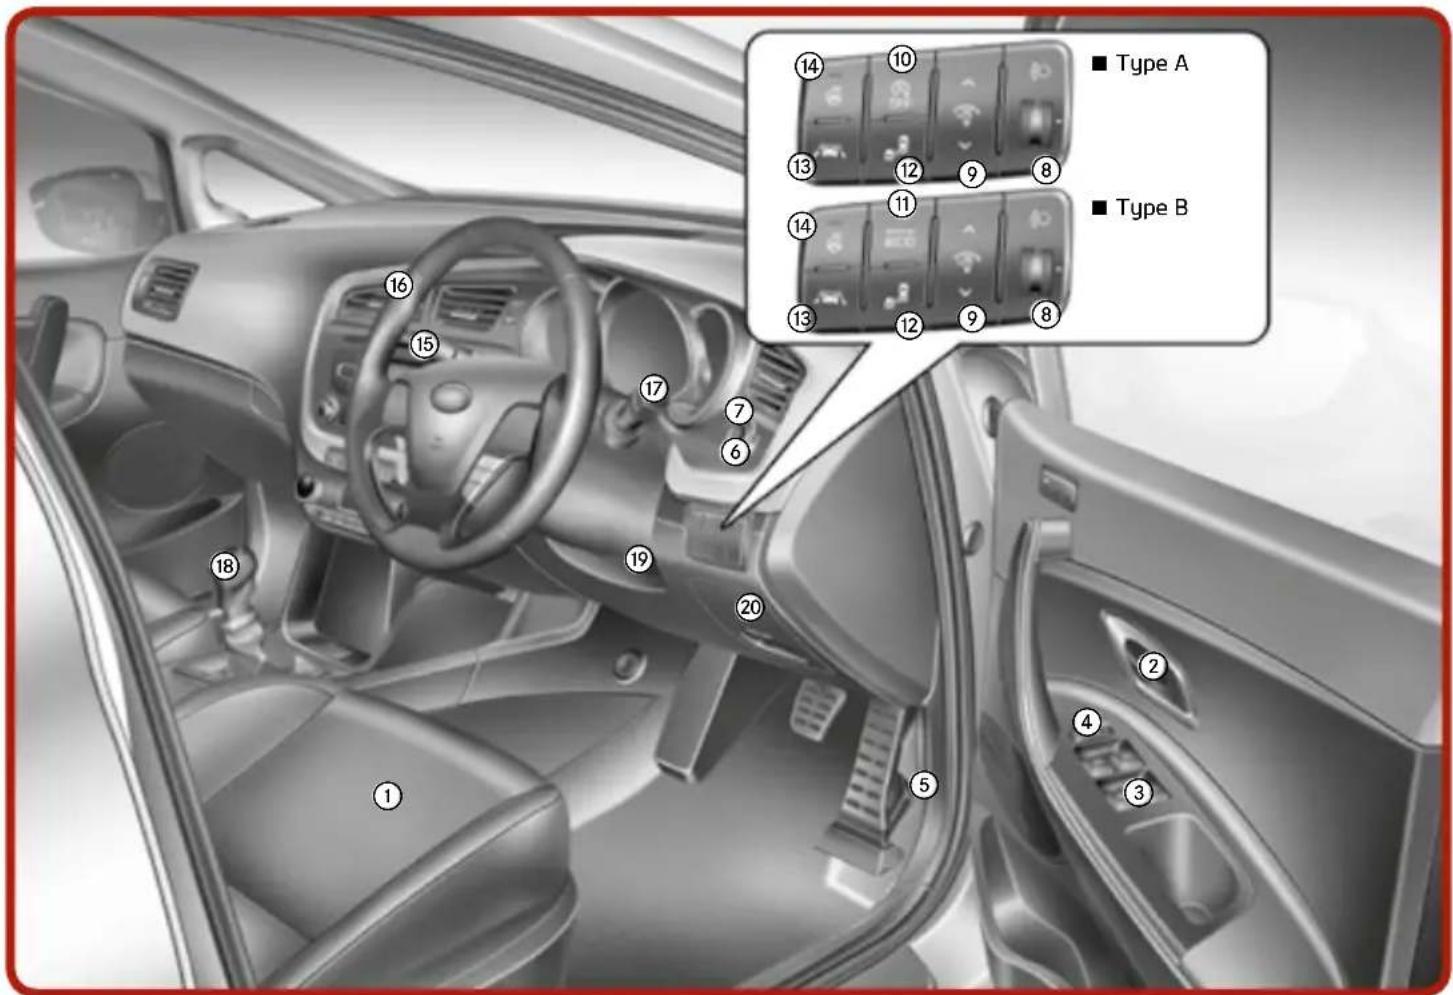
① Seat [3]
② Inside door handle [4]
③ Power window switches [4]
④ Power window lock button [4]
⑤ Bonnet release lever [4]
⑥ Outside rearview mirror folding switch* [4]
⑦ Outside rearview mirror control switch [4]
⑧ Headlight leveling control [4]
⑨ Instrument panel illumination control [4]
⑩ Idle Stop and Go (ISG) OFF button* [5]
⑪ Active ECO button* [5]
⑫ Blind spot detection system ON/OFF button* [5]
⑬ LDWS ON/OFF button* [5]
⑭ Heated steering wheel button* [4]
⑮ Light/Turn signal control lever [4]
⑯ Steering wheel [4]
⑰ Wiper and washer control lever [4]
⑱ Gear lever [5]
⑲ Tilt and telescopic steering column control lever [4]
⑳ Interior fuse box [7]
Instrument Panel Overview / Engine Compartment

① Instrument cluster [4]
② Horn [4]
③ Audio remote control buttons [4]
④ Cruise control/Speed limiter switches* [5]
⑤ Driver's front air bag [3]
⑥ Ignition switch or ENGINE START/STOP button* [5]
⑦ Hazard warning light [4]
⑧ Audio system [4]
⑨ Seat warmer* [3]
⑩ Central door lock switch [4]
⑪ ESC OFF button [5]
⑫ Climate control system [4]
⑬ Cigarette lighter [4]
⑭ Aux, USB and iPod port [4]
⑮ Power outlet [4]
⑯ Passenger's front air bag [3]
⑰ Glove box [4]

① Engine oil filler cap [7]
② Brake/clutch fluid reservoir [7]
③ Positive battery terminal [7]
④ Negative battery terminal [7]
⑤ Engine room fuse box [7]
⑥ Air cleaner [7]
⑦ Radiator cap [7]
⑧ Engine coolant reservoir [7]
⑨ Engine oil dipstick [7]
⑩ Windshield washer fluid reservoir [7]
⑪ Fuel filter* [7]
Door locks / Tailgate / Bonnet / Fuel Filler Lid
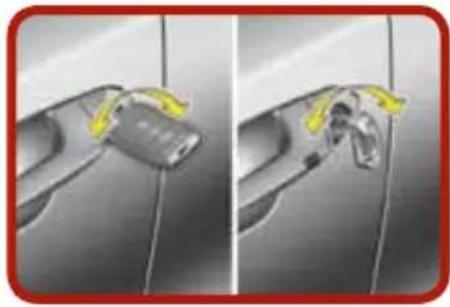
Operating door locks from outside the vehicle [4]
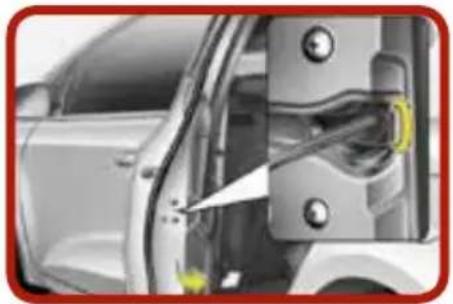
Locking doors in case of an emergency [4]

Child-protector rear door lock [4]

Opening the tailgate [4]
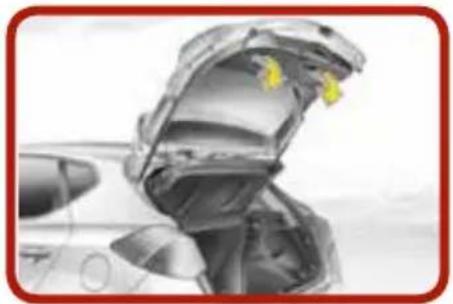
Closing the tailgate [4]

Emergency tailgate release [4]
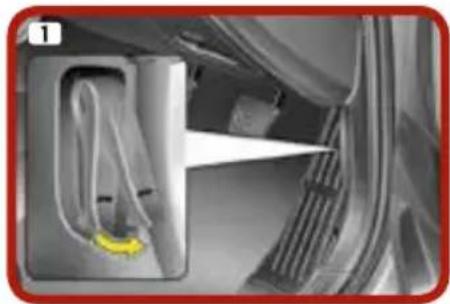
Opening the bonnet [4]
Pull the release lever to unlatch the bonnet.

① Raise the bonnet slightly.
② Push the secondary latch inside and lift the bonnet.

Release the support rod and insert it into the position shown.

Opening the fuel filler lid [4]
Press the center edge of the lid when all doors are unlocked.

① Fully open the lid
② Turn cap counterclockwise
Closing the fuel filler lid
- Turn cap clockwise until it "clicks" to ensure it is securely closed.
- Close the lid and press the edge until it is securely locked.

Windows [4]
① Driver's door power window switch
② Front passenger's door power window switch
③ Rear door (right) power window switch*
④ Rear door (left) power window switch*
⑤ Window opening and closing
⑥ Automatic power window up*/down*
⑦ Power window lock switch*
NOTICE
In cold and wet climates, power windows may not work properly due to freezing conditions.
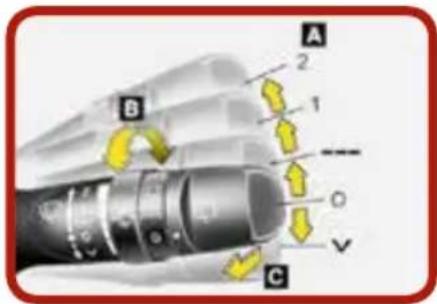
Front [4]
A: Wiper speed control (front)
2 High wiper speed
1 Low wiper speed
--- Intermittent wipe
AUTO* Automatic control wipe
Off
0 Single wipe
B: Intermittent control wipe time adjustment
C: Wash with brief wipes (front)

Rear* [4]
D: Rear wiper/washer control
Continuous wipe
--- Intermittent wipe
0 Off
E: Wash with brief wipes (rear)
Seat / Air Bag / Child Restraint System

Seat [3]
① Seat adjustment, forward/backward
② Seatback recliner
③ Seat adjustment, height
④ Lumbar support*
⑤ Seat warmer*
⑥ Walk-in seat (for 3 door vehicle only)
⑦ Headrest adjustment
⑧ Seat adjustment, forward/backward
⑨ Seatback recliner
⑩ Seat adjustment, height*
⑪ Lumbar support*
⑫ Seat warmer*
⑬ Walk-in seat (for 3 door vehicle only)
⑭ Headrest adjustment
⑮ Armrest*
⑯ Headrest adjustment
⑰ Split folding rear seat
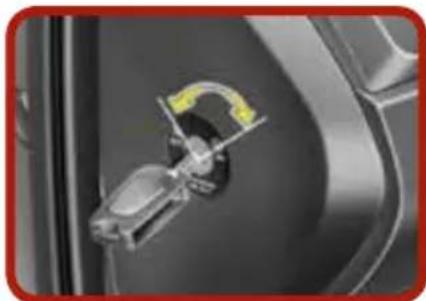
Passenger's front air bag ON/OFF switch* [3]

Rearward-facing child restraint system [3]
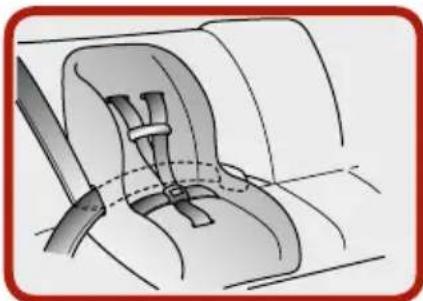
Installing a child restraint system by lap/shoulder belt [3]
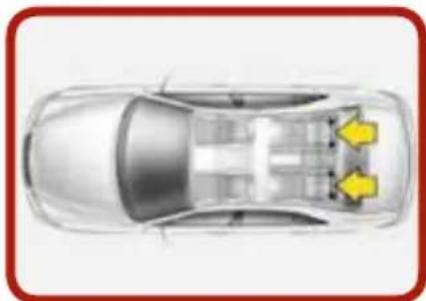
Securing with "ISOFIX" system and "Tether Anchorage" system* [3]

① ISOFIX Anchor Position Indicator
② ISOFIX Anchor

Securing with "Tether Anchor" system* [3]
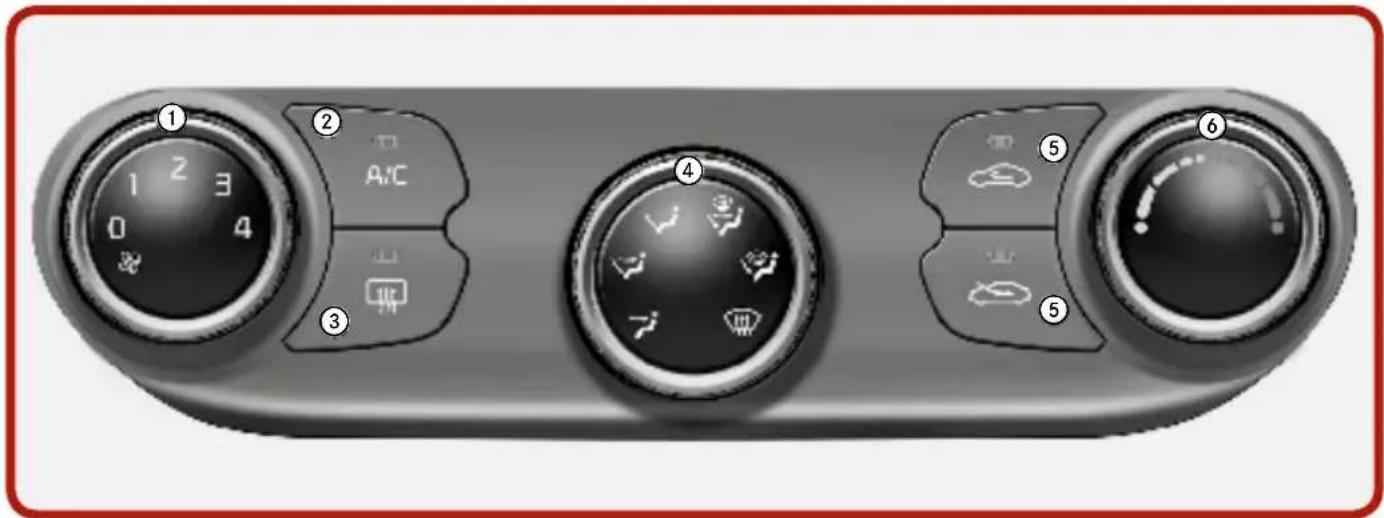
Manual climate control system* [4]
① Fan speed control
② Air conditioning
③ Rear window defroster
④ Mode selection
⑤ Air intake control
⑥ Temperature control

Automatic climate control system* [4]
① Passenger's temperature control
② Dual temperature control selection
③ Fan speed control (High)
④ Fan speed control (Low)
⑤ Climate control display
⑥ Air conditioning
⑦ Air intake control
⑧ Driver's temperature control
⑨ AUTO (automatic control)
⑩ Rear window defroster
⑪ Mode selection
⑫ Front windscreen defroster
⑬ Blower OFF
Lighting Control / Steering Wheel / Cruise Control System

Lighting control [4]
① OFF
② Position light
③ Headlight
④ Auto light*

Tilt & telescopic steering [4]
Steering wheel angle adjustment:
① Pull down lock release lever
② Adjust the steering wheel to the desired angle
③ Height adjustment
Lock steering wheel by pulling up lock release lever.

Flex steering* [4]
The FLEX STEER System controls steering effort depending on the driver's preference or driving conditions.
You can choose between 3 different steering modes by pressing the steering mode button.
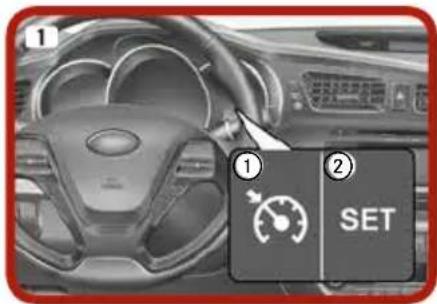
Cruise control system* [5]
① Cruise indicator
② Cruise set indicator
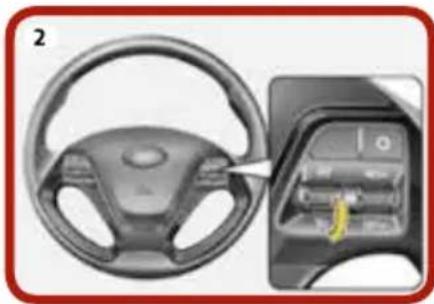
Activate Cruise Control System by moving the lever shown down

Set cruise control speed by moving the lever shown down to SET-
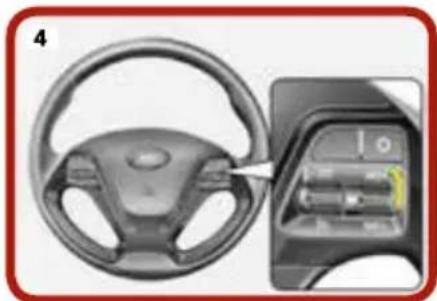
To increase cruise control set speed
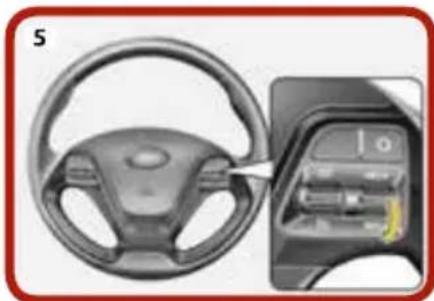
To decrease cruise control set speed

Cancel cruise control set speed by pressing the button shown (CANCEL/O)
Towing / Spare Tyre / Tyre Mobility Kit
Towing [6]
When towing the vehicle in an emergency without wheel dollies:
- Set the ignition switch in the ACC position.
- Place the transaxle shift lever in N (Neutral).
- Release the parking brake.
Emergency towing
If towing is necessary, it is recommended to have it done by an authorised Kia dealer or a commercial tow truck service.
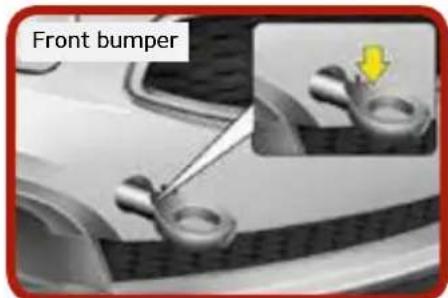
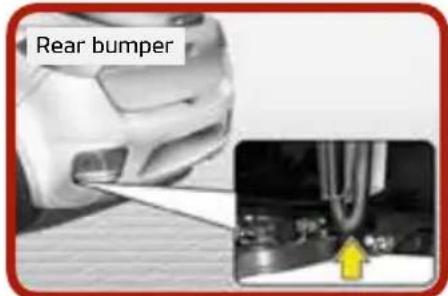
Removable towing hook
- Open the tailgate and remove the towing hook from the tool case. The tool case is located under the luggage box.
- Remove the hole cover pressing the lower part of the cover on the bumper.
- Install the towing hook by turning it clockwise until it is fully secured.
- Remove the towing hook and install the cover after use.
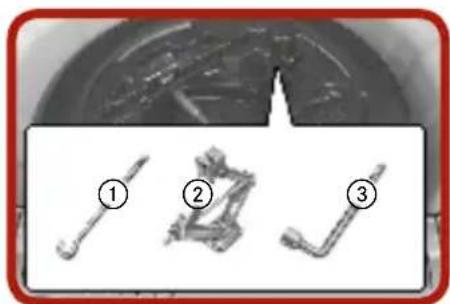
Spare Tyre, Jack and tools* [7]
The shown tools are stored in the luggage compartment.
Pull up the luggage box cover to reach this equipment.
① Jack handle
② Jack
③ Wheel lug nut wrench
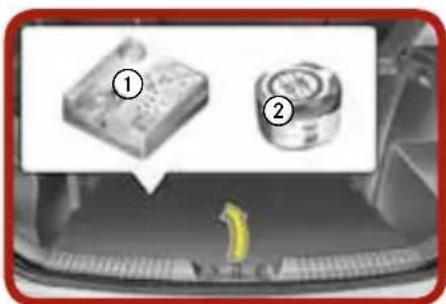
Tyre Mobility Kit* [6]
Please read the instructions before using the Tyre Mobility Kit.
① Compressor
② Sealant bottle
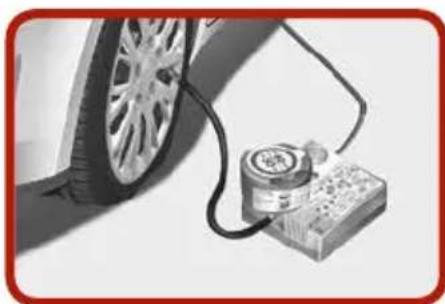
With the Tyre Mobility Kit you stay mobile even after experiencing a tyre puncture.
After you ensure that the tyre is properly sealed you can drive cautiously on the tyre (up to 200 km (120 miles)) at a max. speed of 80 km/h (50 mph) in order to reach a vehicle or tyre dealer to have the tyre replaced.
Engine Oil / Washer Fluid / Additional Info

Checking the engine oil level [7]
Warm up the engine to operating temperature and switch off. On level ground pull the dipstick out and wipe clean before re inserting it fully. Pull the dipstick out again and check the level. It should be between F and L.

Refilling engine oil [7]
Use only the specified engine oil [8] and refill using a funnel to avoid spillage on engine components.

Checking the washer fluid level [7]
Check the fluid level and add fluid if necessary.
Additional Information
Idle Stop & Go (ISG)
When enabled, ISG automatically stops the car's engine to reduce fuel consumption and emissions. The ISG function may not work if the car's battery charge status, ambient temperature and/or engine temperature is too low. Air conditioning/heater control settings may also affect ISG function.
Starting your vehicle with the parking brake applied:
- For Manual Transaxle vehicles: Make sure the transaxle is in Neutral and the clutch pedal is fully depressed before starting the vehicle.
- For Automatic Transaxle vehicles: Make sure the transaxle is in the P (Park) position and the brake pedal fully depressed before starting the vehicle.
For full details and instructions on any item contained in this quick reference guide, please read the owner's manual.
Hill-Start Assist Control (HAC)
This is designed to assist with hill starts by preventing the car rolling backwards when driving off. The system maintains the braking pressure in certain circumstances for 2 seconds enabling to pull away when you are ready.
Parking brake (handbrake)
When engaging the parking brake, apply the footbrake first and keep it depressed. Then ensure the parking brake is properly applied according to the type. Hand type: pull the parking brake lever up as far as possible. Foot type: depress the parking brake pedal down as far as possible.
Electric (EPB) type: pull up the EPB switch and make sure the warning light comes on.
We strongly recommend to leave the car in first or reverse gear or in the 'P' (Park) position on automatics when leaving the car.
Bluetooth®
Many of our cars have Bluetooth® connectivity to enable the driver to safely enjoy the convenience of the mobile phone. For Bluetooth® compatibility please visit the owners section on our website.
The Kia Service App – now available for free on iPhone/iPad and Android
With the Kia Service, you have (almost) all Kia dealers in Europe within reach*. Looking for a showroom or just a service, the app displays all dealers around your current location on the map. With one click you can call a dealer, visit their website or get directions to the showroom. Great for travel at home or abroad.
(*) In selected markets only


The Kia 7 year warranty 7-year/100,000 Mile
new car warranty. Valid in all EU member states (plus Norway, Switzerland, Iceland and Gibraltar), subject to local terms and conditions.
Copyright © 2016 Kia Motors Europe GmbH, all rights reserved. 16.000195 - QRGJDPE - ENG RHD - UK
- OWNER'S MANUAL QUICK REFERENCE GUIDE
- INSTRUMENT PANEL OVERVIEW / ENGINE COMPARTMENT
- DOOR LOCKS / TAILGATE / BONNET / FUEL FILLER LID
- CLOSING THE FUEL FILLER LID
- NOTICE
- SEAT / AIR BAG / CHILD RESTRAINT SYSTEM
- MANUAL CLIMATE CONTROL SYSTEM* [4]
- AUTOMATIC CLIMATE CONTROL SYSTEM* [4]
- LIGHTING CONTROL / STEERING WHEEL / CRUISE CONTROL SYSTEM
- TOWING / SPARE TYRE / TYRE MOBILITY KIT
- TOWING [6]
- EMERGENCY TOWING
- REMOVABLE TOWING HOOK
- ENGINE OIL / WASHER FLUID / ADDITIONAL INFO
- ADDITIONAL INFORMATION
- IDLE STOP & GO (ISG)
- STARTING YOUR VEHICLE WITH THE PARKING BRAKE APPLIED
- HILL-START ASSIST CONTROL (HAC)
- PARKING BRAKE (HANDBRAKE)
- BLUETOOTH®
- THE KIA SERVICE APP – NOW AVAILABLE FOR FREE ON IPHONE/IPAD AND ANDROID
Marque : KIA
Modèle : Pro Cee'd GT (2016)
Catégorie : Voiture