Y651 - Montre PULSAR - Notice d'utilisation et mode d'emploi gratuit
Retrouvez gratuitement la notice de l'appareil Y651 PULSAR au format PDF.


| Type de produit | Montre |
| Marque | Pulsar |
| Modèle | Y651 |
| Mouvement | Quartz analogique |
| Boîtier | Acier inoxydable |
| Verre | Minéral |
| Bracelet | Acier inoxydable |
| Diamètre du boîtier | 40 mm |
| Épaisseur du boîtier | 10 mm |
| Poids | 150 g |
| Alimentation | Pile bouton SR626SW |
| Autonomie de la pile | Environ 3 ans |
| Étanchéité | 50 mètres (5 ATM) |
| Fonctions principales | Affichage de l'heure, des minutes, des secondes, date |
| Entretien et nettoyage | Nettoyer avec un chiffon doux et sec. Éviter les produits chimiques. |
| Sécurité | Éviter les chocs violents et les températures extrêmes. |
| Pièces détachées et réparabilité | Pièces disponibles auprès des revendeurs agréés Pulsar. |
| Informations générales | Montre classique pour homme, cadran analogique avec date. |
FOIRE AUX QUESTIONS - Y651 PULSAR
Questions des utilisateurs sur Y651 PULSAR
0 question sur cet appareil. Repondez a celles que vous connaissez ou posez la votre.
Poser une nouvelle question sur cet appareil
Téléchargez la notice de votre Montre au format PDF gratuitement ! Retrouvez votre notice Y651 - PULSAR et reprennez votre appareil électronique en main. Sur cette page sont publiés tous les documents nécessaires à l'utilisation de votre appareil Y651 de la marque PULSAR.
MODE D'EMPLOI Y651 PULSAR
PULSAR QUARTZ
COMBINATION ANALOGUE AND DIGITAL QUARTZ WITH ALARM AND CHRONOGRAPH
Cal. Y651
CHARACTERISTICS
- Analogue display: Two-hand display (hour and minute)
- Digital time display: Hour, minute, second, "P" (P.M.) mark (A.M, mark is not displayed) and indicators for alarm, time display, "T1" and ships
- Digital calendar display: Day, date, second, year (only when setting digits) and indicators for alarm and chime. Automatic adjustments for odd and even months and February of leap years up to 2099.
- Digital dual time display: Hour, minute, second, "P" (P.M.) mark, and indicators for alarm, dual time "T2" and chime
- Digital stopwatch display: Hour, minute and second up to 24 hours (or minute, second and 1/100 second up to 60 minutes), colon mark and indicators for alarm, chime, lap and stopwatch
-
Digital alarm display: Hour, minute, "P" (P.M.) mark and indicators for alarm and chime.
-
Illuminating light: Illuminates the display in the dark.
- Battery: Use a miniature battery, Toshiba SR41W or Maxell SR41W.
②
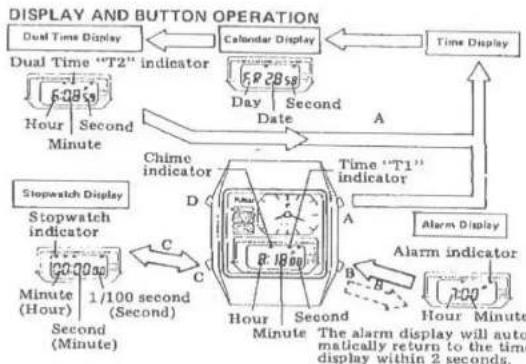
flowchart
graph TD
    A["Dual Time Display"] --> B["Calendar Display"]
    B --> C["Time Display"]
    D["Dual Time "T2" indicator"] --> E["Day 28:58"]
    E --> F["Second Date"]
    F --> G["Chime indicator"]
    G --> H["Stopwatch Indicator"]
    H --> I["Stopwatch Display"]
    I --> J["Minute 1/100 second (Second)"]
    J --> K["Second (Minute)"]
    K --> L["Clock Pulse"]
    L --> M["Alarm Indicator"]
    M --> N["Alarm Display will automatically return to the time display within 2 seconds."]
HOW TO SET THE ANALOG TIME
③

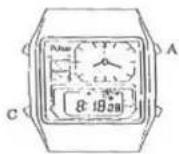
- Depress button "A" to reach the time display.
- In the time display depress button "C" while depressing button "A" to activate the analog time setting function. The time indicator "T1" starts flashing.
- 30 seconds are advanced by each depression of button "C", but keeping depression of button "C" makes hands advance quickly.
- After all adjustments are completed, depress button "C" together with button "A" to return to the analog time display. The time indicator "T1" stops flashing.
* When the digital time setting is engaged, if buttons "A" and "C" are depressed at the same time to activate the analog time setting function, both the analog and digital functions are advanced by the depression of button "C".
HOW TO SET THE DIGITAL TIME

- Depress button "A" to reach the time display.
- From the time display, depress buttons "B" and "D" at the same time to activate the digital time setting function. The second digits start flashing.
- Selection of the digits to be adjusted is made in the following order by depressing button "B". → Second → Minute → Hour →
- One digit (flashing) is advanced by each depression of button "C". However the digits are automatically advanced by depressing button "C" continuously.
⑤
- After all adjustments are completed, depress button "B" and "D" at the same time to return to the time display.
* When the hour digits is being set, be sure to check that the correct A.M. or P.M. is set. ("A" (A.M.) mark is not displayed).
* When the seconds count any numbers from "30" to "59" and button "C" is depressed, one minute is added and the seconds are immediately reset to "00".
HOW TO SET THE ANALOG TIME
③
- Depress button "A" to reach the time display.
- In the time display depress button "C" while depressing button "A" to activate the analog time setting function. The time indicator "T1" starts flashing.
- 30 seconds are advanced by each depression of button "C", but keeping depression of button "C" makes hands advance quickly.
- After all adjustments are completed, depress button "C" together with button "A" to return to the analog time display. The time indicator "T1" stops flashing.
* When the digital time setting is engaged, if buttons "A" and "C" are depressed at the same time to activate the analog time setting function, both the analog and digital functions are advanced by the depression of button "C".
HOW TO SET THE DIGITAL TIME

- Depress button "A" to reach the time display.
- From the time display, depress buttons "B" and "D" at the same time to activate the digital time setting function. The second digits start flashing.
- Selection of the digits to be adjusted is made in the following order by depressing button "B". → Second → Minute → Hour →
- One digit (flashing) is advanced by each depression of button "C". However the digits are automatically advanced by depressing button "C" continuously.
⑤
- After all adjustments are completed, depress button "B" and "D" at the same time to return to the time display.
* When the hour digits is being set, be sure to check that the correct A.M. or P.M. is set. ("A" (A.M.) mark is not displayed).
* When the seconds count any numbers from "30" to "59" and button "C" is depressed, one minute is added and the seconds are immediately reset to "00".
HOW TO SET THE CALENDAR
6
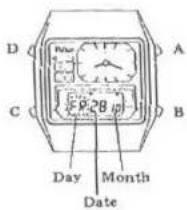
- From the time display depress button "A" once to reach the calendar display.
- In the calendar display depress button "B" and "D" at the same time to activate the calendar setting function. The day digits start flashing.
- Selection of the digits to be adjusted is made in the following order by depressing button "B". (→Day→Date→Month*→Year*)
- One digit is advanced by each depression of button "C". However, the digits are automatically advanced by depressing button "C" continuously.
- After all adjustments are completed, depress button "B" and "D" at the same time to return to the calendar display. And then button "A" twice to the time display.
* Only while the calendar setting function is activated, month and year digits appear.
HOW TO SET THE DIGITAL DUAL TIME DISPLAY

- From the time display depress the button "A" twice to reach the dual time display "T2".
- In the dual time display "T2" depress button "B" and "D" at the same time to activate the dual time setting function. The hour digits and "P" (P.M.) mark (when displayed) start flashing.
- One digit (hour) is advanced by each depression of button "C". However the digits are automatically advanced by depressing button "C" continuously.
• After the hour adjustment is completed, depress buttons "B" and "D" at the same time to re-
turn to the dual time display "T2", and then button "A" once to the time display.
* The minute and second digits in the dual time display "T2" are connected with the ones in the digital time display "T1", therefore they cannot be adjusted.
⑦
HOW TO USE THE STOPWATCH
Stopwatch indicator

- From the time display depress button "C" to activate the stopwatch function. The stopwatch indicator is displayed.
- Start or stop of time counting is made alternately by depressing button "A". The colon flashes every second when the stop-watch function is operating.
- Depress button "B" while counting. The lap time and the lap indicator are displayed.
- When the counting is over, the reset of digits to "00:00oo" is made by depressing button "B".
Accumulated elapsed time measurement (Ex. Basketball game)
Depress the button in the following order:
A - A - A - A - B
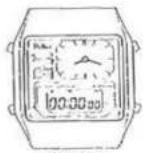
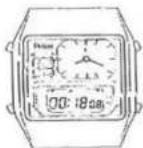

Depress button "A". The second digits start advancing.
When the game is stopped owing to a violation of the rules.
The game is re- started.

Lap time measurement (Ex. Marathon race) Depress the button in the following order: A - B - B - A - B

⑬

Depress button "A". The final time at the goal is displayed.
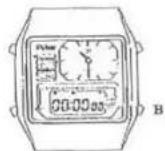
Depress button "B" once and the digits are reset to "00:00:00".
Measurement between two competitors (Ex. 100m match race) Depress the button in the following order: A - B - A - B - B
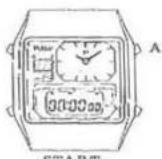
Depress button "A" and the second digits start advancing.
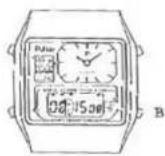
Depress button "B" when the top runner makes a goal. The time of the top runner is displayed.

Depress button "A" when the second runner makes a goal.
①

Depress button "B". The time of the second runner is displayed.
B

Reset the digits to "00:00 oo" for the next race by depressing button "B".
HOW TO SET THE ALARM
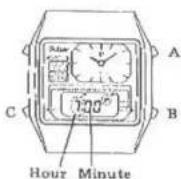
- From the time display depress button "B". The alarm time is displayed for two seconds.
- Depress button "B" twice within two seconds to activate the alarm setting function. The hour digits and "P" (P.M.) (when displayed) start flashing.
• One hour (flashing) is advanced by each depression of button "C" - After the hour digit is adjusted depress button "B". The minute digits start flashing.
• One minute (flashing) is advanced by each depression of button "C" - When all adjustments are completed, depress button "B" once to return to the time display.
* The digits are automatically advanced by depressing button "C" continuously.
* The alarm will ring at the designated time for 60 seconds and stop. However it can be stopped manually by depressing button "B".
* The engagement and disengagement of the alarm can be made by depressing button "A" when the alarm display is engaged.
THE DISPLAY OF
THE CHIME MARK

ILLUMINATING LIGHT
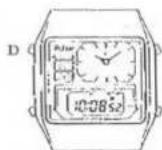
- In the dual time display "T2", each depression of buttons "C" and "D" at the same time repeats the engagement and disengagement of the chime mark alternately.
- When the chime mark is displayed, the hourly time signal rings every hour on the hour with a single "Beep".
TO PRESERVE THE QUALITY OF YOUR WATCH
Your watch contains a highly precise electronic circuit and crystal oscillator, and to maintain its high accuracy, you should not subject it to violent shocks or extreme temperature. Be sure to check if "WATER RESISTANT" is shown on the back of your watch case. If your watch is water resistant, please follow the instructions below.
- Do not depress any buttons when the watch is in water. - If the watch is exposed to salt water, rinse it in fresh water and then wipe it thoroughly dry.
Note: If your watch is not water resistant, care should be taken not to get it wet as water may damage the module.
BATTERY CHANGE
The miniature battery, Toshiba SR41W or Maxell SR41W which powers your watch should last approximately two years. However, because it is inserted at the factory, the actual life of the battery once in your possession may be shortened to less than two years. When replacing the battery, we recommend that you contact an AUTHORIZED PULSAR DEALER.
- PULSAR QUARTZ
- COMBINATION ANALOGUE AND DIGITAL QUARTZ WITH ALARM AND CHRONOGRAPH
- CHARACTERISTICS
- HOW TO SET THE ANALOG TIME
- HOW TO SET THE DIGITAL TIME
- HOW TO SET THE CALENDAR
- HOW TO SET THE DIGITAL DUAL TIME DISPLAY
- HOW TO USE THE STOPWATCH
- HOW TO SET THE ALARM
- TO PRESERVE THE QUALITY OF YOUR WATCH
- BATTERY CHANGE
Marque : PULSAR
Modèle : Y651
Catégorie : Montre