
SC-EH570 - Système home cinéma TECHNICS - Notice d'utilisation et mode d'emploi gratuit
Retrouvez gratuitement la notice de l'appareil SC-EH570 TECHNICS au format PDF.


| Type de produit | Système home cinéma mini-chaîne |
| Marque | Technics |
| Modèle | SC-EH570 |
| Dimensions de l'unité principale (L x H x P) | 430 x 100 x 300 mm |
| Poids de l'unité principale | 4,5 kg |
| Dimensions des enceintes avant (L x H x P) | 200 x 300 x 200 mm chacune |
| Poids des enceintes avant | 2,0 kg chacune |
| Alimentation | 230 V ~ 50 Hz |
| Consommation électrique | 90 W |
| Consommation en veille | Moins de 0,5 W |
| Formats audio pris en charge | CD, CD-R/RW, MP3, WMA |
| Formats vidéo pris en charge | DVD, DVD-R/RW, DivX |
| Tuner | FM/AM avec RDS |
| Puissance de sortie | 100 W RMS totale (5 x 20 W) |
| Entrées audio | 1 x AUX (RCA), 1 x USB |
| Sorties vidéo | 1 x Composite, 1 x S-Vidéo |
| Entretien et nettoyage | Utiliser un chiffon doux et sec. Ne pas utiliser de produits chimiques. |
| Sécurité | Ne pas exposer à l'humidité ou aux gouttes d'eau. Assurer une ventilation adéquate. |
| Pièces détachées et réparabilité | Contacter un centre de service agréé Technics pour les pièces de rechange. |
| Accessoires inclus | Télécommande, antenne FM, câble audio, guide de démarrage rapide |
FOIRE AUX QUESTIONS - SC-EH570 TECHNICS
Questions des utilisateurs sur SC-EH570 TECHNICS
0 question sur cet appareil. Repondez a celles que vous connaissez ou posez la votre.
Poser une nouvelle question sur cet appareil
Téléchargez la notice de votre Système home cinéma au format PDF gratuitement ! Retrouvez votre notice SC-EH570 - TECHNICS et reprennez votre appareil électronique en main. Sur cette page sont publiés tous les documents nécessaires à l'utilisation de votre appareil SC-EH570 de la marque TECHNICS.
MODE D'EMPLOI SC-EH570 TECHNICS
System Component
Operating Instructions
Model No.
SC-EH770
SC-EH570

natural_image
Line drawing of a multi-unit electronic device setup with speakers, monitors, and a front-mounted tower (no text or symbols)The illustration shows SC-EH770 for United Kingdom, Eastern Europe and South Africa.


Technics®
Note
The "EB" on the outer packaging indicates the United Kingdom.
Before connecting, operating or adjusting this product, please read these instructions completely. Please keep this manual for future reference.
RQT5753-B
Dear customer
Thank you for purchasing this product.
For optimum performance and safety, please read these instructions carefully.
These operating instructions are applicable to the following systems.
These operating instructions, however, fundamentally explain the operation of system SC-EH770.
EH770: indicates a function which can be enjoyed with SC-EH770 only.
EH570: indicates a function which can be enjoyed with SC-EH570 only.
| System | SC-EH770 | SC-EH570 | |
| Sound processor | SH-EH770 | SH-EH570 | |
| Tuner / amplifier | SA-EH770 | SA-EH570 | |
| CD changer | SL-EH770 | — | |
| CD player | — | SL-EH570 | |
| Cassette deck | RS-DV250 | RS-DV250 | |
| Speakers | Front | SB-DV250 | SB-EH570 |
| Center | SB-PC95 | — | |
| Surround | SB-PS95 | — | |
CAUTION!
THIS PRODUCT UTILIZES A LASER.
USE OF CONTROLS OR ADJUSTMENTS OR PERFORMANCE OF PROCEDURES OTHER THAN THOSE SPECIFIED HEREIN MAY RESULT IN HAZARDOUS RADIATION EXPOSURE.
DO NOT OPEN COVERS AND DO NOT REPAIR YOURSELF. REFER SERVICING TO QUALIFIED PERSONNEL.
CAUTION!
DO NOT INSTALL OR PLACE THIS UNIT IN A BOOKCASE, BUILT IN CABINET OR IN ANOTHER CONFINED SPACE. ENSURE THE UNIT IS WELL VENTILATED. ENSURE THAT CURTAINS AND ANY OTHER MATERIALS DO NOT OBSTRUCT THE VENTILATION TO PREVENT RISK OF ELECTRIC SHOCK OR FIRE HAZARD DUE TO OVERHEATING.
CLASS 1 LASER PRODUCT

natural_image
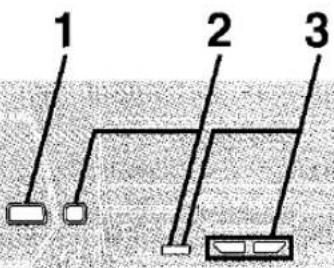
Simple line drawing of a rectangular box with a vertical line above it and a small mark on the side (no text or symbols)CD changer or CD player (Back of product)
| DANGER | IMNISIELE LASER RADIATION WHEN OPEN.AVOID DIRECT EXPOSURE TO BEAM. |
| ADVARSEL | USYNLIG LASERSTRÄUNING YES ÅBHING, NÄR SIKKEREDOSATBYDUEREER IDE AF FUNKTION UNIDÅAIDSGATEILSE FOR STRÄUNG. |
| VARO! | AVATTASSA JA SUOUJALUKITIIS OHITETTAESSA OLET ALTINNA NÄKSYMÄCHITA LASERSÄTEKYLELLA ALA KATSO-SATEESEN. |
| VARNING | DSYNLIG LASERSTRÄUNING NÄR DEKNA DEL AR ÖPPNAD OCHSPARREN JÄR URKÖPPLAD BEITRAKTA EJ STRÄLEN. |
| ADVARSEL | USYNLIG LASERSTRÄUNING NÄR DEKSEL ÅPNES OS SIKKERIEDOSLÄSBRYTES... LUNGÅKSIPFONRING FOR STRÄLEN. |
| VORSICHT | UNSICHTBAPE LASERSTRÄUUNG, WENN ABEDKUND GEÖFFNEHLMÖNT DEM STRAHL ASSET'EN. |
(Inside of product)
(Indersiden at apparatet)
(Tuotteen sisällä)
(Apparatens insida)
(Produktets innside)
(Im Inneren des Gerätes)
Supplied accessories
Please check and identify the supplied accessories.
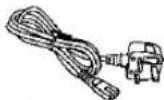
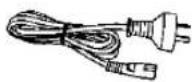
□ AC mains lead 1 pc.
For United Kingdom
(VJA0733)
For Australia and N.Z.
(RJA0035-X)
For others
(RJA0019-1X)

Note
The Included AC mains lead is for use with this unit only. Do not use it with other equipment.
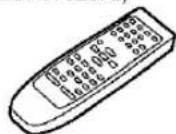
□ Remote control 1 pc.
EH770 for United Kingdom,
Eastern Europe and
South Africa (EUR7702050)
EH770 for others
(EUR7702060)

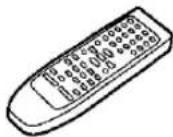
EH570
(EUR7702070)
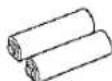
☐ Remote control batteries 2 pcs.
☐ FM indoor antenna 1 pc.
For United Kingdom,
Eastern Europe and
South Africa (RSA0007)
For others
(RSA0006-J)


□ AM loop antenna set .... 1 set
(RSA0022-L)


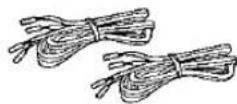
☐ Speaker leads 4 pcs.
(REE1057)
(Red/Black)
(REE0853)
(Gray/Blue)

□ Antenna plug adaptor .... 1 pc.
Only for United Kingdom
(SJP9009)

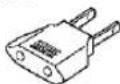
□ Power plug adaptor.... 1 pc.
Only for areas except United Kingdom, Eastern Europe, South
Africa, Australia and N.Z.
(SJP5213-2)
Before use
Safety precautions 3
Caution for AC Mains Lead 4
Simple set-up and play
Locating 5
Speaker leads 6
Antennas 7
Flat cables and AC mains lead 7
Listening to a CD EH770 8
Listening to a CD EH570 9
Control guide and preparatory steps
Front panel controls 10
The remote control 12
Turning DEMO off 13
Setting the time 13
Basic operations
CDs 14
The radio: manual tuning 17
The radio: preset tuning 18
Cassette tapes.... 19
Changing sound field and quality
Boosting the super woofer 20
Using the super sound equalizer 20
Changing sound field and quality 20
Using the acoustic image equalizer (AI EQ) 21
Using the manual equalizer (M.EQ) 21
Enjoying surround sound EH770 22
6CH DISCRETE INPUT 24
DOLBY PRO LOGIC 24
SUPER SURROUND 24
Surround effects EH770 26
Recording operations
Before recording (Deck 2 only) 28
Recording CDs 29
Recording the radio 30
Tape-to-tape recording.... 30
Timer operations and convenient functions
Using the timers 31
Changing the sound range display.... 34
Muting the volume 34
Using headphones 34
Enjoying karaoke (For areas except United Kingdom,
Eastern Europe and South Africa) 35
External unit connections 36
Optional antenna connections 37
Using other equipment.... 37
References
Troubleshooting guide.... 38
Maintenance 39
Cassette tape selection and care 39
Technical specifications .... Back cover
Placement
Set the unit up on an even surface away from direct sunlight, high temperatures, high humidity, and excessive vibration. These conditions can damage the cabinet and other components, thereby shortening the unit's service life.
Place it at least 15 cm away from wall surfaces to avoid distortion and unwanted acoustical effects.
Do not place heavy items on the unit.
Voltage
Do not use high voltage power sources. This can overload the unit and cause a fire.
Do not use a DC power source. Check the source carefully when setting the unit up on a ship or other place where DC is used.
AC mains lead protection
Ensure the AC mains lead is connected correctly and not damaged. Poor connection and lead damage can cause fire or electric shock. Do not pull, bend, or place heavy items on the lead.
Grasp the plug firmly when unplugging the lead. Pulling the AC mains lead can cause electric shock.
Do not handle the plug with wet hands. This can cause electric shock.
Foreign matter
Do not let metal objects fall inside the unit. This can cause electric shock or malfunction.
Do not let liquids get into the unit. This can cause electric shock or malfunction. If this occurs, immediately disconnect the unit from the power supply and contact your dealer.
Do not spray insecticides onto or into the unit. They contain flammable gases which can ignite if sprayed into the unit.
Service
Do not attempt to repair this unit by yourself. If sound is interrupted, indicators fail to light, smoke appears, or any other problem that is not covered in these instructions occurs, disconnect the AC mains lead and contact your dealer or an authorized service center. Electric shock or damage to the unit can occur if the unit is repaired, disassembled or reconstructed by unqualified persons.
Extend operating life by disconnecting the unit from the power source if it is not to be used for a long time.
Caution
- Use the speakers only with the recommended system.
Failure to do so may lead to damage to the amplifier and/or the speakers, and may result in the risk of fire.
Consult a qualified service person if damage has occurred or if you experience a sudden change in performance. - Do not attempt to attach these speakers to walls using methods other than those described in this manual.
WARNING:
TO REDUCE THE RISK OF FIRE, ELECTRIC SHOCK OR PRODUCT DAMAGE, DO NOT EXPOSE THIS APPLIANCE TO RAIN, SPLASHING, DRIPPING OR MOISTURE.
(For areas except United Kingdom, Eastern Europe, South Africa, Australia and N.Z.)
CAUTION:
The AC voltage is different according to the area. Be sure to set the proper voltage in your area before use.
(For details, please refer to page 5.)
(For United Kingdom)
("EB" area code model only)
For your safety, please read the following text carefully.
This appliance is supplied with a moulded three pin mains plug for your safety and convenience.
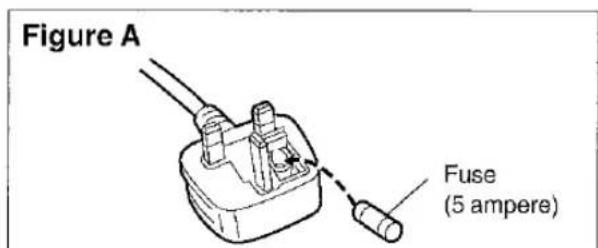
A 5-ampere fuse is fitted in this plug.
Should the fuse need to be replaced please ensure that the replacement fuse has a rating of 5-ampere and that it is approved by ASTA or BSI to BS1362.
Check for the ASTA mark 📍 or the BSI mark 🍽 on the body of the fuse.
If the plug contains a removable fuse cover you must ensure that it is refitted when the fuse is replaced.
If you lose the fuse cover the plug must not be used until a replacement cover is obtained.
A replacement fuse cover can be purchased from your local dealer.
CAUTION!
IF THE FITTED MOULDED PLUG IS UNSUITABLE FOR THE SOCKET OUTLET IN YOUR HOME THEN THE FUSE SHOULD BE REMOVED AND THE PLUG CUT OFF AND DISPOSED OF SAFELY.
THERE IS A DANGER OF SEVERE ELECTRICAL SHOCK IF THE CUT OFF PLUG IS INSERTED INTO ANY 13-AMPERE SOCKET.
If a new plug is to be fitted please observe the wiring code as stated below.
If in any doubt please consult a qualified electrician.
IMPORTANT
The wires in this mains lead are coloured in accordance with the following code:
Blue: Neutral, Brown: Live.
As these colours may not correspond with the coloured markings identifying the terminals in your plug, proceed as follows:
The wire which is coloured Blue must be connected to the terminal which is marked with the letter N or coloured Black or Blue.
The wire which is coloured Brown must be connected to the terminal which is marked with the letter L or coloured Brown or Red.
WARNING: DO NOT CONNECT EITHER WIRE TO THE EARTH TERMINAL WHICH IS MARKED WITH THE LETTER E, BY THE EARTH SYMBOL ⊥ OR COLOURED GREEN OR GREEN/YELLOW.
THIS PLUG IS NOT WATERPROOF—KEEP DRY.
Before use
Remove the connector cover.
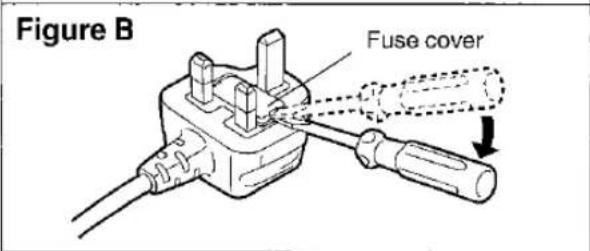
How to replace the fuse
The location of the fuse differ according to the type of AC mains plug (figures A and B). Confirm the AC mains plug fitted and follow the instructions below.
Illustrations may differ from actual AC mains plug.
- Open the fuse cover with a screwdriver.

- Replace the fuse and close or attach the fuse cover.

Simple set-up and play
STEP 1 Locating
For areas except United Kingdom, Eastern Europe, South Africa, Australia and N.Z.:
Before positioning, set the voltage ( below).
Components

Note
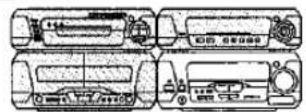
Do not put the CD changer or CD player on the top of the tuner/amplifier. Heat can damage your CDs.
Speakers

flowchart
graph TD
    A["Front speaker (left)"] --> B["EH770 Center speaker"]
    B --> C["Front speaker (right)"]
    D["EH770 Surround speaker (left)"] --> E["EH770 Surround speaker (right)"]
    E --> F["EH770 Center speaker"]
    style A fill:#f9f,stroke:#333
    style B fill:#ccf,stroke:#333
    style C fill:#cfc,stroke:#333
    style D fill:#fcc,stroke:#333
    style E fill:#cff,stroke:#333
    subgraph "Optimum location"
        direction TB
        A -->|A 30°| B
        B -->|B 30°| C
        C -->|C 30°| D
        D -->|D 120°| E
        E -->|E 120°| F
    end
    note right of B "Center speaker"
    note left of A "Front speaker (left)"
    note right of E "EH770 Surround speaker (right)"
    note bottom of A "Distance: A=B=C=D=E"
Use only the supplied speakers.
Using other speakers can damage the unit and sound quality will be negatively affected.
Voltage setting
(For areas except United Kingdom, Eastern Europe, South Africa, Australia and N.Z.)
Use a flat-head screwdriver to turn the voltage selector to the appropriate position for your area.
If the power supply in your area is 115 V or 120 V, please set the voltage selector as follows;
- For 115 V: set to 110 V
- For 120 V: set to 127 V
Bottom of tuner/ amplifier

Note that the unit will be seriously damaged if this setting is not made correctly.
If irregular colouring occurs on your television
The front and center speakers are designed to be used close to a television, but the picture may be affected with some televisions and set-up combinations.
If this occurs, turn the television off for about 30 minutes.
The television's demagnetizing function should correct the problem.
If it persists, move the speakers further away from the television.
Note
The surround speakers do not have magnetic shielding. Do not place them near televisions, personal computers or other devices easily influenced by magnetism.
Front speakers
Left and right front speakers are exactly same.
Surround speakers
Place either side of the listening position, or slightly to the rear, about 1 meter higher than ear level with the Technics logo facing toward the listening position.
The effect varies with the type of music and the music source.
If you are unable to position the surround speakers as recommended
You can put them near the front speakers and still achieve a surround-like effect (→ page 26, VIRTUAL REAR SURROUND).
Attaching to a wall
Set the speaker onto screws and slide through bracket to lock into position.

Note
The wall or pillar on which the speakers are to be attached should be capable of supporting 5 kg per screw.
Simple set-up and play
STEP2
Speaker leads
The illustrations show SC-EH770 for United Kingdom, Eastern Europe and South Africa. Do not connect the AC mains lead until all other connections are complete.
EH770
Surround and center speakers


Front speaker
Connect the leads to the terminals of the same colour.
LF and HF stand for low frequency and high frequency.
Connect the left (L) side in the same way.
Note
- Never short-circuit positive (+) and negative (−) speaker wires.
- Be sure to connect only positive (red or grey) wires to positive (+) terminals and negative (black or blue) wires to negative (-) terminals.
Incorrect connection can damage the speakers.

STEP3 Antennas
FM indoor antenna
Fix the other end of the antenna where reception is best.
Except for United Kingdom, Eastern Europe and South Africa
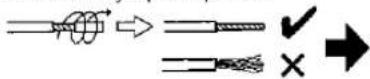
Twist the vinyl tip and pull off.

AM indoor antenna
Twist the vinyl tip and pull off.


Keep loose antenna cord away from other wires and cords.
STEP4 Flat cables and AC mains lead
Flat cables
Keep the cables as flat as possible against the back of the unit.
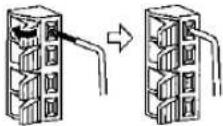
Connect the connectors to the terminals of the same colour.
Incorrect connection can damage the unit.
Connecting
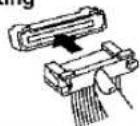
1 Disconnecting


To household mains socket
AC mains lead
(For United Kingdom only)
BE SURE TO READ THE CAUTION FOR THE AC
MAINS LEAD ON PAGE 4 BEFORE CONNECTION.
For areas except United Kingdom, Eastern Europe, South Africa, Australia and N.Z.
If the power plug will not fit your socket, use the power plug adaptor (included).

insertion of connector
Even when the connector is perfectly inserted, depending on the type of inlet used, the front part of the connector may jut out as shown in the drawing.
However there is no problem using the unit.
Appliance inlet

Approx. 6 mm
For your reference:
Information you enter into the unit's memory, except for time, remains intact for up to two weeks after the mains lead is disconnected.
Simple set-up and play — Listening to a CD —
EH770
1 Press [⏻/l] to turn the unit on.
2 Press DIRECT OPEN [DISC1]-[DISC5] and insert a CD.
3Press [▲OPEN/CLOSE] to close the tray.
Repeat steps 2 and 3 to load the other trays. Displayed when the unit is in CD mode.

Disc number Total number of tracks Total playing time
4Press [▶] to start play.
Play starts from the first track on the disc in the play position and finishes at the end of the last track on the final disc (see below).
You can start play from another disc by pressing [DISC 1-5].
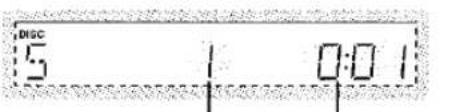
Track number
Elapsed play time
5 Adjust the volume.

To stop the disc
Press [■].
To pause play
Press [11] during play. The "▷" indicator flashes.
Press [■■] or [▶] to resume play.
Note
You can not change CDs in other trays while a disc is playing.
Final disc
For example, if play starts from disc 4, disc 3 will be the final disc.
Order of progression: Disc 4→5→1→2→3
Play position
- The disc in the play position is ready to play immediately when you press [▶].
- "NO DISC" is displayed when a disc isn't in the play position.
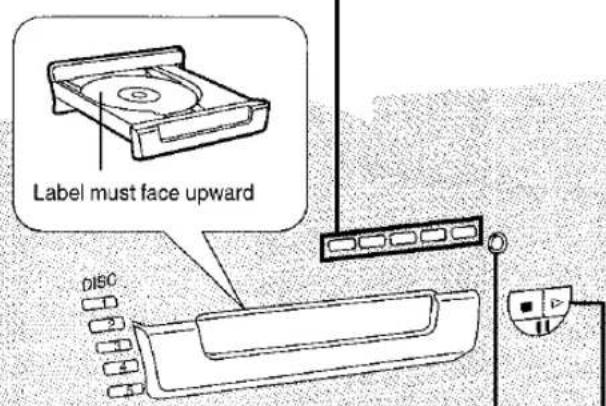
EH570
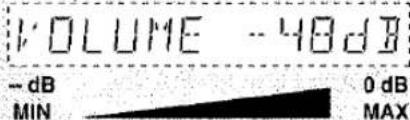
![1 Press [Ø/l] to turn the unit on. 2 Press [▲OPEN/CLOSE] and insert a CD. Label must face upward 3Press [▲OPEN/CLOSE] to close the tray. Displayed when the unit is in CD mode. 16 45:20 Total number of tracks Total playing time 4Press [▶] to start play. Track number Elapsed play time 5Adjust the volume. VOLUME -48dB -- dB MIN 0 dB MAX](/content/2026/06/1310542/images/ca28d8ea100ad0ccb17a39a6b2b46290565d56d64a4829b8320ac4202992eec6.jpg)
To stop the disc
Press [■].
To pause play
Press [III] during play. The "I>” indicator flashes.
Press [■■] or [▶] to resume play.
"NO DISC" is displayed when a disc isn't in the player.
A
EH770

EH570

B
EH770
EH570
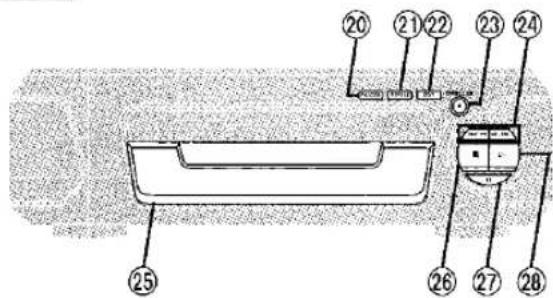
Front panel controls
A Tuner/amplifier
① Standby/on switch (☐/I)....8 Press to switch the unit from on to standby mode or vice versa. In standby mode, the unit is still consuming a small amount of power.
② Standby indicator (☐) When the unit is connected to the AC mains supply, this indicator lights up in standby mode and goes out when the unit is turned on.
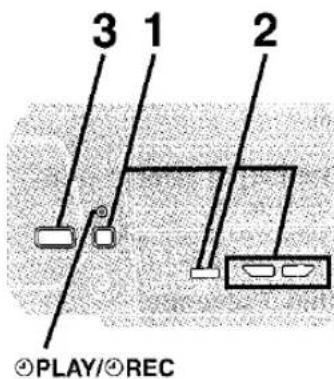
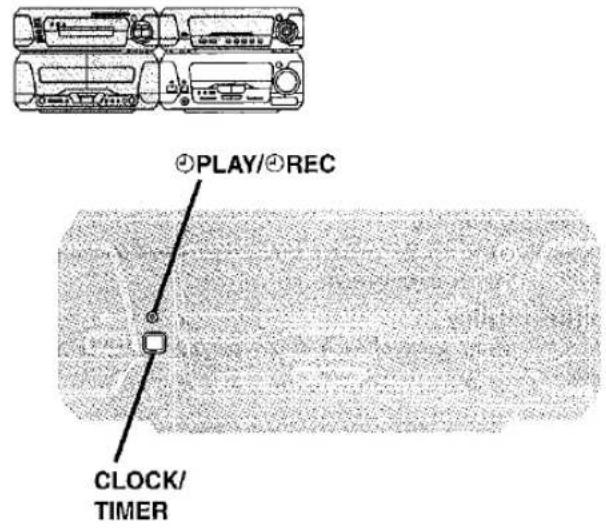
③ Play timer/record timer button and indicator (⊕PLAY/⊕REC).... 31, 32
④ Clock/timer button (CLOCK/TIMER) 13, 31, 32
⑤ Demo button (-DEMO) 13
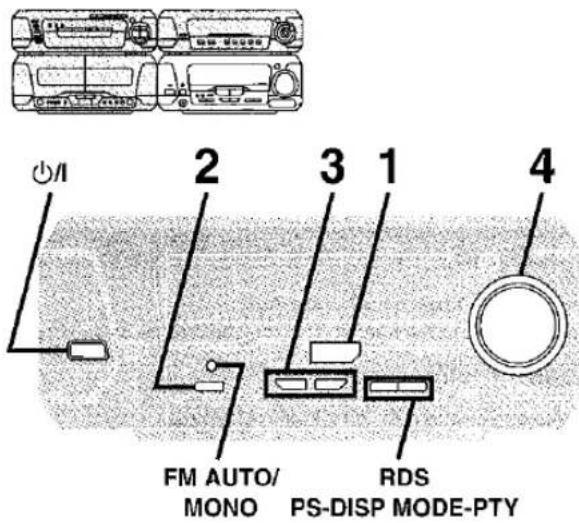
⑥ FM mode button (FM AUTO/MONO) 17
⑦ Source input button (INPUT SELECTOR) 37
⑧ Tuner/band button (TUNER/BAND) 17
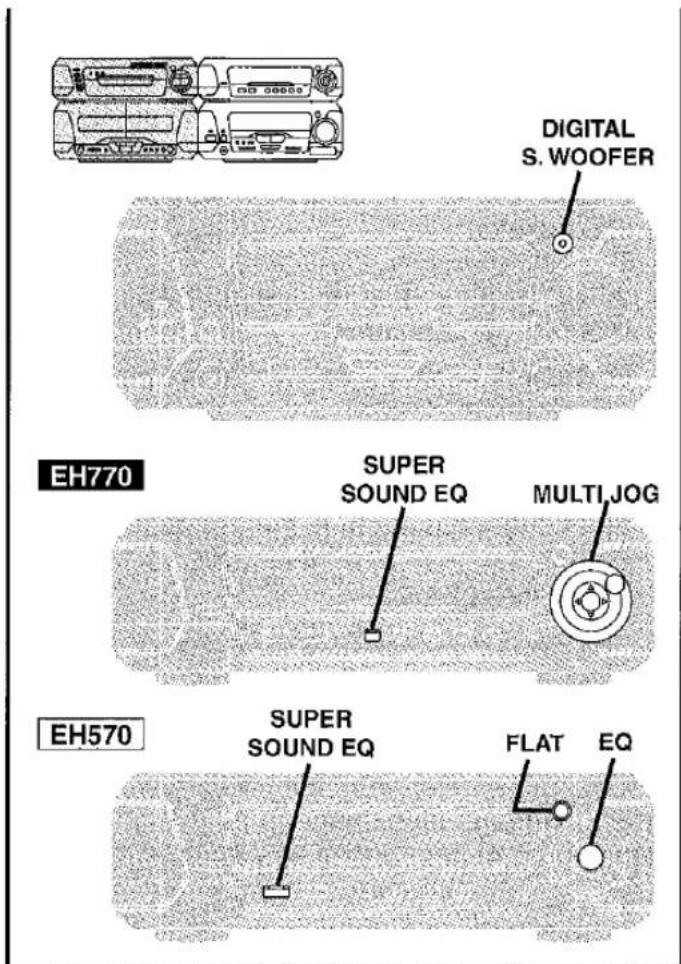
⑨ Digital super woofer button and indicator (DIGITAL S.WOOFER)....20
⑩ Volume control (VOLUME) 8
⑪ Headphone jack (PHONES) 34
⑫ Tuning mode button (TUNING MODE) 17
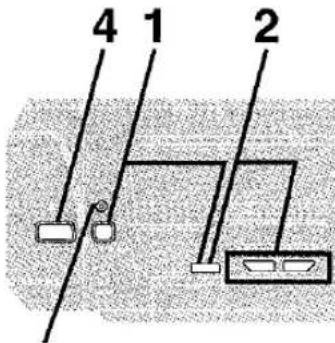
⑬ Set button (SET) 18
⑭ Tuning buttons (v, ∧ TUNING) 13, 17
⑮ EH770
6ch discrete input button (6CH DISCRETE INPUT) ..... 24
16 EH770 for United Kingdom, Eastern Europe and South Africa EH570 for areas except United Kingdom
RDS display mode button (RDS, PS-DISP MODE-PTY) ..... 17
⑰ EH770 for areas except United Kingdom, Eastern Europe and South Africa
Karaoke and echo buttons (KARAOKE, ECHO) 35
EH770 for areas except United Kingdom, Eastern Europe and South Africa
⑱ Microphone jacks (1-MIC-2) 35
⑲ Microphone volume control (MIC VOL) 35
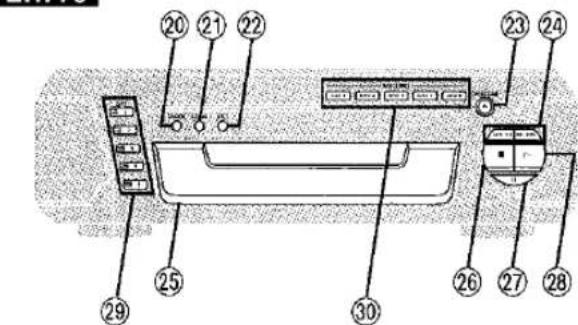
B CD changer/CD player
20 Random play button (RANDOM) 16
② Repeat play button (REPEAT) 16
② CD edit button (EDIT) 29
② Disc tray open/close button (▲, OPEN/CLOSE)....8
②4 Skip/search buttons (1◄◄/◄◄, ►►/►►I).... 14
⑲ Disc tray
Stop button (■) 8
⑳ Pause button (11) 8
⑳ Play button and indicator (▷) 8
The colour of the indicator depends on the operation taking place.
If stopped: orange
If playing: green
If paused: flashes
EH770
⑳ Disc select buttons and indicators (DISC, 1–5) ..... 8
Green: Indicates that the tray is ready to play its CD or to be opened.
⑩ Disc direct open buttons 8
(DIRECT OPEN, DISC 1-DISC 5)
A

B
EH770

EH570
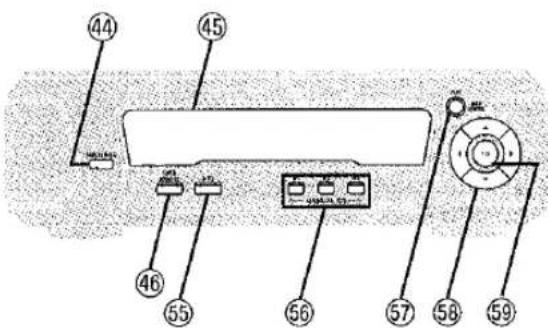
Front panel controls
A Cassette deck
③1 Deck 1 cassette holder open button (▲ OPEN) ..... 19
③2 Deck 1
③3 Fast forward/rewind, TPS buttons (◀◀, ▶▶) 19
34 Deck 2
35 Deck 2 cassette holder open button (▲ OPEN) ..... 19
36 Counter reset, display buttons (COUNTER, RESET, DISPLAY) 28
37 Deck 1/deck 2 select button (DECK 1/2) 19
③8 Playback buttons and indicators (<, ▷) 19
The color of the indicators depends on the operation taking place.
If stopped, fast forwarding or rewinding: orange
If playing or recording: green
While carrying out TPS or recording is on standby: flashes
Stop button (■) 19
④0 Dolby noise reduction button (DOLBY NR) 19
④ Reverse mode button (REV MODE) 19
④2 Tape edit button (TAPE EDIT) 30
Record pause button (● REC PAUSE) 29
B Sound processor
④4 Display mode button (DISPLAY MODE) 34
45 Display
46 Super sound EQ button (SUPER SOUND EQ) 20
EH770
④7 Super 3D AI EQ button (SUPER 3D AI EQ) 21
④6 Jog control and joystick (◄, ►, ▲, ▼, MULTI JOG) ..... 20
④9 DOLBY PRO LOGIC button and indicator
(□□PRO LOGIC, OFF/ON)....24
⑤0 Super surround button and indicator (SUPER SURROUND) 24
⑤ Center focus button and indicator
(CENTER FOCUS) 26
⑤2 Virtual rear surround button and indicator (VIRTUAL REAR SURROUND) 26
⑤3 Multi rear surround button and indicator (MULTI REAR SURROUND) 26
⑥4 Seat position button and indicator (SEAT POSITION) ..... 27
[EH570]
⑤ AI EQ button (AI EQ) 21
⑤6 Manual EQ buttons (M1, M2, M3) 21
⑤ Flat button (FLAT) 20
⑥8 Multi control buttons
(◀, ▶, ▲, ▼, MULTI CONTROL) ..... 21
⑤ EQ button (EQ) 20
A
The illustration shows the remote control for SC-EH770 for areas except United Kingdom, Eastern Europe and South Africa.
B

C
Tuner/amplitier
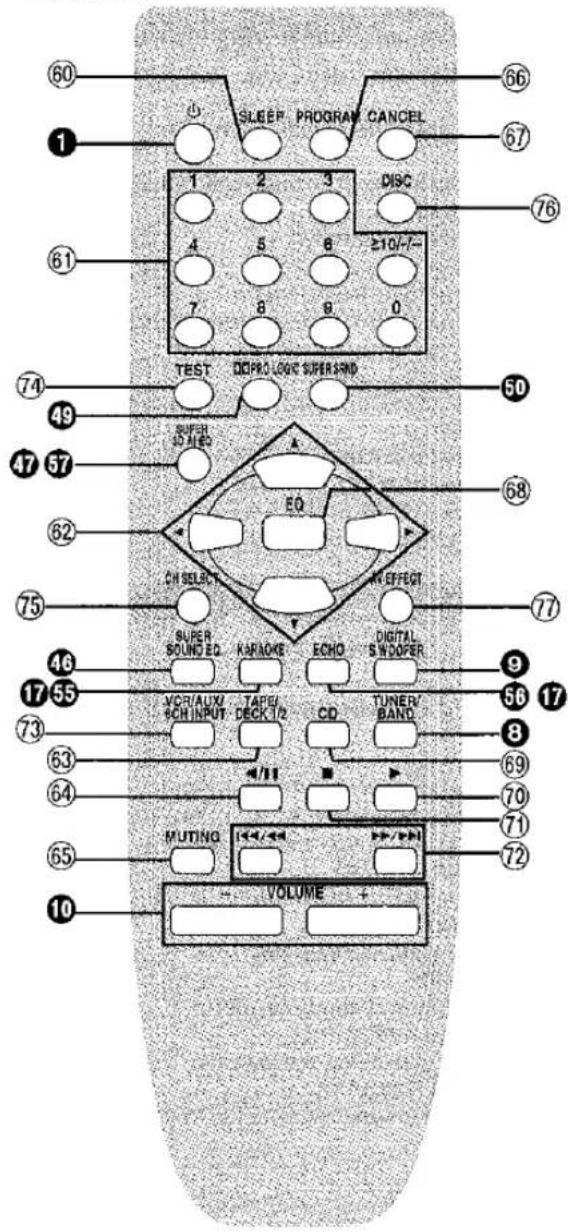
Front panel controls
A Remote control
Buttons such as ① function in the same way as the controls on the main unit.
60 Sleep timer button (SLEEP) 33
⑥1 Numbered buttons (1-9, 0, ≥10/-/--) 15
⑥ Cursor buttons (◀, ▶, ▲, ▼) 25, 26
⑥ Tape select, deck 1/deck 2 select button (TAPE/DECK 1/2)....19
⑥4 CD pause/tape reverse playback button (◄/II) 8,19
⑥5 Muting button (MUTING) 34
66 Program button (PROGRAM) 15
⑥7 Cancel button (CANCEL) 15
⑥ EQ button (EQ) 20
CD button (CD) 15, 16
⑦ CD play/tape forward playback button (▶) 15, 19
⑦ CD/tape stop button (■) 15, 19
② CD skip/search, tape fast forward/rewind buttons (1◄◄/◄◄, ►►/►►1) 15, 19
⑦3 EH770
Input select button (VCR/AUX/6CH INPUT) 37
EH570 AUX button (AUX) 37
EH770
⑦4 Test button (TEST) 25
⑦ Channel select button (CH SELECT) 25
⑦6 Disc button (DISC) 15
⑰ AV effect button (AV EFFECT) 26
The remote control
B Batteries
- Insert so the poles (+ and -) match those in the remote control.
- Do not use rechargeable type batteries.
Do not;
- mix old and new batteries.
- use different types at the same time.
- heat or expose to flame.
●take apart or short circuit.
- attempt to recharge alkaline or manganese batteries
- use batteries if the covering has been peeled off.
- keep together with metallic objects such as necklaces.
Mishandling of batteries can cause electrolyte leakage which can damage items the fluid contacts and may cause a fire.
If electrolyte leaks from the batteries, consult your dealer.
Wash thoroughly with water if electrolyte comes in contact with any part of your body.
Remove if the remote control is not going to be used for a long period of time. Store in a cool, dark place.
Replace if the unit does not respond to the remote control even when held close to the front panel.
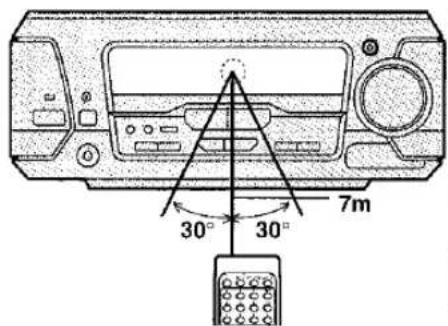
C Use
Aim at the sensor, avoiding obstacles, at a maximum range of 7 meters directly in front of the unit.
- Keep the transmission window and the unit's sensor free from dust.
- Operation can be affected by strong light sources, such as direct sunlight, and the glass doors on cabinets.
Do not;
-put heavy objects on the remote control.
●take the remote control apart.
●spill liquids onto the remote control.
A


NO DEMO
B
1

2


CLOCK……
CLOCK -0:00
3


CLOCK -16:25

Turning DEMO off
A demonstration of the display is shown if you have not set the clock.
You can reduce the power consumed in standby mode by turning the demonstration off.
While the unit is on:
Press and hold [-DEMO] until "NO DEMO" is displayed.
Each time you press and hold the button:
NO DEMO (off)→DEMO (on)
![TECHNICS SC-EH570 - Press and hold [-DEMO] until "NO DEMO" is displayed. - 1](/content/2026/06/1310542/images/0ff53171712d157d2f7626bc97e90b3bd1ea0ad69a018ac8e3e1fda43e990f5b.jpg)
Setting the time
This is a 24-hour clock.
The example shows how to set the clock for 16:25 (4:25 p.m.).
1 Press [☐/I] to turn the unit on.
2 ① Press [CLOCK/TIMER] to display "CLOCK".
Each time you press the button:
CLOCK→∅PLAY→∅REC→Original display
↑
② Within 5 seconds
Press [SET].
3 ① Press [TUNING (∨ or ∧)] to set the time.
The time display can be changed in one minute units by tapping the buttons, and quickly by holding down the buttons.
② Press [SET].
The time is set and the original display is restored.
Displaying the clock
Press [CLOCK/TIMER].
The clock is shown for about 5 seconds.
Reset the clock regularly to maintain accuracy.
A
a

b

©

B
d

natural_image
Two hand-drawn diagrams showing a circular object on a rectangular base with a checkmark and crossed-out cross marks (no text or symbols)e

C

CDs
See pages 8 and 9 for basic CD play.
A CD selection
Choose discs with this mark (a).
Do not;
- use irregularly shaped discs (b).
- attach extra labels and stickers.
- use discs with labels and stickers that are coming off or with adhesive exuding from under labels and stickers (©).
- attach scratch-proof covers or any other kind of accessory.
●write anything on the CD. - clean CDs with liquids. (Wipe with a soft, dry cloth.)
- use CDs printed with label printers available on the market.
B To prevent damage
Always observe the following points.
- Load only 1 CD per tray (d).
- Load CDs as shown in figure (e).
An adaptor is not needed with 8 cm CDs (singles). - Set the system on a flat, level surface.
●Always unload all CDs before moving the system.
Do not;
- set it on top of magazines, inclined surfaces, etc.
- move the system while tray is opening/closing, or when loaded.
- put anything except CDs in trays.
- use cleaning CDs or CDs which are badly warped or cracked.
C Skipping and searching through tracks
Skipping tracks
Press [◀◀/◀◀] (backward), or [▶▶/▶▶] (forward).
![Current position Twice Once Once Twice Track Track Track []](/content/2026/06/1310542/images/d975a955fb6275832b6a73592014113f4d17fb73ef32aced7e8d623962057835.jpg)
Searching through tracks
During play
Press and hold [◀◀/◀◀] (backward), or [▶▶/▶▶▶] (forward).
Note
- Skipping is done in the selected order in program play (→ page 15).
- You cannot skip to tracks already played in random play (→ page 16).
- You can search only within tracks in program and random play.
Note on CD-R and CD-RW
This unit can play CD-DA format audio CD-R and CD-RW that have been finalized※ upon completion of recording. It may not be able to play some CD-R or CD-RW due to the condition of the recording. ※Finalizing is a process that enables CD-R/CD-RW players to play audio CD-R and CD-RW.
1
PROGRAM


PRGM
2
EH770
①


PFGM
②


деси
3

Programmed track no.


Total playing time

4

CDs
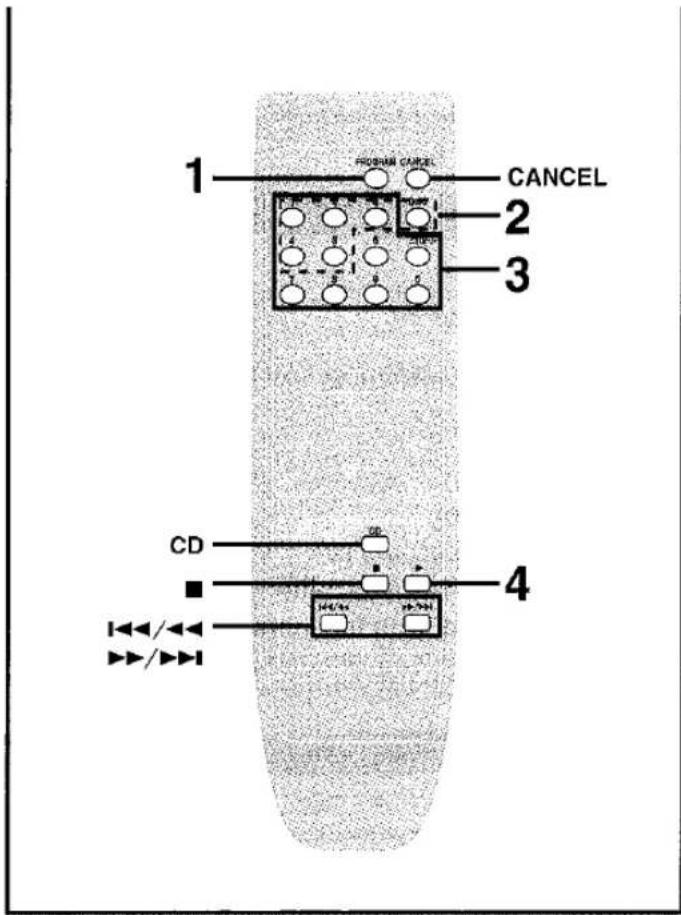
Program play
Select up to 24 tracks to play in the order you choose.
Remote control only
Preparation: Press [CD] to put the unit in CD mode.
1 Press [PROGRAM].
2 EH770
① Press [DISC].
② Within 10 seconds or so Press [1]-[5] to select the disc.
3 Select the track with the numbered buttons.
For tracks numbered 10 and over, press [≥10/-/-] then the two digits. e.g. To select track 21: [≥10/-/-]→[2]→[1]
Repeat steps 2 through 3 (SC-EH770) or step 3 (SC-EH570) to program the tracks in the required order.
The total playing time of the programmed tracks is displayed.
4 Press [▶].
All the tracks are played in the selected order.
To cancel
Press [PROGRAM].
"CLEAR" is displayed and all the tracks are canceled.
"FULL" is displayed
If 24 tracks have been programmed.
“--:--” is displayed if;
●total playing time for the tracks is over 99 minutes and 59 seconds.
- a track numbered 25 or over was programmed.
- a disc not in playing position was programmed (SC-EH770).
Tracks can still be programmed and played.
To check the contents of the program
① Press [CANCEL]. "CANCEL" will light.
② Press [◀◀/◀◀] or [▶▶/▶▶▶]. Each time you press the button, the disc numbers (SC-EH770), track numbers and programmed order are displayed.
③ After the playing time appears on the display, press [CANCEL]. "CANCEL" goes out.
To add to the end of the program
Repeat steps 2 and 3 (SC-EH770) or step 3 (SC-EH570).
To cancel tracks
| A particular track | 1. Press [CANCEL].2. Select the track with [◄◄/◄◄] or [►►/►►I] then press [CANCEL].3. Press [CANCEL] again. |
| All tracks | Press [PROGRAM] or [■] while stopped. |
To program the track you are listening to
Press [PROGRAM]. The program mode engages and the current track is automatically recorded as program No. 1.




CDs
Preparation: Press [CD] on the remote control or [INPUT SELECTOR] on the tuner/amplifier to select "CD".
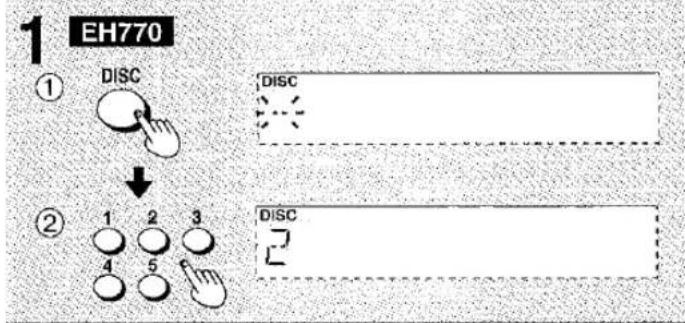
A Direct access play
EH770
Starts normal play from a selected track on a selected disc to the last track of the final disc (→ page 8).
EH570
Starts normal play from a selected track to the last track.
Remote control only
1 EH770
EH770
① Press [DISC].
② Within 10 seconds or so
Press [1]-[5] to select the disc.
2 Select the track with the numbered buttons.
For tracks numbered 10 and over, press [≥10/-/-] then the two digits. e.g. To select track 21: [≥10/-/-]→[2]→[1]
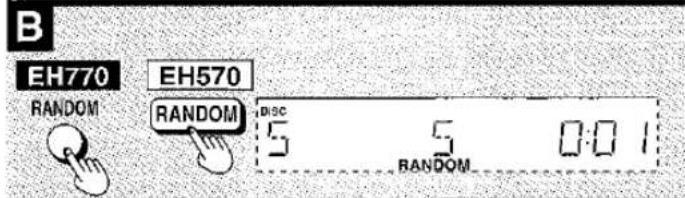
B Random play
EH770
Plays the tracks on all discs once each in random order.
EH570
Plays the tracks once each in random order.
Press [RANDOM].
To cancel
Press [RANDOM].
"RANDOM" goes out.
For your reference:
In the program play mode (→ page 15), the programmed tracks are played randomly.
C Repeat play
EH770
Repeats all tracks on all discs or all programmed tracks.
EH570
Repeats all tracks or programmed tracks.
Press [REPEAT] before or during play.
To cancel
Press [REPEAT].
" goes out.
To repeat only your favorite track(s)
① Program the track(s) you want (→ page 15).
② Press [REPEAT] and make sure "◀" is displayed.
③ Press [D]. Play will start.
B


C


1
FM 87.50MHz
2

MANUAL
3

F M 88.10TUNED ST
4

A
F M 88.10MHz MONO
B


| PTY displays | |||
| NEWS | VARIED | FINANCE | COUNTRY |
| AFFAIRS | POP M | CHILDREN | NATIONAL |
| INFO | ROCK M | SOCIAL A | OLDIES |
| SPORT | M.O.R M* | RELIGION | FOLK M |
| EDUCATE | LIGHT M | PHONE IN | DOCUMENT |
| DRAMA | CLASSICS | TRAVEL | TEST |
| CULTURE | OTHER M | LEISURE | ALARM |
| SCIENCE | WEATHER | JAZZ | |
The radio: manual tuning
Radio stations can be tuned manually by selecting the station's frequency or they can be preset into channels to make it easy to tune (→ page 18).
Preparation: Press [∅/l] to turn the unit on.
1 Press [TUNER/BAND] to select FM or AM.
Each time you press the button: FM→AM
2 Press [TUNING MODE] to select "MANUAL".
Each time you press the button: MANUAL→PRESET
3 Press [TUNING (v or ∧)] to tune in the desired broadcast.
If you press and hold [TUNING (v or ∧)] for a moment, the frequency starts changing automatically. It stops when a station is found.
It may also stop if there is outside interference. Press and hold [TUNING (v or ∧)] again to restart. You can also stop the frequency changing by pressing [TUNING (v or ∧)].
"TUNED" is displayed when a radio station is tuned.
"ST" is displayed when a stereo FM broadcast is being received.
4 Adjust the volume.
A
If noise is excessive in FM
Press [FM AUTO/MONO] to display "MONO".
This mode improves sound quality if reception is weak for some reason but broadcasts are heard in monaural.
Press [FM AUTO/MONO] again to cancel the mode. "MONO" goes out. MONO is also canceled if the frequency is changed.
Turn off "MONO" for normal listening. Stereo and monaural broadcasts are automatically played as they are received.
Stations can be preset in monaural. Carry out presetting manually (→ page 18).
B
RDS broadcasting
EH770 for United Kingdom, Eastern Europe and South Africa EH570 for areas except United Kingdom
This unit can display the text data transmitted by the radio data system (RDS) available in some areas.
If the station you are listening to is transmitting RDS signals, "RDS" will light up on the display.
Displaying the text data
Press [PS-DISP MODE] to display a station name.
Press [DISP MODE-PTY] to display a program type.
Each time you press the button:
Frequency display→PS or PTY display
Note
RDS displays may not be available if reception is poor.
"M.O.R M"="Middle of the road music".
AM allocation settings
(For areas except for United Kingdom, Eastern Europe, South Africa, Australia and N.Z.)
Each country allocates broadcast bands according to their particular system.
By adjusting the AM allocation, you can enable the tuner to receive AM broadcasts allocated in 10 kHz steps. (9 kHz→10 kHz)
Press and hold [TUNER/BAND].
After a few seconds the display will change to a flashing display of the current minimum AM frequency. If you continue to hold [TUNER/BAND] down, the minimum frequency will change. Release the button at this time.
To return to the original frequency indication, repeat above.
Note
After changing the allocation setting, the frequencies you previously preset in the memory will be cleared.

ME-CH-
AUTO MEMORY
-ME-FM 89.15
ME-CH-
ME-CH-1
1
3
CH
Preset channel
The radio: preset tuning
There are two methods of presetting stations.
Automatic presetting: The stations the tuner can receive are preset.
Manual presetting: You can select the stations to preset and the order they are preset in.
There are 39 channels available for presetting.
A Automatic presetting
Do the following once each for FM and AM.
Preparation: Tune to the frequency presetting is to begin at (→ page 17).
Hold down [SET].
Release the button when "AUTO MEMORY" appears.
The tuner presets all the stations it can receive into the channels in ascending order. FM stations are preset into channels 1 to 39, and AM stations are preset into channels 21 to 39.
"SET OK" is shown when presetting is complete and the last station to be preset is played.
"ERROR" is displayed if the tuner doesn't receive any stations. Do presetting manually if this happens (see below).
Note
AM stations replace any FM channels that were preset in channels 21 to 39.
B Manual presetting
Preset the stations one at a time.
① Tune to the required station.
② Press [SET].
③ Press [TUNING (√ or ∧)] to select a channel.
④ Press [SET].
The station occupying a channel is erased if another station is preset in that channel.
C Selecting channels
Preparation: Press [⏻] to turn the unit on.
On the remote control
1 Press [TUNER/BAND].
2 Press the numbered buttons to select the channel.
For channels 1 to 9 press the corresponding number.
For channels 10 or over press [≥10/-/-], then the two digits.
e.g. To select channel 21: [≥10/-/-]→[2]→[1]
3 Adjust the volume.
On the main unit
① Select "PRESET" with [TUNING MODE].
② Press [TUNING (v or ∧)] to select the channel.




Cassette tapes
See page 39 for tape selection.
Preparation: Press [O/l] to turn the unit on.
1 Press [▲ OPEN] on deck 1 or deck 2 and insert the cassette.
Close the holder by hand.
2 Press [DOLBY NR] to select Dolby NR on ("☐☐NR" appears) or off.
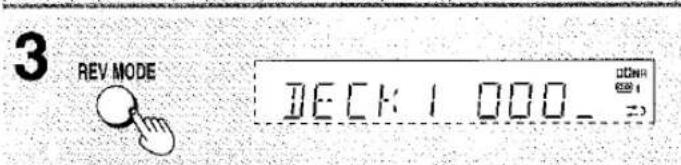
3 Press [REV MODE] to select the reverse mode.
Each time you press the button:
→: One side is played.
→: Both sides are played.
C: Both sides are played 8 times each.
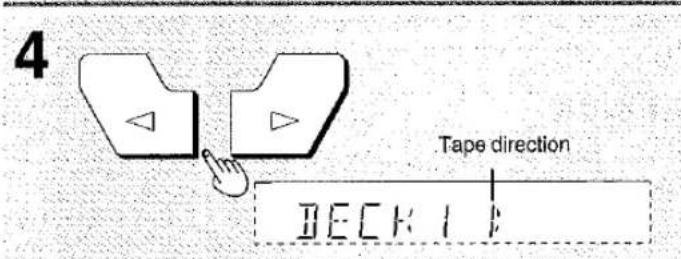
4 Press [◀] (reverse side) or [▶] (forward side). Play begins and the indicator changes to green.
5 Adjust the volume.
To stop the tape
Press [■].
A To change the deck to be used
Press [DECK 1/2] to select the deck you want to play.
To listen to 2 tapes consecutively
Insert a tape into each deck and select "C→D". Both tapes will be played 8 times each.
B Finding a place on a tape
To fast-forward and rewind
Press [◀◀] or [▶▶] while the tape is stopped.
To find the beginning of a track (TPS: Tape program sensor) Press [◀◀] or [▶▶] during play.
Play resumes from the beginning.
| Tape direction | rewind | fast-forward |
| ▷ | ◀◀ | ▶▶ |
| ◀ | ▶▶ | ◀◀ |
- Each deck's play direction is stored in the system's memory.
- You can fast-forward or rewind the tape while you are playing or recording a tape in another deck.
Press [DECK 1/2] to switch to the deck not playing, and then press [◀◀] or [▶▶]. After the above operation, be sure to press [DECK 1/2] to reselect the deck playing.
Note
TPS may not operate correctly in the following situations:
If the interval between tracks is less than 4 seconds.
If there is noise between tracks.
If there are silent parts within tracks.
Dolby noise reduction
Dolby NR reduces "hissing" when playing tapes. It increases the high frequency region when recording and then reduces it in playback. Use the same system during playback and recording. This unit has Dolby B NR which reduces noise to a third.
Prerecorded cassettes and equipment marked "DONR" use Dolby B NR.
Manufactured under license from Dolby Laboratories.
"Dolby" and the double-D symbol are trademarks of Dolby Laboratories.
A

M I II
B
EH770
EH570
SUPER
SOUND EQ
C
MULTI JOG

(On the sound processor)

HERK
D

(On the sound processor)

HEAFY

Boosting the super woofer
Boosting the super woofer adds power to the bass.
Press [DIGITAL S.WOOFER].
The indicator turns green.
Each time you press the button:
MID (medium)→MAX (high)→cancel (off)
There is only one level when listening through headphones.
To cancel
Press [DIGITAL S.WOOFER] to turn the indicator off.

Using the super sound equalizer
Turning on the super sound equalizer gives you a more powerful sound.
Press [SUPER SOUND EQ].
The indicator turns green.
To cancel
Press [SUPER SOUND EQ] so the indicator turns orange (SC-EH770) or turns off (SC-EH570).
Changing sound field and quality

EH770
Turn [MULTI JOG] to select a setting.
Each time you turn:
HEAVY: Adds punch to rock.
CLEAR: Clarifies higher sounds.
SOFT: For background music
HALL.: Expands sound to make you feel like you were in a hall.
AI-EQ: Adjust sound with the acoustic image equalizer (→ page 21).
M.EQ: Create your own effects (→ page 21).
FLAT: Canceled (no effect is added).
![TECHNICS SC-EH570 - Turn [MULTI JOG] to select a setting. - 1](/content/2026/06/1310542/images/a6b8da3d311eafc699d355bc068e764ebe16bd1c4b39ff1059537172905add0b.jpg)
EH570
Press [EQ] to select a setting.
Each time you press the button:
HEAVY: Adds punch to rock.
CLEAR: Clarifies higher sounds.
SOFT: For background music
On the remote control
Press [EQ].
To cancel
EH770 Turn [MULTI JOG] to select "FLAT".
EH570 Press [FLAT].
Note
EH770
Turn off the effect if sound quality reduces when using HALL with a source.
A
1
EH770
MULTI JOG
EH570

(On the sound processor)
FLAT
HEAVY
SOFT
AI-EQ


2
EH770
SUPER
3D AI EQ


3
EH770
MULTI JOG
EH570
1. 2017年1月1日
MULTI
CONTROL

B
1
EH770
MULTI JOG

EH570

(On the sound processor)
FLAT
HEAVY
SOFT
AI-EQ

FLAT
HEAVY
AI·EQ

2
EH770
MULTI JOG
EH570
MULTI
CONTROL

①


②

Changing sound field and quality
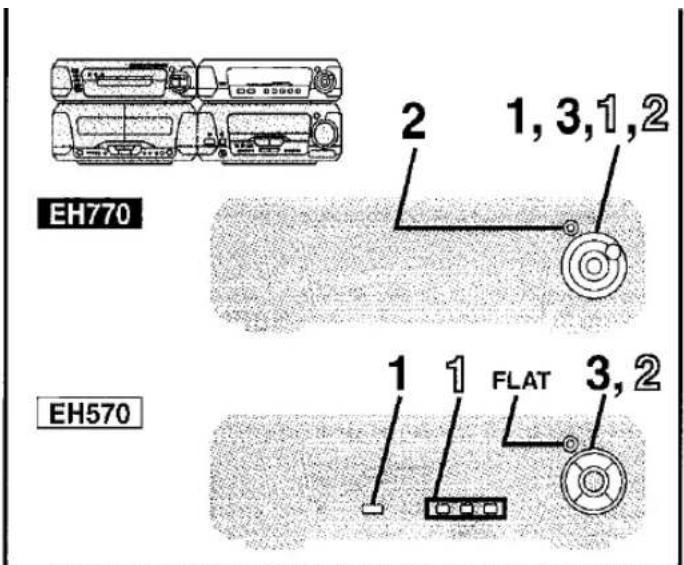
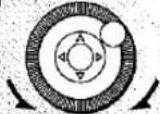
A Using the acoustic image equalizer (AI EQ)
Achieve subtle sound quality settings with the soft, sharp, heavy, and light coordinates.
1 EH770
Turn [MULTI JOG] to select "AI-EQ".
EH570
Press [AI EQ] to select "AI-EQ".
The indicator turns green.
2 EH770
EH770
Press [SUPER 3D AI EQ] to select the surround level.
Each time you press the button:
AI EQ→SUPER 3D AI 1→SUPER 3D AI 2
SUPER 3D AI 1: Adds a surround effect to the AI EQ.
SUPER 3D AI 2: Adds a stronger surround effect to the AI EQ.
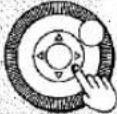
3 Change the sound quality with [◀, ▶, ▲, ▼].
Adjust softness and sharpness with [◀, ▶].
Adjust heaviness and lightness with [▲, ▼].
The original display is restored on the display panel in about 5 seconds.
To cancel
EH770 Turn [MULTI JOG] to select "FLAT".
EH570 Press [FLAT].
The indicator turns off.
The changes you make are stored and automatically recalled the next time you select AI EQ.
Note
EH770
- Turn off the effect if sound quality reduces when using SUPER 3D AI EQ with a source.
- You cannot select "SUPER 3D AI 1" and "SUPER 3D AI 2" while a surround system (→ page 22), karaoke mode (→ page 35), or the radio is on.
B Using the manual equalizer (M.EQ)
Create your own sound quality effects.
SC-EH570 has three manual equalizers.
1 EH770
Turn [MULTI JOG] to select "M.EQ".
EH570
Press [M1], [M2], or [M3] to select the equalizer you want to set.
The indicator turns green.
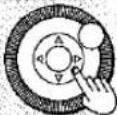
2 Change the sound quality with [◀, ▶, ▲, ▼].
① Select the sound range to be adjusted with [◀] or [▶].
② Adjust the level with [▲] or [▼].
Repeat step 2 to set the desired sound quality.
The original display is restored on the display panel in about 5 seconds.
To cancel
EH770 Turn [MULTI JOG] to select "FLAT".
[EH570] Press [FLAT].
The indicator turns off.
Note
The changes you make are stored and automatically recalled the next time you select the manual equalizer.
The following chart gives a summary of this unit's surround features. It also shows additional effects that can be used to enhance your enjoyment.
Note
●All the features are only effective if speakers are used. No discernible effect will be heard through headphones.
- You may experience a reduction in sound quality when these surround systems and effects are used with some sources. If this occurs, turn the surround system or effect off.
Stinkound System
[Unreadable]
Features
- Use this input selector to enjoy 5.1 channel sources (e.g. Dolby Digital or DTS) played on a DVD player with 5.1 channel output and a built in Dolby Digital/DTS decoder (→ page 36 for connection, page 24 for operation).
- Connect a subwoofer (not included) to the SUBWOOFER terminal to enhance the surround effect (→ page 36).
Software
DVDs encoded with Dolby Digital or DTS can be identified with these marks.


See the manual for the equipment you have connected for details on the types of software you can use.
DORBYCHOLOCIO
(1) (12)(12)
- This unit has built-in Dolby Pro Logic circuitry so you can enjoy Dolby Surround.
- Dolby Pro Logic is a decoding system that was developed to get a better sense of presence from sources encoded with Dolby Surround. The feeling of position has been improved by the addition of a separate center speaker channel.
- If your DVD player only has 2-channel output, you can still enjoy surround sound when playing 5.1 channel software by using Dolby Pro Logic.
Software encoded with Dolby Surround can be identified with this mark.

DOLBY SURROUND
•DVD
• Laser Disc
•Video tape
CD
SURFACE SURROUND
[Unreadable due to extreme blurriness]
MUSIC
- This mode adds surround effects to movie software that hasn't been recorded with the above systems.
- In MOVIE mode you can adjust the volume of the surround speakers to get the best surround effect.
This mode adds surround effects to stereo sources.
Any stereo sound source except for the radio.
- Video tape
•CD
•Tape
"DTS" and "DTS Digital Surround" are trademarks of Digital Theater Systems, Inc.
Manufactured under license from Dolby Laboratories. "Dolby", "Pro Logic" and the double-D symbol are trademarks of Dolby Laboratories.
When you turn on one of the surround systems, the indicator for the additional effects you can use also light.
Additional effects
Ⓐ Center focus
③ Virtual rear surround
© Multi rear surround
© Seat position
(A) Center focus
⑧ Virtual rear surround
© Multi rear surround
⑭ Seat position
B Virtual rear surround
© Multi rear surround
⑭ Seat position
Ⓐ Center focus
(→ page 26)
- This mode makes it seem like the sound from the center speaker is coming from within the television.
●The center speaker should be placed above the television.

flowchart
graph TD
    A["Input Box 1"] --> C["Process Step"]
    B["Input Box 2"] --> C
    D["Input Box 3"] --> C
    C --> E["Output Box"]
⑧ Virtual rear surround
(→ page 26)
- This mode is useful if you have to place your surround speakers near the front speakers due to the layout of your room.
- This mode makes it seem like the sound from the surround speakers is coming from behind you.

flowchart
graph TD
    A["Stage 1"] --> B["Process Box"]
    C["Stage 2"] --> B
    B --> D["Output Box"]
    D --> E["Feedback Loop"]
    E --> A
    style A fill:#f9f,stroke:#333
    style C fill:#f9f,stroke:#333
    style B fill:#ccf,stroke:#333
    style D fill:#cff,stroke:#333
Virtual speakers
© Multi rear surround
(→ page 26)
This mode makes it seem like there are multiple surround speakers in your room, increasing the cinema-like atmosphere.
flowchart
graph TD
    A["Top Left"] --> B["Central Object"]
    C["Top Right"] --> B
    D["Bottom Left"] --> B
    E["Bottom Right"] --> B
    B --> F["Bottom Center"]
    style A fill:#f9f,stroke:#333
    style C fill:#f9f,stroke:#333
    style D fill:#f9f,stroke:#333
    style E fill:#f9f,stroke:#333
Virtual speakers
(D) Seat position
(→ page 27)
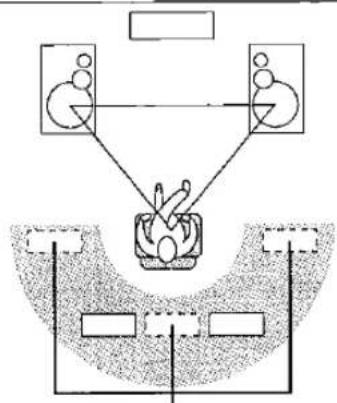
This mode helps maintain the sound position even if the listening position itself is changed.


natural_image
Diagram showing a vehicle positioned on a grid with directional arrows, no text or symbols presentA
1

-6CH INPUT---
B
1
DOLBY
PRO LOGIC
C

MUSIC
Enjoying surround sound EH770
See page 25 for speaker level adjustment.
A 6CH DISCRETE INPUT
Preparation: Connect a DVD player with a built in Dolby Digital or DTS decoder (→ page 36).
1 Press [6CH DISCRETE INPUT].
2 Playback a Dolby Digital or DTS source.
On the remote control
Press [VCR/AUX/6CH INPUT] to select "6CH INPUT".
To cancel
Press [INPUT SELECTOR] to select another source.
Note
You cannot record or enjoy karaoke (For areas except United Kingdom, Eastern Europe and South Africa) when you are using 6CH DISCRETE INPUT. To record or enjoy karaoke with DVDs, ensure the DVD player is also connected to the AUX (DVD) terminals and select "AUX (DVD)" with [INPUT SELECTOR] (→ page 37).
B DOLBY PRO LOGIC
1 Press [PRO LOGIC, OFF/ON]. The indicator turns green.
2 Playback a Dolby Surround source.
To cancel
Press [☐☐ PRO LOGIC, OFF/ON] so the indicator turns off.
C SUPER SURROUND
Press [SUPER SURROUND] and select "MOVIE" or "MUSIC".
The indicator turns green.
Each time you press the button:
MUSIC→MOVIE→STEREO SOUND (off)
To cancel
Press [SUPER SURROUND] to select "STEREO SOUND".
The indicator turns off.
flowchart
graph TD
    A["TEST"] --> B["CH SELECT"]
    B --> C["▲, ▼"]
①
CH SELECT

TEST

Cch 0dB
TEST Cch
②


Cch -2d
Enjoying surround sound EH770
Speaker level adjustments
6CH DISCRETE INPUT, DOLBY PRO LOGIC
If the level of the speakers appears to be different while listening to a source, adjust the level of the speakers to the same apparent level.
6CH DISCRETE INPUT: Adjust while listening to a surround source. If your DVD player is able to output a test signal, you can use it instead of playing a source.
DOLBY PRO LOGIC: Adjust while listening a test signal.
Preparation: Set the volume level of the front speakers normally used for enjoying the source.
Remote control only
① 6CH DISCRETE INPUT
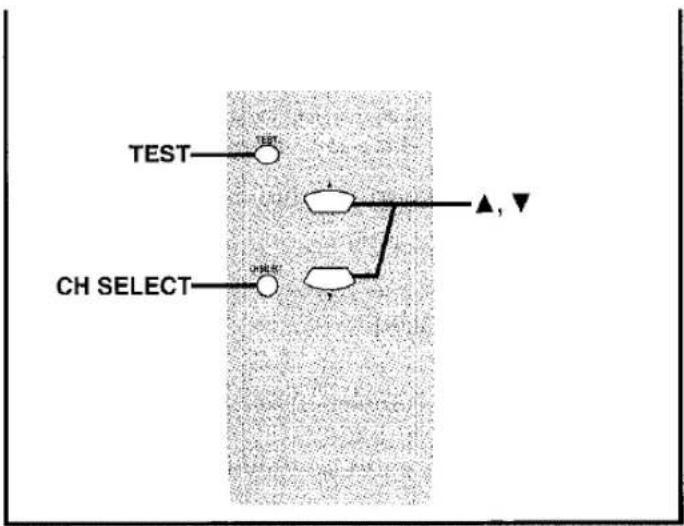
Press [CH SELECT] to select the speaker.
The speaker channel changes each time you press the button.
DOLBY PRO LOGIC
Press [TEST].
A test signal is output from each speaker in order.
To stop the test signal, press [TEST] again.
Lch: Front left, Cch: Center, Rch: Front right, RSch: Right surround, LSch: Left surround
SWch: Subwoofer (6CH DISCRETE INPUT; only when connected)
- The surround channel for Dolby Pro Logic is monaural so the indicator appears as "Sch" instead.
② Press [▲] (to increase level) or [▼] (to decrease level).
SUPER SURROUND
While playing a source
-
Press [CH SELECT].
-
Press [▲] (to increase level) or [▼] (to decrease level).

A
CENTER FOCUS
B

VIRTUAL REAR
C

MULTI REAR
Surround effects EH770
These effects can be used with the surround systems described on page 24. Refer to the chart on pages 22 and 23 for details on which effects can be used. These effects are available when the corresponding indicators are aligned.

CENTER FOCUS
Press [CENTER FOCUS].
The indicator turns green.
To cancel
Press [CENTER FOCUS] so the indicator turns orange.
On the remote control
① Press [AV EFFECT].
② Press [◀] or [▶] so the CENTER FOCUS indicator flashes.
③ Press [▲] (ON) or [▼] (OFF).

VIRTUAL REAR SURROUND
Press [VIRTUAL REAR SURROUND].
The indicator turns green.
To cancel
Press [VIRTUAL REAR SURROUND] so the indicator turns orange.
On the remote control
① Press [AV EFFECT].
② Press [◀] or [▶] so the VIRTUAL REAR SURROUND indicator flashes.
③ Press [▲] (ON) or [▼] (OFF).

MULTI REAR SURROUND
Press [MULTI REAR SURROUND].
The indicator turns green.
To cancel
Press [MULTI REAR SURROUND] so the indicator turns orange.
On the remote control
① Press [AV EFFECT].
② Press [◀] or [▶] so the MULTI REAR SURROUND indicator flashes.
③ Press [▲] (ON) or [▼] (OFF).


Surround effects EH770
SEAT POSITION
1 Press [SEAT POSITION]. The indicator flashes green.
2 While the indicator is flashing (within 10 seconds) Adjust the seat position with [◀, ▶, ▲, ▼].
To cancel
- Press [SEAT POSITION] so the indicator flashes.
- Press [SEAT POSITION] again while the indicator is flashing so it turns orange.
① Press [AV EFFECT].
② Press [◀] or [▶] so the SEAT POSITION indicator flashes.
③ Press [▲] (ON).
④ Adjust the seat position with [◀, ▶, ▲, ▼]
To turn it off, after steps ① and ② press [▼] so the indicator turns orange.
On the remote control
Note
- The seat position is remembered by the unit and is reactivated when you turn seat position on again.
- When used with virtual rear surround, seat position is changed in 3 horizontal steps.

natural_image
Simple line drawing of a room layout with desks, chairs, and a central table (no text or symbols)A B
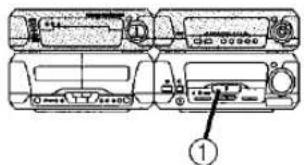
COUNTER

A
COUNTER

COUNTER

DECK2 003_
DECK2000_
C

Tab for side B
Tab for side A

To re-record
Normal tape

High-position tape

Discrimination hole
D

1

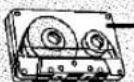
Forward side Tape facing down
2

DECK:2 000_
3
REV MODE

DECK:2 000_
Before recording (Deck 2 only)
See page 39 for tape selection.
Note
EH770
You cannot record when [6CH DISCRETE INPUT] is selected.
Volume, sound quality and surround effects have no effect on recording. Sound quality and surround effects are automatically set to flat when recording.
A
To display the tape counter while recording
Press [COUNTER DISPLAY].
The counter is displayed for about 5 seconds.
- Press [COUNTER RESET] to reset the counter.
- To display or reset the tape counter for deck 1, first press [DECK 1/2].
B
Erasing recordings
① Press [INPUT SELECTOR] to select "TAPE".
② Insert the recorded tape into deck 2.
③ Press [DOLBY NR] so the "☐☐ NR" indicator goes out.
④ Select the reverse mode.
⑤ Press [● REC PAUSE].
⑥ Press [◀] or [▶].
C
Erasure prevention
The illustration shows how to remove the tabs to prevent recording. To record on the tape again, cover as shown, being careful not to cover the high position discrimination hole.
Your attention is drawn to the fact that recording pre-recorded tapes or discs or other published or broadcast material may infringe copyright laws.
D
Preparatory steps
Do these steps before each recording.
Wind up the leader tape so recording can begin immediately.
1 Press [▲ OPEN] on deck 2 and insert the cassette.
2 Press [DOLBY NR] to select Dolby NR on ("☐☐NR" appears) or off.
(→ "Dolby noise reduction", page 19)
3 Press [REV MODE] to select the reverse mode.
Each time you press the button:
One side only records.
and: Both sides record (forward →reverse).
"←→" automatically changes to "←→" when [● REC PAUSE], [EDIT] or [TAPE EDIT] is pressed.


Recording CDs
Preparation:
- Do the preparatory steps (→ page 28).
- Insert the CD(s) you want to record (→ page 8 or 9).
EH770
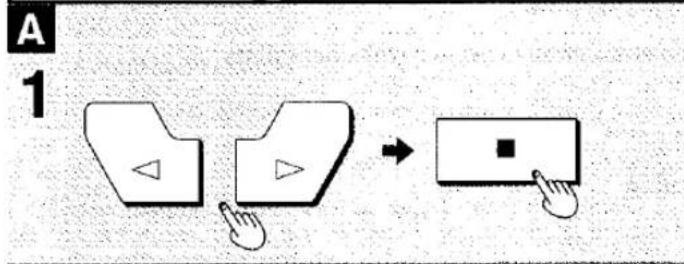
Press [DISC, 1–5] on the CD changer to select the disc where you want to start recording, then press [■] to stop the disc.
A Normal recording
1 Press [◀] (reverse side) or [▶] (forward side) then [■] to set the tape direction.
2 Press [● REC PAUSE].
The deck goes into the recording standby mode and the indicator "<>" or "> " starts flashing.
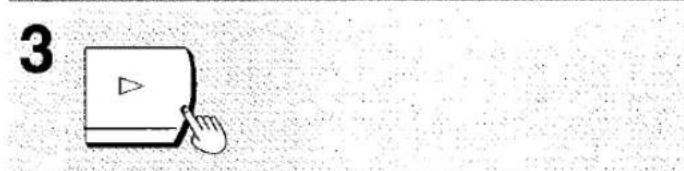
3 Press [▶] on the CD changer or CD player.
Recording starts automatically.
4 seconds after the CD(s) finishes, the deck goes into the recording stand-by mode.
To stop recording
EITHER
Press [■] on the CD changer or CD player.
The deck goes into the recording standby mode 4 seconds later. OR
Press [■] on the deck.
Recording stops immediately but the CD continues to play.
To record programmed tracks
Program tracks before step 1 (→ page 15).
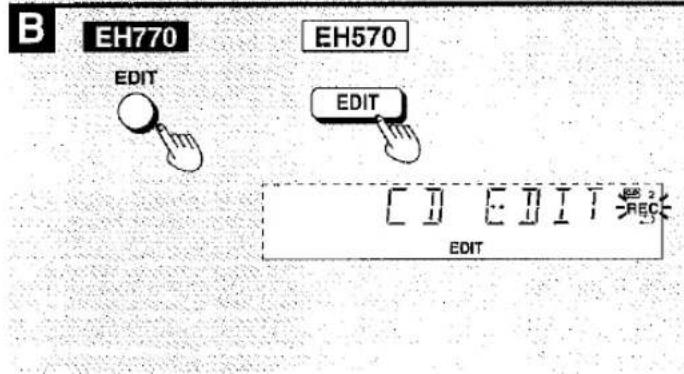
B One touch CD editing
This function makes it easier for you to record from discs.
- When recording, if a track is cut off in the middle at the end of the front side, it is recorded from the beginning on the reverse side. (Ensure the reverse mode “→”) is selected.)
- At the end of the reverse side recording stops and the current track will be interrupted.
After pressing [◀] or [▶] then [■] on the cassette deck to set the tape direction,
Press [EDIT].
Recording starts. In the meantime, "CD EDIT" will scroll across the display.
After edit-recording has finished, the cassette deck automatically stops.
To stop editing
Press [■] on the CD changer or CD player.
The cassette deck also stops. "EDIT OUT" scrolls across the display.
To edit programmed tracks
Program the tracks (→ page 15) and press [EDIT].


A Recording the radio
Preparation: Do the preparatory steps ( page 28).
1 Tune to the required station.
(→ page 17 or 18)
2 Press [● REC PAUSE]. The deck goes into the recording standby mode and the play indicator “◀” or “▶” starts flashing.
3 Press [◀] (reverse side) or [▶] (forward side) to start recording.
To stop recording
Press [■].
To temporarily stop recording
Press [● REC PAUSE].
The deck goes into recording standby mode.
To resume recording press [◀] or [▶] with the flashing indicator.
B Tape-to-tape recording
Preparation:
- Do the preparatory steps 1 and 3 (→ page 28).
- Insert the tape to be recorded in deck 1.
1 Set the tape direction on both decks.
① Press [DECK 1/2] to select "DECK 2".
② First press [◀] or [▶], and then [■].
Repeat steps ① and ② for deck 1.
2 Press [TAPE EDIT] to start recording.
The indicator "<" or "> " shows deck 2 direction. If either deck 1 or deck 2 stops, the other deck also stops.
To stop recording
Press [■].
Both decks will stop.
To enjoy another source while recording
Start playing the other sound source.
You can change the volume level and tone quality without affecting the recording.
Note
The recording level and the noise reduction effect of the original (playback) tape will be recorded on the new tape.

1
①

②
OPLAY
PLAY
2
①

②
a
ON 6:30
b
OFF 7:40
©
TUNER
1 FM 88.10MHz CH PLAY
d
VOLUME -48dB

ON 6:30 ①PLAY
3

GOOD-BYE PLAY
Using the timers
The play timer
This timer starts play of the selected source at the selected time.
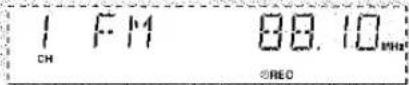
The example shows settings for preset radio channel 1 to play between 6:30 and 7:40 at -48 dB.
Preparation: Turn the unit on, set the time (→ page 13), preset radio stations if you want the timer to start playing the radio (→ page 18).
1
① Press [CLOCK/TIMER] to select “∅PLAY”.
Each time you press the button:
CLOCK→∅PLAY→∅REC→Original display
↑
②
Press [SET] within 3 seconds.
2
Follow these steps to set items ① to ②.
① Press [TUNING (∨ or ∧)] to select the condition required and
②
Press [SET].
a Start time
⑥ Finish time
© Source
TUNER←→CD←→TAPE
Insert a CD or tape if you select these sources.
If you select TUNER
Select a preset channel.
d Volume
The play timer is now on standby. The display shows each condition again then restores the original display.
3
Press [∅/l] to turn the unit off.
④PLAY/⑤REC indicator remains illuminated to show the play (or record) timer is on.
The timer starts at the set time with the volume increasing gradually to the set level.
To cancel the timer
Press [∅PLAY/∅REC] so "∅PLAY" goes out.
Each time you press the button:
④PLAY→②REC→②PLAY ②REC→Light off (OFF)
[Figure]
The play timer will be canceled, but the settings stay in the memory.
For your reference:
When you insert cassettes in decks 1 and 2, deck 1 has priority.

PLAY/REC
1
①

②
BPEC
©REO
2
②
a
b

©


4
GOOD-BYE
④REC
Using the timers
The record timer
This timer records the radio at the set time.
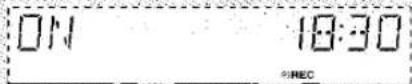
The example shows settings for recording preset channel 1 from 18:30 to 19:30.
Preparation: Turn the unit on, set the time (→ page 13), preset radio stations (→ page 18).
1
① Press [CLOCK/TIMER] to select “∅REC”.
Each time you press the button:
CLOCK→◎PLAY→◎REC→Original display
↑
②
Press [SET] within 3 seconds.
2
Follow these steps to set items Ⓐ, ⓑ and Ⓒ.
① Press [TUNING (v or ∧)] to select the condition required and
② Press [SET].
⑧ Start time
⑥ Finish time
© Preset channel
The record timer is now on standby. The display shows each condition again then restores the original display.
3
Prepare for recording.
① Insert a tape into deck 2.
② Select the Dolby NR mode.
③ Select the reverse mode.
④ Select the tape direction.
4
Press [∅/l] to turn the unit off.
①PLAY/②REC indicator remains illuminated to show the record (or play) timer is on.
Recording starts 30 seconds before the set time with the volume muted during the set time.
To cancel the timer
Press [∅PLAY/∅REC] so "∅REC" goes out.
Each time you press the button:
① PLAY ② REC ③ PLAY ④ REC Light off (OFF)
↑
The record timer will be canceled, but the settings stay in the memory.
A
B


SLEEP 30
Using the timers
A The play and record timers
Turning the timers on and off
The timers come on at the set times if the ⓆPLAY/∅REC indicator is on. They can be turned on and off by pressing [∅PLAY/∅REC].
Checking the timers
Press [CLOCK/TIMER] to select "∅PLAY" (or "∅REC"). The timer conditions are shown in the following order:
Play timer:
Start time→Finish time→Source→Volume Record timer: Start time→Finish time→Selected radio sta
The timers can be checked even if the unit is off.
Playing the unit after the timers are set
The unit can be used after the timers are set. Make sure the unit is off before the set start time.
Note
- If you turn the unit off and on again while a timer is functioning, the finish time setting will not be activated.
- If the unit is on, the timer will not function. The system must be in the standby mode.
- This system retains the ON/OFF time settings until you make a new setting. If you make a new ON time setting, you must make a new OFF time setting.
B The sleep timer
Remote control only
This timer turns the unit off after a set time.
While playing a source
Press [SLEEP] to select the time (minutes).
Each time you press the button: SLEEP 30 → SLEEP 60 → SLEEP 90 ↑ SLEEP OFF ← SLEEP 120 ←
To cancel the sleep timer
Press [SLEEP] to select "SLEEP OFF". "SLEEP" goes out.
To confirm the remaining time
(While the timer is functioning) Press [SLEEP]. The remaining time is shown for about 5 seconds.
To change the setting
Press [SLEEP] to display the remaining time, then press again to select the required time.
Using the timers together
Any of the timers can be used together, but ensure the unit is off before the start time for the record and play timers.

DISPLAY MODE

(On the sound processor)
a
b
C

B

C
A Changing the sound range display
The sound processor shows the level of each sound range with the three types of display described below.
Press [DISPLAY MODE].
The spectrum display will change as follows.
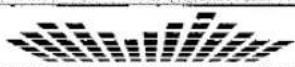
a Normal display
This display indicates the strength of the sound in each tonal range.
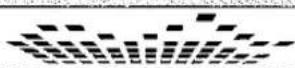
b Peak-hold display
The peak sound value of each sound range is held on the display for about one second after it occurs.
c Aurora display
The peak sound value of each sound range is displayed in inverted form.
B Muting the volume
Remote control only
Press [MUTING].
Volume is reduced to minimum.
To cancel
Press [MUTING] again.
"MUTING" goes out and the volume is restored.
To cancel from the tuner/amplifier, turn [VOLUME] to minimum (--- dB), then raise it to the required level.
Muting is also canceled when the unit is turned off.
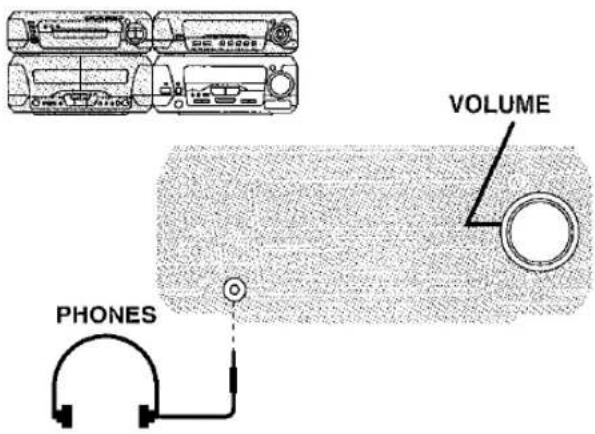
c Using headphones (not included)
Reduce the volume before connection.
Avoid listening for prolonged periods of time to prevent hearing damage.
Plug type: 3.5 mm stereo


1

flowchart
graph TD
    A["KARAOKE"] --> B["MONO L"]
    B --> C["MONO R"]
    C --> D["V.OICE MUTE"]
    D --> E["Original display"]
3


A

ECHO 1
You can do karaoke with CDs and tapes.
Preparation:
Lower the volume with [MIC VOL] and connect the microphone.
Use a dynamic microphone.
Plug type: 6.3 mm monaural
1 Press [KARAOKE] to select a voice mode.
Each time you press the button:
MONO L→MONO R→VOICE MUTE→off (Normal)
●Karaoke CDs and tapes
MONO L: Only left channel sound (No vocal)
MONO R: Only right channel sound (Vocal)
Select no vocal for karaoke. Vocal and no vocal may be reversed.
●Normal music CDs and tapes
VOICE MUTE: Voice mute (Lowers vocal volume)
2 Start playing the CD or tape.
3 Adjust the main volume and microphone volume.
To cancel
Press [KARAOKE] to clear the display.
To record your performance
Start recording in deck 2 and then start singing.
Ensure the voice mode is set to off (at step 2 above) when playing the recording.
Note
The karaoke modes cannot be used with the radio, SUPER 3D AI EQ, 6CH DISCRETE INPUT or surround effects.
When using the VOICE MUTE function
●Voice mute may not function sufficiently or noise may interfere when using the following software.
• Monaural software
- Software with few musical instruments, including classic music and poetry recitations
●Software with duets or strong choruses
- VOICE MUTE reduces the level of the vocals but does not cancel them out completely.
A Using the echo effect
Press [ECHO].
Each time you press the button:
ECHO 1→ECHO 2→ECHO 3→OFF
↑
A
DVD player with 5.1ch output

flowchart
graph TD
    A["Sound processor"] --> B["L/R OUT (MIX)"]
    A --> C["Center"]
    A --> D["SUBWOOFER"]
    A --> E["SURROUND L/R"]
    A --> F["FRONT L/R"]
    G["AUX (DVD)"] --> H["L"]
    G --> I["R"]
    J["DVD 6ch INPUT CENTER SURROUND FRONT"] --> K["BUSWOOFER"]
    J --> L["F"]
    J --> M["L"]
    J --> N["F"]
B
DVD player/laser disc player (without 5.1ch output), etc.

C
Video cassette recorder
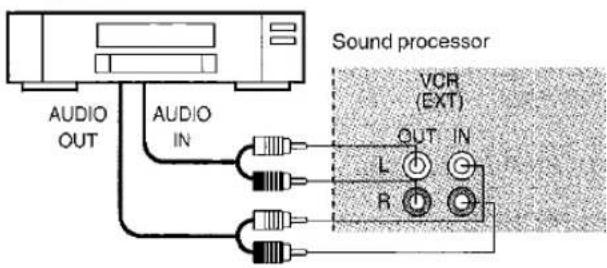
D
DVD player/Laser disc player/
Video cassette recorder

External unit connections
- Turn off all units before making connections.
- Refer to the manual of the other unit for details. (Cables and equipment not included.)
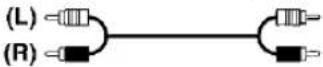
Stereo phono cable (not included)
White Red
Connections to SC-EH770
A DVD player with 5.1ch output
This unit has the input terminals for 5.1ch surround systems but it does not have the decoders necessary to play them back. The DVD player should have these decoders and 5.1ch output.
To record sound from the DVD player
Connect to AUX (DVD).
Subwoofer
The included front speakers have subwoofers, but you can enhance surround sound from a unit connected to DVD 6ch INPUT by connecting another subwoofer to SUBWOOFER terminal.
B DVD player/Laser disc player (without 5.1ch output), etc.
This unit has Dolby Pro Logic circuitry. The sound will be reproduced with the same powerful stereophonic effects found in movie theaters.
C Video cassette recorder
You can enjoy the sound from your video cassette recorder.
Connections to SC-EH570
D DVD player/Laser disc player/Video cassette recorder, etc.
You can enjoy the sound from your DVD player/Laser disc player/Video cassette recorder, etc.
Tuner/amplifier
natural_image
Simple line drawing of a rectangular box with a small icon on the side (no text or symbols)A
For United Kingdom, Eastern Europe and South Africa
For others
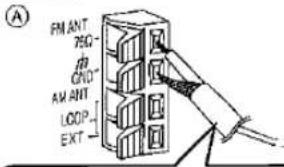
① Remove a piece of the outer vinyl.

② Twist the shield braid to expose the core wire. 15mm

B

C


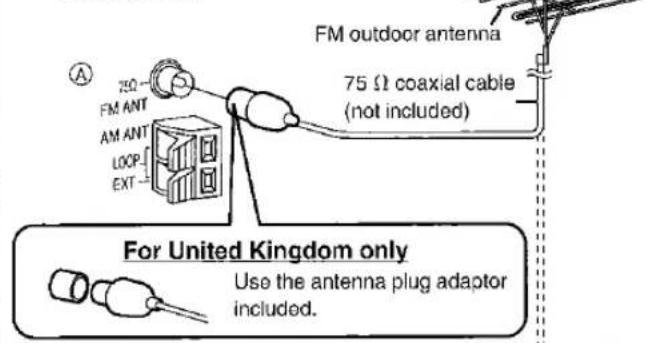
Optional antenna connections
Use outdoor antennas if radio reception is poor.

FM outdoor antenna
- Disconnect the FM indoor antenna.
●The antenna should be installed by a competent technician.

AM outdoor antenna
Run a piece of vinyl wire horizontally across a window or other convenient location.
Leave the loop antenna connected.
Note
Disconnect the antenna when the unit is not in use. Do not use the antenna during an electrical storm.

Using other equipment
Listening to an external source
1 Press [INPUT SELECTOR] to select the external source.
Each time you press the button:
EH770
![TUNER→CD→TAPE→VCR (EXT)→AUX (DVD) ↑______________________________________________________________________________________________________________________________________________________________________________________________________________________________________________________________________________________________________________________________ [EH570] TUNER→CD→TAPE→AUX ↑________________________________________________________________________________________________________________________________________________________________________________________________](/content/2026/06/1310542/images/c2144324d069ec321f4c6a9bd73b252793ec5fc5600c238fb5baccdc83c1f876.jpg)
On the remote control
Press [VCR/AUX/6CH INPUT] (SC-EH770) or [AUX] (SC-EH570).
2 Operate the unit.
See the unit's manual for details on operation and connection.
EH770
To enjoy Dolby Digital and DTS
→ page 24
Recording an external source
1 Press [INPUT SELECTOR] to select the external source.
2 Select Dolby NR and reverse mode. (→ page 28)
3 Press [● REC PAUSE].
4 Press [◀] or [▶] to start recording.
5 Start the source to be recorded.
See the unit's manual for details on operation and connection.
To stop recording
Press [■] on the deck.
To temporarily stop recording
Press [● REC PAUSE].
The deck goes into the recording standby mode.
To resume recording press [◀] or [▶] with the flashing indicator.
Recording onto an external unit
EH770
Connect the external unit to VCR (EXT) OUT. Select the source to be recorded with [INPUT SELECTOR]. Start recording on the external unit and start playing the source to be recorded.
Troubleshooting guide
Before requesting service, make the below checks. If you can't fix the system as described below, or if something not listed here occurs, refer to the enclosed directory to locate an Authorized Service Center convenient to you or contact your dealer.
Reference pages are shown as black circled numbers ⑥.
Common Problems
| No sound. | Turn the volume up.The speaker leads may be shorted. Turn the unit off, check and correct the connections and turn the unit on.6 |
| Sounds unfixed, reversed or come from one speaker only. | Check the speaker connections.8 |
| Humming heard during play. | An AC mains lead or fluorescent light is near the cables. Keep other appliances and leads away from this unit's cables.If possible in your area, turn the AC mains lead's plug or connector over to reverse the lead's polarity. |
| "ERROR" is displayed. | Incorrect operation performed. Read the instructions and try again. |
| "U70" is displayed. | Connect the flat cables firmly. If "U70" remains on the display, contact the dealer. |
| "F60" is displayed. | There is a problem with the amplifier. Consult your dealer. |
| "-!--" appears on the display. | You plugged the AC mains lead in for the first time or there was a power failure recently.Set the time.10 |
| The display starts up even after the unit is turned off. | The demonstration feature (-DEMO) is on. Turn it off if it is not required.11 |
The CD changer or CD player
| The display is wrong or play won't start. | The disc may be upside down. 8, 9 Wipe the disc. Replace the disc if it is scratched, warped, or nonstandard. Condensation may have formed in the changer or player due to a sudden change in temperature. Wait about an hour for it to clear and try again. |
| EH770 "TAKE OUT/DISC" appears on the display. | There is a problem with the CD mechanism. (A power failure may have occurred.) The tray will open automatically. Remove the CD from the tray, and after ensuring there is no CD in the tray, close it. The unit will make the disc changing noises for a few moments and then it should operate normally. |
Listening to the radio
| Noise is heard.The stereo indicator flickers or doesn't light.Sound is distorted. | Use an outdoor antenna.67 |
| A beat sound is heard. | Turn the TV off or separate it from the unit. |
| A low hum is heard during AM broadcasts. | Separate the antenna from other cables and leads. |
| The correct AM frequency can't be tuned in. | Change the frequency step. Hold [TUNER/BAND] down for 10 seconds to change the step to 9 kHz or 10 kHz. |
The cassette deck
| Poor quality sound. | Clean the heads.39Check the Dolby NR settling.15 |
| Recording is not possible. | If the erasure prevention tabs have been removed, cover the holes with adhesive tape.26 |
| “DECK NO TAPE” is displayed during “One touch editing”. | Load a cassette into deck 2.28 |
| “DECK CHANGE TAPE” is displayed during “One touch editing”. | If the erasure prevention tabs have been removed, cover the holes with adhesive tape.28 |
When there is a television set nearby
| The picture on the TV disappears or stripes appear on the screen. | The location and orientation of the antenna are incorrect. If you are using an indoor antenna, change to an outdoor antenna.The TV antenna wire is too close to the unit. Separate the antenna wire of the TV set from the system. |
The remote control
| The remote control doesn't work. | Check the batteries are inserted correctly. 12Replace the batteries if they are worn. |
All components are required to service the system. If service is ever necessary, bring the entire system.
Maintenance
If the surfaces are dirty
To clean this unit, wipe with a soft, dry cloth.
If the surfaces are extremely dirty, use a soft cloth dipped in a soap-and-water solution or a weak detergent solution.
●Never use alcohol, paint thinner or benzine to clean this unit.
- Before using chemically treated cloth, read the instructions that came with the cloth carefully.
For a cleaner crisper sound
Clean the heads regularly to assure good quality playback and recording. Use a cleaning tape (not included).
Cassette tape selection and care
The unit can correctly play or record on the following types. It identifies the type automatically.
| Normal position/TYPE I | √ |
| High position/TYPE II | √ |
| Metal position/TYPE IV | √ |
- Tapes exceeding 100 minutes are thin and can break or get caught in the mechanism.
- Tape slack can get caught up in the mechanism and should be taken up before the tape is played.
- Endless tapes can get caught up in the deck's moving parts if used incorrectly. Use tapes appropriate to this unit's auto-reverse mechanism.
SOUND PROCESSOR
■ EQ/SFP section
MANUAL GEO
5-Band EQ
Center frequency
Level control
70/300/1 k/3.15 k/10 k Hz
±2.0, 4.0, 6.0 dB
EQ/Space mode EH770
4 modes
HEAVY, CLEAR, SOFT, HALL
EQ mode EH570
3 modes
HEAVY, CLEAR, SOFT
SUPER 3D AI EQ EH770
3 modes AI EQ, SUPER 3D AI 1, SUPER 3D AI 2
■ Pre-amplifier section EH770
Input sensitivity/impedance
VCR (EXT)
250 mV/15 kΩ
AUX(DVD)
250 mV/15 kΩ
Output level
VCR REC OUT
150 mV/1.5 kΩ
■ Pre-amplifier section EH570
Input sensitivity/impedance
AUX
250 mV/15 kΩ
■ DOLBY PRO LOGIC section EH770
PRO LOGIC mode
SURROUND
CENTER mode
NORMAL
DELAY TIME
20 ms (Fixed)
■ AV SURROUND section EH770
AV surround mode
SUPER SURROUND(MUSIC, MOVIE)
■ DSP CONTROL section
DSP control mode
SUPER SOUND EQ
EH770 SEAT POSITION
GH770 CENTER FOCUS
EH770 VIRTUAL REAR SURROUND
EH770 MULTI RE
■ Spectrum analyzer section
Display mode NORMAL, PEAKHOLD, AURORA
General
Dimensions (W×H×D)
EH770 293×89×270 mm
EH570 293×89×269 mm
ass
EH770 1.5 kg
EH570 1.4 kg
TUNER AMPLIFIER
■ Amplifier section EH770
Power output (L/R both channel driven)
Stereo Mode
DIN 1 kHz THD 1 %/6 Ω(High) 2×25 W
100 Hz THD 1 %/8 Ω (Low) 2×45 W
RMS 1 kHz THD 10 %/6 Ω (High) 2×35 W
100 Hz THD 10 %/8 Ω (Low) 2×65 W
PRO LOGIC mode
DIN FRONT
1 kHz THD 1 %/6 Ω (High) 2×25 W
100 Hz THD 1 %/8 Ω(Low) 2×45 W
SURROUND 1 kHz THD 1 %/8 Ω 2×30 W
CENTER 1 kHz THD 1 %/8 Ω 60 W
RMS FRONT
1 kHz THD10 %/6 Ω (High) 2×36 W
100 Hz THD 10 %/8 Ω (Low) 2×65 W
SURROUND 1 kHz THD 10 %/8 Ω 2×40 W
CENTER 1 kHz THD 10 %/8 Ω 80 W
PMPO 1 kHz/High 6 Ω, Low 8 Ω
CENT. 8 Ω, SURR. 8 Ω
Total harmonic distortion
Rated power at 1 kHz 1 %(6 Ω)
Half power at 1 kHz 0.1%(6 Ω)
Load impedance
FRONT (High) 6 Ω
FRONT (Low) 8 Ω
SURROUND 8Ω
CENTER 8Ω
DIGITAL S. WOOFER
Center frequency 60 Hz
LEVEL (VOL -20 dB) Mid +3 dB
MAX +6 dB
■ Amplifier section | EH570
Power output (L/R both channel driven)
DIN 1 kHz THD 1 %/6 Ω (High) 2×25 W
100 Hz THD 1 %/B Ω (Low) 2×65 W
RMS 1 kHz THD 10 %/6 Ω (High) 2×35 W
100 Hz THD 10 %/8 Ω (Low) 2×85 W
Total harmonic distortion
Rated power at 1 kHz 1 % (6 Ω)
Half power at 1 kHz
Load impedance Main (High) 6Ω
Main (Low) 8 Ω
DIGITAL S. WOOFER
Center frequency
LEVEL (VOL -20 dB)
60 Hz
MID+3 dB
MAX+6 dB
■ FM tuner section
Frequency range
广力云
87.50-108.00 MHz
(0.05 MHz steps)
Sensitivity
S/N 26 dB
S/N
MONO
Antenna terminal(s)
1.8 μV (IHF usable)
1.5 μV
■ AM tuner section
Frequency range
522-1629 kHz (9 kHz steps)
520-1630 kHz (10 kHz steps)
Sensitivity (S/N 20 dB)
Timer section
Clock
Function
Quartz-lock type
Play timer (1 time, daily),
Rec timer (1 time, daily).
Sleep (120 min, 30 min intervals)
Setting intervals (Play/Rec)
1 minute-23 hours 59 minutes
(1 min intervals)
General
Power supply
(For United Kingdom, Australia and N.Z.)
AC 230-240 V 50 Hz
(For Eastern Europe and South Africa)
(二) 本次股东大会的召集和召开程序
AC 230V 50 Hz
(For others) AC 110/127/220-230/240 V 50/60 Hz
Power consumption
EH770
(For United Kingdom, Eastern Europe,
South Africa, Australia and N.Z.)
(For others)
|EH570
Standby
(For United Kingdom, Eastern Europe,
South Africa, Australia and N.Z.)
(For others) 1.0 W
Dimensions (W×H×D)
293×118.5×343 mm
Mass
EH770
(For United Kingdom, Eastern Europe,
South Africa, Australia and N.Z.)
(For others)
EH570
CD PLAYER
Pickup
Wavelength
■ General
Dimensions (W×H×D)
EH770 293×89××288 mm
EH570|293×89×268 mm
Mass
EH770 2.2 kg
EH570 1.6 kg
CASSETTE DECK
Deck system
Track system
Recording system
Bias frequency
Erasing system
Heads
Deck 1
(Playback head)
Deck 2
(Recording/Playback head)
(Erasing head)
Motors
Deck 1,2
Capstan drive
Tape speed
Wow and flutter
Stereo cassette deck
4 track, 2 channel
AC bias
100 kHz
C erase
[Non-Text]
[Non-Text]
Permalloy head
广力云智慧零售收银系统
Permalloy head
Double gap ferrite head
[Non-Text]
广力云智慧零售收银系统
DC servo motor
4.8 cm/s
0.16% (WRMS)
Fast forward and rewind times
Approx. 110 seconds with C-60 cassette tape
Frequency response (Dolby NR off)
TYPE I (NORMAL) 20 Hz–16 kHz (DIN)
TYPE II (HIGH) 20 Hz–16 kHz (DIN)
TYPE IV (METAL) 20 Hz-16 kHz (DIN)
S/N (Signal level=max recording level, TYPE II type
tape)
NR off 56 dB (A weighted)
Dolby B NR on 66 dB (A weighted)
Input sensitivity and impedance
REC (IN)
Output voltage and impedance
PLAY (OUT) 280 mV/360 Ω
■ General
Dimensions (W×H×D) 294×118.5×281 mm
ass 2.1 kg
FRONT SPEAKER EH770
Type 3 way, 3 speakers, Bassrellex
Speaker(s)
Super woofer 17 cm cone type
Woofer 12 cm cone type
Tweeter 6 cm ring shaped dome type
Impedance High 6 Ω
Low 8 Ω
Input power (Music) High 60 W
Low 120 W
Output sound pressure level
rossover frequency 120 Hz, 4 kHz
Frequency range 42 Hz–50 kHz (−16 dB)
46 Hz-36 kHz (-10 dB)
■ General
Dimensions (W×H×D) 240×412×259 mm
ass 5.8 kg
FRONT SPEAKER EH570
Type 3 way, 3 speakers. Bassreflex
Speaker(s)
Super woofer 17 cm cone type
Woofer 12 cm cone type
Tweeter 6 cm cone type
Ipedance High 6 Ω, Low 8 Ω
Input power (Music) High 60 W, Low 120 W
Output sound pressure level 84 dB/W (1.0 m)
rossover frequency 150 Hz, 4 kHz
Frequency range 42 Hz-22 kHz (-16 dB)
46 Hz-20 kHz (-10 dB)
General
Dimensions (W×H×D) 240×412×259 mm
Mass 5.8 kg
CENTER SPEAKER EH770
Type 2 way, 3 speakers, Bassreflex
Speaker
Woofer(×2) 8 cm cone type
Tweeter 6 cm cone type
Impedance 8 Ω
Input power (Music) 160 W
Output sound pressure level 86 dB/W (1.0 m)
Crossover frequency 4 kHz
equency range 100 Hz\~22 kHz (-16 dB)
115 Hz-20 kHz (-10 dB)
General
Dimensions (W×H×D) 190×99×166 mm
ass 1.8 kg
SURROUND SPEAKER EH770
Type 1 way, 1 speaker, Closed
Speaker
Full range 8 cm cone type
pedance 8 Ω
put power (Music) 70 W
Output sound pressure level 84 dB/W (1.0 m)
Frequency range 130 Hz–20 kHz (−16 dB)
150 Hz-18 kHz (-10 dB)
■ General
Dimensions (W×H×D) 140×99×118 mm
ass 0.9 kg
Note
- Specifications are subject to change without notice.
Mass and dimensions are approximate.
- Total harmonic distortion is measured by the digital spectrum analyzer.
※"Low" and "High" stand for low frequency and high frequency.
- System Component
- Technics®
- Note
- Dear customer
- CAUTION!
- CLASS 1 LASER PRODUCT
- Supplied accessories
- Before use
- Simple set-up and play
- Control guide and preparatory steps
- Basic operations
- Changing sound field and quality
- Recording operations
- Timer operations and convenient functions
- References
- Placement
- Voltage
- AC mains lead protection
- Foreign matter
- Service
- Caution
- WARNING:
- CAUTION:
- (For United Kingdom)
- IMPORTANT
- THIS PLUG IS NOT WATERPROOF—KEEP DRY.
- How to replace the fuse
- STEP 1 Locating
- Use only the supplied speakers.
- Voltage setting
- If irregular colouring occurs on your television
- Front speakers
- Surround speakers
- If you are unable to position the surround speakers as recommended
- Attaching to a wall
- STEP2
- Speaker leads
- EH770
- Surround and center speakers
- Front speaker
- STEP3 Antennas
- STEP4 Flat cables and AC mains lead
- Flat cables
- AC mains lead
- insertion of connector
- For your reference:
- Simple set-up and play — Listening to a CD —
- A
- B
- Front panel controls
- A Tuner/amplifier
- ⑮ EH770
- B CD changer/CD player
- A Cassette deck
- B Sound processor
- [EH570]
- A Remote control
- The remote control
- B Batteries
- Do not;
- C Use
- Turning DEMO off
- Press and hold [-DEMO] until "NO DEMO" is displayed.
- Setting the time
- Press [☐/I] to turn the unit on.
- ① Press [CLOCK/TIMER] to display "CLOCK".
- ① Press [TUNING (∨ or ∧)] to set the time.
- Displaying the clock
- C
- CDs
- See pages 8 and 9 for basic CD play.
- A CD selection
- B To prevent damage
- C Skipping and searching through tracks
- Skipping tracks
- Searching through tracks
- During play
- Note on CD-R and CD-RW
- Program play
- Remote control only
- Press [PROGRAM].
- EH770
- Select the track with the numbered buttons.
- Press [▶].
- To cancel
- "FULL" is displayed
- “--:--” is displayed if;
- To check the contents of the program
- To add to the end of the program
- To program the track you are listening to
- A Direct access play
- EH770
- Select the track with the numbered buttons.
- B Random play
- Press [RANDOM].
- C Repeat play
- Press [REPEAT] before or during play.
- To repeat only your favorite track(s)
- The radio: manual tuning
- The radio: preset tuning
- A Automatic presetting
- Hold down [SET].
- B Manual presetting
- C Selecting channels
- On the remote control
- Adjust the volume.
- On the main unit
- Cassette tapes
- B Finding a place on a tape
- Dolby noise reduction
- Boosting the super woofer
- Press [DIGITAL S.WOOFER].
- Using the super sound equalizer
- Press [SUPER SOUND EQ].
- Turn [MULTI JOG] to select a setting.
- EH570
- Press [EQ] to select a setting.
- A Using the acoustic image equalizer (AI EQ)
- Change the sound quality with [◀, ▶, ▲, ▼].
- B Using the manual equalizer (M.EQ)
- Change the sound quality with [◀, ▶, ▲, ▼].
- Stinkound System
- [Unreadable]
- Features
- Software
- DORBYCHOLOCIO
- DOLBY SURROUND
- SURFACE SURROUND
- Additional effects
- Ⓐ Center focus
- ⑧ Virtual rear surround
- © Multi rear surround
- Seat position
- Enjoying surround sound EH770
- A 6CH DISCRETE INPUT
- B DOLBY PRO LOGIC
- C SUPER SURROUND
- Speaker level adjustments
- 6CH DISCRETE INPUT, DOLBY PRO LOGIC
- ① 6CH DISCRETE INPUT
- DOLBY PRO LOGIC
- SUPER SURROUND
- Surround effects EH770
- CENTER FOCUS
- Press [CENTER FOCUS].
- VIRTUAL REAR SURROUND
- Press [VIRTUAL REAR SURROUND].
- MULTI REAR SURROUND
- Press [MULTI REAR SURROUND].
- SEAT POSITION
- A B
- D
- 1
- 2
- 3
- Before recording (Deck 2 only)
- See page 39 for tape selection.
- To display the tape counter while recording
- Press [COUNTER DISPLAY].
- Erasing recordings
- Erasure prevention
- Preparatory steps
- Recording CDs
- Preparation:
- A Normal recording
- To stop recording
- B One touch CD editing
- A Recording the radio
- B Tape-to-tape recording
- Using the timers
- The play timer
- To cancel the timer
- The record timer
- A The play and record timers
- Turning the timers on and off
- Checking the timers
- Play timer:
- Playing the unit after the timers are set
- B The sleep timer
- While playing a source
- Press [SLEEP] to select the time (minutes).
- To cancel the sleep timer
- To confirm the remaining time
- To change the setting
- Using the timers together
- A Changing the sound range display
- Press [DISPLAY MODE].
- B Muting the volume
- Press [MUTING].
- c Using headphones (not included)
- Reduce the volume before connection.
- Press [KARAOKE] to select a voice mode.
- Start playing the CD or tape.
- Adjust the main volume and microphone volume.
- To record your performance
- When using the VOICE MUTE function
- A Using the echo effect
- Press [ECHO].
- External unit connections
- Connections to SC-EH770
- A DVD player with 5.1ch output
- To record sound from the DVD player
- Subwoofer
- B DVD player/Laser disc player (without 5.1ch output), etc.
- C Video cassette recorder
- Connections to SC-EH570
- D DVD player/Laser disc player/Video cassette recorder, etc.
- Optional antenna connections
- FM outdoor antenna
- AM outdoor antenna
- Using other equipment
- Listening to an external source
- Press [INPUT SELECTOR] to select the external source.
- Operate the unit.
- Recording an external source
- To temporarily stop recording
- Recording onto an external unit
- Troubleshooting guide
- Maintenance
- If the surfaces are dirty
- To clean this unit, wipe with a soft, dry cloth.
- For a cleaner crisper sound
- Cassette tape selection and care
- SOUND PROCESSOR
- TUNER AMPLIFIER
- CD PLAYER
- CASSETTE DECK
Marque : TECHNICS
Modèle : SC-EH570
Catégorie : Système home cinéma