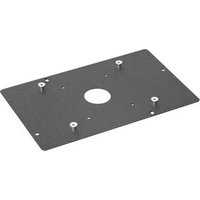
SLM520 - Accessoire de projecteur Chief - Notice d'utilisation et mode d'emploi gratuit
Retrouvez gratuitement la notice de l'appareil SLM520 Chief au format PDF.


| Type de produit | Support de projecteur |
| Marque | Chief |
| Modèle | SLM520 |
| Compatibilité | Projecteurs universels jusqu'à 22,7 kg |
| Charge maximale | 22,7 kg (50 lb) |
| Matériau | Acier à haute résistance |
| Couleur | Noir |
| Dimensions (L x H x P) | 45,7 x 30,5 x 10,2 cm |
| Poids net | 3,2 kg |
| Alimentation | Aucune (support passif) |
| Fixation murale | Oui, inclut vis et chevilles |
| Inclinaison | ±15° |
| Rotation | 360° |
| Angle de nivellement | ±10° |
| Normes de sécurité | Certifié UL, conforme à la norme CE |
| Entretien | Nettoyer avec un chiffon sec et doux |
| Pièces détachées | Disponibles sur demande auprès du fabricant |
| Garantie | 10 ans |
| Pays d'origine | États-Unis |
FOIRE AUX QUESTIONS - SLM520 Chief
Questions des utilisateurs sur SLM520 Chief
0 question sur cet appareil. Repondez a celles que vous connaissez ou posez la votre.
Poser une nouvelle question sur cet appareil
Téléchargez la notice de votre Accessoire de projecteur au format PDF gratuitement ! Retrouvez votre notice SLM520 - Chief et reprennez votre appareil électronique en main. Sur cette page sont publiés tous les documents nécessaires à l'utilisation de votre appareil SLM520 de la marque Chief.
MODE D'EMPLOI SLM520 Chief
INSTALLATION INSTRUCTIONS
SLB-520 HANGER BRACKET
for Sharp PG-M20X, PG-M25X,
Prior to assembly, unpack carton and verify contents.
For security installation, use security hardware package inside the ALL-POINTS™
Security Kit. Follow the instructions below for attaching the bracket to the projector using either standard hardware or security hardware.
If you are missing any of the following components, please contact Customer Service at 1-800-582-6480
(1) SLB-520 Bracket (3) M3 -16mm Flat Head Screw
(4) 10 - 24 Thumb Nuts (3) 1/2" x .218 x 1/4" Nylon Spacer

INSTALLATION INSTRUCTIONS
- Turn projector upside down.
- Place the three 1/4 " nylon spacers over the three threaded inserts in the bottom of the projector.
- Place the SLB-520 bracket onto the three 1/4 " nylon spacers on the bottom of the projector lining up the three mounting holes in the bracket with the three nylon spacers.
- Using the three M3 x 16mm flat head screws, start them into the three threaded inserts and tighten all fasteners at this time, securing the bracket to the projector. CAUTION: When attaching the mount be careful not to overtighten screws.
- See RPA and/or Smart-Lift™ Instructions.
Marque : Chief
Modèle : SLM520
Catégorie : Accessoire de projecteur