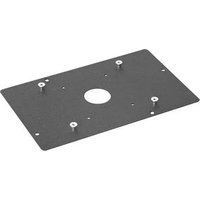
SLM500 - Accessoire de projecteur Chief - Notice d'utilisation et mode d'emploi gratuit
Retrouvez gratuitement la notice de l'appareil SLM500 Chief au format PDF.


| Type de produit | Support de projecteur |
| Marque | Chief |
| Modèle | SLM500 |
| Utilisation prévue | Fixation au plafond ou au mur pour projecteur |
| Capacité de charge maximale | 22,7 kg (50 lb) |
| Matériau | Acier robuste avec finition noire |
| Dimensions (H x L x P) | 43,2 x 30,5 x 25,4 cm |
| Poids net | 4,5 kg |
| Alimentation | Aucune (mécanique) |
| Compatibilité | Projecteurs jusqu'à 22,7 kg avec motif de fixation VESA 100x100 à 400x400 mm |
| Réglages | Inclinaison, rotation et niveau |
| Angle d'inclinaison | +/- 15 degrés |
| Rotation | 360 degrés |
| Fixation au plafond | Nécessite une poutre ou un renfort (non inclus) |
| Kit de montage inclus | Vis, boulons, chevilles et instructions |
| Entretien et nettoyage | Essuyer avec un chiffon doux et sec |
| Sécurité | Vérifier régulièrement le serrage des fixations |
| Pièces détachées | Disponibles sur demande auprès du fabricant |
| Réparabilité | Réparation simple par remplacement de pièces |
| Couleur | Noir |
| Garantie | 10 ans (selon conditions du fabricant) |
FOIRE AUX QUESTIONS - SLM500 Chief
Questions des utilisateurs sur SLM500 Chief
0 question sur cet appareil. Repondez a celles que vous connaissez ou posez la votre.
Poser une nouvelle question sur cet appareil
Téléchargez la notice de votre Accessoire de projecteur au format PDF gratuitement ! Retrouvez votre notice SLM500 - Chief et reprennez votre appareil électronique en main. Sur cette page sont publiés tous les documents nécessaires à l'utilisation de votre appareil SLM500 de la marque Chief.
MODE D'EMPLOI SLM500 Chief
INSTALLATION INSTRUCTIONS
SSB-500, SSM-500, SLB-500 and SLM-500 Interface Brackets
SSB-500, SSM-500, SLB-500 and SLM-500 Interface Brackets are designed for use with Chief® Series Projector Mounts. See the specific installation instructions provided with the mount for additional installation information.
Unpack carton and verify kit contents. If any listed parts are missing, immediately contact a Chief Customer Service representative.

WARNING: IMPROPER INSTALLATION CAN LEAD TO EQUIPMENT FALLING CAUSING SERIOUS PERSONAL INJURY AND DAMAGE TO EQUIPMENT! DO NOT substitute hardware. Use only hardware supplied by manufacturer!
(1) Interface Bracket (2) Screw, Hex Head, Machine, M6 x 30mm
(6) 10 - 24 Thumb Nuts** (1) Screw, Hex Head Cap, M6 x 65mm
(1) All-Points Security Kit (3) Washer, Flat, M6
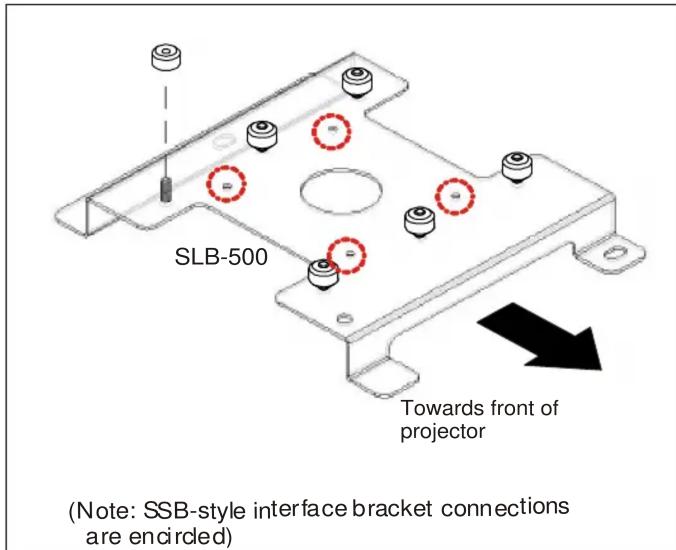
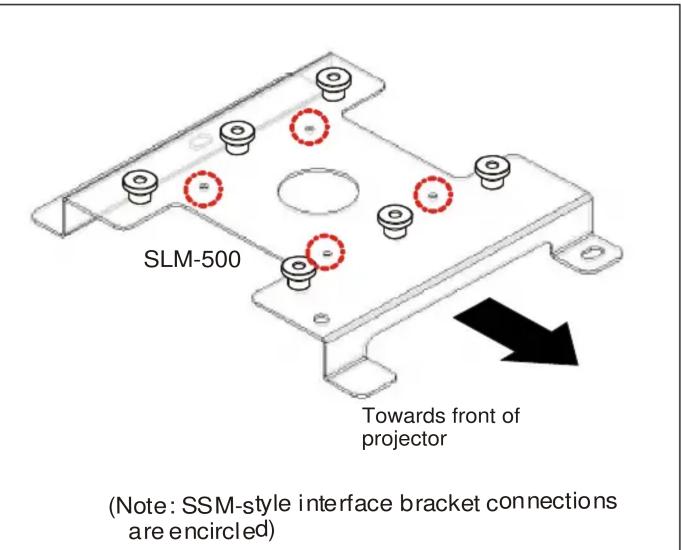
**Only used when installing SLB/SSB interface brackets.
NOTE: Specific to SSB-style and SSM-style interface bracket installation, all appropriate screws come pre-installed as reflected in the encircled locations above. DO NOT attempt to substitute and USE ONLY this pre-installed hardware for SSB-style and SSM-style interface bracket installation.
Installation Instructions

WARNING: OVER TIGHTENING OF SCREWS CAN DAMAGE PARTS AND CAN LEAD TO SERIOUS PERSONAL INJURY AND DAMAGE TO EQUIPMENT! DO NOT over tighten screws when installing Interface bracket.
NOTE: Step 1 is only required when installing an SLB/SSB interface bracket. If an SLM/SSM bracket is being installed, proceed to step 2.
- Screw thumb screws onto 10-24 x 5/8" Phillips pan head screws. DO NOT fully tighten thumb screws at this time.
- Turn projector upside down on a flat surface.
- Place interface bracket onto projector bottom and align mounting holes in bracket with the threaded inserts in projector.
- Place M6 x 30mm hex screws with flat washers in upper part of bracket and the M6 x 65mm Hex screw with flat washer in single hole of bracket. Tighten all fasteners at this time, securing the bracket to the projector.
NOTE: Security screws can be substituted when mounting interface bracket to projector by using the parts and installation instructions in the All-Points Security Kit.
Chief® is a registered trademark of Milestone AV Technologies. All rights reserved.

Milestone AV Technologies, and its affiliated corporations and subsidiaries (collectively, "Milestone"), intend to make this manual accurate and complete. However, Milestone makes no claim that the information contained herein covers all details, conditions or variations, nor does it provide for every possible contingency in connection with the installation or use of this product. The information contained in this document is subject to change without notice or obligation of any kind. Milestone makes no representation of warranty, expressed or implied, regarding the information contained herein. Milestone assumes no responsibility for accuracy, completeness or sufficiency of the information contained in this document.

CHIEF®
Our Mounts. Your Vision.
Chief Manufacturing, a products division of Milestone AV Technologies
8401 Eagle Creek Parkway, Savage, MN 55378
• P: 800.582.6480 / 952.894.6280 • F: 877.894.6918 / 952.894.6918
8850-000170 Rev01
©2009 Milestone AV Technologies,
a Duchossois Group Company
05/09
Marque : Chief
Modèle : SLM500
Catégorie : Accessoire de projecteur