
SX-KN5000 - Clavier TECHNICS - Notice d'utilisation et mode d'emploi gratuit
Retrouvez gratuitement la notice de l'appareil SX-KN5000 TECHNICS au format PDF.


| Type de produit | Clavier numérique arrangeur |
| Marque | Technics |
| Modèle | SX-KN5000 |
| Dimensions (L x P x H) | Environ 1250 x 400 x 150 mm |
| Poids | Environ 20 kg |
| Alimentation | Secteur AC 230 V, 50 Hz |
| Consommation électrique | Environ 50 W |
| Nombre de touches | 76 touches avec toucher dynamique |
| Polyphonie | 64 notes |
| Sons internes | Plus de 800 |
| Rythmes | Plus de 200 styles |
| Effets | Réverbération, chorus, autres effets DSP |
| Écran | LCD rétroéclairé |
| Fonctions principales | Enregistreur multipiste, séquenceur, accompagnement automatique, arrêts |
| Entretien et nettoyage | Nettoyer avec un chiffon doux sec ; éviter solvants et liquides |
| Sécurité | Ne pas exposer à l'humidité ; débrancher lors d'orages |
| Pièces détachées et réparabilité | Contacter un centre de service agréé Technics |
| Informations générales | Manuel d'utilisation disponible en ligne en PDF |
| Garantie | 2 ans (selon législation en vigueur) |
| Accessoires fournis | Câble d'alimentation, pupitre, manuel |
FOIRE AUX QUESTIONS - SX-KN5000 TECHNICS
Questions des utilisateurs sur SX-KN5000 TECHNICS
0 question sur cet appareil. Repondez a celles que vous connaissez ou posez la votre.
Poser une nouvelle question sur cet appareil
Téléchargez la notice de votre Clavier au format PDF gratuitement ! Retrouvez votre notice SX-KN5000 - TECHNICS et reprennez votre appareil électronique en main. Sur cette page sont publiés tous les documents nécessaires à l'utilisation de votre appareil SX-KN5000 de la marque TECHNICS.
MODE D'EMPLOI SX-KN5000 TECHNICS
Technics
K E Y B O A R D
sx-KN5000
natural_image
Black treble clef symbol on lined paper (no text or numbers)
WARNING: TO REDUCE THE RISK OF FIRE OR ELECTRICAL SHOCK, DO NOT EXPOSE THIS PRODUCT TO RAIN OR MOISTURE.
BEFORE YOU PLAY, PLEASE READ THE CAUTIONARY COPY APPEARING ON PAGE 2.

The lightning flash with arrowhead symbol, within an equilateral triangle, is intended to alert the user to the presence of uninsulated "dangerous voltage" within the product's enclosure that may be of sufficient magnitude to constitute a risk of electric shock to persons.
The exclamation point within an equilateral triangle is intended to alert the user to the presence of important operating and maintenance (servicing) instructions in the literature accompanying the appliance.
Note: This equipment has been tested and found to comply with the limits for a Class B digital device, pursuant to Part 15 of the FCC Rules. These limits are designed to provide reasonable protection against harmful interference in a residential installation. This equipment generates, uses and can radiate radio frequency energy and, if not installed and used in accordance with the instructions, may cause harmful interference to radio communications. However, there is no guarantee that interference will not occur in a particular installation. If this equipment does cause harmful interference to radio or television reception which can be determined by turning the equipment off and on, the user is encouraged to try to correct the interference by one or more of the following measures:
— Reorient or relocate the receiving antenna.
— Increase the separation between the equipment and receiver.
— Connect the equipment into an outlet on a circuit different from that to which the receiver is connected.
— Consult the dealer or an experienced radio/TV technician for help.
The model number of this product is found on the rear of the unit.
The model number and serial number are found underneath the keyboard.
Please note the model and serial numbers in the space provided below and retain this sheet as a permanent record of your purchase to aid identification in the event of theft.
MODEL NUMBER
SERIAL NUMBER
Technics
OWNER'S MANUAL
Before you play
For long and pleasurable use of this instrument, and to gain a thorough understanding of your KN5000 Keyboard, it is strongly recommended that you read through this Owner's Manual once.
The Owner's Manual is comprised of the following parts.
BASIC FUNCTIONS
This part includes an explanation of basic procedures and points you should be aware of for proper operation of your instrument.
PRACTICAL APPLICATIONS
This part comprises a detailed explanation of sound, effect, rhythm, SEQUENCER, COMPOSER, Disk Drive, MIDI.
REFERENCE GUIDE (separate booklet)
Reference guide for the contents of the SOUND GROUP, RHYTHM GROUP, MIDI data, etc.
Important Safety Instructions
WARNING
When using electric products, basic precautions should always be followed, including the following;
- Read all the instructions before using the product.
Safety
- Power Source—The product should be connected to a power supply only of the type described in the operating instructions or as marked on the product.
- Polarization—This product may be equipped with a polarized line plug (one blade wider than the other). This is a safety feature. If you are unable to insert the plug into the outlet, contact an electrician to replace your obsolete outlet. Do not defeat the safety purpose of the plug.
- Periods of Non-use—The power-supply cord of the product should be unplugged from the outlet when left unused for a long period of time.
Installation
- Water and Moisture—Do not use this product near water—for example, near a bathtub, washbowl, kitchen sink, in a wet basement, or near a swimming pool, or the like.
- Cart/Stand—This product should be used only with a cart or stand that is recommended by the manufacturer.
- Ventilation—The product should be located so that its location or position does not interfere with its proper ventilation.
- Heat—The product should be located away from heat sources such as radiators, heat registers, or other products that produce heat.
- Foreign Material—Care should be taken so that objects do not fall and liquids are not spilled into the enclosure through openings.
Listening caution
This product, either alone or in combination with an amplifier and headphones or speakers may be capable of producing sound levels that could cause permanent hearing loss. Do not operate for a long period of time at a high volume level or at a level that is uncomfortable. If you experience any hearing loss or ringing in the ears, you should consult an audiologist.
Service
- Damage Requiring Service—The product should be serviced by qualified service personnel when:
a. The power-supply cord or the plug has been damaged; or
b. Objects have fallen, or liquid has been spilled onto the product; or
c. The product has been exposed to rain; or
d. The product does not appear to operate normally or exhibits a marked change in performance; or
e. The product has been dropped, or the enclosure damaged.
- Servicing—Do not attempt to service the product beyond that described in the user-maintenance instructions.
All other servicing should be referred to qualified service personnel.
Maintenance
- Be sure to switch this unit off after use, and do not switch the unit on and off in quick succession, as this places an undue load on the electronic components.
- To maintain the luster of the keys and buttons, wipe with a clean, damp cloth, and polish with a soft, dry cloth. Polish may be used, but do not use thinners or petro-chemical-based polishes.
• A wax-based polish may be used on the cabinet, although you will find that rubbing with a soft cloth will suffice.
SAVE THESE INSTRUCTIONS
Important Safety Instructions 2
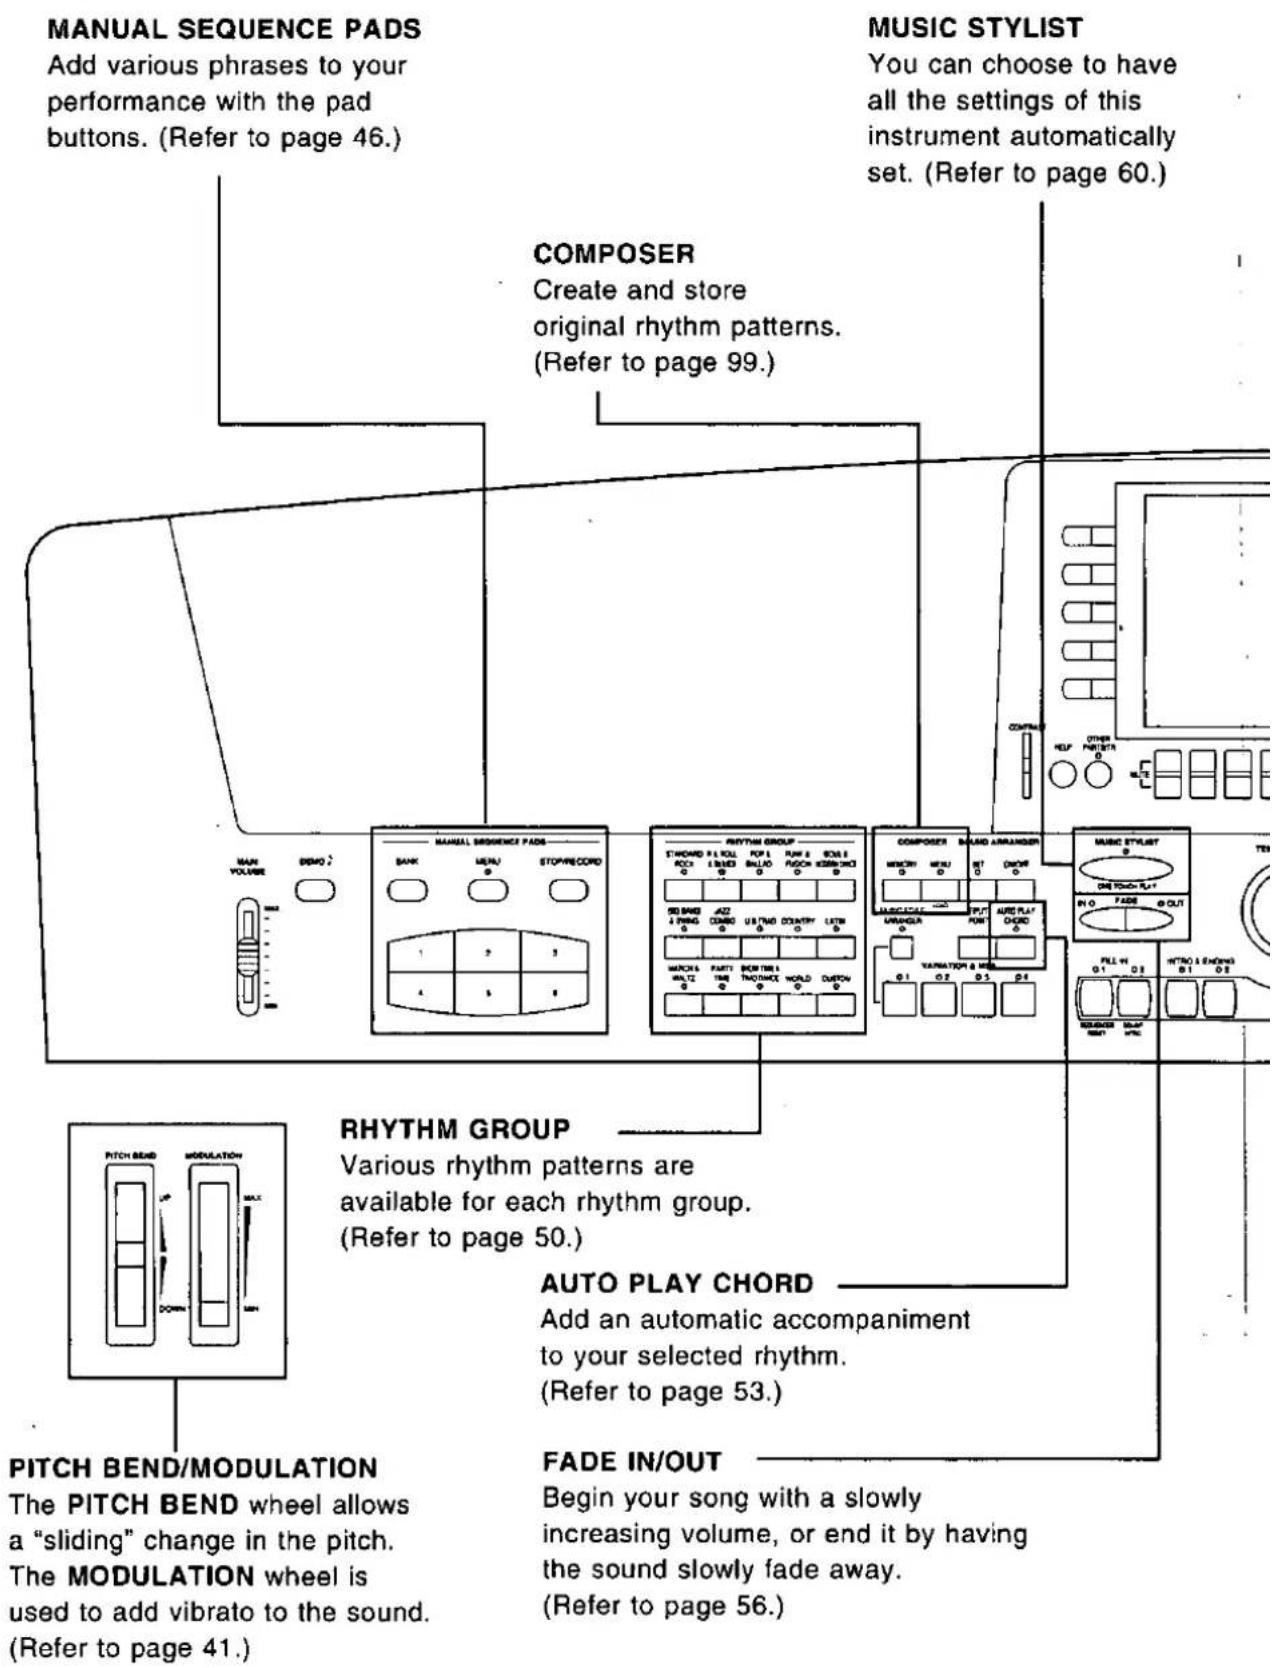
Controls and functions 6
BASIC FUNCTIONS
Getting started 8
Listen to the demonstration 10
Add effects 12
Select the registration for a music style (MUSIC STYLIST) 14
Automatic panel settings (ONE TOUCH PLAY) 16
Search for a music style alphabetically 18
Store your panel settings (PANEL MEMORY) 19
Record your performance (SEQUENCER) 20
Save data on a floppy disk 22
Load rhythm data from a Technics pattern disk (COMPOSER LOAD) 24
Play back commercial song disks (DIRECT PLAY) 25
Entertainer features 26
PRACTICAL APPLICATIONS
About the display 27
Part I Sounds and effects
Selecting sounds 32
Digital Drawbar 33
Accordion Register 35
Assigning parts to the keyboard 36
Effects 39
Transpose 42
Techni-chord 43
Entertainer 44
Part II Manual Sequence Pads
Playing phrases 46
Record a phrase 47
Compile 48
Naming for "User" and "Compile" Banks 49
Part III Playing the rhythm
Selecting rhythms 50
Playing the rhythm 52
Auto Play Chord 53
Fade In/Fade Out 56
Sound Arranger 58
One Touch Play 59
Music Stylist 60
Music Style Arranger 62
Panel Memory 63
Part IV Sequencer
Outline of the Sequencer 67
Sequencer parts 70
Easy Record 71
Realtime Record 72
Sequencer Play 75
Song Select/Naming 77
Punch Record 78
Step Record 80
Track Assign 86
Panel Write 87
Song Clear 88
Song/track Copy 88
After Touch Set 89
Editing the recorded performance 89
Part V Composer
Outline of the Composer 99
Simple recording method 101
Create a completely new rhythm 102
Playback 105
Step Record 106
Pattern Copy 107
Bend Range 109
Custom Copy 109
Part VI Disk Drive
Outline of the Disk Drive function 111
Outline of the procedure 113
Loading data 114
Direct Play 117
Song Medley 119
Saving data 120
Disk management 126
Set the automatic display when a disk is inserted 127
Part VII Sound
Outline of the Sound 128
Part Setting 129
Mixer 133
Master Tuning 134
Key Scaling 135
Reverb & Equalizer Presets 136
Equalizer 137
Left Hold 138
Part VIII Sound Edit
Outline of the Sound Edit 139
Easy Edit 140
Tone Edit 141
Pitch Edit 144
Filter Edit 147
Amplitude Edit 150
Effect Edit 153
Controller Edit 154
Store the new sound 155
Drum Kit Edit 156
Recording Digital Drawbar sounds 158
Part IX Control
Outline of Control functions 159
Overall Touch Sensitivity 160
Foot Controllers 161
Display Time Out 162
Wallpaper Setting 163
Part X MIDI
What is MIDI? 164
Outline of MIDI functions 166
Part Setting 167
Control Messages 168
Realtime Messages 168
Common Setting 169
Input/output Setting 170
MIDI Presets 171
Sysex Bulk Dump 172
General MIDI 173
Program Change MIDI Out 174
Panel Memory Output 174
Computer Connection 175
MIDI Settings Load Option 176
Initialize 177
About the backup memory and performance data 178
Options and connections 179
Connecting to a "Vocalist Workstation" 181
Symptoms which appear to be signs of trouble 184
Error messages 187
Example of general settings 188
Index 190
Specifications 192

Getting started
Before you play

11
Plug the power cord into an outlet.
2
Affix the music stand as shown.

natural_image
Line drawing of a device labeled KN5000 with attached components (no text or symbols beyond label)3
Press the POWER button to turn it on.

4
Adjust angle of the display.
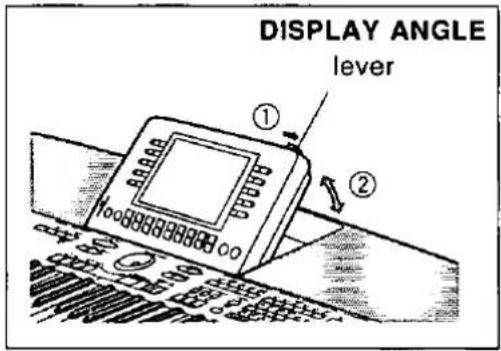
• While pressing the DISPLAY ANGLE lever to the right, swivel the display towards you to the angle at which it is easiest to read.
• To return the display to its original position, do so while pressing the DISPLAY ANGLE lever to the right. Be careful not to pinch your fingers.
- Headphones may be plugged into the PHONES terminal. This will automatically switch off the speaker system, and sound is heard only through the headphones.

natural_image
Line drawing of a piano keyboard with keys and a scroll wheel (no text or symbols)- The pitch of this instrument can be adjusted for when playing with other instruments. (Refer to page 134.)
- For information on this instrument's backup function, refer to page 178.
• Under certain conditions, the functions and memories of this instrument may be initialized when the power is turned on.
Playing
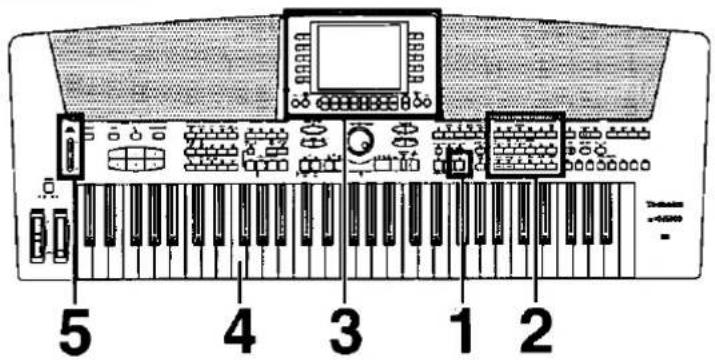
1
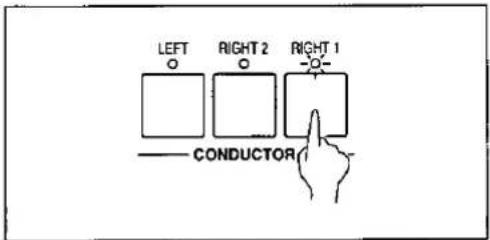
In the CONDUCTOR section on the panel, press the RIGHT 1 button to turn it on.
2
In the SOUND GROUP section, press one of the sound buttons.

3
Select a sound from the list of sounds shown on the display.

- The list of sounds is contained on two or more screen "pages". To see a different part of the list, press either PAGE button.
4
Play the keyboard.
- Your Keyboard features Touch Response. You control the volume by playing the keys harder or softer.
5
Set the MAIN VOLUME to an appropriate level with the sliding control.
- Displays such as those for selecting sounds and rhythms revert to the previous display shortly after you make your selection. You can use the DISPLAY TIME OUT function to adjust the time elapsed before the display reverts to the previous display or even suspend the reversion. (Refer to page 162.)
Listen to the demonstration
Select and listen to the demonstration tunes.

11
Press the DEMO button.

2
Select PERFORMANCES from the display.

3
Use the buttons below the display to select the type of demo performance you wish to hear (STYLE, SOUND, RHYTHM).
4
Use the buttons to the left and right of the display to select the demonstration tune you wish to listen to.
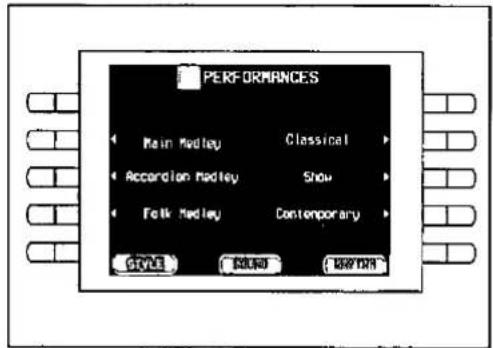
• The demonstration performance corresponding to your selection will begin.
• To end the demonstration before it has finished, again press the button for the selected demo tune.
- Repeat steps 3 and 4 to listen to the other demo tunes.
5
When you are finished listening to the demonstration tunes, press the DEMO button again.
- If you press and hold the DEMO button for a few seconds, all PERFORMANCES demo tunes are demonstrated in order in a medley performance. The medley performance continues until the START/STOP button or the DEMO button is pressed again.
- Some of the buttons do not function while the demonstration performances are being played.
• Even when MIDI LOCAL is set to OFF for all parts, the demonstration performances are played back.
Listen to tunes that demonstrate various features.

1
Press the DEMO button.

2
Select FEATURE PRESENTATION from the display.

3
Press the "Start the internal DEMO" button.

- The FEATURE PRESENTATION demo will begin.
- You can also press the START/STOP button to begin the demo. In this case, the demo is repeated until the START/STOP button is pressed again.
■ Demo playback from a disk
You can play back the FEATURE PRESENTATION recorded in a floppy disk. After activating the FEATURE PRESENTATION display, when a disk with this data is inserted into the Disk Drive slot, the display automatically changes. Press the "Start the loaded DEMO" button.
- Please note that this procedure will erase any other data recorded in the SEQUENCER.
- You can also press the START/STOP button to begin the demo. In this case, the "Internal DEMO" and "loaded DEMO" are played back in a medley until the START/STOP button is pressed again.
41
When you are finished listening to the demonstration tunes, press the DEMO button again.

Add sustain.

Press the SUSTAIN button to turn it on.

Add a feeling of spaciousness to the sound.

Press the DIGITAL EFFECT button to turn it on.

Change the quality of the sound.

Press the DSP EFFECT button to turn it on.

Add reverberation.

Press the DIGITAL REVERB button to turn it on.


Add a dimension of expansion to the sound.
E
Press the ACOUSTIC ILLUSION button to turn it on.

Slide the pitch up or down.
F
While pressing a key on the keyboard, move the PITCH BEND wheel up and down to control the pitch.

Add vibrato.
G
While pressing a key on the keyboard, move the MODULATION wheel up to add the effect.
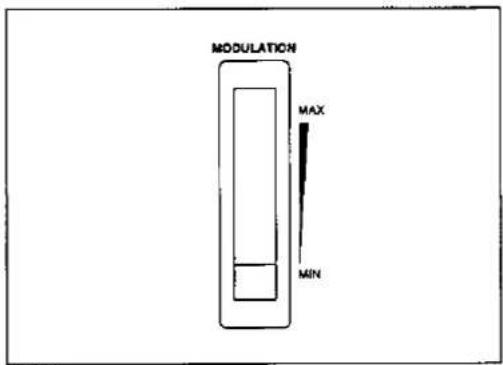
- When you release your hand from the PITCH BEND wheel, it returns automatically to the center position.
- When the vibrato effect is not needed, set the MODULATION wheel to the MIN position.
- You can use the SOUND function to change the DIGITAL REVERB settings by selecting from preset settings, for example, and to make fine adjustments to the various effects. (Refer to page 136.)
Select the registration for a music style (music stylist)

1
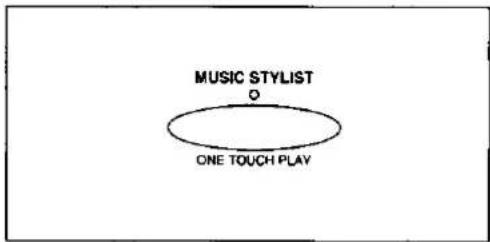
Press the MUSIC STYLIST (ONE TOUCH PLAY) button to turn it on.
2
Select STYLE EXPLORER.

3
Use the MAIN CATEGORY △ and ▽ buttons to select a category. Use the SUB CATEGORY △ and ▽ buttons to select a subcategory.

4
Press the OK button.

5
Use the ▲ and ▼ buttons to select a music style.

- You can use the SKIP^ and v buttons to skip to the previous or following category.
- When you select a style, the sounds and rhythm which are best suited for the selected style are automatically selected.
71
Play the keyboard.
- When you specify a chord, an intro is played, after which the automatic rhythm starts.
6
Press the INTRO & ENDING 1 or 2 button to turn it on.

Automatic panel settings (ONE TOUCH PLAY)

1
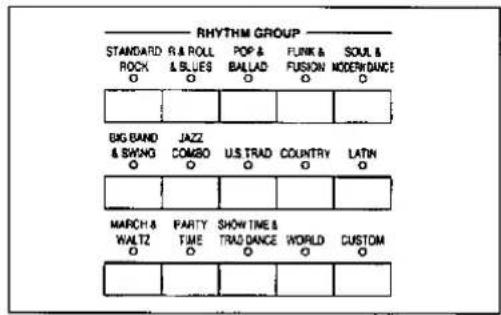
In the RHYTHM GROUP section, press the button for a desired rhythm.
4
Select ONE FINGER on the display.

2
Select a rhythm from the list of rhythms on the display.

5
Press and hold the ONE TOUCH PLAY button for a few seconds.

3
Press the AUTO PLAY CHORD button to turn it on.

• The sound, effects and tempo suitable for the selected rhythm are automatically selected. The tempo can be adjusted with the TEMPO/PROGRAM dial.

6
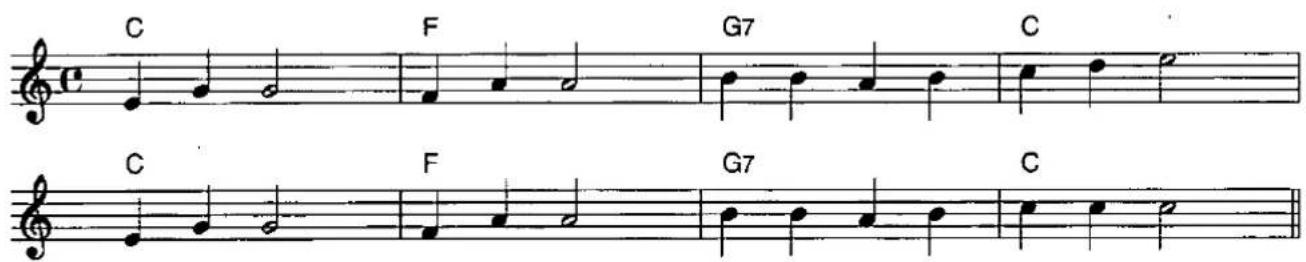
Use your left hand to play the chords and your right hand to play the melody.
- Pressing a key on the left area of the keyboard will cause the automatic rhythm pattern to start playing (synchro start).
7
At the end of your performance, press the INTRO & ENDING 1 or 2 button.

- An ending pattern is played, after which the automatic accompaniment stops.
- If the START/STOP button is pressed, the accompaniment stops immediately.
C
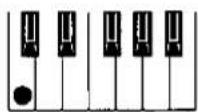
G7
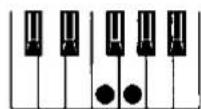
F

- In this example you played chords by pressing the keys for the "root notes" (ONE FINGER chords). But you can also specify the chord by playing all the notes in the chord. (Refer to page 54.)
- You can insert a fill-in pattern while the preset rhythm pattern is playing by pressing either the FILL IN 1 or FILL IN 2 button.
Search for a music style alphabetically.
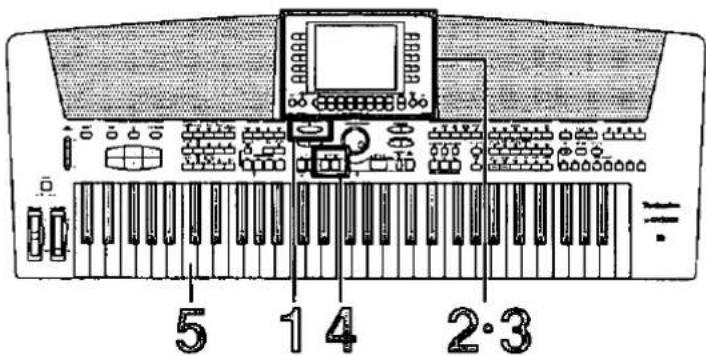
1
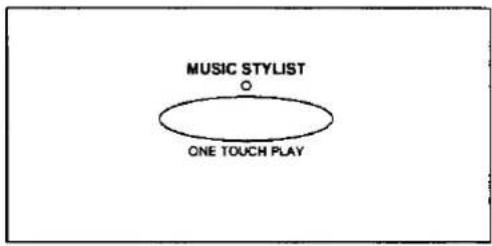
Press the MUSIC STYLIST (ONE TOUCH PLAY) button to turn it on.
- You can use the SKIP ∧ and ∨ buttons to skip to the previous or following alphabetical or numerical heading.
- When you select a music style, the sounds and rhythm which are best suited for the selected tune are automatically selected.
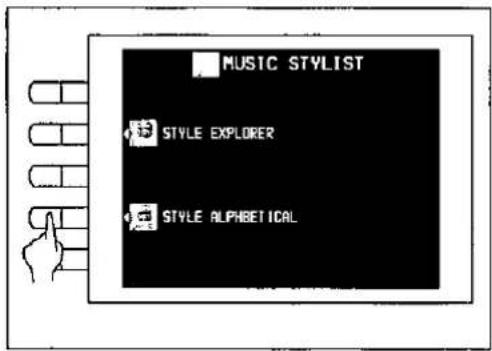
2
Select STYLE ALPHABETICAL.
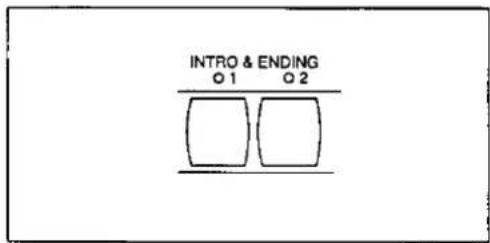
4
Press the INTRO & ENDING 1 or 2 button to turn it on.
3
Use the ▲ and ▼ buttons to select a music style.

5
Play the keyboard.
- When you specify a chord, an intro is played, after which the automatic rhythm starts.
Store your panel settings (PANEL MEMORY)

natural_image
Line drawing of a CD or audio workstation keyboard with no visible text or symbols2·3
11 Set up the desired panel settings (sounds, volumes, etc.)
2| Use the NEXT BANK button to select a bank (1 to 10).

- The bank numbers are shown on the display.

3| With the SET button held down, press one of the numbered buttons of the PANEL MEMORY (1 to 8).

- The current panel settings are now stored in the specified bank and number. When you select the same bank and number again, the stored panel settings are recalled.
- To recall the rhythm, tempo and other settings, press and hold the SET button for a few seconds to show the PANEL MEMORY MODE display, and select EXPAND.
Record your performance
(SEQUENCER)
Sonatina
Sound: Piano 1 (RIGHT 1 part)


1
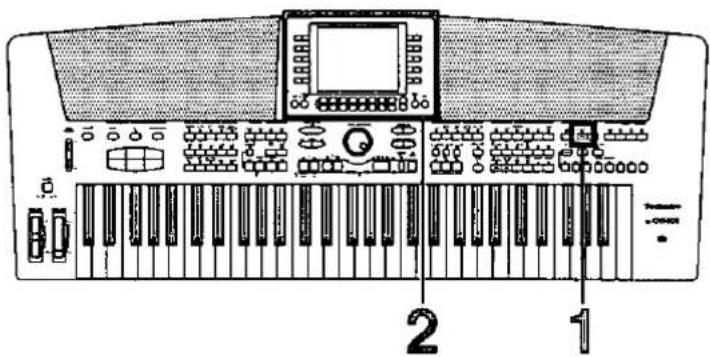
In the SEQUENCER section, press the EASY REC button to turn it on.

2
Press the OK button.

• The display changes to the REALTIME RECORD display.

3
Play the song on the keyboard.
4
When you have finished playing, press the EASY REC button again to turn it off.
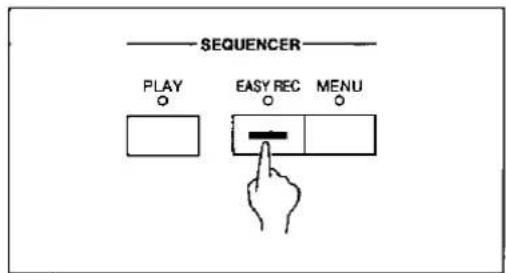
• The PLAY button in the SEQUENCER section turns on.
Playing back your recorded performance
A
Press the SEQUENCER RESET (FILL IN 1) button.

B
Press the START/STOP button.
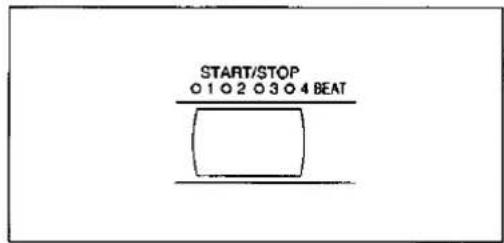
- Your performance is played back just as you recorded it.
- When you are finished playing back your performance, press the PLAY button in the SEQUENCER section to turn it off.
Save data on a floppy disk

1
Insert a disk you wish to save to into the Disk Drive slot Push it all the way in until you hear a click

natural_image
Line drawing of a printer's internal structure with a paper clip inserted (no text or symbols)2
On the DISK MENU display, select SAVE

- If you attempt to use the SAVE procedure when an unformatted disk is inserted into the Disk Drive slot, the FORMAT display appears Follow the instructions on the display to format the disk (Formatting the disk will clear any data which is currently stored on the disk)
3
Select TECHNICS FORMAT

4
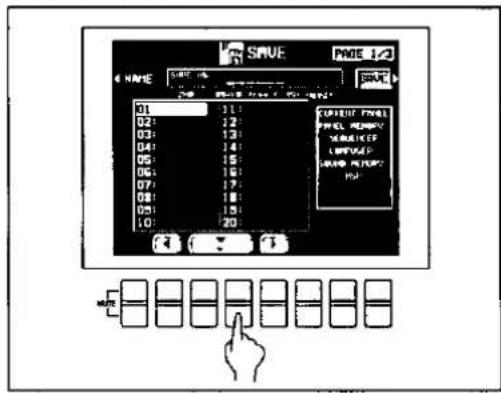
Specify a file number to save to
5
Press the SAVE button
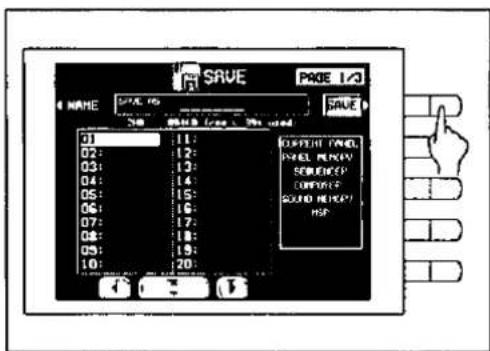
• The performance data of the song recorded in the SEQUENCER is saved on the floppy disk

Recall data from a floppy disk
1
Press and hold the DISK button for a few seconds.

2
Select the file you wish to load.

3
Press the LOAD button.
- The data is copied to the internal memory of this instrument.
4
Press the PLAY button in the SEQUENCER section to turn it on.

5
Press the START/STOP button.
• The recalled song is played back.
■ The following data can be saved/loaded:
| BACKUP | PERFORMANCE | CURRENT PANEL (The current panel settings) |
| PANEL MEMORY | ||
| SEQUENCER | ||
| COMPOSER (MEMORY contents) | ||
| SOUND MEMORY | ||
| MSP (USER memories of the MANUAL SEQUENCE PADS) | ||
| RHYTHM CUSTOM | ||
| USER MIDI SETTINGS (USER memories of the MIDI PRESETS) |
- For detailed information, refer to pages 111 and 178.
Load rhythm data from a Technics pattern disk (COMPOSER LOAD)

1
Insert a commercially sold Technics pattern disk into the Disk Drive slot
2
In the COMPOSER section, press and hold the MENU button for a few seconds
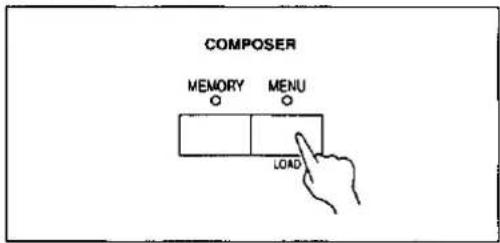
3
Select the name of the pattern to load

4
Press the LOAD button

• Rhythm data is loaded to the COMPOSER memory (MEMORY) You can use the rhythms during your performance, just like the preset rhythms
Play back commercial song disks (DIRECT PLAY)

natural_image
Top-down schematic of a vintage electronic instrument with keyboard, input/output ports, and control panel (no text labels)2·3
11 Insert the song disk into the Disk Drive slot.
2| On the DISK MENU display, select DIRECT PLAY.

3| Use the ∧ and ∨ buttons to select a song.

- For SMF songs, use the PLAY AS button to specify a sound arrangement mode (TECH/GM).
4 | Press the START button.
• The selected song is played back.
- DIRECT PLAY is possible from the following disks:
| Standard MIDI File FORMAT 0 |
| TUNE 1000 “Standard MIDI File with Lyrics” (Format 0 only) |
| DISK ORCHESTRA COLLECTIONTM (DOC) |
| PianoDiscTM |
* All product and company names are trademarks or registered trademarks of their respective owners.
* DISK ORCHESTRA COLLECTION is a trademark of the YAMAHA Corporation.
Entertainer features
Microphone and other connections
Rear panel terminals

*SZ-E2, SZ-P1 and SZ-FC2 are separately sold options.
Microphone (commercially sold)
- To assign a function to a Foot Switch, turn on the CONTROL button and select FOOT CONTROLLERS.
ENTERTAINER display
11
Press the ENTERTAINER button to turn it on.

2
Use the ITEM △ and ∇ buttons to select the item, and the VALUE ∧ and ∨ buttons to change the setting.
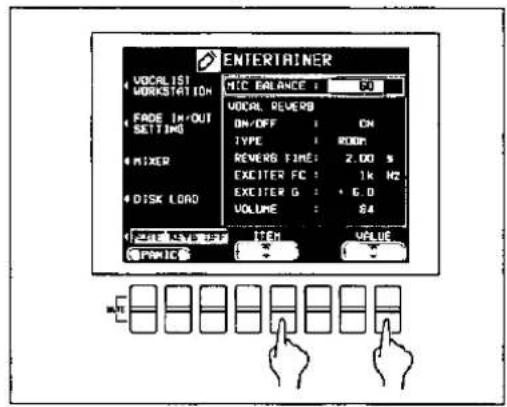
FADE IN/OUT SETTING
Jump to the display to make the settings related to FADE IN and FADE OUT.
MIXER
When the MIXER button is pressed, you can jump to the MIXER display to visually adjust the settings for each part.
- This display can also be used to switch the LOCAL CONTROL on/off setting.
DISK LOAD
You load disk data quickly by jumping to the DISK LOAD display.
MUTE KEYS
When this button is ON, the operation of the keyboard keys and the wheels is disabled. A convenient feature when you want to pretend to play the keyboard while playing back a song disk or the SEQUENCER, for example.
PANIC
During a MIDI performance, if you encounter a problem such as a continuous sound that does not fade, press both balance buttons below the PANIC indication at the same time.
MIC BALANCE
Adjust the microphone volume.
VOCAL REVERB
Special reverb settings for the microphone input.
About the display
A large-size display, easy to operate with excellent readability, is used for displaying various information such as the names of the selected sounds and rhythms etc and when setting the functions Let's take a look
Normal display
This is the kind of information you see on the display during a normal performance

Volume balance
At the bottom half of the normal display, the volume balance of each part is represented in a fader illustration and by a number (0 to 127). You can use the balance buttons below the display to adjust the volumes
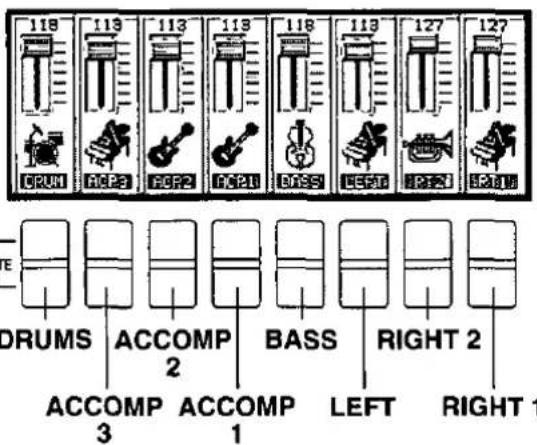
When setting the volume balance, press the button to increase the volume and the button to decrease it
- Hold a button down to scroll the volume quickly
MUTE
To mute a part, press both the corresponding ∧ and ∨ buttons at the same time
- The volume display for a muted part is shown as "MUTE"
- Pressing either balance button for a muted part will cancel the mute function
OTHER PARTS/TR
If you press the OTHER PARTS/TR button, the display changes to show the volumes of these parts. You can then adjust the volumes of these parts.

Use this button to access the RIGHT (RT) 1-PART (PT) 8 and PART 9-16 volume displays. These parts are active when playing back a song disk or when this instrument is connected to external MIDI equipment and is used as a multi-timbre sound generator.
- When there are other parts or tracks to access, the OTHER PARTS/TR indicator is lit.
PAGE
When there are additional parts to the current display, a page number indication, for example PAGE1/2 or P1/2, appears in the upper right corner of the screen. For example, 1/2 indicates that there are two pages of the display, and the current page is page 1. In this case, you can use the PAGE ∧ and ∨ buttons to the right of the balance buttons to view different "pages" of the display.

- Press the ∧ button to view the next page of the display, and the ∨ button to view the previous page of the display.
- On the last page of the display, pressing the ^ button returns to the first page. And conversely, on the first page of the display pressing the ∨ button will skip to the last page.
Menu display
The buttons shown in the illustration below control multiple functions. Pressing one of the buttons will access the corresponding menu display.

■ Example of menu display: SOUND
Select a function from the menu display by pressing the corresponding button to the left or right of the display indicated by the ◀ and ▶ arrows.

- In this manual, the steps describing how to select a function from a menu display are generally abbreviated as follows, for example: "On the SOUND MENU display, select MASTER TUNING."
Setting display
When setting various functions, the available options are shown on the display. The buttons to the right, left and/or directly below the display are used to select and adjust the settings.
Example of setting display: MASTER TUNING

Press the button corresponding to the ∧ or ∨ button on the display to change the value.
- In this manual, this procedure is written as follows: "Use the ∧ and ∨ buttons to adjust the pitch."
TEMPO/PROGRAM dial
If the TEMPO/PROGRAM indicator is lit while you are using the display to adjust a setting, it indicates that the dial can be used to quickly change the displayed value or setting.

- The setting which can be adjusted is highlighted on the display.
EXIT
While the setting display is shown, press this button to go back to the previous display
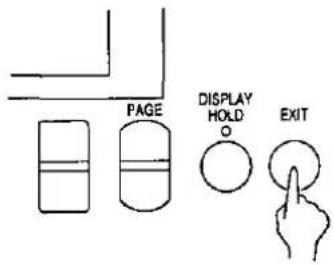
DISPLAY HOLD
Press this button to turn it on when you wish to maintain the current display. You can keep a display which is normally automatically canceled, for example, or even during a performance, you can monitor information which is not shown on the normal display

- The indicator for this button may flash if the current display is one which is normally automatically canceled
- If any of the MENU buttons, for example, is pressed, the DISPLAY HOLD mode is canceled
CONTRAST
Use the CONTRAST controller to adjust the readability of the display

HELP
You can find an explanation of each button's function on the display
1 While the normal performance display is shown, press the HELP button
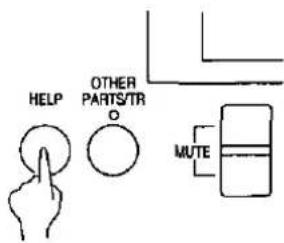
• The following display appears
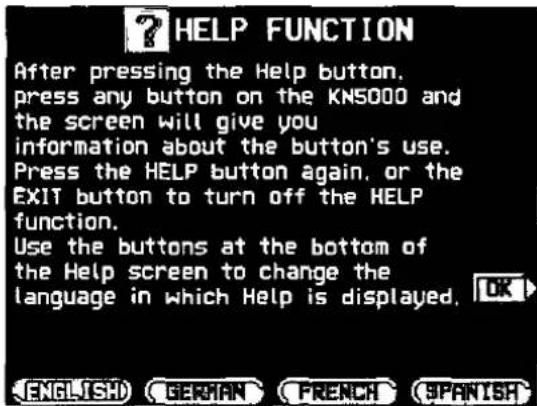
2 Use the buttons below the display to select a language
3 Press the OK button
4. Press a button on the panel whose explanation you wish to read
- An explanation of the button's function is shown on the display
5 Press the HELP button again to exit the help mode
- Attention display messages and error messages are also shown in the selected language
- The appearance of the display on your instrument may be different from the illustrated display in this manual depending on the region in which your instrument was purchased and the selected display language
Part I Sounds and effects
Selecting sounds
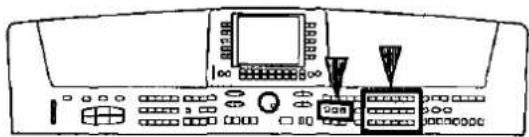
Select the sounds for the three parts you can play on the keyboard—RIGHT 1, RIGHT 2 and LEFT. After first selecting a part and a SOUND GROUP, choose the desired sound from the display.
Select a sound
- In the PART SELECT section, choose RIGHT 1, RIGHT 2 or LEFT.

- The CONDUCTOR buttons are used to specify which part is heard. (Refer to page 36.)
- In the SOUND GROUP section, select a sound group.

• The sounds in GM SPECIAL are GENERAL MIDI sounds that are not included in other groups.
• The sounds in DRUM KITS are percussion sounds that you play by striking the keyboard keys.
- MEMORY A and MEMORY B are reserved for storing sounds you modify. (Refer to page 139.)
- Select the desired sound from the list on the display.

- A list of sounds available for each sound group can be found in the separate REFERENCE GUIDE provided.
- You can use the PAGE buttons to view a different part of the list.
- The sound you select is memorized for the part you selected in step 1.
-
The display returns to the previous display after a few seconds.
-
Play the keyboard.
- This instrument features INITIAL TOUCH (the volume, for example, changes depending on how hard the keyboard is played) and AFTER TOUCH (effects are added by pressing the keys harder).
Digital Drawbar
You can play organ sounds while controlling the drawbars on the display.
-
In the PART SELECT section, select a part.
-
Press the DIGITAL DRAWBAR button to turn it on.

• The display looks similar to the following.
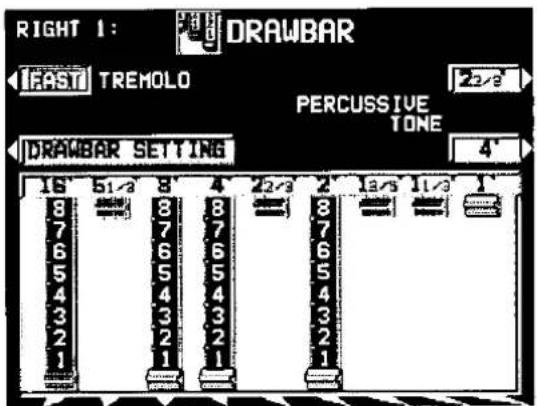
- Use the balance buttons below the display to adjust the volume of each drawbar.
- The volume of each drawbar is illustrated on the display and changes when you press the corresponding balance buttons to adjust the volume. The 1' setting is adjusted with the PAGE buttons.
- The DIGITAL DRAWBAR can be selected only for the RIGHT 1, RIGHT 2 and LEFT parts. It can not be selected for other parts, such as the ACCOMP 1, 2, 3 and BASS parts of the COMPOSER, MANUAL SEQUENCE PADS, or PART 4 to 16 of the SEQUENCER.
■ PERCUSSIVE TONE
PERCUSSIVE TONE adds a tone with a fast initial attack to the drawbar sounds. You can select two pitch levels of attack tones.
Use the PERCUSSIVE TONE 2 2/3' and 4' buttons to turn the respective tone on or off.
- A red frame indicates that the tone is on.
TREMOLO
Tremolo is a rapid oscillation in volume, like the effect of a rotating speaker. The tremolo speed can be changed while you are playing.
- The DSP EFFECT (ROTARY SPEAKER/ROCK ROTARY) is used for the tremolo effect. This effect does not work if the DSP EFFECT button is turned off.
Use the TREMOLO button to switch between the SLOW and FAST rotating speeds.
- The TREMOLO setting is effective for the RIGHT 1, RIGHT 2 and LEFT parts in common.
DRAWBAR SETTING
The drawbar sounds can be adjusted more precisely
1 Press the DRAWBAR SETTING button
• The display looks similar to the following
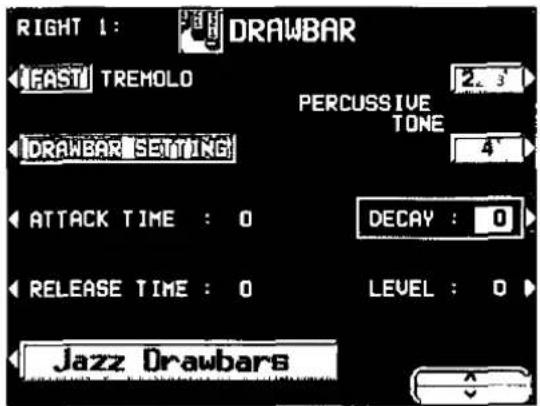
2 Use the Jazz Drawbars/Rock Drawbars button to select the type of sound
• The types of DSP EFFECT used with the TREMOLO effect are as follows
Jazz Drawbars ROTARY SPEAKER
Rock Drawbars ROCK ROTARY
- In case different types are selected for multiple parts, the DSP EFFECT for the sound type which was selected last is active
3 Select the item Use the ∧ and ∨ buttons to change the setting (-5 to +5)
ATTACK TIME
Adjust the time it takes for the drawbar sound to sound after a key is played RELEASE TIME
Adjust the time it takes for the drawbar sound to die out after the keys are released DECAY
Adjust the time it takes for the percussive tone to die out LEVEL
Adjust the volume of the percussive tone
• The above settings are effective for the RIGHT 1, RIGHT 2 and LEFT parts in common
About foot marks
The foot indication on each balance button (for example 8') refers to the pitch of a rank of pipes in a pipe organ. If 8' is used as the standard (the pitch as played on the keyboard), a 16' rank pitch will be one octave below the 8' rank pitch, and a 4' rank pitch one octave above
When the C^3 key is pressed, the sounds of the different pitch ranks are as follows

Accordion Register
You can play accordion sounds on a special display.
- In the PART SELECT section, select a part.

- Press the ACCORDION REGISTER button to turn it on.
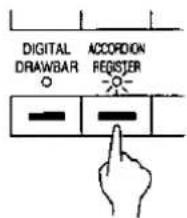
• The display looks similar to the following
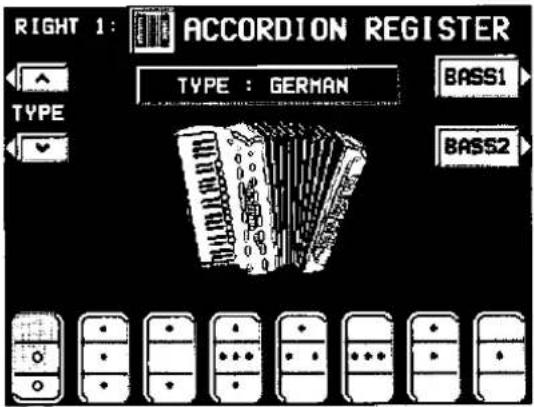
- Use the TYPE ∧ and ∨ buttons to select a type of accordion (GERMAN, ITALIAN).
- Select the register (sound) from the lower display or from BASS1 and BASS2.
- Only one register can be selected.
Assigning parts to the keyboard

natural_image
Front view of a computer control panel with buttons and an LCD screen (no visible text or symbols)The CONDUCTOR buttons are used to assign the parts (RIGHT 1, RIGHT 2, LEFT) to the keyboard in many different ways. For example, you can split the keyboard into right and left sections (SPLIT), and assign a different sound to each section.
CONDUCTOR
| CONDUCTOR settings | How sounds are assigned to the keyboard | |
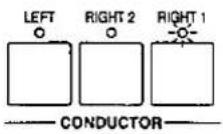 | All keys produce the RIGHT 1 sound. | |
| RIGHT 1 | ||
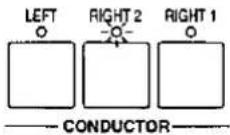 | All keys produce the RIGHT 2 sound. | |
| RIGHT 2 | ||
 | All keys produce both the RIGHT 1 sound and the RIGHT 2 sound. | |
| RIGHT 1 + RIGHT 2 | ||
 | The left keys produce the LEFT sound and the right keys produce the RIGHT 1 sound and the RIGHT 2 sound. | |
| LEFT | RIGHT 1 + RIGHT 2 | |
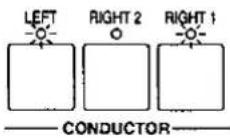 | The left keys produce the LEFT sound and the right keys produce the RIGHT 1 sound. | |
| LEFT | RIGHT 1 | |
 | The left keys produce the LEFT sound and the right keys produce the RIGHT 2 sound. | |
| LEFT | RIGHT 2 | |
• The volume for each part can be adjusted independently. (Refer to page 27.)
• The following conditions are in effect when the AUTO PLAY CHORD is used.
ONE FINGER, FINGERED mode: You cannot assign sounds to all the keys.
PIANIST mode: The keyboard cannot be split.
SPLIT POINT
When the keyboard is divided into left and right sections, the split point is indicated by the lit indicator. You can change the location of the split point.
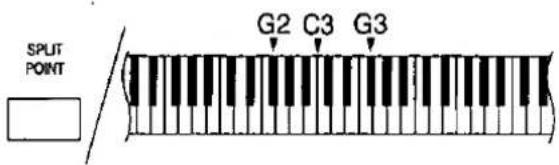
Each time the SPLIT POINT button is pressed, the indication moves to the next split point in the following order. G2 → C3 → G3 → customized split point (all indicators off) (see below).
■ Customized split point
Use the following procedure if you wish to store a split point at a location other than G2, C3 or G3.
- Press and hold the SPLIT POINT button for a few seconds.

• The following display appears.

-
Press a key on the keyboard to specify the desired split point.
-
A split point is set at the location of the pressed key, and is indicated on the keyboard illustration on the display.
- The key at the split point is the lowest note of the right keyboard section.
- After a few seconds, the display exits the setting mode.
- Whenever the keyboard is split, you can select your customized split point by pressing the SPLIT POINT button until none of the split point indicators is lit. In this case, the customized split point is indicated on the display.
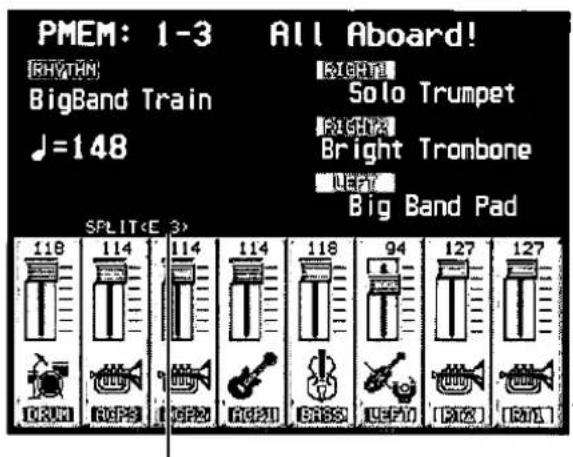
Customized split point
RIGHT 1/RIGHT 2 OCTAVE
During your performance you can quickly change the octave of the RIGHT 1 and RIGHT 2 parts. Use this convenient function to expand the octave range of the keyboard, especially during a split-keyboard performance.
Use the R1/R2 OCTAVE buttons (+ and -) to change the octave.

- Press the + button to raise the pitch and the - button to lower the pitch (-2 to +2).
• The display looks similar to the following.
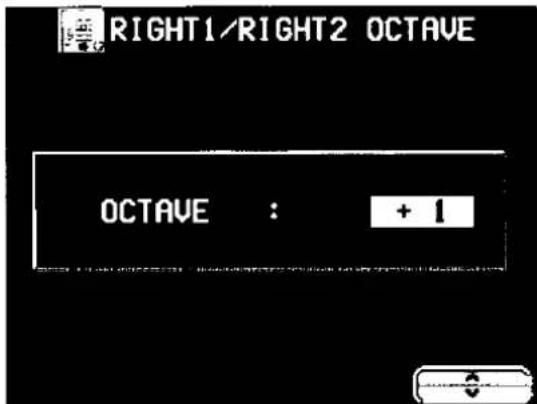
- You can also use the ∧ and ∨ buttons on the RIGHT 1/RIGHT 2 OCTAVE display to change the octave.
• The display returns to the previous display after a few seconds. - A lit + or - indicator shows that the octave has been changed.
- To cancel the octave change, press both buttons at the same time.
- The note pitches (NOTE NUMBER) recorded in the SEQUENCER and during MIDI transmission are also affected by this octave setting. However, it does not affect SEQUENCER playback or received MIDI data.
Effects

natural_image
Front panel of a computer interface with control buttons and a monitor (no visible text or labels)You can achieve even fuller and stirring sounds by adding various effects
SUSTAIN
SUSTAIN is the gradual fading out of musical tones after the key is released
1 In the PART SELECT section, turn on the part to which this effect will be applied
2 Press the SUSTAIN button to turn it on

- The SUSTAIN can be set to on or off for each part
- This effect does not work for the sounds in the DRUM KITS sound group
• This effect may not work for some sounds - In the initialized state, the sustain can be turned on and off with the optional Foot Switch (1) (sold separately)
DIGITAL EFFECT
DIGITAL EFFECT gives the sound richness and enhances your performance
1 In the PART SELECT section, turn on the part to which this effect will be applied
2 Press the DIGITAL EFFECT button to turn it on

- The on or off status of the DIGITAL EFFECT is preset for each sound
- This effect does not work for the sounds in the DIGITAL DRAWBAR and DRUM KITS sound groups
• This effect may not work for some sounds
DSP EFFECT
You can change the quality of the sound.
- In the PART SELECT section, turn on the part to which this effect will be applied.
- Press the DSP EFFECT button to turn it on.

• The DSP EFFECT can be set to on or off for each part.
- When the DIGITAL DRAWBAR is on, this button is used to specify the tremolo effect type (ROTARY SPEAKER/ROCK ROTARY).
☐ Type and parameter settings
- Press and hold the DSP EFFECT button for a few seconds.
• The display changes to the following.

-
Use the TYPE ∧ and ∨ buttons to select the type of effect.
-
Details about the parameters or each type can be found in the separate REFERENCE GUIDE provided.
- Use the PARAMETER ∧ and ∨ buttons to select the parameter.
- Use the VALUE ∧ and ∨ buttons to adjust the setting.
-
Repeat steps 3 and 4 for each parameter as necessary.
-
When a type of effect is selected, the parameters automatically revert to the factory defaults.
- If you set very high or very low settings for PARAMETRIC EQ (equalizer) type effects, the sound may be distorted. In this case, adjust the Q or G setting, or lower the MAIN VOLUME setting.
DIGITAL REVERB
DIGITAL REVERB applies a reverberation effect to the sound.
Press the DIGITAL REVERB button to turn it on.

- This effect is applied to all the sounds of the keyboard.
☐ Type and parameter settings
- Press and hold the DIGITAL REVERB button for a few seconds.
• The display changes to the following.

- Use the TYPE ∧ and ∨ buttons to select the type.
- Details about each type and its parameters can be found in the separate "REFERENCE GUIDE" provided.
- Use the PARAMETER ∧ and ∨ buttons to select the parameter to adjust.
- Use the VALUE ∧ and ∨ buttons to change the setting.
- Repeat steps 3 and 4 for the other parameters, as desired.
- When a type of effect is selected, the parameters automatically revert to the factory defaults.
ACOUSTIC ILLUSION
The ACOUSTIC ILLUSION effect makes your one instrument sound like many instruments, each with a slightly different sound, with various simulated arrangements. When used with the sound of strings, for example, this effect makes your instrument sound like a whole orchestra.
Press the ACOUSTIC ILLUSION button to turn it on.

- This effect is applied to all the sounds of the keyboard.
• This effect is not applied to the MIC input.
■ Type and level settings
- Press and hold the ACOUSTIC ILLUSION button for a few seconds.
• The display looks similar to the following.

- Use the TYPE ∧ and ∨ buttons to select the type.
- Select from STANDARD, PERCUSSIVE (ideal for piano and drum sounds), SYMPHONIC (ideal for strings and brass sounds) and DEEP SPACE.
- Use the LEVEL ∧ and ∨ buttons to select the level (1 to 99).
PITCH BEND
The pitch of the instrument can be continuously changed with the PITCH BEND wheel at the left end of the keyboard. Using this control, you can produce the effect of bending the strings on a guitar.
While pressing a key on the keyboard, move the wheel up and down to control the pitch.

- When you release your hand from the wheel, it returns automatically to the center position and the pitch bend effect is turned off.
- The pitch bend effect does not function for the AUTO PLAY CHORD accompaniment pattern or during a normal performance for the sounds of the LEFT part.
- The amount of pitch bend can be set. (Refer to page 132.)
MODULATION
The MODULATION wheel is used to apply a vibrato effect, for example, to the sound.
While pressing a key on the keyboard, move the wheel up to add the effect.

- When this effect is not needed, set the MODULATION wheel to the MIN position.
- This effect differs depending on the selected sound.
- The vibrato effect does not function for the AUTO PLAY CHORD accompaniment pattern or during a normal performance for the sounds of the LEFT part.
Transpose
natural_image
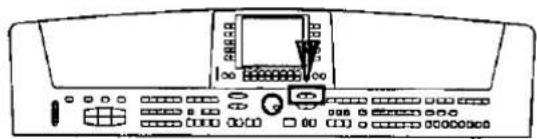
Front view of a computer control panel with buttons and display (no readable text or symbols)The TRANSPOSE buttons are used to change the key of the entire instrument in semi-tone steps across an entire octave.
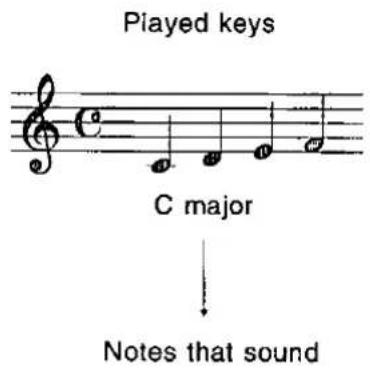
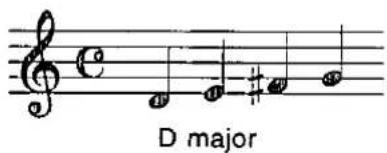
Suppose you learn to play a song—in the key of C, for example—and decide you want to sing it, only to find that it's either too high or too low for your voice. Your choice is to either learn the song all over again in a different key, or to use the TRANSPOSE feature.
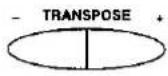
Adjust the key with the < and > buttons.
• Each press of the > button changes the key as follows: D^ D E^ E F F^ . Each press of the < button changes the key as follows: B B^ A A^ G .
- If the two buttons are pressed at the same time, the key returns to C.
- When the TRANSPOSE function is active, the transposed key is shown on the display.

Techni-chord

natural_image
Front view of a car dashboard with control panel and keypad (no visible text or symbols)TECHNI-CHORD turns your single note melodies into full chords and offers you a choice of different types from a simple duet which adds one harmony note to your melody note, to big band reeds which adds four harmony notes to your melody note. If TECHNI-CHORD is part of a ONE TOUCH PLAY or MUSIC STYLIST registration, a suitable TECHNI-CHORD type will be selected automatically.
Example:
Left hand (chord)
Right hand (melody)

- Split the keyboard into left and right sections. (Refer to page 36.)
- Press the TECHNI-CHORD button to turn it on.

-
Play the keyboard.
-
The melody you play with your right hand is automatically played in chords which are based on the chords you play with your left hand.
- This feature is very effective when used with the AUTO PLAY CHORD.
Type setting
- Press and hold the TECHNI-CHORD button for a few seconds.
• The display looks similar to the following.
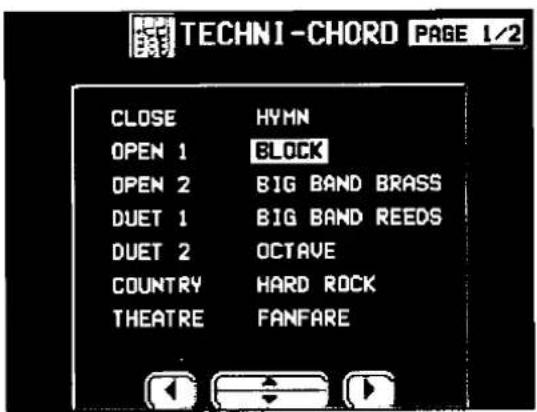
-
Use the ◀, ▲, ▼, ▶ buttons to select the harmony style.
-
When the OCTAVE, HARD ROCK or FANFARE style is selected, the TECHNI-CHORD functions even when the keyboard is not split.
- For a detailed explanation of the different harmony styles, refer to the separate REFERENCE GUIDE provided.
□ ORCHESTRATOR
You can specify which part is used for the harmony tones. Your TECHNI-CHORD performance is enhanced by selecting harmony sounds different from the sounds you play and the sounds produced by the automatic accompaniment.
- Use the PAGE buttons to access the PAGE 2/2 display.

- Use the ∧ and ∨ buttons to select the part for the harmony notes.
• LEFT and PART 16 cannot be selected.
• If CONDUCTOR is selected, the harmony notes are produced in the sounds of the part which is currently selected in the CONDUCTOR (RIGHT 1, RIGHT 2). In other words, the harmony notes are produced in the same sound as the melody notes. If both RIGHT 1 and RIGHT 2 are on, the harmony notes are produced in the sound of the RIGHT 1 part.
Entertainer
natural_image
Front panel of a control panel with buttons and display (no readable text or symbols)When a microphone is connected to the MIC input terminal on the rear panel of this instrument, for performing with vocals at gatherings, for example, the ENTERTAINER function lets you use this display alone to control all the necessary operations.
- Press the ENTERTAINER button to turn it on.

• The display looks similar to the following.

- Use the ITEM ▲ and ▼ buttons to select the item. Use the VALUE ∧ and ∨ buttons to change the setting.
MIC BALANCE
Adjust the microphone volume (0 to 127).
VOCAL REVERB
(Independent reverb for microphone input) ON/OFF:
Turn the mic reverb to on or off.
TYPE:
Select the type of reverb (ROOM, KARAOKE, BATH ROOM, STAGE).
REVERB TIME:
The time it takes for the reverb effect to fade out (0.40s to 30.00s)
EXCITER FC
The frequency of the emphasis (100Hz to 8KHz).
EXCITER G:
The volume of the emphasis (-6.0 to +6.0)
VOLUME:
Adjust the reverb volume (0 to 127).
- The MAIN VOLUME setting affects the microphone input; however the expression pedal and FADE IN/OUT operation does not.
- During a MIDI performance, for example, if you encounter a problem such as a continuous sound that does not fade, press both balance buttons below the PANIC indication at the same time.
MIDI OUT:
ALL NOTES OFF, ALL SOUND OFF, RESET ALL CONTROLLER messages are transmitted to all MIDI channels.
MIDI IN:
Received NOTE, CONTROL data are initialized.
Keyboard:
Keyboard input, CONTROL data are initialized.
- During your performance you can use the buttons to the left of the display for quick execution of the necessary operations.
VOCALIST WORKSTATION:
You can connect a "VOCALIST WORKSTATION" VOCAL HARMONY PROCESSOR by Digitech Corp. and have harmony added to the microphone input. (Refer to page 181.)
FADE IN/OUT SETTING:
Adjust the fade in/fade out. (Refer to page 57.)
MIXER:
Adjust the sound and volume of each part etc. (Refer to page 133.)
DISK LOAD:
Load data from a floppy disk. (Refer to page 114.)
MUTE KEYS:
Disable the operation of the keyboard keys and the wheels (ON/OFF).
- When this button is ON, you can pretend to play the keyboard while playing back a song disk or the SEQUENCER, for example.
- This setting is automatically set to OFF when the power is turned on.
Part II Manual Sequence Pads
Playing phrases

natural_image
Front view of a control panel with display and keypad (no visible text or symbols)During your performance, you can insert a short recorded phrase or effect sounds by pressing a pad button. A different group of phrases is recorded in each bank.
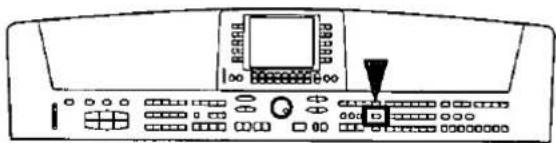
1. Press the BANK button.
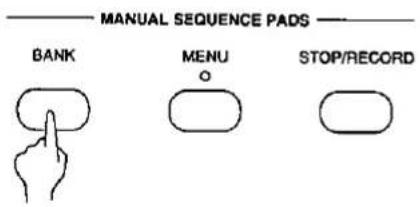
2. Select the desired bank from the display.
- The list of banks consists of two screen pages. Use the PAGE buttons to move from one screen page to another.


- "User Bank" 1 and 2 are for storing your original phrases.
- "Compile Bank" 1 and 2 are for assigning phrases as you desire.
- Various functions are assigned to each pad button in "Control Preset" 1 and 2.
"Control Preset 1" (foot switch functions):
1: ROTARY SLOW/FAST
2: PANEL MEMORY BANK INCREMENT
3: GLIDE
4: PANEL MEMORY DECREMENT
5: PANEL MEMORY BANK DECREMENT
6: PANEL MEMORY INCREMENT
- For more information about these functions, please see to page 161.
- When using this bank, please set the MSP BANK setting of the EXPAND MODE FILTER of the PANEL MEMORY to OFF. (Refer to page 66.)
"Control Preset 2" (rhythm functions):
1: FILL IN 1 (SEQUENCER RESET)
2: INTRO & ENDING 1
3: SYNCHRO & BREAK
4: FILL IN 2 (COUNT INTRO)
5: INTRO & ENDING 2
6: START/STOP
• The display returns to the previous display after a few seconds.
3. Press a pad button (1 to 6).

• A different phrase is assigned to each pad button.
• The selected phrase is played in the current tempo.
• To stop the phrase before it has ended, press the STOP/RECORD button.
• Some phrases continue to play until the STOP/RECORD button is pressed.
• During a rhythm performance, some phrases may play in time with the measure count.
- When the automatic accompaniment is on, the phrase is played in the specified chord.
- When the normal performance display is shown, you can press the OTHER PARTS/TR button to adjust the volume of the MANUAL SEQUENCE PADS (MSP).
- When GENERAL MIDI is ON, the MANUAL SEQUENCE PADS do not sound. (Refer to page 173.)
Record a phrase
"User Bank" 1 and 2 are reserved for storing your original phrases.
-
Press the BANK button; on the MSP BANK SELECT display, select "User Bank 1" or "User Bank 2".
-
While pressing the STOP/RECORD button, press the pad button in which you wish to record.

• The display looks similar to the following.
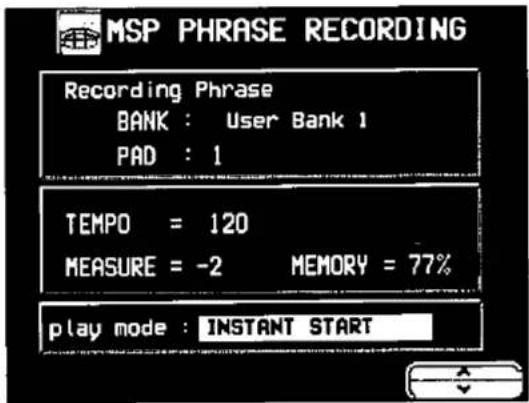
- Use the TEMPO/PROGRAM dial to adjust the recording tempo.
- The tempo is shown on the display as TEMPO=.
- Use the ∧ and ∨ buttons to select the phrase playback mode.
SYNC TO RHYTHM:
During a rhythm performance, the phrase starts in time with the measure.
INSTANT START:
The phrase starts as soon as the pad button is pressed, independent of a rhythm performance.
-
Select the sounds and effects for the phrase you are going to record.
-
Press the START/STOP button.

- After a two-measure count (MEASURE= -2, -1), recording begins.
-
Record the phrase.
-
When you have finished recording the phrase, press the START/STOP button.
- You can also stop recording by pressing the STOP/RECORD button.
- Repeat steps 3 to 8 to record phrases in the other pad buttons as desired.
• The following information is stored.
— Your keyboard performance
— Sound settings and changes
— SUSTAIN on/off setting
—Operation of the PITCH BEND and MODULATION wheels, etc.
- The memory capacity of all the MANUAL SEQUENCE PADS user banks is approximately 1800 notes. The remaining memory available for recording is shown on the display as a percentage (MEMORY= %). When "Memory full!" appears on the display, no more data can be stored.
- You can assign a name to each bank. (Refer to page 49.)
Compile
You can assign desired phrases from different banks in "Compile Bank" 1 and 2.
- Turn on the MENU button in the MANUAL SEQUENCE PADS section.

• The display looks similar to the following.

- Select "COMPILE SET".
• The display looks similar to the following.

-
Press the BANK button to select a bank (COM- PILE BANK: 1/2).
-
Use the PADS and buttons to select the pad to which to assign the phrase.
-
Use the BANK and PHRASE ∧ and ∨ buttons to select the desired bank and phrase you wish to assign.
• The "Control" bank cannot be selected.
-
Repeat steps 4 and 5 to assign phrases to the other pad buttons.
-
When you have finished assigning the phrases, turn off the MENU button.
- You can assign a name to the bank. (See the following.)
Naming for "User" and "Compile" Banks
You can assign original names to "User Bank" 1, 2, "Compile Bank" 1 and 2.
- Turn on the MENU button in the MANUAL SEQUENCE PADS section.

• The display looks similar to the following.

- Use the ∧ and ∨ buttons to select the bank you are going to name ("User" 1, 2, "COM-PILE" 1, 2).
- Select "Naming for User & COMPILE Banks".
• The display looks similar to the following.

-
Assign a name to the bank.
-
Use the POSITION buttons to highlight the character position in the name box. Use the ◀, ▲, ▼, ▶ buttons to select the alphanumeric character. Repeat these steps to type the whole name.
- Press the ABC button to switch to the screen for upper case (capital) letters, or the abc button to switch to the screen for lower case letters.
- Use the !#\$ button to switch to the symbols character set.
- Use the INS button to type a space.
- Use the DEL button to erase a character.
- To erase all the characters, press the CLR button.
-
You can press the ← button if you wish to have the name centered.
-
When you have finished assigning the name, press the OK button.
Part III Playing the rhythm
Selecting rhythms
natural_image
Top-down schematic of a control panel with buttons and display (no text or symbols)Many exciting rhythms are stored in the memory of this instrument. First select one of the rhythm groups and then choose the desired rhythm.
Select a rhythm
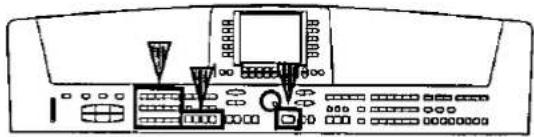
- In the RHYTHM GROUP section, select a rhythm group.

- CUSTOM is reserved for storing rhythms you create with the COMPOSER.
- Select the desired rhythm from the list on the display.
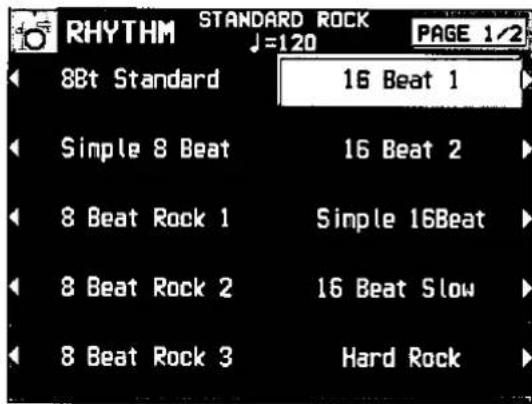
- A list of rhythms available for each rhythm group can be found in the separate REFERENCE GUIDE provided.
- If there is more than one page to the display, use the PAGE buttons to move from one screen page to another.
- The display returns to the previous display a few seconds after you have made your selection.
□ VARIATION
There are four variations available for each rhythm. Use the VARIATION & MSA buttons to select the desired variation.
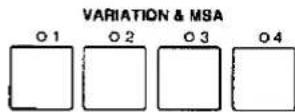
• The nuance of the pattern differs with each variation number.
- You can change to a different variation while the rhythm is playing.
Start the rhythm
There are two ways to start the rhythm.
Normal start
-
Select a rhythm.
-
Press the START/STOP button to turn it on.
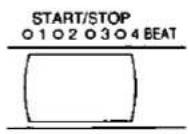
- The selected rhythm pattern immediately begins to play.
- You can stop the rhythm by pressing the START/STOP button again to turn it off.
- The BEAT indicators above the START/STOP button light to indicate the beat. On the first beat of the measure, the red indicator lights. On the second and succeeding beats of the measure, the green indicators light in order.
- When GENERAL MIDI is ON, the rhythm does not sound. (Refer to page 173.)
■ Synchronized start
With the synchronized start feature, the rhythm pattern starts when you play a key on the keyboard.
- Select a rhythm.
- Press the SYNCHRO & BREAK button to turn it on.

- Play a key to the left of the keyboard split point.

• The rhythm pattern begins to play.
- You can use the synchronized start feature even when the keyboard is not divided into left and right sections. To start the rhythm, press a key to the left of the specified split point.
■ Adjust the tempo
The tempo of the rhythm pattern is adjusted with the TEMPO/PROGRAM dial.

- The tempo is shown on the display as a numerical value ( = 40 to 300).
- When the TEMPO/PROGRAM indicator is lit, the TEMPO/PROGRAM dial cannot be used to adjust the tempo.
■ TAP TEMPO
You can set the tempo of the rhythm by tapping this button few times with your finger at the tempo you wish to play.

- The tempo at which the button is tapped is detected, and the tempo automatically changes correspondingly.
Playing the rhythm

Intro, fill-in and ending patterns fitting each different rhythm pattern are permanently recorded in your Keyboard, thus allowing a versatile rhythm performance.
INTRO
Begin the rhythm performance with an intro pattern.
- Press the INTRO & ENDING 1 or INTRO & ENDING 2 button to turn it on.

- Press the START/STOP button to start the rhythm.

- An intro pattern is played, after which the normal rhythm pattern begins.
COUNT INTRO
You can begin the rhythm performance with a one-measure count.
- Press the COUNT INTRO (FILL IN 2) button to turn it on.

- Press the START/STOP button to start the rhythm.
- A one-measure count is played, after which the normal rhythm pattern begins.
FILL IN
You can insert a fill-in pattern any time during the rhythm performance. Choose from two different fill-in patterns.
-
Select a rhythm and press the START/STOP button.
-
Press the FILL IN 1 or FILL IN 2 button.
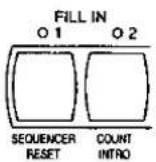
- A fill-in pattern is heard immediately for the remainder of the measure.
- When a FILL IN button is pressed on the last beat of the measure, the fill-in pattern continues to the end of the following measure.
ENDING
Finish the rhythm performance with an ending pattern.
- Select a rhythm and press the START/STOP button.
- Press the INTRO & ENDING 1 or INTRO & ENDING 2 button to turn it on.
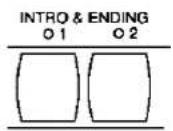
- An ending pattern is produced, and then the rhythm performance stops.
- If you accidentally press the INTRO & ENDING button in the middle of the tune, you can press the FILL IN 1 or FILL IN 2 button. The ending pattern stops, and a fill-in pattern is produced, after which the normal rhythm performance continues.
Auto Play Chord

natural_image
Front view of a computer interface panel with buttons and a central screen (no visible text or symbols)Simply by playing a chord on the keyboard, the AUTO PLAY CHORD function automatically plays an accompaniment pattern which matches perfectly the selected rhythm. With a real accompaniment as a background, you can concentrate on playing the melody.
How the AUTO PLAY CHORD works

When an AUTO PLAY CHORD mode is selected, an automatic accompaniment which matches the rhythm you have chosen is played in the chord which you specify with your left hand. The melody is played with your right hand.
- The accompaniment pattern of the AUTO PLAY CHORD is composed of five parts: DRUMS, BASS, ACCOMP 1, ACCOMP 2 and ACCOMP 3.
- The volume of each part can be adjusted with the buttons below the display. (Refer to page 27.)
Playing chords
Choose from three ways of playing chords.
ONE FINGER mode
In the ONE FINGER mode, a major chord can be played just by pressing the key for its root note.
Example: C chord
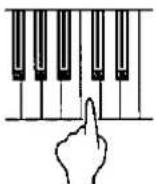
Minor, seventh and minor seventh chords are also easily produced.
| minor chord | seventh chord | minor seventh chord |
| Play the root note plus a black key to the left of it. | Play the root note plus a white key to the left of it. | Play the root note plus a black key and a white key to the left of it. |
Example: Cm | Example: C7 | Example: Cm7 |
■ FINGERED mode
In the FINGERED mode, you specify the chord by playing all the notes in the chord.

- The Keyboard can distinguish the following played chords for each key (C is given as an example): C, C7, CM7, Caug, Caug7, Cm, Cm7, Cdim, Cm7^b5 , CmM7, Csus4, C7sus4, C^b5 , C7^b5 , Cm^b5 , C6, Cm6, CM7^b5 , CM7^b6 , CmM7^b5 , etc.
PIANIST mode
In the PIANIST mode, the entire keyboard can be used to specify chords (FINGERED mode) for the automatic accompaniment; a RIGHT part is assigned to all the keys, and the keyboard does not split. In addition to the chords in the FINGERED mode, the Keyboard also recognizes 9th and 13th chords.
- When specifying chords, if you press a key a perfect 5th or more below the lowest note of the chord, the BASS part becomes a pattern based on that note.
How to use the AUTO PLAY CHORD
-
Select the desired rhythm and sound(s), and set the tempo.
-
Press the AUTO PLAY CHORD button to turn it on.

• The display looks similar to the following.

-
Select an AUTO PLAY CHORD mode (ONE FINGER, FINGERED or PIANIST).
-
After a few seconds, the display returns to the previous display.
- If the ONE FINGER or FINGERED mode was selected, the keyboard automatically splits into right and left sections.
■ MEMORY
When the MEMORY button is ON, even when the keys are released, the chord is memorized and the accompaniment continues to play until you specify another chord.
■ ON BASS
If the ON BASS button is ON while the FINGERED or PIANIST mode is selected, the BASS part is produced in the key of the lowest note of the played chord, thus making it possible to play chords such as C on G.
- For example, with the ON BASS button on, if you play a C chord by pressing the keys G, C and E, the BASS part is produced in the key of G.
- Press the START/STOP button to begin the rhythm.
-
You can start the rhythm by playing a key on the keyboard. (Refer to page 51.)
-
Specify a chord.
- If the ONE FINGER or FINGERED mode was selected, specify the chord on the keyboard section to the left of the split point.
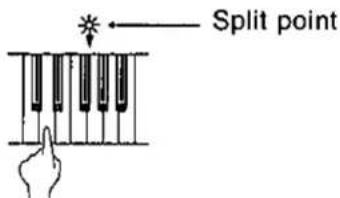
- An accompaniment pattern in the specified chord is automatically played. Play the melody with your right hand.
Example of how to play a ONE FINGER accompaniment
Play the melody with your right hand.
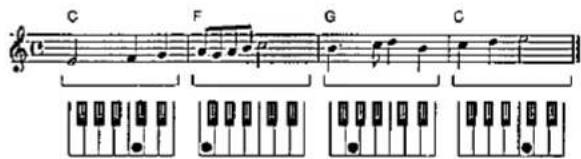
Left hand
- When you use FILL IN, INTRO and ENDING, the automatic accompaniment is also used in these patterns.
- In the ONE FINGER mode, the sound assigned to the left section of the keyboard (LEFT part) does not sound in the initialized condition.
-
You can set the mode which determines how the LEFT part sounds during an AUTO PLAY CHORD performance. (Refer to page 138.)
-
To stop the automatic accompaniment, press the START/STOP button.
- In the initialized condition, when the rhythm is off, if an AUTO PLAY CHORD mode is on and a chord is specified, the specified root note (R. BASS part) and chord notes (CHORD part) are produced. The volumes of these notes can be adjusted. (Refer to page 129.)
BREAK function
With the break function, the rhythm starts when the left keyboard is played and stops when the fingers are removed from the keys.
- Select an AUTO PLAY CHORD mode.
- At this time, the MEMORY button should be off.
- Press the SYNCHRO & BREAK button to turn it on.

- Specify a chord.
• The automatic accompaniment begins to play (synchronized start).
- For the PIANIST mode, play the keys to the left of the currently set split point.
- Release the chord keys.
• The automatic accompaniment stops. When the keys are pressed again, the rhythm starts from the first beat.
Fade In/Fade Out
natural_image
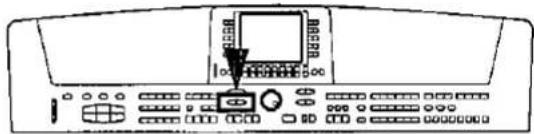
Front view of a computer interface with control buttons and a monitor (no text or symbols visible)Add interest to your performance by starting a part with a fade-in or ending it with a fade-out.
FADE IN
At the beginning of the song, the volume of each part rises slowly.
- Set up the panel settings for your performance.
- Turn on the FADE IN button.
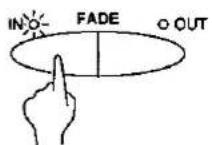
• The indicator flashes. In this condition, the volumes for all parts change to 0 and no sound is produced from this instrument until step 3 is executed.
3. Play the keyboard or press the START/STOP button.
• The volume slowly builds to its preset level.
- For the fade-in effect for a rhythm part or when playing back a SEQUENCER performance, turn on the 'FADE IN button before pressing the START/STOP button.
- At the end of the fade-in, the FADE IN indicator goes out.
- During the fade-in, FADE IN is shown on the normal display.
FADE OUT
At the end of the song, the volume of each part gradually fades to nothing.
- Start the performance.
- Turn on the FADE OUT button at the point you want the fade-out to start.
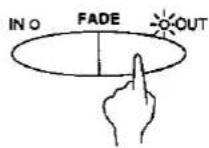
• The volumes of all the parts slowly fade to 0.
- The indicator flashes to show that fade-out is completed, and then goes out. The volumes for all parts return to their specified settings.
- If you wish to interrupt the fade-out, press the FADE OUT button to turn it off.
The volume balance buttons do not work while the FADE IN or FADE OUT indication is shown on the display.
FADE SET
Adjust the settings for the FADE IN and FADE OUT.
- Press and hold the FADE IN or FADE OUT button for a few seconds.
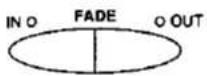
• The display looks similar to the following.

- Use the ▲ and ▼ buttons to select the item. Use the ∧ and ∨ buttons to change the setting.
FADE IN
Time:
Specify the time elapsed between 0 volume to the set volume (1 measure to 16 measure).
FADE OUT
Time:
Specify the time elapsed between the set volume and 0 volume (1 measure to 16 measure).
Auto Reset:
Specify whether the volume of each part automatically returns to its specified setting (ON, OFF).
Rhythm Auto stop:
Specify whether the rhythm turns off after fade-out is completed (ON, OFF).
SEQ Auto stop:
Specify whether the SEQUENCER playback automatically stops after fade-out is completed (ON, OFF).
- The display returns to the previous display a few seconds after you have changed the settings.
Sound Arranger

natural_image
Front view of a computer control panel with buttons and a central display (no visible text or symbols)The SOUND ARRANGER feature lets you select other sounds for the AUTO PLAY CHORD parts of each rhythm.
- Select the rhythm whose sound you wish to change.
- Do not select CUSTOM or a MEMORY of the COMPOSER.
- In the SOUND ARRANGER, press the SET button to turn it on.
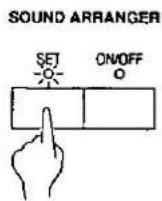
• The display looks similar to the following.

- Use the △ and ∇ buttons to select the part whose sound you wish to change.
- Select the desired sound.
- The DIGITAL EFFECT on/off status can also be specified (except for DRUMS part).
- For the DRUMS part, select sounds from the DRUM KITS group.
- Sounds from the DIGITAL DRAWBAR and DRUM KITS groups cannot be selected for the ACCOMP and BASS parts.
• The sound and on/off status of the DIGITAL EFFECT are shown on the display.
- Repeat steps 3 and 4 for the other parts as desired.
- When you have finished selecting the sounds, press the SET button to turn it off.
Playing back the sounds
- In the SOUND ARRANGER, press the ON/OFF button to turn it on.
SOUND ARRANGER

- Start the rhythm (automatic accompaniment).
- When the ON/OFF button is off, the factory-preset sounds are produced.
One Touch Play
natural_image
Front view of a control panel with buttons and a central touchscreen display (no text or symbols visible)ONE TOUCH PLAY automatically sets a suggested combination of sounds and an appropriate tempo for your chosen rhythm style.
- Select a rhythm pattern.
- Do not select CUSTOM or a MEMORY of the COMPOSER.
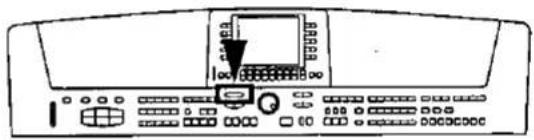
- Press the ONE TOUCH PLAY (MUSIC STYLIST) button until its indicator goes out.

- During setting, the style name is shown on the display.
-
The AUTO PLAY CHORD and the SYNCHRO & BREAK are automatically turned on, and the sounds and effects, volume balances, tempo etc. that are ideal for your selected rhythm are automatically set.
-
Play the keyboard.
- When you specify a chord, the automatic rhythm begins to play immediately.
Music Stylist

natural_image
Front view of a computer control panel with buttons and display (no visible text or symbols)MUSIC STYLIST sets up your instrument with a suitable registration for a specific style of music or tune.
Setup by music style
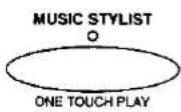
- Press the MUSIC STYLIST (ONE TOUCH PLAY) button to turn it on.
• The display looks similar to the following.
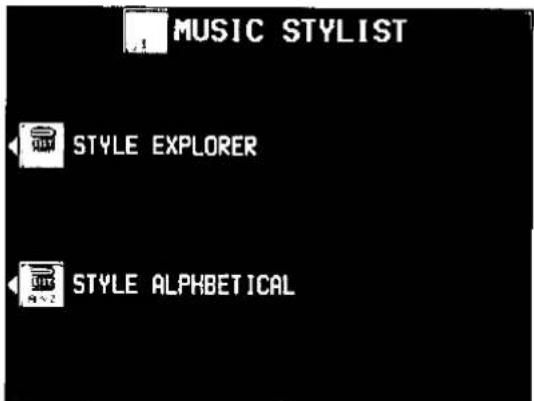
- Select STYLE EXPLORER.
• The display looks similar to the following.
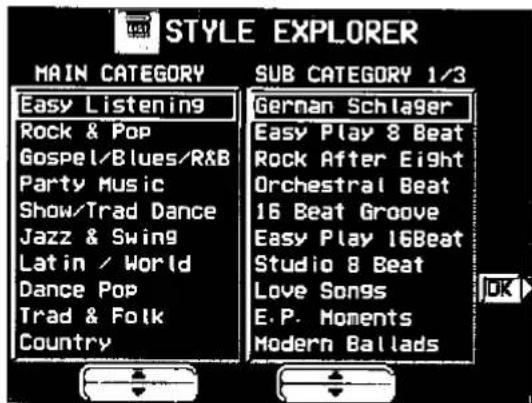
-
Use the MAIN CATEGORY △ and ▼ buttons to select a category. Use the SUB CATEGORY △ and ▼ buttons to select a subcategory.
-
Press the OK button.
• The display looks similar to the following.
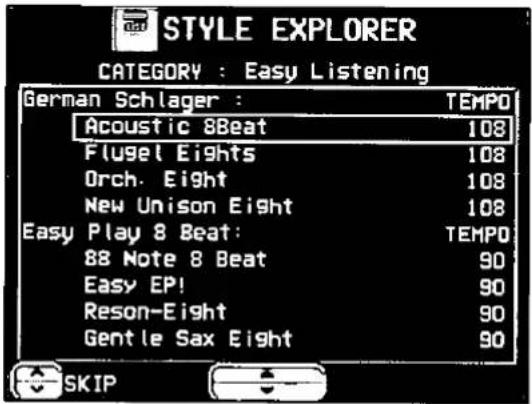
- Use the ▲ and ▼ buttons to select a music style.
• Each subcategory is divided into styles.
- During the search, you can use the SKIP ∧ and ∨ buttons to skip to the previous or following subcategory.
• The AUTO PLAY CHORD and the SYNCHRO & BREAK turn on, and the sounds, effects, volume balances, rhythm and tempo etc. which are best suited for the selected music style are automatically selected.
- Play the keyboard.
- When you specify a chord, the automatic rhythm begins to play immediately.
Setup by alphabetical order
You can use alphabetical or numerical search to select a style name.
- Press the MUSIC STYLIST button to turn it on.
• The display looks similar to the following.

- Select STYLE ALPHABETICAL.

-
Use the ▲ and ▼ buttons to select a tune.
-
You can use the SKIP ∧ and ∨ buttons to skip to the previous or following alphabetical or numerical heading.
-
The AUTO PLAY CHORD and the SYNCHRO & BREAK turn on, and the sounds, effects, volume balances, rhythm and tempo etc. which are best suited for the selected song are automatically selected.
-
Play the keyboard.
- When you specify a chord, the automatic rhythm begins to play immediately.
After deciding on a style with the MUSIC STYLIST, if you record the settings in the PANEL MEMORY, the same style name is copied to the PANEL MEMORY (up to 16 characters). When you recall the PANEL MEMORY settings, this style name is shown at the top of the normal display. (Refer to page 63.)
Music Style Arranger

natural_image
Front view of a control panel with buttons and display (no visible text or symbols)The MUSIC STYLE ARRANGER helps you to make professional registration changes during your performance. Select between four contrasting registrations at the push of a button, or let your instrument change the registration automatically for you when you use FILL IN 1 or 2. The MUSIC STYLE ARRANGER will also alter the accompaniment in character with the registration change creating a polished sounding arrangement.
How to use the MUSIC STYLE ARRANGER
- Select a rhythm pattern.
- Do not select CUSTOM or a MEMORY of the COMPOSER.
- Press the MUSIC STYLE ARRANGER button to turn it on.
- Use the VARIATION & MSA buttons to select a style (1 to 4).

flowchart
graph TD
    A["MUSIC STYLE ARRANGER"] --> B["Square"]
    B --> C["O1"]
    B --> D["O2"]
    B --> E["O3"]
    B --> F["O4"]
    style A fill:#f9f,stroke:#333
    style B fill:#ccf,stroke:#333
    style C fill:#cfc,stroke:#333
    style D fill:#cfc,stroke:#333
    style E fill:#cfc,stroke:#333
    style F fill:#cfc,stroke:#333
• The nuance of the pattern differs with each number.
- The panel settings (including the tempo) change according to the selected rhythm and music style. The AUTO PLAY CHORD, the MEMORY button and the SYNCHRO & BREAK button are automatically turned on. When a key on the left section of the keyboard is pressed, the automatic rhythm begins to play immediately.
- During your performance, the style can be changed, but the tempo does not change.
How to change the music style during your performance
While you are playing the keyboard with the MUSIC STYLE ARRANGER on, press the FILL IN 1 or FILL IN 2 button.

• Each time the FILL IN 1 button is pressed, the FILL IN 1 pattern plays, and then the music style changes in the 4 → 3 → 2 → 1 order. And each time the FILL IN 2 button is pressed, the FILL IN 2 pattern plays, and then the style changes in the 1 → 2 → 3 → 4 order.
■ MUSIC STYLE ARRANGER mode
You can define which panel settings change by pressing a FILL IN button when the MUSIC STYLE ARRANGER is used.
- Press and hold the MUSIC STYLE ARRANGER button for a few seconds.
• The display changes to the following.
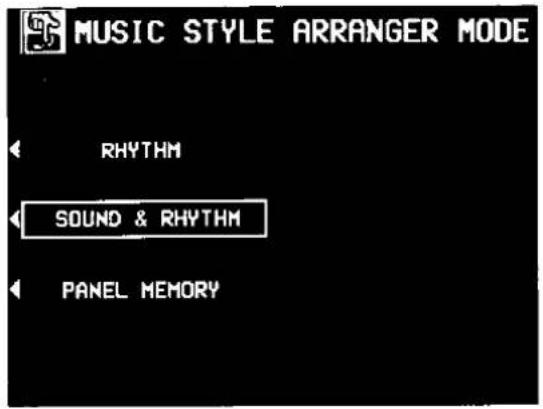
- Select the mode.
RHYTHM:
Only the rhythm changes.
SOUND & RHYTHM:
The sound, effects, rhythms, etc. change.
PANEL MEMORY:
The PANEL MEMORY number (BANK1: 1 to 4) changes.
- After a few seconds, the display exits the setting mode.
- You can also access this setting display from the CONTROL MENU display. (Refer to page 159.)
Panel Memory

natural_image
Front view of a control panel with buttons and a monitor (no visible text or symbols)PANEL MEMORY stores all the current panel settings so you can recall them at the push of a button.
How to store the panel settings
Store up to 80 panel settings (10 banks x 8 memories). By storing all the panel settings you use for a song in the same bank, for example, you can switch from one panel setup to the next in a flash.
-
Set up the desired panel settings (sounds, volumes, etc.)
-
Press the BANK VIEW button to turn it on.

• The list of banks is shown on the display.
-
Select the desired bank.
-
With the SET button held down, press one of the numbered buttons of the PANEL MEMORY (1 to 8).

- The panel settings are now stored in the specified bank and number.
BANK VIEW
After selecting a bank, you can use the PAGE buttons to go to the PAGE2 BANK VIEW page and confirm the memory names of that bank's 8 memories.

- You can use the BANK ∧ and ∨ buttons to view other banks.
- You can also access this display by pressing and holding any of the PANEL MEMORY number buttons (1 to 8) for a few seconds.
Assign a name to the bank/memory
You can assign names to the banks and memories.
- Select a bank or memory.
- Use the PAGE buttons to go to the PAGE2/2 BANK VIEW page on the display.

- Press the BANK NAMING button to assign a name to the bank, or the MEMORY NAMING button for the memory.
• The display looks similar to the following.

4 Assign a name
- Use the POSITION buttons to highlight the character position in the name box. Use the ◀, ▲, ▼, ▶ buttons to select the alphanumeric character. Repeat these steps to type the whole name
- Press the ABC button to switch to the screen for upper case (capital) letters, or the abc button to switch to the screen for lower case letters
- Use the 1#\$ button to switch to the symbols character set
- Use the INS button to type a space
- Use the DEL button to erase a character
• To erase all the characters, press the CLR button -
You can press the →← button if you wish to have the name centered
-
When you have finished assigning the name, press the OK button
Recall the panel setup
1 Press the BANK VIEW button to turn it on Select a bank
2 Press the desired PANEL MEMORY number button (1 to 8)
- The panel setup changes to the one stored in the specified memory
- You can then change the sound settings, etc manually, however, the contents of the memory remain unchanged until you store them again
- The "Control Preset 1" bank of the MANUAL SEQUENCE PADS or the Foot Switch (sold separately) can also be used to change from one PANEL MEMORY setup to another (Refer to pages 46, 161)
- The currently selected bank, memory number and memory name are shown in the top line on the normal display

■ NEXT BANK
You can press the NEXT BANK button to switch to the next bank. This allows you to change banks without exiting the normal display
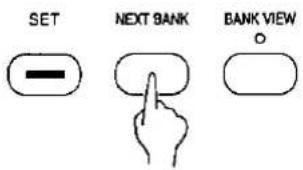
- Each time the NEXT BANK button is pressed, the bank number is incremented by 1. After bank 10, the bank number changes to 1
- The panel settings change when a PANEL MEMORY number button (1 to 8) is pressed
PANEL MEMORY mode
You can define which panel settings are recalled when the PANEL MEMORY is used
1 Press and hold the SET button for a few seconds
• The display changes to the following

2 Select the mode
NORMAL
The sounds and volume balance, and CONDUCTOR status are stored
EXPAND
All the instrument's settings are stored, including the rhythm (except for SOUND ARRANGER on/off status), TRANSPOSE, tempo, etc
• After a few seconds, the display exits the setting mode
☐ EXPAND MODE FILTER
You can specify which data is stored in the EXPAND mode
1 Use the PAGE buttons to access the PAGE 2/3-3/3 EXPAND MODE FILTER display
• The display looks similar to the following
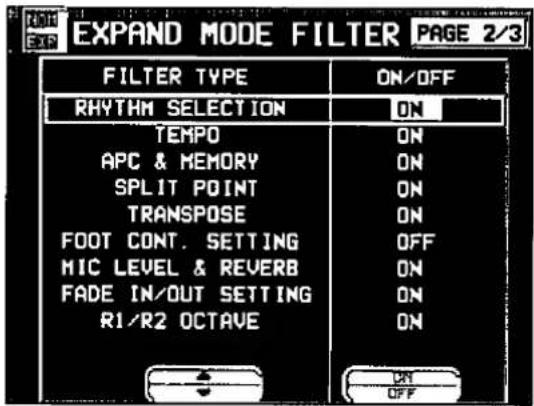
2 Use the △ and ▼ buttons to select the item
3 Use the ON and OFF buttons to store the on or off status for the selected item
Outline of the Sequencer

natural_image
Front panel of a control panel with buttons and display (no readable text or symbols)A sequencer records your performance in a similar way to a tape recorder. This istrument's SEQUENCER allows you to record up to 10 performances in a variety of ways. You may want to record your entire performance in one go (especially if you are using AUTO PLAY CHORD to provide the accompaniment), or to build up a complex arrangement with several different parts playing together, like an orchestral score. This istrument's SEQUENCER has 16 tracks. This means that you can record 16 different parts. However, you don't have to use all 16 tracks. For some uses you may only need to use one or two tracks. This istrument's SEQUENCER enables you to edit your recorded performance. Unlike a tape recorder you can change the sound or the tempo during playback, or correct wrong notes or timing errors.
SEQUENCER features
■ You can change the tempo without changing the pitch
When you record your performance at a slow tempo and play it back at a faster tempo, the pitch stays the same.
■ Consistent sound
Your performance is reproduced by a sound module as it reads digital data. So, unlike a recorded tape, the sound never deteriorates no matter how many times you play back your performance.
■ Edit your recorded performance
Comprehensive editing functions allow you to modify your recorded performance. Data can easily be erased, corrected or copied, providing an especially convenient tool for creating your original tunes.
■ Instant search
A recorded tape has to be rewound, but digital action means you can return to the beginning of your performance, or find any measure, instantly.
■ Save your performances on disks
All the data of your recorded performances can be stored on disks. The built-in Disk Drive also allows you to play commercially sold disks on your own Keyboard.
- Features and operation of the built-in Disk Drive are explained in Part VI: Disk Drive (page 111).
Popular features
■ Simplified recording method
EASY RECORD is a feature that allows you to bypass the more complex recording procedures so you can record and play back your performance quickly and easily.
- You can also record an accompaniment from the AUTO PLAY CHORD.
■ Create a one-man ensemble
Use the REALTIME RECORD function to record your performance in up to 16 tracks and create your own orchestra or band.
■ Store individual data to create your song
For repeating patterns or those especially complicated phrases, the STEP RECORD feature is convenient for recording the notes one-by-one.
- This method can be used to store both the chord progression for the automatic accompaniment and the rhythm changes.
Memory capacity
Up to 10 songs can be stored in the SEQUENCER. Expressed in terms of notes, the total number of notes which can be stored in all the SEQUENCER songs and tracks is about 40,000. The remaining memory available for recording is shown on the display as a percentage (MEMORY= %).
- When "Memory full!" appears on the display, no more data can be stored in the SEQUENCER.
- The recorded contents can be saved on a disk for recall at a later time. (Refer to page 120.)
About the measure count
The measure count on the display corresponds to the time signature of the selected rhythm. However, if rhythm data is stored in the RHYTHM part and that part is played back, the measure count on the display corresponds to the stored rhythm data. (Refer to page 84.)
- If you wish to use a time signature not available in the preset rhythms, use the COMPOSER to create a new time signature. (Refer to page 99.)
SEQUENCER menu
When you press the MENU button in the SE-QUENCER section, a variety of functions are available to you

flowchart
graph TD
    A["SEQUENCER"] --> B["PLAY"]
    A --> C["EASY REC"]
    A --> D["MENU"]
    B --> E["CREATE"]
    C --> E
    D --> E
    E --> F["REALTIME RECORD"]
    E --> G["SONG SELECT /NAMING"]
    E --> H["PUNCH RECORD"]
    E --> I["SONG CLEAR"]
    E --> J["STEP RECORD"]
    E --> K["SONG/TRACK COPY"]
    E --> L["TRACK ASSIGN"]
    E --> M["AFTER TOUCH SET"]
    E --> N["PANEL WRITE"]
    F --> O["EDIT"]
    G --> O
    H --> O
    I --> O
    J --> O
    K --> O
    L --> O
    M --> O
    O --> P["PAGE 1/2"]
    P --> Q["NOTE EDIT"]
    P --> R["QUANTIZE"]
    P --> S["DRUM EDIT"]
    P --> T["TRANSPOSE"]
    P --> U["SONG/TRACK COPY"]
    P --> V["VELOCITY CHANGE"]
    P --> W["TRACK CLEAR"]
    P --> X["NOTE CHANGE"]
    P --> Y["TRACK MERGE"]
    P --> Z["ADVANCE/DELAY"]
    Q --> AA["EDIT"]
    R --> AA
    S --> AA
    T --> AA
    U --> AA
    V --> AA
    W --> AA
    X --> AA
    Y --> AA
    Z --> AA
    AA --> AB["PAGE 2/2"]
    AB --> AC["COPY"]
    AB --> AD["ERASE"]
    AB --> AE["DELETE"]
    AB --> AF["INSERT"]
Summary of the SEQUENCER menu items
CREATE
These functions are recording operations used for creating a new performance
REALTIME RECORD (page 72)
Record each part of your performance just as you play it on the keyboard
PUNCH RECORD (page 78)
Correct a selected portion of your recorded performance
STEP RECORD (page 80)
Store the sounds note-by-note on the display
- You can also store the chord or rhythm progression for the AUTO PLAY CHORD
TRACK ASSIGN (page 86)
Assign parts to tracks
PANEL WRITE (page 87)
Record the panel settings, such as the sounds and volume balance, etc., at the beginning of the song
SONG SELECT/NAMING (page 77)
Specify the name of the song to record or play back
SONG CLEAR (page 88)
Erase all the recorded data of a song
SONG/TRACK COPY (page 88)
Copy data of specific songs or tracks
AFTER TOUCH SET (page 89)
Specify whether or not keyboard after touch is recorded as data
EDIT
Use these functions to edit the recorded data
NOTE EDIT (page 90)
Store and correct performance (NOTE) data on a piano roll display
DRUM EDIT (page 91)
Store and correct DRUMS part data on a special display
SONG/TRACK COPY (page 88)
Copy data of specific songs or tracks
TRACK CLEAR (page 94)
Erase the contents of a specific track
TRACK MERGE (page 95)
Merge the recorded contents of two tracks and store in a third track
QUANTIZE (page 92)
Correct the timing of your performance
TRANSPOSE (page 93)
Change the key of the performance data
VELOCITY CHANGE (page 94)
Modify the recorded velocity (how hard the keyboard was played) of performance data
NOTE CHANGE (page 95)
Change the pitch of specific notes
ADVANCE/DELAY (page 96)
Speed up or delay the sound production of performance data
MEASURE COPY (page 96)
Copy the contents of specific measures
MEASURE ERASE (page 97)
Erase the contents of specific measures
MEASURE DÉLETÉ (page 97)
Delete specific measures from the performance
MEASURE INSERT (page 98)
Insert additional measures in the performance
Sequencer parts
The following summary explains what is stored in each SEQUENCER part.
| Part name[name on display] | Used for | Recorded contents |
| RIGHT1 [RT1]RIGHT2 [RT2]LEFT [LFT]PART4 [P 4]:PART15 [P15] | Recording the performance of each part (REALTIME/STEP) | Sound and volume settingsDIGITAL EFFECT, DSP EFFECT, SUSTAIN on/offPITCH BEND wheel operationMODULATION wheel operationAFTER TOUCH (REALTIME only) (Refer to page 89.) |
| DRUMS [DRM](PART16) | Recording the drums performance with the DRUM KITS group sounds (REALTIME/STEP) | Sound (drum KIT) and volume settings |
| CONTROL [CTL] | Recording changes in the panel button status (REALTIME/STEP) | Rhythm setting and selection changesDIGITAL REVERB on/offAUTO PLAY CHORD statusMUSIC STYLE ARRANGER statusFILL IN 1, 2, INTRO & ENDING 1, 2 onSPLIT statusPANEL MEMORY selection changesTRANSPOSE statusSTART/STOP on/offTEMPO settingCONDUCTOR statusMANUAL SEQUENCE PADS operationFADE IN/OUT operationExpression pedal operation (separately sold option) |
| AUTO PLAY CHORD [APC] | Recording chords for the AUTO PLAY CHORD (REALTIME) | AUTO PLAY CHORD statusSTART/STOP on/offFILL IN 1, 2, INTRO & ENDING 1, 2 on |
| CHORD [CHD] | Recording chord progression for the AUTO PLAY CHORD (STEP) | Chord progressionFILL IN 1, 2, INTRO & ENDING 1, 2 on |
| RHYTHM [RHY] | Settings related to rhythm (STEP) | Rhythm settings and selection changesFILL IN 1, 2, INTRO & ENDING 1, 2 onSTART/STOP on/offTEMPO setting |
- You can use the TRACK ASSIGN function to assign parts to tracks as you wish. (Refer to page 86.)
Default part settings
1: RIGHT1
5: CONTROL
9: PART5
13: PART9
2: RIGHT2
6: RHYTHM
10: PART6
14: PART10
3: LEFT
7: DRUMS
11: PART7
15: PART11
4: APC/CHORD
8: PART4
12: PART8
16: PART12
Easy Record
Suppose you are playing the Keyboard and you wish to record and play back your performance to hear how it sounds. You can bypass the set-up procedures of the full-scale sequencer and begin recording quickly and easily.
Recording procedure
-
Set the desired sounds, effects, rhythms, etc.
-
Press the EASY REC button to turn it on.
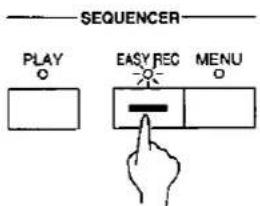
• The display changes to the following.

- Use the SONG ∧ and ∨ buttons to select the song number in which to record (1 to 10).
- If you press the NAMING button, you can assign a name to your song. (Refer to page 77.)
Here is what happens when you select the EASY RECORD mode.
- The recorded data for the currently selected SONG number is erased (SONG CLEAR).
- Tracks available for recording are selected as follows.
1: RIGHT 1 part
2: RIGHT 2 part
3: LEFT part
4: APC part
5: CONTROL part
-
Press the OK button.
-
The display changes to the REALTIME RECORD display.
- Play the keyboard.
- Recording begins as soon as you start the rhythm or play the keyboard.
- When you have finished recording, press the EASY REC button to turn it off.
• The PLAY button turns on. - EASY REC cannot be used when GENERAL MIDI is ON. (Refer to page 173.)
Playback
- Press the SEQUENCER RESET (FILL IN 1) button.

-
Press the START/STOP button.
-
Your recorded performance is played back automatically.
- When you are finished playing back your performance, press the SEQUENCER PLAY button to turn it off.
Realtime Record
With REALTIME RECORD, your performance is recorded with the timing exactly as you played it on the keyboard. Use this mode to record your performance in up to 16 tracks and create your own orchestra or band.
Recording procedure
- In the SEQUENCER section, press the MENU button.
• The display looks similar to the following.
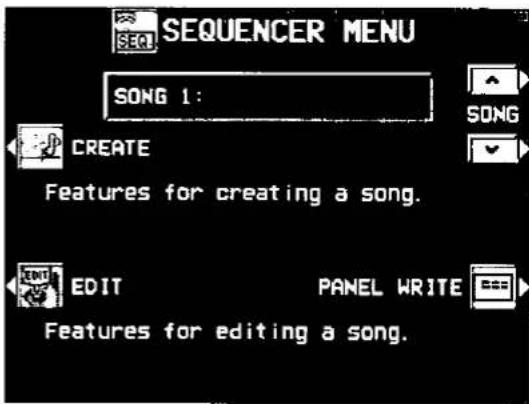
- When you press the PANEL WRITE button, the PANEL WRITE display appears. To store the currently active settings, such as the sounds, at the beginning of the song, press the OK button.
- Use the SONG ∧ and ∨ buttons to select a song number in which to record. (The song number is shown on the display.)
- Select CREATE.
• The display looks similar to the following.

- Select REALTIME RECORD.
• The display looks similar to the following.

-
Use the buttons below the display to turn on the "REC" indication above the track numbers you are going to record.
-
Use the upper buttons to select tracks 1 to 8, and the lower buttons to select tracks 9 to 16.
- While you are recording, you can play back tracks which are already recorded. Press the corresponding balance buttons to display "PLAY" above the track number you wish to have played back.
- You can select two or more tracks to record at one time; however, to monitor a performance part, the corresponding button in the CONDUCTOR (RIGHT 1, RIGHT 2, LEFT) must also be on.
• To record AUTO PLAY CHORD (APC) parts, turn on the AUTO PLAY CHORD button. In this case, press the START/STOP button when beginning recording. -
The track for the RHYTHM (RHY) part can be selected for recording only when STEP RECORD is active.
-
Set the sounds, effects, volumes, etc. for the parts you are going to record.
-
If you press the MIXER button, you can use the MIXER display to visually adjust the settings for each track.
- The LOCAL ON/OFF setting on the MIXER display is used to specify whether the part assigned to that track sounds when it is played on the keyboard during recording. For the LOCAL ON/OFF during playback, use the TRACK ASSIGN display to adjust the settings. (Refer to page 86.)
- The panel settings which are active at the beginning of recording are stored.
- Use the TEMPO/PROGRAM dial to adjust the recording tempo.
• The tempo is shown on the display as !=.
- If you wish to record the tempo setting and tempo changes, store them in the control (CTL) part, or use the step record to store them in the rhythm (RHY) part.
- Turn the metronome on or off as desired with the ON/OFF button.
- The metronome selection alternates between ON and OFF each time the button is pressed.
• The metronome sound is not recorded.
- Play the keyboard.
- Recording begins.
- You can also press the START/STOP button to start the rhythm and begin recording.
- If the metronome is on, when you press the START/STOP button, a two-measure count plays, after which recording automatically begins. In this case, the rhythm does not start. Recording does not start until the two-measure count is completed.
- The recording status is continuously updated on the display:
MEASURE= indicates the current measure.
TIME SIG.= indicates the current time signature.
MEMORY= indicates the remaining memory (%) available for recording.
- If you wish to redo the recording, press the REC STOP button and then record again. To change the sounds and effects, etc. please set them again.
- If you make a mistake in recording, you can correct a specific portion of your performance without having to redo the whole part. (Refer to page 78.)
- When you have finished recording, turn off the MENU button in the SEQUENCER section.
- When the MENU button is turned off, the ending command (END) is recorded. Note that, as long as the ending command is not recorded, blank recording continues even if you stop playing.
• The SEQUENCER PLAY button turns on.
■ Multi-track recording
Use the following procedure to record one track while listening to the track or tracks already recorded.
- Follow the procedure to record the first track, and press the REC STOP button at the end of the recording.
- The indication for the track just recorded changes from "REC" to "PLAY".
-
Turn on the "REC" indication for the track you wish to record next, and select the sounds and effects, etc.
-
Press the START/STOP button and begin recording.
- You can also begin recording by playing the keyboard.
- Tracks for which "PLAY" is shown are played back, and you can record in time with this.
-
Press the REC STOP button at the end of the recording.
-
Repeat steps 2 to 4 for other tracks, as desired.
-
When multi-track recording is finished, turn off the MENU button in the SEQUENCER section.
- If you wish to store part settings that you modified after recording as beginning song data, press the MIXER button and follow the PANEL WRITE procedure. (Refer to page 87.)
CYCLE RECORD
This mode allows you to have specified recording measures continuously repeated. Thus you can record measures by adding notes during any cycle.
-
On the REALTIME RECORD display, specify "REC" for track numbers you are going to record, and "PLAY" for track numbers you wish to have played back.
-
Press the CYCLE: OFF button.
• The display looks similar to the following.

-
Select CYCLE START MEASURE, and use the VALUE^ and v buttons to specify the beginning measure number.
-
Select CYCLE END MEASURE, and use the VALUE ∧ and ∨ buttons to specify the ending measure number.
- The measure in which the END command has been stored can also be specified.

- Press the START/STOP button.
- If the metronome is on, cycle recording of the specified measures begins after a two-measure count.
-
Play the keyboard.
-
The specified measures are repeated, during which time you can record by adding notes little by little at the correct timing (over-dubbing).
- If you wish to erase all the performance data from the specified measures, press the CLEAR button.
- If CYCLE is selected and the v button used to select OFF, cycle recording is not activated. This button does not work during recording.
• To return to the REALTIME RECORD display, press the EXIT button. -
Cycle record can also be started from the REALTIME RECORD display whenever the CYCLE: ON indication is shown.
-
When you have finished recording, turn off the SEQUENCER MENU button.
Sequencer Play
Play back your recorded performance.
- Press the SEQUENCER PLAY button to turn it on.
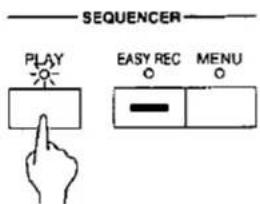
• The display looks similar to the following.

-
Use the SONG buttons to select the song number you wish to play back.
-
Use the balance buttons below the display to show "PLAY" above the track numbers you wish to have played back.
- Use the upper buttons to select tracks 1 to 8, and the lower buttons to select tracks 9 to 16.
- You can select two or more tracks to play back at one time.
- Use the TEMPO/PROGRAM dial to adjust the playback tempo.
- The tempo is shown on the display as "♩ =".
- Press the SEQUENCER RESET (FILL IN 1) button.
- The SEQUENCER returns to the beginning of the song and the beginning panel settings are recalled.
- To begin playback from a measure other than measure 1, use the MEAS ∧ and ∨ buttons to specify the beginning measure.
- "MEASURE=" indicates the current measure number.
- Press the START/STOP button.
- The recorded performance is played back from the specified measure.
- When playback is begun from a measure in which an INTRO, COUNT INTRO, FILL IN or ENDING is recorded, the corresponding function does not work.
- You can press the MIXER button and modify the settings for each part.
- To stop playback, press the START/STOP button.
- If the START/STOP button is pressed again, playback will continue from the point it was interrupted.
- When you are finished playing back your performance, press the SEQUENCER PLAY button to turn it off.
If "PLAY" is specified for the track to which the RHYTHM (RHY) part is assigned, the MEASURE display used in the STEP RECORD and EDIT displays is shown conforming to the time signature data stored in the RHYTHM part.
CYCLE PLAY
You can have specified measures played back repeatedly.
-
On the SEQUENCER PLAY display, specify "PLAY" for track numbers you wish to have played back.
-
Press the CYCLE button.
• The display looks similar to the following.

-
Select CYCLE START MEASURE, and use the VALUE ∧ and ∨ buttons to specify the beginning measure number.
-
Select CYCLE END MEASURE, and use the VALUE ∧ and ∨ buttons to specify the ending measure number.
• The measure in which the END command has been stored can also be specified.

- Press the START/STOP button.
• Cycle playback of the specified measures begins.
• The rhythm pattern is not played back.
- To stop cycle playback, press the START/STOP button again.
- During playback stop, if the SEQUENCER RESET (FILL IN 1) button is pressed, the SEQUENCER returns to the measure number specified in step 3. If the SEQUENCER RESET button is pressed again, the SEQUENCER returns to measure 1.
- If CYCLE is selected and the v button is pressed to select-OFF, cycle playback is not activated.
• To return to the SEQUENCER PLAY display, press the EXIT button.
- Cycle playback can also be specified on the SEQUENCER PLAY display whenever the CYCLE: ON indication is shown.
MEDLEY
Multiple recorded songs can be played back in a medley.
- On the SEQUENCER PLAY display, press the MEDLEY button.
• The display looks similar to the following.
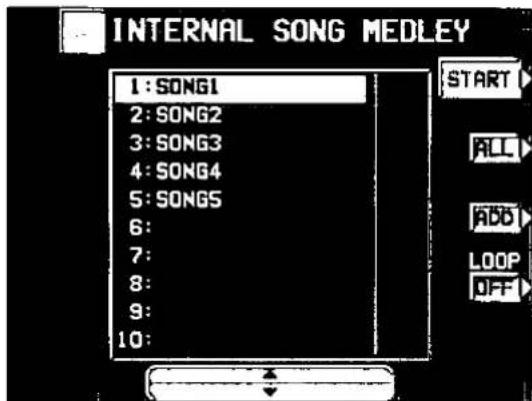
- Specify the order of songs in the medley.
- If ALL is pressed, all the files are selected, and the songs are played back in order in a medley. If ALL is pressed again, the files are deselected.
- You can use the and buttons to select a song to add to the song list, then press the ADD button to add it to the list. Repeat these steps to create your own list of songs to have played back. A M01, M02 etc. next to the file name indicates its order in the list.
- You can delete a marked file from the medley song list by selecting it and pressing the ADD button.
• Use the LOOP button to specify ON or OFF for repeat playback of the medley.
- Press the START button.
- During medley playback, you can use the SKIP button to skip to the next song.
Song Select/Naming
Here is the way to assign a name to your recorded song.
-
On the SEQUENCER MENU display, select CREATE.
-
On the CREATE menu display, select SONG SELECT/NAMING.
• The display looks similar to the following.
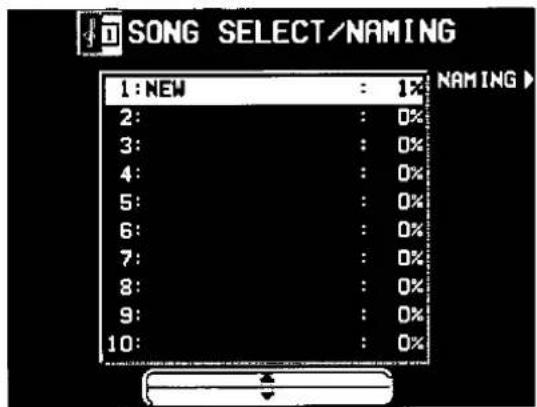
- Use the ▲ and ▼ buttons to select the number of the song you wish to name.
- The total amount of memory used for the current song is shown as a percentage (%) to the right of the song name.
- Press the NAMING button.
• The display looks similar to the following.
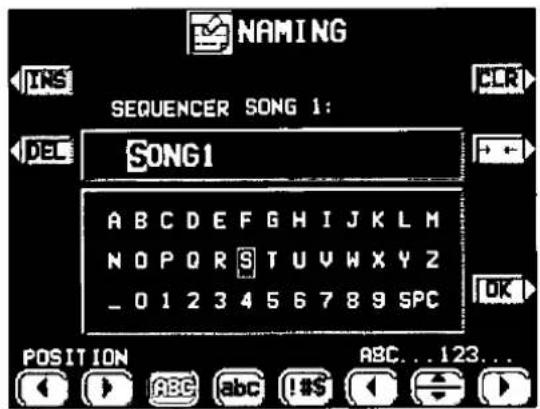
-
Assign a name to the song.
-
Use the POSITION buttons to highlight the character position in the name box. Use the ◀, ▲, ▼, ▶ butons to select the alphanumeric character. Repeat these steps to type the whole name.
- Press the ABC button to switch to the screen for upper case (capital) letters, or the abc button to switch to the screen for lower case letters.
- Use the !#\$ button to switch to the symbols character set.
- Use the INS button to type a space.
- Use the DEL button to erase a character.
- To erase all the characters, press the CLR button.
-
You can press the button if you wish to have the name centered.
-
Press the OK button.
-
Follow the procedures to record the song.
-
To optimize memory, songs you do not wish to preserve should be deleted. (Refer to page 88.)
- If you wish to record the tempo for each song, record the desired tempo at the beginning of the CONTROL part. When you play back the song, be sure to also select the CONTROL part for playback.
Punch Record
If you make a playing error during REALTIME RECORD or would like to change the recording for some other reason, you can use the punch recording feature to correct a selected portion of the performance without having to redo the whole part.

flowchart
graph TD
    A["Recording the performance"] --> B["Playing error"]
    B --> C["Punch in"]
    C --> D["Playback"]
    D --> E["Recording mode"]
    E --> F["Punch out"]
    style A fill:#f9f,stroke:#333
    style B fill:#ccf,stroke:#333
    style C fill:#cfc,stroke:#333
    style D fill:#fcc,stroke:#333
    style E fill:#cff,stroke:#333
    style F fill:#ffc,stroke:#333
- On the SEQUENCER MENU display, use the SONG ∧ and ∨ buttons to select the song number. Then select CREATE.
- On the CREATE menu display, select PUNCH RECORD.
• The display looks similar to the following.

- Select the track which contains the portion you want to correct.
- On the display "REC" indicates tracks which are being recorded, and "PLAY" indicates tracks which are being played back.
- Use the MEAS ∧ and ∨ buttons to specify the beginning measure of playback.
- "MEASURE=" indicates the current measure number.
-
Press the START/STOP button to begin playback of the specified track.
-
During playback, press the PUNCH IN button at the point you want to begin recording.
-
Recording begins as soon as the PUNCH IN button is pressed. Begin playing at this point.
• The PUNCH IN button switches to the PUNCH OUT button. - Press the PUNCH OUT button at the point you want to stop recording.
• Recording stops immediately. -
When you have finished correcting the performance, press the SEQUENCER MENU button to turn it off.
-
You can also begin punch-in recording by playing the keyboard.
- You can specify the punch-in/punch-out points with the optional Foot Switch (sold separately). (Refer to page 161.)
■ AUTO PUNCH RECORD
You can also set the punch-in and punch-out points beforehand, so that recording automatically begins and ends at the specified points.
- On the SEQUENCER MENU display, select PUNCH RECORD. Specify the track you wish to correct.
- Press the AUTO PUNCH button.
• The display looks similar to the following.

- Select PUNCH IN MEASURE. Use the MEAS ∧ and ∨ buttons to specify the number of the punch-in measure.
-
Select PUNCH OUT MEASURE. Use the MEAS ∧ and ∨ buttons to specify the number of the punch-out measure.
-
The number of the punch-out measure must be higher than the number of the punch-in measure.
- The specified punch-out measure is not recorded.
- Select MEASURE COUNT IN. Use the MEAS ∧ and ∨ buttons to specify the number of lead-in measures you wish to have played back before the punch-in measure.
- Set the metronome to on or off with the ON or OFF button.
- Press the START/STOP button.
-
Playback begins from the measure indicated by CURRENT MEASURE on the display.
-
Correct the performance.
-
The mode changes automatically to the recording mode at the specified punch-in measure. Begin playing at this point. The mode automatically changes back to the playback mode at the specified punch-out measure.
- Punch-in recording also begins if the keyboard is played before the specified PUNCH IN MEASURE.
- When you have finished correcting the performance, press the SEQUENCER MENU button to turn it off.
Step Record
STEP RECORD is simply a method of making a tune by storing the sounds note-by-note on the display. Instead of playing the keyboard directly as in the REALTIME RECORD mode, you can take your time to input each single note. This is an especially effective method for storing complicated passages that are difficult to play or when the exact timing of a part is critical.
Recording procedure
Record the keyboard performance and panel changes.
-
On the SEQUENCER MENU display, use the SONG ∧ and ∨ buttons to select the song number. Then select CREATE.
-
On the CREATE menu display, select STEP RECORD.
- The display changes to the PART SELECT display.

-
Use the balance buttons below the display to specify the track for the part you are going to record (only one track can be selected at a time).
-
Use the upper buttons to select tracks 1 to 8, and the lower buttons to select tracks 9 to 16.
- The display changes to the STEP RECORD input display similar to the following.
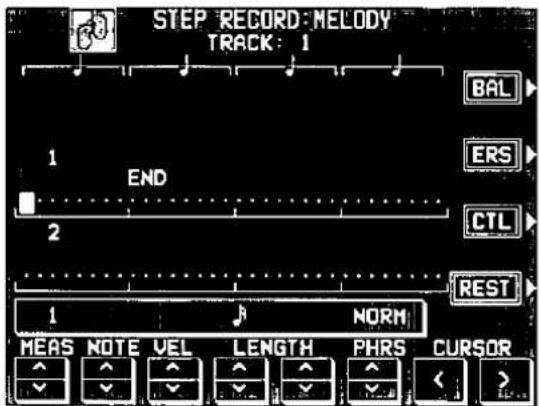
- If you selected the track to which the CHORD part has been assigned, the display changes to the STEP RECORD: CHORD display. (Refer to page 82.)
- If you selected the track to which the RHYTHM part has been assigned, the display changes to the STEP RECORD: RHYTHM display. (Refer to page 84.)
-
If you selected the track to which the CONTROL part has been assigned, the display changes to the STEP RECORD: CONTROL display.
-
Use the MEAS ∧ and ∨ buttons to select the measure.
- This step is not necessary if you are recording from measure 1 of a blank track.
- Use the CURSOR < and > buttons to move the cursor to the note position (dot) you are going to store.
• Each dot represents one-eighth of a quarter-note (a thirty-second note). - When storing triplets, it may not be possible to match the timing exactly with the 1/32-note steps. However, if you select triplet-type notes for the note length (LENGTH) in step 6 below, the timing is automatically corrected.
- Use the left LENGTH ∧ and ∨ buttons to specify the note value. Select from ⌘3, ⌘, ⌘3, ⌘, ⌘3, ⌘, ⌘3; ⌘, ⌘, ⌘, ⌘ × 2 to 4. (A 3 denotes a triplet-type note.)
- For note values other than these, use the right LENGTH buttons to specify the note value to be added to that which you specified with the left buttons.
Example: To record a dotted quarter-note (♪.) ♩ + ♩
- Use the PHRS ∧ and ∨ buttons to specify the actual length of the produced sound for the desired legato or staccato effect.
TENU (tenuto): Sound is produced for 95% of the note length.
NORM (normal): 80%
STAC (staccato): 50%
CUTT (cutting): 25%
-
Specify the pitch and velocity of the note by playing the keyboard.
-
The dot on the display where the note is stored changes to a * mark.
- When recording chords, you can store multiple notes at one position.
- Any panel setting changes—for example changes in the sound selection, button operation, wheel operation, etc.—are recorded at the cursor position.
- When a wheel or dial is operated, the input value is indicated on the display. Confirm that this is the correct value and press the YES button to record the value or the NO button to cancel it.
REST:
To store a rest, after specifying the note LENGTH, press the REST button.
- Positions at which nothing is stored are read as rests.
ERS:
If you make a mistake, move the cursor to the error, and after displaying the data you wish to erase, press the ERS button.
BAL:
To specify the volume at the cursor position, after pressing the BAL button, use the VALUE buttons to set the volume (0 to 127).
- Repeat steps 5 through 8 to continue storing notes.
- To input data on another track, press the button for the desired track and repeat the procedure from step 2.
- When you have finished recording, press the SEQUENCER MENU button to turn it off.
■ Storing control data
Various control data can be stored at the cursor position.
- On the STEP RECORD: MELODY display, press the CTL button.
• The display looks similar to the following.

- Use the CTL ∧ and ∨ buttons to select the control data you wish to insert.
- Select from PAN, KEY SHIFT (COARSE TUNE), TUNING (FINE TUNE), BEND SENS.
-
Use the VALUE ∧ and ∨ buttons to adjust the numerical value of the setting.
-
Press YES button.
□ Correcting the data
- In the STEP RECORD mode, specify the track you wish to correct.
- Use the MEAS buttons to go to the measure you wish to modify. Use the CURSOR buttons to move the cursor to the point (*) you wish to edit.
- The data stored at that point is shown on the display.
-
When multiple data is stored at one point, different data is displayed in order each time a CURSOR button is pressed. When a chord is recorded, a different note in the chord is displayed each time a CURSOR button is pressed.
-
Correct the data.
There are three types of data:
Performance data
NOTE data (note pitch) and VEL data (how hard the key was played), etc. are displayed. Use the relevant buttons to correct the data as desired.
Sound data
The name of the sound is displayed. Change the sound as desired (the sound setting display is interposed on the current display).
Control data
The name of the function is displayed. Change the data as desired.
- Press the ERS button to erase the data which is displayed.
- You can also correct data which was stored in the REALTIME RECORD mode.
• Performance (NOTE) data can be recorded or edited on a piano roll display, and there is also a specialized display for recording and editing the DRUMS part data. (Refer to page 90.)
Store a chord progression
Store the chord progression for the AUTO PLAY CHORD in the track for the CHORD part. Then, when the AUTO PLAY CHORD is used during playback, even if you do not specify the chords with your left hand, the chords change automatically.
• The chord length is specified with the CHORD STEP RECORD keys on the keyboard.

Note value keys

Reset key
I- Press to begin storing from the beginning.
Correction keys

Repeat key
Press to end the chord-storing procedure and to specify automatic repeat playback of the stored progression.
End key
—! Press after the whole chord progression has been stored.
DELETE key
DELETE Press to erase data.
- To erase all the data from the current track, while pressing the DELETE key, press the End key (---).
■ Example of storing a chord progression
| Measure 1 | 2 | 3 | 4 | ||
| C | C | F | G7 | C | Am |
| o | o | ♩ | ♩ | ♩ | ♩ |
-
On the SEQUENCER MENU display, use the SONG ∧ and ∨ buttons to select the song number. Then select CREATE.
-
On the CREATE menu display, select STEP RECORD.
- The display changes to the PART SELECT display.
- Using the balance buttons below the display, select the track to which the CHORD (CHD) part has been assigned.
- The display changes to the STEP RECORD: CHORD input display similar to the following.

4. Store the chords.
While playing a C chord with your left hand, press the o key one time with your right hand.
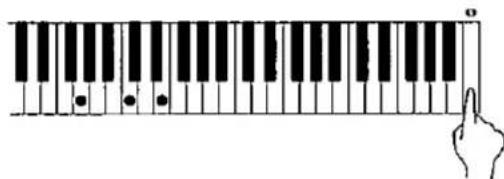
- A "beep" tone indicates that the chord has been successfully stored. - The dot on the display where the chord is stored changes to a * mark and the cursor automatically moves forward, in accordance with the specified note value, to the next unrecorded position. The chord name is shown on the display.
(1) While playing an F chord, press the key one time.
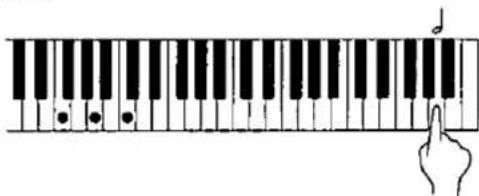
(2) While playing a G7 chord, press the key one time.
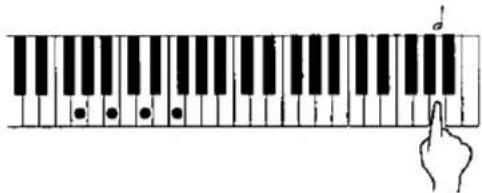
(1) While playing a C chord, press the key one time.
(2) While playing an Am chord, press the key one time.
- You can press the INTRO & ENDING button or a FILL IN button on the panel to store the desired pattern at the cursor position. (An INTRO or COUNT INTRO can be stored only at the beginning.)
- Store a rest by pressing a note value key without specifying a chord.
- At the end of the chord progression, press the End key (—).
• The Keyboard exits the recording mode.
- During playback, playback of the recorded chord progression stops at this point. For automatic repeat playback of the chord progression, press the Repeat key (→) instead of the End key (—).
- When you play back the track for the CHORD part, the chords of the automatic accompaniment change in accordance with the stored chord progression.
- Chords can also be specified in the ONE FINGER mode.
- If the ON BASS button is on, chords such as "C on G" can also be specified (except in the ONE FINGER mode).
■ Correct the recorded chord progression
-
Follow the procedure to select the STEP RECORD: CHORD display.
-
Use the MEAS buttons to go to the measure you wish to modify. Use the ◀ and ▶ Correction keys to move the cursor to the point (*) you wish to edit.

- The lengths of rests are indicated by the respective rest value x its multiplier.
Example:
‡ 1-beat rest (quarter rest)
7....1/2-beat rest (eighth rest)
× 1 + .... 1-1/2-beat rest (dotted quarter rest)
× 10.....10 -beat rest
- To go to the end of the chord progression, while pressing the Reset key (1½—), press the ◀ key.
- Correct the chord data.
Chord data
When the chord name is displayed at the cursor position, you can press the DELETE key to erase the data and then store a new chord.
- If you do not erase the displayed data before entering new chord data, the new data is inserted at this point, and the displayed data is merely shifted by the note value of the new chord.
- Rests can also be erased. Each time the DELETE key is pressed, the rest is erased in units of × 1 . The rest is erased last.
- If you wish to cancel the REPEAT, enter an END command.
Control data
The name of the stored function (INTRO, FILL, etc.) is displayed. You can press the DELETE key to erase the data which is displayed.
TRACK CLEAR
To erase all data from the current track, press the CLR button, and then press the YES button on the confirmation display.
- If you wish to cancel the clear procedure, press the NO button.
Store a rhythm progression
Changes in the rhythm selection and tempo, as well as the intro, fill-ins and the ending, can be stored by measures with the step recording method.
- On the SEQUENCER MENU display, use the SONG ∧ and ∨ buttons to select the song number. Then select CREATE.
- On the CREATE menu display, select STEP RECORD.
- The display changes to the PART SELECT display.
- Using the balance buttons below the display, select the track to which the RHYTHM (RHY) part has been assigned.
• The display changes to the STEP RECORD: RHYTHM input display similar to the following.

- Use the MEAS ∧ and ∨ buttons to go to the measure you wish to record.
- Store the rhythm data.
• Data which can be stored:
START/STOP
Changes in the rhythm selection COUNT INTRO, INTRO, FILL IN, ENDING
Tempo changes
- Be sure to store the START/STOP data in the measure in which the rhythm starts or stops.
- If you are storing a COUNT INTRO or INTRO, store this data before the START/STOP data.
-
If the tempo is changed, the display changes to the confirmation display. After specifying the desired tempo, Press the YES button to store the specified tempo, or press the NO button to cancel the new tempo value.
-
Repeat steps 4 and 5 to continue storing the rhythm progression.
- At the end of the rhythm progression, press the END button.
- If the REP button is pressed instead of the END button, during playback the recorded rhythm progression is repeated.
• The Keyboard exits the recording mode.
■ Correct the recorded rhythm progression
- Follow the procedure to select the STEP RECORD: RHYTHM display.
- Use the MEAS buttons to go to the measure you wish to modify. (The * is highlighted.)
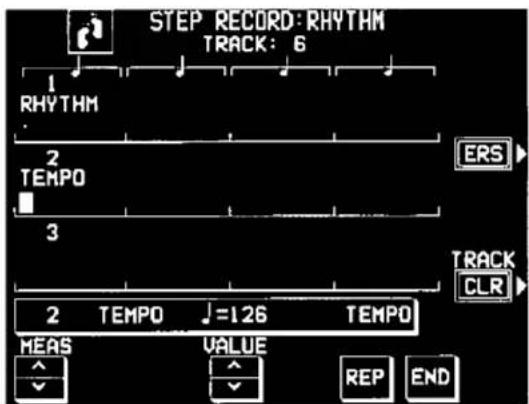
-
Correct the rhythm data.
-
Press the ERS button to erase data at the cursor position.
- If you wish to cancel the REPEAT, enter an END command.
- If you select a rhythm with a different time signature, the time signature of all subsequent measures will also change.
- if data has already been recorded in other tracks, you cannot select a rhythm with a different time signature.
■ TRACK CLEAR
To erase all data from the current track, press the CLR button, and then press the YES button on the confirmation display.
- If you wish to cancel the clear procedure, press the NO button.
Track Assign
Each SEQUENCER part is already assigned to a track number. However, you can use the TRACK ASSIGN function to assign parts to tracks as you wish.
-
On the SEQUENCER MENU display, use the SONG ∧ and ∨ buttons to select the song number. Then select CREATE.
-
On the CREATE menu display, select TRACK ASSIGN.
• The display looks similar to the following.

-
Use the TR △ and ▼ buttons to select the track.
-
Use the TRACK ASSIGN ∧ and ∨ buttons to select the part for the specified track.
- When a part other than the CONTROL, APC, CHORD or RHYTHM part is assigned, the track assign procedure is completed at this point.
- Either the CHORD part or APC part can be assigned to a track, but not both.
• The CONTROL, APC, CHORD and RHYTHM parts cannot be assigned to more than one track.
- You can use the ON and OFF buttons for LOCAL CONT. to specify whether or not the sound of the part assigned to this track is generated. Because no sound is generated for this instrument's parts assigned to tracks set to OFF through this procedure, use this setting to generate sound from an external sound source through the MIDI connectors.
- You can use the MIDI OUT ON and OFF buttons to specify whether or not the data of the part assigned to this track is sent as MIDI data. When set to OFF, the data is not sent, even if MIDI equipment is connected.
- When assigning the CONTROL, APC, CHORD or RHYTHM part, press the OK button.
- The confirmation display appears. Press the YES button to confirm that you wish to execute the specified track assignment. Or press NO to stop the track assignment.
■ TRACK ASSIGN PRESETS
A preset track assignment can be selected.
- On the TRACK ASSIGN display, press the PRESET button.
• The display looks similar to the following.

- Use the SONG ∧ and ∨ buttons to select the song number for which the preset track assignment will be effective.
- If ALL is selected, the track assignment is effective for all the songs.
- Select the track assign mode.
INITIAL: Factory-preset settings.
TECHNICS MULTI RECORDING: The optimum track assignment for multiplex recording.
GM MULTI RECORDING: The optimum track assignment for creating GENERAL MIDI data.
- Press the OK button.
- A confirmation display will appear when the arrangement of sounds changes, for example by switching to GM MULTI RECORDING. Press the YES button to confirm that you wish to execute the procedure, or press the NO button to cancel the procedure.
- "COMPLETED!" is shown on the display and the selected track assign mode is enabled.
- You can confirm the track assignment settings on the TRACK ASSIGN display.
Panel Write
You can change the panel status which is in effect at the beginning of the song. These are the settings which are recalled when the SEQUENCER RESET button is pressed.
-
Use the panel buttons to change to the desired panel settings.
-
On the SEQUENCER MENU display, use the SONG ∧ and ∨ buttons to select the song number. Then select CREATE.
-
On the CREATE menu display, select PANEL WRITE.
• The display looks similar to the following.

- Press the OK button.
- "COMPLETED!" is shown on the display.
- PANEL WRITE is automatically activated at the when you start to record, or when a panel setting is changed during recording stop.
- There is also a button on the SEQUENCER display that allows you to access this function.
- For rhythm data, the data in the RHYTHM part has priority.
Song Clear
Erase the recorded contents of all tracks.
-
On the SEQUENCER MENU display, select CREATE.
-
On the CREATE menu display, select SONG CLEAR.
• The display looks similar to the following.
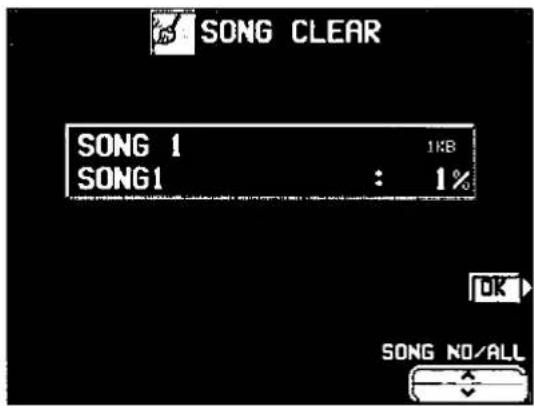
- Use the SONG NO/ALL ∧ and ∨ buttons to specify the number of the song to erase.
• The total amount of SEQUENCER memory or current song memory used is shown as a percentage (%) to the right of the song name.
• If ALL is selected, all the songs recorded in the SEQUENCER will be erased.
- Press the OK button.
- The confirmation display appears. Press the YES button to execute the function, or press the NO button to cancel the function.
- If the YES button is pressed, "COMPLETED!" appears on the display, the specified songs are erased, and the instrument returns to the normal performance mode.
Song/track Copy
Copy the recorded data from specific tracks of a song.
-
On the SEQUENCER MENU display, select CREATE.
-
On the CREATE menu display, select SONG/TRACK COPY.
• The display looks similar to the following.

- Specify the track you wish to copy from.
- On the FROM side, use the ITEM and buttons to select the item, and the VALUE and buttons to specify the setting.
SONG: Song number TRACK: Track number
- If ALL is selected, all the tracks of the specified song number will be copied.
-
Specify the track you wish to copy to (TO side).
-
Press the OK button.
- The confirmation display appears. Press the YES button to execute the function, or press the NO button to cancel the function.
- The track assignment settings are also copied. Note that in some cases, the CONTROL, RHYTHM and CHORD part data in the destination tracks may be lost.
After Touch Set
Specify whether or not AFTER TOUCH data is recorded. The AFTER TOUCH applies a special effect to the sound depending on how hard the keys are being pressed.
-
On the SEQUENCER MENU display, use the SONG ∧ and ∨ buttons to select a song number. Then select CREATE.
-
On the CREATE menu display, select AFTER TOUCH SET.
• The display looks similar to the following.

- Use the ON and OFF buttons to specify if the aftertouch data is recorded.
ON:
Aftertouch data is recorded with the performance.
OFF
The data is not recorded (factory-preset setting).
Editing the recorded performance
The edit feature allows you to erase or change portions of your performance after it has been recorded.
Select the edit function
- On the SEQUENCER MENU display, use the SONG ∧ and ∨ buttons to select the number of the song you wish to edit. Then select EDIT.
- On the EDIT menu display, select an edit function.
• The display looks similar to the following.
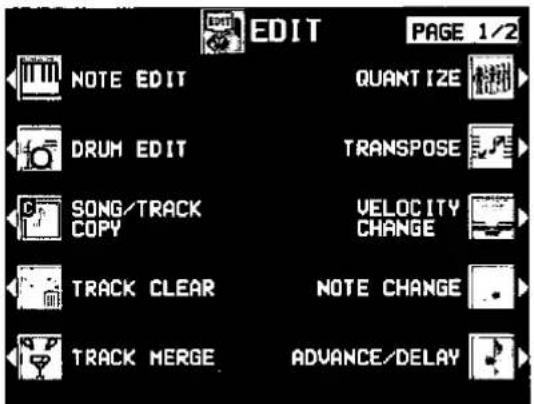
- Use the PAGE ∧ and ∨ buttons to view different sections of the menu.
- Perform the editing procedures. (See below.)
- During the editing procedure, if the indicator for the TEMPO/PROGRAM dial is lit, you can use the dial for the editing function.
NOTE EDIT
You can edit performance (NOTE) data on a piano roll display. This differs from the normal STEP RECORD edit procedure, and is a convenient way to check the data for each note.
- Data other than NOTE data cannot be corrected or recorded. To correct or record other types of data, use the STEP RECORD display. (Refer to page 82.)
- On the PART SELECT display, select a track.
• The CHORD, RHYTHM and CONTROL tracks cannot be selected.
• The display looks similar to the following.

- Use the MEAS ∧ and ∨ buttons to select the measure you wish to edit.
- Use the CURSOR ◀ and ▶ buttons to move the cursor (▽) to the point you wish to edit.
- Recorded performance (NOTE) data is shown as horizontal bars. Data selected for editing is highlighted.
- You can use the INC ∧ and ∨ buttons to change the increment of cursor movement. The resolution can be set at ♩/96. However, if NOTE data is present between increments, the cursor will stop.
- Use the POS and buttons to change the value.
Example: 10.2.48 indicates a point in measure 10, beat 2, point 48 (one point is 1/96 of a quarter note [↓]).
- + is shown at the point where the END command is stored.
-
Select the data to edit (it changes to a highlighted horizontal bar). Edit the data.
-
Use the POS and buttons to move the cursor, the NOTE and buttons to change the note number, the VEL and buttons to change the velocity (how hard the keys are played), and the LEN and buttons to change the note length (1 = 1/96 of a quarter note [♪]).
- Use the GRAPH ▲ and ▼ buttons to view a higher or lower section of the keyboard (in one-octave steps).
-
If the ERS button is pressed, the selected NOTE data is erased.
-
Repeat steps 2 to 4 to continue editing.
☐ Inserting note data
You can also store note data on this display.
- Specify the point where the new note data will be stored.
-
Use the LEN ∧ and ∨ buttons to specify the note length.
• Examples of note lengths (♩ = 96)
91: tenuto (95%)
76: normal (80%)
48: staccato (50%)
24: cutting (25%) -
Play a key on the keyboard to specify the note pitch (NOTE NUMBER) and velocity (how hard the key is played).
- Repeat steps 1 to 3 to input more note data.
CYCLE PLAY
You can aurally check the data you are editing by accessing the CYCLE PLAY display from the NOTE EDIT display.
- If you wish other tracks to be played back, they should be selected beforehand on the SEQUENCER PLAY display. (Refer to page 76.)
- On the NOTE EDIT display, press the PLAY button.
• The display looks similar to the following.
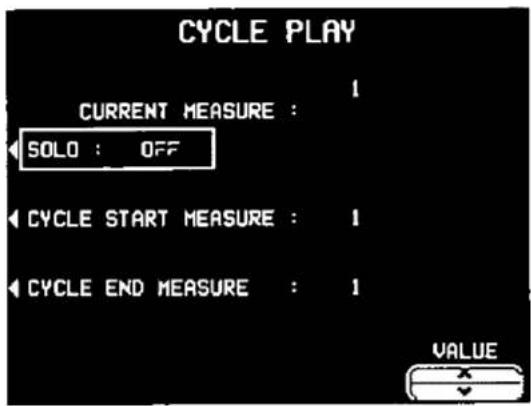
- Select CYCLE START MEASURE, and use the ∧ and ∨ buttons to select the beginning playback measure.
- Select CYCLE END MEASURE, and use the ∧ and ∨ buttons to select the last playback measure.
- Press the START/STOP button.
- Cycle playback of the specified measures begins.
- If the SOLO button is turned ON, playback changes to that of the recording track only. If it is turned OFF, all the tracks specified on the SEQUENCER PLAY display are played back.
- To stop cycle playback, press the START/STOP button again.
- During playback stop, if the SEQUENCER RESET (FILL IN 1) button is pressed, the SEQUENCER returns to the measure number specified in step 2. If the SEQUENCER RESET button is pressed again, the SEQUENCER returns to measure 1.
DRUM EDIT
The DRUMS part can be edited on a specialized display. This differs from the normal STEP RECORD edit procedure, and is a convenient way to check the data for each note.
- On the PART SELECT display, select the track for the DRUMS part.
- The CHORD, RHYTHM and CONTROL tracks cannot be selected.
• The display looks similar to the following.
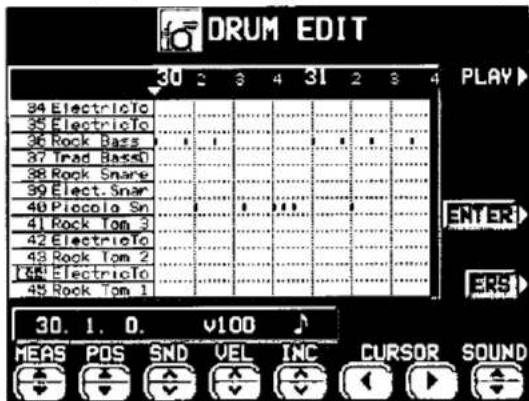
-
Use the SOUND ▲ and ▼ buttons to select the percussion instrument you wish to edit.
-
The number to the left of the instrument name is its MIDI NOTE NUMBER in the Technics arrangement.
-
If sounds other than percussion instrument sounds are assigned, they are not displayed.
-
Use the MEAS ▲ and ▼ buttons to select the measure you wish to edit.
-
Use the CURSOR ◀ and ▶ buttons to move the cursor (▼) to the point you wish to edit.
-
Recorded performance data is shown as vertical bars. Data selected for editing is shown as a longer vertical bar.
- You can use the INC ∧ and ∨ buttons to change the increment of cursor movement. The resolution can be set at ♩/96. However, if NOTE data is present between increments, the cursor will stop.
- Use the POS ∧ and ∨ buttons to change the value.
Example: 10.2.48 indicates a point in measure 10, beat 2, point 48 (one point is 1/96 of a quarter note [♩]).
- + is shown at the point where the END command is stored.
(Continued on the next page)
- Select the data to edit (it changes to a long bar). Edit the data.
- Use the POS ▲ and ∇ buttons to move the cursor, the SND ∧ and ∨ buttons to change the percussion instrument sound, and the VEL ∧ and ∨ buttons to change the velocity (how hard the keys are played).
- If the ERS button is pressed, the selected NOTE data is erased.
- Repeat steps 2 to 5 to continue editing.
Inserting DRUMS data
You can also store DRUMS data on this display.
- Specify the point where the new note data will be stored.
-
Use the VEL ∧ and ∨ buttons to specify the velocity (how hard the key is played).
-
Press the ENTER button to store the data.
• Instead of the ENTER button, you can store data (including velocity data) by playing the keyboard. In this case, the instrument is that specified on the display, regardless of which key is played. - The note length is fixed. If you wish to change the note length, use the STEP RECORD function to specify a different note length. The NOTE EDIT display can also be used to change the length (LEN). (Refer to page 90.)
- Repeat steps 1 to 3 to input more DRUMS data.
CYCLE PLAY
You can aurally check the data you are editing by accessing the CYCLE PLAY display from the DRUM EDIT display.
• The procedure is the same as for NOTE EDIT.
- If you wish other tracks to be played back, they should be selected beforehand on the SEQUENCER PLAY display. (Refer to page 76.)
QUANTIZE
The QUANTIZE function can correct the timing of your performance after it has been recorded. If the rhythm is slightly out of sync or inexact, it will automatically be corrected to the specified quantize level.
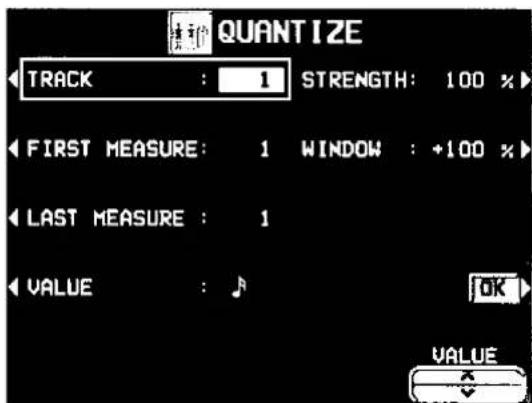
Rhythm as written in the score
Timing of actual performance
Quantized performance

natural_image
Pure electrical circuit lines without any symbols- Select TRACK. Use the ∧ and ∨ buttons to specify the track number.
-
You cannot select the track for the CONTROL, RHYTHM or CHORD part.
• If ALL is selected, all the tracks are quantized. -
Select FIRST MEASURE. Use the VALUE ∧ and ∨ buttons to specify the start point (measure number).
-
Select LAST MEASURE. Use the VALUE ∧ and ∨ buttons to specify the end point (measure number).
-
Select VALUE. Use the VALUE ∧ and ∨ buttons to specify the quantize level.
- Select from ♩, ♩, ♩3, ♩, ♩3, ♩, ♩3. (A 3 denotes a triplet-type note.)
- Select STRENGTH. Use the VALUE ∧ and ∨ buttons to select the amount of quantize (%).
- 100% is a convenient setting. When set to 100%, the performance data is quantized exactly to the level specified for the VALUE ("just"). For example, at 50%, the data is quantized to a point that is half that of the just level. By this setting, you can attain an effect that is very slightly off-beat from the rhythm.
- Select WINDOW. Use the VALUE ∧ and ∨ buttons to specify the range (%) affected by the quantize setting.
- With the increment set to 100 for the VALUE, at a + setting, data close to the just point is corrected, and at a - setting, data far from the just point is corrected. For example, if set to -30% the quantize function affects data far from the just point, and if set to +30% the quantize function affects data close to the just point. +100% is usually a convenient setting.
- The +100% setting and the -100% setting are the same.
Example: When VALUE is set to ♪

bar
| Category | Value (%) | |---|---| | +100% | 100 | | +50% | 50 | | +30% | 30 | | -50% | -20 | | -30% | -40 | | -100% | -100 |- Press the OK button.
- The confirmation display appears. Press the YES button to execute the function, or press the NO button to cancel the function.
TRANSPOSE
Change of key of specific measures of specific tracks.

-
Select TRACK. Use the VALUE ∧ and ∨ buttons to select the track you wish to edit.
-
You cannot select the track for the CONTROL, RHYTHM or CHORD part.
-
If ALL is selected, all tracks will be edited.
-
Select FIRST MEASURE. Use the VALUE ∧ and ∨ buttons to specify the start point (measure number) of the transpose.
- Select LAST MEASURE. Use the VALUE ∧ and ∨ buttons to specify the end point (measure number) of the transpose.
- Select TRANSPOSE. Use the VALUE ∧ and ∨ buttons to specify the change in pitch.
- Increments are in semitones. A value of 12 is one octave. A - value lowers the pitch, and a + value raises it.
- Press the OK button.
- The confirmation display appears. Press the YES button to execute the function, or press the NO button to cancel the function.
VELOCITY CHANGE
Modify the recorded velocity in specific measures of specific tracks.
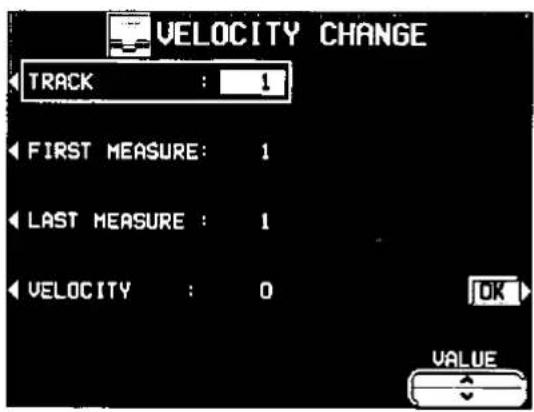
- Select TRACK. Use the ∧ and ∨ buttons to select the track you wish to edit.
- You cannot select the track for the CONTROL, RHYTHM or CHORD part.
• If ALL is selected, all tracks will be edited.
-
Select FIRST MEASURE. Use the VALUE ∧ and ∨ buttons to specify the start point (measure number) of the velocity change.
-
Select LAST MEASURE. Use the VALUE ∧ and ∨ buttons to specify the end point (measure number) of the velocity change.
-
Select VELOCITY. Use the VALUE ∧ and ∨ buttons to specify the change in velocity.
- The value you select will be added to or deleted from the current velocity.
- Press the OK button.
- The confirmation display appears. Press the YES button to execute the function, or press the NO button to cancel the function.
TRACK CLEAR
Erase the contents of a specific track.
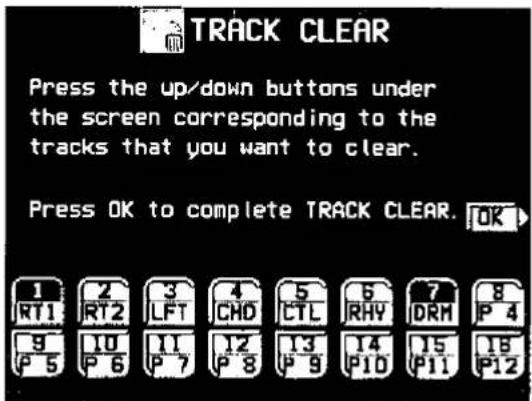
- Use the balance buttons to select the track or tracks you wish to clear.
- A "CLR" mark is shown for the selected tracks.
- Press the OK button.
- The confirmation display appears. Press the YES button to execute the function, or press the NO button to cancel the function.
- If the YES button is pressed, the specified tracks are erased.
TRACK MERGE
Merge the recorded contents of two tracks (source tracks) and store the merged contents in a third track (destination track).
- When the TRACK MERGE function is executed, the data is erased from the two source tracks.

flowchart
graph TD
    A["TRACK : 1"] --> C["TRACK : 3"]
    B["TRACK : 2"] --> C
    D["OK"] --> E["VALUE"]
-
Select the two source tracks (left half of the display).
-
Use the buttons on the left side of the display to select one of the source tracks, and use the VALUE ∧ and ∨ buttons to specify the track number. Repeat for the other source track.
- You cannot select the track to which the CONTROL, RHYTHM or CHORD part has been assigned.
NOTE CHANGE
Change of pitch of specified notes.
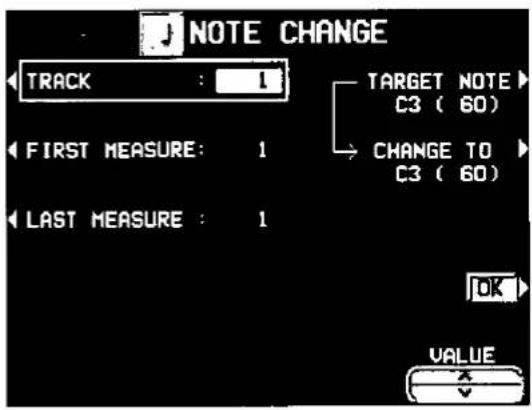
-
Select TRACK. Use the VALUE ∧ and ∨ buttons to select the track you wish to edit.
-
You cannot select the track for the CONTROL, RHYTHM or CHORD part.
-
If ALL is selected, all tracks will be edited.
-
If the part assigned to the upper source track ("upper" meaning its position on the TRACK MERGE display) is different from the part assigned to the lower source track, when the parts are merged in the destination track, the new track is assigned the same part as the upper track.
- Select the destination track (right half of the display).
- Press the button on the right side of the display to select the destination track, and use the VALUE ∧ and ∨ buttons to specify the track number.
- Press the OK button.
-
The confirmation display appears. Press the YES button to execute the function, or press the NO button to cancel the function.
-
Select FIRST MEASURE. Use the VALUE ∧ and ∨ buttons to specify the start point (measure number) of the note change.
- Select LAST MEASURE. Use the VALUE ∧ and ∨ buttons to specify the end point (measure number) of the note change.
- Select TARGET NOTE. Use the VALUE ∧ and ∨ buttons to specify the pitch of the note you wish to change.
- The number next to the note name is its note number.
- Select CHANGE TO. Use the VALUE ∧ and ∨ buttons to specify the pitch you wish to change to.
- Press the OK button.
- The confirmation display appears. Press the YES button to execute the function, or press the NO button to cancel the function.
ADVANCE/DELAY
Speed up or delay the sound production of specified performance data.

-
Select TRACK. Use the VALUE ∧ and ∨ buttons to select the track you wish to edit.
-
You cannot select the track for the CONTROL, RHYTHM or CHORD part.
• If ALL is selected, all tracks will be edited. -
Select FIRST MEASURE. Use the VALUE ∧ and ∨ buttons to specify the start point (measure number) of the change.
- Select LAST MEASURE. Use the VALUE ∧ and ∨ buttons to specify the end point (measure number) of the change.
- Select ADVANCE/DELAY. Use the VALUE ∧ and ∨ buttons to accelerate or delay the timing of the sound production (-96 to +96).
- A + value causes the notes to sound later, and a - value causes the notes to sound earlier.
- Press the OK button.
- The confirmation display appears. Press the YES button to execute the function, or press the NO button to cancel the function.
MEASURE COPY
Copy recorded data of specified measures to a specified point.
- On the destination track, the new data replaces the current measure contents.
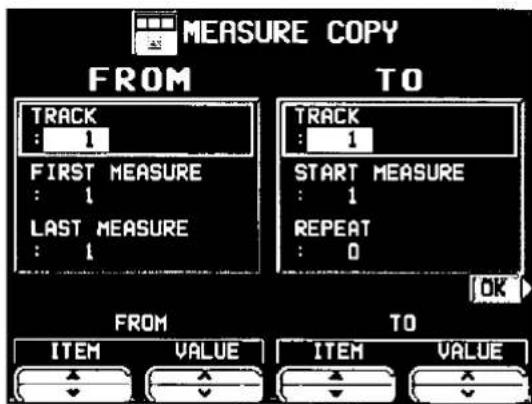
- Specify the measures you wish to copy from the source track.
- On the FROM side, use the ITEM ▲ and ∇ buttons to select the item. Then use the VALUE ∧ and ∨ buttons to specify the setting for that item.
TRACK:
Specify the track number you wish to copy the measures from.
- You cannot select the track for the RHYTHM part or CHORD part in which a repeat command has been stored.
- If ALL is selected, the specified measures are copied to all tracks at the same time.
FIRST MEASURE:
Specify the first measure to copy.
LAST MEASURE:
Specify the last measure to copy.
- Specify where you wish to copy the selected measures to.
- On the TO side, use the ITEM △ and ▼ buttons to select the item. Then use the VALUE ∧ and ∨ buttons to specify the setting for that item.
TRACK:
Specify the track number you wish to copy to.
• Measures in a track for the CONTROL, RHYTHM or CHORD part can be copied only to the same track.
START MEASURE:
Specify the start point to copy the selected measures to.
REPEAT:
Specify the number of times the selected measures are to be repeated.
-
Press the OK button.
-
The confirmation display appears. Press the YES button to execute the function, or press the NO button to cancel the function.
- Note that if the END command is included in the source data, it is also copied. Any data following the END command is not copied.
MEASURE ERASE
Erase the recorded contents of specific measures. You can also specify which type of data is to be erased.
- Note that only the contents of the measures are erased, not the measures themselves; the length of the performance remains the same.

-
Select TRACK. Use the VALUE ∧ and ∨ buttons to specify the track number.
-
This function does not work for the RHYTHM part or CHORD part in which a repeat command has been stored.
-
If ALL is selected, data is erased from the specified measures of all the tracks at one time.
-
Select FIRST MEASURE. Use the VALUE ∧ and ∨ buttons to specify the start point (measure number).
- Select LAST MEASURE. Use the VALUE ∧ and ∨ buttons to specify the end point (measure number).
- Select ERASE DATA. Use the VALUE ∧ and ∨ buttons to specify the type of data to be erased.
ALL: All data is erased.
NOTE: Only note data.
CONTROL: Only control data (volume, effect and other panel settings as well as selection changes) is erased.
- Press the OK button.
- The confirmation display appears. Press the YES button to execute the function, or press the NO button to cancel the function.
MEASURE DELETE
Delete specified measures from a track.
- The length of the performance accordingly decreases by the number of deleted measures.

- Select TRACK. Use the VALUE ∧ and ∨ buttons to select the track from which measures are to be deleted.
- This function does not work for the CHORD or RHYTHM track in which the repeat function has been stored.
- If ALL is selected, the specified measures are deleted from all the tracks at one time.
- Select FIRST MEASURE. Use the VALUE ∧ and ∨ buttons, to specify the first measure to delete.
- Select LAST MEASURE. Use the VALUE ∧ and ∨ buttons to specify the last measure to delete.
- Press the OK button.
- The confirmation display appears. Press the YES button to execute the function, or press the NO button to cancel the function.
MEASURE INSERT
Insert specified measures at a specified point.
- The length of the performance accordingly increases by the number of inserted measures.

- Specify the measures you wish to copy from the source track.
- On the FROM side, use the ITEM △ and ∇ buttons to select the item. Then use the VALUE ∧ and ∨ buttons to specify the setting for that item.
TRACK:
Specify the track number you wish to copy the measures from.
- This function does not work for the CHORD or RHYTHM track in which the repeat function has been stored.
- If ALL is selected, the measures are inserted in all tracks at the same time.
FIRST MEASURE:
Specify the first measure to copy.
LAST MEASURE:
Specify the last measure to copy.
- Specify where you wish to insert the selected measures.
- On the TO side, use the ITEM ▲ and ▼ buttons to select the item. Then use the VALUE ∧ and ∨ buttons to specify the setting for that item.
TRACK:
Specify the track number.
• Measures from the CHORD, RHYTHM or CONTROL track can only be inserted in the same track.
START MEASURE:
Specify the start point to insert the selected measures.
REPEAT:
Specify the number of times the selected measures are to be repeated.
- Press the OK button.
• The confirmation display appears. Press the YES button to execute the function, or press the NO button to cancel the function.
• Note that if the END command is included in the source data, it is also inserted. Any data following the END command is not inserted.
Outline of the Composer

natural_image
Front view of a control panel with buttons and display (no visible text or symbols)The COMPOSER enables you to create your own accompaniment patterns. A pattern is comprised of five parts: DRUMS, BASS and 3 ACCOMP parts. These parts would form the backing of a song.
Rhythm components which can be stored
You can store up to 4 types of patterns (VARIATION 1 to 4) in each MEMORY (A, B, C). You can also create INTRO 1 and 2, FILL IN 1 and 2, and ENDING 1 and 2 patterns for each MEMORY. During MEMORY playback, you can press the INTRO & ENDING 1 or 2 button, or the FILL IN 1 or 2 button to have your original pattern played back.
- The INTRO, FILL IN and ENDING patterns are the same for each variation within a MEMORY.
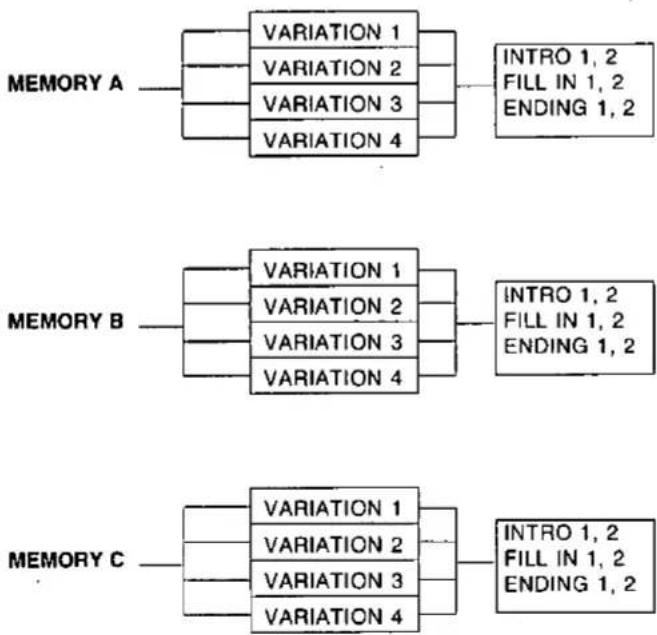
flowchart
graph LR
    A["MEMORY A"] --> B["VARIATION 1"]
    A --> C["VARIATION 2"]
    A --> D["VARIATION 3"]
    A --> E["VARIATION 4"]
    B --> F["INTRO 1, 2\nFILL IN 1, 2\nENDING 1, 2"]
    C --> G["VARIATION 1"]
    C --> H["VARIATION 2"]
    C --> I["VARIATION 3"]
    C --> J["VARIATION 4"]
    D --> K["INTRO 1, 2\nFILL IN 1, 2\nENDING 1, 2"]
    E --> L["VARIATION 1"]
    E --> M["VARIATION 2"]
    E --> N["VARIATION 3"]
    E --> O["VARIATION 4"]
    P["MEMORY B"] --> Q["VARIATION 1"]
    P --> R["VARIATION 2"]
    P --> S["VARIATION 3"]
    P --> T["VARIATION 4"]
    U["MEMORY C"] --> V["VARIATION 1"]
    U --> W["VARIATION 2"]
    U --> X["VARIATION 3"]
    U --> Y["VARIATION 4"]
    Z["INTRO 1, 2\nFILL IN 1, 2\nENDING 1, 2"] --> AA["INTRO 1, 2\nFILL IN 1, 2\nENDING 1, 2"]
CUSTOM
Up to 20 original patterns can be stored in the CUSTOM button of the RHYTHM GROUP. You can use them during your performance, just like the preset rhythms.

• Copy is performed one MEMORY at a time.
- Because CUSTOM uses a large portion of the memory, it takes a long time to load from or save to a floppy disk. For this reason, it is not suitable to use in cases where data is saved to or loaded from a floppy disk, for example, performance data for creating SEQUENCER songs. When creating a SEQUENCER performance, use the MEMORY pattern.
Memory capacity
Expressed in terms of notes, the total number of notes which can be stored in all the COMPOSER memories is about 10,000. The remaining memory available for recording is shown on the recording display as a percentage (%).
- When "Memory full!" appears on the display no more data can be stored in the COMPOSER.
- The total number of notes that can be stored to all the CUSTOM memories (20) is about 70,000.
MEMORY
The memory contents of CUSTOM are retained even if the power to this instrument is turned off. However, because the contents of the MEMORY are erased after about 80 minutes after the power is turned off, you should save the data on floppy disks if you wish to keep it. (Refer to page 120.)
COMPOSER menu
When you press the COMPOSER MENU button to turn it on, the display changes to the following.


Summary of the COMPOSER menu items
RECORDING MEMORY-A
Create a memory in the MEMORY A bank.
RECORDING MEMORY-B
Create a memory in the MEMORY B bank.
RECORDING MEMORY-C
Create a memory in the MEMORY C bank.
EASY COMPOSER (page 101)
Create a rhythm pattern with a simplified procedure.
PATTERN COPY (page 107)
Copy a preset rhythm pattern into a memory.
CUSTOM COPY (page 109)
Copy MEMORY contents to CUSTOM area, or vice versa.
SEQ TO COMPOSER COPY (page 108)
Copy recorded data in the SEQUENCER to the COMPOSER.
BEND RANGE SET (page 109)
Set the PITCH BEND range effective during recording for the ACCOMP and BASS parts.
LOAD SINGLE COMPOSER
Recall the desired COMPOSER data from data saved on a disk. This procedure is the same as when COMPOSER is selected for SINGLE LOAD. (Refer to page 115.)
Three ways to record in the COMPOSER
There are three ways to create and record a rhythm
■ Simple recording method
Use EASY COMPOSER to quickly create a unique rhythm just by selecting a style for each part
■ Create a completely new rhythm (page 102)
Compose all the parts of a completely new rhythm from scratch
- You can use either realtime recording or step record for any part of the recording
■ Pattern Copy (page 107)
Copy a preset rhythm or SEQUENCER data to a COMPOSER memory, edit it as you like, and then store it as a new rhythm
Simple recording method
With EASY COMPOSER you can easily create a unique rhythm pattern by selecting a different style for each part of the rhythm
1 On the COMPOSER MENU display, select EASY COMPOSER
• The display looks similar to the following
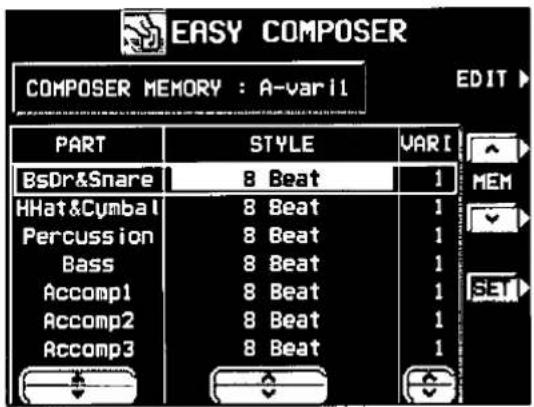
2 Use the MEM ∧ and ∨ buttons to select the memory in which to record your rhythm
- Select from A-var 1 to 4, B-var 1 to 4 and C-var 1 to 4
3 Use the PART ▲ and ▼ buttons to select the part
- In the EASY COMPOSER, the new rhythm pattern is divided into 7 parts, to each of which a style and variation is assigned
4 Use the STYLE ∧ and ∨ buttons to select a style
5 Use the VARI ∧ and ∨ buttons to select the variation number
- The number of variations differs depending on the selected style
- A part which is set to OFF does not sound Note that the "BsDr&Snare" part cannot be set to OFF
6 Repeat steps 3 to 5 to select styles for the other parts
7 Press the SET button
• The rhythm pattern is played back
• The RHYTHM name changes to "Easy"
- If you are not satisfied with the rhythm pattern, repeat steps 3 to 7
- If you wish to correct the sounds or phrases in your rhythm pattern, press the EDIT button The display changes to the recording display (Refer to page 104)
• For playback, refer to page 105
Create a completely new rhythm
Clear the memories and compose a completely new rhythm from scratch
- You can also use this method when copying a pattern from a preset rhythm or the SEQUENCER (Refer to page 107)
Prepare to record
1 On the COMPOSER MENU display, select a memory in which to record (RECORDING MEMORY A, B, or C)
• The display looks similar to the following

2 Specify the pattern you are going to create
• The display looks similar to the following
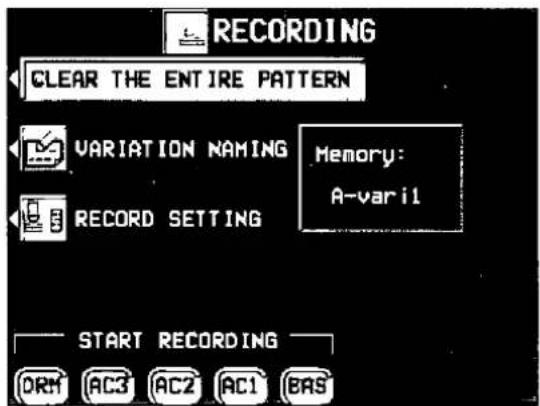
3 Press the CLEAR THE ENTIRE PATTERN button
• The display looks similar to the following

4 Press the YES button
- Press the NO button to cancel the operation
5 Press the VARIATION NAMING button
• FILL IN, INTRO and ENDING patterns cannot be named
• The display looks similar to the following
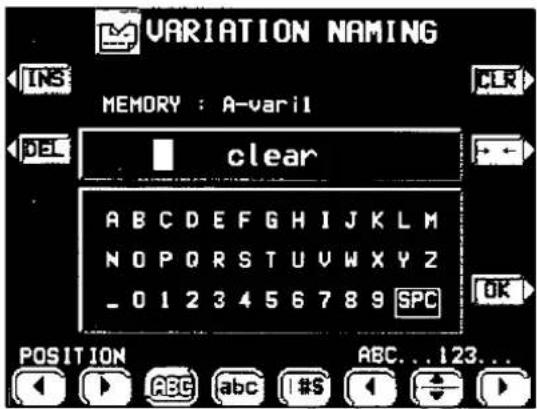
6 Type a name for your rhythm pattern
- Use the POSITION buttons to highlight the character position in the name box. Use the ◀, △, ▽, ▶ buttons to select the alphanumeric character. Repeat these steps to type the whole name
-
Press the ABC button to switch to the screen for upper case (capital) letters, or the abc button to switch to the screen for lower case letters
-
Use the !#\$ button to switch to the symbols character set.
• Use the INS button to type a space. - Use the DEL button to erase a character.
- To erase all the characters, press the CLR button.
-
You can press the ← button if you wish to have the name centered.
-
Press the OK button.
- The display changes to the RECORDING display.
- Press the RECORD SETTING button.
- There are two screen pages of settings. Use the PAGE ∧ and ∨ buttons to switch between pages.
PAGE 1

Use the ITEM ▲ and ▼ buttons to select the item. Use the VALUE ∧ and ∨ buttons to change the setting.
MEASURE & TIME SIGNATURE
MEASURE:
Specify the number of measures in your repeating rhythm pattern (1 to 8).
TIME SIGNATURE:
Specify the time signature (1/4 to 8/4).
RECORD SETTING
KEY:
Specify the root note of the recorded performance.
CHORD:
Specify the type of chord you wish to record (MAJOR or MINOR).
BASS TYPE:
Specify the type of phrase progression for the BASS part (NORMAL or 7th).
ACCOMP TYPE:
Specify the type of phrase progression for the ACCOMP parts (NORMAL or 7th).
- When 7th is selected and a chord is specified, if a 7th chord is specified during playback, the flat of the 7th tone is substituted for the 5th tone.
PAGE 2

Use the PART ▲ and ▼ buttons to select a part, then the PANPOT and PITCH POINT ∧ and ∨ buttons to change the settings.
PANPOT:
Stereo balance (Left64-CENTER-Right63).
- At "Left64", the sound is all the way to the left, at "Right63" all the way to the right. The center point is CENTER.
PITCH POINT:
The pitch at which the pattern progression sound is lowered by one octave.
- When the root note of the specified chord is lower than the set pitch point, the pitch of that part is automatically raised by one octave, thus avoiding an unnaturally low accompaniment pitch.
- Press the EXIT button.
• The RECORDING display is shown.
Recording procedure

- In the START RECORDING area on the display, select the rhythm part you want to record first.
BAS: BASS
AC1: ACCOMP 1
AC2: ACCOMP 2
AC3: ACCOMP 3
DRM: DRUMS
• The metronome sound starts and the display looks similar to the following.
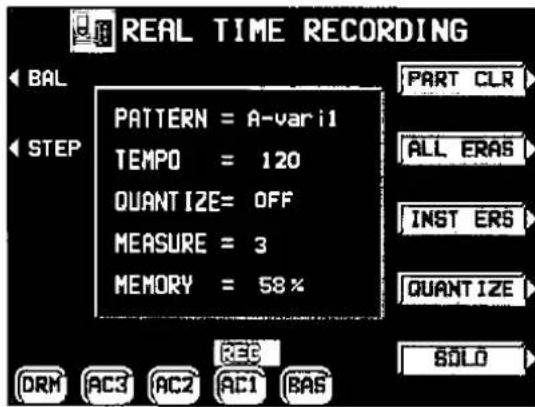
-
Adjust the tempo.
-
The tempo is shown on the display as TEMPO=.
-
The tempo can be freely adjusted when you play back the rhythm pattern, so record at the tempo which is easiest for you to play.
-
Select the sound.
-
For the DRUMS part, only sounds from the DRUM KITS sound group can be selected.
-
For the ACCOMP and BASS parts, select sounds from groups other than the DIGITAL DRAWBAR and DRUM KITS sound groups.
-
Record the part.

- The specified number of measures are repeatedly played back, during which time any newly played notes are added to those already recorded. The current measure number is shown on the display as "MEASURE="
- Record the performance in C major for correct chord progressions during playback. Follow the RECORD SETTING procedure if you wish to record the performance in a different scale. (Refer to page 103.)
- PITCH BEND and MODULATION effects are also recorded (except for the DRUMS part).
• AFTER TOUCH is not recorded.
Button functions
BAL:
Adjust the volume of each part on the PART BALANCE display. (These settings are not recorded.)
STEP:
Change to the STEP RECORD mode. (Refer to page 106.)
PART CLR:
Erase all recorded contents of the currently selected part.
ALL ERAS:
The performance recorded in the selected part is erased for as long as this button is pressed.
INST ERS:
During recording of the DRUMS part, clear the part instrument by instrument.
- Hold down this button and specify the instrument sound to be deleted by pressing the corresponding instrument key on the keyboard, after which only the specified instrument will be erased for as long as this button is kept pressed.
QUANTIZE:
Smooth out any unevenness in the timing of your performance.
- Before recording, select the note value for the desired quantize level. (The quantize level is shown on the display as QUANTIZE=.)
SOLO:
Mute all parts except the part which is currently being recorded.
- A MUTE mark is shown for the other parts on the display.
- To turn off the SOLO function, press this button again.
-
Use the buttons below the display to switch to a different recording part, and proceed to record each part in turn.
-
When you have finished recording the rhythm, turn off the MENU button in the COMPOSER section.
Playback
- In the COMPOSER section, turn on the MEMORY button.

• The display looks similar to the following.
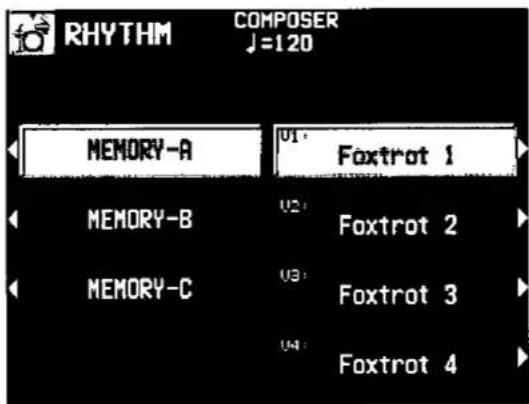
-
Use the buttons to the left of the display to select the desired memory.
-
Use the buttons to the right of the display to select a variation.
- The VARIATION & MSA buttons can also be used to select the desire variation number.
- Press the START/STOP button.
• The DRUMS part begins to play back.
• The BASS and ACCOMP parts are played back when you use the AUTO PLAY CHORD.
Step Record
Use STEP RECORD to store the notes one-by-one on the display. This is a convenient way to store complicated patterns that are difficult to play.
Recording procedure
- While you are recording, press the STEP button.
- The display changes to the STEP RECORD display similar to the following.

- Use the MEAS buttons to select the measure you wish to record.
- This step is not necessary if you are recording from measure 1 of a blank part.
- Use the CURSOR < and > buttons to move the cursor to the note position (dot) you are going to store.
• Each dot represents one-eighth of a quarter-note (a thirty-second note).
- When storing triplets, it may not be possible to match the timing exactly with the 1/32-note steps. However, if you select triplet-type notes for the note length (LENGTH) in step 4 below, the timing is automatically corrected.
- Use the left LENGTH buttons to specify the note value. Select from ♩3, ♩, ♩3, ♩, ♩3, ♩, ♩3, ♩, ♩, ♩, ♩, ♩, ♩ × 2 to 4. (A 3 denotes a triplet-type note.)
- For note values other than these, use the right LENGTH buttons to specify the note value to be added to that which you specified with the left buttons.
Example: To record a dotted quarter-note (!.)
$$ \mathcal {J} + \mathcal {J} $$
- Use the PHRAS ∧ and ∨ buttons to specify the actual length of the produced sound for the desired legato or staccato effect.
| TENU (tenuto): | Sound is produced for 95% of the note length. |
| NORM (normal): | 80% |
| STAC (staccato): | 50% |
| CUTT (cutting): | 25% |
-
Specify the pitch and velocity of the note by playing the keyboard.
-
The dot on the display where the note is stored changes to a * mark.
- When recording chords, you can store multiple notes at one position.
REST: To store a rest, after specifying the note LENGTH, press the REST button.
- Positions at which nothing is stored are read as rests.
ERS: If you make a mistake, move the cursor to the error, and after displaying the data you wish to erase, press the ERS button.
- Repeat steps 3 through 6 to continue storing notes.
• To record a different part, use the PART ∧ and ∨ buttons to select another part.
- You can easily switch between the REALTIME mode and the STEP mode any time during recording. To return to the realtime recording display during the STEP RECORD mode, press the EXIT button.
■ Correcting the data
- In the STEP RECORD mode, specify the part you wish to correct.
- Use to MEAS buttons to go to the measure you wish to modify. Use the CURSOR buttons to move the cursor to the point (*) you wish to edit.
- The data stored at that point is shown on the display.
-
When a chord is stored at one point, a different note of the chord is displayed in order each time a CURSOR button is pressed.
-
Correct the data.
-
NOTE data (note pitch) and VEL data (how hard the key was played), etc. are displayed. Use the relevant buttons to correct the data as desired.
- Press the ERS button to erase the data which is displayed.
- You can also correct data which was stored in the REALTIME RECORD mode.
Pattern Copy
Use this function to copy a pattern from a preset rhythm or from SEQUENCER data.
PATTERN COPY
Copy a preset rhythm to the COMPOSER.
- On the COMPOSER MENU display, select PATTERN COPY.
• The display looks similar to the following.

- Select the pattern you wish to copy.
- In the FROM box, use the ITEM ▲ and ▼ buttons to select the group, rhythm and pattern, and the VALUE ∧ and ∨ buttons to specify the name.
GROUP: Group name
RHYTHM: Rhythm name
PATTERN: Pattern name
- If ALL is selected, all the patterns are copied.
- Select the memory you wish to copy to.
- In the TO box, use the ITEM ▲ and ▼ buttons to select the memory and pattern, and the VALUE ∧ and ∨ buttons to specify the name.
MEMORY: Memory name (A, B or C) PATTERN: Pattern name
- If ALL is selected, all the patterns are copied.
-
Press the OK button.
-
When copying has been successfully completed, "COMPLETED!" appears on the display.
- If you wish to use the COMPOSER functions to edit the copied data, on the COMPOSER MENU display, select the memory and pattern you copied to, and follow the procedure to record a pattern.
SEQ TO COMPOSER COPY
Data from the SEQUENCER can be copied to a COMPOSER memory. For example, you can use a rhythm pattern on a song disk as the automatic accompaniment for your own performance.
- Play back the song you wish to copy from SEQUENCER to confirm the tracks, the measures and the time signature you wish to copy.
- Follow the procedure in "Prepare to record" to prepare the COMPOSER memory you will be copying to. (Refer to page 102.)
- Be sure that time signature setting in the SEQUENCER data you are copying from and the time signature in the COMPOSER memory you are copying to are the same, or the data will not be copied successfully.
- On the COMPOSER MENU display, select SEQ TO COMPOSER COPY.
• The display looks similar to the following.

- Use the MEASURE FIRST ∧ and ∨ buttons to specify the number of the first measure to copy.
- Use the MEASURE LAST ∧ and ∨ buttons to specify the number of the last measure to copy.
- Up to 8 measures can be copied.
- Use the TRANSPOSE ∧ and ∨ buttons to change the key of the copied measures (-24 to +24).
-
Units are in semitones.
-
Use the MEM ∧ and ∨ buttons to specify the COMPOSER memory to copy to.
-
For each COMPOSER part, specify the SE-QUENCER track from which to copy data.
-
Use the PART and buttons to specify the part name, and the TRACK and buttons to specify the track number.
-
Parts which are set to CLEAR are blank.
-
Press the OK button.
- "COMPLETED!" is shown on the display.
- If you wish to use the COMPOSER functions to edit the copied data, on the COMPOSER MENU display, select the memory and pattern you copied to, and follow the procedure to record a pattern.
Bend Range
Adjust the amount of pitch change applied to the ACCOMP parts and the BASS part when the PITCH BEND wheel is operated during COMPOSER recording.
- On the COMPOSER MENU display, select BEND RANGE SET.
• The display changes to the following.
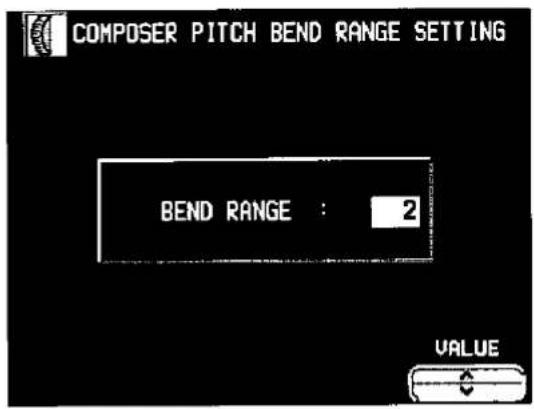
- Use the VALUE ∧ and ∨ buttons to specify the range (0 to 12).
• Increments are in semitones.
Custom Copy
Up to 20 COMPOSER patterns can be stored in the CUSTOM memory area of the RHYTHM GROUP, one MEMORY at a time. The patterns stored in CUSTOM are retained even when the power to this instrument is turned off. You can use them during your performance, just like the preset rhythms.
- You can copy CUSTOM rhythms to the COMPOSER and edit them.
- On the COMPOSER MENU display, select CUSTOM COPY.
• The display looks similar to the following.

- Use the CUSTOM ∧ and ∨ buttons to select the CUSTOM number, and the MEMORY ∧ and ∨ buttons to select the MEMORY name.
- The DIRECTION button can be used to change the source and destination of the copied pattern (MEMORY→ CUSTOM, CUSTOM → MEMORY).
- Press the OK button.
- When copying has been successfully completed, "COMPLETED!" appears on the display.
Note
- The total number of notes that can be copied to all the CUSTOM memories is about 70,000. The maximum number of MEMORY patterns which can be saved may be less than 20 if you are saving many patterns which use a lot of memory.
- If you copy a pattern which uses sounds from SOUND GROUP MEMORY A and MEMORY B, the copied sound data is operative. However, the MEMORY sound data capacity in the CUSTOM area is limited. If the capacity is exceeded, when you attempt to copy the pattern, an ATTENTION display appears requiring you to specify how you wish to proceed.
- If you select CUSTOM → MEMORY copy, the contents of the SOUND GROUP MEMORY may be replaced. In this case an ATTENTION display appears requiring you to specify how you wish to proceed.
- To reset the CUSTOM contents to the factory-preset settings, load the included "INITIAL DATA DISK" floppy disk.
Selecting a CUSTOM memory
- In the RHYTHM GROUP section, turn on the CUSTOM button.

• The display changes to the CUSTOM select display.
- There are two screen pages of the list. Use the PAGE ∧ and ∨ buttons to switch between pages.
- Select the desired custom number (1-20).
- This rhythm can be used just like the preset rhythms.
Outline of the Disk Drive function
The Disk Drive enables you to store recorded and stored data from this instrument's memories on floppy disks, as well as play commercial recorded disks on this instrument.


Internal memory and Floppy Disk Drive
The storable internal memory of this instrument as well as the backup time are limited. However, the Disk Drive maximizes your control of data management by allowing you to store (SAVE) this instrument's data on floppy disks, and then to recall (LOAD) it at any time.
- For more information about the backup time and performance data, please see page 178.
■ The following data can be saved/loaded:
| BACKUP | PERFORMANCE | CURRENT PANEL (The current panel settings) |
| PANEL MEMORY* | ||
| SEQUENCER | ||
| COMPOSER* (MEMORY contents) | ||
| SOUND MEMORY* | ||
| MSP (USER memories of the MANUAL SEQUENCE PADS) | ||
| RHYTHM CUSTOM | ||
| USER MIDI SETTINGS (USER memories of the MIDI PRESETS) |
- The PERFORMANCE group includes the data used in your performance. The PERFORMANCE group along with the RHYTHM CUSTOM and USER MIDI SETTINGS comprises the BACKUP group.
- When creating or saving song data, it is recommended that you use the performance data in the PERFORMANCE group.
- Instead of using RHYTHM CUSTOM and USER MIDI SETTINGS as frequently loaded and saved data, it is recommended that you save it with other data as Keyboard backup data.
-
A * mark indicates that data can be loaded to and from a specific memory (SINGLE LOAD).
-
Because RHYTHM CUSTOM uses a lot of memory, the save or load time may be long. In particular, the load procedure takes some time.
- Please use 2HD disks to load/save BACKUP data.
Main parts of the Floppy Disk Drive

Using commercial song disks
Not only disks recorded on this instrument, but also data from commercial song disks can be read on this instrument.
• This instrument accepts the following file formats:
| TECHNICS File format |
| Standard MIDI File format |
■ Loading Technics File format disks
Using Technics file format disks allows you load new SOUND EDIT, rhythm & accompaniments, PANEL MEMORY, MANUAL SEQUENCE PADS and Song data into your KN5000 to expand its potential even further. "Music Disk Collection" is the brand name for Technics software and is written to bring you the maximum benefit from your KN5000.
■ About Standard MIDI Files
"Standard MIDI File" (SMF) is a standardized data format which makes it possible for music data to be exchanged among different sequencers. Data stored in this format on sequencers of different models can be played back on this instrument, and vice versa. Note, however, that Standard MIDI Files ensure the compatibility of data such as NOTE data (keyboard performance data), VELOCITY (how hard the keyboard is played), PROGRAM NUMBER data (voice number data), etc. Because it does not guarantee 100% faithful reproduction of recorded music which is replete with such data, it may be necessary for you to adjust the settings to your satisfaction.
- Only files with the ".MID" extension can be loaded.
- Standard MIDI File FORMAT 1 can be loaded, but not saved.
- This instrument's SEQUENCER data can be saved to a disk in Standard MIDI File (FORMAT 0) and can be used by other equipment.
Eject button
Press to remove the disk from the Disk Drive.
Access indicator
Lights when data is being loaded from or saved to disk.
• To prevent data loss, do not remove the disk from the Disk Drive or turn off the power when the access indicator is lit.
- You can use 3.5 inch 2DD (720 KB) or 2HD (1.44 MB) floppy disks; however, 2HD disks formatted as 2DD cannot be used.
Playback of commercial song disks
DIRECT PLAY lets you enjoy playing commercially sold song disks directly from a disk. It's fast because you don't have to load the disk data into your instrument's memory.
• DIRECT PLAY is possible from the following disks:
| Standard MIDI File FORMAT 0 |
| TUNE 1000 “Standard MIDI File with Lyrics” (FORMAT 0 only) |
| DISK ORCHESTRA COLLECTIONTM (DOC) |
| PianoDiscTM |
* All product and company names are trademarks or registered trademarks of their respective owners.
* DISK ORCHESTRA COLLECTION is a trademark of the YAMAHA Corporation.
Outline of the procedure
- Insert the floppy disk into the Disk Drive slot. Push it all the way in until you hear a click.
- On this instrument, if the normal display is active, it automatically changes to the DISK MENU display when a floppy disk is inserted into the Disk Drive (initialized settings). The PREFERENCES menu is used to specify which display is shown when a disk is inserted.
- Select a menu on the DISK MENU display.
- If the DISK MENU display does not appear, turn on the DISK button.
- Follow the procedure for the function (see below).
- When function is being set, if the TEMPO/PROGRAM indicator is lit, the dial is available for setting the current function.
- When you have finished setting the functions, turn off the DISK button.
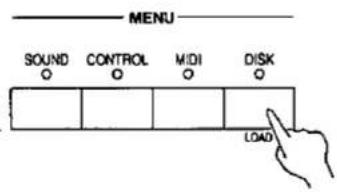

natural_image
Front panel of a computer control interface with buttons and a central display (no visible text or symbols)■ About the menu

LOAD (page 114)
Load data from a disk into this instrument's memory.
SAVE (page 121)
Save data from this instrument's memory to a disk.
DIRECT PLAY (page 117)
Direct playback of commercial song disks and medley playback.
SONG MÉDLEY (page 119)
Medley playback of songs in the SEQUENCER or floppy disk.
DISK TOOLS (page 125)
Disk management procedures, such as disk format.
PREFERENCES (page 126)
Automatic display when a floppy disk is inserted.
Loading data
Recall (load) the data from the disk to this instrument's memories.
- Note that the load procedure causes any data which is currently stored in the relevant memories to be erased.
LOAD
Load data that saved to a disk into this instrument's memory.
- Insert the disk with the stored data into the Disk Drive. Push it all the way in until you hear a click.

natural_image
Diagram of a piano keyboard being inserted into a slot (no text or symbols present)- On the DISK MENU display, select LOAD.
• The display looks similar to the following.
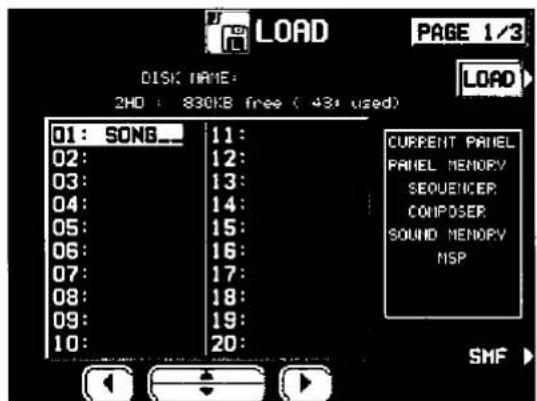
- If there are only SMF files on the disk, the display automatically changes to the SMF LOAD display. (Refer to page 115.)
- Use the buttons below the display to select the file (Technics file) you wish to load.
- If there are SMF files on the disk and you wish to load an SMF file, press the SMF button. (Refer to page 115.)
- The types of data which can be loaded from the file are shown in a frame on the right side of the display. You can press the LOAD button to load all of the indicated data, or you can use the LOAD OPTION to select specific data to load.
- Press the LOAD button.
• The LOAD operation begins.
- When the operation has been successfully completed, "COMPLETED!" is shown on the display.
- If song data was loaded, you can press the START/STOP button to begin playback when the SEQUENCER PLAY display is active.
- You can load the type of data for which only one song can be recorded in the SEQUENCER. (This type is available for disks used with older Technics models.) Note, however, that in this case, the song is loaded into SONG 1, but the data in SONG memories 2 to 10 are erased.
- You can also access the LOAD display by pressing the DISK button for a few seconds.
■ LOAD OPTION
Specify the kind of data you wish to load from the disk to your instrument.
- Use the PAGE buttons to access the PAGE 2/3 LOAD OPTION display.
• The display looks similar to the following.
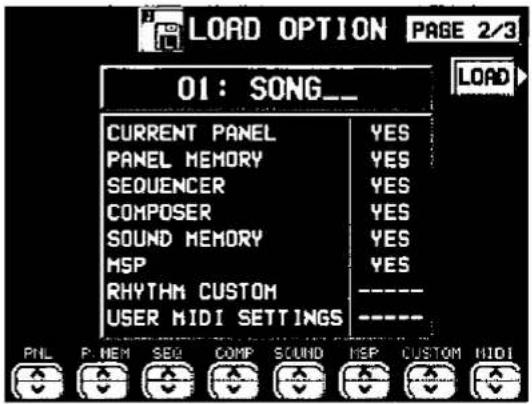
-
Use the buttons below the display to specify the types of data you wish to load (YES/NO).
-
-
-
-
- indicates that this type of data has not been saved.
-
-
-
-
This setting is canceled when you quit the LOAD display or when another file is selected.
-
Press the LOAD button.
• The LOAD operation begins.
- If RHYTHM CUSTOM was selected, the load operation will take about one minute.
■ SINGLE LOAD
Load only the desired data from a disk into a specific PANEL MEMORY, COMPOSER (MEMORY), SOUND MEMORY memory.
- Use the PAGE buttons to access the PAGE 3/3 SINGLE LOAD display.
• The display looks similar to the following.

- Use the MODE button to select the data you wish to load.
- Use the BANK/SINGLE button to select the load increment.
BANK: Load one bank at a time.
SINGLE: Load the smallest data increment.
- Follow the appropriate procedure to load the specified data.
- Specify the data source for FROM (left side), and the data destination (this instrument's memory location) for TO.
■ SMF LOAD
Load data which was saved in the "Standard MIDI File" (SMF) format.
- On the LOAD display, press the SMF button.
• The display looks similar to the following.

- For disks which contain SMF files only, this display appears automatically when LOAD is selected on the DISK MENU display.
-
Use the ▲ and ▼ buttons to select the filename you wish to load.
-
If the number of files is 10 or more, you can use the PREV and NEXT buttons to go back or advance 10 files at a time.
- If you press the TECH button, the display changes to the LOAD display for Technics files.
(Continued on the next page)
- You can use the INFO button to switch the displayed data.
DISK: Disk name
SONG: Song name
-
Use the TO SONG button to select the number to load to (this instrument's SEQUENCER song number).
-
Songs to load are specified one at a time.
- The song name to load to is shown below the TO SONG button.
- Use the LOAD AS button to specify the load method.
- Select from the following.
GM → GM:
Treat the file as a GENERAL MIDI file and load it with this instrument's GENERAL MIDI turned ON.
GM → TECH:
Treat the file as a GENERAL MIDI file and load it with this instrument's GENERAL MIDI turned OFF.
TECH → TECH:
Treat the file as a TECHNICS file and load it with this instrument's GENERAL MIDI turned OFF.
• Information about GENERAL MIDI (GM) can be found on page 165.
- If you select the setting which is different from that in which the song was stored, the sounds, octaves, and arrangement of percussion instrument sounds will be different.
- Press the LOAD button.
• The LOAD operation begins.
- When the operation has been successfully completed, "COMPLETED!" is shown on the display.
• If you press the START/STOP button, playback of the loaded data begins.
COMPOSER LOAD
Load COMPOSER data only from a disk.
- In the COMPOSER section, press and hold the LOAD (MENU) button for a few seconds.

• The display looks similar to the following.

- Select the name of the file you wish to load.
- Press the LOAD button.
- Data is loaded to this instrument's COMPOSER memory (MEMORY).
Direct Play
You can enjoy immediate playback of "Standard MIDI File" (SMF) (FORMAT 0), "Disk Orchestra Collection" (DOC) and "PianoDisc" disks—all without loading the song data.
- Insert the disk with the stored data into the Disk Drive.
- On the DISK MENU display, select DIRECT PLAY.
• The display looks similar to the following.

-
Use the ▲ and ▼ buttons to select the song you wish to have played.
-
If the number of files is 10 or more, you can use the PREV and NEXT buttons to go back or advance 10 files at a time.
- For SMF files, use the PLAY AS button to specify a sound arrangement mode (TECH/GM). If the playback data was saved in the GENERAL MIDI mode, select GM.
- For SMF files, you can use the INFO button to switch the displayed data.
DISK: Disk name
SONG: Song name
- For SMF files, use the MIDI OUT button to specify whether or not MIDI data is output during playback (ON/OFF). (This cannot be changed during playback.)
- Press the START button.
• The selected song is played back.
■ The display during playback
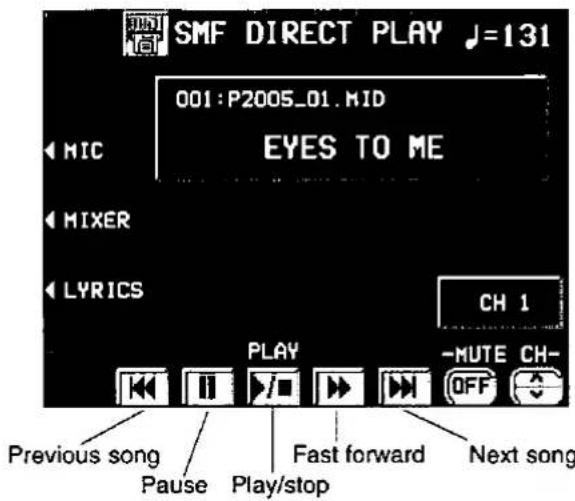
- During playback, the buttons below the display are used for player functions such as fast forward, pause, etc.
- During playback, if you press the MIXER button you can change the settings for each part.
- If the MIC button is pressed, the display changes to the setting display (ENTERTAINER) for when a microphone is connected to the MIC input terminal.
- For SMF disks:
For some disks, by pressing the LYRICS button, the lyrics are shown on the display.
For a "minus one" performance, use the CH ∧ and ∨ buttons to select the channel you wish to mute. Then turn the MUTE ON/OFF button to ON. You can perform the part for the selected channel on the keyboard. Following this, you can also specify the performance part using the CONDUCTOR buttons.
- For DOC disks:
You can use the RT1 (RIGHT 1), RT2 (RIGHT 2) and ORCH (other accompaniment parts) buttons to set the respective parts to ON or OFF.
• For PIANO DISC playback:
You can use the RT1 (RIGHT 1) and ORCH (other accompaniment parts) buttons to set the respective parts to ON or OFF.
MEDLEY PLAY
With DIRECT PLAY, songs saved on a disk can be played back continuously in a medley.
- On the DIRECT PLAY display, set the MEDLEY settings.
- If ALL is pressed, all the files are selected, and the songs are played back in order in a medley. If ALL is pressed again, the files are deselected.
- You can use the ▲ and ▼ buttons to select a song to add to the song list, then press the ADD button to add it to the list. Repeat these steps to create your own list of songs to have played back. A M01, M02 etc. next to the file name indicates its order in the list.
- If the number of files is 10 or more, you can use the PREV and NEXT buttons to go back or advance 10 files at a time.
- You can delete a marked file from the medley song list by selecting it and pressing the ADD button.
-
Use the LOOP button to specify ON or OFF for repeat playback of the medley.
-
Press the START button.
• Medley playback begins.
- During medley playback, you can use the SKIP button to skip to the next song.
Song Medley
Songs saved from the SEQUENCER to a disk (disk data) in the TECHNICS FORMAT can be played back in a medley.
- On the DISK MENU display, select SONG MEDLEY from the display.
• The display looks similar to the following.
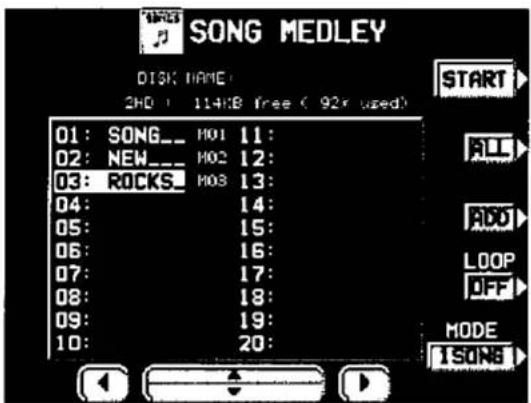
- Select the order of files in the medley.
- If ALL is pressed, all the files are selected, and the songs are played back in numerical in a medley.
- You can select a file and song, then press the ADD button to add it to the song list. Repeat these steps to create your own list of songs to have played back. A M01, M02 etc. next to the file name indicates its order in the list.
- If the number of files is 10 or more, you can use the PREV and NEXT buttons to go back or advance 10 files at a time.
- You can delete a marked file from the medley song list by selecting it and pressing the ADD button.
- Use the LOOP button to specify ON or OFF for repeat playback of the medley.
- You can use the MODE button to select the medley mode.
10 SNGS:
Songs 1 to 10 from each file are played in a medley.
1 SONG:
Only song 1 from each file is played back in a medley.
- Press the START button.
• Medley playback begins.
- During the performance, the display changes to the playback display.
- During a medley performance, if you press the MIXER button you can change the settings for each part.
- During a medley performance, you can use the SKIP button to skip to the next song.
Saving data
The recorded data and panel settings of this instrument can be saved on a disk.
Floppy disks
You can use 3.5 inch 2DD (720KB) or 2HD (1.44MB) disks.
• How to distinguish the two disk types:

- Although 2HD disks can hold more data and are convenient for quick loading and saving, 2DD disks are generally used for musical instruments. Therefore, you may not be able to use your 2HD disk data with other musical instrument models. However, because of the large amount of BACKUP data, a 2HD disk is required when this instrument's BACKUP data is saved.
- When saving data to the disk, the write-protect window must be closed.

FORMAT
Floppy disks which are used for the first time with this instrument have to be formatted through the following procedure. When an unformatted disk is inserted into the Disk Drive slot and you attempt to execute the save or load procedure, the FLOPPY DISK FORMAT display appears. Follow the instructions shown to format the disk.
- Note that this procedure clears any data which is currently stored on the disk.
- Select the type of format (2DD or 2HD).
- Be sure to select the type which is the same as your disk type.
• The display looks similar to the following.

- Press the YES button to format the disk, or press the NO button to cancel the format.
- When the YES button is pressed, disk format begins. After about 1–2 minutes, formatting is completed and DISK NAMING display is shown.
- Assign a name to the disk.
- Use the POSITION buttons to highlight the character position in the name box. Use the ABC...123 buttons to select the alphanumeric character. Repeat these steps to type the whole name.
- Use the INS button to type a space.
- Use the DEL button to erase a character.
• To erase all the characters, press the CLR button. -
You can press the ← button if you wish to have the name centered.
-
Press the OK button.
- The FORMAT display can also be accessed from the DISK TOOLS menu when, for example, you wish to reformat a disk. (Refer to page 125.)
SAVE
- Insert a formatted disk into the Disk Drive slot. Push it all the way in until you hear a click.
- A disk which is used with this instrument for the first time must first be formatted.
- On the DISK MENU display, select SAVE.
• The display looks similar to the following.
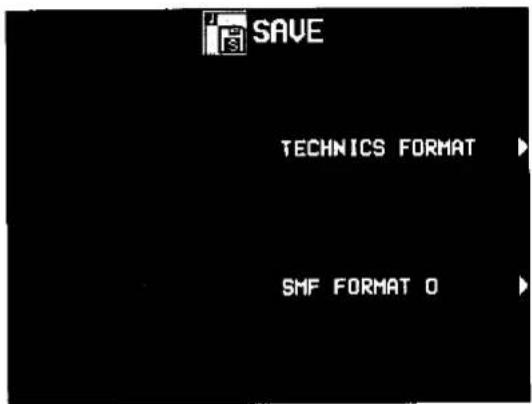
- Select the type of data save you want.
TECHNICS FORMAT:
Save this instrument's data in the Technics File format.
SMF FORMAT 0:
Save the SEQUENCER data in the "Standard MIDI File" format (FORMAT 0).
TECHNICS FORMAT
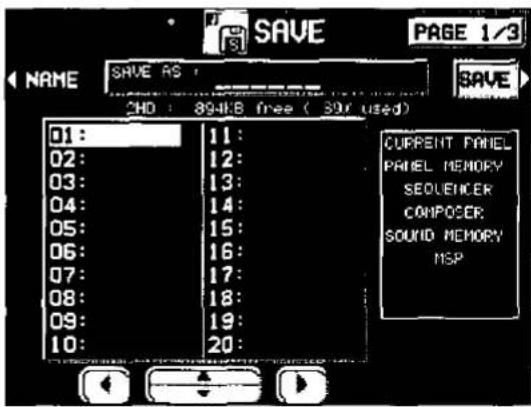
- Use the buttons below the display to specify the file number you wish to save to.
- The types of data that can be saved are shown in a frame on the right side of the display. If you press the SAVE button, all the indicated data is saved. Ordinarily PERFORMANCE data is selected, but you can use the SAVE OPTION to select specific data to save.
- If you wish to assign a name to the file, press the NAME button.
• The display looks similar to the following.

-
Assign a name to the file.
-
Use the POSITION buttons to highlight the character position in the name box. Use the ABC...123 buttons to select the alphanumeric character. Repeat these steps to type the whole name.
• Use the INS button to type a space.
• Use the DEL button to erase a character.
• To erase all the characters, press the CLR button. -
You can press the button if you wish to have the name centered.
-
Press the OK button.
• The display returns to the SAVE display.
- Press the SAVE button.
• The SAVE operation begins.
- If you attempt to save data to a file number in which data is currently saved, the display changes to the confirmation display. Press the YES button to continue the SAVE procedure, or press the NO button if you wish to cancel it.
Specify the kind of data you wish to save to the disk. To maximize effective use of disk memory or to minimize the save time, select only the type of data you wish to save.
- Use the PAGE buttons to access the 2/3 SAVE OPTION display.
• The display looks similar to the following.

-
Use the buttons below the display to specify the types of data you wish to save (YES/NO).
-
For PANEL MEMORY, select from YES/NO/1 BANK. If you save data with 1 BANK selected, only the contents of BANK 1 are saved and when loading data, only the BANK 1 data is overwritten; the other banks are not affected.
- Press the PERFORM button to select all the performance data (that is, all data except RHYTHM CUSTOM, USER MIDI SETTINGS), or press the BACKUP button to select all the data at once.
-
If the ALL OFF button is pressed, all the settings change to NO.
-
Press the SAVE button.
• The SAVE operation begins.
- If RHYTHM CUSTOM was selected, the save operation will take about one minute.
You can specify a single song in the SEQUENCER to save to the disk.
- Use the PAGE buttons to access the 3/3 SE-QUENCER SONG SAVE display.
• The display looks similar to the following.

- Use the ▲ and ▼ buttons to select the song number you wish to save.
- Press the SAVE button.
• The SAVE operation begins.
SMF FORMAT 0
This instrument's SEQUENCER data can be saved in the "Standard MIDI File" format (FORMAT 0) for use on other instruments.
- What you can save in the SMF format (FORMAT 0) is ordinary performance data, such as note data. Data such as chord and rhythm data, COMPOSER data, PANEL MEMORY data, etc. is not saved. If you wish to also save this special Technics data, save the data in the Technics File format.

- Use the ▲ and ▼ buttons to select the song number you wish to save to.
- If the number of files is 10 or more, you can use the PREV and NEXT buttons to go back or advance 10 files at a time.
- If you wish to assign a name to the file, press the NAME button.
• The display looks similar to the following.
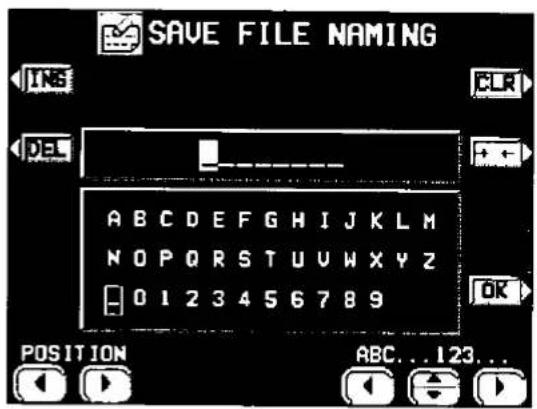
-
Assign a name to the file.
-
Use the POSITION buttons to highlight the character position in the name box. Use the ABC...123 buttons to select the alphanumeric character. Repeat these steps to type the whole name.
• Use the INS button to type a space.
• Use the DEL button to erase a character.
• To erase all the characters, press the CLR button. -
You can press the ← button if you wish to have the name centered.
-
Press the OK button.
• The display returns to the SAVE display. - Use the FROM SONG buttons to select the SEQUENCER song number you wish to save.
• The song name to save from is shown below the FROM SONG button. - Use the PANEL HEADER buttons to specify ON or OFF.
ON:
The sound and volume settings for each part are saved as data at the beginning of the file.
OFF:
This data is not saved.
- Use the 1 MEASURE SPACE buttons to select ON or OFF.
ON:
A one-measure space is added to the beginning of the file.
OFF:
No space is added.
- When there is various data other than performance data stored at the beginning of a file, the start of playback may be delayed. This can be avoided by set the 1 MEASURE SPACE to ON to inserting a before the beginning of the performance.
-
When set to ON, a space is added each time a file is saved. Therefore, if you have already saved a file once with the 1 MEASURE SPACE set to ON, please set it to OFF each time the file is subsequently saved.
-
Press the SAVE button.
• The SAVE operation begins.
- When the operation has been successfully completed, "COMPLETED!" is shown on the display.
- If you attempt to save data to a file number in which data is currently saved, the display changes to the confirmation display. Press the YES button to continue the SAVE procedure, or press the NO button if you wish to cancel it.
Disk management
Various disk management procedures, such as file erase, file copy, and disk format, are available from the DISK TOOLS menu.
DISK TOOLS
- Insert the disk into the Disk Drive slot.
- On the DISK MENU display, select DISK TOOLS from the display.
• The display looks similar to the following.

-
Select a function and follow the procedure to execute it.
-
Use the buttons below the display to select a file.
- Use the buttons to the left and right of the display to access the corresponding setting display.
- You can press the SMF/TECH button to change to the display for procedures related to TECH/SMF files.
RENAME:
Assign a name to a file.
DEL:
Delete a file.
FORMAT:
Reformat the disk.
COPY:
Copy a file.
MOVE:
Replace a file.
INFO (DISK/SONG) (SMF files only):
Select whether to display the disk data or the song names.
Set the automatic display when a disk is inserted
When a disk is inserted in the Disk Drive, the display automatically changes to a disk-procedure display. Follow this procedure to customize the automatic display.
PREFERENCES
- On the DISK MENU display, select PREFERENCES.
• The display looks similar to the following.
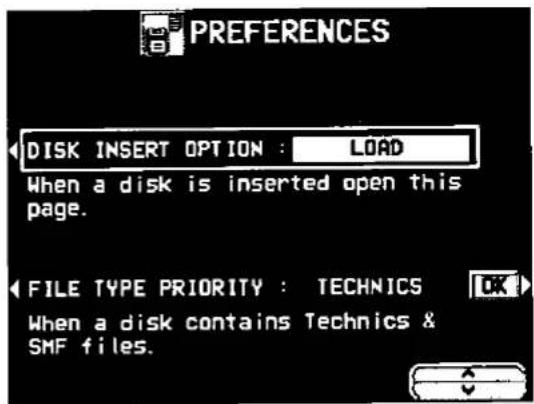
- Use the buttons to the left of the display to select the item, and the ∧ and ∨ buttons to change the setting.
DISK INSERT OPTION:
The display automatically changes to a disk-procedure display when a disk is inserted in the Disk Drive (OFF, DISK MENU, LOAD, DIRECT PLAY, SONG MEDLEY).
- During playback, recording or changing the settings, the displays unrelated to the settings made here do not change.
FILE TYPE PRIORITY:
Specify the desired priority ranking of displayed files when Technics files and SMF files are both recorded on the one disk (TECHNICS/SMF).
- Press the OK button.
Outline of the Sound

natural_image
Front view of a control panel with buttons and a central touchscreen (no text or symbols visible)The SOUND mode is used for making fine adjustments to the functions related to sound, such as tone, effects and tuning.
- Press the SOUND button to turn it on.

• The display looks similar to the following.
- The SOUND MENU display consists of two screen pages. Use the PAGE buttons to switch the screen page, as desired.
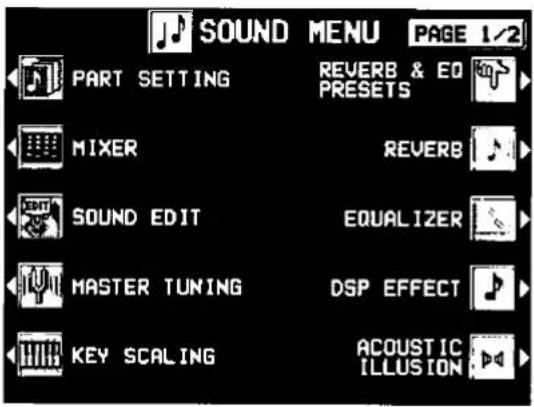

- Select the desired menu.
- Follow the procedures on the corresponding menu display.
- When the TEMPO/PROGRAM indicator is lit, it indicates that the dial is available for setting the current function.
Summary of the SOUND menu items
PART SETTING (page 129)
Set the various sound attributes for each part.
MIXER (page 133)
Use the MIXER display to visually adjust the major settings of each part.
SOUND EDIT:
Edit and create new sounds. (Refer to Part VIII: Sound Edit, page 139.)
MASTER TUNING (page 134)
Select the type of tuning for the instrument.
KEY SCALING (page 135)
Select the type of scaling (tuning).
REVERB & EQ PRESETS (page 136)
Select the reverb and equalizer preset values.
REVERB
Select the type of DIGITAL REVERB effect and how it is applied. (Refer to page 40.)
EQUALIZER (page 137)
Adjust the equalizer.
DSP EFFECT
Select the type of DSP EFFECT and how it is applied. (Refer to page 40.)
ACOUSTIC ILLUSION
Specify the type of ACOUSTIC ILLUSION effect and how it is applied. (Refer to page 41.)
LEFT HOLD (page 138)
Set the mode which determines how the LEFT part sounds during an AUTO PLAY CHORD performance.
TECHNI-CHORD
Select the TECHNI-CHORD harmony style. (Refer to page 43.)
- When you have finished setting the functions, press the SOUND button to turn it off.
■ A word about parts
The organization of the sound parts is as follows.
Normal parts (16 parts):
RIGHT 1 (PART 1), RIGHT 2 (PART 2), LEFT (PART 3), PART 4 to 16
• PART 16 is reserved for the DRUMS part.
AUTO PLAY CHORD (automatic accompaniment) parts:
ACCOMP 1, 2, 3, BASS, DRUMS, CHORD, R.BASS.
MANUAL SEQUENCE PADS part:
MSP
Part Setting
Set the various sound attributes for each part.
Selecting an attribute
- On the SOUND MENU display, select PART SETTING.
• The display looks similar to the following.

- Use the ∧ and ∨ buttons to select the part.
- PART 4 to 16 are used in SEQUENCER and MIDI functions. PART 16 is reserved for the DRUMS part.
- For information concerning CHORD and R.BASS, refer to the section on the AUTO PLAY CHORD (page 55).
- If necessary, assign a sound to the selected part at this time. (Only sounds from the DRUM KITS group can be selected for PART 16.)
- The upper portion of the display shows the name of the selected part and the sound assigned to that part. The box in the lower portion of the display shows the status of each attribute for the selected part.
- Use the buttons along the bottom of the display to select the attribute you wish to adjust.
VOL: VOLUME
PAN: PAN
EFF: EFFECT
SUS: SUSTAIN
KEY: KEY SHIFT
TUN: TUNING
BND: PITCH BEND RANGE
OTH: OTHER SETTING
- The display changes to the setting display for the selected attribute.
- The settings which can be adjusted may differ depending on the selected part.
- Adjust each attribute (explained in detail following).
- When you have completed adjustment of an attribute, use the buttons along the bottom of the display to select the next attribute you wish to adjust.
- When you have completed adjusting all of the settings for one part, select another part and repeat the adjustment procedure as desired.
- The settings and effects of the PAN, EFFECT etc. may differ depending on the sound.
VOLUME
Adjust the volume of each part.

Use the VOL ∧ and ∨ buttons to adjust the volume (0 to 127).
- If you wish to adjust this effect for other parts, use the PART SELECT ∧ and ∨ buttons to select another part.
PAN
Adjust the stereo balance of each part.

Use the PAN ∧ and ∨ buttons to adjust the stereo balance (L64-CTR-R63).
- At L64, the sound is completely to the left, at R63 completely to the right. At CTR, the sound is at the center. The display indicates the selected position.
- If you wish to adjust this effect for other parts, use the PART SELECT ∧ and ∨ buttons to select another part.
- Even at the same numerical value, the stereo balance may differ slightly depending on the sound.
EFFECT
The DIGITAL REVERB depth, the DSP EFFECT depth, and the DIGITAL EFFECT on/off status can be set for each part.

- Select an effect (REVERB DEPTH, DSP EFFECT or DIGITAL EFF).
- Use the EFF ∧ and ∨ buttons to change the setting.
- For the REVERB DEPTH and DSP EFFECT, specify the depth (0 to 127). For the DIGITAL EFF, set to ON or OFF.
-
Repeat steps 1 and 2 for the other effects, as necessary.
-
If you wish to adjust this effect for other parts, use the PART SELECT ∧ and ∨ buttons to select another part.
• Even at the same numerical value, the effect may differ depending on the sound.
SUSTAIN
Turn the sustain on or off for each part, and specify the length of the sustain.

■ Sustain on/off
-
Select SUSTAIN ON/OFF.
-
Use the SUS ∧ and ∨ buttons to set the sustain to on or off.
■ Sustain length
-
Select SUSTAIN LENGTH.
-
Use the SUS ∧ and ∨ buttons to adjust the length of the sustain (1 to 8).
- For some sounds, the length of the sustain does not change even if the number is changed.
- If you wish to adjust this effect for other parts, use the PART SELECT ∧ and ∨ buttons to select another part.
KEY SHIFT
The pitch of the part can be shifted up or down.

Use the KEY ∧ and ∨ buttons to specify the amount of key shift (-12 to +12).
- A value of 1 means a shift of one semi-tone. To raise (or lower) the pitch one octave, set the value to +12 (or -12).
- The v button is used to lower the pitch, and the ∧ button to raise the pitch.
- If you wish to adjust this effect for other parts, use the PART SELECT ∧ and ∨ buttons to select another part.
TUNING
Fine-tune the pitch of each part.
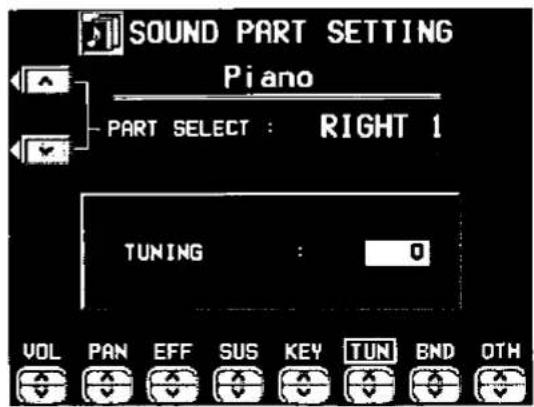
Use the TUN ∧ and ∨ buttons to adjust the tuning (-128 to +127).
- The ∨ button is used to lower the pitch, and the ∧ button to raise the pitch.
- If you wish to adjust this effect for other parts, use the PART SELECT ∧ and ∨ buttons to select another part.
PITCH BEND RANGE
Set the pitch range of the PITCH BEND wheel.

Use the BND ∧ and ∨ buttons to specify the range (0 to 12). Increments are in semi-tones.
- The higher the number, the greater the change in pitch when the PITCH BEND wheel is operated.
- If you wish to adjust this effect for other parts, use the PART SELECT ∧ and ∨ buttons to select another part.
OTHER SETTING
Modify the Foot Switch setting and other settings.

- Select the function to adjust.
GLIDE PEDAL:
Enable or disable the glide effect, if it has been assigned to the Foot Switch (sold separately).
SUSTAIN PEDAL:
Enable or disable the sustain effect, if it has been assigned to the Foot Switch (sold separately).
PART EXP PEDAL:
Enable or disable part expression by the expression pedal (sold separately).
• To enable the ON/OFF setting for each part, it is necessary to set EXPRESS. PEDAL to PART EXPRESSION on the FOOT CONTROLLERS display. (Refer to page 162.)
AFTER TOUCH:
Enable or disable the aftertouch effect for the keyboard.
KEY SCALING:
Enable or disable key scaling (page 135).
-
Use the OTH ∧ and ∨ buttons to select ON or OFF for each function.
-
For Foot Switch settings, refer to page 161.
- To change the settings for other parts, use the PART SELECT ∧ and ∨ buttons to select a different part.
Mixer
Use the MIXER display to visually adjust the major settings of each part. Use this display to make broad, general changes to the settings.
-
On the SOUND MENU display, select MIXER.
-
The MIXER display consists of 3 pages. Use the PAGE buttons to switch among the pages.
• Each time the OTHER PARTS/TR button is pressed, the part setting display changes in the following order: RIGHT (RT) 1 to PART (PT) 8 → PART (PT) 9 to PART 16 → Accompaniment and other parts. -
Adjust each parameter.

SOUND:
Select SOUND. Use the balance buttons below the display to set the sound for the corresponding part.
- The buttons in the SOUND GROUP can also be used to select the sound.
PAN:
Select PAN. Use the balance buttons below the display to adjust the stereo balance of the corresponding part (L64-CTR-R63).
VOLUME:
Select VOL. Use the balance buttons below the display to adjust the volume of the corresponding part (0 to 127).
- To mute a part, press both the corresponding balance buttons as the same time. To cancel the mute, press either balance button for the part.
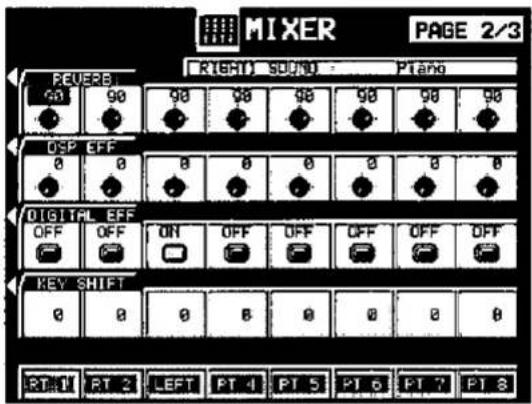
REVERB:
Select REVERB. Use the balance buttons below the display to set the level of the DIGITAL REVERB for the corresponding part (0 to 127).
DSP EFFECT:
Select DSP EFF. Use the balance buttons below the display to adjust the level of the DSP EFFECT for the corresponding part (0 to 127).
- In some cases, this setting may not be operative depending on the selected type of DSP EFFECT.
DIGITAL EFFECT:
Select DIGITAL EFF. Use the balance buttons below the display to set the DIGITAL EFFECT to ON or OFF for the corresponding part.
KEY SHIFT:
Select KEY SHIFT. Use the balance buttons below the display to adjust the shift width of the output pitch of each part (in semitone increments; -12 to +12).

MIDI:
Select MIDI. Use the balance buttons below the display to set the MIDI channel for each part (CH1-CH16).
• Information about MIDI channels can be found on page 165.
LOCAL:
Select LOCAL. Use the balance buttons below the display to turn LOCAL CONTROL ON or OFF for each part.
• Even at the same numerical value, the PAN and effects may differ depending on the sound.
- For some parts, such as the automatic accompaniment parts, the items that can be adjusted are limited.
Master Tuning
This setting is used to fine-tune the pitch of the entire instrument. This is convenient when the Keyboard is played with other instruments or with a recorded performance.
-
On the SOUND MENU display, select MASTER TUNING.
• The display changes to the following. -
Use the and buttons to adjust the pitch within a range of 427.3 to 453.0 Hz.
• The decimal can be set to 0, 3 or 6.
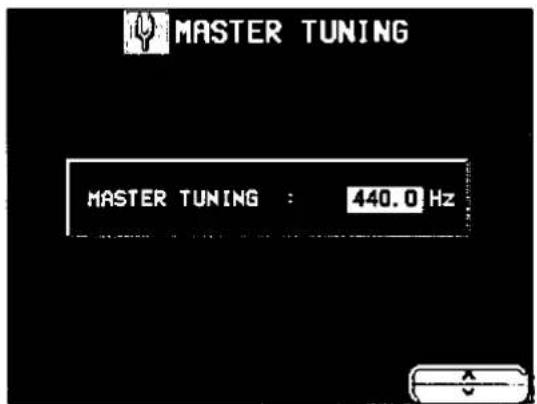
Key Scaling
The type of tuning for this instrument can be changed. In addition to standard (equal temperament) tuning, other types of scaling are available.
- On the SOUND MENU display, select KEY SCALING.
• The display looks similar to the following.
![KEY SCALING PAGE 1/2 SCALING TYPE : OFF SCALING SHIFT : 0 [KEY=C ] SCALING MODE : TOTAL](/content/2026/06/1304673/images/6497785aa5e299b8a16e089ebc6d601052936a994572927c1904978ad18c6684.jpg)
- Use the buttons to the left of the display to select the function you wish to adjust.
- You can use the SOUND EDIT feature to adjust the KEY SCALING for each sound. (Refer to page 144.)
SCALING TYPE
Select the type of scaling (tuning) from OFF, RANDOM, PIANO, ORCHESTRA, PYTHAGOREAN, WERCKMEISTER, KIRNBERGER, ARABIC 1 to 5, SLENDRO, PELOG, USER.
- Select OFF for the normal scaling. Select USER if you wish to use a customized scaling (see below).
SCALING SHIFT
Select the key on which the tuning will be based.
- Set to the key in which you are going to perform.
SCALING MODE (TOTAL/SOUND)
TOTAL: The selected KEY SCALING is active for all parts.
SOUND: The KEY SCALING defined for each sound is active.
- Use the and buttons to change the setting.
■ User type scaling
You can adjust the instrument to a customized scaling.
- In KEY SCALING, the pitch of each note of the octave is slightly shifted up or down from the standard (equal temperament) tuning.
-
Select USER for SCALING TYPE.
-
Select TOTAL for SCALING MODE.
-
Use the PAGE buttons to access the 2/2 USER KEY SCALING display.
• The display looks similar to the following.

- Adjust the scaling.
- Use the ◀ and ▶ buttons to select a keyboard key; use the ∧ and ∨ buttons to adjust the pitch for the selected key. Repeat these steps for each keyboard key, as desired.
- Increments are in cents (one hundredth of an equal-tempered semitone). A + value raises the pitch and a - value lowers the pitch in relation to standard (equal temperament) tuning.
Reverb & Equalizer Presets
You can select preset DIGITAL REVERB and equalizer settings for this instrument. This convenient feature gives you exactly the sound you want without going through complicated procedures.
- On the SOUND MENU display, select REVERB & EQ PRESETS.
• The display looks similar to the following.

- Select a preset type.
REVERB PRESETS:
Presets for the DIGITAL REVERB.
EQUALIZER PRESETS:
Presets for the equalizer.
REVERB + EQUALIZER PRESETS:
Presets used for both the DIGITAL REVERB and the equalizer.
- Select the desired preset settings.
• The display looks similar to the following.
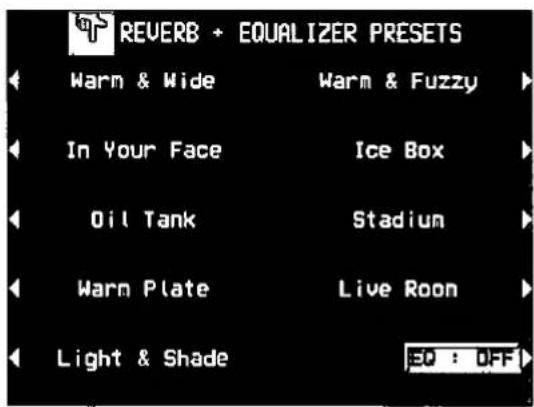
- For the EQUALIZER PRESETS and the REVERB + EQUALIZER PRESETS, the EQ button can be used to turn the equalizer function on or off.
Equalizer
You can apply a 4-band equalizer to the final output of this instrument.
- The equalizer is applied to both the L and R outputs.
- On the SOUND MENU display, select EQUALIZER.
• The display looks similar to the following.

- Use the buttons below the display to select the sound quality for the four sound ranges (LOW, MID-LOW, MID-HIGH, HIGH).
- Use the FREQ ∧ and ∨ buttons to adjust the standard frequency (Hz), and the GAIN ∧ and ∨ buttons to adjust the level gain (decibels).
- The EQ button can be used to turn the equalizer on or off.
- Depending on the selected sound, if you set very high GAIN setting, the sound may be distorted. In this case, lower the GAIN setting, or lower the MAIN VOLUME setting.
Left Hold
Select the mode to specify how the left section of the keyboard sounds during an AUTO PLAY CHORD performance.
- On the SOUND MENU display, select LEFT HOLD.
• The display changes to the following.
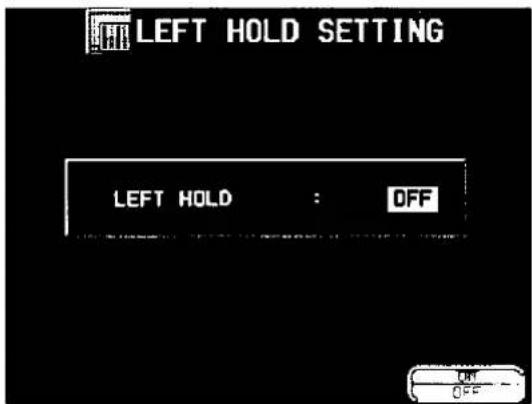
- Use the ON and OFF buttons to set the mode to on or off.
OFF
| ONE FINGER | FINGERED | PIANIST | |
| When rhythm is off | The chord note specified by the pressed key is heard (CHORD part). | The LEFT part sound and chord note specified by the pressed keys are heard. | The LEFT part notes and the chord note are not heard (the RIGHT part sound is heard for the entire keyboard). |
| When rhythm is on | The LEFT part notes and the chord note are not heard. | The LEFT part sound of the pressed keys is heard. |
• The LEFT part can be heard only when the LEFT button in the CONDUCTOR section is on.
- When you select the ONE FINGER mode, the LEFT button in the CONDUCTOR section turns off automatically.
ON
| ONE FINGER | FINGERED | PIANIST | |
| When rhythm is on/off | The specified chord note is produced in the LEFT part sound. | The LEFT part sound of the pressed keys is heard. | The LEFT part notes and the chord note are not heard (the RIGHT part sound is heard for the entire keyboard). |
• The LEFT part can be heard only when the LEFT button in the CONDUCTOR section is on.
- When the MEMORY button is on, even when the keys are released, the LEFT part sound continues to play.
Outline of the Sound Edit
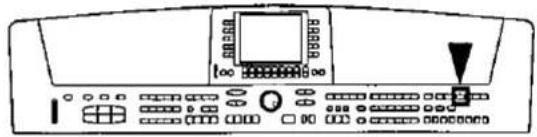
SOUND EDIT enables you to create your own new sound by altering one of the this instrument's preset sounds. Your new sound can be stored in one of the sound memory locations. SOUND EDIT has two methods of use. You can edit in detail using functions more commonly associated with a synthesizer, or you can use EASY EDIT which allows you to change some basic parameters on one page.
- Select a sound to edit.
• To edit DRUM KITS sound, refer to page 156.
- To reserve the DIGITAL DRAWBAR settings, refer to page 158.
- Turn on the SOUND button.

• The display looks similar to the following.

- Select SOUND EDIT.
• The display looks similar to the following.

- SOUND EDIT does not function when GENERAL MIDI is set to ON.
Summary of the SOUND EDIT menu items
EASY EDIT (page 140)
The most often used edit functions—such as brightness and attack speed—are assembled on one display for easy sound modification.
TONE SELECT (page 141)
Modify the tones which make up the sound.
TONE LAYER (page 143)
Specify how the tones are assigned to the keyboard keys.
PITCH (page 144)
Adjust the settings related to the pitch of the sound.
FILTER (page 147)
Adjust the amount of frequency cut in specific frequency ranges.
AMPLITUDE (page 150)
Volume settings, such as the sound envelope.
DIGITAL EFFECT (page 153)
Select the type and degree of effects applied to the sound.
CONTROLLER (page 154)
Specify how wheel operation etc. affects the sound.
-
Select the desired menu and follow the procedures on the corresponding setting display.
-
To check the sound of a single tone, press the SOLO button to highlight the SOLO indication. Only the currently selected tone sounds when a key is played.
- When the TEMPO/PROGRAM indicator is lit, it indicates that the dial is available for setting the current function.
- The sounds created with the SOUND EDIT are also affected by the settings adjusted in the other SOUND menus (refer to "Part VII: Sound").
(Continued on the next page)
- When the sound is just the way you like it, press the EXIT button to return to the menu display, and press the WRITE button to store your new sound.
- Press the EDITED (or ORIGINAL) button to switch between the modified sound (EDITED) and the original sound (ORIGINAL). This allows you to compare the edited sound to the original sound as you are modifying it.
Easy Edit
The most commonly used edit functions are consolidated on one display, providing convenient and quick editing operation.
- On the SOUND EDIT menu display, select EASY EDIT.
• The display changes to the following.

- Select a sound attribute to modify.
-
Use the VALUE ∧ and ∨ buttons to specify the value of the attribute.
-
Selecting the type of DIGITAL EFFECT is explained in the section on EFFECT EDIT (page 153).
- An effect may remain unchanged when EASY EDIT is used to set the value, if another EDIT function was first used to set the value to its upper or lower limit.
-
Repeat steps 2 and 3 to modify other sound attributes as desired.
-
Press the WRITE button to store your new sound.
-
Storing your new sound is explained on page 155.
- If a sound is stored in the EASY EDIT mode, and is later selected in the EASY EDIT mode, the displayed value of an attribute may be different from the value when it was stored. The sound itself, however, is exactly as it was stored.
Easy Edit items
BRILLIANCE:
Adjust the brightness of the sound (-10 to +10).
VIBRATO DEPTH:
Set vibrato depth (OFF, -10 to +10).
VIBRATO SPEED:
Set vibrato speed (-10 to +10).
VIBRATO DELAY:
Set time delay between key played and vibrato start (-10 to +10).
OCTAVE SHIFT:
Shift the octave range (-2 to +2).
ATTACK TIME:
Adjust attack time (-10 to +10).
RELEASE TIME:
Adjust time of sound fade-out after key is released (-10 to +10).
DIGITAL EFFECT:
Select type of effect.
Tone Edit
Modify the separate tones which comprise the sound.
About tones
A sound may be made up of at most four tones.

flowchart
graph TD
    A["SOUND"] --> B["1st tone"]
    A --> C["2nd tone"]
    A --> D["3rd tone"]
    A --> E["4th tone"]
TONE SELECT
- On the SOUND EDIT menu, select TONE SELECT.
• The display looks similar to the following.
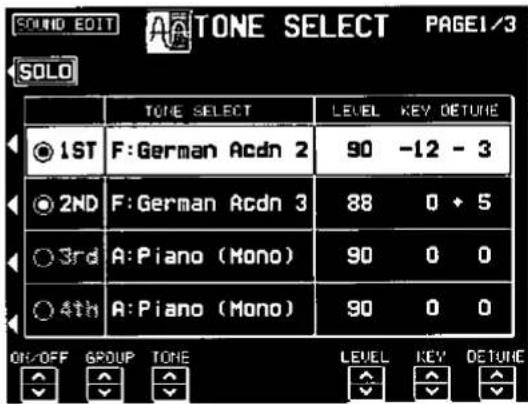
-
Use the buttons to the left of the display to select the tone you wish to edit (1st, 2nd, 3rd, 4th).
-
Use the ON/OFF ∧ and ∨ buttons to select ON or OFF.
- ● indicates that the tone is on, and ○ indicates that it is off.
- Tones which are set to OFF are not produced.
- Select a sound for the tone.
- Use the GROUP ∧ and ∨ buttons to select the group, and the TONE ∧ and ∨ buttons to select the sound.
- A list of tone sounds can be found in the separate "REFERENCE GUIDE" provided.
-
Use the LEVEL ∧ and ∨ buttons to adjust the volume (0 to 127).
-
Use the KEY ∧ and ∨ buttons to set the output pitch (-24 to +24).
• Increments are in semitones.
-
Use the DETUNE ∧ and ∨ buttons to make fine adjustments to the pitch (-50 to +50).
-
Repeat steps 2 to 7 for the other tones, as desired.
TONE WAVEFORM
One tone may consist of up to four TONE WAVEFORMs. You can adjust the settings so that a different sound (tone waveform) is output for each tone depending on the velocity (how hard the keys are played).
- Use the PAGE buttons to view the 2/3 display.
• The display looks similar to the following.

- Use the buttons to the left of the display to select a tone.
- Use the CURSOR ∧ and ∨ buttons to select the column for the function you wish to adjust.
■ Other settings
- Use the PAGE buttons to view the 3/3 display.
• The display looks similar to the following.
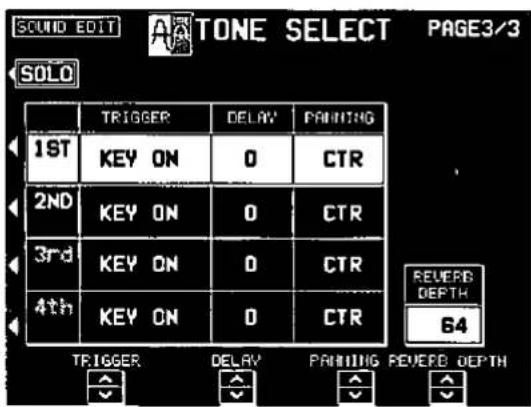
- Use the buttons to the left of the display to select a tone.
- Use the TRIGGER ∧ and ∨ buttons to select a trigger mode.
KEY ON:
The normal mode, in which sound is emitted when the key is played.
-
Select the tone waveform.
-
Use the GROUP ∧ and ∨ buttons to select the sound group. Use the TONE WAVEFORM ∧ and ∨ buttons to select the waveform.
-
A TONE list can be found in the separate REFERENCE GUIDE provided.
-
Use the VELOCITY ∧ and ∨ buttons to specify the velocity range.
- When the upper limit of a waveform is set to 127, no more waveforms can be added.
- Repeat steps 3 to 5 to edit the other waveforms, as desired.
- Up to four waveforms can be set, with a different sound for each velocity range.
- Repeat steps 2 to 6 for the other tones, as desired.
KEY OFF:
Sound is emitted when the key is released (like plucked strings, for example).
CHORD:
The sound is emphasized when chords are played (like the cutting sound of a guitar, for example).
- Use the DELAY ∧ and ∨ buttons to adjust the delay time of the sound (0 to 50).
- The higher the number, the longer the delay before sound output.
- Use the PANNING ∧ and ∨ buttons to adjust the stereo balance (L64-CTR-R63).
- CTR is the center point. At L64, the sound is all the way to the left, at R63 all the way to the right.
- Use the REVERB DEPTH ∧ and ∨ buttons to adjust the depth of the reverb (0 to 127).
- Repeat steps 2 to 6 for the other tones, as desired.
TONE LAYER
On the SOUND EDIT menu display, select TONE LAYER.
■ KEY LAYER
Adjust the relation of tone output to keyboard location.
- Press the KEY LAYER button.
• The display looks similar to the following.
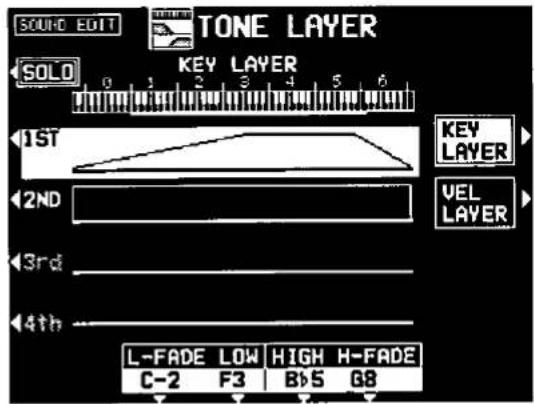
-
Use the buttons to the left of the display to select a tone (1st, 2nd, 3rd or 4th).
-
Use the L-FADE ∧ and ∨ buttons and the LOW ∧ and ∨ buttons to define the curve for the lower range of tone output.
- By entering different values for the L-FADE and LOW setting, you can define a sloping volume increase to the peak output volume which corresponds to the note pitch.
- Use the HIGH ∧ and ∨ buttons and the H-FADE ∧ and ∨ buttons to define the curve for the higher range of tone output.
- By entering different values for the H-FADE and HIGH settings, you can define a sloping volume decrease from the peak output which corresponds to the note pitch.
- By overlapping the L-FADE and H-FADE curves of each different tone, you can achieve a cross-fade effect, where the sound gradually changes in relation to pitch.
- Repeat steps 2 to 4 for the other tones, as desired.
■ VELOCITY LAYER
Adjust these settings to regulate the tone output relative to the velocity.
- Press the VEL LAYER button.
• The display looks similar to the following.
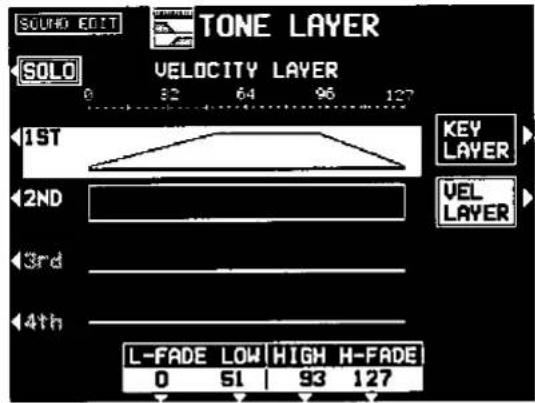
-
Use the buttons to the left of the display to select a tone (1st, 2nd, 3rd or 4th).
-
Use the L-FADE ∧ and ∨ buttons and the LOW ∧ and ∨ buttons to define the velocity curve for the lower range.
-
Use the HIGH ∧ and ∨ buttons and the H-FADE ∧ and ∨ buttons to define the velocity curve for the higher range.
- By overlapping the L-FADE and H-FADE curves of each different tone, you can change the way the tone sounds relative to how hard or softly the keyboard is played.
- Repeat steps 2 to 4 for the other tones, as desired.
Pitch Edit
Adjust the settings related to the pitch of the sound.
PITCH
- On the SOUND EDIT menu display, select PITCH.
• The display looks similar to the following.

-
Use the buttons to the left of the display to select a tone (1st, 2nd, 3rd or 4th).
-
Use the KEY ∧ and ∨ buttons to specify the output pitch (-24 to +24).
- Units are in semitones.
- Use the DETUNE ∧ and ∨ buttons to fine-adjust the pitch (-50 to +50).
- Slight differences in the DETUNE values between the tones add fullness to the sound.
- Use the SCALE ∧ and ∨ buttons to select the type of scale (NORM, 1/2, 1/4, 1/8, 1/16, 1/32, 1/64, FIX).
- NORM is the normal scale type. For example, when 1/2 is selected, a difference in pitch between one key and the adjacent key becomes half the normal pitch difference. When FIX is selected, the pitch is the same regardless of which key is played.
- Select the type of scaling (tuning).
- Use the CURSOR ∧ and ∨ buttons to select KEY SCALING. Use the VALUE ∧ and ∨ buttons to change the setting.
• Key scaling is explained on page 135.
- Set the octave of the sound.
- Use the CURSOR ∧ and ∨ buttons to select OCT-SHIFT. Use the VALUE ∧ and ∨ buttons to change the setting (-2 to +2).
- Set the octave of the right part when the keyboard is split.
- Use the CURSOR ∧ and ∨ buttons to select RIGHT SPLIT. Use the VALUE ∧ and ∨ buttons to change the setting (-2 to +2).
- Set the octave of the left part when the keyboard is split.
- Use the CURSOR ∧ and ∨ buttons to select LEFT SPLIT. Use the VALUE ∧ and ∨ buttons to change the setting (-2 to +2).
- Repeat steps 2 to 9 for the other tones, as desired.
■ ENVELOPE
Specify how the pitch changes over time, from the time the key is played to the time the sound dies out.
- Press the ENV button.
• The display looks similar to the following.
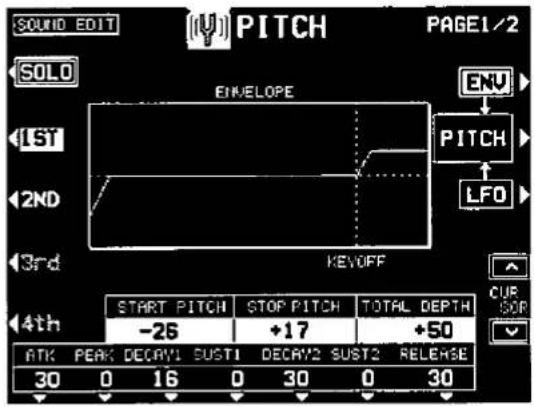
-
Use the buttons to the left of the display to select a tone.
-
Adjust the settings for the pitch change envelope.
- Use the buttons below the display to set the corresponding values. The envelope is created on the display as you input the settings.
- Use the CURSOR ∧ and ∨ buttons switch between the upper row and lower row items.
- Use the TOTAL DEPTH ∧ and ∨ buttons to specify the maximum level (-50 to +50).
- Repeat steps 2 and 3 for the other tones, as desired.
Specify how the pitch envelope changes in relation to note pitch.
- Use the PAGE buttons to view the 2/2 display.
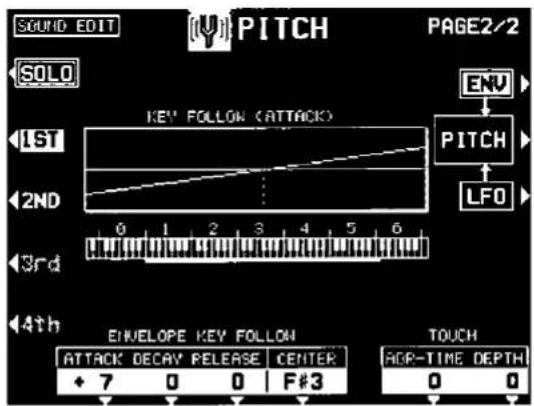
-
Use the buttons to the left of the display to select a tone.
-
Change the key follow settings for the ATTACK, DECAY and RELEASE.
- Use the ∧ and ∨ buttons corresponding to the ENVELOPE KEY FOLLOW attributes to adjust the settings (-50 to +50). Use the CENTER ∧ and ∨ buttons to select the center of the bend direction.
- Change the touch settings.
- Use the ADR-TIME ∧ and ∨ buttons to specify the time change depending on touch (-50 to +50). Use the DEPTH ∧ and ∨ buttons to specify the pitch change level depending on touch (-50 to +50).
- At a – setting, the softer the keys are pressed, the greater the change. At a + setting, the harder the keys are pressed, the greater the change.
LFO
Adjust the pitch LFO (cyclic modulation) settings.
There are four types of LFO.
- Press the LFO button.
• The display looks similar to the following.

flowchart
graph TD
    A["1ST"] --> B["LF01"]
    C["2ND"] --> B
    D["3rd"] --> B
    E["4th"] --> B
    B --> F["PITCH"]
    G["LFO"] --> H["LFO"]
    I["ENV"] --> J["PITCH"]
    K["LFO"] --> L["PITCH"]
    M["LFO"] --> N["SELECT"]
    O["WAVE"] --> P["SIN 15 23 0 0 OFF"]
-
Use the LFO SELECT ∧ and ∨ buttons to select an LFO (1-4).
-
Use the buttons below the display to adjust the settings.
WAVE
Modulate the waveform.
SIN: Sine wave
TRI: Triangle wave
SQR: Square wave
SAW: Saw tooth wave
DELAY
Delay time is the time elapsed from when the keyboard key is pressed until the modulation begins (0 to 30).
SPEED
Modulation speed (0 to 127)
DEPTH
Modulation depth (0 to 127)
TOUCH
Degree of modulation change in relation to touch (0 to 50).
KEYSYNC
When playing more than one note, specify whether the LFO starts or not each time a key is pressed (ON/OFF).
- When KEYSYNC is set to ON: if, while playing one note, you play a second note, the LFO is applied to the second note as well.
- Use the buttons to the left of the display to specify for each tone whether or not the specified LFO is applied.
• The LFO can be applied to multiple tones.
- A + indicates that the LFO is on for the tone, a - indicates that the inverted-phase LFO is applied to the tone.
- Repeat steps 2 to 4 for the other LFO types, as desired.
Filter Edit
Make major changes to the sound by eliminating specific frequency ranges.
FILTER
- On the SOUND EDIT menu, select FILTER.
• The display looks similar to the following.

- Use the buttons to the left of the display to select a tone.
- Use the MODE button to select the filter mode.
LPF+EQ (low-pass filter + equalizer) Signals higher than the cut-off frequency are cut. Normal sounds are softened.
HPF+EQ (high-pass filter + equalizer) Signals lower than the cut-off frequency are cut. Normal sounds are sharpened.
LPF24 (low-pass filter 24) A stronger low-pass filter than LPF+EQ.
HPF24 (high-pass filter 24) A stronger high-pass filter than HPF+EQ.
BPF (band-pass filter) Cuts all signals which are not in the range close to the cut-off frequency. The sound has a distinctive character.
THRU No filter effect is applied.
- Use the buttons below the display to adjust the filter attributes.
CUTOFF
Set the frequency range which is cut by the filter.
- The cut-off frequency is the standard frequency which is cut by the filter.
RESO
Specify the resonance value (dB).
- Resonance is effect which adds character to the sound by emphasizing the harmonic components of frequencies close to the cut-off frequency.
TOUCH
Specify the degree of change relative to keyboard touch.
CURVE
Specify the type of curve relative to keyboard touch.
For LPF+EQ/HPF+EQ filters, the sound quality can be modified by the EQUALIZER.
RANGE
Select the setting range (HIGH or LOW).
FREQ
Set the standard frequency.
GAIN
Set the level increase or decrease from the value set for FREQ (dB).
- Repeat steps 2 to 4 for each tone, as desired.
FILTER KEY FOLLOW
Specify how the filter changes in relation to note pitch.
- Use the PAGE buttons to view the 2/2 display.
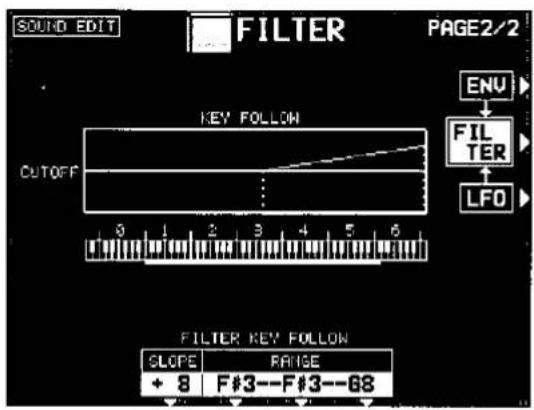
- Use the buttons to the left of the display to select a tone.
- Change the key follow settings.
- Use the SLOPE ∧ and ∨ buttons to adjust the bend slope (-50 to +50). Use the RANGE ∧ and ∨ buttons to specify the pitch range by note name. The center setting defines the bend direction.
- Repeat steps 2 and 3 for the other tones, as desired.
ENVELOPE
Specify how the filter changes over time, from the time the key is played to the time the sound dies out.
- Press the ENV button.
• The display looks similar to the following.
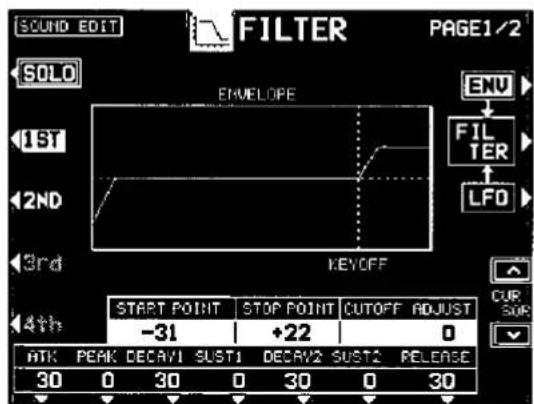
- Use the buttons to the left of the display to select a tone.
-
Adjust the settings for the filter envelope.
-
Use the buttons below the display to set the corresponding values. The envelope is created on the display as you input the settings.
- Use the CURSOR ∧ and ∨ buttons switch between the upper row and lower row items.
- Use the CUTOFF ADJUST ∧ and ∨ buttons to move the entire graph up or down to change the amount of filter effect (-50 to +50).
- Repeat steps 2 and 3 for the other tones, as desired.
Specify how the filter changes relative to note pitch over time.
- Use the PAGE buttons to view the KEY FOLLOW display.

- Use the buttons to the left of the display to select a tone.
- Change the key follow settings for the ATTACK, DECAY and RELEASE.
-
Use the ∧ and ∨ buttons corresponding to the ENVELOPE KEY FOLLOW attributes to adjust the settings (-50 to +50). Use the CENTER ∧ and ∨ buttons to select the center of the bend direction.
-
Change the touch settings.
- Use the ADR-TIME ∧ and ∨ buttons to specify the time change depending on touch (-50 to +50). Use the DEPTH ∧ and ∨ buttons to specify the pitch change level depending on touch (-50 to +50).
- At a - setting, the softer the keys are pressed, the greater the change. At a + setting, the harder the keys are pressed, the greater the change.
LFO
Adjust the LFO (cyclic modulation) settings applied to the filter. There are four types of LFO.
- Press the LFO button.
• The display looks similar to the following.

flowchart
graph TD
    A["1ST"] --> B["LF01"]
    C["2ND"] --> D["LF02"]
    E["3rd"] --> F["LF03"]
    G["4th"] --> H["LF04"]
    I["LFO SELECT"] --> J["HAVE DELAY SPEED DEPTH TOUCH KEYSYNC SIN 0 23 20 40 OFF"]
    K["ENV"] --> L["FILTER"]
    M["ENVO"] --> L
-
Use the LFO SELECT ∧ and ∨ buttons to select an LFO (1-4).
-
Use the buttons below the display to adjust the settings.
WAVE
Modulate the waveform.
SIN: Sine wave
TRI: Triangle wave
SQR: Square wave
SAW: Saw tooth wave
DELAY
Delay time is the time elapsed from when the keyboard key is pressed until the modulation begins (0 to 30).
SPEED
Modulation speed (0 to 127).
DEPTH
Modulation depth (0 to 127).
TOUCH
Degree of modulation change in relation to touch (0 to 50).
KEYSYNC
When playing more than one note, specify whether the LFO starts or not each time a key is pressed (ON/OFF).
- When KEYSYNC is set to ON: if, while playing one note, you play a second note, the LFO is applied to the second note as well.
- Use the buttons to the left of the display to specify for each tone whether or not the specified LFO is applied.
• The LFO can be applied to multiple tones.
- A + indicates that the LFO is on for the tone, a - indicates that the inverted-phase LFO is applied to the tone.
- Repeat steps 2 to 4 for the other LFO types, as desired.
Amplitude Edit
Adjust the settings related to the volume of the sound.
AMPLITUDE
- On the SOUND EDIT menu, select AMPLITUDE.
• The display looks similar to the following.
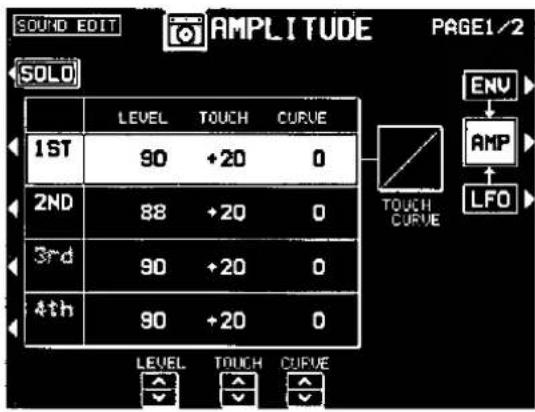
- Use the buttons to the left of the display to select a tone.
- Use the LEVEL ∧ and ∨ buttons to select the volume (0 to 127).
- Use the TOUCH ∧ and ∨ buttons to set the amount of volume change in relation to how hard the keyboard is played (-50 to +50).
- At a – value, the softer the keyboard is played, the louder the sound. At a + value, the harder the keyboard is played, the louder the sound.
- Use the CURVE ∧ and ∨ buttons to select the type of volume curve depending on touch (-3 to +3).
- Repeat steps 2 to 5 for the other tones, as desired.
AMPLITITUDE KEY FOLLOW
Specify how the volume changes in relation to note pitch.
- Use the PAGE buttons to view the 2/2 display.
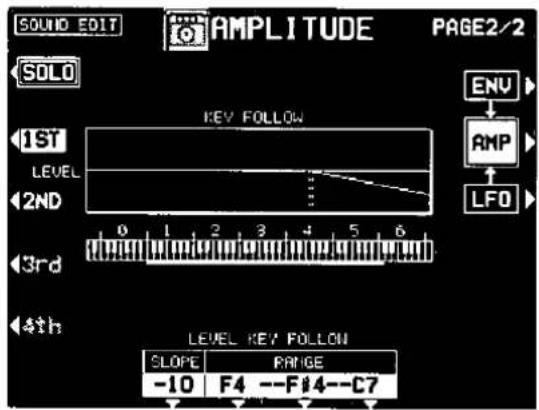
- Use the buttons to the left of the display to select a tone.
- Change the key follow settings.
- Use the SLOPE ∧ and ∨ buttons to adjust the bend slope (-50 to +50). Use the RANGE ∧ and ∨ buttons to specify the pitch range by note name. The center setting defines the bend direction.
■ ENVELOPE
Specify how the volume changes over time, from the time the key is played to the time the sound dies out.
- Press the ENV button.
• The display looks similar to the following.

- Use the buttons to the left of the display to select a tone.
- Adjust the settings for the volume envelope.
- Use the buttons below the display to set the corresponding values. The envelope is created on the display as you input the settings.
- Repeat steps 2 and 3 for the other tones, as desired.
Specify how the volume changes relative to note pitch over time.
- Use the PAGE buttons to view the 2/2 display.
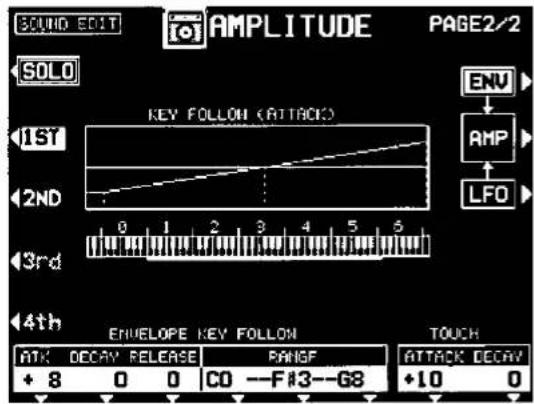
- Use the buttons to the left of the display to select a tone.
-
Change the key follow settings for the ATTACK, DECAY and RELEASE.
-
Use the ∧ and ∨ buttons corresponding to the ENVELOPE KEY FOLLOW attributes to adjust the settings (-50 to +50). Use the RANGE buttons to specify the keyboard range.
- Change the touch settings.
- Use the ATTACK ∧ and ∨ buttons to specify the ATTACK time change depending on touch (-50 to +50). Use the DECAY ∧ and ∨ buttons to specify the DECAY time change depending on touch (-50 to +50).
- At a – setting, the softer the keys are pressed, the greater the change. At a + setting, the harder the keys are pressed, the greater the change.
LFO
Adjust the LFO (cyclic modulation) settings applied to the amplitude. There are four types of LFO.
- Press the LFO button.
• The display looks similar to the following.
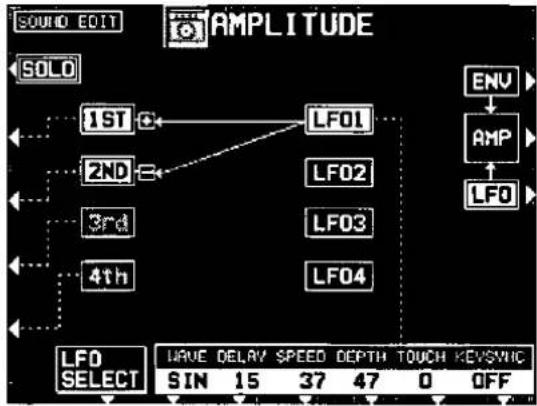
flowchart
graph TD
    A["AMPLITUDE"] --> B["1ST"]
    A --> C["2ND"]
    A --> D["3rd"]
    A --> E["4th"]
    B --> F["LF01"]
    C --> G["LF02"]
    D --> H["LF03"]
    E --> I["LF04"]
    F --> J["ENV"]
    G --> K["AMP"]
    H --> L["LFO"]
    I --> M["LFO"]
    N["LFO SELECT"] --> O["WAVE DELRV SPEED DEPTH TOUCH KEV/SNIC"]
    O --> P["SIN 15 37 47 0 OFF"]
-
Use the LFO SELECT ∧ and ∨ buttons to select an LFO (1-4).
-
Use the buttons below the display to adjust the settings.
WAVE
Modulate the waveform.
SIN: Sine wave
TRI: Triangle wave
SQR: Square wave
SAW: Saw tooth wave
DELAY
Delay time is the time elapsed from when the keyboard key is pressed until the modulation begins (0 to 30).
SPEED
Modulation speed (0 to 127)
DEPTH
Modulation depth (0 to 127)
TOUCH
Degree of modulation change in relation to touch (0 to 50)
KEYSYNC
When playing more than one note, specify whether the LFO starts or not each time a key is pressed (ON/OFF).
- When KEYSYNC is set to ON: if, while playing one note, you play a second note, the LFO is applied to the second note as well.
- Use the buttons to the left of the display to specify for each tone whether or not the specified LFO is applied.
• The LFO can be applied to multiple tones.
- A + indicates that the LFO is on for the tone, a - indicates that the inverted-phase LFO is applied to the tone.
- Repeat steps 2 to 4 for the other LFO types, as desired.
Effect Edit
Select the type of effect which is applied to your new sound when the DIGITAL EFFECT button is on, and modify the effect.
DIGITAL EFFECT
- On the SOUND EDIT menu, select DIGITAL EFFECT.
• The display looks similar to the following.
- The display for the effect type which is best-suited for the sound currently being edited is selected.
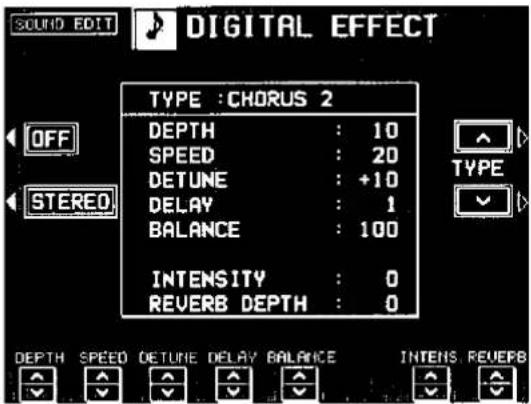
-
Use the TYPE ∧ and ∨ buttons to select the type of effect.
-
Select from the following types: CELESTE 1, 2, CHORUS 1, 2, ENSEMBLE 1, 2, TREMOLO, ORGAN TREMOLO, SINGLE DELAY, REPEAT DELAY, SOLO EFFECT 1, 2.
Specify whether the DIGITAL EFFECT button turns on or off when the sound is selected. When set to ON, the DIGITAL EFFECT button turns on automatically when the sound is selected. The button alternates between ON and OFF each time it is pressed.
Select stereo (STEREO) or monaural (MONO) output of the effect. The button alternates between STEREO and MONO each time it is pressed.
-
Use the buttons along the bottom of the display to select the attribute you wish to adjust.
-
When the type is changed, the parameters revert to the factory defaults.
- For a detailed explanation of the parameters of each type of effect, refer to the separate REFERENCE GUIDE provided.
Controller Edit
Specify how operation of the controllers, such as the wheels, etc., affects the sound.
CONTROLLER
- On the SOUND EDIT menu display, select CONTROLLER.
• The display looks similar to the following.
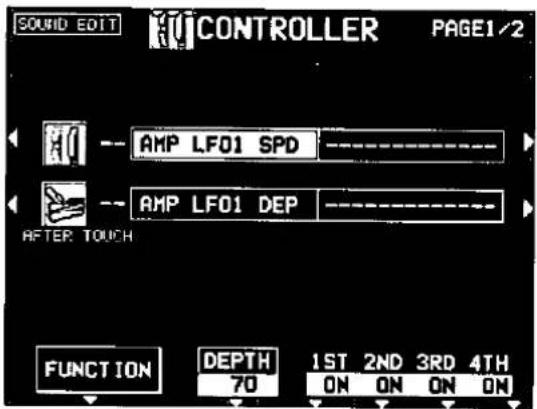
- Use the buttons to the left and right of the display to select a controller.
• The controllers are in order from the top: MODULATION WHEEL, AFTER TOUCH.
- Two functions can be assigned to each controller.
SUSTAIN PEDAL MODE, GLIDE
This setting is for when the sustain function or glide function has been assigned to the foot switch.
- Use the PAGE buttons to view the 2/2 display.

- Use the FUNCTION button to select a function for the controller.
- Use the DEPTH ∧ and ∨ buttons to set the depth of the function applied by the controller (0 to 127).
- Use the 1st, 2nd, 3rd and 4th ∧ and ∨ buttons to set the controller to on or off for each tone.
- When set to INV, the function is inverted for the tone.
-
Repeat steps 2 to 5 for the other controllers, as desired.
-
Use the SUSTAIN PEDAL MODE ∧ and ∨ buttons to select the type of sustain.
LONG:
The release time of the sound is lengthened.
HOLD:
The sustain is continuous until the foot switch is released.
- Use the GLIDE ∧ and ∨ buttons to select whether or not the glide effect is active.
ENABLE:
The glide effect is enabled.
DISABLE:
The glide effect is disabled.
• To assigning a function to the foot switch, refer to page 161.
Store the new sound
The MEMORY A and MEMORY B buttons in the SOUND GROUP section are memory banks reserved for the sounds you create with the SOUND EDIT. You can store up to 40 original sounds—20 in each bank—then select the sounds just like the other sounds in the SOUND GROUP.
WARNING: Your new sound will be erased if you exit the SOUND EDIT mode without first storing it in a memory.
Procedure
- When you have edited the sound to just the way you like it, on the SOUND EDIT menu display, press the WRITE button.
- The display changes to the MEMORY WRITE display.

-
To assign a name to your new sound, press the SOUND NAMING button.
-
If you do not assign a name to your sound, the name becomes the same as the original sound from which you started. In this case, skip to step 5.
- The display changes to the SOUND NAMING display.
![SOUND EDIT WRITE Piano A B C D E F G H I J K L M N O P Q R S T U V W X Y Z a b c d e f g h i j k l n n o p q r s t u v w x y z 0 1 2 3 4 5 6 7 8 9 ! S % & ' ( ) + - 1 / = . . ? : ? ¥ ^ _ ! → ← [ ] ( ) POSITION ABC..( ) < > INS DEL A/a < ^ > +>](/content/2026/06/1304673/images/2a53cc4a6d9e1eb2a2b8ec1cda2ea47bcc5dd702dd96cab5f87206abdea08484.jpg)
- Type a new name for your sound (up to 16 characters).
- Use the POSITION buttons to highlight the character position in the name box. Use the ABC...]( ) buttons to select the alphanumeric character. Repeat these steps to type the whole name.
- Use the INS button to type a space.
- Use the DEL button to erase a character.
- Use the A/a button to switch between upper case and lower case characters.
- To erase all the characters, press the CLR button.
- You can press the →← button if you wish to have the name centered.
- When you have finished typing the name, press the WRITE button.
- The display returns to the MEMORY WRITE display.
- Use the ∧ and ∨ buttons to select the MEMORY number in which to store the new sound.
- Select BANK A or BANK B, and number 1 through 20.
-
Press the OK button.
-
The new sound is stored, and "COMPLETED!" is shown on the display.
• The SOUND EDIT mode is turned off. - The stored sound memories can be saved on a disk for recall at a later time. (Refer to page 120.)
Select a new sound
You can select your original sound just like the other sounds in the SOUND GROUP.
- In the SOUND GROUP section, press the MEMORY A or MEMORY B button.

-
Select the bank (A/B) in which you stored the sound during the MEMORY WRITE procedure.
• The list of sounds in the selected bank is shown on the display. -
Select the desired sound from the list on the display.
Drum Kit Edit
You can create your original drum kit.
DRUM SOUND EDIT
By editing each percussion instrument sound in the drum kit, you can create your original drum kit.
- From the DRUM KITS sound group, select a drum kit to use as the foundation of your new drum kit.
- Change to the SOUND EDIT mode. (Refer to page 139.)
• The confirmation display appears. Press the YES button. - When the YES button is pressed, the contents of the "User Kit" are overwritten.
• The display looks similar to the following.

- While pressing the key for the percussion instrument sound you wish to edit, press the NOTE SELECT button.
- Use the SOUND ∧ and ∨ buttons to select the percussion instrument sound to assign.
- Use the buttons below the display to select the tone.
- Percussion sounds are composed of two tones (1st and 2nd).
-
The name of the currently selected percussion instrument and the note name assigned to it are shown in the upper part of the display.
-
Edit the setting.
ON/OFF:
Use the ON/OFF ∧ and ∨ buttons to specify whether or not the selected tone is output.
TONE SELECT:
Use the GROUP ∧ and ∨ buttons and the TONE ∧ and ∨ buttons to change the tone.
LEVEL:
Use the LEVEL ∧ and ∨ buttons to adjust the volume (0 to 127).
KEY:
Use the KEY ∧ and ∨ buttons to adjust the pitch (-50 to +50).
TUNE:
Use the TUNE ∧ and ∨ buttons to make fine adjustments to the pitch (-50 to +50).
PAN:
Use the PAN ∧ and ∨ buttons to adjust the stereo balance (L64-CTR-R63).
REV:
Use the REV ∧ and ∨ buttons to specify the amount of output to the REVERB (0 to 127).
- This setting is effective for both the 1st and 2nd tones in common.
- Repeat steps 3 to 6 for the other keyboard keys.
- Your original drum kit is stored in the USER KIT of the DRUM KITS sounds in the SOUND GROUP.
■ DRUM DETAIL EDIT
Follow this procedure when you wish to make more precise adjustments to each tone.
- Press the DETAIL EDIT button.
• The display looks similar to the following.
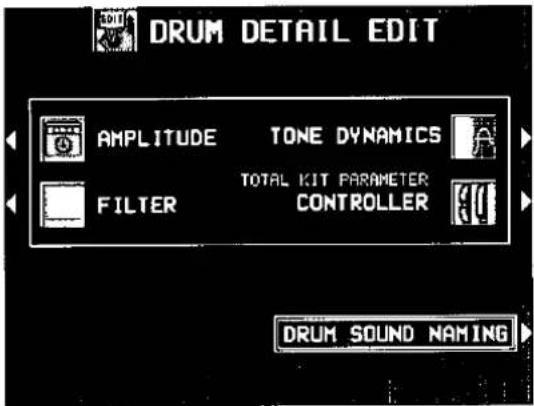
-
Select the item to edit.
-
The editing procedure is basically the same as the SOUND EDIT procedure for other sounds.
- For drum kits, the number of items that can be edited it limited.
- You can press the DRUM SOUND NAMING button to assign a name to your percussion instrument sound while you are editing it.
Recording Digital Drawbar sounds
You can save your customized drawbar settings.
DIGITAL DRAWBAR EDIT
-
Follow the procedure to adjust the DIGITAL DRAWBAR sound. (Refer to page 33.)
-
Change to the SOUND EDIT mode. (Refer to page 139.)
• The display looks similar to the following.
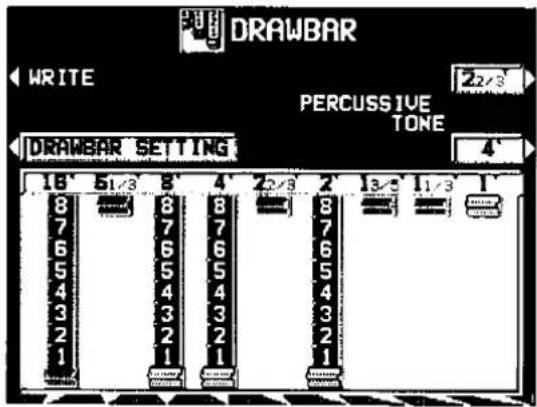
- Press the WRITE button.
- The display changes to the MEMORY WRITE display. Follow the procedure to store the new sound. (Refer to page 155.)
Outline of Control functions

natural_image
Front panel of a computer interface with buttons and a monitor (no visible text or symbols)Various settings related to the operation of this instrument are adjusted with the CONTROL functions.
- In the MENU section, press the CONTROL button to turn it on.

• The display looks similar to the following.

- Select a function.
INITIAL (page 177)
Return the settings and memories to the factory-preset status.
OVERALL TOUCH SENSITIVITY (page 160)
Adjust the amount of keyboard touch response.
FOOT CONTROLLERS (page 161)
Assign functions to the separately sold Foot Switch and Foot Controller, etc.
DISPLAY TIME OUT (page 162)
Adjust settings related to the screen display.
PANEL MEMORY MODE
Define which panel settings are stored when the PANEL MEMORY is used. (Refer to page 66.)
MUSIC STYLE ARRANGER MODE
Define which panel settings change by pressing a FILL IN button when the MUSIC STYLE ARRANGER is used. (Refer to page 63.)
WALLPAPER SETTING (page 163)
Change the background (wallpaper) of the display.
- Follow the procedure to adjust the settings.
- While you are adjusting the settings, when the TEMPO/PROGRAM indicator is lit, it indicates that the dial is available for setting the current function.
- When you have finished setting the functions, press the CONTROL button to turn it off.
Overall Touch Sensitivity
This instrument features INITIAL TOUCH (the volume, for example, changes depending on how hard the keyboard is played) and AFTER TOUCH (effects are added by pressing the keys harder).
- On the CONTROL MENU display, select OVERALL TOUCH SENSITIVITY.
• The display looks similar to the following.
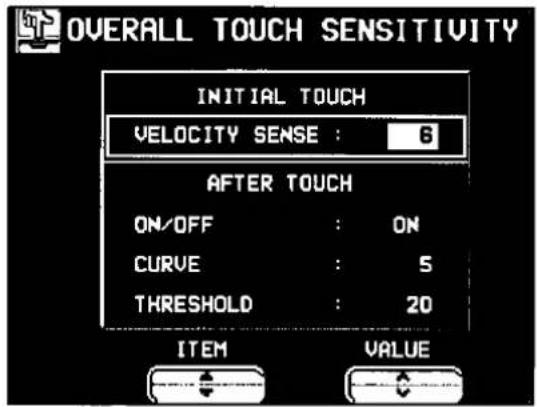
- Use the ITEM ▲ and ▼ buttons to select the function.
INITIAL TOUCH
VELOCITY SENSE:
Adjust the amount of keyboard touch response (0 to 9).
- When set to 0, initial touch sensitivity is turned off.
AFTER TOUCH
ON/OFF:
Enable or disable the aftertouch effect for the keyboard (ON/OFF).
CURVE:
Adjust the curve of the sound change relative to how hard the keys are pressed (1 to 10).
THRESHOLD:
Specify how hard a key must be pressed to produce the effect (1 to 127).
- The higher the value, the hard the key must be pressed to produce the effect.
- Use the VALUE ∧ and ∨ buttons to change the settings.
Foot Controllers
If an optional Foot Switch, Foot Controller and/or Expression Pedal (sold separately) is connected, you can assign it one of several functions, allowing convenient and fast control during your performance.
- This instrument allows connection of two Foot Switches and one Foot Controller (four switches) for a total of six switches, and an Expression Pedal.
- On the CONTROL MENU display, select FOOT CONTROLLERS.
• The display looks similar to the following.

- Use the ▲ and ▼ buttons to select a switch name, and the ∧ and ∨ buttons to select its function.
■ FOOT SWITCH/FOOT CONT.SW
OFF:
No function is assigned.
P. MEM INCREMENT:
Increment the PANEL MEMORY number selection by 1.
P. MEM DECREMENT:
Decrement the PANEL MEMORY number selection by 1.
P. MEM BANK INC.:
Change to the next PANEL MEMORY bank in order.
P. MEM BANK DEC.:
Change to the previous PANEL MEMORY bank in order.
PANEL MEMORY 1 to 8:
The specified PANEL MEMORY number is turned on.
P. MEM INC.+DEC.:
Press the switch to increment the PANEL MEMORY number selection by one; release the switch to return to the previous number.
START/STOP:
START/STOP button on/off
FILL IN 1:
FILL IN 1 button on
FILL IN 2:
FILL IN 2 button on
INTRO & ENDING 1:
INTRO & ENDING 1 button on
INTRO & ENDING 2:
INTRO & ENDING 2 button on
SUSTAIN:
SUSTAIN button on/off
GLIDE:
Glide on/off (The glide effect "bends" the pitch down by about one semitone.)
TECHNI-CHORD:
TECHNI-CHORD button on/off
DIGITAL EFFECT:
DIGITAL EFFECT button on/off
DSP EFFECT:
DSP EFFECT button on/off
ROTARY SLOW/FAST:
ROTARY SLOW/FAST of the DIGITAL DRAWBAR
PUNCH RECORD:
Punch in/punch out (Refer to page 78.)
APC HOLD:
Memorize the chord specified for the automatic accompaniment.
FADE IN:
FADE IN button on
FADE OUT
FADE OUT button on
EXPRESS. PEDAL
TOTAL EXPRESSION:
The volume for all parts changes when the expression pedal is operated.
PART EXPRESSION:
The volume changes only for parts for which PART EXP PEDAL was turned ON on the PART SETTING display for SOUND. (Refer to page 132.)
• The initialized settings are as follows:
| FOOT SWITCH 1 | SUSTAIN |
| FOOT SWITCH 2 | GLIDE |
| FOOT CONT. SW 1 | START/STOP |
| FOOT CONT. SW 2 | P.MEM INCREMENT |
| FOOT CONT. SW 3 | P.MEM DECREMENT |
| FOOT CONT. SW 4 | P.MEM BANK INC. |
| EXPRESS. PEDAL | TOTAL EXPRESSION |
- For connection of a Foot Switch, etc., refer to page 179.
Display Time Out
Numerous message displays and setting displays conveniently guide you through the operation steps of this instrument. Once you become familiar with the operation of your instrument, however, you may wish to shorten or even suspend the display time of the message displays.
- On the CONTROL MENU display, select DISPLAY TIME OUT.
• The display looks similar to the following.

- Use the △ and ▼ buttons to select the function.
SAVE REMINDER:
Reminder display (OFF, DEFAULT, HOLD, 1 to 10 sec)
'COMPLETED' MESSAGE:
Operation successfully completed (OFF, DEFAULT, HOLD, 1 to 10 sec)
ARE YOU SURE?:
Display requires user action for confirmation (OFF, DEFAULT, HOLD)
ERROR MESSAGE:
Error notification display (DEFAULT, HOLD, 1 to 10 sec)
SOUND/RHYTHM SELECT:
Sound/rhythm and MSP BANK selection display (DEFAULT, HOLD, 1 to 10 sec)
EASY SETTING:
Display time when the setting display was accessed pressing and holding a panel button (DEFAULT, HOLD, 1 to 10 sec)
- When set the OFF, the display will not appear.
- When set to DEFAULT, the display time returns to the initialized setting.
- You can specify 1 to 10 seconds for the display time.
-
When set to HOLD, the DISPLAY HOLD automatically turns on.
-
Use the ∧ and ∨ buttons to change the setting.
- Press the OK button.
- Some messages may be displayed even if they are set to OFF.
Wallpaper Setting
You can load desired bitmap (.BMP) data to display your favorite background pattern (wallpaper) on the display.
- On the CONTROL MENU display, select WALLPAPER SETTING.
• The display looks similar to the following.

- Select a display category.
HOME PAGE/SOUND & RHYTHM SELECT: The standard display and the displays to select the sound and rhythm.
MENU PAGES: MENU display
OTHERS: A simple pattern is active in the initialized state.
- Use the VALUE ∧ and ∨ buttons to select a mode.
DEFAULT: Select the initialized settings.
USER: Select the user-specified wallpaper data.
- When USER is selected, after inserting a disk with .BMP data in the Disk Drive and pressing the LOAD button, the .BMP data is displayed. Select the desired file to load and press the LOAD button. The background pattern changes. An error message is displayed if the data cannot be loaded.
- The data which can be loaded is as follows: — Files with a .BMP extension — Bitmap data for Windows — Data for 320 x 240 dot screen size — 192 colors, bitmap data of the first 192 colors on the color pallet
- Press the OK button.
- The initial pattern for USER is PLAIN BLACK. This pattern is recommended if you do not care for the default wallpaper. To select this pattern, press the USER INITIAL button. A confirmation display appears. Press the YES button to activate the selected pattern or NO to cancel it.
- Note that some displays use the fixed default wallpaper regardless of the selected setting.
What is MIDI?
MIDI (Musical Instrument Digital Interface) is the international standard for digital communication of electronic musical instrument data. This means that any equipment which has a MIDI terminal—such as electronic musical instruments and personal computers—can easily exchange digital data with other MIDI equipment without resorting to complicated conversions or connections.
MIDI terminals
(On the rear panel)

IN:
The terminal by which this instrument receives data from other equipment.
OUT:
The terminal that transmits data from this instrument to other equipment.
THRU:
The terminal that transfers data from the IN terminal directly.
- For these connections, use a commercially available MIDI cable.
- Exchange of normal data through these terminals is enabled only when the COMPUTER terminal switch is set to MIDI. (Refer to page 179.)
Connection examples
To generate sound from a connected instrument by playing this instrument

flowchart
graph TD
    A["This instrument"] --> B["OUT"]
    A --> C["MIDI cable"]
    C --> D["IN"]
    A --> E["Another MIDI instrument"]
To generate sound from this instrument by operating a connected instrument

flowchart
graph TD
    A["This instrument"] -->|IN| B["MIDI cable"]
    B --> C["Another MIDI instrument"]
    C -->|OUT| D["Out"]
To connect with a MIDI sequencer

flowchart
graph TD
    A["OUT"] --> B["This instrument"]
    C["IN"] --> B
    B --> D["MIDI cable"]
    E["OUT"] --> F["MIDI sequencer"]
    G["IN"] --> F
MIDI channels
Many different kinds of performance data are sent using just one MIDI cable. This is possible because MIDI signals are sent and received through 16 different "basic channels" (numbered 1 to 16). In order for the exchange of data to take
place, the channels on the transmission side must match the channels on the receiving side. This characteristic also makes it possible to link multiple sound generators and to control each by matching specific channels.
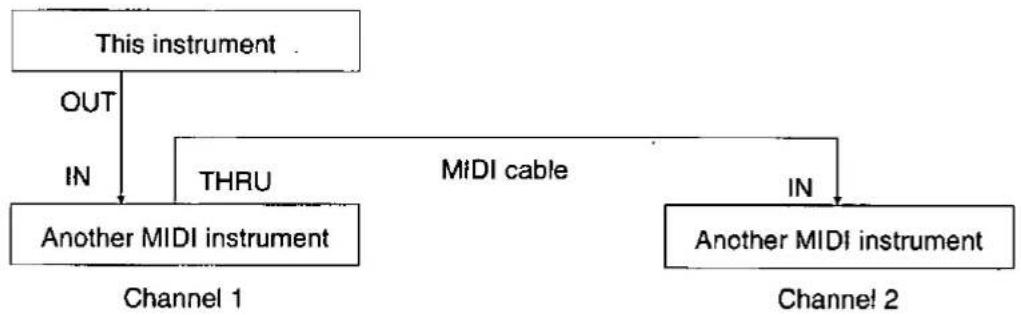
flowchart
graph TD
    A["This instrument"] -->|OUT| B["Another MIDI instrument"]
    A -->|IN| C["Another MIDI instrument"]
    B -->|THRU| D["Channel 1"]
    B -->|MIDI cable| E["Channel 2"]
    E -->|IN| F["Another MIDI instrument"]
The following kinds of data can be transmitted/received.
■ NOTE data
This is the most basic kind of MIDI data which is exchanged, and is used to specify which keys are played and how hard they are played.
NOTE NUMBER: Number specifying which key is played.
NOTE ON: Specifies that a key is played.
NOTE OFF: Specifies that a key is released.
VELOCITY: Specifies how hard a key is struck.
- MIDI notes are assigned numbers from 0 to 127, with middle C (C3) as 60. Note pitches are in semitone increments, with the higher numbers assigned to the higher pitches.
■ PROGRAM CHANGE
This is sound change data. When a different sound is selected on the transmitting instrument, the sound on the receiving instrument also changes.
■ CONTROL CHANGE
These are volume, sustain, effect, etc. data used to enhance performance expression. Each function is distinguished by its control number, and the function which can be changed by the control differs depending on the instrument.
■ EXCLUSIVE data
This is sound data, etc. particular to a specific instrument model. This data can also be transmitted and received by the DUMP function.
- For details, refer to the separate "REFERENCE GUIDE" provided.
GENERAL MIDI
GENERAL MIDI (GM) is the standard which enables MIDI data exchange between different models or equipment of different manufacture. Program change numbers and their corresponding sounds, percussion instrument sounds, note numbers, etc. are data-compatible between equipment using this standard. Song data created on the equipment of one manufacturer can be played back on the equipment of a different manufacturer, as long as both conform to the GENERAL MIDI standard. This instrument conforms to this standard and can be used as a GENERAL MIDI sound generator.
Equipment which conforms to GENERAL MIDI standards is indicated by the following logo.

- GENERAL MIDI can be set to ON or OFF. (Refer to page 173.)
Outline of MIDI functions
- In the MENU section, press the MIDI button to turn it on.

• The display looks similar to the following.
- The menu display consists of two screen pages. Use the PAGE button to switch between pages.
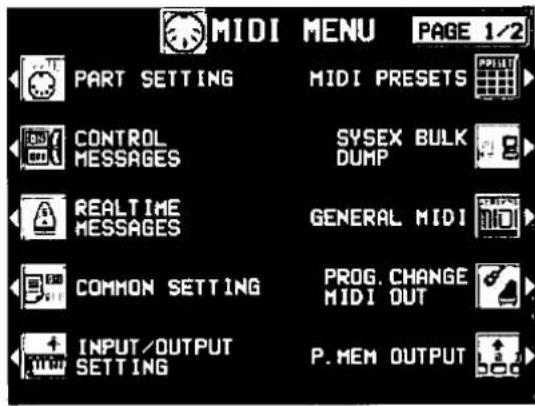

- Select a function.
-
Follow the procedure to adjust the settings.
-
While you are adjusting the settings, when the TEMPO/PROGRAM indicator is lit, it indicates that the dial is available for setting the current function.
- When you have finished setting the functions, press the MIDI button to turn it off.

natural_image
Front panel of a control panel with buttons, display screen, and indicator lights (no text or symbols visible)Summary of the MIDI menu items
PART SETTING (page 167)
Set the MIDI BASIC CHANNEL, OCTAVE and LOCAL CONTROL settings for each part.
CONTROL MESSAGES (page 168)
Enable or disable the exchange of various CONTROL data.
REALTIME MESSAGES (page 168)
Enable or disable the exchange of REAL-TIME COMMANDS, and select the CLOCK mode.
COMMON SETTING (page 169)
Set the functions which are common to all parts.
INPUT/OUTPUT SETTING (page 170)
Settings which determine how various performance data is treated during data transmission and reception.
MIDI PRESETS (page 171)
Establish the optimum settings depending on how this instrument is connected to other equipment.
- You can save the settings you specify yourself.
SYSEX BULK DUMP (page 172)
Data exchange of SYSTEM EXCLUSIVE data.
GENERAL MIDI (page 173)
Settings when this instrument is used as a GENERAL MIDI instrument.
PROG. CHANGE MIDI OUT (page 174)
Settings for transmitting the desired PRO-GRAM CHANGE data on the specified MIDI channel.
P. MEM OUTPUT (page 174)
Settings that affect the transmission data when the PANEL MEMORY buttons are operated.
COMPUTER CONNECTION (page 175)
Mode settings related to the flow of MIDI signals when this instrument is connected to a personal computer.
MIDI SETTINGS LOAD OPTION (page 176)
Specify how MIDI data is handled when data is loaded from a disk.
Part Setting
Follow this procedure to set the functions which can be set for each part: MIDI CHANNELs, the OCTAVE data to NOTE data during transmission, and LOCAL CONTROL (whether or not the sound generator of this instrument is active during transmission).
- On the MIDI MENU display, select PART SETTING.
• The display looks similar to the following.
| PART | CHANNEL | OCTAVE | LOCAL |
| RIGHT1 | 1 | 0 | ON |
| RIGHT2 | 2 | 0 | ON |
| LEFT | 3 | 0 | ON |
| PART4 | 4 | 0 | ON |
| PART5 | 5 | 0 | ON |
| PART6 | 6 | 0 | ON |
| PART7 | 7 | 0 | ON |
| PART8 | 8 | 0 | ON |
- Use the PART ∧ and ∨ buttons to select a part.
- The list of parts covers three pages. Use the PAGE buttons to view different pages of the list.
-
Use the CHANNEL ∧ and ∨ buttons to select a MIDI CHANNEL for the part (OFF, 1 to 16).
-
A part which has been set to OFF cannot be used to transmit or receive MIDI data.
• The initialized settings are as follows:
| RIGHT 1 | 1 |
| RIGHT 2 | 2 |
| LEFT | 3 |
| PART 4 | 4 |
| PART 5 | 5 |
| PART 6 | 6 |
| PART 7 | 7 |
| PART 8 | 8 |
| PART 9 | 9 |
| PART 10 | 10 |
| PART 11 | 11 |
| PART 12 | 12 |
| PART 13 | 13 |
| PART 14 | 14 |
| PART 15 | 15 |
| PART 16 | 16 |
| CONTROL | OFF |
| ACCOMP 1 | OFF |
| ACCOMP 2 | OFF |
| ACCOMP 3 | OFF |
| BASS | OFF |
| DRUMS | OFF |
| CHORD | OFF |
- Use the OCTAVE ∧ and ∨ buttons to set the octave shift value (-3 to 3).
- Octave shift is set for transmitted data only; however the transmitted and received octave shifts are linked. For example, if the transmitted octave shift is set to 1, the received octave shift is automatically set to -1.
- Use the LOCAL ON and OFF buttons to enable or disable this instrument's sound generator.
- When set to ON, the performance from this instrument is transmitted as MIDI data and also sounds from this instrument. When set to OFF, the performance from this instrument is transmitted as MIDI data but does not sound from this instrument.
- Repeat steps 2 to 5 for each part as desired.
Control Messages
Enable or disable the exchange of various control data.
- On the MIDI MENU display, select CONTROL MESSAGES.
• The display looks similar to the following. - The CONTROL MESSAGES display consists of 2 pages. Use the PAGE buttons to switch between pages.
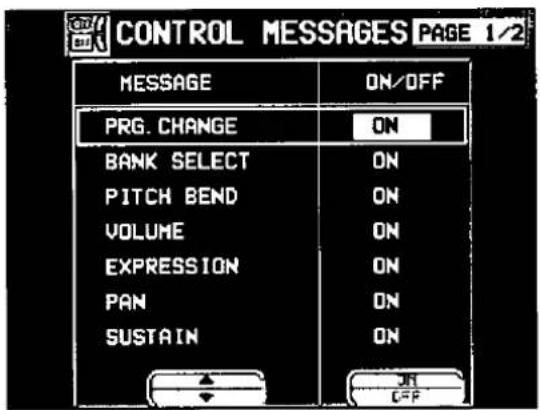
-
Use the MESSAGE ▲ and ▼ buttons to select the control message.
-
Use the ON and OFF buttons to specify on or off for the control message.
ON:
Data for the control operation is exchanged. OFF:
Data for the control operation is not exchanged.
• The BANK SELECT setting is effective only when PRG. CHANGE is set to ON.
- The EFFECT & REVERB setting controls the DIGITAL EFFECT, DSP EFFECT and DIGITAL REVERB on/off.
- The TUNING setting is the on/off setting for the TUNING and KEY SHIFT settings.
- Repeat steps 1 and 2 for each control as desired.
Realtime Messages
Enable or disable the exchange of START/STOP data (REALTIME COMMANDS), and select the CLOCK mode.
- On the MIDI MENU display, select REALTIME MESSAGES.
• The display looks similar to the following.

- Use the buttons on the left side of the display to select a function.
- Use the VALUE ∧ and ∨ buttons to change the setting.
REALTIME COMMANDS
ON:
Rhythm and SEQUENCER start/stop, continue, and song position pointer data can be transmitted/received.
OFF:
This data cannot be transmitted/received.
CLOCK
INTERNAL:
This instrument's internal clock is used to control the performance. The clock of the connected equipment is disabled.
MIDI:
The clock of the connected equipment is used to control the performance. This instrument's clock is disabled. (The tempo is displayed as "! = - - - .")
• The CLOCK is set to INTERNAL when the power to this instrument is turned on.
4. Repeat steps 2 and 3 for the other function if desired.
Common Setting
Set the functions which are common to all parts.
- On the MIDI MENU display, select COMMON SETTING.
• The display looks similar to the following.

- Use ▲ and ▼ buttons to select the item.
NOTE ONLY:
Of the performance data, specify whether or not only note data is exchanged.
PROG. CHANGE TO P. MEM:
Enable or disable the exchange of program change numbers for the RIGHT 1 part by operation of the PANEL MEMORY buttons.
- For this setting, the PANEL MEMORY 1 to 8 program change numbers correspond to the bank numbers as follows:
BANK 1 = 0 to 7
BANK 2 = 8 to 15 ...
REALTIME SYSEX:
Specify whether or not MIDI data is exchanged as system exclusive data during the performance.
- For details about REALTIME SYSEX, refer to the pages on MIDI in the separate "REFERENCE GUIDE" provided.
INTRO, FILL-IN, ENDING:
Enable or disable the exchange of intro, fill-in and ending data.
- Data is exchanged on the channel for the DRUMS part.
APC CONTROL:
Enable the exchange of data for the on/off status of the AUTO PLAY CHORD's ONE FINGER, FINGERED and PIANIST modes.
- Data is exchanged on the channel for the AC-COMP 1 part.
FADE IN/OUT:
Specify whether or not FADE IN/OUT data is exchanged.
PROGRAM CHANGE MODE
NORMAL:
The program change numbers are as indicated in the "REFERENCE GUIDE."
TECH:
Program change numbers are standardized among all Technics models which are set to this mode. The program change number assigned to a given sound on one model is assigned to the same sound on all models which are set to the same mode.
GM:
Program change numbers follow the GM standard.
- The program change numbers for each mode can be found in the separate "REFERENCE GUIDE" provided.
DRUMS TYPE
NORMAL:
Keyboard percussion instrument sounds correspond to this instrument's key note numbers
TECH:
Keyboard percussion instrument sounds correspond to the same key note numbers for connect Technics models set to this type.
GM:
Keyboard percussion instrument sounds follow the GM standard.
SONG SELECT
ON:
Song number data can be exchanged.
OFF:
Song number data cannot be exchanged.
- Use ∧ and ∨ buttons to change the setting.
ON:
Data exchange is enabled.
OFF:
Data exchange is disabled.
- Repeat steps 2 and 3 for the other settings as desired.
Input/output Setting
Make the settings which determine how various performance data is treated during data transmission and reception.
- On the MIDI MENU display, select INPUT/OUTPUT SETTING.
• The display looks similar to the following.

- Use the ▲ and ▼ buttons to select the item.
RIGHT 1 INPUT
CONDUCTOR:
When data for the RIGHT 1 part is received, the CONDUCTOR determines which part it is used for.
DIRECT:
When data for the RIGHT 1 part is received, it is treated as RIGHT 1 data, and performance data for all parts is received on their respective basic channels.
AUTO PLAY CHORD INPUT
ON:
Input data for the ACCOMP 1, 2, 3, BASS, DRUMS and CHORD parts is received.
OFF:
Data for the above parts is not received.
- Basic channels should be assigned to the above parts before exchanging data.
VELOCITY INPUT
DIRECT:
The VELOCITY value of received NOTE ON data is treated as is.
OFFSET:
The VELOCITY value of received NOTE ON data is offset (-50 to 50).
- Select VELOCITY OFFSET VALUE. Use the ∧ and ∨ buttons to change the value.
- All the values are offset from the current value by the fixed amount.
• The upper (127) and lower (1) limits cannot be exceeded.
FIX:
The VELOCITY value of all received NOTE ON data is set to a fixed value. (1 to 127)
- Select VELOCITY FIXED VALUE. Use the ∧ and ∨ buttons to change the value.
TECHNI-CHORD OUTPUT
ON:
Keyboard notes generated by the TECHNI-CHORD function are also transmitted.
OFF:
Only key note data of the pressed keys is transmitted.
TRANSPOSE OUTPUT
ON:
The note data of the transposed notes is transmitted.
OFF:
The note data of the played keys is trans- mitted.
DRUM PATTERN OUTPUT
ON:
Data from the DRUMS part is transmitted.
OFF:
Data from the DRUMS part is not transmitted.
AUTO PLAY CHORD OUTPUT
ON:
The data for the ACCOMP 1, 2, 3, BASS and CHORD parts is transmitted.
OFF;
The data for the above parts is not transmitted.
- Basic channels should be assigned to the above parts before exchanging data.
- Use the ∧ and ∨ buttons to select the setting.
- Repeat steps 2 and 3 for each item as desired.
MIDI Presets
Establish the optimum settings depending on how this Keyboard is connected to other equipment, and on whether this Keyboard is used as the master or the slave.
- On the MIDI MENU display, select MIDI PRESETS.
• The display looks similar to the following.
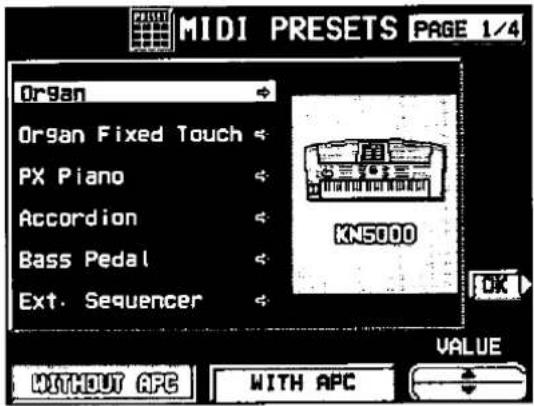
- Use the VALUE ▲ and ▼ buttons to select the connection setup.
- The PAGE 1/4 display shows connection setups with this instrument as the SLAVE. And the PAGE 2/4 display shows connection setups with this instrument as the MASTER.
- The MASTER is the instrument used to transmit data, and the SLAVE is the instrument used to receive the data.
- Use the buttons below the display to select WITHOUT APC (the AUTO PLAY CHORD is not used) or WITH APC (the performance includes AUTO PLAY CHORD).
- Press the OK button.
- When the settings have been successfully stored, "COMPLETED!" appears on the display.
- Detailed information about the MIDI PRESETS can be found in the separate "REFERENCE GUIDE" provided.
■ Storing user settings
After you change the MIDI settings, you can store your customized settings in USER preset memories (3 USER memories).
-
Adjust the various MIDI settings.
-
Go to PAGE 4/4 of the MIDI PRESETS display.
• The display looks similar to the following.

-
Use the ▲ and ▼ buttons to select the memory in which to store the settings (USER SETTING 1, 2, 3).
-
Use the WITH SPLIT POINT? button to specify whether or not to also store the keyboard split point (YES/NO).
Notice
When an instrument such as an organ or accordion with separate or divided keyboards dedicated to melody and chords is used as the master instrument, if this instrument's split point is set to a note below the lowest note of the melody keyboard of the master instrument, it is possible to produce melody notes on multiple parts by this instrument's CONDUCTOR settings.
- Assign the RIGHT 1 channel as the BASIC CHANNEL for the melody keyboard. Assign the CHORD channel (or if you also wish the played note to be produced, CHORD + LEFT) as the BASIC CHANNEL for the chord keyboard.
- You will also have to specify CONDUCTOR as the RIGHT 1 INPUT for the INPUT/OUTPUT SETTING. (Refer to page 170.)
- Press the WRITE button.
■ Recalling the USER settings
- Go to PAGE 3/4 of the MIDI PRESETS display.

- Use the and buttons to select a number.
- Press the OK button.
Sysex Bulk Dump
This instrument's internal data such as panel settings, performance data, etc. can be transmitted to and received from another KN5000 or other MIDI equipment with BULK DUMP capability as SYSTEM EXCLUSIVE data.
• Sound is not generated from this instrument during this procedure.
- The operations on this display are executed, even if REALTIME SYSEX is set to OFF on the COMMON SETTING display.
Transmitting
- Follow the procedure necessary to prepare the receiving instrument for data reception.
- On the MIDI MENU display, select SYSEX BULK DUMP.
• The display looks similar to the following.

-
Use the △ and ▽ buttons to select the type of data to transmit.
• The SEQUENCER data for all 10 songs are transmitted at once. You can decrease the time it takes to transmit by deleting beforehand any songs you do not wish to transmit. -
Press the SEND button.
-
During transmission, the transmitting status is shown on the display.
- You can also receive data with this instrument. After accessing this display on this keyboard, follow the transmission procedure on the transmission side. During reception, the receiving status is shown on the display.
- If data transmission/reception is unsuccessful, an error message appears on the display. In this case, repeat the procedure from the beginning.
General MIDI
GENERAL MIDI (GM) is the standard which enables MIDI data exchange between different models or equipment of different manufacture. Program change numbers and their corresponding sounds, percussion instrument sounds, note numbers, etc. are data compatible between equipment using this standard.
- On the MIDI MENU display, select GENERAL MIDI.
• The display looks similar to the following.

-
Use the ON and OFF buttons to specify whether or not this Keyboard should be compatible with GENERAL MIDI standard instruments.
-
This setting is automatically set to OFF when the power is turned on.
- If ON is selected, the status of this Keyboard changes to the GENERAL MIDI status, and the sounds and operations which can be selected are limited. In addition, the arrangement of percussion sounds on the keyboard changes. (Refer to the separate "REFERENCE GUIDE" provided.)
- This setting is automatically set to ON if disk data other than Technics data is loaded.
- Press the OK button.
- The confirmation display appears. Press the YES button to execute the function, or press the NO button to cancel the function.
- If ON was selected, GENERAL MIDI is shown on the normal performance display.
- When this function is executed, the SEQUENCER memory is cleared and the panel settings are reset.
- If ON is selected, this setting is automatically set to OFF when the power is turned off, and the SEQUENCER memory and panel settings are cleared.
Program Change MIDI Out
Use this function to immediately transmit specific PROGRAM CHANGE and BANK SELECT data from this display on a specified MIDI channel.
- On the MIDI MENU display, select PROG. CHANGE MIDI OUT.
• The display looks similar to the following.

- Use the △ and ▼ buttons to select a function.
MIDI CHANNEL:
The MIDI channel to transmit to (1 to 16).
PROGRAM CHANGE:
Specify the PROGRAM CHANGE number to transmit (1 to 128).
BANK MSB:
Specify the BANK SELECT MSB to transmit (0 to 127).
BANK LSB:
Specify the BANK SELECT LSB to transmit (OFF, 0 to 127).
- When set to OFF, neither the LSB nor the MSB are transmitted.
-
Use the ∧ and ∨ buttons to change the setting.
-
Press the SEND button.
• The specified data is transmitted.
- The data is unconditionally transmitted regardless of the other settings.
Panel Memory Output
These are settings affect the transmission data when the PANEL MEMORY buttons are operated.
- On the MIDI MENU display, select P.MEM OUTPUT.
• The display looks similar to the following.

-
Use the P.MEM ∧ and ∨ buttons to select a PANEL MEMORY number.
-
Use the ON/OFF ∧ and ∨ buttons to specify whether the data in the selected PANEL MEMORY number is transmitted or not.
-
Use the PART ∧ and ∨ buttons to select a part (RIGHT 1, RIGHT 2 or LEFT).
-
Use the P.CNG ∧ and ∨ buttons to specify a program change number (0 to 127, or OFF).
-
Use the BANK ∧ and ∨ buttons to specify a bank select number (0 to 255).
-
Use the VOL ∧ and ∨ buttons to specify the volume (0 to 127, or OFF).
-
Repeat steps 4 to 7 for each part, as necessary.
-
Repeat steps 2 to 8 for each PANEL MEMORY number, as necessary.
Computer Connection
These settings are used to select the mode related to MIDI signal flow when a personal computer is connected to the COMPUTER terminal of this instrument.
- Turn off the power to this instrument.
- Connect a personal computer to the COMPUTER terminal on the rear of this instrument. Set the switch to the correct position. (Refer to page 179.)
- Turn on the power to this instrument.
- On the MIDI MENU display, select COMPUTER CONNECTION.
• The display looks similar to the following.

- Use the VALUE ∧ and ∨ buttons to select a mode.
NORMAL:
The normal mode for data exchange.
KN as master:
The mode when this instrument is used as the master keyboard.
KN as slave:
The mode when this instrument is used as a slave instrument.
- The data received through the MIDI IN terminal is always transferred and output from the MIDI THRU terminal.
MIDI Settings Load Option
Specify how MIDI data is handled when data is loaded from a disk.
- On the MIDI MENU display, select MIDI SETTINGS LOAD OPTION.
• The display looks similar to the following.

-
Use the ∧ and ∨ buttons to change the setting.
-
Press the OK button.
-
Use the ▲ and ▼ buttons to select an item.
Load MIDI Parameters?
From Registration file:
Specify whether MIDI data is also loaded when panel data is loaded (NO/YES).
From Sequencer Song:
Specify whether MIDI data is loaded or changed when SEQUENCER data is loaded or when the SONG is changed by the SEQUENCER SONG SELECT, SONG COPY or TRACK ASSIGN (NO/YES).
• The MIDI settings are always stored at the start of each recorded SEQUENCER SONG and when PANEL WRITE is executed. In the initialized state, the MIDI settings are not loaded even when the SONG is changed. However, changing this setting to YES will cause the stored MIDI settings to also load in these cases.
□ Use these settings when;
GM mode is ON:
Specify how the MIDI settings of this instrument are affected when GENERAL MIDI ON data is loaded.
- Select from INITIAL (initialized settings), USER (MIDI PRESETS) 1, 2 and 3.
GM mode is OFF:
Specify how the MIDI settings of this instrument are affected when GENERAL MIDI OFF data is loaded.
- Select from INITIAL (initialized settings), USER (MIDI PRESETS) 1, 2 and 3.
Initialize
This Keyboard has many settable functions and storable memories. However, you can return the settings and memory to the factory-preset status.
INITIAL
- Press the CONTROL button to turn it on.

• The display changes to the following.
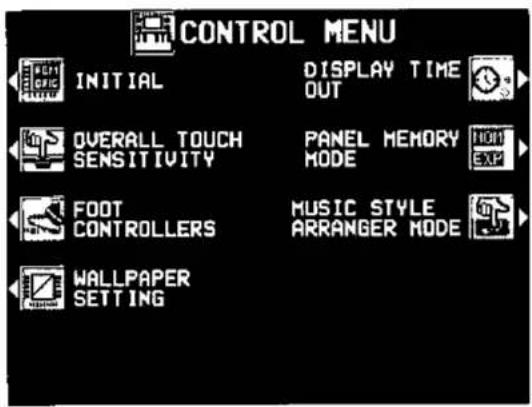
- Select INITIAL.
• This display changes to the following.
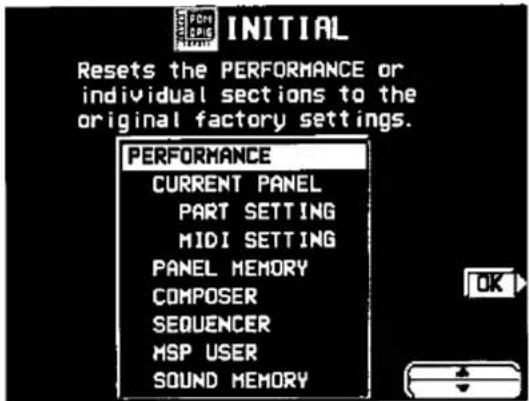
- Use the ▲ and ▼ buttons to select the desired type of initialization.
- PERFORMANCE includes all the items which are listed below it.
- Press the OK button.
- The display changes to the confirmation display. Press the YES button if you wish to execute the initialization. Press the NO button if you wish to cancel the procedure.

- Initialization begins. When initialization is completed, "COMPLETED!" is shown on the display and the Keyboard returns to the normal performance mode.
- You can also reset all the instrument settings (excluding RHYTHM CUSTOM and USER MIDI SETTINGS) with the following procedure: Turn off the power to this instrument once. Then, while pressing the three lower left buttons in the RHYTHM GROUP section (MARCH & WALTZ, PARTY TIME and SHOWTIME & TRAD DANCE) at the same time, turn the power on again.
About the backup memory and performance data
When the power to this instrument is turned off, the various settings and memory contents of this instrument are maintained in the backup memory as follows:
| BACKUP | PERFORMANCE | CURRENT PANEL settings | 1 week |
| PANEL MEMORY | 1 week | ||
| SEQUENCER | 80 minutes | ||
| COMPOSER(MEMORY contents) | 80 minutes | ||
| SOUND MEMORY | 1 week | ||
| MSP(USER memories of the MANUAL SEQUENCE PADS) | 1 week | ||
| RHYTHM CUSTOM | indefinitely | ||
| USER MIDI SETTINGS Egypt memories for the MIDI PRESETS) | indefinitely |
- When GENERAL MIDI is ON (the logo is shown on the normal display), the CURRENT PANEL and SEQUENCER data are lost when the power is turned off.
- If you wish to retain the settings and stored memory contents for recall at a later time, store the desired data on a floppy disk. (Refer to page 120.)
- The backup memory does not function until the power has been on for about 10 minutes (except for RHYTHM CUSTOM, USER MIDI SETTINGS, WALLPAPER SETTING).
- The PERFORMANCE data are returned to the initialized state by the initialization procedure but the RHYTHM CUSTOM and USER MIDI SETTINGS are retained.
• MIDI SYSEX deals only with the PERFORMANCE data.
• Data from previous Technics models limited to PERFORMANCE data.
Options and connections
This page shows the optional accessories that are available for your Technics Keyboard. These can make your instrument more versatile and fun to play than it already is.
Also indicated are the many possible connections to the rear accessory panel.
Connections
(on the rear panel)
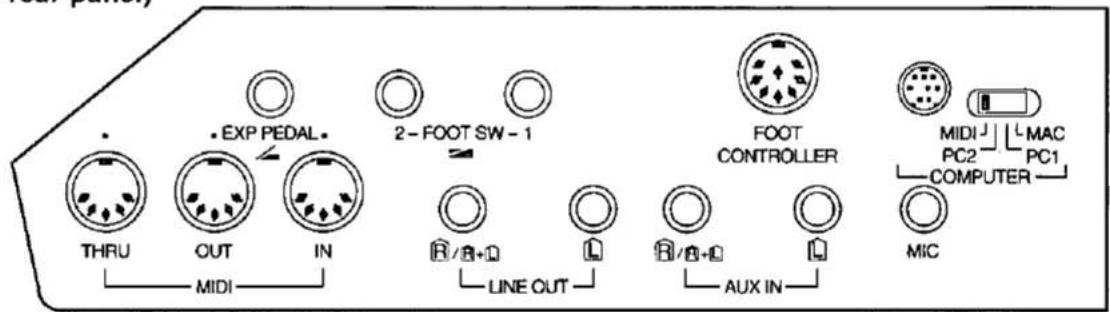
EXP PEDAL
The optional SZ-E2 Expression Pedal (sold separately) can be connected to this terminal to control the volume.
FOOT SW 1, 2
An optional SZ-P1 Foot Switch (sold separately) can be connected to each terminal to control various functions. (Refer to page 161.)
AUX IN (input level 0.5 Vrms, 6 kΩ)
Other instruments such as a sound generator can be connected to this terminal, and the sound will be output from the Keyboard's speakers. To receive monaural sound, connect the other instrument to the R/R+L terminal. (Do not connect the L terminal.)
LINE OUT (output level 1.5 Vrms, 600 Ω)
By connecting an external high-power amplifier, the sound can be reproduced at a high volume. To output monaural sound, connect the external equipment to the R/R+L terminal. (Do not connect the L terminal.)
MIDI
These terminals are for connection to another MIDI instrument. (Refer to page 164.)
FOOT CONTROLLER
An optional SZ-FC2 Foot Controller (sold separately) can be connected to this terminal to control various functions. (Refer to page 161.)
MIC
A microphone can be connected to this terminal for voice output through the speakers.
- With the ENTERTAINER function, you can change various settings for a performance that uses a microphone. (Refer to page 44.)
COMPUTER
By connecting this terminal to the serial port of a computer, performance data can be exchanged. Use the switch to select the type of computer.
- Be sure that the power to this instrument is turned off when connecting to a computer or when changing the switch setting.
Caution:
Failure to turn off the power before changing the switch setting may result in malfunction.
- When no computer is connected, or when a MIDI interface is used, the switch should be set to MIDI.
Connection to a Macintosh series computer
Use an ACCESSORY CABLE (SZ-JJAP1: sold separately) to connect the COMPUTER terminal of this instrument to the modem port or printer port of a Macintosh Series computer. Set the switch to MAC.
- Set the MIDI interface clock of the Macintosh software to 1 MHz.
- Do not remove the core at either end of the cable.
Connection to a PC
Use an ACCESSORY CABLE (SZ-JJAT1: sold separately) to connect the COMPUTER terminal of this instrument to the RS232C terminal of a PC. Set the switch to PC2.
- The MIDI driver included with the cable should be installed in the computer. (Refer to the manual accompanying the cable.)
- Do not remove the core at either end of the cable.
* All product and company names are trademarks or registered trademarks of their respective owners.
Separately sold options

SZ-E2
Expression Pedal

SZ-P1
Foot Switch

SZ·FC2
Foot Controller
- Be sure to turn off the power before connecting the Foot Controller.
Connecting to a "Vocalist Workstation"
By connecting a "VOCALIST WORKSTATION" VOCAL HARMONY PROCESSOR by Digitech Corp. to this instrument, harmony can be added to the microphone input. The settings for the connection are executed using this instrument's display.
Connection diagram

- If sounds are input to the AUX IN terminal of the KN5000, set the output on the VOCALIST WORKSTATION side to a suitable level.
Settings
The settings for connecting are as follows:
- Press the ENTERTAINER button to turn it on.

• The display looks similar to the following.
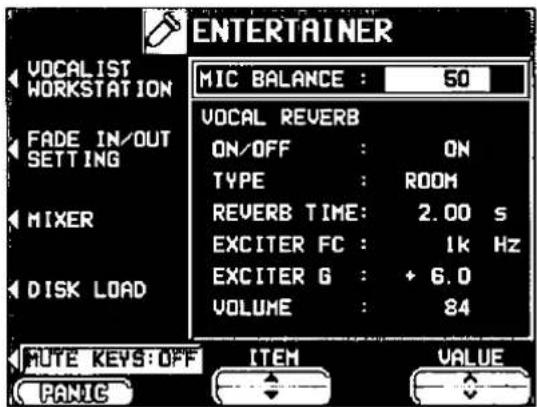
- Press the VOCALIST WORKSTATION button.
• The display looks similar to the following.
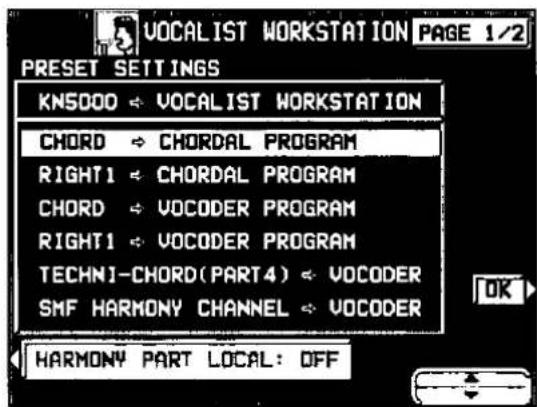
- Use the and buttons to select the desired presets.
CHORD→CHORDAL PROGRAM:
The chords of the AUTO PLAY CHORD are developed as harmony data in the CHORDAL mode.
RIGHT 1→CHORDAL PROGRAM:
The melody of the RIGHT 1 part is developed as harmony data in the CHORDAL mode.
CHORD→VOCODER PROGRAM:
The chords of the AUTO PLAY CHORD are developed as harmony data in the VOCODER mode.
RIGHT 1→VOCODER PROGRAM:
The melody of the RIGHT 1 part is developed as harmony data in the VOCODER mode.
TECHNI-CHORD (PART 4)→VOCODER:
The TECHNI-CHORD is developed as harmony data in the VOCODER mode.
• The ORCHESTRATOR becomes PART 4.
SMF HARMONY CHANNEL→VOCODER
The SMF (TUNE 1000) harmony track is developed as harmony data in the VOCODER mode.
• The MIDI OUT of DIRECT PLAY turns ON.
Specify whether the sound for the part which is sent from MIDI output as harmony data is generated from this instrument (ON/OFF).
- This setting is automatically set when one of the above presets is selected; however, it can be changed.
- Press the OK button.
- The MIDI settings of this instrument and the VOCALIST WORKSTATION settings are automatically set.
■ Detailed settings
The VOCALIST WORKSTATION parameters can be set on the PAGE 2/2 display.
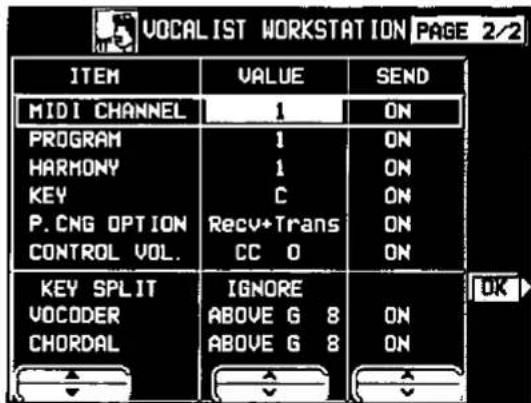
- Use the ITEM ▲ and ▼ buttons to select a parameter.
- Use the VALUE ∧ and ∨ buttons to change the setting.
- Use the SEND ∧ and ∨ buttons specify whether or not to send those parameter settings to the VOCALIST WORKSTATION (ON/OFF).
- Repeat steps 1 to 3 as necessary.
- Press the OK button.
- The settings are transmitted to the VOCALIST WORKSTATION
- If the OK button on PAGE 1/2 was not pressed, the appropriate MIDI CHANNEL settings may not have been executed. In this case, even if the OK button is pressed now, the settings may not be transmitted to the VOCALIST WORKSTATION. If this happens, press the OK button on PAGE 1/2.
Symptoms which appear to be signs of trouble
The following changes in performance may occur in the Technics Keyboard but do not indicate trouble.
| Phenomenon | Remedy | |
| Sounds and effects | The buttons, keys, etc. malfunction. | Turn off the POWER button once, then turn it on again. If this procedure is not successful, turn off the POWER button once. Then, while pressing the three lower left buttons in the RHYTHM GROUP section (MARCH & WALTZ, PARTY TIME and SHOW TIME & TRAD DANCE) at the same time, turn the POWER button on again. (Note that, in this case, all programmable settings, functions and memories return to their factory-preset status.) |
| No sound is produced when the keys are pressed. | The MAIN VOLUME is at the minimum setting. Adjust the volume with the MAIN VOLUME control.The volumes for the selected parts are set to the minimum levels. Use the balance buttons to set the volumes of the relevant parts to appropriate levels. (Refer to page 27.)The part is muted. (Refer to page 27.)The LOCAL CONTROL for a part performed on the keyboard is set to OFF. Set the local control to ON. (Refer to page 167.) | |
| Only percussive instrument sounds are produced when the keyboard is played. | In the SOUND GROUP section, the DRUM KITS button is on. | |
| The volume is very low when the keyboard is played. | The volume setting in the SEQUENCER contents is very low. Follow the INITIAL procedure to reset the settings. (Refer to page 177.) | |
| Some sounds cannot be selected. | When the GENERAL MIDI status is set to on, The sounds which can be selected and operation which can be executed are limited. Turn the GENERAL MIDI status off to return the instrument to its normal operation. (Refer to page 173.) | |
| The sound you hear is different from the sound you selected. | This sometimes occurs when you play back SEQUENCER or COMPOSER data which was created on a different model, or when MIDI data is received from a connected instrument. Select the desired sounds again. | |
| Rhythm | The rhythm does not start. | The DRUMS volume is set to the minimum level. Use the balance buttons to set the DRUMS volume to an appropriate level.In the RHYTHM GROUP section, a rhythm in CUSTOM with no stored pattern was selected. Select a different rhythm.A SEQUENCER PLAY button is on. When you are not playing back the SEQUENCER performance, turn off the SEQUENCER PLAY button.CLOCK is set to MIDI. Set CLOCK to INTERNAL. (Refer to page 168.)The rhythm does not work when the GENERAL MIDI mode is set to ON. Turn the GENERAL MIDI status OFF to return the instrument to its normal operation. (Refer to page 173.) |
| AUTO PLAY CHORD | No sound is produced for the automatic accom- paniment. | • In the RHYTHM GROUP section, a rhythm in CUSTOM with no stored pattern was selected. Select a different rhythm. |
| No sound is produced for the automatic accom- paniment, or only the sounds of some parts are produced. | • An ACCOMP part does not sound if its corresponding volume is set to the minimum level. Use the respective balance buttons to set the ACCOMP 1, 2 and 3 volumes to appropriate levels. | |
| SEQUENCER | Storage is not possible. | • The remaining memory capacity of the SEQUENCER is 0. Follow the SONG CLEAR or TRACK CLEAR procedure to erase the memory. (Refer to pages 88 , 94.) |
| The playback measure indication is different from when the performance was recorded. | • The number of measures corresponds to the time signature of the rhythm selected at the start of recording. To change the rhythm in the middle of the song, record the rhythm change in the RHYTHM part. (Refer to page 84.) | |
| COMPOSER | Storage is not possible. | • The remaining memory capacity of the COMPOSER is 0. |
| Setting the time signature and number of measures is not possible. | • The time signature and number of measures cannot be changed for a pattern which is currently recorded in the COMPOSER. If you wish to change the time signature and/or measure data, first follow the procedure to clear the memory. (Refer to page 102.) | |
| The playback timing of the rhythm pattern is different from the timing with which it was recorded. | • The QUANTIZE function was on when the pattern was recorded and the timing was automatically corrected. Set the quantize level to a smaller note unit or to OFF when recording. (Refer to page 104.) | |
| Disk Drive | The Disk Drive produces a noise during recording or playback. | • This occurs when the Disk Drive is reading a disk. It does not indicate a problem. |
| When the procedure to load from a disk is per- formed, the contents of the keyboard memory are erased. | • When performing the load operation from a disk, the keyboard memory changes to that of the data loaded from the disk. If you wish to preserve a song which is stored in the keyboard memory, save it on a disk before performing the load procedure. (Refer to page 120.) | |
| MIDI | Data cannot be exchanged through MIDI terminals. | • The switch for the COMPUTER terminal is not set to MIDI. Turn off the power to this instrument and set the switch to MIDI. (Refer to page 179.)• Match the channels on the transmitting side and the receiving side. (Refer to page 167.) |
| The sound quavers or is distorted. | • When the COMPUTER terminal or both the MIDI IN and OUT terminals are connected to a computer, depending on the computer software the received data may be sent back to the instrument just as it is. Because of this the sound generated from the keys and the sound generated from the returned data are both produced, causing undesirable effects, such as the sounds canceling each other out, for example. In this case, either change the software settings to prevent received data from being returned, or set the MIDI LOCAL CONTROL to off. | |
| Other | Noise from a radio or TV can be heard. | This sometimes occurs when electrical equipment such as a radio or TV is used near the instrument.Try moving such electrical equipment further away from the instrument.The sound may be coming from a nearby broadcast station or amateur radio station. If the sound is bothersome, consult your dealer or service center. |
| The cabinet becomes warm during use. | This instrument has a built-in power source that heats the cabinet to some degree. This is not an indication of trouble. | |
Error messages
| No. | Contents |
| 00 | The data on the disk that you are using is for a different product. |
| 01 | An error has occurred while the disk was loading.Please try again! |
| 02 | There is no disk in the Disk Drive. |
| 03 | The file that you tried to load is empty. |
| 05 | An error has occurred while the disk was saving.Please try again! |
| 06 | The disk that you are using is write protected.Please remove the write protection and try again. |
| 07 | The disk that you are using is full. Please use another disk. |
| 08 | An error has occurred while the disk was formatting. The disk that you are using may be faulty.Please try formatting another disk. |
| 10 | The data is already copy protected. |
| 20 | A problem has occurred with your SEQUENCER Data.This might be due to a damaged or faulty disk. |
| 21 | Memory full |
| 22 | It is necessary to press PUNCH OUT to complete this procedure. |
| 23 | It is impossible to change the time signature because it has already been set in the existing tracks. |
| 24 | A rhythm track already exists. It is impossible to assign two tracks to rhythm. |
| 25 | It is only possible to change the velocity on a melody track. |
| 26 | It is only possible to merge melody tracks. Tracks such as rhythm, chord and control cannot be merged. |
| 27 | It is only possible to copy melody tracks. Tracks such as rhythm, chord and control cannot be copied. |
| 28 | This song is too long to be saved as a MIDI file. |
| 29 | The MIDI file that you have tried to load exceeds the memory capacity of the KN5000 and cannot be played. The SEQUENCER memory has been cleared. |
| No. | Contents |
| 30 | It is not possible to change the time signature or measure length of a COMPOSER pattern after it has been recorded. If you want to proceed, you must first clear the entire COMPOSER pattern. |
| 31 | The time signature of the pattern from which you are copying is different from the COMPOSER memory that you are using.Either: Change the time signature of the COMPOSER memoryor: Copy from a pattern that has the same time signature |
| 32 | Memory full |
| 40 | The Identification (ID) code of the system exclusive data received by the KN5000 is for a different product. |
| 41 | An error has occurred during system exclusive data reception. The data from the transmitting device may be incomplete.Please try again. |
| 42 | An error has occurred during system exclusive transmission. The data has not been received correctly.Please try again. |
| 43 | The file that you are trying to load was saved on a previous KN keyboard. It is only possible to load using the "ALL" option. |
| 47 | Please select a preset pattern. |
| 54 | Please select a USER bank. |
| 55 | Special tracks such as CHORD (APC), RHY and CTL exist in the song from which you are copying and are incompatible with the destination song because it is in the GM mode. |
| 56 | AUTO PUNCH recording has been unsuccessful because SEQUENCER operation was interrupted before the PUNCH OUT measure was reached. |
| 58 | The song that you have tried to load exceeds the KN5000's available memory and cannot be loaded. The selected song memory has been cleared. Please clear existing songs in the instrument's memory using SONG CLEAR to make more memory available, and try again. |
Examples of general settings
☐ Discontinue the display background (wallpaper) when the characters are difficult to read.
- On the CONTROL MENU display, select WALLPAPER SETTING.
- Press the USER INITIAL button, and press the YES button on the confirmation display.
- Set all three categories to USER, and press the OK button.
• The wallpaper changes to an unpatterned background, making the characters easier to read.
☐ Discontinue the messages such as "Are You Sure?" because they are bothersome.
- On the CONTROL MENU display, select DISPLAY TIME OUT.
-
Set the message categories you do not wish to appear to OFF, and press the OK button.
□ Retain the sound and rhythm select displays. -
On the CONTROL MENU display, select DISPLAY TIME OUT.
-
Set the SOUND/RHYTHM SELECT to HOLD, and press the OK button.
□ Arrange your favorite MUSIC STYLE selections in the desired order. -
Use the MUSIC STYLIST to select a favorite MUSIC STYLE.
-
Immediately store the settings in the PANEL MEMORY.
• The style name is also copied.
3. Repeat steps 1 and 2 to store the music styles in the desired order.
4. Press and hold the SET button, and select EXPAND on the PANEL MEMORY MODE display.
Minimize the floppy disk load/save time.
- Insert a floppy disk into the Disk Drive slot.
- On the DISK MENU display, select LOAD or SAVE.
-
On the PAGE 2 (LOAD OPTION/SAVE OPTION) display, set unessential data to NO.
-
Press the LOAD/SAVE button.
-
In the initialized state, all the PERFORMANCE data is selected to be saved, and all the saved data is selected to be loaded. In order to avoid unnecessarily large data size and/or to shorten the load time, it is suggested that you use this method to collectively save only the necessary data. Then when you load data from the disk, only the data you selected to save is loaded without your having to access the LOAD OPTION.
• The SAVE OPTION allows only BANK 1 of the PANEL MEMORY to be saved. When data is loaded, only the BANK 1 data is overwritten; the other banks are not affected.
■ Name a floppy disk.
- Format a floppy disk.
- On the DISK NAMING display, enter a name.
- The current contents of the disk are erased when the disk is formatted.
☐ Use part of commercially sold GM (SMF) song data as a COMPOSER pattern.
- On the SMF LOAD display, set LOAD AS to GM→TECH, and load the song to the SE-QUENCER.
- The sound numbers, drum kit instrument arrangement, octave, volumes, etc. for GM are automatically changed to the Technics standard settings.
- Use the SEQ TO COMPOSER COPY of the COMPOSER, to copy the desired portion of the loaded data to the COMPOSER.
- You can use the TRANSPOSE function on this display to adjust the octave.
■ Switch the TREMOLO SLOW/FAST of the DIGITAL DRAWBAR without accessing the DIGITAL DRAWBAR display.
On the CONTROL MENU, for FOOT CONTROLLERS, assign the ROTARY SLOW/FAST function to the desired FOOT SWITCH.
For MANUAL SEQUENCE PADS, select Control Preset 1 Bank, and press pad 1.
■ Pretend to play the keyboard while playing back the SEQUENCER.
Press the ENTERTAINER button to turn it on, and set the MUTE KEYS to ON.
- Setting MUTE KEYS to ON will disable this instrument's keyboard and wheels.
■ Block storing of MIDI settings at beginning of each SONG stored in the SEQUENCER.
The MIDI settings for each part or for parts in common are stored at the start of each recorded SEQUENCER SONG and when PANEL WRITE is executed. Normally, these MIDI settings are not recalled when data is loaded; however, the setting can be changed to allow these MIDI settings to be loaded.
- On the MIDI SETTING LOAD OPTION display of the MIDI MENU, set "From Sequence Song" to YES.
- After adjusting the MIDI settings, follow the procedure to record in the SEQUENCER.
- If you wish to change and store the MIDI settings after recording in the SEQUENCER, change the settings and then execute the PANEL WRITE function.
- Load the MIDI settings after selecting a different SONG, after using SEQUENCER SONG LOAD to load from a floppy disk, after executing SONG COPY to copy to the currently selected SONG, etc.
■ Specify directly PROGRAM CHANGE NUMBERS of connected external MIDI equipment.
On the PROG. CHANGE MIDI OUT display of the MIDI MENU, set each parameter, and press the SEND button.
■ Use the PANEL MEMORY to switch settings and connections to VOCALIST WORKSTATION (sold separately, manufactured by Digitech Corp.)
- Press the ENTERTAINER button to turn it on, and press the VOCALIST WORKSTATION button.
- Change the settings on the VOCALIST WORKSTATION display.
-
Store the settings in the PANEL MEMORY.
-
The VOCALIST WORKSTATION settings and the MIDI settings are both stored.
- Set the PANEL MEMORY MODE to EXPAND.
- When the VOCALIST of the EXPAND MODE FILTER is set to ON, the PANEL MEMORY can be used to change the VOCALIST WORKSTATION settings. When MIDI is set to ON, the PANEL MEMORY can be used to change the MIDI settings of this instrument.
- If a VOCALIST WORKSTATION is again connected and the MIDI channels do not match, automatic setting is not executed. In this case, on PAGE 1/2 of the VOCALIST WORKSTATION display, select one of the presets, and press the OK button to effect automatic MIDI CHANNEL matching.
Index
A
ACOUSTIC ILLUSION 41
ACCORDION REGISTER 35
AFTER TOUCH SET 89
AMPLITUDE 150
APC CONTROL 169
AUTO PLAY CHORD 53
AUTO PLAY CHORD INPUT 170
AUTO PLAY CHORD OUTPUT 170
AUX IN 179
B
BACKUP 178
Backup memory 178
BANK 46
BANK VIEW 63
BEAT 51
BEND RANGE SET 132
C
CHORD STEP RECORD 82
CLOCK 168
COMMON SETTING 169
COMPOSER 99
COMPUTER CONNECTION 175
CONDUCTOR 36
Connections 179
CONTRAST 31
CONTROL 159
CONTROLMESSAGES 168
CONTROLLER 154
COUNT INTRO 52
CREATE 69
CUSTOM 99
CUSTOM COPY 109
D
DEMO 10
DIGITAL DRAWBAR 33
DIGITAL EFFECT 39
DIGITAL REVERB 40
DIRECT PLAY 117
Disk Drive 111
DISK 113
Display 27
DISPLAY TIME OUT 162
DISPLAY HOLD 31
DRUM EDIT 91
DRUM PATTERN OUTPUT 170
DRUMS TYPE 169
DSP EFFECT 40
E
EASY COMPOSER 101
EASY EDIT 140
EASY REC 71
EDIT 69
ENTERTAINER 44
EQUALIZER 137
Error messages 187
EXIT 31
EXP PEDAL 179
Expression Pedal 179
F
FADE IN/OUT 56
FILL IN 52
FILTER 147
FINGERED 54
FLOPPY DISK FORMAT 120
FOOT CONTROLLERS 161
FOOT SW 1,2 179
Foot Switch 179
G
GENERAL MIDI 165
GLIDE 161
H
Headphones 8
HELP 31
1
Initialize 177
INPUT/OUTPUT SETTING....170
INTRO & ENDING 52
INTRO, FILL IN, ENDING 169
K
KEY SCALING 135
KEY SHIFT 131
L
LANGUAGE SELECT 31
LEFT HOLD 138
LINE OUT 179
LOAD 114
LOCAL (MIDI) 167
M
MAIN VOLUME 9
MANUAL SEQUENCE PADS 46
MASTER TUNING 134
MEASURE COPY 96
MEASURE ERASE 97
MEASURE & TIME SIGNATURE 103
MEMORY, AUTO PLAY CHORD ....55
MEMORY, COMPOSER 105
MEMORY, SOUND GROUP 156
MEMORY WRITE 155
Menu 29
Metronome 73
MIDI 164
MIDI PRESETS 171
MIDI SETTING LOAD OPTION 176
MIXER 133
MODULATION 41
Music stand 8
MUSIC STYLIST 60
MUSIC STYLE ARRANGER 62
MUTE 27
N
NOTE EDIT 90
NOTE ONLY 169
O
OCTAVE (MIDI) 167
ON BASS 55
ONE FINGER 54
ONE TOUCH PLAY 59
Options 180
OTHER PARTS/TR 28
OVERALL TOUCH SENSITIVITY 160
P
PAGE 28
PAN 130
PANEL MEMORY 63
PANEL MEMORY OUTPUT 174
PART SELECT 32
PART SETTING 129
PATTERN COPY 107
PERFORMANCE 178
PIANIST 54
PITCH 144
PITCH BEND 41
PITCH BEND RANGE 132
POWER 8
PROGRAM CHANGE MODE 169
PUNCH RECORD 78
Q
QUANTIZE, COMPOSER 105
QUANTIZE, SEQUENCER 92
R
R1/R2 OCTAVE 38
REALTIME COMMANDS 168
REALTIME RECORD 72
REALTIME SYSEX 169
RECORD SETTING 103
REVERB 40
RHYTHM GROUP 50
RIGHT 1 INPUT 170
S
SAVE 120
SET 63
SEQUENCER 67
SEQUENCER EDIT 89
SEQUENCER PLAY 75
SEQUENCER RESET 75
SEQUENCER SONG SAVE 123
SINGLE LOAD 115
SMF LOAD 115
SMF SAVE 124
SONG CLEAR 88
SONG SELECT/NAMING 77
SOUND 128
SOUND ARRANGER ....58
SOUND EDIT 139
SOUND GROUP 32
Specifications 192
SPLIT POINT 37
Standard MIDI File 112
START/STOP 51
STEP RECORD 80
STEP RECORD: CHORD 82
STEP RECORD: RHYTHM 84
STOP/RECORD 47
SUSTAIN 39
SYNCHRO & BREAK 51
SYSEX BULK DUMP 172
T
TAP TEMPO ....51
TECHNI-CHORD 43
TEMPO/PROGRAM 51
TONE 141
TONE SELECT 141
TONE LAYER 143
Touch Response 160
TRACK ASSIGN 86
TRACK CLEAR 94
TRACK MERGE 95
TRANSPOSE 42
Troubleshooting 184
TUNING 131
V
VARIATION 50
VELOCITY CHANGE 94
VOCALIST WORKSTATION 181
VOLUME 130
Volume balance 27
W
WALLPAPER SETTING 163
WRITE 155
Specifications
| SX-KN5000 | |
| KEYBOARD | 61 KEYS (WITH INITIAL/AFTER TOUCH) |
| SOUND GENERATOR | PCM |
| MAXIMUM NUMBER OF NOTES PRODUCED SIMULTANEOUSLY | 64 NOTES |
| SOUNDS | 290 SOUNDS + 15 DRUM KITSGROUP PIANO, GUITAR, STRINGS & VOCAL, BRASS, FLUTE, SAX & REED,MALLET & ORCH PERC, WORLD PERC, ORGAN & ACCORDION,ORCHESTRAL PAD, SYNTH, BASS, GM SPECIAL, DRUM KITS |
| DIGITAL DRAWBAR (DRAWBARS 16', 5-1/3', 8', 4', 2-2/3', 2', 1-3/5', 1-1/3', 1',2 SOUNDS)ACCORDION REGISTER (2 TYPES x 10 SOUNDS) | |
| EFFECTS | DIGITAL EFFECT, DSP EFFECT, SUSTAIN, DIGITAL REVERB, ACOUSTIC ILLUSION |
| PART SELECT | RIGHT 1, RIGHT 2, LEFT |
| TRANSPOSE | G-C-F‡ |
| RHYTHM | 200 RHYTHMSx4 VARIATIONSGROUP STANDARD ROCK, R&ROLL & BLUES, POP & BALLAD, FUNK & FUSION,SOUL & MODERN DANCE, BIG BAND & SWING, JAZZ COMBO, US TRAD,COUNTRY, LATIN, MARCH & WALTZ, PARTY TIME,SHOW TIME & TRAD DANCE, WORLD |
| CONTROLS | MAIN VOLUME, BALANCE, MUTE, CONDUCTOR, START/STOP, INTRO & ENDING 1,INTRO & ENDING 2, FILL IN 1, FILL IN 2, COUNT INTRO, SYNCHRO & BREAK,TEMPO/PROGRAM, TAP TEMPO, FADE IN/OUT, SPLIT POINT, R1/R2 OCTAVE |
| MANUAL SEQUENCE PADS | 19 BANKS x 6(USER BANKS x 2 STORAGE CAPACITY APPROX 1800 NOTES,COMPILE BANKS x 2)STOP/RECORD |
| AUTO PLAY CHORD | ONE FINGER, FINGERED, PIANIST, MEMORY, ON BASS,MUSIC STYLE ARRANGER, SOUND ARRANGER |
| MUSIC STYLIST | ○ (MUSIC STYLIST/ONE TOUCH PLAY) |
| TECHNI-CHORD | ○ |
| PANEL MEMORY | 10 BANKS x 8, SET, NEXT BANK, BANK VIEW |
| ENTERTAINER | ○ |
| SEQUENCER | 16 TRACKSRESOLUTION 96 PULSES PER QUARTER-NOTESTORAGE CAPACITY APPROX 40000 NOTES (10 SONGS MAX )INPUT MODES EASY RECORD, REALTIME RECORD, STEP RECORDFUNCTIONS CREATE, EDIT |
| COMPOSER | 5 PARTS BASS, ACCOMP 1, ACCOMP 2, ACCOMP 3, DRUMSSTORAGE CAPACITY APPROX 10000 NOTESINPUT MODES EASY COMPOSER, REALTIME RECORD, STEP RECORDFUNCTIONS PATTERN COPY, CUSTOM COPY,SEQ TO COMPOSER COPY, LOAD SINGLE COMPOSER,BEND RANGE SETMEMORY 3 BANKS x 10(VARIATION 1-4, INTRO 1, 2, FILL IN 1, 2, ENDING 1, 2)CUSTOM 20 MEMORIES |
| DISK | LOAD, SAVE, DIRECT PLAY, SONG MEDLEY, DISK TOOLS,PREFERENCES |
| CONTROL | INITIAL, FOOT CONTROLLERS, OVERALL TOUCH SENSITIVITY,DISPLAY TIME OUT, PANEL MEMORY MODE, MUSIC STYLE ARRANGER MODE,WALLPAPER SETTING |
| SOUND | PART SETTING (VOLUME, SUSTAIN, EFFECT, PAN, KEY SHIFT, TUNING,PITCH BEND RANGE, OTHERS), MIXER, MASTER TUNING, KEY SCALING,TECHNI-CHORD, LEFT HOLD, REVERB, DSP EFFECT, REVERB & EQ PRESETS,EQUALIZER, ACOUSTIC ILLUSIONSOUND EDIT EASY EDIT, TONE SELECT, TONE LAYER, PITCH, FILTER,AMPLITUDE, DIGITAL EFFECT, CONTROLLER2 BANKS x 20 MEMORIES, 1 USER DRUM KIT |
| MIDI | PART SETTING, CONTROL MESSAGES, REALTIME MESSAGES, COMMON SETTING, P MEM OUTPUT, MIDI PRESETS, INPUT/OUTPUT SETTING, SYSEX BULK DUMP, GENERAL MIDI, PROG CHANGE MIDI OUT COMPUTER CONNECTION, MIDI SETTINGS LOAD OPTION |
| EXTERNAL MEMORY | BUILT-IN 3 5 inch FLOPPY DISK DRIVE FOR 2HD (1 44 MB), 2DD (720 KB) |
| DISPLAY | LCDPAGE, CONTRAST, EXIT, DISPLAY HOLD |
| HELP | ○ |
| DEMO | ○ |
| TERMINALS | PHONES, LINE OUT (R/R+L, L), AUX IN (R/R+L, L), MIC, FOOT SW 1, 2, FOOT CONTROLLER, EXP PEDAL, MIDI (IN, OUT, THRU), COMPUTER |
| OUTPUT | 66 W (18 W × 2 FOR MID/HIGH, 30 W × 1 FOR BASS) |
| SPEAKERS | 12 cm × 2, 6 5 cm × 2 FOR MID/HIGH 14 cm × 1 FOR BASS |
| POWER REQUIREMENT | 195 W, 100 W (CANADA), 85 W (U S A AND MEXICO) |
| AC120/220/240V 50/60 HzAC120V 60 Hz (NORTH AMERICA AND MEXICO)AC230-240V 50/60 Hz (EUROPE, AUSTRALIA, NEW ZEALAND, SINGAPORE AND PHILLIPPINES) | |
| DIMENSIONS (W×H×D)* | 106 2 cm × 17 4 cm × 41 4 cm (41-13/16" × 6-27/32" × 16-5/16") |
| NET WEIGHT* | 15 1 kg (33 3 lbs) |
| ACCESSORIES | MUSIC STAND, AC CORD |
* Without MUSIC STAND
- Design and specifications are subject to change without notice
- Technics
- WARNING: TO REDUCE THE RISK OF FIRE OR ELECTRICAL SHOCK, DO NOT EXPOSE THIS PRODUCT TO RAIN OR MOISTURE.
- OWNER'S MANUAL
- Before you play
- Important Safety Instructions
- WARNING
- Safety
- Installation
- Listening caution
- Service
- Maintenance
- BASIC FUNCTIONS
- PRACTICAL APPLICATIONS
- Part I Sounds and effects
- Part II Manual Sequence Pads
- Part III Playing the rhythm
- Part IV Sequencer
- Part V Composer
- Part VI Disk Drive
- Part VII Sound
- Part VIII Sound Edit
- Part IX Control
- Part X MIDI
- Getting started
- Playing
- 1
- 2
- 3
- 4
- 5
- Listen to the demonstration
- Select and listen to the demonstration tunes.
- Listen to tunes that demonstrate various features.
- ■ Demo playback from a disk
- 41
- Add sustain.
- Add a feeling of spaciousness to the sound.
- Change the quality of the sound.
- Add reverberation.
- Add a dimension of expansion to the sound.
- Slide the pitch up or down.
- Add vibrato.
- Select the registration for a music style (music stylist)
- 71
- 6
- Automatic panel settings (ONE TOUCH PLAY)
- Search for a music style alphabetically.
- Store your panel settings (PANEL MEMORY)
- Record your performance
- (SEQUENCER)
- Playing back your recorded performance
- A
- B
- Save data on a floppy disk
- Recall data from a floppy disk
- Load rhythm data from a Technics pattern disk (COMPOSER LOAD)
- Play back commercial song disks (DIRECT PLAY)
- Entertainer features
- Microphone and other connections
- ENTERTAINER display
- FADE IN/OUT SETTING
- MIXER
- DISK LOAD
- MUTE KEYS
- PANIC
- MIC BALANCE
- VOCAL REVERB
- About the display
- Normal display
- Volume balance
- MUTE
- OTHER PARTS/TR
- PAGE
- Menu display
- ■ Example of menu display: SOUND
- Setting display
- TEMPO/PROGRAM dial
- EXIT
- DISPLAY HOLD
- CONTRAST
- HELP
- Selecting sounds
- Select a sound
- Digital Drawbar
- ■ PERCUSSIVE TONE
- TREMOLO
- DRAWBAR SETTING
- ATTACK TIME
- About foot marks
- Accordion Register
- Assigning parts to the keyboard
- SPLIT POINT
- ■ Customized split point
- RIGHT 1/RIGHT 2 OCTAVE
- Effects
- SUSTAIN
- DIGITAL EFFECT
- DSP EFFECT
- DIGITAL REVERB
- ACOUSTIC ILLUSION
- ■ Type and level settings
- PITCH BEND
- MODULATION
- Transpose
- Techni-chord
- Type setting
- □ ORCHESTRATOR
- Entertainer
- EXCITER G:
- VOLUME:
- MIDI IN:
- Keyboard:
- VOCALIST WORKSTATION:
- FADE IN/OUT SETTING:
- MIXER:
- DISK LOAD:
- MUTE KEYS:
- Playing phrases
- Press the BANK button.
- Select the desired bank from the display.
- "Control Preset 1" (foot switch functions):
- "Control Preset 2" (rhythm functions):
- Press a pad button (1 to 6).
- Record a phrase
- SYNC TO RHYTHM:
- INSTANT START:
- Compile
- Naming for "User" and "Compile" Banks
- Selecting rhythms
- Select a rhythm
- □ VARIATION
- Start the rhythm
- Normal start
- ■ Synchronized start
- ■ Adjust the tempo
- ■ TAP TEMPO
- Playing the rhythm
- INTRO
- COUNT INTRO
- FILL IN
- ENDING
- Auto Play Chord
- How the AUTO PLAY CHORD works
- Playing chords
- ONE FINGER mode
- ■ FINGERED mode
- PIANIST mode
- How to use the AUTO PLAY CHORD
- ■ MEMORY
- ■ ON BASS
- Example of how to play a ONE FINGER accompaniment
- BREAK function
- Fade In/Fade Out
- FADE IN
- FADE OUT
- FADE SET
- Sound Arranger
- Playing back the sounds
- One Touch Play
- Music Stylist
- Setup by music style
- Setup by alphabetical order
- Music Style Arranger
- How to use the MUSIC STYLE ARRANGER
- How to change the music style during your performance
- ■ MUSIC STYLE ARRANGER mode
- Panel Memory
- How to store the panel settings
- BANK VIEW
- Assign a name to the bank/memory
- Assign a name
- Recall the panel setup
- ■ NEXT BANK
- PANEL MEMORY mode
- NORMAL
- EXPAND
- ☐ EXPAND MODE FILTER
- Outline of the Sequencer
- SEQUENCER features
- ■ You can change the tempo without changing the pitch
- ■ Consistent sound
- ■ Edit your recorded performance
- ■ Instant search
- ■ Save your performances on disks
- Popular features
- ■ Simplified recording method
- ■ Create a one-man ensemble
- ■ Store individual data to create your song
- Memory capacity
- About the measure count
- SEQUENCER menu
- Summary of the SEQUENCER menu items
- CREATE
- EDIT
- Sequencer parts
- Default part settings
- Easy Record
- Recording procedure
- Playback
- Realtime Record
- ■ Multi-track recording
- CYCLE RECORD
- Sequencer Play
- CYCLE PLAY
- MEDLEY
- Song Select/Naming
- Punch Record
- ■ AUTO PUNCH RECORD
- Step Record
- REST:
- ERS:
- BAL:
- ■ Storing control data
- □ Correcting the data
- Performance data
- Sound data
- Control data
- Store a chord progression
- Note value keys
- Reset key
- Correction keys
- Repeat key
- End key
- DELETE key
- ■ Example of storing a chord progression
- Store the chords.
- ■ Correct the recorded chord progression
- Chord data
- TRACK CLEAR
- Store a rhythm progression
- START/STOP
- ■ Correct the recorded rhythm progression
- ■ TRACK CLEAR
- Track Assign
- ■ TRACK ASSIGN PRESETS
- Panel Write
- Song Clear
- Song/track Copy
- After Touch Set
- Editing the recorded performance
- Select the edit function
- NOTE EDIT
- ☐ Inserting note data
- DRUM EDIT
- Inserting DRUMS data
- QUANTIZE
- VELOCITY CHANGE
- TRACK MERGE
- NOTE CHANGE
- ADVANCE/DELAY
- MEASURE COPY
- TRACK:
- FIRST MEASURE:
- LAST MEASURE:
- START MEASURE:
- REPEAT:
- MEASURE ERASE
- MEASURE DELETE
- MEASURE INSERT
- Outline of the Composer
- Rhythm components which can be stored
- CUSTOM
- MEMORY
- COMPOSER menu
- Summary of the COMPOSER menu items
- Three ways to record in the COMPOSER
- ■ Simple recording method
- ■ Create a completely new rhythm (page 102)
- ■ Pattern Copy (page 107)
- Simple recording method
- Create a completely new rhythm
- Prepare to record
- MEASURE & TIME SIGNATURE
- RECORD SETTING
- PANPOT:
- PITCH POINT:
- Button functions
- INST ERS:
- QUANTIZE:
- SOLO:
- ■ Correcting the data
- Pattern Copy
- SEQ TO COMPOSER COPY
- Bend Range
- Custom Copy
- Note
- Selecting a CUSTOM memory
- Outline of the Disk Drive function
- Internal memory and Floppy Disk Drive
- Main parts of the Floppy Disk Drive
- Using commercial song disks
- ■ Loading Technics File format disks
- ■ About Standard MIDI Files
- Eject button
- Access indicator
- Playback of commercial song disks
- Outline of the procedure
- Loading data
- LOAD
- ■ LOAD OPTION
- ■ SINGLE LOAD
- ■ SMF LOAD
- COMPOSER LOAD
- Direct Play
- ■ The display during playback
- MEDLEY PLAY
- Song Medley
- Saving data
- Floppy disks
- FORMAT
- SAVE
- TECHNICS FORMAT
- SMF FORMAT 0
- Disk management
- DISK TOOLS
- RENAME:
- FORMAT:
- Set the automatic display when a disk is inserted
- PREFERENCES
- DISK INSERT OPTION:
- FILE TYPE PRIORITY:
- Outline of the Sound
- Summary of the SOUND menu items
- ■ A word about parts
- Part Setting
- Selecting an attribute
- VOLUME
- PAN
- EFFECT
- ■ Sustain on/off
- ■ Sustain length
- KEY SHIFT
- TUNING
- PITCH BEND RANGE
- OTHER SETTING
- GLIDE PEDAL:
- SUSTAIN PEDAL:
- PART EXP PEDAL:
- AFTER TOUCH:
- KEY SCALING:
- SOUND:
- PAN:
- REVERB:
- DSP EFFECT:
- DIGITAL EFFECT:
- KEY SHIFT:
- MIDI:
- LOCAL:
- Master Tuning
- Key Scaling
- SCALING TYPE
- SCALING SHIFT
- SCALING MODE (TOTAL/SOUND)
- ■ User type scaling
- Reverb & Equalizer Presets
- Equalizer
- Left Hold
- Outline of the Sound Edit
- Summary of the SOUND EDIT menu items
- Easy Edit
- Easy Edit items
- BRILLIANCE:
- Tone Edit
- About tones
- TONE SELECT
- TONE WAVEFORM
- ■ Other settings
- KEY ON:
- KEY OFF:
- CHORD:
- TONE LAYER
- ■ KEY LAYER
- ■ VELOCITY LAYER
- Pitch Edit
- PITCH
- ■ ENVELOPE
- LFO
- WAVE
- DELAY
- SPEED
- DEPTH
- TOUCH
- KEYSYNC
- Filter Edit
- FILTER
- CUTOFF
- RESO
- CURVE
- RANGE
- FREQ
- GAIN
- FILTER KEY FOLLOW
- ENVELOPE
- Amplitude Edit
- AMPLITUDE
- AMPLITITUDE KEY FOLLOW
- Effect Edit
- Controller Edit
- CONTROLLER
- SUSTAIN PEDAL MODE, GLIDE
- LONG:
- HOLD:
- ENABLE:
- DISABLE:
- Store the new sound
- Procedure
- S % & ' ( ) + - 1 / = . . ?
- Select a new sound
- Drum Kit Edit
- DRUM SOUND EDIT
- LEVEL:
- KEY:
- TUNE:
- REV:
- ■ DRUM DETAIL EDIT
- Recording Digital Drawbar sounds
- DIGITAL DRAWBAR EDIT
- Outline of Control functions
- Overall Touch Sensitivity
- INITIAL TOUCH
- AFTER TOUCH
- Foot Controllers
- ■ FOOT SWITCH/FOOT CONT.SW
- EXPRESS. PEDAL
- TOTAL EXPRESSION:
- PART EXPRESSION:
- Display Time Out
- SAVE REMINDER:
- SOUND/RHYTHM SELECT:
- EASY SETTING:
- Wallpaper Setting
- What is MIDI?
- MIDI terminals
- IN:
- OUT:
- THRU:
- Connection examples
- MIDI channels
- The following kinds of data can be transmitted/received.
- ■ NOTE data
- ■ PROGRAM CHANGE
- ■ CONTROL CHANGE
- ■ EXCLUSIVE data
- GENERAL MIDI
- Outline of MIDI functions
- Summary of the MIDI menu items
- Control Messages
- ON:
- Realtime Messages
- REALTIME COMMANDS
- OFF:
- CLOCK
- INTERNAL:
- Common Setting
- NOTE ONLY:
- PROG. CHANGE TO P. MEM:
- REALTIME SYSEX:
- INTRO, FILL-IN, ENDING:
- APC CONTROL:
- FADE IN/OUT:
- PROGRAM CHANGE MODE
- NORMAL:
- TECH:
- GM:
- DRUMS TYPE
- SONG SELECT
- Input/output Setting
- RIGHT 1 INPUT
- AUTO PLAY CHORD INPUT
- VELOCITY INPUT
- TECHNI-CHORD OUTPUT
- TRANSPOSE OUTPUT
- DRUM PATTERN OUTPUT
- AUTO PLAY CHORD OUTPUT
- MIDI Presets
- ■ Storing user settings
- Notice
- ■ Recalling the USER settings
- Sysex Bulk Dump
- Transmitting
- Program Change MIDI Out
- Panel Memory Output
- Computer Connection
- MIDI Settings Load Option
- Load MIDI Parameters?
- □ Use these settings when;
- Initialize
- INITIAL
- About the backup memory and performance data
- Options and connections
- Connections
- EXP PEDAL
- FOOT SW 1, 2
- AUX IN (input level 0.5 Vrms, 6 kΩ)
- LINE OUT (output level 1.5 Vrms, 600 Ω)
- MIDI
- FOOT CONTROLLER
- MIC
- COMPUTER
- Caution:
- Connection to a Macintosh series computer
- Connection to a PC
- Separately sold options
- Connecting to a "Vocalist Workstation"
- Settings
- ■ Detailed settings
- Symptoms which appear to be signs of trouble
- Examples of general settings
- Index
- C
- D
- E
- F
- G
- H
- K
- L
- M
- N
- O
- P
- Q
- R
- S
- T
- V
- W
Marque : TECHNICS
Modèle : SX-KN5000
Catégorie : Clavier