
SX-KN720 - Clavier TECHNICS - Notice d'utilisation et mode d'emploi gratuit
Retrouvez gratuitement la notice de l'appareil SX-KN720 TECHNICS au format PDF.


| Type de produit | Clavier arrangeur |
| Marque | Technics |
| Modèle | SX-KN720 |
| Polyphonie | 32 voix |
| Nombre de touches | 61 touches sensibles à la vélocité |
| Sonorités | Plus de 700 sons PCM |
| Rythmes | Plus de 200 styles d'accompagnement |
| Mémoire des morceaux | Jusqu'à 20 000 notes |
| Écran | LCD rétroéclairé multilingue |
| Enregistrement | Séquenceur 16 pistes |
| Effets | Réverbération, chorus, delay |
| Connectiques | MIDI IN/OUT, sorties audio L/Mono et R, entrée pédale |
| Alimentation | Adaptateur secteur 9V DC (fourni) ou 6 piles R20 |
| Dim. | 1000 x 400 x 150 mm |
| Poids | 10 kg environ |
| Entretien | Nettoyer avec un chiffon doux et sec |
| Sécurité | Débrancher en cas d'orage, éviter l'humidité |
| Pièces détachées | Disponibles auprès du service après-vente Technics |
| Garantie | 2 ans pièces et main-d'œuvre |
FOIRE AUX QUESTIONS - SX-KN720 TECHNICS
Questions des utilisateurs sur SX-KN720 TECHNICS
0 question sur cet appareil. Repondez a celles que vous connaissez ou posez la votre.
Poser une nouvelle question sur cet appareil
Téléchargez la notice de votre Clavier au format PDF gratuitement ! Retrouvez votre notice SX-KN720 - TECHNICS et reprennez votre appareil électronique en main. Sur cette page sont publiés tous les documents nécessaires à l'utilisation de votre appareil SX-KN720 de la marque TECHNICS.
MODE D'EMPLOI SX-KN720 TECHNICS
Technics
KEYBOARD
sx-KN720 sx-KN920 sx-KN1500 sx-KN930
natural_image
Black treble clef symbol on lined paper (no text or symbols present)
CAUTION
RISK OF ELECTRIC SHOCK DO NOT OPEN

CAUTION
TO REDUCE THE RISK OF
ELECTRIC SHOCK, DO NOT
REMOVE SCREWS.
NO USER-SERVICEABLE
PARTS INSIDE.
REFER SERVICING TO QUALIFIED
SERVICE PERSONNEL.
WARNING: TO REDUCE THE RISK OF FIRE OR ELECTRICAL SHOCK, DO NOT EXPOSE THIS PRODUCT TO RAIN OR MOISTURE.
BEFORE YOU PLAY, PLEASE READ THE CAUTIONARY COPY APPEARING ON PAGES 2 AND 3.

The lightning flash with arrowhead symbol, within an equilateral triangle, is intended to alert the user to the presence of uninsulated "dangerous voltage" within the product's enclosure that may be of sufficient magnitude to constitute a risk of electric shock to persons.

The exclamation point within an equilateral triangle is intended to alert the user to the presence of important operating and maintenance (servicing) instructions in the literature accompanying the appliance.
Note: This equipment has been tested and found to comply with the limits for a Class B digital device, pursuant to Part 15 of the FCC Rules. These limits are designed to provide reasonable protection against harmful interference in a residential installation. This equipment generates, uses and can radiate radio frequency energy and, if not installed and used in accordance with the instructions, may cause harmful interference to radio communications. However, there is no guarantee that interference will not occur in a particular installation. If this equipment does cause harmful interference to radio or television reception which can be determined by turning the equipment off and on, the user is encouraged to try to correct the interference by one or more of the following measures:
— Reorient or relocate the receiving antenna.
— Increase the separation between the equipment and receiver.
— Connect the equipment into an outlet on a circuit different from that to which the receiver is connected.
— Consult the dealer or an experienced radio/TV technician for help.
The model number of this product is found on the rear of the unit.
The model number and serial number are found underneath the keyboard.
Please note the model and serial numbers in the space provided below and retain this sheet as a permanent record of your purchase to aid identification in the event of theft.
MODEL NUMBER
SERIAL NUMBER
Technics
OWNER'S MANUAL
Before you play
For long and pleasurable use of this instrument, and to gain a thorough understanding of your KN Keyboard, it is strongly recommended that you read through this Owner's Manual once.
The Owner's Manual is comprised of the following parts.
BASIC FUNCTIONS
This part includes an explanation of basic procedures and points you should be aware of for proper operation of your instrument.
PRACTICAL APPLICATIONS
This part comprises a detailed explanation of sound, effect, rhythm, SEQUENCER, COMPOSER, Disk Drive, MIDI, etc.
REFERENCE GUIDE (separate booklet)
Reference guide for the contents of the SOUND, RHYTHM, MIDI data, etc.
Important Safety Instructions (KN720/KN920)
WARNING!
When using this unit, basic precautions should always be followed, including the following:
• Children using this unit should be supervised.
- Do not use this unit near water—for example, in a wet basement, near a swimming pool, or the like.
- This unit should be used only with a stand that is recommended by the manufacturer.
Installation location
- Take care to use this unit in a place where it will receive sufficient ventilation. Do not permit the ventilation holes to be covered by curtains or any similar materials.
- Place it away from direct sunlight and excessive heat from heating equipment.
- Place it where humidity, vibration and dust are minimized.
Metal items inside the unit may result in electric shock or damage.
Do not permit metal articles to get inside the unit. Be especially careful with regard to this point if children are near this unit. They should be warned never to try to put anything inside.
If water gets into the unit...
Case should be taken so that liquids are not spilled in the unit. As a precaution, it is suggested that flower vases and other containers which hold liquids not be placed on the top of this unit.
Protect your hearing
This product, either alone or in combination with an amplifier and headphones or speakers, may be capable of producing sound levels that could cause a permanent hearing loss. Do not operate for a long period of time at a high volume level or at a level that is uncomfortable. If you experience any hearing loss or ringing in the ears, you should consult an audiologist.
When to request service
The product should be serviced by qualified service personnel when:
A. The power cord or the plug has been damaged; or
B. Objects have fallen, or liquid has been spilled into the unit; or
C. The product has been exposed to rain; or
D. The product does not appear to operate normally or exhibits a marked change in performance; or
E. The product has been dropped, or the enclosure damaged.
Service and repair
Never try to remove the top or back panels of this unit, or to touch inside parts by hand or with tools. All servicing beyond that described in the Maintenance section below should be referred to your dealer or qualified service personnel.
Maintenance
- Be sure to switch this unit off after use, and do not switch the unit on and off in quick succession, as this places an undue load on the electronic components.
- To maintain the luster of the keys and buttons, wipe with a clean, damp cloth, and polish with a soft, dry cloth. Polish may be used, but do not use thinners or petro-chemical-based polishes.
- A wax-based polish may be used on the cabinet, although you will find that rubbing with a soft cloth will suffice.
When using the AC adaptor
Power source
- Use only a 120V AC power source.
- DC power cannot be used.
Handling the power cord
- Never touch the power cord, or its plug, with wet hands.
- Don't pull the power cord.
- The power cord of this unit should be unplugged from the outlet when the unit is left unused for a long period of time.
SAVE THESE INSTRUCTIONS
Important Safety Instructions (KN1500)
WARNING!
When using this unit, basic precautions should always be followed, including the following:
• Children using this unit should be supervised.
- Do not use this unit near water—for example, in a wet basement, near a swimming pool, or the like.
- This unit should be used only with a stand that is recommended by the manufacturer.
Installation location
• Take care to use this unit in a place where it will receive sufficient ventilation. Do not permit the ventilation holes to be covered by curtains or any similar materials.
- Place it away from direct sunlight and excessive heat from heating equipment.
- Place it where humidity, vibration and dust are minimized.
Power source
- Use only a 120V AC power source.
- DC power cannot be used.
Handling the power cord
- Never touch the power cord, or its plug, with wet hands.
- Don't pull the power cord.
- The power cord of this unit should be unplugged from the outlet when the unit is left unused for a long period of time.
Metal items inside the unit may result in electric shock or damage.
Do not permit metal articles to get inside the unit. Be especially careful with regard to this point if children are near this unit. They should be warned never to try to put anything inside.
Protect your hearing
This product, either alone or in combination with an amplifier and headphones or speakers, may be capable of producing sound levels that could cause a permanent hearing loss. Do not operate for a long period of time at a high volume level or at a level that is uncomfortable. If you experience any hearing loss or ringing in the ears, you should consult an audiologist.
If water gets into the unit...
Case should be taken so that liquids are not spilled in the unit. As a precaution, it is suggested that flower vases and other containers which hold liquids not be placed on the top of this unit.
When to request service
The product should be serviced by qualified service personnel when:
A. The power cord or the plug has been damaged; or
B. Objects have fallen, or liquid has been spilled into the unit; or
C. The product has been exposed to rain; or
D. The product does not appear to operate normally or exhibits a marked change in performance; or
E. The product has been dropped, or the enclosure damaged.
Service and repair
Never try to remove the top or back panels of this unit, or to touch inside parts by hand or with tools. All servicing beyond that described in the Maintenance section below should be referred to your dealer or qualified service personnel.
Maintenance
- Be sure to switch this unit off after use, and do not switch the unit on and off in quick succession, as this places an undue load on the electronic components.
- To maintain the luster of the keys and buttons, wipe with a clean, damp cloth, and polish with a soft, dry cloth. Polish may be used, but do not use thinners or petro-chemical-based polishes.
- A wax-based polish may be used on the cabinet, although you will find that rubbing with a soft cloth will suffice.
SAVE THESE INSTRUCTIONS
Important Safety Instructions (KN720/KN920) 2
Important Safety Instructions (KN1500) 3
Controls and functions (KN720) 6
Controls and functions (KN920) 8
Controls and functions (KN1500) 10
BASIC FUNCTIONS
Getting started (KN720/KN920)....12
Getting started (KN1500) 14
Listen to the demonstration 16
Selecting sounds ....17
Add effects 18
Playing automatic rhythms (KN720) .....20
Playing automatic rhythms (KN920/KN1500) .....22
Automatic accompaniment .....24
Record your performance....26
Playing commercial disks (KN920/KN1500) .....28
PRACTICAL APPLICATIONS
About the display ....30
Part I Sounds and effects ....35
Selecting sounds ....35
Assigning parts to the keyboard 36
Effects 38
Transpose 41
Techni-chord 42
Part II Manual Sequence Pads 44
Playing phrases 44
Record a phrase ....45
Part III Playing the rhythm 46
Selecting rhythms 46
Playing the rhythm 48
Auto Play Chord 49
Sound Arranger 52
One Touch Play ....53
Music Style Select (KN1500) 54
Music Style Arranger (KN920/KN1500) 55
Panel Memory 56
Foot Switch setting ....58
Part IV Sequencer ....59
Outline of the Sequencer ....59
Song 61
Easy Record 62
Sequencer parts 63
Realtime Record 64
Sequencer Play 66
Step Record ....68
Track Assign 72
Editing the recorded performance ....73
Sequencer Medley 76
Part V Composer (KN920/KN1500) 77
Outline of the Composer 77
Edit a preset rhythm pattern: preparation .....79
Create a completely new rhythm: preparation ....80
Record your rhythm pattern 82
Playback 83
Composer mode ....83
Bend Range 84
Composer Chord Map ....85
Part VI Song memory (KN720) 87
Store your performance .....87
Recall the stored performance ....88
Part VII Disk Drive (KN920/KN1500) .....89
Outline of the Disk Drive function 89
Outline of procedure .....90
Loading data .91
Playing commercial disks .95
Formatting a disk....96
Saving data 97
Part VIII Adjusting the sounds 101
Outline of the Sound Setting mode 101
Part Setting 102
Touch & Tune 103
Key Scaling 104
Left Hold 105
Part IX Creating sounds (KN920/KN1500) 106
Outline of the Sound Edit 106
Setting the function 107
Part X MIDI 111
What is MIDI? 111
Outline of MIDI functions 113
Setting the functions 114
Initialize 122
Options 123
Connections 124
Symptoms which appear to be signs of trouble 125
Error messages 127
Index 129
Specifications 131
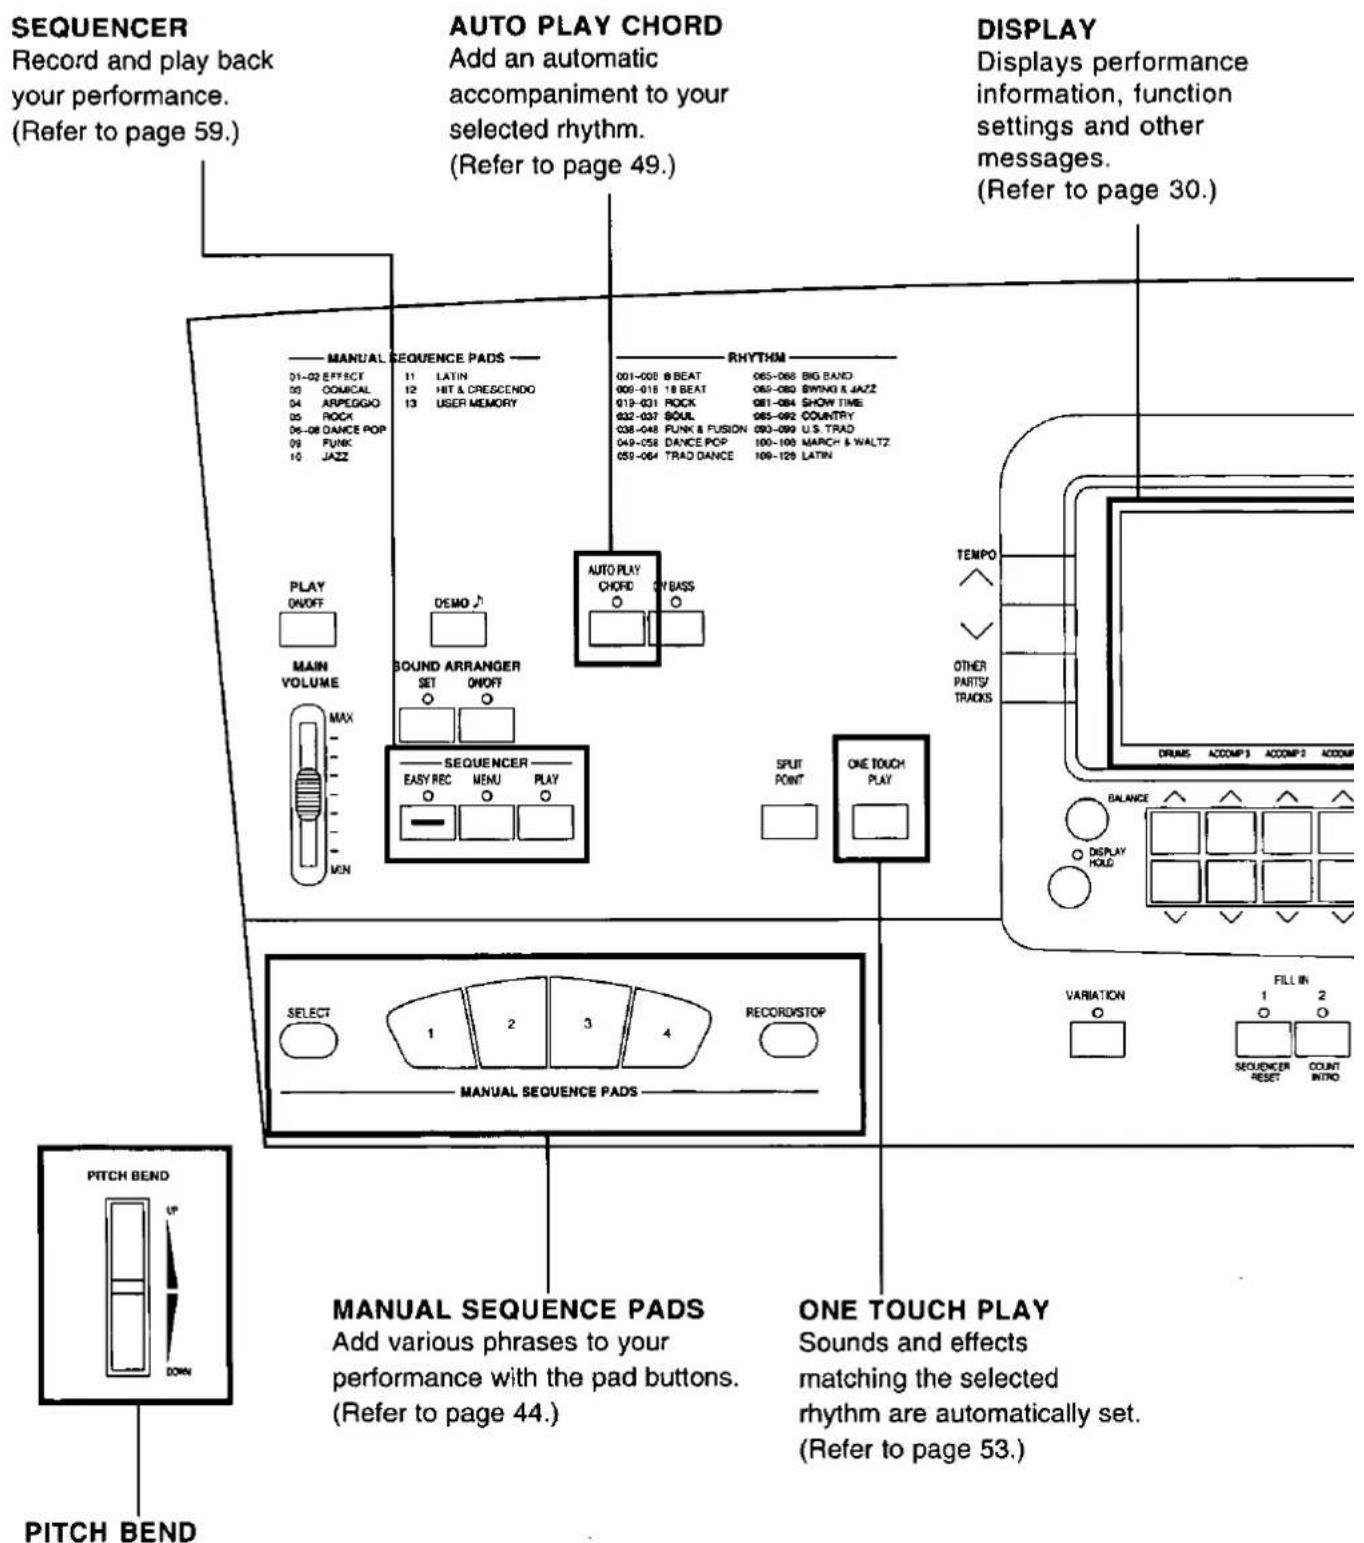
The PITCH BEND wheel allows
a "sliding" change in the pitch.
(Refer to page 40.)

Backup memory
The various stored memories and function settings are preserved even if the PLAY button is turned off, as long as power is being supplied through the AC adaptor or the batteries.
If the power supply to this instrument is discontinued (either through the AC adaptor or the batteries), the various memories and settings will be cleared after about 10 minutes.

Backup memory
The various stored memories and function settings are preserved even if the PLAY button is turned off, as long as power is being supplied through the AC adaptor or the batteries.
If the power supply to this instrument is discontinued (either through the AC adaptor or the batteries), the various memories and settings will be cleared after about 10 minutes.

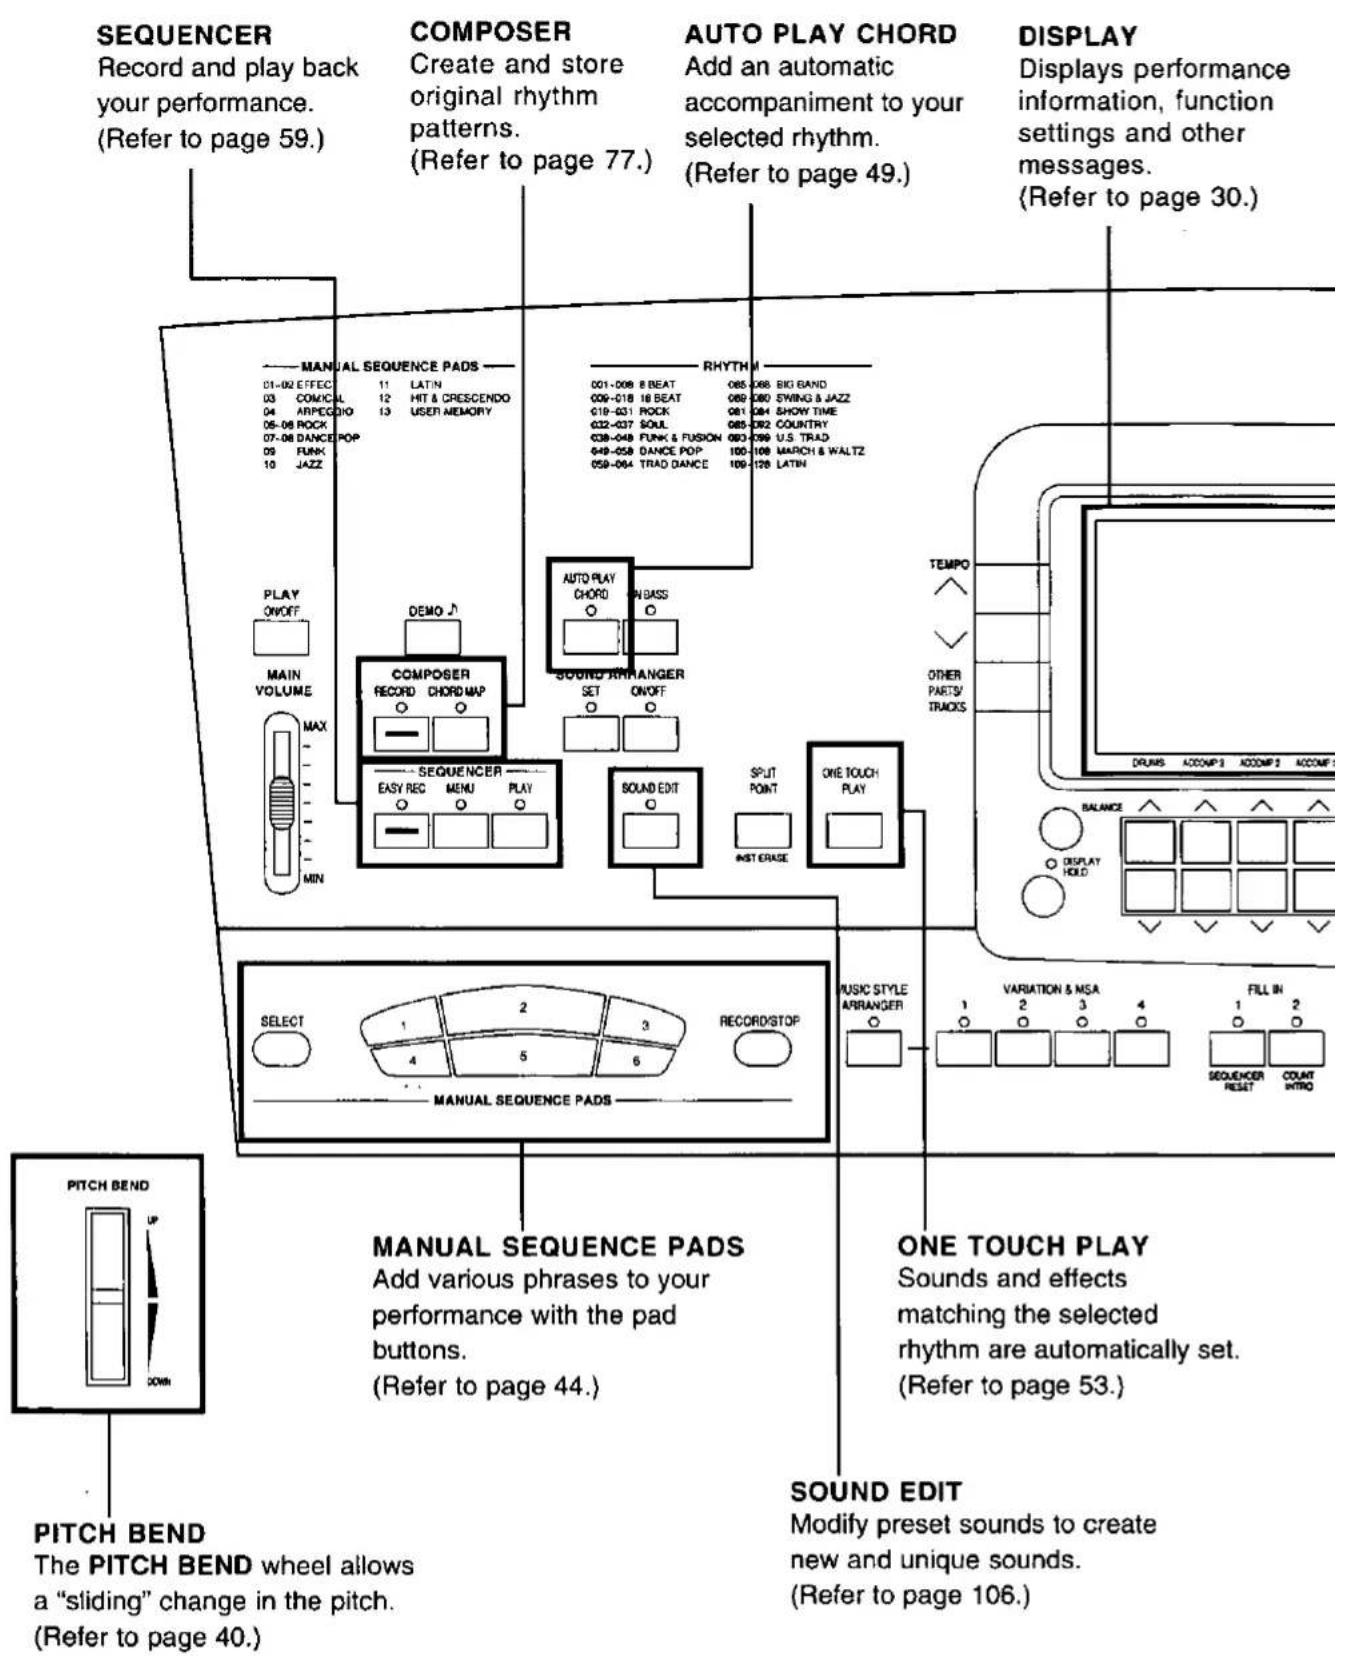
PITCH BEND/MODULATION
The PITCH BEND wheel allows
a "sliding" change in the pitch.
The MODULATION wheel is used
to add vibrato to the sound.
(Refer to pages 40 and 41.)
SOUND EDIT
Modify preset sounds to create
new and unique sounds.
(Refer to page 106.)

Getting started (KN720/KN920)
Before you play
This Keyboard can use either dry cell batteries or ordinary household AC current. If using batteries, use six R20/LR20 batteries ("D" size, UM-1). To use AC current, an SY-AD6 AC adaptor (12V, 2A) or SY-AD9 AC adaptor (12V 1A) is required. (Note: Use of an AC adaptor other than the SY-AD6/AD9 may cause damage to your instrument.)
• The AC adaptor and battery are sold separately.
- The output power differs depending on whether the AC adaptor or batteries are being used.
When using batteries
Open the battery compartment cover, found on the rear of the instrument. Insert six R20/LR20 batteries, and replace the battery compartment cover.
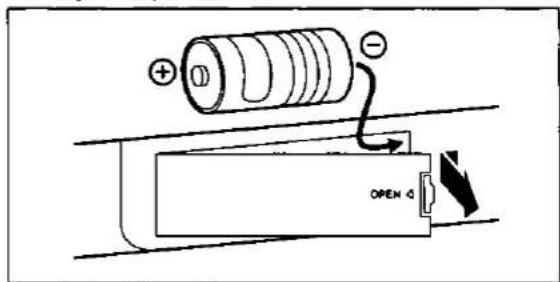
- To insert the batteries correctly, follow the + and - polarity indications. (Batteries installed with incorrect polarities may leak and damage this unit. If the leaking electrolyte comes into contact with skin or clothes, flush with water immediately.)
- Do not mix batteries (old and new) or types (carbon and alkaline).
- Remove the batteries from the battery compartment and store separately when the instrument is not to be used for a long time.
- Never subject batteries to excessive heat or flame; do not attempt to disassemble them; and be sure they are not short-circuited.
-
Do not attempt to recharge carbon or alkaline batteries.
-
Even when batteries are installed, if the AC adaptor is used, the battery circuit is bypassed and the power is supplied through the AC adaptor.
- When batteries are used, if the instrument is left on but the controls are not touched for a while (about 5 minutes), the energy-saving function is activated and the PLAY button turns off automatically.
When using the AC adaptor
Connect the AC adaptor.

natural_image
Line drawing of a device connected to a control panel with buttons and a battery (no text or symbols)- Do not disconnect and connect the AC adaptor when the PLAY button is on.
Music stand
Affix the music stand as shown.

natural_image
Line drawing of a vintage electronic device with ports and buttons (no text or symbols)- When the power is withdrawn from this instrument, the various storable memories and storable function settings of this instrument will be erased in about 10 minutes.
- When battery power is low during a performance, "WARNING! LOW BATTERIES!" is shown on the display. In this case, replace the batteries as soon as possible.
Playing

1
Press the PLAY button to turn it on.

2
In the CONDUCTOR section on the panel, press the RIGHT 1 button to turn it on.

3
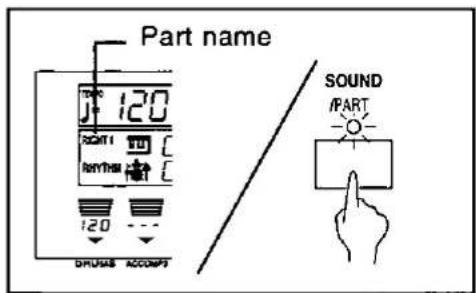
Use the SOUND/PART button to select RIGHT 1.
4
On the number pad, press 0, 0, 2.

- Touch any note on the keyboard. You will hear the "Bright Piano" sound.
5
Set the MAIN VOLUME to an appropriate level with the sliding control.

- Your Keyboard features Touch Response. You control the volume by playing the keys harder or softer.
- The pitch of this instrument can be adjusted for when playing with other instruments. (Refer to page 103.)
Getting started (KN1500)
Before you play
natural_image
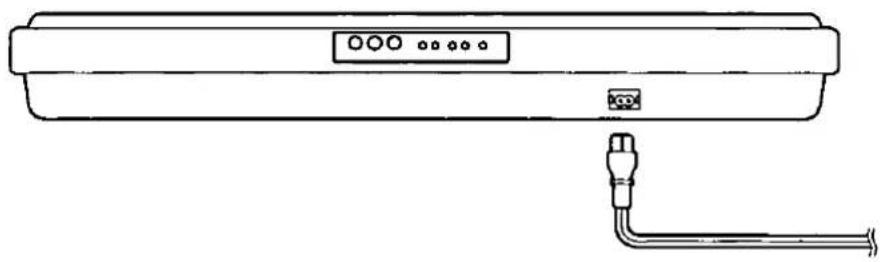
Line drawing of a rectangular electronic device with ports and cables (no text or symbols)1 | Plug the power cord into an outlet.
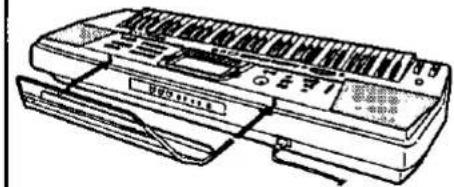
21 Affix the music stand as shown.
About the backup memory
The panel settings and stored memories are maintained in a backup memory for about 10 minutes after the power to this instrument is turned off. If you wish to keep the memory contents, before you turn off the instrument, use the SAVE procedure to store the desired data on a disk for recall at a later time.
- The backup memory does not function until the power has been on for about 10 minutes.
- When you quit the operating mode, a warning display may appear to remind you to save the data.
- The pitch of this instrument can be adjusted for when playing with other instruments. (Refer to page 103.)
Playing

1
Press the POWER button to turn it on.

- Under certain conditions, the functions and memories of this instrument may be initialized when the power is turned on.
2
In the CONDUCTOR section on the panel, press the RIGHT 1 button to turn it on.

3
Use the SOUND/PART button to select RIGHT 1.

4
On the number pad, press 0, 0, 8.

- Touch any note on the keyboard. You will hear the "Midi Grand" sound.
5
Set the MAIN VOLUME to an appropriate level with the sliding control.

- Your Keyboard features Touch Response. You control the volume by playing the keys harder or softer.
Listen to the demonstration

1
Press the DEMO button.
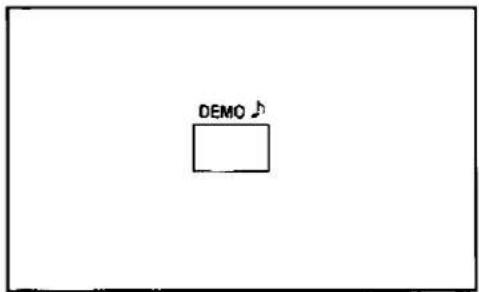
- The display changes to the DEMO SONG display.
2
Use the LEFT ∧ and ∨ buttons to select a song number.

- If you select "Medley," all the songs are played in a medley performance.
3
Press the START/STOP button.

- The demonstration performance corresponding to your selection begins.
- To end the demonstration before it has finished, again press the START/STOP button.
- To listen to other songs, repeat steps 2 and 3.
- If "Medley" was selected, all the songs are played in order in a medley performance. The medley performance continues until the START/STOP button or the DEMO button is pressed again.
4
When you are finished listening to the demonstration tunes, press the DEMO button again.
- If you press and hold the DEMO button for a few seconds, or if you press first the DEMO button and then the START/STOP button, you can also begin a medley performance.
- During the medley performance, use the LEFT ∧ and ∨ buttons if you wish to change to a different song.
- Some of the buttons do not function while the demonstration performances are being played.

1
In the CONDUCTOR section, turn on the RIGHT 1 button.

2
Use the SOUND/PART button to select RIGHT 1.
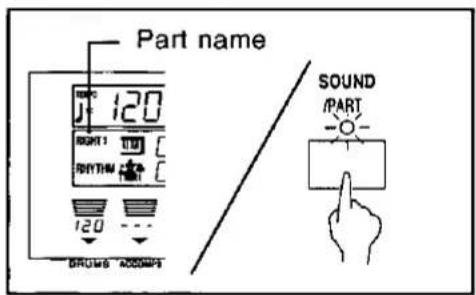
3
On the number pad, select a sound number (3 digits).

- The number and name of the sound you selected is shown on the display.
- The list of sound groups and their numbers is found on the upper part of the operation panel.
- For single-digit sound numbers: for sound 003, for example, press 0, 0, 3.
- You can use the ∧ and ∨ buttons to change to the next higher or lower sound number.
- Other things you can do are mixing sounds and playing different sounds on the left and right areas of the keyboard. (Refer to page 36.)
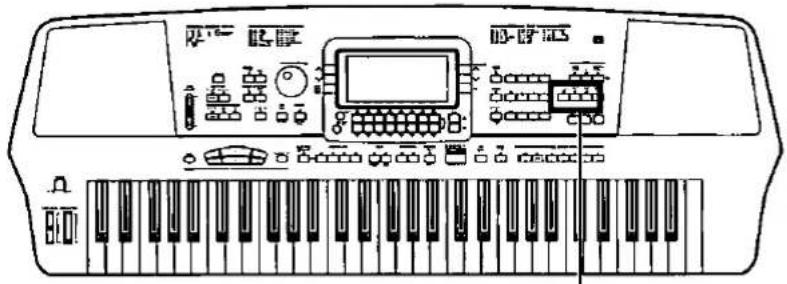
A·B·C
(KN1500)
Add a feeling of spaciousness to the sound.
A
Turn on the DIGITAL EFFECT button.
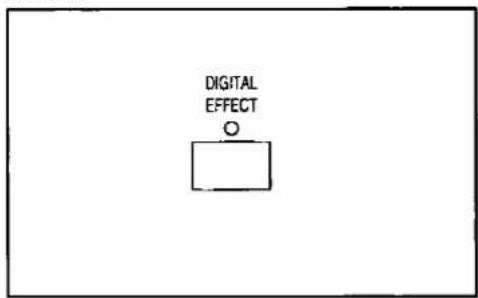
• The sound is broader and deeper.
Add breadth to the sound. (KN720)
C
Turn on the CHORUS button.

Add a unique quality to the sound. (KN920/KN1500)
C
Turn on the DSP EFFECT button.
Add sustain.
B
Turn on the SUSTAIN button.

- Play and release a key. The tones fade out gradually after the key is released.

- The type of DIGITAL EFFECT differs depending on the selected sound.

Add reverberation.
D
Turn on the DIGITAL REVERB button.

- The reverberation effect is applied to all sounds.
Change the pitch.
E
While playing a key on the keyboard, move the PITCH BEND wheel up and down.

- The pitch of the played key slides up and down, as when you bend the strings on a guitar.
Playing automatic rhythms (KN720)

1
Press the RHYTHM button to turn it on.

3
Start the rhythm by pressing the START/STOP button.
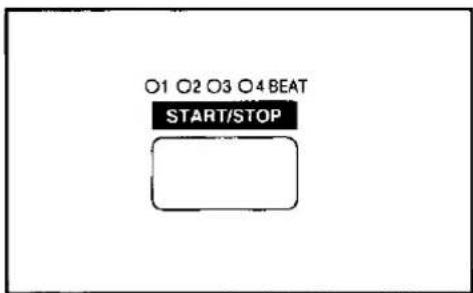
- Stop the rhythm by pressing the START/STOP button again.
2
On the number pad, select a rhythm number (3 digits).

- The list of rhythm groups and their numbers is shown at the upper left of the operation panel.
- You can use the ∧ and ∨ buttons to change to the next higher or lower rhythm number.
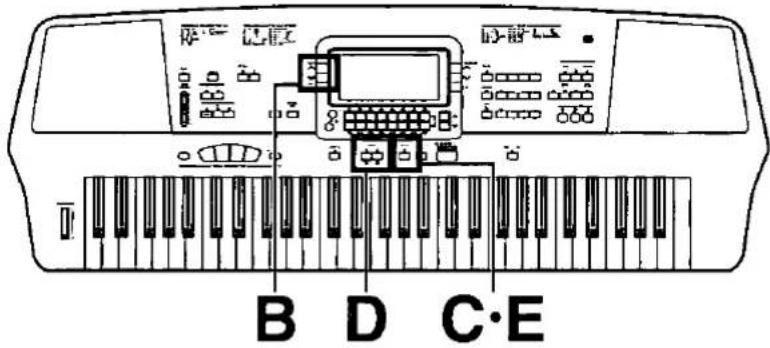
Select a variation.
A
When you turn on the VARIATION button, the nuance of the pattern changes.
Adjust the tempo.
B
Adjust the tempo with the TEMPO buttons.

- The tempo is shown on the display as “! =”.
Insert an intro pattern.
C
To start your performance with an introduction, press the INTRO & ENDING button before starting the rhythm.

- An intro is played, after which the regular rhythm starts.
Insert a fill-in pattern.
D
While the preset rhythm pattern is playing, press either the FILL IN 1 or 2 button.

- A fill-in pattern immediately starts to play.
Insert an ending pattern.
E
While the rhythm is playing, press the INTRO & ENDING button.
- You will hear an ending pattern, and then the rhythm stops.
Playing automatic rhythms (KN920/KN1500)

1
Press the RHYTHM button to turn it on.

3
Use the VARIATION buttons to select the variation number.

- The nuance of the pattern differs with each variation number.
2
On the number pad, select a rhythm number (3 digits).
- The list of rhythm groups and their numbers is shown at the upper left of the operation panel.
- You can use the ∧ and ∨ buttons to change to the next higher or lower rhythm number.
4
Start the rhythm by pressing the START/STOP button.
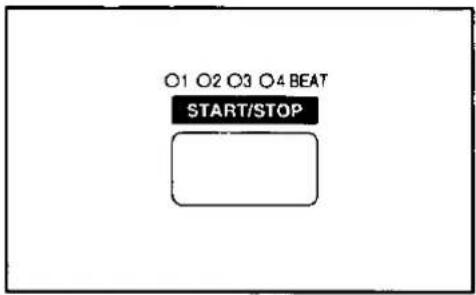
- Stop the rhythm by pressing the START/STOP button again.

Adjust the tempo.
A
Adjust the tempo with the TEMPO buttons.

KN1500: You can also adjust the tempo with the TEMPO/PROGRAM dial.

- The tempo is shown in the display as "J = ".
Insert an intro pattern.
B
To start your performance with an introduction, press the INTRO & ENDING 1 or 2 button before starting the rhythm.
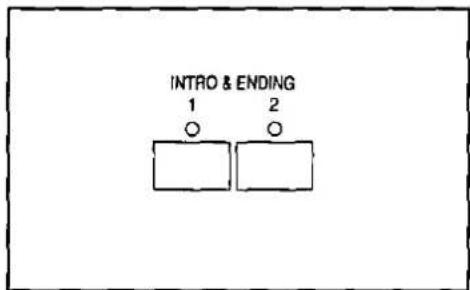
- An intro is played, after which the regular rhythm starts.
Insert a fill-in pattern.
C
While the preset rhythm pattern is playing, press either the FILL IN 1 or 2 button.
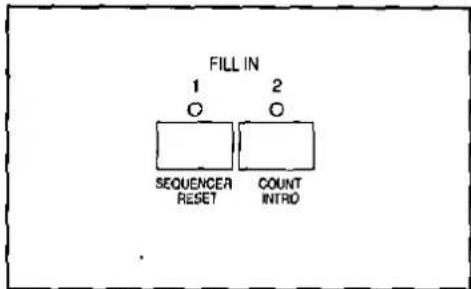
- A fill-in pattern immediately starts to play.
Insert an ending pattern.
D
While the rhythm is playing, press the INTRO & ENDING 1 or 2 button.

- You will hear an ending pattern, and then the rhythm stops.
Automatic accompaniment
Just by specifying a chord on the keyboard, an accompaniment pattern which matches the selected rhythm is automatically played.

Use the AUTO PLAY CHORD with the following tune.

1 | Select a rhythm (other than a three-beat rhythm).

3 | Use the BASS ∧ and ∨ buttons to select "1 Finger."
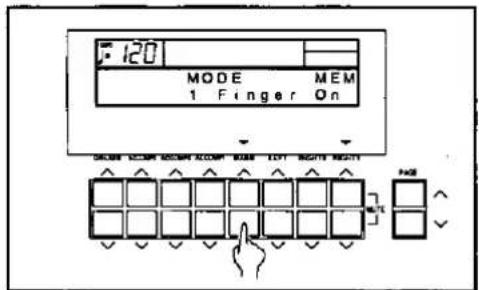
- The display returns to the previous display after a few seconds.
4 | Press and hold the ONE TOUCH PLAY button for a few seconds until the panel settings change.
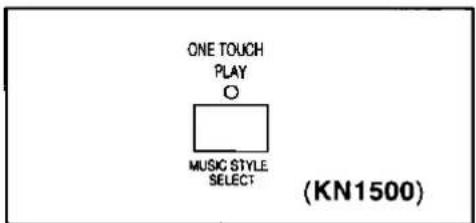
- The panel settings automatically change to those matching the rhythm you selected in step 1.

5
Use your left hand to play the chords and your right hand to play the melody.

flowchart
graph TD
    A["Chord"] --> B["Melody"]
- Pressing a key on the left area of the keyboard will cause the automatic rhythm pattern to start playing (synchro start).
- When the C key is pressed on the left area of the keyboard, an accompaniment begins to play in the C major key.
- Playing the chord key (root note) and the white key to its left will produce a 7th chord.
6
At the end of your performance, press the START/STOP button.

- The automatic accompaniment stops.
- When ending a performance which uses the automatic accompaniment, press the AUTO PLAY CHORD button to turn it off.
C chord
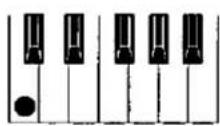
F chord

G7 chord

- KN1500: You can also have the panel settings change to automatically match the style you select. (Refer to page 54.)
Record your performance
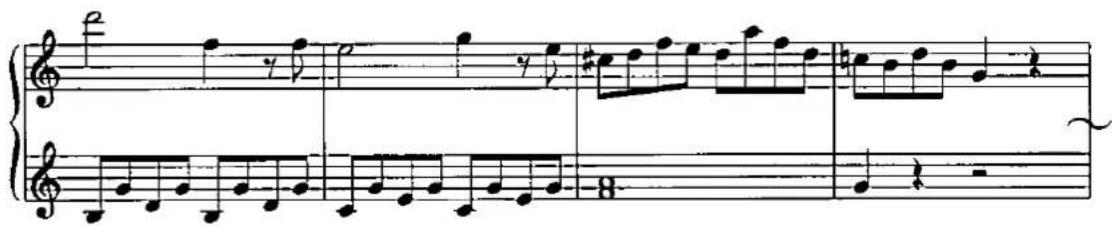
Use the SEQUENCER to record your performance.

Sonatina
Sound: 001 [Grand Piano] (RIGHT 1 part)

1
Press the EASY REC button to turn it on.
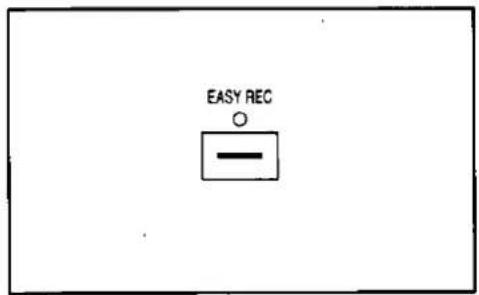
- The display changes to the EASY RECORD display.
2
Press either LEFT (Yes) button.

- The display changes to the REC display.

3
Play the song on the keyboard.
4
When you have finished playing, press the EASY REC button again to turn it off.

- The display changes to the SEQ PLAY display.
Playing back your recorded performance
A
Press the SEQUENCER RESET (FILL IN 1) button.

B
Press the START/STOP button.

- Your performance is played back just as you recorded it.
- When you are finished playing back your performance, press the PLAY button in the SEQUENCER section to turn it off.
Playing commercial disks (KN920/KN1500)
You can play commercial song disks such as Standard MIDI File (SMF) FORMAT 0 or DISK ORCHESTRA COLLECTION™ (DOC) disks on this instrument.

1
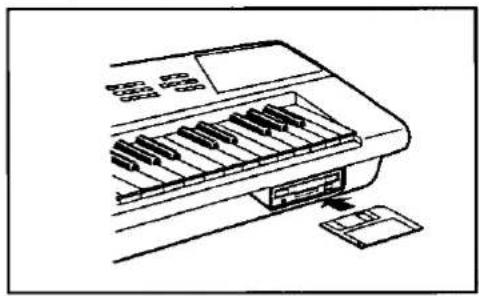
Insert the song disk into the Disk Drive slot. Push it all the way in until you hear a click.
natural_image
Line drawing of a piano keyboard with an open drawer and a separate clip (no text or symbols)3
Press the PAGE ∧ button to select "P2 Direct Play."

2
Press the MEMORY & CONTROL button to turn it on.
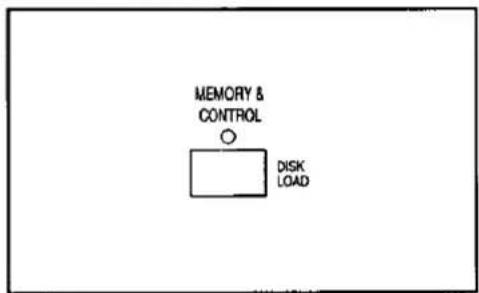
- The display changes to the MEM & CONTROL display.
4
Press the LEFT ∧ or ∨ button.

- The display changes to the DIRECT PLAY display.

5
Use the LEFT ∧ and ∨ buttons to select the song you wish to play.

- For SMF files, if you press the PAGE ∧ button to display P2 DIRECT PLAY, you can use the RIGHT 1 ∧ and ∨ buttons to specify whether or not to play the song as GENERAL MIDI (GM) (On/Off).
6
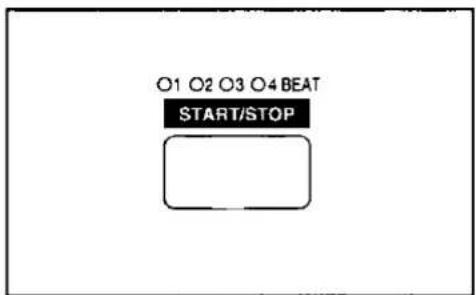
Press the START/STOP button.
-
The selected song is played back.
• To stop playback, press the START/STOP button again. -
You can use the same procedure to play back other songs on the disk.
- Direct play from SMF FORMAT 1 disks is not possible. To play FORMAT 1 disks, follow the SMF LOAD procedure (page 93).
* DISK ORCHESTRA COLLECTION is a trademark of the YAMAHA Corporation.
About the display
The display shows various information and is used for most of this instrument's operations.
Normal display
This illustration shows the kind of information you see on the display during a normal performance.
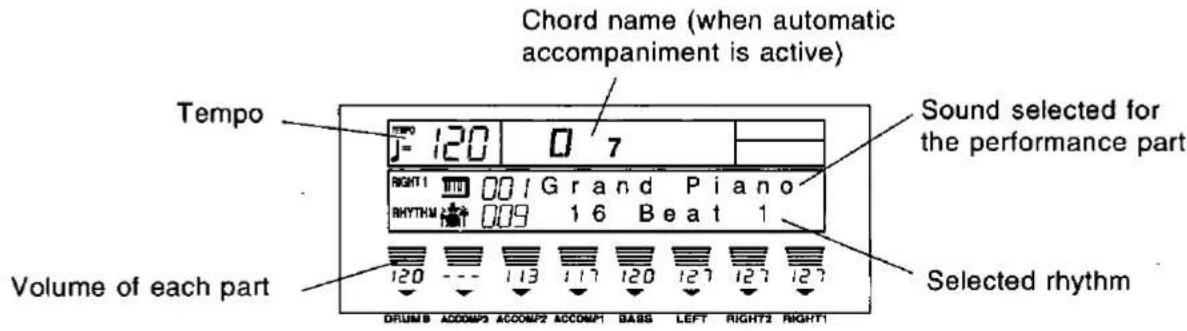
Volume balance
At the bottom half of the normal display, the volume balance of each part is shown as a bar graph and a number (0 to 127).

Use the ∧ and ∨ buttons directly below the display to adjust the volume of each part.
- If you press and hold a button, the scrolling speed becomes fast.
- Even when the display is not the normal display, you can view the volume balance by pressing the BALANCE button, located to the lower left of the display.
MUTE
To mute a part, press both the corresponding ∧ and ∨ buttons at the same time.
- The number indication for the volume of a muted part is shown as [---].
- Pressing either balance button for a muted part will cancel the mute function.
■ OTHER PARTS
Press the OTHER PARTS/TRACKS button to show the PART BALANCE display for MSP (MANUAL SEQUENCE PADS), [Part 1 - 8]; press again for [Part 9 - 16].
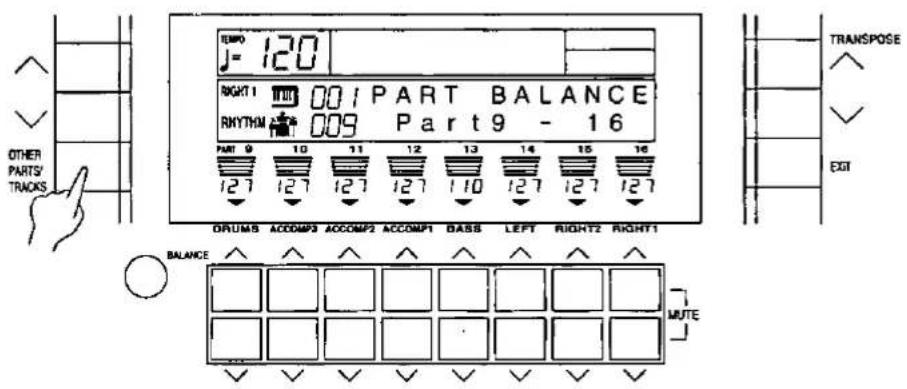
- Press the EXIT button to return to the display before the volume setting display.
- These parts are used when this instrument is being utilized as a 16-part multi-timbre sound generator: during SEQUENCER operation, during song disk playback (KN920/KN1500) or when external MIDI equipment is connected.
PAGE buttons
When the current display fills more than one screen, a PAGE indication is shown on the display. For example, if PAGE ▲ is shown on the display, it means that there is a following page or pages. Likewise, PAGE ▼ indicates a previous page, and PAGE ▼▲ indicates a previous and a following page. In this case, you can use the PAGE ∧ and ∨ buttons to the right of the balance buttons to view different "pages" of the display.
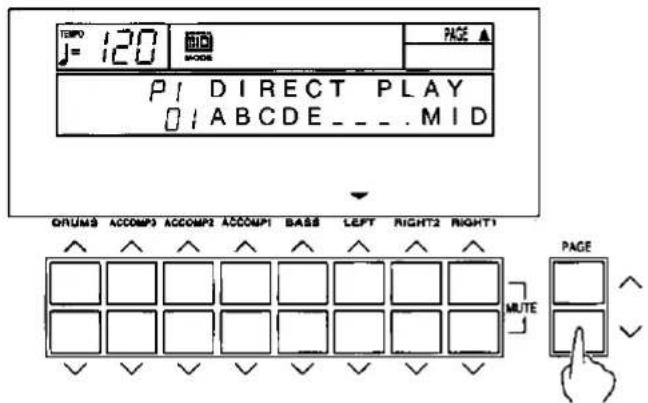
- Press the ∧ button to view the next page of the display, and the ∨ button to view the previous page of the display.
- P1, P2 etc. on the display indicates the page number.
MENU displays
The buttons shown in the illustration below for example control multiple functions. Pressing one of the buttons will access the corresponding MENU display.

■ Example of MENU display: MEMORY & CONTROL

The PAGE buttons are also used to select the menu pages. When selecting a menu, a MENU PAGE indication is shown in the upper right part of the screen. For example, to select [Foot Switch], use the PAGE ∧ button to select page 5 (P5) (KN920/KN1500).
- In this manual, this procedure is written as follows: "Select [P5 Foot Switch]."
- To access the setting display, press the button below the display which corresponds to the ▼ indication (in this example, either LEFT ∧ or ∨ button).
Setting display
When necessary, the buttons below the display are used to set the functions.
■ Example of setting display: Foot Switch

One or more ▼ indications at the bottom of the screen indicate that the corresponding balance buttons below the display are used to change the settings. In this example, the LEFT ∧ and ∨ buttons are used.
- In this manual, this procedure is written as follows: "Use the LEFT ∧ and ∨ buttons to select the function."
EXIT button
While the setting display is shown, press this button to go back to the previous display.

DISPLAY HOLD button
Press this button to turn it on when you wish to maintain the current display. For example, you can maintain a setting display which normally turns off automatically, or even during a performance you can monitor information which is not shown on the normal performance display.

- If you are viewing a setting display which normally turns off automatically, this indicator may flash.
- If any of the MENU buttons, for example, is pressed, the DISPLAY HOLD mode is canceled.
CONTRAST
Adjust the contrast of the display.
- Press the MEMORY & CONTROL button to turn it on.

• The display looks similar to the following.

- Use the PAGE buttons to select [P4 Contrast] (KN720) or [P6 Contrast] (KN920/KN1500).
• The display looks similar to the following.

- Press either LEFT button.
• The display looks similar to the following.

- Use the LEFT ∧ and ∨ buttons to adjust the setting (1 to 8).
- Adjust the contrast of the display so that it is easy to read.
- When you have completed making the settings, press the MEMORY & CONTROL button to turn it off.
TEMPO/PROGRAM dial (KN1500)
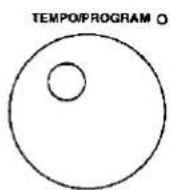
If the TEMPO/PROGRAM indicator is lit while you are using the display to adjust a setting, it indicates that the dial may be used to change the displayed value or setting.
Selecting sounds

natural_image
Front view of a computer control panel with buttons and a monitor (no visible text or labels)Select the sounds for the three parts you can play on the keyboard—RIGHT 1, RIGHT 2 and LEFT.
- Use the SOUND/PART button to select a part (RIGHT 1, RIGHT 2 or LEFT).

• The selected part is shown on the display.
- On the number pad (0 to 9), press the buttons to select the desired sound (3 digits).
- The list of sound group names and their corresponding numbers is found on the upper part of the operation panel.
- A list of all the sounds and their numbers can be found in the separate REFERENCE GUIDE provided.

- Enter three digits to select the sound. For example, to select sound 003, press 0, 0, 3. To select sound 030, press 0, 3, 0.
- Do not enter the digits too slowly. If you wait too long after entering a number before entering the next number, the first number will be canceled.
- The selected sound is assigned to the part you selected in step 1.
- While the setting is being changed, the name of the selected part, and the number and name of the selected sound are shown on the display.
■ ∧ and ∨ buttons

- Keep the ∧ or ∨ button pressed to scroll the numbers quickly.
■ Percussion sounds
The sounds in the KEYBOARD PERC group are percussion instrument sounds.
- Percussion instrument sounds are produced by the keyboard keys as indicated by the picture code above each key.
- For further information about the arrangement of percussion sounds, refer to the separate REFERENCE GUIDE provided.
- Repeat steps 1 and 2 to select sounds for the other parts.
- The CONDUCTOR buttons are used to assign parts to the keyboard. (Refer to page 36.)
- Most of the sounds in the KEYBOARD PERC and PERC & EFFECT sound groups do not have scaled pitches.
- KN920/KN1500: SOUND MEMORY 201 to 240 are reserved for storing sounds you create yourself. (Refer to page 106.)
Assigning parts to the keyboard

natural_image
Pure electrical circuit lines without any symbolsThe CONDUCTOR buttons are used to assign sounds to the keyboard in many different ways. For example, you can assign two sounds to the entire keyboard so that playing one key will produce two sounds. You can even split the keyboard into right and left sections (SPLIT), and assign a different sound to each section.
CONDUCTOR
| CONDUCTOR settings | How sounds are assigned to the keyboard | |
 | All keys produce the RIGHT 1 sound. | |
| RIGHT 1 | ||
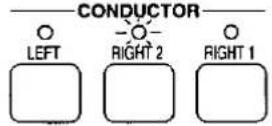 | All keys produce the RIGHT 2 sound. | |
| RIGHT 2 | ||
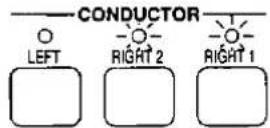 | All keys produce both the RIGHT 1 sound and the RIGHT 2 sound. | |
| RIGHT 1 + RIGHT 2 | ||
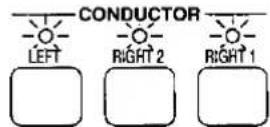 | The left keys produce the LEFT sound and the right keys produce the RIGHT 1 sound and the RIGHT 2 sound. | |
| LEFT | RIGHT 1 + RIGHT 2 | |
 | The left keys produce the LEFT sound and the right keys produce the RIGHT 1 sound. | |
| LEFT | RIGHT 1 | |
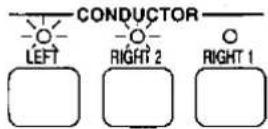 | The left keys produce the LEFT sound and the right keys produce the RIGHT 2 sound. | |
| LEFT | RIGHT 2 | |
- The volume for each part can be adjusted independently. (Refer to page 30.)
• The following conditions are in effect when the AUTO PLAY CHORD is used.
ONE FINGER, FINGERED mode: You cannot assign sounds to all the keys.
PIANIST mode: The keyboard cannot be split.
SPLIT POINT
When the keyboard is divided into left and right sections, the split point is normally at C3 (indicated by ▼).

■ Customized split point
You can set a different split point.
- Press the SPLIT POINT button.
SPLIT
POINT
• The following display appears.

-
Specify the name of the desired split point note by pressing the corresponding key on the keyboard.
-
The specified note name is shown on the display.
- A split point is set at the location of the pressed key, which is the lowest note of the right keyboard section.
- The display returns to the previous display after a few seconds.
Effects

natural_image
Line drawing of a control panel with buttons and a monitor (no text or symbols)You can achieve even fuller and stirring sounds by adding various effects.
DIGITAL EFFECT
DIGITAL EFFECT gives the sound richness and enhances your performance.
- Use the SOUND/PART button to select the part to which is effect will be applied.
- Press the DIGITAL EFFECT button to turn it on for the selected part.

- The DIGITAL EFFECT on or off status is preset for each sound, so that the DIGITAL EFFECT automatically turns on when certain sounds are selected.
- This effect differs depending on the selected sound.
- This effect does not work for the KEYBOARD PERC sounds.
CHORUS (KN720)
Add breadth to the sound.
- Use the SOUND/PART button to select the part to which is effect will be applied.
- Press the CHORUS button to turn it on for the selected part.
- The CHORUS can be set to on or off for each part.
■ Effect setting
You can specify the type and adjust the parameters of this effect.
- Press and hold the CHORUS button for a few seconds.
• The display looks similar to the following.

- Use the TRANSPOSE (PROG) ∧ and ∨ buttons to select the type.
- Use the ACCOMP 1 ∧ and ∨ buttons to select a parameter.
-
Use the RIGHT 1 ∧ and ∨ buttons to modify the parameter.
-
An explanation of the types and their corresponding parameters can be found in the separate REFERENCE GUIDE provided.
- The depth of the effect can be adjusted for each part. (Refer to page 102.)
- The display returns to the previous display after a few seconds.
DSP EFFECT (KN920/KN1500)
Add a unique quality to the sound.
-
Use the SOUND/PART button to select the part to which is effect will be applied.
-
Press the DSP EFFECT button to turn it on.
- This effect can be set to on or off for each part.
■ Effect Setting
You can specify the type and adjust the parameters of this effect.
- Press and hold the DSP EFFECT button for a few seconds.
• The display looks similar to the following.

- Use the TRANSPOSE (PROG) ∧ and ∨ buttons to select the type.
- Use the ACCOMP 1 ∧ and ∨ buttons to select a parameter.
-
Use the RIGHT 1 ∧ and ∨ buttons to modify the parameter.
-
An explanation of the types and their corresponding parameters can be found in the separate REFERENCE GUIDE provided.
- The depth of the effect can be adjusted for each part. (Refer to page 102.)
- The display returns to the previous display after a few seconds.
SUSTAIN
Sustain is the gradual fading out of musical tones after the key is released.
-
Use the SOUND/PART button to select the part to which is effect will be applied.
-
Press the SUSTAIN button to turn it on.

- The SUSTAIN can be set to on or off for each part.
- This effect does not work for the sounds in the KEYBOARD PERC sound group.
- This effect differs depending on the selected sound.
- The display can also be used to adjust the length of sustain. (Refer to page 102.)
- In the initialized state, this effect can be turned on and off with the optional Foot Switch (sold separately).
DIGITAL REVERB
DIGITAL REVERB applies a reverberation effect to the sound.
Press the DIGITAL REVERB button to turn it on.
- This effect is applied to all the sounds of this instrument.
- The display can also be used to adjust the depth of the reverb for each part. (Refer to page 102.)
■ Effect Setting
You can select the type and adjust the parameters of this effect.
- Press and hold the DIGITAL REVERB button for a few seconds.
• The display looks similar to the following.

- Use the TRANSPOSE (PROG) ∧ and ∨ buttons to select the type.
- KN920/KN1500: Use the ACCOMP 1 ∧ and ∨ buttons to select the parameter.
-
Use the RIGHT 1 ∧ and ∨ buttons to modify the parameter.
-
An explanation of the types and their corresponding parameters can be found in the separate REFERENCE GUIDE provided.
- KN720: Only the [Volume] setting can be changed.
- The display returns to the previous display after a few seconds.
PITCH BEND
The pitch of the instrument can be continuously changed with the PITCH BEND wheel at the left end of the keyboard. Using this control, you can produce the effect of bending the strings on a guitar.
While pressing a key on the keyboard, move the wheel up and down to control the pitch.

- When you release your hand from the wheel, it returns automatically to the center position and the pitch bend effect is turned off.
- The pitch bend effect does not function for the AUTO PLAY CHORD accompaniment pattern and for the sounds of the LEFT part.
- The amount of pitch bend can be set. (Refer to page 102.)
MODULATION (KN1500)
The MODULATION wheel is used to apply a vibrato effect, for example, to the sound.
While pressing a key on the keyboard, move the wheel up to add the effect.

- When this effect is not needed, set the MODULATION wheel to the MIN position.
- This effect differs depending on the selected sound.
- The vibrato effect does not function for the AUTO PLAY CHORD accompaniment pattern and for the sounds of the LEFT part.
Transpose

natural_image
Line drawing of a control panel with buttons and a central touchscreen device (no text or symbols)The TRANSPOSE buttons are used to change the key of the entire instrument in semitone steps across an entire octave.
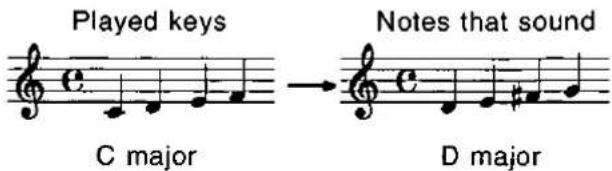
Suppose you learn to play a song—in the key of C, for example—and decide you want to sing it, only to find that it's either too high or too low for your voice. Your choice is to either learn the song all over again in a different key, or to use the TRANSPOSE feature.
Adjust the key with the TRANSPOSE ∧ and ∨ buttons.

- Each press of the button raises the key in semitone steps, and each press of the button lowers the key in semitone steps (G — C — F ^2 ).
- If the two buttons are pressed at the same time, the key returns to C.
- When the TRANSPOSE function is active, TRANSPOSE is shown in the upper right part of the display and, during setting, the key is indicated.
Techni-chord

natural_image
Front view of a control panel with display and keypad (no visible text or symbols)TECHNI-CHORD turns your single-note melodies into full chords and offers you a choice of 13 different types, from a simple duet which adds one harmony note to your melody note, to big band reeds which adds four harmony notes to your melody note. If TECHNI-CHORD is part of a ONE TOUCH PLAY or MUSIC STYLE SELECT (KN1500) registration, a suitable TECHNI-CHORD type will be selected automatically.
- Split the keyboard into left and right sections. (Refer to page 36.)
- Press the TECHNI-CHORD button to turn it on.

- Play the keyboard.
- The melody you play with your right hand is automatically played in chords which are based on the chords you play with your left hand.
Example:
Left hand (chord)
Right hand (melody)

- This feature is very effective when used with the AUTO PLAY CHORD. (This feature does not work in the PIANIST mode.)
■ Harmony type
You can select the desired harmony style for the TECHNI-CHORD.
- Press and hold the TECHNI-CHORD button for a few seconds.
• The display looks similar to the following.

-
Use the LEFT ∧ and ∨ buttons to select the harmony type.
-
Select from [Close], [Open 1], [Open 2], [Duet], [Country], [Theatre], [Hymn], [Block], [Big Band Brass], [Big Band Reeds], [Octave], [Hard Rock], [Fanfare].
- When the [Octave], [Hard Rock] or [Fanfare] type is selected, the TECHNI-CHORD functions even when the keyboard is not split.
- The display returns to the previous display after a few seconds.
- An explanation of each harmony type can be found in the separate REFERENCE GUIDE provided.
Use this function to specify which part plays the harmony notes. By assigning different sounds to the melody notes and harmony notes, you can achieve a striking TECHNI-CHORD performance.
- While the TECHNI-CHORD display is shown, press the PAGE ∧ button.
• The display looks similar to the following.

- Use the RIGHT 2 ∧ and ∨ buttons to select the part you wish to generate the harmony notes.
• LEFT and PART 16 cannot be selected.
- If [Conduct] is selected, the CONDUCTOR part which is currently selected will be specified as the part for the harmony notes. However, when RIGHT 1 and RIGHT 2 are both on, the harmony notes are produced in the sound for the RIGHT 1 part.
Part II Manual Sequence Pads
During your performance, you can insert a short recorded phrase or effect sounds by pressing a pad button. Several types of phrases have been prerecorded, but you can also create your own phrases and store them.
Playing phrases
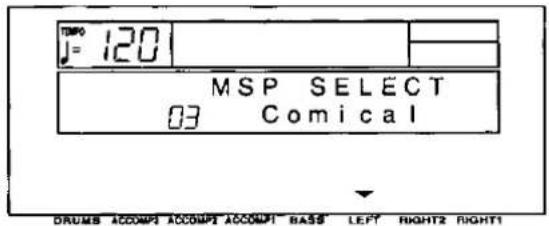
- In the MANUAL SEQUENCE PADS section, press the SELECT button.

• The display looks similar to the following.
-
Use the LEFT ∧ and ∨ buttons to select the desired phrase bank number.
-
The list of bank names and their corresponding numbers is found on the upper part of the operation panel.
• Bank [13 User] is reserved for storing your original phrases. - The display returns to the previous display after a few seconds.

natural_image
Pure electrical circuit lines without any symbols- Press a pad button (KN720: 1 to 4; KN920/KN1500: 1 to 6).
KN720

KN920/KN1500

- A different phrase is played by each pad button.
- The selected phrase is played in the current tempo.
- To stop the phrase before it has ended, press the RECORD/STOP button.
- Some phrases continue to play until the RECORD/STOP button is pressed.
- Some phrases are programmed to begin playing in time with the measure count during a rhythm performance.
- When the AUTO PLAY CHORD is on, the phrase is played in the specified chord.
- On the normal display, if you press the OTHER PARTS/TRACKS button, the volume of the MANUAL SEQUENCE PADS (MSP) can be adjusted. (Refer to page 31.)
Record a phrase
Bank 13 is reserved for storing your original phrases.
-
Use the TEMPO buttons or TEMPO/PROGRAM dial (KN1500) to adjust the recording tempo.
-
Press the SELECT button. On the MSP SELECT display, select [13 User].
-
While pressing the RECORD/STOP button, press the pad button in which you wish to record.
- There are two types of pads: For one type, the phrase is not timed to begin playing with the measure count. For the other type, the phrase starts to play in time with the measure count. KN720: Phrases in pad buttons 1 and 2 are not timed to begin playing with the measure count; phrases in 3 and 4 are synchronized with the measure count.
KN920/KN1500: Phrases in pad buttons 1, 2 and 3 are not timed to begin playing with the measure count; phrases in 4, 5 and 6 are synchronized with the measure count.
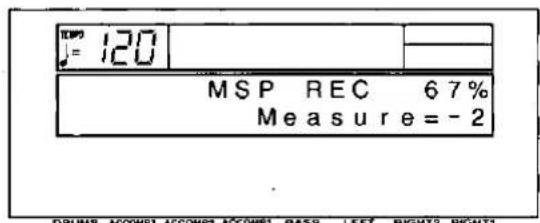
• The display looks similar to the following.
-
Select the sound for the phrase you are going to record.
-
Press the START/STOP button.
O1 O2 O3 O4 BEAT
START/STOP
- After a two-measure count (Measure = -2, -1), recording begins.
- Play the phrase.
- When you have finished recording the phrase, press the START/STOP button.
- You can also stop recording by pressing the RECORD/STOP button.
- Repeat steps 3 to 7 to record phrases in the other pad buttons as desired.
• The following information is stored.
- Your keyboard performance
- Sound settings and changes
- SUSTAIN setting
- PITCH BEND, MODULATION (KN1500) wheel operation, etc.
- The memory capacity of the user bank is approximately 1200 notes. The remaining memory available for recording is shown on the MSP REC display as a percentage (%). When "MEMORY FULL!" appears on the display, no more data can be stored.
Part III Playing the rhythm
The rhythm section enhances the capabilities of this instrument with features such as automatic performance of the preset rhythm patterns and accompaniment patterns.
Selecting rhythms

Select a rhythm
- Press the RHYTHM button to turn it on.
-
On the number pad (0 to 9), press the buttons to select the desired rhythm (3 digits).
-
The list of rhythm group names and their corresponding numbers is found on the upper part of the operation panel.
- A list of all the rhythms and their numbers can be found in the separate REFERENCE GUIDE provided.


- Enter three digits to select the rhythm. For example, to select rhythm 003, press 0, 0, 3. To select rhythm 030, press 0, 3, 0.
- Do not enter the digits too slowly. If you wait too long after entering a number before entering the next number, the first number will be canceled.
- During setting, the selected number and rhythm name are shown on the display.
- KN920/KN1500: A COMPOSER rhythm or COMPOSER CHORD MAP can also be selected as a rhythm. (Refer to pages 83 and 85.)
■ ∧ and ∨ buttons

Next higher number

Next lower number
- Keep the ∧ or ∨ button pressed to scroll the numbers quickly.
VARIATION
For each rhythm, variations with difference nuances are available.
- You can change to a different variation while the rhythm is playing.
KN720: Turn on the VARIATION button to play the rhythm variation.

KN920/KN1500: Use the VARIATION & MSA buttons to choose from four different variations.
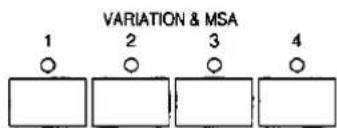
Start the rhythm
There are two ways to start the rhythm.
■ Immediate rhythm start
-
Select a rhythm.
-
Press the START/STOP button to turn it on.
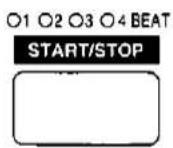
- The selected rhythm pattern immediately begins to play.
- You can stop the rhythm by pressing the START/STOP button again to turn it off.
- The BEAT indicators above the START/STOP button light to indicate the beat. On the first beat of the measure, the red indicator lights. On the second and succeeding beats of the measure, the green indicators light in order.
■ Synchronized start
With the synchronized start feature, the rhythm pattern starts when you play a key on the keyboard.
- Select a rhythm.
- Press the SYNCHRO & BREAK button to turn it on.

- Play a key to the left of the keyboard split point.

• The rhythm pattern begins to play.
- You can use the synchronized start feature even when the keyboard is not divided into left and right sections. To start the rhythm, press a key to the left of the specified split point.
■ Adjust the tempo
The tempo of the rhythm pattern is adjusted with the TEMPO ∧ and ∨ buttons.

- The tempo is shown on the display as a numerical value (♩ = 40 to 300).
- Keep the button pressed to change the value quickly.
- If the two buttons are pressed at the same time, the tempo returns to the standard 120 setting.
- KN1500: The TEMPO/PROGRAM dial can also be used to adjust the tempo of the rhythm pattern.
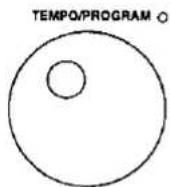
- When the TEMPO/PROGRAM indicator is lit, the TEMPO/PROGRAM dial is used for setting functions and cannot be used to adjust the tempo.
■ TAP TEMPO (KN1500)
You can set the tempo of the rhythm by tapping this button few times with your finger.

- The tempo at which the button is tapped is detected, and the tempo automatically changes correspondingly.
Playing the rhythm
natural_image
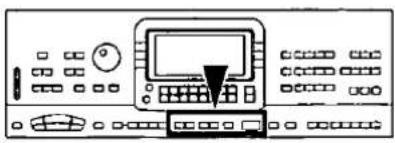
Front view of a computer control panel with an LCD screen and keypad (no visible text or labels)Intro, fill-in and ending patterns fitting each different rhythm pattern are permanently recorded in your instrument, thus allowing a versatile rhythm performance.
INTRO
Begin the rhythm performance with an intro pattern.
- Press the INTRO & ENDING (KN720)/INTRO & ENDING 1 or 2 (KN920/KN1500) button to turn it on.

(KN920/KN1500)
- Press the START/STOP button to start the rhythm.
- An intro pattern is played, after which the normal rhythm pattern begins.
COUNT INTRO
You can begin the rhythm performance with a one-measure count.
- Press the COUNT INTRO (FILL IN 2) button to turn it on.
- Press the START/STOP button to start the rhythm.
- A one-measure count is played, after which the normal rhythm pattern begins.
FILL IN
You can insert a fill-in pattern any time during the rhythm performance. Choose from two different fill-in patterns.
-
Select a rhythm and press the START/STOP button.
-
Press the FILL IN 1 or 2 button.

- A fill-in pattern is heard immediately for the remainder of the measure.
- When a FILL IN button is pressed on the last beat of the measure, the fill-in pattern continues to the end of the following measure.
ENDING
Finish the rhythm performance with an ending pattern.
- Select a rhythm and press the START/STOP button.
- Press the INTRO & ENDING (KN720)/INTRO & ENDING 1 or 2 (KN920/KN1500) button to turn it on.
(KN920/KN1500)
- An ending pattern is produced, and then the rhythm performance stops.
- If you accidentally press an INTRO & ENDING button in the middle of the tune, you can press the FILL IN 1 or 2 button. The ending pattern stops, and a fill-in pattern is produced, after which the normal rhythm performance continues.
Auto Play Chord

natural_image
Line drawing of a control panel with buttons, display screen, and device (no text or symbols)Simply by playing a chord on the keyboard, the AUTO PLAY CHORD function automatically plays an accompaniment pattern which matches perfectly the selected rhythm. With a real accompaniment as a background, you can concentrate on playing the melody.
How the AUTO PLAY CHORD works

When an AUTO PLAY CHORD mode is selected, an automatic accompaniment which matches the rhythm you have chosen is played in the chord which you specify with your left hand. The melody is played with your right hand.
- The accompaniment pattern of the AUTO PLAY CHORD is composed of five parts: DRUMS, BASS, ACCOMP 1, ACCOMP 2 and ACCOMP 3.
Playing chords
Choose from three ways of playing chords.
■ ONE FINGER mode
In the [1 Finger] mode, a major chord can be played just by pressing the key for its root note.
Example: C chord

Minor, seventh and minor seventh chords are also easily produced.
| minor chord | seventh chord | minor seventh chord |
| Play the root note plus a black key to the left of it. | Play the root note plus a white key to the left of it. | Play the root note plus a black key and a white key to the left of it. |
Example: Cm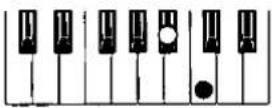 | Example: C7 | Example: Cm7 |
■ FINGERED mode
In the [Fingered] mode, you specify the chord by playing all the notes in the chord.
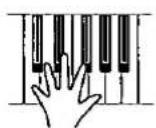
- The Keyboard can distinguish the following played chords for each key (C is given as an example): C, C7, CM7, Caug, Caug7, Cm, Cm7, Cdim, Cm7^ 5 , CmM7, Csus4, C7sus4, C^ 5 , C7^ 5 , Cm^ 5 , C6, Cm6, CM7^ 5 , CM7^ 5 , CmM7^ 5 , etc.
■ PIANIST mode
In the [Pianist] mode, the entire keyboard can be used to specify chords (FINGERED mode) for the automatic accompaniment; a RIGHT part is assigned to all the keys, and the keyboard does not split. In addition to the chords in the [Fingered] mode, the Keyboard also recognizes 9th and 13th chords.
- When specifying chords, if you press a key a perfect 5th or more below the lowest note of the chord, the BASS part becomes a pattern based on that note.

If the ON BASS button is on while the [Fingered] or [Pianist] mode is selected, the BASS part is produced in the key of the lowest note of the played chord, thus making it possible to play chords such as "C on G" with just one hand.
- For example, with the ON BASS button on, if you play a C chord by pressing the keys G, C and E, the BASS part is produced in the key of G.
When the MEMORY (MEM) function is on, even when the keys are released, the chord is memorized and the accompaniment continues to play until you specify another chord.
How to use the AUTO PLAY CHORD
-
Select the desired rhythm and sound(s), and set the tempo.
-
Press the AUTO PLAY CHORD button to turn it on.

• The display looks similar to the following.

- Use the BASS ∧ and ∨ buttons to select the AUTO PLAY CHORD mode.
- Use the RIGHT 1 (MEM) ∧ and ∨ buttons to set MEMORY to on or off.
- After a few seconds, the display returns to the previous display.
- Press the START/STOP button to begin the rhythm.
- You can also start the rhythm by playing a key on the keyboard. (Refer to page 47.)
- Specify a chord.
- If the [1 Finger] or [Fingered] mode was selected, specify the chord on the keyboard section to the left of the split point.

- The split point can be changed. (Refer to page 37.)
- An accompaniment pattern in the specified chord is automatically played.
- When you use FILL IN, INTRO and ENDING, the automatic accompaniment is also used in these patterns.
- You can set the mode which determines how the LEFT part sounds during an AUTO PLAY CHORD performance. (Refer to page 105.)
- If the AUTO PLAY CHORD button is pressed during an automatic accompaniment, the button does not turn off, and the display changes to the mode-setting display.
- To stop the automatic accompaniment, press the START/STOP button.
- When the rhythm is off, if the [1 Finger] or [Fingered] mode is on and a chord is specified, the specified root note (R. BASS part) and chord notes (CHORD part) are produced. The volumes of these notes can be adjusted. (Refer to page 102.)
BREAK function
With the break function, the rhythm starts when the left keyboard is played and stops when the fingers are removed from the keys.
- Select an AUTO PLAY CHORD mode.
- At this time, the MEMORY function should be off.
- Press the SYNCHRO & BREAK button to turn it on.

- Specify a chord.
- The automatic accompaniment begins to play (synchronized start).
- For the [Pianist] mode, play the keys to the left of the currently set split point.
- Release the chord keys.
- The automatic accompaniment stops. When the keys are pressed again, the rhythm starts from the first beat.
Sound Arranger
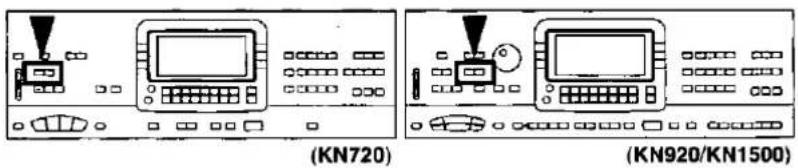
The SOUND ARRANGER feature lets you select other sounds for the AUTO PLAY CHORD parts of each rhythm.
Setting the sounds
- Select the rhythm whose sound you wish to change.
- KN920/KN1500: Do not select a COMPOSER rhythm or a COMPOSER CHORD MAP.
- In the SOUND ARRANGER, press the SET button to turn it on.

• The display changes to the following.
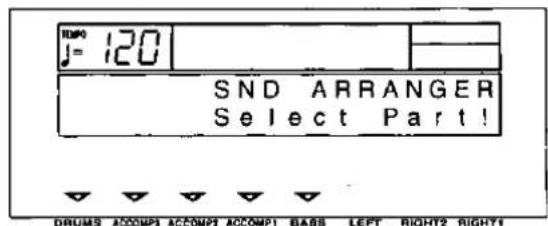
- Use the balance buttons below the display to select the part whose sound you wish to change.
- Select from BASS, ACCOMP 1, ACCOMP 2, ACCOMP 3 and DRUMS.
• The display changes to the following.

• The ▼ mark for the selected part only flashes.
-
Select the desired sound.
-
The DIGITAL EFFECT on/off status can also be specified (except for DRUMS part).
- For the DRUMS part, select sounds from the KEYBOARD PERC sounds. (These sounds cannot be selected for other parts.)
- The sound and on/off status of the DIGITAL EFFECT are shown on the display.
- Depending on the selected sound, the sound quality may differ from that during a normal performance.
- Repeat steps 3 and 4 for the other parts as desired.
- When you have finished selecting the sounds, press the SET button to turn it off.
Playing back the sounds
- In the SOUND ARRANGER, press the ON/OFF button to turn it on.

-
Start the rhythm (automatic accompaniment).
-
When the ON/OFF button is off, the factory-preset sounds are produced.
- The ON/OFF setting is memorized for each rhythm.
One Touch Play
natural_image
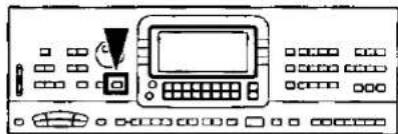
Line drawing of a control panel with buttons and a monitor (no text or symbols)ONE TOUCH PLAY sets up the your instrument with a suitable registration for your chosen rhythm style so that you can make a great sound straight away, even if you are playing this instrument for the first time. Using ONE TOUCH PLAY sets a suggested combination of sounds and balances and an appropriate tempo for the rhythm style at the push of a button.
- Select a rhythm pattern.
- KN920/KN1500: Do not select a COMPOSER rhythm or a COMPOSER CHORD MAP.
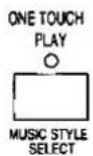
- Press and hold the ONE TOUCH PLAY button for a few seconds until the panel settings change.
(KN1500)
• The display looks similar to the following.

- The AUTO PLAY CHORD button and the SYNCHRO & BREAK button are automatically turned on. When a key on the left section of the keyboard is pressed, the automatic rhythm begins to play immediately.
- The octave and stereo balance of the sound may change.
- To return the functions of this instrument to their original settings, perform the INITIAL procedure. (Refer to page 122.)
Suggestions for using ONE TOUCH PLAY
Press the INTRO & ENDING button before you play for a professional sounding introduction. Use the ONE TOUCH PLAY registration as a starting point for your own registration. Alter the sounds, balance and tempo to your own taste and store your new registration in the PANEL MEMORY for future use. (Refer to page 56.)
Music Style Select
(KN1500)

natural_image
Line drawing of a vintage computer setup with monitor, keyboard, and control panel (no text or symbols)MUSIC STYLE SELECT sets up your instrument with a suitable registration for a specific style of music. Select from this instrument's list of style names and MUSIC STYLE SELECT does the rest for you, setting suitable sounds and volume balances, along with the appropriate rhythm, accompaniment and tempo for your chosen style.
- Press the MUSIC STYLE SELECT (ONE TOUCH PLAY) button momentarily.
• The display looks similar to the following.
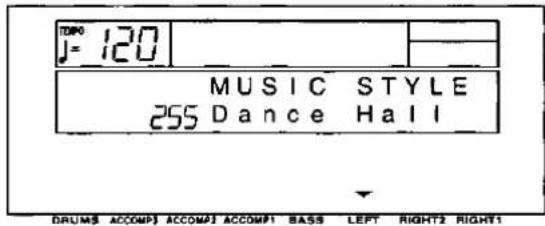
- The name of the style shown on the display may become altered.
- Use the LEFT ∧ and ∨ buttons to select a music style.
- The AUTO PLAY CHORD button and the SYNCHRO & BREAK button turn on, and the sounds, effects, rhythm and tempo which are best suited for the selected music style are automatically selected. When a key on the left section of the keyboard is pressed, the automatic rhythm begins to play immediately.
- The octave and stereo balance of the sound may change.
- To return the functions of this instrument to their original settings, perform the INITIAL procedure. (Refer to page 122.)
Suggestions for using MUSIC STYLE SELECT
Press the INTRO & ENDING button before you play for a professional sounding introduction. Use the MUSIC STYLE SELECT registration as a starting point for your own registration. Alter the sounds, volume balance and tempo to your own taste and store your new registration in the PANEL MEMORY for future use. (Refer to page 56.)
Music Style Arranger (KN920/KN1500)
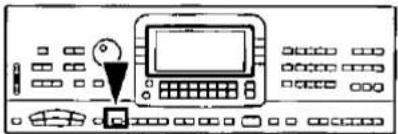
The MUSIC STYLE ARRANGER helps you to make professional registration changes during your performance. Select from four contrasting registrations at the push of a button, or let your instrument change the registration automatically for you when you use FILL IN 1 or 2. The MUSIC STYLE ARRANGER will also alter the accompaniment in character with the registration change, creating a polished sounding arrangement.
How to use the MUSIC STYLE ARRANGER
-
Select a rhythm pattern.
-
Press the MUSIC STYLE ARRANGER button to turn it on.

- Use the VARIATION & MSA buttons to select a style (1 to 4).
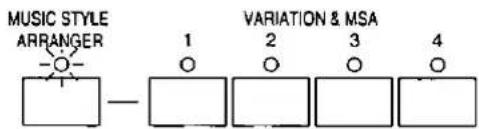
- The nuance of the pattern differs with each number.
- The panel settings (including the tempo) change according to the selected rhythm and music style. The AUTO PLAY CHORD button and the SYNCHRO & BREAK button are automatically turned on. When a key on the left section of the keyboard is pressed, the automatic rhythm begins to play immediately.
- The octave and stereo balance of the sound may change.
- To return the functions of this instrument to their original settings, perform the INITIAL procedure. (Refer to page 122.)
- During your performance, the style can be changed, but the tempo does not change.
How to change the music style during your performance
While you are playing the keyboard with the MUSIC STYLE ARRANGER on, press the FILL IN 1 or 2 button.

- Each time the FILL IN 1 button is pressed, the FILL IN 1 pattern plays, and then the music style changes in the 4 3 2 1 order. And each time the FILL IN 2 button is pressed, the FILL IN 2 pattern plays, and then the style changes in the 1 2 3 4 order.
■ MUSIC STYLE ARRANGER mode
You can define which panel settings change by pressing a FILL IN button when the MUSIC STYLE ARRANGER is used.
- Press and hold the MUSIC STYLE AR-RANGER button for a few seconds.
• The display changes to the following.

(continued on the next page)
- Use the LEFT ∧ and ∨ buttons to select the mode.
[Rhythm]: Only the rhythm changes.
[Sound & Rhythm]: Both the sound and rhythm change.
[Panel Memory]: The PANEL MEMORY number changes (A1 to A4).
- After a few seconds, the display exits the setting mode.
Panel Memory
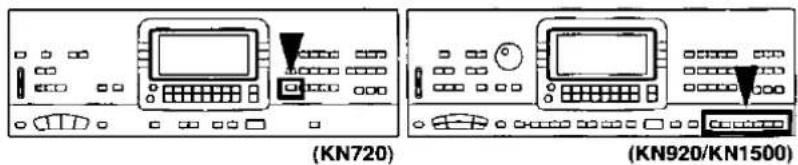
PANEL MEMORY stores the panel set up of this instrument allowing you to make complex changes at the push of a single button.
How to store the panel settings
Store a different panel setting in each of the number buttons (0 to 9).
-
Set up the desired panel settings (sounds, volumes, etc.)
-
While pressing the PANEL MEMORY button, press the number button for the memory you want to store (0 to 9).

- The current panel settings are now stored in the specified PANEL MEMORY number. To recall the stored settings, just turn on the PANEL MEMORY button, and press the number for the desired panel setup.
Five panel setups can be stored in each of the two banks (A and B).
-
Set up the desired panel settings (sounds, volumes, etc.)
-
Use the BANK button in the PANEL MEMORY section to select a bank (A or B).
-
While pressing the SET button, press a number button (1 to 5) for the memory you want to store.

- The current panel settings are now stored in the specified bank and number. To recall the stored settings, select the BANK and specify the number.
- The recalled settings can be changed manually; however the memory contents of the PANEL MEMORY remain unchanged until you store them again.
- KN720: The contents stored in the PANEL MEMORY can be saved in this instrument's memory. (Refer to page 87.)
- KN920/KN1500: The PANEL MEMORY settings can be saved on a disk for recall at a later time. (Refer to page 89.)
■ PANEL MEMORY mode
You can define which panel settings are stored when the PANEL MEMORY is used.
- Press and hold the PANEL MEMORY button (KN720)/SET button (KN920/KN1500) for a few seconds.
• The display changes to the following.

- Use the LEFT ∧ and ∨ buttons to select the mode.
Normal: The sounds and volume balance, effects and CONDUCTOR status are stored. Expand: All the instrument's settings are stored, including the rhythm, TRANSPOSE, tempo, etc.
- After a few seconds, the display exits the setting mode.
■ EXPAND MODE FILTER
You can specify which data is stored in the Expand mode.
- While the P.MEM MODE display is shown, press the PAGE ∧ button.
• The display looks similar to the following.
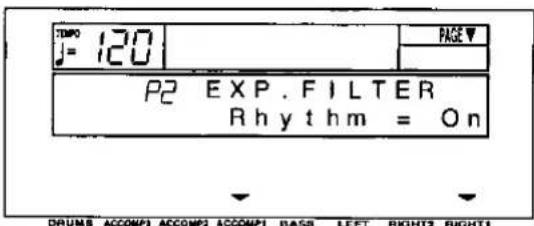
- Use the ACCOMP 1 ∧ and ∨ buttons to select the item.
- Select from [Rhythm], [Tempo], [Split Pt] (SPLIT POINT), [Transpos], [APC&Mem] (AUTO PLAY CHORD & MEMORY), [MIDI], [Key Scale], [Reverb], [CHO Set] (CHORUS Setting) (KN720), [DSP Set] (KN920/KN1500), and [P4-P16 Set] (PART 4 to 16 Setting).
-
Use the RIGHT 1 ∧ and ∨ buttons to store the on or off status for the selected item (On/Off).
-
Repeat steps 2 and 3 for each item, as desired.
Suggestions for using PANEL MEMORY
- The initial factory setting of PANEL MEMORY contains professional settings which you may choose to use or to alter to your own taste. These can be restored at any time by initializing the PANEL MEMORY. (Refer to page 122.)
- You can change from one PANEL MEMORY to another by pressing the optional Foot Switch (sold separately).
Foot Switch setting
natural_image
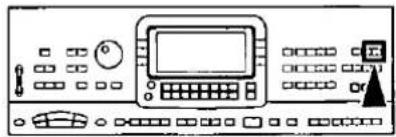
Line drawing of a control panel with buttons, dials, and a monitor (no text or symbols)You can assign various functions to the optional Foot Switch (sold separately). The assigned function can then be controlled with the Foot Switch.
Assigning functions
- Press the MEMORY & CONTROL button to turn it on.

• The display changes to the following.
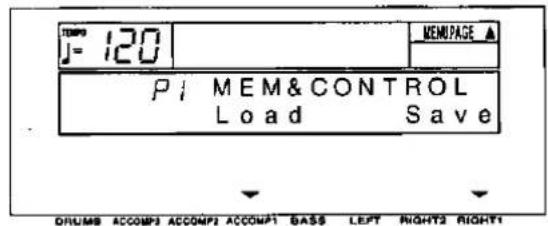
- Use the PAGE buttons to select [P3 Foot Switch] (KN720)/[P5 Foot Switch] (KN920/KN1500).
• The display changes to the following.

- Press either LEFT button.
• The display changes to the following.

- Use the LEFT ∧ and ∨ buttons to select a desired function.
[P. Memory] 0-9 (KN720)/A1-B5 (KN920/KN1500): The specified PANEL MEMORY number is turned on.
[P. Memory inc]: Increment the PANEL MEMORY selection by 1.
[Start/Stop]: START/STOP button on/off
[Rhythm Vari] (KN720): VARIATION button on/off
[Rhythm Vari 1-4] (KN920/KN1500): VARIATION button on
[Fill in 1]: FILL IN 1 button on
[Fill in 2]: FILL IN 2 button on
[Intro/Endng] (KN720): INTRO & ENDING button on
[Intro/Endng 1] (KN920/KN1500): INTRO & ENDING 1 button on
[Intro/Endng 2] (KN920/KN1500): INTRO & ENDING 2 button on
[Sustain]: SUSTAIN button on/off
[MSP] 1-4 (KN720)/1-6 (KN920/KN1500): Specified MANUAL SEQUENCE PADS button on
[Dig Effect]: DIGITAL EFFECT button on/off
[Chorus] (KN720): CHORUS button on/off
[DSP Effect] (KN920/KN1500): DSP EF-FECT button on
[Glide]: Glide on/off (The glide effect "bends" the pitch down by about one semitone.)
[Techni-Chord]: TECHNI-CHORD button on/off
[Rotary Speed] (KN920/KN1500): DSP EF-FECT rotary speed (Slow/Fast)
- When you have completed making the settings, press the MEMORY & CONTROL button to turn it off.
Outline of the Sequencer

natural_image
Front view of a control panel with buttons, display screen, and control buttons (no text or symbols visible)A sequencer records your performance in a similar way to a tape recorder. This instrument's SEQUENCER allows you to record up to 10 performances in a variety of ways. You may want to record your entire performance in one go (especially if you are using AUTO PLAY CHORD to provide the accompaniment), or to build up a complex arrangement with several different parts playing together, like an orchestral score. This instrument's SEQUENCER has 16 tracks. This means that you can record 16 different parts. However, you don't have to use all 16 tracks. For some uses you may only need to use one or two tracks. This instrument's SEQUENCER enables you to edit your recorded performance. Unlike a tape recorder you can change the sound or the tempo during playback, or correct wrong notes or timing errors.
SEQUENCER features
■ You can change the tempo without changing the pitch
When you record your performance at a slow tempo and play it back at a faster tempo, the pitch stays the same.
■ Consistent sound
Your performance is reproduced by a sound module as it reads digital data. So, unlike a recorded tape, the sound never deteriorates no matter how many times you play back your performance.
■ Edit your recorded performance
Comprehensive editing functions allow you to modify your recorded performance. Data can easily be erased, corrected or copied, providing an especially convenient tool for creating your original tunes.
■ Instant search
A recorded tape has to be rewound, but digital action means you can return to the beginning of your performance, or find any measure, instantly.
■ Save your performances on disks (KN920/KN1500)
All the data of your recorded performances can be stored on disks. The built-in Disk Drive also allows you to play back and use commercially sold disks on your own instrument.
- Features and operation of the built-in Disk Drive are explained in Part VII: Disk Drive (page 89).
- KN720: Your performance data can be stored in this instrument's memory. (Refer to page 87.)
Popular features
■ Simplified recording method
EASY RECORD is a feature that allows you to bypass the more complex recording procedures so you can record and play back your performance quickly and easily.
- You can also record an accompaniment from the AUTO PLAY CHORD.
■ Create a one-man ensemble
Use the REALTIME RECORD function to record your performance in up to 16 tracks and create your own orchestra or band.
■ Store a chord progression
Use the STEP RECORD to store a chord progression for the automatic accompaniment, and the rhythm changes, note by note.
Memory capacity
Up to 10 songs can be stored in the SEQUENCER. Expressed in terms of notes, the total number of notes which can be stored in all the SEQUENCER songs and tracks is about 10,000 (KN720)/30,000 (KN920/KN1500). The remaining memory available for recording is shown on the display as a percentage.
- When "MEMORY FULL!" appears on the display, no more data can be stored in the SEQUENCER.
About the measure count
The measure count on the display corresponds to the time signature of the selected rhythm. However, if rhythm data is stored in the RHYTHM part and that part is played back, the measure count on the display corresponds to the stored rhythm data. (Refer to page 71.)
- KN920/KN1500: If you wish to use a time signature not available in the preset rhythms, use the COMPOSER to create a new time signature. (Refer to page 77.)
SEQUENCER MENU
When you press the MENU button in the SE-QUENCER section to turn it on, the display changes to the following.
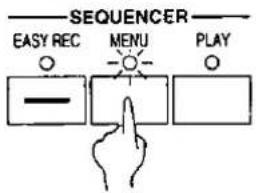
flowchart
graph TD
    A["Easy Rec"] --> B["Menu"]
    B --> C["PLAY"]
- Use the PAGE buttons to view the three pages of menu display.


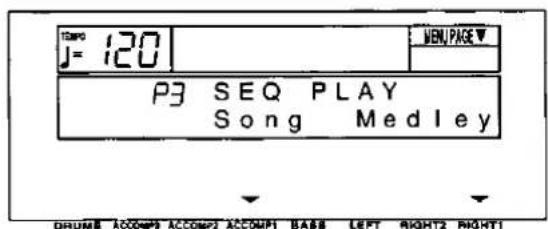
Summary of the SEQUENCER menu items
[P1 SEQ RECORD]
Real (REALTIME RECORD) (page 64)
Record your performance just as you play it on the keyboard.
Step (STEP RECORD) (page 68)
Store the chord progression for the automatic accompaniment, and the rhythm changes.
[P2 SEQUENCER]
Track (TRACK ASSIGN) (page 72)
Assign parts to up to 16 different tracks.
Edit (page 73)
Full-scale editing features are available.
[Song Clear]: Erase the recorded contents of a specific song.
[Track Clear]: Erase the contents of a specific track.
[Quantize]: Correct the timing of the recorded performance.
[Song Copy]: Copy specific songs.
[Panel Write]: Modify the panel status at the beginning of the song.
[P3 SEQ PLAY]
Song (page 61)
Specify the song number and name of the song to record or play back.
Medley (page 76)
Specify medley playback of songs.
Song
Up to 10 songs can be recorded in the SEQUENCER. The song number and song name are specified before recording begins.
- Press the MENU button in the SEQUENCER section to turn it on.
- Use the PAGE buttons to select [P3 SEQ PLAY].
- The display looks similar to the following.

- Press either ACCOMP 1 button.
• The display looks similar to the following.

- Use the RIGHT 2 ∧ and ∨ buttons to select a song number (1 to 10).
- If you wish to assign a name to the song, press the PAGE ∧ button.
• The display looks similar to the following.

-
Assign a name to the song (up to 6 characters).
-
Use the BASS or RIGHT 2 buttons to highlight the character position. Use the LEFT (Abc) buttons to select the alphanumeric character. Repeat these steps to type the whole name.
-
To erase the name, press either RIGHT 1 (cLr) button.
-
Use the EXIT button to return to the MENU display.
-
Follow the procedures to record the song.
-
The same procedure is used to select the song to play back.
- Until this procedure is repeated, all subsequent recording and playback procedures are associated with the specified song number.
- To optimize memory, songs you do not wish to preserve should be deleted. (Refer to page 73.)
Easy Record
Suppose you are playing your instrument and you wish to record and play back your performance to hear how it sounds. You can bypass the set-up procedures of the full-scale sequencer and begin recording quickly and easily.
Recording procedure
- Select the song number. (Refer to page 61.)
- Set the desired sounds, effects, rhythms, etc.
- In the SEQUENCER section, press the EASY REC button to turn it on.

• The display changes to the following.

- EASY RECORD is not available if GENERAL MIDI is set to On. (Refer to page 120.)
Here is what happens when you select the EASY RECORD mode.
- The recorded data for the currently selected SONG number is erased (Song Clear).
-
Tracks available for recording are selected as follows.
1: RIGHT 1 part
2: RIGHT 2 part
3: LEFT part
4: APC part
5: CONTROL part -
Press either LEFT (Yes) button.
-
To cancel the procedure, press either RIGHT 1 (No) button.
• The display changes to the REC display. -
Play the keyboard.
- Recording begins as soon as you start the rhythm or play the keyboard.
- When you have finished recording, press the EASY REC button in the SEQUENCER section to turn it off.
• The display changes to the SEQ PLAY display.
Playback
- Press the SEQUENCER RESET (FILL IN 1) button.

- Press the START/STOP button.

- Your recorded performance is played back automatically.
- When you are finished playing back your performance, press the PLAY button in the SEQUENCER section to turn it off.
Sequencer parts
The following summary explains what is stored in each SEQUENCER part.
| Part name[name on display] | Used for | Recorded contents |
| RIGHT1 [Right1]RIGHT2 [Right2]LEFT [Left]PART4 [Part 4]:PART15 [Part15] | Recording the performance of each part (REALTIME) | Sound and volume settingsSustain pedal operationDIGITAL EFFECT, CHORUS (KN720), DSP EFFECT (KN920/KN1500) on/offPITCH BEND wheel operationMODULATION wheel operation (KN1500) |
| DRUM [Drum](Part16) | Recording the drums performance with the KEYBOARD PERC group sounds (REALTIME) | Sound (drum KIT) and volume settings |
| CONTROL [Control] | Recording changes in the panel button status (REALTIME) | Rhythm setting and selection changesVARIATION on/off (KN720)VARIATION selection (KN920/KN1500)DIGITAL REVERB on/offAUTO PLAY CHORD statusON BASS on/offMUSIC STYLE ARRANGER status (KN920/KN1500)FILL IN, INTRO & ENDING onPANEL MEMORY selection changesTRANSPOSE statusTECHNI-CHORD on/offSTART/STOP on/offTEMPO settingCONDUCTOR statusMANUAL SEQUENCE PADS operationExpression pedal operation (separately sold option) (KN1500) |
| AUTO PLAY CHORD [APC] | Recording chords for the AUTO PLAY CHORD (REALTIME) | AUTO PLAY CHORD statusSTART/STOP on/offFILL IN, INTRO & ENDING on |
| CHORD [Chord] | Recording the chord progression for the AUTO PLAY CHORD (STEP) | Chord progressionFILL IN, INTRO & ENDING on |
| RHYTHM [Rhythm] | Settings related to rhythm (STEP) | Rhythm settings and selection changesVARIATION on/off (KN720)VARIATION selection (KN920/KN1500)TEMPO setting and changesFILL IN, INTRO & ENDING onSTART/STOP on/off |
- You can use the TRACK ASSIGN function to assign parts to tracks as you wish. (Refer to page 72.)
■ Default part settings
1: RIGHT1
5: CONTROL
9: PART5
13: PART9
2: RIGHT2
6: RHYTHM
10: PART6
14: PART10
3: LEFT
7: DRUM
11: PART7
15: PART11
4: APC/CHORD
8: PART4
12: PART8
16: PART12
Realtime Record
With REALTIME RECORD, your performance is recorded with the timing exactly as you played it on the keyboard. And with the 16 tracks, you can even record your performance one track at a time (multi-track recording).
Recording procedure
-
Select a song number. (Refer to page 61.)
-
On the SEQUENCER menu display, select P1.
• The display looks similar to the following.
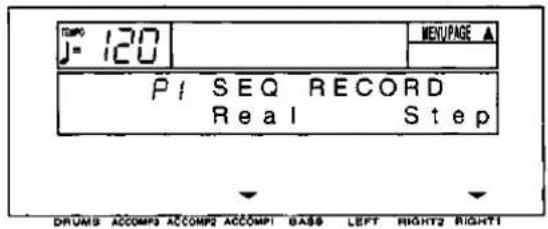
- Press either ACCOMP 1 (Real) button.
• The display looks similar to the following.
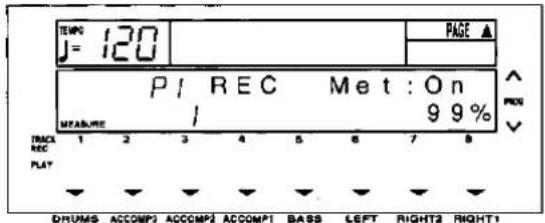
- Use the buttons below the display to select the track numbers you are going to record.
- In the REC row, turn on the horizontal bar for TRACK numbers you are going to record.
- You can press the OTHER PARTS/TRACKS button to view the display for tracks 9 to 16.
- While you are recording, you can play back tracks which are already recorded. In the PLAY row, turn on the horizontal bar for TRACK numbers you wish to have played back.
- The part name for the selected recording track is shown on the display.
- You can select two or more tracks to record at one time. For performance parts, use the CONDUCTOR buttons to turn on the parts for the selected tracks (you should be able to hear them).
- When recording a track for the AUTO PLAY CHORD (APC) part, turn on the AUTO PLAY CHORD button. In this case, when recording begins, press the START/STOP button to begin the rhythm.
- The track for the RHYTHM ([Rhythm]) part can be selected for recording only when STEP RECORD is active.
- Set the sounds, effects and volume as desired.
- The settings which are in effect at the time that recording begins are stored at the very beginning of the song.
- Use the TEMPO buttons or TEMPO/PROGRAM dial (KN1500) to adjust the recording tempo.
- The tempo is shown on the display as a numerical value (♩ =).
- If you wish to record the tempo setting and tempo changes, select the CONTROL part, or use STEP RECORD: RHYTHM. (Refer to page 71.)
- Turn the metronome on or off (On/Off) as desired with the TRANSPOSE (PROG) ∧ and ∨ buttons.
• The metronome sound is not recorded.
- Play the keyboard.
- Recording begins.
- The current measure number is shown as "MEASURE" on the display.
- You can also press the START/STOP button to start the rhythm and begin recording.
- If the metronome is on, when you press the START/STOP button, a two-measure count plays, after which recording automatically begins. In this case, the rhythm does not start.
- Recording does not start until the two-measure count is completed.
- The remaining memory is shown on the display as “%”.
- If you wish to adjust the volume balance of each track, the metronome, etc., during recording, press the BALANCE button and adjust the volume on the SEQ BALANCE display. Press the OTHER PARTS/TRACKS button if you wish to view other tracks, etc.
- If you wish to redo the recording or change the recording track, press the EXIT button. In this case, recording is terminated, so select the recording tracks again. You can change the panel settings at this time, if desired.
- When you have finished recording, press the MENU button in the SEQUENCER section to turn it off.
- When the MENU button is turned off, the ending command is recorded. Note that, as long as the ending command is not recorded, blank recording continues even if you stop playing.
• The display changes to the SEQ PLAY display.
■ Multi-track recording
To record the next track immediately after the first track is completed, press the EXIT button. The track you just recorded changes to a "PLAY" track. Use the buttons below the display to specify "REC" for the next track you wish to record, and make the various settings (sound, etc.) for the track. Next, press the START/STOP button and record the track. The "PLAY" tracks are played back while you record. You can repeat these steps until your multi-track recording is complete.
- For multi-track recording, be sure to press the START/STOP button to begin recording.
- If after recording you wish to change the panel setting and store them as the beginning song data, follow the PANEL WRITE procedure. (Refer to page 75.)
CYCLE RECORD
This mode allows you to have specified recording measures continuously repeated. Thus you can record measures by adding notes during any cycle.
- On the REC display, specify "REC" for the track number you are going to record, and "PLAY" for track numbers you wish to have played back.
- Press the PAGE ∧ button.
• The display looks similar to the following.

- Press the RIGHT 1 ∧ button to select "On".
• The display looks similar to the following.

- Press the PAGE ∧ button.
• The display looks similar to the following.

- Use the ACCOMP 1 ∧ and ∨ buttons to specify the beginning measure number.
- Use the RIGHT.1 ∧ and ∨ buttons to specify the ending measure number.
- The ending measure you specify becomes the last measure of the cycle.

-
Press the START/STOP button.
-
Cycle recording of the specified measures begins. If the metronome is on, cycle recording begins after a two-measure count.
• The rhythm does not start.
(Continued on the next page)
-
Play the keyboard.
-
The specified measures are repeated, during which time you can record by adding notes little by little at the correct timing (over-dubbing).
- If you wish to erase all the performance data from the specified measures, press either AC-COMP 1 (Clear) button on the P2 display.
-
The maximum number of notes which can sound simultaneously for a track is 16.
-
When you have finished recording, turn off the MENU button in the SEQUENCER section.
• The display changes to the SEQ PLAY display.
Sequencer Play
Play back your recorded performance.
- Select a song number. (Refer to page 61.)
- In the SEQUENCER section, press the PLAY button to turn it on.
• The display looks similar to the following.

-
Use the buttons below the display to select the track numbers you wish to have played back.
-
In the PLAY row, turn on the horizontal bars for the TRACK numbers you wish to have played back.
- You can press the OTHER PARTS/TRACKS button to view the display for tracks 9 to 16.
- On the display for tracks 1–8, a "9–16" indication means that at least one track from tracks 9–16 is selected as a playback track.
- You can select two or more tracks to play back at one time.
-
The current song number is shown on the display (S01 to S20).
-
If necessary, use the TEMPO buttons or the TEMPO/PROGRAM dial (KN1500) to adjust the playback tempo.
- The tempo is shown on the display as “! =”.
-
If the tempo was stored in the CONTROL or RHYTHM part, when that part is played back, the stored tempo data has priority.
-
Press the SEQUENCER RESET (FILL IN 1) button.
- The SEQUENCER returns to the beginning of the song and the beginning panel settings are recalled.
- To begin playback from a measure other than measure 1, use the PAGE ∧ button to select [P4 SEQ PLAY].
• The display looks similar to the following.

-
Use the ACCOMP 2 ∧ and ∨ buttons to select the beginning playback measure.
-
By pressing and holding either BASS (Fwd) button, you can fast-forward to the desired measure while listening to the sound. This button does not function during playback.
-
"MEASURE" indicates the current measure number.
-
Press the START/STOP button.
-
The recorded performance is played back from the specified measure.
- When playback is begun from a measure in which an INTRO, COUNT INTRO, FILL IN or ENDING is recorded, the corresponding function does not work.
-
If you wish to adjust the volume balance of each track or each AUTO PLAY CHORD part, for example, press the BALANCE button and adjust the volume on the SEQ BALANCE display. Press the OTHER PARTS/TRACKS button if you wish to view other tracks and parts.
-
To stop playback, press the START/STOP button.
- If the START/STOP button is pressed again, playback will continue from the point it was interrupted.
- When you are finished playing back your performance, press the PLAY button in the SEQUENCER section to turn it off.
- During STEP RECORD or EDIT operations, the MEASURE indication on the display conforms to the time signature data recorded in the RHYTHM part.
- If you wish to play back a different song, use the RIGHT 1 ∧ and ∨ buttons on the P4 display to select a different song number.
- Even if you press the EXIT button, for example, to exit the SEQ PLAY display, as long as the PLAY button is on, the song will be played back when the START/STOP button is pressed. In this case, even when the normal performance display is shown, the song may be played back without the rhythm start when the START/STOP button is pressed. Therefore, be sure to turn off the PLAY button if you do not wish to play back the recorded performance.
CYCLE PLAY
You can have specified measures played back repeatedly.
- On the P1 SEQ PLAY display, specify "PLAY" for track numbers you wish to have played back.
- Press the PAGE ∧ button.
• The display looks similar to the following.
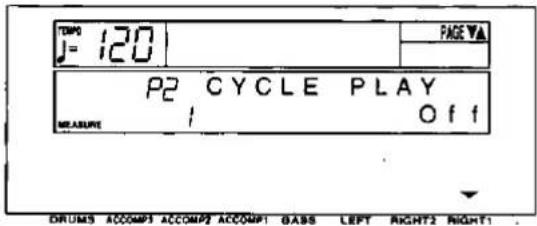
- Press the RIGHT 1 ∧ button to select On.
- Press the PAGE ∧ button.
• The display looks similar to the following.

- Use the ACCOMP 1 ∧ and ∨ buttons to specify the beginning measure number.
- Use the RIGHT 1 ∧ and ∨ buttons to specify the ending measure number.
- The ending measure you specify becomes the last measure of the cycle.

- Press the START/STOP button.
- Cycle playback of the specified measures begins.
- To stop cycle playback, press the START/STOP button again.
- During playback stop, if the SEQUENCER RESET (FILL IN 1) button is pressed, the SEQUENCER returns to the measure number specified in step 5. If the SEQUENCER RESET button is pressed again, the SEQUENCER returns to measure 1.
Step Record
Store a chord progression
Store the chord progression for the AUTO PLAY CHORD in the track for the CHORD part. Then, when the AUTO PLAY CHORD is used during playback, even if you do not specify the chords with your left hand, the chords change automatically.
- The chord length is specified with the STEP RECORD keys on the keyboard.

Note value keys
Whole note
Dotted half-note
Half-note
J. Dotted quarter-note
Quarter-note
Eighth-note
Reset key
F - Press to begin storing from the beginning.
Correction keys
Move back one step.
▶ Move forward one step.
Repeat key
Press to end the chord-storing procedure and to specify automatic repeat playback of the stored progression.
End key
—Press after the whole chord progression has been stored.
DELETE key
DELETE Press to erase data.
- To erase all the data from the current track, while pressing the DELETE key, press the End key ( —+).
■ Example of storing a chord progression
| Measure 1 | 2 | 3 | 4 | ||
| C | C | F | G7 | C | Am |
| a | a | d | d | d | d |
-
Select the song number. (Refer to page 61.)
-
On the SEQUENCER menu display, select P1.
• The display changes to the following.
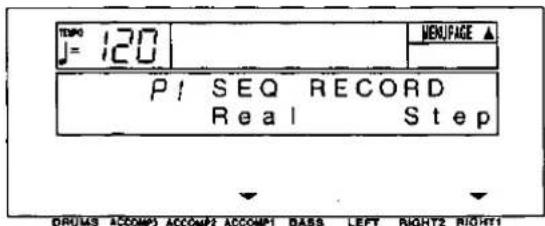
- Press either RIGHT 1 (Step) button.
• The display changes to the following.
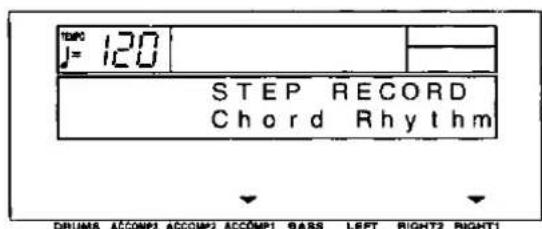
- Press either ACCOMP 1 (Chord) button.
• The display changes to the following.
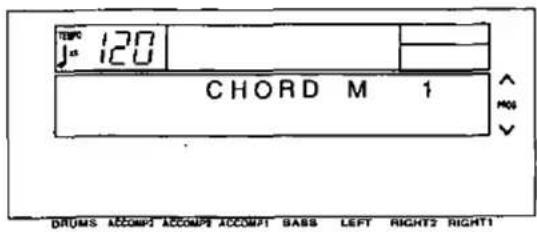
- Store the chords.
While playing a C chord with your left hand, press the “key one time with your right hand.

- A "beep" tone indicates that the chord has been successfully stored.
• The chord name is shown on the display. - The measure automatically advances, in accordance with the specified note value.
(1) While playing an F chord, press the J key one time.
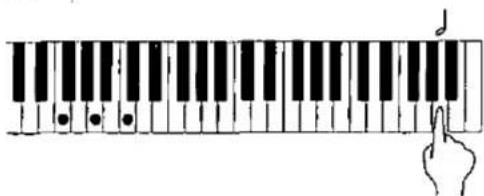
(2) While playing a G7 chord, press the ♩ key one time.

(1) While playing a C chord, press the ♩ key one time.
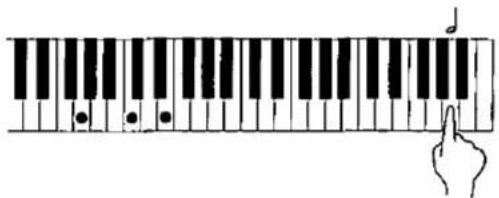
(2) While playing an Am chord, press the ♩ key one time.

- You can press an INTRO & ENDING button or a FILL IN button on the panel to store the desired pattern at the current position. (An INTRO or COUNT INTRO can be stored only at the beginning.)
- At the end of the chord progression, press the End key ( ——).
• This instrument exits the recording mode. - During playback, playback of the recorded chord progression stops at this point. For automatic repeat playback of the chord progression, press the Repeat key ( —) instead of the End key ( —).
- When you play back the track for the Chord part, the chords of the automatic accompaniment change in accordance with the stored chord progression.
- Chords can also be specified in the ONE FINGER mode.
- If the ON BASS button is on, chords such as "C on G" can also be specified.
■ Correct the recorded chord progression
-
Follow the procedure to select the STEP RECORD: CHORD display.
-
Use the TRANSPOSE (PROG) ∧ and ∨ buttons to go to the measure you wish to modify. Use the ◀ and ▶ Correction keys to move the point you wish to edit.
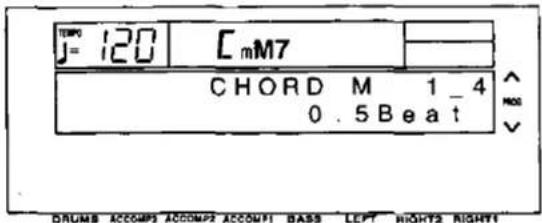
- The measure number is indicated in the upper row. (Example: [1_4] indicates the fourth beat of the first measure.)
- In the lower row, the note length of the specified note is indicated in Beat units.
- To go to the end of the chord progression, while pressing the Reset key ( 163 ), press the key.
3. Correct the chord data.
Chord data
When the chord name is displayed, you can press the DELETE key to erase the data and then store a new chord.
- If you do not erase the displayed data before entering new chord data, the new data is inserted at this point, and the displayed data is merely shifted by the note value of the new chord.
Control data
The name of the stored function (INTRO, FILL, etc.) is displayed. You can press the DELETE key to erase the data which is displayed.
■ TRACK CLEAR
To erase all data from the current track, hold down the DELETE key and press the End (—H) key.
Store a rhythm progression
Changes in the rhythm selection and tempo, as well as the intro, fill-ins and the ending, can be stored by measures with the step recording method.
- Select the song number. (Refer to page 61.)
- On the SEQUENCER menu display, select P1.
• The display looks similar to the following.

- Press either RIGHT 1 (Step) button.
• The display changes to the following.

- Press either RIGHT 1 (Rhythm) button.
• The display changes to the following.

- Use the TRANSPOSE (PROG) ∧ and ∨ buttons to go to the measure you wish to record.
- Store the rhythm data.
• Data which can be stored:
START/STOP
Changes in the rhythm selection
Changes in the VARIATION selection
COUNT INTRO, INTRO, FILL IN, ENDING
Tempo changes
- Be sure to store the START/STOP data in the measure in which the rhythm starts or stops.
-
If you are storing a COUNT INTRO or INTRO, store this data before the START/STOP data.
-
Repeat steps 5 and 6 to continue storing the rhythm progression.
-
At the end of the rhythm progression, press the End key.
-
If the Repeat key is pressed instead of the End key, during playback the recorded rhythm progression is repeated.
• This instrument exits the recording mode.
■ Correct the recorded rhythm progression
- Follow the procedure to select the STEP RECORD: RHYTHM display.
- Use the TRANSPOSE (PROG) ∧ and ∨ buttons or the ◀ and ▶ Correction keys to move the point you wish to edit.

-
Correct the rhythm data.
-
Press the DELETE key to erase data.
- If you select a rhythm with a different time signature, the time signature of all subsequent measures will also change.
- If data has already been recorded in other tracks, you cannot select a rhythm with a different time signature.
■ TRACK CLEAR
To erase all data from the current track, while the RHYTHM display is shown, hold down the DELETE key and press the End (—H) key.
Track Assign
Each SEQUENCER part is already assigned to a track number. However, you can use the TRACK ASSIGN function to assign parts to tracks as you wish. This function is also used to designate the tracks used for the rhythm data and chord progression data.
-
Select the song number. (Refer to page 61.)
-
On the SEQUENCER menu display, select P2.
• The display looks similar to the following.

- Press either ACCOMP 1 (Track) button.
• The display changes to the following.

-
Use the ACCOMP 1 ∧ and ∨ buttons to select the track.
-
Use the LEFT ∧ and ∨ buttons to select the part for the specified track.
- Select one of the following parts: [Right1], [Right2], [Left], [Part4] to [Part15], [Drum], [APC], [Chord], [Control], [Rhythm]. (For an explanation of each SEQUENCER part, refer to page 63.)
- When a part other than the [Control], [APC/Chord] or [Rhythm] part is assigned, the track assign procedure is completed at this point.
- The [Rhythm], [Control] and [APC/Chord] parts cannot be assigned to more than one track.
- When assigning the [Control], [APC/Chord] or [Rhythm] part, press either RIGHT 1 button.
- The ARE YOU SURE? display appears. Press either LEFT (Yes) button to execute the function. Or press either RIGHT 1 (No) button if you wish to cancel the procedure.
■ TRACK ASSIGN PRESETS
A preset track assignment can be selected.
- While the P1 TRACK ASSIGN display is shown, press the PAGE ∧ button.
• The display looks similar to the following.

- Use the LEFT ∧ and ∨ buttons to select the track assign mode.
- Select from the following modes.
Initial: Factory-preset settings.
Tech Multi: The optimum track assignment for a 16-part multi-timbre sound generator.
GM Multi: The optimum track assignment for creating GENERAL MIDI data.
- Press the EXECUTE (SYNCHRO & BREAK) button.
- The ARE YOU SURE? display appears. Press either LEFT (Yes) button to execute the function. Or press either RIGHT 1 (No) button if you wish to cancel the procedure.
- If [Yes] was selected, "COMPLETED!" is shown on the display and the selected track assign mode is enabled.
- After the TRACK PRESET is executed, you can use the ACCOMP 1 ∧ and ∨ buttons to check the track assignment.
Editing the recorded performance
The edit feature allows you to erase or change portions of your performance after it has been recorded.
Select the edit function
-
Select the number of the song you wish to edit. (Refer to page 61.)
-
On the SEQUENCER menu display, select P2.
• The display changes to the following.
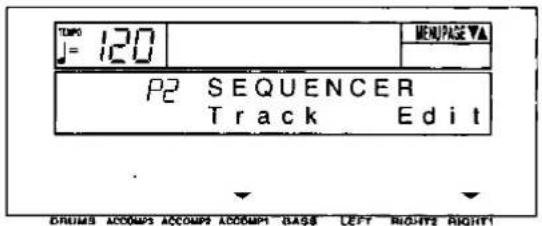
- Press either RIGHT 1 (Edit) button.
- The display changes to the following SEQ EDIT menu display.
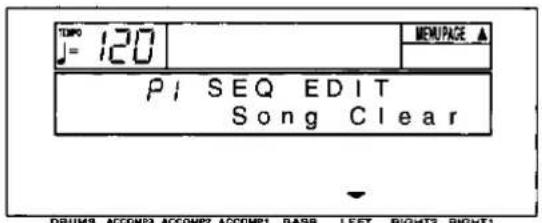
- Use the PAGE ∧ and ∨ buttons to select a menu item.
P1: [Song Clear]
P2: [Track Clear]
P3: [Quantize]
P4: [Song Copy]
P5: [Panel Write]
- Press either LEFT button.
- The display changes in accordance with your selection.
- Perform the editing procedures.
- During the editing procedure, you can press the EXIT button to go back to the SEQ EDIT menu display.
SONG CLEAR
Erase the recorded contents of a specified song.
![TIME J = 120 SONG CLEAR Song 1 [OK] DRUMS ACCOMP3 ACCOMP2 ACCOMP1 BASS LEFT RIGHT2 RIGHT1](/content/2026/06/1304666/images/b11f14cce3d6398ee2082c4e191dee13c1b8009b3dfd64a4fa03f6fcfb2c80fc.jpg)
- Use the ACCOMP 1 ∧ and ∨ buttons to specify the number of the song to erase.
- If [All] is selected, all the songs recorded in the SEQUENCER will be erased.
- Press either RIGHT 1 (OK) button.
- The ARE YOU SURE? display appears. Press either LEFT (Yes) button to execute the function. Or press either RIGHT 1 (No) button if you wish to cancel the procedure.
- If [Yes] was selected, "COMPLETED!" appears on the display, the specified songs are erased, and the instrument returns to the normal performance mode.
TRACK CLEAR
Erase the contents of a specific track.
![TIME J= 120 TRACK CLEAR Tr 1 [OK] DRUMS ACCOMP1 ACCOMP2 ACCOMP1 BASS LEFT RIGHT2 RIGHT1](/content/2026/06/1304666/images/dde6e62f9c4c083206f31da85d718f80197f15646231ab6a7f3b19881f448513.jpg)
- Use the ACCOMP 1 ∧ and ∨ buttons to select the track you wish to clear.
- If [All] is selected, the data is erased from all the tracks.
QUANTIZE
The QUANTIZE function can correct the timing of your performance after it has been recorded. If the rhythm is slightly out of sync or inexact, it will automatically be corrected to the specified quantize level.

Rhythm as written in the score
Timing of actual performance
Quantized performance
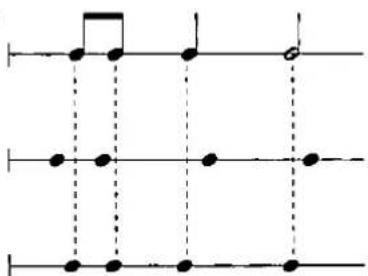
-
Use the ACCOMP 1 ∧ and ∨ buttons to specify the track number.
-
You cannot quantize the track for the [Control], [Rhythm] or [APC/Chord] part.
• If [All] is selected, all the tracks are quantized. -
Press either RIGHT 1 (OK) button.
-
The ARE YOU SURE? display appears. Press either LEFT (Yes) button to execute the function. Or press either RIGHT 1 (No) button if you wish to cancel the procedure.
- If [Yes] was selected, "COMPLETED!" appears on the display, and the specified tracks are erased.
-
To erase more than one track, repeat steps 1 and 2.
-
Use the RIGHT 1 ∧ and ∨ buttons to specify the quantize level.
-
This setting specifies the timing (minimum note value) on which the quantizing will be based.
-
Select from 4, 8, 16, 32, 8T, 16T, 32T. (Example: 16=sixteenth note; T=triplet-type note.)
-
Press the PAGE ∧ button.
• The display changes to the following.

- Use the ACCOMP 1 ∧ and ∨ buttons to specify the start point (measure number).
- Use the RIGHT 1 ∧ and ∨ buttons to specify the end point (measure number).
- Press the EXECUTE (SYNCHRO & BREAK) button.
- The ARE YOU SURE? display appears. Press either LEFT (Yes) button to execute the function. Or press either RIGHT 1 (No) button if you wish to cancel the procedure.
SONG COPY
Copy the recorded data from specific tracks of a song.
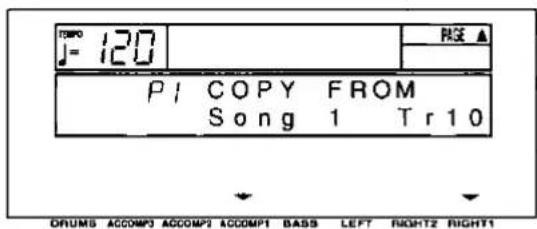
- Use the ACCOMP 1 ∧ and ∨ buttons to specify the song number to copy from.
- Use the RIGHT 1 ∧ and ∨ buttons to specify the number of the track to copy from.
- If [All] is selected, all the tracks of the specified song number will be copied.
- Press the PAGE ∧ button.
• The display changes to the following.

- Use the ACCOMP 1 ∧ and ∨ buttons to specify the song number to copy to.
- Use the RIGHT 1 ∧ and ∨ buttons to specify the number of the track to copy to.
- If [All] is selected, the data will be copied to all the tracks of the specified song number.
- Press the EXECUTE (SYNCHRO & BREAK) button.
- The ARE YOU SURE? display appears. Press either LEFT (Yes) button to execute the function. Or press either RIGHT 1 (No) button if you wish to cancel the procedure.
PANEL WRITE
You can change the panel status which is in effect at the beginning of the song. These are the settings which are recalled when the SEQUENCER RESET button is pressed.
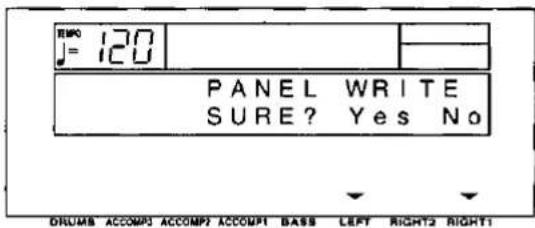
- Use the panel buttons to change to the desired panel settings.
-
Press either LEFT (Yes) button.
-
To cancel the procedure, press either RIGHT 1 (No) button.
- If the [Yes] button is pressed, "COMPLETED!" is shown on the display.
- PANEL WRITE is automatically activated at the beginning of the REALTIME RECORD, or when a panel setting is changed during recording standby.
Sequencer Medley
You can have the songs played back continuously in order. Songs saved on a disk can also be played back in a medley.
- On the SEQUENCER menu display, select P3 SEQ PLAY.
• The display looks similar to the following.

- Press either RIGHT 1 (Medley) button.
- KN920/KN1500: The display looks similar to the following.

• KN720: Skip to step 5.
- KN920/KN1500: Use the LEFT ∧ and ∨ buttons to specify which songs you wish to have played.
Internal: Play back song data from this instrument's SEQUENCER memories.
FD Technics: Play back Technics format song data saved on the floppy disk in the disk drive.
Other FD: Play back Standard MIDI File (Format 0) and DISK ORCHESTRA COLLECTION™ (DOC) song data saved on the floppy disk in the disk drive.
- Note that if [FD Technics] is selected and medley play is executed, all song data (SONG 1-10) currently stored in the SEQUENCER memory is destroyed.
- Press the PAGE ∧ button.
• The display looks similar to the following.
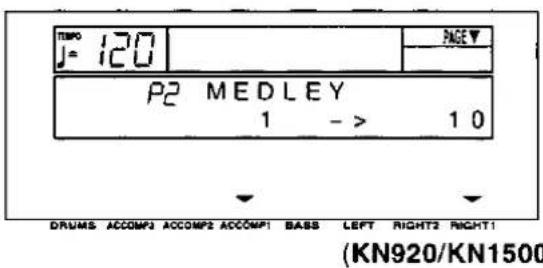
-
Use the ACCOMP 1 ∧ and ∨ buttons to specify the first song you wish to have played.
-
Use the RIGHT 1 ∧ and ∨ buttons to specify the last song.
-
Press the START/STOP button.
- The songs are played back in the specified order.
• The display looks similar to the following.
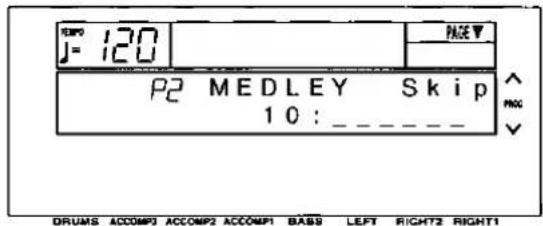
- You can press either TRANSPOSE (PROG) button to skip to the next song.
- To stop medley play, press the START/STOP button.
- KN920/KN1500: Features and operation of the Disk Drive are explained in "Part VII Disk Drive" (page 89).
Outline of the Composer

natural_image
Front view of a control panel with display and keypad (no visible text or symbols)The COMPOSER enables you to create your own accompaniment patterns or to edit preset accompaniment patterns. A pattern is comprised of five parts: DRUMS, BASS and three ACCOMP parts. These parts would form the backing of a song, for example: Drums, Acoustic Bass, Piano, Jazz Guitar and Vibes. You may find it useful at first to copy and edit a preset pattern.
Rhythm components which can be stored
You can store up to 12 different rhythms (4 in each memory bank A, B, C).

flowchart
graph TD
    subgraph BANK_A
        A1["VARIATION [Vari"] 1] --> B1["INTRO [Intr"] 1, 2]
        A2["VARIATION [Vari"] 2] --> B2["FILL IN [Fill"] 1, 2]
        A3["VARIATION [Vari"] 3] --> B3["ENDING [Endg"] 1, 2]
        A4["VARIATION [Vari"] 4] --> B4["INTRO [Intr"] 1, 2]
    end
    subgraph BANK_B
        B1["VARIATION [Vari"] 1] --> C1["INTRO [Intr"] 1, 2]
        B2["VARIATION [Vari"] 2] --> C2["FILL IN [Fill"] 1, 2]
        B3["VARIATION [Vari"] 3] --> C3["ENDING [Endg"] 1, 2]
        B4["VARIATION [Vari"] 4] --> C4["INTRO [Intr"] 1, 2]
    end
    subgraph BANK_C
        C1["VARIATION [Vari"] 1] --> D1["INTRO [Intr"] 1, 2]
        C2["VARIATION [Vari"] 2] --> D2["FILL IN [Fill"] 1, 2]
        C3["VARIATION [Vari"] 3] --> D3["ENDING [Endg"] 1, 2]
        C4["VARIATION [Vari"] 4] --> D4["INTRO [Intr"] 1, 2]
    end
- You can also create INTRO, FILL IN and ENDING patterns for each bank (A, B, C). These patterns are played back when the COMPOSER MODE is set to [Expand]. (Refer to page 83.)
Memory capacity
Expressed in terms of notes, the total number of notes which can be stored in all the COMPOSER memories is about 10,000. The remaining memory available for recording is shown on the RECORD display as a percentage (MEMORY= %).
- When "MEMORY FULL!" appears on the display no more data can be stored in the COMPOSER.
- The recorded COMPOSER data can be saved to a disk and later quickly recalled (COMPOSER LOAD). (Refer to page 92.)
COMPOSER RECORD menu
When you press the RECORD button in the COMPOSER section to turn it on, the display changes to the following.

- Use the PAGE buttons to view the three pages of menu display.

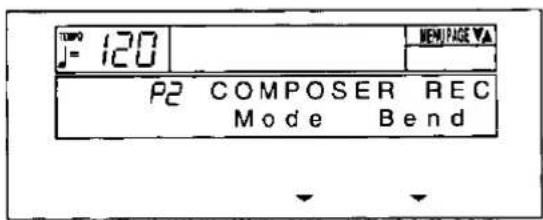

Summary of the COMPOSER menu items
[P1 COMPOSER REC]
A/B/C (pages 79 and 80)
Create a pattern in each of the A, B, C banks.
Copy (page 79)
Copy a preset rhythm pattern into a memory.
[P2 COMPOSER REC]
Mode (page 83)
Specify whether or not you are playing back your own INTRO, FILL IN and ENDING patterns.
Bend (page 84)
Set the pitch range for when the PITCH BEND wheel is operated during recording of the ACCOMP and BASS parts.
[P3 COMPOSER REC]
Single Load
Recall the desired COMPOSER data from data saved on a disk. The items on this menu are also on the MEMORY & CONTROL menu, and the procedures are the same (page 93).
Two ways to record in the COMPOSER
There are two ways to create and record a rhythm.
■ Edit a preset rhythm (pages 79 and 82)
Use the copy function to copy a preset rhythm to a memory, change parts of it, and then store it as a new rhythm.
■ Create a completely new rhythm (pages 80 and 82)
Clear the memories and compose a completely new rhythm from scratch.
Edit a preset rhythm pattern: preparation
These are step-by-step instructions for preparing to create a new rhythm pattern by modifying a part of a preset rhythm pattern. First you copy one of the preset rhythm patterns to a location in the specified memory bank.
- On the COMPOSER RECORD menu display, select P1.
• The display looks similar to the following.

- Press either RIGHT 1 (Copy) button.
• The display looks similar to the following.

-
Use the BASS ∧ and ∨ buttons to select a rhythm number to copy.
-
Use the RIGHT 2 ∧ and ∨ buttons to select the name of the section to copy from.
- Select from Vari (VARIATION) 1–4, Intr (INTRO) 1, 2, Endg (ENDING) 1, 2, V (VARIATION) 1FI (FILL IN) 1, 2, V2FI 1, 2, V3FI 1, 2, V4FI 1, 2.
- Press the PAGE ∧ button.
• The display looks similar to the following.
![J= 120 PAGE A P2 COPY TO A - V a r i 1 [OK] DRUM3 ACCOMP2 ACCOMP2 ACCOMP1 BASS LEFT RIGHTS RIGHT1](/content/2026/06/1304666/images/273b655e173069f9fa67cb841c43bab3ab5871b5321f628b38242c5ca82ab275.jpg)
-
Use the ACCOMP 1 ∧ and ∨ buttons to select a memory bank to copy to (A, B, C).
-
Use the LEFT ∧ and ∨ buttons to select the section name to copy to.
- Select from Vari 1–4, Intr 1, 2, Fill 1, 2, Endg 1, 2.
- Press either RIGHT 1 (OK) button.
- When copying has been successfully completed, "COPY COMPLETED!" appears on the display.
-
Press the EXIT button to view the P1 display.
-
Select the bank to which you copied the rhythm pattern (the memory bank you selected in step 6: A, B or C).
• The display looks similar to the following.
![J= 120 MEMORY - A Vari 1 [OK] DRUMS ACCOMP3 ACCOMP3 ACCOMP1 BASS LEFT RIGHT2 RIGHT1](/content/2026/06/1304666/images/1d141ac766cc37771906166d83b83705c31a0b7fa58cdefd9dc5560dbf66bb2c.jpg)
-
Use the BASS ∧ and ∨ buttons to select the section name to which you copied the section (the section name you selected in step 7).
-
Press either RIGHT 1 (OK) button.
• The display looks similar to the following.
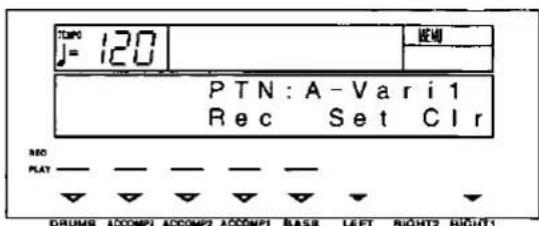
(Continued on the next page)
-
If you wish to name your new rhythm pattern (except for FILL IN, INTRO and ENDING), press either LEFT (Set) button.
-
If you do not input a name for your rhythm pattern, the name becomes the same as the original rhythm from which you copied. Skip to step 17.
• The display looks similar to the following.

- Press the PAGE ∧ button to view the P2 PATTERN NAME display.
• The display looks similar to the following.
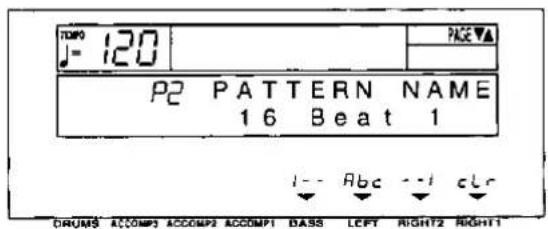
-
Type a new name for your rhythm pattern (up to 12 characters).
-
Use the BASS or the RIGHT 2 buttons to highlight the character position. Use the LEFT (Abc) ∧ and ∨ buttons to select the alphanumeric character. Repeat these steps to type the whole name.
• To erase all the characters, press either RIGHT 1 (cLr) button. -
Press the EXIT button to return to the following display.

- Press a [Rec] button to select the rhythm part you want to record first.
BASS ACCOMP 1 ACCOMP 2 ACCOMP 3 DRUMS
- The pattern you copied and the metronome sound start, and recording begins. (Refer to page 82.)
Create a completely new rhythm: preparation
Here are the preparatory steps to compose a completely new rhythm from scratch.
- On the COMPOSER RECORD menu display, select P1.
• The display looks similar to the following.
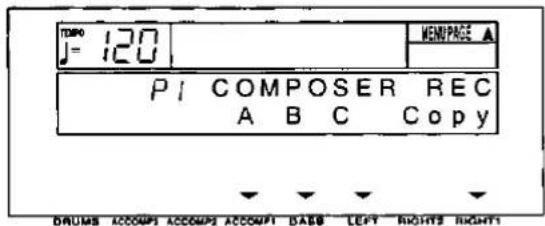
- Select a bank in which to record the rhythm (A, B or C).
• The display looks similar to the following.

- Use the BASS ∧ and ∨ buttons to specify the section you are going to create.
- Select from Vari 1–4, Intr 1, 2, Fill 1, 2, Endg 1, 2.
- Press either RIGHT 1 (OK) button.
• The display looks similar to the following.
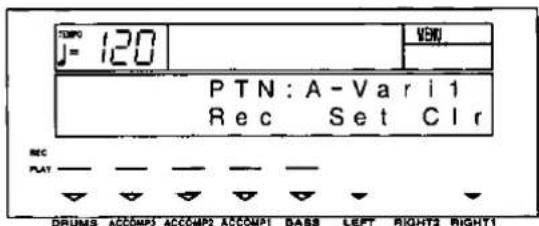
- Press either RIGHT 1 (CIr) button.
- The following confirmation display appears. Press either LEFT (Yes) button to execute the function, or press either RIGHT 1 (No) button to cancel the function.

- If [Yes] was selected, "COMPLETED!" appears on the display, and the contents of all parts are cleared.
- Press either LEFT (Set) button.
• The display looks similar to the following.
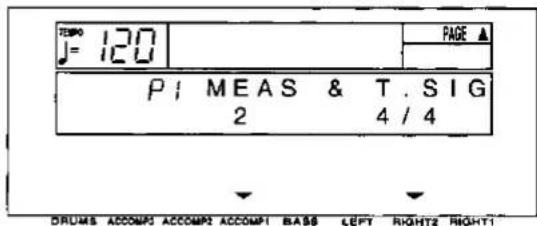
-
Use the ACCOMP 1 ∧ and ∨ buttons to specify the number of measures in your repeating rhythm pattern (1 to 8).
-
Use the RIGHT 2 ∧ and ∨ buttons to specify the time signature (1/4 to 8/4).
- The settings for the number of measures and the time signature can be changed only if all the parts of the pattern were cleared in step 5.
- Press the PAGE ∧ button to view the P2 PATTERN NAME display (except for FILL IN, INTRO and ENDING).
• The display looks similar to the following.
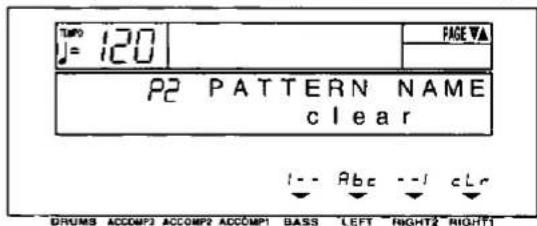
- Type a name for your rhythm pattern (up to 12 characters).
- Use the BASS or RIGHT 2 ∧ and ∨ buttons to highlight the character position. Use the LEFT (Abc) ∧ and ∨ buttons to select the alphanumeric character. Repeat these steps to type the whole name.
• To erase all the characters, press either RIGHT 1 (cLr) button.
- If you wish to record a performance in a key other than C major, or if you wish to specify the type of chord progression, press the PAGE ▲ button to view the P3 CHORD SET 1 display.
• The display looks similar to the following.

- If you do not wish to change these settings, skip to step 17.
-
Use the BASS ∧ and ∨ buttons to specify the root note of the chords you wish to record. Use the RIGHT 2 ∧ and ∨ buttons to specify the type of chord you wish to record (Min or Maj).
-
Press the PAGE ∧ button to view the P4 CHORD SET 2 display.
• The display looks similar to the following.
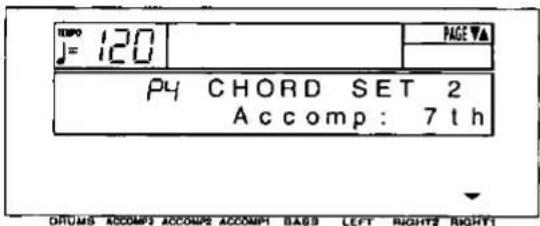
-
Use the RIGHT 1 ∧ and ∨ buttons to specify the type of phrase progression for the AC-COMP parts (Normal [Nrml], or 7th).
-
Press the PAGE ∧ button to view the P5 CHORD SET 3 display.
• The display looks similar to the following.

- Use the RIGHT 1 ∧ and ∨ buttons to specify the type of phrase progression for the BASS part (Normal [Nrml], or 7th).
(Continued on the next page)
- Press the EXIT button to return to the following display.
![TDM J = 120 [EN] PTN: A - Var i 1 Rec Set Cl r REC PLAY DRUM18 ACCOMP1 ACCOMP2 ACCOMP1 BASS LEFT RIGHT2 RIGHT1](/content/2026/06/1304666/images/01dbb9928d57a9637aa214730fe8348244c105c9135eb423d9a5a228037ea67c.jpg)
- Press a [Rec] button to select the rhythm part you want to record first.
BASS
ACCOMP 1
ACCOMP 2
ACCOMP 3
DRUMS
- The metronome sound starts and recording begins.
Record your rhythm pattern
Store each part of the rhythm pattern as you perform it on the keyboard.
Recording procedure
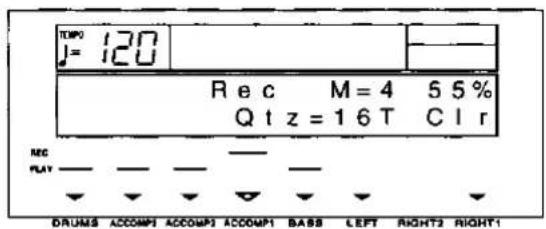
-
Adjust the tempo.
-
The tempo can be freely adjusted when you play back the rhythm pattern, so record at the tempo which is easiest for you to play.
- Select the sound.
- For the DRUMS part, select sounds from the KEYBOARD PERC sounds.
- For the ACCOMP 1 to 3 and the BASS parts, select sounds from groups other than the KEYBOARD PERC sounds. You can also set the DIGITAL EFFECT to on or off.
- Depending on the selected sound, the sound quality may differ from that during a normal performance.
- Record the part.
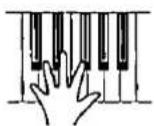
- The specified number of measures are repeatedly played back, during which time any newly played notes are added to those already recorded. The current measure number is shown on the display as "M="
- Record the performance in C major for correct chord progressions during playback. To record the performance in a different scale, refer to page 81.
-
The PITCH BEND wheel operation and SUS-TAIN on/off are also recorded (except for the DRUMS part).
-
When you have finished recording one part, use the [Rec] buttons below the display to select the next part to record.
• The ▼ mark for the selected part only flashes. - Repeat steps 1 through 4 to record all the parts of the rhythm.
- When you have finished recording the rhythm, press the RECORD button in the COMPOSER section to turn it off.
■ Functions during recording
Clr
Press either RIGHT 1 (CIr) button if you wish to erase all recorded contents of the currently selected part.
INST ERASE
When the DRUMS part is selected, the DRUMS part can be cleared instrument by instrument. Hold down the INST ERASE (SPLIT POINT) button and specify the instrument sound to be deleted by pressing the corresponding instrument key on the keyboard, after which only the specified instrument will be erased for as long as this button is kept pressed.
Qtz (QUANTIZE)
Set the desired quantize level to smooth out any unevenness in the timing of your performance. Use the LEFT ∧ and ∨ buttons to specify the timing (minimum note value) on which the quantizing will be based.
- Select from 32T, 32, 16T, OFF, 16, 8T, 8, 4. (Example: 16=sixteenth note; T=triplet-type note.)
Playback
- Press the COMPOSER button to turn it on.
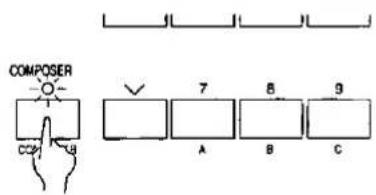
- Use the number pad to select the bank.
- Press 7 for bank A, 8 for bank B, or 9 for bank C.
- Use the VARIATION & MSA buttons to select the variation (1 to 4).
- Press the START/STOP button.
• The DRUMS part begins to play back.
• The BASS and ACCOMP parts are played back when you use the AUTO PLAY CHORD.
Composer mode
Two playback modes are available for you to choose from. If you wish to use the intro, fill-in and ending patterns from a preset rhythm when you play back your new rhythm pattern, select NORMAL MODE. For creating and playing back your original intro, fill-in and ending patterns, select EXPAND MODE.
- On the COMPOSER RECORD menu display, select P2.
• The display changes to the following.
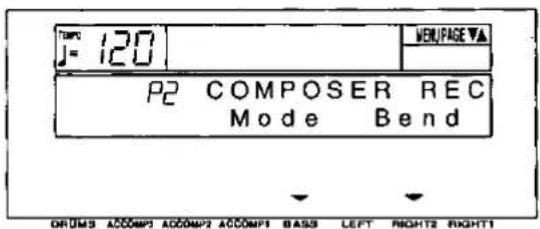
- Press either BASS (Mode) button.
• The display looks similar to the following.

- Use the LEFT ∧ and ∨ buttons to select the mode.
Normal
When a FILL IN button or the INTRO & ENDING button is pressed during playback, the corresponding pattern for a preset rhythm is played back.
■ Expand
When a FILL IN button or an INTRO & ENDING button is pressed during playback, the corresponding pattern you created is played back.
- Only one each FILL IN 1, FILL IN 2, INTRO 1, INTRO 2, ENDING 1 and ENDING 2 pattern can be created for each of the three banks (A, B or C). The fill-in patterns, etc. for each bank are used for all the basic rhythms in the same bank.
• Each pattern of a bank should have the same time signature.

flowchart
graph LR
    A["VARIATION 1"] --> B["INTRO 1, 2"]
    C["VARIATION 2"] --> B
    D["VARIATION 3"] --> B
    E["VARIATION 4"] --> B
    B --> F["FILL IN 1, 2"]
    B --> G["ENDING 1, 2"]
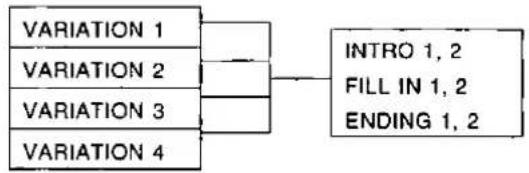
flowchart
graph LR
    A["VARIATION 1"] --> B["INTRO 1, 2"]
    C["VARIATION 2"] --> B
    D["VARIATION 3"] --> B
    E["VARIATION 4"] --> B
    B --> F["FILL IN 1, 2"]
    B --> G["ENDING 1, 2"]

flowchart
graph LR
    A["VARIATION 1"] --> D["INTRO 1,2"]
    B["VARIATION 2"] --> D
    C["VARIATION 3"] --> D
    E["VARIATION 4"] --> D
    D --> F["FILL IN 1,2"]
    D --> G["ENDING 1,2"]
Bend Range
Adjust the amount of pitch change applied to the ACCOMP parts and the BASS part when the PITCH BEND wheel is operated during COMPOSER recording.
- On the COMPOSER RECORD menu display, select P2.
• The display looks similar to the following.

- Press either RIGHT 2 (Bend) button.
• The display looks similar to the following.

- Use the LEFT ∧ and ∨ buttons to specify the range (0 to 12).
- Increments are in semitones.
Composer Chord Map
A different accompaniment pattern can be selected for each of the four types of chords (major, minor, seventh and diminished). Then the accompaniment combination can be stored in one of five different maps.
- Store beforehand in a COMPOSER memory (Vari 1–4) each accompaniment pattern you are going to perform when a type of chord is selected. When recording a pattern, for the minor type for example, record it in a minor key.
- Press and hold the CHORD MAP button in the COMPOSER section for a few seconds.

• The display looks similar to the following.

-
Use the LEFT ∧ and ∨ buttons to select a map number (Map 1 to 5).
-
Press the PAGE ∧ button.
• The display looks similar to the following.
![TIME J= 120 PAGE ▼▲ P2 SET MAP = 3 7 th : A - v 3 [OK] DRUMS ACCOMP2 ACCOMP2 ACCOMP1 BASS LEFT RIGHT2 RIGHT1](/content/2026/06/1304666/images/53529419d924e8ed9d850ad9e3793719f96183cee85484fc41b77ab4779722ce.jpg)
- Use the ACCOMP 1 buttons to select a chord type.
- Select from [Maj] (major), [Min] (minor), [7th], and [Dim] (diminished).
- Use the LEFT ∧ and ∨ buttons to select a pattern for the chord type (bank name-variation number).
- The accompaniment pattern for the INTRO, FILL IN and ENDING is the one selected for [Maj].
- The accompaniment pattern for chords which are set to [Off] is the same as the pattern for [Maj] chords.
- Repeat steps 4 and 5 for each chord type, as desired.
- Only patterns with the same number of measures and same time signature can be selected.
- When all the settings are completed, press either RIGHT 1 (OK) button.
- "COMPLETED!" appears on the display, and the settings are executed.
- Press the PAGE ∧ button.
• The display looks similar to the following.
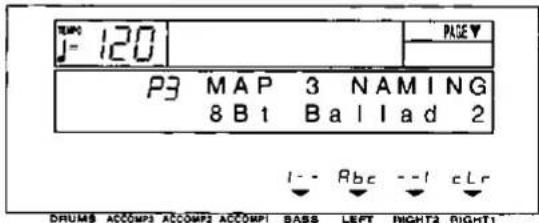
- Assign a name to the map.
- Use the BASS or RIGHT 2 buttons to highlight the character position. Use the LEFT (Abc) ∧ and ∨ buttons to select the alphanumeric character. Repeat these steps to type the whole name.
• To erase all the characters, press either RIGHT 1 (cLr) button.
-
Use the PAGE buttons to select P1 MAP SELECT. Repeat steps 3 to 9 to create other maps, as desired.
-
When you have finished making the map settings, press the EXIT button.
Recall chord map
Follow the procedure below to recall a stored chord map and use with your performance.
- Press the CHORD MAP button in the COMPOSER section to turn it on.
- Use the number pad to select the number of the desired map (1 to 5).
- The selected map number and map name are shown on the display.
- Play the keyboard using the automatic accom- paniment.
- The pattern changes according to the type of chord you play.
- If you select a different rhythm or COMPOSER rhythm, the COMPOSER CHORD MAP function is canceled.
Store your performance

natural_image
Front view of a control panel with display and control buttons (no visible text or symbols)The stored contents of the SEQUENCER can be saved in this instrument's memory (SAVE). The stored contents of the PANEL MEMORY and the current panel settings are also stored.
SAVE
- Press the MEMORY & CONTROL button to turn it on.

• The display looks similar to the following.

- Press either RIGHT 1 (Save) button. • The display looks similar to the following.

- Assign a name to the song (up to 6 characters).
- Use the BASS and RIGHT 2 buttons to highlight the character position. Use the LEFT (Abc) buttons to select the alphanumeric character. Repeat these steps to type the whole name.
- To erase the name, press either RIGHT 1 (cLr) button.
- Press the EXECUTE (SYNCHRO & BREAK) button.

• The display looks similar to the following.

- Use the ACCOMP 1 ∧ and ∨ buttons to select the file number to save.
- File numbers in which songs are already saved are indicated by the song name.
- The number of files that can be saved is limited. If you are saving several songs which use a lot of memory, the number of files which can be saved will be about three.
- When the internal memory is full, "FILE FULL!" is shown on the display. Use the FILE DELETE function (refer to the next article) to clear any unnecessary files.
- Press the EXECUTE (SYNCHRO & BREAK) button.
- The SAVE operation begins. - When the operation has been successfully completed, "COMPLETED!" is shown on the display.
- If you attempt to save data to a file number in which data is currently saved, the display changes to the confirmation display. Press either LEFT (Yes) to continue the save procedure, or press either RIGHT 1 (No) button if you wish to cancel the procedure.
FILE delete
Use the following procedure to clear a specific file.
- On the FILE NAMING display, press the PAGE ^ button.
• The display looks similar to the following.

- Press either LEFT button.
• The display looks similar to the following.

- Use the ACCOMP 1 ∧ and ∨ buttons to specify the file to erase.
- Press the EXECUTE (SYNCHRO & BREAK) button.
- The ARE YOU SURE? display appears. Press either LEFT (Yes) button to execute the function. Or press either RIGHT 1 (No) button if you wish to cancel the procedure.
- The contents of the song files are preserved even if the PLAY button is turned off, as long as power is being supplied through the AC adaptor or the batteries.
Recall the stored performance
The contents of the song files can be recalled any time (LOAD).
- When the LOAD procedure is performed, the current memory contents (SEQUENCER, PANEL MEMORY, etc.) are replaced by the contents of the selected song file.
LOAD
- Press the MEMORY & CONTROL button to turn it on.
• The display looks similar to the following.

- Press either ACCOMP 1 (Load) button.
• The display looks similar to the following.

- Use the ACCOMP 1 ∧ and ∨ buttons to select the file number to load.
- File numbers and the names of stored songs are shown on the display.
- Press the EXECUTE (SYNCHRO & BREAK) button.
• The LOAD operation begins.
- When the operation has been successfully completed, "COMPLETED!" is shown on the display.
Outline of the Disk Drive function
The Disk Drive enables you to store COMPOSER memories, SEQUENCER data etc. for future use.
Internal memory and Floppy Disk Drive
The storable internal memory is fixed at a limited capacity, but this external memory device expands the storable memory infinitely.
- You can use 3.5 inch 2DD (720 KB) or 2HD (1.44 MB) floppy disks; however, 2HD disks formatted as 2DD cannot be used.
- Specific file formats are handled as follows.
| SAVE | LOAD | ||
| TECHNICS File | ○ | ○ | |
| Standard MIDI File | FORMAT 0 | ○ | ○ |
| FORMAT 1 | × | ○ | |
FORMAT 0: There is one track on the disk, and it contains the 16 MIDI channels.
FORMAT 1: There is an unlimited number of tracks on the disk, each of which can contain the 16 MIDI channels.
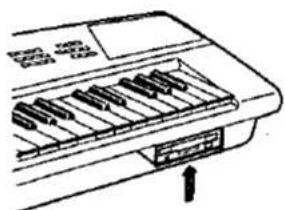
natural_image
Diagram of a keyboard layout with no visible text or symbolsFloppy Disk Drive

Load commercial software
Disks recorded using the Disk Drive of this instrument can, of course, be played back on your instrument (TECHNICS file). But this instrument also reads song data from floppy disks recorded in the Standard MIDI File format, enabling you to play commercial song disks on this instrument. In addition, by saving this instrument's SEQUENCER data in the Standard MIDI File format, you can play it back on an external sequencer.
DIRECT PLAY
You can play commercially sold song disks immediately without performing the normal load procedure.
- DIRECT PLAY can be used for the following disks:
Standard MIDI File (SMF) disks (FORMAT 0) DISK ORCHESTRA COLLECTION™ (DOC)
About Standard MIDI Files
"Standard MIDI File" is a standardized data format which makes it possible for music data to be exchanged among different sequencers. Data stored in this format on sequencers of different models can be played back on this instrument, and vice versa.
- Only files with the ".MID" extension can be loaded.
- No more than 310 KB of data can be loaded into this instrument.
Warning
Standard MIDI Files ensure the compatibility of data such as key on, key off, velocity, program number. It does not guarantee 100% faithful reproduction of recorded music which is replete with such data. For exact playback of music, it may be necessary to perform extensive adjustments of all the sound generator settings. As you the listener are the ultimate judge of what sounds best, you should perform such adjustments to your satisfaction.
Main parts of the Floppy Disk Drive

Eject button
Press to remove the disk from the Disk Drive.
Access indicator
Lights when data is being loaded from or saved to disk.
- To prevent data loss, do not remove the disk from the Disk Drive or turn off the power when the access indicator is lit.
Outline of procedure
- Press the MEMORY & CONTROL button to turn it on.


natural_image
Line drawing of a control panel with display and keypad (no text or symbols)- Use the PAGE buttons to select the desired menu.
• There are six pages of the menu display.
P1 Load (page 91)
Load data in either the Technics File format or Standard MIDI File format from a disk into this instrument's memory.
P1 Save (page 97)
Save data from this instrument's memory to a disk, in either the Technics File format or the Standard MIDI File format.
P2 Direct Play (page 95)
Immediate playback of commercial song disks.
P3 FD Format (page 96)
Format new floppy disks or erase the contents of recorded disks so they can be used by this instrument.
• (P4 Initial) is explained on page 122.
• [P5 Foot Switch] is explained on page 58.
• [P6 Contrast] is explained on page 34.
- Select the desired menu and follow the procedures on the corresponding setting display.
- When you have finished setting the functions, press the MEMORY & CONTROL button to turn it off.
Loading data
Recall (load) the data from the disk to this instrument's memories.
WARNING: The load procedure causes any data which is currently stored in the relevant memories to be erased.
DISK LOAD
- Insert the disk with the stored data into the Disk Drive. Push it all the way in until you hear a click.

natural_image
Diagram of a printer's internal structure showing internal components and paper feeding (no text or labels)- On the MEMORY & CONTROL menu display, select P1.
• The display looks similar to the following.

- Press either ACCOMP 1 (Load) button.
- The display changes to the following load menu display.
• There are three pages of the menu display.

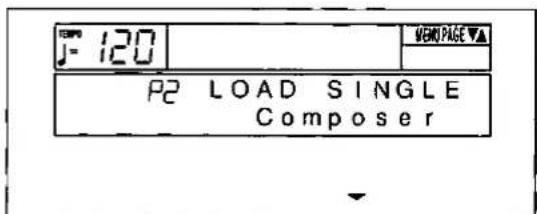
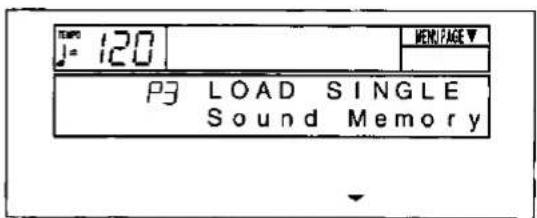
- Select the type of data load you want.
[Tech]: Load data which was saved in the Technics File format (TECHNICS LOAD).
[SMF]: Load data which was saved in the Standard MIDI File format (SMF LOAD).
[LOAD SINGLE Composer]: Load COMPOSER data from a disk into a specified memory number.
[LOAD SINGLE Sound Memory]: Load specified SOUND MEMORY data.
- Perform the selected disk load procedure. (Refer to the following sections.)
■ TECHNICS LOAD
Load data which was saved in the Technics File format.
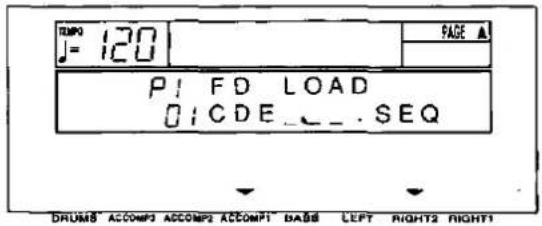
- Use the ACCOMP 1 ∧ and ∨ buttons to select the file on the floppy disk you wish to load (copy) to this instrument's memories.
- The file name is shown next to each file number.
- Use the RIGHT 2 ∧ and ∨ buttons to specify the kind of data you wish to load from the disk to your instrument.
ALL: All the following data is loaded.
SEQ: Only SEQUENCER data
CMP: Only COMPOSER data
SND: Only SOUND MEMORY data
PNL: Only PANEL MEMORY data
MSP: Only MANUAL SEQUENCE PADS data
- The option which was specified during the SAVE procedure is automatically selected. Skip this step if you do not wish to change the selection.
- For a SEQ file, press the PAGE ∧ button.
• The display looks similar to the following.
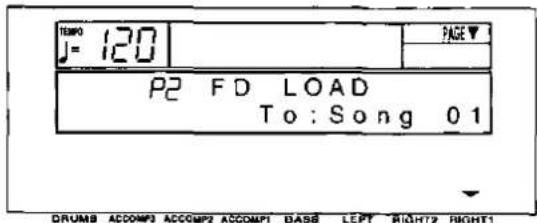
- Use the RIGHT 1 ∧ and ∨ buttons to select the song number in this instrument's memories to which you wish to have the file loaded (copied).
- If you are loading a file that was saved with the ALL option selected, this display will not appear even if SEQ is selected in step 2.
-
SEQUENCER data is loaded one song at a time. However, if you load a file for which ALL was selected, SEQUENCER songs 1 to 10 are loaded at once.
-
Press the EXECUTE (SYNCHRO & BREAK) button.

• The LOAD operation begins.
- When the operation has been successfully completed, "COMPLETED!" is shown on the display.
- If song data was loaded, you can press the START/STOP button to begin playback when the PLAY button of the SEQUENCER is on.
- You can quickly load just the COMPOSER data by pressing and holding the COMPOSER LOAD (COMPOSER) button for a few seconds.
- You can also access the FD LOAD display by pressing the MEMORY & CONTROL (DISK LOAD) button for a few seconds.
■ SMF LOAD
Load data which was saved in the Standard MIDI File (SMF) format.

- Use the LEFT ∧ and ∨ buttons to select the file.
- Press the PAGE ∧ button.
• The display looks similar to the following.

- Use the BASS ∧ and ∨ buttons to select the song.
• Data is loaded one song at a time.
4. Use the RIGHT 1 ∧ and ∨ buttons to specify whether or not to load the song as GENERAL MIDI (GM) (On/Off).
- If the GM setting you specify is different from the setting in the file, the sounds, the octave, and the arrangement of percussion sounds on the keyboard will be different.
• Information about GENERAL MIDI can be found on page 112. -
If playback is executed with the setting set to On, the functions of this instrument are limited in various ways. For detailed information, please refer to the separate REFERENCE GUIDE provided.
-
Press the EXECUTE (SYNCHRO & BREAK) button.
• The LOAD operation begins.
- When the operation has been successfully completed, "COMPLETED!" is shown on the display.
- Press the START/STOP button to begin playback.
■ LOAD SINGLE COMPOSER
Load the desired COMPOSER data from a disk into a specific COMPOSER memory.

- Use the LEFT ∧ and ∨ buttons to select the number of the file with the data you wish to load.
- Press the PAGE ∧ button.
• The display looks similar to the following.

-
Select the pattern you wish to load.
-
Use the LEFT ∧ and ∨ buttons to specify the bank name, and the RIGHT 1 ∧ and ∨ buttons to specify the section name.
- Press the PAGE ∧ button.
• The display looks similar to the following.

-
Select the section to load to.
-
Use the LEFT ∧ and ∨ buttons to specify the bank name, and the RIGHT 1 ∧ and ∨ buttons to specify the section name.
- Press the EXECUTE (SYNCHRO & BREAK) button.
• The LOAD operation begins.
- When the operation has been successfully completed, "COMPLETED!" is shown on the display.
- This procedure can also be accessed from the COMPOSER menu display. (Refer to page 78.)
■ LOAD SINGLE SOUND MEMORY
Load the desired SOUND data from a disk into a specific SOUND MEMORY.

- Use the LEFT ∧ and ∨ buttons to select the number of the file with the data you wish to load.
- Press the PAGE ∧ button.
• The display looks similar to the following.

- Use the ACCOMP 1 ∧ and ∨ buttons to select the sound number (201–240) you wish to load.
-
Use the RIGHT 1 ∧ and ∨ buttons to specify the sound number to load to.
-
Press the EXECUTE (SYNCHRO & BREAK) button.
• The LOAD operation begins.
- When the operation has been successfully completed, "COMPLETED!" is shown on the display.
Playing commercial disks
Commercial song disks can be played back directly from a disk. The usual LOAD operation is not necessary, so playback is quicker.
DIRECT PLAY
- Insert the disk you wish to play back into the Disk Drive.
- On the MEMORY & CONTROL menu display, select [P2 Direct Play].
• The display looks similar to the following.
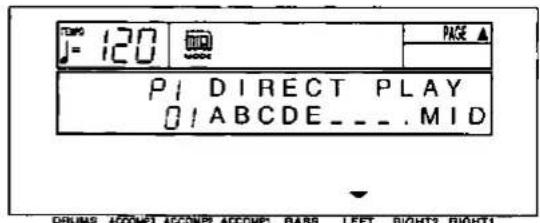
- Use the LEFT ∧ and ∨ buttons to select the filename to play back.
- For SMF files, press the PAGE ∧ button.
• The display looks similar to the following.

- Use the RIGHT 1 ∧ and ∨ buttons to specify whether or not to play the song as GENERAL MIDI (GM) (On/Off).
- If the GM setting you specify is different from the setting in the file, the sounds, the octave, and the arrangement of percussion sounds on the keyboard will be different.
• Information about GENERAL MIDI can be found on page 112. -
If playback is executed with the setting set to On, the functions of this instrument are limited in various ways. For detailed information, please refer to the separate REFERENCE GUIDE provided.
-
Press the START/STOP button.
• The selected song begins to play.
- Press the START/STOP button if you wish to stop playback before it has finished.
- You can use the same procedure to play back other songs on the disk.
- The song stops if you exit this display during playback.
- DIRECT PLAY can be used for the following disks: Standard MIDI File (SMF) disks (FORMAT 0) DISK ORCHESTRA COLLECTION™ (DOC)
- Standard MIDI File FORMAT 1 disks cannot be played back using DIRECT PLAY. Use SMF LOAD for these disks.
Formatting a disk
New floppy disks can be used only after they have been formatted. Follow the procedure below to format a new disk or erase the contents of a recorded disk.
FLOPPY DISK FORMAT
- This procedure clears the entire contents of the disk.
- Reformat a disk if it cannot be saved to or loaded from properly because of exposure to a magnetic field.
- You can use 3.5 inch 2DD (720KB) or 2HD (1.44MB) floppy disks.
- Be sure to specify the type of format which is suitable for the disk.
• How to distinguish the two disk types:

- Although 2HD floppy disks can hold more data and are convenient for quick loading and saving, 2DD disks are generally used for musical instruments. Therefore, you may not be able to use your 2HD disk data with other musical instrument models.
- To format the floppy disk, the write-protect window must be closed, as illustrated.

- Insert the floppy disk into the Disk Drive slot. Push it all the way in until you hear a click.
- On the MEMORY & CONTROL menu display, select [P3 FD Format] and press either LEFT button.
• The display changes to the following.

-
Select the type of format (2DD or 2HD).
-
Be sure to select the type which is the same as your disk type.
• The display changes to the following.

- Press either LEFT (Yes) button to format the disk, or press either RIGHT 1 (No) button to cancel the format.
- After about 1–2 minutes, formatting is completed, "COMPLETED!" is shown on the display, and this instrument returns to the normal performance mode.
Saving data
The recorded data and panel settings of this instrument can be saved on a disk.
- It is a good idea to save Technics File format data and Standard MIDI File format data in separate disks.
DISK SAVE
This procedure is used to save the performance data and settings of this instrument to a disk.
-
Insert a formatted disk into the Disk Drive slot. Push it all the way in until you hear a click.
-
On the MEMORY & CONTROL menu display, select P1.
• The display looks similar to the following.

- Press either RIGHT 1 (Save) button.
• The display looks similar to the following.

- Select the type of data save you want.
[Tech]: Save data in the Technics File format (TECHNICS SAVE).
[SMF]: Save data in the Standard MIDI File format (SMF SAVE).
- Perform the selected disk save procedure. (Refer to the following sections.)
■ TECHNICS SAVE
Save data from this instrument in the Technics File format to a floppy disk.

-
Type a name for the new data file (up to 6 characters).
-
Use the BASS and RIGHT 2 ∧ and ∨ buttons to highlight the character position. Use the LEFT (Abc) ∧ and ∨ buttons to select the alphanumeric character. Repeat these steps to type the whole name.
-
To erase the name, press either RIGHT 1 (cLr) button.
-
Press the EXECUTE (SYNCHRO & BREAK) button.
• The display looks similar to the following.

-
Use the ACCOMP 1 ∧ and ∨ buttons to select a file number (01 to 20).
-
Files in which data is currently stored are indicated by the file name following the file number.
- The maximum number of files which can be saved may be less than 20 if you are saving many songs which use a lot of memory.
- More data can be saved using 2HD floppy disk.
(Continued on the next page)
- Use the RIGHT 2 ∧ and ∨ buttons to specify the kind of data you wish to save to the disk.
ALL: All the following data is saved.
SEQ: Only SEQUENCER data
CMP: Only COMPOSER data
SND: Only SOUND MEMORY data
PNL: Only PANEL MEMORY data
MSP: Only MANUAL SEQUENCE PADS data
• The MASTER TUNING setting is not saved.
- If SEQ was selected in step 4, press the PAGE ^ button.
• The display looks similar to the following.

- Use the RIGHT 1 ∧ and ∨ buttons to select the song number in this instrument's memories you wish to have saved to the floppy disk.
- SEQUENCER data is saved one song at a time. However, if ALL is selected, the contents of SEQUENCER songs 1 to 10 are saved at once. In this case, you can conserve memory by deleting songs you do not wish to save.
- Press the EXECUTE (SYNCHRO & BREAK) button.
• The SAVE operation begins. - When the operation has been successfully completed, "COMPLETED!" is shown on the display, and this instrument returns to the normal performance mode.
- If you attempt to save data to a file number in which data is currently saved, the display changes to the confirmation display. Press either RIGHT 1 (No) button if you wish to cancel the procedure. When either LEFT (Yes) button is pressed, the DISK SAVE operation begins.
FILE delete
Use the following procedure to clear a specific file.
- On the FILE NAMING display, press the PAGE ^ button.
• The display looks similar to the following.

- Press either LEFT button.
• The display looks similar to the following.

- Use the ACCOMP 1 ∧ and ∨ buttons to specify the file to erase.
- Press the EXECUTE (SYNCHRO & BREAK) button.
- The ARE YOU SURE? display appears. Press either LEFT (Yes) button to execute the function. Or press either RIGHT 1 (No) button if you wish to cancel the procedure.
SMF SAVE
The data from this instrument's SEQUENCER can be saved to a floppy disk as Standard MIDI Files (SMF) (FORMAT 0 only). (Standard MIDI Files are most commonly saved on 2DD floppy disks.) Data saved on this instrument can then be used on another instrument.
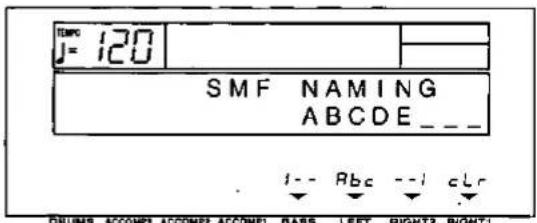
- What you can save in the Standard MIDI File format is ordinary performance data, such as note data. Data such as SEQUENCER data for the chord and rhythm parts, COMPOSER data, PANEL MEMORY data, etc. is not saved. If you wish to also save the special Technics data, first use the TECHNICS SAVE procedure to save the data to a disk, and then follow the SMF SAVE procedure below.
-
Standard MIDI Files are generally saved in the GM mode, but can be saved in the Technics mode.
-
Type a name for the new data file (up to 8 characters).
-
Use the BASS and RIGHT 2 ∧ and ∨ buttons to highlight the character position. Use the LEFT (Abc) ∧ and ∨ buttons to select the alphanumeric character. Repeat these steps to type the whole name.
- To erase the name, press either RIGHT 1 (cLr) button.
-
Avoid using the numbers from 01 to 20 as the first two letters of the name.
-
Press the EXECUTE (SYNCHRO & BREAK) button.
• The display looks similar to the following.
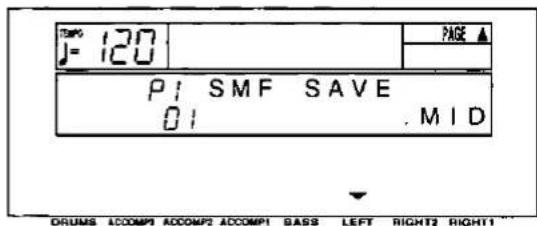
- Use the LEFT ∧ and ∨ buttons to select the name of the file in which to save the data.
• To save in a new file, select a blank line.
- Press the PAGE ∧ button.
• The display looks similar to the following.

- Use the RIGHT 1 ∧ and ∨ buttons to select the song number in this instrument's memories you wish to have saved to the floppy disk.
• Data is saved one song at a time.
- Press the PAGE ∧ button.
• The display looks similar to the following.

- Use the RIGHT 1 ∧ and ∨ buttons to select HEADER On/Off.
- Select On to save the sound, volume and other settings for each part as data at the beginning of the file.
(Continued on the next page)
8. Press the PAGE ∧ button.
• The display looks similar to the following.

-
Use the RIGHT 1 ∧ and ∨ buttons to select ONE MEASURE SPACE On/Off.
-
When there is various data other than performance data stored at the beginning of a file, the start of playback may be delayed. This can be avoided by inserting a one-measure space before the beginning of the performance. Select On to insert a one-measure space. Select Off if you do not wish to insert the space.
-
When set to On, a space is added each time a file is saved. Therefore, if you have already saved a file once with the ONE MEASURE SPACE set to On, please set it to Off each time the file is subsequently saved.
-
Press the EXECUTE (SYNCHRO & BREAK) button.
• The SAVE operation begins.
- When the operation has been successfully completed, "COMPLETED!" is shown on the display.
- If you attempt to save data to a file number in which data is currently saved, the display changes to the confirmation display. Press either RIGHT 1 (No) button if you wish to cancel the procedure. When either LEFT (Yes) button is pressed, the SMF SAVE operation begins.
FILE delete
Use the following procedure to clear a specific file.
- On the SMF NAMING display, press the PAGE ^ button.
• The display looks similar to the following.

- Press either LEFT button.
• The display looks similar to the following.
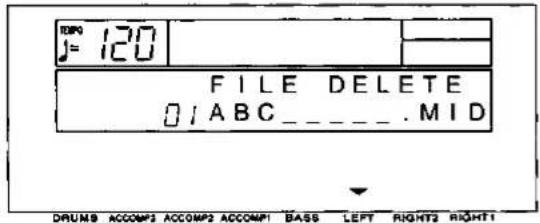
-
Use the LEFT ∧ and ∨ buttons to specify the file to erase.
-
Press the EXECUTE (SYNCHRO & BREAK) button.
- The ARE YOU SURE? display appears. Press either LEFT (Yes) button to execute the function. Or press either RIGHT 1 (No) button if you wish to cancel the procedure.
Outline of the Sound Setting mode

natural_image
Line drawing of a control panel with buttons and a triangular indicator (no text or symbols)The SOUND SETTING mode is used for making fine adjustments to the functions related to sound, such as tone, volume and effects.
SOUND menu
- Press the SOUND SETTING button to turn it on.

- Use the PAGE buttons to select the menu.
• There are four pages of the menu display. - Select the desired menu and follow the procedures on the corresponding setting display.
- When the current display is a setting display, you can press the EXIT button to go back to the previous display. To show other menus, use the EXIT button to return to the SOUND menu display and make another selection.
- When you have finished setting the functions, press the SOUND SETTING button to turn it off.
■ A word about parts
The organization of the sound parts is as follows.
Normal parts:
RIGHT 1, RIGHT 2, LEFT, PART 4 to 16
(PART 16 is reserved for the DRUM part)
AUTO PLAY CHORD parts:
ACCOMP 1, 2, 3, BASS, DRUMS, CHORD,
R.BASS.
MANUAL SEQUENCE PADS part:
MSP
METRONOME part: METRO
- On the BALANCE display, PART 1, PART 2 and PART 3 become RIGHT 1, RIGHT 2 and LEFT, respectively.
Summary of the SOUND menu items
P1 Part Setting (page 102)
Set the various sound attributes for each part.
P2 Touch & Tune (page 103)
Set the keyboard sensitivity, and adjust the tuning.
P3 Key Scaling (page 104)
Select the type of scaling (tuning).
P4 Left Hold (page 105)
Set the mode which determines how the LEFT part sounds during an AUTO PLAY CHORD performance.
Part Setting
Set the various sound attributes for each part.
- On the SOUND menu display, select [P1 Part Setting].
• The display looks similar to the following.
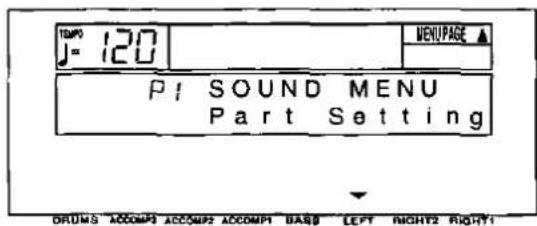
- Press either LEFT button.
• The display looks similar to the following.

- Use the TRANSPOSE (PROG) ∧ and ∨ buttons to select a part.
- PART 4 to 16 are used in SEQUENCER and MIDI functions when playing back Standard MIDI Files. PART 16 is reserved for the DRUM part.
- For information concerning CHORD and R. BASS, refer to page 51.
- Assign a sound to the selected part.
- If the SOUND/PART button is pressed, the currently selected part and sound name are shown on the display.
- Only sounds from the KEYBOARD PERC can be selected for Part 16.
- You cannot assign sounds to the ACCOMP 1, 2, 3, BASS, DRUMS, MSP and METRO parts. (If the panel buttons are used to change the sound or effects for these parts, the RIGHT 1 settings change.)
-
Use the ACCOMP 1 ∧ and ∨ buttons to select the attribute you wish to adjust.
-
Use the RIGHT 1 ∧ and ∨ buttons to adjust the attribute.
Volume: Adjust the volume of each part (0 to 127).
Pan: Adjust the stereo balance of each part (L64-CTR-R63).
- At L64, the sound is completely to the left, at R63 completely to the right. At CTR, the sound is at the center.
- Even at the same numerical value, the stereo balance may differ slightly depending on the sound.
Reverb: Adjust the depth of the reverb for the part (0 to 127).
Chorus (KN720): Adjust the depth of the CHORUS (0 to 127).
DSP Eff. (KN920/KN1500): Adjust the depth of the DSP EFFECT (0 to 127).
S. Length: Adjust the length of the sustain (1 to 8).
- For some sounds, the length of the sustain does not change even if the number is changed.
KeyShift: Specify the amount of shift in the pitch of the played keys (-12 to +12).
- A value of 1 means a shift of one semitone.
A value of 12 is one octave.
- The – button is used to lower the pitch, and the + button to raise the pitch.
Tuning: Fine-tune the pitch of each part (-128 to +127).
- Slight differences in the pitches between the parts add fullness to the sound.
- The – button is used to lower the pitch, and the + button to raise the pitch.
P.Bend: Set the amount of pitch change when the PITCH BEND wheel is operated (0 to 12).
- Increments are in semitones. A value of 12 is one octave.
Glide Pdl: Enable or disable the glide effect of the pedal (Foot Switch) (On/Off).
- For glide pedal setting, refer to page 58.
Sust. Pdl: Specify whether or not the SUSTAIN effect is applied with the pedal (Foot Switch) (On/Off).
Key Scale: Enable or disable key scaling (On/Off)
- For key scaling, refer to page 104.
- The settings which can be adjusted may differ depending on the selected part.
- If KEYBOARD PERC sounds are assigned to a part other than PART 16, even if you change the setting for the attribute (except for Volume, Reverb, Chorus [KN720]/DSP Eff [KN920/KN1500]), the new setting will not be in effect.
- To change the settings for a different part while the setting display is shown, use the TRANSPOSE (PROG) ∧ and ∨ buttons to change the part.
- When you have completed adjustment of an attribute, use the ACCOMP 1 ∧ and ∨ buttons to select the next attribute you wish to adjust.
Touch & Tune
Select the keyboard touch response mode (TOUCH SENSE) and fine-tune the pitch of the entire instrument (TUNING).
- On the SOUND menu display, select [P2 Touch & Tune].
• The display looks similar to the following.

- Press either LEFT button.
• The display looks similar to the following.

-
Use the LEFT ∧ and ∨ buttons to select the touch mode.
-
Select from 0 to 9.
-
When 0 is selected, the keyboard touch response is turned off.
-
Press the PAGE ∧ button.
• The display looks similar to the following.

- Use the LEFT ∧ and ∨ buttons to adjust the pitch within a range of 427.3 to 453.0 Hz.
• The decimal can be set to 0, 3 or 6.
Key Scaling
The temperament (tuning) of this instrument can be adjusted. Various types other than standard temperament are available to choose from.
- On the SOUND menu, select [P3 Key Scaling].
• The display looks similar to the following.

- Press either LEFT button.
• The display looks similar to the following.

- Use the LEFT ∧ and ∨ buttons to select the tuning mode.
Total: The key scaling selected for this instrument is active for all parts. (Select this mode if you are selecting a tuning type.)
Sound: The preset key scaling specified for individual sounds is active.
- Press the PAGE ∧ button.
• The display looks similar to the following.

-
Use the LEFT ∧ and ∨ buttons to select the type.
-
Select from [Off], [Random], [Piano], [Orchestra], [Pythagorean], [Werckmeister], [Kirnberger], [Arabic 1] to [Arabic 5], [Slendro], [Pelog], [User].
• [Off] is standard (equal temperament) tuning. -
Select [User] if you wish to use a customized scaling (explained in the following section).
-
Use the TRANSPOSE (PROG) ∧ and ∨ buttons to select the key in which you are going to perform.
- Set to the key of the song you are going to play.
■ User type scaling
You can adjust the instrument to a customized scaling.
- In KEY SCALING, the pitch of each note of the octave is slightly shifted up or down from the standard (equal temperament) tuning.
- On the P2 display, select [User] for the type.
- Press the PAGE ∧ button.
• The display looks similar to the following.

-
Adjust the key scaling.
-
Use the ACCOMP 1 ∧ and ∨ buttons to specify the keyboard key, and use the RIGHT 1 ∧ and ∨ buttons to adjust the pitch of the key.
- Increments are in cents (one hundredth of an equal-tempered semitone). A + value raises the pitch and a - value lowers the pitch in relation to standard tuning (equal temperament).
Left Hold
Select the mode to specify how the left section of the keyboard sounds during an AUTO PLAY CHORD performance.
- On the SOUND menu display, select [P4 Left Hold].
• The display looks similar to the following.

- Press either LEFT button.
• The display looks similar to the following.

- Use the RIGHT 1 buttons to set the mode to On or Off.
■ OFF
| ONE-FINGER | FINGERED | PIANIST | |
| When rhythm is stopped | The specified chord sounds in the CHORD part sound. | The specified chord sounds in the CHORD part sound, and the pressed keys sounds in the LEFT part sound. | The CHORD part and the LEFT part do not sound (the entire keyboard produces the RIGHT part sound). |
| When rhythm is playing | The CHORD part and the LEFT part do not sound. | The CHORD part does not sound, but the pressed keys sound in the LEFT part sound. |
■ ON
| ONE-FINGER | FINGERED | PIANIST | |
| When the rhythm is stopped or playing | The specified chord sounds in the LEFT part sound. | The specified chord sounds in the LEFT part sound. | The CHORD part and the LEFT part do not sound (the entire keyboard produces the RIGHT part sound). |
- The LEFT part can be heard only when the LEFT button in the CONDUCTOR section is on.
Part IX Creating sounds (KN920/KN1500)
Outline of the Sound Edit

natural_image
Line drawing of a vintage computer control panel with buttons and a monitor (no text or symbols)SOUND EDIT enables you to create your own new sound by altering one of the this instrument's preset sounds. Your new sound can be stored in one of the sound memory locations.
- Select a preset sound on which to build your new sound.
- The sounds in the KEYBOARD PERC group (189 to 200) cannot be edited.
- Press the SOUND EDIT button to turn it on.

• The display looks similar to the following.
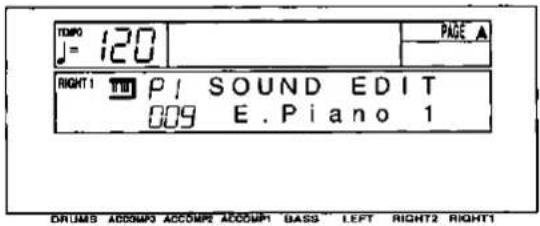
• The sound you selected in step 1 is shown.
3. Use the PAGE buttons to select a menu.
- You can select from the following menus.
P2 SOUND NAMING (page 107)
Assign a name to your sound.
P3 WRITE (page 107)
Select a memory number to save the new sound.
P4 OCTAVE SHIFT (page 107)
Shift the octave range of the sound.
P5 D. EFFECT (page 108)
Select the type of DIGITAL EFFECT to apply to the sound.
P6 VIBRATO (page 108)
Specify the various vibrato settings.
P7 TONE SEL (TONE SELECT) (page 108)
Modify the tones which make up the sound.
P8 PITCH (page 109)
Adjust the settings related to the pitch of the sound.
P9 MIXER (page 109)
Adjust the volume, brilliance and stereo balance of the sound.
P10 ENVELOPE (page 110)
Specify how the volume changes over time.
P11 PTCH ENV (PITCH ENVELOPE)
(page 110)
Specify how the pitch changes over time.
- Select a menu item and adjust the setting.
- KN1500: When the TEMPO/PROGRAM indicator is lit, it indicates that the dial is available for setting the current function.
- Repeat steps 3 and 4 to modify other sound attributes as desired.
- Use the PAGE buttons to select different menus.
- When the sound is just the way you like it, use the PAGE buttons to select P3 WRITE, and follow the procedure to store your new sound. (Refer to page 107.)
■ About TONEs
A sound may be made up of at most four TONEs.

flowchart
graph TD
    A["SOUND"] --> B["1st TONE"]
    A --> C["2nd TONE"]
    A --> D["3rd TONE"]
    A --> E["4th TONE"]
- The essence of the sound is created by the combination of the 1st TONE and 2nd TONE. Depending on the sound output status of the instrument, the 3rd and 4th TONEs may not be generated.
- There are two types of settings: those that can be adjusted for each TONE that comprises the sound, and those that can be adjusted for the whole sound. For settings that can be adjusted for each TONE, the TRANSPOSE (PROG) ∧ and ∨ buttons to the right of the display are used to specify the TONE.
Setting the function
SOUND NAMING
Assign a name to the sound you are creating.
- Use the PAGE buttons to select [P2 SOUND NAMING].
• The display looks similar to the following.

-
Type a new name for your sound (up to 12 characters).
-
Use the BASS and RIGHT 2 buttons to highlight the character position. Use the LEFT (Abc) buttons to select the alphanumeric character. Repeat these steps to type the whole name.
- To erase the name, press either RIGHT 1 (cLr) button.
WRITE
The sound numbers 201 to 240 in the SOUND MEMORY are reserved for storing the sounds you create with the SOUND EDIT.
- Your new sound will be erased if you exit the SOUND EDIT mode without first storing it in a memory.
- Use the PAGE buttons to select [P3 WRITE TO].
• The display looks similar to the following.

-
Use the LEFT ∧ and ∨ buttons to select the MEMORY number in which to store the new sound (201 to 240).
-
When you are finished editing the sound, if you wish to save it, press the EXECUTE (SYNCHRO & BREAK) button to store the new sound.
OCTAVE SHIFT
Set the pitch of the sound by octaves.
- Use the PAGE buttons to select [P4 OCTAVE SHIFT].
- The display looks similar to the following.

- Use the LEFT ∧ and ∨ buttons to set the octave for the whole keyboard ([Overall]) (-2 to 2).
- Use the RIGHT 2 ∧ and ∨ buttons to set the octave for the LEFT part when the keyboard is split ([Split Left]) (-2 to 2).
- Use the RIGHT 1 ∧ and ∨ buttons to set the octave for the RIGHT parts when the keyboard is split ([Split Right]) (-2 to 2).
DIGITAL EFFECT
Select the type of DIGITAL EFFECT for your sound. When the DIGITAL EFFECT button is on, the type you set will be active for your sound.
- Use the PAGE buttons to select [P5 D. EFFECT].
• The display looks similar to the following.

- Use the LEFT ∧ and ∨ buttons to select the type of effect.
- Select from [Off], [Celeste 1, 2], [Chorus 1, 2], [Ensemble 1, 2], [Tremolo], [Organ Tremolo], [Single Delay], [Repeat Delay], [Solo Effect 1, 2].
- If a type other than [Off] is selected, the DIGITAL EFFECT button will turn on when the sound is selected.
- If the [Organ Tremolo] effect is selected, use the DIGITAL EFFECT button now to specify FAST (DIGITAL EFFECT button on) or SLOW (off) when the sound is selected.
VIBRATO
Modify the vibrato attributes of the sound.
- Use the PAGE buttons to select [P6 VIBRATO].
• The display looks similar to the following.

-
Use the LEFT ∧ and ∨ buttons to adjust the vibrato depth ([Depth]) (OFF, 1 to 127).
-
Use the RIGHT 2 ∧ and ∨ buttons to adjust the vibrato speed ([Speed]) (0 to 127).
-
Use the RIGHT 1 ∧ and ∨ buttons to set the time delay between key played and vibrato start ([Delay]) (0 to 30).
TONE SELECT
Modify the separate TONEs which comprise the sound.
• TONEs are explained on page 106.
- Use the PAGE buttons to select [P7 TONE SEL].
• The display looks similar to the following.

-
Use the TRANSPOSE (PROG) ∧ and ∨ buttons to select the TONE ([1st], [2nd], [3rd], or [4th]).
-
Use the RIGHT 2 ∧ and ∨ buttons to select a sound for the TONE.
-
Use the RIGHT 1 ∧ and ∨ buttons to select one TONE from the sound selected in step 3.
- The number of TONEs may differ depending on the selected sound.
- If either LEFT (OFF) button is pressed, the TONE will not sound. If either BASS (On) button is pressed, the TONE will be turned on.
- When a TONE is selected, the MIXER, ENVELOPE and PITCH ENVELOPE settings change to those of the selected TONE.
- Repeat steps 2 to 4 for each TONE, as desired.
PITCH
Adjust the output pitch of each TONE.
- Use the PAGE buttons to select [P8-PITCH].
• The display looks similar to the following.

- Use the TRANSPOSE (PROG) ∧ and ∨ buttons to select a TONE.
- Use the RIGHT 2 ∧ and ∨ buttons to specify the output pitch ([Key Shift]) (-24 to 24).
- Units are in semitones.
- Use the RIGHT 1 ∧ and ∨ buttons to fine-adjust the pitch ([Detune]) (-128 to 127).
- Slight differences in the [Detune] values between the tones add fullness to the sound.
- Repeat steps 2 to 4 for each TONE, as desired.
MIXER
Adjust the volume, brilliance and stereo balance of each TONE.
- Use the PAGE buttons to select [P9 MIXER].
• The display looks similar to the following.

- Use the TRANSPOSE (PROG) ∧ and ∨ buttons to select a TONE.
- Use the LEFT ∧ and ∨ buttons to adjust the volume ([Volume]) (0 to 127).
-
Use the RIGHT 2 ∧ and ∨ buttons to adjust the brightness ([Brilliance]) (0 to 127).
-
Use the RIGHT 1 ∧ and ∨ buttons to adjust the stereo balance ([Pan]) of the sound (L64-Ctr-r63, rnd).
-
Ctr is the center point. At L64, the sound is all the way to the left, at r63 all the way to the right.
- If [rnd] is selected the stereo balance changes randomly each time a key is pressed.
- Even at the same numerical value, the stereo balance may differ slightly depending on the sound.
- Repeat steps 2 to 5 for each TONE, as desired.
ENVELOPE
For each tone, specify the waveform (envelope) of volume change, from the time the key is played to the time the sound dies out.

area
| Time Point | Event Description | | :--- | :--- | | Peak | Attack | | Peak | Decay 1 | | Peak | Decay 2 | | Peak | Sustain 1 | | Peak | Sustain 2 | | Peak | Release | | Peak | Key ON | | Peak | Key OFF |- Use the PAGE buttons to select [P10 ENVELOPE].
• The display looks similar to the following.
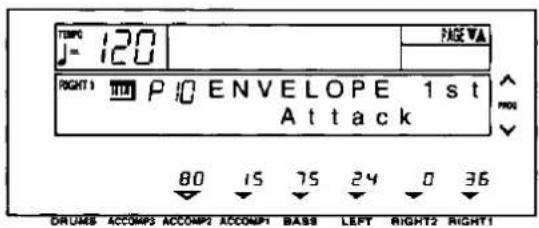
-
Use the TRANSPOSE (PROG) ∧ and ∨ buttons to select a TONE.
-
Use the ∧ and ∨ buttons below the display to modify the envelope (0 to 100).
ACCOMP 2: [Attack]
ACCOMP 1: [Decay 1]
BASS: [Sustain 1]
LEFT: [Decay 2]
RIGHT 2: [Sustain 2]
RIGHT 1: [Release]
- Repeat steps 2 and 3 for each TONE, as desired.
PITCH ENVELOPE
For each tone, specify the waveform (envelope) of pitch change, from the time the key is played to the time the sound dies out.
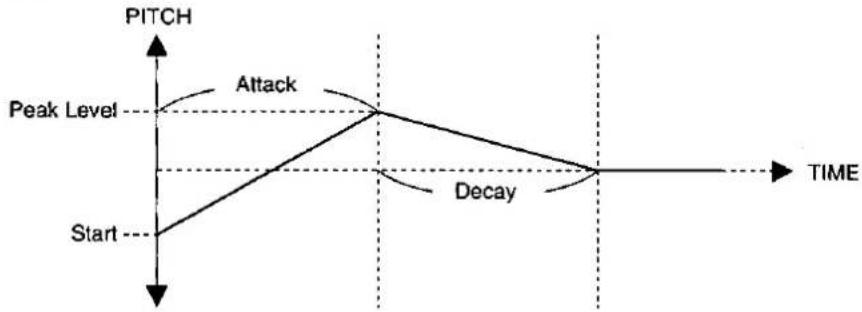
flowchart
graph TD
    A["Start"] --> B["Peak Level"]
    B --> C["Attack"]
    C --> D["Decay"]
    D --> E["TIME"]
    style A fill:#f9f,stroke:#333
    style B fill:#ccf,stroke:#333
    style C fill:#cfc,stroke:#333
    style D fill:#fcc,stroke:#333
    style E fill:#ffc,stroke:#333
- Use the PAGE buttons to select [P11 PTCH ENV].
• The display looks similar to the following.

-
Use the TRANSPOSE (PROG) ∧ and ∨ buttons to select a TONE.
-
Use the ∧ and ∨ buttons below the display to modify the envelope.
BASS: [Start] (-50 to 50)
LEFT: [Attack] (0 to 100)
RIGHT 2: [Peak Level] (-50 to 50)
RIGHT 1: [Decay] (0 to 100)
- Repeat steps 2 and 3 for each TONE, as desired.
What is MIDI?
MIDI (Musical Instrument Digital Interface) is the international standard for digital communication of electronic musical instrument data. This means that any equipment which has a MIDI terminal—such as electronic musical instruments and personal computers—can easily exchange digital data with other MIDI equipment without resorting to complicated conversions or connections.
MIDI terminals
(On the rear panel)
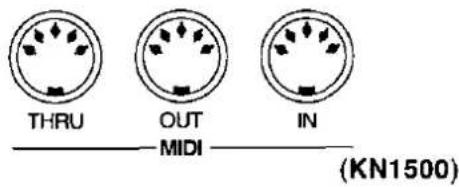
IN:
The terminal by which this instrument receives data from other equipment.
OUT:
The terminal that transmits data from this instrument to other equipment.
THRU (KN1500):
The terminal that transfers data from the IN terminal directly to other equipment.
- For these connections, use a commercially available MIDI cable.
Connection examples
■ To generate sound from a connected instrument by playing this instrument

flowchart
graph TD
    A["This instrument"] -->|OUT| B["MIDI cable"]
    B -->|IN| C["Another MIDI instrument"]
■ To generate sound from this instrument by operating a connected instrument

flowchart
graph TD
    A["This instrument"] -->|IN| B["MIDI cable"]
    B -->|OUT| C["Another MIDI instrument"]
■ To connect with a MIDI sequencer or a personal computer

flowchart
graph TD
    A["OUT"] --> B["This instrument"]
    C["IN"] --> B
    B --> D["MIDI cable"]
    E["OUT"] --> F["MIDI sequencer"]
    G["IN"] --> F
MIDI channels
Many different kinds of performance data are sent using just one MIDI cable. This is possible because MIDI signals are sent and received through 16 different "basic channels" (numbered 1 to 16). In order for the exchange of data to take
place, the channels on the transmission side must match the channels on the receiving side. This characteristic also makes it possible to link multiple sound generators and to control each by matching specific channels.
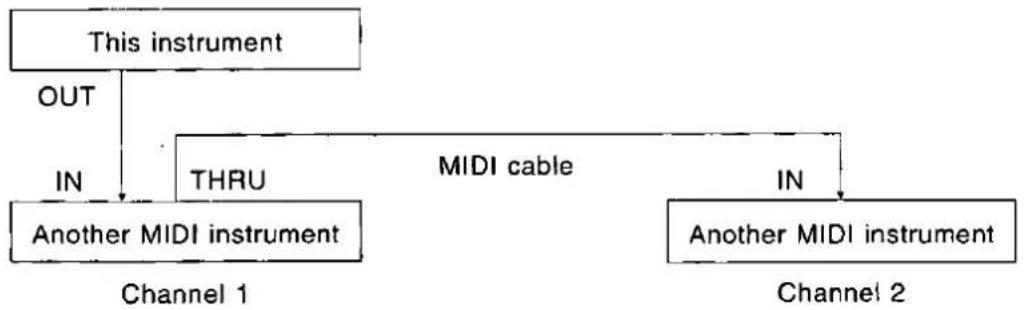
flowchart
graph TD
    A["This instrument"] -->|OUT| B["Another MIDI instrument"]
    A -->|IN| C["THRU"]
    A -->|MIDI cable| D["Another MIDI instrument"]
    D -->|IN| E["Another MIDI instrument"]
    B --> F["Channel 1"]
    D --> G["Channel 2"]
The following kinds of data can be transmitted/received.
NOTE data
This is the most basic kind of MIDI data which is exchanged, and is used to specify which keys are played and how hard they are played.
NOTE NUMBER: Number specifying which key is played.
NOTE ON: Specifies that a key is played.
NOTE OFF: Specifies that a key is released.
VELOCITY: Specifies how hard a key is struck.
- MIDI notes are assigned numbers from 0 to 127, with middle C (C3) as 60. Note pitches are in semitone increments, with the higher numbers assigned to the higher pitches.
■ PROGRAM CHANGE
This is sound change data. When a different sound is selected on the transmitting instrument, the sound on the receiving instrument also changes.
■ CONTROL CHANGE
These are volume, sustain, effect, etc. data used to enhance performance expression. Each function is distinguished by its control number, and the function which can be changed by the control differs depending on the instrument.
■ EXCLUSIVE data
This is sound data, etc. particular to a specific instrument model. This data can also be transmitted and received by the DUMP function.
- For details, refer to the separate REFERENCE GUIDE provided.
GENERAL MIDI
GENERAL MIDI (GM) is the standard which enables MIDI data exchange between different models or equipment of different manufacture. Program change numbers and their corresponding sounds, percussion instrument sounds, note numbers, etc. are data-compatible between equipment using this standard. Song data created on the equipment of one manufacturer can be played back on the equipment of a different manufacturer, as long as both conform to the GENERAL MIDI standard. This instrument conforms to this standard and can be used as a GENERAL MIDI sound generator.
Equipment which conforms to GENERAL MIDI standards is indicated by the following logo.

Outline of MIDI functions
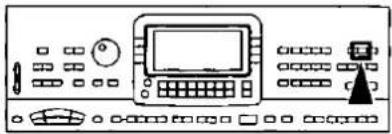
natural_image
Line drawing of a control panel with buttons, dials, and a triangular indicator (no text or symbols)Select the various settings which are used for MIDI operation of this instrument.
- Press the MIDI button to turn it on.

- Use the PAGE buttons to select the menu.
• There are nine pages of the menu display.
- Select the desired menu and follow the procedures on the corresponding setting display.
- During the setting display, you can press the EXIT button to go back to the previous display. To show other menus, use the EXIT button to return to the MIDI menu display and make another selection.
- When you have finished setting the functions, press the MIDI button to turn it off.
Summary of the MIDI menu items
P1 Channel (page 114)
Assign a MIDI channel to each part.
P2 Part Setting (page 115)
Make the OCTAVE and LOCAL CONTROL settings for each part.
P3 Common Set (page 116)
Set the following functions which are common to all parts.
NOTE ONLY
PROG. CHANGE TO P. MEM
INTRO, FILL-IN, ENDING
REALTIME SYSEX
APC CONTROL
TRANSPOSE
PROGRAM CHANGE MODE
DRUMS TYPE
SONG SELECT
MIDI SETUP LOAD
P4 Control Msg (CONTROL MESSAGE) (page 117)
Enable or disable the exchange of various control data.
P5 IN/OUT Set (INPUT/OUTPUT SETTING) (page 118)
Various settings related to transmission and reception of data
P6 Realtime Msg (REALTIME MESSAGE) (page 119)
Make the REALTIME COMMANDS and CLOCK settings.
P7 MIDI Presets (page 119)
Optimum MIDI settings according to the connected equipment
P8 GM Mode (page 120)
GENERAL MIDI settings
P9 Bulk Dump (page 121)
Settings related to data exchange of this instrument's internal data.
Setting the functions
MIDI CHANNEL
MIDI Basic Channel numbers have already been assigned to parts (default settings) but you can reassign channel number to parts as follows.
- On the MIDI menu display, select [P1 Channel].
• The display looks similar to the following.

- Press either LEFT button.
• The display looks similar to the following.

- Use the BASS ∧ and ∨ buttons to select the part.
- Use the RIGHT 1 ∧ and ∨ buttons to select a basic channel for the part (Off, 01 to 16).
- A part which has been set to Off cannot be used to transmit or receive MIDI data.
- Repeat steps 3 and 4 for each part as desired.
■ Default part settings
| Part | Channel | Part | Channel | Part | Channel | AUTO PLAY CHORD part | Channel |
| Right 1 | 01 | Part 7 | 07 | Part 13 | 13 | Acmp 1 | Off |
| Right 2 | 02 | Part 8 | 08 | Part 14 | 14 | Acmp 2 | Off |
| Left | 03 | Part 9 | 09 | Part 15 | 15 | Acmp 3 | Off |
| Part 4 | 04 | Part 10 | 10 | Part 16 | 16 | Bass | Off |
| Part 5 | 05 | Part 11 | 11 | (Drum) | Drums | Off | |
| Part 6 | 06 | Part 12 | 12 | Control | Off | Chord | Off |
PART SETTING
Set the octave shift value for key notes transmitted from this instrument (OCTAVE), and specify whether this instrument's sound generator is enabled when MIDI data is transmitted (LOCAL CONTROL).
- On the MIDI menu display, select [P2 Part Setting].
• The display looks similar to the following.

- Press either LEFT button.
• The display looks similar to the following.

-
Use the BASS ∧ and ∨ buttons to select the part.
-
Use the RIGHT 1 ∧ and ∨ buttons to set the octave shift value (-3 to 3).
- Octave shift is set for transmitted data only; however the transmitted and received octave shifts are linked. For example, if the transmitted octave shift is set to 1, the received octave shift is automatically set to -1.
-
Repeat steps 3 and 4 for each part, as necessary.
-
Press the PAGE ∧ button.
• The display looks similar to the following.

-
Use the BASS ∧ and ∨ buttons to select a part.
-
Use the RIGHT 1 ∧ and ∨ buttons to enable or disable this instrument's sound generator.
- When set to On, the performance from this instrument is transmitted as MIDI data and also sounds from this instrument. When set to Off, the performance from this instrument is transmitted as MIDI data but does not sound from this instrument.
- Repeat steps 7 and 8 for each part as desired.
COMMON SETTING
Set the functions which are common to all parts.
- On the MIDI menu display, select [P3 Common Set].
• The display looks similar to the following.

- Press either LEFT button.
• The display looks similar to the following.
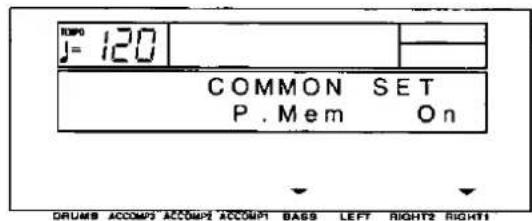
-
Use BASS ∧ and ∨ buttons to select the item.
-
Use the RIGHT 1 ∧ and ∨ buttons to change the setting.
[P. Mem] (PROGRAM CHANGE TO PANEL MEMORY): Enable or disable the exchange of program change numbers for the RIGHT 1 part by operation of the PANEL MEMORY buttons (On/Off).
- KN920/KN1500: For this setting, the PANEL MEMORY 1 to 5 program change numbers correspond to the bank numbers as follows: BANK A = 0 to 4; BANK B = 5 to 9.
[Note Only]: Of the performance data, specify whether or not only note data is exchanged (On/Off).
[P. Change] (PROGRAM CHANGE MODE)
Nor: The program change numbers correspond to the sound numbers.
Tec: Program change numbers are standardized among all Technics models which are set to this mode. The program change number assigned to a given sound on one model is assigned to the same sound on all models which are set to the same mode.
GM: Program change numbers follow the GM standard.
- The program change numbers for each mode can be found in the separate REFERENCE GUIDE provided.
[Drums]
Nor: Keyboard percussion instrument sounds correspond to this instrument's key note numbers.
Tec: Keyboard percussion instrument sounds correspond to the same key note numbers for connected Technics models set to this type.
GM: Keyboard percussion instrument sounds follow the GM standard.
[Song Sel] (SONG SELECT)
On: Song number data can be exchanged.
Off: Song number data cannot be exchanged.
[Setup Ld] (MIDI SETUP LOAD)
On: When disk data is loaded, the MIDI settings stored on the disk are automatically recalled.
Off: MIDI settings stored on the disk are not recalled.
[Intro]: Enable or disable the exchange of intro, fill-in and ending data (On/Off).
- Data is exchanged on the channel for the DRUMS part.
[APC Ctrl] (APC CONTROL): Enable the exchange of data for the on/off status of the AUTO PLAY CHORD's ONE-FINGER, FINGERED and PIANIST modes (On/Off).
- Data is exchanged on the channel for the ACCOMP 1 part.
[RT Sysex] (REALTIME SYSTEM EXCLUSIVE): Specify whether or not SYSTEM EXCLUSIVE data is exchanged during the performance (On/Off).
- Repeat steps 3 and 4 for the other settings as desired.
CONTROL MESSAGE
Enable or disable the exchange of various control data.
- On the MIDI menu display, select [P4 Control Msg].
• The display looks similar to the following.
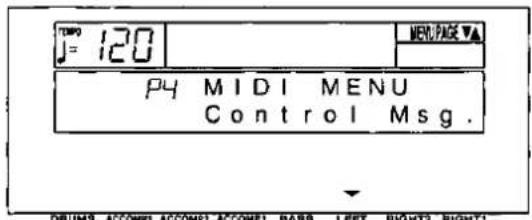
- Press either LEFT button.
• The display looks similar to the following.
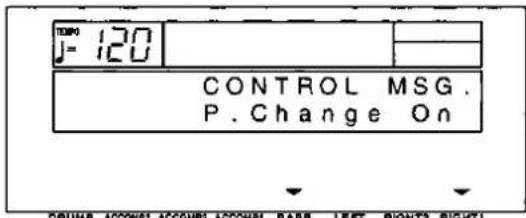
- Use the BASS ∧ and ∨ buttons to select the control message.
- Select from the following: P.Change (PROGRAM CHANGE), Bank Sel (BANK SELECT), P.Bend (PITCH BEND), Volume, Express. (EXPRESSION), Panpot, Sustain, EFF&REV (EFFECT & REVERB), Modulat. (MODULATION), Tuning, Bend Rng (BEND RANGE), AftTouch (AFTER TOUCH), Rst.Cnt. (RESET ALL CONTROLLERS).
- Use the RIGHT 1 ∧ and ∨ buttons to specify on or off for the control message.
On: Data for the control operation is exchanged.
Off: Data for the control operation is not exchanged.
- The [Bank Sel] setting is effective only when [P. Change] is set to On.
- The [EFF&REV] setting controls the DIGITAL EFFECT and DIGITAL REVERB on/off.
- The [Tuning] setting is the on/off setting for the Tuning and Key Shift settings.
- Repeat steps 3 and 4 for each control as desired.
INPUT/OUTPUT SETTING
Make the settings which determine how various performance data is treated during data transmission and reception.
- On the MIDI menu display, select [P5 IN/OUT Set].
• The display looks similar to the following.

- Press either LEFT button.
• The display looks similar to the following.

-
Use the BASS ∧ and ∨ buttons to select the item.
-
Use the RIGHT 1 ∧ and ∨ buttons to change the setting.
[Rt1] (RIGHT 1 INPUT)
Cond: When data for the RIGHT 1 part is received, the CONDUCTOR determines which part it is used for.
Direct: When data for the RIGHT 1 part is received, it is treated as RIGHT 1 data, and performance data for all parts is received on their respective basic channels.
[APC] (APC INPUT)
On: Input data for the ACCOMP 1, 2, 3, BASS, DRUMS and CHORD parts is received.
Off: Data for the above parts is not received.
- Basic channels should be assigned to the above parts before exchanging data.
- Press the PAGE ∧ button.
• The display looks similar to the following.

-
Use the BASS ∧ and ∨ buttons to select the output item.
-
Use the RIGHT 1 ∧ and ∨ buttons to change the setting.
[T.Chord] (TECHNI-CHORD OUTPUT)
On: Keyboard notes generated by the TECHNI-CHORD function are also transmitted.
Off: Only key note data of the pressed keys is transmitted.
[Drums] (DRUMS OUTPUT)
On: Data from the DRUMS part is transmitted.
Off: Data from the DRUMS part is not transmitted.
[APC] (APC OUTPUT)
On: The data for the ACCOMP 1, 2, 3, BASS and CHORD parts is transmitted.
Off: The data for the above parts is not transmitted.
- Basic channels should be assigned to the above parts before exchanging data.
[Trans.] (TRANSPOSE)
On: The note number of the transposed note is transmitted/received.
Off: The note number of the played key is transmitted/received.
REALTIME MESSAGE
Enable or disable the exchange of START/STOP data (REALTIME COMMANDS), and select the CLOCK mode.
- On the MIDI menu display, select [P6 Realtime Msg].
• The display looks similar to the following.
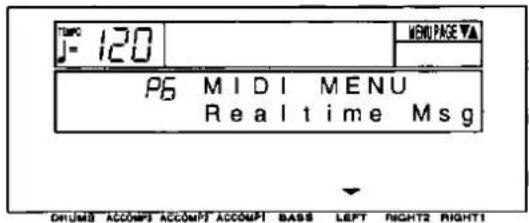
- Press either LEFT button.
• The display looks similar to the following.

-
Use the BASS ∧ and ∨ buttons to select a function (Commands/Clock).
-
Use the RIGHT 1 ∧ and ∨ buttons to change the setting.
[Commands]
On: Rhythm and SEQUENCER start/stop, continue, and song position pointer data can be transmitted/received.
Off: This data cannot be transmitted/received.
[Clock]
int: This instrument's internal clock is used to control the performance. The clock of the connected equipment is disabled.
Mid: The clock of the connected equipment is used to control the performance. This instrument's clock is disabled. (The tempo is displayed as [♩ = - -].)
- The Clock is set to "Int" when the power to this instrument is turned on.
- Repeat steps 3 and 4 for the other function if desired.
MIDI PRESETS
Establish the optimum settings depending on how this instrument is connected to other equipment, and on whether this instrument is used as the master or the slave.
- On the MIDI menu display, select [P7 MIDI Presets].
• The display looks similar to the following.

- Press either LEFT button.
• The display looks similar to the following.

- Use the LEFT ∧ and ∨ buttons to select the connection setup.
- There are two pages to this display. Use the PAGE buttons to change the page.
- The P1 display shows connection setups for when the AUTO PLAY CHORD is not used (without APC). And the P2 display shows connection setups for when the AUTO PLAY CHORD is used (with APC).
- Press the EXECUTE (SYNCHRO & BREAK) button.
- When the settings have been successfully stored, "COMPLETED!" appears on the display.
- Detailed information about the PRESETS can be found in the separate REFERENCE GUIDE provided.
GENERAL MIDI
GENERAL MIDI (GM) is the standard which enables MIDI data exchange between different models or equipment of different manufacture. Program change numbers and their corresponding sounds, percussion instrument sounds, note numbers, etc. are data compatible between equipment using this standard.
- On the MIDI menu display, select [P8 GM Mode].
• The display looks similar to the following.

- Press either LEFT button.
• The display looks similar to the following.

- Use the RIGHT 1 ∧ and ∨ buttons to specify whether or not this instrument should be compatible with GENERAL M!DI standard instruments (On/Off).
- This setting is automatically set to Off when the power is turned on.
- If On is selected, the status of this instrument changes to the GENERAL MIDI status, and the sounds and operations which can be selected are limited. In addition, the arrangement of percussion sounds on the keyboard changes. (Refer to the separate REFERENCE GUIDE provided.)
- Press the EXECUTE (SYNCHRO & BREAK) button.
• The display looks similar to the following.

-
Press either LEFT (Yes) button.
-
Press either RIGHT 1 (No) button if you wish to cancel the function.
- If On was selected, the GENERAL MIDI logo is shown on the display.
- If the setting is changed from Off to On, the SEQUENCER memory is cleared and the panel settings are reset.
- If On is selected, this setting is automatically set to Off when the power is turned off, and all the memories are cleared. (KN720: The data in files that have been saved is not erased.)
BULK DUMP
This instrument's internal data can be transmitted to and received from another instrument of the same model, or other MIDI equipment with Bulk Dump capability, as SYSTEM EXCLUSIVE data.
- Sound is not generated from this instrument during this procedure.
-
The operations on this display are executed, even if [RT. Sysex] is set to off on the [Common Set] display.
-
On the MIDI menu display select [P9 Bulk Dump].
• The display looks similar to the following.
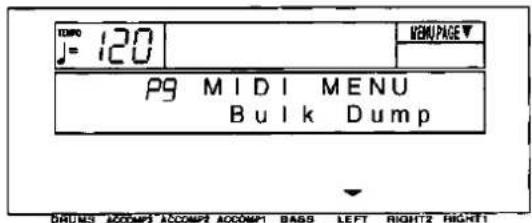
- Press either LEFT button.
• The display looks similar to the following.
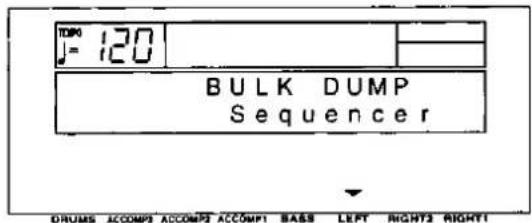
■ Transmitting
- Follow the procedure necessary to prepare the receiving instrument for data reception.
- Use the LEFT buttons to select the type of data to transmit.
- Select from [Total] (includes all the following data), [Composer] (KN920/KN1500), [Sequencer], [Sound Memory] (KN920/KN1500), [Panel Memory], and [Manual Seq Pad] (MANUAL SEQUENCE PADS).
- Press the EXECUTE (SYNCHRO & BREAK) button.
• The display looks similar to the following.

-
Press either LEFT (Yes) button.
-
Press either RIGHT 1 (No) button if you wish to cancel the procedure.
- If the LEFT (Yes) button was pressed, transmission begins. During transmission, the transmitting status is shown on the display.
■ Receiving
After accessing the BULK DUMP display, follow the transmission procedure on the transmission side.
- During reception, the receiving status is shown on the display.
- If data transmission/reception is unsuccessful, an error message appears on the display.
Initialize
This instrument has many settable functions and storable memories. However, you can return the settings and memory to the factory-preset status.
INITIAL
- Press the MEMORY & CONTROL button to turn it on.
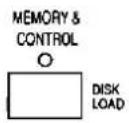
• The display changes to the following.
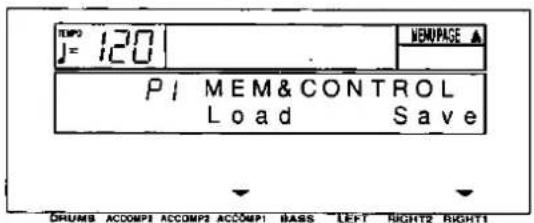
- Use the PAGE ∧ and ∨ buttons to select [P2 Initial] (KN720)/[P4 Initial] (KN920/KN1500).
• This display looks similar to the following.

- Press either LEFT button.
• The display looks similar to the following.

- Use the LEFT ∧ and ∨ buttons to select the desired type of initialization.
- Select from [Total] (includes all the following data), [Composer] (KN920/ KN1500), [Sequencer], [Sound Memory] (KN920/KN1500), [MIDI Setting], [Panel Memory] or [Manual Seq Pad].
- The [Panel Memory] type includes the SOUND ARRANGER settings.
- Press the EXECUTE (SYNCHRO & BREAK) button.
- The display changes to the confirmation display. Press either LEFT (Yes) button if you wish to execute the initialization. Press either RIGHT 1 (No) button if you wish to cancel the procedure.

- When you press either LEFT (Yes) button, initialization begins. When initialization is completed, "COMPLETED!" is shown on the display and this instrument returns to the normal performance mode.
- You can also reset all the instrument settings with the following procedure: Turn off the PLAY (KN720/KN920)/POWER (KN1500) button once. Then, while pressing the three buttons to the right of the display (TRANSPOSE ∧ and ∨, and EXIT) at the same time, turn the PLAY/POWER button on again.
- All the instrument settings may be initialized when the power is turn on, for example, if the effective time of the backup memory has been exceeded.
■ KN720/KN920: Backup memory
The various stored memories and function settings of this instrument are preserved as long as power is being supplied through the AC adaptor or the batteries. If the power supply to this instrument is discontinued (either through the AC adaptor or the batteries), the various memories and settings will be cleared after about 10 minutes.
- The backup memory does not function until the power has been on for about 10 minutes.
- KN920: If you wish to keep the contents of the various memories, such as the SEQUENCER and COMPOSER, before you turn off the instrument, use the SAVE procedure to store the desired data on a disk for recall at a later time. When you exit these functions without saving to a disk, a warning display appears to remind you to save the data.
■ KN1500: Backup memory
The panel settings and stored memories are maintained in a backup memory for about 10 minutes after the power to this instrument is turned off. If you wish to keep the memory contents, before you turn off the instrument, use the SAVE procedure to store the desired data on a disk for recall at a later time.
- The backup memory does not function until the power has been on for about 10 minutes.
- When you quit the operating mode, a warning display may appear to remind you to save the data.
Options

SZ-E2 (KN1500 only)
Expression Pedal
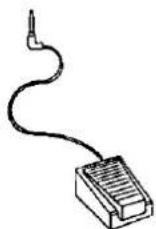
SZ-P1
Foot Switch
Connections
KN720/KN920
(Rear panel)

FOOT SW
An optional SZ-P1 Foot Switch (sold separately) can be connected to this terminal to control various functions. (Refer to page 58.)
PHONES/LINE OUT
(output level 1.5 Vrms, 16 Ω)
Headphones, a keyboard amplifier, or stereo equipment can be connected to this terminal. When another apparatus is connected to this terminal, the speaker system is automatically switched off, and sound is heard only through the connected device.
MIDI
These terminals are for connection to another MIDI instrument. (Refer to page 111.)
KN1500
(Rear panel)

EXP PEDAL
The optional SZ-E2 Expression Pedal (sold separately) can be connected to this terminal to control the volume.
FOOT SW
An optional SZ-P1 Foot Switch (sold separately) can be connected to each terminal to control various functions. (Refer to page 58.)
LINE OUT (output level 1.5 Vrms, 600 Ω)
By connecting an external high-power amplifier, the sound can be reproduced at a high volume. To output monaural sound, connect the external equipment to the R/R+L terminal. (Do not connect the L terminal.)
PHONES
Headphones can be connected to this terminal. When headphones are connected to this terminal, the speaker system is automatically switched off.
MIDI
These terminals are for connection to another MIDI instrument. (Refer to page 111.)
Symptoms which appear to be signs of trouble
The following changes in performance may occur in the Technics Keyboard but do not indicate trouble.
| Phenomenon | Remedy | |
| Sounds and effects | The buttons, keys, etc. malfunction. | Turn off the PLAY (KN720/KN920)/POWER (KN1500) button once, then turn it on again. If this procedure is not successful, turn off this button once. Then, while pressing the three buttons to the right of the display (TRANSPOSE ∧ and ∨, and EXIT) at the same time, turn the PLAY/POWER button on again. (Note that, in this case, all programmable settings, functions and memories return to their factory-preset status.) |
| No sound is produced when the keys are pressed. | The MAIN VOLUME is at the minimum setting. Adjust the volume with the MAIN VOLUME control.The volumes for the selected parts are set to the minimum levels. Use the balance buttons to set the volumes of the relevant parts to appropriate levels. (Refer to page 30.)The part is muted. (Refer to page 30.)The local control for a part performed on the keyboard is set to OFF. Set the local control to ON. (Refer to page 115.) | |
| Only percussive instrument sounds are produced when the keyboard is played. | A sound in the KEYBOARD PERC sound group is selected. | |
| The volume is very low when the keyboard is played. | The volume setting in the SEQUENCER contents is very low. Follow the INITIAL procedure to reset the settings. (Refer to page 122.) | |
| Some sounds cannot be selected. | When the GENERAL MIDI status is set to on, The sounds which can be selected and operation which can be executed are limited. Turn the GENERAL MIDI status off to return the instrument to its normal operation. (Refer to page 120.) | |
| KN720/KN920: When using batteries, the volume level becomes low or the sound is distorted. | The batteries are low. Replace all the batteries with new ones as soon as possible. | |
| KN920/KN1500: The sound you hear is different from the sound you selected. | This sometimes occurs when you play back SEQUENCER or COMPOSER data which was created on a different model, or when MIDI data is received from a connected instrument. Select the desired sounds again. | |
| Rhythm | The rhythm does not start. | The DRUMS volume is set to the minimum level. Use the balance buttons to set the DRUMS volume to an appropriate level.KN920/KN1500: A rhythm in memory with no stored pattern was selected. Select a different rhythm.A SEQUENCER PLAY button is on. When you are not playing back the SEQUENCER performance, turn off the SEQUENCER PLAY button.CLOCK is set to MIDI. Set CLOCK to INTERNAL. (Refer to page 119.)The rhythm does not work when the GENERAL MIDI mode is set to ON. Turn the GENERAL MIDI status off to return the instrument to its normal operation. (Refer to page 120.) |
| AUTO PLAY CHORD | No sound is produced for the automatic accom- paniment. | ·KN920/KN1500: A rhythm in COMPOSER memory with no stored pattern was selected. Select a different rhythm. |
| No sound is produced for the automatic accom- paniment, or only the sounds of some parts are produced. | ·An ACCOMP part does not sound if its corresponding volume is set to the minimum level. Use the respective balance buttons to set the ACCOMP 1, 2 and 3 volumes to appropriate levels. | |
| SEQUENCER | Storage is not possible. | ·The remaining memory capacity of the SEQUENCER is 0. Follow the SONG CLEAR or TRACK CLEAR procedure to erase the memory. (Refer to pages 73 and 74.) |
| Multi-track storage is not possible. | ·The playback track has been selected, but the START/STOP button has not been pressed. On the recording display, the track marked with a horizontal bar in the REC row is the track which is ready for recording; a track marked with a horizontal bar in the PLAY row is a track which is ready for playback. To record one track while listening to another (playback) track, press the START/STOP button to begin playback. | |
| The playback measure indication is different from when the performance was recorded. | ·The number of measures corresponds to the time signature of the rhythm selected at the start of recording. To change the rhythm in the middle of the song, record the rhythm change in the RHYTHM part. (Refer to page 71.) | |
| COMPOSER(KN920/KN1500) | Storage is not possible. | ·The remaining memory capacity of the COMPOSER is 0. |
| Setting the time signature and number of measures is not possible. | ·The time signature and number of measures cannot be changed for a pattern which is currently recorded in the COMPOSER. If you wish to change the time signature and/or measure data, first follow the procedure to clear the memory. (Refer to page 81.) | |
| The playback timing of the rhythm pattern is different from the timing with which it was recorded. | ·The QUANTIZE function was on when the pattern was recorded and the timing was automatically corrected. Set the quantize level to a smaller note unit or to OFF when recording. (Refer to page 83.) | |
| Disk Drive(KN920/KN1500) | The Disk Drive produces a noise during recording or playback. | ·This occurs when the Disk Drive is reading a disk. It does not indicate a problem. |
| When the procedure to load from a disk is per- formed, the contents of the keyboard memory are erased. | ·When performing the load operation from a disk, the keyboard memory changes to that of the data loaded from the disk. If you wish to preserve a song which is stored in the keyboard memory, save it on a disk before performing the load procedure. (Refer to page 97.) | |
| Other | Noise from a radio or TV can be heard. | ·This sometimes occurs when electrical equipment such as a radio or TV is used near the instrument. Try moving such electrical equipment further away from the instrument.·The sound may be coming from a nearby broadcast station or amateur radio station. If the sound is bothersome, consult your dealer or service center. |
| The cabinet becomes warm during use. | ·This instrument has a built-in power source that heats the cabinet to some degree. This is not an indication of trouble. | |
Error messages
| Display | Contents | |
| 00 | WRONG DISK! | The data on the disk that you are using is for a different product. (KN920/KN1500) |
| 01 | LOAD ERROR TRY AGAIN! | An error has occurred while the disk was loading. Please try again. |
| 02 | NO DISK! | There is no disk in the Disk Drive. (KN920/KN1500) |
| 03 | FILE EMPTY! | The file that you tried to load is empty. (KN920/KN1500) |
| 04 | SAVE ERROR TRY AGAIN! | An error has occurred while the data was being saved. Please try again. |
| 05 | WRITE PROTECTED! | The disk that you are using is write protected. Please remove the write protection and try again. (KN920/KN1500) |
| 06 | FILE FULL! | The internal memory is full. Please clear unwanted files. (KN720) |
| DISK FULL! | The disk that you are using is full. Please use another disk. (KN920/KN1500) | |
| 07 | FORMAT ERROR TRY AGAIN! | An error has occurred while the disk was formatting. The disk that you are using may be faulty. Please try formatting another disk. (KN920/KN1500) |
| 08 | DATA IS COPY PROTECTED! | The data on this disk is copy protected. (KN920/KN1500) |
| 09 | ALREADY COPY PROTECTED! | The data on this disk is already copy protected. (KN920/KN1500) |
| 11 | SEQUENCER DATA ERROR! | There is an error in the SEQUENCER data. Playback is not possible. |
| 12 | MEMORY FULL! | The memory is full. No more data can be recorded. |
| 13 | CHANGE IMPOSSIBLE! | It is not possible to change the time signature of a COMPOSER pattern after it has been recorded. If you want to proceed, you must first clear the entire COMPOSER pattern. (KN920/KN1500) |
| 14 | TIME SIG MISMATCH! | The time signature of the pattern from which you are copying is different from the COMPOSER memory that you are using. Either: Change the time signature of the COMPOSER memory or: Copy from a pattern that has the same time signature. (KN920/KN1500) |
| 15 | TIME SIG ALREADY SET | The time signature has already been set. It cannot be changed. |
| 16 | TRACK EXISTS! | The specified track already exists. It is impossible to assign two tracks to that part. |
| 17 | FILE TOO LONG! | This song is too long to be saved as an SMF file. (KN920/KN1500) |
| 18 | SMF LOAD ERROR! | The SMF file that you tried to load exceeds the memory capacity of this instrument and cannot be loaded. The destination SEQUENCER memory has been cleared. (KN920/KN1500) |
| 19 | BULK DUMP SEND ERROR! | An error occurred during system exclusive transmission. The data was not transmitted successfully. Please try again. |
| 20 | BULK DUMP RECV ERROR! | An error occurred during system exclusive data reception. The data was not received successfully. Please try again. |
| 21 | BULK DUMP ID CODE ERR! | The Identification (ID) code of the system exclusive data received by this instrument is for a different product. |
| 22 | "ALL" OPTION ONLY AVAIL | To load data which was saved on an older model Technics instrument, set the load option to "ALL." (KN920/KN1500) |
| 23 | NO SEQUENCER DATA! | There is no data in the SEQUENCER. |
| 24 | SMF CONVERT ERROR! | An error occurred in the SMF conversion. (KN920/KN1500) |
| 25 | NOT STANDARD MIDI FILE! | This disk is not in the Standard MIDI File data format. (KN920/KN1500) |
| 26 | SMF CONVERT ERROR! | SMF conversion is possible only for files with a time base (PPQ resolution) of 24/48/96/192/288/384. (KN920/KN1500) |
| 27 | SMF FORMAT ERROR! | FORMAT 2, 3, 4 ... SMF data cannot be used. (KN920/KN1500) |
| 28 | RHYTHM & CHORD ONLY! | Step record can be activated only for tracks to which the RHYTHM or CHORD part has been assigned. |
| 29 | SELECT A PRESET PTN! | A COMPOSER rhythm cannot be selected for the SOUND ARRANGER. Please select a preset rhythm. (KN920/KN1500) |
| 30 | SELECT A USER BANK! | Please select Bank "13 User" to store in the MANUAL SEQUENCE PADS. |
| 31 | TRACK ASSIGN MISMATCH! | Special tracks such as CHORD/APC, RHYTHM and CONTROL exist in the song from which you are copying and are incompatible with the destination song because it is in the GM mode. |
| 32 | MEAS/T. SIG MISMATCH! | The COMPOSER pattern you have chosen has a different time signature or number of measures from the other patterns in this COMPOSER CHORD MAP. All of the COMPOSER patterns used in a COMPOSER CHORD MAP must have the same time signature and number of measures. (KN920/KN1500) |
| 33 | NOT ENOUGH AVAIL MEMORY | The song that you have tried to load exceeds the this instrument's available memory and cannot be loaded. The selected SEQUENCER song memory has been cleared. Please clear existing songs in the instrument's memory using SONG CLEAR to make more memory available, and try again. (KN920/KN1500) |
| 34 | THIS FILE IS SMF FORMAT1! | This is an SMF FORMAT 1 file. Direct Play and Sequencer Medley are not available for this file. (KN920/KN1500) |
| 35 | RHYTHM DATA ERROR! | There is an error in the rhythm data. Playback is not possible. |
| 36 | MSP DATA ERROR! | There is an error in the MANUAL SEQUENCE PADS data. Playback is not possible. |
| 37 | DRUM EDIT IMPOSSIBLE! | The DRUM sounds cannot be edited with the SOUND EDIT. (KN920/KN1500) |
| 38 | NO CHORD TRACK! | [Chord] was selected in the Step record mode of the SEQUENCER, but there is no track to which the [Chord] part has been assigned. |
| 39 | NO RHYTHM TRACK! | [Rhythm] was selected in the Step record mode of the SEQUENCER, but there is no track to which the [Rhythm] part has been assigned. |
| WARNING! LOW BATTERIES! | The remaining battery power is very low. Replace all the batteries with new ones immediately. (KN720/KN920) | |
Index
A
APC CONTROL, MIDI 116
AUTO PLAY CHORD 49
AUTO PLAY CHORD INPUT, MIDI 118
AUTO PLAY CHORD OUTPUT, MIDI 118
B
Backup memory 123
BALANCE 30
BANK 56
BASIC CHANNEL, MIDI 114
BEAT 47
BEND RANGE 84
BULK DUMP 121
C
CHORUS 38
CLOCK, MIDI 119
COMMON SETTING, MIDI 116
COMPOSER 77
COMPOSER CHORD MAP 85
COMPOSER COPY 79
CONDUCTOR 36
Connections 124
CONTRAST 34
CONTROLMESSAGE, MIDI 117
COUNT INTRO 48
D
DEMO 16
DIGITAL EFFECT 38
DIGITAL REVERB 40
DIRECT PLAY 95
Disk Drive 89
DISK LOAD 91
DISK SAVE 97
Display 30
DISPLAY HOLD 33
DRUMS OUTPUT, MIDI 118
DRUMS TYPE, MIDI 116
DSP EFFECT 39
E
EASY RECORD 62
EDIT, SEQUENCER 73
ENDING 49
ENVELOPE 110
Error messages 127
EXIT 33
EXP PEDAL 124
Expression Pedal 123
F
FILL IN 48
FINGERED 50
FLOPPY DISK FORMAT 96
FOOT SW 124
Foot Switch 123
FOOT SWITCH SETTING 58
G
GENERAL MIDI (GM) 120
GLIDE 58
H
Headphones 124
|
INITIAL 122
INPUT/OUTPUT SETTING, MIDI 118
INST ERASE....83
INTRO & ENDING 48
INTRO, MIDI 116
K
KEY SCALING 104
KEY SHIFT 102
KEYBOARD PERC 35
L
LEFT HOLD 105
LINE OUT 124
LOAD SINGLE COMPOSER PATTERN 93
LOAD SINGLE SOUND MEMORY 94
LOCAL CONTROL, MIDI 115
M
MAIN VOLUME 13,15
MANUAL SEQUENCE PADS 44
MASTER TUNING 103
MEASURE & TIME SIGNATURE....81
MEMORY, AUTO PLAY CHORD ....50
MEMORY & CONTROL 90
MENU 32
Metronome 64
MIDI....111
MIDI PRESETS....119
MIDI SETUP LOAD 116
MODULATION 41
Music stand 12, 14
MUSIC STYLE SELECT 54
MUSIC STYLE ARRANGER 55
MUTE 30
N
NOTE ONLY, MIDI 116
O
OCTAVE SHIFT, MIDI 115
ON BASS 50
ONE FINGER 50
ONE TOUCH PLAY 53
Options 123
OTHER PARTS/TRACKS 31
P
PAGE 31
PAN 102
PANEL MEMORY 56
PART SETTING 102
PIANIST 50
PITCH 109
PITCH BEND 40
PITCH BEND RANGE 102
PLAY 13
POWER 15
PROGRAM CHANGE MODE, MIDI 116
Q
QUANTIZE, COMPOSER 83
QUANTIZE, SEQUENCER 74
R
REALTIME COMMANDS, MIDI 119
REALTIME RECORD 64
REALTIME SYSEX, MIDI 116
RECORD/STOP 44
RHYTHM 46
RIGHT 1 INPUT, MIDI 118
S
SELECT 44
SET 56
SEQUENCER 59
SEQUENCER EDIT 73
SEQUENCER MEDLEY 76
SEQUENCER PLAY 66
SEQUENCER RESET 66
SMF LOAD 93
SMF SAVE 99
SONG CLEAR 73
SONG SELECT/NAME 61
SOUND/PART 35
SOUND ARRANGER 52
SOUND EDIT 106
SOUND MEMORY 107
SOUND SETTING 101
Specifications 131
SPLIT POINT 37
Standard MIDI File (SMF) 89
START/STOP 47,67
STEP RECORD: CHORD 68
STEP RECORD: RHYTHM 71
SUSTAIN 39
SYNCHRO & BREAK 47,51
T
TAP TEMPO 47
TECHNI-CHORD 42
TECHNI-CHORD OUTPUT, MIDI 118
TECHNI-CHORD TYPE 43
TEMPO 47
TEMPO/PROGRAM 47
TONE 106
TONE SELECT 108
TOUCH & TUNE 103
TRACK ASSIGN 72
TRACK CLEAR 74
TRANSPOSE 41
Troubleshooting 125
TUNING 103
V
VARIATION 46
VARIATION & MSA 46
VOLUME 102
Volume balance 30
W
WRITE 107
Specifications
| SX-KN720 | SX-KN920 | SX-KN1500 | |
| KEYBOARD | 61 KEYS (WITH INITIAL TOUCH) | ||
| SOUND GENERATOR | PCM | ||
| MAXIMUM NUMBER OF NOTES PRODUCED SIMULTANEOUSLY | 32 NOTES | ||
| SOUNDS | 150 SOUNDS | 200 SOUNDS | |
| DIGITAL REVERB | ○ | ||
| DIGITAL EFFECT | ○ | ||
| DSP EFFECT | - | ○ | |
| CHORUS | ○ | - | |
| SUSTAIN | ○ | ||
| SOUND EDIT | - | ○ (MEMORY: 40) | |
| TRANSPOSE | G-C-F | ||
| RHYTHM | 128 x 2 VARIATIONS | 128 x 4 VARIATIONS | |
| RHYTHM CONTROLS | START/STOP, INTRO & ENDING, FILL IN 1, 2, COUNT INTRO, SYNCHRO & BREAK, TEMPO | START/STOP, INTRO & ENDING 1, 2, FILL IN 1, 2, COUNT INTRO, SYNCHRO & BREAK, TEMPO | START/STOP, INTRO & ENDING 1, 2, FILL IN 1, 2, COUNT INTRO, SYNCHRO & BREAK, TEMPO, TEMPO/PROGRAM DIAL, TAP TEMPO |
| MANUAL SEQUENCE PADS | 12 BANKS x 4 PADS, 1 USER BANK: 1200 NOTES, RECORD/STOP | 12 BANKS x 6 PADS, 1 USER BANK: 1200 NOTES, RECORD/STOP | |
| AUTO PLAY CHORD | MODE: ONE FINGER, FINGERED, PIANIST MEMORY, ON BASS | ||
| MUSIC STYLE ARRANGER | - | ○ | |
| SOUND ARRANGER | ○ | ||
| ONE TOUCH PLAY | ○ | ||
| MUSIC STYLE SELECT | - | ○ | |
| TECHNI-CHORD | ○ | ||
| PANEL MEMORY | 10 | 2 BANKS x 5, SET | |
| SEQUENCER | 16 TRACKS, 10 SONGS RESOLUTION: 96 PULSES PER QUARTER-NOTE STORAGE CAPACITY: APPROX. 10000 NOTES (KN720)/ APPROX. 30000 NOTES (KN920/KN1500) RECORD MODES: EASY, REALTIME, STEP (CHORD, RHYTHM) FUNCTIONS: TRACK ASSIGN, EDIT, SONG SELECT/NAME, MEDLEY | ||
| COMPOSER | - | 5 PARTS: BASS, ACCOMP 1, 2, 3, DRUMS STORAGE CAPACITY: APPROX. 10000 NOTES FUNCTIONS: BEND RANGE, MODE SELECT, PATTERN COPY, SINGLE LOAD, CHORD MAP MEMORY: 3 BANKS x 10 (VARIATION 1-4, INTRO 1, 2, FILL IN 1, 2, ENDING 1, 2) | |
| MEMORY & CONTROL | INITIAL, FOOT SWITCH SET, LOAD, SAVE, CONTRAST | INITIAL, FOOT SWITCH SET, DIRECT PLAY, DISK LOAD, DISK SAVE, DISK FORMAT, CONTRAST | |
| SOUND SETTING | PART SETTING, KEY SCALING, TOUCH & TUNE, LEFT HOLD | ||
| MIDI | CHANNEL, PART SETTING, COMMON SET, CONTROL MESSAGE, IN/OUT SET, REALTIME MESSAGE, MIDI PRESETS, GM MODE, BULK DUMP | ||
| DISK DRIVE | - | BUILT-IN 3.5 INCH FLOPPY DISK DRIVE FOR 2HD (1.44 MB), 2DD (720 KB) | |
| PITCH BEND WHEEL | ○ | ||
| MODULATION WHEEL | - | ○ | |
| OTHER CONTROLS | MAIN VOLUME, BALANCE, MUTE, SPLIT POINT, CONDUCTOR | ||
| DISPLAY | LCD (PAGE, EXIT, DISPLAY HOLD) | ||
| DEMO | ○ | ||
| TERMINALS | DC IN 12V, PHONES/LINE OUT, FOOT SW,MIDI (IN, OUT) | PHONES,LINE OUT (R/R+L, L),FOOT SW, EXP PEDAL,MIDI (IN, OUT, THRU) | |
| OUTPUT | 1.5 W × 2 (WITH BATTERIES),8 W × 2 (WITH SY-AD6/AD6B AC ADAPTOR) | 15 W × 2 | |
| SPEAKERS | 12 cm × 2 | 12 cm × 2, 6.5 cm × 2 | |
| POWER REQUIREMENT | BATTERIES: DC 9V(USING R20/LR20 [“D” SIZE, UM-1] BATTERIES × 6) | 90 W,60 W (NORTH AMERICAAND MEXICO) | |
| AC: WITH SY-AD6 AC ADAPTORAC 120/220/230/240V 50/60HzAC 120V 60Hz (NORTH AMERICA AND MEXICO) | AC 120/220/240V 50/60HzAC 120V 60Hz(NORTH AMERICA ANDMEXICO)AC 230-240V 50/60Hz(EUROPE, AUSTRALIA,NEW ZEALAND,SINGAPORE ANDPHILIPPINES) | ||
| AC: WITH SY-AD6B AC ADAPTORAC 230V 50/60Hz (EUROPE EXCEPT FORUNITED KINGDOM) | |||
| DIMENSIONS (W×H×D)* | 105.7 cm × 14.9 cm × 40.4 cm(41-5/8" × 5-7/8" × 15-29/32") | ||
| NET WEIGHT* | 8.3 kg (18.3 lbs.) | 8.8 kg (19.4 lbs.) | 10.8 kg (23.8 lbs.) |
| ACCESSORIES | MUSIC STAND | MUSIC STAND,AC CORD | |
* Without MUSIC STAND, BATTERIES
- Design and specifications are subject to change without notice.
MATSUSHITA CONSUMER ELECTRONICS COMPANY
DIVISION OF MATSUSHITA ELECTRIC CORPORATION OF AMERICA
One Panasonic Way, Secaucus, New Jersey 07094
Printed in Japan
- Technics
- CAUTION
- WARNING: TO REDUCE THE RISK OF FIRE OR ELECTRICAL SHOCK, DO NOT EXPOSE THIS PRODUCT TO RAIN OR MOISTURE.
- OWNER'S MANUAL
- Before you play
- Important Safety Instructions (KN720/KN920)
- WARNING!
- Installation location
- Metal items inside the unit may result in electric shock or damage.
- If water gets into the unit...
- Protect your hearing
- When to request service
- Service and repair
- Maintenance
- When using the AC adaptor
- Power source
- Handling the power cord
- SAVE THESE INSTRUCTIONS
- Important Safety Instructions (KN1500)
- BASIC FUNCTIONS
- PRACTICAL APPLICATIONS
- Part I Sounds and effects ....35
- Part II Manual Sequence Pads 44
- Part III Playing the rhythm 46
- Part IV Sequencer ....59
- Part V Composer (KN920/KN1500) 77
- Part VI Song memory (KN720) 87
- Part VII Disk Drive (KN920/KN1500) .....89
- Part VIII Adjusting the sounds 101
- Part IX Creating sounds (KN920/KN1500) 106
- Part X MIDI 111
- Backup memory
- Getting started (KN720/KN920)
- When using batteries
- Music stand
- Playing
- 1
- 2
- 3
- 4
- 5
- Getting started (KN1500)
- About the backup memory
- Listen to the demonstration
- Add a feeling of spaciousness to the sound.
- Add breadth to the sound. (KN720)
- Add a unique quality to the sound. (KN920/KN1500)
- Add sustain.
- Add reverberation.
- D
- Change the pitch.
- E
- Playing automatic rhythms (KN720)
- Select a variation.
- A
- Adjust the tempo.
- Insert an intro pattern.
- Insert a fill-in pattern.
- Insert an ending pattern.
- Playing automatic rhythms (KN920/KN1500)
- Automatic accompaniment
- 6
- Record your performance
- Playing back your recorded performance
- B
- Playing commercial disks (KN920/KN1500)
- About the display
- Normal display
- Volume balance
- MUTE
- ■ OTHER PARTS
- PAGE buttons
- MENU displays
- ■ Example of MENU display: MEMORY & CONTROL
- Setting display
- ■ Example of setting display: Foot Switch
- EXIT button
- DISPLAY HOLD button
- CONTRAST
- TEMPO/PROGRAM dial (KN1500)
- Selecting sounds
- Assigning parts to the keyboard
- SPLIT POINT
- ■ Customized split point
- Effects
- DIGITAL EFFECT
- CHORUS (KN720)
- ■ Effect setting
- DSP EFFECT (KN920/KN1500)
- SUSTAIN
- DIGITAL REVERB
- PITCH BEND
- MODULATION (KN1500)
- Transpose
- Techni-chord
- ■ Harmony type
- Part II Manual Sequence Pads
- Playing phrases
- Record a phrase
- Part III Playing the rhythm
- Selecting rhythms
- Select a rhythm
- VARIATION
- Start the rhythm
- ■ Immediate rhythm start
- ■ Synchronized start
- ■ Adjust the tempo
- ■ TAP TEMPO (KN1500)
- Playing the rhythm
- INTRO
- COUNT INTRO
- FILL IN
- ENDING
- Auto Play Chord
- How the AUTO PLAY CHORD works
- Playing chords
- ■ ONE FINGER mode
- ■ FINGERED mode
- ■ PIANIST mode
- How to use the AUTO PLAY CHORD
- BREAK function
- Sound Arranger
- Setting the sounds
- Playing back the sounds
- One Touch Play
- Suggestions for using ONE TOUCH PLAY
- Music Style Select
- (KN1500)
- Suggestions for using MUSIC STYLE SELECT
- Music Style Arranger (KN920/KN1500)
- How to use the MUSIC STYLE ARRANGER
- How to change the music style during your performance
- ■ MUSIC STYLE ARRANGER mode
- Panel Memory
- How to store the panel settings
- ■ PANEL MEMORY mode
- ■ EXPAND MODE FILTER
- Suggestions for using PANEL MEMORY
- Foot Switch setting
- Assigning functions
- Outline of the Sequencer
- SEQUENCER features
- Popular features
- Memory capacity
- About the measure count
- SEQUENCER MENU
- Summary of the SEQUENCER menu items
- [P1 SEQ RECORD]
- [P2 SEQUENCER]
- [P3 SEQ PLAY]
- Song
- Easy Record
- Recording procedure
- Playback
- Sequencer parts
- Realtime Record
- ■ Multi-track recording
- CYCLE RECORD
- Sequencer Play
- CYCLE PLAY
- Step Record
- Store a chord progression
- Note value keys
- Reset key
- Correction keys
- Repeat key
- End key
- DELETE key
- ■ Correct the recorded chord progression
- Correct the chord data.
- Chord data
- Control data
- ■ TRACK CLEAR
- Store a rhythm progression
- START/STOP
- COUNT INTRO, INTRO, FILL IN, ENDING
- ■ Correct the recorded rhythm progression
- Track Assign
- ■ TRACK ASSIGN PRESETS
- Editing the recorded performance
- Select the edit function
- SONG CLEAR
- TRACK CLEAR
- QUANTIZE
- SONG COPY
- PANEL WRITE
- Sequencer Medley
- Outline of the Composer
- Rhythm components which can be stored
- COMPOSER RECORD menu
- Summary of the COMPOSER menu items
- [P1 COMPOSER REC]
- [P2 COMPOSER REC]
- [P3 COMPOSER REC]
- Two ways to record in the COMPOSER
- Edit a preset rhythm pattern: preparation
- Create a completely new rhythm: preparation
- Record your rhythm pattern
- ■ Functions during recording
- Clr
- INST ERASE
- Qtz (QUANTIZE)
- Composer mode
- Normal
- ■ Expand
- Bend Range
- Composer Chord Map
- Recall chord map
- Store your performance
- SAVE
- FILE delete
- Recall the stored performance
- LOAD
- Outline of the Disk Drive function
- Internal memory and Floppy Disk Drive
- Load commercial software
- DIRECT PLAY
- About Standard MIDI Files
- Warning
- Main parts of the Floppy Disk Drive
- Eject button
- Access indicator
- Outline of procedure
- Loading data
- DISK LOAD
- ■ TECHNICS LOAD
- ■ SMF LOAD
- ■ LOAD SINGLE COMPOSER
- ■ LOAD SINGLE SOUND MEMORY
- -> # 202
- Playing commercial disks
- Formatting a disk
- FLOPPY DISK FORMAT
- Saving data
- DISK SAVE
- ■ TECHNICS SAVE
- SMF SAVE
- Press the PAGE ∧ button.
- Outline of the Sound Setting mode
- SOUND menu
- ■ A word about parts
- Summary of the SOUND menu items
- Part Setting
- Touch & Tune
- Key Scaling
- Left Hold
- Part IX Creating sounds (KN920/KN1500)
- Outline of the Sound Edit
- ■ About TONEs
- Setting the function
- SOUND NAMING
- WRITE
- OCTAVE SHIFT
- VIBRATO
- TONE SELECT
- PITCH
- MIXER
- ENVELOPE
- PITCH ENVELOPE
- What is MIDI?
- MIDI terminals
- IN:
- OUT:
- THRU (KN1500):
- Connection examples
- MIDI channels
- The following kinds of data can be transmitted/received.
- NOTE data
- ■ PROGRAM CHANGE
- ■ CONTROL CHANGE
- ■ EXCLUSIVE data
- GENERAL MIDI
- Outline of MIDI functions
- Summary of the MIDI menu items
- Setting the functions
- MIDI CHANNEL
- COMMON SETTING
- CONTROL MESSAGE
- INPUT/OUTPUT SETTING
- REALTIME MESSAGE
- MIDI PRESETS
- BULK DUMP
- ■ Transmitting
- ■ Receiving
- Initialize
- INITIAL
- ■ KN720/KN920: Backup memory
- ■ KN1500: Backup memory
- Options
- Connections
- KN720/KN920
- FOOT SW
- PHONES/LINE OUT
- MIDI
- KN1500
- EXP PEDAL
- LINE OUT (output level 1.5 Vrms, 600 Ω)
- PHONES
- Symptoms which appear to be signs of trouble
- Index
- C
- F
- G
- H
- |
- K
- L
- M
- N
- O
- P
- Q
- R
- S
- T
- V
- W
Marque : TECHNICS
Modèle : SX-KN720
Catégorie : Clavier