
VHR-278E - Magnétoscope SANYO - Notice d'utilisation et mode d'emploi gratuit
Retrouvez gratuitement la notice de l'appareil VHR-278E SANYO au format PDF.


| Type de produit | Magnétoscope VHS |
| Marque | Sanyo |
| Modèle | VHR-278E |
| Dimensions (L x H x P) | 430 x 100 x 350 mm |
| Poids | 4 kg |
| Alimentation | 220-240 V~, 50 Hz |
| Consommation électrique | 20 W |
| Système vidéo | PAL/SECAM |
| Têtes vidéo | 4 têtes |
| Modes d'enregistrement | SP, LP, EP |
| Fonctions principales | Enregistrement, lecture, avance/retour rapide, pause, arrêt sur image, programmation hebdomadaire |
| Connectiques | Péritel, antenne HF, sortie audio/vidéo |
| Télécommande | Incluse avec piles |
| Entretien et nettoyage | Utiliser une cassette nettoyante pour têtes vidéo ; nettoyer le boîtier avec un chiffon sec |
| Sécurité | Débrancher avant toute opération de nettoyage ; ne pas exposer à l'humidité |
| Pièces détachées | Télécommande (RC-V278), câble péritel, adaptateur secteur |
| Réparabilité | Indice de réparabilité : 7,5/10 (estimation) |
| Normes | CE, RoHS |
FOIRE AUX QUESTIONS - VHR-278E SANYO
Questions des utilisateurs sur VHR-278E SANYO
0 question sur cet appareil. Repondez a celles que vous connaissez ou posez la votre.
Poser une nouvelle question sur cet appareil
Téléchargez la notice de votre Magnétoscope au format PDF gratuitement ! Retrouvez votre notice VHR-278E - SANYO et reprennez votre appareil électronique en main. Sur cette page sont publiés tous les documents nécessaires à l'utilisation de votre appareil VHR-278E de la marque SANYO.
MODE D'EMPLOI VHR-278E SANYO
Quick Setup Guide
Video Cassette Recorder VHR-278E
• CONNECTIONS
- AUTO SETUP
- SORTING THE TV STATIONS
• CLOCK SETTING
Dear Customer,
Thank you for buying Sanyo. Please follow this Quick Setup Guide for an easy setup of your VCR.
For more details, please refer to the supplied instruction manual.
Accessories
Is everything in the box?


Caution concerning condensation
Be careful of condensation!
Condensation can form inside a VCR when it is suddenly moved from a cold place to a warm, humid one, or when a heater has been turned on to quickly heat the room.
Do not insert a video cassette if you use this VCR in areas subject to condensation.
Wait for 1 to 2 hours to completely eliminate condensation before using the VCR.
SETUP 1 CONNECTIONS
Aerial/RF connection
1 Disconnect the aerial cable from your TV, then connect it to the VCR.
2 Connect the supplied aerial output cable between the VCR and the TV.

3 Connect the mains lead straight and firmly.
To a wall socket

Note:
AUTO SETUP will start if the VCR is switched to the power on mode by pressing the Ⓑ/1 button.
Go to "SETUP2 AUTO SETUP".
SETUP 2 AUTO SETUP (Tuning & Video channel setting)
The AUTO SETUP function will do the following.
- Auto tuning
The VCR will automatically search and preset all the available TV stations in the area of use to programme position numbers (1 to 44).
• Auto video channel (RF output channel) setting
The VCR will automatically search for an available channel (21 - 69) to set the video channel for the RF connection.
Note on AUTO SETUP
During AUTO SETUP operations, please do not press any of the buttons or controls on the VCR or remote control.
The first steps of the AUTO SETUP should be done with the TV turned off.
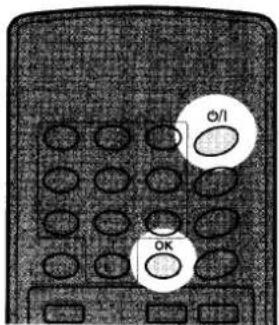
1 Press the ⏻/l button to turn the VCR on.
- The initial video channel number (UHF21) is displayed.

- The AUTO SETUP operations will take a few minutes to find the optimum appropriate video channel (between 21 and 69), please be patient.

- The selected optimum video channel number is displayed.
(e.g.)

2 Make a note of the displayed video channel number.
- The displayed video channel (e.g. 52) is not needed for the AV connection. Go to step 3.
3 Press the OK button.
4 TV setup with an RF connection.

- Turn on the TV.
- Set it to the designated video channel (on modern TVs it is normally 0, on older ones 8).
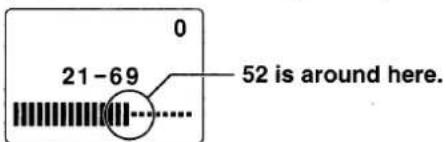
- Tune its UHF channel to your VCR video channel (e.g. 52) as noted at step 2.
(e.g. 52... in case of Sanyo's TV)
TV setup with an AV connection.

Turn on the TV and set it to AV mode.
SETUP 3 / SORTING THE TV STATIONS
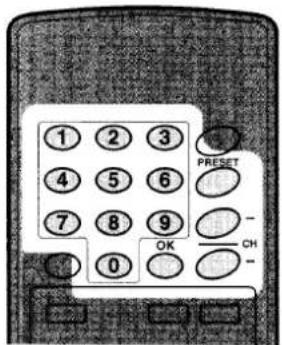
It is possible to sort the TV stations as desired.
Example: To change BBC2 from programme position "4" to programme position "2".
| Programme position | “1” | “2” | “3” | “4” | |
| TV station | (Before) | BBC1 | C4 | ITV | BBC2 |
| (After) | BBC1 | BBC2 | ITV | C4 | |
1 Press the PRESET button.
2 Using the CH (+ or -) button select the TV station for sorting (e.g. BBC2, select programme position "04").
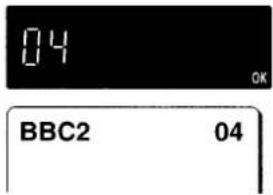
3 Using the numeric buttons (0 - 9), enter the target programme position number (e.g. "02"). Enter 02.
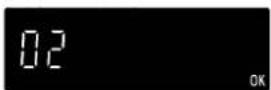
4 Press the OK button.
• The VCR will interchange the locations of BBC2 and C4.
• To sort another TV station, repeat steps 2 to 4.
5 When finished, press the PRESET button.
SETUP 4 CLOCK SETTING

Example: To set December 1st, 1998, 16:15
1 Press the CLOCK button.
2 Set the day, month and year using the numeric buttons (e.g. enter 01 12 98).

If you entered a wrong number, press the CLEAR button to delete it, then enter the correct number.
3 Set the time using the numeric buttons (e.g. enter 16 15).

4 Press the OK button.
Remote control batteries insertion
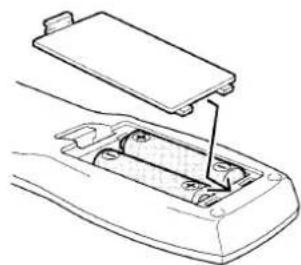
- Open the lid.
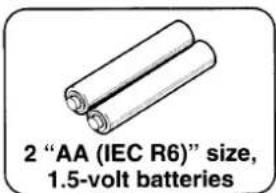
- Insert the 2 supplied batteries according to the ⊕ and ⊖ signs.
- Replace the lid.
AV connection
After step 2, connect an EURO-AV cable (sold separately) between the VCR and the TV. You can get a higher quality of picture and sound during playback.

INSTRUCTION MANUAL
VHR-278E
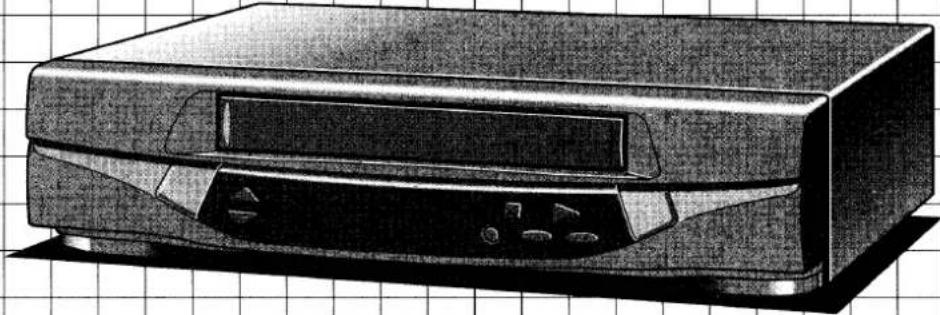
Video cassette recorder
CONTENTS
GB
Make sure these settings are done before operating the VCR.
CONTENTS 1
1 INTRODUCTION
PRECAUTIONS.... 2
CONTROLS.... 3
2 PREPARATION
SETUP1 CONNECTIONS 4
Accessories 4
Remote control batteries insertion.... 4
SETUP2 AUTO SETUP 5
SETUP3 SORTING THE TV STATIONS.... 6
SETUP4 CLOCK SETTING 6
VCR PRESETTING.... 7
Additional tuning controls 7
Changing the clock.... 7
3 BASIC OPERATION
PLAYBACK 8
Variable playback modes.... 8
Playback of a NTSC tape 8
Counter memory 8
Index search.... 9
Endless play 9
Picture adjustments 9
RECORDING TV PROGRAMMES 10
Quick Start Recording timer.... 10
4 ADVANCED OPERATION
VIDEO PLUS+ TIMER RECORDING PROGRAMMING 11
MANUAL TIMER RECORDING PROGRAMMING 12
Confirmation 12
Cancelling.... 12
Notes on timer recording 12
PDC function (for option) 13
TAPE COPY 13
5 TROUBLESHOOTING.... 14
SPECIFICATIONS.... 14
GUARANTEE TO CUSTOMER ....Back cover
Safety precautions
DANGER:
This VCR contains live parts. Do not remove the cabinet.

WARNING:
To prevent fire or shock hazard, do not expose this product to rain or moisture.
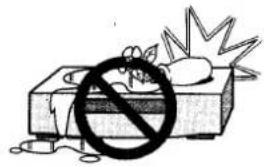
CAUTION:
Do not put your hand or other objects in the cassette loading slot because of the risk of injury or an accident. Be sure to keep small children away from the VCR.

Caution concerning condensation
Be careful of condensation
Condensation can form inside a VCR when it is suddenly moved from a cold place to a warm, humid one, or when a heater has been turned on to quickly heat the room.
Do not insert a video cassette if you use this VCR in areas subject to condensation.
Wait for 11/2 to 2 hours to completely eliminate condensation before using the VCR.
Operating precautions
- Place the VCR on a flat, stable, level surface. Never subject it to violent shaking or any other shock or impact.
- Do not expose the unit to high temperatures. Excessive heat (heat sources such as heaters, ovens, closed car on hot days, etc.) may damage the unit.
- Be sure to use this VCR only in a temperature range of 5°C to 40°C (41°F to 105°F) and at less than 80% humidity.
- Do not use the unit under the following conditions:
– in locations with high humidity
– in presence of excessive dirt or dust
– in areas subject to strong vibrations
- near strong magnetic fields (e.g. transmitting antennas, motors, fluorescent lights, etc.)
- Do not stack anything on top of your VCR, or block the air vents, to prevent damaging or overheating.
- Do not place anything, except VHS video cassette tapes, in the unit.
- Do not allow rain, steam, dew, salt water, sand, oily smoke, metal objects, etc. to enter the unit.
- Clean with a dry and soft cloth, or soft cloth slightly moistened with a mild detergent solution.
- Do not use any type of solvent, such as alcohol or benzine.
Power on/standby mode
Power is switched on/off by pressing the ⏻/I button.
VCR display
Standby mode (⏻)
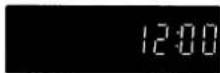
Power on mode (I)

"Standby mode" is the condition in which only the time is displayed.
- Do not forget that even in the power off state there is an electrical voltage inside the VCR as long as it is connected to a wall socket.
- Disconnect the mains lead from the wall socket if the VCR is not to be used for a long time.
Only cassettes marked VHS can be used with this VCR.
Note:
If the unit does not operate properly, switch it off, refer to "TROUBLESHOOTING" (see page
14) or contact your Sanyo authorized service agent.
VCR display
| Mode | Display |
| Cassette in | |
| Playback | |
| Forward search | |
| Fast-forward | |
| Rewind | |
| Reverse search | |
| Still picture | |
| Record | REC |
| Record pause | REC |
(※: Flashing)
PDC option
If it does gain wider use and you want to make use of it, this VCR can be adapted. Please consult your Sanyo authorized service agent.
(See page 13 for more information on PDC.)
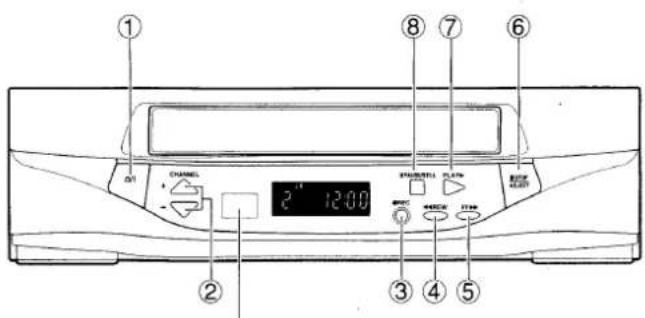
Remote control sensor
Operate the remote control unit within a range of approx. 30° and approx. 6m (20 ft.) from the front of the VCR.

| Indication | Function | Page | |
| 1 | ∅/I | Power on/standby mode | 2 |
| 2 | CHANNEL+, - | Programme selection, picture adjustment | 9, 10 |
| 3 | REC | Recording | 10 ,13 |
| 4 | REW | Rewind, reverse search during playback | 8 |
| 5 | FF | Fast-forward, forward search during playback | 8 |
| 6 | STOP/EJECT | Tape stop, cassette ejection (VCR only) | 8 |
| 7 | PLAY | Playback | 8 |
| 8 | PAUSE/STILL | Pause during recording, still picture during playback | 8, 10 |
(On the remote control only)
| 9 | 0 - 9 | Direct programme selection, for various input | 10 |
| 10 | CLEAR | Clears data | 12 |
| 11 | VIDEO Plus+ | VIDEO Plus+ timer programme set | 11 |
| 12 | CLOCK | Clock set | 6 |
| 13 | PDC | PDC function on/off (for option) | 13 |
| 14 | SP/LP | Recording tape speed selection | 10 |
| 15 | STOP | Tape stop | 8 |
| 16 | PRESET | Tuner preset | 6 |
| 17 | CH+, - | Programme selection, picture adjustment | 9, 10 |
| 18 | OK | Data/settings entry | 5 |
| 19 | PROG | Timer programme set | 12 |
| 20 | SYSTEM | NTSC playback system selection | 8 |
| 21 | RESET | Counter reset | 8 |
| 22 | MEMORY | Counter “0:00:00” position memory | 8 |
| 23 | INDEX | Index search | 9 |
| 24 | INPUT | External input mode selection | 10, 12, 13 |
Aerial/RF connection
1 Disconnect the aerial cable from your TV, then connect it to the VCR.
2 Connect the supplied aerial output cable between the VCR and the TV.

3 Connect the mains lead straight and firmly.

- AUTO SETUP will start if the VCR is switched to the power on mode by pressing the ⏻/I button. Go to "SETUP2 AUTO SETUP".
Additional connections
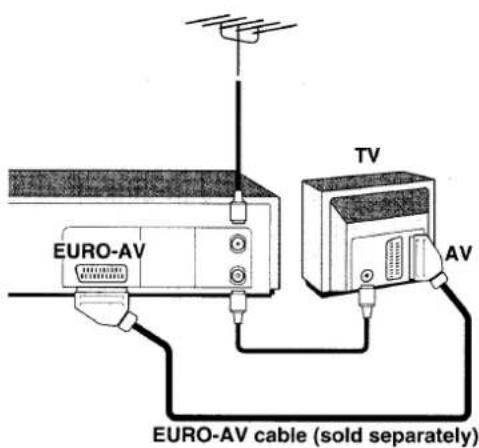
AV connection
Connect the supplied aerial output cable and an EURO-AV cable (sold separately) between the VCR and the TV.
- You can get a higher quality of picture and sound during playback.
- When the PLAY button is pressed, the TV is automatically switched to the AV mode.
Mains lead connections
- If the plug supplied with this appliance is not suitable for the wall socket in your home, it should be cut off and the correct type fitted.
The wires in the mains lead are coloured according to the following code:
Blue: Neutral Brown: Live
If the colours of the wires in the mains lead of this apparatus do not correspond with the colour markings identifying the terminals in your plug, proceed as follows:
- The wire which is coloured blue must be connected to the terminal which is marked with the letter N or coloured blue or black.
- The wire which is coloured brown must be connected to the terminal which is marked with the letter L or coloured brown or red.
- Do not connect either wire to the Earth terminal.
Disposal of plug
If the non rewireable plug is to be cut off, the removed plug should be disposed of carefully as there is a shock hazard should the plug be inserted into a live socket.
Replacing the fuse
The detachable fuse cover must be replaced after changing the fuse.
Only a 3A fuse should be used, it should comply with BS1362, and should carry the ASTA mark.
Accessories
Is everything in the box?


Remote control batteries insertion
1 Open the lid.
2 Insert 2 "AA (IEC R6)" 1.5 volt batteries (supplied) according to the ⊕ and ⊖ signs.
3 Replace the lid.


Notes on AUTO SETUP:
- During AUTO SETUP operations, please do not press any of the buttons or controls on the VCR or remote control.
- AUTO SETUP is not possible if the VCR is set to external input mode.
- The skip function will be automatically set for all position numbers where no TV station has been preset. Please refer to "Skip function".
If channel position 0 or 8 on your TV is preset to a TV station, select another channel position where no TV station is received. (For more details, please refer to your TV instruction manual.)
This VCR is equipped with an AUTO SETUP function. The necessary settings are entered automatically before the VCR is used for the first time. The AUTO SETUP function will do the following.
Auto tuning
The VCR will automatically search and preset all the available TV stations in the area of use to programme position numbers (1 to 44).
Auto video channel (RF output channel) setting
The VCR will automatically search for an available channel (21 - 69) to set the video channel for the RF connection.
The first steps of the AUTO SETUP should be done with the TV turned off, using the display on the VCR.
1 Press the ⏻/l button to turn the VCR on.
- The initial video channel number (UHF 21) is displayed.
If not, press both CHANNEL (− and +) button on the VCR for at least 3 seconds.

- The AUTO SETUP operations will take a few minutes to find the optimum appropriate video channel (between 21 and 69), please be patient.

- The selected optimum video channel number is displayed.
(e.g.)

2 Make a note of the displayed video channel number.
- The displayed video channel number (e.g. 52) is not needed for the AV connection. Go to step 3.
3 Press the OK button.
4 TV setup with an RF connection.

-
Turn on the TV.
-
Set it to the designated video channel (on modern TVs it is normally 0, on older ones 8).
-
Tune its UHF channel to your VCR video channel (e.g. 52) as noted at step 2.
(e.g. 52...in case of Sanyo's TV)

52 is around here.
TV setup with an AV connection.

Turn on the TV and set it to AV mode.
ALTERNATIVE METHODS
If it is difficult to tune on your TV, the UHF channel for the video channel, instead of step 4, follow one of the methods below.
Using the test pattern
1 Press the ⏻/I button to turn the VCR off.
2 Press and hold the PRESET button for at least 3 seconds.
- The video channel number (e.g. 52) is dispayed.
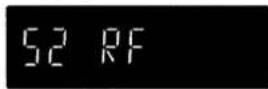
3 Turn on the TV and set it to the designated video channel 0 or 8.
4 Turn the TV's UHF channel to the selected video channel number (e.g. 52).
- The test pattern (below) appears when the video channel is tuned.

5 When finished, press the PRESET button.
• The VCR is turned off.
Using a playback picture
1 Playback a tape.
2 Turn on the TV and set it to the designated video channel 0 or 8.
3 Tune the TV's UHF channel to the selected video channel number (e.g. 52).
- The playback picture appears when the video channel is tuned.

4 When finished, stop the tape.
It is possible to sort the TV stations as desired.
Example: To change BBC2 from programme position "4" to programme position "2".
| Programme position | "1" | "2" | "3" | "4" | |
| TV station | (Before) | BBC1 | C4 | ITV | BBC2 |
| (After) | BBC1 | BBC2 | ITV | C4 | |
1 Press the PRESET button.
2 Using the CH (+ or -) button select the TV station for sorting (e.g. BBC2, selected programme position "04").
(TV screen)

(VCR display)

3 Using the numeric buttons (0 - 9), enter the target programme position number (e.g. "02", enter 02).
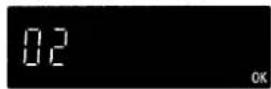
4 Press the OK button.
- The VCR will interchange the locations of BBC2 and C4.
To sort another TV station, repeat steps 2 to 4.
5 When finished, press the PRESET button.
SETUP4 CLOCK SETTING


PREPARATION
Example: To set December 1st, 1998, 16:15.
1 Press the CLOCK button.
2 Set the date using the numeric buttons (e.g. 01 12 98).

If you entered a wrong number, press the CLEAR button to delete it, then enter the correct number.
3 Set the time using the numeric buttons (e.g. 16 15).

4 Press the OK button.
- Seconds will start counting from "00" as the OK button is pressed.
Power interruption
If the power to the VCR has failed or has been disconnected for more than 1 hour, the date, time, function setup memory and any recording information regarding future recordings should be reset.
However, the tuner preset memory will not be erased.
So there is no need to retune the VCR stations.


VCR PRESETTING
Turn on the TV, then set it to the video channel or AV mode (if using AV connection).
Additional tuning controls
Fine tuning
If the tuning is not optimum, it can be improved by manual fine tuning.
1 Press the PRESET button.
2 Press the FF or REW button to obtain the best possible picture and sound.
3 Press the OK button.
4 When finished, press the PRESET button.
Skip function
If only programme position numbers 1 to 30 have been preset, you can set the skip function for programme position numbers 31 to 44, so that only the preset TV stations will appear when pressing the CH (+ or -) button.
1 Press the PRESET button.
2 Using the numeric buttons or the CH (+ or -) button, select the programme position number to skip.
3 Press the CLEAR button.
- The "S" indicator will light.
To cancel the skip function, press the CLEAR button again to erase the "S" indicator.
4 Press the OK button.
Repeat steps 2 to 4 for every programme position number to skip.
5 When finished, press the PRESET button.
Manual tuning
This tuning mode can be used to modify the settings entered by the Auto tuning function, or to manually preset the TV stations to particular programme position numbers.
1 Press the PRESET button.
2 Using the CH (+ or -) button, select the desired programme position number.
3 Press the PLAY button.
If the search stops on a broadcast other than the one desired, press the PLAY button again until the broadcast from the desired TV station appears on the TV screen.
4 Press the OK button when the desired TV station appears on the TV screen.
Repeat steps 2 to 4 to preset another TV station to another programme position number.
5 When finished, press the PRESET button.
Changing the clock
1 Press the CLOCK button.
2 Continue pressing the CLEAR button to clear the digits to correct, then enter the new settings for the date, then for the time, using the numeric buttons.
Each press of the CH (+ or -) button, will advance or retard the clock by 1 hour.
3 When finished, press the OK button.
Summer/Standard time setting
Turn on the TV, then set it to the preset video channel.
1 Insert a recorded video cassette.
Cassette loading
Gently push the centre of the cassette until it is loaded automatically.

*Erasure-prevention tab
2 Press the PLAY button.
Stop
Press the STOP button.
Eject the cassette
Press the EJECT button on the VCR.
Rewind
Press the REW button during stop or play for reverse search operation.
Fast-forward
Press the FF button during stop or play for forward search operation.
Variable playback modes
Forward search
Press the FF button during playback or fast-forward operation.
Reverse search
Press the REW button during playback or rewind operation.
Still picture
Press the PAUSE/ STILL button during normal playback.
Frame advance
Press the PAUSE/STILL button during still picture.
Playback of an NTSC tape
This VCR can playback an NTSC tape on a PAL (I) or NTSC 4.43 system TV.
![graph TD A["NTSC"] --> B["Device"] C["PAL"] --> B D["NTSC 4.43"] --> E["Computer"]](/content/2026/06/1301736/images/3c984815f3ad4fafc73c6ec87337efa038410e59ff961a662a586d972f743c9d.jpg)
Select the TV system on the VCR to match the system of the TV used, as indicated below.
1 Press the SYSTEM button.
2 Press the CH+ button.
| TV system | VCR display |
| PALI | PAL |
| NTSC4.43 | NT443 |
3 Press the SYSTEM button.
When you playback an NTSC tape on a PAL TV,
- If the image is unstable, rolling vertically, use the TV vertical hold button to stabilize the image.
- The image may shrink vertically and a black band may appear at the top and bottom of the screen.
Notes about NTSC tape
- An NTSC tape cannot be copied normally.
● Picture quality of NTSC tapes cannot be guaranteed with this VCR.
Counter memory
This convenient feature for finding the beginning of a specific recording etc., is made possible by the "Linear Time counter" that indicates the tape run time in hours, minutes and seconds.
1 Press the RESET then the MEMORY button before starting recording or playback.
- The zero point of the counter is now memorized and the memory indicator "M" will illuminate.
2 Press the REW button at the end of the recording or playback, the tape will be rewound and stop automatically at the memorized position.
Notes:
- Whenever you load a cassette tape, the counter is reset to "0:00:00".
- If you play back a blank tape or a blank portion of tape, the counter will not operate.

Auto power on
The power is automatically switched on as a cassette is inserted while the VCR is in the standby mode.
Auto play
The VCR will play back a tape automatically when a video cassette is inserted whose *erasure-prevention tab has been removed.
Auto eject
When a video cassette without an *erasure-prevention tab is played to the end of the tape, the tape will be automatically rewound and then the cassette will be ejected.
Power off eject
The video cassette will be ejected when the EJECT button is pressed, even when the VCR is in standby mode.

Index search
An index signal is automatically placed at the beginning of each recording made on this VCR. This index can be used to search for the next (or present) recording.
![graph LR A["Current position"] --> B["REW"] B --> C["FF"] C --> D["Present programme"] D --> E["Following programme"] E --> F["Index signal"] E --> G["Index signal"]](/content/2026/06/1301736/images/decce99128641b82927cc698ea1cea0fa97a7ec2f022fe375738545d01ae2b4f.jpg)
Notes:
- Make sure that indexes are at least five minutes apart from each other.
- Index signals are not recorded after a recording pause.
1 Press the INDEX button while in the stop or playback mode.
To cancel the index search mode, press the INDEX button again.
2 Press the FF or REW button.
To stop the search function, press the STOP button.
- Playback will start automatically when an index is found.
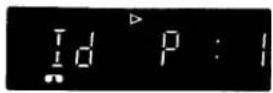
Endless play
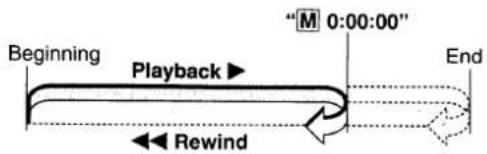
This function will play back a tape to the end, rewind it then replay it again, and again until you stop it.
1 In the stop or playback mode, first press the PLAY button then while holding it down press the REW button on the VCR.
2 To cancel the endless play, press the STOP button.
- If the counter memory function is used in combination with endless play, the VCR will play back the tape to the counter reading "M 0:00:00" then start again from the beginning.
Note:
During endless play, please do not press FF, REW or PAUSE/STILL button because the endless play will be cancelled.
Picture adjustments
Tracking adjustment
This VCR is equipped with an auto tracking function. During playback this function will adjust the tracking to the best possible image. If noise appears in the playback picture, press the CH (+ or -) button, to reduce the noise interference in the image.
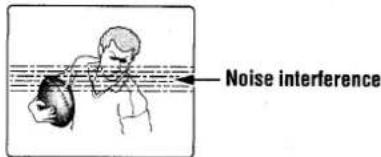
Note:
Depending on the quality of the cassette tape, you may find that some noise interference cannot be completely corrected using the tracking controls.
If the still picture moves up and down
Use the CH (+ or -) button, to correct.
Once the cassette tape is unloaded, the VCR is reset and the next time the VCR is used you may need to do the corrections again.
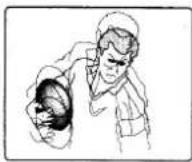
Notes:
- During variable playback modes the picture may contain some noise or vibration that cannot be corrected. This is not a malfunction.
- If still picture playback is continued for about five minutes, the VCR will automatically change to stop mode in order to prevent the tape from being damaged.
- This VCR will not guarantee the variable playback modes picture quality.
Turn on the TV, then set it to the preset video channel or AV mode (if connected by a EURO-AV cable).
Insert a video cassette with erasure-prevention tab.
1 Press the numeric buttons, or the CH (+ or -) button, to select the TV station to be recorded.
2 To select the tape speed, press the SP/LP button.
3 Press the REC button.
4 To stop the recording, press the STOP button.
To record from an external source
At step 1,
Press the INPUT button.
"L1" is displayed instead of the programme position number.
If you wish to avoid recording unwanted material
1 Press the PAUSE/ STILL button.
2 To continue recording, press the PAUSE/ STILL button or REC button.
Note:
If the record pause mode continues for about five minutes, the VCR will automatically go into the stop mode in order to prevent damage to the tape.
Recording one programme while watching another
1 Start recording the desired TV station programme selected on the VCR.
2 Select on the TV receiver the TV station you want to watch.
If using the "AV connection", set the TV to the TV mode.
Quick Start Recording timer
Timer recording is simple.
You can start a recording and then programme when the VCR will automatically stop recording and go into standby mode.
1 Press the REC button twice.
2 Set the recording end time by using REC and CH (+ or -) buttons.
REC: Units of 30 minutes
CH +, CH -: Units of 1 minute
- The timer indicator (☐) will light after the recording end time is set.
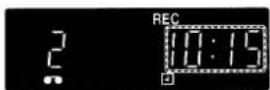
To stop the recording at any time, press the STOP button.
Checking/Changing
When the REC button is pressed during Quick Start Recording, the recording end time will blink.
The recording end time can be changed by pressing REC and CH (+ or -) buttons.

Tape speed
| SP | Best image and sound quality.No display. |
| LP | |
| EP | NTSC playback only |
Mis-erasure prevention eject
The cassette will automatically be ejected if recording is attempted on a video cassette without an erasure-prevention tab.
Auto rewind
The VCR automatically rewinds the tape when it reaches the end. This function does not operate with timer recording or Quick Start Recording timer.
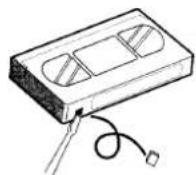
Erasure-prevention tab
To prevent accidental erasure, remove the tab after recording. To record again, cover the hole with vinyl tape.

This VCR has a built-in VIDEO Plus+ system. Programming timer recordings is now as simple as entering a PlusCode number (1 to 9 digits) listed next to each programme in your local TV guide or newspaper TV programme listing.

Easy process
![graph TD A["1 Press the VIDEO Plus+ button."] --> B["2 Enter the PlusCode number."] B --> C["3 Press the OK button."] C --> D["4 Press the OK button."] D --> E["5 Press the VIDEO Plus+ button."] C --> F["Additional settings"]](/content/2026/06/1301736/images/d32ba1e1986bc44a248c096ea33e0277d62648baf550533d8e733dee14359ef9.jpg)
VIDEO PLUS+ TIMER RECORDING PROGRAMMING
You can set up to 6 programmes to be recorded upon a period of up to 1 year. Make sure the date and time are correctly set (See page 6).
1 Press the VIDEO Plus+ button.

2 Using the numeric buttons, enter the Plus Code number for the programme you want to record. (e.g. 489135)

If you entered a wrong number, press the CLEAR button to delete it, then enter the correct number.
3 Press the OK button.
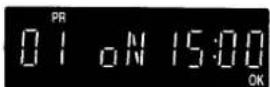
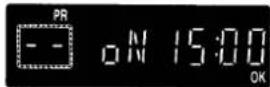
If the programme position number (PR) displays “--”
Enter the programme position number the TV station has been preset to.
- That setting will be memorized and set the next time the same TV station is selected.
4 When all the settings are as desired, press the OK button.
You can programme another recording by repeating steps 2 to 4.
Insert a video cassette with erasure-prevention tab. Make sure the tape is longer than the total recording time.
5 Press the VIDEO Plus+ button.
- The timer indicator (☐) will light on the VCR display and the VCR goes into timer recording standby mode.
Additional settings
After pressing the OK button in step 3.
Recording tape speed setting
Press the SP/LP button repeatedly to display the desired tape speed.
Daily/Weekly recording
Press the PROG button repeatedly to select:
M-F: for daily recording (Monday through Friday)
WK: for weekly recording (the same programme every week)
Changing the off time
Each press of the CH (+ or -) button will change the recording off time by units of 10 minutes.
PDC function (for option)
Press the PDC button repeatedly.
- When the "PDC" indicator appears, the PDC function is set. (See page 13 for more information on PDC.)
Example: Programme position: 02
Date: 25 December
On time (start): 21:30
Off time (end) 23:15
1 Press the PROG button.
2 Using the numeric buttons, set the programme position number (e.g. "02")

Recording tape speed setting
Press the SP/LP button repeatedly to display the desired tape speed.
3 Set the date (e.g. 25 12)
If you entered a wrong number, press the CLEAR button to delete it, then enter the correct number.

Everyday/Weekly recording
.Press the CH+ button repeatedly to select:
Ed: for everyday recording
WK: for weekly recording (the same programme every week)
PDC function (for option)
Press the PDC button repeatedly.
- When the "PDC" indicator appears, the PDC function is set. (See page 13 for more information on PDC.)
4 Set the recording on times (e.g. 21 30).

5 Set the recording off times (e.g. 23 15).

6 When all the settings are as desired, press the OK button.
You can programme another recording by repeating steps 2 to 6.
Insert a video cassette with erasure-prevention tab.
Make sure the tape is longer than the total recording time.
7 Press the ⏻/I button.
- The timer indicator (☐) will light on the VCR display and the VCR goes into timer recording standby mode.
Confirmation
1 Press the PROG button repeatedly. "PR --- ----" will be displayed first if less than 6 recordings have been programmed. The settings (programme position and date) for the programmed recordings are displayed in sequence.
2 When the settings you want to confirm are displayed, press the CH-button. The date will change to the on time then to the off time.
Cancelling
1 When the settings you want to cancel are displayed, press the PROG button.
2 Press the CLEAR button. The VCR will automatically return to the clock (counter) display.
To correct a programmed timer recording, first cancel it, then reprogramme it as desired.
Notes on timer recording
- The (☐) indicator will flash if no video cassette is loaded when going into timer standby mode.
- The (☐) indicator will flash and the video cassette is ejected if a video cassette with no erasure-prevention tab is loaded.
- Daily recording starting on a Saturday or Sunday is not possible.
● Daily or weekly recording using the PDC function (for option) is not possible. - Even if a timer recording has been preset, the VCR can be used as usual up to the programmed start time. When finished using the VCR, do not forget to return it to timer recording standby mode.
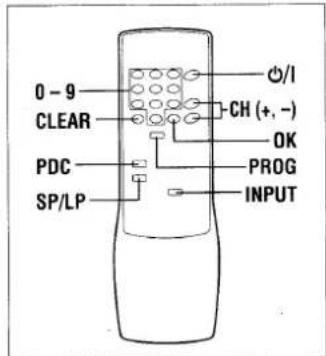
To record from an external source
At step 2,
Press the INPUT button.
- "L1" is displayed instead of the programme position number.
Programme priority
- If several timer recordings have overlapping recording time, the recording with the earliest start time will be recorded first, until the end.
- Recordings programmed with PDC (for option) always have priority.
- If two PDC (for option)-programmed recordings overlap, the recording that starts first will have priority.

These portions will not be recorded
MANUAL TIMER RECORDING PROGRAMMING
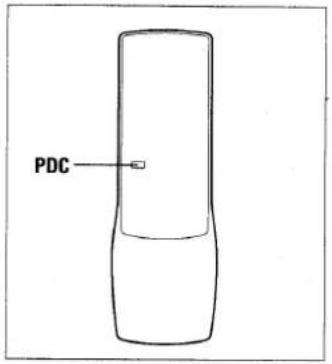
PDC function (for option)
The PDC function ensures that the recording is made according to the recording on and off time control signals broadcasted by the TV station. Therefore, if the recording start (on) and/or end (off) time are changed, the VCR is informed of the altered times and recording is changed, whether it is at an earlier or later time.
Also, if the programme being recorded is interrupted (for example by a news special, etc.) and the PDC function is on, recording will be automatically interrupted and will automatically resume when the programme starts again.
PDC standby period
When programming with the PDC function, the recording can be done anytime in the standby period if the start (on) time differs from the scheduled one.
The PDC standby period is from 20:00 (the previous day) to 4:00 (the following day).

The PDC standby period
Notes:
- Set the recording times and date exactly as advertised. If the start (on) time is different from advertised, the PDC function will not work.
- Not all TV stations transmit PDC signals. Check in your region to find out which stations transmit PDC signals.
- If the station does not transmit PDC signals or if the PDC function is not set, the recording will be done at the programmed times.

ADVANCED OPERATION
CAUTION:
The unauthorized recording of television programmes, video tapes, films and other such material may infringe upon copyright or the rights of third parties.
TAPE COPY
Copying (dubbing) a tape can be done using two video recorders, a playback VCR (e.g. a camcorder) and a recording VCR.
Recording VCR

Playback VCR (Camcorder)

Camcorder
VCR
RECORDING VCR
Insert a video cassette with erasure-prevention tab.
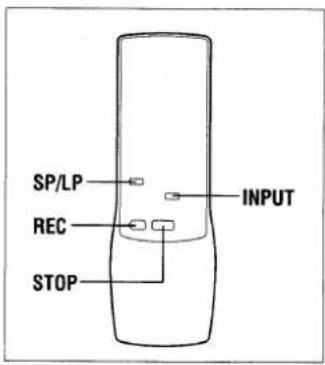
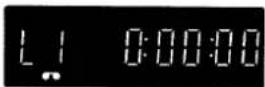
1 Press the INPUT button.
- "L1" is displayed instead of the programme position number.
2 To select the tape speed, press the SP/LP button.
PLAYBACK VCR (Camcorder)
Insert the recorded video cassette.
3 Start playback.
RECORDING VCR
4 When the desired starting position is reached, press the REC button.
5 When finished, press the STOP button on both VCRs.
| Symptom | Check points |
| POWER TROUBLE | |
| No power | The mains lead is disconnected. |
| The remote control unit doesn't operate | The batteries are low. |
| RECEIVER TROUBLE | |
| No TV programmes received | Are the connections between your VCR and TV correct?Was tuning correctly preset? |
| Reception is poor when TV is on video channel | The video channel setting of the TV does not correspond to the video channel presetting of the VCR. |
| PLAYBACK TROUBLE | |
| Playback picture does not appear | The video channel setting of the TV does not correspond to the video channel presetting of the VCR. |
| Interference in playback picture | Adjust the tracking control.Dust or dirt on video heads. Contact your Sanyo authorized service agent. |
| RECORDING TROUBLE | |
| No recording | The erasure-prevention tab on the cassette has been removed. |
| VIDEO Plus+ or timer recording is not possible | The starting day and time have not been set correctly.The clock day and time are not set correctly.There has been a power interruption of more than one hour. |
Repairs
This VCR is a precision instrument and, if treated with care, will provide years of satisfactory performance. However, in the event of difficulty, the owner is advised not to attempt to make repairs or open the cabinet. Servicing should always be referred to your Sanyo authorized service agent.
SPECIFICATIONS
General
| Video format: | VHS PAL/NTSC 4.43 | |
| Television system: | CCIR: 625 lines, PAL colour signals | |
| TV channel storage capacity: | 44 positions | |
| Video heads: | 2 heads | |
| Tape speed: | PALSP: 23.39 mm/secLP: 11.70 mm/sec | NTSC (Playback only)SP: 33.35 mm/secLP: 16.67 mm/sec |
| RF converter: | Built-in UHF converter |
| Converter output: | On channel 21 - 69 |
| Timer indication: | 24-hour indication |
| Power failure backup: | Approx. one hour |
| Timer recording: | 1 year 6 programmes with everyday or daily (Monday through Friday) and weekly recording function |
| Power requirement: | 220-240 V AC, 50Hz |
| Dimensions (W x H x D): | 360 x 97 x 301 mm |
| Weight: | Approx. 3.5 kg |
| Power consumption: | 18 W (in operation), less than 6 W (standby mode) |
Electrical characteristics
| Video input: | 0.5 - 2.0Vp-p, 75 ± 5 ohms |
| Video output: | 1.0 ± 0.2Vp-p, 75 ± 5 ohms |
| Audio input: | -3.8 dBs, more than 10 kohms |
| Audio output: | -3.8 dBs, less than 1 kohm |
| Video S/N: | More than 43 dB |
| Horizontal resolution: | More than 240 lines |
GUARANTEE TO CUSTOMER
Sanyo U.K. Sales Ltd. (the Company) guarantees to the initial retail purchaser that if this equipment is or becomes defective and that, in the opinion of the Company, the defect is due to faulty material or workmanship the Company will, for a period of 12 calendar months from the date of sale to the original purchaser repair or replace, at its sole option, free of charge, any such defective component part of the equipment, always provided that:-
- The equipment has at all times been used in accordance with the operating instructions issued by the Company, and has not been connected to an electrical mains supply for which it has not been adjusted.
- Accidental damage, or damage caused by negligence or misuse by the user, including leakage from exhausted batteries, is specifically excluded.
- Unauthorised repairs, or any modification to the equipment which has not been expressly approved by the Company, shall render this guarantee null and void.
- Failure due to fair wear and tear of any item, such as batteries, record playing styli, and tape recording, playback and erase heads and head cleaning is specifically excluded.
This guarantee is not transferable and is only applicable within the United Kingdom (and the Republic of Ireland). Nothing in this express guarantee affects the statutory rights available to the purchaser of this equipment.
DearCustomer
Thank you for buying Sanyo. This equipment should give you many years of pleasure and faithful service but in the event that a fault occurs, the following notes for your guidance may be helpful:-
- PLEASE RETAIN YOUR PURCHASE RECEIPT WHICH WILL BE REQUIRED FOR SERVICE DURING GUARANTEE.
- If your Sanyo equipment proves faulty during the period of guarantee, take it or send it back to the dealer who originally supplied it together with this guarantee and the proof of purchase. We have made arrangements with our approved dealers under which they will carry out in guarantee service repairs on our behalf. In this way, we hope to reduce to a minimum the amount of time you will be without your equipment.
- If for some reason it is impossible to return the equipment to the original supplier, please contact our Service Administration Department at the address below for further advice.
- Should the equipment require servicing after the expiry of the guarantee period, take or send it to the original supplier or any other Sanyo dealer. He will be pleased to give you a quotation for the repair. If you are in any doubt about what to do, write to us at the address below or telephone:
Sanyo U.K. Sales Ltd.
Sanyo House Otterspool Way, Watford, Hertfordshire WD2 8JX Tel: Watford 246363
- QUICK SETUP GUIDE
- DEAR CUSTOMER
- ACCESSORIES
- CAUTION CONCERNING CONDENSATION
- SETUP 1 CONNECTIONS
- AERIAL/RF CONNECTION
- NOTE
- SETUP 2 AUTO SETUP (TUNING & VIDEO CHANNEL SETTING)
- THE AUTO SETUP FUNCTION WILL DO THE FOLLOWING
- AUTO TUNING
- AUTO VIDEO CHANNEL (RF OUTPUT CHANNEL) SETTING
- NOTE ON AUTO SETUP
- 1 PRESS THE ⏻/L BUTTON TO TURN THE VCR ON
- 2 MAKE A NOTE OF THE DISPLAYED VIDEO CHANNEL NUMBER
- 3 PRESS THE OK BUTTON
- 4 TV SETUP WITH AN RF CONNECTION
- SETUP 3 / SORTING THE TV STATIONS
- SETUP 4 CLOCK SETTING
- REMOTE CONTROL BATTERIES INSERTION
- AV CONNECTION
- INSTRUCTION MANUAL
- VHR-278E
- CONTENTS
- SAFETY PRECAUTIONS
- DANGER
- WARNING
- CAUTION
- BE CAREFUL OF CONDENSATION
- OPERATING PRECAUTIONS
- POWER ON/STANDBY MODE
- VCR DISPLAY
- PDC OPTION
- ADDITIONAL CONNECTIONS
- MAINS LEAD CONNECTIONS
- BLUE: NEUTRAL BROWN: LIVE
- DISPOSAL OF PLUG
- REPLACING THE FUSE
- NOTES ON AUTO SETUP
- ALTERNATIVE METHODS
- USING THE TEST PATTERN
- USING A PLAYBACK PICTURE
- SETUP4 CLOCK SETTING
- POWER INTERRUPTION
- VCR PRESETTING
- ADDITIONAL TUNING CONTROLS
- FINE TUNING
- SKIP FUNCTION
- MANUAL TUNING
- CHANGING THE CLOCK
- SUMMER/STANDARD TIME SETTING
- VARIABLE PLAYBACK MODES
- PLAYBACK OF AN NTSC TAPE
- COUNTER MEMORY
- INDEX SEARCH
- NOTES
- 2 PRESS THE FF OR REW BUTTON
- ENDLESS PLAY
- 2 TO CANCEL THE ENDLESS PLAY, PRESS THE STOP BUTTON
- PICTURE ADJUSTMENTS
- TRACKING ADJUSTMENT
- IF THE STILL PICTURE MOVES UP AND DOWN
- TO RECORD FROM AN EXTERNAL SOURCE
- AT STEP 1
- IF YOU WISH TO AVOID RECORDING UNWANTED MATERIAL
- RECORDING ONE PROGRAMME WHILE WATCHING ANOTHER
- QUICK START RECORDING TIMER
- TIMER RECORDING IS SIMPLE
- CHECKING/CHANGING
- MIS-ERASURE PREVENTION EJECT
- AUTO REWIND
- ERASURE-PREVENTION TAB
- EASY PROCESS
- VIDEO PLUS+ TIMER RECORDING PROGRAMMING
- ADDITIONAL SETTINGS
- RECORDING TAPE SPEED SETTING
- DAILY/WEEKLY RECORDING
- CHANGING THE OFF TIME
- PDC FUNCTION (FOR OPTION)
- EVERYDAY/WEEKLY RECORDING
- CONFIRMATION
- CANCELLING
- NOTES ON TIMER RECORDING
- AT STEP 2
- PROGRAMME PRIORITY
- MANUAL TIMER RECORDING PROGRAMMING
- PDC STANDBY PERIOD
- TAPE COPY
- RECORDING VCR
- PLAYBACK VCR (CAMCORDER)
- REPAIRS
- SPECIFICATIONS
- GENERAL
- ELECTRICAL CHARACTERISTICS
- GUARANTEE TO CUSTOMER
- DEARCUSTOMER
Marque : SANYO
Modèle : VHR-278E
Catégorie : Magnétoscope