
PS99BSP - Lave-linge HITACHI - Notice d'utilisation et mode d'emploi gratuit
Retrouvez gratuitement la notice de l'appareil PS99BSP HITACHI au format PDF.


| Type de produit | Lave-linge |
| Marque | Hitachi |
| Modèle | PS99BSP |
| Capacité de lavage | 7 kg |
| Vitesse d'essorage maximale | 1200 tr/min |
| Classe énergétique | A+ |
| Nombre de programmes | 15 programmes |
| Dimensions (H x L x P) | 85 x 60 x 60 cm |
| Poids net | 65 kg |
| Alimentation électrique | 230 V, 50 Hz |
| Puissance absorbée | 2000 W |
| Consommation d'eau par cycle | 50 L |
| Niveau sonore (lavage/essorage) | 55 / 75 dB(A) |
| Système de lavage | Moteur inverter |
| Fonctions spéciales | Départ différé, Rinçage plus, Lavage rapide |
| Sécurité enfants | Oui |
| Type de pose | Libre |
| Entretien | Nettoyage du filtre et du bac à lessive régulier |
| Pièces détachées disponibles | Oui, via service après-vente |
| Réparabilité | Indice de réparabilité de 8.5/10 |
FOIRE AUX QUESTIONS - PS99BSP HITACHI
Questions des utilisateurs sur PS99BSP HITACHI
0 question sur cet appareil. Repondez a celles que vous connaissez ou posez la votre.
Poser une nouvelle question sur cet appareil
Téléchargez la notice de votre Lave-linge au format PDF gratuitement ! Retrouvez votre notice PS99BSP - HITACHI et reprennez votre appareil électronique en main. Sur cette page sont publiés tous les documents nécessaires à l'utilisation de votre appareil PS99BSP de la marque HITACHI.
MODE D'EMPLOI PS99BSP HITACHI
Model PS-99BSP
Thank you for purchasing the Hitachi Twin-Tub Washer Please carefully read this Instruction Manual to ensure correct use of the machine.
After reading through this manual, please keep it together with warranty in a safe place for future reference.

natural_image
Line drawing of a washing machine with wheels and top panel (no text or symbols)Contents
Features 2
Safety Precautions 3
Precautions for Proper Use 6
Component Names and Functions 7
Parts Description and Functions of the Operating Panel 8
Washing Procedures 8
Preparation 8
① Washing 10
② Preliminary Spinning 10
③ Rinsing 12
④ Spinning 12
When washing is completed 13
Various Washing Modes 14
When washing wool garments and other delicate laundry
When washing blanket
Hints for Effective Washing 15
Cleaning the Machine 16
Installation 17
Before Calling for Service 18
After-Sales Service and Warranty 19
Specifications 20
High Speed Spinning
Large-sized Spin Dryer Basket
You can load the basket with laundry and unload it from the basket with ease.

natural_image
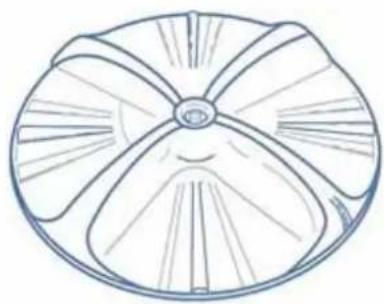
Line drawing of a cylindrical container with internal mesh structure and fluid flow indicators (no text or symbols)Large-sized Pulsator
This large pulsator enables laundry load of up to 8kg to be washed.
natural_image
Line drawing of a sunflower with five petals and central hub (no text or symbols)Safety Precautions
The safety precautions described herein are
classified into the following two categories, "Warning" and "Caution", in order to express a degree of seriousness and urgency of possible injury and damage which may result from misuse and improper use of the washer due to failure to observe the individual instructions:
 | WARNING | Warning(s) is used to indicate the "presence of a hazard which may cause severe personal injury or death if its instructions are not strictly observed." |
 | CAUTION | Caution(s) is used to indicate the "presence of a hazard which may cause personal injury or property damage if its instructions are not correctly followed." |
* After reading through the manual, be sure to keep it in a safe place where any users can always visibly recognize and refer to it with ease.
Examples of Warning Pictographs:


The “△” marks indicate "warnings and precautions to which all users must pay and direct their attention."
The "S" marks enclosed in a circle indicate "prohibited actions" that all users are not allowed to perform.
The “①” marks with exclamation mark in them indicate some “procedure that must be followed.”
a) The appliance is not intended for use by young children or infirm persons without supervision.
b) Young children should be supervised to ensure they do not play with the appliance.
c) If appliance is supplied from a cord extension socket or an electric portable outlet device, the cord extension set or electric portable outlet device must be positioned so that is not subject to splashing or ingress of moisture.
d) The appliance is to be connected to the mains using new hose-sets and old hose-sets should not be reused.
e) If the supply cord is damaged, it must be replaced by the manufacturer or the manufacturer's agent or similarly qualified person in order to avoid a hazard.
 WARNING WARNING | ||
 | Persons other than repair technician must not disassemble, repair or modify the unit.Doing so may result in fire or malfunctioning, which may cause injury. |  Use a single socket rated at 10A or more. Use a single socket rated at 10A or more. If you use the outlet into which other power plug is inserted, the outlet may cause fire resulting from abnormal heat. If you use the outlet into which other power plug is inserted, the outlet may cause fire resulting from abnormal heat. |
 | When the prong (s) of power plug or the base of the prong (s) is soiled with dirt or dust, wipe it off with a clean cloth. Otherwise, fire may result. Otherwise, fire may result. |  Be sure to apply the specified voltage to the unit.Failure to do so may cause an electric shock or fire. Be sure to apply the specified voltage to the unit.Failure to do so may cause an electric shock or fire. |

WARNING

If the spin dryer basket does not stop within 15 seconds after opening its lid during the spin cycle, immediately stop using the machine and contact an authorized service dealer to request repair.
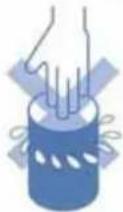
● Failure to do so may result in injury.

Be sure to pull out the power plug from the socket when maintaining the unit. Do not pull out the plug from the socket with wet hands.

natural_image
Illustration of a hand connecting electrical plug to a wall socket with a blue arrow indicating direction (no text or symbols)● Failure to do so may result in electric shock or injury.

When carrying out maintenance on the unit, avoid applying water directly onto any unit section.

natural_image
Illustration of a hand pouring liquid into a trash bin with a spray bottle (no text or symbols)● This may cause a short circuit or electric shock.

Do not install the washer in a bathroom or outdoors where it is exposed to wind and rain or high humidity.

natural_image
Illustration of a hand pouring liquid into a container with a blue arrow indicating flow direction (no text or symbols)● An electric shock, fire, malfunction and deformation may result.

Never put any of the following things into the washing tub or spin dryer basket: kerosene, gasoline, benzene, alcohol, thinners, or clothes wet with any of these substances.

natural_image
Illustration of a plastic bottle and a washing machine side by side (no text or symbols)● An explosion may occur or a fire can break out.

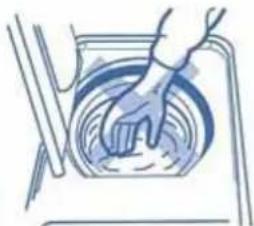
Never touch the laundry in the spin dryer basket until it comes to a full stop.
- Even slow spinning of the basket may cause the laundry to get caught in your hands or fingers, which may cause injury. Particular care is required in this regard when children are involved.
natural_image
Illustration of a hand washing a circular object with liquid, no text or symbols present
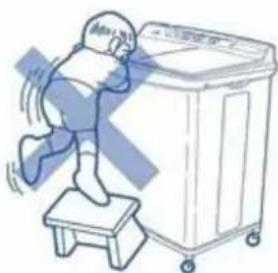
Do not allow infants to look into the washing tub and spin dryer basket, and do not place a stand in the proximity of the washing machine.
natural_image
Illustration of a person climbing stairs next to a trash bin (no text or symbols)● This may result in your child falling into the tub or basket, possibly resulting in injury.

WARNING

Do not damage, break, process, forcibly bend or pull, distort or bind the power cord. Do not place any heavy objects on it, or allow the power cord to get caught in any objects.
- This may damage the power cord, resulting in fire or electric shock.

Do not use the unit when the power cord or power plug is damaged, or the plug insertion in the socket is loose.

- If the power supply plug is damaged, it must only be replaced by a repair shop appointed by the manufacturer or its service agents in order to avoid a hazard.
- Doing so may result in electric shock, or fire.

CAUTION

Be sure to hold the insulated body of the power plug, not the cord, when pulling out the power plug.

● Failure to do so may cause an electric shock or short, resulting in fire.

Do not place your hand into the washing machine while it is in operation.
- Even slow spinning of the washing tub may cause the laundry to get caught in your hands or fingers, which may cause injury. (Be sure to "turn OFF the timer" first if you should put your hand into it.)

natural_image
Illustration of a hand holding a device with a blue X symbol overlay (no text or symbols present)
Use the hot water of 50^ C or below whenever using warm water for washing.
50°C or hotter
- Doing otherwise will cause deformation or damage to the plastic parts, which may result in electric shock or electricity leak.

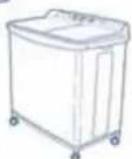

Do not step on the washing machine or place any heavy objects on it.

natural_image
Illustration of a white industrial machine with a blue windmill symbol above it (no text or labels)● This may cause the washing machine to be deformed or damaged, leading to injury.

Be sure to keep the power plug unplugged when not using the unit for an extended period.
- Failure to do so may deteriorate the unit's insulation performance, which may cause an electric shock or fire resulting from electricity leak.

Do not place your hand or foot underneath the washing machine while it is in use.

natural_image
Illustration of a person using a tool to lift a wall-mounted device (no text or symbols visible)
Place the inner cover (for spinning operation) in the spin dryer basket correctly when you spin-dry laundry

● Otherwise, the laundry may pop out of the basket, resulting in injury.

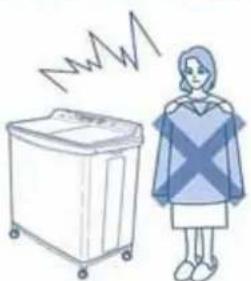
Do not wash, rinse or spin dry the water proof sheets and clothes (Sleeping bag, diaper cover, sauna suit, wet suit, rain coat and covers for bicycles motorcycles and cars)
natural_image
Illustration of a woman standing beside a washing machine with steam lines above (no text or symbols)Precautions for Proper Use
Keep the washer away from heat sources or flame, including a lighted candle, mosquito coil, cigarette, heater, kerosene stove, etc. ● Doing otherwise will cause deformation or damage to the washer and fire accident. ● Doing otherwise will cause deformation or damage to the washer and fire accident. | When maintaining the washerDo not use benzene, thinner, cleanser, wax, slightly alkaline detergent to wipe the unit, and never scrub it with a scrub brush. ● Doing otherwise will cause deformation or damage to the plastic parts and paint-finished surfaces. ● Doing otherwise will cause deformation or damage to the plastic parts and paint-finished surfaces. |
If you find that water pressure is too high, close the faucet accordingly. ● Otherwise, the water supply may be dislodged and water leak from other sections that water inlet port. ● Otherwise, the water supply may be dislodged and water leak from other sections that water inlet port. | Close the washer lld, if necessary, when washing water splashes ● This is a preventive measure to avoid moistening the floor. ● This is a preventive measure to avoid moistening the floor. |
When dewdrops are deposited on the unit:If the difference between the ambient temperature and water temperature is too high, as in summer, the floor may get wet due to dewdrops deposited on the outer surface of the washing tub.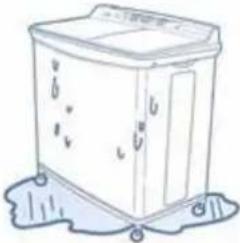 | Take proper care after using the washing machine Be sure to pull out the power plug from the socket. ● This is to prevent a fire accident. ● This is to prevent a fire accident. |
When freezing may occur:Drain the water left in the washing tub, then set the Wash Mode/Drain to the "NORMAL" position.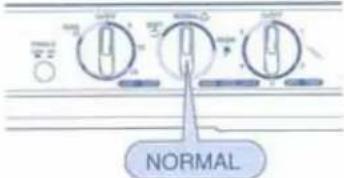 ● Should freezing occur, pour approx. 2L (liters) or warm water of about 40°C into the washing tub and leave it as it is for a while. Then, use the washer after you can rotate the pulsator manually. ● Should freezing occur, pour approx. 2L (liters) or warm water of about 40°C into the washing tub and leave it as it is for a while. Then, use the washer after you can rotate the pulsator manually. | The opening must not be obstructed by carpeting when the washing machine is installed on a carpet floor. |
Avoid machine-washing and spin-drying shoes and the like.● Otherwise, it may result in damage to the washer or cause an accident.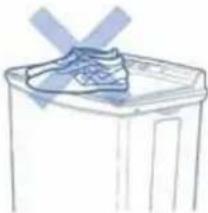 | |
Component Names and Functions

Attachments
Water supply joint (1 piece)

( 8)
Water drain hose (1 piece)
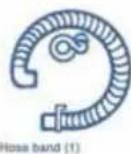
( 8)
U pipe
(1 piece)
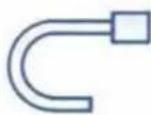
( 8)
Castors
(4 pieces)
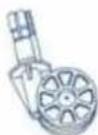
( 17)
Leg cap (4 pieces)

Water supply hose (1 piece)

( 8)
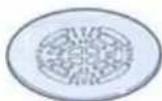
( 10)
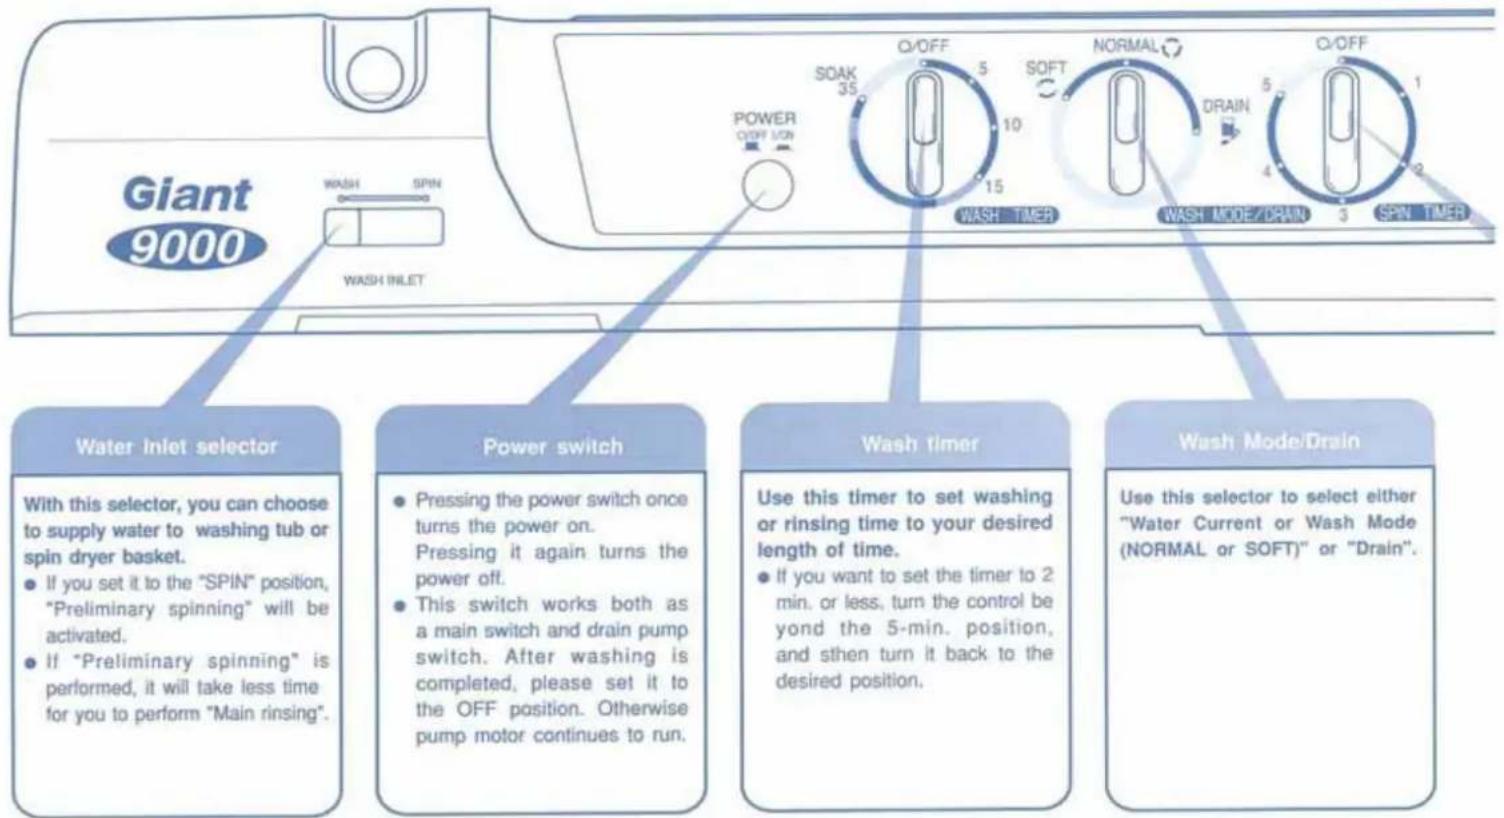
Parts Description and Functions of the Operation Panel
Washing Procedures
Preparation
*See "Installation" (on page 17).
- Pull down the water drain hose.
- Connect the water supply joint with a water supply hose. Insert the water supply joint into the water supply inlet.
- Connect the power supply plug to the power outlet.
- Before washing, see "Hints for Effective Washing".
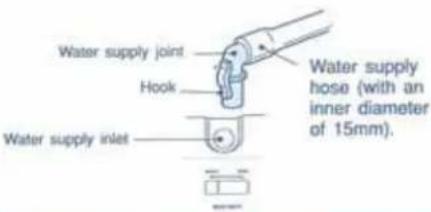
Water Pressure
0.03-0.8 MPa (0.3-8kgf/Cm²)

1
Washing
- Set the power switch to on.
- Select the Wash Mode (or water current).
● Dissolve detergent well in water. - Fill the washing tub with water.
- Use the Wash Timer to set washing time to your desired length of time.

10)

Spin timer
im this selector to your desired ngth of time when you spin-dry undry.
If you want to set the timer to 1 min. or less, turn the selector beyond the 2-min. position, and then turn it back to the desired position.
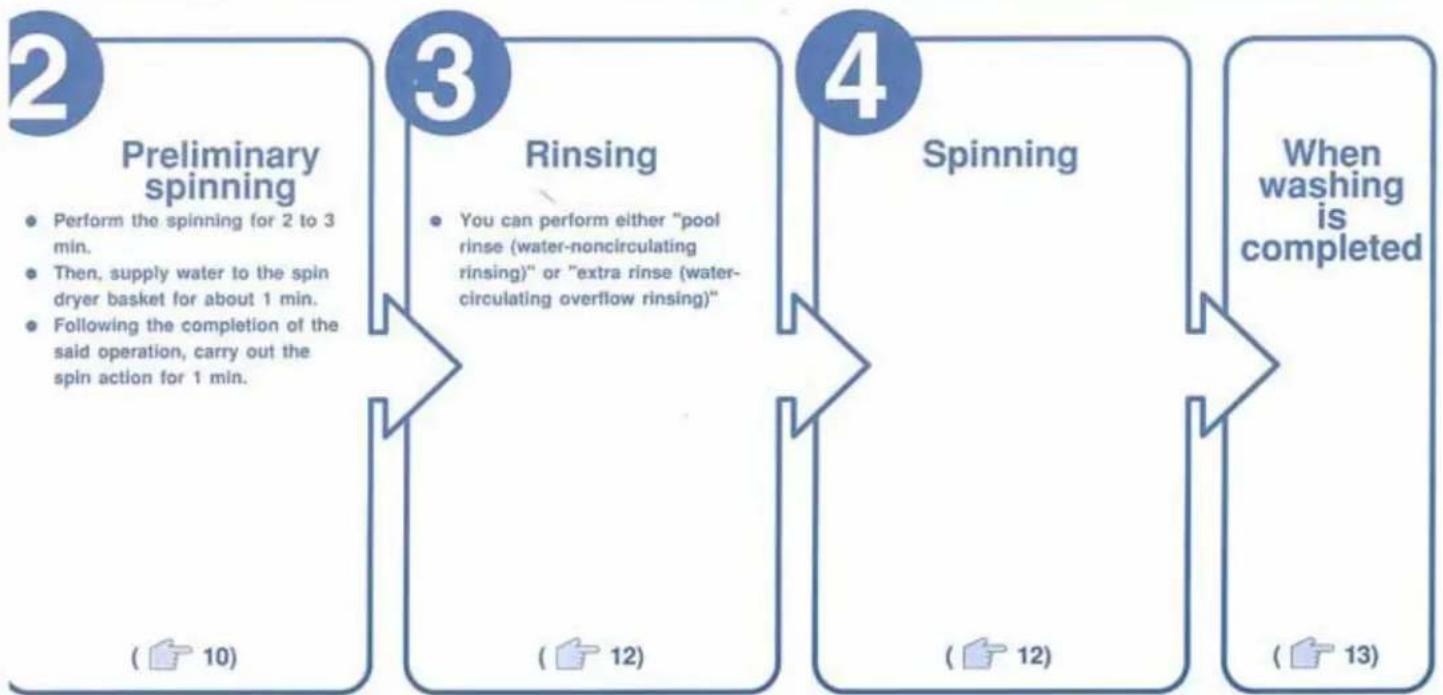
flowchart
graph LR
    A["2: Preliminary spinning"] --> B["3: Rinsing"]
    B --> C["4: Spinning"]
    C --> D["When washing is completed"]

    note1["Perform the spinning for 2 to 3 min.<br>Then, supply water to the spin dryer basket for about 1 min.<br>Following the completion of the said operation, carry out the spin action for 1 min."] --> note1
    note2["☐ 10"] --> note1
    note3["☐ 12"] --> note2
    note4["☐ 12"] --> note3
    note5["☐ 13"] --> note4
Washing Procedures (continued from the previous page)
1) Washing
| Set the POWER switch on.1 | Set the WASH MODE/DRAIN to "NORMAL" or "SOFT"2 | Set the water inlet selector to "WASH" position.3 | Add water to the washing tub to dissolve detergent well.4 |
 | 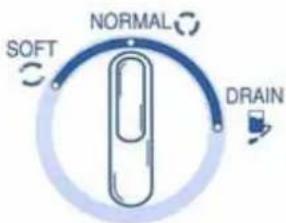 WASH MODE/DRAIN WASH MODE/DRAIN |  | Fill the tub with water until the drain filter is submerged.Put measured amount of detergent into the tub.Set the wash timer to about two minutes to dissolve the detergent completely.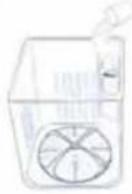 |
2 Preliminary spinning
| 1 Open the Spin dryer lid and Inner lid. | 2 Close the Inner lid and Spin dryer lid. | 3 Set the spin timer to 2 to 3 min. fin then perform the spinning actic |
 Put the laundry into the spin dryer basket evenly, and set the Inner Cover horizontally inside the basket by putting it under the bottom of the balancer. Put the laundry into the spin dryer basket evenly, and set the Inner Cover horizontally inside the basket by putting it under the bottom of the balancer. |  |  |
Reference Guide for Washing
Table 1 Wash Mode/Drain and Washing Time
| Types of Laundry | Washing Time | Wash Mode/Drain | Wash water Temperature |
| Full load (Linen, cotton, etc.) | Soak 35 min. | NORMAL | WARM (40°C) |
| Extremely soiled and bulky laundry | 10 to 15 min. | NORMAL | COLD |
| Linen, cotton, etc. (Small to medium load) | 8 to 10 min. | ||
| Ordinary clothes (underwear, etc.) | 7 min. | ||
| Slightly stained synthetic fiber | 2 to 5 min. | ||
| Delicate clothes, including 100% wool garments, wool-blended yarn fabric and thin synthetic fiber with a tag indicating "HandWashing". | 2 to 5 min. | SOFT | WARM (25°C-30°C) |
- The standard amount of laundry to wash applies to the case where the laundry made of those fabrics and textiles that are specified by JIS (Japan Industrial Standard) are washed. However, the amount may vary according to types, sizes and thickness of laundry.
- For ordinary type of clothes, about 80% of the standard amount can be washed effectively.
| Put your laundry into the washing tub, and add water to it until the water level reaches the suitable level for the laundry load. | 6 Select your desired water current (Wash mode). | 7 Set the washing time to the desired time according to your needs. | 8 Set the Wash Mode/Drain to "Drain" to discharge the washing water. |
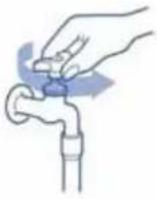 |  WASH MODE/DRAIN( [IMAGE] Table 1) WASH MODE/DRAIN( [IMAGE] Table 1) |  WASH TIMER( [IMAGE] Table 1) WASH TIMER( [IMAGE] Table 1) |  WASH MODE/DRAIN WASH MODE/DRAIN |
Before rinsing, be sure to perform preliminary spinning to remove as much as soapy water possible. In addition to that, preliminary spinning enables you to reduce more time and water for rinsing if you perform the steps 4 to 6.
| Open the Spin dryer lid, and set the water inlet selector to "SPIN" position. Then, feed water to the spin dryer basket for about 1 min. | 5 Continue the water supply for about 1 min. | 6 Close the both lids to start spinning operation. |
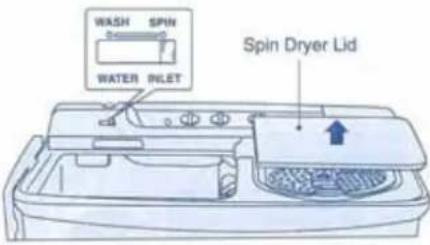 |  |  |
| Position it to "SPIN". Open the spin dryer lid. | Do not add water to the basket while the basket is rotating.No water remains stored inside the spin dryer basket. | Stop supplying water to the spin dryer basket and start spin-drying laundry for one minute. |
Table 2 Weight of Laundry
| Type of Laundry | Type of Material | Weight/ 1 Piece |
| Socks (pair) | Blended yarn fabric | Approx. 50g |
| Short-sleeved underwear | 100% cotton | Approx. 130g |
| White shirts | Blended yarn fabric | Approx. 200g |
| Bath towel | 100% cotton | Approx. 300g |
| Pajama (a suit) | 100% cotton | Approx. 500g |
| Linen | 100% cotton | Approx. 500g |
| Towel bedquilt (thin) | 100% cotton | Approx. 500g |
| Working clothes (a suit) | Blended yarn fabric | Approx. 800g |
Table 3 Water level and detergent quantity
| Maximum mass of Dry cloth (Wash/Spin) 8.0kg. | Water level | Water amount | Detergent quantity (for 30 l of water) | |
| 25g (concentrated) | 40g (normal) | |||
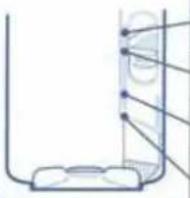 | Max | 72 l | 60g | 96g |
| 3 | 70 l | 58g | 93g | |
| 2 | 55 l | 46g | 73g | |
| 1 | 40 l | 33g | 53g | |
Washing Procedures (continued from the previous page)

Rinsing
You can perform either "pool rinse" or "extra rinse".
● The former is recommendable to save water.
- The latter rinses laundry completely.
| 1 Put laundry into the washing tub. | 2 Set the Wash Mode/Drain to "NORMAL" or "SOFT" | 3 Set the water inlet selector to "WASH" position. |
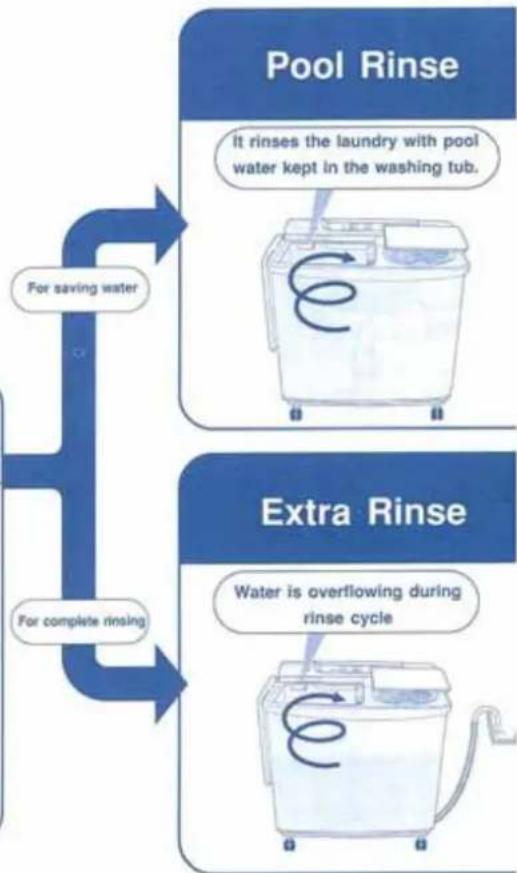
flowchart
graph TD
    A["For saving water"] --> B["Pool Rinse"]
    C["For complete rinsing"] --> D["Extra Rinse"]
    B --> E["It rinses the laundry with pool water kept in the washing tub."]
    D --> F["Water is overflowing during rinse cycle"]
Spinning
Put the laundry into the spin dryer basket and start spin-drying it. (Follow the same procedures as the steps 1 to 3 for Preliminary spinning.)
| [76c3] WARNING | |
| Never put your hands into the spin dryer basket when it is spinning and until it comes to a full stop.● Should you do so, clothes can get caught in your fingers and you may get injured. Especially, keep children away from the washer whenever it is in operation. | |
| If the spin dryer basket does not stop within fifteen seconds after you open the spin dryer lid, immediately stop using the washer, and ask for repairs.● Otherwise, you may get injured. | |
■ Recommendable spinning time:
| Laundry | Spinning time |
| Linen (cotton, towel, etc.) | 3 to 5 min. |
| Underwear (cotton) | 2 to 4 min. |
| Shirt (blended yarn fabric) | 1 to 2 min. |
| Thin clothes (chemical fibers) | 1 min. |
Hints for Rinsing
If you wish to remove bubbles after each rinsing process, perform extra rinsing (water-circulation overflow rinsing) in Soft Mode (water current) at the final stage of the rinsing for one minute or so. This helps you reduce bubbles remaining floated on the rinse water.
- It saves water to wash clothes in the same water that was used for rinsing.
| Fill the tub with water up tothe selected water level. | Set the timer to 2 to 3 min.5 | Put the laundry into the spin dryerbasket, and perform spin for 1 min.6 | In about 1 min. after spinning,set the Wash Mode/Drain to DRAIN.7 |
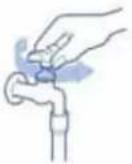 Close the water tap when waterlevel reaches the desired amount. Close the water tap when waterlevel reaches the desired amount. |  WASH TIMER WASH TIMER |  SPIN TIMER SPIN TIMER | The reason why this is advisable isthat the spin dryer basket squeezeswater well from the laundry.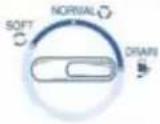 WASH MODE/DRAINIf rinsing is incomplete, repeats thesteps 5 through 8 once or twice more. WASH MODE/DRAINIf rinsing is incomplete, repeats thesteps 5 through 8 once or twice more. |
| Fill the tub with water up tothe selected water level. | Continue feeding water to the tub, whileadjusting the water level. | Set the washing timer to 3 to 5 min.,and perform rinsing. |
 | Adjust the water level in such a manner that no wateroverflows from the "Convenient Excess Water Indicator Outlet". ____ Convenient ExcessWater Indicator OutletThe water level during extra rinse cycle becomes higherthan the water level limit for washing cycle.The reason is that the overflows outlet is located at higherposition than the water level limit is. ____ Convenient ExcessWater Indicator OutletThe water level during extra rinse cycle becomes higherthan the water level limit for washing cycle.The reason is that the overflows outlet is located at higherposition than the water level limit is. |  WASH TIMERSet it to 7 min. if you did not perform preliminary spinning.When the rinsing is completed, close the water tap. WASH TIMERSet it to 7 min. if you did not perform preliminary spinning.When the rinsing is completed, close the water tap. |
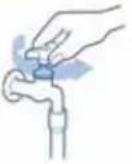
| Close the water tap when waterlevel reaches the desired amount. |
When washing is completed.
- Pull the power plug from the socket.
| WARNING | |
 | Be sure to pull out the power plug from the socket when maintaining the unit. Do not pull out the plug from the socket with wet hands.Failure to do so may result in electric shock or injury. |
| [6w3c] CAUTION | |
 | Be sure to hold the insulated body of power plug, not the cord, when pulling out the power plug.Failure to do so may cause an electric shock or short, resulting in fire. |
Hints for Rinsing
- Put small-sized laundry, such as socks and handkerchiefs, in the bottom area of the spin dryer basket to prevent them from popping out of the basket.
- If the washer makes any abnormal noise during the spin cycle, stop the spinning operation and spread the laundry uniformly inside the basket once again.
- For easy draining, be sure to drain the washing water remaining in the washing tub after the spin cycle is completed.
■ To pick out laundry which has fallen between the basket and tub:
1. Remove the power plug from the power outlet.
2. Remove the spin dryer hatch.
* Insert a flat-blade screwdriver between the inside of the brim and the spin dryer basket, and push the brim outward to pry off the hooks.
3. Pick up the laundry.
* You may tilt the spin dryer basket for easy pickup.
4. Be sure to place back the spin dryer hatch in its original position.
* Push in the hatch firmly until the hooks at the front is engaged securely.
Various Washing Modes
When washing wool garments and other delicate laundry
- Recommendable water level for amount of laundry.
| Water level | 2 | 3 |
| Amount of laundry | 1.5 kg or less | 2.0 kg |
- Recommendable washing cycles.
| Water current | Wash | Preliminary spinning | Extra rinsing | Spinning |
| Soft | 2 min. | 30 sec. or less | 2 min. | 30 sec. or less |
How to dry the laundry.
Let the laundry dry by laying it flat on such objects as a bath tub cover to ensure that it retains its shap

Precaution
Do not machine-wash the following clothes and articles:
- Those items that come only with a "Dry Cleaning" label but not with a "Hand Washing" lable.
● Animal hair materials (such as cashmere, angora and mohair) excluding wool.
● Special knit items such as lace.
Helpful hints for effective washing
- Prior to washing, be sure to use the kind of detergent specified by the symbol attached to clothes to be washed and dissolve it well in water. It is recommendable to use lukewarm water at about 30 for washing wool garments and knit wear.
- Turn the laundry inside out and place it in commercially available washing net, so that soapy water can immerse into it well.
- For heavily stained laundry, it is recommendable to soak it in soapy water beforehand (about 5 min.) for better washing results.
When washing blanket
■ Machine-washable blankets are as follows:
- Those blankets that are labeled with "Hand Washing"
- Single-sized blanket made of 100% chemical fibers (3.0kg or less in weight per piece)
Precaution
- Some electric blankets are not machine-washable. Therefore, when washing a "machine-washable electric blanket", observe its instruction manual
- Use the washing net when you wash the electric blanket.
■ Recommendable washing cycle
| Amount of laundry | Water level | Water current | Recommendable washing course | |||||
| Washing | Spin time | Pool rinse | Spin | Extra rinse | Spin | |||
| 2.8 kg or less | 3 | Standard | 5 min | 1 min | 2 min. | 1 min | 2 min | 3 min. |
Request
- Be sure to use synthetic detergent and dissolve it well in washing water in advance.
- If a blanket resurfaces while the washing is in operation, push it under the water.
- When you move the laundry into the spin dryer basket, squeeze lightly water out of it and put it in the basket in the manner as shown in the right illustration.

Hints for Effective Washing
Observe the “Instructions” given on the tag attached to the clothes. | When you are worried about the tangling of a wool garment, turn it inside out before washing.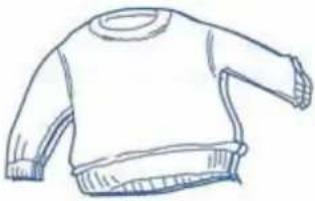 |
Put a bulky laundry, such as sheets or jeans, first into the washing tub.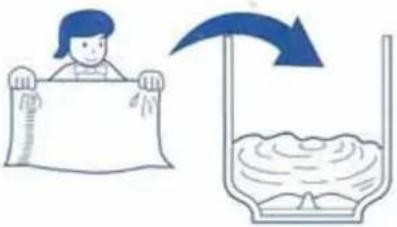 This aims at moving the entire laundry more easily inside the washing tub while the washing is in progress. This aims at moving the entire laundry more easily inside the washing tub while the washing is in progress. | If clothes you wish to wash are extremely soiled, they may be dipped in soapy water in advance.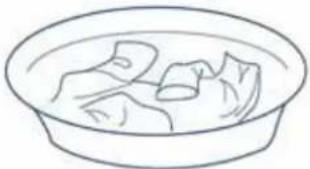 |
Put those laundry items that are likely to easily damaged into a commercially available washing net before washing. | Be sure to remove sharp edged objects and foreign materials (hair pin, coin, etc.) from the pockets of laundry before washing. This is to avoid damaging the washing tub and clothes, or obstructing the drain pipe. This is to avoid damaging the washing tub and clothes, or obstructing the drain pipe. |
Secure strings and close fasteners.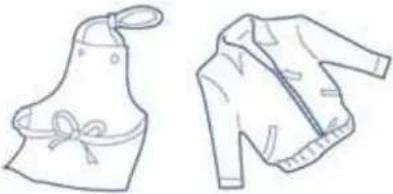 This aims at preventing damage to the clothes and fasteners. This aims at preventing damage to the clothes and fasteners. | Be sure to remove dirt or sand before washing.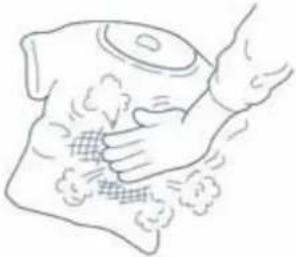 |
Cleaning the Machine
Wipe dust and dirt away from the washer's unit with a soft and clean cloth dampened with a small amount of water. When using a chemically treated cleaning cloth, observe its instructions.
Overflow Filter
- Pull the overflow filter forward as shown in the figure to remove it. Remove waste threads.
- Use a toothbrush, etc. to clean the inner hose.
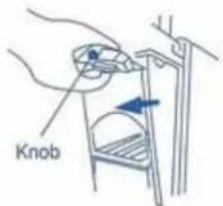
- Replace the overflow filter.

Inner hose
Drain Filter
- Remove the overflow filter.
- Remove the screw.
- Pull the knob to remove the drain filter. Then, remove lint.
- Set the WASH MODE/DRAIN to DRAIN.
Remove lint on the drain valve, and remove sand and dirt from the drain hole.
● Scrub with a tooth brush, and wash away.
- Replace the drain filter.
- Insert it from the pulsator side.


Installation
When using the washer for the first time, you may find water remaining in the drain hose. It was used for the factory performance test. It does not imply any malfunction.
Dust may also settle on the unit when you unpack your washer.
However, this results from the storage of washer at warehouses.
Installing the washer
Place the washer on a dry, well-ventilated, level floor.
Precaution
- Avoid a place where the washer can be exposed to direct sunlight. Otherwise, the components of washer may be defomed or discolored.
Installation of Castors
- 4 castors of the washer are taken off and packed in the washer for only transporting ease. Before installing, push them in on the base.
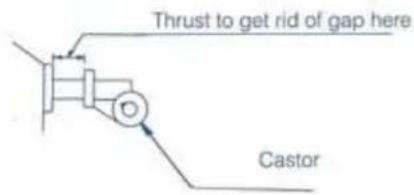

flowchart
graph TD
    A["Base"] --> B["Cabinet"]
    B --> C["Click"]
    C --> D["Castor"]
    D --> E["Arrow to Base"]
    style A fill:#f9f,stroke:#333
    style B fill:#ccf,stroke:#333
    style C fill:#cfc,stroke:#333
    style D fill:#fcc,stroke:#333
    style E fill:#ffc,stroke:#333
Installation (continued from the previous page)
About the Drain Hose
● The drain hose is packed in the washer Before operating, insert the water drain hose on the water outlet and fix it with the hose band to avoid water leakage.
- Set the washer in a dry place.
- Set on horizontal and flat surface.

Before Calling for Service
If any abnormality is found, check the following before asking for service:
| Trouble | Check point | Trouble | Check point |
| Washer does not function at all. | Is the fuse is blown or circuit breaker switched off?Is poor connection between the power supply plug and outlet made?Is any water remaining in pulsator frozen?6 | Incomplete spinning | Is laundry spread evenly inside the spin dryer basket?Is the drain port is closed with laundry falling out of the tub or basket?Are there bubbles all around the spin dryer basket?Is the water drain hose raised in the halfway? Is the hose extended for more than 2 meters? |
| Laundry will not move smoothly. | Is excessive amount of laundry put in the washing tub? | Washing water leaks from the hose. | Is the drain valve or drain outlet clogged with lint, dirt, or mud?16 |
| The spin dryer basket will not function. | Is the spin dryer lid closed completely?Are there any clothes (socks, etc.) that fell out of the spin dryer basket and clung to the axis?12 | Incomplete draining | Is the drain filter or overflow filter clogged with lint?16Is the drain hose crushed or damaged? |
After-Sales Service and Warranty (Be sure to read through this Chapter.)
For inquiries and advice for repair:
For any question or advice on repair about your washer, please get in touch with the dealer from whom you purchased it or one of "our customer support centers" as described in the separate copy.
When you ask for service
In-field services
Refer to the "Before Calling for Service" for troubleshooting any trouble. If you think that the trouble still cannot be cured, stop using the washer, pull out the power plug from the power outlet, and contact the distributor from whom you bought it for checks and repairs.
During the warranty period:
Please show your warranty to a qualified service dealer when the dealer repairs your washer. Then, the dealer makes any needed repair according to the terms and conditions as stipulated in the warranty.
Required information for after-sales services, checks and repairs
| Product's name | Electric Washing Machine | Your Address | Please describe any easy-to-see building, signs, etc. in your neighborhood as well. |
| Model Type | PS-99BSP | Your Name | |
| Date of Purchase | Your Telephone No. | ||
| Trouble & Problem | Please specify it in detail as much as possible. | Request date for service |
When warranty expires:
If your washer can become available for normal operation after it is repaired, the repair service will be available upon request.
Maintenance
with tender care

Please check your washer for possible malfunction when it is used for an extended period of time!
Check to see if any of the following conditions or other abnormalities exist:
● The spin dryer basket is difficult to stop.
● There are water leaks (hose, washing tub, joint, etc.)
- There is smell of burning or strange noise and vibration when the washer is in operation.
- If you touch the washer, you receive an electric shock.
● The washer rattles or is installed on an inclined surface.
- When you turn on the switch, the washer sometimes does not operate.
- Timer sometimes stops functioning halfway.
● The power cord or plug is heated excessively.
● Other failure and malfunction are found in the washer.
Stop using the washer in the aforementioned cases
If any of the above-mentioned conditions or abnormalities exist, be sure to immediately switch off the power switch to prevent an accident and damage, and ask the dealer to inspect and repair the washer.
Specifications
| Product | Electric Washing Machine(Hitachi's Twin-Tub Washer) | StandardAmountof WashingWater | Max 72 l | Weight | Approx. 33 kg |
| (3) 70 l | |||||
| Power Source | See below of spec | (2) 55 l | Rated Time | Washing : 30 min.Max 35 min. (with soak) | |
| Washing System | Whirl Water Current | (1) 40 l | Spinning: 10 min. | ||
| Outer Dimension | 922 (W) x 509 (D) x 934 (H) mmInclude drain hose | PowerConsumption | Washing Cycle: See on name plate | ||
| Spinning Cycle: See on name plate | |||||
| Model | PS-99BSP SAA |
| Type | Twin Tub Washer |
| Rated Voltage | 240V~ |
| Rated Frequency | 50Hz |
| Castor (4 Sets) | With |
| Customer's Note:Please write down the necessary information on your washer for future reference.This note is helpful for you to ask a dealer for service in the future. | Place of Purchase: | Phone No. |
| Date of Purchase: |
HITACHI
THE HITACHI ATAGO BLDG.
3-J5766-5
15-12, Nishi-Shinbashi 2-chome, Minato-ku, Tokyo, 105-8410 Japan
Tel: Tokyo (03) 3502-2111
- Model PS-99BSP
- Contents
- High Speed Spinning
- Large-sized Spin Dryer Basket
- Large-sized Pulsator
- Safety Precautions
- The safety precautions described herein are
- WARNING
- CAUTION
- Precautions for Proper Use
- Component Names and Functions
- Attachments
- Parts Description and Functions of the Operation Panel
- Washing Procedures
- Preparation
- 1
- Washing
- Spin timer
- Washing Procedures (continued from the previous page)
- 1) Washing
- Preliminary spinning
- Reference Guide for Washing
- Rinsing
- Spinning
- Hints for Rinsing
- When washing is completed.
- Various Washing Modes
- When washing wool garments and other delicate laundry
- Precaution
- Helpful hints for effective washing
- When washing blanket
- Request
- Hints for Effective Washing
- Cleaning the Machine
- Overflow Filter
- Drain Filter
- Installation
- Installing the washer
- Installation of Castors
- Installation (continued from the previous page)
- About the Drain Hose
- Before Calling for Service
- After-Sales Service and Warranty (Be sure to read through this Chapter.)
- For inquiries and advice for repair:
- When you ask for service
- In-field services
- During the warranty period:
- When warranty expires:
- Maintenance
- Please check your washer for possible malfunction when it is used for an extended period of time!
- Specifications
- HITACHI
Marque : HITACHI
Modèle : PS99BSP
Catégorie : Lave-linge