XM-2VRSUA744 - Autoradio Xomax - Notice d'utilisation et mode d'emploi gratuit
Retrouvez gratuitement la notice de l'appareil XM-2VRSUA744 Xomax au format PDF.


| Marque | Xomax |
| Modèle | XM-2VRSUA744 |
| Type de produit | Autoradio 2-DIN avec écran tactile |
| Dimensions (L x H x P) | 178 x 100 x 160 mm |
| Poids | 1,5 kg |
| Alimentation | 12 V DC (batterie véhicule) |
| Puissance de sortie | 4 x 50 W (max) |
| Taille d'écran | 6,2 pouces (15,7 cm) |
| Récepteur radio | FM/AM avec RDS |
| Formats audio pris en charge | MP3, WMA, WAV, FLAC |
| Connectivité | Bluetooth (mains libres, streaming), USB, AUX, entrée microphone |
| Fonctions principales | Lecteur CD/DVD, radio FM/AM, Bluetooth, USB, AUX, écran tactile, égaliseur, entrée caméra de recul, compatibilité volant (filaire) |
| Entretien et nettoyage | Nettoyer avec un chiffon doux et sec. Ne pas utiliser de produits abrasifs ou solvants |
| Sécurité | Fusible de protection (10A), arrêt automatique en cas de surchauffe |
| Pièces détachées et réparabilité | Disponibles sur le site officiel Xomax ou auprès des revendeurs agréés |
| Informations générales | Autoradio multimédia 2-DIN, compatible avec la plupart des véhicules, livré avec kit de montage et faisceau ISO |
FOIRE AUX QUESTIONS - XM-2VRSUA744 Xomax
Questions des utilisateurs sur XM-2VRSUA744 Xomax
0 question sur cet appareil. Repondez a celles que vous connaissez ou posez la votre.
Poser une nouvelle question sur cet appareil
Téléchargez la notice de votre Autoradio au format PDF gratuitement ! Retrouvez votre notice XM-2VRSUA744 - Xomax et reprennez votre appareil électronique en main. Sur cette page sont publiés tous les documents nécessaires à l'utilisation de votre appareil XM-2VRSUA744 de la marque Xomax.
MODE D'EMPLOI XM-2VRSUA744 Xomax
Multimedia & Navigation System with Android™ OS
User manual
XM-2VRSUA744

Basic
Basic - Gestures

Main Interface – Main Menu
When this device is switched on, the main menu will automatically open up.
This menu displays shortcuts to frequently used functions.
Press the space bar once to activate the wallpaper settings.
The user can make adjustments to the layout of
this menu according to personal preference.

Main Interface - Application Interface
Press the Menu button to access a list of applications on-screen.
Shortcuts can be created from here to the main menu to allow easy operation.

Radio
Press the Radio button on the panel or click the icon on the main menu to enter the radio interface.
The functions of icons in the radio interface are described below:

FREQUENCY-PLUS

BAND SWITCHING

LOCATE

STEREO

QUICK SEARCH

SAVE CHANNEL

SAVE FREQUENCY

PROGRAM TYPE

ALTERNATIVE FREQUENCIES

TRAFFIC ANNOUNCEMENT

RADIO EDIT

RADIO SETTINGS

Radio
Click on the Radio Edit button to bring up the Edit Station Info tab.
Click the Edit Station Info button to bring up the edit box,
this cannot be empty Press the Done button on the keyboard
once editing is complete. A list of stored stations will appear on the right
hand side of the radio.

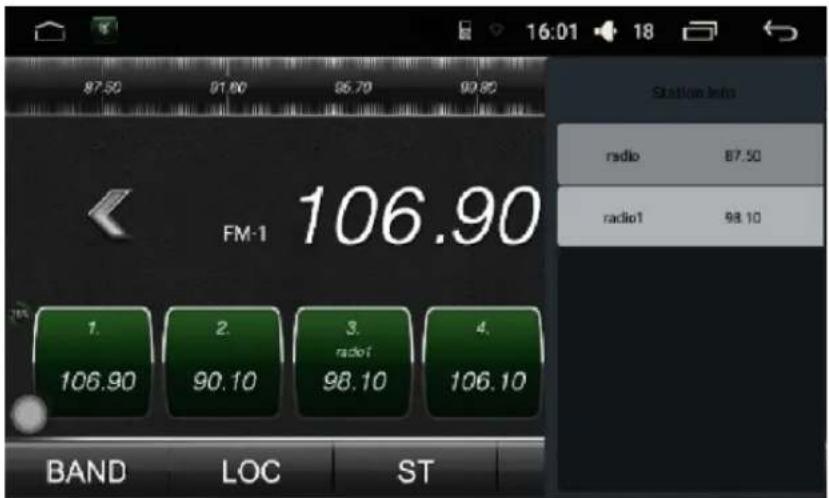
Radio - Edit and Deleting of Information

Pull up the list of radio stations. Click the Edit button to open the radio message editor. The user can modify the frequency of the station as well as the name under which it was previously saved.

When you click the Delete button on the list, the station information will be stored in the cleanup database.


Radio - Automatic Searching / Storing of Stations

Each wave band can store 6 pre-set stations. The system can store a total of 24 pre-set stations (18 FM stations and 6 AM stations).
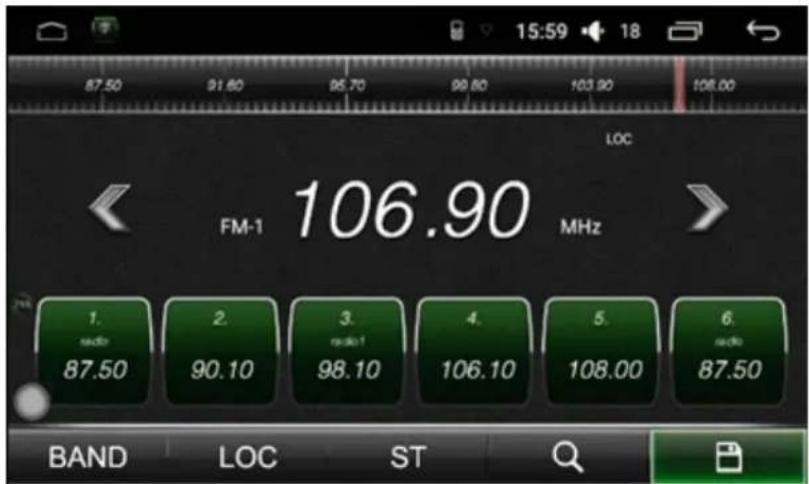
Radio - Select One Radio Band

Touch the BAND icon on the user interface to select one radio band among FM1, FM2, FM3, AM1 and AM2.
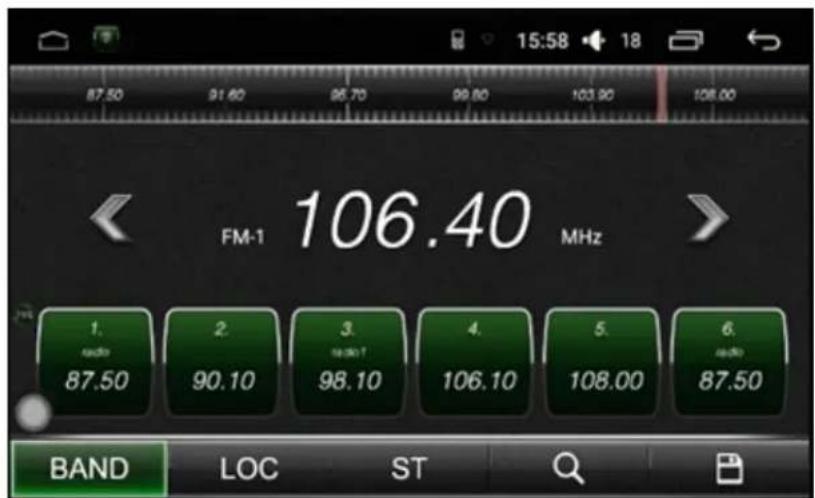
Radio- Search

Click the search button to activate the automatic station search function.

Upward Search.

Downward Search.
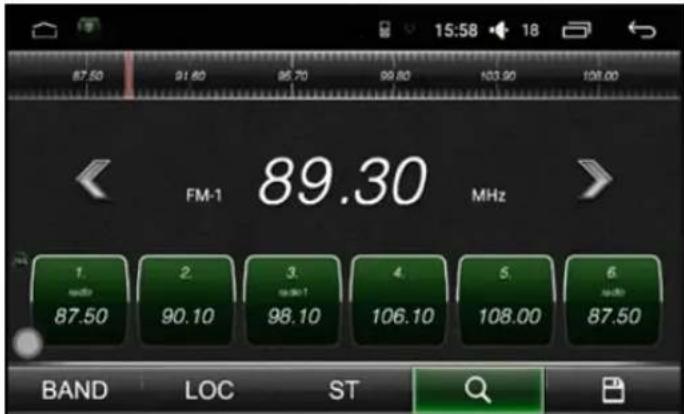
Radio Settings

Click the radio button to enter the Radio Setting interface. AM/FM sensitivity adjustments can be made from this interface.
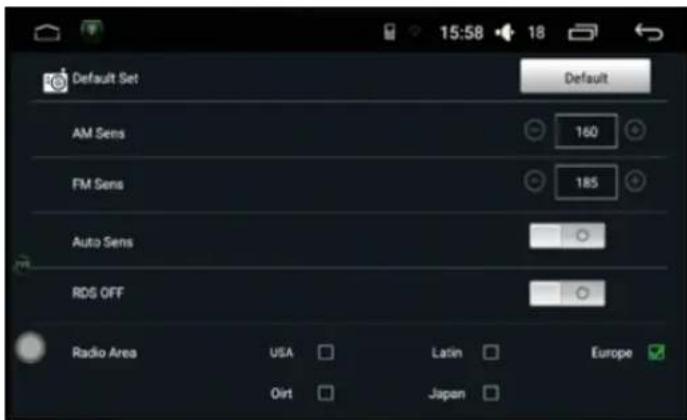
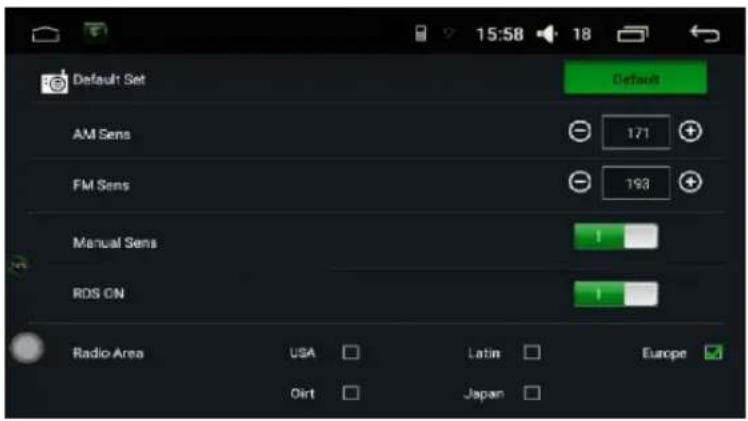
Radio - Restore
If the user is not happy with choice made as to sensitivity of AM/FM stations, the Restore button can be clicked to restore default settings.

Car
Sound Settings

On the Sound Setting screen, the user can select options pertaining to the equalizer, amplifier, sound effects and the like.

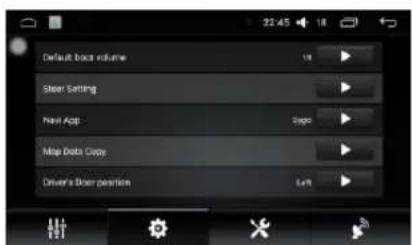
General Settings

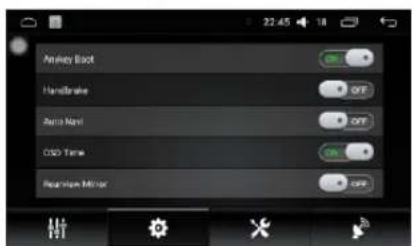
From the General Settings menu, basic properties of the unit can be set according to user preference.

General Settings
- Click on any button to activate the touch screen.
2.Activate Handbrake to convert a video file to any format. - Set the system to automatically enter the navigation function when switching on the unit.
- Reverse mirror image can be displayed.
5.Activate Reverse Audio Output to block out other sounds. - Control volume settings using the Default Volume Switch.
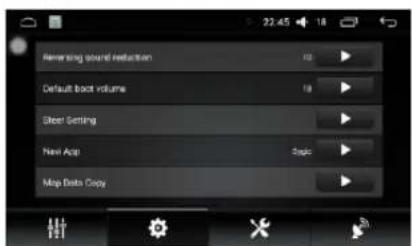
- The power-on default volume sets the default boot volume value.
- Select and control navigation message, tone and background sound by making use of the GPS Mixing Function.
- When using the Mixing Ratio Function, the size of the navigation message, tone as well as background sound can be formatted.
- Reversing Sound Reduction controls the volume of background sound.
- The Navigation Application is where maps are found and saved.
- The position of driver's door: Set driving position according to actual conditions.
- Rainbow Light Set: This unit has only one light available - Blue.

GPS

This GPS supports both BEIDOU and GPS Double Module Display. The Auto Sync Switch, when activated, will control the location of the unit as well as time synchronization.

Factory Settings (Password: 3368)

Factory settings have been configured for specific functions.
To ensure the normal operation of the unit, it is recommended that users do not change the original settings.

Bluetooth
Bluetooth Matching and Connections
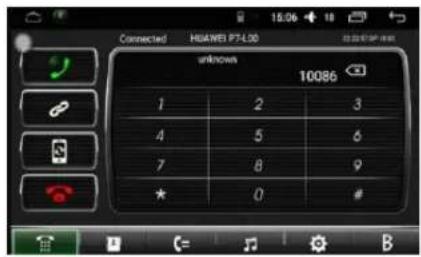
First match the Bluetooth of a mobile phone and the unit before using Bluetooth hands-free function.
Turn on the Bluetooth function of the mobile phone and search for the Bluetooth equipment. Gets a signal from the mobile phone, input the universal code "0000" and confirm it.
After the mobile phone has been matched and connected with the unit successfully, the Bluetooth icon will appear on the top of the interface.

Receive/Hang Up/ Stop Phone
When receiving an incoming call, the system will switch to Bluetooth hands-free mode. The sounds of the previous mode will switch to the ring tone of the incoming call and the phone number will display on the screen.

Bluetooth- Synchronize your Phone Contacts
Before synchronizing the phone contacts, ensure that the phone and unit are connected via Bluetooth then follow the next steps:


Contact Look Up Function

Download Phone Book Function

Save Phone Book

Clear Phone Book Function

Call Function
Bluetooth- Call Records
All phone calls made, received or missed whilst Bluetooth is activated, will be recorded.


Call Log

Outgoing Records

Record of Missed Calls

Delete all Records

Function
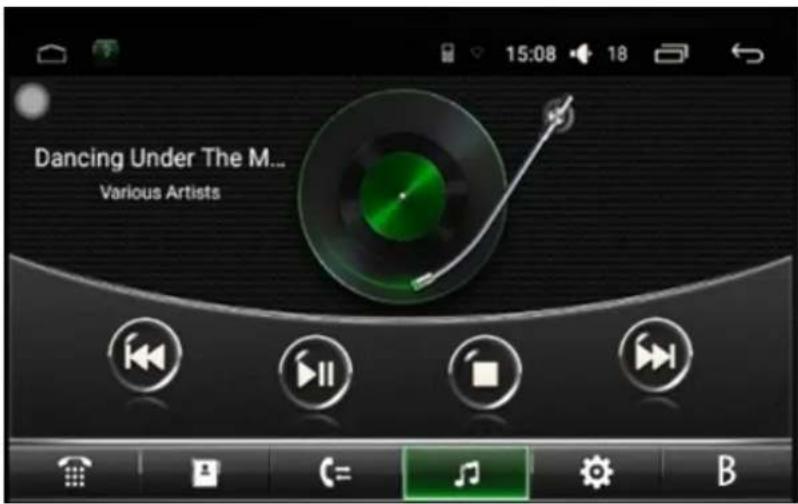
Bluetooth Music Playing
If the mobile phone supports the Bluetooth music playing function.
Once the phone and unit have successfully connected via Bluetooth, press the Stereo button on the Bluetooth main interface to enter Bluetooth music playing function.

PREV

NEXT

PLAYBACK / PAUSE

STOP
Settings
System Settings
To ensure that this unit works according to specification, it is recommended that the default factory settings are not changed unless permission has been given to do so.

WIFI Setting
WIFI Connection: Touch the Setting icon to enter Wireless network.
Turn on the WIFI function, then enter WIFI - setting, and the system will automatically search. Select the WIFI name click on it then input password. The WIFI icon will appear at the top of the notification bar once the connection is successful.

System Settings
Display Setting:
Adjust screen brightness, dynamic screen and background.

Application Setting:
Check running status, space usage, installation and unloading of software.

GPS Setting:
Select and set GPS navigation sound mode and GPS running status display.

Security Setting:

System Setting - Date and Time
Select and set time and time display format according to time zone.
![About device Android version 5.1.7 CPU Info CPU: Intel-ATOM 4模, GPU4D, M39-490 MP4 System Info APP: 1024x602 [2016-07-13.14.63.62] MCU Version 2016-07-05 17:41.07 SBG (NOR), 99, C9, R73, V1.00 (DaZhongAIC) BT Version 5.1.1 - img geqo 20160712.115934-32 CAN Version (Shenzhen) SYSTEM UPDATES](/content/2026/06/1296274/images/1d35b62d0be5fe917ac84af6d4dd43ecf26438b796851c71d0a7f01b547a6e3c.jpg)
Steering Wheel
Steering Wheel Settings
Click on the "Steering Wheel" icon in the system settings interface to enter the settings.


Steering Wheel Icons

POWER ON/OFF
PAGE JUMP
NAVIGATION
VOLUME INCREASE
VOLUME DECREASE
MUTE
PLAYBACK/PAUSE
PREV
NEXT
REWIND
FAST FORWARD
CALL ANSWER
CALL END
SAVE
CLEAR

LOGO
LOGO
Should the user want to customize the wallpaper to the logo of the vehicle being driven, click the Settings button to enter the car standard page. Select the logo required, then click setting success button. Custom logo will then appear.

Car Standard Setting
To customize a logo, first obtain a picture with a resolution greater than or equal to 800x480 Place SD card or USB into the unit and import the required image.

File Manger
File Management Operation
Enter the File Management Operation interface.
File Manager – Icons

natural_image
Vertical sequence of black-and-white icons representing media and document processing functions (no text or symbols)APPLICATION INSTALLATION
IMAGES
MUSIC
VIDEOS
PREVIOUS
SELECT ALL
NEW FOLDER
COPY
CUT
PASTE
PROPERTIES
DELETE
RENAME

Floating
Assistant Touch - Display Button
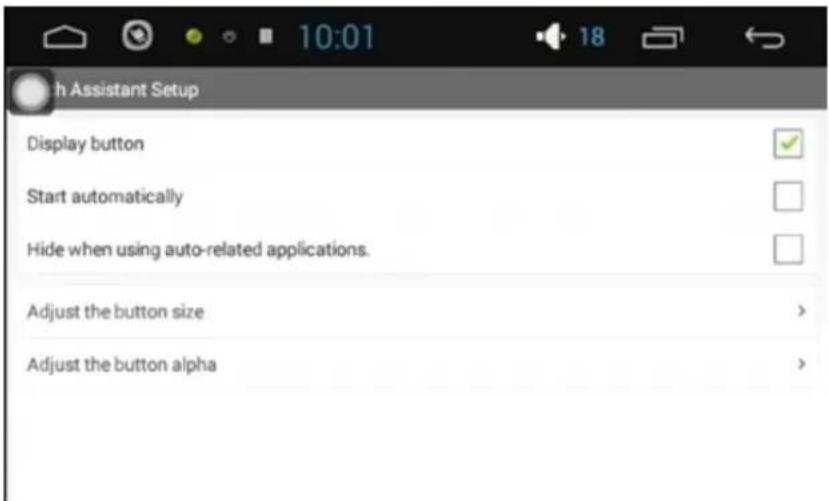
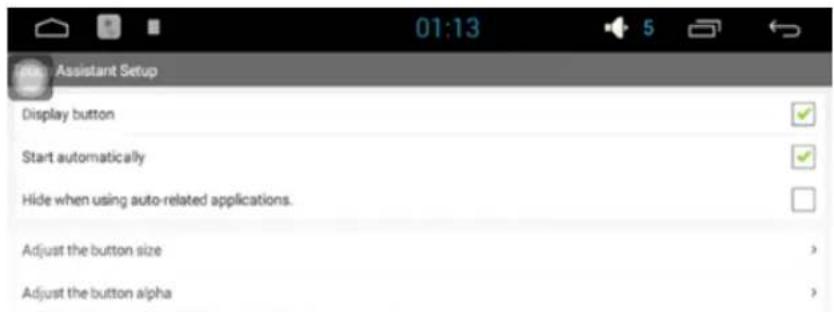
Floating touch buttons assist with shortcuts to various functions. To display a floating button, click on the touch screen assistant to enter the screen to display button options.
Touch Helper
Once display button has been set up, click on the "Start Automatically" icon. By doing this, there is no need to go to the Assistant Setup every time the unit is switched on - it will automatically appear.
Assistant Setup - Size Adjustment
In Assistant Setup, the size of the button can be adjusted according to personal preference.

Assistant Touch - Buttons to Adjust Transparency
In Assistant Setup, the user can also adjust the button background color so that the button can easily be seen.

Music
Music Player—Music Play List
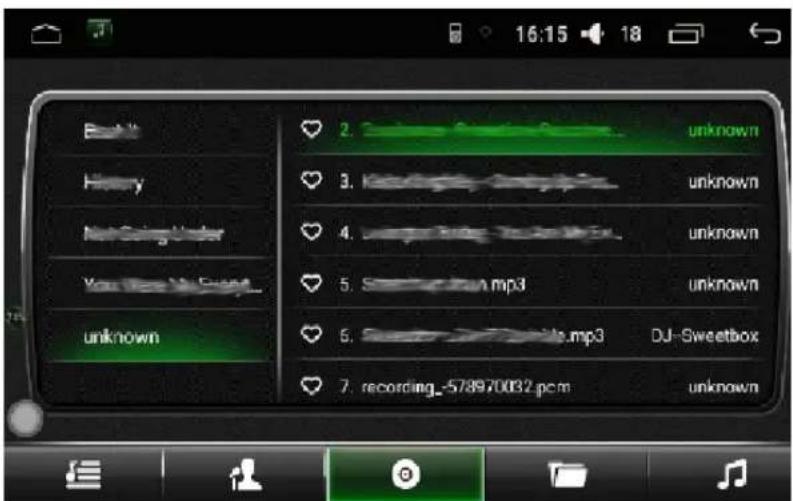
Enter the music play list either through the main interface or application interface. If no music is recorded, the unit will automatically show the default list screen.

Click this icon to display all songs stored on the computer and external storage device memory.

Folder List Button: Click this button to display the files saved within the vehicle computer memory as well as an external device which has saved songs within a folder.



Artist List: Click this button to find out the name of an artist who sings a particular song.
Album List: Click this button to find out information about an album on which a particular song is found.

Music Player —Playback Interface
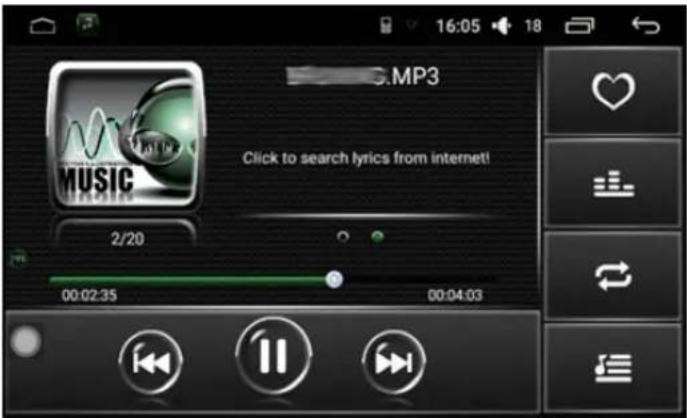
Click Playback interface icon. The screen will display the song currently playing together with basic information and common control buttons. The user can then set the corresponding button to achieve desired effect. A song can also be played by dragging the progress bar to enable Fast Forward and Rewind functions.

SOUND SETTING
REWIND
PLAY/PAUSE
FAST FORWARD
CYCLE
SONG COLLECTION
SONG LIST

Music Player—Play Interface
In the track display area, by swiping left or right, the user can switch between the current song playing and the spectrum display. From the lyrics display area, the user can search lyrics from the Internet. This allows users to enjoy three-dimensional sound effects.
Video
Video Player
The video player can identify internal and external storage of all video formats from the machine. It supports playback of MP4, AVI, WMV, RMVB, FLV, MKV, MOV, TS and other common video formats.
Unique and simple to use, this interface has powerful decoding capabilities and supports high-definition video playback.

Video Player - Video List
In the Video List screen, the user can view the corresponding video list by choosing the type of storage device.

The current storage device video list

The current storage device video folder list


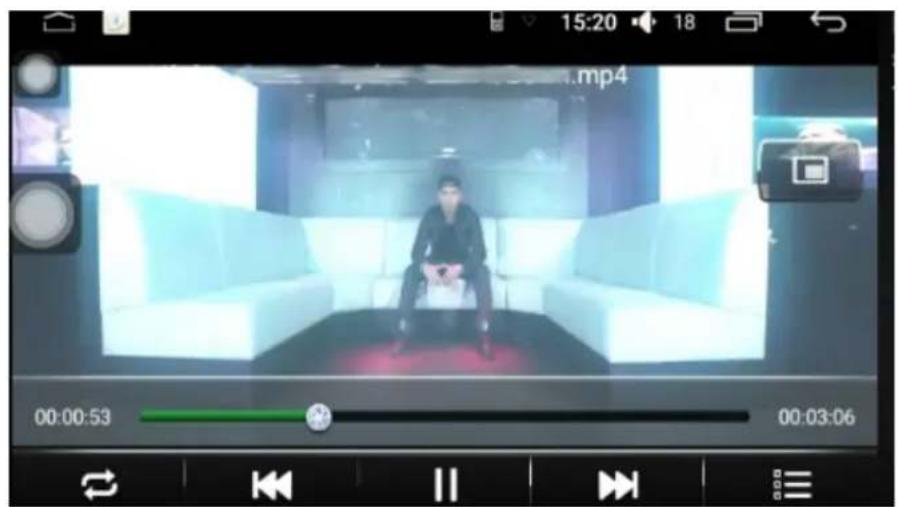
Video Player Interface
Select the Video List Screen Playback icon to access the video player interface. This Interface will display the video title as well as playing schedule. The user can also rewind or fast forward the current video playing by dragging the progress bar.
The following icons can be found on the Video Player interface:

PLAY LIST
CYCLE PLAY MODE
PLAY/PAUSE
FAST FORWARD
REWIND
Video Player-PIP
Click the Picture Function Button. The video player interface will shrink and will then appear superimposed on the other application interface. Click on the upper right corner of the PIP zoom and then click the full-screen button to select the video size. The picture in Picture function allows the user to watch a video whilst operating other applications.

EQ
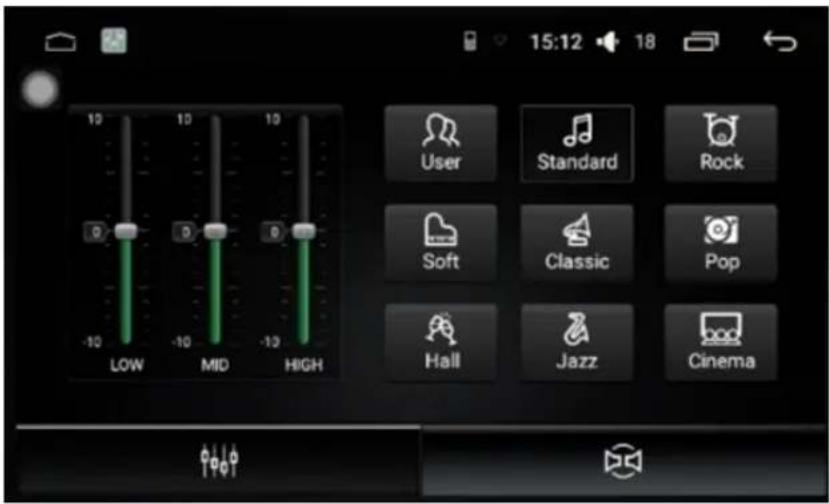
Car Settings-Equalizer Settings
Click on the button to enter the sound mode adjustment page. The user can present a sound effect or manually adjust the slider to set the value of sound effects.
Car Settings- Equalizer Settings
Click the button to enter the sound field mode page. The user can drag the ball to adjust the sound output mode manually according to the position of the vehicle.

Picture
Gallery —The Main Interface Gallery
Picture browsing is where all pictures, both from internal and external storage can be viewed and formatted. The wallpaper can also be customized.

Current directory is stored in the SD Card.
Current directory is stored internally.

Current directory is stored on the external USB.

Gallery—Picture Operation
Click on any picture to enter the browsing mode in on. In this mode, double-click the screen which will then zoom the picture. By pressing and holding the function button you can hide the operation. This function supports gestures of finger movement as well as up and down gestures.

WALLPAPER

PREVIOUS IMAGE

PLAY/PAUSE

NEXT IMAGE

ROTATION
Troubleshooting
Frequently Asked Questions
1. The Bluetooth on the car unit has not paired with the Bluetooth on the mobile phone :
The Bluetooth connection is not on. Turn offBluetooth on the mobile phone, then open connection again and search. If this does not help, click Reset Bluetooth Settings. The devices should then connect.
2.No sound:
Determine whether the paired phone has volume output.
3.The phone did not respond to the request to download :
Once Bluetooth is connected, click to download the phone book on the unit. The phone will receive a request to download contacts Confirm the request prior to downloading.
4. Bluetooth name is not updated after setting :
When the Bluetooth name is set, but does not update immediately, disconnect and click on the Bluetooth pairing connection again.
5. No data to read from USB/SD Card:
When a user plugs in a storage device, the music player detects and scans the device for data. If the stored data is relatively large, it may take a while to update. If after a few minutes there is still no data to update, make sure that the storage device is plugged into the device correctly. View file browser to see if there is a corresponding storage directory, if not, remove and re-insert the USB/SD Card into the device or check the hardware.
6.Song file name garbled :
If the file name of the song is not displayed, it could mean that the format is not recognized or is not in line with the national language encoding policy. An error encoding message will display on the LED.
Recycling
Recycling of an old unit
User information regarding recycling of electric and electronic devices (private households)

natural_image
Symbol of a trash bin crossed with no text or labels, accompanied by a black rectangular block below (no readable text or symbols)This symbol on products or in their manuals implies that electric and electronic devices at the end of their service life should be separated from the domestic waist. Please hand these products for recycling at municipal collection points free of charge. The proper disposal of these products contributes to environment protection.
To find the nearest collection point or recycling yard please consult your municipal administration.
Recycling of the battery
According to the battery decree we make you aware of your obligation to dispose of empty batteries at municipal collection points.
Batteries that contain pollutants: Hg = mercury, Pb = lead, Cd = cadmium
are labelled with the symbol pictured above.
At our place you can free dispose of the empty batteries purchased at our store.
- Multimedia & Navigation System with Android™ OS
- User manual
- XM-2VRSUA744
- Basic
- Main Interface – Main Menu
- Main Interface - Application Interface
- Radio
- Radio - Edit and Deleting of Information
- Radio - Automatic Searching / Storing of Stations
- Radio - Select One Radio Band
- Radio- Search
- Radio Settings
- Radio - Restore
- Car
- Sound Settings
- General Settings
- GPS
- Factory Settings (Password: 3368)
- Bluetooth
- Bluetooth Matching and Connections
- Receive/Hang Up/ Stop Phone
- Bluetooth- Synchronize your Phone Contacts
- Bluetooth- Call Records
- Bluetooth Music Playing
- Settings
- System Settings
- WIFI Setting
- Application Setting:
- GPS Setting:
- Security Setting:
- System Setting - Date and Time
- Steering Wheel
- Steering Wheel Settings
- Steering Wheel Icons
- LOGO
- Car Standard Setting
- File Manger
- File Management Operation
- File Manager – Icons
- Floating
- Assistant Touch - Display Button
- Touch Helper
- Assistant Setup - Size Adjustment
- Assistant Touch - Buttons to Adjust Transparency
- Music
- Music Player—Music Play List
- Music Player —Playback Interface
- Music Player—Play Interface
- Video
- Video Player
- Video Player - Video List
- Video Player Interface
- Video Player-PIP
- EQ
- Car Settings-Equalizer Settings
- Car Settings- Equalizer Settings
- Picture
- Gallery —The Main Interface Gallery
- Gallery—Picture Operation
- Troubleshooting
- Frequently Asked Questions
- The Bluetooth on the car unit has not paired with the Bluetooth on the mobile phone :
- 2.No sound:
- 3.The phone did not respond to the request to download :
- Bluetooth name is not updated after setting :
- No data to read from USB/SD Card:
- 6.Song file name garbled :
- Recycling
- Recycling of an old unit
- Recycling of the battery
Marque : Xomax
Modèle : XM-2VRSUA744
Catégorie : Autoradio