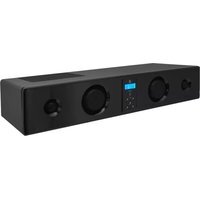
PSBV100 - Barre de son Pyle - Notice d'utilisation et mode d'emploi gratuit
Retrouvez gratuitement la notice de l'appareil PSBV100 Pyle au format PDF.


| Type de produit | Barre de son |
| Marque | Pyle |
| Modèle | PSBV100 |
| Dimensions (L x H x P) | 90 x 8 x 6 cm |
| Poids | 1,5 kg |
| Alimentation | Adaptateur secteur 12V DC |
| Puissance de sortie | 40 W RMS |
| Nombre de canaux | 2.0 stéréo |
| Connectivité | Bluetooth 5.0, entrée AUX 3,5 mm |
| Fonctions principales | Lecture audio sans fil, télécommande incluse, support mural |
| Entretien et nettoyage | Nettoyer avec un chiffon doux et sec. Ne pas utiliser de produits chimiques. |
| Sécurité | Ne pas exposer à l’humidité ni aux liquides. Débrancher avant nettoyage. |
| Pièces détachées | Télécommande, câble d’alimentation, adaptateur secteur |
| Réparabilité | Faire appel à un technicien agréé pour toute réparation |
| Accessoires inclus | Télécommande, câble AUX, support mural, vis |
| Utilisation prévue | Amélioration du son des téléviseurs, PC, lecteurs audio |
| Température de fonctionnement | 5°C à 35°C |
| Indice de protection | IPX0 (non étanche) |
| Couleur | Noir |
FOIRE AUX QUESTIONS - PSBV100 Pyle
Questions des utilisateurs sur PSBV100 Pyle
0 question sur cet appareil. Repondez a celles que vous connaissez ou posez la votre.
Poser une nouvelle question sur cet appareil
Téléchargez la notice de votre Barre de son au format PDF gratuitement ! Retrouvez votre notice PSBV100 - Pyle et reprennez votre appareil électronique en main. Sur cette page sont publiés tous les documents nécessaires à l'utilisation de votre appareil PSBV100 de la marque Pyle.
MODE D'EMPLOI PSBV100 Pyle

PSBV100

natural_image
Line drawing of a rectangular electronic device with four circular control knobs and a digital display (no text or symbols)150 Watts Multi Source Sound Bar Speaker Entertainment System With FM Radio/and Aux Inputs
ENTERTAINMENT SPEAKER SYSTEM
www.pyleaudio.com
Maintenance and Care
Caring for the Unit
- "The apparatus shall not be exposed to dripping or splashing" and that no objects filled with liquid such as vases shall be placed on the unit.
- If anything falls into the cabinet, unplug the unit and have it checked by qualified personnel before operating it any further.
Cleaning the Unit
- To prevent fire or shock hazard, disconnect your unit from the AC power source when cleaning.
- The finish on your unit may be cleaned with a dust cloth and cared for as other furniture. Use caution when cleaning and wiping the plastic parts.
- Mild soap and a damp cloth may be used on the front panel.
Inclination
- Do not install the unit in an inclined position. It is designed to be operated in a horizontal position only.
Avoid Interference
- When you place this unit near TV, radio or VCR, noisy may occur or the sound may distorted. In this case, move the unit away from the TV, radio or VCR.
Disconnect Power
- If you are not going to use the unit for a long time, be sure to disconnect the unit from the wall outlet. To disconnect the AC power cord (main leads), grasp the plug itself, never pull the cord.
The mains plug is used as disconnect device, the disconnect device shall remain readily operable.
IMPORTANT SAFETY INSTRUCTIONS
Warning: To reduce the risk of fire or electric shock, do not expose this apparatus to rain or moisture. Dangerous high voltages are present inside the enclosure. Do not open the cabinet, refer servicing to qualified personnel only.

WARNING: SHOCK HAZARD - DO NOT OPEN AVIS: RISQUE DE CHOC ELECTRIQUE - NE PAS OUVRIR

The lighting flash with arrowhead symbol, within an equilateral triangle, is intended to alert user to the presence of uninsulated "dangerous voltage" within the product's enclosure, that may be of sufficient magnitude to constitute a risk of electric.

The excclamation point within an equilateral triangle is intended to alert the user to the presence of important operating and maintenance (servicing) instruction in the literature accompanying the appliance.
Notes:
• Periodically inspect for damage.
• Adult supervision recommended.
CAUTION:
PLEASE READ AND OBSERVE ALL WARNINGS AND INSTRUCTIONS GIVEN IN THIS OWNER'S MANUAL AND THOSE MARKED ON THE UNIT, KEEP THESE INSTRUCTIONS. RETAIN THIS BOOKLET FOR FUTURE REFERENCE.
This set has been designed and manufactured to assure personal safety. Improper use can result in electric shock or fire hazard. The safeguards incorporated in this unit will protect you if you observe the following procedures for installation, use and servicing. This unit does not contain any parts that can be repaired by the user.
Before using the unit, be sure to read all operating instructions carefully. Please note that these are general precautions and may not pertain to your unit. For example, this unit may not have the capability to be connected to an outdoor antenna.
- Read these instructions
- Keep these instructions
- Heed all warning
- Follow all instructions
- Do not use this apparatus near water
- Clean only with dry cloth
- Do not block any ventilation openings. Install in accordance with the manufacturer's instructions.
- Do not install near any heat sources such as radiators, heat registers, stoves, or other apparatus (including amplifiers) that produce heat.
- Do not defeat the safety purpose of the polarized or grounding-type plug. A polarized plug has two blades with one wider than the other. a grounding type plug has two blades and a third grounding prong. the wide blade or the third prong are provided for your safety. if the provided plug does not fit into your outlet, consult an electrician for replacement of the obsolete outlet.
- Protect the power cord from being walked on or pinched particularly at plugs, convenience receptacles, and the point where they exit from the apparatus.
-
Only use attachments/accessories specified by the manufacturer.
-
Use only with the cart, stand, tripod, bracket, or table specified by the manufacturer, or sold with the apparatus. When a cart is used, use caution when moving the cart/apparatus combination to avoid injury from tip-over.

Portable Cart Warning
-
Unplug this apparatus during lightning storms or when unused for long periods of time.
-
Refer all servicing to qualified service personnel. Servicing is required when the apparatus has been damaged in any way, such as power-supply cord or plug is damaged, liquid has been spilled or objects have fallen into the apparatus, the apparatus has been exposed to rain or moisture does not operate normally, or has been dropped.
15. Power Source
The product should be operated only from the type of power source indicated on the marking label. If you are not sure of the type of power supply to your home, consult your appliance dealer or local power company. For products intended to operate from battery power, or other sources, refer to the operating instructions.
16. Power lines
An outside antenna system should not be located in the vicinity of overhead power lines or other electric light or power circuits, or where it can fall into such power lines or circuits. When installing an outside antenna system, extreme care should be taken to keep from touching such power lines or circuits as contact with them might be fatal.
17. Overloading
Do not overload wall outlets and extension cords as this can result in a risk or fire or electric shock.
18. Object and liquid entry
Never push objects of any kind into this product through as they may touch dangerous voltage points or short out parts that could result in fire or electric shock. Never spill or spray any type of liquid on the product.
19. Outdoor antenna grounding
If an outside antenna is connected to the product, be sure the antenna system is grounded so as to provide some protection against voltage surges and built up static charges. Section 810 of the National

Electrical Code, ANSI/NFPA 70, provides information with respect to proper to grounding of the mast and supporting structure, grounding of the lead-in wire to an antenna discharge product, size of grounding conductors, location of antennadischarge product, connection to grounding electrodes and requirements for the grounding electrodes.
20. Service
Do not attempt to service this product yourself as opening or removing covers may expose you to dangerous voltage or other hazards. Refer all servicing to qualified service personnel.
21. Replacement parts
When replacement parts are required, be sure the service technician uses replacement parts specified by the manufacturer or those that have the same characteristics as the original part. Unauthorized substitutions may result in fire or electric shock or other hazards.
22. Safety check
Upon completion of any service or repairs to this product, ask the service technician to perform safety checks to determine that the product is in proper operating condition.
23. Damage requiring service
Unplug the product from the wall outlet and refer servicing to qualified service personnel under the following conditions:
a. When the power-supply cord or plug is damaged.
b. If liquid has been spilled or objects have fallen into the product.
c. If the product has been exposed to rain or water.
d. If the product does not operate normally by following the operating instructions,
Adjust only those controls that are covered by the operating instructions, as an adjustment of other controls may result in damage and will and require extensive work by a qualified technician to restore in the product to its normal operation.
e. If the product has been dropped or the cabinet has been damaged.
f. When the product exhibits a distinct change in performance – this indicates a need for service.
24. Note to CATV system installer
This reminder is provided to call the CATV system installer's attention to Article 820-40 of the NEC that provides guidelines for proper grounding and, in particular, specifies that the cable ground shall be connected to the grounding system of the building, as close to the point of cable entry as practical.
FCC information
This device complies with Part 15 of the FCC Rules. Operation is subject to the following two conditions: (1) This device may not cause harmful interference, and (2) this device must accept any interference received, including interference that may cause undesired operation. In accordance with FCC requirements, changes or modifications not expressly approved by CRAIG Electronics International Ltd. could void the user's authority to operate this product. This device generates and uses radio frequency (RF) energy, and if not installed and used properly, this equipment may cause interference to radio and television reception. If this equipment does cause interference to radio or television reception (which you can determine by unplugging the unit), try to correct the interference by one or more of the following measures:
- Re-orient the receiving antenna (that is, the antenna for the radio or television that is "receiving" the interference).
- Move the unit away from the equipment that is receiving interference.
- Plug the unit into a different wall outlet so that the unit and the equipment receiving interference are on different branch circuits. If these measures do not eliminate the interference, please consult your dealer or an experienced radio/television technician for additional suggestions.
Ventilation
You must adequately ventilate the product. Make sure there is adequate space around the unit to provide proper air flow for ventilation.
For your safety
Insert the AC plug (with the 2 blades) into a conveniently located AC outlet having AC\~120V, 60Hz. The AC plug supplied with the unit is polarized to help minimize the possibility of electric shock. If the AC p does not fit into a nonpolarized AC outlet, not file or cut the wide blade. It is the user responsibility to have an electrician replace the obsolete outlet.

Removing the power plug is the only way to completely remove power from your product. Make sure the power plug remains easily accessible.

- MUTE Button: Press to turn off the sound temporary, press again to turn the sound back.
- VOL - Button: Press to reduce the sound level.
- LCD Display.
- Remote Sensor.
- STANDBY Indicator.
- INPUT Button: Press repeatedly to select the input source as desire.
- STANDBY Button: Press to turn on the unit from standby mode. Press again to turn the unit off (standby).
- VOL + Button: Press to increase the sound level.
- CD L Jack: Left channel for CD input.
- AUX1 L Jack: Left channel for AUX1 input.
- AUX2 L Jack: Left channel for AUX 2 input.
- POWER ON/OFF Switch.
(The switch on rear enclosure is an all-pole mains switch which can be used as disconnect device. The switch shall remain readily operable. The symbol "O" on switch indicates OFF (power), The symbol "I" on switch indicates ON(power)) - FM ANT (Antenna) Input Jack.
- CD R Input Jack: Right channel for CD input.
- AUX1 R Jack: Right channel for AUX1 input.
- AUX2 R Jack: Right channel for AUX2 input.
- PC/MP3 Input Jack.
- AC Power Cord.

-
STAND-BYButton Press to turn on the unit from standby mode. Press again to turn the unit off (standby).
-
SRS Button Press to turn on the surround sound effect. Press again to turn it off.
-
INPUTButton Press repeatedly to select the input source as desire.
-
MEMORY Button In radio mode, press to store the current radio station into the memory.
-
SCAN▲Button: Press to searching the upper frequency radio stations.
-
AUTOBHttttn In radio mode, press to turn on the auto searching. Press again to turn it off.
-
SCANVButton: Press to searching the lower frequency radio stations.
-
SIEREOButton While receiving the radio FM broadcasting, press to turn on stereo. Press again to turn it off.
-
SUB-Button Press to reduce the sound level of woofer.
-
WOL-Button Press to reduce the sound level.
-
MUTE Button Press to turn off the sound temporary, press again to turn the sound back.
- RHSFTButton Press to reset the sound level to default setting.
- CHL-B Button: Imodipress to searching the stored upper channels.
- CHH-Buoton: In radio mode, press to searching the stored lower channels.
- SUB+Button Press to increase the sound level of woofer.
- WOL+Button Press to increase the sound level.
HOW TO USE THE REMOTE CONTROL
- Battery Installation:
a. Slide and lift up the battery door.
b. Install two (2) "AAA' size batteries (included) into the battery compartment as the figure below and the polarity markings inside battery compartment.
c. Replace the battery door.

natural_image
Diagram of a battery cell with two electrolytic cells and external capacitors (no text or symbols)BATTERY PRECAUTIONS
Follow these precautions when using batteries in this device:
- Use only the size and type of batteries specified.
- Be sure to follow the correct polarity when installing the batteries as indicated next to the battery compartment. Reversed batteries may cause damage to the device.
- Do not mix different types of batteries together (e.g. Alkaline, Rechargeable and Carbon-zinc) or old batteries with fresh ones.
- If the device is not to be used for a long period of time, remove the batteries to prevent damage or injury from possible battery leakage.
- Do not try to recharge batteries which not designed to be recharged; they can overheat and rupture. (Follow battery manufacturer's directions.)
- Do not dispose of batteries in fire, Batteries may explode or leak.
2. Effective scope of the remote control
The remote control has an operating range, which is less than 16 feet, and at 30 degree angle left or right away from the system.

NOTES:
When there is an obstacle between the unit and the transmitter, the transmitter may not operate.
When direct sunlight, an incandescent lamp, fluorescent lamp or any other strong light shines on the REMOTE SENSOR of the unit, the remote operation may be unstable.
PLACING THE UNIT
Take advantage of SRS stereo technology, you can listen to surround sound without extra speakers. Placing our system as follows, and turn on SRS effect by press the SRS Button on the remote control, you will get the surround sound effects.
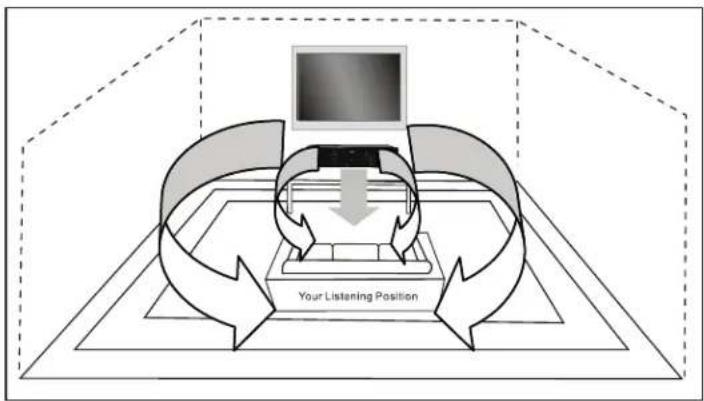
flowchart
graph TD
    A["Computer"] --> B["User"]
    B --> C["Feedback Loop"]
    C --> D["User"]
    D --> E["Your Listening Position"]
    E --> F["Back to Computer"]
    style A fill:#f9f,stroke:#333
    style B fill:#ccf,stroke:#333
    style C fill:#cfc,stroke:#333
    style D fill:#fcc,stroke:#333
    style E fill:#cff,stroke:#333

isatrademarkofSRSLabs,Inc.SRS
technology
isincorporatedunderlicensefromSRSLabs,Inc.
To listening the sound source from Television and/or CD/VCR/DVD/DVR Players, connect the unit with the external device as below (connection cables not included):

flowchart
graph TD
    A["To Stereo Output"] --> B["TV"]
    C["Video In"] --> B
    B --> D["Video Out"]
    D --> E["CD AUX 1/AUX 2 INPUT SELECT"]
    E --> F["PC/PS3"]
    F --> G["Video In"]
    style A fill:#f9f,stroke:#333
    style C fill:#f9f,stroke:#333
    style D fill:#ccf,stroke:#333
    style E fill:#cfc,stroke:#333
    style F fill:#fcc,stroke:#333
    style G fill:#cff,stroke:#333
CD/VCR/DVD/DVR Players
To listening the sound source from PC (Computer) or MP3 Players, connect the unit with the external device as below (connection cables not included):

OPERATIONS
- Press the POWER ON/OFF Switch on the rear of unit to ON position to turn the unit to Standby mode.
- Press the STANDBY Button on the unit or remote control to power on the unit.
- Press the INPUT Button on the unit or remote control repeatedly to select the input sources to PC; Radio; CD; AUX1 or AUX2 as desire.
- Press the VOL +/- Buttons on the unit or remote control to adjust volume as desire.
- Press the SUB +/- Buttons on the remote control to adjust the sound level of woofer.
- Press the SRS Button on the remote control to turn the Surround Sound Effect ON, press again to turn it OFF.
- During listening, press the MUTE Button on the unit or remote control to turn off the sound temporary (MUTE will appear on the display), press again to turn the sound back.
- During listening, press the RESET Button on the remote control to reset the sound level to default settings.
- When finished listening, press the STANDBY Button on the unit or remote control to turn off (Standby mode) the unit.
NOTE: If long period off time will not use the unit. Power off the unit by press the POWER COMOFFS Switch to OFF position to Carolina ACC supply.
Listening tooRealtos:
Connected the supplied FM Antenna to FM ANT Jack on the rear of the unit as the figure below. Extend the wire and relocation it to get the best reception.

natural_image
Simple line drawing of a cable connected to a rectangular device with a grid and control panel (no text or symbols)- Power ON the unit as previous procedures.
- Press the INPUT Button on the unit or remote control repeatedly until 87.50 MHz appear on the display.
- Press the SCAN ▲/▼ Buttons repeatedly to search the specific radio stations. (To searing the radio stations in auto mode: Press the AUTO Button on the remote control, AUTO will appear on the display. In this setting, press and hold the SCAN ▲/▼ Buttons one second then release the button. The unit will auto search the next available radio station then stop.)
- Press the STEREO Button on the remote control repeatedly to select stereo or mono as desire. STEREO or MONO will appear on the display.
- To store the current received radio station into the memory. Press the MEMORY Button on the remote control, Ⓐwill appear on the display. Press the CH ▲/▼ Buttons repeatedly to select channel number as desire. Press the MEMORY Button again to stored the current radio station to the selected channel.
- To listening the preset channels, press the CH ▲/▼ Buttons on the remote control repeatedly until the desired channel appear on the display.
- When finished listening, power off the unit as previous procedures.
Power Supply.....AC\~120V, 60Hz
Power Output(Max).... 75 W x 2
Input Sensitivity....400mV ± 50mV
S/N (A Weight)≥80dB
Channel Separated Rate(1kHz)≥40dB
Speaker Impedance....8. Ohm
THD (1kHz, 1W, 8 Ohm)....≤0.5%
Frequency response 20Hz-20KHz
Note: Specifications are subject to change for improvements.
Accessory:
1 x Instruction Manual
1 x Remote Control
2 x "AAA" size batteries for remote control
1 x 3.5mm mini plug connection cable
IMPORTANT: Pack carefully in original package if possible. We are not responsible for damage incurred in returning items for repair, A letter stating your exact street addres, daytime phone number, and the problem you are experiencing should be included. You must also enclose a copy of the original receipt a sproof of date of purchase
尺寸:140x200mm

www.pyleaudio.com
- Maintenance and Care
- Caring for the Unit
- Cleaning the Unit
- Inclination
- Avoid Interference
- Disconnect Power
- IMPORTANT SAFETY INSTRUCTIONS
- Notes:
- CAUTION:
- Power Source
- Power lines
- Overloading
- Object and liquid entry
- Outdoor antenna grounding
- Service
- Replacement parts
- Safety check
- Damage requiring service
- Note to CATV system installer
- FCC information
- Ventilation
- For your safety
- HOW TO USE THE REMOTE CONTROL
- BATTERY PRECAUTIONS
- Effective scope of the remote control
- PLACING THE UNIT
- OPERATIONS
- Listening tooRealtos:
- Accessory:
Marque : Pyle
Modèle : PSBV100
Catégorie : Barre de son