
SF-P80DJ - Lave-linge HITACHI - Notice d'utilisation et mode d'emploi gratuit
Retrouvez gratuitement la notice de l'appareil SF-P80DJ HITACHI au format PDF.


| Type de produit | Lave-linge frontal |
| Marque | Hitachi |
| Modèle | SF-P80DJ |
| Capacité de lavage | 8 kg |
| Vitesse d'essorage maximale | 1200 tours/min |
| Classe énergétique | A+++ |
| Consommation d'eau annuelle | 9 900 L |
| Consommation d'énergie annuelle | 152 kWh |
| Niveau sonore (lavage/essorage) | 59 dB / 76 dB |
| Nombre de programmes | 14 |
| Programmes principaux | Coton, Synthétiques, Délicats, Rapide, Laine, Soie, Rinçage + Essorage, Essorage seul |
| Options | Départ différé, Prélavage, Repassage facile, Arrêt cuve pleine |
| Dimensions (H x L x P) | 85 x 60 x 65 cm |
| Poids net | 72 kg |
| Alimentation | 220-240 V, 50 Hz |
| Puissance nominale | 2200 W |
| Type d'installation | Libre ou encastrable |
| Sécurité enfants | Sécurité enfants par code verrouillage |
| Système anti-débordement | Oui |
| Nettoyage du tambour | Programme Nettoyage tambour |
| Réparabilité | Indice de réparabilité 7.5/10 |
FOIRE AUX QUESTIONS - SF-P80DJ HITACHI
Questions des utilisateurs sur SF-P80DJ HITACHI
0 question sur cet appareil. Repondez a celles que vous connaissez ou posez la votre.
Poser une nouvelle question sur cet appareil
Téléchargez la notice de votre Lave-linge au format PDF gratuitement ! Retrouvez votre notice SF-P80DJ - HITACHI et reprennez votre appareil électronique en main. Sur cette page sont publiés tous les documents nécessaires à l'utilisation de votre appareil SF-P80DJ de la marque HITACHI.
MODE D'EMPLOI SF-P80DJ HITACHI
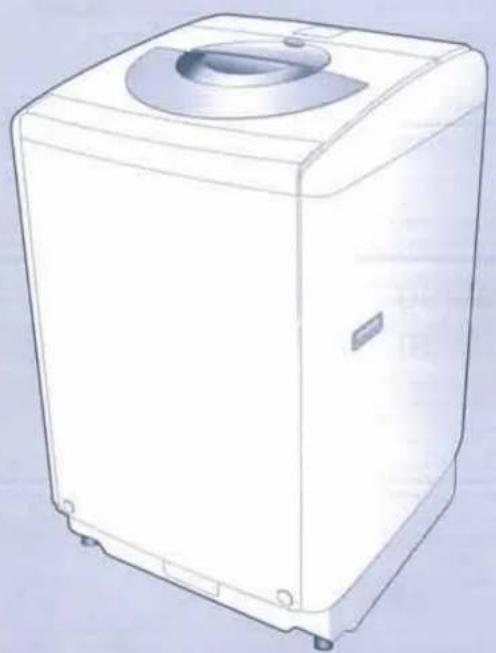
HITACHI FULLY AUTOMATIC WASHER
Model :
SF-P80DJ
Thank you for purchasing your new HITACHI Fully Automatic Washer.
- Please read this guide carefully to operate the machine properly.
- Please keep this manual for future reference.
natural_image
Line drawing of a white washing machine with a circular top and side-mounted buttons (no text or symbols)Contents
Convenient New Features 2
Precautions 3
Description of Main Components 7
Control Panel 8
Detection of laundry load, and indication of amount of detergent (rough measure) and water level 10
Types of laundry and how to select your desired fully automatic washing course 12
Easy to wash course (FUZZY course) 14
User customized washing course for home use (ECO WASH course) ... 16
Rapid Washing (SPEEDY course) 18
Washing Heavily Stained Clothes (HEAVY course) 19
Using the Washing Cap 20
Washing course for clothes with DRY Cleaning label (WOOL course) .... 21
User-customized washing course for home use (JET course) 24
Thorough washing cycle (SOAK course) 26
Using the Delay Timer for washing (DELAY course) 27
Washing Procedure 28
Manual Operation 30
Load size and Detergent 32
Using liquid detergent, bleach and softener 33
Using powder detergent 34
Using wash water twice and starch 35
How to change sound (Melodious) of Buzzer 36
Child Lock 36
Precautions during use 36
Handy Washing Hints 37
Care and Maintenance 38
Alarm Mode Indicators 42
Installing and dismantling the water supply hose 44
Trouble Shooting Guide 45
Safety Check 45
Specifications 46
Fixing the washing machine 46
Memo 47
Convenient New Features
One Touch-Sensor Wash
Convenient one touch operation where water level, load size and fabric mix are automatically sensed to ensure correct wash action for each load.
Heavy Duty, Large Capacity (8.0 kg), Stainless Steel Wash Bowl
Large capacity wash bowl will handle a large, family sized load with ease.
Water-level Selector in 12 Levels
Economical washing can be done even for small load of laundry.
Depending on a wide variety of washing load sizes (800g to 8.0 Kg.) fine adjustment for washing water level can be made automatically in 12 levels.
Double Lint Filter
Lint can be collected assiduously through the upper and lower lint filters.
Lint filters located in upper and lower sections of the washbowl enable lint to be collected effectively.
Even when washing is under way at a low water level, the lower lint filter can take away lint to a satisfactory degree. 40

"AIR JET" (Spinning with Blowing AIR)
During the process of dry function, water content of laundries is blown away by dried blowing air and laundries can be dried earlier than usual spinning time.

flowchart
graph LR
    A["Dried Blowing Air"] --> B["AIR with moisture"]
    C["Dried Out"] --> B
Nano Titanium Catalyst
Many agents can be put in position. It's dense enough to catch the smallest microbes.

chemical
Diagram illustrating the transformation of a polymer chain with spherical particles and chains, showing structural change from left to right.Precautions
Before operating the machine, please read the precautions carefully for proper operation.
■ Precautions and warnings in this manual.
Classification and description of types of damages and dangers caused by incorrect operation:
This appliance is not intended for use by young children or infirm persons unless they have been adequately supervised by a responsible person to ensure that they can use the appliance safely.
■ Young children should be supervised to ensure that they do not play with the appliance.
 Warning Warning | This means there is a risk of injury or death. |
 Caution Caution | This means there is a risk of injury or damage. |
Examples of pictures
 | This means warning or precaution. |
 | This means something that cannot or must not be done. |
 | This means something that must be done. |

Warning

Do not open or remove
- This could cause fire, electric shock or injury.
- For repair, please contact our stores.

Use electricity safely
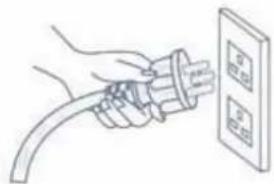
- Using the washing machine plug together with other electrical systems may cause overheating in the plug and result in fire.
natural_image
Line drawing of a hand holding a cable connected to a wall-mounted panel (no text or symbols)
Do not touch with wet hands
Do not insert plug with a wet hand.

natural_image
Illustration of a hand inserting a plug into a wall-mounted electrical outlet (no text or symbols)• This could cause an electric shock.

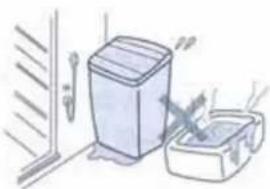
Keep dry
Do not install in a damp place such as a bathroom or a place exposed to rain.
natural_image
Illustration of a washing machine and a sink with a hand gesture (no text or symbols)
Caution
Do not use an electric socket or connection which is damaged or loose.

natural_image
Illustration of a hand holding a smartphone with scissors cutting through it, emitting sound waves (no text or symbols)● This can cause an electric shock or a short circuit which may start a fire.
User customized washing course for home
The sensor detects the type and quantity of the laundry, and the mode to best process the washing is automatically selected.
During the process of dry function, water content of laundries is blown away by dried blowing air and laundries can be dried earlier than usual spinning time.

natural_image
Illustration of a woman in an overalls making a peace sign (no text or symbols)1 Turn the power button ON

2 Select the (JET) course

| How to use PROGRAM (JET COURSE), WASH, RINSE and WATER LEVEL(Different setting is made accordingly every time you press each button) | |||
| PROGRAM (JET COURSE) | WASH | RINSE | WATER LEVEL |
Each setting enclosed in rectangle box is factory-adjusted setting (default setting) prior to shipment.

Warning

No naked flame
Do not place a fire sources such as a candle or cigarette near the machine.

- Risk of fire.

Caution

Caution
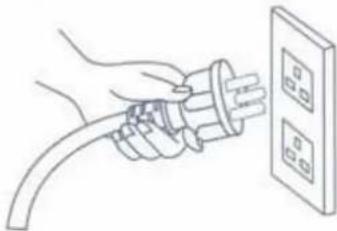
Grip the body of the plug when pulling it out of a socket.
natural_image
Line drawing of a hand holding a plug with two outlets (no text or symbols)● Failure to disconnect a plug properly could cause a short circuit, electric shock or fire.

Take off plug
If you don't use the machine for a long time, please remove the plug from the socket.

● Failure to do so may cause a fire, leaking current or electric shock due to an ineffective insulator.

Don't do this
Do not use water hotter than 50°C when washing with warm water.

natural_image
Simple line drawing of a trash bin and a hand washing a bag (no text or symbols)- This could create a risk of an electric shock or leaking current due to damaged plastics.

Don't do this
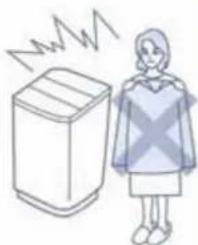
Do not wash fabrics or sheets which cannot be permeated by water.
● Fabrics of this type may be ejected, or the machine might not work properly. This may cause injuly or damage the machine, the floor, the wall, or the clothes.
natural_image
Illustration of a person standing beside a refrigerator with steam lines indicating heat (no text or symbols)Examples of this type of fabrics include ; raincoats, swimming costumes, wetsuits, ski suits, sleeping bags and etc.

Caution
After turning off the water, or removing or fitting a water hose, turn off the water tap before pressing the start button, then turn on the tap. (The same applies if you do not use the machine for a long time.)

Caution
If detergent spills out from the machine, clean it up with a damp cloth immediately.
- If there is air in the water pipe, the air pressure could damage the machine, causing leaking water or an injury.
- Otherwise this could damage the plastics and cause injury.
User customized washing course for home
e sensor detects the type and quantity of the laundry, and the mode to best process the washing is automatically selected.
pinning rinse cycle with water injection" is performed in the "ECO WASH" course super save water.

natural_image
Illustration of a person wearing an overalls and raising one finger (no text or symbols)1 Turn the power button ON

2 Select the [ECO WASH] course

![HITACHI SF-P80DJ - Select the [ECO WASH] course - 2](/content/2026/06/1290776/images/6ac7c3085f7be39a449af2b664272ba626e91b8019cd9c3c195ee9936f2c2ec7.jpg)
Warning : Fabric softener should not be use with ECO WASH course.
Description of Main components

- If the washing machine is to be connected to the water mains, using new water supply hose and the old water supply hose should not be used.
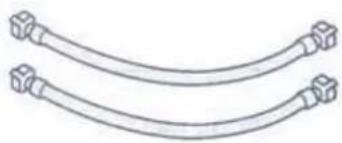
Attachments
Check that the followings are contained in the washer package. If not provided, please contact your retailer immediately.
natural_image
Pure diagram of two curved pipe fittings with flanged ends (no text or symbols)Water supply hose x 2
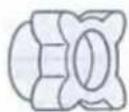
Water inlet cap

Leg cap x 6

Drain hose assembly and Hose clamp
Washing Procedure
is section explains the washing processes of each course. Slightly more complex ashing processes are adopted to ensure washing performance which meet an extensive variety of washing needs. This section provides information for those ashing to understand the progress and functions of the washing process.

natural_image
Illustration of a person wearing a graduation cap and holding a pointer (no text or symbols)| Programmed Wash Cycles | Auto-Water Level Setting | Washing (Approx.) | Rinsing | |||
| FUZZY(3 STEP WASH) | 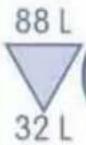 (12 levelsAutomatic setting) (12 levelsAutomatic setting) |  | ||||
| 1st Rinse | 2 nd Rinse | |||||
| Serving 6 min. | Serving 8 min. | Serving 6 min. | Serving 8 min. | |||
| 6-10 min. | 0.8 min. | 4-8 min. | 3.0 min. | |||
| ECO WASH(3 STEP WASH) | 88 I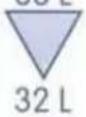 12 levelsAutomatic setting 12 levelsAutomatic setting | 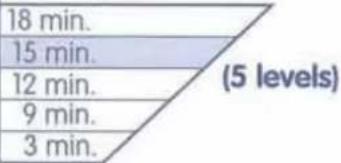 | 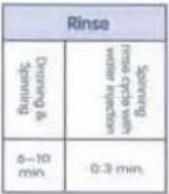 | |||
| SPEEDY(3 STEP WASH) | 64L(88L ~ 32L)(12 levels) | 9 min.(18 min, 15 min, 12 min,9 min, 3 min) | DEEP 1(DEEP 1 ~ DEEP 2) | |||
| HEAVY | 68L(68L ~ 32L)(7 levels) | 18 min.(18 min, 15 min, 12 min,9 min, 3 min) | DEEP 2(DEEP 1 ~ DEEP 2) | |||
| WOOL | 38L(52L ~ 32L)(4 levels) | 9 min.(Fixed) | DEEP 2(Fixed) | |||
| JET(3 STEP WASH) | 88 L(12 levelsAutomatic setting) | 18 min.(5 levels) | DEEP 2(DEEP 1 ~ DEEP 2) | |||
| 15 min. | ||||||
| 12 min. | ||||||
| 9 min. | ||||||
| 3 min. | ||||||
| SOAK | 88 L(12 levelsAutomatic setting) | 110 min. | DEEP 2(Fixed) | |||
| 103 min. | ||||||
| DELAY(3 STEP WASH) | 88 L(12 levelsAutomatic setting) | 18 min.(5 levels) | 1st Rinse | 2 nd Rinse | ||
| 15 min. | Serving 6 min. | Serving 8 min. | ||||
| 12 min. | 6-10 min. | 0.8 min. | ||||
| 9 min. | 4-8 min. | 3.0 min. | ||||
| 3 min. | min. | |||||
| 1st Rinse | 2 nd Rinse | ||
| Draining &Spinning | spinningresist cycle withwater injection | Draining &Spinning | Deep inlet |
| 6-10min. | 0.8 min | 4-8min. | 3.0min. |

flowchart
graph TD
    A["Program button"] --> B["Program ON/OFF"]
    B --> C["WATER TEMP button"]
    C --> D["Water TEMP button"]
    D --> E["FUZZY CONTROL"]
    E --> F["Indication of program"]
    F --> G["Indicator of the selected course will light up. When the power is turned on."]
    F --> H["Indication of water temp"]
    H --> I["Depending on which lamp is turned on in this area, you will be informed of washing water temperature."]
    H --> J["Use this level as a guide to place the main unit in a horizontal position. If the air bubble stays in the center circle, no adjustment of legs is required."]
    C --> K["Power button"]
    K --> L["Button to turn the machine ON or OFF. When the operation finishes, the buzzer beeps and the machine will be turned off automatically."]
    style A fill:#f9f,stroke:#333
    style B fill:#ccf,stroke:#333
    style C fill:#cfc,stroke:#333
    style D fill:#fcc,stroke:#333
    style E fill:#cff,stroke:#333
    style F fill:#ffc,stroke:#333
    style G fill:#fff,stroke:#333
    style H fill:#fff,stroke:#333
    style I fill:#fff,stroke:#333
    style J fill:#fff,stroke:#333
CAUTION
- Never push the two-or-more buttons simultaneously. Otherwise, malfunction may result.
Detection of laundry load, and indication o
Detection of laundry load
The built-in sensor automatically detects any laundry load and indicates recommendable amount of detergent and water level as follows:


2 The pulsator rotates for approximately eight seconds


3 Indication of detergent quantity (rough measure) and water level
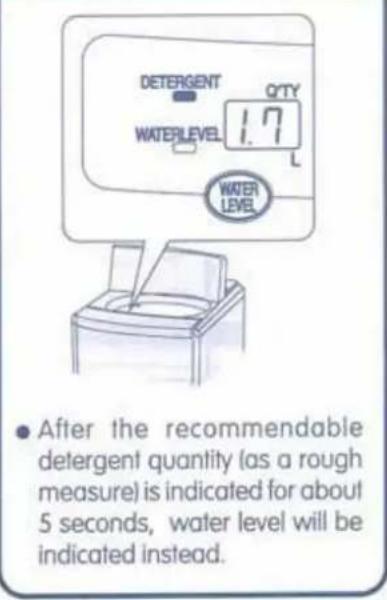
Detergent quantity (rough measure) indicator and its recommendable amount
The detergent quantity (rough measure) indicator shows you the recommendable amount of concentrated-type powder detergent (20g is enough to wash laundry at 32L water level) which is measured by a measuring spoon (with max. capacity of 35g).
- The detergent quantity (rough measure) indication is determined based on one spoonful of measuring spoon with the max. capacity of 35g. (The capacity of a measuring spoon may vary depending on detergent manufacturer and brand.)
• See page 32 for other kinds of detergents. - Do not use excessive amount of detergent. Otherwise, a poor rinsing performance may result or excessive foams may cause some trouble.
- For details, observe the instructions of each detergent you use.
- In "WOOL" courses, no detergent quantity (rough measure) is indicated.

amount of detergent (rough measure) and water level
Water level indicator
Depending on laundry load, the applicable water level that ranges from 32L to 88L is indicated in 12 levels. (For details 📋 32)
Water level indication

Detergent quantity (rough measure) indication
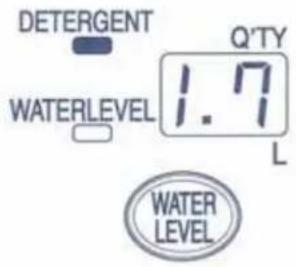
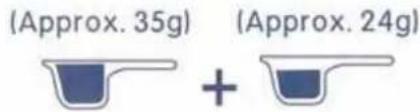
Use about 59g of detergent in total.
- If you press the WATER LEVEL button while a water level is appearing on the control panel, recommendable detergent quantity (rough measure) will be indicated for about 2 seconds.
- (This indication is available only when washing water is fed into the washer during washing cycle. In other cases, no indication is available).
Types of laundry and how to select you
This washer has been designed to provide you with 8 different kinds of fully automatic washing courses.
Select your desired washing course and suitable amount or type of detergent for laundry type to ensure an effective washing.

natural_image
Illustration of a person wearing a graduation cap and holding a pointer (no text or symbols)| Types of laundry | ||||
| General types of laundry (cotton, synthetic fiber, and blended yarn fabric) | FUZZY | |||
 |  |  | ||
 |  | |||
 |  |  | ||
| Clothes that are labeled with "Dry Cleaning" only as well as "Dry Cleaning" and "Hand Washing" 21 |  |  | ||
| Heavily stained clothes | Socks and sportswear stained with mud Bulky clothes such as jeans |  |  | |
| Stubborn stains, such as oil and fat fouling, on collars and cuffs |  | |||
- Load size and detergent 32
- When using bleach, liquid detergent and softener 33
- When using powder detergent 📋 34
desired fully automatic washing course
| Recommendable full-automatic course | Recommendable detergent | |
| Automatic Washing suitable for laundry will be performed. | 14 | Synthetic detergent (powder and liquid detergent) |
| Automatic Washing for save water. | 16 | |
| During the process of dry function, water content of laundries is blown away by dried blowing air and laundries can be dried earlier than usual spinning time. | 24 | |
| Lightly-stained laundry is quickly washed. | 18 | |
| This convenient function is designed to wash clothes when going out or during night time and dry in the morning. | 27 | |
Whirl-wash water current enables laundry to be washed gently. (An optionally available Washing Cap  is required.) 20 is required.) 20 | 22 | Detergent for exclusive use for clothes with a tag indicating "Dry Cleaning" |
| Strong washing water current enables the laundry to be cleansed to a satisfactory degree. | 19 | Synthetic detergent (powder and liquid detergent) |
| Through activation of enzyme element contained in detergent, the laundry is washed clean without damaging it. | 26 | |
Easy to wash course (FUZZY course)
The sensor detects the type and quantity of the laundry, and the mode to best process the washing is automatically selected. (for course details. 28)
"Spinning rinse cycle with water injection" is performed in the "FUZZY" course to save water.
For water temperature, see Table 1 and Table 2.

natural_image
Line drawing of a person standing beside a box with an open lid (no text or symbols)1 Turn the power button ON

2 Select the (FUZZY) course
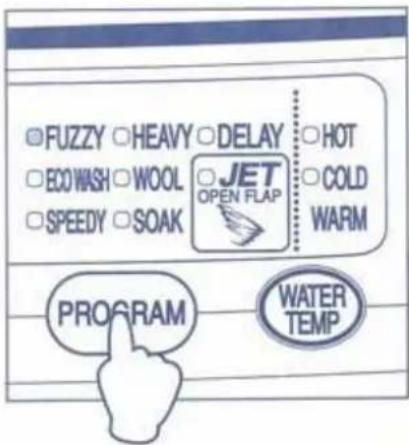
Table 1. WASH WATER TEMPERATURE GIUDE
| WATER TEMPERATURE | USED FOR |
| Hot | White and colorfast cottons, linens with heavy or normal soil.Permanent press & synthetics with heavy or oily soil. |
| Warm | Dark or non-color fast fabrics. White & colored synthetics.Permanent press with normal or light soil.Wool is only selected with warm. |
| Cold | Normal or lightly soiled fabrics. |
Table 2. FILL TEMPERATURE OF EACH CYCLE FOR PROGRAM
For each program, washing machine automatically selects a suitable fill water temperature.
| PROGRAM | Fill TEMPERATURE | APPENDIX EXPLANATION | |
| WASH | RINSE | ||
| FUZZY, JETECO WASHSPEEDY, HEAVYDELAY | WARMHOTCOLD | COLD | Fill temperature for wash is able to change for your washing style.Fill cold for rinse is not able to change because of energy saving. |
| WOOL | WARM | WARM | Fill temperature is not able to change to protect laundry transformation. |
| SOAK | COLD, WARM | COLD | Fill temperature for wash is able to change for your washing style. |

A wash temperature to be selected is illuminated during a complete cycle on the control panel.
Washing actions of FUZZY ECO WASH SPEEDY DELAY AND JET courses.
After closing the lid
Step 1:
Dissolve detergent in small amount of water and do washing with the thick detergent water.

1

Step 2:
Add water. Wash in strong water flow to get the all dirt out of laundry.
2

Step 3:
Add more water and wash in regular water level

3
3 Press the START/PAUSE button

● The pulsator rotates for approximately eight seconds to detect the amount of washing, and then the guideline for the amount of detergent and water is indicated before the water starts feeding in.
4 Put the detergent in and close the lid.
To ensure that the detergent dissolves well in the water, place the detergent in the area where the feed water falls.
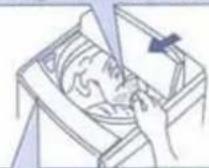
According to the recommendable detergent quantity (as a rough measure) indicated on the control panel, put the measured detergent into the bowl.
• 33 when using bleach, liquid detergent and softener.
- 34 when using powder detergent. (natural oils and fats.)
● The spin cycle will not proceed if the cover remains open.
5 Washing finished.
The beeping buzzer indicates the completion of the washing process.

natural_image
Illustration of a single refrigerator with lid and front panel, no text or symbols visible- When the buzzer stops beeping, the power turn off automatically.
Rinsing operations in "FUZZY" course 28
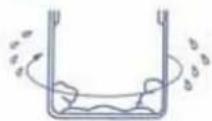
First rinsing cycle (spinning rinse cycle with water injection)
Washer spin-dries the laundry after draining wash water.
Washbowl rotates itself slowly while water is fed into it.

About 6 to 10 min.


About 0.8 min.

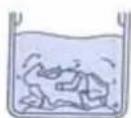
Second rinsing cycle (deep rinse)
Washer spin-dries the laundry after draining wash water.
Water is fed up to the preset water level.
Laundry is stirred with water current (deep rinse).


User customized washing course for home
The sensor detects the type and quantity of the laundry, and the mode to best process the washing is automatically selected.
"Spinning rinse cycle with water injection" is performed in the "ECO WASH" course to super save water.

natural_image
Line drawing of a person wearing an overalls and raising one finger (no text or symbols)1 Turn the power button ON

2 Select the [ECO WASH] course

![HITACHI SF-P80DJ - Select the [ECO WASH] course - 2](/content/2026/06/1290776/images/2a2a355c440299542d5fbdd67e832b788b6aed14ae139fca423c0f553caf4ece.jpg)
Warning : Fabric softener should not be use with ECO WASH course.
ise (ECO WASH course)
3 Press the START/PAUSE button

4 Put the detergent in and close the lid
To ensure that the detergent dissolves well in the water, place the detergent in the area where the feed water falls.
According to the indication of recommendable amount of detergent (rough measure), put measured detergent into the washbowl
When you press the "WATER LEVEL" button, the detergent quantity will be indicated on the control panel for about 2 seconds. 📷 11.

natural_image
Illustration of a hand using a tool to clean food in a container, with arrows indicating direction (no text or symbols)- If the lid is left opened, the sensor cannot detect a proper amount of detergent and no spinning operation can be performed.
Leave the rest of the washing process to the machine until the buzzer beeps.
Rinsing cycle (Spinning rinse cycle with water injection)
Washer spin-dries the laundry after draining wash water.

natural_image
Simple line drawing of a U-tube with liquid and bubbles, showing fluid flow direction (no text or symbols)About 6 to 10 min.
Washbowl rotates itself slowly while water is fed into it.


natural_image
Diagram of a container with a flowing liquid and circular arrows indicating circulation (no text or symbols)About 0.3 min.
Rapid Washing (SPEEDY course)
With this course, you can wash lightly stained laundry or small amount of laundry quickly with ease.
(For details of the washing processes of each course; 28)
natural_image
Illustration of a woman holding a baby (no text or symbols present)1 Turn the power button ON and select the (SPEEDY) course.

● The water level is automatically set at a (64L) (Washing capacity : 4 kg)
2 Press the START/PAUSE button

3 Put the detergent in and close lid
To ensure that the detergent dissolves well in the water, place the detergent in the area where the feed water falls.

natural_image
Illustration of a hand operating a machine with a tool, no visible text or symbolsAccording to the indication of recommendable amount of detergent trough measure, put measured detergent into the washbowl.
When you press the "WATER LEVEL" button, the detergent quantity will be indicated on the control panel for about 2 seconds. ☐ 11
● The spin cycle will not proceed if the lid remains open.
Leave the rest of the washing process to the machine until the buzzer beeps.
■ Helpful tips for effective washing
- For washing lightly stained laundry, the recommendable amount of detergent which is almost one-half the normal quantity (approx. 50 to 60% ) will do. (For detergent quantity; 📋 32)
- Depending on amount of laundry you wash, change water level accordingly. (For a guidance of laundry load; 32)

Washing Heavily Stained Clothes (HEAVY course)
HEAVY course is designed to wash heavily stained clothes such as sportswear and socks with strong water currents. ( 28 for details)

CAUTION
Whenever you use the "HEAVY" course, never attempt to wash those clothes that are liable to get damaged.
- Otherwise, damage to the clothes may result.

natural_image
Illustration of a woman holding an open book (no text or symbols visible)1 Turn the power button ON and select the (HEAVY) course

● The amount of washable clothes is a maximum 3.0kg.
- The water level is set automatically. (If necessary, the water level can be changed to any level in the range from 32L to 68L [in 7 levels]).
2 Press the START/PAUSE button

3 Put the detergent in and close lid
To ensure that the detergent dissolves well in the water, place the detergent in the area where the feed water falls.

natural_image
Diagram of a mechanical device with a handle and lever mechanism (no text or symbols)According to the indication of recommendable amount of detergent (rough measure), put measured detergent into the washbowl. When you press the "WATER LEVEL" button, the detergent quantity will be indicated on the control panel for about 2 seconds. 11
● The spin cycle will not proceed if the lid remains open.
Leave the rest of the washing process to the machine until the buzzer beeps.
■ Helpful tips for effective washing.
When washing bulky clothes such as jeans:
Water level "68L" is suitable for washing four jeans. Water level "32L" is suitable for washing one jeans.
When washing away stubborn stains of socks:
For better washing performance, it is advisable to set water level to "32L" and put a small towel into each of a pair of socks, prior to washing.
- This aims at washing away stained portions which can be rubbed against the pulsator.

Washing course for clothes with DRY Cleaning label (WOOL course)
Even those clothes with "Dry Cleaning" label and/or "Hand Washing" and "Dry Cleaning" labels can be washed gently and carefully through a whirl water current produced by rotating the washbowl itself without activating the pulsator. However, since some materials cannot be washed, check to see if the laundry you wish to wash is machine-washable prior to the washing. (For details of the washing processes of each course; 12

natural_image
Illustration of a woman holding a baby (no text or symbols present)Machine-washable clothes and articles are as follows:
Machine-washable items
- Sweater, cardigan (wool, angora, cashmere, etc.)
• Trousers and skirt - Blouse, shirt, one-piece dress (silk, hemp, etc.)

natural_image
Simple line drawing of a rounded object with no text or symbols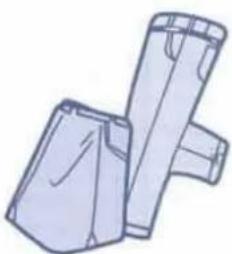
natural_image
Illustration of two mechanical components with no visible text or symbolsNon-machine-washable items
● Leather product, leather ornament
● Garments with ornament (feather, fur, etc.)
● Blended yarn fabric, such as rayon and cupro
• Non-colorfast articles
- Necktie, suits, and coat
- Items to which coating and resin (or adhesive) is applied or emboss (convex and concave patterns) processing is given.
- Wool or silk items using forcibly stranded threads (hard twist yarn), especially woven fabrics.
● Pile fabrics, such as velvets and corduroys
CAUTION
- When washing other items except those mentioned above, observe instructions of detergent you are using.
■ Checking laundry for colorfastness - Please ascertain in advance whether those clothes that may not be colorfast are easily discolored or not.(For this purpose, use a white clean towel dampened with a small amount of liquid detergent and rub it against a hidden portion of a cloth to ascertain whether or not color is transferred to the towel.)
If you find that color is transferred from the cloth to towel, do not wash it.
CAUTION
Precaution to bear in mind when washing clothes with "Dry Cleaning" label
Use a suitable amount of detergent
- You cannot make any difference in washing results even though you use larger amount of detergent than the specified amount. On the contrary, however, it may result in a poor rinsing performance, causing a cloth to be damaged. Do not use bleach.
● Because bleach is extremely alkaline, it causes damage to fabrics.
Washing course for clothes with DRY Cleaning
Before using the washer, read. 21
- Be sure to use an optionally available Washing Cap.
- "WOOL" course cannot be used with timer. 28
Preparation (Pretreatment)
- Prior to washing, wash away dirt beforehand from heavily soiled laundry, if any.
● Turn clothes inside out first to which buttons or embroidenis are attached, then wash them. - In the event that the washed laundry is shrunk excessively, it is advisable to keep its dress-pattern paper to restore its shape to the original form.
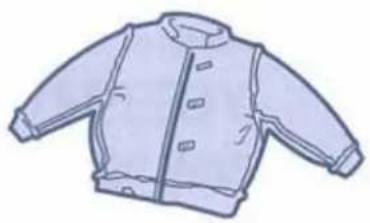
natural_image
Illustration of a light blue traditional-style jacket with buttons and front panel (no text or symbols)1 Put laundry into the wash-bowl, and put the Washing Cap on the laundry.

- Put the laundry neatly into the washbowl in such a manner that the laundry is distributed evenly and uniformly inside the washbowl, then put the Washing Cap on the laundry to prevent it from being swung out.
*This measures is required to prevent the laundry from being deformed or kept off-balance during spin-drying cycle. - Do not perform the washing without using the Washing Cap.
● The maximum load of laundry is 1.5 kg or less.
2 Turn the power switch ON and select the "WOOL" course.

- Water level is designed to automatically reach "38L". If necessary, the level can be changed to any level in the range from "32L" to "52L". (Except the water level button, other buttons remain inoperable.)
● A suitable water level should be that the whole laundry is submerged into water. - Fill temperature is not able to change to protect laundry transformation.
■ Helpful tips for effective washing
How to remove dirt
- Place a clean towel on the reverse side of laundry first, then apply a small amount of liquid detergent to a dirty spot. Pat the spot lightly through the use of brush or the like to remove the dirt.
- Apply a small amount of liquid detergent to a stained spot on cuffs, collars, hems and other areas around pockets of laundry. Then, give a brush finish to it unidirectionally to scour a stain away.

natural_image
Line drawing of a hand adjusting a jacket with a handle (no text or symbols)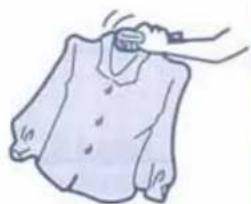
natural_image
Simple line drawing of a hand holding a jacket over a shirt (no text or symbols)■ Setting position of Washing Cap
- The position (or height) into which the Washing Cap should be placed must be the height from where laundry can be lightly covered with it, depending on type, amount and thickness of the laundry to be washed.
- Refer to the guide marks for the setting position, which are indicated on the inner wall of the washbowl.

- When you wash a thin cloth such as blouse, put a clean towel and so on into the washbowl to adjust a height of water level, so that the laundry will be prevented from being un-uniformly distributed inside the washing tub during spin cycle.
abel (WOOL course) Continued from the previous page
3 Put the detergent
Liquid detergent inlet
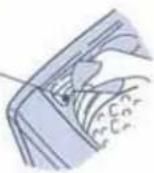
- When you wash a cloth with a tag indicating "Dry Cleaning", be sure to use a detergent (liquid detergent) for exclusive use for that kind of cloth. Mild detergent (liquid detergent) can also be used for those clothes that are labeled with "Hand Washing".
- For amount of detergent, follow its instruction.
- Dilute liquid detergent with water and pour it gently into the washbowl through the liquid detergent inlet.
- Do not use powder detergent because it does not dissolve well in water.
4 Close the lid and Press the START/ PAUSE button

- Be sure to close the main lid completely. (Opening the lid causes the washbowl to stop rotating and indication "C3" will start blinking.
5 When the washing finishes
- Keep sweater of wool, angora and cashmere in shape first and let it dry in the shade in a horizontal position.
- Laying these items flat on such objects ensures that they retain their shape.

natural_image
Illustration of a long-sleeve shirt with pleated design, shown in 3D perspective (no text or symbols)- Keep the shape of blouse or onepiece dress neatly and let it dry by hanging it on a hanger in the shade.
Leave the rest of the washing process to the machine until the buzzer beeps.
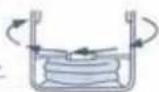
Washing cycle of WOOL course
Washing (9 min)
Whirl current (2 min). + Soak (2.5 min).
(This cycle is repeated twice.)
Whirl current
Washbowl rotation : 6 to 8 sec.
Pause: 12 to 14 sec.
Draining → Spinning (1-2 min)


Deep rinse.
Whirl current + Soak
(30 sec.) + (1.5 min)
This cycle is repeated twice.
Draining → Spinning (1 min)


■ Finish (How to correct shrunk and slightly deformed laundry)
Keep a steam iron off the laundry to spray steam onto it, so that it may keep in shape.

natural_image
Simple line drawing of a printer emitting smoke from a tray (no text or symbols)After spraying a large amount steam over the laundry, use its dress-pattern paper to stretch it out until its shape is restored to the original form.

User customized washing course for home
The sensor detects the type and quantity of the laundry, and the mode to best process the washing is automatically selected.
During the process of dry function, water content of laundries is blown away by dried blowing air and laundries can be dried earlier than usual spinning time.

natural_image
Illustration of a person wearing an overalls and raising one finger (no text or symbols)1 Turn the power button ON

2 Select the (JET) course

| How to use PROGRAM (JET COURSE), WASH, RINSE and WATER LEVEL(Different setting is made accordingly every time you press each button) | |||
| PROGRAM (JET COURSE) | WASH | RINSE | WATER LEVEL |
● Each setting enclosed in rectangle box is factory-adjusted setting (default setting) prior to shipment.
3 Press the START/PAUSE button and put the detergent and close the lid.

To ensure that the detergent dissolves well in the water, place the detergent in the area where the feed water falls.
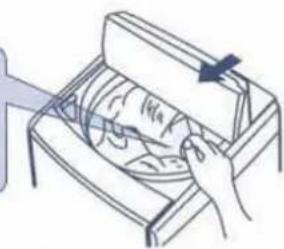
natural_image
Illustration of hands placing a plate into a kitchen appliance with a bag (no text or symbols)4 Open the Air Jet lid.
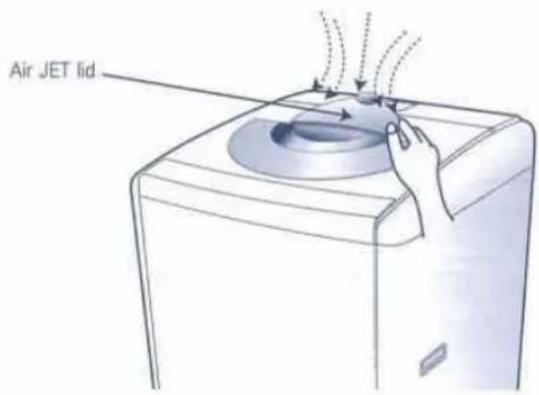
Leave the rest of the washing process to the machine until the buzzer beeps.
Thorough washing cycle (SOAK course)
This course is designed to soak load around 2 hours for thorough washing without causing any damages. ( ⏻ 28 for course details)

natural_image
Illustration of a person adjusting a button-up shirt (no text or symbols)1 Turn the power button ON and select the (SOAK) course
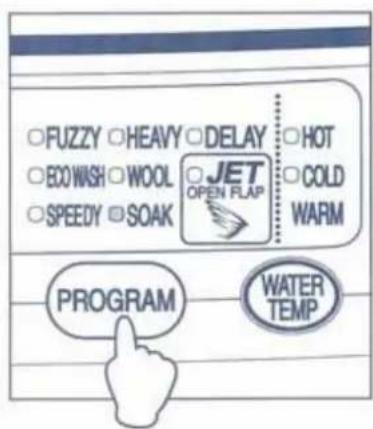
- Not indicating wash and rinse cycles. (28 for course details)
2 Press the START/PAUSE button
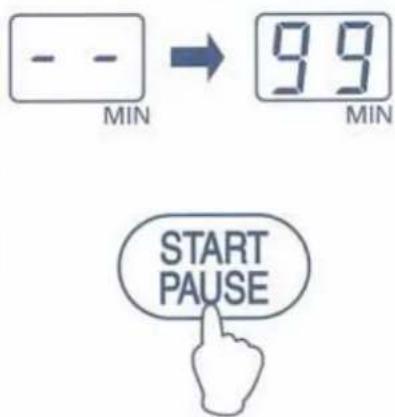
- The remaining wash time starts appearing on the control panel after it comes to "99" min.
3 Put the detergent in and close the lid
To ensure that the detergent dissolves well in the water, place the detergent in the area where the feed water falls.
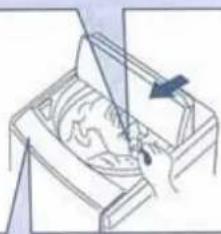
natural_image
Illustration of a hand using a tool to interact with a device (no text or symbols visible)Add in the indicated amount of detergent
- To prevent garments from being creased, spin cycle will not be activated except when it is preset to function.
• To set spin manually. 📋 30
Leave the rest of the washing process to the machine until the buzzer beeps.
■ What's SOAK course?
Soaking means to soak laundry load with gentle water currents to thoroughly wash heavily stained parts such as collars and cuffs.
CAUTION
- Please do not wash clothes of easily-fadeaway colors.
- Be sure not to use powder detergent (natural oils and fats), as it may cause the whole laundry to become yellowish or blackish.
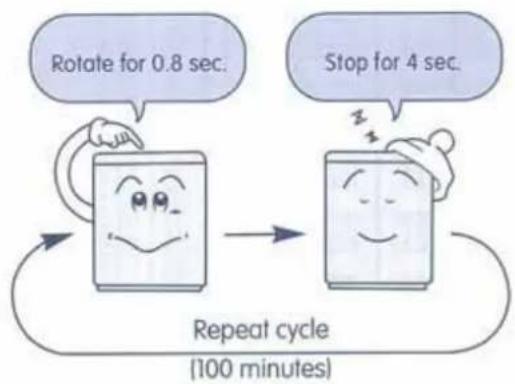
Using the Delay Timer for Washing (DELAY course)
Finishing time can be set 6 and 9 hours.
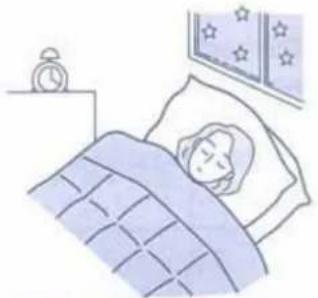
This convenient function is designed to wash clothes when going out or during night time and dry in the morning.
natural_image
Illustration of a sleeping person in bed with a starry nightstand and alarm clock nearby (no text or symbols)1 Turn the power switch ON and put the laundry in.

2 Select the PROGRAM DELAY and press the START/PAUSE button.


● Pulsator rotates for 8 seconds and amount of detergent to be used will be indicated.
- All other indicators are off except timer indicator is on.
- Can be set 6 Hr. and 9 Hr. when push program button.
3 Put the detergent in and close the lid.
Hold the bulge part at the edge of the detergent dispenser and let it all forward to fill in powdered detergent.
(Dispenser in released position)
- For concentrated powdered detergent use only.
- Put the dispenser back in position after timed washing finishes.
The washing process commences in accordance with the preset finishing in time. - When detergent dispenser falls 39
CAUTION
● Make sure that the detergent dispenser is dry, otherwise, detergent will stick on the surface.

CAUTION
● The timer operation will be cancelled when electricity is cut off.
- The actual washing time varies according to different types and quantities of laundry and amount of water injected, as a result, it may differs from the preset washing time slightly.
● To prevent wrinkles, take out and hang dry laundry as soon as washing finishes.
In the follow cases
● To verify the timer setup : Keep pressing the program button to check progress and remaining time.
● To cancel the timer washing process : Turn the power off.
- When water injection is slow (approximately below 10L/minute) or detergent remains in dispenser: Wrap powdered detergent in white handkerchief and put it in the middle of the basket. Make sure detergent is not scattered.
Washing Procedure
This section explains the washing processes of each course. Slightly more complex washing processes are adopted to ensure washing performance which meet an extensive variety of washing needs. This section provides information for those washing to understand the progress and functions of the washing process.

natural_image
Illustration of a person wearing a graduation cap and holding a pointer (no text or symbols)| Programmed Wash Cycles | Auto-Water Level Setting | Washing (Approx.) | Rinsing | |||
| FUZZY(3 STEP WASH) |  (12 levelsAutomatic setting) (12 levelsAutomatic setting) | 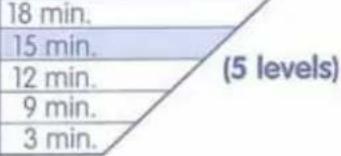 | ||||
| 1st Rinse | 2 nd Rinse | |||||
| Geslar A min. | Geslar B min. | Geslar A max. | Geslar B max. | |||
| 6-10 min. | 0.5 min. | 4-8 min. | 3.0 min. | |||
| ECO WASH(3 STEP WASH) |  12 levelsAutomatic setting 12 levelsAutomatic setting |  | 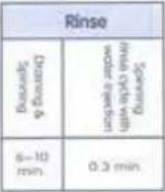 | |||
| SPEEDY(3 STEP WASH) | 64L(88L ~ 32L)(12 levels) | 9 min.(18 min, 15 min, 12 min,9 min, 3 min) | DEEP 1(DEEP 1 ~ DEEP 2) | |||
| HEAVY | 68L(68L ~ 32L)(7 levels) | 18 min.(18 min, 15 min, 12 min,9 min, 3 min) | DEEP 2(DEEP 1 ~ DEEP 2) | |||
| WOOL | 38L(52L ~ 32L)(4 levels) | 9 min.(Fixed) | DEEP 2(Fixed) | |||
| JET(3 STEP WASH) | 88 L(12 levelsAutomatic setting) | 18 min.15 min.12 min.9 min.3 min. | (5 levels) | DEEP 2(DEEP 1 ~ DEEP 2) | ||
| SOAK | 88 L(12 levelsAutomatic setting) | 110 min.103 min. | DEEP 2(Fixed) | |||
| DELAY(3 STEP WASH) | 88 L(12 levelsAutomatic setting) | 18 min.15 min.12 min.9 min.3 min. | (5 levels) | 1st Rinse | 2 nd Rinse | |
| Geslar A min. | Geslar B min. | Geslar A max. | ||||
| 6-10 min. | 0.8 min. | 4-8 min. | ||||
| 1st Rinse | 2 nd Rinse | ||
| Driabinig A.Sriabinig | Sriveng initial Crti withwater injection | Driabinig A.Sriabinig | Chenin nitase |
| 6-10min. | 0 & 8 min. | 4-8min. | 3.0min. |
| Spinning(Approx.) | Time required(Approx.) | |
| 9 min.(4 levels) | 54 min.60 min. ~ 31 min. | |
| 9 min.(4 levels) | 64 min.66 min. ~ 18 min. | |
| 3 min.(9min, 6 min, 3 min, 1min) | 32 min.66 min. ~ 18 min. | |
| 6 min.(9min, 6 min, 3 min, 1min) | 58 min.58 min. ~ 14 min. | |
| 1 min.(Fixed) | 34 min. | |
| Initial JET Setting15 min.(45min, 25 min, 15 min) | 55 min.85 min. ~ 55 min. | |
| 146 min.154 min. ~ 127 min. | ||
| 9 min.(4 levels) | 114 min. |
Helpful Hints:
• Time needed in standard situations.
- The rinsing process involves spinning to improve the rinsing performance.
- The required time to complete the rinsing cycle is calculated on the precondition that "agitation process" takes 2 to 3 minutes.
- When SOAK course begins, water currents stirs for 3 min. to fully dissolve powdered detergent.
- SOAK course will increase 7 min. in time for timer washing.
CAUTION
- Higher than normal tap water pressure may result in greater water feed noise. To mute the noise, turn down the water tap.
Changing Wash Course
Wash course cannot be changed after START button is pressed.
- Be sure to turn off the power button once before changing a wash course to another one.
Manual Operation
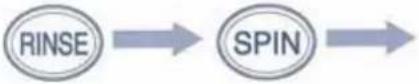
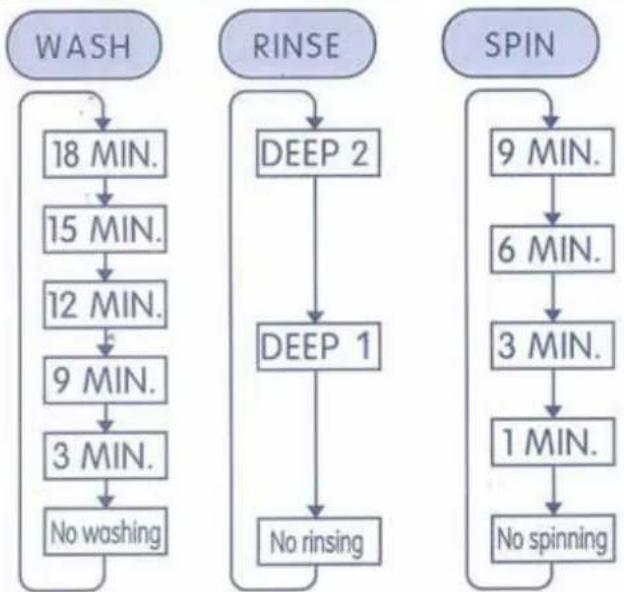
It is possible to set WASH, RINSE and SPIN separately or a combination of two or more of these.
(The detailed wash courses cannot be programmed into the built-in memory.)

natural_image
Illustration of a person with short hair and overalls, gesturing with one hand (no text or symbols)| Examples | Manual Operation Options | |||
| 1 Turn the power button ON | 2 Select the FUZZY course | 3 Select the Water level | ||
| When it is desirable to wash, rinse and spin manually. | Washing → Rinsing → Spinning |  |  |  Sensor automatically set Water level when it is not preset. Sensor automatically set Water level when it is not preset. |
| When washing liquid is to be used twice. 35 | Washing only | |||
| When it is not desirable to spin clothes in order to avoid wrinkles. | Washing → Rinsing | |||
| When it is desirable to rinse clothes which have already been washes. | Rinsing only | Automatically set to [90L] when water level is not preset. | ||
| When it is desirable to rinse and spin clothes which have already been washes. 35 | Rinsing → Spinning | Automatically set to [90L] when water level is not preset. | ||
| When it is desirable to drain water from the bowl or spin clothes before drying. | Drainage or spinning only | |||
 | ||||
Sensor automatically set Water level when it is not preset.
Automatically set to 90LJ when water level is not preset.
Automatically set to [90L] when water level is not preset.
| Operating Sequence | Cycle content | |||
| 4 Select the Water course | 5 Select the Water temp | 6 Press the START/PAUSE button | ||
 |  |  | Start from washing to spinning. | |
 | Washer stops while washing liquid remains. | |||
 | Washer stops while rinsing liquid remains. | |||
 | Drain (Approx. 2 min.) and Spin (Approx. 2~4 min.) before rinsing starts. Stop with cleaning water remaining. | |||
 | Drain (Approx. 2 min.) and Spin (Approx. 2~4 min.) before rinsing starts. | |||
(For draining only select "1 min.")  | Spin after water draings (Approx. 2 min.) (Turn off power when spinnig starts in cases of draining only.) | |||
 | WATER TEMP | CAUTIONIn case of "Rinse only" or "Rinse-Spin" when there is no water in the basket, spin before filling in water to remove water or detergent remaining in laundry.(When there is water in the basket, drain first) | ||
| Every time each button is pressed, a different setting can be made. | ||||
- In case of "Rinse only" or "Rinse-Spin" when there is no water in the basket, spin before filling in water to remove water or detergent remaining in laundry. (When there is water in the basket, drain first)
Load size and Detergent
● Maximum mass of dry cloth 8.0 kg.
| Load size | Water level | Ind. of detergent qty. (rough measure) | Compact type (20 grams or 25 milliliters for 30 liters of water) | Conventional type (40 grams or 40 milliliters for 30 liters of water) | Powder Detergent (natural oils and fats) (40 grams for 30 liters of water) | ||
| Powder | Liquid | Powder (Liquid) | |||||
| 8.0 kg | XT'A LARGE | 88L | 1.7 spoonful quantity | 59 g | 73mL | 117g (117mL) | 117g |
| 7 | 84L | 1.6 spoonful quantity | 56g | 70mL | 112g (112mL) | 112g | |
| 6 | 80L | 1.5 spoonful quantity | 53g | 67mL | 107g (107mL) | 107g | |
| 5 | LARGE | 76L | 1.4 spoonful quantity | 51g | 63mL | 101g (101mL) | 101g |
| 4 | 72L | 1.4 spoonful quantity | 48g | 60mL | 96g (96mL) | 96g | |
| 3 | MEDIUM | 68L | 1.3 spoonful quantity | 45g | 57mL | 91g (91mL) | 91g |
| 2 | 64L | 1.2 spoonful quantity | 43g | 53mL | 85g (85mL) | 85g | |
| 1 | SMALL | 59L | 1.1 spoonful quantity | 39g | 49mL | 79g (79mL) | 79g |
| 52L | 1.0 spoonful quantity | 35g | 43mL | 69g (69mL) | 69g | ||
| 45L | 0.9 spoonful quantity | 30g | 38mL | 60g (60mL) | 60g | ||
| XT'A SMALL | 38L | 0.7 spoonful quantity | 25g | 32mL | 51g (51mL) | 51g | |
| 32L | 0.6 spoonful quantity | 20g | 25mL | 40g (40mL) | 40g | ||
- The detergent quantity (rough measure) indication is determined based on one spoonful of measuring spoon with the max. capacity of about 35g (for such detergent that 20g is enough to wash laundry at 30L water level) If you are using a different measuring spoon from the said one, use a proper amount of detergent which is suitable for the desired water level, in accordance with the instruction of your detergent.
- For washing lightly stained laundry, amount of detergent which is almost one-half the normal quantity(approx. 50 to 60% ) will do.
- Do not use excessive amount of detergent. Otherwise, a poor rinsing performance may result or excessive foams may cause some trouble.
■ Amount of laundry
● Each amount of laundry as shown in the table above may vary according to the type, size and thickness of the laundry to be washed.
- When washing regular clothes, the approximate amount of washing is about 70 to 80 percent of the amount indicated. If the clothes stop moving, it indicates that the load is too large. Adjust the load by looking at how the clothes are moving in the machine.
Using liquid detergent, bleach and softener
How to use liquid detergent and bleach
Liquid detergent
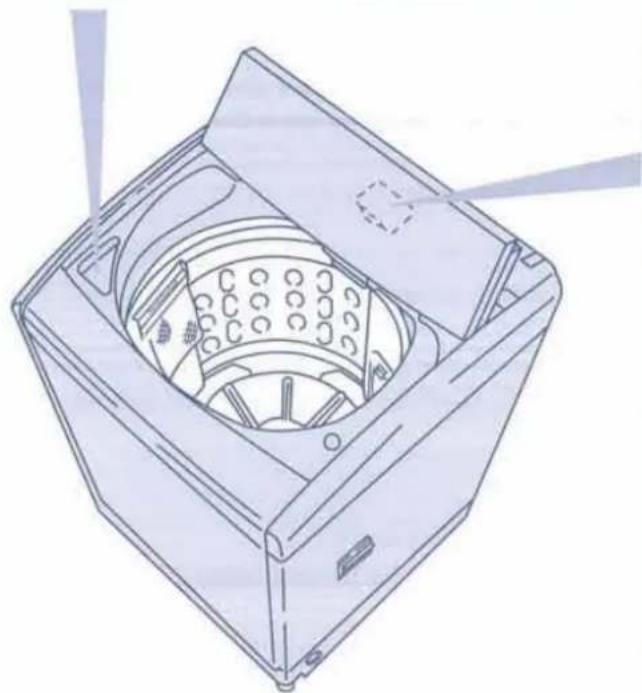
Dilute liquid detergent and gently pour into the dispenser.
- When using washer timer, dilute liquid detergent twice.
Bleach
Dilute bleach with water and gently pour into dispenser before washing starts.
Liquid detergent and bleach dispenser
CAUTION
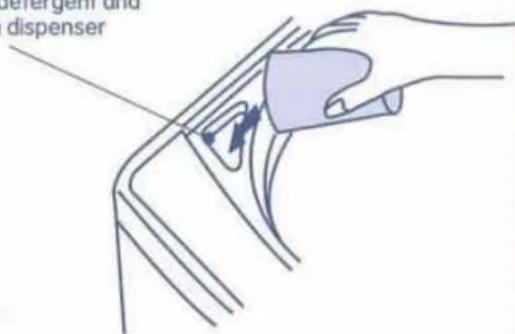
- Follow the indication shown on the liquid detergent and bleach labels for the amount to use and how to use them.
- Do not pour bleach directly onto the items being washed. Doing so may cause discoloring and damage to the clothes.
natural_image
Technical line drawing of a mechanical device with internal components and no visible text or symbolsHow to use softener
Automatic fabric softener dispenser is for use of concentrated fabric softener only.
1
Open the fabric softener dispenser lid until it comes to a full stop.
• Make sure the dispenser is working properly.
Softener dispenser lid

2
Switch power on, select appropriate wash course and press the START button.

3
Add softener according to water level indicator.
4
Close dispenser lid. - Softener will be automatically injected before last rinse.

(Guidelines on the amount of softener)
| Water amount | 32L | 38L | 45L | 52L | 59L | 64L |
| Amount of softener | 7mL | 9mL | 10mL | 12mL | 13mL | 14mL |
| Water amount | 68L | 72L | 76L | 80L | 84L | 88L |
| Amount of softener | 15mL | 16mL | 17mL | 18mL | 19mL | 20mL |
- Concentrated type: use 6.6 milliliters of softener for 30 liters of water.
CAUTION
- Do not add to much softener, otherwise, discoloring may occur owing to the leakage of softener from dispenser.
- Use an appropriate amount of detergent. Too much detergent means poorer rinsing and softener performance.
- Do not and softener when unit is filling in water, otherwise, liquid may spill out.
● Maintenance of fabric softener dispenser. 41
Using powder detergent
When dissolving powder detergent in the washing machine
1 Turn on the power switch. Set the water level at (32L) and begin operations. 30

2 When the agitation begins, put the powder detergent in and let it rotate for approximately three minutes.
3 When the powder detergent is dissolved into the water, turn OFF the power switch and load the washing.

- Be sure to sufficiently soak the laundry in the washing liquid.
4 Turn the power ON and select the course you want to wash and the water level to start washing.
- The quantity of detergent and water be indicated slightly more than the actual one when pouring water because a small quantity of water has already been in the tub.
When the powder detergent is hard to dissolve
1 Prepare approximately five liters of tepid water to about 30°C in a bucket.

2 While sufficiently mixing the water, gradually pour the approximate amount of powder detergent.
- To prevent solidification of the powder detergent, or residue of powder detergent in the bucket, dissolve it sufficiently before pouring the water into the wash bowl.
Helpful Hints
- When you use powder detergent, it is recommendable to mix it with synthetic detergent which accounts for about 10% of the powder detergent in volume so as to prevent the detergent scum from being generated.
CAUTION
- The powder detergent is more likely to stay in the laundry than synthetic detergent, therefore through rinsing is required. Failure to do so may cause discoloration or bad odors.
- If the amount of powder detergent used is excessive or it the powder detergent is directly poured into water at a low temperature, the residue of the powder detergent which is not properly dissolved may adhere to the drainage hose or the interior of the wash bowl.
In the following cases, avoid using powder detergent:
- When performing user-preset wash cycle. The powder detergent may solidify in the washbowl.
- When using "SOAK" and "WOOL" courses. Soak course may cause the whole laundry to become yellowish or blackish.
Using wash water twice and starch
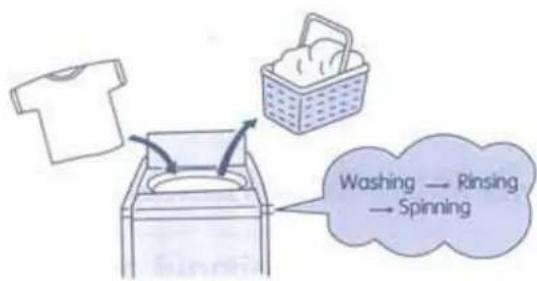
When using washing liquid twice
1
Only wash the first time of washing 30

2
Load the second time of washing and select the course you want.
● A water level appropriate to the type of washing is set.
3
Carry out rinsing → spinning cycles for the first load of laundry. 30
- Set a water level appropriate to the type of washing

When using starch
■
Washing starch
The use of washing starch specified as synthetic starch (aesthetic vinyl base, PVAC) only in allowed.
- Using other types of starch than those above may cause the washing machine to break down. Therefore, check the product component.
■
Amount of washing starch
Use the amount indicated on the washing starch alabel as a guideline.
-
Amount which can be starched.
Maximum 3.0kg.
1
Put ready-to-starch laundry into wash bowl after washing finishes.
2
Power switch on and select FUZZY course.
3
Select water level, wash, rinse and spin mode. 30
| WATER LEVEL | WASH | RINSE | SPIN |
| 52L | 9 min. | no setup | 1 min. |
4
Press the START button.
5
Pour starch in after pulsator starts rotating and close the lid.
CAUTION
- Do not machine-dry starch laundry.
After starching
Please wash washbowl to remove remaining starch.
1
Select FUZZY coures.
2
Select water level, wash, rinse and spin mode. 30
| WATER LEVEL | WASH | RINSE | SPIN |
| 88L | 9 min. | no setup | 1 min. |
3
Press the START button.
How to change sound (Melodious) of Buzzer
Melodious sound of buzzer can be changed to beeps. The sound of buzzer signaling finishing of washing completion can also be cancelled. Following instruction below:
When changing sound (melodious) of buzzer
1 Connect power.
2 Press WATER LEVEL button for at least 3 seconds.
- When change the sound of buzzer signaling washing completion, connect power and press WATER LEVEL button for at least 3 seconds.
When cancelling sound of buzzer signaling washing completion
1 Connect power.
2 Press WATER LEVEL button for at least 3 seconds.
- When restoring the original melody, connect power and press WATER LEVEL button for at least 3 seconds.
Child Lock
This function has been provided with the washer as a safety switch for those housewives who have a child, in order to keep the children from tampering with the washer.
When you press the power switch first and then "WASH" button for 3 seconds or longer, "ch" appears on the control panel to activate the tamper-proof mode. If the lid is opened duging the washing process, agitation cycle during "Wash" and "Rinse" processes will come to a stop. (At this stage, error indication "C3" appears on the control panel.)
- If you wish to cancel this function, press the "WASH" button once again for 3 seconds or longer. Then, "--" will be indicated to show you that the function is disabled.
However, the function remains active until it is canceled.
- If the set this function to active in the "FUZZY" course, on "wash" cycle will be available. In such case, switch off the power and turn it on again.
Precautions during use
Do not push the buttons with a pointed object

natural_image
Illustration of a person standing next to a box with a sad face (no text or symbols)● This may result in damage or breakdown.
Take proper care after the washing process
- Close the water tap.
- Turn the POWER button "OFF" at the wall power outlet, if you will not be using the machine for a long period of time.
● To prevent water leakage, fire, electric shocks, etc.
Do not allow flames near the unit such as a kerosene stove or cigarettes.

natural_image
Illustration of a hand reaching toward a trash bin with a broken box nearby (no text or symbols)● This may cause deformation or fire.
If the wash bowl does not stop within 15 seconds from opening the lid during the spin cycle, immediately stop using the machine.
- Request repair. Failure to do so may result in injury.
Handy Washing Hints
Before putting any items with loose strings or zippers into the machine, be sure to tie the strings, and to zip up all zippers.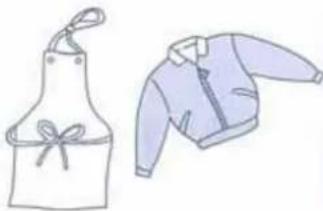 This aims at preventing damage to the clothes or fasteners. This aims at preventing damage to the clothes or fasteners. | When you are worried about the tangling of wool garments, put the item inside out. |
Remove any mud or sand by brushing, etc., before washing. | Load large items or items which are likely to resurface into the wash bowl first. Be sure to put large-size clothes or materials which are likely to resurface onto the water, such as synthetic textiles, in the bottom of the wash bowl. Doing so improves the movement of the clothes. Be sure to put large-size clothes or materials which are likely to resurface onto the water, such as synthetic textiles, in the bottom of the wash bowl. Doing so improves the movement of the clothes. |
If the neck or cuffs of a shirt are heavily soiled, it is recommended to scrub the area in advance with a liquid detergent, or prewash stain remover. Using the "SOAK" course enables the stubborn stains on the collar or cuffs of shirts to be washed away effectively. Using the "SOAK" course enables the stubborn stains on the collar or cuffs of shirts to be washed away effectively. | Wash according to the cleaning instruction tag attached to the clothing. |
Before hanging up, stretch clothes after spinning.Good finish and reduces creasing of the clothes. | It is advisable to turn clothing inside out to minimize formation of lint.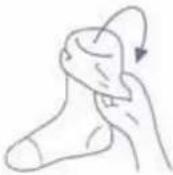 |
Hang up synthetic clothes without spinning.Good finish and reduces creasing of the clothes. | |
Care and Maintenance
After using the washer, perform the normal maintenance for it, taking the following procedures.
Maintenance of the wash bowl (to ensure clean washing)
Using the washing machine for an extended period may produce a blackish soap scum in the wash bowl, which may stain the clothes. Make sure to wash the wash bowl in the procedures set below approximately once every two months.
1
Select SOAK course.

26

2 Set water level at (88L) and press the START button.
● After filling up with water, keep pressing the water level button when the machine starts stirring until water supply stop.

3 Put 250g (About one bottle) of bleach oxide which is generally available into the wash bowl.
4 Set spin cycle at "1 min." when cycle stops and spinning will start instantly.

30

REQUESTS
- Please read the instructions of the bleaching agent to be used before use.
● Warm water of approximately 40^ C will increase the efficiency of cleaning.
Rusting Precautions
Stainless steel is usually rust-proof except under the following situations.
① If iron products which rust easily such as hair pins and pins remain in contact with the bowl they amy cause rust.
② If water containing red rust enters the bowl and red rust adheres to the bowl. It will mark the clothing.
If you notice rust, apply a commercial cream cleanser to a sponge or cloth to remove it. (For details refer to the cleanser instruction.)
- Do not use a metal scrubbing brush because it may damage the bowl.
Observing the following will prevent rust from occurring.
- Do not leave water in the bowl for a long time.
- Do not leave a chlorine type bleaching agent in the bowl for a long time

Commercial cream cleanser is most suitable for cleaning.
Cleaning the detergent dispenser
When detergent is adhering to the detergent dispenser, open the tray and wipe it with a soft cloth.
- When the level of adhesion is severe, wipe it off with a cloth while applying water with a hose.
Detergent dispenser
CAUTION
- Do not apply excessive force when it is open. The dispenser may become detached.

natural_image
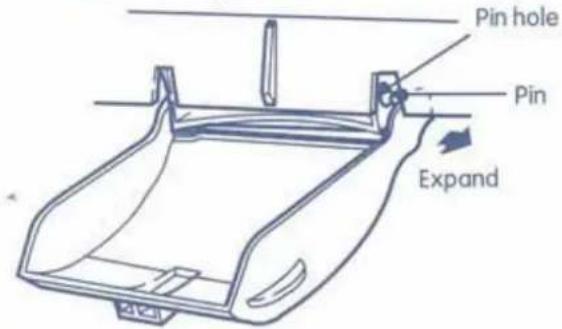
Illustration of a hand inserting a device into a box (no text or symbols visible)When detergent dispenser detached from the unit.
Follow instructions below for reattachment.
1 Fit the left pin of detergent dispenser into the pin hole of the inlet

2 Insert the pin into the pin hole while expanding the right-hand side where the pin is to fit.
REQUESTS
- When the detergent injection tray is not used, make sure return it to the original (closed) position.
When there is a fear of freezing
1 Close the water taps and remove the water supply hoses.
2 Hold the water supply hoses as shown in the drawing so that it does not sag.
3 Set the POWER button to "ON" and the WATER TEMP to warm.
4 Press START button and operate the washing machine for 30 seconds.
● Water which remains in the water supply is removed.

natural_image
Illustration of a hand holding a faucet with arrows indicating rotation and clockwise motion (no text or symbols)
natural_image
Line drawing of a simple water pump with a side arm and cup (no text or symbols)5 Press START/PAUSE button to stop the operation.
6 Lower the drain hose and select manual spin mode.
7 Press START button and operate for 30 seconds. 📋 30
If frozen
1 Remove the water supply hose, and immerse it in hot water at approx. 40°C.
2 Pour approx. 2 liters or hot water at approx. 40°C, into the bowl and let it stand for 10 minutes.
3 Connect the water supply hose to the water tap, and confirm that the washing machine performs the supply and drainage of water.
Care and Maintenance (Cont.)
Cleaning the upper lint filter.
(Be sure to clean it each time you finish using the washer.)
Overflowing of washing water from the notches of the upper lint filter is a sign to inform you that the filter's net is fully clogged with debris.
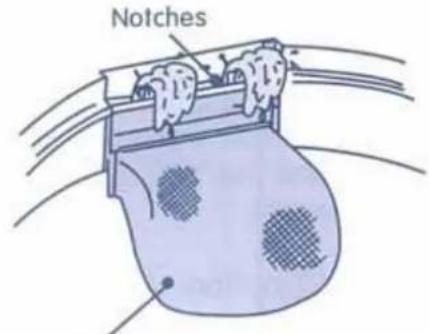
Upper lint filter
1 Remove the filter frame.

2 Turn the filter net inside out and wipe off the lint in the water.

natural_image
Illustration of hands using a tool to clean or brush a container (no text or symbols visible)3 Firmly insert the filter frame.
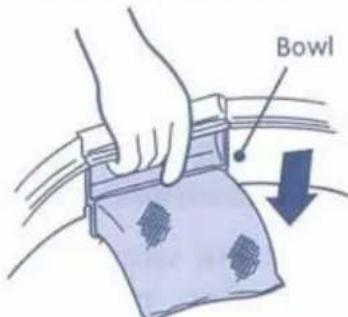
CAUTION
- Lint filters are consumable items. When you find a break in the net, please purchase a new one at a sales outlet.
Cleaning the lower lint filter
(Be sure to cleanse it each time you finish using the washer.)
1 While depressing the tab, lean the filter frame toward you and remove it.
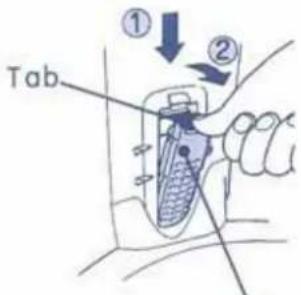
Lower lint filter
2 Open the filter and wipe off the lint.

natural_image
Illustration of hands using a folding tool to adjust or install a mechanical part (no text or symbols present)3 Close the filter.
4 Attach the lower lint filter firmly to the bowl as illustrated.

natural_image
Hand holding a mechanical device with a valve and handle, no visible text or symbolsCAUTION
- When you take away the lower lint filter, take care not to drop hair pin, coin, etc. into the grooves or openings of the washbowl.
- Do not operate the washer with the lower lint filter removed. Otherwise, damage to the laundry may result.
REQUESTS
● The lower lint filter is a consumable item.
- When the filter is damaged or lost, please purchase a new one at the nearest distributor.
Cleaning the softener dispenser
(For concentrated type only)
When residue remains in the dispenser.
Pour hot water of about 50°C into the dispenser and leave it for about 5-10 minutes.

2 Remove residue using a toothbrush.
- Do not use your finger to clean the dispenser.

natural_image
Hand inserting a small component into a wall socket (no text or symbols visible)3 Connect power, set RINSE once and press the START button. 30
After drain-spin, switch power off after water fill for about 30 seconds.
- When filling in water for rinsing purpose, softener dispenser works automatically and drain out the hot water inside.

4 Connect power, set SPIN cycle and run for 1 minute.
● Conduct drain-spin cycles.

30

Note
Do not supply water during cleaning because it may overflow and wet the floor.
Cleaning the water inlet valve
If dirt has accumulated, water flow will be impeated.
1 Close the water tap and disconnect the water supply hose.
2 Remove any lint or dirt on the screen of the water inlet valves. (Use a toothbrush or similar.) Cold water
Cold water inlet valve
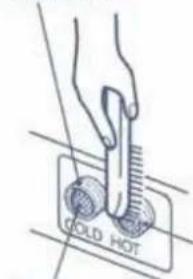
Screen
Hot water inlet valve
CAUTION
- Be sure to return the screen to the original position.
Cleaning the cabinet
Wipe stains from the cabinet and the control panel with a soft cloth.


CAUTION
When performing maintenance, do not apply water directly to any unit section.
● This may cause a short or electric shock.
CAUTION
- Do not wipe with cloth wet with benzine, thinner, cleanser, alkali detergent, weak alkali detergent or wax, or scrub it with a scrub brush.
- Follow the instructions when using a rag made of a synthetic material.
- Wipe detergent off immediately when it adheres to the plastic part of the washing machine lid. Leaving it may cause damage to the washing machine.
Alarm Mode Indicators
Before requesting repair, check the following points one more time.
- Abnormality alarm: When the following cases occur, you will be alert by flashes of indicators and sound of buzzer.
| Symptoms | Indicator flashes | Check items | Restart |
| Not running | Check if electricity is cut off?Check if fuse or circuit break is blown?Check if power cord is properly plugged? | Make sure power is on.Make sure the power cord is properly plugged. | |
| Not filling in water | 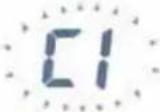 (Not filled with water after 30 minutes.) (Not filled with water after 30 minutes.) | Is the water tap closed?Is city water frozen or water supply stopped?Does dust clog the screen in the water supply inlet? | Press START/PAUSE button and eliminate the cause of the trouble. |
| Not draining | 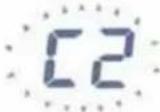 (Drain isn't completed with in 10 minutes.) (Drain isn't completed with in 10 minutes.) | Is the drain hose crushed?Is the remaining water in the built-in drain hose frozen? | |
| Not spinning |  | Is the lid open? | Close the lid. |
 | Are clothes placed to one side? | Evenly distribute the load and close the lid. |
- If warning signs to tell you some failure or trouble, such as "F0", "F9" are generated, immediately stop operating the washer and contact an authorized service dealer or a service agent for further inspection and or repair.
General Information
| Phenomenon | Causes |
| When the washing machine is used for the first time, water may flow out of the drain hose. | This is the water which remains after the performance test is conducted at factory. |
| When the water supply hose is set and the water tap is opened, a slight amount of water may come out of water supply inlet. | It takes a while to close the special water hammer noise reducing valve assembly. |
| The remaining time increases or decreases. | The remaining time is corrected depending on the time of water supply and drainage. |
| Water is supplied during washing. | When the water level decreases during washing, water is automatically supplied. |
| When the reserved operation is in progress, the operation does not come to an end even after the preset time elapsed. | If amount of washing water is in a short supply, the washer may continue functioning even after the preset time elapsed. |
| Spinning stops and water is supplied at the time of spinning before rinsing. | The safety switch has functioned because the clothes have moved to one side. |
| Spinning stops during last spinning cycle and reverse back to rinse with water filling in | This takes place when the safety switch is activated as a result of an uneven distribution of laundry.When water fill in and pulsator rotates, laundry can be balanced by the motion and spin cycle will resume. |
| Spinning cycle takes place intermittently. | The number of spinning rotations is controlled by the rotation sensor in order to perform an effective spin-drying operation. |
| When the bowl is moved by hand, a splashing sound can be heard. | This is the sound of water in the fluid balancer that eliminates vibration during spinning. |
| When the "FUZZY" course is in operation, spinning rinse cycle with water injection is not performed. | The safety switch has been activated because the load is off-balance in the bowl. |
| Water not coming out from upper lint filter. | Rotation speed is slow in WOOL course, as a result, water is not coming out from the lint filter. It also happens when water is at (40L). |
Automatic power OFF
- When the operation finishes, power is automatically turned, off.
- Power is automatically cut off if the following situation remain for over an hour.
① Pause mode. ② Lid is left opened during spin cycle. ③ Abnormal situations as described on page 41.
- When START button is not pressed 5 minutes after machine is being turned on, power is automatically cut off.
Water tap
Installation
1 Push the ring down bearings should be exposed and connect the joint.
2 Release the ring and push water supply hose upward until a click sound is heard.
- Slightly pull the water supply hose to check if it is tightly and properly connected.

Dismantling
1 Turn water tap off.
2 Press the START button and run for 10 seconds.
- This is to prevent water from spilling out during dismantling.
Release hook, pull the ring downward and disconnect water supply hose.

Main unit
Screw the union nut to arrow direction to firmly attach the water supply opening.
Precautions
Make sure that the union nut between water supply hose and main unit is tightly screwed.
● Water leakage may occur if union nut is loosened.

Make sure the hoses are connected to the correct inlet, Cold to Cold and Hot to Hot.
- Water leakage may occur if union nut is loosened.
• Unscrew the union nut when dismantling.
Trouble Shooting Guide
If there is a problem, please follow the instructions in the "Trouble Shooting Guide" carefully and check the washer before requesting repair service.
If there is still a problem, contact an authorized service dealer a service agent.
Do not try to repair the washer by yourself.
| Problem | What to check |
| Washer does not start | Check the fuses circuit breaker of the household electrical supply.Make sure the power cord is firmly plugged in. |
| Water does not fill or enters slowly | Is the water tap closed?Is the water pipe frozen or has the water supply been stopped?Is dirt blocking the screen in the water inlet? |
| Water does not drain out | Make sure the drain hose is not kinked or pinched. |
| Washer does not spin | Is the load off-balance?Is the water able to drain?Is the lid open? |
- The washing machine bottom must not be obstructed by carpeting when the washing machine is installed on a carpet floor.
Safety Check
If any of these (or other) unusual conditions occur, immediately unplug the power cord to prevent accidents. Contact an authorized service dealer or a service agent for further inspection and/or repair.
● Even if timer is set to ON, the machine will not operate.
- Cracks in the power cord can be seen.
● Unusual noise or vibration during operation.
- Stop of bowl rotation is taking much longer than normal.
● Water leakage detected at or around the tub, hose, joint, etc.
- There is a burning smell.
- An electric shock (tingling or strong) is felt when the machine is touched.
● Never attempt to make repairs by yourself. This could be dangerous.
Even if the machine operates without problems, it is advisable to have it inspected by an authorized service dealer or a service agent after four to five years. This will assure safe and reliable operation.
- If the supply cord is damaged, it must be replaced by the manufacturer or its service agent or a similarly qualified person in order to avoid hazard.
Specifications
| Model | SF-P80DJ |
| Type | Fully automatic washer |
| Electrical ratings | See the rating plate attached to the rear of the washer |
| Standard amount of water | Approx. 88L (high Water Level) |
| Standard amount of water used | Approx. 180L (Fuzzy Cycle) |
| Washing system | Automatic reverse pulsator type |
| Water tap pressure | Cold water : 30~800kPa (0.3~8kgf/cm2)Hot water : 30~500kPa (0.3~5kgf/cm2) |
| Outer dimension | 625 x 677 x 947 (W x D x H) mm |
| Weight | 45kg |
NOTE: Specifications are subject to change without notice for reasons of product improvement.
Fixing the washing machine
If you experience problems when using your washing machine, before contacting a service center please take a moment to carefully read the manual. In particular, the table shown below may be of use for basic troubleshooting. In case of a malfunction that cannot be solved by consulting the manual, please contact a service center at any of our licensed vendors and provide the following information.
- Series No.: SF-P80DJ
- Tell the service center about the malfunction in as much detail as possible.
- Your address and telephone number.
Memo
HITACHI
THE HITACHI ATAGO BLDG.
15-12, Nishi-Shinbashi 2-chome, Minato-ku, Tokyo, 105-8410 Japan
Tel: Tokyo (03) 3502-2111
- HITACHI FULLY AUTOMATIC WASHER
- Model :
- SF-P80DJ
- Thank you for purchasing your new HITACHI Fully Automatic Washer.
- Contents
- Convenient New Features
- One Touch-Sensor Wash
- Heavy Duty, Large Capacity (8.0 kg), Stainless Steel Wash Bowl
- Water-level Selector in 12 Levels
- Double Lint Filter
- "AIR JET" (Spinning with Blowing AIR)
- Nano Titanium Catalyst
- Precautions
- Warning
- User customized washing course for home
- Turn the power button ON
- Select the (JET) course
- Caution
- Select the [ECO WASH] course
- Description of Main components
- Attachments
- Washing Procedure
- Detection of laundry load, and indication o
- Detection of laundry load
- Detergent quantity (rough measure) indicator and its recommendable amount
- amount of detergent (rough measure) and water level
- Water level indicator
- Types of laundry and how to select you
- desired fully automatic washing course
- Easy to wash course (FUZZY course)
- Select the (FUZZY) course
- Washing actions of FUZZY ECO WASH SPEEDY DELAY AND JET courses.
- After closing the lid
- Step 1:
- Step 2:
- Step 3:
- Press the START/PAUSE button
- Put the detergent in and close the lid.
- Washing finished.
- Rinsing operations in "FUZZY" course 28
- First rinsing cycle (spinning rinse cycle with water injection)
- Second rinsing cycle (deep rinse)
- ise (ECO WASH course)
- Put the detergent in and close the lid
- Rinsing cycle (Spinning rinse cycle with water injection)
- Rapid Washing (SPEEDY course)
- Turn the power button ON and select the (SPEEDY) course.
- Press the START/PAUSE button
- Put the detergent in and close lid
- ■ Helpful tips for effective washing
- Washing Heavily Stained Clothes (HEAVY course)
- Turn the power button ON and select the (HEAVY) course
- ■ Helpful tips for effective washing.
- When washing bulky clothes such as jeans:
- When washing away stubborn stains of socks:
- Washing course for clothes with DRY Cleaning label (WOOL course)
- Machine-washable items
- Non-machine-washable items
- Use a suitable amount of detergent
- Washing course for clothes with DRY Cleaning
- Preparation (Pretreatment)
- Put laundry into the wash-bowl, and put the Washing Cap on the laundry.
- Turn the power switch ON and select the "WOOL" course.
- How to remove dirt
- ■ Setting position of Washing Cap
- abel (WOOL course) Continued from the previous page
- Put the detergent
- Close the lid and Press the START/ PAUSE button
- When the washing finishes
- Washing cycle of WOOL course
- ■ Finish (How to correct shrunk and slightly deformed laundry)
- Thorough washing cycle (SOAK course)
- Turn the power button ON and select the (SOAK) course
- Put the detergent in and close the lid
- ■ What's SOAK course?
- Using the Delay Timer for Washing (DELAY course)
- Turn the power switch ON and put the laundry in.
- Select the PROGRAM DELAY and press the START/PAUSE button.
- Put the detergent in and close the lid.
- Hold the bulge part at the edge of the detergent dispenser and let it all forward to fill in powdered detergent.
- (Dispenser in released position)
- In the follow cases
- Helpful Hints:
- Changing Wash Course
- Manual Operation
- Load size and Detergent
- ■ Amount of laundry
- Using liquid detergent, bleach and softener
- How to use liquid detergent and bleach
- Liquid detergent
- Bleach
- How to use softener
- 1
- 2
- 3
- 4
- Using powder detergent
- When dissolving powder detergent in the washing machine
- When the powder detergent is hard to dissolve
- Helpful Hints
- Using wash water twice and starch
- When using washing liquid twice
- When using starch
- ■
- -
- 5
- After starching
- How to change sound (Melodious) of Buzzer
- When changing sound (melodious) of buzzer
- Connect power.
- Press WATER LEVEL button for at least 3 seconds.
- When cancelling sound of buzzer signaling washing completion
- Child Lock
- Precautions during use
- Do not push the buttons with a pointed object
- Take proper care after the washing process
- Do not allow flames near the unit such as a kerosene stove or cigarettes.
- If the wash bowl does not stop within 15 seconds from opening the lid during the spin cycle, immediately stop using the machine.
- Handy Washing Hints
- Care and Maintenance
- Maintenance of the wash bowl (to ensure clean washing)
- Select SOAK course.
- Set water level at (88L) and press the START button.
- REQUESTS
- Rusting Precautions
- Observing the following will prevent rust from occurring.
- Cleaning the detergent dispenser
- When there is a fear of freezing
- If frozen
- Care and Maintenance (Cont.)
- Cleaning the upper lint filter.
- Remove the filter frame.
- Firmly insert the filter frame.
- Cleaning the lower lint filter
- While depressing the tab, lean the filter frame toward you and remove it.
- Open the filter and wipe off the lint.
- Close the filter.
- Attach the lower lint filter firmly to the bowl as illustrated.
- Cleaning the softener dispenser
- Note
- Cleaning the water inlet valve
- Cleaning the cabinet
- Alarm Mode Indicators
- Automatic power OFF
- Water tap
- Main unit
- Trouble Shooting Guide
- Safety Check
- Specifications
- Fixing the washing machine
- Memo
- HITACHI
Marque : HITACHI
Modèle : SF-P80DJ
Catégorie : Lave-linge