
P300X2 - Recepteur Rockford Fosgate - Notice d'utilisation et mode d'emploi gratuit
Retrouvez gratuitement la notice de l'appareil P300X2 Rockford Fosgate au format PDF.


| Type de produit | Récepteur audio numérique pour véhicule |
| Marque | Rockford Fosgate |
| Modèle | P300X2 |
| Dimensions (L x H x P) | 17,8 x 5,1 x 17,8 cm |
| Poids | 1,2 kg |
| Alimentation | 12 V CC (véhicule) |
| Consommation maximale | 15 A |
| Puissance de sortie maximale | 50 W x 2 (RMS) |
| Impédance de charge | 4 ohms |
| Réponse en fréquence | 20 Hz - 20 kHz |
| Rapport signal/bruit | > 90 dB |
| Formats audio supportés | CD, CD-R, MP3, WMA |
| Radio | AM/FM avec RDS |
| Entrées audio | 1 x entrée auxiliaire (3,5 mm) |
| Sorties audio | 2 x sorties préamplifiées (RCA) |
| Fonctions principales | Lecture CD/MP3, radio, entrée aux, égaliseur intégré |
| Égaliseur | 5 bandes préréglées et personnalisable |
| Affichage | LCD rétroéclairé |
| Télécommande | Filaire incluse |
| Entretien et nettoyage | Utiliser un chiffon doux et sec. Ne pas utiliser de produits chimiques. |
| Consignes de sécurité | Débrancher la batterie avant l'installation. Respecter la polarité. |
| Pièces détachées et réparabilité | Contacter le service client Rockford Fosgate pour pièces et réparations. |
| Garantie | 2 ans (selon revendeur) |
| Informations générales | Récepteur 2 canaux, idéal pour système audio de voiture. |
FOIRE AUX QUESTIONS - P300X2 Rockford Fosgate
Questions des utilisateurs sur P300X2 Rockford Fosgate
0 question sur cet appareil. Repondez a celles que vous connaissez ou posez la votre.
Poser une nouvelle question sur cet appareil
Téléchargez la notice de votre Recepteur au format PDF gratuitement ! Retrouvez votre notice P300X2 - Rockford Fosgate et reprennez votre appareil électronique en main. Sur cette page sont publiés tous les documents nécessaires à l'utilisation de votre appareil P300X2 de la marque Rockford Fosgate.
MODE D'EMPLOI P300X2 Rockford Fosgate

Step 1 - Input
Input Clip Indicator Setup
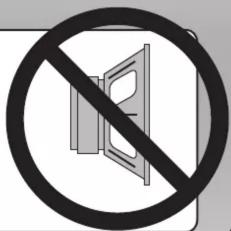
Be sure to disconnect all speakers
from the amplifier.

CAUTION
Failure to comply may cause damage
to connected components and/or
amplifier.

Step 2 - Input
Turn on the source unit with volume set to zero.


Step 3 - Input
Adjust the Bass & Treble levels on the source unit to flat.

Amplifier Clip Indicator Setup
Step 4 - Input
Play test tone* or music CD for setup.
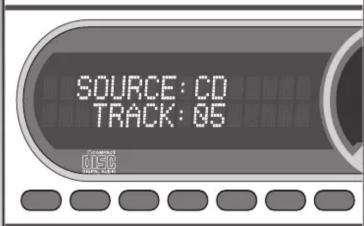
Note: Use the 40Hz @ 0dB tone (Track 5) for mono amplifier applications or the 1kHz @ 0dB tone (Track 7) for multi-channel amplifier applications. Be sure your x-over is switched to the appropriate filter setting.
*Test tones available at https://rftech.custhelp.com/app/answers/de-
tail/a_id/1126/ Scroll to the bottom of the page and download your preferred
Step 5 - Input
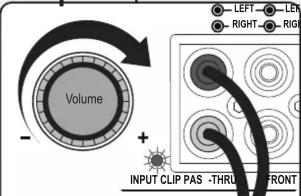
Increase the source unit volume until the Input Clip Indicator illuminates red.
Note: Input Clip can be viewed remotely with optional PLC2.
Step 6 - Input

Decrease the source unit volume slightly until the light turns completely off. This establishes your maximum source unit volume for adjusting the Output Clip Indicator.
Note: Some source units will not clip.
Step 7 - Output
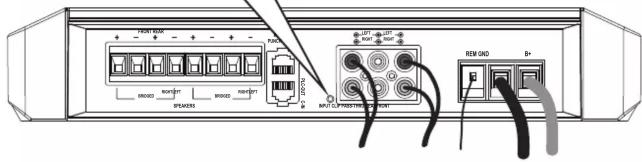
Be sure to disconnect Punch Level Control - PLC (if equipped) from the amplifier.
Step 8 - Output
Output Clip Indicator Setup

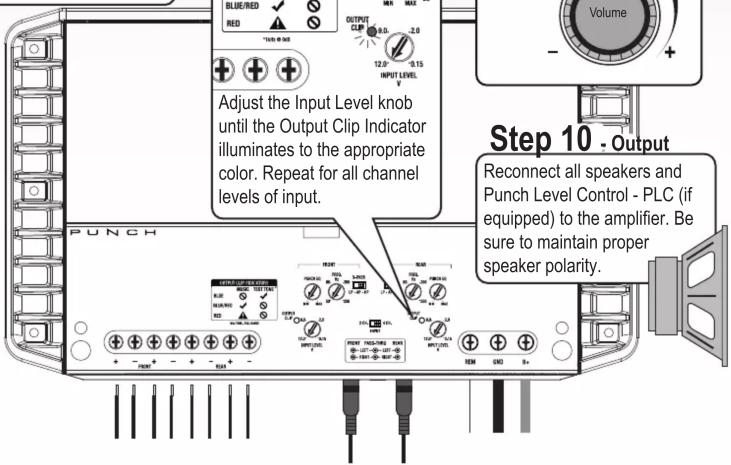
Adjust the Input Level knob until the Output Clip Indicator illuminates to the appropriate color. Repeat for all channel levels of input.
Step 9 - Output
Turn the source unit volume down.


Step 10 - Output
Reconnect all speakers and Punch Level Control - PLC (if equipped) to the amplifier. Be sure to maintain proper speaker polarity.

Rockford Fosgate
Marque : Rockford Fosgate
Modèle : P300X2
Catégorie : Recepteur