
CloseCut Pro - Tondeuse à barbe WAHL - Notice d'utilisation et mode d'emploi gratuit
Retrouvez gratuitement la notice de l'appareil CloseCut Pro WAHL au format PDF.


| Marque | Wahl |
| Modèle | CloseCut Pro |
| Type de produit | Tondeuse à barbe |
| Dimensions | Environ 15 x 4 x 4 cm |
| Poids | Environ 200 g |
| Alimentation | Rechargeable sur secteur (adaptateur inclus) |
| Autonomie | Environ 60 minutes après charge complète |
| Temps de charge | Environ 8 heures |
| Lame | Acier inoxydable, auto-affûtante |
| Sabots de coupe | 3 sabots de longueur réglable (1-10 mm) |
| Fonctions principales | Coupe précise des poils de barbe et moustache |
| Utilisation | À sec ou sous la douche (résistant à l'eau) |
| Entretien et nettoyage | Rincer à l'eau courante après usage; huiler la lame régulièrement |
| Sécurité | Blocage de transport; arrêt automatique après 10 min d'inactivité |
| Pièces détachées et réparabilité | Lame et sabot disponibles; réparation par centre agréé Wahl |
| Informations générales | Garantie 2 ans; fabricant: Wahl GmbH |
FOIRE AUX QUESTIONS - CloseCut Pro WAHL
Questions des utilisateurs sur CloseCut Pro WAHL
0 question sur cet appareil. Repondez a celles que vous connaissez ou posez la votre.
Poser une nouvelle question sur cet appareil
Téléchargez la notice de votre Tondeuse à barbe au format PDF gratuitement ! Retrouvez votre notice CloseCut Pro - WAHL et reprennez votre appareil électronique en main. Sur cette page sont publiés tous les documents nécessaires à l'utilisation de votre appareil CloseCut Pro de la marque WAHL.
MODE D'EMPLOI CloseCut Pro WAHL
en Operating instructions
When using an electrical appliance, basic precautions should always be followed, including the points listed below. Read all instruc-
tions and safe, RANGER
DANGER To reduce the risk of injury or death by electric shock:
-
Do not reach for an appliance that has fallen into water. Unplug immediately from the outlet.
-
Do not use while bathing or in a shower.
-
Do not place or store appliance where it can fall or be pulled into a tub or sink.
-
Always unplan this appliance from the electrical outlet immediately after using
-
Always unplug this appliance before cleaning
KUATIUS
WARNING To reduce the risk of burns, fire, electric shock or injury to persons:
• This appliance can be used by children aged from 8 years and above and
persons with reduced physical, sensory or mental capabilities or lack of ex-
perience and knowledge if they have been given supervision or instruction
concerning use of the appliance in a safe way and understand the hazards
involved. Children shall not play with the appliance. Cleaning and user mainte-
nance shall not be made by children without supervision.
- Warning: Keep the Product Dry. It is essential to PREVENT electrical equip-
ment from coming into contact with water or other liquids.
- Use this appliance only for its intended use as described in this manual. Do
not use attachments not recommended by the manufacturer.
- If the power cord is damaged, it must be replaced by the manufacturer or authorized agent or similarly qualified person in order to avoid risks.
a Keep the con
- Do not use outdoors or operate where aero
- Do not use this appliance with a damaged or broken comb nor with teeth missing from the blades, as injury may occur.
[Non-Text]
UK appliance : N a 13 amp (BS 1363) plug is used, a 3 amp fuse must be fitted, or N any other type of plug is used, a
5 amp fuse must be fitted either in the plug or adapter at the distribution board. Replacement fuses should be ASTA approved to RE 1362. Fuse covers must be fitted when changing the fuse. If fuse covers is lost, the plus must not be
approved to DO 1502. Fuse cover must be missed when changing the fuse. If fuse cover is lost, the plug must not be used until a replacement is obtained. Information for obtaining the correct fuse carrier is marked on the carrier itself. and in the bottom of the fuse cavity on the plug. These may be obtained from Wahl UK. If the supply cord is dam-
aged, it must be replaced by the manufacturer or its service agent or a similarly qualified person in order to avoid a hazard.
SAVE THESE INSTRUCTIONS
This clipper has been designed for household use.
A- Bottom blade D- Switch
B- Blade slide (on Multi-cut (MC) clipper only). E-Top blade
C- Taper lever (on Multi-cut (MC) clipper only) F- Power screw
CURPER MAINTENANCE
Your Wahl clipper blades were oiled and aligned before leaving our factory; however, it is possible for blades to get
bumped out of alignment. Blades must be realigned if they have been removed for cleaning or replacement. To deter
mine if realignment is necessary, compare your clipper blades with diagram 6.
1 If your clipper has a taper lever, position the taper lever in the close cut position. (H)
2 End of top blade teeth should be approximately 1/32" (.64 mm) back from bottom blade. This is important so that
the clipper does not cut too close or allow the moving cutter to touch the skin.
3 Extreme left-hand tooth of top blade must be covering or to the left of the first small tooth of bottom blade
4 Extreme right-hand tooth of top blade must be touching the big tooth on the bottom blade.
if blade alignment is incorrect, add a few drops of Wahl Clipper ON to the blades, turn clipper "On" for a few
moments, turn "Off" and unplug. Loosen screws slightly and adjust (steps 2-4 listed above). Tighten screws after
blades are aligned. Other than blades this clipper has no user serviceable parts. (diagram 1)
OIL (J)
The blades of your new chlorine should be piled every few haircuts. Simply place a few drops of Wohl Clinner Oil on
the teeth of the blades. Use only the Wafi Clipper Oil included in the pack. Due to the high speed of your Wafi clip-
per, the correct type of oil must be used. Do not use hair oil, grease or any oil mixed with kerosene or any solvent, as
the solvent will evaporate and leave the thick oil, slowing down the blades. Wat/ Clipper Oil is a very thin, natural oil
which will not evaporate and will not slow down the blades.
POWER SCREW (Not found on all models of Wahl Clippers)
if your clipper has a power screw, it has been adjusted for peak efficiency before leaving the factory. However, if volt-
age in your home is low, you may need to readjust it.
To adjust power, use the plastic brush, a screwdriver or a thin coin to turn power screw in a clockwise direction until
the arm strikes the coil, making a noise. Then, slowly turn power screw out (counterclockwise), just until noise stops. This is the maximum never calling. (K)
This
CORD
The cord should not be used to pull the clipper. Since freedom of movement needs to be maintained, care should be
Used to-keep the cord twisted and unobstructed. When stored, the cord should be called and the unit placed in original box or storage pouch (if provided).
M. wavy slippers has a polarized plus: To reduce the risk of elastic shock, this appliance has a polarized plus
If your clipper has a polarized plug. To reduce the risk of electric shock, this appliance has a polarized plug (one blade is wider than the other). This plug fits in a polarized outlet only one way. In the event the plug does not fit
(see clause is matter than the other). This plug has in a potable buffer only one way. In the event the plug does not fully in the outlet, reverse the plug. In the event it still does not fit, contact a qualified electrician to install the proper
outlet. Do not change the plug in any way.
TAPER LEVER (Not found on all models of Wahl Clinners)
If your clipper has an adjustable tager lever, it is conveniently located near your thumb (if you're right-handed), so it
in your clips, there an adjusted clipper is not consistently installed near your edges (in your right hand), so it can easily be adjusted while the clipper is in your hand.
The taper lever adds versatility to your clipper by allowing you to gradually change the closeness of your cut without
a guide comb. When the lever is in the uppermost position, the blades will give you the closest cut and leave the bar
very short. (diagram H1) Pushing the lever downward gradually increases the cutting length. In its lowest position,
the taper lever will leave the hair approximately the same length as the 1/8" guide comb. (diagram H2)
The taper lever will also extend the use of your blades since a different cutting edge is used in each setting. In addition, if extremely heavy hairwelling has jammed the blades, it will help you remove hair that has become undred.
but, it extremely heavy hawcuting has jawed the blades. It will help you remove hair that has become hedged between the two blades without removing the blades. While the clinker is running rapidly over the tear from "cirs
between the two beaves without removing the beaves. What we trigger is turning, rapidly move the lever from cut to cut" to "longer cut" a couple of times. Doing this each time you've finished using your diaper will help keep the
blades clear of cut hair. If your clipper stops cutting and this does not help, your cutting blades may be dull. Either
replace them or return them to Wahl for sharpening.
WAHI'S GUIDE TO FOOL PROOF HOME HAIRCUTTING
Before you cut your hair
Before you cut your hall 1. Your slippers should be clean, glad and in perfect working condition
1 Your clipper should be clean, cured and to perfect working condition. 2 If your kit includes a plastic case, places it around the neck, buying the strings, and overlooking the cane portion to
2 if your Mr. includes a plazol tape, plate it around she neck, lying she springs and overlapping a pregnant hair from fading down inside the collar. If no cane is provided, a towel will do nicely.
- Position the person whose hair is to be cut on a stool or chair so that the top of his head is about even with your eyes.
4 After combing the hair to remove all tangles, hold the clipper in a relaxed comfortable grip with the namenplate
Under the palm near your index finger. This grip will help you maintain comfortable, accurate cutting control.
NOTE: To attach guide combs, hold comb with the teeth up. Snap guide comb attachment firmly to the bottom of
the clipper blade. (L.)
Depending on the kit you purchased your kit may include one of the following:
Adjustable Guide Combs - allowing multiple cutting lengths in the convenience of a single comb.
Individual Black Guide Combs - providing predetermined lengths indicated on each guide comb.
Individual Color Guide Combs - providing predetermined lengths indicated on each guide comb. Combs are
also color coded for quick cutting length reference
Using adjustable guide combs:
The email adjustable guide comb has five cattings from 1/8" to 5/8" (3mm to 16mm) in 1/8" (2mm) increments.
The small adjustable guide comb has five settings from 1/6" to 3/6" (3mm to 10mm) in 1/6" (3mm) increments. [M]. The large adjustable guide comb has five settings from 3/4" to 1-1/4" (19mm to 32mm) in 1/8" (3mm) increments.
(9)
Using your thumb, you can change the length of the cut by simply sliding the adjustable lever to the next position.
Both adjustable guide combs have positive click stops and indicators that show position number and cutting length.
museumers for quick and easy setting identification.
The large adjustable guide comb can be used from the ear to the crown of the head. (D1) The email adjustable guide comb can be used from the pane of the neck to the ear area. (D2)
The small adjustable grid comb can be used from the maps of the neck.
Using individual (black or colored) guide combs:
Some kits do not include all Wari guide combs. However, any of these combs (or additional accessories not listed here) you be available from your drivers or can be ordered directly from Webl.
here) may be available from your de
INDIVIDUAL GUIDE COMB LISTING.
- 3mm - Black/Red • 6mm - Black/Purple
- 10mm - Black/Dark Blue - 15mm - Black/Orange/Flu - 10mm
- 10mm - Black/Redraw - 22mm - Black/Green - 75mm - Black/Latender - 25mm - Black/light Blue
- 21mm - Black/Moils
- S'mill - Black/White - Salmon - Black only - Right Far Taper - Black only - Left Far Taper - Black only
NO HAD
CUTTING HAIR
FOR MEDIUM TO LONG CUTS: (F
The first time you cut the hair, cut only a small amount until you become accustomed to how long each guide comb leaves the hair. Already plait by giving the instant guide comb on the screen, then you opting comb (no options, it
leaves the ran. Always start by pacing the largest gate combo on the clipper, then use shorter combos (for Settings - x using adjustable guide combs) if a shorter length is desired.
Remember, between professional haircuts, the hair grows evenly all over the head and a light trimming at the lower
neck and sides may be all that is needed to bring back that neat, well-groomed look.
For uniform cutting allow the cleaner to cut its way through the hair. Do not force it through at a faster rate
1 Start by combing the hair so it falls into its natural direction.
2 Place the largest guide comb onto your clipper and start by trimming the sides from the bottom upwards. Hold
the clipper lightly against the hair, with teeth of the guide comb pointing up but flat against the head. Slowly lift the
clipper up and outward through the hair, cutting only a small amount at a time.
Repeat around sides and back of head
if you desire shorter hair, either change to a shorter guide comb (or setting - if using adjustable guide combs) or
apply more pressure and less lift away from head with the present attachment
This entire procedure requires practice, and it is always better to leave too much hair the first few haircuts.
For the top of the head, you will give a fairly short cut if you use the 1" guide combo (if your kit includes the 1-1/4" or 1-1/2"
guide comb, you may use this for a slightly longer cut.) With the teeth flat against the head, slowly start thinning from the front to the back. Again, it is better to leave the hair longer the first few hairsuits.
From to the basic Again, A 10 better is
FOR LONGER HAIR ON TOP:
By not using a guide comb, a longer can be achieved. Use either a barber comb or a regular comb and all the has on top of the head, cutting over the comb, or gram the hair between the fingers and cut to desired length. Continue
on top to the head, cutting over the bolt, by grasp she has between the mgers and cut to desired suggs. Behind this procedure from the front to the back of the head, gradually cutting the hair shorter by reducing the space between
the pressure from the inlet to the back of the head, gradually using this hair shorter by roasting the space between the comb or fingers and the head. Comb frequently to remove trimmed hair and check for uneven strands.
TAPERING AROUND EARS:
TAPERING AROUND EARS. USWIC LEFT AND RIGHT FAR CUIDE COMBS
The Left and Right Far Guide Combs have a built-in tanger ranging from 1/8" to 1/2". By following the outline of the
The Loll and High E&P outlooks have a soft in tapef ranging from the "to the " by removing the outlooks of our with the appropriate comp you achieve a gradual taper and blending without having to use multiple combs.
TO TAPEO THIS AREA BONDEWING THE LEFT 549
TO TAPER THE AREA BORDERING THE LEFT EAR. Attach the Left Far Taper Corn to your clipper and stand facing the left ear. While holding the clipper at a slight angle
against the head, position the guide comb just back of the left ear at the hairline. Then move the clipper in a small
half circle pattern around the left ear toward the front of the head. Depending on the length of hair you are working
with you may need to take several small strokes as you proceed around the ear. When doing so, slowly move the
clipper upward and outward being mindful of the ear. This will allow you to guide hair into the comb towards the clip-
per blades. Note: You may also achieve a tonoring of sideburne by including the oildburn area as you begin to move the slippers.
Note: You may also achieve a tapering of sidewalks by including the sidewalk area as you begin to move the clipper ground the ear.
around the car.
TO TAPER THE AREA BORDERING THE RIGHT EAR
Attach the Right Ear Guide Camo to your copper. Stand facing the right ear and repeat the process described above for the left air.
for the left bar. Finish by utilizing the area around the axis or described in the following section.
Finish by dominating
OUTLINING: (U)
No attachments are needed. (On a multi-cut clipper, push the taper lever up to the "close-cut" position.) Comb hair
into desired style. Starting between the ear and the sideburns, as shown at left, hold copper with corner edge or blade against the hairline. Slowly follow the desired outline of the hair over, around and behind the eye. For defining rideagainst the name. Slowly follow the desired absence of the half body, around and behind the ears. For delivering side byons and the back of the park, hold the clinner upside down against the skin at the desired length and move down.
comb hair and check that sides are even. Check for uneven spots throughout the haircut
CREW CUTS AND SHORT CUTS. (E)
CREW CUTS AND SHORT CUTS (A) Cutting with the latest guide camb cut from the back of the neck to the crown. [Hold the guide camb flat against
Starting with the longest guide combo, cut from the back of the neck to the crown. Hold the guide combo not against the head and slowly move the clinner through the hair, as shown.
Use the same procedure from the lower side to the upper side of the head, as shown. Then cut the hair against the
Use the same pressure from the lower side to the upper ends of the sides, as shown. Then out the half against the direction in which it grows, from the front to the crown, and even up the cut with the sides.
To give a "flattop" look, the hair on top of the head must be cut over the top of a flat comb, rather than using the
guide comb.
Use closer-cutting guide combs to "taper" the hair down to the neckline, as desired. Comb hair and check for uneven
spots. Outline sideburns and neckline as previously described.
if a short, tapered cut on the sides and back is desired, follow diagram S.
The five basic areas illustrated on the Walt haircutting guide are your "road map" to easy, do-it-yourself haircutting.
For tips on the latest trends and fashions in haircutting, visit us at www.want.com.
A
This marking indicates that this product should not be disposed with other household wastes throughout the EU. To
prevent possible harm to the environment or human health from uncontrolled waste disposal, recycle it responsibly to promote the
sustainable reuse of maternal resources. To return your used device, please use the return and collection systems or contact the retailer where the product was numbered. They can take this product for environmental safety reference.
de Gebrauchsanweisung
GE SIGUERHEITSCHINWEISE
WICHTIGE SICHERREITSHINWEISE Beim Gebrauch eines Elektrogesplittes sollten immer grundlegende Vorsichtsmaßnahmen beachtet werden, insbesondere die
m Folgenden aufgeführten. Lesen Sie vor Gebrauch alle Anweisungen und Sicherheitshinweise sorgfältig durch.
GEFAHR
So vermeiden Sie das Hisiko einer Vernetzung oder des Todes durch einen elektrischen Schlag: 1. Gewitten Sie nicht nach einem ins Wasser gefallenen Gerät. Ziehen Sie sofort den Stocker aus der Starlednose
-
Verwenden Sie das Gerät nicht in der Badewanne oder unter der Dusche.
-
Platzieren oder bewahren Sie das Gerät nicht an einem Ort auf, von dem es in ein Waschbecken oder eine Wanne fallen
oder gezogen werden könnte. Tauchen Sie das Gerät nicht in Wasser oder andere Hüssgeiten und lassen Sie es nicht dort ein ein fallen.
-
Ziehen Sie, außer wenn Sie das Gerät aufladen, nach jedem Gebrauch den Stecker des Gerätes aus der Steckdose.
-
Ziehen Sie vor dem Reinigen des Gerätes immer den Stecker aus der Steckdose
WARNING
Zur Reduzierung des Risikos von Verbrennungen, Bränden, Stromschlägen und Verletzungen:
• Dieses Gerät kann von Jugendlichen ab 8 Jahren und Personen mit
eingeschränkten physischen, sensorischen oder geistigen Fähigkeiten oder
Personen mit mangelnder Erfahrung und Wissen verwendet werden, sol-
ange dies unter Beaufsichtigung erfolgt oder sie die notwendige Anleitung
zum sicheren Umgang mit diesem Gerät erhalten haben und über die damit
verbundenen Gefahren aufgeklart wurden. Das Gerät darf von Kindem
nicht als Spielzeug verwendet werden. Reinigung und Wartung durlen von
Kindern nur unter angemessener Auisicht durchgeführt werden.
- Warnung: Halten Sie das Gerät trocken. Es ist außerst wichtig zu VER-
HINDERN, dass Elektrogerate in Kontakt mit Wasser oder anderen Flussigkeiten kommen.
Südkellen Kommel - Vorwenden Sie
- verwenden Sie dieses Gerät ausschließlich zum vorgesehenen und in dieser Gebrauchsgesellschaft beschriebenen. Zwerk. Vorwenden Sie auf
dieser Gebrauchsanweisung beschriebenen Zwe schließlich vom Hersteller empfohlenes. Zubehör
Schließlich vom Hersteller empfohliches Zuschorf. Verwenden Sie dieses Gerät nie, wenn sein Netzkabel oder -stecker beschüldet ist, das Gerät nicht ordnungszpermäß funk
ioniert, fallen gelassen oder beschädigt worden ist oder ins Wasser gefallen ist. Senden Sie das Gerät zum Testen und zur
Reparatur an die Wahl Clipper Corporation. Schnalling Sie ausverhöhe Roh des Kohl des Lutzerpiltes in die entsprechende Ruhrer des Garitres an
- Schliebem Sie ausschließlich das Kabel des Laubergeales in die entsprechenke Buchse des Gerätes an. - Gebrauchen Sie dieses Gerät nicht im Freien und nicht in Bäumen, in denen Aerospi-Sorzus oder Saue
durchschnitt der Staatze Zentralisierung, Aktien und Kredit Anteilen, Erzernen erwerbte Spräge oder Wasserstein Anteilen werden.
- Schließen Sie das Kabel immer zuerst am Gerät, anschließend an der Stockclose an. Um das Gerät vom Stromnetz zu tr
in, schalam Sie es zuerlei aus OFF und zehem Sie darin dem Stobler aus der Stadlobas.
HEBEN SIE DIESE ANLEITUNG SORGFÄLTIG AUF
Diese Haarschneidemaschine ist für den privaten Gebrauch bestimmt.
4- Untere Klinge
B- Klingengleichvorrichtung (nur bei Multi-cut-Haarschneidemaschinen (MC)) E- Obere Kinge
D- Schuldungenregier (vor der Multi-Cur-Naarschweidemascellen (WG)) P- Schraße für Leistungswand KARTUNG PER HAAROSHNEIDEMAGGÜNE
WARTUNG DER HAARSCHNEIDEMASCHINE Die Kängen der Haarschneidemaschine von Wa
es vorkommen, dass die Ausrichtung der Klingen nicht mehr stimmt und eine Newausrichtung erforderlich wird.
Klingen müssen neu ausgerichtet werden, wenn sie für Reinigungs- oder Austauschzwecke entnommen worden
Sando. Um festzustellen, do eine Neuausrichtung erfordenich ist, vergleichen Sie die kangen ihrer Haarschreibemaschine mit davon Trafikungen (G).
- Wenn die Hasrochseidemarchive mit einem Schnittlängensanler ausgerürtet ist, stellen. Sie den
Schnittlängenregier auf die Stufe mit der kürzesten Schnittgänge ein. (H)
2 Das Ende der Zähne der oberen Känge sollte etwa 0,64 mm (1/32 in.) hinter der unteren Känge zurückstehen.
Dies es In Michtig, damit die Haarschneidemässchwe nicht zu kurz Schwerder und damit der Schwerdesatz bei der Bewegung nicht die laut berührt.
3 Der äußerste linke Zahn der oberen Klinge muss den ersten kleinen Zahn der unteren Klinge abdecken oder
sich links neben diesem befinden. - Das äußerte aktive Tzeln des ihren Klüge musen dar großen Tzeln des unterden klüge bewörsen
4 Der abdiversie Rechte Zahn der Doreten Künge muss den großen Zahn der älteren Künge berufteilt. Waren die Klinen feisch ausgerichtet sind, anders Sie einige Transfes Welt Owingen Öl auf die König
Wenn die Kirgen ausso ausgelichen sind, geben sie einige Troppen Wahl Lüper Dr auf die Kirgen, Steven Sie die Haarschneidemaschine kurz auf „On“ (Ein), dann auf „Off“ (Aus), und ziehen Sie den Netzstecker des
Seriäts aus der Steckdose. Lösen Sie die Schrauben leicht, und nehmen Sie die Einstellung (anhand der oben beseckleihenan Schritte 2-4) vor. Zaben Sie die Schrauben wieder an, nachdem Sie die Kängen ausgewichtet
beuchtemmel Schuss 2-4) vor. Zieven Sie die Schwaden Weber am, Nahdost Sie die Kirfen ausgenlichten haben. Mit Ausnahme der Kirfen verfügt diese Haarschneidemaschine über keine vom Benutzer zu wartende
Tele.
3L(J)
Der Klingen ihrer neuen Haarschneidemasschine sollen jeweils nach einigen Haarschneiden gebt werden. Geben Sie einschreibungen Torsten Mötz Clinner Öl auf die Zähna der Köpingen. Uarwanden Sie nur das in der Varnackung enthaltene Mötz
Lettige Trophen Wahl Lipper Schluss die Zatine der Klangert. Vermögen die hier das in der Verpackung inklusive Wahl Clipper Öl. Wegen der hohen Geschwindlakeselt, mit der die Wahl-Haarschreidermaschine arbeitet, müssen Sie den richtigen
Üthyp verwenden. Verwenden Sie kein Haaröl, Fett oder Öl, das mit Kerosin oder Lösungsmittel vermiecht ist, da sich das
Lösungsmittel verfüchtigt und zinflüssiges Öl zurückässt, was zur Folge hat, dass die Bewegung der Klingen verlangsamt
Wird. Wolf Capper Uf ist ein sehr durinflüssiges, hafurbeassenes Uf, aus sich nicht verlubracht und aus die Geschäftigke der Kärzen nicht berehaltet.
SCHRAUBE FÜR LEISTUNGSWAHL, (sicht bei allen Modellen der Haarschneidersauflichen von Wahl
Wenn die Haarschneidemaschine über eine Schraube für die Leistungswahl verfügt, ist diese werksseitig auf
föchste Leistungstähigkeit eingestellt worden. Wenn aber die Spannungsversorgung in Ihrem Haus niedrig ist zinsen Ein zulichanlagen eine Ansatzung unternehmen
wüssen Sie möglichtenweise eine Anpassung vornehmen. Um die /sichtung anpassen, bewertet Sie die Püste aus Kürststoff, einen Gebruhandskos anders eine düme
dow die Leistung anzapassen, bevulzen Sie die Bursie aus Kunststoff, einen Schraubensloven über eine solme Münze, um die Schraube für die Leistungswahl so lange im Uhrzeipersinn zu drehen, bis sie an den Anschlag gerät
und ein Geräusch ertönt. Drehen Sie anschließend die Schraube für die Leistungswahl langsam (im entgegengesetz-
ten Uhrzeigersinn) heraus, bis das Geräusch verstummt. Sie haben nun die maximale Leistung eingestellt. (K)
KABEL Barutzen Sie das Kabel nicht, um an der Haarschneidomarschine zu ziehen. Da die Bauwagenfreihalt
Schnizen Sie das Kabel nicht, am av den Haarschleistmaschine 25 Zielen. Sie die Bewegungstrehen gewährägtat sein muss achten Sie darauf, dass das Kabel nicht verstreit oder hinkiert wird. Wirkeln Sie da
Kabel vor dem Lagern auf, und heben Sie das Gerät in seiner Originalverpackung oder (falls vorhanden) in dem
Beutel für die Lagerung auf.
Wenn die Haarschneidemaschine mit einem gepolten Stecker ausgerüstet ist: Um das
Stromschnittagsiko zu mindern, ist dieses Geraß mit einem gepolten Stecker ausgewüste (evo Kontakt ist drei bis den anders). Piese Ostenge erwart nur in einer Position (in eine gesamte Ostenlage. Winge des Steuers nicht
is der andere). Dieser Stecker passi hat in einer Position in eine gepone Steckause. Wenn der Stecker nicht gang in die Stecklose gest, drehen Sie ihn um. Wenn der Stecker immer noch nicht gest, lassen Sie von eigener
Elektriker die richtige Steckdose installieren. Nehmen Sie auf keinen Fall Veränderungen an dem Stecker vor.
SCHNITTLÄNGENREGLER (nicht bei allen Modelteor der Haarschmeidernaschloer von Wahl)
Wenn die Haarschneidemaschine mit einem verstellbaren Schnittlängenregler ausgerüstet ist, der ganz prak-
isch neben ihrem rechten Daumien angevoriert ist (sofern Sie Hechtshander sind), konven Sie
Schmittange ganz einfach entstellen, während Sie die Haarschneidemaschine in der Hand halten. Dieser Schnittlängengenler verleiht der Haarschneidemaschine zusätzliche Flexibilität, da er das Einstellen der
Schnittlänge ohne einen Führungskamm ermöglicht. Wenn sich der Regier in der obersten Position befindet.
Können Sie den kürzasten Haarschnitt erzielen. Wenn Sie den Regier nach unten schieben, wird die Schnittläng
stufenweise erhöht. Wenn sich der Schnittlängenregler in der untersten Position befindet, beträgt die Haaränge
stwa 3 mm (1/8 m.) und entspricht damit ungetahr der Lange des Führungskamms.
Der Schmittlungsregler ermittelt auch die Flexielle des Schwerdbessatzes, dar in jeder Einschreibung eine andere Schriftskauf bezugt wird. Außerdem ist der Schmittlungsregler nütlich, wenn die Klinen in Folge extremer Bezugschüsse und
Sembzil wird. Außerdem ist der Schichtungenregler möglich, wenn die Klingen im Tüge Extremei desansführung ver- lemmt sind und Haare entfernt werden sollen, die sich zwischen den beiden Klingen verfangen haben, ohne dass die
Kingen dazu ausgebaut werden müssen. Während die Haarschneidemaschine läuft, bewegen Sie den Repler mehrmal
rasch von der Stellung für „kurzen Schnitt“ in die Stellung für „längeren Schnitt“. Wenn Sie diesen Vorgang nach
ledem Gebrauch der Haarschneidermaschine wiederholen, trägt dies dazu bei, dass sich keine Haarreste zwischen den Können abtagarn. Mann die horschneidermaschine nicht mehr schneidet und sich das Problem mit dieser Moßnahme
dengt abagene. Werls der Jahresweizmäßerte henn man Schreiber und sich das Problem mit dieser Mathematik nicht behangen liegt, sind möglicherweise die Klingen stumpf neuorden. Tauschen Sie die Klingen aus oder senden Sie
diese zum Schärfen an Wahl zurück.
WAHL-RATGEBER FÜR KINDERLEICHTES HAARSCHNEIDEN
VOR DEM SCHNEIDEN DER HAARE
7 Die Haarschneidemaschine sollte sauber, gehört und in einwandfreiem Betriebszustand sein. 2 Wann über Haarschneida-Get einen Einkieromfang enthält, binden Sie diesen um den Hals, ziehen Sie die
- Wann der Haarschelbeck- und Eilen Forderung entstet, Brinden Sie frühen am den Haus, Zellen Sie die Kordein fest und schlagen Sie den Umfang so ein, dass keine Hause in den Kragen fallen können. Wenn
Umkang vorhanden ist, erfüllt ein Handtuch diesen Zweck.
3 Lassen Sie die Person, die frisiert werden soll, so auf einem Stuhl Platz nehmen, dass sich die Kopföberse
der Person ends in Hone ihrer Augen Betriebt. 4. Nach dem Aushriptan der Haare und dem /özen aller Kneten halten. Sie die Hazenschneidemarchine entra
- Nach dem Auszurden der Täure und dem Lösen aber Abfalln nahen, die der Haarschmidtmaschens entspau und behavem in der Hand, unter sich das Tungenschild unter der Handfläche in der Nähe Ihres Zeinafingers.
die bequirm in der Hand, wenn schon als Typelnstelle unter der Handnahme in der Hande imbo Ergeingelder befinden sollte. Wenn Sie die Haarschneidemaschine so halten, können Sie den Schneidevorgang bequern uns
präzise kontrolleren.
HINWEIS: Zum Aufstecken von Führungskammten halten Sie den Kamm mit der Zahnseite nach oben. Schweben Sie den Führungskammten auf die 120000 (davonstehendwachte auf, bis so eingetet, il.)
Se den Führungskaufmaßsatz fest auf die Antige der Haarschneidemästeine auf, als er Erwidest. (L) Tier Hazerschneider-Sat kann je nach Modell die folgenden Klimme enthalten:
Verstellbare Führungskämme – ermöglichen verschiedene Schnittmägen mit einem einzigen Kamm.
individuelle schwarze Führungskämme – mit vorgegebenen Längen, die auf jedem Führungskamm
individuelle farbige Führungskämme – mit vorgegebenen Längen, die auf jedem Führungskamm angege
ben sind Kämme sind auch farbcodiert, sodass eine rasche identifizierung ihrer Schnittlänge möglich ist.
VERWENDEN VERSTELLBARER FÜHRUNGSKÄMME:
Der kleine verständbare Führungskamm kann im Bereich von 3 mm bis 16 mm (1/8 m. bis 5/8 m.) in Stufen von Insgre 2 mm einverteil werden. (M)
Winds 3 mm angestellt infusiert. (M) Der große verstellbare Führungskamm kann im Bereich von 18 mm bis 22 mm (2/f in, bis 1-f/f in.) in Stufen
der große verstellbare Aufwandskammt kann am bereich vor 15 mm bis 32 mm (3-4 m. bis 1-164 m.) zu Stellen von jeweils 3 mm eingestellt werden. (N)
Mit Hilfe ihres Daumens können Sie die Schnittlänge verändern, indem Sie einfach den verstellbaren Regler in die
nichtste Stellung schieben. Beide verstellbare Führungskimme sind mit Kickstopps und Stufenanzeige sowie mit
einer Anzeige der Schnittlänge in Minimetern ausgestattet, sodass sich die jeweilige Einstellung rasch und einfach abieren jetzt.
Der große verstellbare Führungskamm kann für den Barseinb vom Ohr bis zur Konsfahersalte verwendet werden. (011)
Der groß Vorstellbare Raumungskamm kann für den Bereich vom Jahr 1950 und Lär Nephoborsitz Verbindlich worden. (31) Hier kleine verstellbare Führungskamm kann für den Bereich vom Marken bis zu den Ohren verwendet werden. (12)
Sor. Kamro Vorstellbare Fertangskämm: Nahr ist zum Börschen Vermatischen bis zu den Söllner Verwirket mboll; (OL) VERWENDEN INDIVIDUELLER (SCHWARZER ODER FABRIGER) EÜHRUNGSKÄMME:
Einige Sets enthalten nicht sämtliche Wahl-Führungskämme. Alle Kämme (oder weiteres Zubehör, das hier nicht
aufgelistet ist) können über den Händler bezogen oder direkt bei Wahl bestellt werden.
LISTE DER INDIVIDUELLEN FÜHRUNGSKÄMME
- 3 mm - schwarz/rot - 10 mm - schwarz/rot
- 10 mm - schwarz/distekwal - 16 mm - schwarz/kehl - 13 mm - schwarz/orange/losa - 19 mm - schwarz/lawendefacher
• 22 mm - schwarz/grün • 25 mm - schwarz/helblau
• 31 mm - schwarz/weiß • 38 mm - nur schwarz
- Haarschnitt im Bereich des rechten Obrs - nur schwarz - Haarschnitt im Bereich des Nr. 1000000000
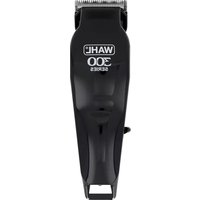
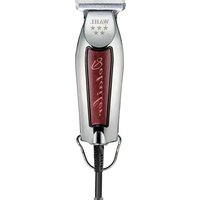
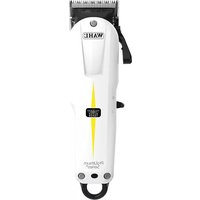

Marque : WAHL
Modèle : CloseCut Pro
Catégorie : Tondeuse à barbe