
AF 5088MS - Cadre photo numérique AGFAPHOTO - Notice d'utilisation et mode d'emploi gratuit
Retrouvez gratuitement la notice de l'appareil AF 5088MS AGFAPHOTO au format PDF.


| Type de produit | Cadre photo numérique |
| Marque | AgfaPhoto |
| Modèle | AF 5088MS |
| Taille de l'écran | 8 pouces (20,3 cm) |
| Résolution d'écran | 800 x 600 pixels |
| Formats d'image supportés | JPEG, BMP, PNG |
| Mémoire interne | 128 Mo |
| Lecteur de cartes mémoire | SD, SDHC, MMC jusqu'à 32 Go |
| Port USB | Oui, pour clé USB |
| Fonction diaporama | Oui, avec réglages de transition et intervalle |
| Fonction calendrier et horloge | Oui, intégrés |
| Alimentation | Adaptateur secteur 5V, 1A (fourni) |
| Dimensions (L x H x P) | 220 x 170 x 30 mm |
| Poids | 400 g |
| Entretien et nettoyage | Nettoyer avec un chiffon doux et sec. Ne pas utiliser de produits abrasifs. |
| Sécurité | Ne pas exposer à l'humidité ni aux températures extrêmes. Débrancher en cas d'orage. |
| Pièces détachées et réparabilité | Adaptateur secteur disponible en remplacement. Aucune pièce réparable par l'utilisateur. |
FOIRE AUX QUESTIONS - AF 5088MS AGFAPHOTO
Questions des utilisateurs sur AF 5088MS AGFAPHOTO
0 question sur cet appareil. Repondez a celles que vous connaissez ou posez la votre.
Poser une nouvelle question sur cet appareil
Téléchargez la notice de votre Cadre photo numérique au format PDF gratuitement ! Retrouvez votre notice AF 5088MS - AGFAPHOTO et reprennez votre appareil électronique en main. Sur cette page sont publiés tous les documents nécessaires à l'utilisation de votre appareil AF 5088MS de la marque AGFAPHOTO.
MODE D'EMPLOI AF 5088MS AGFAPHOTO

AGFAPHOTO
AF 5088/5108MS
Quick Start Guide
1

1.1

1.2

1.3
2


3


3.1
A
V
<
3.2

1 Packing Contents
1.1 Digital Photo Frame
12 Power Supply
1.3 Quick Guide
2 Getting Started
2.1 Insert a memory card (SD, MMC or MS) into the card slot
Insert the OSB device into the OSB port
The card will only fit in one direction; do not
(1) force it. The card should it study when
property inserted.
2.2 Connection to a PC
Using the USB cablenot included, you open connect your
using this GBD database technology, you can access your
name to a computer to transfer lines between the two
memory and computer
If you connected the terms to a computer, the
③ inserted memory card can not be recognized.
Plug AC adaptor into the Digital Photo Frame, and plug
k into a wall outlet.
2.4 Press the POWER button on the rear of the device to
3 Basic Operations
3.1 Press the MENU@button to enter the main menu.
A: Photo Playback
B: Video Playback
C: Music History
G. Music:Physician
Press the 15 button to enter the setting menu.
A: Preview Mode
B. Copy Menu
C: Delete Meri
D: Setting Mode
3.2 Use the direction key to select different item.
⑤ ②1. Direction Key
2. Sides to previous or next in-service/music file
⑧ Enable write slung power during slide time.
③ Einkar-mast, playing them in the side show
1. Direction Key
2. Adjust the volume during audio playback.
OK StartPause the playback
Press the Button during photo playback:
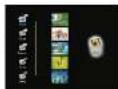
Photo Preview Mode( 16 thumbnails per page)

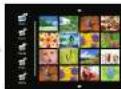


- Use Ⓧ or ⭕ button to select a folder/album on the left, then touch ⏱ button
- Use Ⓞ Ⓞ ➕ button to select an image and touch OK to start the slideshow
- Skips to the previous or next image use the 📄or button. To pause or start the slide show touch OK
- Touch the Ⓧ button to enter the background music setting menu. Use Ⓧ or Ⓧ button to adjust the volume.
Photo Copy Menu


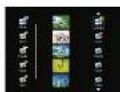
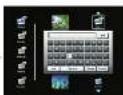
- Use △or◎button to select a source;
- Select an image and touch OK
- Use @orbutton to select a folder/album and touch OK to start copying.
- If select and touch OK, you can rename the album. Use OK button to select a letter/digit, and touch OK
- I school — and touch OK, you can Romania the album. Use iOS 📷 button to
Photo Delete Menu

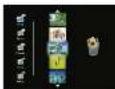
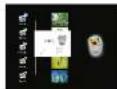
- Use @pr @button to select a source and:
- Select an away and touch OK Touch OK again to cancel the selections
- Touch a button and then touch OK buttons
-
Touchesbutton and then touch OR button.
-
USE(S): (2) button to select X to delete, select X to cancel
The same steps for music/video copy/delete.

Setting Mode
loons in the setting mode:
| To set specific fun frame | |
| To choose the specific power start mode | |
| Power Start Up Mode-orderly 1 | |
| Power Start Up Mode-orderly 2 | |
| Power Start Up Mode-orderly 3 | |
| Power Start Up Mode-orderly 4 | |
| Power Start Up Mode-random 1 | |
| Power Start Up Mode-random 2 | |
| Power Start Up Mode-random 3 | |
| Power Start Up Mode-random 4 | |
| Eco Setting(Set the automatically power on/off time). | |
| Photo Setting(from the left to the right) | |
| 1. Rotation. | |
| 2.To change the interval time for side show. | |
| 3.To choose different transition effect for slice show. | |
| 4.To set different LCD screen display ratio. | |
| Adjustment of Brightness,Contrast,Color saturation,LCD backlight of the LCD screen. | |
| Brightness | |
| Contrast | |
| Color Saturation | |
| LCD Backlight | |
| Data Setting | |
| Time Setting | |
| Alarm Clock Setting | |
| Reset! |

Technical Data
| Dimensions | 203x182.5x86 1mm (AF5088MG) |
| 255x202x88 3mm (AF5108MS) | |
| Score on size | 8" (AF5098MS) |
| 10.4" (AF5108MS) | |
| Aspect ratio | ±3 |
| Resolution | 800 x 800 pixels |
| File at real memory | 2GB |
| USB port | USB Port, USB Device |
| Compatible memory card | SD/MMC/WS/XD |
| Photo format | JPEG |
| Music format | VIP3 |
| Video format | MPEG, Xid, MPEG4-visual |
| File format | *.evl, *. mag, *. mp3, *.jpg |
| Max. video resolution | 720x576pixel |
| at 30 pictures/sec (/ps) |
Safety instructions and recommendations
- Keep the screen clean (please use a dry soft cloth for cleaning). Make sure the power is off before cleaning the unit. Then
- In order to prevent damage to the card or the unit, please turn off the power before removing or inserting the card.
- Use enclosed DC 5V/2A power adapter, the unit is for indoor use only
- Always handle the unit with care. Avoid to using the LCD screen
gently wipe with a dry soft cloth.
- Do not place the unit near any other heat sources.
- Do not splash or a film with liquids
- Do not place the unit to rain, water, moisture or high humidity.
- Tempers wire are fully:
Opened long tempera wire : CC-++50, Humidity : 205-e 6%
- This equipment comprises with the voltage type specified on the unit.
The CE marking certifies that the product meets the main requirements of the European Parliament and Council

regarding electromagnetic interference.
The declaration of compliance can be consulted on the site www.agfapholo.com
Preservation of the environment as part of a sustainable development logic is an essential concern of AgfaPhoto.
The desire of Agfa-Photo is to operate systems observing the environment and consequently it has decided to integrate environmental performance.
Integrate environmental performance
In the life cycle of this products from manufacturing to commissioning use and elimination.

Packaging:
The presence of the logo(green dot) means that a contribution is paid to an approved national organisation to improve package recovery and recycling infrastructures to facilitate, please respect the sorting rules set up locally for this kind of waste.

Product:
The crossed-out waste bin stuck on the product means that the product belongs to the family of electrical and electronic
equipment. In this respect, the European regulators ask you to dispose all selectively
At sales gains in the event of the purchase of similar equipment.
At the collection points made available to you local-bridge p-off centre, selective collection, etc.
In this way you can participate in the re-use and unloading of Electrical and Electronic Equipment Waste, which can have an
effect on the environment and human health.
AgfaPhoto Holding GmbH AGFAPHOTO is used under license of Agfa-Gevaert NV & Co KG Agfa-Gevaert NV & Co KG does not
manufacture these products or provide any product warranty or support. Contact www.agfapholo.com
For service support and warranty information, contact the distributor or manufacturer.


Marque : AGFAPHOTO
Modèle : AF 5088MS
Catégorie : Cadre photo numérique