
RGB790SERSA - Four HOTPOINT - Notice d'utilisation et mode d'emploi gratuit
Retrouvez gratuitement la notice de l'appareil RGB790SERSA HOTPOINT au format PDF.


| Type de produit | Four à gaz encastrable (free-standing) |
| Marque | Hotpoint |
| Modèle | RGB790SERSA |
| Alimentation | Gaz naturel (convertible au GPL par un technicien qualifié) |
| Tension électrique | 120 V, 60 Hz, prise mise à la terre |
| Table de cuisson | 5 brûleurs à gaz scellés : 1 brûleur petit (mijotage), 2 moyens, 1 grand, 1 extra-large (triple flamme sur certains modèles) |
| Fonctions du four | Cuisson (bake), rôtissage (roast), grill (broil) haut/bas, cuisson minutée, cuisson programmée, fonction Sabbath |
| Nettoyage | Pyrolyse (auto-nettoyage) avec cycle de 3 à 5 heures réglable |
| Tiroir chauffant | Tiroir de réchaud avec 3 réglages (LO/MED/HI) |
| Sécurité | Dispositif anti-basculement, arrêt automatique de 12 h (cuisson) ou 3 h (grill), verrouillage de porte pendant pyrolyse |
| Éclairage du four | Ampoule remplaçable, commande par touche ou interrupteur |
| Grilles | 5 positions, grille basse spéciale (R) pour grandes pièces ; grilles en porcelaine ou nickel selon version |
| Accessoires inclus | Lèchefrite avec grille, grilles de four, grilles de brûleurs |
| Entretien | Nettoyage manuel des brûleurs et grilles ; ne pas utiliser de nettoyant pour four pendant pyrolyse |
| Pièces détachées et réparabilité | Pièces disponibles via GE Appliances (Canada : Mabe) ; intervention par un technicien qualifié |
FOIRE AUX QUESTIONS - RGB790SERSA HOTPOINT
Questions des utilisateurs sur RGB790SERSA HOTPOINT
0 question sur cet appareil. Repondez a celles que vous connaissez ou posez la votre.
Poser une nouvelle question sur cet appareil
Téléchargez la notice de votre Four au format PDF gratuitement ! Retrouvez votre notice RGB790SERSA - HOTPOINT et reprennez votre appareil électronique en main. Sur cette page sont publiés tous les documents nécessaires à l'utilisation de votre appareil RGB790SERSA de la marque HOTPOINT.
MODE D'EMPLOI RGB790SERSA HOTPOINT
Free-Standing Gas Ranges
For a Spanish version of this manual, visit our Website at GEAppliances.com.
Para consultar una version en español de este manual de instrucciones, visite nuestro sitio de internet GEAppliances.com.
In Canada contact us at: www.GEAppliances.ca
| Safety Instructions .....2-5 | Installation Instructions .....36-46 | Owner's Manual & Installation Instructions |
| Operating Instructions | Air Adjustment .....45 | |
| Clock and Timer. . . . . . . . . . . . . . . . . . . . . . . . . . . . . . . . . . . . . . . . . . . . . . . . . . . . . . . . . . . . . . . . . . . . . . . . . . . . . . . . . . . . . . . . . . . . . . . . . . . . . | Airt 16 Tip Device .....46 | |
| Oven .....8-25 | Assemble Surface Burners .43,44 | Standard Clean |
| Baking and Roasting .....12 | Checking Burner .....44 | JGBS04 |
| Broiling, Broiling Guide .....13-15 | Ignition .....44 | JGBS07 |
| Oven Control .....8-9 | Connecting the Range .....39-42 | JGBS18 |
| Power Outage .....7,11,17 to Gas .....39-42 | Preheating .....12 Dimensions and Clearances .....38 | JGBS23 |
| Sabbath Feature .....20,21 | JGSS05 | |
| Self-Cleaning .....Electrical Connections .....43 | Shelves .....Leveling the Range .....46 | RGB508 |
| Special Features .....L.P.19 .....39 | Steam Clean .....35 | RGB525 |
| Thermostat Adjustment .....24 | Troubleshooting Tips .....47-50 | RGB526 |
| Timed Baking .....18 | and Roasting .....18 | RGB530 |
| Surface Cooking .....8,7 | Warming Drawer .....23,24 | RGB540 |
| Consumer Support | Self Clean | |
| Care and Cleaning | Consumer Support. . . Back Cover | JGB250 |
| Aluminum Foil .....19,15 | Warranty for Customers | JGB281 |
| Burner Assembly .....27 Canada .....55 | Burner Grates .....Warranty for Customers | JGB282 |
| Control Panel and Knobs. .30,31 | in the U.S.A. .....54 | JGB285 |
| Cooktop .....30,31 | JGBP27 | |
| Door Removal .....32 | JGBP28 | |
| Drawer .....34 | JGBP33 | |
| Oven Bottom .....31 | RGB745 | |
| Oven Light Replacement .....33 | RGB746 | |
| Oven Vents .....30 | RGB790 | |
| Racks .....32 | ||
| Self-Cleaning .....25,26 | ||
| Stainless Steel Surfaces .....33 | ||
Write the model and serial numbers here:
Model # ____
Serial # ____
You can find them on a label on the front of the range behind the warming drawer or lower oven drawer.
WARNING
If the information in this manual is not followed exactly, a fire or explosion may damage, personal injury or death.
- Do not store or use gasoline or other flammable vapors and liquids in the vicinity of this or any other appliance.
-
WHAT TO DO IF YOU SMELL GAS
-
Do not try to light any appliance.
- Do not touch any electrical switch; do not use any phone in your building.
Immediately call your gas supplier from a neighbor's phone. Follow the gas supplier's instructions.
If you cannot reach your gas supplier, call the fire department.
- Installation and service must be performed by a qualified installer, service agency or the gas supplier.
WARNING

All ranges can tip.
■ BURNS or other SERIOUS INJURIES can result.
INSTALL and CHECK the anti-tip bracket following the instructions supplied with the bracket.
To reduce the risk of tipping the range, the range must be secured by a properly installed anti-tip bracket. See installation instructions shipped with the bracket for complete details before attempting to install.

To check if the bracket is installed and engaged properly, look underneath the range to see that the anti-tip arm attached to the side panel is engaged in the bracket. On some models, the storage drawer or kick panel can be removed for easier inspection. If visual inspection is not possible, slide
the range forward, confirm the anti-tip bracket is securely attached to the floor or wall, and slide the range back so the anti-tip arm slides just under the anti-tip bracket. If the range is pulled from the wall for any reason, always repeat this procedure to verify the range is properly secured by the anti-tip bracket.
Never completely remove the leveling legs or the range will not be secured to the anti-tip device properly.
If you did not receive an anti-tip bracket with your purchase, call 1.800.626.8774 to receive one at no cost (in Canada, call 1.800.561.3344). For installation instructions of the bracket, visit GEAppliances.com (in Canada, GEAppliances.ca).
WARNING
IMPORTANT SAFETY NOTICE
The California Safe Drinking Water and Toxic Enforcement Act requires the Governor of California to publish a list of substances known to the state to cause cancer, birth defects or other reproductive harm, and requires businesses to warn customers of potential exposure to such substances.
The fiberglass insulation in self-clean ovens gives off a very small amount of carbon monoxide during the cleaning cycle. Exposure can be minimized by venting with an open window or using a ventilation fan or hood.
WARNING
GENERAL SAFETY INSTRUCTIONS
WARNING
NEVER use this appliance as a space heater to heat or warm the room. Doing so may result in carbon monoxide poisoning and overheating of the oven.
Use this appliance for its intended purpose as described in this owner's manual.
- Have your range installed and properly grounded by a qualified installer in accordance with the provided installation instructions. Any adjustment and service should be performed only by a qualified gas range installers or service technicians. Do not attempt to repair or replace any part of your range unless it is specifically recommended in this manual.
- Your range is shipped from the factory set for use with natural gas. It can be converted for use with LP gas. If required, these adjustments must be made by a qualified technician in accordance with the installation instructions and local codes. The agency performing this work assumes responsibility for the conversion.
- Have the installer show you the location of the range gas shut-off valve and how to turn it off if necessary.
Plug your range into a 120-volt grounded outlet only. Do not remove the round grounding prong from the plug. If in doubt about the grounding of the home electrical system, it is your responsibility and obligation to have an ungrounded outlet replaced with a properly grounded, three prong outlet in accordance with the National Electrical Code. Do not use on extension cord with this appliance.
Before performing any service, unplug the range or disconnect the power supply at the household distribution panel by removing the fuse or switching off the circuit breaker.
Be sure all packing materials are removed from the range before operating to prevent ignition of these materials.
- Avoid scratching or impacting glass doors, cooktops or control panels. Doing so may lead to glass breakage. Do not cook on a product with broken glass. Shock, fire or cuts may occur.
Do not leave children alone or unattended in an area where an appliance is in use. They should never be allowed to climb, sit or stand on any part of the appliance.
Do not store items of interest to children above a range or on the backguard of a range—children climbing on the range to reach items could be seriously injured.
Do not allow anyone to climb, stand or hang on the oven door, drawer or cooktop. They could damage the range or tip it over causing severe injury or death.
Never block the vents (air openings) of the range. They provide the air inlets and outlets that are necessary for the range to operate properly with correct combustion. Air openings are located at the rear of the cooktop, at the top and bottom of the oven door, and at the bottom of the range under the warming drawer, lower oven drawer or kick panel.
Use only dry pot holders—moist or damp pot holders on hot surfaces may result in burns from steam. Do not let pot holders touch surface burners, burner grate, or oven heating element. Do not use a towel or other bulky cloth in place of pot holders.
- Be careful not to touch hot surfaces of the range. Potentially hot surfaces include burners, grates, cooktop, backguard, oven and door interior and crevices around the oven door.
Do not heat unopened food containers. Pressure could build up and the container could burst, causing an injury.
To protect against foodborne illness, ensure that temperatures of meat and poultry products meet or exceed the USDA minimum recommended temperatures for food safety. For more information see: www.isitdoneyet.gov or call the USDA meat and poultry hotline at 1-888-674-6854.
WARNING
KEEP FLAMMABLE MATERIALS AWAY FROM THE RANGE
Do not store or use flammable materials in an oven or near the cooktop, including paper, plastic, pot holders, linens, wall coverings, curtains, drapes and gasoline or other flammable vapors and liquids.
Never wear loose-fitting or hanging garments while using the appliance. Avoid storing commonly used items in cabinets above the range and be careful when reaching over the range. Clothing in close proximity to burners or hot surfaces may ignite causing severe burns.
Do not let cooking grease or other flammable materials accumulate in or near the range. Grease in the oven or on the cooktop may ignite.
- Clean ventilating hoods frequently. Grease should not be allowed to accumulate on the hood or filter.
WARNING
IN THE EVENT OF A FIRE, TAKE THE FOLLOWING STEPS TO PREVENT INJURY AND FIRE SPREADING:
Do not use water on grease fires. Never pick up a flaming pan. Turn the controls off. Smother a flaming pan on a surface burner by covering the pan completely with a well-fitting lid, cookie sheet or flat tray. If necessary, use a multi-purpose dry chemical or foam-type fire extinguisher.
If there is a fire in the oven during baking, turn the oven off and keep the door closed until the fire goes out. If
necessary, use a multi-purpose dry chemical or foam type fire extinguisher.
If there is a fire in the oven during self-clean, turn the oven off and wait for the fire to go out. Do not force the door open. Introduction of fresh air at self-clean temperatures may lead to a burst of flame from the oven. Failure to follow this instruction may result in severe burns.
WARNING
COOKTOP SAFETY INSTRUCTIONS
Never leave the surface burners unattended at medium or high heat settings. Foods, especially oily foods, may ignite resulting in fire that could spread to surrounding cabinets.
Never leave oil unattended while frying. If allowed to heat beyond its smoking point, oil may ignite resulting in fire that may spread to surrounding cabinets. Use a deep fat thermometer whenever possible to monitor oil temperature.
To avoid oil spillover and fire, use a minimum amount of oil when shallow pan-frying and avoid cooking frozen foods with excessive amounts of ice.
Use proper pan size and avoid pans that are unstable or easily tipped. Select cookware that is matched to the size of the burner. Burner flames should be adjusted so that they do not extend beyond the bottom of the pan. Excessive flame may be hazardous.
■ Always use the LITE position when igniting the top burners and make sure the burners have ignited.
When using glass/ceramic cookware, make sure it is suitable for cooktop service; others may break because of sudden change in temperature.
To minimize the possibility of burns, ignition of flammable materials and spillage, the handle of a container should be turned toward the center of the range without extending over nearby burners.
- When preparing flaming foods under a hood, turn the fan on.
Do not use a wok with a round metal support ring, the ring may trap heat and block air to the burner resulting in a carbon monoxide hazard.
Do not attempt to lift the cooktop if your range has sealed surface burners. Doing so may damage the gas tubing to the surface burners resulting in a gas leak and risk of fire.
Do not use aluminum foil to cover the grates or line any part of the cooktop. Doing so may result in carbon monoxide poisoning, overheating of the cooktop surfaces, or a potential fire hazard.
WARNING
OVEN SAFETY INSTRUCTIONS
WARNING
NEVER cover any slots, holes, or passages in the oven bottom or cover an entire rack with materials such as aluminum foil. Doing so blocks air flow through the oven and may cause carbon monoxide poisoning. Aluminum foil linings may also trap heat, causing a fire hazard.
Stand away from the range when opening the oven door. Hot air or steam which escapes can cause burns to hands, face and/or eyes.
- Keep the oven free from grease buildup. Grease in the oven may ignite.
Place oven racks in desired location while oven is cool. If rack must be moved while oven is hot, be careful to avoid touching hot surfaces.
Pull the oven rack to the stop-lock position when loading and unloading food from the oven. This helps prevent burns from touching hot surfaces of the door and oven walls.
Do not leave items such as paper, cooking utensils or food in the oven when not in use. Items stored in an oven can ignite.
Do not leave items on the cooktop near the oven vent which is in the center of the backguard. Items may overheat resulting in a risk of fire or burns.
- When using cooking or roasting bags in the oven, follow the manufacturer's directions.
- Never broil with door open. Open-door broiling is not permitted due to overheating of control knobs.
WARNING
SELF-CLEANING OVEN SAFETY INSTRUCTIONS (Some models)
The self-cleaning feature operates the oven at temperatures high enough to burn away food soils in the oven. Follow these instructions for safe operation.
Before operating the self-clean cycle, remove pans, shiny metal oven racks and other utensils from the oven. Only porcelain-coated oven racks may be left in the oven. Do not use self-clean to clean other parts, such as grates.
Before operating the self-clean cycle, wipe grease and food soils from the oven. Excessive amount of grease may ignite leading to smoke damage to your home.
If the self-cleaning mode malfunctions, turn the oven off and disconnect the power supply. Have it serviced by a qualified technician.
Do not clean the door gasket. The door gasket is essential for a good seal. Care should be taken not to rub, damage or move the gasket.
Do not use oven cleaners. No commercial oven cleaner or oven liner protective coating of any kind should be used in or around any part of the oven.
WARNING
WARMING DRAWER/LOWER OVEN DRAWER SAFETY INSTRUCTIONS (Some models)
The purpose of the warming drawer is to hold hot cooked foods at serving temperature. Bacteria will grow very rapidly in food that is between 40 and 140°F. Do not put cold food in warming drawer. Do not keep food in the warming drawer for more than 2 hours. Failure to follow these instructions may result in foodborne illness.
Do not leave paper products, plastics, canned food or combustible materials in the drawer. They may ignite.
Do not touch the heating element or the interior surface of the drawer. These surfaces may be hot enough to cause burns.
Use care when opening the drawer. Open the drawer a crack and let hot air or steam escape before removing or replacing food. Hot air or steam that escapes can cause burns to hands, face and/or eyes.
Do not use aluminum foil to line the warming drawer. Foil is an excellent heat insulator and will trap heat beneath it. This will upset the performance of the drawer and potentially cause a fire hazard.
Using the gas surface burners.
Throughout this manual, features and appearance may vary from your model.
Before Lighting a Gas Burner
■ Make sure all burners are in place.
■ Make sure all grates on the range are properly placed before using any burner.
After Lighting a Gas Burner
Do not operate the burner for an extended period of time without cookware on the grate. The finish on the grate may chip without cookware to absorb the heat.
- Be sure the burners and grates are cool before you place your hand, a pot holder, cleaning cloths or other materials on them.

natural_image
Hand holding a small electronic component with an arrow indicating direction (no text or symbols present)Push the control knob in and turn it to the LITE position.
How to Light a Gas Surface Burner
Make sure all the surface burners are placed in their respective positions.
Push the control knob in and turn it to the LITE position.
You will hear a little clicking noise—the sound of the electric spark igniting the burner.
Turn the knob to adjust the flame size. If the knob stays at LITE, it will continue to click.
When one burner is turned to LITE, all the burners spark. Do not attempt to disassemble or clean around any burner while another burner is on. An electric shock may result, which could cause you to knock over hot cookware.

Large Center (oval) Extra Large Extra (on some models)
Sealed Gas Burners (Some models)
Your gas range cooktop has sealed gas burners. They offer convenience, cleanability and flexibility to be used in a wide range of cooking applications.
The smallest burner in the right rear position is the simmer burner. On some models, the right front position triple flame burner will be the simmer burner. This burner can be turned down to SIM for a very low simmer setting. It provides precise cooking performance for delicate foods such as sauces or foods that require low heat for a long cooking time.
The medium (left rear) and the large (left front) burners are the primary burners for most cooking. These general-purpose burners can be turned down from HI to LO to suit a wide range of cooking needs.
The extra large burner (right front, triple flame burner, or left front burner on some models) are the maximum output burners. Like the other four burners, it can be turned down from HI to SIM for a wide range of cooking applications.
 | How to Select Flame Size⚠ WARNING Flames that are not covered by cookware may present a risk of burns or clothing ignition. Never let flames extend beyond the sides of the cookware. | Watch the flame, not the knob, as you adjust heat. When fast heating is desired, the flame size on a gas burner should match the cookware you are using.Flames larger than the bottom of the cookware will not result in faster heating and may be hazardous. |
| Top-of-Range CookwareAluminum: Medium-weight cookware is recommended because it heats quickly and evenly. Most foods brown evenly in an aluminum skillet. Use saucepans with tight-fitting lids when cooking with minimum amounts of water.Cast-Iron: If heated slowly, most skillets will give satisfactory results.Enamelware: Under some conditions, the enamel of some cookware may melt. Follow cookware manufacturer's recommendations for cooking methods.Glass: There are two types of glass cookware—those for oven use only and | those for top-of-range cooking (saucepans, coffee and teapots). Glass conducts heat very slowly.Heatproof Glass Ceramic: Can be used for either surface or oven cooking. It conducts heat very slowly and cools very slowly. Check cookware manufacturer's directions to be sure it can be used on gas ranges.Stainless Steel: This metal alone has poor heating properties and is usually combined with copper, aluminum or other metals for improved heat distribution. Combination metal skillets usually work satisfactorily if they are used with medium heat as the manufacturer recommends. | |
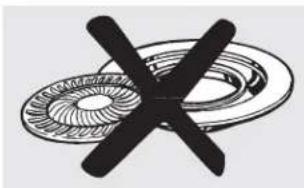 | Stove Top Grills (Sealed burner models)Do not use stove top grills on your sealed gas burners. If you use the stove top grill on the sealed gas burner, it will cause incomplete combustion and can result in exposure to carbon monoxide levels above allowable current standards. | This can be hazardous to your health. |
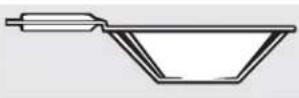 Use a flat-bottomed wok. Use a flat-bottomed wok.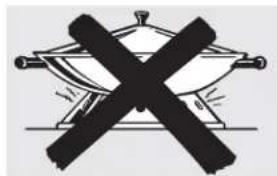 | Wok This WayWe recommend that you use a 14-inch or smaller flat-bottomed wok. Make sure the wok bottom sits flat on the grate. They are available at your local retail store.Only a flat-bottomed wok should be used. | Do not use a wok support ring. Placing the ring over the burner or grate may cause the burner to work improperly, resulting in carbon monoxide levels above allowable standards. This could be dangerous to your health. |
| In Case of Power FailureIn case of a power failure, you can light the gas surface burners on your range with a match. Hold a lit match to the burner, then push in and turn the control knob to theLITEposition. Use extreme caution when lighting burners this way. | Surface burners in use when an electrical power failure occurs will continue to operate normally. |
Using the oven controls.
Throughout this manual, features and appearance may vary from your model.
flowchart
graph TD
    A["1"] --> B["Bake Temp Recall"]
    C["2"] --> D["Start On"]
    E["3"] --> F["Box Box"]
    G["4"] --> H["Kitchen Timer On / Off"]
    I["5"] --> J["Clock"]
    K["6"] --> L["Automatic Oven"]
    M["7"] --> N["Cooking Time"]
    O["8"] --> P["Steam Clean"]
    Q["9"] --> R["Oven Light On / Off"]
    S["10"] --> T["+"]
    U["11"] --> V["-"]
    W["12"] --> X["Self Clean or Steam Clean"]
    Y["13"] --> Z["Broil Hi / Lo"]
    AA["14"] --> AB["15"]
Oven Control, Clock and Timer Features and Settings (on some models)
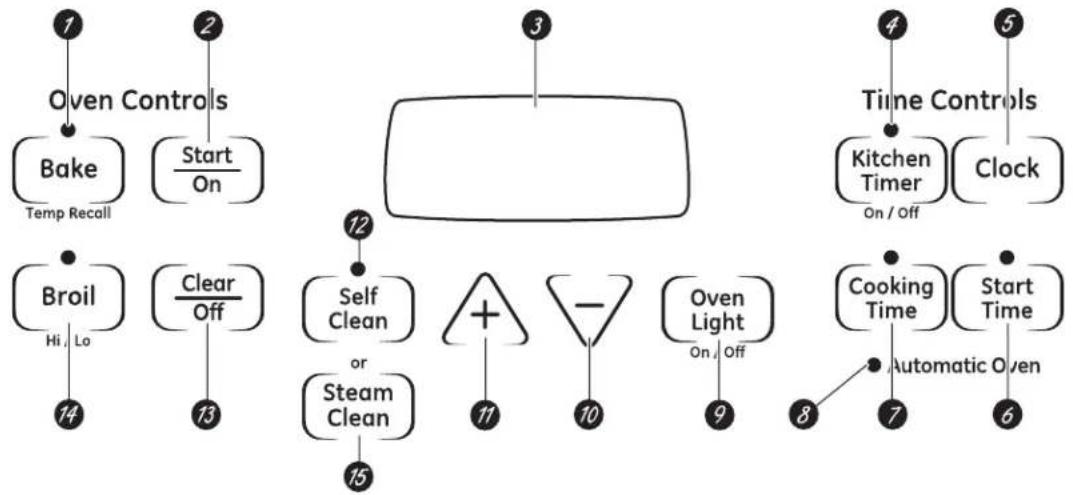
1 Bake/Temp Recall Pad
Touch this pad to select the bake function.
Bake Light
Flashes while in edit mode—you can change the oven temperature at this point. Glows when the oven is in bake mode.
2 Start/On Pad
Must be touched to start any cooking or cleaning function.
3 Display
Shows the time of day, oven temperature, whether the oven is in the bake, broil or self-cleaning mode and the times set for the timer or automatic oven operations. The display will show PRE while preheating. When the oven reaches the selected temperature, the oven control will beep and the display will show the oven temperature.
If "F-" and a number or letter flash in the display and the oven control signals, this indicates a function error code.
If your oven was set for a timed oven operation and a power outage occurred, the clock and all programmed functions must be reset.
The time of day will flash in the display when there has been a power outage. Reset the clock.
If the function error code appears during the self-cleaning cycle, check the oven door latch. The latch handle may have been moved, even if only slightly, from the latched position. Make sure the latch is moved to the right as far as it will go.
Touch the Clear/Off pad. Allow the oven to cool for one hour. Put the oven back into operation. If the function error code repeats, disconnect the power to the range and call for service.
4 Kitchen Timer On/Off Pad
Touch this pad to select the timer feature.
Then press the + and - pads to adjust the timer.
Timer Light
Flashes while in edit mode—you can change the set time at this point. Glows when the timer has been activated. Flashes again when the time has run out until the control is reset.
5 Clock Pad
To set the clock, press this pad twice and then press the + and - pads. The time of day will flash in the display when the oven is first turned on.
6 Start Time Pad (on some models)
Use along with the Cooking Time or Self Clean pads to set the oven to start and stop automatically at a time you set.
Start Time Light
Flashes while in edit mode—you can change the start time at this point. Glows when the function has been activated.
7 Cooking Time Pad (on some models)
Touch this pad and then touch the + or - pads to set the amount of time you want your food to cook. The oven will shut off when the cooking time has run out.
Cooking Time Light
Flashes while in edit mode—you can change the set time at this point. Glows when the function has been activated. Flashes again when the time has run out until the control is reset.
Oven Control, Clock and Timer Features and Settings (on some models)

Automatic Oven Light (on some models)
This lights anytime the oven has been programmed using the Cooking Time or Start Time functions.

Oven Light On/Off Pad
Touch this pad to turn the oven light on or off.

- Pad
Short taps to this pad will decrease the time or temperature by small amounts. Touch and hold the pad to decrease the time or temperature by larger amounts.

+ Pad
Short taps to this pad will increase the time or temperature by small amounts. Touch and hold the pad to increase the time or temperature by larger amounts.

Self Clean Pad (on some models)
Touch this pad to select the self-cleaning function. See the Using the self-cleaning oven section.
Clean Light
Flashes while in edit mode—you can change the length of time for the self-clean cycle at this point. Glows when the oven is in the self-clean cycle. After the self-clean cycle, the light will turn off. Unlatch the door.

Clear/Off Pad
Touch this pad to cancel ALL oven operations except the clock and timer.

Broil Hi/Lo Pad
Touch this pad to select the broil function.
Broil Light
Flashes while in edit mode—you can switch from Hi to Lo Broil at this point. Glows when the oven is in broil mode.
Indicator Lights (on some pads)
E D I T mode lasts several seconds after the last pad press. Start Time and Cooking Time will be the only pads lit if either of these options is selected. (Example: Start Time is selected with Bake—the Start Time pad will remain lit until the clock reaches the programmed time, at which point it will turn off and the Bake/Temp Recall pad light will light up.)

Steam Clean Pad (on some models)
Touch this pad for easier cleaning, light soiling of the oven cavity or door.
Oven Temperature Knob (on some models)

Appearance may vary.
Turn the OVEN TEMP knob to the setting you want.
■ The oven cycling light comes on during cooking.
Using the clock and timer.
Throughout this manual, features and appearance may vary from your model.

You have the choice of having the timer show the time counting down or the time of day. In either case, the timer will signal at the end of the timer period to alert you that the time is up.
To Set the Clock
NOTE: When you first plug in the range or after a power failure, the entire Clock/Timer display will light up.
1 Press the CLOCK pad.
2 Press and hold the + or - pad and the time of day will change 10 minutes at a time. To change the time by single minutes, give the pads short taps.
3 Press the CLOCK pad to start the clock.
To Set the Kitchen Timer
1 Press the KITCHEN TIMER ON/OFF pad.
2 Use the + and - pads to set the timer. Short taps on the + or - pad change the timer's setting one minute at a time. Pressing and continuing to hold the + pad increases the setting 10 minutes at a time.
3 Once you have set your timer, press the KITCHEN TIMER ON/OFF pad to start timing.
As the timer counts down, a signal will indicate when one minute is left. After this signal, the display will count down in seconds. When time runs out, a final signal will sound. Press the KITCHEN TIMER ON/OFF pad to stop the signal.
To Change or Cancel the Kitchen Timer Setting
When the timer is counting down, use the + and - pad to change the remaining time, or press the KITCHEN TIMER ON/OFF pad to stop the timer. The timer cannot be cancelled unless you have fully completed "set timer" instructions above.
Display Clock While Kitchen Timer Is Operating
Pressing the CLOCK pad while the timer is operating will not interfere with the timer's operation; the display will change to show the clock, but the timer will continue to count down and will still signal when time is up. Press the KITCHEN TIMER ON/OFF pad again to change the display back to show the timer.
To avoid possible burns, place the shelves in the desired position before you turn the oven on.

The oven has 5 shelf positions. It also has a special low shelf position (R) for extra large items, such as a large turkey.
Before you begin...
The shelves have stop-locks, so that when placed correctly on the shelf supports (A through E), they will stop before coming completely out, and will not tilt.
When placing and removing cookware, pull the shelf out to the bump on the shelf support.
ACAUTION When you are using a rack in the lowest position (R), you will need to use caution when pulling the rack out. We recommend that you pull the rack out several inches and then, using two
pot holders, pull the rack out by holding the sides of it. The rack is low and you can be burned if you put your hand in the middle of the rack and pull all the way out.
To remove a shelf, pull it toward you, tilt the front end up and pull it out.
To replace, place the end of the shelf (stop-locks) on the support, tilt up the front and push the shelf in.
NOTE: The shelf is not designed to slide out at the special low shelf (R) position.
natural_image
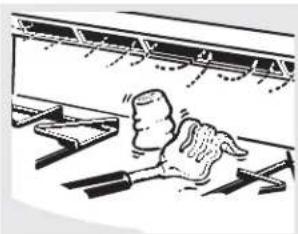
Cartoon illustration of a person falling off a train window with tools (no text or symbols)Plastic items on the cooktop may melt if left too close to the vent. Vent appearance and location vary.
Upper Oven Vent
Your oven is vented through ducts at the rear of the range. Do not block these ducts when cooking in the oven—it is important that the flow of hot air from the oven and fresh air to the oven burner be uninterrupted. Avoid touching the vent openings or nearby surfaces during oven or broiler operation—they may become hot.
■ Handles of pots and pans on the cooktop may become hot if left too close to the vent.
Do not leave plastic or flammable items on the cooktop—they may melt or ignite if left too close to the vent.
Do not leave closed containers on the cooktop. The pressure in closed containers may increase, which may cause them to burst.
■ Metal items will become very hot if they are left on the cooktop, and could cause burns.
natural_image
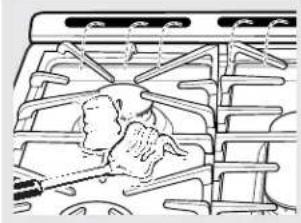
Line drawing of a person sitting on a bench surrounded by chairs and chairs (no text or symbols)Power Outage
The oven or broiler cannot be lit during a power failure.
If the oven is in use when a power failure occurs, the oven burner shuts off. This is because the flow of gas is automatically stopped and will not resume until power is restored.
Oven Light
On some models, touch the Oven Light pad on the upper control panel to turn the light on or off.
On some models, use the switch on the lower control panel to turn the light on or off.
If your model has a door latch, do not lock the oven door with the latch during baking or roasting. The latch is used for self-cleaning only.

The oven has a special low shelf (R) position just above the oven bottom. Use it when extra cooking space is needed, for example, when cooking a large turkey. The shelf is not designed to slide out at this position.
How to Set the Upper Oven for Baking or Roasting
Your oven is not designed for open-door cooking.
1 Touch the Bake pad.
2 Touch the number pads to set the desired temperature.
3 Touch the Start pad.
The word ON and 100° will be displayed. As the oven heats up, the display will show the changing temperature. When the oven reaches the temperature you set, a tone will sound.
To change the oven temperature during BAKE cycle, press the Bake pad and then the number pads to get the new temperature.
4 Check food for doneness at minimum time on recipe. Cook longer if necessary.
5 Touch the Clear/Off pad when cooking is complete.
NOTE: A cooling fan may automatically turn on and off to cool internal parts. This is normal, and the fan may continue to run even after the oven is turned off.

When baking on a single rack, baking results will be better if baking pans are centered in the oven as much as possible.
Preheating and Pan Placement
To avoid possible burns, place the racks in the desired position before you turn on the oven.
Preheat the oven if the recipe calls for it. To preheat, set the oven at the correct temperature. Preheating is necessary for good results when baking cakes, cookies, pastry and breads.
For ovens without a preheat indicator light or tone, preheat 10 minutes.
Baking results will be better if baking pans are centered in the oven as much as possible. Pans should not touch each other or the walls of the oven. If you need to use two shelves, stagger the pans so one is not directly above the other, and leave approximately 1½" between pans, from the front, back and sides of the wall.

When baking four cake layers at a time, use racks B and D. Place the lower pans at the back of the rack and the upper pans to the front of the rack shown so that one pan is not directly above another.
Aluminum Foil
Do not use aluminum foil to line oven bottoms. The foil will trap heat below and upset the performance of the oven. Foil can melt and permanently damage the oven bottom. Damage from improper use of aluminum foil is not covered by the product warranty.
Foil may be used to catch spills by placing a
sheet on a lower rack, several inches below the food. Do not use more foil than necessary and never entirely cover an oven rack with aluminum foil. Keep foil at least 1-1/2" from oven walls to prevent poor heat circulation.
Oven Moisture
As your oven heats up, the temperature change of the air in the oven may cause water droplets to form on the door glass. These droplets are harmless and will evaporate as the oven continues to heat up.
If your model has a door latch, do not lock the oven door with the latch during broiling. The latch is used for self-cleaning only. On some models, your range has a compartment below the oven for broiling.

natural_image
Simple line drawing of a door with a handle and frame (no text or symbols)Close the door. Always broil with the door closed.
How to Set the Upper Oven for Broiling
Place the meat or fish on a broiler grid in a broiler pan.
2 Follow suggested shelf positions in the Broiling Guide.
3 The oven door must be closed during broiling.
4 Touch the Broil Hi/Lo pad once for Hi Broil.
To change to Lo Broil, touch the Broil Hi/Lo pad again.
5 Touch the Start pad. A "CLOSE door" reminder is displayed.
6 When broiling is finished, touch the Clear/Off pad.
Serve the food immediately, and leave the pan outside the oven to cool during the meal for easiest cleaning.
Use Lo Broil to cook foods such as poultry or thick cuts of meat thoroughly without over-browning them.
Using the upper oven.
Broiling Guide
The size, weight, thickness, cut, starting temperature and personal preference of doneness will affect broiling times. This guide is intended as a general recommendation and is based on meats at refrigerator temperature. Preheating the broiler 5-10 minutes is recommended.
Adjust rack position or broil setting to achieve different results.
For greater searing and less internal doneness:
• Preheat the broiler for 10 minutes
- Use rack positions closer to the broiler
- Use Broil Hi setting
For less searing, meat that is cooked through and thicker cuts of meat:
- Use rack positions farther from the broiler.
- Try broil low setting.

The oven has 6 shelf positions. Broiling generally should take place on rack C or higher. Rack R is for roasting
| Food | Desired Doneness | Broil Setting | Rack Position | Comments |
| Beef (Steaks or ground beef patties) | Rare - Medium Rare | Hi E | Steaks less | than 1" thick may cook through before browning. To avoid flare-ups trim excess fat.To avoid curling, slash fat at 1" intervals. |
| Medium Hi | D-E | |||
| Well Done Hi | D | |||
| Chicken Hi | C Broil skin side down first. | |||
| Fish Hi D | Handle and turn very carefully | |||
| Pork Chops Hi | D To avoid curling, slash fat at 1" | intervals. | ||
USDA recommends the following minimum safe internal temperatures:
- Raw beef, pork, lamb, and veal steaks or chops: 145°F as measured with a food thermometer before removing meat from the heat source. For safety and quality, allow meat to rest for at least three minutes before carving or consuming.
- Raw ground beef, pork lamb or veal: 160°F as measured with a food thermometer.
- Poultry: 165irc F as measured with a food thermometer
For more information see: www.isitdoneyet.gov or call the USDA meat and poultry hotline at 1-888-674-6854.
How to Set the Broiler Compartment (on some models)
Broiling is cooking food by direct heat from above the food. Most fish and tender cuts of meat can be broiled. Follow these directions to keep spattering and smoking to a minimum.
Your range has a compartment below the oven for broiling.
Both the oven and broiler compartment doors must be closed during broiling.
Turn most foods once during cooking (the exception is thin fillets of fish; oil one side, place that side down on broiler grid and cook without turning until done). Time foods for about one-half the total cooking time, turn food, then continue to cook to preferred doneness.
You can change the distance of the food from the heat source by positioning the broiler pan and grid on one of three rack positions in the broiler compartment—A (bottom of broiler compartment), B (middle) and C (top). Placing food close to the burner increases exterior browning of the food, but also increases splattering and the possibility of fats igniting. Thicker foods and
foods that need to be cooked thoroughly should be broiled on a rack position farther from the broiler.
2 Preheating the broiler or oven is not necessary and can produce poor results. Preheating the broiler may produce better results for some foods but is not necessary.
3 If meat has fat or gristle around the edge, cut vertical slashes through both about 2" apart. If desired, the fat may be trimmed, leaving a layer about 1/8" thick.
4 Arrange the food on the grid and position the broiler pan on the appropriate rack in the oven or broiling compartment.
5 Close the oven and broiler compartment door.
6 Turn the OVEN CONTROL knob to BROIL.
When broiling is finished, turn the OVEN CONTROL knob to OFF. Remove the broiler pan from the broiler compartment and serve the food immediately. Leave the pan outside the range to cool.
Broiling Compartment Guide Suggestions
■ Always use the broiler pan and grid that comes with your range. It is designed to minimize smoking and spattering by trapping juices in the shielded lower part of the pan.
For steaks and chops, slash fat evenly around the outside edges of the meat. To slash, cut crosswise through the outer fat surface just to the edge of the meat. Use tongs to turn the meat over to prevent piercing the meat and losing juices.
If desired, marinate meats or chicken before broiling. Or brush with barbecue sauce last 5–10 minutes only.
When arranging the food on the pan, do not let fatty edges hang over the sides because dripping fat could soil the oven.
The broiler compartment does not need to be preheated. However, for very thin foods, or to increase browning, preheat if desired.
Frozen steaks can be broiled by positioning the rack at the next lowest rack position and increasing the cooking time given in this guide 1½ times per side.
natural_image
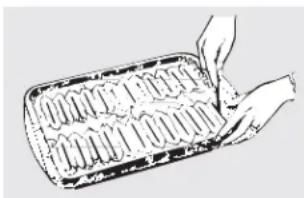
Illustration of a hand using a tool to cut or mark a rectangular tray with evenly spaced slots (no text or symbols)Cut slits in the foil just like the grid.
Aluminum Foil
You can use aluminum foil to line your broiler pan and broiler grid. However, you must mold the foil tightly to the grid and cut slits in it just like the grid.
Using the clock and timer. (on some models)
Not all features are on all models.

Make sure the clock is set to the correct time of day.
To Set the Clock
The clock must be set to the correct time of day for the automatic oven timing functions to work properly. The time of day cannot be changed during a delayed cooking or a delayed self-cleaning cycle.
1 Touch the Clock pad twice.
2 Touch the + or - pads.
If the + or - pads are not touched within one minute after you touch the Clock pad, the display reverts to the original setting. If this happens, touch the Clock pad twice and reenter the time of day.
3 Touch the Start/On pad until the time of day shows in the display. This enters the time and starts the clock.
To check the time of day when the display is showing other information, simply touch the Clock pad. The time of day shows until another pad is touched.
To Turn Off the Clock Display
If you have several clocks in your kitchen, you may wish to turn off the time of day clock display on your range.
1 Touch the Clock pad once to turn off the time of day display. Although you will not be able to see it, the clock maintains the correct time of day.
2 Touch the Clock pad twice to recall the clock display.
The timer is a minute timer only. The Clear/Off pad does not affect the timer.
To Set the Timer
The timer does not control oven operations. The maximum setting on the timer is 9 hours and 59 minutes.
1 Touch the Kitchen Timer On/Off pad.
2 Touch the + or - pads until the amount of time you want shows in the display. The maximum time that can be entered in minutes is 59. Times more than 59 minutes should be changed to hours and minutes.
If you make a mistake, touch the Kitchen Timer On/Off pad and begin again.
3 Touch the Start/On pad. The time will start counting down, although the display does not change until one minute has passed.
4 When the timer reaches :00, the control will beep 3 times followed by one beep every 6 seconds until the Kitchen Timer On/Off pad is touched.
Not all features are on all models.
To Reset the Timer
If the display is still showing the time remaining, you may change it by touching the Kitchen Timer On/Off pad and then touching the + or - pads until the time you want appears in the display.
If the remaining time is not in the display (clock, start time or cooking time are in the display), recall the remaining time by touching the Kitchen Timer On/Off pad and then touching the + or - pads to enter the new time you want.
To Cancel the Timer
Touch the Kitchen Timer On/Off pad twice.

flowchart
graph TD
    A["Kitchen Timer\nOn / Off"] --> B["or"]
    B --> C["Cooking Time"]
End of Cycle Tones (on some models)
Clear the tones by pressing the pad of the function you are using.
Power Outage
If a flashing time is in the display, you have experienced a power failure. Reset the clock.
To reset the clock, touch the Clock pad. Enter the correct time of day by touching the + or - pads. Touch the Start/On pad.
Using the timed baking and roasting features. (on some models)
Do not lock the oven door with the latch during timed cooking. The latch is used for self-cleaning only.
NOTE: Foods that spoil easily—such as milk, eggs, fish, stuffings, poultry and pork—should not be allowed to sit for more than 1 hour before or after cooking. Room temperature promotes the growth of harmful bacteria. Be sure that the oven light is off because heat from the bulb will speed harmful bacteria growth.


How to Set an Immediate Start and Automatic Stop
The oven will turn on immediately and cook for a selected length of time. At the end of the cooking time, the oven will turn off automatically.
1 Touch the Bake pad.
2 Touch the + or - pads to set the oven temperature.
3 Touch the Cooking Time pad.
NOTE: If your recipe requires preheating, you may need to add additional time to the length of the cooking time.
4 Touch the + or - pads to set the baking time.
The cooking time that you entered will be displayed. (If you select Cooking Time first and then adjust the Bake Temperature, the oven temperature will be displayed instead.)
5 Touch the Start/On pad.
The display shows either the oven temperature that you set or the cooking time countdown. (The display starts with PRE if showing the oven temperature.)
The oven will continue to cook for the programmed amount of time, then turn off automatically.
6 Touch the Clear/Off pad to clear the display if necessary.
Remove the food from the oven. Remember, even though the oven shuts off automatically, foods continue cooking after controls are off.

How to Set a Delayed Start and Automatic Stop
The oven will turn on at the time of day you set, cook for a specific length of time and then turn off automatically.
Make sure the clock shows the correct time of day.
1 Touch the Bake pad.
2 Touch the + or - pads to set the oven temperature.
3 Touch the Cooking Time pad.
4 Touch the + or - pads to set the desired length of cooking time.
5 Touch the Start Time pad.
6 Touch the + or - pads to set the time of day you want the oven to turn on and start cooking.
7 Touch the Start/On pad.
NOTE: An attention tone will sound if you are using timed baking and do not touch the Start/On pad.
NOTE: If you would like to check the times you have set, touch the Start Time pad to check the start time you have set or touch the Cooking Time pad to check the length of cooking time you have set.
When the oven turns on at the time of day you have set, the display will show PRE until it reaches the selected temperature, and then it will display the oven temperature.
At the end of cooking time, the oven will turn off and the end of cycle tone will sound.
8 Touch the Clear/Off pad to clear the display if necessary.
Remove the food from the oven. Remember, even though the oven shuts off automatically, foods continue cooking after controls are off.
Your new touch pad control has additional features that you may choose to use. The following are the features and how you may activate them.
The special feature modes can only be activated while the display is showing the time of day. They remain in the control's memory until the steps are repeated.
When the display shows your choice, touch the Start/On pad. The special features will remain in memory after a power failure.
NOTE: The Sabbath feature and the Thermostat Adjustment feature are also Special Features, but they are addressed separately in the following sections.

flowchart
graph TD
    A["Bake Temp Recall"] --> B["Clock"]
    C["Broil Hi / Lo"] --> B
    D["Start On"] --> B
12 Hour Shut-Off
With this feature, should you forget and leave the oven on, the control will automatically turn off the oven after 12 hours during baking functions or after 3 hours during a broil function.
If you wish to turn OFF this feature, follow the steps below.
1 Touch the Bake and Broil Hi/Lo pads at the same time for 3 seconds until the display shows SF.
2 Touch the Clock pad. The display will show ON (12 hour shut-off). Touch the Clock pad repeatedly until the display shows OFF (no shut-off).
3 Touch the Start/On pad to activate the no shut-off and leave the control set in this special features mode.
The Sabbath feature can be used for baking/roasting only. It cannot be used for broiling, self-cleaning or delay start cooking.
NOTE: The oven light comes on automatically (on some models) when the door is opened and goes off when the door is closed. The bulb may be removed. See the Oven Light Replacement section. On models with a light switch on the control panel, the oven light may be turned on and left on.


flowchart
graph TD
    A["Bake Temp Recall"] --> B["Clock"]
    C["Broil Hi / Lo"] --> B
    B --> D["Start On"]
    D --> E["Bake Temp Recall"]
    F["Start On"] --> G["+"]
    F --> H["-"]
When the display shows ⊃ the oven is set in Sabbath. When the display shows ⊃⊂ the oven is baking/roasting.
How to Set for Regular Baking/Roasting
NOTE: To understand how the oven control works, practice using regular baking (non-Sabbath) before entering Sabbath mode.
Make sure the clock shows the correct time of day and the oven is off.
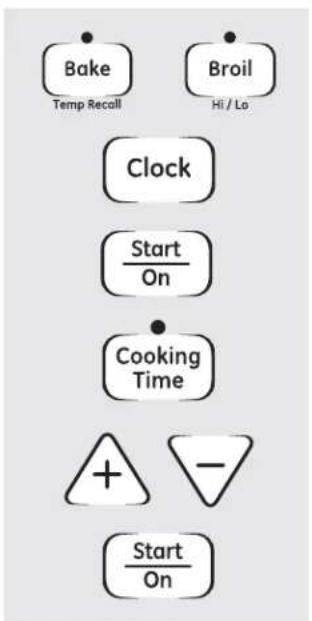
1 Touch and hold both the Bake and Broil Hi/Lo pads, at the same time, until the display shows SF.
2 Tap the Clock pad until SAb appears in the display.
3 Touch the Start/On pad and will appear in the display.
4 Touch the Bake pad. No signal will be given.
5 The preset starting temperature will automatically be set to 350.° Tap the + or - pads to increase or decrease the temperature in 25° increments. The temperature can be set between 170° and 550.° No signal or temperature will be given.
6 Touch the Start/On pad.
7 After a random delay period of approximately 30 seconds to 1 minute, will appear in the display indicating that the oven is baking/ roasting. If doesn't appear in the display, start again at Step 4.
To adjust the oven temperature, touch the Bake pad and tap the + or - pads to increase or decrease the temperature in 25° increments. Touch the Start/On pad.
NOTE: The Clear/Off and Cooking Time pads are active during the Sabbath feature.
flowchart
graph TD
    A["Bake Temp Recall"] --> B["Clock"]
    C["Broil Hi / Lo"] --> B
    B --> D["Start On"]
    D --> E["Cooking Time"]
    E --> F["+ -"]
    F --> G["Start On"]
When the display shows ⊃ the oven is set in Sabbath. When the display shows ⊃ the oven is baking/roasting.
How to Set for Timed Baking/Roasting—Immediate Start and Automatic Stop
NOTE: To understand how the oven control works, practice using regular (non-Sabbath) Immediate Start and Automatic Stop before entering the Sabbath mode.
Make sure the clock shows the correct time of day and the oven is off.
1 Touch and hold both the Bake and Broil Hi/Lo pads, at the same time, until the display shows SF.
2 Tap the Clock pad until SAb appears in the display.
3 Touch the Start/On pad and will appear in the display.
4 Touch the Cooking Time pad.
5 Touch the + or - pads to set the desired length of cooking time between 1 minute and 9 hours and 59 minutes. The cooking time that you entered will be displayed.
6 Touch the Start/On pad.
7 Touch the Bake pad. No signal will be given.
8 The preset starting temperature will automatically be set to 350.° Tap the + or - pads to increase or decrease the temperature in 25° increments. The temperature can be set between 170° and 550.° No signal or temperature will be given.
9 Touch the Start/On pad.
10 After a random delay period of approximately 30 seconds to 1 minute, C will appear in the display indicating that the oven is baking/ roasting. If C doesn't appear in the display, start again at Step 7.
To adjust the oven temperature, touch the Bake pad and tap the + or - pads to increase or decrease the temperature in 25° increments. Touch the Start/On pad.
When cooking is finished, the display will change from C to , indicating that the oven has turned OFF but is still set in Sabbath. Remove the cooked food.
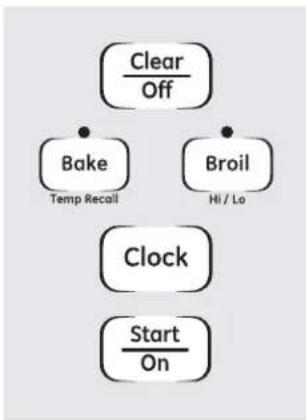
flowchart
graph TD
    A["Clear/Off"] --> B["Bake Temp Recall"]
    A --> C["Broil Hi / Lo"]
    B --> D["Clock"]
    C --> D
    D --> E["Start/On"]
How to Exit the Sabbath Feature

Touch the Clear/Off pad.

If the oven is cooking, wait for a random delay period of approximately 30 seconds to 1 minute, until only ⊃ is in the display.

Touch and hold both the Bake and Broil Hi/Lo pads, at the same time, until the display shows SF.

Tap the Clock pad until ON or OFF appears in the display. ON indicates that the oven will automatically turn off after 12 hours. OFF indicates that the oven will not automatically turn off. See the Special features section for an explanation of the 12 Hour Shut-Off feature.

Touch the Start/On pad.
NOTE: If a power outage occurred while the oven was in Sabbath, the oven will automatically turn off and stay off even when the power returns. The oven control must be reset.
Adjust the oven thermostat—Do it yourself!
You may find that your new oven cooks differently than the one it replaced. Use your new oven for a few weeks to become more familiar with it. If you still think your new oven is too hot or too cold, you can adjust the thermostat yourself.
Do not use thermometers, such as those found in grocery stores, to check the temperature setting of your oven. These thermometers may vary 20–40 degrees.
NOTE: This adjustment will not affect the broiling or the self-cleaning temperatures. The adjustment will be retained in memory after a power failure.
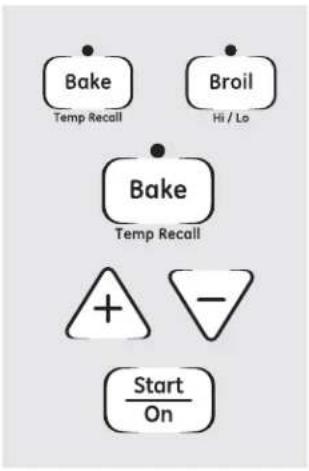
To Adjust the Thermostat (on some models)
1 Touch the Bake and Broil Hi/Lo pads at the same time for 3 seconds until the display shows SF.
2 Touch the Bake pad. A two-digit number shows in the display.
3 The oven temperature can be adjusted up to (+) 35irc F hotter or (−) 35irc F cooler. Touch the + pad to increase the temperature in 1-degree increments.
Touch the - pad to decrease the temperature in 1-degree increments.
4 When you have made the adjustment, touch the Start/On pad to go back to the time-of-day display. Use your oven as you would normally.
NOTE: This adjustment will not affect the broiling or self-cleaning temperatures. It will be retained in memory after a power failure.

Front of OVEN TEMP knob (knob appearance may vary)

Back of OVEN TEMP knob (knob appearance may vary)
To Adjust the Thermostat (on models with an OVEN TEMP Knob)
1 Pull the OVEN TEMP knob off the range and look at the back side. To make an adjustment, loosen (approximately one turn), but do not completely remove, the two screws on the back of the knob.
2 With the back of the knob facing you, hold the outer edge of the knob with one hand and turn the front of the knob with the other hand.
To increase the oven temperature, move the top screw toward the right. You'll hear a click for each notch you move the knob.
To decrease the oven temperature, move the top screw toward the left.
Each click will change the oven temperature approximately 10irc F. (Range is plus or minus 60irc F from the arrow.) We suggest that you make the adjustment one click from the original setting and check oven performance before making any additional adjustments.
3 After the adjustment is made, retighten screws so they are snug, but be careful not to overtighten.
4 Replace the knob, matching the flat area of the knob to the shaft, and check performance.
The type of margarine will affect baking performance!
Most recipes for baking have been developed using high-fat products such as butter or margarine (80% fat). If you decrease the fat, the recipe may not give the same results as with a higher-fat product.
Recipe failure can result if cakes, pies, pastries, cookies or candies are made with low-fat spreads. The lower the fat content of a spread product, the more noticeable these differences become.
Federal standards require products labeled "margarine" to contain at least 80% fat by weight. Low-fat spreads, on the other hand, contain less fat and more water. The high moisture content of these spreads affects the texture and flavor of baked goods. For best results with your old favorite recipes, use margarine, butter or stick spreads containing at least 70% vegetable oil.
WARNING
FOOD POISON HAZARD: Bacteria may grow in food temperatures below 140F.
• Always start with hot food. Do not use WARM settings to heat cold food.
- Do not warm food for more than 2 hours.
The warming drawer will keep hot, cooked foods at serving temperature. Always start with hot food. Do not use to heat cold food other than crisping crackers, chips or dry cereal. Failure to follow these instructions may result in foodborne illness.

Control Knob (on models equipped with a knob)
Push and turn the control knob to any desired setting.
NOTES:
The warming drawer cannot be used during a self-clean cycle.
The warming drawer has three settings: 1, 2 and 3. These settings maintain different temperature levels in the warming drawer.
On some models, if using the oven at the same time as the warming drawer, only the oven settings will be displayed.
| Number Pad | Setting |
| 1 Lo (pies) | |
| 2 Med (casseroles) | |
| 3 Hi (meats) |
When Using the Warming Drawer
The warming drawer will keep hot, cooked foods at serving temperature. Always start with hot food. Do not use to heat cold food other than crisping crackers, chips or dry cereal.
Allow approximately 25 minutes for the warming drawer to preheat.
- Do not put liquid or water in the warming drawer.
All foods placed in the warming drawer should be covered with a lid or aluminum foil. When warming pastries or breads, the cover should be vented to allow moisture to escape.
- Food should be kept hot in its cooking container or transferred to a heat-safe serving dish.
NOTE: Plastic containers or plastic wrap will melt if in direct contact with the drawer, pan or a hot utensil. Melted plastic may not be removable and is not covered under your warranty.
■ Remove serving spoons, etc., before placing containers in warming drawer.
Temperature Selection Chart
To keep several different foods hot, set the control to the food needing the highest setting.
The temperature, type and amount of food, and the time held will affect the quality of the food.
- Repeated opening of the drawer allows the hot air to escape and the food to cool.
- With large loads, it may be necessary to use a higher warming drawer setting and cover some of the cooked food items.
- Do not use plastic containers or plastic wrap.
| FOOD TYPE CONTOL SETTING | |
| Casserole MED/2 | |
| Chili HI/3 | |
| Pizza MED/2 | |
| Potatoes, baked HI/3 | |
| Tortilla Chips LO/1 | |
| Waffles | LO/1 |
To Crisp Stale Items
- Place food in low-sided dishes or pans.
■ Preheat on LO/1 setting. - Check crispness after 45 minutes. Add time as needed.
To Warm Serving Bowls and Plates
To warm serving bowls and plates, set the control on LO/1.
▲CAUTION
Dishes will be hot. Use pot holders or mitts when removing hot dishes.
■ Use only heat-safe dishes.
If you want to heat fine china, please check with the manufacturer of the dishes for their maximum heat tolerance.
- You may warm empty serving dishes while preheating the drawer.
If your model has a door latch, never force the latch handle. Forcing the handle will damage the door lock mechanism.
The oven door must be closed and all controls set correctly for the cycle to work properly.

natural_image
Illustration of a hand cleaning a microwave oven with a gridded grille (no text or symbols)Wipe up heavy soil on the oven bottom.
DO NOT hand
clean gasket. (On some models, the gasket is on the inner door.
DO hand clean inside door frame and glass.

DO hand clean oven frame.
Before a Clean Cycle
For the first self-clean cycle, we recommend venting your kitchen with an open window or using a ventilation fan or hood.
Remove any broiler pan, broiler grid, all cookware, probe and any aluminum foil from the oven—they cannot withstand the high cleaning temperatures.
NOTE:
If your oven is equipped with nickel oven shelves, remove them before you begin the self-clean cycle.
If your oven is equipped with gray porcelain-coated oven shelves, they may be left in the oven during the self-clean cycle.
Soil on the front frame of the range and outside the gasket on the front frame will need to be cleaned by hand. Clean these areas with hot water, soap-filled scouring pads or cleansers such as Soft Scrub® Rinse well with clean water and dry. Wipe off the flat inner door and glass with soapy water and sponge.
Do not clean the gasket. The fiberglass material of the front frame gasket cannot withstand abrasion. It is essential for the gasket to remain intact. If you notice it becoming worn or frayed, replace it.
Wipe up any heavy spillovers on the oven bottom.
Make sure the oven light bulb cover is in place and the oven light is off.
IMPORTANT: The health of some birds is extremely sensitive to the fumes given off during the self-cleaning cycle of any range. Move birds to another well ventilated room.
NOTE: Use caution when opening the upper oven after the self-clean cycle has ended. The oven may still be hot.

How to Set the Oven for Cleaning (on models with an OVEN TEMP Knob)
Follow the directions in the Before a Clean Cycle section.
1 Latch the door.
2 Turn the OVEN TEMP knob to CLEAN.
The Clean Time is 4 hours and 20 minutes. The self-clean light will come on and stay on until the self-clean cycle is complete.
The oven shuts off automatically when the clean cycle is complete.
3 After a clean cycle, turn the OVEN TEMP knob to OFF and slide the latch handle to the left as far as it will go.
To cancel self-clean cycle, turn OVEN TEMP knob to off and slide latch to left as far as it will go. Wait until self-clean light stops blinking. Use oven as desired.
NOTE: Never force the latch. If the oven is too hot, you will not be able to slide the latch. Allow the oven to cool.

How to Set the Oven for Cleaning
Follow the directions in the Before a Clean Cycle section.
1 Latch the door.
NOTE: Never force the latch. If the oven is too hot, you will not be able to slide the latch. Allow the oven to cool.
2 Touch the Self Clean pad.
3 Touch the + or - pads until the desire Clean Time is displayed.
The Clean Time is normally 4 hours and 20 minutes. You can change the Clean Time to any time between 3 and 5 hours, depending on the amount of soil in your oven.
4 Touch the Start/On pad.
The self-clean cycle will automatically begin after CLEAN is displayed and the time countdown appears in the display. While the oven is self-cleaning, you can touch the Clock pad to display the time of day. To return to the clean countdown, touch the Self Clean pad.
The oven shuts off automatically when the clean cycle is complete, and 0:00 will flash in the display.
5 Slide the latch handle to the left as far as it will go and open the door. 25
Care and cleaning of the range.
The oven door must be closed and all controls set correctly for the cycle to work properly.

flowchart
graph TD
    A["Self Clean"] --> B["+"]
    B --> C["-"]
    C --> D["Start Time"]
    D --> E["Start On"]
How to Delay the Start of Cleaning (on some models)
You can set the oven control to delay-start the oven, clean for a specific length of time and then turn off automatically.
Make sure the clock shows the correct time of day.
Follow the directions in the Before a Clean Cycle section.
1 Latch the door.
NOTE: Never force the latch. If the oven is too hot, you will not be able to slide the latch. Allow the oven to cool.
2 Touch the Self Clean pad.
3 Touch the + or - pads to set the Clean Time.
The Clean Time is preset for 4 hours and 20 minutes. You can change the Clean Time to any time between 3 and 5 hours, depending on the amount of soil in your oven. If a different Clean Time is desired, touch the + or - pads until the desired Clean Time is displayed.
4 Touch the Start Time pad
Change the Start Time by touching the + or - pads. The start time will appear in the display.
5 Touch the Start/On pad.
The self-clean cycle will automatically begin at the time set.
While the oven is self-cleaning, you can touch the Clock pad to display the time of day. To return to the clean countdown, touch the Self Clean pad.
The oven shuts off automatically when the clean cycle is complete, and 0:00 will flash in the display.
6 Slide the latch handle to the left as far as it will go and open the door.
To Stop a Clean Cycle (on some models)
Touch the Clear/Off pad.
Wait until the oven has cooled below the locking temperature to unlatch the door. You will not be able to open the door right away unless the oven has cooled below the locking temperature.
After a Clean Cycle
You may notice some white ash in the oven. Wipe it up with a damp cloth after the oven cools.
If white spots remain, remove them with a soap-filled scouring pad and rinse thoroughly with a vinegar and water mixture.
These deposits are usually a salt residue that cannot be removed by the clean cycle.
If the oven is not clean after one clean cycle, repeat the cycle.
- You cannot set the oven for cooking until the oven is cool enough for the door to unlock.
While the oven is self-cleaning, you can touch the Clock pad to display the time of day. To return to the clean countdown, touch the Cooking Time pad.
If the shelves become hard to slide, apply a small amount of vegetable oil or cooking oil to a paper towel and wipe the edges of the oven shelves with the paper towel.
Be sure electrical power is off and all surfaces are cool before cleaning any part of the range.
natural_image
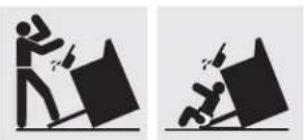
Two black-and-white pictograms showing a person pushing a large block with a stick, and another falling down with a broken figure (no text or symbols)⚠ WARNING If your range is removed for cleaning, servicing or any reason, be sure the anti-tip device is reengaged properly when the range is replaced. Failure to take this precaution could result in tipping of the range and cause injury.
To check if the bracket is installed and engaged properly, carefully tip the range forward. The bracket should stop the range within 4 inches. If it does not, the bracket must be reinstalled. If the range is pulled from the wall for any reason, always repeat this procedure to verify the range is properly secured by the anti-tip bracket.
If your range has no anti-tip bracket, call 1.800.626.8774 to receive one at no cost.
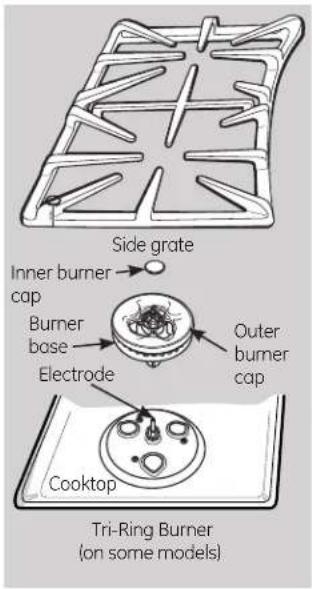
Sealed Burner Assemblies (on some models)
Turn all controls OFF before removing the burner parts.
The round side burner caps and burner heads can be lifted off, making them easy to clean. The electrodes are not removable.
The oval center burner head and cap assembly can be lifted off, making it easy to clean. The burner electrode is not removable.
The tri-ring burner inner cap can be lifted off for cleaning. the outer cap and base assembly can be lifted off the cooktop as one piece for cleaning purposes.
CAUTION Do not operate the cooktop without all burner parts and grates in place.

The electrode of the spark igniter is exposed when the burner head is removed. When one burner is turned to LITE, all the burners spark. Do not attempt to disassemble or clean around any burner while another burner is on. An electric shock may result, which could cause you to knock over hot cookware.

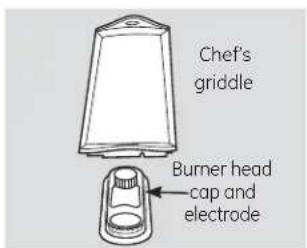
CAUTION Do not remove
tri-ring or bridge burner cap from head.
The tri-ring or bridge burner head and cap assembly can be lifted off, making it easy to clean. The electrode is not removable.
Care and cleaning of the range.

CAUTION: Do not operate the cooktop without all burner parts, drip pans (if so equipped) and grates in place.

natural_image
Technical diagram of a mechanical device with two circular components and connecting rods (no text or symbols)Clean these holes thoroughly on each burner.
Standard Twin Burner Assemblies (on some models)
For cleaning information on sealed burners, see section below. Sealed burner cooktops do not lift up.
On models with standard twin burners, the cooktop lifts up for easy access.
Turn all controls OFF before removing burner parts and drip pans (if so equipped).
The burner grates and drip pans (if so equipped) can be lifted off, making them easy to clean.
The holes in the surface burners of your range must be kept clean at all times for proper ignition and an even, unhampered flame.
You should clean the surface burners routinely, especially after bad spillovers, which could clog these holes.
Wipe off surface burners. If heavy spillover occurs, remove the surface burners from the range. Burners lift out for cleaning. Lift up the cooktop and then lift out the surface burners.
To remove burned-on food, soak the surface burner in a solution of mild liquid detergent and hot water. Soak the surface burner for 20 to 30 minutes.
For more stubborn stains, use a cleanser like Soft Scrub® brand or Bon Ami® brand. Rinse well to remove any traces of the cleanser that might clog the surface burner openings.
Do not use steel wool because it will clog the surface burner openings and scratch the surface burners. If the holes become clogged, clean them with a sewing needle or twist-tie.
Before putting the surface burner back, shake out excess water and then dry it thoroughly by setting it in a warm oven for 30 minutes. Then place it back in the range, making sure it is properly seated and level.
Check the flame pattern of each burner. If the flames are "jumpy" (not steady), clean the holes again with a sewing needle or twist-tie.

natural_image
Technical line drawing of a square mechanical component with a circular recess (no text or symbols)Drip Pans (if so equipped)
Remove the grates and lift out the drip pans. Drip pans can be cleaned in a dishwasher or by hand.
When replacing the drip pans, make sure they are in the correct position.
Place them in a covered container. Add 1/4 cup ammonia and let soak several hours or overnight. Wash, rinse well and dry.
⚠CAUTION: Do not clean the drip pans in a self-cleaning oven.

Burner cap is properly seated.

Burner cap is NOT properly seated.
Burner heads (on some models) The burner heads (on some models) are removable. Simply lift them off the range for cleaning.
Tri-ring head (on some models)
Burner head
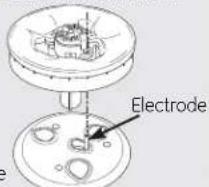
Burner base
Make sure the ring in the burner head is positioned over the electrode and that the burner head is fully inserted inside the burner base. A small gap between the base and head is normal.
Front-right head (on some models), front-left head, back-right head and back-left head

Make sure the slot in the burner head is positioned over the electrode.
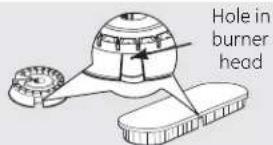
The oval burner head/cap assembly is removable. Simply lift it off the range for cleaning. Use a sewing needle or twist-tie to unclog the small hole in the burner heads.
Burner Caps, Bases and Heads
Before removing the burner caps and heads (on some models), remember their size and location. Replace them in the same location after cleaning.
NOTE: Do not use steel wool or scouring powders to clean the burner parts.
Burner caps
Lift off when cool. Wash burner caps in hot, soapy water and rinse with clean water. You may scour with a plastic scouring pad to remove burned-on food particles.
Tri-ring burner (on some models)
The outer cap on the tri-ring burner is not removable. Only the center round cap may be removed for cleaning.
To clean the burner bases, use soapy water and a plastic scouring pad. Wipe clean with a damp cloth.
Make sure that no water gets into the burner bases. Allow them to dry fully before using.
Burner Heads (on some models) and Oval (Center) Burner Head/Cap Assembly
The burner heads and the oval burner head/cap assembly are removable. Simply lift them off the range for cleaning.
For proper ignition, make sure the small hole in the section that fits over the electrode is kept open. A sewing needle or wire twist-tie works well to unclog it.
The slits in the burner heads must be kept clean at all times for an even, unhampered flame.
Clogged or dirty burner ports or electrodes will not allow the burner to operate properly.
Any spill on or around an electrode must be carefully cleaned. Take care to not hit an electrode with anything hard or it could be damaged.
Clean the burner heads routinely, especially after bad spillovers, which could clog the openings. Lift off when cool.
To remove burned-on food, soak the burner heads in a solution of mild liquid detergent and hot water for 20-30 minutes. For more stubborn stains, use a toothbrush.
After cleaning
Before putting the burner caps, heads (on some models) and oval head/cap assembly back, shake out excess water and then dry them thoroughly by setting in a warm oven for 30 minutes.
Replacement Burner Heads (on some models) Replace burner heads over the electrodes on the cooktop, in the correct locations according to their size. There is one small, one medium, one large and one extra-large burner head.

Make sure the slot or hole (depending on model) in the burner head is positioned over the electrode.

Oval (Center) Burner Head/Cap Assembly
Replace the oval (center) head/cap assembly over the electrode on the cooktop.
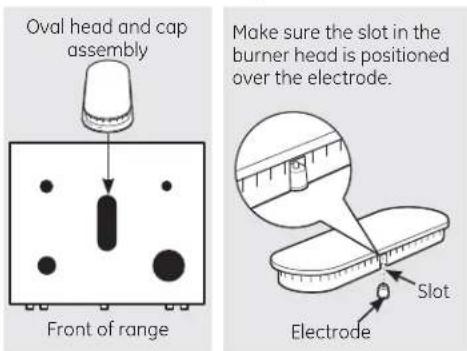
Caps
Replace the matching size caps onto the burner bases or heads.
Make sure that the heads (on some models) and caps are replaced in the correct locations.

flowchart
graph TD
    A["Front of range"] --> B["Diagonal arrow"]
    B --> C["Diagonal dot"]
    C --> D["Diagonal dot with arrow"]
    D --> E["(on some models)"]
    F["Tri-ring cap"] --> G["(on some models)"]
    H["○"] --> I["○"]
    J["○"] --> K["○"]
Care and cleaning of the range.

natural_image
Line drawing of a grid-like structure with triangular cutouts, no text or symbols presentAppearance may vary. The grates may be cleaned in a dishwasher.
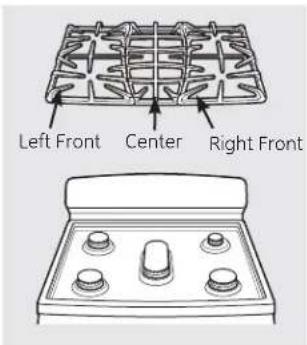
Burner Grates
Your range has two or three professional-style double grates. These grates are position-specific. For maximum stability, these grates should only be used in their proper position; they cannot be interchanged left to right or front to back. For convenience, the undersides of the left and right grates are marked "LEFT FRONT" and "RIGHT FRONT." Make sure the front portion of both grates is in front. The middle grate has a bow in front. Make sure the bowed portion is toward the front of the range. In addition, the middle grate is supported by the left and right grates and must be installed LAST for stability.
Cleaning
Lift out when cool. Grates should be washed regularly and, of course, after spillovers. Wash them in hot, soapy water and rinse with clean water. When replacing the grates, be sure they are positioned securely over the burners.
Replace the grates so that continuous arcs are formed with the center ribs of all three grates.
Do not operate a burner for an extended period of time without cookware on the grate. The finish on the grate may chip without cookware to absorb the heat.
To get rid of burned-on food, place the grates in a covered container. Add 1/4 cup ammonia and let them soak several hours or overnight. Wash, rinse well and dry.
Although they are durable, the grates will gradually lose their shine, regardless of the best care you can give them. This is due to their continual exposure to high temperatures. You will notice this sooner with lighter color grates.
NOTE: Do not clean the grates in a self-cleaning oven.

natural_image
Line drawing of a hand pouring liquid into a pan on a stove (no text or symbols)Cooktop Surface
To avoid damaging the porcelain-enamel surface of the cooktop and to prevent it from becoming dull, clean up spills right away. Foods with a lot of acid (tomatoes, sauerkraut, fruit juices, etc.) or foods with high sugar content could cause a dull spot if allowed to set.
When the surface has cooled, wash and rinse. For other spills such as fat spatterings, wash with soap and water once the surface has cooled. Then rinse and polish with a dry cloth.
NOTE: For stainless steel cooktops, refer to the Stainless steel surfaces section.

natural_image
Line drawing of a refrigerator interior showing multiple compartments (no text or symbols)Oven Air Vents
Never block the vents (air openings) of the range. They provide the air inlet and outlet that are necessary for the range to operate properly with correct combustion.
Air openings are located at the rear of the cooktop, at the top and bottom of the oven door, and at the bottom of the range.

natural_image
Line drawing of a gas stove interior with visible blades and fan (no text or symbols)Vent appearance and location vary.

Upper Control Panel (on some models)
On models so equipped, lock out the touch pads before cleaning.
Clean up splatters with a damp cloth.
You may also use a glass cleaner.
Remove heavier soil with warm soapy water.
Do not use abrasives of any kind.
Unlock the touch pads after cleaning.

Surface burner knob

Lower oven knob (on some models)
Lower Control Panel (Front Manifold Panel) and Knobs
It's a good idea to wipe the control panel after each use of the oven. Use a damp cloth to clean or rinse. For cleaning, use mild soap and water or a 50/50 solution of vinegar and water. For rinsing, use clean water. Polish dry with a soft cloth.
Do not use abrasive cleansers, strong liquid cleaners, plastic scouring pads or oven cleaners on the control panel—they will damage the finish.
Do not try to bend knobs by pulling them up or down or by hanging a towel or other such loads. This can damage the gas valve shaft.
The control knobs may be removed for easier cleaning.
Make sure the knobs are in the OFF positions and pull them straight off the stems for cleaning.
The knobs can be cleaned in a dishwasher or they may also be washed with soap and water. Make sure the insides of the knobs are dry before replacing.
Replace the knobs in the OFF position to ensure proper placement.
Metal parts can be cleaned with soap and water. Do not use steel wool, abrasives, ammonia, acids or commercial oven cleaners. Dry with a soft cloth.
NOTE: Knobs are not interchangeable. Be sure to reinstall the knobs to the original location.

natural_image
Line drawing of a cabinet with open lid and multiple windows (no text or symbols)Some models have dual support rods that will hold the cooktop up while you clean underneath it.
Lift-Up Cooktop (on models with standard twin burners)
Clean the area under the cooktop often. Built-up soil, especially grease, may catch on fire.
To make cleaning easier, the cooktop may be lifted up.
NOTE: Do not lift the cooktop on sealed burner models. Lifting the cooktop can lead to damage and improper operation of the range.
Clean under the cooktop with hot, soapy water and a clean cloth. If you removed your surface burners while cleaning, make sure they are properly seated when replacing them.
After cleaning, lower the cooktop (be careful not to pinch your fingers).
To raise the cooktop:
1 Be sure the burners are turned off.
2 Remove the grates.
3 Grasp the two front burner wells and lift up.
Oven Bottom
The oven bottom has a porcelain-enamel finish. To make cleaning easier, protect the oven bottom from excessive spillovers by placing a cookie sheet on the rack below the rack you are cooking on. This is particularly important when baking a fruit pie or other foods with a high acid content. Hot fruit fillings or other foods that are highly acidic
(such as tomatoes, sauerkraut and sauces with vinegar or lemon juice) may cause pitting and damage to the porcelain-enamel surface and should be wiped up immediately.
To clean up spillovers, use soap and water, an abrasive cleaner or soap-filled scouring pad. Rinse well to remove any soap before self-cleaning.
Care and cleaning of the range.

Pull hinge locks down to unlock.
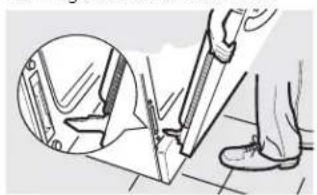
natural_image
Illustration of a foot using a tool to cut a shoe, showing the blade and foot positioning (no text or symbols)Removal position
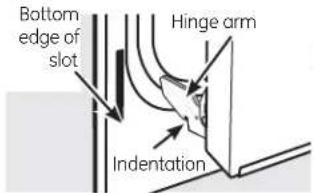
Removable Oven Door (on some models) The door is very heavy. Be careful when removing and lifting the door.
Do not lift the door by the handle.
To remove the door:
1 Fully open the door.
2 Pull the hinge locks down toward the door frame, to the unlocked position. A tool, such as a small flat-blade screwdriver, may be required.
3 Firmly grasp both sides of the door at the top.
4 Close door to the door removal position, which is halfway between the broil stop position and fully closed.
5 Lift door up and out until the hinge arm is clear of the slot.
To replace the door:
Firmly grasp both sides of the door at the top.
2 With the door at the same angle as the removal position, seat the indentation of the hinge arm into the bottom edge of the hinge slot. The notch in the hinge arm must be fully seated into the bottom of the slot.
3 Fully open the door. If the door will not fully open, the indentation is not seated correctly in the bottom edge of the slot.
4 Push the hinge locks up against the front frame of the oven cavity to the locked position.
5 Close the oven door.

Push hinge locks up to lock.

natural_image
Line drawing of a mechanical assembly with two plates and clamps (no text or symbols)Lift the door straight up and off the hinges.
Lift-Off Oven Door (on some models)
The oven door is removable, but it is heavy. You may need help removing and replacing the door.
To remove the door:
1 Open it a few inches to the special stop position that will hold the door open.
2 Grasp firmly on each side and lift the door straight up and off the hinges.
NOTE: Be careful not to place hands between the hinge and the oven door frame since the hinge could snap back and pinch fingers.
To replace the door:
1 Make sure the hinges are in the special stop position. Position the slots in the bottom of the door squarely over the hinges.
2 Lower the door slowly and evenly over both hinges at the same time. If the hinges snap back against the oven frame, pull them back out.
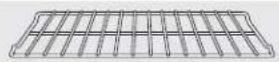
Oven Racks
All oven racks may be cleaned by hand with an abrasive cleaner or steel wool. After cleaning, rinse the racks with clean water and dry with a clean cloth. Gray porcelain-coated oven racks may remain in the oven during the self-cleaning cycle without being damaged. The nickel-plated oven racks may remain in the oven during the
self-cleaning cycle, but they will lose their luster and become hard to slide. It will be necessary to grease all oven rack side edges with a light coating of vegetable oil after cleaning them by hand or in the oven. This will help maintain the ease of sliding the racks in and out of the oven.
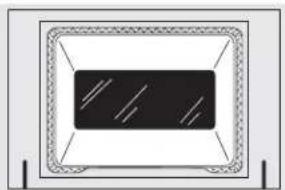
natural_image
Simple line drawing of a rectangular frame with a central dark rectangle and diagonal lines, no text or symbols present.The gasket is designed with a gap at the bottom to allow for proper air circulation. Do not rub or clean the door gasket—it has an extremely low resistance to abrasion.
If you notice the gasket becoming worn, froyed or damaged in any way or if it has become displaced on the door, you should have it replaced.
Cleaning the Door
To clean the inside of the door:
Do not allow excess water to run into any holes or slots in the door.
Wipe dishwashing detergent over any baked-on spatters on the glass. Use a single sided safety razor blade to clean it off. Then wipe over the glass with a soapy cloth to remove any residue and dry off.
The area outside the gasket can be cleaned with a soap-filled plastic scouring pad.
To clean the outside of the door:
Use soap and water to thoroughly clean the top, sides and front of the oven door. Rinse well. You may also use a glass cleaner to clean the glass on the outside of the door.
Spillage of marinades, fruit juices, tomato sauces and basting materials containing acids may cause discoloration and should be wiped up immediately. When the surface is cool, clean and rinse.
Do not use oven cleaners, cleansing powders or harsh abrasives on the outside of the door.
Stainless Steel Surfaces (on some models) Do not use a steel wool pad; it will scratch the surface.
This will help you to maintain the brightness and appearance of your stainless steel range.
In order to avoid any discolorations and/or grease stains, we recommend cleaning and removing any spills, spots and grease from the range after use.
It is important to use a soft cloth or paper towel every time the range is cleaned to avoid any scratches.
Read carefully the instructions on the back of the Brightener for better results.
Cleaning Instructions:
- Remove grates.
- Wash using warm, soapy water:
Wet soft cloth or paper towel (avoid using excessive water).
Wipe the surface in the direction of the grain (following the steel lines).
Rinse and wring out a soft cloth or paper towel and dry the range.
- Apply a degreaser that does not contain sodium hydroxide or stainless steel cleaner (follow instructions).
- Repeat steps 2–4 as many times as needed.
- Put grates back in place.
Follow these instructions for any stainless steel surface on your range.
DO NOT USE for cooktop or stainless steel parts cleaning:
- Caustic lye (sodium hydroxide) or cleaners containing this chemical
- Hard or steel wool pads
- Abrasive materials or chemicals
To inquire about purchasing stainless steel appliance cleaner or polish, or to find the location of a dealer nearest you, please call our toll-free number:
National Parts Center 800.626.2002 (U.S.) 800.661.1616 (Canada)
GEApplianceParts.com (U.S.)
www.GEAppliances.ca (Canada)
WARNING
Shock or Burn Hazard: Before replacing oven light bulb, disconnect the electrical power to the circuit breaker panel. Failure to do so may result in electric shock or burn.
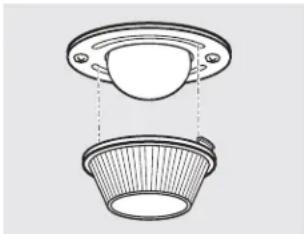
natural_image
Technical line drawing of a mechanical component with a flange and a woven basket (no text or symbols)Oven Light Replacement (on some models)
Be sure to let the light cover and bulb cool completely.
To remove the cover:
1 Twist lens counterclockwise about a quarter turn to remove.
Do not remove any screws to remove the cover.
2 Replace bulb with a 40-watt appliance bulb or two-prong halogen bulb, as appropriate.
To replace the cover:
7 Line up tabs of lens in front of tabs on housing and rotate clockwise to engage.

Oven Light Replacement (on some models)
CAUTION
Before replacing
your oven light bulb, disconnect the electrical power to the range at the main fuse or circuit breaker panel. Be sure to let the light cover and bulb cool completely.
The oven light bulb is covered with a removable glass cover that is held in place with a bail-shaped wire. Remove the oven door, if desired, to reach cover easily.
To remove:
Hold a hand under the cover so it doesn't fall when released. With fingers of the same hand, firmly push back the wire cover holder. Lift off the cover.
Do not remove any screws to remove the cover.
2 Do not touch hot bulb with a wet cloth. Replace bulb with a 40-watt household appliance bulb.
To replace cover:
1 Place it into the groove of the light receptacle. Pull the wire forward to the center of the cover until it snaps into place. When in place, the wire holds the cover firmly. Be certain the wire is in the depression in the center of the cover.
2 Connect electrical power to the range.
Care and cleaning of the range.

natural_image
Illustration showing two mechanical or electrical assembly steps with arrows indicating motion (no text or symbols)Removable Kick Panel (on some models)
The kick panel may be removed for cleaning under the range.
To remove:
Lift up the bottom of the panel slightly to disengage the panel from the tabs at the base of the range. Pull the bottom of the panel forward until the spring clips are released at the top of the panel.
To replace:
Insert the two slots at the bottom of the panel onto the two tabs at the base of the range, and push the top of the panel forward to engage the spring clips.
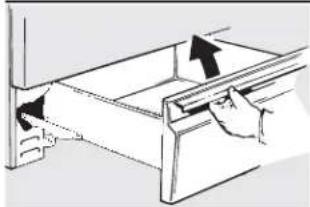
natural_image
Diagram of a mechanical assembly with arrows indicating direction (no text or symbols)The storage drawer may be removed for cleaning under the range.
Removable Storage Drawer (on some models)
The storage drawer is a good place to store cookware and bakeware. Do not store plastics and flammable material in the drawer.
The storage drawer may be removed for cleaning under the range. Clean the storage drawer with a damp cloth or sponge. Never use harsh abrasives or scouring pads.
To remove storage drawer:
1 Pull drawer straight out until it stops.
2 Tilt the front of the drawer up and free of the range.
To replace storage drawer:
1 Set the stops on the back of the drawer over the stops in the range.
2 Slide drawer evenly and straight back, so that the rails in the range are engaged.

Broiler Pan and Grid
After broiling, remove the broiler pan from the oven. Remove the grid from the pan. Carefully pour out grease from the pan into a proper container. Wash and rinse the broiler pan and grid in hot water with a soap-filled or plastic scouring pad.
If food has burned on, sprinkle the grid with detergent while hot and cover with wet paper towels or a dishcloth. Soaking the pan will remove burned-on foods.
The broiler pan and grid may be cleaned with a commercial oven cleaner.
Both the broiler pan and grid can also be cleaned in a dishwasher.
Do not store a soiled broiler pan and grid anywhere in the range.
⚠️ CAUTION: Do not clean the broiler pan or grid in a self-cleaning oven.
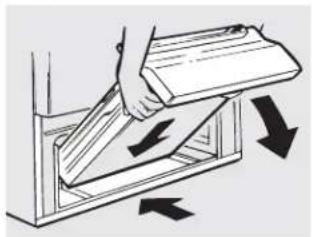
natural_image
Illustration of a hand using a tool to lift or rotate a component, with arrows indicating direction (no text or symbols)Removable Broiler Drawer (on some models)
To remove:
When the broiler is cool, remove the grid and pan.
2 Pull the broiler drawer out until it stops, then push it back in about one inch.
3 Grasp the handle, lift and pull the broiler drawer out. Clean the broiler drawer with hot soapy water.
To replace:
Hold the broiler drawer in the raised position as you slide it partway into the range. Then lower the drawer and push it completely closed.
WARNING: FIRE HAZARD
Do not store cookware and bakeware in broiler drawer. This could result in fire.
CAUTION
During the steam clean cycle, the oven bottom becomes hot enough to cause burns. Wait until the cycle is over (30 minutes) before wiping the inside surfaces of the oven. Failure to do so may result in burns.
The Steam Clean cycle makes it easier to clean light soil from the porcelain oven interior and door glass.
The range should be at room temperature before beginning the Steam Clean cycle. If the oven is too hot, "Hot" will appear on the display and the cycle will not activate until the oven cools down.
The Steam Clean cycle performs best on new spills or soils. Burned-on food is more difficult to remove.

Pour 1 cup of water onto the oven floor.
To Begin Steam Clean Cycle:
Remove racks and accessories from the oven cavity. Do not place cookware or other items in the oven during the Steam Clean cycle.
Pour 1 cup (8 oz.) room-temperature water onto the recessed area of the oven bottom. Do not add cleaning solutions or chemicals of any kind to the water. Do not pour water down the burner slots on oven bottom.
3 Close the door.
4 Press the Steam Clean pad; then press Start/On.
5 A 30-minute cycle will begin to count down on the display.
4 Press the Steam Clean pad; then press Start/On.
5 A 30-minute cycle will begin to count down on the display.
6 When the Steam Clean cycle is complete, the oven control will beep and the Steam Clean light will blink. Press the Clear/Off pad and open the door.
7 The oven bottom and remaining water will still be very warm at the end of the cycle. This is normal.
8 Remove soils using a scrub brush or nylon scouring pad. A soap-filled steel wool pad may be used only on the porcelain oven interior. The use of abrasive pads will scratch the door glass. Do not wipe soil or water onto the door gasket.
9 Remove any remaining water with a dry cloth or sponge.
10 Leave the door open to air dry.
IMPORTANT NOTES:
- If a steam clean cycle is initiated without water, press the Clear/Off pad to end the cycle. Wait for the range to cool to room temperature before pouring water into the recessed area and initiating another steam cycle.
- Do not open the door during the Steam Clean cycle. An error beep will sound upon opening the door.
- Press Clear/Off pad at any time to end the cycle.
- If mineral deposits remain in the oven bottom after cleaning, use a cloth or sponge soaked in vinegar to remove them.
- Some water may drip from the bottom of the oven door. If this happens, wipe it up at the end of the cycle.
- The door gasket may be wet when the Steam Clean cycle finishes. This is normal. Do not clean the gasket.
- If soil still remains after cleaning the oven, see the Care and Cleaning of the Range section of the Owner's Manual for additional options.

Installation Instructions
Range
If you have questions, call 1.800.GE.CARES or visit our Website at: GEAppliances.com
In the Commonwealth of Massachusetts
- This product must be installed by a licensed plumber of gas fitter.
- When using ball type gas shut-off valves, they shall be the T-handle type.
- A flexible gas connector, when used, must not exceed 3 feet.
BEFORE YOU BEGIN
Read these instructions completely and carefully. Installation of this range must conform with local codes, or in the absence of local codes, with the National Fuel Gas Code, ANSI Z223.1/NFPA.54, latest edition. In Canada, installation must conform with the current Natural Gas Installation Code, CAN/CGA-B149.1 or the current Propane Installation Code, CAN/CGA-B149.2, and with local codes where applicable. This range has been design-certified by CSA International according to ANSI Z21.1, latest edition and Canadian Gas Association according to CAN/CGA-1.1 latest edition.
As with any appliance using gas and generating heat, there are certain safety precautions you should follow. You will find these precautions in the Important Safety Information section in the front of this manual. Read them carefully.
- IMPORTANT – Save these instructions for local electrical inspector's use.
• IMPORTANT – Observe all governing codes and ordinances. - Note to Installer – Leave these instructions with the appliance after installation is completed.
- Note to Consumer – Keep this Owner's Manual and Installation Instructions for future reference.
- Note – This appliance must be properly grounded.
- Servicer – The electrical diagram is in an envelope attached to the back of the range.
• Proper installation is the responsibility of the installer. - Product failure due to improper installation is not covered under the Warranty.
Mobile Home - Additional Installation Requirements
The installation of this range must conform to the Manufactured Home Construction and Safety Standard, Title 24 CFR, Part 3280 (formerly the Federal Standard for Mobile Home Construction, use the Standard for Manufactured Home Installations, ANSI A225, 1/NFPA 501A or with local codes.
Mobile home installations require:
- When this range is installed in a mobile home, it must be secured to the floor during transit. Any method of securing the range is adequate as long as it conforms to the standards listed above.
FOR YOUR SAFETY
Do not store or use combustible materials, gasoline or other flammable vapors and liquids in the vicinity of this or any other appliance.
If you smell gas:
1 Open windows.
2 Don't touch electrical switches.
3 Extinguish any open flame.
4 Immediately call your gas supplier.
TOOLS YOU WILL NEED


MATERIALS YOU MAY NEED
• Gas line shut-off valve
- Pipe joint sealant or UL-approved pipe thread tape with Teflon* that resists action of natural and LP gases
- Flexible metal appliance connector (1/2" I.D.)
A 5-foot length is recommended for ease of installation but other lengths are acceptable. Never use an old connector when installing a new range.
- Flare union adapter for connection to gas supply line (3/4" or 1/2" NPT × 1/2" I.D.)
- Flare union adapter for connection to pressure regulator on range (1/2" NPT × 1/2" I.D.)
• Liquid leak detector or soapy water.
- Lag bolt or 1/2" O.D. sleeve anchor (for concrete floors only).
*Teflon: Registered trademark of DuPont
WARNING
INSTALLATION SAFETY INSTRUCTIONS
Read these instructions completely and carefully. Failure to follow these instructions can result in electrical shock, fire, serious injury, or death.
■ Improper installation, adjustment, alteration, service or maintenance can cause injury or property damage. Refer to this manual. For assistance or additional information, consult a qualified installer, service agency, manufacturer (dealer) or the gas supplier.
■ Never reuse old flexible connectors. The use of old flexible connectors can cause gas leaks and personal injury. Always use NEW flexible connectors when installing a gas appliance.
■ Leak testing of the appliance shall be conducted according to the manufacturer instructions.
■ Remove all packing material and literature from oven before connecting gas and electrical supply to range.
■ Do not attempt to operate the oven of this range during a power failure (Electric Ignition models only).
■ Have your range installed by a qualified installer.
- Your range must be electrically grounded in accordance with local codes or, in the absence of local codes, in accordance with the National Electrical Code (ANSI/NFPA 70, latest edition). In Canada, electrical grounding must be in accordance with the current CSA C22.1 Canadian Electrical Code Part 1 and/or local codes. See Electrical Connections in this section.
■ Before installing your range on linoleum or any other synthetic floor covering, make sure the floor covering can withstand 180°F without shrinking, warping or discoloring. Do not install the range over carpeting unless a sheet of 1/4" thick plywood or similar insulator is placed between the range and carpeting.
■ Make sure the cabinets, floor, and wall coverings around the range can withstand heat generated by the range up to 200°F.
■ Avoid placing cabinets above the range. To reduce the hazard caused by reaching over the open flames of operating burners, install a ventilation hood over the range that projects forward at least 5" beyond the front of the cabinets.
■ The ventilating hood must be constructed of sheet metal not less than 0.0122" thick. Install above the cooktop with a clearance of not less than 1/4" between the hood and the underside of the combustible material or metal cabinet. The hood must be at least as wide as the appliance and centered over the appliance. Clearance between the cooking surface and the ventilation hood surface MUST NEVER BE LESS THAN 24".
EXCEPTION: Installation of a listed microwave oven or cooking appliance over the cooktop shall conform to the installation instructions packed with that appliance.
If cabinets are placed above the range, allow a minimum clearance of 30" between the cooking surface and the bottom of unprotected cabinets.
If a 30" clearance between cooking surface and overhead combustible material or metal cabinets cannot be maintained, protect the underside of the cabinets above the cooktop with not less than 1/4" insulating millboard covered with sheet metal not less than 0.0122" thick. Clearance between the cooking surface and protected cabinets MUST NEVER BE LESS THAN 24".
■ The vertical distance from the plane of the cooking surface to the bottom of adjacent overhead cabinets extending closer than 1" to the plane of the range sides must not be less than 18". (See the Dimensions and Clearances illustration in this section.)
- Do not install this product with an air curtain hood or other range hood that operates by blowing air down on the cooktop. This airflow may interfere with operation of the gas burners resulting in fire or explosion hazard.
⚠️CAUTION – Only the GE Café branded series of Advantium® or microwave over-the-range ovens are designed to be installed above the GE Café range. Surface above a gas range can become hot. Installation of any other over-the-range oven above a GE Café range may result in surface temperatures that can cause burns.
DIMENSIONS AND CLEARANCES
Provide adequate clearances between the range and adjacent combustible surfaces. These dimensions must be met for safe use of your range. The location of the electrical outlet and pipe opening (see Gas Pipe and Electric Outlet Locations) may be adjusted to meet specific requirements.
The range may be placed with 0" clearance (flush) at the back wall.
For island installation, Model JGSS05, maintain 2-1/2 in. minimum from cutout to back edge of countertop and 3 in. minimum from cutout to side edges of countertop.
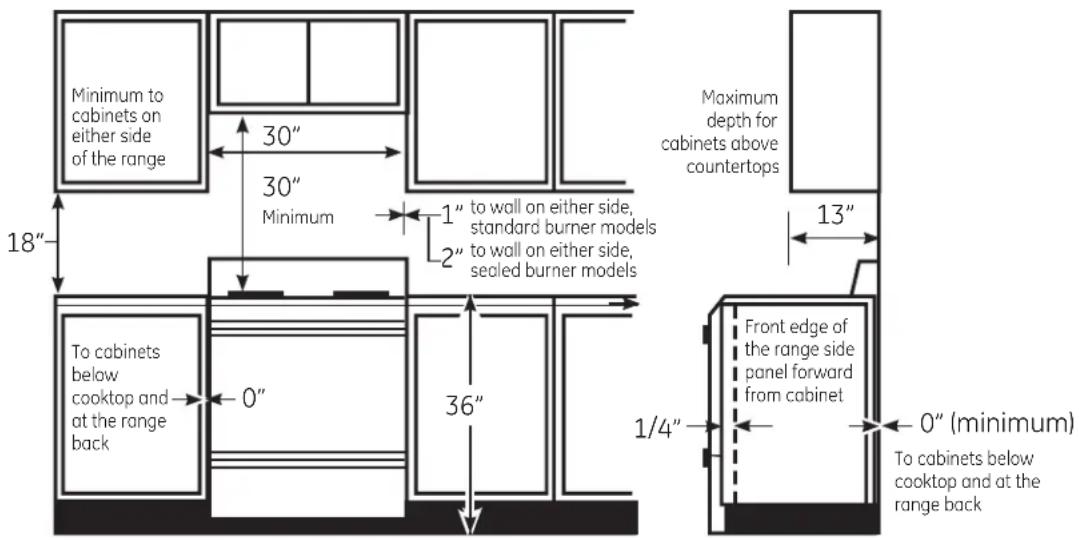
| Height | Model |
| 36" | JGSS05 |
| 46-7/8" | JGBS04JGBS07 |
| 44" | RGB524 |

LOCATION
Do not locate the range where it may be subject to strong drafts. Any openings in the floor or wall behind the range should be sealed. Make sure the openings around the base of the range that supply fresh air for combustion and ventilation are not obstructed by carpeting or woodwork.
Your range, like many other household items, is heavy and can settle into soft floor coverings such as cushioned vinyl or carpeting. Use care when moving the range on this type of flooring. It is recommended that the following simple and inexpensive instructions be followed to protect your floor.
The range should be installed on a sheet of plywood (or similar material). When the floor covering ends at the front of the range, the area that the range will rest on should be built up with plywood to the same level or higher than the floor covering.
This will allow the range to be moved for cleaning or servicing. Also, make sure your floor covering will withstand 180°F. (See the Installation Safety Instructions section.)
Make sure the wall coverings around your range can withstand the heat generated (up to 200°F) by the range. (See the Installation Safety Instructions section.)
IMPORTANT!
Remove all tape and packaging. Make sure the burners are properly seated and level.
Take the accessory pack out of the oven and/or drawer. Check to be sure that no range parts have come loose during shipping.
CONVERTING TO LP GAS (or converting back to natural gas from LP)
This range leaves the factory set for use with natural gas. If you want to convert to LP gas, the conversion must be performed by a qualified LP gas installer.
The conversion instructions and LP orifices can be found attached to the range next to the pressure regulator.
Keep these instructions and the orifices in case you want to convert back to natural gas.
1 PROVIDE ADEQUATE GAS SUPPLY
Your range is designed to operate at a manifold pressure of 5" of water column on natural gas or, if designed for LP gas (propane or butane), 10" of water column.
Make sure you are supplying your range with the type of gas for which it is designed.
This range is convertible for use on natural or propane gas. If you decide to use this range on LP gas, conversion must be made by a qualified LP installer before attempting to operate the range on that gas.
For proper operation, the pressure of natural gas supplied to the regulator must be between 6" and 13" of water column.
For LP gas, the pressure supplied must be between 11" and 13" of water column.
When checking for proper operation of the regulator, the inlet pressure must be at least 1" greater than the operating (manifold) pressure as given above.
The pressure regulator located at the inlet of the range manifold must remain in the supply line regardless of whether natural or LP gas is being used.
A flexible metal appliance connector used to connect the range to the gas supply line should have an I.D. of 1/2" and be 5 feet in length for ease of installation. In Canada, flexible connectors must be single wall metal connectors no longer than 6 feet in length.
2 CONNECT THE RANGE TO GAS
Shut off the main gas supply valve before disconnecting the old range and leave it off until the new hook-up has been completed. Don't forget to relight the pilot on other gas appliances when you turn the gas back on.
Because hard piping restricts movement of the range, the use of a CSA International-certified flexible metal appliance connector is recommended unless local codes require a hard-piped connection.
Never use an old connector when installing a new range. If the hard piping method is used, you must carefully align the pipe; the range cannot be moved after the connection is made.
To prevent gas leaks, put pipe joint compound on, or wrap pipe thread tape with Teflon* around, all male (external) pipe threads.
A. Install a manual gas line shut-off valve in the gas line in an easily accessed location outside of the range. Make sure everyone operating the range knows where and how to shut off the gas supply to the range.
B. Install male 1/2" flare union adapter to the 1/2" NPT internal thread at inlet of regulator. Use a backup wrench on the regulator fitting to avoid damage.
When installing the range from the front, remove the 90° elbow for easier installation.
C. Install male 1/2" or 3/4" flare union adapter to the NPT internal thread of the manual shut-off valve, taking care to back-up the shut-off valve to keep it from turning.
D. Connect flexible metal appliance connector to the adapter on the range. Position range to permit connection at the shut-off valve.
E. When all connections have been made, make sure all range controls are in the off position and turn on the main gas supply valve. Use a liquid leak detector at all joints and connections to check for leaks in the system.
WARNING
Fire hazard: Do not use a
flame to check for gas leaks.
When using test pressures greater than 1/2 psig to pressure test the gas supply system of the residence, disconnect the range and individual shut-off valve from the gas supply piping. When using test pressures of
1/2 psig or less to test the gas supply system, simply isolate the range from the gas supply system by closing the individual shut-off valve.
*Teflon: Registered trademark of DuPont
GAS PIPE AND ELECTRICAL OUTLET LOCATIONS
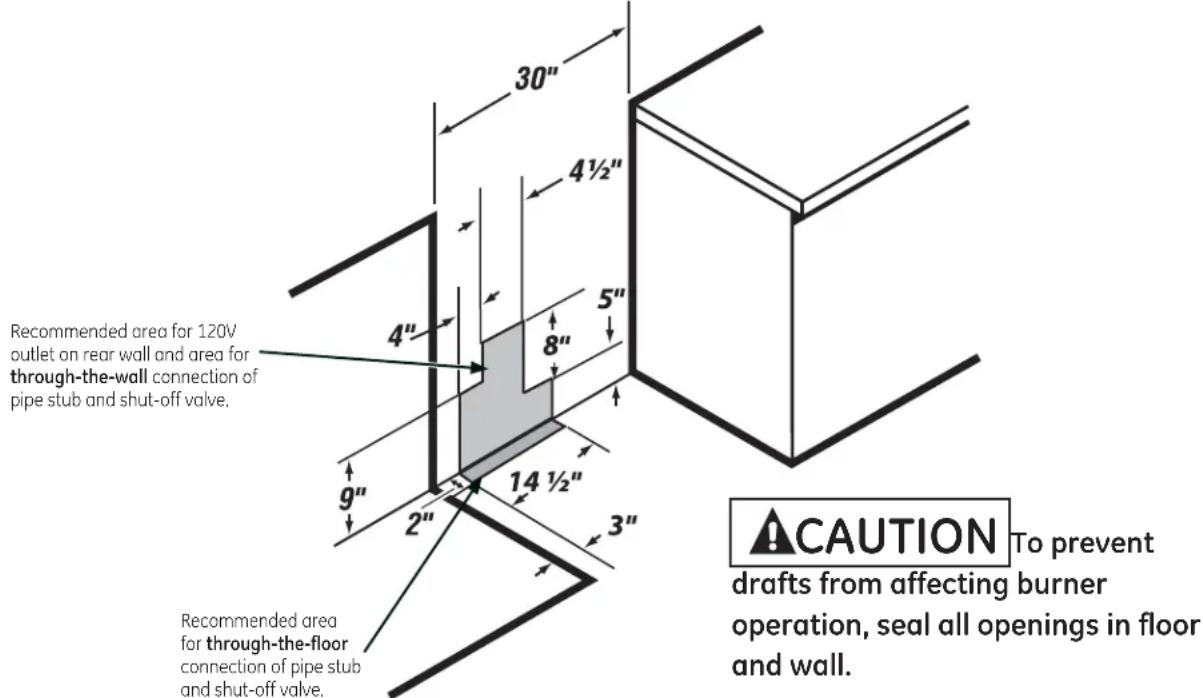
FLEXIBLE CONNECTOR HOOKUP

RIGID PIPE HOOKUP OPTIONS
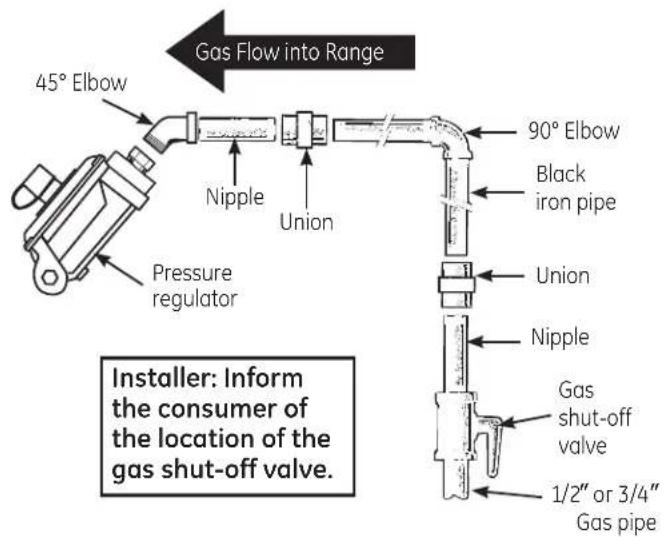

FLEXIBLE CONNECTOR HOOKUP
(for models equipped with Standard Twin Burners)

flowchart
graph TD
    A["Manifold pipe"] --> B["Pressure regulator"]
    B --> C["Adapter"]
    C --> D["Flex connector (6 feet maximum)"]
    D --> E["Adapter"]
    E --> F["1/2" or 3/4" Gas pipe"]
    F --> G["Gas shut-off valve"]
    style A fill:#f9f,stroke:#333
    style B fill:#ccf,stroke:#333
    style C fill:#cfc,stroke:#333
    style D fill:#fcc,stroke:#333
    style E fill:#cff,stroke:#333
    style F fill:#ffc,stroke:#333
    style G fill:#fcc,stroke:#333
RIGID PIPE HOOKUP (for models equipped with Standard Twin Burners)
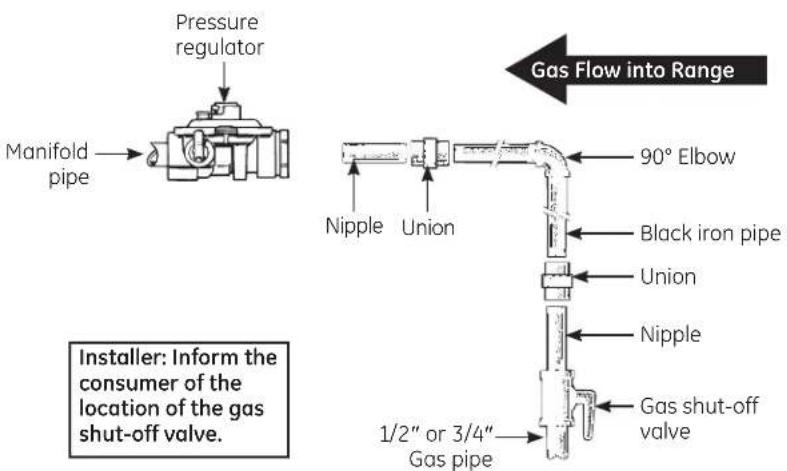
3 ELECTRICAL CONNECTIONS
Electrical Requirements
120-volt, 60 Hertz, properly grounded dedicated circuit protected by a 15-amp or 20-amp circuit breaker or time delay fuse.
Note: Use of automatic, wireless, or wired external switches that shut off power to the appliance are not recommended for this product.
Grounding
WARNING
Shock Hazard: This
appliance must be properly grounded. Failure to do so can result in electric shock.
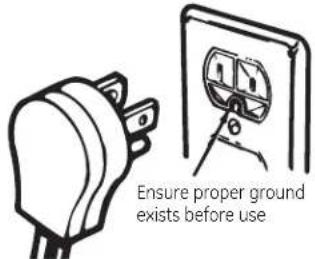
The power cord of this appliance is equipped with a three-prong (grounding) plug which mates with a standard three-prong grounding wall receptacle to minimize the possibility of electric shock hazard from this appliance.
The customer should have the wall receptacle and circuit checked by a qualified electrician to make sure the receptacle is properly grounded.
Where a standard two-prong wall receptacle is encountered, it is the personal responsibility and obligation of the customer to have it replaced with a properly grounded three-prong wall receptacle.
DO NOT, UNDER ANY CIRCUMSTANCES, CUT OR REMOVE THE THIRD (GROUND) PRONG FROM THE POWER CORD. DO NOT USE AN ADAPTER. DO NOT USE AN EXTENSION CORD.
A word about GFCI's – GFCI's are not required or recommended for gas range receptacles.
Ground Fault Circuit Interrupters (GFCI's) are devices that sense leakage of current in a circuit and automatically switch off power when a threshold leakage level is detected. These devices must be manually reset by the consumer. The National Electrical Code requires the use of GFCI's in kitchen receptacles installed to serve countertop surfaces. Performance of the range will not be affected if operated on a GFCI-protected circuit but occasional nuisance tripping of the GFCI breaker is possible.
4 SEAL THE OPENINGS
Seal any openings in the wall behind the range and in the floor under the range when hookups are completed.
5 ASSEMBLE SURFACE BURNERS (on some models)
A Burner Heads
Place burner heads over the electrodes on the cooktop, in the correct locations according to their size.
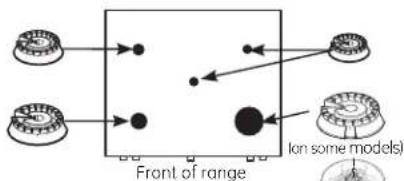
Make sure the slot in the burner head is positioned over the electrode.


Front right burner (on some models)
B Oval (Center) Burner Head/Cap Assembly
Place the oval (center) head/cap assembly over the electrode on the cooktop.
Oval head and cap assembly

natural_image
Diagram showing a container with a lid and a downward arrow pointing to a black object inside a rectangular frame (no text or symbols)Front of range
Make sure the slot in the burner head is positioned over the electrode.

C Caps
Place the matching size caps onto the burner bases or heads.
Make sure that the heads (on some models) and caps are replaced in the correct locations.
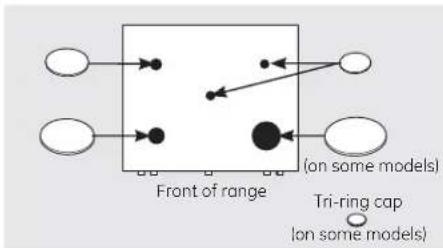
5 ASSEMBLE SURFACE BURNERS (CONT.)

Grates
Place the left, right and center grates on the cooktop. These grates are position specific. The undersides of the left and right grates are marked "LEFT FRONT" and "RIGHT FRONT." On some models the underside of the grates are marked "Outside". Place the middle grate with its bowed front toward the front of the range.

Do not operate the burner
without all burner parts in place.
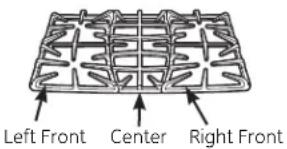
6 LIGHT THE BURNERS
A Check Ignition of Oven Burner
The oven is designed to operate quietly and automatically. To operate the oven, turn the OVEN CONTROL knob to a setting above 300°F.
The oven burner will ignite and burn until the set temperature is reached. The oven burner will continue to cycle on and off as necessary to maintain the oven at the temperature indicated by the OVEN CONTROL knob.
B Adjust Bake Burner Air Adjustment Shutter on Models with a Broiler Drawer, if Necessary
Determine if the bottom burner flames are burning properly.
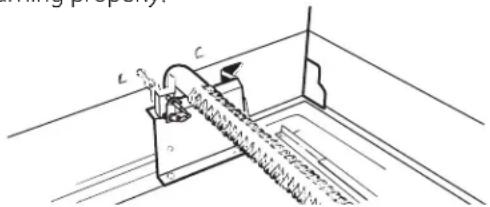
natural_image
Technical line drawing of a mechanical assembly with labeled components (no text or symbols)With the oven bottom removed, properly adjusted flames should have approximately 1" blue cones and, if range is supplied with natural gas, should burn with no yellow tipping. (With most LP gas, small yellow tips at the end of outer cones are normal.) Flames should not lift off burner ports. If lifting is observed, gradually reduce air shutter opening until flames are stabilized.
The shutter for the oven burner is near the back wall of the oven and behind the broiler drawer.
6 LIGHT THE BURNERS (CONT.)
C Adjust Broil Burner Air Adjustment Shutter on Models with a Broiler Drawer, if Necessary (cont.)
To Remove the Broiler Drawer:
- Pull the drawer out until it stops, then push it back in about one inch.
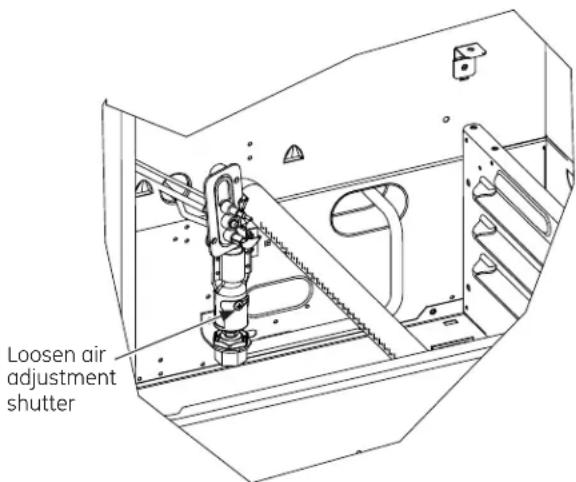
- Grasp handle, lift and pull broiler drawer out.
On some models, remove the metal shield at the rear of the cavity.
To adjust the flow of air to the burner, loosen the Phillips-head screw and rotate the shutter to allow more or less air into the burner tube.
D Check Ignition of Surface Burners
Operation of all cooktop and oven burners should be checked after the range and gas supply lines have been carefully checked for leaks.
Select a top burner knob and simultaneously push in and turn to LITE position. You will hear a clicking sound indicating proper operation of the spark module. Once the air has been purged from the supply lines, burners should light within 4 seconds. After burner lights, rotate knob out of the LITE position. Try each burner in succession until all burners have been checked.
6 LIGHT THE BURNERS (cont.)
Quality of Flames
The combustion quality of burner flames needs to be determined visually.

(A) Yellow flames—Call for service

(B) Yellow tips on outer cones—Normal for LP gas

(C) Soft blue flames—Normal for natural gas
If burner flames look like (A), call for service. Normal burner flames should look like (B) or (C), depending on the type of gas you use.
With LP gas, some yellow tipping on outer cones is normal.
E Replace Oven Parts
After all adjustments are made, replace the broiler drawer, oven bottom, racks and oven door.
7 ADJUST BROIL AND OVEN BURNER AIR ADJUSTMENT SHUTTER IN A SELF-CLEANING OVEN IF NECESSARY
Air adjustment shutters for the top and bottom burners regulate the flow of air to the flames.

The air adjustment shutter for the top (broil) burner is in the center of the rear wall of the oven.

7 ADJUST BROIL AND OVEN BURNER AIR ADJUSTMENT SHUTTER IN A SELF-CLEANING OVEN IF NECESSARY (CONT.)
The shutter for the bottom (oven) burner is near the back wall behind the warming drawer. Remove the drawer. See the Care and cleaning of the range section.
To adjust the flow of air to either burner, loosen the Phillips head screw and rotate the shutter toward open or closed position as needed.

natural_image
Mechanical component diagram showing internal structure with no visible text or symbolsThe flames for the top (broil) burner should be steady with approximately 1" blue cones and should not extend out over the edges of the burner baffle.
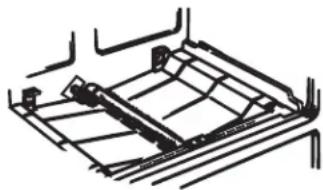
natural_image
Pure technical line drawing of a mechanical assembly without any text, numbers, or symbolsTo determine if the bottom burner flames are burning properly, remove the oven bottom. Flames should have approximately 1" blue cones and, if range is supplied with natural gas, should burn with no yellow tipping. (With most LP gas, small yellow tips at the end of outer cones are normal.) Flames should not lift off burner ports. If lifting is observed, gradually reduce air shutter opening until flames are stabilized.

To remove the oven bottom:
A. Remove the screws holding down rear of the oven bottom.
B. Grasp the oven bottom at finger slots on each side.
C. Lift the rear of the oven bottom enough to clear the lip of the range frame, push it back, and then pull it up and out.
8 LEVELING THE RANGE
A. Install the oven shelves in the oven and position the range where it will be installed with front access to front leveling legs and rear access to rear leveling legs. All legs must be leveled BEFORE the product is installed.

(on some models)

(on some models)
B. Check for levelness by placing a spirit level or a cup, partially filled with water, on one of the oven shelves. If using a spirit level, take two readings—with the level placed diagonally first in one direction and then the other.
C. Remove the drawer (on some models). See the Care and cleaning of the range section. The front leveling legs can be adjusted from the bottom and the rear legs can be adjusted from the top (on some models) or the bottom.
D. Use an open-end or adjustable wrench to adjust the leveling legs until the range is level.
WARNING
Never completely remove
the leveling leg as the range will not be secured to the anti-tip device properly.
E. After leveling the unit, slide it into final position and verify levelness.
F. After the range is level, slide the range away from the wall so that the Anti-Tip device can be installed.
9 INSTALLING THE ANTI-TIP DEVICE
WARNING
ANTI-TIP DEVICE

- All ranges can tip.
- BURNS or other SERIOUS INJURIES can result.
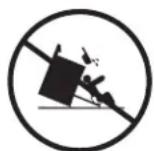
- INSTALL and CHECK the anti-tip bracket following the instructions supplied with the bracket.
To reduce the risk of tipping the range, the range must be secured by a properly installed anti-tip bracket. Follow the instructions packaged with the bracket.
To check if the bracket is installed and engaged properly, look underneath the range to see that the rear leveling leg is engaged in the bracket. On some models, the storage drawer or kick panel can be removed for easy inspection. If visual inspection is not possible, slide the range forward, confirm the anti-tip bracket is securely attached to the floor or wall, and slide the range back so the rear leveling leg is under the anti-tip bracket.
If the range is pulled from the wall for any reason, always repeat this procedure to verify the range is properly secured by the anti-tip bracket.
If your range has no anti-tip bracket, call 1.800.626.8774 to receive one at no cost.
WHEN ALL HOOKUPS ARE COMPLETED
Make sure all controls are left in the off position. Make sure the flow of combustion and ventilation air to the range is unobstructed.
Before you call for service...

Troubleshooting Tips
Save time and money! Review the charts on the following
pages first and you may not need to call for service.
| Problem Possible Causes What To Do | ||
| Top burners do not light or not in the electrical outlet. (The front right burner is designed to have slightly smaller flames between the Core and cleaning of the range section. This is normal.) See the Care and cleaning of the range section. | Plug on range is not completely grounded outlet. | Make sure electrical plug is plugged into a live, properly |
| Burner slits on the side of the burner may be clogged. | Remove the burners and clean them. Check the electrode area for burned-on food or grease. See | |
| Improper burner assembly. | Make sure the burner parts are installed correctly. | |
| Burner flames very large or yellow | Improper air to gas ratio. | If range is connected to LP gas, contact the person who installed your range or made the conversion. |
| Surface burners light but oven does not in the upper left and right corners. Look for the gas shut-off lever at the back of the range. | The oven gas shut-off valve may have accidentally been moved during cleaning or moving. | To check the oven gas shut-off valve, remove the drawer (see the Care and cleaning of the range section). For lower oven drawer models, remove the rear access panel by unscrewing the thumb screws |
  | ||
| Control signals after entering cooking time or start time | You forgot to enter a bake temperature or cleaning time. | Touch the Bake pad and desired temperature or the Self Clean pad and desired clean time. |
| Food does not bake or roast properly in the upper oven | Oven controls improperly set. | See the Using the upper oven section. |
| Shelf position is incorrect. | See the Using the upper oven section. | |
| Incorrect cookware or cookware of improper size being used. | See the Using the upper oven section. | |
| Oven thermostat needs adjustment. | See the Adjust the upper oven thermostat—Do it yourself! section. | |
| Clock not set correctly. | See the Using the clock and timer section. | |
| Aluminum foil used improperly in the oven. | See the Care and cleaning of the range section. | |
| Oven bottom not securely seated in position. | See the Installation of the range section. | |
| Burners do not light | Plug on range is not completely inserted in the electrical outlet. | Make sure electrical plug is plugged into a live, properly grounded outlet. |
| Gas supply not connected or turned on. | See the Installation Instructions that came with your range. | |
| Bridge burner won't light | See How to Light Bridge Burner for Model PGB980 section. | |
Before you call for service...

Troubleshooting Tips
| Problem Possible Causes What To Do | ||
| Burners do not light (cont.) tripped. correctly. | A fuse in your home may be blown or the circuit breaker | Replace the fuse or reset the circuit breaker. |
| Burner parts not replaced | See the Care and cleaning of the range section. | |
| Food does not broil properly in the upper oven | Oven controls improperly set. | Make sure you touch theBroil Hi/Lo pad. |
| Oven door not closed. | See the Using the upper oven section. | |
| Improper shelf position being used. | See the Broiling Guide. | |
| Food being cooked in a hot pan. | For best results, use a pan designed for broiling. Make sure it is cool. | |
| Cookware not suited for broiling. | For best results, use a pan designed for broiling. | |
| Oven bottom not securely seated in position. | See the Installation of the range section. | |
| Upper oven temperature too hot or too cold | Oven thermostat needs adjustment. | See the Adjust the upper oven thermostat—Do it yourself! section. |
| Clock and timer do not work | Plug on range is not completely inserted in the electrical outlet. | Make sure electrical plug is plugged into a live, properly grounded outlet. |
| A fuse in your home may be blown or the circuit breaker tripped. | Replace the fuse or reset the circuit breaker. | |
| Oven controls improperly set. | See the Using the clock and timer section. | |
| Upper oven light does not work | Light bulb is loose or defective. | Tighten or replace the bulb. |
| Plug on range is not completely inserted in the electrical outlet. | Make sure electrical plug is plugged into a live, properly grounded outlet. | |
| Upper oven will not self-clean | The oven temperature is too high to set a self-clean operation. | Allow the range to cool to room temperature and reset the controls. |
| Oven controls improperly set. | See the Using the self-cleaning upper oven section. | |
| On models with a door latch, the oven door is not in the locked position. | Make sure you move the door latch handle all the way to the right. | |
| “Crackling” or “popping” sound | This is the sound of the metal heating and cooling during both the cooking and cleaning functions. | This is normal. |
| Excessive smokingrid the room of smoke. Wait until the LOCKED DOOR light goes off. Wipe up the excess soil and reset the clean cycle. | Excessive soil. | • Touch the Clear/Off pad. Open the windows to |
| Oven door will not open after a clean cycleusing the self-clean feature. | Oven too hot.Do not lock the door with the door latch except when | • Allow the oven to cool below locking temperature. |
| Oven not clean after a clean cyclecycle. Heavily soiled ovens may need to self-clean again or for a longer period of time. | Oven controls not properly set. | • See the Using the self-cleaning upper oven section. |
| Oven was heavily soiled. | • Clean up heavy spillovers before starting the clean | |
| “Door” appears in the display (on models with a door latch) | Latch handle was moved to the right but a program other than self-clean was selected. | • Move the latch handle to the right only when setting the self-cleaning cycle. |
| “LOCK DOOR” flashes in the displayclosed and on models with a latch,the latch was not moved all the way to the right. | The self-clean cycle has been selected but the door is not | • Close the oven door and on models with a latch, move the latch all the way to the right. |
| LOCKED DOOR light is on when you want to cook dropped below the locking temperature. | The oven door is locked because the temperature inside the oven has not | • Touch the Clear/Off pad. Allow the oven to cool and then, on models with a door latch, unlock the door. |
| “F—and a number or letter” flash in the displaycheck the oven door latch. | On models with a door latch, if a function error code appears during the self-cleaning cycle, | • The latch may have been moved, even if only slightly, from the locked position. Make sure the latch is moved to the right as far as it will go. |
| You have a function error code. | • Touch the Clear/Off pad. Allow the oven to cool for | |
| If the function code repeats.and then reconnect power. If the function error code repeats, call for service. | • Disconnect all power to the range for 5 minutes | |
| Oven shelves are difficult to slidecleaned. | The nickel shelves (if so equipped) were cleaned in a self-clean cycle. The gray porcelain-coated shelves (if so equipped) were improperly | • Apply a small amount of vegetable oil to a paper towel and wipe the edges of the oven shelves with the paper towel. Do not spray with Pam® or other lubricant sprays. |
| “Probe” appears in the display (some models) in the probe. | This is reminding you to enter a probe temperature after plugging | • Enter a probe temperature. |
| Water remaining on oven floor after steam clean cycle | This is normal | • Remove any remaining water with a dry cloth or sponge. |
Before you call for service...

Troubleshooting Tips
| Problem Possible Causes What To Do | ||
| Display goes blank | A fuse in your home may be blown or the circuit breaker tripped. | Replace the fuse or reset the circuit breaker. |
| The clock is in the black-out mode. | See the Special features of your oven control section. | |
| Display flashes | Power failure. | Reset the clock. |
| Unable to get the display to show "SF" | Oven control pads were not pressed properly. | The Bake and Broil Hi/Lo pads must be touched at the same time and held for 3 seconds. |
| Power outage, clock flashes | Power outage or surge. | Reset the clock. If the oven was in use, you must reset it by touching the Clear/Off pad, setting the clock and resetting any cooking function. |
| "Burning" or "oily" odor emitting from the vent | This is normal in a new oven and will disappear quickly. | Open a window to ventilate the room. |
| Strong odor | An odor from the insulation around the inside of the oven is normal for the first few times the oven is used. | This is temporary. |
| Fan noise (some models) | A cooling fan may turn on. | This is normal. The cooling fan will turn on to cool internal parts. It may run for up to 1 1/2 hrs after the oven is turned off. |
| Drawer does not slide smoothly or drags | The drawer is out of alignment. | Fully extend the drawer and push it all the way in. See the Care and cleaning of the range section. |
| Drawer is over-loaded or load is unbalanced. | Reduce weight. Redistribute drawer contents. | |
| Lower oven drawer or warming drawer will not work | A fuse in your home may be blown or the circuit breaker tripped. | Replace the fuse or reset the circuit breaker. |
| The oven is self-cleaning. | Wait for the self-clean cycle to finish and the oven to cool. | |
| Controls improperly set. | See the Electric warming drawer or Lower oven drawer section. | |
| Excessive condensation in the drawer | Liquid in drawer. | Remove liquid. |
| Uncovered foods. | Cover food with lid or aluminum foil. | |
| Temperature setting too high. | Reduce temperature setting. | |
| Food dries out in the lower oven drawer or warming drawer | Moisture escaping. | Cover food with lid or aluminum foil. |
| Drawer not fully closed. | Push drawer in until latch engages. | |
Looking For Something More? (Not all accessories are available for all models.)
You can find these accessories and many more at GEApplianceParts.com (U.S.) or www.GEAppliances.ca (Canada), or call 800.626.2002 (U.S.) or 800.661.1616 (Canada) (during normal business hours). Have your model number ready.
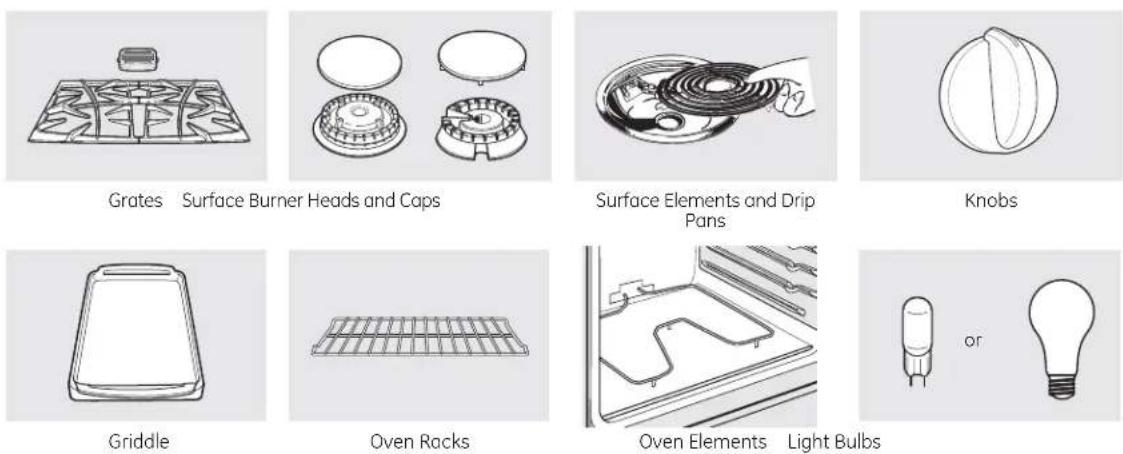
Experience these other great products to keep your kitchen looking great!

Cerama Bryte®
Ceramic Cooktop
Cleaning Kit:
Includes cleaner,
scraper and pad
WX10X117GCS

Cerama Bryte ® TouchUp Spray
WX10X391

Citrushine
Stainless Steel
Wipes
WX10X10007

Cerama Bryte®
Stainless Steel
Appliance
Cleaner
PM10X311
Get the most out of your Broiler Pan! (Not for use with Broiler Drawer models.)
Use your pan and grid cover to broil hamburgers, seafood, steaks, vegetables, bacon, chops and so much more! The pan below catches the excess fats and oils.
• Genuine GE Part
- Easy To Clean
• One-Year Warranty

Limited Time Offer! Free Shipping!
When you order your broiler pan within 30 days of purchasing your GE cooking product.
Small Large* XL**
U.S. Part # WB48X10055 WB48X10056 WB48X10057
Canada Part # 222D2097G001 222D2097G002 N/A
Dimensions 8-3/4"W x 1-1/4"H x 13-1/2"D 12-3/4"W x 1-1/4"H x 16-1/2"D 17"W x 1-1/4"H x 19-1/4"D
* The large (standard) broil pan does not fit in 20"/24" ranges.
** The XL pan does not fit in 24" wall ovens, 27" drop-ins or 20"/24" ranges.
To place your order, call 800.626.2002 (U.S.), 800.661.1616 (Canada) or mail this form to:
In the U.S.: GE Parts, P.O. Box 221027, Memphis, TN 38122-1027. In Canada: GE Parts, 1 Factory Lane, Moncton, N.B. E1C 9M3
Broiler Pan Order Form
| Quantity | Part Number |
Model Number ____ Serial Number ____ Brand ____ Date of Purchase ____
First Name Last Name
Address
City ____ State ____ Zip Code ____
Phone ____ E-Mail ____
Check ____ Money Order ____
Call 800.626.2002 in the U.S. or 800.661.6161 in Canada for current pricing. All credit card orders must be called in.
Notes.
GE Gas Range Warranty. (For customers in the United States)
All warranty service provided by our Factory Service Centers, or an authorized Customer Care® technician. To schedule service, on-line, 24 hours a day, visit us at GEAppliances.com, or call 800.GE.CARES (800.432.2737). Please have serial number and model number available when calling for service.
Staple your receipt here. Proof of the original purchase date is needed to obtain service under the warranty.
For The Period Of: GE Will Replace:
One Year From the date of the original purchase to replace the defective part. Any part of the range which fails due to a defect in materials or workmanship. During this limited one-year warranty, GE will also provide, free of charge, all labor and in-home service
What GE Will Not Cover:
■ Service trips to your home to teach you how to use the product.
- Improper installation, delivery or maintenance.
Product damage or failure of the product if it is abused, misused, modified, used for other than the intended purpose, or used commercially.
■ Replacement of house fuses or resetting of circuit breakers.
■ Damage to the product caused by accident, fire, floods or acts of God.
■ Incidental or consequential damage caused by possible defects with this appliance.
■ Damage caused after delivery.
■ Product not accessible to provide required service.
■ Replacement of battery on cordless models.
EXCLUSION OF IMPLIED WARRANTIES—Your sole and exclusive remedy is product repair as provided in this Limited Warranty. Any implied warranties, including the implied warranties of merchantability or fitness for a particular purpose, are limited to one year or the shortest period allowed by law.
This warranty is extended to the original purchaser and any succeeding owner for products purchased for home use within the USA. If the product is located in an area where service by a GE Authorized Servicer is not available, you may be responsible for a trip charge or you may be required to bring the product to an Authorized GE Service Location for service. In Alaska, the warranty excludes the cost of shipping or service calls to your home.
Some states do not allow the exclusion or limitation of incidental or consequential damages. This warranty gives you specific legal rights, and you may also have other rights which vary from state to state. To know what your legal rights are, consult your local or state consumer affairs office or your state's Attorney General.
GE Gas Range Warranty. (For customers in Canada)

All warranty service provided by our Factory Service Centers or an authorized Customer Care® technician. For service, call 1.800.561.3344. Please have serial number and model number available when calling for service.
Staple your receipt here. Proof of the original purchase date is needed to obtain service under the warranty.
For The Period Of: Mabe Will Replace:
One Year
From the date of the original purchase
Any part of the range which fails due to a defect in materials or workmanship. During this
limited one-year warranty, Mabe will also provide, free of charge, all labor and in-home service
to replace the defective part.
What Mabe Will Not Cover:
■ Service trips to your home to teach you how to use the product.
- Improper installation, delivery or maintenance.
Product damage or failure of the product if it is abused, misused, modified, used for other than the intended purpose, or used commercially.
- Replacement of house fuses or resetting of circuit breakers.
■ Damage to the product caused by accident, fire, floods or acts of God.
■ Incidental or consequential damage caused by possible defects with this appliance.
■ Damage caused after delivery.
■ Product not accessible to provide required service.
■ Replacement of battery on cordless models.
EXCLUSION OF IMPLIED WARRANTIES—Your sole and exclusive remedy is product repair as provided in this Limited Warranty. Any implied warranties, including the implied warranties of merchantability or fitness for a particular purpose, are limited to one year or the shortest period allowed by law.
WARRANTOR IS NOT RESPONSIBLE FOR CONSE QUEN TIAL DAMAGES.
Warrantor: MABE CANADA INC.

GE Appliances Website
In the U.S.: GEAppliances.com
Have a question or need assistance with your appliance? Try the GE Appliances Website 24 hours a day, any day of the year! For greater convenience and faster service, you can now download Owner's Manuals, order parts or even schedule service on-line. In Canada: www.GEAppliances.ca
Schedule Service
In the U.S.: GEAppliances.com
Expert GE repair service is only one step away from your door. Get on-line and schedule your service at your convenience 24 hours any day of the year! Or call 800.GE.CARES (800.432.2737) during normal business hours. In Canada, call 1.800.561.3344
Real Life Design Studio
In the U.S.: GEAppliances.com
GE supports the Universal Design concept—products, services and environments that can be used by people of all ages, sizes and capabilities. We recognize the need to design for a wide range of physical and mental abilities and impairments. For details of GE's Universal Design applications, including kitchen design ideas for people with disabilities, check out our Website today. For the hearing impaired, please call 800.TDD.GEAC (800.833.4322).
In Canada, contact: Manager, Consumer Relations, Mabe Canada Inc.
Suite 310, 1 Factory Lane
Moncton, N.B. E1C 9M3

Extended Warranties
In the U.S.: GEAppliances.com
Purchase a GE extended warranty and learn about special discounts that are available while your warranty is still in effect. You can purchase it on-line anytime, or call 800.626.2224 during normal business hours. GE Consumer Home Services will still be there after your warranty expires. In Canada, call 1.888.261.2133

Parts and Accessories
In the U.S.: GEApplianceParts.com
Individuals qualified to service their own appliances can have parts or accessories sent directly to their homes (VISA, MasterCard and Discover cards are accepted). Order on-line today, 24 hours every day or by phone at 800.626.2002 during normal business hours.
Instructions contained in this manual cover procedures to be performed by any user. Other servicing generally should be referred to qualified service personnel. Caution must be exercised, since improper servicing may cause unsafe operation.
Customers in Canada should consult the yellow pages for the nearest Mabe service center, or call 1.888.261.3055.

Contact Us
In the U.S.: GEAppliances.com
If you are not satisfied with the service you receive from GE, contact us on our Website with all the details including your phone number, or write to: General Manager, Customer Relations
GE Appliances, Appliance Park
Louisville, KY 40225
In Canada: www.GEAppliances.ca, or write to: Director, Consumer Relations, Mabe Canada Inc.
Suite 310, 1 Factory Lane
Moncton, N.B. E1C 9M3

Register Your Appliance
In the U.S.: GEAppliances.com
Register your new appliance on-line—at your convenience! Timely product registration will allow for enhanced communication and prompt service under the terms of your warranty, should the need arise. You may also mail in the pre-printed registration card included in the packing material. In Canada: www.GEAppliances.ca
Instrucciones de seguridad 2 - 5
Instrucciones de Funcionamiento
Reloj y Temporizador .... 10, 16,
Horno 8-3
Horneado o Dorado....12
Asar, Guía para Asar ..... 13 - 1
Control del Horno 8,9
Corte de Corriente ....7, 11,
Precalentamiento ..... 1 2
Modo Sabático 20,
Hornos de Auto Limpieza ..... 2 5
Estantes. 1
Funciones Especiales ..... 1 9
Limpieza al Vapor....35
Ajuste del Termostato ..... 2 2
Horneado y Asado .....
Superficie de Cocción ...
Cajón Calentador .....23, 24
Cuidado y Limpieza
Papel de Aluminio .....
Ensambles del Quemador . .27-29
Parrillas de los Quemadores. . . 30
Panel de Control y Perillas. .30, 31
Superficie de la Cocina .....30, 31
Retiro de la Puerta .....32
Cajón 34
Parte Inferior del Horno .....32
Reemplazo de la Luz
del Horno. . 34
Ventiladores del Horno .....30
Estantes del Horno. 33
Hornos de Auto Limpieza . . . .25, 26
Superficies de Acero
Inoxidable 33
Instrucciones de Instalación ..... 37-47
Ajuste del Aire......
Dispositivo Anti-Vuelco.
Ensamble los Quemadores
-7Superficiales....44
Control de Encendido
del Quemador 44
Conecte la Cocina al Gas . .41, 43
Dimensiones y Espacios ..... 3 9
Nivelación de la Cocina.....JGBS18
LP 40
21
Consejos para Solucionar
Problemas....48-51
Accesorios 54
Soporte al Cliente
Sóporte al Cliente ....Contratana
Garantía para Clientes
en Canadá....52
Garantía para Clientes
1en E6.gU 55
(1)基因通过控制 通过控制
30
JGB285
30 31 JGBP27
....32 JGBP28
JGBP33
.....32 PGB745
RGB745 RGB746
4 RGB746
.....30 RGB790
Escriba los números de modelo y de serie aquí:
N° de Modelo ____
N° de Serie ____
En Canadá, comuníquese con nosotros en:
www.GEAppliances.ca
Los puede encontrar en la etiqueta que se encuentra en el frente de la cocina, detrás del cajón calentador o en el cajón inferior del horno.
INFORMACIÓN IMPORTANTE DE SEGURIDAD. LEA TODAS LAS INSTRUCCIONES ANTES DE USAR.
ADVERTENCIA
Si la información de este manual no se sigue exactamente, se podrá n, ocasionando daños sobre la propiedad, lesiones o la muerte.
- No guarde ni use gasolina u otros vapores inflamables y líquidos cerca de este ni de otros electrodomésticos.
- QUÉ DEBE HACER SI HUELE GAS
No intente iluminar ningún electrodoméstico.
No toque ningún interruptor eléctrico; no use teléfonos en su edificio.
De inmediato llame a su proveedor de gas desde el teléfono de un vecino.
Si no se puede comunicar con su proveedor de gas, llame al departamento de bomberos.
- La instalación y las reparaciones deberán ser realizadas por un instalador calificado, agencia de servicios o el proveedor de gas.
ADVERTENCIA
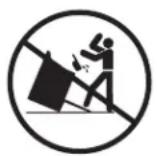
- Todas las cocinas pueden sufrir caídas.
Se pueden producir QUEMADURAS y otras LESIONES GRAVES.
INSTALE y CONTROLE el soporte anti-volcaduras, siguiendo las instrucciones suministradas con el soporte.

Para revisar si el soporte esta instalado y ajustado de forma apropiada, mire que debajo de la cocina, el brazo anti volteo ensamblado en el lateral, este ajustado al soporte. En algunos modelos, el cajón de almacenamiento o el panel de protección se puede retirar para una inspeccion mas fácil. Si no es posible realizar una inspección visual, deslice la cocina hacia adelante, confirme que el soporte anti-volcaduras esté ajustado de forma segura al piso o la pared, y deslice la cocina hacia atras de modo que el brazo anti volteo se deslice por debajo
del soporte anti-volcaduras. Si la cocina es expulsada de la pared por alguna razon, siempre repita este procedimiento a fin de verificar que esté asegurada de forma correcta con un soporte anti volcaduras.
Nunca retire completamente las patas niveladoras, ya que la cocina no estará asegurada de forma adecuada al dispositivo anti-volcaduras.
Si no recibió el soporte anti-volcaduras con su compra, llame al 1.800.626.8774 para recibir uno sin costo (en Canadá, llame al 1.800.561-3344). Para acceder a instrucciones de instalación del soporte, visite GEAppliances.com (en Canadá, GEAppliances.ca).
ADVERTENCIA
AVISO DE SEGURIDAD IMPORTANTE
La Ley de Agua Potable Inocua y Tratamiento de Residuos Tóxicos de California (California Safe Drinking Water and Toxic Enforcement Act) solicita al Gobernador de California que publique una lista de sustancias que el estado reconoce que producen cáncer, defectos de nacimiento u otros daños reproductivos y solicita a los empresarios que adviertan a sus clientes sobre la posible exposición a tales sustancias.
El aislante de fibra de vidrio en los hornos de auto limpieza despide una pequeña cantidad de monóxido de carbono durante el ciclo de limpieza. La exposición puede ser minimizada si se ventila con una ventana abierta o si se usa un ventilador o campana.
ADVERTENCIA
INSTRUCCIONES GENERALES DE SEGURIDAD
ADVERTENCIA
NUNCA use este electrodoméstico para calentar el ambiente. Como consecuencia de esto, se podrá producir envenenamiento con monóxido de carbono y el sobrecalentamiento del horno.
Use este electrodoméstico sólo para su propósito original, como se describe en el manual del propietario.
Solicite que un instalador calificado instale su cocina y que esté correctamente conectada a tierra, de acuerdo con las instrucciones de instalación provistas. Cualquier ajuste y trabajo de servicio técnico deberá ser realizado únicamente por instaladores de cocinas a gas calificados o por técnicos del servicio. No intente reparar o reemplazar ninguna parte de la cocina, a menos que esto se recomiende específicamente en este manual.
Su cocina es enviada desde la fábrica para uso con gas natural. Puede ser convertida para uso con gas LP. Si se requieren, estos ajustes deben ser realizados por un técnico calificado de acuerdo con las instrucciones de instalación y códigos locales. La agencia que realiza este trabajo asume la responsabilidad de la conversión.
Solicite que el instalador le muestre la ubicación de la válvula de cierre de la cocina a gas y cómo apagarla en caso de ser necesario.
Enchufe la cocina en un tomacorriente con conexión a tierra de 120 voltios únicamente. No retire la pata redonda de conexión a tierra del enchufe. Si tiene dudas sobre la conexión a tierra del sistema eléctrico para hogar, es su responsabilidad y obligación contar con el reemplazo de un tomacorriente sin conexión a tierra por un tomacorriente de tres patas correctamente conectado a tierra, de acuerdo con el Código Nacional de Electricidad. No use prolongadores con este electrodoméstico.
Antes de realizar cualquier servicio técnico, desenchufe la cocina o desconecte el suministro de corriente desde el panel de distribución del hogar, retirando el fusible o desconectando el disyuntor.
Asegúrese de que todos los materiales de embalaje sean retirados de la cocina antes de su uso, a fin de evitar que estos materiales se incendien.
Evite ralladuras o impactos sobre las puertas de metal, cocinas o paneles de control. Hacer esto podrá producir la rotura de vidrios. No cocine un producto con un vidrio roto. Es posible que se produzcan descargas, incendio o cortes.
No deje a los niños solos o fuera de su radio de atención en el área donde el electrodoméstico se encuentre en uso. Nunca se les deberá permitir trepar, sentarse o pararse sobre ninguna parte del electrodoméstico.
No guarde artículos de interés para los niños sobre una cocina o en la parte trasera de la misma – Si un niño trepa sobre la cocina para alcanzar artículos, es posible que sufra lesiones graves.
No permita que nadie se trepe, se pare o se cuelgue de la puerta del horno, del cajón o de la parte superior de la cocina. Se podrá dañar la cocina o provocar su caída, ocasionando lesiones graves o la muerte
Nunca bloquee las ventilaciones (aberturas de aire) de la cocina. Las mismas brindan las entradas y salidas de aire que son necesarias para que la cocina opere de forma correcta con la combustión adecuada. Las aberturas de aire están ubicadas en la parte trasera de la cocina, en la parte superior e inferior de la puerta del horno, y en la parte inferior de la cocina debajo del cajón calentador, del cajón del horno inferior o del panel de protección.
Use sólo sostenedores de ollas secos - los sostenedores húmedos sobre superficies calientes pueden producir quemaduras debido al vapor. No permita que los sostenedores de ollas tengan contacto con los quemadores superficiales, la parrilla de los quemadores, o el elemento de calefacción del horno. No use una toalla u otra tela voluminosa para reemplazar el mango de las cacerolas.
Tenga cuidado de no tocar las superficies calientes de la cocina. Las superficies potencialmente calientes incluyen los quemadores, parrillas, parte superior de la cocina, parte trasera, horno e interior de la puerta y aberturas alrededor de la puerta del horno.
No caliente envases de comida que no hayan sido abiertos. Se podría acumular presión y el contenedor podría explotar, ocasionando una lesión.
Como protección contra enfermedades transmitidas a través de la comida, asegúrese de que las temperaturas de los productos con carne y ave alcancen o superen las temperaturas mínimas de seguridad alimentaria recomendadas por USDA. Para más información visite: www.isitdoneyet.gov o llame a la línea gratuita de carnes y aves de USDA al 1-888-674-6854.
INFORMACIÓN IMPORTANTE DE SEGURIDAD. LEA TODAS LAS INSTRUCCIONES ANTES DE USAR.
ADVERTENCIA
MANTENGA LOS MATERIALES INFLAMABLES ALEJADOS DE LA COCINA
No guarde ni use materiales inflamables en un horno o cerca de la parte superior de la cocina, incluyendo papel, plástico, sostenedores de ollas, trapos, cobertores de pared, cortinas, paños y gasolina u otros vapores y líquidos inflamables.
Nunca use prendas holgadas o que cuelguen mientras usa el electrodoméstico. Evite acumular artículos comúnmente usados en gabinetes sobre la cocina, y tenga cuidado al extender la mano sobre la cocina.
La ropa que se encuentre cerca de los quemadores o superficies calientes se podrá encender, ocasionando quemaduras graves.
No permita que la grasa de la cocción u otros materiales inflamables se acumulen en o cerca de la cocina. La grasa del horno o sobre la cocina se podrá incendiar.
Limpie las campanas de ventilación de forma frecuente. No se debe permitir la acumulación de grasa en la campana o el filtro.
ADVERTENCIA
EN CASO DE INCENDIO, SIGA LOS SIGUIENTES PASOS PARA EVITAR LESIONES O LA PROPAGACIÓN DEL FUEGO:
No use agua sobre el fuego de la grasa. Nunca tome una olla que se esté incendiando. Apague los controles. Extinga la olla que se esté incendiando sobre un quemador superficial, cubriendo la olla completamente con su tapa correspondiente, una hoja metálica de galletas o una bandeja plana. Si es necesario, use un químico seco multiuso o un extintor de chorro de espuma.
En caso de que haya fuego en el horno durante la cocción, apague el horno y mantenga la puerta cerrada
hasta que el fuego se extinga. Si es necesario, use un químico seco multiuso o un extintor de chorro de espuma.
En caso de que haya fuego en el horno durante el período de auto limpieza, apague el horno y espere a que el fuego se extinga. No fuerce la puerta para abrirla. La entrada de aire fresco sobre las temperaturas de auto limpieza podrá conducir a la producción de llamas en el horno. Si no se siguen estas instrucciones, se podrán producir quemaduras graves.
ADVERTENCIA
INSTRUCCIONES DE SEGURIDAD DE LA PARTE SUPERIOR DE LA COCINA
Nunca pierda de vista los quemadores cuando se encuentren en las configuraciones de calor media o alta. Las comidas, especialmente las que se preparan con aceite, se pueden incendiar, lo cual puede ocasionar un incendio que se propague a los gabinetes próximos.
Nunca pierda de vista el aceite cuando esté friendo. Si se calienta más allá de su punto de cocción, el aceite se puede quemar y provocar un incendio que se puede propagar a los gabinetes próximos. Use un termómetro para grasas profundas siempre que sea posible, a fin de monitorear la temperatura del aceite.
Para evitar derrames e incendios, use una cantidad mínima de aceite cuando esté friendo en una olla que no sea profunda y evite cocinar comidas congeladas con cantidades excesivas de hielo.
Use el tamaño de olla adecuado para evitar que sean inestables o que sufran caídas fácilmente. Seleccione utensilios que coincidan con el tamaño del quemador. Las llamas del quemador se deberán ajustar de modo que no se extiendan más allá de la parte inferior de la olla. Una cantidad excesiva de llama puede representar un riesgo.
Siempre use la posición LITE al encender los quemadores superiores y asegúrese de que estos se hayan encendido.
Al usar utensilios de vidrio/ cerámica, asegúrese de que sean adecuados para el servicio de cocina; otros se podrán romper debido a un cambio repentino de temperatura.
A fin de minimizar posibles quemaduras, incendio de materiales inflamables y derrames, la manija de un envase deberá ser inclinada hacia el centro de la cocina sin que se extienda sobre los quemadores cercanos.
Al preparar comidas llameantes debajo de una campana, encienda el ventilador.
No use un wok con un anillo con soporte de metal redondo. El anillo podrá atrapar calor y bloquear el aire hacia el quemador, produciendo el riesgo de emisión de monóxido de carbono.
No intente levantar la estufa si los quemadores de la superficie están sellados. Hacer esto podría dañar la tubería de gas hasta los quemadores superficiales, ocasionando una pérdida de gas y riesgo de incendio.
No use papel de aluminio para cubrir rejillas cualquier parte de la cocina. Si se hace esto se podrá producir envenenamiento con monóxido de carbono, sobrecalentamiento de las superficies de la cocina o un posible riesgo de incendio.
ADVERTENCIA INSTRUCCIONES DE SEGURIDAD
ADVERTENCIA
NUNCA cubra ninguna ranura, agujeros o pasajes en el fondo del horno ni cubra un estante entero con materiales tales como papel de aluminio. Hacer esto bloquea el flujo de aire a través del horno y puede ocasionar envenenamiento con monóxido de carbono. Los recubrimientos de aluminio también pueden atrapar el calor, causando riesgo de incendio.
Manténgase alejado de la cocina al abrir la puerta del horno. El aire caliente o el vapor que sale puede causar quemaduras en las manos, rostro y/u ojos.
Mantenga el horno libre de acumulación de grasa. La grasa en el horno se puede incendiar.
Coloque los estantes del horno en la ubicación correspondiente mientras éste se encuentra frío. Si es necesario retirar el estante mientras el horno se encuentra caliente, evite tocar las superficies calientes.
Coloque el estante del horno en la posición de bloqueo, al introducir y retirar comida del horno. Esto ayuda a evitar quemaduras por tocar superficies calientes de la puerta y las paredes del horno.
No deje productos tales como papel, utensilios de cocina ni comida en el horno cuando no esté en uso. Los artículos guardados en el horno se pueden incendiar.
No deje artículos en la parte superior de la cocina cerca de la ventilación del horno, que está en el centro de la parte trasera. Los artículos se pueden sobrecalentar, y existe riesgo de incendio o quemaduras.
Al usar las bolsas para cocinar o dorar en el horno, siga las instrucciones del fabricante.
Nunca ase con la puerta abierta. Se prohíbe asar con la puerta abierta debido al sobrecalentamiento de las perillas de control.
ADVERTENCIA
INSTRUCCIONES DE SEGURIDAD DEL HORNO CON
FUNCIÓN DE AUTO LIMPIEZ (Algunos modelos)
La función de auto limpieza usa el horno en temperaturas lo suficientemente altas como para consumir restos de comida que haya dentro del mismo. Para un funcionamiento seguro, siga estas instrucciones.
Antes de utilizar el ciclo de auto limpieza, retire las ollas, estantes de metal brillante del horno y otros utensilios que haya dentro del mismo. Sólo se pueden dejar dentro del horno los estantes para horno con recubrimiento de porcelana. No use la función de auto limpieza para limpiar otras partes, tales como parrillas.
Antes de utilizar el ciclo de auto limpieza, limpie la grasa y restos de comida que haya en el horno. Una cantidad excesiva de grasa se puede incendiar, lo cual puede producir daños con humo en su hogar.
Si el modo de auto limpieza funciona de forma incorrecta, apague el horno y desconecte el suministro de corriente. Solicite el servicio de un técnico calificado.
No limpie la junta de la puerta. La junta de la puerta es esencial para un buen sellado. Se debe tener cuidado de no frotar, dañar ni mover la junta.
No use limpiadores para horno. No se deberá usar limpiador para hornos comerciales ni revestimientos de protección para hornos de ningún tipo en o alrededor de cualquier parte del horno.
ADVERTENCIA INSTRUCCIONES DE SEGURIDAD DEL CAJÓN
CALENTADOR/ CAJÓN DEL HORNO INFERIOR (Algunos modelos)
El propósito del cajón calentador es mantener las comidas cocinadas a temperatura para servir. Las bacterias crecen de forma muy rápida en las comidas con temperaturas entre 40°F y 140°F. No coloque comida fría en el cajón calentador. No guarde comida en el cajón calentador por más de 2 horas. Si no se siguen estas instrucciones, se podrán producir enfermedades generadas en la comida.
No deje productos de papel, plásticos, comida enlatada o materiales combustibles en el cajón. Se pueden incendiar.
No toque el elemento calentador ni la superficie interior del cajón. Es posible que las superficies estén
lo suficientemente calientes como para provocar quemaduras.
Tenga cuidado al abrir el cajón. Abra un poco el cajón y deje que salga aire caliente o vapor antes de retirar o reemplazar la comida. El aire caliente o el vapor que sale puede causar quemaduras en las manos, rostro y/u ojos.
No use papel de aluminio para revestir el cajón calentador. El aluminio es un excelente aislante del calor y atrapará el calor debajo de éste. Esto alterará el funcionamiento del cajón y existe el riesgo de que se produzca un incendio.
GUARDE ESTAS INSTRUCCIONES 5
Cómo usar los quemadores superficiales de gas.
Es posible que las funciones y apariencias varían con relación a su modelo a lo largo del manual.
Antes de Encender un Quemador de Gas
Asegúrese de que todos los quemadores estén en su lugar.
Asegúrese de que todas las parrillas de la cocina estén correctamente ubicadas antes de usar un quemador.
Luego de Encender un Quemador de Gas
No utilice el quemador durante un período de tiempo prolongado sin un utensilio de cocina sobre la parrilla. El acabado de la parrilla se puede resquebrajar si no hay un utensilio de cocina que absorba el calor.
Asegúrese de que los quemadores y las parrillas estén fríos antes de colocar la mano, tomar el mango de una olla, trapos de limpieza u otros materiales sobre estos..

natural_image
Hand holding a small electronic component with an arrow pointing upward (no text or symbols visible)Empuje el mango de control y gire el mismo hasta la posición LITE.
Cómo Encender un Quemador Superficial de Gas
Asegúrese de que todos los quemadores superficiales estén ubicados en sus posiciones respectivas.
Empuje el mango de control y gire el mismo hasta la posición LITE.
Escuchará un pequeño ruido de clic – el sonido de la chispa eléctrica que enciende el quemador.
Gire la perilla para ajustar el tamaño de la llama. Si la perilla permanece en LITE, continuará haciendo clic.
Cuando un quemador se gira a LITE, todos los quemadores hacen chispa. No intente desensamblar ni limpiar un quemador mientras otro quemador está encendido. Es posible que se produzca una descarga eléctrica, lo cual podría hacer que vuelque un utensilio de cocina caliente.

Quemadores de Gas Sellados (Algunos modelos)
La parte superior de su cocina a gas cuenta con quemadores de gas sellados. Le ofrecen conveniencia, facilidad de limpieza y flexibilidad para ser usados en una amplia variedad de aplicaciones de cocina.
El quemador más pequeño en la posición trasera derecha es el quemador a fuego lento. En algunos modelos, el quemador de triple llama que se encuentra en la posición frontal derecha es el quemador a fuego lento. Este quemador se puede pasar a SIM (Fuego Lento) para que funcione a un fuego muy lento. Brinda un funcionamiento de cocción muy preciso para comidas delicadas tales como salsas o comidas que requieren fuego lento durante un período de tiempo de cocción largo.
Los quemadores mediano (atrás a la izquierda) y grande (frente a la izquierda) son los quemadores principales para la mayoría de las cocciones. Estos quemadores de uso general se pueden pasar de HI (Alto) a LO (Bajo), a fin de que se adecúen a una amplia variedad de necesidades de cocción
El quemador extra grande (al frente a la derecha, quemador de triple llama, o al frente a la izquierda en algunos modelos) es el quemador de máxima producción. Al igual que los otros cuatro quemadores, se puede pasar de HI (Alto) a SIM (Fuego Lento) para una amplia variedad de aplicaciones de cocción.
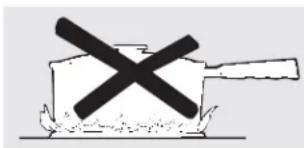
natural_image
Simple line drawing of a box with a cross mark and a handle, no text or symbols present.Cómo Seleccionar el Tamaño de la Llama
ADVERTENCIA Las llamas
del quemador que no están cubiertas por el utensilio de cocina pueden presentar un riesgo de quemaduras o incendio de telas. Nunca permita que las llamas se extiendan más allá de los costados del utensilio.
Observe la llama, no la perilla, a medida que reduce el calor. Cuando se desee calentar de forma rápida, el tamaño de la llama de un quemador de gas deberá ser equivalente con el utensilio de cocina que esté usando.
Cuando las llamas sean más grandes que la parte inferior del utensilio de cocina, no calentarán el utensilio más rápido y podrían ser riesgosas.
Utensilio sobre la Cocina
Aluminio: Se recomienda un utensilio de peso mediano, ya que calienta de forma rápida y pareja. La mayoría de las comidas se doran de forma pareja en un sartén de aluminio. Use cacerolas con tapa hermética cuando cocine con cantidades mínimas de agua.
Hierro Forjado: Si cocinará de forma lenta, la mayoría de los sartenes le darán resultados satisfactorios.
Utensilios de esmalte: Bajo ciertas condiciones, el esmalte de algunos utensilios de cocina se pueden derretir. Siga las recomendaciones sobre métodos de cocción del fabricante de utensilios de cocina.
Vidrio: Existen dos tipos de utensilios de cocina de vidrio – aquellos para uso con el horno únicamente y aquellos para la cocción en la
parte superior de la cocina (cacerolas, café y teteras). Los conductores de vidrio calientan de forma muy lenta.
Cerámica de Vidrio Resistente al Calor: Se pueden usar para cualquier superficie o para cocción en el horno. Conduce el calor de forma muy lenta y se enfría de forma muy rápida. Consulte las instrucciones del fabricante de utensilios de cocina para saber con seguridad si se puede usar con cocinas a gas.
Acero Inoxidable: Este metal posee propiedades de calentamiento limitadas y normalmente se combina con cobre, aluminio u otros materiales para una mejor distribución del calor. Los sartenes con combinación de metales normalmente funcionan de forma satisfactoria si se usan con calor medio, como lo recomienda el fabricante.

natural_image
Cross symbol crossed over a circular ring, no text or labels presentParrillas para la Parte Superior de la Cocina (Modelos con quemador sellado)
No use parrillas para la parte superior de la cocina sobre los quemadores de gas sellados. Si usa la parrilla para la parte superior de la cocina en el quemador de gas sellado, ocasionará una combustión incompleta y podrá producir
exposición a niveles de monóxido de carbono superiores a los estándares actualmente permitidos.
This can be hazardous to your health.

Use el Wok de Esta Forma
Recomendamos que use un wok de 14 pulgadas o más pequeño con fondo plano. Asegúrese de que el fondo del wok se apoye de forma plana sobre la parrilla. Están disponibles en su tienda minorista local.
Sólo se deberá usar un wok con fondo plano. No use un anillo de soporte para wok. Colocar el anillo sobre el quemador o parrilla podrá hacer que el quemador funcione de forma inadecuada, produciendo niveles de monóxido de carbono que superan los estándares permitidos. Esto puede ser peligroso para su salud.
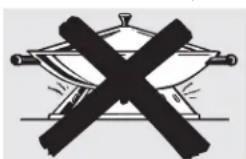
En Caso de Corte de Corriente
En caso de corte de corriente, puede encender los quemadores de gas superficiales de la cocina con un fósforo. Acerque un fósforo prendido al quemador, y luego presione y gire la perilla de control hasta la posición LITE. Tenga especial cuidado al encender los quemadores de esta manera.
Los quemadores que se estén usando cuando se produzca un corte de corriente eléctrica continuarán funcionando normalmente.
NOTA: Si el Bloqueo del Control de Gas está en uso en el momento del corte de corriente, los quemadores superficiales no se podrán encender.
Uso de los controles del horno.
(Es posible que las funciones y apariencias varían con relación a su modelo a lo largo del manual.)

flowchart
graph TD
    A["1: Oven Controls"] --> B["Bake Temp Recall"]
    C["2: Start On"] --> D["Broil Hi/Lo"]
    D --> E["14"]
    F["3: Box"] --> G["Clear Off"]
    G --> H["13"]
    I["4: Time Controls"] --> J["Kitchen Timer On/Off"]
    K["5: Clock"] --> L["Cooking Time"]
    M["6: Start Time"] --> N["Automatic Oven"]
    O["7: Cooking Time"] --> P["On/Off"]
    Q["8: Oven Light"] --> R["Steam Clean or +"]
    S["9: Oven Light"] --> T["Steam Clean or -"]
    U["10: Self Clean"] --> V["Steam Clean or +"]
    W["11: +"] --> X["Steam Clean or -"]
    Y["12: Clear Off"] --> Z["Steam Clean or +"]
    AA["13: Break down"] --> AB["Steam Clean or +"]
    AC["14: Air quality y ubicaciones en variar."] --> AD["15: Break down"]
Las funciones, apariencia y ubicaciones de las teclas pueden variar.
Funciones y Configuraciones del Control del Horno, Reloj y Temporizador (en algunos modelos)
1 Tecla Bake/ Temp Recall (Recordatorio de Hornear/ Temperatura)
Presione para seleccionar la función hornear.
Luz de Horneado
Titila mientras se encuentra en el modo editar - usted puede cambiar la temperatura del horno en este punto. Brilla cuando el horno se encuentra en el modo de horneado
2 Tecla Start/ On (Iniciar/ Encendido)
Presione para seleccionar hornear con la función de convección.
3 Pantalla Muestre
Muestra la hora del día, temperatura del horno, si el horno está en el modo hornear, asar o auto limpieza y los tiempos configurados para las funciones del temporizador o de horno automático. En la pantalla aparecerá PRE mientras se esté precalentando. Cuando el horno alcance la temperatura seleccionada, el control del horno emitirá un pitido y la pantalla mostrará la temperatura del horno.
Si "F- y un número o letra" titilan en la pantalla y el control del horno da una señal, esto indica un código de error de función.
Si su horno fue configurado para un funcionamiento por tiempo y se produce un corte de corriente, el reloj y las funciones programadas serán reiniciados.
La hora del día titilará en la pantalla cuando haya habido un corte de corriente. Reinicie el reloj.
Si la función código de error aparece durante el ciclo de auto limpieza, controle la traba de la puerta del horno. Es posible que la manija de la traba se haya movido, incluso aunque sólo haya sido levemente, de la posición de bloqueo. Asegúrese de que la traba sea movida hacia la derecha tanto como sea posible.
Presione la tecla Clear/ Off (Borrar/ Apagar). Permita que el horno se enfríe durante una hora. Coloque el horno nuevamente en funcionamiento. Si el código de error de función se repite, desconecte la corriente del horno y llame al servicio técnico.
4 Tecla Kitchen Timer On/ Off (Temporizador de Cocina Encendido/ Apagado)
Presione para seleccionar la función del contador. Luego presione las teclas + y - para ajustar el temporizador.
Luz del temporizador
Titila cuando se encuentra en el modo editar - usted puede cambiar el horario configurado en este punto. Brilla cuando el temporizador ha sido activado. Titila nuevamente cuando el temporizador finalizó hasta que el control es reiniciado.
5 Tecla de Reloj Para configur
Para configurar el reloj, presione la tecla dos veces y luego presione las teclas + y -. La hora del día titilará en la pantalla cuando el horno se encienda por primera vez.
6 Tecla Start Time (Hora de Inicio (en algunos modelos) Use junto con las teclas Cooking Time (Tiempo d
Cocción) o Self Clean (Auto Limpieza) para configurar el horno para que se inicie y detenga de forma automática en el tiempo que configuró.
Luz de Hora de Inicio
Titila mientras se encuentra en el modo editar – usted puede cambiar la hora de inicio en este punto. Brilla cuando la función fue activada.
7 Tecla Cooking Time (Tiempo de Cocción) (en algunos modelos)
Presione esta tecla y luego presione las teclas + y - para configurar la cantidad de tiempo durante el cual desee que su comida se cocine. El horno se apagará cuando el tiempo de cocción se haya terminado.
Luz de Tiempo de Cocción
Titila cuando se encuentra en el modo editar - usted puede cambiar el tiempo configurado en este punto. Brilla cuando la función ha sido activado. Titila nuevamente cuando el temporizador finalizó hasta que el control es reiniciado.
Funciones y Configuraciones del Control del Horno, Reloj y Temporizador
(en algunos modelos)

Luz del Horno Automática (en algunos modelos)
Ilumina en cualquier momento en que el horno haya sido programado usando las funciones Cooking Time (Tiempo de Cocción) o Start Time (Hora de Inicio).

Tecla Oven Light On/ Off (Encendido/ Apagado de la Luz del Horno)
Presione esta tecla para encender o apagar la luz del horno.

Tecla -
Golpecitos cortos sobre esta tecla reducirán el tiempo o la temperatura en pequeñas cantidades. Mantenga presionada la tecla para reducir el tiempo o la temperatura en grandes cantidades.

Tecla +
Golpecitos cortos sobre esta tecla incrementarán el tiempo o la temperatura en pequeñas cantidades.
Mantenga presionada la tecla para incrementar el tiempo o la temperatura en grandes cantidades.

Tecla Self Clean (Auto Limpieza) (en algunos modelos)
Presione esta tecla para seleccionar la función de auto limpieza. Consulte la sección Using the self-cleaning oven (Uso del horno de auto limpieza).
Luz de Limpieza
Titila mientras se encuentra en el modo editar – usted puede cambiar la cantidad de tiempo del ciclo de auto limpieza en este punto. Brilla cuando el horno se encuentra en el ciclo de auto limpieza. Luego del ciclo de auto limpieza, la luz se apagará. Destrabe la puerta.

Tecla Clear/ Off (Borrar/ Apagar)
Presione esta tecla para cancelar TODAS las operaciones del horno, excepto el reloj y el temporizador.

Tecla Broil Hi/ Lo (Asar Alto/ Bajo)
Presione esta tecla para seleccionar la función asar.
Luz para Asar
Titila mientras se encuentra en el modo editar—usted puede pasar de la función Broil (Asar) en Hi (Alto) a Lo (Bajo) en este punto. Brilla cuando el horno se encuentra en el modo Broil (Asar).
Luces Indicadoras (en algunas teclas)
El modo EDIT (Editar) dura varios segundos luego de haber presionado la última tecla. Start Time (Hora de Inicio) y
Cooking Time (Tiempo de Cocción) serán las únicas teclas encendidas si cualquiera de estas opciones es seleccionada.
(Ejemplo: Start Time (Hora de Inicio) es seleccionada con la tecla Bake (Hornear)—la tecla Start Time (Hora de Inicio) permanecerá encendida hasta que el reloj llegue al tiempo programado, en cuyo punto se apagará y la luz de la tecla Bake/Temp Recall (Recordatorio de Horneado Temperatura) se encenderá).

Tecla Steam Clean Pad (Limpieza al Vapor) (en algunos modelos)
Touch this pad for easier cleaning, light soiling of the oven cavity or door.
Perilla de la Temperatura del Horno (en algunos modelos)

La apariencia puede variar.
Presione la perilla OVEN TEMP (Temperatura del Horno) en la configuración que desee.
La luz cíclica del horno se enciende durante la cocción.
Uso del reloj y el temporizador.
Es posible que las funciones y apariencias varían con relación a su modelo a lo largo del manual.
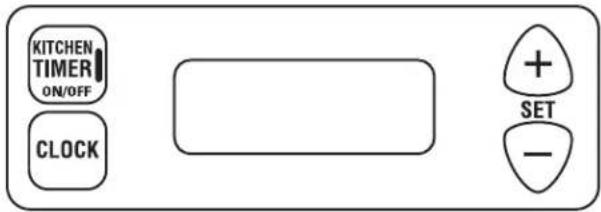
Usted tiene la opción de que el temporizador muestre la cuenta regresiva de la hora del día. En tal caso, el temporizador emitirá una señal al concluir el período para alertar que el tiempo finalizó.

Para Configurar el Reloj
NOTA: Al enchufar por primera vez la cocina o luego de un corte de corriente, toda la pantalla del Reloj/ Temporizador se iluminará.
1 Presione la tecla CLOCK (Reloj).
2 - Mantenga presionada la tecla + o - y la hora del día cambiará de a 10 minutos por vez. Para cargar la hora en minutes, dé a las teclas golpecitos cortos.
3 Presione la tecla CLOCK (Reloj) para iniciar el reloj.

Para Programar el Temporizador de la Cocina
1 Presione la tecla KITCHEN TIMER ON/OFF (Encendido/ Apagado del Temporizador de la Cocina).
2 Presione las teclas + o - para programar el temporizador. Golpecitos cortos en las teclas + o - cambian la configuración del temporizador de a un minuto por vez. Mantener presionada la tecla + incrementa la configuración de a 10 minutos por vez.
3 Una vez configurado el temporizador, presione la tecla KITCHEN TIMER ON/OFF
(Encendido/ Apagado del Temporizador de la Cocina) para iniciar el conteo.
A medida que el temporizador realice la cuenta regresiva, una señal dará una indicación cuando falte un minuto. Luego de la señal, la pantalla realizará la cuenta regresiva en segundos. Cuando el tiempo finalice, se emitirá una señal final. Presione la tecla KITCHEN TIMER ON/ OFF (Encendido/ Apagado del Temporizador de la Cocina) para detener la señal.
Para Cambiar o Cancelar la Configuración del Temporizador de la Cocina
Cuando el temporizador esté realizando la cuenta regresiva, utilice la tecla + o - para cambiar el tiempo restante, o presione la tecla KITCHEN TIMER ON/ OFF (Encendido/ Apagado del Temporizador de la Cocina) para detener el temporizador. El temporizador no se puede
cancelar, a menos que haya completado las instrucciones anteriores de "configuración del temporizador" en su totalidad.
Mostrar el Reloj Mientras el Temporizador de la Cocina Está Funcionando
Presionar la tecla CLOCK (Reloj) mientras el temporizador está funcionando no interferirá con el funcionamiento del temporizador; la pantalla cambiará para mostrar el reloj, pero el temporizador continuará la cuenta regresiva y aún dará la señal cuando el tiempo finalice.
Presione la tecla KITCHEN TIMER ON/OFF (Encendido/ Apagado del Temporizador de la Cocina) para modificar la pantalla a fin de que muestre el temporizador.
Para evitar posibles quemaduras, coloque los estantes en la posición deseada antes de encender el horno.

El horno tiene 5 posiciones de estantes. También cuenta con una posición especial del estante bajo (R) para cosas más grandes, tales como un pavo grande.
Antes de comenzar...
Los estantes poseen bloqueadores, de modo que al colocarlos correctamente sobre los soportes (A a E) se detendrán antes de salirse completamente y no se inclinarán.
Al colocar y retirar utensilios de cocina, empuje el estante hacia afuera del tope sobre el soporte del estante.
PRECAUCIÓN:
Al usar
un estante en la posición más baja (R), se deberá tener cuidado al empujar el estante varias pulgadas hacia afuera y luego, utilizando dos sostenedores de olla, empuje el estante hacia afuera sosteniendo
los lados. El estante está en una posición baja y usted podría sufrir una quemadura si coloca la mano en medio del mismo al empujar hacia afuera.
Para retirar el estante, empuje el mismo hacia usted, incline el extremo frontal hacia arriba y empuje hacia afuera.
Para hacer un reemplazo, coloque el extremo del estante (bloqueadores) en el soporte, incline el frente hacia arriba y empuje el estante hacia adentro.
NOTA: El estante no está diseñado para deslizarse hacia afuera en la posición especial del estante bajo (R).

natural_image
Illustration of a person lying on the ground with abstract lines above, no text or symbols presentLos artículos de plástico sobre la parte superior del horno se podrán derretir si se los deja demasiado cerca de la ventilación.
La apariencia y la ubicación de la ventilación varían.
Ventilación del Horno Superior
Su horno es ventilado a través de conductos en la parte trasera de la cocina. No bloquee estos conductos al cocinar en el horno – es importante que el flujo de aire caliente desde el horno y el aire fresco hacia el quemador del horno no sean interrumpidos. Evite tocar las aberturas de la ventilación o superficies cercanas durante el funcionamiento del horno y el asador – se podrán calentar.
Las manijas de las ollas y cacerolas se podrán calentar al estar en la parte superior del horno si se las ubica demasiado cerca de la ventilación..
No deje artículos de plástico o inflamables sobre la parte superior de la cocina; se podrán derretir o incendiarse si se encuentran demasiado cerca de la ventilación
No deje envases cerrados en la parte superior de la cocina. La presión en envases cerrados se podrá incrementar, lo cual podrá hacer que exploten.
Los artículos de metal se calentarán demasiado si se los deja sobre la parte superior de la cocina y podrán ocasionar incendios.

natural_image
Diagram of a mechanical assembly with gears and a tool, no visible text or symbolsCómo Configurar el Compartimiento para Asar (en algunos modelos)
El horno o parrilla no se podrán iluminar durante un corte de corriente.
Si se produce un corte de corriente mientras el horno está en uso, el quemador del horno se apaga. Esto se debe a que el flujo de gas se detiene de forma automática y no se reinicia hasta que regresa la corriente.
Luz del Horno
En algunos modelos, presione la tecla Oven Light (Luz del Horno) que se encuentra en el panel de control superior para encender o apagar la luz.
En algunos modelos, utilice el interruptor que se encuentra en el panel de control inferior para encender o apagar la luz.
Si su modelo cuenta con una traba para puerta, no bloquee la puerta con la traba durante el horneado o tostado. La traba se usa para la función de auto limpieza únicamente.

El horno cuenta con una posición especial para estante bajo (R) justo sobre la parte inferior del horno. Use esta posición cuando necesite espacio adicional para la cocción. Por ejemplo, cuando cocine un pavo grande. El estante no está diseñado para deslizarse y ser levantado en esta posición.


Al hornear cuatro capas de torta de una sola vez, use los estantes B y D. Coloque las ollas inferiores en la parte trasera del estante y las ollas superiores en la parte frontal del estante que se muestra, de modo que una olla no esté directamente sobre la otra.
Cómo Configurar el Horno Inferior para Horneado o Dorado
Su horno no está diseñado para la cocción con la puerta abierta.
1 Presione la tecla Bake (Hornear).
2 Touch the number pads to set the desired temperature.
3 Presione la tecla Start (Iniciar).
Aparecerá la palabra ON (Encendido) y 100°. A medida que el horno se caliente, la pantalla mostrará el cambio de temperatura. Cuando el horno alcance la temperatura que programó, sonarán un pitido.
Para cambiar la temperatura del horno durante el ciclo BAKE (Hornear), presione la tecla Bake
(Hornear) y luego las teclas numéricas para obtener la nueva temperatura.
4 Controle que la comida esté hecha en el tiempo mínimo de cocción de la receta. Cocine durante más tiempo si es necesario.
5 Presione la tecla Clear/ Off (Borrar/Apagar) cuando la cocción esté completa.
NOTA: Es posible que el ventilador se encienda y apague de forma automática para enfriar las partes interiores. Esto es normal, y es posible que el ventilador continúe funcionando incluso luego de que el horno se apague.
Precalentamiento y Ubicación de Ollas
Para evitar posibles quemaduras, coloque los estantes en la posición deseada antes de encender el horno.
Precaliente el horno si la receta lo requiere. Para calentar el horno previamente, ajuste la temperatura correcta. Es necesario precalentar el horno para el horneado por convección y para obtener buenos resultados al cocinar tortas, galletas, pasteles y panes. Para hornos sin una luz o tono indicador de precalentamiento, precaliente durante 10 minutos.
Los resultados del horneado serán mejores si las cacerolas de horneado se encuentran en el centro del horno la mayor cantidad de tiempo posible. Las cacerolas no deben tocarse mutuamente ni tocar las paredes del horno.
Si necesita usar dos estantes, escalone las ollas de modo que uno no esté directamente sobre el otro, y deje aproximadamente un espacio de 1 ½" entre las ollas, desde el frente, la parte trasera y los costados de la pared.
NOTA: No hornee ni almacene nada en ninguno de los hornos durante un ciclo de auto limpieza.
Papel de Aluminio
No use papel de aluminio para revestir el fondo del horno. El aluminio atrapará el calor inferior y alterará el funcionamiento del horno. El aluminio se puede derretir y dañar de forma permanente la parte inferior del horno. Los daños por uso inadecuado del papel de aluminio no están cubiertos por la garantía del producto.
Se podrá usar aluminio para evitar derrames, colocando una hoja sobre un estante inferior, varias pulgadas debajo de la comida. No use más aluminio que el necesario y nunca cubra totalmente el estante de un horno con papel de aluminio. Mantenga el aluminio a por lo menos 1 1/2" de las paredes del horno, para evitar una circulación deficiente del calor.
Humedad del Horno
A medida que el horno se caliente, el cambio de temperatura en el aire del horno podrá generar la formación de gotas de agua en el
vidrio de la puerta. Estas gotas son inofensivas y se evaporarán a medida que el horno se siga calentando.
Si su modelo cuenta con una traba para puerta, no bloquee la puerta con la traba durante el asado. La traba se usa para la función de auto limpieza únicamente. En algunos modelos, su cocina cuenta con un compartimiento para asar debajo del horno.

natural_image
Simple line drawing of a door frame with no text or symbolsCierre la puerta. Siempre ase con la puerta cerrada.
Cómo Programar el Horno Superior para Asar
Coloque la carne o pescado sobre una rejilla para asar en una cacerola para asar.
5 Presione la tecla Start (Iniciar). Se exhibe el recordatorio "CERRAR la puerta".
2 Use las posiciones sugeridas para repisas en la Guía para Asar.
6 Una vez terminado el asado, presione la tecla Clear/ Off (Borrar/ Apagar).
3 La puerta del horno se deberá cerrar durante el asado.
Sirva la comida de forma inmediata, y deje la olla afuera del horno para que se enfríe durante la comida para una limpieza más fácil.
4 Presione la tecla Broil Hi/ Lo (Asado Alto/Bajo) una vez para Asado Alto.
Use Lo Broil (Asado Bajo) para cocinar comidas como pavo o cortes gruesos de carne en forma completa sin que se doren en exceso.
Para cambiar a Lo Broil (Asado Bajo), presione la tecla Broil Hi (Asado Alto) nuevamente.
Guía para Asar
El tamaño, peso, grosor, corte, temperatura inicial y su preferencia de preparación afectarán los tiempos del asado. La finalidad de la guía es brindar una recomendación general y está basada en carnes con temperatura de refrigerador. Se recomienda precalentar la parrilla entre 5 y 10 minutos.
Para lograr resultados diferentes, ajuste la posición del estante o la configuración para asar.
Para un mayor dorado de la superficie y menor cocción interna:
- Precaliente la parrilla durante 10 minutos.
- Precaliente la parrilla durante 10 minutos.
- Use la configuración Broil Hi (Asado Alto).
Para un menor dorado externo de la carne que es completamente cocinada y los cortes gruesos de carne: - Use las posiciones de los estantes más alejadas de la parrilla.
- Use la configuración de asado bajo.

El horno cuenta con 6 posiciones de estantes. Generalmente se debería asar en el estante C o en uno superior. El estante R es para dorar.
| Comida | Preparación Deseada | Configuración para Asar | Posición del Estante | Comentarios |
| Bife (Bistecs o ham-burguesas de carne picada) | Jugoso - medio | Alto E Es | difícil cocino | r en el punto jugoso los bistecs de un grosor inferior a 1". Es posible que se cocinen antes de dorarse. Para evitar ondeados, corte la grasa por intervalos de 1". |
| Término medio | Alto D-E | |||
| Bien cocido A | to D | |||
| Pollo Alto | C Ase del lado de | la piel hacia | abajo primero. | |
| Pescado Alto D Sostenga y | gire con mucho | cuidado. | ||
| Costillas de cerdo | Alto D | Para evitar | ondeados, corte la grasa por intervalos de 1". | |
USDA recomienda las siguientes temperaturas mínimas internas y seguras:
- Carne cruda, cerdo, cordero, y bistec de ternera o costillas: 145°F de acuerdo con la medición de un termómetro de comida antes de retirar la carne de la fuente de calor. Por cuestiones de seguridad y calidad, deje descansar la carne durante por lo menos tres minutos antes de cortar o consumir.
- Carne picada cruda, cerdo, cordero o ternera: 160°F de acuerdo con la medición de un termómetro de comidas.
- Ave: 165°F de acuerdo con la medición de un termómetro de comidas.
Para más información visite: www.isitdoneyet.gov o llame a la línea gratuita de carnes y aves de USDA al 1-88-674-6854.
Cómo Configurar el Horno para Asar
Asar es cocinar la comida utilizando calor directamente desde arriba de la comida. Asar es cocinar la comida utilizando calor directamente desde arriba de la comida.
Su cocina cuenta con un compartimiento para asar debajo del horno.
Tanto la puerta del horno como la del compartimiento para asar se deberán cerrar durante el asado.
Dé vuelta la mayoría de las comidas una vez durante la cocción (a excepción de los filetes finos de pescado; aceite un lado, coloque dicho lado hacia abajo en la parilla para asar y cocine sin dar vuelta hasta que esté listo). Cocine las comidas durante aproximadamente la mitad del tiempo de cocción, dé vuelta la comida y luego continúe cocinando hasta el punto de cocción preferido.
7 Usted puede cambiar la distancia de la comida desde la fuente de calor, posicionando la cacerola y la rejilla para asar en una de las tres posiciones de los estantes del compartimiento para asar – A (parte inferior del compartimiento para asar), B (parte intermedia) y C (parte superior). Colocar comida cerca del quemador incrementa el dorado externo de la comida, pero también incrementa las salpicaduras y la posibilidad de que se incendien las grasas. Las comidas más gruesas y aquellas que se deben
cocinar completamente se deberían asar en un estante con la posición más alejada del asador.
2 No es necesario precalentar la parilla o el horno y esto puede producir malos resultados. Precalentar el asador permitirá mejores resultados para algunas comidas, pero no es necesario.
3 Si la carne posee grasa o cartilagos sobre el borde, corte tiras verticales sobre ambas a 2" de distancia. Si se desea, la grasa se podrá cortar, dejando una capa de un grosor de 1/8".
4 Ubique la comida en la rejilla y posicione la cacerola para asar en el estante apropiado del horno o del compartimiento para asar.
5 Cierre la puerta del horno y del compartimiento para asar.
6 Gire la perilla OVEN CONTROL (Temperatura del Horno) a BROIL (Asar).
7 Al finalizar de Asar, gire la perilla OVEN CONTROL (Temperatura del Horno) a OFF (Apagado). Retire la cacerola para asar del compartimiento para asar y sirva la comida de forma inmediata. Deje la cacerola fuera de la cocina para que se enfríe.
Sugerencias de la Guía del Compartimiento para Asar
Siempre use la cacerola y la rejilla para asar incluidas con su cocina. Fueron diseñadas para minimizar el humo y las salpicaduras, atrapando los jugos en la parte inferior cubierta de la cacerola.
Al cocinar en bistecs y trozos, corte la grasa de forma pareja alrededor de los extremos exteriores de la carne. Realice dicho corte en forma diagonal a través de la superficie de grasa exterior hasta el extremo de la carne. Use tenazas para dar vuelta la carne, a fin de evitar la perforación de la carne y la pérdida de jugos.
■ Si lo desea, marine las carnes o el pollo antes de asar. O cubra con salsa de barbacoa sólo los últimos 5 o 10 minutos.
Al ubicar la comida en la cacerola, no deje que los extremos con grasa cuelguen sobre los costados, ya que el goteo de grasa podría ensuciar el horno.
No es necesario precalentar el compartimiento para asar. Sin embargo, con cortes muy finos de comida, o para incrementar el dorado, precaliente si lo desea
■ Los bistecs congelados se podrá asar posicionando el estante en la siguiente posición inferior del estante e incrementando el tiempo de cocción dado en esta guía 1 ½ veces por lado.
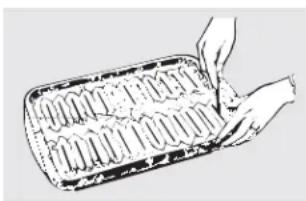
natural_image
Line drawing of a hand holding a tray with food items (no text or symbols)Recorte las aberturas del papel de aluminio al igual que en la rejilla.
Papel de Aluminio
Usted puede usar papel de aluminio para alinear la cacerola para asar y la rejilla para asar. Sin embargo, deberá moldear el papel de aluminio de forma ajustada a la rejilla y cortar las aberturas al igual que en la rejilla.
Uso del reloj y el temporizador.
No todas las funciones corresponden a todos los modelos.

Asegúrese que el reloj marque la hora correcta del día.
Para Configurar el Reloj
El reloj se deberá configurar en la hora correcta del día para que las funciones automáticas del temporizador del horno funcionen de forma adecuada. La hora del día no se puede cambiar durante un horneado por tiempo o el ciclo de auto limpieza.
1 Presione la tecla CLOCK (Reloj).
2 Presione las teclas + o -.
Si las teclas + o - no se presione dentro de un minuto luego de haber tocado la tecla CLOCK (Reloj), la pantalla vuelve a la configuración original. Si esto sucede, presione la tecla Clock (Reloj) dos veces y vuelva a ingresar la hora del día.
3 Presione la tecla START (Iniciar) hasta que la hora del día aparezca en la pantalla. Esto ingresa la hora e inicia el reloj.
Para controlar la hora del día cuando la pantalla muestra otra información, simplemente presione la tecla CLOCK (Reloj). La hora del día aparece hasta que otra tecla es presionada.
Para Apagar la Pantalla del Reloj
Si cuenta con varios relojes en su cocina, es posible que desee apagar la pantalla con la hora del día en su estufa.
7 Presione la tecla CLOCK (Reloj) una vez para apagar la pantalla de la hora del día. Aunque no la podrá ver, el reloj mantiene la hora correcta del día.
2 Presione la tecla CLOCK (Reloj) dos veces para regresar a la pantalla del reloj.

La función de temporizador sólo cuenta por minutos. La función Clear/ Off (Borrar/ Apagar) no afecta el temporizador.
Para Configurar el Temporizador (sólo el horno inferior)
El temporizador no controla el funcionamiento del horno. La configuración máxima del temporizador es 9 horas y 59 minutos.
1 Presione la tecla Kitchen Timer On/ Off (Encendido/ Apagado del Temporizador de Cocina).
2 Presione las teclas + o - hasta que la cantidad de tiempo que desee aparezca en la pantalla. El tiempo máximo que se puede ingresar en minutos es 59. Los tiempos superiores a 59 minutos se deberían cambiar a horas y minutos.
3 Presione la tecla Start (Iniciar). Luego de presionar la tecla Start (Iniciar), Set (Configuración) desaparece; esto le indica que el tiempo está en cuenta regresiva, aunque la pantalla no cambia hasta que haya pasado un minuto.
4 Cuando el contador llegue a :00, el control hará 3 pitidos seguidos por un pitido cada 6 segundos, hasta que se presione la tecla Kitchen Timer On/ Off (Encendido/Apagado del Temporizador de Cocina).
Si comete un error, presione la tecla Kitchen Timer On/ Off (Encendido/ Apagado del Temporizador de Cocina) y vuelva a comenzar.
No todas las funciones corresponden a todos los modelos.
Para Reiniciar el Temporizador
Si la pantalla aún muestra el tiempo restante, la puede cambiar presionando la tecla Kitchen Timer On/ Off (Encendido/ Apagado del Temporizador de Cocina), y luego presionando las teclas numéricas hasta que el tiempo que desea aparezca en la pantalla.
Si el tiempo restante no se encuentra en la pantalla (retraso del comienzo del reloj o tiempo de cocción aparecen en la pantalla), recuerde el tiempo restante presionando la tecla Kitchen Timer On/ Off (Encendido/Apagado del Temporizador de Cocina) y luego presionando las teclas numéricas para ingresar el nuevo tiempo que desee.
Para Cancelar el Temporizador
Presione la tecla Kitchen Timer On/ Off (Encendido/ Apagado del Temporizador de Cocina) dos veces.
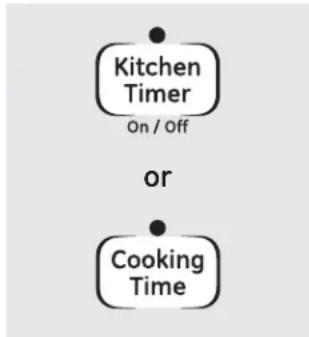
flowchart
graph TD
    A["Kitchen Timer\nOn / Off"] --> B["or"]
    B --> C["Cooking Time"]
Tonos de Fin de Ciclo (en algunos modelos)
Borre los tonos presionando la tecla de la función que está usando.
Corte de Corriente
Si la hora aparece titilando en la pantalla, significa que se produjo un corte de corriente. Reinicie el reloj.
Presione la tecla CLOCK (Reloj) una vez para reiniciar. Ingrese la hora del día correcta presionando las teclas numéricas apropiadas. Presione la tecla START (Inicio).
Uso de las funciones de horneado y dorado por tiempo. (en algunos modelos)
No bloquee la puerta del horno con la trabadurante la cocción por tiempo. La trabase usa para la auto limpieza únicamente.
NOTA: Las comidas que se echan a perder rápidamente, tales como leche, huevos, pescado, rellenos, ave y cerdo, no se deberán dejar reposar por más de 1 hora antes y después de la cocción. La temperatura ambiente estimula el desarrollo de bacterias nocivas. Asegúrese de que la luz del horno esté apagada, ya que el calor de la lámpara acelerará el crecimiento de bacterias nocivas.
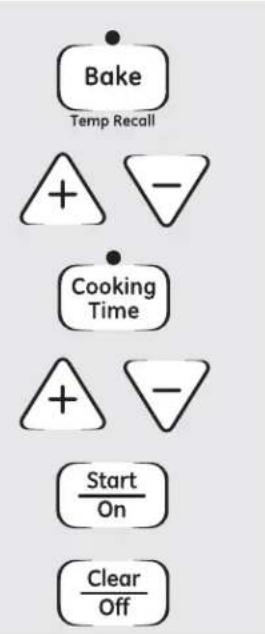
flowchart
graph TD
    A["Bake"] --> B["Temp Recall"]
    B --> C["+"]
    B --> D["-"]
    E["Cooking Time"] --> F["+"]
    E --> G["-"]
    H["Start On"] --> I["Clear Off"]
Cómo Configurar un Inicio Inmediato y Detención Automática
El horno superior se encenderá de forma inmediata y se cocinará por un período de tiempo seleccionado. Al final del tiempo de cocción, el horno se apagará automáticamente.
1 Presione la tecla Bake (Hornear).
2 Presione las teclas + o - para programar la temperatura del horno.
3 Presione la tecla Cooking Time (Tiempo de Cocción).
NOTA: Si su receta requiere calentar en forma previa, es posible que necesite tiempo adicional sobre el tiempo de cocción.
4 Presione las teclas + o - para programar el tiempo de horneado.
Aparecerá el tiempo de cocción que ingresó. (Si selecciona Cooking Time (Cocción por Tiempo) primero y luego ajusta Bake Temperature (Temperatura de Horneado), aparecerá en cambio la temperatura del horno.)
5 Presione la tecla Start (Iniciar).
La pantalla muestra la temperatura del horno que configuró o la cuenta regresiva de la cocción por tiempo. (La pantalla comienza con PRE si se está mostrando la temperatura del horno).
El horno continuará cocinando durante la cantidad de tiempo programada, y luego de apagará de forma automática.
6 Presione la tecla Clear/ Off (Borrar/ Apagar) para apagar la pantalla si es necesario.
Retire la comida del horno. Recuerde que aunque el horno se apague de forma automática, la comida que permanezca dentro de éste continuará cocinándose cuando el horno esté apagado.
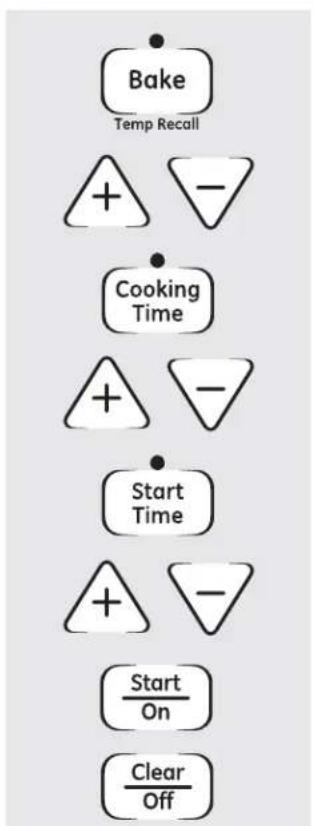
flowchart
graph TD
    A["Bake Temp Recall"] --> B["+"]
    B --> C["-"]
    C --> D["Cooking Time"]
    D --> E["+"]
    E --> F["-"]
    F --> G["Start Time"]
    G --> H["+"]
    H --> I["-"]
    I --> J["Start On"]
    J --> K["Clear Off"]
Cómo Configurar un Inicio Retrasado y Detención Automática
El horno se encenderá en el horario del día que configure, cocinará durante un período de tiempo específico y luego se apagará automáticamente.
Asegúrese que el reloj marque la hora correcta del día.
1 Presione la tecla Bake (Hornear).
2 Presione las teclas + o - para programar la temperatura del horno.
3 Presione la tecla Cooking Time (Tiempo de Cocción).
4 Presione las teclas + o - para configurar la cantidad de tiempo de cocción deseado.
5 Presione la tecla Delay Start (Retrasar Inicio).
6 Presione las teclas + o - para configurar la hora del día en que desea que el horno se encienda e inicie la cocción.
7 Presione la tecla Start (Iniciar).
NOTA: Un tono de atención sonará si está usando el horneado por tiempo y no se debe tocar la tecla Start /On (Inicio/Encendido).
NOTA: Si desea controlar los horarios configurados, presione la tecla Start Time (Hora de Inicio) para controlar la hora de inicio que configuró o presione la tecla Cooking Time (Tiempo de Cocción) para controlar el período de tiempo de cocción que programó.
Cuando el horno se encienda en la hora del día que configuró, la pantalla mostrará PRE hasta que alcance la temperatura seleccionada, y luego mostrará la temperatura del horno.
Al finalizar el tiempo de cocción, El horno se apagará y se escuchará el tono del final del ciclo.
Presione la tecla Clear/ Off (Borrar/ Apagar) para apagar la pantalla si es necesario.
Retire la comida del horno. Recuerde que aunque el horno se apague de forma automática, la comida que permanezca dentro de éste continuará cocinándose cuando el horno esté apagado.
Funciones especiales en el control del horno bajo.
GEAppliances.com
Su nuevo control de teclas táctiles cuenta con funciones adicionales que puede elegir usar. Las siguientes son las funciones y cómo las puede activar.
Los modos de funciones especiales sólo pueden ser activados mientras que la pantalla está mostrando la hora del día. Permanecen en la memoria del control hasta que se repiten los pasos.
Cuando la pantalla muestre su elección, presione la tecla Start/On (Iniciar/ Encendido). Las funciones especiales permanecerán en la memoria luego de un corte de corriente.
NOTA: La función Sabbath (Modo Sabático) y la función Thermostat Adjustment (Ajuste del Termostato) son también Funciones Especiales, pero se detallan de forma separada en las siguientes secciones.

flowchart
graph TD
    A["BAKE"] --> B["WARM"]
    C["DELAY START"] --> D["START"]
Corte de 12 Horas
Con esta función, en caso de olvidarse y dejar el horno prendido, el control apagará de forma automática el horno luego de 12 horas durante las funciones de horneado y luego de 3 horas durante la función asar.
Si desea desactivar esta función, siga los siguientes pasos.
1 Presione las teclas Bake and Broil Hi/Lo (Hornear y Asar Alto/ Bajo) al mismo tiempo durante 3 segundos, hasta que la pantalla muestra SF.
2 Presione la tecla Clock (Reloj). En la pantalla aparecerá ON (Encender) (apagado en 12 horas). Presione la tecla Clock (Reloj) en forma repetida hasta que la pantalla muestre OFF (Apagar) (sin apagado).
3 Touch the Start/On (Iniciar/Encendido) pad to activate the no shut-off and leave the control set in this special features mode.
Uso del Modo Sabático. (en algunos modelos)
(Diseñado para usar en el Descanso Judío y Feriados)
La función Sabbath (Sabático) se puede usar para hornear/ asar en el horno. No se puede usar para la cocción por asar, auto limpieza o Delay Start (Inicio Retrasado).
NOTA: La luz del horno se enciende de forma automática (en algunos modelos) cuando la puerta se abre, y se apaga cuando la puerta se cierra. La lámpara se puede retirar. Lea la sección de Reemplazo de la Luz del Horno. En modelos con interruptor de luz en el panel de control, la luz del horno se puede encender y dejar encendida.
CERTIFIED SABBATH MODE

MODO SABÁTICO CERTIFICADO

flowchart
graph TD
    A["Bake Temp Recall"] --> B["Clock"]
    C["Broil Hi / Lo"] --> D["Start On"]
    E["Bake Temp Recall"] --> F["+"]
    G["Start On"] --> H["-"]
Cuando la pantalla muestra ⊃-, el horno está configurado en Sabbath (Sabático). Cuando la pantalla muestra ⊃= el horno está configurado en horneado/ asado.
Cómo programar un Horneado/Asado Común
NOTA: Para entender cómo funciona el control del horno, utilice el horneado regular (sin modo sabático) antes de ingresar Sabbath (Modo Sabático).
Asegúrese que el reloj marque la hora correcta del día y que el horno esté apagado.
1 Presione las teclas Bake and Broil Hi/Lo (Hornear y Asar Alto/ Bajo), al mismo tiempo, hasta que la pantalla muestre SF.
2 Presione levemente la tecla Clock (Reloj) hasta que aparezca SAb en la pantalla.
3 Presione la tecla Start/On (Iniciar/ Encendido) y ⊃ aparecerá en la pantalla.
4 Presione la tecla Bake (Hornear). No se dará ninguna señal.
5 La temperatura de inicio preconfigurada se ajustará automáticamente en 350°. Presione levemente las teclas + o - para incrementar o reducir la temperatura por incrementos de 25° grados. La temperatura se puede configurar entre 170° y 550°. No se dará ninguna señal ni temperatura.
6 Presione la tecla Start/On (Iniciar/Encendido).
7 Luego del período de demora al azar de entre aproximadamente 30 segundos y 1 minuto, □c aparecerá en la pantalla, indicando que el horno está horneando/asando. Si □c no aparece en la pantalla, comience nuevamente en el Paso 4.
Para ajustar la temperatura del horno, presione la tecla Bake (Hornear) y presione las teclas + o - para incrementar o reducir la temperatura por incrementos de 25°. Presione la tecla Start/ On (Iniciar/ Encender).
NOTA: Las teclas Clear/ Off (Borrar/ Apagar) y Cooking Time (Tiempo de Cocción) están activas durante la función Sabbath (Sabático).
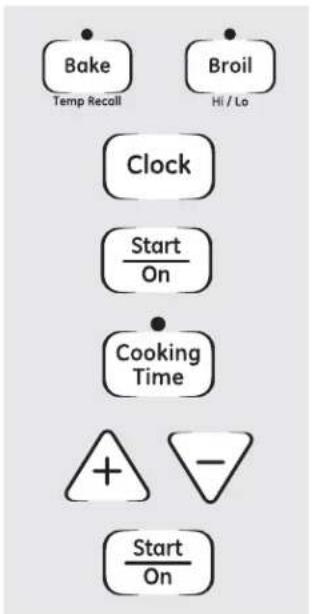
flowchart
graph TD
    A["Bake Temp Recall"] --> B["Clock"]
    C["Broil Hi/Lo"] --> B
    B --> D["Start On"]
    D --> E["Cooking Time"]
    E --> F["+ -"]
    F --> G["Start On"]
Cuando la pantalla muestra ▷ el horno está configurado en Sabbath (Sabático). Cuando la pantalla muestra ▷□ el horno está configurado en horneado/ asado.
Cómo Configurar Horneado/ Asado por Tiempo – Comienzo Inmediato y Detención Automática
NOTA: Para entender cómo funciona el control del horno, utilice el Immediate Start (Inicio Inmediato) y Automatic Stop (Detención Automática) (sin modo sabático) antes de ingresar Sabbath (Modo Sabático).
Asegúrese que el reloj marque la hora correcta del día y que el horno esté apagado.
Presione las teclas Bake and Broil Hi/Lo (Hornear y Asar Alto/ Bajo), al mismo tiempo, hasta que la pantalla muestra SF.
2 Presione levemente la tecla Clock (Reloj) hasta que aparezca SAb en la pantalla.
3 Presione la tecla Start/On (Iniciar/ Encendido) y ⊃ aparecerá en la pantalla.
4 Presione la tecla Cooking Time (Tiempo de Cocción).
5 Touch the + or - pads to set the desired length of cooking time between 1 minute and 9 hours and 59 minutes. The cooking time that you entered will be displayed
6 Presione la tecla Start/On (Iniciar/Encendido).
7 Presione la tecla Bake (Hornear). No se dará ninguna señal.
Presione las teclas numéricas e ingrese la temperatura deseada. No se dará ninguna señal ni temperatura.
9 Presione la tecla Start (Iniciar).
70 Luego del período de demora al azar de entre aproximadamente 30 segundos y 1 minuto, ⊃c aparecerá en la pantalla, indicando que el horno está horneando/asando. Si ⊃c no aparece en la pantalla, comience nuevamente en el Paso 7.
Para ajustar la temperatura del horno, presione la tecla Bake (hornear) y presione las teclas + o - para incrementar o reducir la temperatura por incrementos de 25°. Presione la tecla Start/ On (Iniciar/ Encender). Cuando la cocción haya finalizado, la pantalla cambiará de ∞ a ∩, indicando que el horno está en OFF (Apagado) pero aún está en Sabbath (Sabático). Retire la comida cocinada.

flowchart
graph TD
    A["CLEAR OFF"] --> B["BAKE"]
    B --> C["WARM"]
    C --> D["DELAY START"]
    D --> E["START"]
Cómo Salir el Modo Sabático
1 Presione la tecla Clear/ Off (Borrar/ Apagar).
2 Si el horno está cocinando, espere un período de retraso al azar de aproximadamente entre 30 segundos y 1 minuto, hasta que sólo → aparezca en la pantalla.
3 Presione las teclas Bake and Broil Hi/Lo (Hornear y Asar Alto/ Bajo), al mismo tiempo, hasta que la pantalla muestra SF.
4 Presione levemente la tecla Clock (Reloj) hasta que aparezca ON (Encender) u OFF (Apagar) en la pantalla. ON (Encender) indica que el horno se apagará de forma automática luego de 12
horas. OFF (Apagar) indica que el horno no se apagará de forma automática. Para acceder a una explicación de la función 12 Hour Shut-Off (Apagar Después de 12 Horas), cconsulte la sección de Funciones Especiales.
5 Presione la tecla Start/On (Iniciar/Encendido).
NOTA: Si se produjera un corte de luz mientras el horno se encuentra en Modo Sabático, éste se apagará automáticamente y permanecerá apagado incluso cuando regrese la luz. El control del horno se debe reiniciar.
Ajuste los termostatos - ¡Hágalo usted mismo!
Es posible que encuentre que su horno nuevo cocina de forma diferente al que reemplazó. Use su horno nuevo durante algunas semanas para familiarizarse con el mismo. Si aún piensa que su horno nuevo está demasiado caliente o demasiado frío, podrá ajustar el termostato usted mismo.
No use termómetros, tales como los que se venden en las tiendas, para controlar la temperatura del horno. Estos termómetros pueden variar entre 20 y 40 grados.
NOTA: Este ajuste no afectará el asado o las temperaturas de auto limpieza. El ajuste se guardará en la memoria luego de un corte de corriente. To Adjust the Lower Thermostat
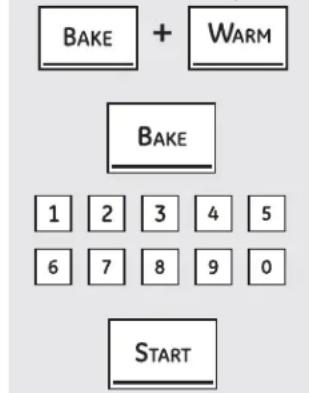
To Adjust the Lower Thermostat
1 Presione las teclas Bake and Broil Hi/Lo (Hornear y Asar Alto/ Bajo) al mismo tiempo durante 3 segundos, hasta que la pantalla muestre SF.
2 Presione la tecla Bake (Hornear). En la pantalla se muestra un número de dos dígitos.
Presione Bake (Hornear) una vez para reducir (-) la temperatura del horno, o dos veces para incrementar (+) la misma.
3 La temperatura del horno se puede ajustar hasta (+) 35° F (1.6° C) más caliente o (-) 35° F (1.6° C) más fría. Presione la tecla
+ para incrementar la temperatura por incrementos de 1 grado.
Presione la tecla - para reducir la temperatura por descensos de 1 grado.
4 Cuando haya realizado el ajuste, presione la tecla Start/On (Iniciar/Encendido).para regresar a la pantalla de la hora del día. Use su horno como lo haría normalmente.
NOTA: Este ajuste no afectará el asado o las temperaturas asado y limpieza automática. El ajuste se guardará en la memoria luego de un corte de corriente.

Para Ajustar el Termostato
1 Empuje la perilla OVEN TEMP (Temperatura del Horno) fuera del rango y observe la parte trasera. Para realizar un ajuste, aflaje (aproximadamente un giro), pero sin quitar completamente, los dos tornillos en la parte trasera de la perilla.
2 Con la parte trasera del tornillo hacia usted, sostenga el extremo exterior de la perilla con una mano y gire el frente de la misma con a otra, para incrementar la temperatura del horno; mueva el tornillo superior hacia la derecha.
Escuchará un sonido de clic por cada abertura que mueva la perilla. Para reducir la temperatura del horno, mueva el tornillo superior hacia la izquierda.
Cada clic cambiará la temperatura del horno en aproximadamente 10° F. (El rango es de más 60° F o menos 60° F desde la flecha).
Sugerimos que haga el ajuste de a un clic desde la configuración original y que controle el rendimiento del horno antes de hacer cualquier ajuste adicional.
3 Una vez realizado el ajuste, vuelva a ajustar los tornillos de modo que estén firmes, pero tenga cuidado de no ajustarlos en exceso.
4 Reemplace la perilla, enlazando el área plana de la misma con el hueco, y controle el funcionamiento.
¡El tipo de margarina afectará el rendimiento del horneado!
La mayoría de las recetas para hornear fueron desarrolladas utilizando productos con alto contenido de grasa tales como manteca o margarina (80% de grasa). Si se reduce la cantidad de grasa, es posible que la receta no dé los mismos resultados como con un producto con alto contenido de grasa.
Puede haber fallas en la preparación de la receta si las tortas, tartas, pasteles, galletas o dulces se preparan con productos untados con bajo contenido de grasa. Cuanto más bajo es el contenido de grasa del producto untado, más notorias son estas diferencias.
Los estándares federales requieren que los productos con la etiqueta "margarina" contengan por lo menos un 80% de grasa por peso. Por otra parte, los productos con bajo contenido de grasa poseen menos grasa y más agua. El alto contenido de humedad afecta la textura y el sabor de los productos horneados. Para un mejor resultado con sus viejas recetas favoritas, use margarina, manteca o productos para untar que contengan por lo menos un 70% de aceite vegetal.
ADVERTENCIA
RIESGO DE ENVENENAMIENTO CON COMIDA : Se pueden desarrollar bacterias
cuando la comida esté a una temperatura inferior a los 140°.
- Siempre comience con comida caliente. No use configuraciones en WARM (Caliente) para calendar comida fría.
- No caliente comida durante más de 2 horas.
El cajón calentador mantendrá las comidas calientes y cocinadas en la temperatura para servir. Siempre comience con comida caliente. No lo use para calentar comida fría excepto galletas crujientes, papas fritas o cereales secos. Si no se siguen estas instrucciones, se podrán producir enfermedades generadas en la comida.
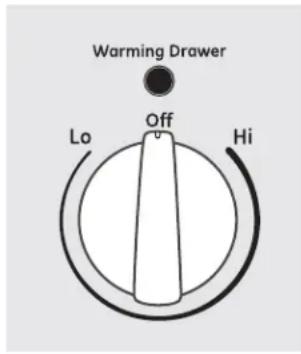
Perilla de Control (en modelos equipados con una perilla)
Presione y gire la perilla de control hacia cualquier configuración deseada.
NOTAS:
El cajón calentador no se puede usar durante un ciclo de auto limpieza.
El cajón calentador posee tres configuraciones: 1, 2 y 3. Estas configuraciones mantienen diferentes niveles de temperatura en el cajón calentador.
En algunos modelos, si se usa el horno el mismo tiempo que el cajón calentador, sólo se mostrarán las configuraciones del horno.
| Tecla Numérica | Configuración |
| 1 Bajo (tartas) | |
| 2 Medio (cazuelas) | |
| 3 Alto (carnes) |
Al Usar el Cajón Calentador
El cajón calentador mantendrá las comidas calientes y cocinadas en la temperatura para servir. Siempre comience con comida caliente. No lo use para calentar comida fría excepto galletas crujientes, papas fritas o cereales secos.
Deje que el cajón calentador se precaliente durante aproximadamente 25 minutos.
No coloque líquido ni agua en el cajón calentador.
- Todas las comidas colocadas en el cajón calentador se deberán cubrir con una tapa o papel de aluminio. Al calentar pasteles
o panes, la tapa se deberá ventilar para dejar que la humedad salga.
La comida se debería mantener caliente en su envase de cocción o transferirla a un plato con protección térmica para servir.
NOTA: Los envases de plástico o envoltorios de plástico se derretirán si están en contacto directo con el cajón, olla o utensilio caliente. Es posible que no pueda quitar el plástico derretido y esto no está cubierto por la garantía.
- Retire las cucharas para servir, etc., antes de colocar envases en el cajón calentador.
Cuadro de Selección de Temperatura
Para mantener calientes varios tipos de comidas diferentes, programe la temperatura en la configuración para comidas que necesitan el grado más alto.
La temperatura, tipo y cantidad de comida, y el tiempo afectarán la calidad de la comida.
La apertura repetida del cajón permite que el aire caliente salga y que la comida se enfríe.
Con cantidades grandes es posible que sea necesario usar una configuración del cajón calentador más alta y cubrir parte de los ítems de comida cocinados..
No use recipientes ni envoltorios de plástico.
| TIPO DE COMIDA | CONFIGURACIÓN DEL CONTROL |
| Cazuela MEDIO/2 | |
| Chili ALTO/3 | |
| Pizza MEDIO/2 | |
| Papas, horneadas | ALTO/3 |
| Tortilla de Papas | BAJO/1 |
| Wafles | BAJO/1 |
Para que Ítems Duros queden Crocantes
Coloque comida en platos o cacerolas en la parte inferior.
■ Precaliente en la configuración LO/1 (BAJO/1).
- Controle si está crocante luego de 45 minutos. Agregue tiempo según sea necesario.
Para Calentar Tazones y Platos para Servir
Para calentar tazones y platos para servir, configure el control en LO/1 (BAJO/1).
PRECAUCIÓN
Los platos estarán calientes. Use sostenedores de ollas o guantes al retirar platos calientes.
■ Use sólo platos resistentes al calor.
Si desea calentar porcelana fina, consulte al fabricante de los platos sobre el nivel de tolerancia máxima al calor.
- Puede calentar platos vacíos para servir mientras precaliente el cajón.
Si su modelo cuenta con una traba, nunca fuerce la manija de la traba. Forzar la manija dañará el mecanismo de bloqueo de la puerta. La puerta del horno deberá estar cerrada y todos los controles configurados de forma correcta para que el ciclo funcione adecuadamente.
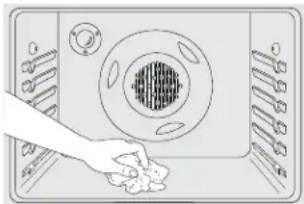
natural_image
Illustration of a hand placing a flower on a kitchen appliance panel (no text or symbols visible)Limpie cualquier suciedad
importante sobre el fondo del horno.
NO limpie
la junta
manualmente
len algunos
modelos, la junta
se encuentra en
la puerta interior).
HAGA una limpieza manual dentro de la puerta y del vidrio.
(a puerta interior).

HAGA una limpieza manual de la estructura del horno.
Antes de un Ciclo de Limpieza
Para el primer ciclo de limpieza, recomendamos ventilar su cocina con una ventana abierta o usar un ventilador o campana de ventilación.
Retire cualquier olla para asar, rejilla para asar, todos los utensilios de cocina, sonda y cualquier papel de aluminio dentro del horno, ya que no resistirán las altas temperaturas de limpieza.
NOTA:
Si el horno se encuentra equipado con estantes para horno de níquel, retire los mismos antes de comenzar con el ciclo de auto limpieza.
Si su horno está equipado con estantes para horno grises y cubiertos de porcelana, se podrán dejar dentro del horno durante el ciclo de auto limpieza.
La suciedad en la estructura frontal de la cocina y la parte externa de la junta de la estructura frontal se deberán limpiar en forma manual. Limpie estas áreas con agua caliente, almohadillas de viruta y jabón o limpiadores tales como Soft Scrub®.
Enjuague bien con agua caliente y seque. Limpie la puerta plana interior y el vidrio con agua y jabón y esponja.
No limpie la junta. El material de fibra de vidrio de la junta de la estructura frontal no resiste la abrasión. Es esencial que la junta permanezca intacta. Si observa que comienza a gastarse o deshilacharse, reemplace la misma.
Limpie cualquier derrame importante sobre el fondo del horno.
Asegúrese de que la tapa de la lámpara de luz del horno se encuentre en su lugar y que la luz del mismo esté apagada.
IMPORTANTE: La salud de algunas aves es extremadamente sensible a los humos emitidos durante el ciclo de auto limpieza de cualquier cocina. Coloque las aves en otra habitación bien ventilada.
NOTA:Tenga cuidado al abrir el horno superior una vez que el ciclo de auto limpieza haya finalizado. Es posible que el horno aún esté caliente.
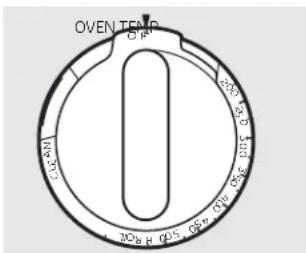
Cómo Configurar el Horno para su Limpieza (en modelos con la perilla OVEN
TEMP (Temperatura del Horno)
Siga las instrucciones en la sección Antes de un Ciclo de Limpieza.
1 Trabe la puerta.
2 Gire la perilla OVEN TEMP (Temperatura del Horno) para LIMPIAR.
El Tiempo de Limpieza es 4 horas y 20 minutos. La luz de auto limpieza se encenderá y permanecerá encendida hasta que el ciclo de auto limpieza esté completo.
El horno se apaga de forma automática cuando el ciclo de limpieza es completado.
3 Luego de un ciclo de limpieza, gire la
perilla OVEN TEMP (Temperatura del Horno) hacia la posición OFF (Apagado) y deslice la manija de la trabab hacia la izquierda hasta su límite.
Para cancelar el ciclo de auto limpieza, gire la perilla OVEN TEMP (Temperatura del Horno) hacia la posición de apagado y deslice la trabahacia la izquierda hasta su límite. Espere hasta que la luz de auto limpieza deje de titilar. Use el horno tanto como lo desee.
NOTA: Nunca fuerce la traba. Si el horno está demasiado caliente, no podrá deslizar la traba. Deje que el horno se enfríe.
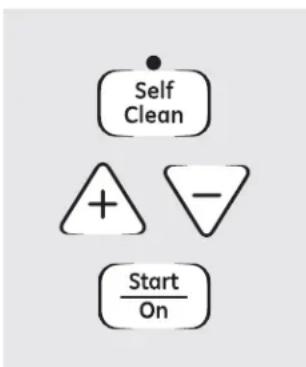
Cómo Programar el Horno para su Limpieza
Siga las instrucciones en la sección Antes de un Ciclo de Limpieza.
1 Trabe la puerta.
NOTA: Nunca fuerce la traba. Si el horno está demasiado caliente, no podrá deslizar la traba. Deje que el horno se enfríe.
2 Presione la tecla Self Clean (Auto Limpieza).
3 Presione las teclas + o - hasta que el Tiempo de Limpieza deseado se muestre.
El Tiempo de Limpieza es normalmente 4 horas y 20 minutos. Puede cambiar el Tiempo de Limpieza a cualquier tiempo entre 3 y 5 horas, dependiendo de la cantidad de suciedad en el horno.
4 Presione la tecla Start/On (Iniciar/ Encender).
El ciclo de auto limpieza comenzará automáticamente luego de que CLEAN (Limpieza) sea visualizado y que la cuenta regresiva de tiempo aparezca en la pantalla.
Mientras el horno está realizando la auto limpieza, puede presionar la tecla Clock (Reloj) para mostrar la hora del día. Para regresar a la cuenta regresiva de limpieza, presione la tecla Self Clean (Auto Limpieza).
El horno se apaga de forma automática cuando el ciclo de limpieza está completo, y 0:00 titilará en la pantalla.
5 Deslice la manija de la trabahacia la izquierda hasta el límite y abra la puerta.
Cuidado y limpieza de la cocina.
La puerta del horno deberá estar cerrada y todos los controles configurados de forma correcta para que el ciclo funcione adecuadamente.
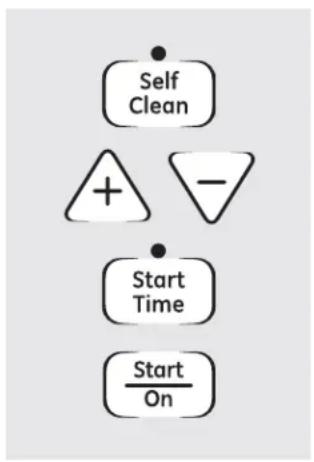
flowchart
graph TD
    A["Self Clean"] --> B["+"]
    B --> C["-"]
    C --> D["Start Time"]
    D --> E["Start On"]
Como Retrasar el Inicio de la Limpieza (en algunos modelos)
Puede programar el control del horno para demorar-iniciar el horno, limpiar durante un período de tiempo específico y luego apagarse de forma automática.
Asegúrese que el reloj marque la hora correcta del día.
Siga las instrucciones en la sección Antes de un Ciclo de Limpieza.
1 Trabe la puerta.
NOTA: Nunca fuerce la traba. Si el horno está demasiado caliente, no podrá deslizar la traba. Deje que el horno se enfríe.
2 Presione la tecla Self Clean (Auto Limpieza).
NOTA: Los quemadores superficiales se apagarán de forma automática cuando el ciclo de auto limpieza comience.
3 Presione las teclas + o - para programar Clean Time (Tiempo de Limpieza).
El Tiempo de Limpieza es normalmente 4 horas y 20 minutos. Puede cambiar el Tiempo de Limpieza a cualquier tiempo entre 3 y 5 horas, dependiendo de la cantidad de suciedad en
el horno. Si se desea un Tiempo de Limpieza diferente, presione las teclas + o - hasta que el Tiempo de Limpieza deseado sea visualizado.
4 Presione la tecla Start Time (Tiempo de Inicio).
Cambie el Tiempo de Inicio presionando las teclas + o -. La tiempo de inicio aparecerá en la pantalla.
5 Presione la tecla Start/On (Iniciar/Encender).
El ciclo de auto limpieza comenzará de forma automática en la hora programada.
Mientras el horno está realizando la auto limpieza, puede presionar la tecla Clock (Reloj) para visualizar la hora del día. Para regresar a la cuenta regresiva de limpieza, presione la tecla Self Clean (Auto Limpieza).
El horno se apaga de forma automática cuando el ciclo de limpieza está completo, y 0:00 titilará en la pantalla.
6 Deslice la manija de la trabahacia la izquierda hasta el límite y abra la puerta.
Para Detener un Ciclo de Limpieza (en algunos modelos)
Presione la tecla Clear/ Off (Borrar/ Apagar).
Espere hasta que el horno se haya enfriado por debajo de la temperatura de bloqueo para destrabar la puerta. No podrá abrir la puerta de inmediato, a menos que el horno se haya enfriado por debajo de la temperatura de bloqueo.
Después de un Ciclo de Limpieza
Es posible que observe ceniza blanca en el horno. Limpie la misma con una tela húmeda una vez que el horno se enfríe.
Si quedan manchas blancas, elimine las mismas con un estropajo con jabón y enjuague completamente con una mezcla de agua y vinagre.
Estos depósitos son normalmente un residuo de sal que no puede ser eliminado por el ciclo de limpieza.
Si el horno no se limpia luego de un ciclo de limpieza, repita el ciclo.
No puede configurar el horno para cocinar hasta que el mismo esté lo suficientemente caliente para que la puerta se desbloquee.
■ Mientras el horno está realizando la función de auto limpieza, puede presionar la tecla Clock (Reloj) para visualizar la hora del día. Para regresar a la cuenta regresiva de limpieza, presione la tecla Cooking Time (Tiempo de Cocción).
Si resulta difícil deslizar los estantes, aplique una cantidad reducida de aceite vegetal o aceite de cocina a una toalla de papel y limpie los extremos de los estantes del horno con una toalla de papel.
Asegúrese de que la corriente eléctrica esté apagada y que todas las superficies estén frías antes de limpiar cualquier parte de la cocina.

natural_image
Two black-and-white illustrations showing a person pushing a large block and another falling with a broken object (no text or symbols)ADVERTENCIA
Si la cocina es retirada para su limpieza, servicio técnico
o cualquier otra razón, asegúrese de que el dispositivo anti-volcaduras vuelva a ser colocado de forma correcta cuando la cocina sea instalada nuevamente. Si no se tiene esta precaución, se podrá ocasionar la caída de la cocina y provocar lesiones.
Para controlar que el soporte esté instalado y sujetado de forma adecuada, con cuidado incline la cocina hacia adelante. El soporte debería detener la cocina dentro de las 4 pulgadas. Si no lo hace, el soporte se deberá volver a instalar.
En caso de que la cocina sea empujada de la pared por alguna razón, siempre repita este procedimiento para verificar que la cocina esté correctamente asegurada por el soporte anti-volcaduras.
Si la cocina no cuenta con el soporte anti-volcaduras, llame al 1.800.626.8774 para recibir uno sin costo.
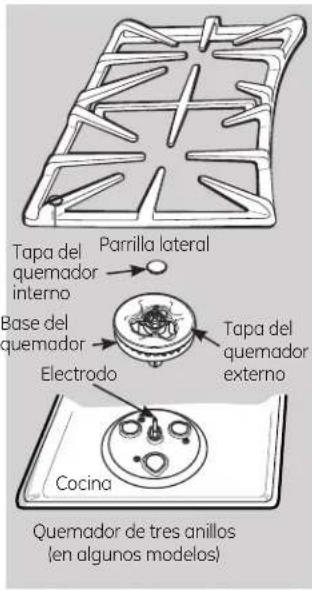
Ensambles del Quemador Sellado (en algunos modelos)
Coloque todos los controles en la posición OFF (Apagar) antes de retirar las partes del quemador.
Las tapas del quemador lateral redondo y las cabezas de los quemadores se pueden levantar, facilitando su limpieza. Los electrodos no se pueden retirar.
La cabeza del quemador central ovalado y los ensambles de las tapas se pueden levantar, facilitando su limpieza. El electrodo del quemador no se puede retirar.
La tapa interna del quemador de tres anillos se puede levantar para su limpieza. La tapa externa y el ensamble de la base se pueden levantar de la parte superior de la cocina como una sola pieza con propósitos de limpieza.
PRECAUCIÓN
No use la
parte superior de la cocina sin que todas las partes de los quemadores y las parrillas estén en sus respectivos lugares.

El electrodo del encendedor de la chispa es expuesto cuando la cabeza del quemador es retirada. Cuando un quemador se gira a LITE, todos los quemadores hacen chispa. No intente desensamblar ni limpiar un quemador mientras otro quemador está encendido. Es posible que se produzca una descarga eléctrica, lo cual podría hacer que vuelque un utensilio de cocina caliente.

PRECAUCIÓN No retire
la tapa del quemador del puente de la cabeza.

La cabeza del quemador del puente de tres anillos y los ensambles de las tapas se pueden levantar, facilitando su limpieza. El electrodo no se puede retirar.

APRECAUCIÓN: No use la parte superior de la cocina sin que todas las partes de los quemadores, cubetas de goteo (si están incluidas) y las parrillas estén en sus respectivos lugares.

Ensembles del Quemador Doble Estándar (en algunos modelos)
Para acceder a información sobre limpieza de quemadores sellados, consulte la siguiente sección. Las estufas con quemadores sellados no se levantan.
En modelos con quemadores dobles estándar, la parte superior de la estufa se levanta para fácil acceso.
Coloque todos los controles en OFF (Apagar) antes de retirar las partes del quemador y las cubetas de goteo (si se incluyen).
Las parrillas de los quemadores y las cubetas de goteo (si se incluyen) se pueden levantar, facilitando la limpieza.
Los agujeros de las cabezas de los quemadores de su cocina se deben mantener limpios en todo momento, para un correcto encendido y una llama pareja y sin obstrucciones.
Debería limpiar las cabezas de los quemadores de forma rutinaria, especialmente luego de derrames importantes, que podrían bloquear las aberturas.
Limpie las cabezas de los quemadores. Si se producen derrames importantes, retire las cabezas de los quemadores de la cocina. Los quemadores se pueden levantar para su limpieza. Levante la estufa y luego levante las cabezas de los quemadores.
Para retirar comida quemada, moje las cabezas de los quemadores en una solución de detergente líquido suave y agua caliente. Moje la cabeza del quemador por entre 20 y 30 minutos.
Si se trata de manchas difíciles, use un limpiador de las marcas Soft Scrub® o Bon Ami®. Enjuague bien para retirar cualquier rastro del limpiador que podría obstruir las aberturas de las cabezas de los quemadores.
No use estropajos, ya que obstruirán las aberturas de las cabezas de los quemadores y rayarán sus superficies. Si los agujeros son obstaculizados, limpie los mismos con una aguja de coser o un alambre doblado.
Antes de volver a colocar la cabeza del quemador, sacuda el exceso de agua y luego seque completamente colocando la cabeza en un horno caliente durante 30 minutos. Luego vuelva a colocar la cabeza en la estufa, asegurándose de que esté colocada y nivelada correctamente.
Controle el patrón de la llama de cada quemador. Si las llamas "saltan" (no están parejas", limpie los agujeros nuevamente con una aguja de coser o un alambre doblado.

Cubetas de Goteo (si se incluyen)
Retire las parrillas y levante y retire las cubetas de goteo. Las cubetas de goteo se pueden limpiar en un lavavajillas o en forma manual.
Al reemplazar las cubetas de goteo, asegúrese de que estén en la posición correcta.
Coloque las mismas en un envase cubierto. Agregue 1/4 de taza de amoníaco y deje en remojo durante varias horas o durante la noche. Lave, enjuague bien y seque.
APRECAUCIÓN: No limpie las cubetas de goteo en el horno de auto limpieza.
La tapa del quemador está correctamente colocada.
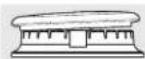
La tapa del quemador NO está correctamente colocada.
Cabezas del quemador (en algunos modelos)
Las cabezas del quemador (en algunos modelos) se pueden retirar. Simplemente levante las mismas de la parrilla para su limpieza.
Cabeza de tres anillos (en algunos
Cabeza del quemador
Base del quemador
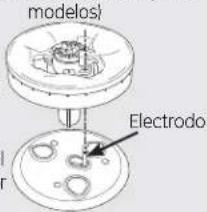
Asegúrese de que el anillo de la cabeza del quemador esté posicionado sobre el electrodo y que la cabeza del quemador esté completamente insertada dentro de la base del quemador. Una pequeña brecha entre la base y la cabeza es normal.
Cabeza frontal derecha (en algunos modelos), cabeza frontal izquierda, cabeza trasera derecha y cabeza trasera izquierda

Asegúrese de que la ranura de la cabeza del quemador esté posicionada sobre el electrodo.
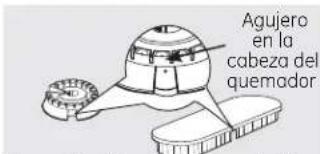
El ensamble de la cabeza/tapa oval del quemador se puede retirar. Simplemente levante la misma de la cocina para su limpieza. Use una aguja de coser o precintos para desbloquear el pequeño agujero en el quemador.
Tapas, Bases y Cabezas de Quemadores
Antes de retirar las tapas y cabezas de los quemadores (en algunos modelos), recuerde su tamaño y ubicación. Reemplace los mismos en la misma ubicación luego de la limpieza.
NOTA: No use estropajos ni polvos para fregar para limpiar las partes del quemador.
Tapas de los Quemadores
Levantar cuando estén frías. Lave las tapas de los quemadores en agua caliente con jabón y enjuague con agua limpia. Puede fregar con una base de fregado plástica para eliminar partículas de comida quemadas.
Quemador de tres anillos (en algunos modelos)
La capa exterior del quemador de tres anillos no se puede retirar. Sólo la tapa redonda del centro se puede retirar para su limpieza.
Para limpiar las bases de los quemadores, use agua con jabón y una base para fregar de plástico. Limpie con una tela húmeda.
Asegúrese de que no ingrese agua a las bases de los quemadores. Permita que se sequen totalmente antes de usar.
Cabezas de los Quemadores (en algunos modelos) y Ensamble de la Tapa/Cabeza del Quemador Ovalado (Centro)
Las cabezas de los quemadores y el ensamble de la cabeza/tapa del quemador ovalado se pueden retirar. Simplemente levante las mismas de la cocina para su limpieza.
Para un encendido adecuado, asegúrese de que el agujero pequeño en la sección que coincide con el electrodo se mantenga abierto. Puede usar una aguja de coser o un precinto para desbloquearlo.
Las hendiduras de las cabezas de los quemadores se deben mantener limpias en todo momento para obtener una llama pareja y sin obstrucción.
Las partes bloqueadas o sucias de los quemadores o los electrodos no permitirán que el quemador funcione de forma correcta.
Cualquier derrame en o alrededor de un electrodo se deberá limpiar de forma cuidadosa. Tenga cuidado de no golpear un electrodo con nada duro, ya que se podrá dañar
Limpie las cabezas de los quemadores de forma rutinaria, especialmente luego de derrames importantes que podrían bloquear las aberturas. Levantar cuando esté fría.
Para eliminar la comida quemada, moje las cabezas de los quemadores en una solución de detergente líquido suave y agua caliente por entre 20 y 30 minutos. Cuando se trate de manchas más difíciles, use un cepillo de dientes.
Luego de la limpieza
Antes de colocar las tapas y cabezas de los quemadores (en algunos modelos) y el ensamble de la cabeza/ tapa nuevamente, escurra el exceso de agua y luego seque las mismas totalmente, programando el horno para que esté caliente por 30 minutos.
Reemplazo de las Cabezas de los
Quemadores (en algunos modelos)
Reemplace las cabezas de los quemadores sobre los electrodos en la parte superior de la cocina, en las ubicaciones correctas de acuerdo con su tamaño. Hay una cabeza de quemador pequeña, una mediana, una grande y una extra grande.
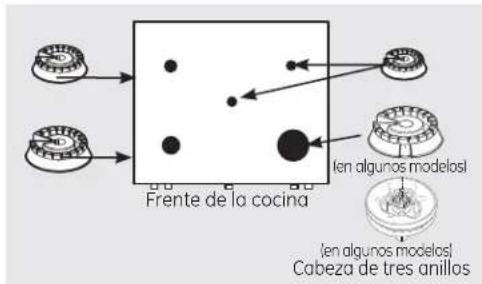
Asegúrese de que la ranura o agujero (dependiendo del modelo) del quemador esté posicionado sobre el electrodo.

Ensamble de la Cabeza/ Tapa del Quemador Ovalado (Centro)
Reemplace el ensamble de la cabeza/ tapa ovalada (centro) sobre el electrodo en la parte superior de la cocina.

Tapas
Reemplace las tapas de tamaño coincidente en las bases y cabezas de los quemadores.
Asegúrese de que las cabezas (en algunos modelos) y las tapas sean reemplazadas en las ubicaciones correctas.
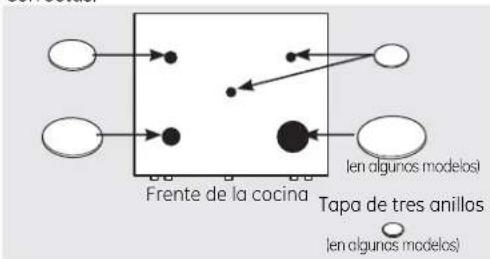
flowchart
graph TD
    A[" "] --> B["•"]
    C[" "] --> D["•"]
    E[" "] --> F["•"]
    G[" "] --> H["•"]
    I[" "] --> J["•"]
    K[" "] --> L["•"]
    M[" "] --> N["•"]
    O[" "] --> P["•"]
    Q[" "] --> R["•"]
    S[" "] --> T["•"]
    U[" "] --> V["•"]
    W[" "] --> X["•"]
    Y[" "] --> Z["•"]
    AA[" "] --> AB["•"]
    AC[" "] --> AD["•"]
    AE[" "] --> AF["•"]
    AG[" "] --> AH["•"]
    AI[" "] --> AJ["•"]
    AK[" "] --> AL["•"]
    AM[" "] --> AN["•"]
    AO[" "] --> AP["•"]
    AQ[" "] --> AR["•"]
    AS[" "] --> AT["•"]
    AU[" "] --> AV["•"]
    AW[" "] --> AX["•"]
    AY[" "] --> AZ["•"]
    BA[" "] --> BB["•"]
    BC[" "] --> BD["•"]
    BE[" "] --> BF["•"]
    BG[" "] --> BH["•"]
    BI[" "] --> BJ["•"]
    BK[" "] --> BL["•"]
    BM[" "] --> BN["•"]
    BO[" "] --> BP["•"]
    BQ[" "] --> BR["•"]
    BS[" "] --> BT["•"]
    BU[" "] --> BV["•"]
    BW[" "] --> BX["•"]
    BY[" "] --> BZ["•"]
    CA[" "] --> CB["•"]
    CC[" "] --> CD["•"]
    CE[" "] --> CF["•"]
    CG[" "] --> CH["•"]
    CI[" "] --> CJ["•"]
Cuidado y limpieza de la cocina.

natural_image
Pure geometric line drawing of a 3D grid-like structure with no text or symbolsLa apariencia puede variar. Las parrillas se pueden limpiar en un lavavajillas,

Parrillas de los Quemadores
Su cocina cuenta con tres parrillas dobles de tipo profesional. Estas parrillas poseen posiciones específicas. Para una estabilidad máxima, estas parrillas sólo se deberán usar en su posición adecuada; no se pueden cambiar de izquierda a derecha o del frente a atrás. Para mayor conveniencia, los lados inferiores de las parrillas izquierda y derecha están marcadas "LEFT FRONT" (Frente Izquierdo) y "RIGHT FRONT" (Frente Derecho). Asegúrese de que la posición frontal de ambas parrillas esté en el frente. La parrilla intermedia posee un arco en el frente. Asegúrese de que la parte arqueada esté hacia el frente de la cocina. Además, la parrilla intermedia está apoyada por las parrillas izquierda y derecha y debe ser instalada al final para mayor estabilidad.
Limpieza
Levante las mismas cuando estén frías. Las parrillas se deben lavar de forma regular y, por supuesto, luego de derrames. Lave las parrillas con agua caliente y jabón y enjuague con agua limpia. Al reemplazar las parrillas, asegúrese de que estén posicionadas de forma segura sobre los quemadores. Reemplace las parrillas de modo que se formen arcos continuos con las líneas centrales de las tres parrillas.
No utilice el quemador durante un período de tiempo prolongado sin un utensilio de cocina sobre la rejilla. El acabado de la parrilla se puede resquebrajar si no hay un utensilio de cocina que absorba el calor.
Para liberarse de comidas quemadas, coloque las parrillas en un envase cubierto. Agregue una taza de 14 de amoníaco y deje que permanezcan mojadas varias horas durante la noche. Lave, enjuague bien y seque.
Aunque son durables, las parrillas perderán gradualmente su brillo, más allá del mejor cuidado que les pueda dar. Esto se debe a la exposición continua a altas temperaturas. Observará esto antes con parrillas de color claro.
NOTA: No limpie las parrillas en el horno de auto limpieza.
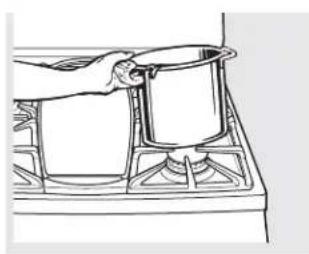
natural_image
Line drawing of a hand pouring liquid into a pan with two containers (no text or symbols)Superficie de la Parte Superior de la Cocina
A fin de evitar daños sobre la superficie esmaltada de porcelana sobre la parte superior de la cocina y para evitar que quede sin brillo, limpie los derrames de inmediato. La comida con mucho ácido (tomates, chucrut, jugos de fruta, etc.) o las comidas con alto contenido de azúcar pueden dejar un espacio sin brillo si no se limpian.
Cuando la superficie esté fría, lave y enjuague. Para otros derrames tales como salpicaduras de grasa, lave con agua y jabón una vez que la superficie se haya enfriado. Luego enjuague y pula con una tela seca.
NOTA: Para las cocinas de acero inoxidable, consulte la sección sobre superficies de acero inoxidable.

natural_image
Line drawing of a car air conditioner unit with cooling fins and ventilation slots (no text or symbols)Ventilaciones de Aire del Horno
Nunca bloquee las ventilaciones (aberturas de aire) de la cocina. Las mismas brindan las entradas y salidas de aire que son necesarias para que la cocina opere de forma correcta con la combustión adecuada.
Las aberturas de aire se encuentran ubicadas en la parte trasera de la cocina, en la parte superior e inferior de la puerta del horno, y en la parte inferior de la cocina.

natural_image
Line drawing of a gas stove burner with heat sinks and mounting feet (no text or symbols)La apariencia y la ubicación de la ventilación varían.

Panel de Control Superior (en algunos modelos)
En modelos equipados de este modo, bloquee las teclas táctiles antes de limpiar.
Consulte la información de Bloqueo del Control de Gas en las funciones Especiales de la sección de control de su horno en este manual.
Limpie cualquier salpicadura con una tela húmeda.
También puede usar un limpiador de vidrios.
Elimine la suciedad importante con agua caliente y jabón. No use ningún tipo de material abrasivo.
Vuelva a activar las teclas táctiles luego de la limpieza.

Perilla del quemador superficial


natural_image
Simple line drawing of a knob and handle mechanism (no text or symbols)Perilla del horno inferior (en algunos modelos)
Panel de Control Inferior (Panel del Colector Frontal) y Perillas
Una buena idea es limpiar el panel de control luego de cada uso del horno. Use una tela húmeda para limpiar o enjuagar. Para limpiar, use jabón suave y agua o una solución que sea mitad de vinagre y mitad de agua. Para enjuagar, use agua limpia. Pula en seco con una tela suave.
No use limpiadores abrasivos, limpiadores líquidos fuertes, almohadillas para fregar de plástico y limpiadores de horno en el panel de control; dañarán el acabado.
No intente inclinar las perillas empujando las mismas hacia arriba o hacia abajo o colgando una toalla u otras cargas de este tipo. Esto puede dañar el eje de la válvula de gas.
Las perillas de control se pueden retirar para facilitar la limpieza.
Asegúrese de que las perillas estén en las posiciones OFF (Apagado) y empuje las mismas desde los soportes de forma derecha para su limpieza.
Las perillas se pueden limpiar en un lavavajillas o también se pueden lavar con agua y jabón. Asegúrese de que los interiores de las perillas estén secos antes de volver a colocarlas.
Reemplace las perillas en la posición OFF (Apagado) para asegurar una ubicación adecuada.
Las piezas metálicas se pueden limpiar con agua y jabón. No use estropajos, abrasivos, amoníacos, ácidos o limpiadores para hornos comerciales. Seque con una tela seca.
NOTE: Las perillas no se pueden cambiar de lugar. Asegúrese de volver a instalar las perillas en sus ubicaciones originales.
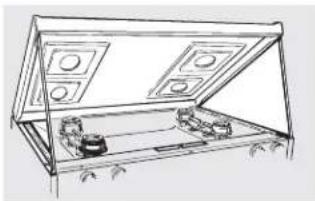
natural_image
Line drawing of an open storage cabinet with internal compartments and control panels (no text or symbols)Algunos modelos cuentan con varas de soporte dual que sostendrán la estufa mientras limpia su parte inferior.
Elevador de la Estufa (en modelos con quemadores gemelos estándar)
Limpie el área debajo de la estufa con frecuencia. La suciedad acumulada, especialmente la grasa, se puede incendiar.
Para facilitar la limpieza, la estufa puede ser levantada.
NOTA: No levante la estufa en modelos con quemadores sellados. Levantar la cocina puede producir daños y un funcionamiento inapropiado de la estufa.
Para levantar la estufa:
1 Asegúrese de que los controles de la superficie estén apagados.
2 Retire las parrillass.
3 Tome los dos quemadores frontales y levántelos.
Limpie debajo de la estufa con agua caliente y jabón y una tela seca. Si retiró los quemadores durante la limpieza, asegúrese de que se encuentren correctamente posicionados al reemplazarlos.
Luego de la limpieza, baje la estufa (evite pincharse los dedos).
Cuidado y limpieza de la cocina.
Parte Inferior del Horno
La parte inferior del horno posee un acabado de porcelana esmaltada. Para facilitar la limpieza, proteja el fondo del horno de derrames excesivos colocando una hoja de galletas en el estante que está debajo del estante sobre el cual está cocinando. Esto es particularmente importante al hornear una tarta de fruta u otras comidas con alto contenido de ácido. Los rellenos de fruta caliente u otras comidas con alto contenido de ácido (tales como tomate, chucrut y salsas con vinagre o jugo de limón) pueden ocasionar fisuras y daños sobre la superficie de porcelana esmaltada y se deberán limpiar inmediatamente.
Para limpiar derrames, use agua y jabón, un limpiador abrasivo o una almohadilla para fregar llena de jabón. Enjuague bien para eliminar cualquier resto de jabón antes de la función de auto limpieza.

Empuje los bloqueos de bisagra hacia abajo para desbloquear

natural_image
Technical illustration of a mechanical assembly with a tool and magnified detail view (no text or symbols)Posición de retiro

Puerta del Horno desmontable (en algunos modelos)
La puerta es muy pesada. Tenga cuidado al retirar y levantar la puerta.
No levante la puerta usando la manija.
Para retirar la puerta:
1 Abra la puerta totalmente.
2 Empuje los bloqueos de bisagra hacia abajo en dirección a la estructura de la puerta, hasta la posición desbloqueada. Es posible que necesite una herramienta tal como un destornillador pequeño de punta plana.
3 Firmemente tome ambos lados de la puerta por la parte superior
4 Cierre la puerta hasta la posición de retiro de la misma, que está en la mitad entre la posición de detención para asar y totalmente cerrada.
5 Levante la puerta hacia arriba y hacia afuera hasta que el brazo de la bisagra esté fuera de la ranura.
Para reemplazar la puerta:
Firmemente tome ambos lados de la puerta por la parte superior.
2 Con la puerta en el mismo ángulo que en la posición de retiro, apoye la hendidura en la ranura de la bisagra. La abertura en el brazo de la bisagra deberá estar totalmente apoyada en la parte inferior de la ranura.
3 Abra la puerta totalmente. Si la puerta no se abre totalmente, la hendidura no está correctamente apoyada en el extremo inferior de la ranura.
4 Empuje los bloqueos de bisagra contra la estructura frontal de la cavidad del horno en la posición de bloqueo.
5 Cierre la puerta del horno.

Empuje los bloqueos de la bisagra hacia arriba para bloquear.

natural_image
Line drawing of a person holding a book or document, partially enclosed in a frame (no text or symbols)Levante la puerta hacia ar-riba y afuera de las bisagras.
Levante la Puerta del Horno (en algunos modelos)
La puerta del horno se puede retirar, pero es pesada. Es posible que necesite ayuda para retirar y reemplazar la puerta.
Para retirar la puerta:
1 Abra la misma unas pulgadas hasta la posición de detención específica que sostendrá la puerta abierta.
2 Sostenga la misma de manera firme sobre cada lado y levante la puerta hacia arriba y afuera de las bisagras.
NOTA: Asegúrese de no colocar las manos entre la bisagra y el marco de la puerta
del horno, ya que la bisagra podría hacer presión bruscamente y lastimar los dedos.
Para reemplazar la puerta:
7 Asegúrese de que las bisagras se encuentren en la posición de detención específica. Posicione las ranuras en la parte inferior de la puerta directamente sobre las bisagras.
2 Haga descender la puerta de forma lenta y pareja sobre ambas bisagras al mismo tiempo. Si las bisagras hacen presión bruscamente sobre el marco, empuje las mismas hacia afuera.
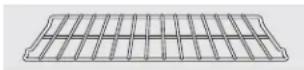
Estantes del Horno
Todas las parrillas del horno se podrán limpiar a mano con un limpiador abrasivo o viruta. Luego de la limpieza, enjuague las parrillas con agua limpia y seque con una tela limpia. Las parrillas del horno grises y cubiertas de porcelana podrán permanecer en el horno durante el ciclo de auto limpieza sin sufrir ningún tipo de daños. Las parrillas del horno de níquel podrán
permanecer en el mismo durante el ciclo de auto limpieza, pero perderán su lustre y será difícil deslizarlas. Será necesario engrasar todos los costados de la parrilla del horno con una capa suave de aceite vegetal luego de limpiarlas a mano o en el horno. Esto ayudará a que las parrillas se puedan deslizar con facilidad fuera de horno.

natural_image
Simple diagram of a rectangular frame with a central black rectangle and diagonal lines, no text or symbols present.La junta está diseñada con un espacio en la parte inferior para permitir la circulación de aire adecuada.
No frote ni limpie la junta de la puerta; posee una resistencia extremadamente baja a la abrasión.
Si observa que la junta se vuelve caliente, se deshilacha o daña de cualquier forma y si quedó fuera de la puerta, deberá reemplazar la misma.
Limpieza de la Puerta
Para limpiar el interior de la puerta:
No permita que el excedente de agua entre a ningún agujero o ranuras de la puerta.
Aplique detergente para lavar platos sobre cualquier salpicadura que haya sobre el vidrio debido al horneado. Use el filo de una navaja del lado seguro para despejarlo. Luego limpie el vidrio con una tela con jabón para eliminar cualquier residuo y seque.
El área fuera de la junta se puede limpiar con una almohadilla para fregar de plástico con jabón.
Para limpiar el exterior de la puerta:
Use agua y jabón para limpiar completamente la parte superior, los lados y el frente de la puerta del horno. Enjuague bien. También puede usar un limpiador de vidrio para limpiar el vidrio de la parte exterior de la puerta.
El derrame de adobo, jugos de fruta, salsas de tomate y materiales glaseados que contengan ácidos pueden ocasionar descoloración y se deberán limpiar de inmediato. Cuando la superficie esté fría, lave y enjuague.
No use limpiadores para horno, polvos de limpieza o abrasivos duros sobre la parte exterior de la puerta.
Superficies de Acero Inoxidable (en algunos modelos)
No use virutas de acero; éstas dañarán la superficie.
Esto ayudará a mantener el brillo y el aspecto de su cocina de acero inoxidable.
A fin de evitar cualquier descoloración y/o manchas de grasa, recomendamos limpiar y remover cualquier derrame, manchas y grasa de la cocina luego de su uso.
Es importante usar una tela suave o toalla de papel cada vez que se limpia la cocina, a fin de evitar ralladuras.
Lea con cuidado las instrucciones que aparecen en el reverso del Realzador de Brillo para un mejor resultado.
Instrucciones de Limpieza:
- Retire las parrillas.
-
Lave usando agua caliente y jabón: Tela húmeda suave o toalla de papel (evite usar agua en exceso).
Limpie la superficie en la dirección del veteado (siguiendo las líneas de acero). Enjuague y estruje una tela suave o una toalla de papel y seque la cocina. -
Aplique un desengrasante que no contenga hidróxido de sodio o un limpiador de acero inoxidable (siga las instrucciones).
-
Repita los pasos 2 a 4 tantas veces como sea necesario.
5. Vuelva a colocar los estantes.
Siga las instrucciones para cualquier superficie de acero inoxidable de su cocina.
NO LO USE para limpiar la parte superior de la cocina o las partes de acero inoxidable:
- Lejía cáustica (hidróxido de sodio) o limpiadores que contengan este químico
- Almohadillas duras o de estropajo
- Materiales o químicos abrasivos
Para consultar sobre la compra de limpiadores o pulidores para el artefacto de acero inoxidable, o para buscar la ubicación del vendedor minorista más cercano a su hogar, comuníquese al número gratuito:
Centro Nacional de Piezas
800.626.2002 (EE.UU.)
800.661.1616 (Canadá)
GEApplianceParts.com (EE.UU.)
www.GEAppliances.ca (Canadá)
Cuidado y limpieza de la cocina.
ADVERTENCIA
Riesgo de Descarga Eléctrica o Incendio: Antes de reemplazar la lámpara de luz del
horno, desconecte la conexión eléctrica del horno del fusible principal o del panel del disyuntor. Si esto no se cumple, se podrá producir una descarga eléctrica o incendio.
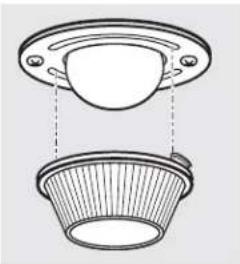
natural_image
Technical line drawing of a mechanical component with two views: top shows a circular opening, bottom shows a flanged base (no text or symbols)Reemplazo de la Luz del Horno (en algunos modelos)
Asegúrese de dejar que la tapa de la luz y la lámpara se enfríen completamente.
Para retirar la tapa:
Doble los cristales en dirección contraria a las agujas del reloj aproximadamente un cuarto.
No retire ningún tornillo para retirar la tapa.
2 Reemplace la lámpara por una para electrodomésticos de 40 watts o por una lámpara de luz halógena de dos patas, según corresponda.
Para reemplazar la tapa:
1 Line up tabs of lens in front of tabs on housing and rotate clockwise to engage.
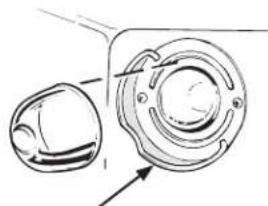
natural_image
Technical line drawing of a mechanical component with no visible text or symbolsAmplio suspensor de tapa
Reemplazo de la Luz del Horno (en algunos modelos)
PRECAUCIÓN
Antes
de reemplazar la lámpara de luz del horno, desconecte la conexión eléctrica de la cocina del fusible principal o del panel del disyuntor. Asegúrese de dejar que la tapa de la luz y la lámpara se enfrien completamente.
La lámpara de luz del horno está cubierta por una tapa de vidrio extraíble que es sostenida por un cable que la cruza. Retire la puerta del horno, si lo desea, para llegar a la tapa fácilmente.
Para retirar.
Sostenga una mano debajo de la tapa de modo que no se caiga al ser liberada. Con los dedos en la misma mano, empuje firmemente el suspensor de la tapa del cable. Levante la tapa.
No retire ningún tornillo para retirar la tapa.
2 No toque la lámpara caliente con una tela húmeda. Reemplace la lámpara por una para electrodomésticos hogareños de 40 watts.
Para reemplazar la tapa:
Coloque la misma ranura del receptáculo de la luz. Empuje el cable hacia adelante hasta el centro de la tapa, hasta que entre en el lugar correcto. Una vez en su lugar, el cable sostiene la tapa firmemente. Asegúrese de que el cable se encuentre en la hendidura que está en el centro de la tapa.
2 Conecte el cable de electricidad a la cocina.


natural_image
Pure mechanical diagram showing a lever mechanism with no text or symbolsPanel de Almacenamiento Extraíble (en algunos modelos)
El panel de almacenamiento se podrá retirar para limpiar debajo de la cocina.
Para retirar:
Levante la parte inferior del panel suavemente para destrabar el panel de las lengüetas en la base de la estufa. Empuje la parte inferior del panel hacia adelante hasta que los clics con resorte sean liberados en la parte superior del panel.
Para reemplazar:
Inserte las dos ranuras en la parte inferior del panel en las dos lengüetas en la base de la estufa, y presione la parte superior del panel hacia adelante para enganchar los clics con resorte.
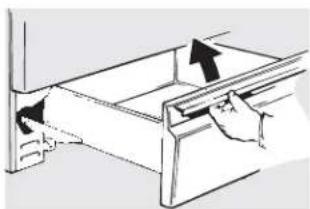
natural_image
Diagram of a mechanical assembly with arrows indicating direction (no text or symbols)El cajón de almacenamiento se podrá retirar para limpiar debajo de la cocina.
Cajón de Almacenamiento Extraíble (en algunos modelos)
El cajón de almacenamiento es un buen lugar para guardar utensilios de cocina y panadería. No guarde plásticos ni materiales inflamables en el cajón.
El cajón de almacenamiento se podrá retirar para limpiar debajo de la cocina. Limpie el cajón de almacenamiento con una tela o esponja húmeda. Nunca use abrasivos duros ni almohadillas para fregar.
Para retirar el cajón de almacenamiento:
1 Empuje el cajón hacia afuera hasta que se detenga.
2 Incline el frente del cajón hacia arriba y afuera de la cocina.
Para retirar el cajón de almacenamiento:
1 Configure los puntos de detención en la parte trasera del cajón sobre las detenciones en la cocina.
2 Deslice el cajón de forma pareja y derecho hacia atrás, de modo que los rieles de la cocina queden ajustados.

Bandeja para Asar y Rejilla
Luego de asar, retire la bandeja para asar del compartimiento para asar. Retire la rejila de la bandeja. Con cuidado vierta la grasa de la bandeja en un recipiente adecuado. Lave y enjuague la bandeja para asar y la parrilla en agua caliente con un estropajo para fregar plástico lleno de jabón.
Si la comida se quemó, rocíe la rejilla con detergente mientras está caliente y cubra con toallas de papel mojadas o con un paño de cocina. Remajar la bandeja eliminará las comidas quemadas.
La bandeja para asar y la rejilla se podrán limpiar con un limpiador de horno comercial.
La bandeja para asar y la rejilla también se podrán limpiar en un lavavajillas.
No guarde la bandeja para asar y la rejilla en ninguna parte de la cocina.
PRECAUCIÓN: No limpie la
bandeja para asar ni la rejilla en el horno de auto limpieza.
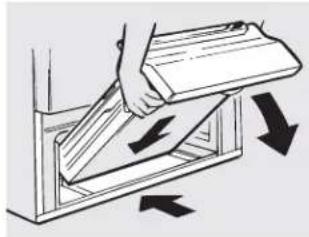
natural_image
Illustration of a hand using a tool to lift a window frame with directional arrows indicating motion (no text or symbols)Cajón asador extraíble (en algunos modelos)
Para remover:
7 Cuando el asador este frio, retire a rejilla y la bandeja.
2 Jale el cajón hacia afuera hasta que se detenga, después regréselo cerca de una pulgada.
3 Sujete la jaladera, levante y jale el cajón hacia afuera. Limpie el cajón con agua caliente y jabón.
Para reemplazarlo:
Sujete el cajón en la misma posición tal como lo removió en la estufa, después baje el cajón y empújelo hasta su posición de cerrado.
ADVERTENCIA: Riesgo
de incendio: No guarde los utensilios de cocina y para hornear en el cajón del asador. Esto podría provocar un incendio
PRECAUCIÓN
Durante el ciclo de limpieza
al vapor, el fondo del horno se vuelve lo suficientemente caliente como para ocasionar quemaduras. Espere hasta que el ciclo esté terminado (30 minutos) antes de limpiar las superficies interiores del horno. Si esto no se cumple, se podrá sufrir quemaduras.
El ciclo Steam Clean (Limpieza al Vapor) facilita la limpieza de suciedad leve en el interior del horno de porcelana y sobre la puerta de vidrio.
La cocina estará a temperatura ambiente antes de comenzar el ciclo Steam Clean (Limpieza al Vapor). Si el horno está demasiado caliente, en la pantalla se visualizará "Hot" (Caliente) y el ciclo no se activará hasta que el horno se enfríe.
El ciclo Steam Clean (Limpieza al Vapor) funciona mejor en nuevos derrames o suciedades. La comida quemada es más difícil de eliminar.
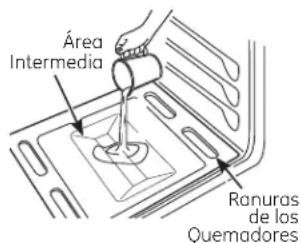
Vierta 1 taza de agua en el piso del horno.



Para Comenzar el Ciclo de Limpieza al Vapor:
7 Retire los estantes y accesorios de la cavidad del horno. No coloque utensilios u otros artículos en el horno durante el Ciclo de Limpieza al Vapor.
2 Vierta 1 taza (8 oz.) de agua a temperatura ambiente en el área intermedia del fondo del horno. No agregue soluciones de limpieza ni químicos de ningún tipo al agua. No vierta agua sobre las ranuras de los quemadores en el fondo del horno.
3 Cierre la puerta.
4 Presione la tecla Steam Clean (Limpieza al Vapor); luego presione Start/ On (Iniciar/ Encender).
5 Un ciclo de 30 minutos comenzará la cuenta regresiva en la pantalla.
6 Cuando el ciclo Steam Clean (Limpieza al Vapor) está completo, la luz de Steam Clean (Limpieza al Vapor) titilará. Presione la tecla Clear/Off (Borrar/ Apagar) y abra la puerta.
7 El fondo del horno y el agua restante aún estarán muy calientes al final del ciclo. Esto es normal.
8 Retire la suciedad fregando con un cepillo o almohadilla de nylon. Se podrá usar una almohadilla de estropajo con jabón únicamente sobre el interior del horno de porcelana. El uso de almohadillas abrasivas rayarán la puerta de vidrio. No limpie la suciedad ni el agua de la junta de la puerta.
9 Retire el agua restante con una esponja o tela seca.
10 Deje la puerta abierta para que se seque con el aire.
NOTAS IMPORTANTES:
- Si un ciclo de limpieza al vapor es iniciado sin agua, presione la tecla Clear/ Off (Borrar/ Apagar) para finalizar dicho ciclo. Espere a que la cocina se enfríe a temperatura ambiente antes de verter agua en el área intermedia e iniciar otro ciclo de vapor.
- No abra la puerta durante el ciclo Steam Clean (Limpieza al Vapor). Un pitido de error sonará al abrir la puerta.
- Presione la tecla Clear/ Off (Borrar/ Apagar) en cualquier momento para finalizar el ciclo.
- Si permanecen depósitos minerales en el fondo del horno luego de la limpieza, use una tela o esponja mojada en vinagre para eliminar los mismos.
- Es posible que gotee algo de agua desde la parte inferior de la puerta del horno. Si esto sucede, limpie la misma al finalizar el ciclo.
- La junta de la puerta podrá estar mojada cuando el ciclo Steam Clean (Limpieza al Vapor) finalice. Esto es normal. No limpie la junta.
- Si aún permanece suciedad luego de la limpieza del horno, consulte la sección de Cuidado y limpieza de la Cocina, en el Manual del Propietario para opciones adicionales.
Instrucciones de Instalación
Cocina
Ante cualquier duda, llame al 1.800-GE-CARES o visite nuestro sitio web en: GEAppliances.com
En el Commonwealth de Massachusetts
- Este producto debe ser instalado por un plomero licenciado o un mecánico gasista..
- Al usar válvulas de cierre de gas tipo balón, deberán ser del tipo de manija T.
- Al usar un conector de gas flexible no deberá exceder los 3 pies..
ANTES DE COMENZAR
Lea estas instrucciones en su totalidad y atentamente. Esta cocina se deberá instalar de acuerdo con los códigos locales, o en la ausencia de códigos locales, con el Código de Gas Combustible Nacional, ANSIZ223.1/NFPA.54, última edición. En Canadá, la instalación deberá ser conforme con el Código de Instalación de Gas Natural actual, CAN/CGA-B149.1 o el Código de Instalación de Propano actual, CAN/CGA-B149.2, y con los códigos locales cuando corresponda. Esta cocina fue diseñada y certificada por CSA International, de acuerdo con ANSI Z21.1, última edición y con la Canadian Gas Association (Asociación de Gas de Canadá) CAN/CGA-1.1 última edición.
Al igual que con cualquier electrodoméstico que utilice gas y genere calor, existen ciertas precauciones de seguridad que se deberán seguir. Encontrará estas precauciones en la sección de Información Importante de Seguridad, en el frente de este manual. Lea las mismas detenidamente.
- IMPORTANTE Conserve estas instrucciones para uso del inspector de electricidad local.
- IMPORTANTE – Cumpla con todos los códigos y ordenanzas gubernamentales..
- Nota para el Instalador – Guarde estas instrucciones con el electrodoméstico una vez completada la instalación.
- Nota para el Consumidor – Guarde este Manual del Propietario y las Instrucciones de Instalación para referencia futura.
- Nota – Este electrodoméstico deberá estar conectado a tierra de forma adecuada.
- Servicio Técnico – El diagrama eléctrico se encuentra en un sobre adjunto al reverso de la cocina.
- La correcta instalación del producto es responsabilidad del instalador.
- Si se producen fallas en el producto debido a una instalación inadecuada, la Garantía no cubrirá las mismas.
Casa Rodante – Requisitos de Información Adicional Esta cocina se deberá instalar conforme con el Estándar de Construcción y Seguridad para Hogar, Título 24 CFR, Pieza 3280 (anteriormente Estándar Federal para las Construcciones en Casas Móviles, use el estándar para las Instalaciones de Casas Fabricadas, ANSI A225, 1/NFPA 501A o con códigos locales).
Las instalaciones en casas móviles requieren: - Cuando la cocina es instalada en una casa móvil, se deberá asegurar al piso durante el tránsito. Cualquier método para asegurar la cocina es adecuado, siempre y cuando se realice conforme con los estándares que figuran a continuación.
PARA SU SEGURIDAD
No guarde ni use materiales combustibles, gasolina u otros vapores inflamables y líquidos cerca de éste ni de otros electrodomésticos.
Si huele gas:
1 Abra las ventanas.
2 No toque los enchufes eléctricos.
3 Extinga cualquier llama abierta.
4 Inmediatamente llame a su proveedor de gas.
HERRAMIENTAS NECESARIAS

MATERIALES NECESARIOS
- Válvula de cierre para tubería de gas
- Sellador para junta de tubería o UL – cinta para tubería aprobada con Teflón*, resistente a la acción de gases naturales o LP
- Conector para artefacto metálico flexible (1/2" I.D.) Se recomienda una longitud de 5 pies para una fácil instalación, pero otras longitudes son aceptables. Nunca use un conector viejo al instalar una cocina nueva.
- Adaptador para unión cónica para la conexión al suministro de gas (3/4" o 1/2" NPT x 1/2" I.D.)
- Adaptador para unión cónica para la conexión al regulador de presión en la cocina (1/2" o ½" NPT x ½" I.D.))
- Detector de pérdida de líquido o agua con jabón.
- Tornillo de compresión o sujetador de manga de 12 " O.D. (sólo para pisos de concreto).
*Teflón: Marca registrada por DuPont
ADVERTENCIA
INSTRUCCIONES PARA UNA INSTALACIÓN SEGURA
Lea estas instrucciones en su totalidad y atentamente. Si no se siguen estas instrucciones se podrá producir descarga eléctrica, incendio, lesiones graves o la muerte..
■ Una instalación, ajuste, alteración, servicio o mantenimiento inadecuados pueden ocasionar lesiones o daños sobre la propiedad. Consulte este manual. Para recibir asistencia o información adicional, consulte a un instalador calificado, agencia de servicio, fabricante (comerciante) o proveedor de gas.
■ Nunca vuelva a usar conectores flexibles viejos. El uso de conectores flexibles viejos puede ocasionar goteras y lesiones personales. Siempre use conectores flexibles NUEVOS al instalar electrodomésticos a gas.
■ La prueba de goteras del electrodoméstico se deberá realizar de acuerdo con las instrucciones del fabricante.
■ Retire todo el material de embalaje y material escrito del horno antes de conectar el gas y el suministro de corriente a la cocina.
■ No intente utilizar el horno de esta cocina durante un corte de corriente (sólo en modelos de encendido eléctrico).
■ Solicite que su cocina sea instalada por un instalador calificado.
■ Su cocina deberá estar correctamente conectada a tierra de acuerdo con los códigos y ordenanzas locales o, en ausencia de códigos locales, de acuerdo con el Código Nacional de Electricidad (National Electric Code), (ANSI/NFPA NO. 70., última edición). En Canadá, la conexión a tierra se deberá realizar de acuerdo con la Parte 1 del Código de Electricidad de Canadá CSA C22.1 y/o los códigos locales. En esta sección, consulte las Conexiones Eléctricas.
■ Antes de instalar su cocina sobre linóleo y cualquier otro revestimiento de piso sintético, asegúrese de que el revestimiento del piso resista los 180° F sin contraerse, combarse o descolorarse. No instale la cocina sobre alfombras, a menos que haya una hoja de contrachapado de un grosor de 14 " o un aislante similar entre la cocina y la alfombra.
Asegúrese de que los gabinetes, el piso y los revestimientos de pared alrededor de la cocina puedan resistir el calor de hasta 200°F generado por la cocina.
■ Evite usar gabinetes sobre la cocina. Para reducir el riesgo ocasionado por la extensión de las llamas abiertas de los quemadores en funcionamiento, instale una campana de ventilación sobre la cocina que se proyecte hacia adelante por lo menos a 5" del frente de los gabinetes.
La campana de ventilación deberá estar construida de una lámina de metal de no menos de 0.0122" de grosor. Instale sobre la parte superior de la cocina, dejando un espacio de no menos de 1/4" entre la campana y la parte inferior del gabinete de material combustible o metal. La campana deberá ser por lo menos tan ancha como el electrodoméstico y estar centrada sobre el mismo. El despeje entre la superficie de cocción y la superficie de la campana de ventilación NUNCA DEBE SER INFERIOR A 24".
EXCEPCIÓN: La instalación de un horno microondas o electrodoméstico de cocción que figuren en la lista sobre la parte superior de la cocina deberá cumplir con las instrucciones de instalación provistas con el electrodoméstico.
■ Si se ubican gabinetes sobre la cocina, deje un espacio mínimo de 30" entre la superficie de cocción y la parte inferior de los gabinetes desprotegidos.
Si no se puede mantener una distancia de 30" entre la superficie de cocción y el material combustible en la parte superior o los gabinetes de metal, proteja la parte inferior de los gabinetes sobre la parte superior de la cocina con no menos de 1/4" de cartulina común aislante cubierta con una lámina de metal de no menos de 0.0122" de grosor. El despeje entre la superficie de cocción y los gabinetes protegidos NUNCA DEBE SER INFERIOR A 24".
La distancia vertical desde el plano de la superficie de cocción hasta la parte inferior de los gabinetes adyacentes de la parte superior que se extienden más cerca que 1" al plano de los lados de la cocina no deberá ser inferior a las 18". (Consulte la ilustración de Dimensiones y Espacios en esta sección).
No instale este producto con una campana con cortina de aire u otra campana de cocina que funcione llevando aire a la placa de cocción. El flujo de aire podrá interferir en el funcionamiento de los quemadores de gas, produciendo riesgos de incendio o explosión.
APRECAUCIÓN: - Sólo la serie de marca de Café Advantium® de GE o los hornos microondas de calidad excepcional están diseñados para su instalación sobre el horno Café de GE. Es posible que las superficies sobre una cocina a gas se calienten. La instalación de cualquier otro horno excepcional sobre un horno Café de GE puede producir temperaturas superficiales que pueden ocasionar quemaduras.
DIMENSIONES Y ESPACIOS
Deje el espacio adecuado entre la cocina y las superficies combustibles adyacentes. Estas dimensiones se deberán cumplir para un uso seguro de su cocina. La ubicación del tomacorriente de electricidad y la abertura de la tubería (consulte Ubicaciones del Gas y el Tomacorriente Eléctrico) se podrán ajustar para cumplir con los requisitos específicos.
La cocina se deberá ubicar con un espacio (nivelado) de 0" con relación a la pared trasera.
Para la instalación de la isla, Modelo JGSS05, deje un espacio mínimo de 2-1/2" entre la abertura y el extremo trasero de la mesada y un mínimo de 3" entre la abertura y los extremos laterales de la mesada.

| Altura | Modelo |
| 36" | JGSS05 |
| 46-7/8" | JGBS04JGBS07 |
| 44" | RGB524 |

UBICACIÓN
No ubique la cocina donde pueda haber corrientes de aire fuertes. Cualquier abertura en el piso o la pared detrás de la cocina deberán estar selladas. Asegúrese de que las aberturas alrededor de la base de la cocina que brindan aire fresco para la combustión y ventilación no estén obstruidas por alfombras ni piezas de carpintería.
Su cocina, al igual que muchos otros artículos del hogar, es pesada y se puede colocar sobre revestimientos de piso suaves tales como alfombras o vinilo acolchonado. Tenga cuidado al mover la parilla en este tipo de pisos. Se recomienda que se sigan las siguientes instrucciones simples y económicas para proteger su piso.
La cocina se debería instalar sobre una lámina de madera contrachapada (o material similar). Cuando el revestimiento del piso finaliza frente a la cocina, el área donde la cocina se apoyará deberá ser de contrachapado, al mismo nivel o más alto que el revestimiento del piso.
Esto permitirá que la cocina pueda ser movida para su limpieza o reparaciones técnicas. Además, asegúrese de que el revestimiento de su piso resista los 180° F. (Consulte la sección de Instrucciones para una Instalación Segura).
Asegúrese de que el revestimiento de pared alrededor de la cocina pueda resistir el calor (de hasta 200° F) generado por la cocina. (Consulte la sección de Instrucciones para una Instalación Segura).
¡IMPORTANTE!
Remove all tape and packaging. Make sure the burners are properly seated and level.
Take the accessory pack out of the oven and/or drawer.
Check to be sure that no range parts have come loose during shipping.
CONVERTIR A GAS LP (o convertir nuevamente a gas natural de LP)
Esta cocina deja la configuración de fábrica para uso con gas natural. Si desea convertir a gas LP, la conversión deberá ser realizada por un instalador de gas LP calificado.
Las instrucciones de conversión y los orificios LP se pueden encontrar adjuntos a la cocina junto al regulador de presión.
Guarde estas instrucciones y los orificios en caso de que lo desee convertir nuevamente a gas natural.
1 BRINDE EL SUMINISTRO DE GAS ADECUADO
Su cocina fue diseñada para funcionar con una presión del colector de 5" sobre una columna de agua a gas natural o, si se desea usar con gas LP (propano y butano), una columna de agua de 10".
Asegúrese de que esté suministrando a su cocina el tipo de gas para el cual fue diseñada.
Esta cocina es convertible para uso con gas natural o gas propano. Si decide usar esta cocina con gas LP, un instalador de LP calificado deberá realizar la conversión antes de intentar utilizar la cocina con dicho gas.
Para una instalación adecuada, la presión del gas natural suministrado al regulador deberá ser de una columna de agua de entre 6" y 13".
Para el gas LP, la presión suministrada deberá ser de una columna de agua de entre 11" y 13".
Al controlar el funcionamiento adecuado del regulador, la presión de entrada deberá ser por lo menos 1" mayor que la presión de funcionamiento (tubo) como se indica más arriba.
El regulador de presión ubicado en la entrada del tubo de la cocina deberá permanecer en la línea de suministro, más allá de si el gas natural o LP está siendo usado.
Un conector de metal flexible del electrodoméstico usado para conectar la cocina al suministro de gas debería tener un I.D. de 12 " y 5 pies de longitud para una instalación más fácil. En Canadá, los conectores flexibles deberán ser conectores metálicos de pared simples, de no más de 6 pies de longitud.
2 CONECTE LA COCINA AL GAS
Cierre la válvula principal de suministro de gas antes de desconectar su vieja cocina y deje la misma apagada hasta que la nueva conexión se haya completado. No olvide volver a encender el piloto en otros electrodomésticos a gas cuando vuelva a encender el gas.
Debido a que las tuberías duras restringen el movimiento de la cocina, se recomienda el uso del conector para electrodomésticos de metal flexible con certificación internacional de CSA, a menos que los códigos locales requieran una conexión de tubería dura.
Nunca use un conector viejo al instalar una cocina nueva. Si se usa el método de tubería dura, deberá alinear la misma con cuidado; la cocina no se podrá mover una vez realizada la conexión.
Para evitar pérdidas de gas, coloque el compuesto de la junta de gas, o envuelva la cinta para roscas de tuberías con Teflón* alrededor de todas las roscas de tubería macho (externas).
A. Instale una válvula de cierre manual de la línea de gas en la línea de gas, en una ubicación de fácil acceso fuera de la cocina. Asegúrese de que todas las personas que usen la cocina sepan dónde y cómo cerrar el suministro de gas de la cocina.
B. Instale el adaptador de la unión cónica macho de 12 " a la rosca interna de 1/2" de NPT en la entrada del regulador. Use la llave de repuesto en el accesorio regulador para evitar daños.
Al instalar la cocina desde el frente, retire el codo de 90° para una instalación más fácil.
C. Instale un adaptador para unión cónica de 12 " o 34 " a la rosca interna de NPT de la válvula de cierre manual, procurando evitar que la válvula de cierre no gire.
D. Conecte el conector de metal flexible del electrodoméstico al adaptador de la cocina. Posicione la cocina para permitir la conexión en la válvula de cierre.
E. Cuando todas las conexiones se hayan realizado, asegúrese de que todos los controles de la cocina estén en la posición de apagado y encienda la válvula de suministro principal de gas. Use un detector de pérdida de líquido en todas las uniones y conexiones, para controlar pérdidas en el sistema.
ADVERTENCIA
Riesgo de
incendio: No use una llama para controlar las pérdidas de gas.
Al usar presión de prueba superior a 12 psig para controlar la presión del sistema de suministro de gas de la residencia, desconecte la cocina y la válvula de cierre individual de la tubería de suministro de gas. Al usar las presiones de prueba de 12 psig o menos para controlar el sistema de suministro de gas, simplemente aíse la cocina del sistema de suministro de gas, cerrando la válvula de cierre individual.
*Teflón: Marca registrada por DuPont
UBICACIONES DE LA TUBERÍA DE GAS Y DEL TOMACORRIENTE ELÉCTRICO

CONEXIÓN DEL CONECTOR FLEXIBLE

OPCIONES DE CONEXIÓN DE TUBERÍA RÍGIDA


CONEXIÓN DEL CONECTOR FLEXIBLE
(para modelos equipados con Quemadores Dobles Estándar)

flowchart
graph TD
    A["Tubería múltiple"] --> B["Regulador de presión"]
    B --> C["Adaptador"]
    C --> D["Flujo del Gas en la Cocina"]
    D --> E["Conector flexible (6 pies de máximo)"]
    E --> F["Adaptador"]
    F --> G["Tubería de gas de ½" o ¾/4""]
    G --> H["Válvula de cierre de gas"]
CONECTOR DE TUBERÍA RÍGIDA (para modelos equipados con Quemadores Dobles Estándar)

3 CONEXIONES ELÉCTRICAS
Requisitos Eléctricos
Circuito específico de 120 voltios, 60 Hertz, correctamente conectado a tierra por un disyuntor de 15 o 20 amperes o fusible de retraso.
Nota: No se recomienda para este producto el uso de interruptores automáticos, inalámbricos o con cableado externo que apagan la corriente del electrodoméstico.
Conexión a Tierra
ADVERTENCIA
Riesgo de
Descarga: Este electrodoméstico deberá estar conectado a tierra de forma adecuada. Si no cumple con esto se podrán producir descargas eléctricas.
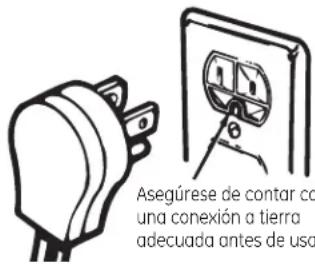
El cable de corriente de este electrodoméstico cuenta con un enchufe de 3 patas (conexión a tierra) que se conecta a un tomacorriente de pared estándar de 3 cables para minimizar la posibilidad de riesgos de descargas eléctricas por parte del mismo.
El cliente deberá contratar a un electricista calificado para que controle el circuito, a fin de asegurar que el tomacorriente esté correctamente conectado a tierra.
En caso de contar con un tomacorriente de pared de 2 cables, es la responsabilidad y obligación del cliente reemplazarlo por un tomacorriente de pared de 3 cables correctamente conectado a tierra.
NUNCA, BAJO NINGUNA CIRCUNSTANCIA, CORTE NI ELIMINE EL TERCER CABLE (TIERRA) DEL CABLE DE CORRIENTE.
Unas palabras sobre los GFCI – no se requieren ni se recomiendan los GFCI para receptáculos de cocinas a gas.
Los Interruptores de Circuito de Tierra (GFCI) son dispositivos que detectan pérdidas de corriente en un circuito y automáticamente apagan la corriente cuando el límite del nivel de pérdida es detectado. El consumidor deberá reiniciar estos dispositivos de forma manual. El Código Nacional de Electricidad requiere el uso de los GFCI en receptáculos de cocina instalados para superficies de mostradores. El funcionamiento de la cocina no se verá afectado si se utiliza en un circuito GFCI protegido, pero es posible que se produzcan detenciones ocasionales no deseadas del interruptor GFCI.
4 SELLADO DE ABERTURAS
Selle cualquier abertura en la pared, detrás de la cocina y en el piso debajo de la cocina cuando las conexiones se hayan completado.
5 ENSAMBLE LOS QUEMADORES SUPERFICIALES (en algunos modelos)
A Cabezas del quemador (en algunos modelos)
Coloque las cabezas de los quemadores sobre los electrodos en la parte superior de la cocina, en las ubicaciones correctas de ad con su tamaño

Asegúrese de que la ranura de la cabeza del quemador esté posicionada sobre el electrodo.
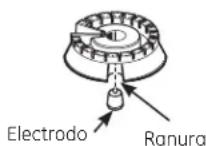

B Ensamble de la Cabeza/ Tapa del Quemador Ovalado (Centro)
Coloque el ensamble de la cabeza/ tapa ovalada (centro) sobre el electrodo en la parte superior de la cocina.
Cabeza ovalada y ensamble de la tapa
Asegúrese de que la ranura de la cabeza del quemador esté posicionada sobre el electrodo.


C Tapas
Coloque las tapas de tamaño coincidente en las bases o cabezas de los quemadores.
Asegúrese de que las cabezas (en algunos modelos) y las tapas sean reemplazadas en las ubicaciones correctas.
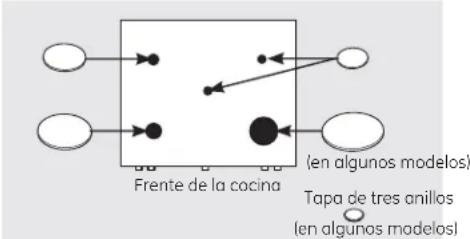
flowchart
graph TD
    A[" "] --> B[" "]
    C[" "] --> D[" "]
    E[" "] --> F[" "]
    G[" "] --> H[" "]
    I[" "] --> J[" "]
    K[" "] --> L[" "]
    M[" "] --> N[" "]
    O[" "] --> P[" "]
    Q[" "] --> R[" "]
    S[" "] --> T[" "]
    U[" "] --> V[" "]
    W[" "] --> X[" "]
    Y[" "] --> Z[" "]
    AA[" "] --> AB[" "]
    AC[" "] --> AD[" "]
    AE[" "] --> AF[" "]
    AG[" "] --> AH[" "]
    AI[" "] --> AJ[" "]
    AK[" "] --> AL[" "]
    AM[" "] --> AN[" "]
    AO[" "] --> AP[" "]
    AQ[" "] --> AR[" "]
    AS[" "] --> AT[" "]
    AU[" "] --> AV[" "]
    AW[" "] --> AX[" "]
    AY[" "] --> AZ[" "]
    BA[" "] --> BB[" "]
    BC[" "] --> BD[" "]
    BE[" "] --> BF[" "]
    BG[" "] --> BH[" "]
    BI[" "] --> BJ[" "]
    BK[" "] --> BL[" "]
    BM[" "] --> BN[" "]
    BO[" "] --> BP[" "]
    BQ[" "] --> BR[" "]
    BS[" "] --> BT[" "]
    BU[" "] --> BV[" "]
    BW[" "] --> BX[" "]
    BY[" "] --> BZ[" "]
    CA[" "] --> CB[" "]
    CC[" "] --> CD[" "]
    CE[" "] --> CF[" "]
    CG[" "] --> DH[" "]
    DI[" "] --> DJ[" "]
    DK[" "] --> DL[" "]
    DM[" "] --> DJ
    DB[" "] --> DV[" "]
    DW[" "] --> DX[" "]
    DXN[" "] --> DXV[" "]
    DXV --> DXW[" "]
    DXW --> DXW1
    DXW1 --> DXW2
    DXW2 --> DXW3
    DXW3 --> DXW4
    DXW4 --> DXW5
    DXW5 --> DXW6
    DXW6 --> DXW7
    DXW7 --> DXW8
    DXW8 --> DXW9
    DXW9 --> DXW10
    DXW10 --> DXW11
    DXW11 --> DXW12
    DXW12 --> DXW13
    DXW13 --> DXW14
    DXW14 --> DXW15
    DXW15 --> DXW16
    DXW16 --> DXW17
    DXW17 --> DXW18
    DXW18 --> DXW19
    DXW19 --> DXW20
    DXW20 --> DXW21
    DXW21 --> DXW22
    DXW22 --> DXW23
    DXW23 --> DXW24
    DXW24 --> DXW25
    DXW25 --> DXW26
    DXW26 --> DXW27
    DXW27 --> DXW28
    DXW28 --> DXW29
    DXW29 --> DXW30
    DXW30 --> DXW31
    DXW31 --> DXW32
    DXW32 --> DXW33
    DXW33 --> DXW34
    DXW34 --> DXW35
    DXW35 --> DXW36
    DXW36 --> DXW37
    DXW37 --> DXW38
    DXW38 --> DXW39
    DXW39 --> DXW40
    DXW40 --> DXW41
    DXW41 --> DXW42
    DXW42 --> DXW43
    DXW43 --> DXW44
    DXW44 --> DXW45
    DXW45 --> DXW46
    DXW46 --> DXW47
    DXW47 --> DXW48
    DXW48 --> DXW49
    DXW49 --> DXW50
    DXW50 --> DXW51
    DXW51 --> DXW52
    DXW52 --> DXW53
    DXW53 --> DXW54
    DXW54 --> DXW55
    DXW55 --> DXW56
    DXW56 --> DXW57
    DXW57 --> DXW58
    DXW58 --> DXW59
    DXW59 --> DXW60
    DXW60 --> DXW61
    DXW61 --> DXW62
    DXW62 --> DXW63
    DXW63 --> DXW64
    DXW64 --> DXW65
    DXW65 --> DXW66
    DXW66 --> DXW67
    DXW67 --> DXW68
    DXW68 --> DXW69
    DXW69 --> DXW70
    DXW70 --> DXW71
    DXW71 --> DXW72
    DXW72 --> DXW73
    DXW73 --> DXW74
    DXW74 --> DXW75
    DXW75 --> DXW76
    DXW76 --> DXW77
    DXW77 --> DXW78
    DXW78 --> DXW79
    DXW79 --> DXW80
    DXW80 --> DXW81
    DXW81 --> DXW82
    DXW82 --> DXW83
    DXW83 --> DXW84
    DXW84 --> DXW85
    DXW85 --> DXW86
    DXW86 --> DXW87
    DXW87 --> DXW88
    DXW88 --> DXW89
    DXW89 --> DXw100
5 ENSAMBLE LOS QUEMADORES SUPERFICIALES (en algunos modelos) (CONT.)

Parrillas
Coloque las parrillas izquierda, derecha y central en la parte superior de la cocina. Estas parrillas poseen posiciones específicas. Los lados inferiores de las parrillas izquierda y derecha están marcadas "LEFT FRONT" (Frente Izquierdo) y "RIGHT FRONT" (Frente Derecho). En algunos modelos, la parte inferior de las parrillas poseen la marca "Outside" (Afuera). Coloque la parrilla intermedia con frente encovado hacia el frente de la parrilla.

Frente Izquierdo
Centro
Frente Derecho
PRECAUCIÓN
No use el quemador
sin que todas las partes de los quemadores estén en sus respectivos lugares.
6 ILUMINACIÓN DE LOS QUEMADORES

Controle el Encendido del Quemador del Horno
El horno se diseñó para funcionar de forma silenciosa y automática. Para utilizar el horno, gire la perilla OVEN CONTROL (Control del Horno) a una configuración superior a los 300°F. El quemador del horno se encenderá y quemará hasta que se alcance la temperatura configurada. El quemador del horno continuará el ciclo de encendido y apagado, según sea necesario, para mantener el horno en la temperatura indicada por la perilla OVEN CONTROL (Control del Horno).

Ajuste el Obturador de Ajuste de Aire del Quemador para Hornear en Modelos con un Cajón para Asar, si es Necesario
Determine si las llamas del quemador inferior se están quemando de forma apropiada.

natural_image
Technical line drawing of a mechanical device with labeled components (no text or symbols present)6 ILUMINACIÓN DE LOS QUEMADORES (CONT)
Una vez retirado el fondo del horno, las llamas correctamente ajustadas deben tener conos azules de aproximadamente 1" y, si la cocina es suministrada con gas natural, deberán quemar sin puntas amarillas. (Con la mayoría de los gases LP, las puntas de llama amarillas al final de los conos exteriores son normales). Las llamas no deben levantar los partes del quemador. Si se observa una elevación, reduzca gradualmente la abertura del obturador de aire hasta que las llamas se estabilicen.
El obturador del quemador del horno se encuentra cerca de la pared trasera del horno y detrás del cajón para asar.

Ajuste el Obturador de Ajuste de Aire del Quemador para Asar en Modelos con un Cajón para Asar, si es Necesario (cont.)
Para retirar el Cajón para Asar:
- Empuje el cajón hacia afuera hasta que se detenga, luego empuje el mismo hacia adentro aproximadamente una pulgada.

- Toma la manija, levante y empuje el cajón para asar hacia afuera.
Para ajustar el flujo de aire hacia el quemador, afloje el tornillo tipo Phillips y gire el obturador para permitir que más o menos aire ingrese por el tubo del quemador.
6 ILUMINACIÓN DE LOS QUEMADORES (CONT.)
D Controle el Encendido de los Quemadores de la Superficie
El funcionamiento de todos los quemadores del horno y parte superior de la cocina se deben controlar una vez que la cocina y las líneas de suministro de gas hayan sido cuidadosamente controladas para verificar que no haya pérdidas.
Seleccione la perilla de un quemador superior y de forma simultánea empuje el mismo y gire a la posición LITE (Luz). Escuchará un sonido de clic, que indica el funcionamiento adecuado del módulo de chispeo. Una vez que el aire se haya purgado de las líneas de suministro, los quemadores se deberán encender dentro de los 4 segundos. Luego de que los quemadores se iluminen, gire la perilla fuera de la posición LITE (Luz). Pruebe cada quemador de forma sucesiva hasta que todos los quemadores hayan sido controlados.
Calidad de las Llamas
La calidad de combustión de las llamas del quemador se deberá determinar visualmente.
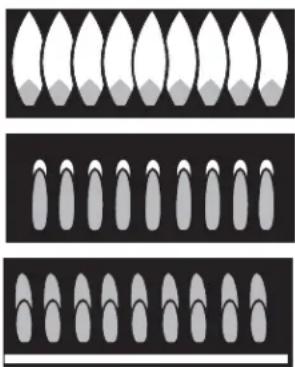
(A) Llamas amarillas —Llame al servicio técnico
(B) Puntas amarillas en conos externos — Normal para el gas LP
(C) Llamas azul suave —Normal para gas natural
Si las llamas del quemador se ven como en (A), llame al servicio técnico. El aspecto de la llama normal se ve como en (B) o (C), dependiendo del tipo de gas que use.
Con gas LP, es normal que haya algunas puntas amarillas en los conos externos.
E Reemplace las Piezas del Horno
Una vez realizados todos los ajustes, reemplace el cajón para asar, el fondo del horno, los estantes y la puerta del horno.
7 AJUSTE EL OBTURADOR DE AJUSTE DE AIRE PARA ASAR Y DEL QUEMADOR DEL HORNO EN UN HORNO DE AUTO LIMPIEZA, SI ES NECESARIO.
Los obturadores de ajuste de aire para los quemadores de la parte superior e inferior regulan el flujo de aire de las llamas.
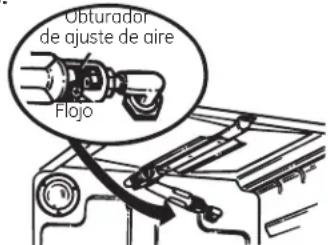
El obturador de ajuste de aire para el quemador superior (asar) está en el centro de la pared trasera del horno.
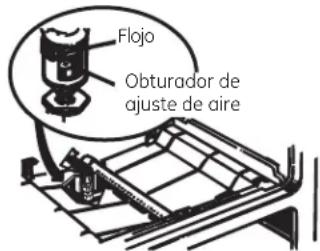
El obturador del quemador inferior (horno) se encuentra cerca de la pared trasera detrás del cajón calentador. Retire el cajón. Consulte la sección de Cuidado y limpieza de la cocina.
Para ajustar el flujo de aire de cada quemador, afloje el tornillo con cabeza Phillips y gire el obturador hacia la posición abierta o cerrada, según sea necesario.

natural_image
Mechanical assembly diagram showing a piston and crank mechanism (no text or labels)Las llamas del quemador superior (asar) deberán estar parejas con conos azules de aproximadamente 1" y no se deberán extender más allá de los bordes del deflector del quemador.

natural_image
Pure technical line drawing of a mechanical assembly without any text, numbers, or symbols7 AJUSTE EL OBTURADOR DE AJUSTE DE AIRE PARA ASAR Y DEL QUEMADOR DEL HORNO EN UN HORNO DE AUTO LIMPIEZA, SI ES NECESARIO.
Para determinar si las llamas del quemador inferior están quemando de forma adecuada, retire la parte inferior del horno. Las llamas deben tener conos azules de aproximadamente 1" y, si la cocina es suministrada con gas natural, deberán quemar sin puntas amarillas. (Con la mayoría de los gases LP, las puntas de llama amarillas al final de los conos exteriores son normales). Las llamas no deben levantar los partes del quemador. Si se observa una elevación, reduzca gradualmente la abertura del obturador de aire hasta que las llamas se estabilicen.
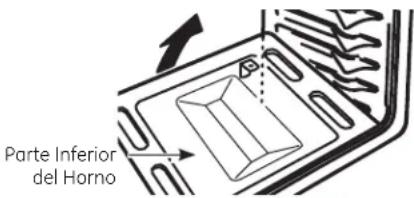
Para retirar la parte inferior del horno:
A. Retire los tornillos que sostienen la parte trasera del fondo del horno.
B. Tome el fondo del horno de las ranuras para los dedos a cada lado.
C. Levante la parte trasera del fondo del horno lo suficiente como para despejar el reborde de la estructura de la cocina, empuje la misma hacia atrás, y luego empuje hacia arriba y afuera.
8 NIVELACIÓN DE LA COCINA
A. Instale los estantes del horno en el mismo y posicione la cocina en el lugar donde será instalada, con acceso frontal a las patas niveladoras frontales y acceso trasero a las patas niveladoras traseras. Todas las patas deberán ser niveladas ANTES de que el producto sea instalado.


B. Controle la nivelación ubicando un nivel de burbuja o una taza, parcialmente llena de agua, en uno de los estantes del horno. Si usará un nivel de burbuja, haga dos lecturas: con el nivel ubicado de forma diagonal primero en una dirección y luego en la otra.
C. Retire el cajón (en algunos modelos). Consulte la sección de Cuidado y limpieza de la cocina Las patas niveladoras frontales se podrán ajustar desde la parte inferior y las patas traseras se podrán ajustar desde la parte superior (en algunos modelos) o desde la parte inferior.
8 NIVELACIÓN DE LA COCINA (CONT)
D. Use una llave de tuercas o ajustable para ajustar las patas niveladoras hasta que la cocina esté nivelada.

Nunca retire
completamente las patas niveladoras, ya que la cocina no estará asegurada de forma adecuada al dispositivo anti-volcaduras.
E. Luego de nivelar la unidad, deslice hasta la posición final y verifique la nivelación.
F. Luego de que la cocina esté nivelada, aleje la cocina de la pared, de modo que se pueda instalar el dispositivo anti-volcaduras.
9 INSTALACIÓN DEL DISPOSITIVO ANTI- VOLCADURAS
▲ ADVERTENCIA DISPOSITIVO ANTI-VOLCADURAS

- Todas las cocinas pueden sufrir caídas.
- Se pueden producir QUEMADURAS y otras LESIONES GRAVES.
- INSTALE y CONTROLE el soporte anti-volcaduras, siguiendo las instrucciones suministradas con el soporte.

A fin de reducir el riesgo de caída de la cocina, ésta deberá estar asegurada por un soporte anti-volcaduras correctamente instalado. Siga las instrucciones embaladas con el soporte
Para controlar si el soporte es instalado y ajustado de forma apropiada, mire que debajo de la cocina la pata niveladora trasera esté ajustada al soporte. En algunos modelos, el cajón de almacenamiento o el panel de protección se pueden retirar para una fácil inspección. Si no es posible realizar una inspección visual, deslice la cocina hacia adelante, confirme que el soporte antivolcaduras esté ajustado de forma segura al piso o la pared, y deslice la cocina hacia atrás de modo que la pata niveladora trasera se encuentre debajo del soporte antivolcaduras.
En caso de que la cocina sea empujada de la pared por alguna razón, siempre repita este procedimiento para verificar que la cocina esté correctamente asegurada por el soporte anti-volcaduras.
Si la cocina no cuenta con el soporte anti-volcaduras, llame al 1.800.626.8774 para recibir uno sin costo.
CUANDO TODAS LAS CONEXIONES SE HAYAN COMPLETADO
Asegúrese de que todos los controles queden en la posición de apagado. Asegúrese de que el flujo de la combustión y el aire de ventilación a la cocina estén desobstruidos.
Antes de Solicitar el Servicio Técnico...

Consejos para la Solución de Problemas ¡Ahorre tiempo y dinero! Primero revise los cuadros que aparecen en las siguientes páginas y es posible que no necesite solicitar reparaciones.
| Problema Causas Posibles Qué Hacer | |||
| Los quemadores no se encienden o no quem de forma pareja. (El quemador frontal derecho está diseñado para que sus llamas sean un poco más pequeñas entre las posiciones de las 6 y las 9 en punto. Esto es normal). | El enchufe en la cocina no está completamente insertado en el tomacorriente eléctrico. | Asegúrese de que el cable de electricidad esté enchufado en un tomacorriente correctamente conectado a tierra. | |
| Las hendiduras al costado del quemador se podrán atascar. | Retire los quemadores o limpie los mismos. Controle que no haya comida quemada ni grasa en el área del electrodo. Consulte la sección de Cuidado y limpieza de la cocina | ||
| Ensamble del quemador inapropiado. | Asegúrese de que las partes del quemador estén instaladas correctamente. Consulte Cuidado y limpieza en la sección de la cocina. | ||
| Llamas del quemador muy grandes o amarillas | Improper air to gas ratio. Si la cocina es conectada a gas LP, contacte a la persona que instaló la cocina o que hizo la conversión. | ||
| Los quemadores superficiales se encienden pero el horno no | Se pudo haber movido la válvula de cierre del horno de forma accidental durante la limpieza o al moverlo. | Para controlar la válvula de cierre de gas del horno, retire el cajón (lea Cuidado y limpieza de la sección del horno). Para modelos del cajón del horno inferior, retire el panel de acceso trasero desenroscando los tornillos de pulgar en las esquinas superior izquierda y derecha. Busque la palanca de cierre del gas en la parte trasera de la cocina | |
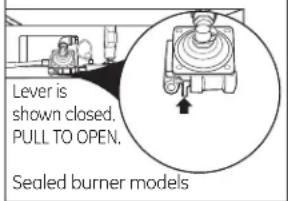 |  | ||
| El control da la señal luego de ingresar el tiempo de cocción o el tiempo de inicio | Olvidó ingresar una temperatura de horneado o tiempo de limpieza. | Presione la tecla Bake (Hornear) y la temperatura deseada o la tecla Self Clean (Auto Limpieza) y el tiempo de limpieza deseado. | |
| La comida no se hornea ni se tuesta en el horno superior | Controles del horno configura-dos de forma incorrecta. | Lea la sección sobre Uso del horno superior. | |
| La posición del estante es incorrecta. | Lea la sección sobre Uso del horno superior. | ||
| Uso del utensilio incorrecto o de un utensilio de tamaño incorrecto. | Lea la sección sobre Uso del horno superior. | ||
| El termostato del horno debe ser ajustado. | Lea la sección Ajuste el termostato del horno superior - ¡Há-galo usted mismo! | ||
| El reloj no se configuró correctamente. | Lea la sección Uso del reloj y del temporizador. | ||
| Se usó papel de aluminio de forma incorrecta en el horno. | Lea la sección Cuidado y limpieza de la cocina. | ||
| El fondo del horno no está correctamente ajustado en su posición. | Lea la sección Instalación de la cocina. | ||
| El quemador no se enciende | El enchufe en la cocina no está completamente insertado en el tomacorriente eléctrico. | Asegúrese de que el cable de electricidad esté enchufado en un tomacorriente correctamente conectado a tierra. | |
| El suministro de gas no fue conectado o encendido. | Consulte las Instrucciones de Instalación provistas con su cocina. | ||
| El quemador del puente no se enciende. | Consulte la sección Cómo Iluminar el Quemador del Puente para el Modelo PGB980. | ||
| Los quemadores no se encienden (cont.) | Es posible que un fusible de su hogar se haya quemado o que el disyuntor se haya desconectado. | Reemplace el fusible o reinicie el disyuntor. | |
| Las piezas del quemador no fuer-on reemplazadas correctamen | Lea la sección Cuidado y limpieza de la cocina. | ||
| La comida no asa de forma correcta en el horno superior | Controles del horno configurados de forma incorrecta. | Asegúrese de presionar la tecla Broil Hi/ Lo (Asar Alto/ Bajo). | |
| La puerta del horno no se cerró correctamente. | Lea la sección sobre Uso del horno superior. | ||
| Se usó una posición incorrecta para la repisa. | Lea la Guía para Asar. | ||
| Se cocinó comida en una olla caliente. | Para un mejor resultado, use una olla diseñada para asar. Asegúrese de que esté fría. | ||
| Utensilio de cocina inadecuado para asar. | Para un mejor resultado, use una olla diseñada para asar. | ||
| El fondo del horno no está correcta-mente ajustado en su posición. | Lea la sección Instalación de la cocina. | ||
| Temperatura del horno su-perior demasiado caliente o demasiado fría | El termostato del horno debe ser ajustado. | Lea la sección Ajuste el termostato del horno superior - ¡Há-galo usted mismo! | |
| El reloj y el temporiza-dor no funcionan | El enchufe en la cocina no está completamente insertado en el tomacorriente eléctrico. | Asegúrese de que el cable de electricidad esté enchufado en un tomacorriente correctamente conectado a tierra. | |
| Es posible que un fusible de su hogar se haya quemado o que el disyuntor se haya desconectado. | Reemplace el fusible o reinicie el disyuntor. | ||
| Controles del horno configurados de forma incorrecta. | Lea la sección Uso del reloj y del temporizador. | ||
| La luz del horno no funciona | La lámpara está floja o presenta defectos. | Ajuste o reemplace la lámpara. | |
| El enchufe en la cocina no está completamente insertado en el tomacorriente eléctrico. | Asegúrese de que el cable de electricidad esté enchufado en un tomacorriente correctamente conectado a tierra. | ||
| El horno superior no realiza la auto limp-ieza | La temperatura del horno está demasiado caliente para configurar un funcionamiento de auto limpieza | Espere a que la cocina se enfríe a temperatura ambiente y reinicie los controles. | |
| Controles del horno configurados de forma incorrecta. | Lea la sección Horno superior con función de auto limpieza. | ||
| En modelos con trabapara puerta, la puerta del horno no está en la posición bloqueada. | Asegúrese de mover la manija de la trabapla de la puerta total-mente hacia la derecha. | ||
| Sonido de “chispor-roteo” o “traqueo” | Éste es el sonido de metal calentán-dose o enfriándose durante las funciones de cocción y limpieza. | Esto es normal. | |
Antes de Solicitar el Servicio Técnico...

Consejos para la Solución de Problemas
| Problema Causas Posibles Qué Hacer | ||
| Exceso de humo | Hay exceso de suciedad. | Presione la tecla Clear/ Off (Borrar/ Apagar) o gire la perilla del horno superior a la posición OFF (Apagado) y presione la tecla Clear/ Off (Borrar/ Apagar). Abra las ventanas para liberar el humo en la habitación. Espere hasta que la luz LOCKED DOOR (Puerta Trabada) desaparezca. Limpie el exceso de suciedad y reinicie el ciclo de limpieza. |
| La puerta del horno no se abrirá luego de un ciclo de limpieza | El horno está demasiado caliente. | Espere a que el horno se enfríe por debajo de la temperatura de bloqueo. No bloquee la puerta con la trabapara puerta, excepto al usar la función auto limpieza. |
| El horno no limpia luego de un ciclo de limpieza | Los controles del horno no están correctamente configurados. | Lea la sección Horno superior con función de auto limpieza. |
| El horno estaba demasiado sucio. | Limpie derrames excesivos antes de iniciar el ciclo de limpieza. Es posible que sea necesario usar auto limpieza nuevamente en hornos con mucha suciedad o por períodos de tiempo más prolongados. | |
| “Door” (Puerta) aparece en la pantalla (en modelos con puerta con trab) | La manija de la trabase movió a la derecha pero se seleccionó un programa que no es auto limpieza. | Mueva la manija de la trabahacia la derecha sólo al configurar el ciclo de auto limpieza. |
| “LOCK DOOR” (Puerta Trabada) titila en la pantalla | El ciclo de auto limpieza fue seleccionado pero la puerta no está cerrada y en modelos con trab, la misma no se movió totalmente a la derecha. | Cierre la puerta del horno y, en modelos con trab, mueva la trabatotalmente hacia la derecha. |
| La luz de LOCKED DOOR (Puerta Bloqueada) está encendida cuando desea cocinar | La puerta del horno está bloqueada debido a que la temperatura interior del horno no descendió por debajo de la temperatura de bloqueo. | Presione la tecla Clear/ Off (Borrar/ Apagar). Espere a que el horno se enfríy luego, en modelos con trabapara puerta, destrabe la puerta. |
| “F - y un número o letra” titila en la pantalla | En modelos con una trabapara puerta, si aparece un código de error de función durante el ciclo de auto limpieza, controle la trabade la puerta del horno. | Es posible que la trabase haya movido, incluso aunque sólo haya sido levemente, de la posición de bloqueo. Asegúrese de que la trabase movida hacia la derecha tanto como sea posible. |
| Tiene un código de error defunción. | Presione la tecla Clear/ Off (Borrar/ Apagar). Permita que el horno se enfríe durante una hora. Coloque el horno nuevamente en funcionamiento. | |
| Si el código de función se repite. | Desconecte totalmente la corriente del horno por 5 minutos y luego vuelva a conectar la misma. Si el código de error de función se repite, llame al servicio técnico. | |
| Las repisas del horno son difíciles de deslizar | Las repisas de níquel (si está equipada de este modo) fueron limpiadas en el ciclo de auto limpieza. Las repisas grises con recubrimiento de porcelana (si está equipada de este modo) se limpiaron de forma incorrecta | Aplique una cantidad reducida de aceite vegetal a una toalla de papel y limpie los extremos de las repisas con dicha toalla de papel. No rocíe con Pam® o cualquier otro lubricante en espray. |
| “Probe” (Sonda) aparece en la pantalla (en algunos modelos) | Esto le está recordando que ingrese una temperatura de sonda luego de enchufar la sonda. | Ingrese una temperatura de sonda. |
| La pantalla queda en blanco | Es posible que un fusible de su hogar se haya quemado o que el disyuntor se haya desconectado. | Reemplace el fusible o reinicie el disyuntor. |
| El reloj está en el modo de pan-talla oscura. | Lea las funciones Especiales de la sección de control del horno. | |
| La pantalla titila | Corte de corriente. Reinicie el reloj. | |
| No se logra que la pantalla muestre "SF" | Las teclas de control del horno no se presionaron de forma adecuada. | Las teclas Bake (Hornear) y Broil Hi/ Lo (Asar Alto/Bajo) se deberán presionar al mismo tiempo y mantener por 3 segundos. |
| Corte de corriente, el reloj titila | Corte o exceso de corriente. | Reinicie el reloj. Si el horno estuvo en uso, deberá reiniciar el mismo presionando la tecla Clear/ Off (Borrar/ Apagar), con-figurando el reloj y reiniciando cualquier función de cocción. |
| Olor a "quemado" o "aceite" desde la ven-tilación | Esto es normal en un horno nuevo y desaparecerá con el rápidamente. | Abra la ventana para ventilar la habitación. |
| Olor fuerte Un olor en la aislación alrededor del interior del horno es normal desde las primeras veces en que el horno es usado.. | Esto es temporario. | |
| Ruido del ventilador (en algunos modelos)v | Un ventilador para enfriar o un ventilador por convección (dependi-endo de la función que esté usando) se podrán encender. | Esto es normal. El ventilador de convección funcionará hasta que la función finalice o la puerta se abra. |
| El cajón no se desliza de forma pareja o se arrastra | El cajón está desalineado. Extienda totalmente el cajón y empuje el mismo totalmente hacia adentro. Consulte la sección Cuidado y limpieza de la cocina. | |
| El cajón está sobrecargado o la carga está desbalanceada. | Reduzca el peso. Redistribuya los contenidos del cajón. | |
| El cajón del horno infe-rior o el cajón calenta-dor no funciona | Es posible que un fusible de su hogar se haya quemado o que el disyuntor se haya desconectado. | Reemplace el fusible o reinicie el disyuntor. |
| El horno está realizando la función de auto limpieza. | Espere a que el ciclo de auto limpieza finalice y que el horno se enfríe. | |
| Los controles están configurados de forma incorrecta. | Consulte la sección del cajón calentador o la sección del horno inferior. | |
| Condensación exce-siva en el cajón | Líquido en el cajón. Retire el líquido. | |
| Comidas no cubiertas. Cubra la comida con una tapa o papel de aluminio. | ||
| La configuración de temperatura es demasiado alta. | Reduzca la configuración de temperatura. | |
| La comida se seca en el cajón del horno inferior o en el cajón calentador | Escape de humedad. Cubra la comida con una tapa o papel de aluminio. | |
| Drawer not fully closed. Empuje el cajón hacia adentro hasta que la traba que ajuste. | ||

Todo el servicio de garantía es provisto por nuestros Centros de Servicio de Fabricación, o un técnico autorizado de Servicio al Cliente (Customer Care®). Puede programar una consulta al servicio técnico a través del Internet, las 24 del día, visitándonos en GEAppliances.com, o llamando al 800. GE.CARES (800.432.2737). Cuando llame para solicitar el servicio, tenga los números de serie y de modelo disponibles.
Abroche su recibo aquí. Para acceder al servicio técnico de acuerdo con la garantía deberá contar con la prueba de la fecha original de compra.
Por el Período de:
GE Reemplazará:
Un Año
Desde la fecha de la compra original el
Cualquier parte de la cocina que falle debido a un defecto en los materiales o la fabricación. Durante esta garantía limitada de un año, GE también proveerá, sin costo, todo el trabajo y el servicio en r relacionado con el reemplazo de la parte que presente defectos.
Qué No Cubrirá GE:
Viajes del técnico del servicio a su hogar para enseñarle a usar el producto.
Instalación inadecuada, entrega o mantenimiento.
PFallas o daños del producto en caso de abuso, mal uso, o uso para propósitos diferentes al original o uso comercial.
■ Reemplazo de fusibles de la casa o reinicio de disyuntores.
Daños ocasionados sobre el producto por accidente, incendio, inundaciones o catástrofes naturales.
- Daños consecuentes o incidentales causados por posibles defectos sobre este producto.
Daño causado después de la entrega. - Producto no accesible para brindar el servicio requerido.
■ Reemplazo de la batería en modelos inalámbricos.
EXCLUSIÓN DE GARANTÍAS IMPLÍCITAS—Su única y exclusiva alternativa es la reparación del producto, como se indica en la Garantía Limitada. Las garantías implícitas, incluyendo garantías implícitas de comerciabilidad o conveniencia sobre un propósito particular, se limitan a un año o al período más corto permitido por la ley.
Esta garantía se extiende al comprador original y a cualquier dueño subsiguiente de productos comprados para uso hogareño dentro de EE.UU. Si el producto se encuentra en un área donde no se encuentra disponible el servicio técnico de un Proveedor de Servicio de GE Autorizado, usted será responsable por el costo de un viaje o se podrá requerir que traiga el producto a una Ubicación del Servicio Técnico de GE Autorizado para recibir el servicio. En Alaska, la garantía excluye el costo de envío o llamadas del servicio a su hogar.
Algunos estados no permiten la exclusión o limitación de daños fortuitos o consecuentes. Esta garantía le da derechos legales específicos y es posible que tenga otros derechos legales que varían entre un estado y otro. Para conocer cuáles son sus derechos legales, consulte a la oficina de asuntos del consumidor local o estatal o al Fiscal de su Estado.

¿Busca Algo Más? (Not all accessories are available for all models.)
Puede encontrar estos accesorios y mucho más en GEApplianceParts.com (EE.UU.) o en www.GEAppliances.ca (Canadá), o llamando al 800.626.2002 (EE.UU.) o al 888.261.3055 (Canadá) (durante el horario comercial habitual). Tenga a mano su número de modelo.
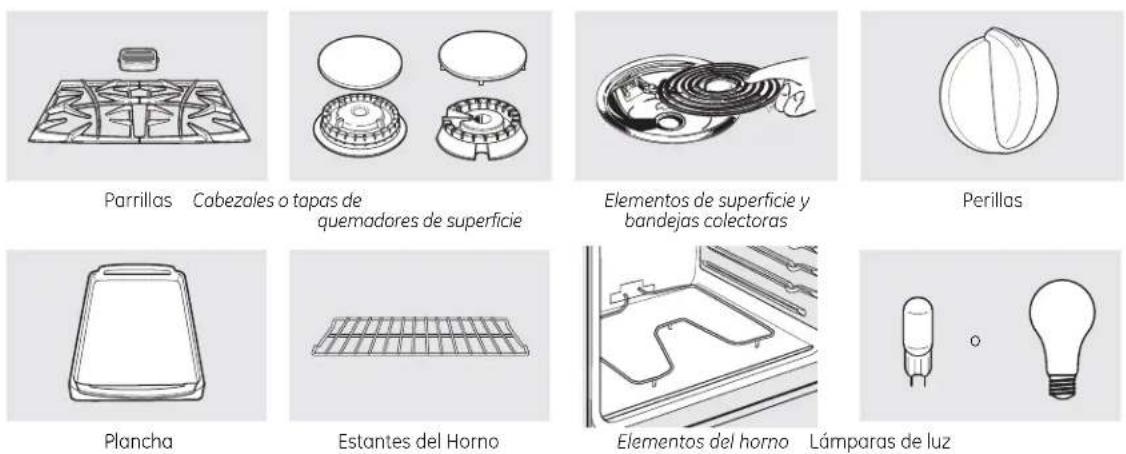
¡Pruebe estos otros excelentes productos para que su cocina se vea estupenda!
Cerama Bryte® Kit de limpieza de anafes vitrocerámicos; Incluye limpiador, rasqueta y paño WX10X117GCS

Cerama Bryte® Retocar Spray
WX10X391

Citrushine
Toallitas para
pulir artefactos
de acero
inoxidable
WX10X10007

Cerama Bryte®
Limpiador
de artefactos
de acero
inoxidable
PM10X311
¡Aproveche al máximo su bandeja para asar! (No para usar con modelos de cajón asador.)
¡Utilice su bandeja y tapa de rejilla para asar hamburguesas, frutos de mar, filetes, vegetales, panceta, costillas y mucho más! La bandeja inferior retiene el exceso de grasas y aceites.
- Pieza GE genuina
- Fácil de limpiar
• Garantía de un año

¡Oferta de tiempo limitado! ¡Envío sin cargo!
Cuando solicite la bandeja para asar dentro de los 30 días de haber adquirido su producto de cocina GE.
Pequeña Grande\* Extra grande\*\*
N° de pieza WB48X10055 WB48X10056 WB48X10057
Dimensiones 8-3/4" A × 1-1/4" A × 13-1/2" P 12-3/4" A × 1-1/4" A × 16-1/2" P 17" A × 1-1/4" A × 19-1/4" P
* La bandeja para asar grande (estándar) no entra en cocinas de 20/24 pulgadas.
** La bandeja extra grande no entra en hornos de paredes de 24 pulgadas, empotradas de 27 pulgadas o cocinas de 20/24 pulgadas.
Llame al 800.626.2002 o utilice este formulario para enviar su solicitud por correo:
GE Parts, P.O. Box 221027, Memphis, TN 38122-1027.
Formulario de solicitud de la bandeja para asar
Cantidad ____ Número de pieza ____
Número de modelo ____ Número de serie ____ Marca ____ Fecha de compra ____
Nombre ____ Apellido ____
Dirección
Ciudad Estado Código Postal
Teléfono ____ Correo electrónico ____
Check ____ Giro postal ____
Para consultar sobre los precios actuales llame al 800.626.2002. Todas las órdenes con tarjeta de crédito se deberán realizar en forma telefónica.
Garantía de la Cocina a Gas de GE. (Para clientes en Canadá)

Todo el servicio de garantía es provisto por nuestros Centros de Servicio de Fabricación, o un técnico autorizado de Servicio al Cliente (Customer Care®). Para solicitar el servicio técnico, llame al 1.800.561.3344. Cuando llame para solicitar el servicio, tenga los números de serie y modelo disponibles.
Abroche su recibo aquí. Para acceder al servicio técnico de acuerdo con la garantía, deberá contar con la prueba de la fecha original de compra.
Por el Período de: Mabe Reemplazará:
Un Año
Desde la fecha de la
compra original
Cualquier parte de la cocina que falle debido a un defecto en los materiales o la fabricación. Durante esta garantía limitada de un año, Mabe también proveerá, sin costo, todo el trabajo y el servicio en relacionado con el reemplazo de la parte que presente defectos.
Qué No Cubrirá Mabe:
Viajes del técnico del servicio a su hogar para enseñarle a usar el producto.
■ Instalación inadecuada, entrega o mantenimiento.
- Fallas o daños del producto en caso de abuso, mal uso, o uso para propósitos diferentes al original o uso comercial.
■ Reemplazo de fusibles de la casa o reinicio de disyuntores.
Daños ocasionados sobre el producto por accidente, incendio, inundaciones o catástrofes naturales.
Daños consecuentes o incidentales causados por posibles defectos sobre este producto.
Daño causado después de la entrega..
- Producto no accesible para brindar el servicio requerido.
■ Reemplazo de la batería en modelos inalámbricos.
EXCLUSIÓN DE GARANTÍAS IMPLÍCITAS—Su única y exclusiva alternativa es la reparación del producto, como se indica en la Garantía Limitada. Las garantías implícitas, incluyendo garantías implícitas de comerciabilidad o conveniencia sobre un propósito particular, se limitan a un año o al período más corto permitido por la ley.
EL GARANTE NO ES RESPONSABLE POR CUALQUIER DAÑO CONSECUENTE.
Garante: MABE CANADA INC.
Sitio Web de Electrodomésticos de GE
En EE.UU.: GEAppliances.com
¿Desea realizar una consulta o necesita ayuda con su electrodoméstico? ¡Intente a través del Sitio Web de Electrodomésticos de GE las 24 horas del día, cualquier día del año! Para mayor conveniencia y un servicio más rápido, ahora puede descargar el Manual del Propietario, ordenar piezas o incluso programar el servicio técnico a través de Internet. En Canadá: www.GEAppliances.ca
Servicio Programado
En EE.UU.: GEAppliances.com
El servicio de reparación de expertos de GE está a sólo un paso de su puerta. ¡Conéctese a través de Internet y programe su servicio a su conveniencia las 24 horas del día cualquier día del año! O llame al 800.GE.CARES (800.432.2737) durante el horario comercial habitual.
In Canada, call 1.800.561.3344

Estudio de Diseño de la Vida Real
En EE.UU.: GEAppliances.com
GE apoya el concepto de Diseño Universal – productos, servicios y ambientes que pueden ser usados por personas de todas las edades, tamaños y capacidades. Reconocemos la necesidad de realizar diseños para una amplia gama de habilidades e incapacidades físicas y mentales. Para más detalles sobre las aplicaciones de Diseño Universal de GE, incluyendo ideas de diseño de cocinas para personas con incapacidades, visite nuestro sitio web hoy. Sobre casos de incapacidad auditiva, comuníquese al 800.TDD.GEAC (800.833.4322).
En Canadá, comuníquese con: Manager, Consumer Relations, Mabe Canada Inc.
Suite 310, 1 Factory Lane
Moncton, N.B. E1C 9M3

Garantías Extendidas
En EE.UU.: GEAppliances.com
Adquiera una garantía extendida de GE y conozca sobre descuentos especiales que están disponibles mientras su garantía aún está vigente. La puede adquirir a través de Internet en cualquier momento o llamando al 800.626.2224 durante el horario comercial habitual. Los Servicios para el Consumidor Hogareño de GE aún estarán allí cuando su garantía caduque. En Canadá, llame al 1.888.261.2133

Piezas y Accesorios
En EE.UU.: GEApplianceParts.com
Individuos calificados para realizar el servicio técnico de sus propios electrodomésticos podrán solicitar el envío de piezas o accesorios directamente a sus hogares (se aceptan las tarjetas VISA, MasterCard y Discover). Ordene hoy a través de Internet, las 24 horas del día o en forma telefónica llamando al 800.626.2002, durante el horario comercial habitual.
Las instrucciones que figuran en este manual cubren los procedimientos que serán realizados por cualquier usuario. Otros servicios técnicos generalmente deberían ser derivados a personal calificado del servicio. Se deberá tener cuidado, ya que una reparación indebida podrá ocasionar que el funcionamiento no sea seguro.
Los clientes de Canadá deberán buscar el Centro de servicio técnico Mabe más cercado en las páginas amarillas, o llamar al 1 888.261.3055.

Contáctenos
In the U.S.: GEAppliances.com
Si no se encuentra satisfecho con el servicio que recibió de GE, comuníquese con nosotros a través de nuestro sitio web con todos los detalles, incluyendo su número telefónico, o escriba a: General Manager, Customer
Relations
GE Appliances, Appliance Park
Louisville, KY 40225
En Canadá: www.GEAppliances.ca, o escriba a:
Director, Consumer Relations, Mabe Canada Inc.
Suite 310, 1 Factory Lane
Moncton, N.B. E1C 9M3

Registre su Electrodoméstico
In the U.S.: GEAppliances.com
Registre su electrodoméstico nuevo a través de Internet - ¡a su conveniencia! Un registro puntual de su producto permitirá una mejor comunicación y un servicio más puntual de acuerdo con los términos de su garantía, en caso de surgir la necesidad. También puede enviar una carta en la tarjeta de inscripción pre-impresa que se incluye con el material empaquetado. En Canadá: www.GEAppliances.ca
Impreso en México
Este libro fue impreso en papel reciclado.
- Free-Standing Gas Ranges
- WARNING
- IMPORTANT SAFETY NOTICE
- GENERAL SAFETY INSTRUCTIONS
- KEEP FLAMMABLE MATERIALS AWAY FROM THE RANGE
- IN THE EVENT OF A FIRE, TAKE THE FOLLOWING STEPS TO PREVENT INJURY AND FIRE SPREADING:
- COOKTOP SAFETY INSTRUCTIONS
- OVEN SAFETY INSTRUCTIONS
- SELF-CLEANING OVEN SAFETY INSTRUCTIONS (Some models)
- WARMING DRAWER/LOWER OVEN DRAWER SAFETY INSTRUCTIONS (Some models)
- Using the gas surface burners.
- Before Lighting a Gas Burner
- After Lighting a Gas Burner
- How to Light a Gas Surface Burner
- Sealed Gas Burners (Some models)
- Using the oven controls.
- Oven Control, Clock and Timer Features and Settings (on some models)
- Bake/Temp Recall Pad
- Start/On Pad
- Display
- Kitchen Timer On/Off Pad
- Clock Pad
- Start Time Pad (on some models)
- Cooking Time Pad (on some models)
- Oven Temperature Knob (on some models)
- Using the clock and timer.
- To Set the Clock
- To Set the Kitchen Timer
- To Change or Cancel the Kitchen Timer Setting
- Display Clock While Kitchen Timer Is Operating
- Before you begin...
- Upper Oven Vent
- Power Outage
- Oven Light
- How to Set the Upper Oven for Baking or Roasting
- Preheating and Pan Placement
- Aluminum Foil
- Oven Moisture
- How to Set the Upper Oven for Broiling
- Using the upper oven.
- Broiling Guide
- How to Set the Broiler Compartment (on some models)
- Both the oven and broiler compartment doors must be closed during broiling.
- Broiling Compartment Guide Suggestions
- Using the clock and timer. (on some models)
- To Turn Off the Clock Display
- To Set the Timer
- To Reset the Timer
- To Cancel the Timer
- End of Cycle Tones (on some models)
- Using the timed baking and roasting features. (on some models)
- How to Set an Immediate Start and Automatic Stop
- How to Set a Delayed Start and Automatic Stop
- Hour Shut-Off
- How to Set for Regular Baking/Roasting
- How to Set for Timed Baking/Roasting—Immediate Start and Automatic Stop
- How to Exit the Sabbath Feature
- Adjust the oven thermostat—Do it yourself!
- To Adjust the Thermostat (on some models)
- To Adjust the Thermostat (on models with an OVEN TEMP Knob)
- The type of margarine will affect baking performance!
- Control Knob (on models equipped with a knob)
- NOTES:
- When Using the Warming Drawer
- Allow approximately 25 minutes for the warming drawer to preheat.
- Temperature Selection Chart
- To Crisp Stale Items
- To Warm Serving Bowls and Plates
- ▲CAUTION
- Before a Clean Cycle
- NOTE:
- Wipe up any heavy spillovers on the oven bottom.
- How to Set the Oven for Cleaning (on models with an OVEN TEMP Knob)
- How to Set the Oven for Cleaning
- Care and cleaning of the range.
- How to Delay the Start of Cleaning (on some models)
- To Stop a Clean Cycle (on some models)
- After a Clean Cycle
- Sealed Burner Assemblies (on some models)
- CAUTION Do not remove
- Standard Twin Burner Assemblies (on some models)
- Drip Pans (if so equipped)
- Burner Caps, Bases and Heads
- Burner caps
- Tri-ring burner (on some models)
- Burner Heads (on some models) and Oval (Center) Burner Head/Cap Assembly
- After cleaning
- Oval (Center) Burner Head/Cap Assembly
- Caps
- Burner Grates
- Cleaning
- Cooktop Surface
- Oven Air Vents
- Upper Control Panel (on some models)
- Lower Control Panel (Front Manifold Panel) and Knobs
- Lift-Up Cooktop (on models with standard twin burners)
- To raise the cooktop:
- Oven Bottom
- Removable Oven Door (on some models) The door is very heavy. Be careful when removing and lifting the door.
- To remove the door:
- To replace the door:
- Lift-Off Oven Door (on some models)
- The oven door is removable, but it is heavy. You may need help removing and replacing the door.
- Oven Racks
- Cleaning the Door
- To clean the inside of the door:
- To clean the outside of the door:
- Stainless Steel Surfaces (on some models) Do not use a steel wool pad; it will scratch the surface.
- Cleaning Instructions:
- DO NOT USE for cooktop or stainless steel parts cleaning:
- Oven Light Replacement (on some models)
- To remove the cover:
- To replace the cover:
- CAUTION
- To remove:
- Do not remove any screws to remove the cover.
- To replace cover:
- Removable Kick Panel (on some models)
- To replace:
- Removable Storage Drawer (on some models)
- To remove storage drawer:
- To replace storage drawer:
- Broiler Pan and Grid
- Removable Broiler Drawer (on some models)
- WARNING: FIRE HAZARD
- To Begin Steam Clean Cycle:
- IMPORTANT NOTES:
- Installation Instructions
- Range
- In the Commonwealth of Massachusetts
- BEFORE YOU BEGIN
- Mobile Home - Additional Installation Requirements
- Mobile home installations require:
- FOR YOUR SAFETY
- If you smell gas:
- MATERIALS YOU MAY NEED
- INSTALLATION SAFETY INSTRUCTIONS
- DIMENSIONS AND CLEARANCES
- LOCATION
- IMPORTANT!
- CONVERTING TO LP GAS (or converting back to natural gas from LP)
- PROVIDE ADEQUATE GAS SUPPLY
- CONNECT THE RANGE TO GAS
- flame to check for gas leaks.
- ELECTRICAL CONNECTIONS
- Electrical Requirements
- Grounding
- SEAL THE OPENINGS
- ASSEMBLE SURFACE BURNERS (on some models)
- A Burner Heads
- B Oval (Center) Burner Head/Cap Assembly
- C Caps
- ASSEMBLE SURFACE BURNERS (CONT.)
- Grates
- LIGHT THE BURNERS
- A Check Ignition of Oven Burner
- B Adjust Bake Burner Air Adjustment Shutter on Models with a Broiler Drawer, if Necessary
- LIGHT THE BURNERS (CONT.)
- C Adjust Broil Burner Air Adjustment Shutter on Models with a Broiler Drawer, if Necessary (cont.)
- To Remove the Broiler Drawer:
- D Check Ignition of Surface Burners
- Quality of Flames
- E Replace Oven Parts
- ADJUST BROIL AND OVEN BURNER AIR ADJUSTMENT SHUTTER IN A SELF-CLEANING OVEN IF NECESSARY
- ADJUST BROIL AND OVEN BURNER AIR ADJUSTMENT SHUTTER IN A SELF-CLEANING OVEN IF NECESSARY (CONT.)
- To remove the oven bottom:
- LEVELING THE RANGE
- INSTALLING THE ANTI-TIP DEVICE
- ANTI-TIP DEVICE
- WHEN ALL HOOKUPS ARE COMPLETED
- Before you call for service...
- Troubleshooting Tips
- Looking For Something More? (Not all accessories are available for all models.)
- Experience these other great products to keep your kitchen looking great!
- Get the most out of your Broiler Pan! (Not for use with Broiler Drawer models.)
- Limited Time Offer! Free Shipping!
- Broiler Pan Order Form
- Notes.
- GE Gas Range Warranty. (For customers in the United States)
- For The Period Of: GE Will Replace:
- What GE Will Not Cover:
- GE Gas Range Warranty. (For customers in Canada)
- For The Period Of: Mabe Will Replace:
- One Year
- What Mabe Will Not Cover:
- GE Appliances Website
- Schedule Service
- Real Life Design Studio
- Extended Warranties
- Parts and Accessories
- Contact Us
- Register Your Appliance
- Instrucciones de Funcionamiento
- Cuidado y Limpieza
- Instrucciones de Instalación ..... 37-47
- Consejos para Solucionar
- Soporte al Cliente
- Escriba los números de modelo y de serie aquí:
- INFORMACIÓN IMPORTANTE DE SEGURIDAD. LEA TODAS LAS INSTRUCCIONES ANTES DE USAR.
- ADVERTENCIA
- AVISO DE SEGURIDAD IMPORTANTE
- INSTRUCCIONES GENERALES DE SEGURIDAD
- MANTENGA LOS MATERIALES INFLAMABLES ALEJADOS DE LA COCINA
- EN CASO DE INCENDIO, SIGA LOS SIGUIENTES PASOS PARA EVITAR LESIONES O LA PROPAGACIÓN DEL FUEGO:
- INSTRUCCIONES DE SEGURIDAD DE LA PARTE SUPERIOR DE LA COCINA
- ADVERTENCIA INSTRUCCIONES DE SEGURIDAD
- INSTRUCCIONES DE SEGURIDAD DEL HORNO CON
- FUNCIÓN DE AUTO LIMPIEZ (Algunos modelos)
- ADVERTENCIA INSTRUCCIONES DE SEGURIDAD DEL CAJÓN
- CALENTADOR/ CAJÓN DEL HORNO INFERIOR (Algunos modelos)
- Cómo usar los quemadores superficiales de gas.
- Antes de Encender un Quemador de Gas
- Luego de Encender un Quemador de Gas
- Cómo Encender un Quemador Superficial de Gas
- Quemadores de Gas Sellados (Algunos modelos)
- Cómo Seleccionar el Tamaño de la Llama
- ADVERTENCIA Las llamas
- Utensilio sobre la Cocina
- Parrillas para la Parte Superior de la Cocina (Modelos con quemador sellado)
- Use el Wok de Esta Forma
- En Caso de Corte de Corriente
- Uso de los controles del horno.
- Funciones y Configuraciones del Control del Horno, Reloj y Temporizador (en algunos modelos)
- Funciones y Configuraciones del Control del Horno, Reloj y Temporizador
- Perilla de la Temperatura del Horno (en algunos modelos)
- Uso del reloj y el temporizador.
- Para Configurar el Reloj
- Para Programar el Temporizador de la Cocina
- Para Cambiar o Cancelar la Configuración del Temporizador de la Cocina
- Mostrar el Reloj Mientras el Temporizador de la Cocina Está Funcionando
- Antes de comenzar...
- PRECAUCIÓN:
- Ventilación del Horno Superior
- Cómo Configurar el Compartimiento para Asar (en algunos modelos)
- Luz del Horno
- Cómo Configurar el Horno Inferior para Horneado o Dorado
- Precalentamiento y Ubicación de Ollas
- Papel de Aluminio
- Humedad del Horno
- Cómo Programar el Horno Superior para Asar
- Guía para Asar
- Cómo Configurar el Horno para Asar
- Tanto la puerta del horno como la del compartimiento para asar se deberán cerrar durante el asado.
- Sugerencias de la Guía del Compartimiento para Asar
- Para Apagar la Pantalla del Reloj
- Para Configurar el Temporizador (sólo el horno inferior)
- Para Reiniciar el Temporizador
- Para Cancelar el Temporizador
- Tonos de Fin de Ciclo (en algunos modelos)
- Corte de Corriente
- Uso de las funciones de horneado y dorado por tiempo. (en algunos modelos)
- Cómo Configurar un Inicio Inmediato y Detención Automática
- Cómo Configurar un Inicio Retrasado y Detención Automática
- Funciones especiales en el control del horno bajo.
- Corte de 12 Horas
- Uso del Modo Sabático. (en algunos modelos)
- Cómo programar un Horneado/Asado Común
- Cómo Configurar Horneado/ Asado por Tiempo – Comienzo Inmediato y Detención Automática
- Cómo Salir el Modo Sabático
- Ajuste los termostatos - ¡Hágalo usted mismo!
- To Adjust the Lower Thermostat
- Para Ajustar el Termostato
- ¡El tipo de margarina afectará el rendimiento del horneado!
- RIESGO DE ENVENENAMIENTO CON COMIDA : Se pueden desarrollar bacterias
- Perilla de Control (en modelos equipados con una perilla)
- NOTAS:
- Al Usar el Cajón Calentador
- Deje que el cajón calentador se precaliente durante aproximadamente 25 minutos.
- Cuadro de Selección de Temperatura
- Para que Ítems Duros queden Crocantes
- Para Calentar Tazones y Platos para Servir
- PRECAUCIÓN
- Antes de un Ciclo de Limpieza
- NOTA:
- Limpie cualquier derrame importante sobre el fondo del horno.
- Cómo Configurar el Horno para su Limpieza (en modelos con la perilla OVEN
- Cómo Programar el Horno para su Limpieza
- Cuidado y limpieza de la cocina.
- Como Retrasar el Inicio de la Limpieza (en algunos modelos)
- Para Detener un Ciclo de Limpieza (en algunos modelos)
- Después de un Ciclo de Limpieza
- Ensambles del Quemador Sellado (en algunos modelos)
- PRECAUCIÓN No retire
- Ensembles del Quemador Doble Estándar (en algunos modelos)
- Cubetas de Goteo (si se incluyen)
- Tapas, Bases y Cabezas de Quemadores
- Tapas de los Quemadores
- Quemador de tres anillos (en algunos modelos)
- Cabezas de los Quemadores (en algunos modelos) y Ensamble de la Tapa/Cabeza del Quemador Ovalado (Centro)
- Luego de la limpieza
- Reemplazo de las Cabezas de los
- Quemadores (en algunos modelos)
- Ensamble de la Cabeza/ Tapa del Quemador Ovalado (Centro)
- Tapas
- Parrillas de los Quemadores
- Limpieza
- Superficie de la Parte Superior de la Cocina
- Ventilaciones de Aire del Horno
- Panel de Control Superior (en algunos modelos)
- Panel de Control Inferior (Panel del Colector Frontal) y Perillas
- Elevador de la Estufa (en modelos con quemadores gemelos estándar)
- Para levantar la estufa:
- Parte Inferior del Horno
- Puerta del Horno desmontable (en algunos modelos)
- La puerta es muy pesada. Tenga cuidado al retirar y levantar la puerta.
- Para retirar la puerta:
- Levante la Puerta del Horno (en algunos modelos)
- La puerta del horno se puede retirar, pero es pesada. Es posible que necesite ayuda para retirar y reemplazar la puerta.
- Para reemplazar la puerta:
- Estantes del Horno
- Limpieza de la Puerta
- Para limpiar el interior de la puerta:
- Para limpiar el exterior de la puerta:
- Superficies de Acero Inoxidable (en algunos modelos)
- No use virutas de acero; éstas dañarán la superficie.
- Instrucciones de Limpieza:
- Vuelva a colocar los estantes.
- NO LO USE para limpiar la parte superior de la cocina o las partes de acero inoxidable:
- Centro Nacional de Piezas
- Reemplazo de la Luz del Horno (en algunos modelos)
- Para retirar la tapa:
- Para reemplazar la tapa:
- Para retirar.
- No retire ningún tornillo para retirar la tapa.
- Panel de Almacenamiento Extraíble (en algunos modelos)
- Para retirar:
- Para reemplazar:
- Cajón de Almacenamiento Extraíble (en algunos modelos)
- Para retirar el cajón de almacenamiento:
- Bandeja para Asar y Rejilla
- Cajón asador extraíble (en algunos modelos)
- Para remover:
- Para reemplazarlo:
- Para Comenzar el Ciclo de Limpieza al Vapor:
- NOTAS IMPORTANTES:
- Instrucciones de Instalación
- Cocina
- En el Commonwealth de Massachusetts
- ANTES DE COMENZAR
- PARA SU SEGURIDAD
- Si huele gas:
- HERRAMIENTAS NECESARIAS
- MATERIALES NECESARIOS
- INSTRUCCIONES PARA UNA INSTALACIÓN SEGURA
- DIMENSIONES Y ESPACIOS
- UBICACIÓN
- ¡IMPORTANTE!
- CONVERTIR A GAS LP (o convertir nuevamente a gas natural de LP)
- BRINDE EL SUMINISTRO DE GAS ADECUADO
- CONECTE LA COCINA AL GAS
- CONEXIONES ELÉCTRICAS
- Requisitos Eléctricos
- Riesgo de
- NUNCA, BAJO NINGUNA CIRCUNSTANCIA, CORTE NI ELIMINE EL TERCER CABLE (TIERRA) DEL CABLE DE CORRIENTE.
- SELLADO DE ABERTURAS
- ENSAMBLE LOS QUEMADORES SUPERFICIALES (en algunos modelos)
- ENSAMBLE LOS QUEMADORES SUPERFICIALES (en algunos modelos) (CONT.)
- ILUMINACIÓN DE LOS QUEMADORES
- ILUMINACIÓN DE LOS QUEMADORES (CONT)
- ILUMINACIÓN DE LOS QUEMADORES (CONT.)
- D Controle el Encendido de los Quemadores de la Superficie
- Calidad de las Llamas
- E Reemplace las Piezas del Horno
- AJUSTE EL OBTURADOR DE AJUSTE DE AIRE PARA ASAR Y DEL QUEMADOR DEL HORNO EN UN HORNO DE AUTO LIMPIEZA, SI ES NECESARIO.
- Para retirar la parte inferior del horno:
- NIVELACIÓN DE LA COCINA
- NIVELACIÓN DE LA COCINA (CONT)
- INSTALACIÓN DEL DISPOSITIVO ANTI- VOLCADURAS
- ▲ ADVERTENCIA DISPOSITIVO ANTI-VOLCADURAS
- CUANDO TODAS LAS CONEXIONES SE HAYAN COMPLETADO
- Antes de Solicitar el Servicio Técnico...
- Por el Período de:
- GE Reemplazará:
- Un Año
- Qué No Cubrirá GE:
- ¿Busca Algo Más? (Not all accessories are available for all models.)
- ¡Pruebe estos otros excelentes productos para que su cocina se vea estupenda!
- ¡Aproveche al máximo su bandeja para asar! (No para usar con modelos de cajón asador.)
- ¡Oferta de tiempo limitado! ¡Envío sin cargo!
- Pequeña Grande\* Extra grande\*\*
- Formulario de solicitud de la bandeja para asar
- Garantía de la Cocina a Gas de GE. (Para clientes en Canadá)
- Por el Período de: Mabe Reemplazará:
- Qué No Cubrirá Mabe:
- Sitio Web de Electrodomésticos de GE
- Servicio Programado
- Estudio de Diseño de la Vida Real
- Garantías Extendidas
- Piezas y Accesorios
- Contáctenos
- Registre su Electrodoméstico
Marque : HOTPOINT
Modèle : RGB790SERSA
Catégorie : Four