
JS630SFSS - Four GE - Notice d'utilisation et mode d'emploi gratuit
Retrouvez gratuitement la notice de l'appareil JS630SFSS GE au format PDF.


| Type de produit | Four encastrable à convection |
| Marque | GE |
| Modèle | JS630SFSS |
| Dimensions (L x H x P) | 76,2 x 45,7 x 61 cm (30 x 18 x 24 po) |
| Poids net | 68 kg (150 lb) |
| Alimentation électrique | 240 V / 60 Hz, 30 A |
| Capacité du four | 142 L (5 pi³) |
| Types de cuisson | Convection, chaleur tournante, gril, cuisson par sonde |
| Fonctions spéciales | Autonettoyant pyrolytique, cuisson programmée, éclairage intérieur |
| Matériau de la cavité | Émail haute température |
| Porte | Double vitrage amovible |
| Commandes | Écran tactile numérique et boutons rotatifs |
| Entretien et nettoyage | Cycle d'autonettoyage, nettoyage à la vapeur disponible |
| Sécurité | Verrouillage enfant, arrêt automatique, protection contre les surchauffes |
| Pièces détachées | Disponibles via le service client GE (grilles, ampoules, sonde, etc.) |
| Réparabilité | Indice de réparabilité : 8,2 / 10 (estimation) |
| Informations générales | Four électrique de la série Profile, finition inox, compatible avec les accessoires GE |
FOIRE AUX QUESTIONS - JS630SFSS GE
Questions des utilisateurs sur JS630SFSS GE
0 question sur cet appareil. Repondez a celles que vous connaissez ou posez la votre.
Poser une nouvelle question sur cet appareil
Téléchargez la notice de votre Four au format PDF gratuitement ! Retrouvez votre notice JS630SFSS - GE et reprennez votre appareil électronique en main. Sur cette page sont publiés tous les documents nécessaires à l'utilisation de votre appareil JS630SFSS de la marque GE.
MODE D'EMPLOI JS630SFSS GE
Free-Standing, Slide-In, and Drop-In Electric Range
Español
For a Spanish version of this manual, visit our Website at GEAppliances.com.
Para consultar una version en español de este manual de instrucciones, visite nuestro sitio de internet
GEAppliances.com.
In Canada:
www.GEAppliances.ca
Printed in the United States
Safety Instructions 2-5
Owner's Manual
Operating Instructions
Kitchen Timer 11
Oven 10-25
Quick Set V,
Quick Set VI
Adjust Oven Thermostat
Baking or Roasting
Broiling, Broiling Guide
Controls 10, 11
Convection Oven 16,17
Preheating 13
Probe 18
Sabbath Feature 25
Self-Cleaning....20, 21
Proofing and Warming Features 22
Special Features 23, 24
Timed Baking and Roasting 19
Surface Units 6-9
Bridge Burner 7
Cookware 9
Glass Cooktop 8
Warming Zone 7
Care and Cleaning
Aluminum Foil 3,4,5,13
Control Knobs 26
Control Panel 26
Glass Cooktop 30,31
Lift-Off Oven Door 28
Light 27
Oven Floor 32
Oven Heating Elements 32
Racks 29
Storage Drawer 32
Surfaces 26
Vent 32
Troubleshooting Tips 33-36
Accessories 37
Consumer Support
Consumer Support .... Back Cover
Warranty 39
Write the model and serial numbers here:
Model # \_\_\_\_
Serial #
You can find them on a label behind the drawer or behind the lower oven door on the front of the range frame.

Printed on Recycled Paper
49-80651 02-12 GE
WARNING
Read all safety instructions before using the product. Failure to follow these instructions may result in fire, electric shock, serious injury or death.
ANTI-TIP DEVICE

WARNING
Tip-Over Hazard
A child or adult can tip the range and be killed.
Verify the anti-tip bracket has been properly installed and engaged.
Ensure the anti-tip bracket is re-engaged when the range is moved.
Do not operate the range without the anti-tip bracket in place and engaged.
Failure to follow these instructions can result in death or serious burns to children or adults.
To reduce the risk of tipping the range, the range must be secured by a properly installed anti-tip bracket. See installation instructions shipped with the bracket for complete details before attempting to install.
For Freestanding and Slide-In Ranges
To check if the bracket is installed and engaged properly, look underneath the range to see that the rear leveling leg is engaged in
Leveling Leg
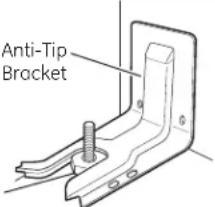
Freestanding and Slide-In Ranges
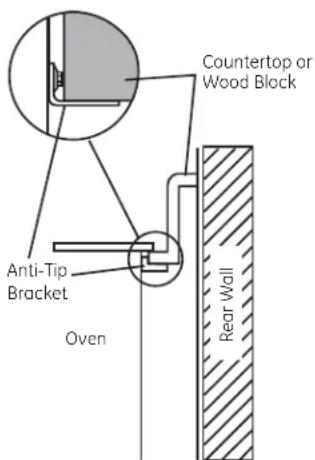
Drop-In Ranges
the bracket. On some models, the storage drawer or kick panel can be removed for easy inspection. If visual inspection is not possible, slide the range forward, confirm the anti-tip bracket is securely attached to the floor or wall, and slide the range back so the rear leveling leg is under the anti-tip bracket.
If the range is pulled from the wall for any reason, always repeat this procedure to verify the range is properly secured by the anti-tip bracket. Never completely remove the leveling legs or the range will not be secured to the anti-tip device properly.
For Drop-In Ranges
To check if the bracket is installed and engaged properly, slide the range forward, confirm the anti-tip bracket is securely attached to the rear of the range, and slide the range back so that the anti-tip bracket slides just under the countertop or wood block attached to the rear wall.
If you did not receive an anti-tip bracket with your purchase, call 1.800.626.8774 to receive one at no cost (in Canada, call 1.800.561.3344). For installation instructions of the bracket, visit GEAppliances.com (in Canada, GEAppliances.ca).
WARNING
IMPORTANT SAFETY NOTICE
The California Safe Drinking Water and Toxic Enforcement Act requires the Governor of California to publish a list of substances known to the state to cause cancer, birth defects or other reproductive harm, and requires businesses to warn customers of potential exposure to such substances.
The fiberglass insulation in self-clean ovens gives off a very small amount of carbon monoxide during the cleaning cycle. Exposure can be minimized by venting with an open window or using a ventilation fan or hood.
WARNING
GENERAL SAFETY INSTRUCTIONS
- Use this appliance for its intended purpose as described in this Owner's Manual.
- Be sure your appliance is properly installed and grounded by a qualified installer in accordance with the provided installation instructions.
Do not attempt to repair or replace any part of your range unless it is specifically recommended in this manual. All other servicing should be transferred to a qualified technician.
Before performing any service, unplug the range or disconnect the power supply at the household distribution panel by removing the fuse or switching off the circuit breaker.
Do not leave children alone—children should not be left alone or unattended in an area where an appliance is in use. They should never be allowed to climb, sit or stand on any part of the appliance.
■ CAUTION: Do not store items of interest to children above a range or on the backguard of a range—children climbing on the range to reach items could be seriously injured.
Use only dry pot holders—moist or damp pot holders on hot surfaces may result in burns from steam. Do not let pot holders touch hot surface units or heating elements. Do not use a towel or other bulky cloth in place of pot holders.
■ Never use your appliance for warming or heating the room.
Do not touch the surface units, the heating elements or the interior surface of the oven. These surfaces may be hot enough to burn even though they are dark in color. During and after use, do not touch, or let clothing or other flammable materials contact the surface units, areas nearby the surface units or any interior area of the oven; allow sufficient time for cooling first. Other surfaces of the appliance may become hot enough to cause burns. Potentially hot surfaces include the cooktop, areas facing the cooktop, oven vent opening, surfaces near the opening and crevices around the oven door.
- Do not heat unopened food containers. Pressure could build up and the container could burst, causing an injury.
Do not use aluminum foil to line the drip pans or anywhere in the oven, except as described in this manual. Misuse could result in damage to the range and shock or fire hazard.
Avoid scratching or impacting glass doors, cooktops or control panels. Doing so may lead to glass breakage. Do not cook on a product with broken glass. Shock, fire or cuts may occur.
Cook meat and poultry thoroughly—meat to at least an internal temperature of 160^ F and poultry to at least an internal temperature of 180^ F. Cooking to these temperatures usually protects against foodborne illness.
WARNING
KEEP FLAMMABLE MATERIALS AWAY FROM
THE RANGE.
Do not store or use flammable materials in an oven or near the cooktop, including paper, plastic, pot holders, linens, wall coverings, curtains, drapes and gasoline or other flammable vapors and liquids.
■ Never wear loose-fitting or hanging garments while using the appliance. These garments may ignite if they contact hot surfaces, causing severe burns.
Do not let cooking grease or other flammable materials accumulate in or near the range. Grease in the oven or on the cooktop may ignite.
- Clean ventilating hoods frequently. Grease should not be allowed to accumulate on the hood or filter.
WARNING
IN THE EVENT OF A FIRE, TAKE THE FOLLOWING STEPS
TO PREVENT THE FIRE FROM SPREADING:
Do not use water on grease fires. Never pick up a flaming pan. Turn the controls off. Smother a flaming pan on a surface unit by covering the pan completely with a well-fitting lid, cookie sheet or flat tray. Use a multi-purpose dry chemical or foam-type fire extinguisher.
If there is a fire in the oven during baking, smother the fire by closing the oven door and turning the oven off or by using a multi-purpose dry chemical or foam-type fire extinguisher.
If there is a fire in the oven during self-clean, turn the oven off and wait for the fire to go out. Do not force the door open. Introduction of fresh air at self-clean temperatures may lead to a burst of flame from the oven. Failure to follow this instruction may result in severe burns.
WARNING
COOKTOP SAFETY INSTRUCTIONS
Never leave the surface units unattended at medium or high heat settings. Boilovers cause smoking and greasy spillovers that may catch on fire.
Never leave oil unattended while frying. If allowed to heat beyond its smoking point, oil may ignite, resulting in fire that may spread to surrounding cabinets. Use a deep fat thermometer whenever possible to monitor oil temperature.
To avoid oil spillover and fire, use a minimum amount of oil when shallow pan-frying and avoid cooking frozen foods with excessive amounts of ice.
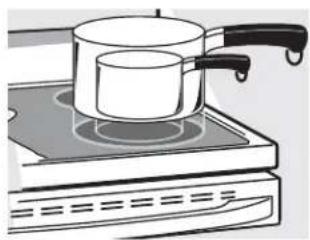
Use proper pan size—select cookware having flat bottoms large enough to cover the surface heating element. The use of undersized cookware will expose a portion of the surface unit to direct contact and may result in ignition of clothing. Proper relationship of cookware to surface unit will also improve efficiency.
Only certain types of glass, glass/ceramic, earthenware or other glazed containers are suitable for cooktop service; others may break because of the sudden change in temperature.
To minimize the possibility of burns, ignition of flammable materials and spillage, the handle of a container should be turned toward the center of the range without extending over nearby surface units.
When preparing flaming foods under a hood, turn the fan on.
If power is lost to an electric cooktop while a surface unit is ON, the surface unit will turn back ON as soon as power is restored. In the event of power loss, failure to turn all surface unit knobs to the OFF position may result in ignition of items on or near the cooktop leading to serious injury or death.
WARNING
RADIANT COOKTOP SAFETY INSTRUCTIONS
(some models)
Use care when touching the cooktop. The glass surface of the cooktop will retain heat after the controls have been turned off.
Do not cook on a broken cooktop. If glass cooktop should break, cleaning solutions and spillovers may penetrate the broken cooktop and create a risk of electric shock. Contact a qualified technician immediately.
Avoid scratching the glass cooktop. The cooktop can be scratched with items such as knives, sharp instruments, rings or other jewelry and rivets on clothing.
Do not place or store items that can melt or catch fire on the glass cooktop, even when it is not being used. If the cooktop is inadvertently turned on, they may ignite. Heat from the cooktop or oven vent after it is turned off may cause them to ignite also.
Use CERAMA BRYTE Ceramic Cooktop Cleaner and CERAMA BRYTE® Cleaning Pad to clean the cooktop. Wait until the cooktop cools and the indicator light goes out before cleaning. A wet sponge or cloth on a hot surface can cause steam burns. Some cleaners can produce noxious fumes if applied to a hot surface. NOTE: Sugar spills are an exception. They should be scraped off while still hot using an oven mitt and a scraper. See the Cleaning the glass cooktop section for detailed instructions.
Read and follow all instructions and warnings on the cleaning cream label.
WARNING
COIL COOKTOP SAFETY INSTRUCTIONS
(some models)
Do not immerse or soak the removable surface units. Do not put them in a dishwasher. Do not self-clean the surface units in an oven. Doing so may cause them to fail, presenting a burn or fire hazard.
To avoid the possibility of a burn or electric shock, always be certain that the controls for all surface units are at the OFF position and all coils are cool before attempting to lift or remove a coil surface unit.
Be sure the drip pans are not covered and are in place. Their absence during cooking could damage range parts and wiring.
Do not use aluminum foil to line drip pans. Foil can trap heat or melt, resulting in damage to the product and a shock or fire hazard.
WARNING
OVEN SAFETY INSTRUCTIONS
Stand away from the range when opening the oven door. Hot air or steam which escapes can cause burns to hands, face and/or eyes.
- Keep the oven vent unobstructed.
- Keep the oven free from grease buildup. Grease in the oven may ignite.
Place oven racks in desired location while oven is cool. If rack must be moved while oven is hot, do not let pot holder contact hot heating element in oven.
When using cooking or roasting bags in the oven, follow the manufacturer's directions.
Pull the oven rack to the stop-lock position when loading and unloading food from the oven. This helps prevent burns from touching hot surfaces of the door and oven walls.
Do not leave items such as paper, cooking utensils or food in the oven when not in use. Items stored in an oven can ignite.
Do not use aluminum foil to line the oven bottom. Foil may trap or reflect heat, leading to a shock or fire hazard.
WARNING
SELF-CLEANING OVEN SAFETY INSTRUCTIONS
(Some models)
The self-cleaning feature operates the oven at temperatures high enough to burn away food soils in the oven. Follow these instructions for safe operation.
Before operating the self-clean cycle, remove pans, shiny metal oven racks and other utensils from the oven. Only gray or black porcelain-coated oven racks and drip pans may be left in the oven. Do not use self-clean to clean other parts, such as shiny drip pans or bowls.
Before operating the self-clean cycle, wipe grease and food soils from the oven. Excessive amount of grease may ignite, leading to smoke damage to your home.
If the self-cleaning mode malfunctions, turn the oven off and disconnect the power supply. Have it serviced by a qualified technician.
Do not clean the door gasket. The door gasket is essential for a good seal. Care should be taken not to rub, damage or move the gasket.
Do not use oven cleaners. No commercial oven cleaner or oven liner protective coating of any kind should be used in or around any part of the oven.
WARNING
WARMING DRAWER SAFETY INSTRUCTIONS (some models)
The purpose of the warming drawer is to hold hot cooked foods at serving temperature. Bacteria will grow in food while it is below 140°F. Do not put cold food in warming drawer. Do not heat food for more than 2 hours. Failure to follow these instructions may result in foodborne illness.
Do not leave paper products, plastics, canned food or combustible materials in the drawer. They may ignite.
Do not touch the heating element or the interior surface of the drawer. These surfaces may be hot enough to cause burns.
Use care when opening the drawer. Open the drawer a crack and let hot air or steam escape before removing or replacing food. Hot air or steam that escapes can cause burns to hands, face and/or eyes.
Do not use aluminum foil to line the lower drawer. The foil will trap heat below, and upset the performance of the oven. Foil can melt and permanently damage the drawer bottom. Damage from improper use of aluminum foil is not covered by the product warranty.
Using the surface units.
WARNING
FIRE HAZARD: Never leave the range unattended with the cooktop on medium or high settings. Keep flammable items away from the cooktop. Turn off all controls when done cooking. Failure to follow these instructions can result in fire, serious injury or death.
Throughout this manual, features and appearance may vary from your model.
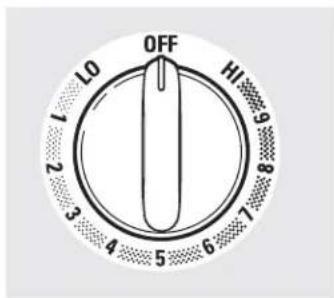
At both OFF and HI the control clicks into position. You may hear slight clicking sounds during cooking, indicating the control is maintaining your desired setting.
Be sure you turn the control knob to OFF when you finish cooking.
How to Set
Push the knob in and turn in either direction to the setting you want.
A surface ON indicator light will glow when any surface unit is on
For glass cooktop surfaces:
A HOT COOKTOP indicator light will:
■ come on when the unit is hot to the touch.
■ stay on even after the unit is turned off.
■ stay on until the unit is cooled to approximately 150°F.
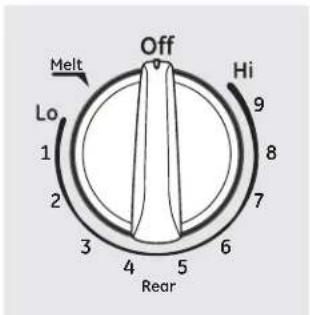
Melt setting (on some models) will melt chocolate or butter. Simmer setting (on some models) will simmer sauces.
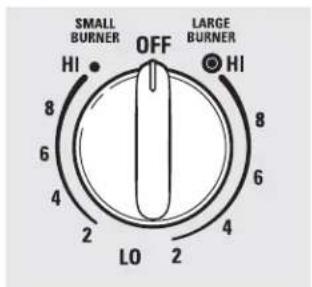
Models with a Dual-Ring surface element only
Dual and Triple Surface Units and Control Knobs (on some models)
The surface unit has 2 or 3 cooking sizes to select from so you can match the size of the unit to the size of the cookware you are using.
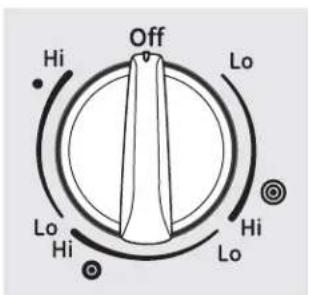
Models with a Tri-Ring surface element only.
natural_image
Illustration of a cooking pot on an induction cooktop with a stove (no text or symbols)Throughout this manual, features and appearance may vary from your model.
Models with a bridge burner only.
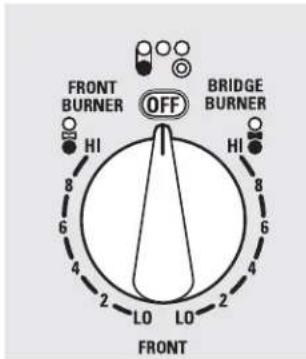
Using the Bridge Burner (on some models)
To use the bridge burner, turn the left-front control knob to the BRIDGE BURNER settings.
For full bridge surface unit operation, also turn on the left-rear surface unit.
To use only the front surface unit, turn the control knob to the FRONT BURNER settings.
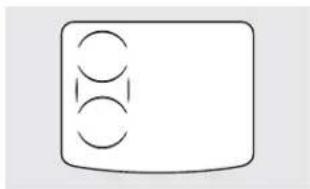
natural_image
Simple line drawing of a rectangular object with three circular cutouts on the top (no text or symbols)Warming Zone
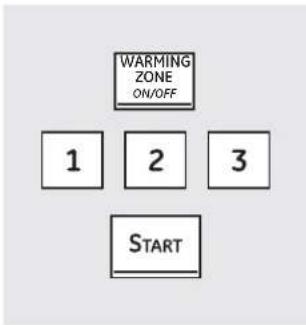
Using the Warming Zone
WARNING
FOOD POISON HAZARD: Bacteria may grow in food at temperatures below 140°F.
■ Always start with hot food. Do not use warm setting to heat cold food.
- Do not use warm setting for more than 2 hours.
Failure to follow these instructions may result in foodborne illness.
The WARMING ZONE, located in the back center of the glass surface, will keep hot, cooked food at serving temperature. Always start with hot food. Do not use to heat cold food. Placing uncooked or cold food on the WARMING ZONE could result in foodborne illness.
To use the WARMING ZONE:
1 Touch the WARMING ZONE ON/OFF pad.
2 Touch the 1 (low), 2 (medium), or 3 (high) pad to select the desired control setting.
3 Touch the START pad. WARMER HOT ON will be in the control display.
To turn off the WARMING ZONE:
Touch the WARMING ZONE ON/OFF pad. NOTE: The CLEAR/OFF pad will not turn off the WARMING ZONE.
For best results, all foods on the WARMING ZONE should be covered with a lid or aluminum foil. When warming pastries or breads, the cover should be vented to allow moisture to escape.
Use the lowest setting for breads and pastries. Use a medium setting for vegetables, sauces, stews, cream soups, butter and chocolate. Use the highest setting for soups (liquid) and hot beverages. These initial suggested settings are for reference only. The temperature, type and amount of food, type of pan, and the time held will affect the quality of the food.
Always use pot holders or oven mitts when removing food from the WARMING ZONE, since cookware and plates will be hot.
NOTE: The surface warmer will not glow red like the cooking elements.
Home Canning Tips
Be sure the canner is centered over the surface unit.
Make sure the canner is flat on the bottom.
To prevent burns from steam or heat, use caution when canning.
Use recipes and procedures from reputable sources. These are available from manufacturers such as Ball® and Kerr® and the Department of Agriculture Extension Service.
Flat-bottomed canners are recommended. Use of water bath canners with rippled bottoms may extend the time required to bring the water to a boil.
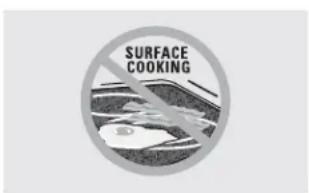
Never cook directly on the glass. Always use cookware.
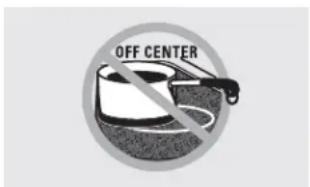
Always place the pan in the center of the surface unit you are cooking on.
For Models With a Radiant Glass Cooktop
The radiant cooktop features heating units beneath a smooth glass surface.
NOTE: A slight odor is normal when a new cooktop is used for the first time. It is caused by the heating of new parts and insulating materials and will disappear in a short time.
NOTE: On models with light-colored glass cooktops, it is normal for the cooking zones to change color when hot or cooling down. This is temporary and will disappear as the glass cools to room temperature.
The surface unit will cycle on and off to maintain your selected control setting.
It is safe to place hot cookware on the glass surface even when the cooktop is cool.
Even after the surface units are turned off, the glass cooktop retains enough heat to continue cooking. To avoid overcooking, remove pans from the surface units when the food is cooked. Avoid placing anything on the surface unit until it has cooled completely.
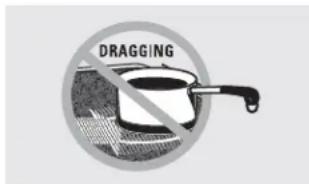
Do not slide cookware across the cooktop because it can scratch the glass—the glass is scratch-resistant, not scratchproof.
Water stains (mineral deposits) are removable using the cleaning cream or full-strength white vinegar.
Use of window cleaner may leave an iridescent film on the cooktop. The cleaning cream will remove this film.
- Don't store heavy items above the cooktop. If they drop onto the cooktop, they can cause damage.
- Do not use the surface as a cutting board.
Temperature Limiter on Radiant Glass Cooktops
Every radiant surface unit has a temperature limiter.
The temperature limiter protects the glass cooktop from getting too hot.
The temperature limiter may cycle the surface units off for a time if:
■ the pan boils dry.
■ the pan bottom is not flat.
■ the pan is off-center.
■ there is no pan on the unit.
Selecting types of cookware for radiant glass cooktop models.
GEAppliances.com
The following information will help you choose cookware which will give good performance on glass cooktops.
natural_image
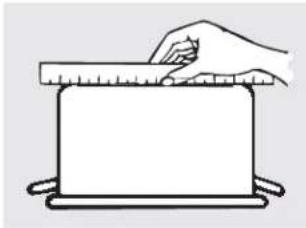
Simple line drawing of a hand holding a ruler above a rectangular object (no text or symbols)Check pans for flat bottoms by using a straight edge.
Stainless Steel:
recommended
Porcelain Enamel on Cast Iron:
recommended if bottom of pan is coated
Aluminum:
heavy weight recommended
Good conductivity. Aluminum residues sometimes appear as scratches on the cooktop but can be removed if cleaned immediately. Because of its low melting point, thin weight aluminum should not be used.
Porcelain Enamel on Steel:
not recommended
Heating empty pans can cause permanent damage to cooktop glass. The enamel can melt and bond to the ceramic cooktop.
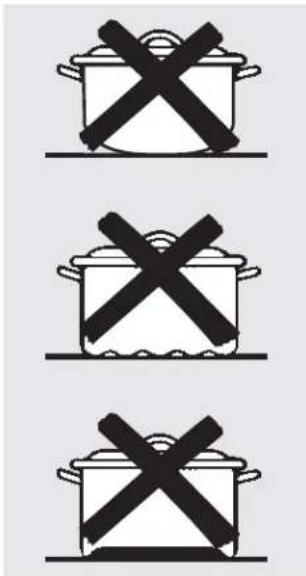
Pans with rounded, curved, ridged or warped bottoms are not recommended.
Copper Bottom:
recommended
Copper may leave residues which can appear as scratches. The residues can be removed, as long as the cooktop is cleaned immediately. However, do not let these pots boil dry. Overheated metal can bond to glass cooktops. An overheated copper bottom pot will leave a residue that will permanently stain the cooktop if not removed immediately.
Glass-ceramic:
not recommended
Poor performance. Will scratch the surface.
Stoneware:
not recommended
Poor performance. May scratch the surface.
Cast Iron:
not recommended—unless designed specifically for glass cooktops
Poor conductivity and slow to absorb heat. Will scratch the cooktop surface.
NOTE: Follow all cookware manufacturer's recommendations when using any type of cookware on the ceramic cooktop.
For Best Results
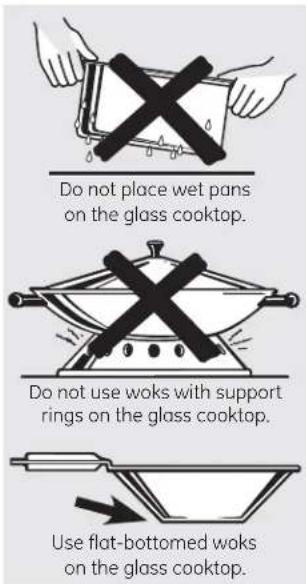
Place only dry pans on the surface elements. Do not place lids on the surface elements, particularly wet lids. Wet pans and lids may stick to the surface when cool.
Do not use woks that have support rings. This type of wok will not heat on glass surface elements.
We recommend that you use only a flat-bottomed wok. They are available at your local retail store. The bottom of the wok should have the same diameter as the surface element to ensure proper contact.
Some special cooking procedures require specific cookware such as pressure cookers or deep-fat fryers. All cookware must have flat bottoms and be the correct size.
Using the oven controls.
Throughout this manual, features and appearance may vary from your model.
BROIL HI/LO Pad
Touch this pad to select the broil function. See the How to Set the Oven for Broiling section.
BAKE Pad
Touch this pad to select the bake function. See the How to Set the Oven for Baking section.
CONVECTION BAKE Pad
Uses a fan to circulate air in the oven. See the Using the convection oven section.
CONVECTION ROAST Pad
Touch to roast large tender cuts of meat. See the Using the convection oven section.
WARM Pad
Touch to keep cooked foods warm. See the How to Set the Oven for Warming section.
PROBE Pad
Touch when using the probe to automatically cook to a desired internal food temperature. See the Using the Probe section.
SELF CLEAN Pad
Touch to self-clean the oven. See the Using the Self-Cleaning Oven section.
CLEAR/OFF Pad
Touch to cancel ALL oven operations except the clock and timer.
START Pad
Must be touched to start any cooking or cleaning function.
WARMING ZONE Pad
Touch to keep hot, cooked food warm. See the Using the Warming Zone section.
OVEN LIGHT Pad
Touch to turn the oven lights on or off.
KITCHEN TIMER ON/OFF Pad
NOTE: When setting times, you are setting hours and minutes only. The lowest time you can set is one minute.
Touch to set the kitchen timer. See the Using the Kitchen Timer section
COOKING TIME Pad
NOTE: When setting times, you are setting hours and minutes only. The lowest time you can set is one minute.
Touch this pad and then touch the number pads to set the amount of time you want your food to cook. The oven will shut off when the cooking time has run out.
DELAY START Pad
Touch this pad to set the oven to start automatically at a time you set.
CLOCK Pad
The clock must be set to the correct time of day for the automatic oven timing functions to work properly. The time of day cannot be changed during a timed baking or self-cleaning cycle.
See To set the clock section.
If your oven was set for a timed oven operation and a power outage occurred, the clock and all programmed functions must be reset. The time of day will flash in the display when there has been a power outage.
CONTROL LOCKOUT
The control pads can be locked so they cannot be activated when touched. See the How to Lock Out the Controls section.
PROOF Pad
Touch to raise yeast-leavened products. See the How to Set the Oven for Proofing section.
 | To Set the ClockThe clock must be set to the correct time of day for theDelay Startfunctions to work properly. The time of day cannot be changed during a delayed cooking or a delayed self-cleaning cycle.1 Touch theCLOCKpad.2 Touch the number pads until the correct time of day is shown in the display. If the number pads are not touched within one minute after you touch theCLOCKpad, the display reverts to the original setting. If this happens, touch theCLOCKpad and enter the time of day. | 3 Touch theSTARTpad until the time of day shows in the display. This enters the time and starts the clock.To check the time of day when the display is showing other information, touch theCLOCKpad. The time of day shows until another pad is touched. To change the time format or turn off the clock display, see the Special Features section. |
 The Kitchen Timer is in hours and minutes.The Kitchen Timer does not control oven operations. The maximum setting on the Kitchen Timer is 9 hours and 59 minutes. The Kitchen Timer is in hours and minutes.The Kitchen Timer does not control oven operations. The maximum setting on the Kitchen Timer is 9 hours and 59 minutes. | To Set the Kitchen Timer1 Touch theKITCHEN TIMER ON/OFFpad.2 Touch the number pads until the amount of time you want shows in the display. For example, to set 2 hours and 45 minutes, touch 2, 4 and 5 in that order. If you make a mistake, touch theKITCHEN TIMER ON/OFFpad and begin again.3 Touch theSTARTpad.After touching theSTARTpad, SETdisappears; this tells you the time is counting down, although the display does not change until one minute | has passed. Seconds will not be shown in the display until the last minute is counting down.4 When the kitchen timer reaches .00, the control will beep 3 times followed by one beep every 6 seconds until theKITCHEN TIMER ON/OFFpad is touched.The 6-second tone can be cancelled by following the steps in the Special features of your oven control section under Tones at the End of a Timed Cycle. |
| To Reset the Kitchen TimerIf the display is still showing the time remaining, you may change it by touching theKITCHEN TIMER ON/OFFpad, then touching the number pads so that the time you want appears in the display. | If the remaining time is not in the display (clock, delay start or cooking time are in the display), recall the remaining time by touching theKITCHEN TIMER ON/OFFpad and then touch the number pads to enter the new time you want. | |
 | To Cancel the Kitchen TimerTouch theKITCHEN TIMER ON/OFFpad twice. | |
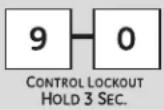 | How to Lock Out the ControlsControl Lockoutwill allow you to lock out the touch pads so they cannot be activated when touched.To lock/unlock the controls:1 Touch and hold the9and0pads at the same time for 3 seconds. The display will showLOC ON. | 2 To unlock the control, touch and hold the 9 and 0pads at the same time for 3 seconds. The display will showLOC OFF.When this feature is on, the touch pads will not respond except for theClear/Offpad.■ The adjustment will be retained in memory after a power failure. |
Using the oven.
To avoid possible burns, place the racks in the desired position before you turn on the oven.
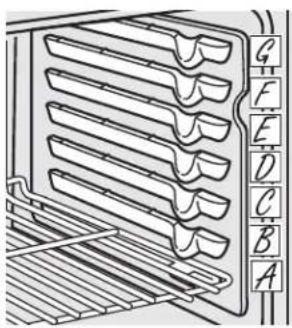
The number of rack positions may vary by model.
natural_image
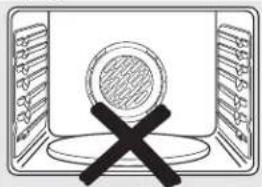
Simple line drawing of a computer monitor with a circular screen and a cross symbol (no text or symbols present)Never place cooking utensils, baking stones, foil, or any other items on the oven floor.
Before you begin...
The racks have stops, so that when placed correctly on the supports, they will stop before coming completely out and will not tilt.
When placing and removing cookware, pull the rack out until it stops.
On some models, the bake heating element is under the oven floor. Never place cooking utensils, baking stones, foil, or any other items on the oven floor.
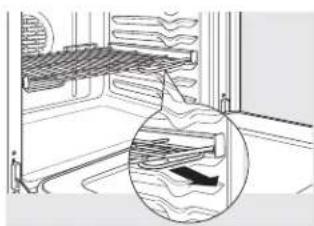
To remove a rack, pull it toward you, tilt the front end up and pull it out.
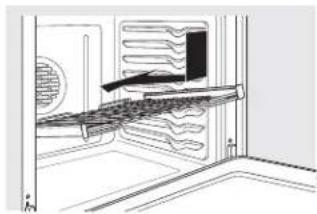
To replace, place the end of the rack (stop-locks) on the support, tilt up the front and push the rack in.
CAUTION
BURN HAZARD: Avoid touching the hot door surface when using the oven rack in the lowest position. Always use 2 hands and 2 mitten pot holders to move the rack. Pull the rack out a few inches and then carefully grasp the sides of the rack to pull it out the rest of the way.
natural_image
Diagram of a kitchen interior showing a rack with insulation and a magnified view of insulation layers (no text or symbols)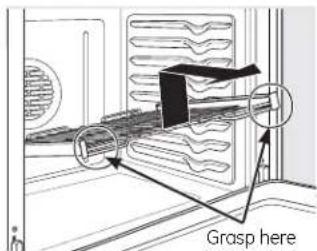
natural_image
Line drawing of an oven interior showing ventilation ducts and tray (no text or symbols)Extension Rack (on some models)
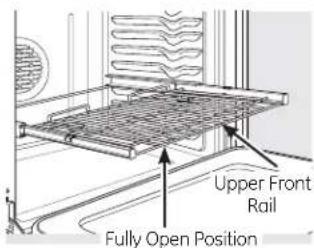
When placing and removing cookware, always pull the rack out by its upper front rail to its fully open position.
Do not extend the rack quickly. Food may slide off the front of the rack.
To remove the rack:
1 Make sure the rack is pushed all the way into the oven so that side paddles on the rack from disengaged with oven support.
2 Slide the rack toward you to the bump (stop position) on the rack support.
3 Firmly grasp both sides of the rack frame and the sliding rack, tilt the front end up and pull it out.
NOTE: When handling the extension rack, do not allow the sliding portion to fall open. This can damage the slides.
To replace the rack:
1 Firmly grasp both sides of the rack frame and the sliding rack.
2 Place the curved end of the rack (stop-locks) onto the oven supports, tilt up the front of the rack and push it in as far as it will go.
CAUTION
Never use the rack when its frame is not fully inserted in the oven and locked into position.
When the rack is properly installed and locked into position, the locking side paddles on the rack frame will click-lock into place on the oven supports. If the side paddles did not click-lock into position, repeat the steps above and make sure the side paddles have been correctly cleaned and lubricated. See Extension Rack in the Care and cleaning section.
Aluminum Foil
Do not use aluminum foil to line oven bottoms. The foil will trap heat below and upset the performance of the oven. Foil can melt and permanently damage the oven bottom. Damage from improper use of aluminum foil is not covered by the product warranty.
Foil may be used to catch spills by placing a sheet on a lower rack, several inches below the food. Do not use more foil than necessary and never entirely cover an oven rack with aluminum foil. Keep foil at least 1-1/2" from oven walls to prevent poor heat circulation.
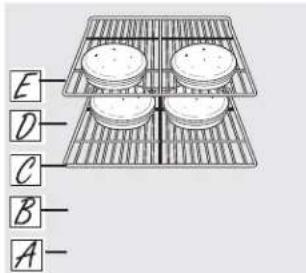
Rack position for baking 4 layer cakes.
Preheating and Pan Placement
To avoid possible burns, place the racks in the desired position before you turn on the oven.
Preheat the oven if the recipe calls for it. Preheating is necessary for good results when baking cakes, cookies, pastries and breads.
If baking four cake layers at the same time, place two layers on rack C and two layers on rack E. Stagger pans on the rack so one is not directly above the other.
Baking results will be better if food is centered in the oven as much as possible. Angel food cake is the exception and should be placed on the bottom oven rack (position A). Follow package directions on prepackaged and frozen foods for pan placement. Pans should not touch each other or the walls of the oven. If you need to use two racks, stagger the pans so one is not directly above the other. Leave approximately 1½" between pans and from the front, back and sides of oven wall.
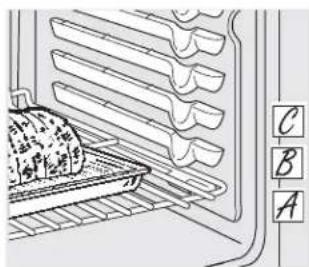
How to Set the Oven for Baking or Roasting
1 Touch the BAKE pad.
2 Touch the number pads until the desired temperature is displayed.
3 Touch the START pad.
The oven will start automatically. The display will show the changing temperature starting at 100^ F. (The temperature display will start to change once the oven temperature reaches 100^ F.) When the oven reaches the selected temperature, the oven control will beep several times and the display will show the oven temperature.
NOTE: You may hear the convection fan (on some models) while the oven is preheating. The fan will stop after the oven is preheated and the display shows your set temperature. This is normal.
To change the oven temperature during the BAKE cycle, touch the BAKE pad and then the number pads to get the new temperature.
4 Check food for doneness at the minimum time on the recipe. Cook longer if necessary.
5 Touch the CLEAR/OFF pad when baking is finished, and then remove the food from the oven.
Roasting Guide
| Meat | Oven Temp. Internal Temp. | ||||
| Beef Ribon- and Boneless | Roast (4 to 8 lbs.) Rare Medium | 325°F | 145°F | ||
| Beef Tenderloin (4 to 6 lbs.) | Tenderloin (4 to 6 lbs.) Rare | 425°F | 145°F | ||
| Beef Tenderloin (2 to 3 lbs.) | Tenderloin (2 to 3 lbs.) Rare | 425°F | 145°F | ||
| Pork | Bone-In, Boneless (3 to 5 lbs.) | 325°F | 160°F | ||
| LambBoneless | Bone-In (5 to 9 lbs.) Medium (4 to 7 lbs.) Medium | Medium 375°F | 325°F | 165°F | |
| Poultry | Whole Chicken (5 to 7 lbs.) | 350°F | 170°F | ||
| Turkey, Whole*Unstuffed (10 to 16 lbs.) | 325°F | 170°-180°F | |||
| Unstuffed (18 to 24 lbs.) | 325°F | 170°-180°F | |||
| Turkey | Breast (4 to 6 lbs.) | 325°F | 170°F | ||
* Stuffed birds generally require 30–45 minutes additional roasting time. Shield legs and breast with foil to prevent overbrowning and drying of skin.
natural_image
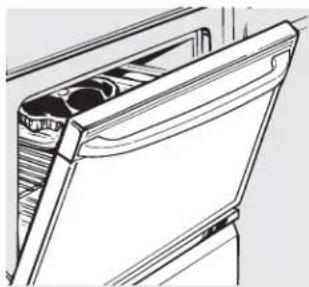
Line drawing of a mechanical component with internal cavities and mounting brackets (no text or symbols)Leave the door open to the broil stop position. The door stays open by itself, yet the proper temperature is maintained in the oven.
How to Set the Oven for Broiling
Use LO Broil to cook foods such as poultry or thick cuts of meat thoroughly without overbrowning them.
Place the meat or fish on a broiler grid in a broiler pan designed for broiling.
2 Follow suggested rack positions in the Broiling Guide.
3 Touch the BROIL HI/LO pad once for HI Broil.
To change to LO Broil, touch the BROIL HI/LO pad again.
4 Touch the START pad.
5 When broiling is finished, touch the CLEAR/OFF pad.
The size, weight, thickness, starting temperature and your preference of doneness will affect broiling times. This guide is based on meats at refrigerator temperature.
† The U.S. Department of Agriculture says "Rare beef is popular, but you should know that cooking it to only 140°F means some food poisoning organisms may survive." (Source: Safe Food Book. Your Kitchen Guide. USDA Rev. June 1985.)
Broiling Guide
Preheat the broiler for 2 minutes to improve performance.
| Type or Food Doneness | Thickness | Rack Position | Comments | |
| Beef | Rare (140°F) | Steaks - 1" thick | E or F (food should be 1" to 3" from broil element) | Steaks less than 1" thick are difficult to cook rare. They cook through before browning. To prevent curling of meat, slash fat at 1" intervals. |
| Medium (160°F) | Steaks - 3/4" to 1" thick | E (food should be 3" to 4" from broil element) | ||
| Well Done (170°F) | Steaks - 3/4" to 1" thick or Ground Beef Patties | D or E (food should be 3" to 5" from broil element) | ||
| Chicken | Breast, boneless | C (food should be 8" to 9" from broil element) | Broil skin-side-down first. | |
| Breast, bone-in | C (food should be 7" to 8" from broil element) | |||
| Fish Fillets | 1/2" to 1" thick | D or E (food should be 3" to 6" from broil element) | Handle and turn very carefully. | |
| Pork Chops | Well Done (170°F) | 3/4" thick | D (food should be 6" to 7" from broil element) | To prevent curling of meat, slash fat at 1" intervals. |
If your range is connected to 208 volts, rare steaks may be broiled by preheating the broiler and positioning the oven rack one position higher.
You may find that your new oven cooks differently than the one it replaced. Use your new oven for a few weeks to become more familiar with it. If you still think your new oven is too hot or too cold, you can adjust the thermostat yourself.
Do not use thermometers, such as those found in grocery stores, to check the temperature setting of your oven. These thermometers may vary 20–40 degrees.
NOTE: This adjustment will only affect baking and roasting temperatures; it will not affect broiling or self-cleaning temperatures. The adjustment will be retained in memory after a power failure.
flowchart
graph TD
    A["BROIL Hi/Lo"] + B["BAKE"] --> C["BAKE"]
    C --> D["1 2 3 4 5"]
    D --> E["6 7 8 9 0"]
    E --> F["START"]
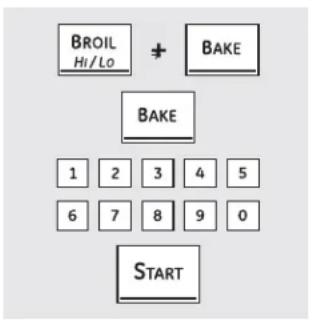
To Adjust the Thermostat
1 Touch the BROIL HI/LO and BAKE pads at the same time until the display shows SF.
2 Touch the BAKE pad. A number shows in the display.
3 The oven temperature can be adjusted up to (+) 35^ F hotter or (-) 35^ F cooler. Touch the number pads the same way you read them. For example, to change the oven temperature 15^ F, touch 1 and 5.
Touch the BAKE pad, again, to alternate between increasing and decreasing the oven temperature.
When you have made the adjustment, touch the START pad to go back to the time of day display. Use your oven as you would normally.
The type of margarine will affect baking performance!
Most recipes for baking have been developed using high-fat products such as butter or margarine (80% fat). If you decrease the fat, the recipe may not give the same results as with a higher-fat product.
Recipe failure can result if cakes, pies, pastries, cookies or candies are made with low-fat spreads. The lower the fat content of a spread product, the more noticeable these differences become.
Federal standards require products labeled "margarine" to contain at least 80% fat by weight. Low-fat spreads, on the other hand, contain less fat and more water. The high moisture content of these spreads affects the texture and flavor of baked goods. For best results with your old favorite recipes, use margarine, butter or stick spreads containing at least 70% vegetable oil.
Using the convection oven. (on some models)
natural_image
Diagram of a kitchen appliance with arms and legs, showing internal components (no text or labels)Convection Fan Operation
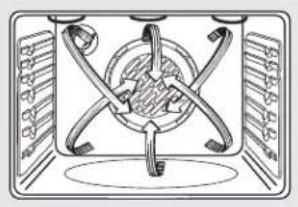
In a convection oven, a fan circulates hot air over, under and around the food.
This circulating hot air is evenly distributed throughout the oven cavity. As a result, foods are evenly cooked and browned—often in less time with convection heat.
NOTE: On some models, the fan is designed to rotate in both directions, with a pause in between. This is normal.
The convection fan shuts off when the oven door is opened. DO NOT leave the door open for long periods of time while using convection cooking or you may shorten the life of the convection heating element.
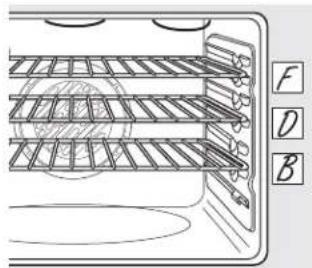
Multi-rack position.
Multi-Rack Convection Baking (on some models)
Because heated air is circulated evenly throughout the oven, foods can be baked with excellent results using multiple racks.
Multi-rack baking may increase cook times slightly for some foods but the overall result is time saved. Cookies, muffins, biscuits and other quickbreads give very good results with multi-rack baking.
When baking on 3 racks, place one rack in the second (B) position, another rack in the fourth (D) position and the third rack in the sixth (F) position.
For two-rack baking, place one rack in the second (B) rack position. Place the other rack in the fifth (E) rack position.
1-Rack Convection Baking (on some models)
When convection baking with only 1 rack, place the food so that it is centered in the oven.
Convection Roast (on some models)
Good for large tender cuts of meat, uncovered.
The convection fan circulates the heated air evenly over and around the food. Meat and poultry are browned on all sides as if they were cooked on a rotisserie. The heated air seals in juices quickly for a moist and tender product while, at the same time, creating a rich golden brown exterior.
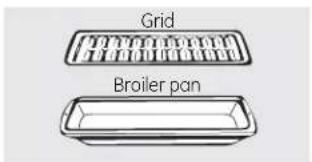
When you are convection roasting, it is important that you use a broiler pan and grid for best convection roasting results. The pan is used to catch grease spills and the grid is used to prevent grease spatters.
flowchart
graph TD
    A["CONVECTION BAKE"] --> B["1"]
    C["CONVECTION ROAST"] --> D["2"]
    B --> E["3"]
    D --> F["4"]
    E --> G["5"]
    F --> H["6"]
    G --> I["7"]
    H --> J["8"]
    I --> K["9"]
    J --> L["0"]
    M["START"] --> N["CLEAR/OFF"]
How to Set the Oven for Convection Baking or Roasting
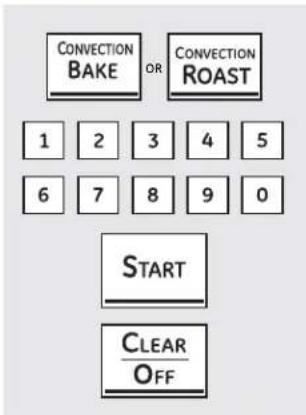
1 Touch the CONVECTION BAKE pad (on some models) once for multi-rack convection baking. See the Multi-Rack Convection Baking section.
Touch the CONVECTION BAKE pad (on some models) twice for 1-rack convection baking. See the 1-Rack Convection Baking section.
Touch the CONVECTION ROAST pad for convection roasting (on some models).
2 Touch the number pads to set the oven temperature.
3 Touch the START pad.
NOTE: If the Auto Recipe™ Conversion Feature is on, it will automatically reduce the set regular baking temperature by approximately 25°F to the appropriate convection temperature in convection bake mode. See Auto Recipe™ Conversion in the Special Features section.
To change the oven temperature, touch the CONVECTION BAKE or CONVECTION ROAST pad and then the number pads to set the new temperature.
When the oven starts to heat, the changing temperature, starting at 100^ F, will be displayed. When oven reaches the temperature you set, 3 beeps will sound.
4 Touch CLEAR/OFF pad when finished.
You will hear a fan while cooking with convection. The fan will stop when the door is opened, but the heat will not turn off.
■ You may hear the oven clicking during baking. This is normal.
When baking cookies, you will get the best results if you use a flat cookie sheet instead of a pan with low sides.
Cookware for Convection Cooking
Before using your convection oven, check to see if your cookware leaves room for air circulation in the oven. If you are baking with several pans, leave space between them. Also, be sure the pans do not touch each other or the walls of the oven.
Paper and Plastic
Heat-resistant paper and plastic containers that are recommended for use in regular baking can also be used for convection baking but should not be used at temperatures higher than the temperature recommended by the cookware manufacturer. Plastic cookware that is heat-resistant to temperatures of 400^ F can also be used.
Metal and Glass
Any type of cookware will work in your convection oven; however, metal pans heat the fastest and are recommended for convection baking.
Darkened or matte-finished pans will bake faster than shiny pans.
■ Glass or ceramic pans cook more slowly.
For recipes like oven-baked chicken, use a pan with low sides. Hot air cannot circulate well around food in a pan with high sides.
For many foods, especially roasts and poultry, internal food temperature is the best test for doneness. The temperature probe takes the guesswork out of roasting by cooking foods to the exact doneness you want.
natural_image
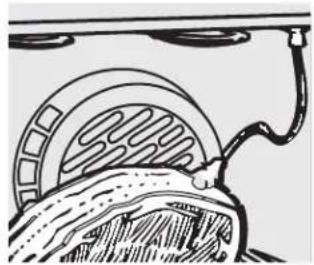
Diagram of a mechanical or electrical component with concentric rings and a cable, no visible text or symbolsThe temperature probe has a skewer-like probe at one end and a plug at the other end that goes into the outlet in the oven.
CAUTION
To prevent burns, do not unplug the probe from the oven outlet until the oven has cooled.
Use of probes other than the one provided with this product may result in damage to the probe or oven control.
Use the handles of the probe and plug when inserting and removing them from the food and outlet.
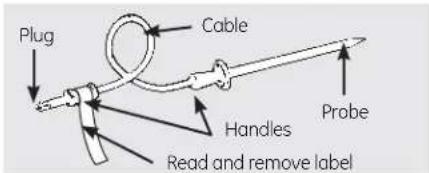
Never leave your probe inside the oven during a self-cleaning or broil cycle.
Do not store the probe in the oven.
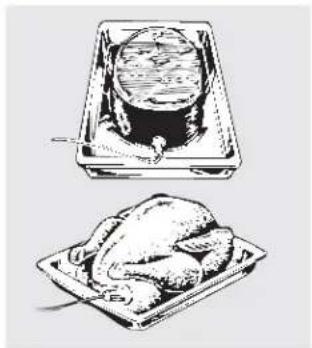
For roasts with no bone, insert the probe into the meatiest part of the roast. For bone-in ham or lamb, insert the probe into the center of the
dlowest large muscle.
natural_image
Illustration of a kitchen appliance and a roasted chicken (no text or symbols)To avoid damaging your probe, do not use tongs to pull on the cable when removing it.
To avoid breaking the probe, make sure food is completely defrosted before inserting.
After preparing the meat and placing it on a trivet or a broiler pan grid, follow these directions for proper probe placement.
Insert the probe completely into the meat. It should not touch bone, fat or gristle.
NOTE: Failure to fully insert the probe into the meat may result in poor cooking performance because the probe will sense the oven air vs. the food temperature.
Insert the probe into the center of dishes such as meat loaf or casseroles.
Insert the probe into the meatiest part of the inner thigh from below and parallel to the leg of a whole turkey.
NOTE: Self-clean and Broil settings will not work if the temperature probe is plugged in.
flowchart
graph TD
    A["PROBE"] --> B["1 2 3 4 5"]
    B --> C["6 7 8 9 0"]
    C --> D["BAKE OR CONVECTION BAKE"]
    D --> E["1 2 3 4 5"]
    E --> F["6 7 8 9 0"]
    F --> G["START"]
    G --> H["CLEAR OFF"]
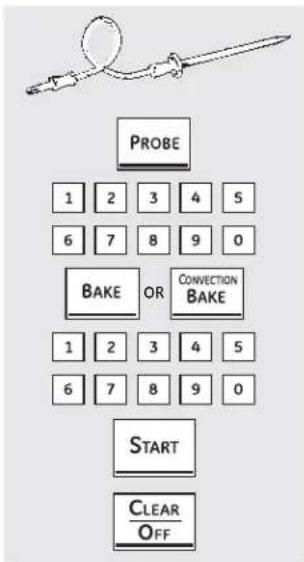
How to Set the Oven For Baking/Roasting When Using the Probe
(on some models)
1 Insert the probe fully into the food.
2 Plug the probe into the outlet in the oven. Make sure it's pushed all the way in. Close the oven door. Make sure the probe cable is not touching the broil element.
3 Touch the PROBE pad. Display will show "Set Probe."
4 Touch the number pads to set the desired internal food or meat temperature. The maximum internal temperature for the food that you can set is 200°F.
5 Touch the BAKE or CONVECTION pad.
6 Touch the number pads to set the desired oven temperature.
7 Touch the START pad.
The display will flash if the probe is inserted into the outlet and you have not set a probe temperature and touched the START pad.
Touch the PROBE pad to recall the probe temperature or BAKE or CONVECTION pad to recall the oven temperature. For the probe temperature, after the internal temperature of the food reaches 100°F, the changing temperature will be shown in the display.
8 When the internal temperature of the food reaches the number you have set, the probe and the oven turn off and the oven control signals. To stop the signal, touch the CLEAR/OFF pad. Use hot pads to remove the probe from the food. Do not use tongs to pull on it—they might damage it.
If the probe is removed from the oven while probe cooking, the oven will not automatically turn off.
To change the oven temperature during the Bake/Roast cycle, touch the BAKE or CONVECTION pad and then the number pads to set the new temperature.
- You can use the Kitchen Timer even though you cannot use timed oven operations while using the probe.
NOTE: Foods that spoil easily—such as milk, eggs, fish, stuffings, poultry and pork—should not be allowed to sit for more than 1 hour before or after cooking. Room temperature promotes the growth of harmful bacteria. Be sure that the oven light is off because heat from the bulb will speed harmful bacteria growth.
flowchart
graph TD
    A["BAKE"] --> B["1"]
    C["OR"] --> D["2"]
    E["CONVECTION BAKE"] --> F["3"]
    G["6"] --> H["7"]
    I["8"] --> J["9"]
    K["0"] --> L["0"]
    M["START"] --> N["COOKING TIME"]
    O["START"] --> P["CLEAR OFF"]
    Q["1"] --> R["2"]
    S["3"] --> T["4"]
    U["5"] --> V["5"]
    W["6"] --> X["7"]
    Y["8"] --> Z["9"]
    AA["0"] --> AB["0"]
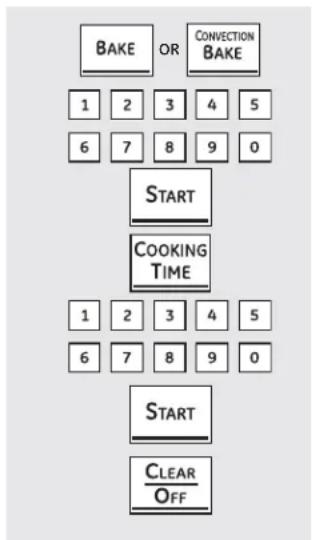
How to Set an Immediate Start and Automatic Stop
The oven will turn on immediately and cook for a selected length of time. At the end of the cooking time the oven will turn off automatically.
1 Touch the BAKE or CONVECTION BAKE pad or other desired cooking function.
2 Touch the number pads to set the desired oven temperature.
3 Touch the START pad.
4 Touch the COOKING TIME pad.
NOTE: If your recipe requires preheating, you may need to add additional time to the length of the cooking time.
5 Touch the number pads to set the desired length of cooking time. The minimum cooking time you can set is 1 minute.
The oven temperature that you set and the cooking time that you entered will be in the display.
6 Touch the START pad.
The oven will turn ON, and the display will show the cooking time countdown and the changing temperature starting at 100^ F. (The temperature display will start to change once the oven temperature reaches 100^ F.) When the oven reaches the temperature you set, 3 beeps will sound.
The oven will continue to cook for the set amount of time, then turn off automatically, unless the WARM feature was set. See the How to Set the Oven for Warming section.
7 Touch the CLEAR/OFF pad to clear the display if necessary. Remove the food from the oven. Remember, even though the oven turns off automatically, food left in the oven will continue cooking after the oven turns off.
flowchart
graph TD
    A["DELAY START"] --> B["1 2 3 4 5"]
    B --> C["6 7 8 9 0"]
    C --> D["START"]
    D --> E["BAKE OR CONVECTION BAKE"]
    E --> F["1 2 3 4 5"]
    F --> G["6 7 8 9 0"]
    G --> H["START"]
    H --> I["COOKING TIME"]
    I --> J["1 2 3 4 5"]
    J --> K["6 7 8 9 0"]
    K --> L["START"]
    L --> M["CLEAR OFF"]
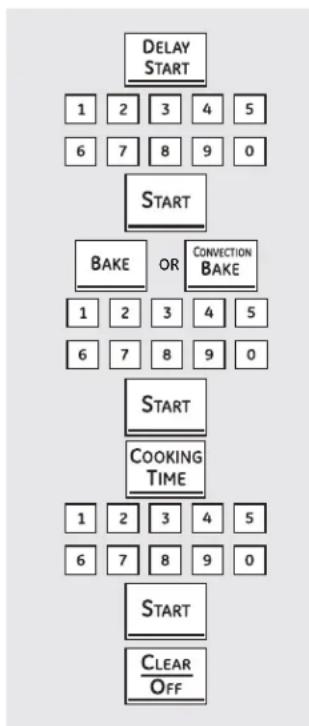
How to Set a Delayed Start and Automatic Stop
The oven will turn on at the time of day you set, cook for a specific length of time and then turn off automatically.
Make sure the clock shows the correct time of day.
1 Touch the DELAY START pad.
2 Touch the number pads to set the time of day you want the oven to turn on and start cooking.
3 Touch the START pad.
4 Touch the BAKE or CONVECTION BAKE pad or other desired cooking function.
5 Touch the number pads to set the desired oven temperature.
6 Touch the START pad.
7 Touch the COOKING TIME pad.
NOTE: If your recipe requires preheating, you may need to add additional time to the length of the cooking time.
8 Touch the number pads to set the desired length of cooking time. The minimum cooking time you can set is 1 minute.
The oven temperature that you set and the cooking time that you entered will be in the display.
9 Touch the START pad.
NOTE: If you would like to check the times you have set, touch the DELAY START pad to check the start time you have set or touch the COOK TIME pad to check the length of cooking time you have set.
When the oven turns ON at the time of day you set, the display will show the cooking time countdown and the changing temperature starting at 100^ F. (The temperature display will start to change once the oven temperature reaches 100^ F.) When the oven reaches the temperature you set, beeps will sound.
The oven will continue to cook for the set amount of time, then turn off automatically, unless the WARM feature was set. See the How to Set the Oven for Warming section.
10 Touch the CLEAR/OFF pad to clear the display if necessary. Remove the food from the oven. Remember, even though the oven turns off automatically, food left in the oven will continue cooking after the oven turns off.
natural_image
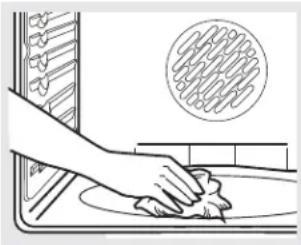
Illustration of a hand cleaning a kitchen sink with a circular inset showing food items (no text or symbols)Wipe up heavy soil on the oven bottom.
Before a Self-Clean Cycle
WARNING
FIRE HAZARD: Wipe grease and heavy soil from the oven bottom before self-cleaning. Failure to do so may result in an oven fire.
We recommend venting your kitchen with an open window or using a ventilation fan or hood during the first self-clean cycle.
Remove any broiler pan, broiler grid, probe, all cookware and any aluminum foil from the oven.
NOTE:
If your oven is equipped with shiny, silver-colored oven racks, we recommend you remove them before you begin the self-clean cycle. They may remain in the oven during the self-clean cycle, but they will darken, lose their luster and become hard to slide.
If your oven is equipped with gray porcelain-coated oven racks, they may be left in the oven during the self-clean cycle.
Soil on the front frame of the range and outside the gasket on the door will need to be cleaned by hand. Clean these areas with hot water, soap-filled steel-wool pads or cleansers such as Soft Scrub®. Rinse well with clean water and dry.
Do not clean the gasket. The fiberglass material of the oven door gasket cannot withstand abrasion. It is essential for the gasket to remain intact. If you notice it becoming worn or frayed, replace it.
Make sure the oven light bulb cover is in place and the oven light is off.
IMPORTANT: The health of some birds is extremely sensitive to the fumes given off during the self-cleaning cycle of any range. Move birds to another well-ventilated room.
Canadian Models Only:
The surface units are automatically disabled during the self-clean cycle. Make sure that all surface unit controls are turned off at all times during the self-clean cycle. Any surface unit that is set to an "on" position while the self-clean cycle is operating will automatically come on after the self-clean cycle is finished, and could result in an "on" unattended surface unit. Wait until the self-clean cycle is finished to set and use the surface units.
flowchart
graph TD
    A["SELF CLEAN"] --> B["1"]
    A --> C["2"]
    A --> D["3"]
    A --> E["4"]
    A --> F["5"]
    B --> G["6"]
    C --> H["7"]
    D --> I["8"]
    E --> J["9"]
    F --> K["0"]
    G --> L["START"]
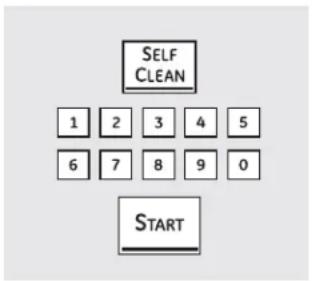
How to Set the Oven for Self-Cleaning
The oven door must be closed and all controls set correctly for the cycle to work properly.
1 Touch the SELF CLEAN pad.
2 If a time other than the default time is needed, use the number pads and enter the desired clean time.
You can change the clean time to any time between 3 hours and 5 hours, depending on how dirty your oven is.
3 Touch the START pad.
The oven door locks automatically. The display will show the clean time remaining. It will not be possible to open the oven door until the temperature drops below the lock temperature and LOCKED goes off in the control display.
The word LOCKED will flash and the word DOOR will display if you set the clean cycle and forget to close the oven door.
To stop a clean cycle, touch the CLEAR/OFF pad. When LOCKED goes off, indicating the oven has cooled below the locking temperature, you will be able to open the door.
The oven door must be closed and all controls set correctly for the cycle to work properly.
flowchart
graph TD
    A["DELAY START"] --> B["1 2 3 4 5"]
    B --> C["6 7 8 9 0"]
    C --> D["START"]
    D --> E["SELF CLEAN"]
    E --> F["1 2 3 4 5"]
    F --> G["6 7 8 9 0"]
    G --> H["START"]
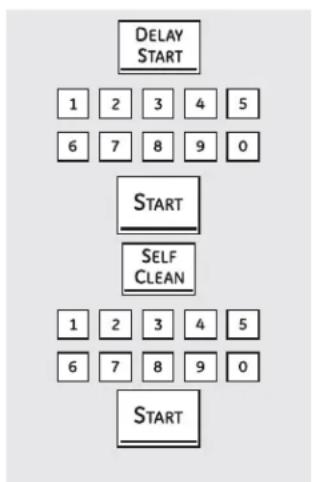
How to Delay the Start of Self-Cleaning
1 Touch the DELAY START pad.
2 Using the number pads, enter the time of day you want the clean cycle to start.
3 Touch the START pad.
4 Touch the SELF CLEAN pad.
5 If a time other than the default time is needed, use the number pads and enter the desired clean time.
You can change the clean time to any time between 3 hours and 5 hours, depending on how dirty your oven is.
6 Touch the START pad.
The oven door locks automatically. The display will show the start time. It will not be possible to open the oven door until the temperature drops below the lock temperature and LOCKED goes off in the control display.
After a Self-Clean Cycle
You may notice some white ash in the oven. Wipe it up with a damp cloth after the oven cools.
If white spots remain, remove them with a soap-filled steel wool pad and rinse thoroughly with a vinegar and water mixture.
These deposits are usually a salt residue that cannot be removed by the clean cycle.
If the oven is not clean after one clean cycle, repeat the cycle.
- You cannot set the oven for cooking until the oven is cool enough for the door to unlock.
While the oven is self-cleaning, you can touch CLOCK to display the time of day. To return to the clean countdown, touch SELF CLEAN.
Standard Racks
If they become hard to slide, wipe their side edges and the oven rack supports with cooking oil.
Extension Rack
If it becomes difficult to slide, see Extension Rack in the Care and cleaning section. Do not spray extension rack with cooking spray or other lubricant sprays.
If it becomes hard to remove or replace, wipe the oven rack supports with cooking oil. Do not wipe cooking oil on the slides.
NOTE: After the first self-clean cycle, the gray stainless steel surfaces will change color on enameled extension racks. This is normal. It is not recommended to self-clean nickel extension racks as the whole rack will discolor because of the self-clean temperatures.
Using the proofing and warming features.
How to Set the Oven For Proofing (on some models)
The proofing feature maintains a warm environment useful for rising yeast-leavened products.
Place the covered dough in a dish in the oven on rack B or C.
NOTE: For best results, cover the dough with a cloth or with greased plastic wrap (the plastic may need to be anchored underneath the container so the oven fan will not blow it off).
2 Touch the PROOF pad and then the START pad.
The display will read PrF (proof).
The oven interior light turns on and remains on during proofing.
The proofing feature automatically provides the optimum temperature for the proofing process, and therefore does not have a temperature adjustment.
3 Set the KITCHEN TIMER ON/OFF for the minimum proof time.
4 When proofing is finished, touch the CLEAR/OFF pad.
To avoid lowering the oven temperature and lengthening proofing time, do not open the oven door unnecessarily.
- Check bread products early to avoid overproofing.
NOTES:
Do not use the proofing mode for warming food or keeping food hot. The proofing oven temperature is not hot enough to hold foods at safe temperatures. Use the WARM feature to keep food warm.
Proofing will not operate when oven is above 125°F. "HOT" will show in the display.
How to Set the Oven For Warming
The WARM feature keeps cooked foods hot.
This feature is not designed to reheat cold food.
To use the WARM feature, touch the WARM pad and then the START pad.
To use the WARM feature after Timed Baking or Roasting, follow these steps:
1 Touch the mode of cooking that you want to use (BAKE, CONVECTION BAKE MULTI/1 RACK or CONVECTION ROAST).
2 Touch the number pads to set the oven temperature.
3 Touch the COOKING TIME pad.
4 Touch the number pads to set the desired length of cooking time.
5 Touch the WARM pad.
6 Touch the START pad.
To Crisp Stale Items
■ Place food in low-sided dishes or pans.
For best results, place the food items in a single layer. Do not stack.
Leave them uncovered.
- Check crispness after 20–30 minutes. Add time as needed.
IMPORTANT NOTES:
- Food should be kept hot in its cooking container or transferred to a heat-safe serving dish.
For moist foods, cover them with an oven-safe lid or aluminum foil.
■ Fried or crisp foods do not need to be covered, but can become too dry if warmed for too long.
■ Repeated opening of the door allows the hot air to escape and the food to cool. - Allow extra time for the temperature inside the oven to stabilize after adding items.
■ With large loads it may be necessary to cover some of the cooked food items.
■ Remove serving spoons, etc., before placing containers in the oven. - Do not use plastic containers, lids or plastic wrap.
CAUTION
Plastic containers, lids or plastic wrap will melt if placed in the oven. Melted plastic may not be removable and is not covered under your warranty.
Your new touch pad control has additional features that you may choose to use. The following are the features and how you may activate them.
The special feature modes can only be activated while the display is showing the time of day. They remain in the control's memory until the steps are repeated.
To enter a special feature for either oven, you must first touch the BROIL HI/LO and BAKE pads at the same time.
When the display shows your choice, touch the START pad. The special features will remain in memory after a power failure, except for the Sabbath feature, which will have to be reset.
Fahrenheit or Celsius Temperature Selection
Your oven control is set to use the Fahrenheit temperature selections, but you may change this to use the Celsius selections.
1 Touch the BROIL HI/LO and BAKE pads at the same time until the display shows SF.
2 Touch the COOKING TIME and BROIL HI/LO pads at the same time. The display will show F (Fahrenheit).
3 Touch the COOKING TIME and BROIL HI/LO pads again at the same time. The display will show C (Celsius).
4 Touch the START pad.
flowchart
graph TD
    A["BROIL Hi/Lo"] + B["BAKE"]
    C["KITCHEN TIMER ON/OFF"]
    D["START"]
Tones at the End of a Timed Cycle
At the end of a timed cycle, 3 short beeps will sound followed by one beep every 6 seconds until the CLEAR/OFF pad is touched. This continual 6-second beep may be cancelled.
To cancel the 6-second beep:
1 Touch the BROIL HI/LO and BAKE pads at the same time until the display shows SF.
2 Touch the KITCHEN TIMER ON/OFF pad. The display shows CON BEEP (continuous beep). Touch the KITCHEN TIMER ON/OFF pad again. The display shows BEEP. (This cancels the one beep every 6 seconds.)
3 Touch the START pad.
Special features of your oven control.
flowchart
graph TD
    A["BROIL\nHi/Lo"] --> C["CLOCK"]
    B["BAKE"] --> C["CLOCK"]
    C["CLOCK"] --> D["START"]
12-Hour, 24-Hour or Clock Blackout
Your control is set to use a 12-hour clock.
If you would prefer to have a 24-hour military time clock or black out the clock display, follow the steps below.
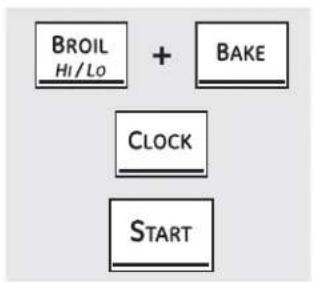
1 Touch the BROIL HI/LO and BAKE pads at the same time until the display shows SF.
2 Touch the CLOCK pad once. The display will show 12 hr. If this is the choice you want, touch the START pad.
Touch the CLOCK pad again to change to the 24-hour military time clock. The display will show 24 hr. If this is the choice you want, touch the START pad.
Touch the CLOCK pad again to black out the clock display. The display will show OFF. If this is the choice you want, touch the START pad.
NOTE: If the clock is in the black-out mode, you will not be able to use the Delay Start function.
flowchart
graph TD
    A["BROIL Hi/Lo"] --> C["+"]
    B["BAKE"] --> C
    D["CONVECTION BAKE"] --> C
    E["START"] --> C
Auto Recipe™ Conversion (on some models)
When using convection bake, the Auto Recipe™ Conversion feature can automatically convert entered regular baking temperatures to convection baking temperatures. The display will show the converted (reduced) temperature. For example, if you enter a regular recipe temperature of 350°F and touch the START pad, the display will show CON and the converted temperature of 325°F.
To activate or deactivate the feature:
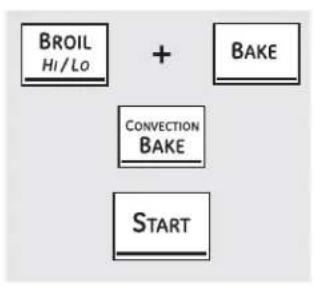
1 Touch the BAKE and BROIL HI/LO pads at the same time until the display shows SF.
2 Touch the CONVECTION BAKE pad until the display shows CON ON (Conversion On) or CON OFF (Conversion Off) as desired.
3 Touch the START pad.
flowchart
graph TD
    A["BROIL Hi/Lo"] + B["BAKE"] --> C["DELAY START"]
    C --> D["START"]
12-Hour Shutdown
With this feature, should you forget and leave the oven on, the control will automatically turn off the oven after 12 hours during baking functions or after 3 hours during a broil function.
If you wish to turn OFF this feature, follow the steps below.
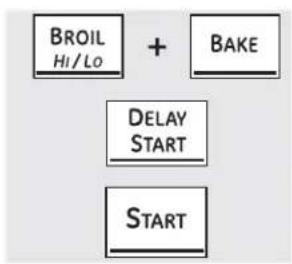
1 Touch the BROIL HI/LO and BAKE pads at the same time until the display shows SF.
2 Touch the DELAY START pad until no shdn (no shut-off) appears in the display.
3 Touch the START pad to activate the no shut-off and leave the control set in this special features mode.
Using the Sabbath feature.
(Designed for use on the Jewish Sabbath and Holidays) (on some models)
GEAppliances.com
The Sabbath feature can be used for baking/roasting only. It cannot be used for convection, broiling, self-cleaning or Delay Start cooking.
NOTE: The oven light comes on automatically (on some models) when the door is opened and goes off when the door is closed. The bulb may be removed. See the Oven Light Replacement section. On models with a light switch on the control panel, the oven light may be turned on and left on.
flowchart
graph TD
    A["BROIL Hi/Lo"] + B["BAKE"] --> C["DELAY START"]
    C --> D["1 2 3 4 5"]
    C --> E["6 7 8 9 0"]
    C --> F["START"]
When the display shows ⊃, the oven is set in Sabbath. When the display shows ⊃⊂, the oven is baking/roasting.
How to Set for Regular Baking/Roasting
Make sure the clock shows the correct time of day and the oven is off.
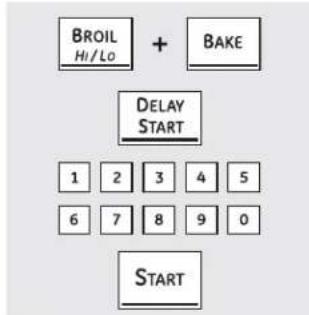
1 Touch and hold both the BROIL HI/LO and BAKE pads, at the same time, until the display shows SF.
NOTE: If bake or broil appears in the display, the BROIL HI/LO and BAKE pads were not touched at the same time. Touch the CLEAR/OFF pad and begin again.
2 Tap the DELAY START pad until SAb bAtH appears in the display.
3 Touch the START pad and will appear in the display. The oven is now in Sabbath mode.
4 Touch the BAKE pad. No signal will be given.
5 Using the number pads, enter the desired temperature between 170°F and 550°F. No signal or temperature will be given. There is no default temperature.
6 Touch the START pad.
7 After a random delay period of approximately 30 seconds to 1 minute, will appear in the display indicating that the oven is baking/ roasting. If doesn't appear in the display, start again at Step 4.
To adjust the oven temperature, touch the BAKE pad, enter the new temperature using the number pads and touch the START pad.
NOTE: The CLEAR/OFF and COOKING TIME pads are active during the Sabbath feature.
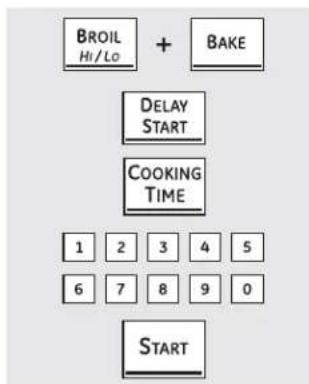
flowchart
graph TD
    A["BROIL Hi/Lo"] --> B["+ BAKE"]
    C["DELAY START"] --> D["COOKING TIME"]
    E["1 2 3 4 5"] --> F["6 7 8 9 0"]
    G["START"] --> H["End"]
When the display shows ⊃, the oven is set in Sabbath. When the display shows ∞, the oven is baking/roasting.
How to Set for Timed Baking/Roasting—Immediate Start and Automatic Stop
Make sure the clock shows the correct time of day and the oven is off.
1 Touch and hold both the BROIL HI/LO and BAKE pads, at the same time, until the display shows SF. NOTE: If bake or broil appears in the display, the BROIL HI/LO and BAKE pads were not touched at the same time. Touch the CLEAR/OFF pad and begin again.
2 Tap the DELAY START pad until SAb bAtH appears in the display.
3 Touch the START pad and will appear in the display. The oven is now in Sabbath mode.
4 Touch the COOKING TIME pad. No signal will be given.
5 Touch the number pads to set the desired length of cooking time between 1 minute and 9 hours and 99 minutes.
6 Touch the START pad.
7 Touch the BAKE pad. No signal will be given.
8 Using the number pads, enter the desired temperature. No signal or temperature will be given. There is no default temperature.
9 Touch the START pad.
After a random delay period of approximately 30 seconds to 1 minute, will appear in the display indicating that the oven is baking/ roasting. If doesn't appear in the display, start again at Step 7.
To adjust the oven temperature, touch the BAKE pad, enter the new temperature using the number pads and touch the START pad.
When cooking is finished, the display will change from to and 0:00 will appear, indicating that the oven has turned OFF but is still set in Sabbath. Remove the cooked food.
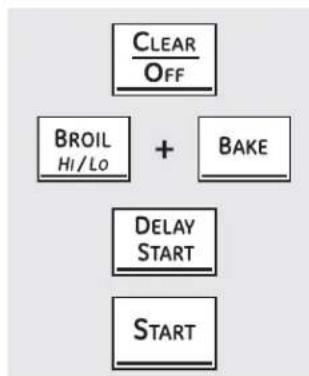
flowchart
graph TD
    A["CLEAR/OFF"] --> B["BROIL/Hi/Lo"]
    B --> C["+"]
    C --> D["BAKE"]
    D --> E["DELAY START"]
    E --> F["START"]
How to Exit the Sabbath Feature
1 Touch the CLEAR/OFF pad.
2 If the oven is cooking, wait for a random delay period of approximately 30 seconds to 1 minute, until only is in the display.
3 Touch and hold both the BROIL HI/LO and BAKE pads, at the same time, until the display shows SF.
4 Tap the DELAY START pad until 12 shdn or no shdn appears in the display.
1 Touch the CLEAR/OFF pad.
2 If the oven is cooking, wait for a random delay period of approximately 30 seconds to 1 minute, until only is in the display.
3 Touch and hold both the BROIL HI/LO and BAKE pads, at the same time, until the display shows SF.
4 Tap the DELAY START pad until 12 shdn or no shdn appears in the display.
Choose 12 shdn, indicating that the oven will automatically turn off after 12 hours or no shdn, indicating that the oven will not automatically turn off after 12 hours.
5 Press START when the option that you want is in the display (12 shdn or no shdn).
NOTE: If a power outage occurred while the oven was in Sabbath, the oven will automatically turn off and stay off even when the power returns. The oven control must be reset. Some models will resume Sabbath mode; however, opening the door will activate the oven light.
Care and cleaning of the range.
Be sure all controls are off and all surfaces are cool before cleaning any part of the range.
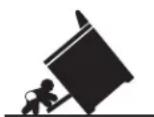
WARNING
If your range is removed for cleaning, servicing or any reason, be sure the anti-tip device is reengaged properly when the range is replaced. Failure to take this precaution could result in tipping of the range and can result in death or serious burns to children or adults.
How to Remove Protective Shipping Film and Packaging Tape
Carefully grasp a corner of the protective shipping film with your fingers and slowly peel it from the appliance surface. Do not use any sharp items to remove the film. Remove all of the film before using the appliance for the first time.
To ensure no damage is done to the finish of the product, the safest way to remove the adhesive from packaging tape on new appliances is an application of a household liquid dishwashing detergent. Apply with a soft cloth and allow to soak.
NOTE: The adhesive must be removed from all parts. It cannot be removed if it is baked on.
Control Knobs
The control knobs may be removed for easier cleaning. Make sure the knobs are in the OFF positions and pull them straight off the stems for cleaning.
sure the inside of the knobs are dry before replacing. Replace the knobs, in the OFF position to ensure proper placement.
The knobs can be cleaned in a dishwasher or they may also be washed with soap and water. Make
Control Panel
If desired, the touch pads may be deactivated before cleaning.
Clean up splatters with a damp cloth.
See How to Lock Out the Controls in the Using the clock, kitchen timer and control lockout section in this manual.
You may also use a glass cleaner.
Remove heavier soil with warm, soapy water. Do not use abrasives of any kind.
Reactivate the touch pads after cleaning.
Painted Surfaces
Painted surfaces include the sides of the range and the door, top of control panel and the drawer front. Clean these with soap and water or a vinegar and water solution.
Do not use commercial oven cleaners, cleaning powders, steel wool or harsh abrasives on any painted surface.
Stainless Steel Surfaces (on some models)
Do not use a steel wool pad; it will scratch the surface.
To clean the stainless steel surface, use warm, sudsy water or a stainless steel cleaner or polish. Always wipe the surface in the direction of the grain. Follow the cleaner instructions for cleaning the stainless steel surface.
To inquire about purchasing stainless steel appliance cleaner or polish or to find the location of a dealer nearest you, please call our toll-free number:
National Parts Center 1.800.626.2002
GEAppliances.com
Porcelain Enamel Cooktop (on some models)
The porcelain enamel finish is sturdy but breakable if misused. This finish is acid-resistant. However, any acidic foods spilled (such as fruit juices, tomato or vinegar) should not be permitted to remain on the finish.
away. When the surface has cooled, wash with soap and water. Rinse well.
If acids spill on the cooktop while it is hot, use a dry paper towel or cloth to wipe it up right
For other spills such as fat spatterings, wash with soap and water or cleansing powders after the surface has cooled. Rinse well. Polish with a dry cloth.
WARNING
SHOCK OR BURN HAZARD: Before replacing oven light bulb, disconnect the electrical power to the range at the main fuse or circuit breaker panel. Failure to do so may result in electric shock or burn.
CAUTION
BURN HAZARD: The glass cover and bulb should be removed when cool. Touching hot glass with bare hands or a damp cloth can cause burns.
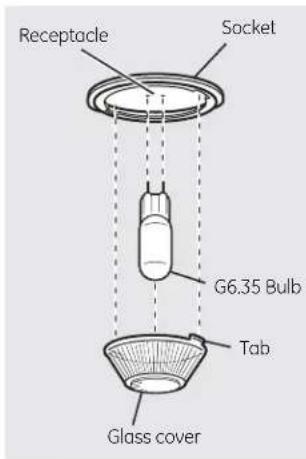
(on some models)
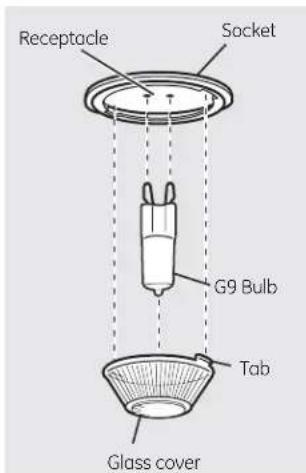
(on some models)
Oven Light Replacement (on some models)
To remove:
7 Turn the glass cover counterclockwise 1/4 turn until the tabs of the glass cover clear the grooves of the socket. Wearing latex gloves may offer a better grip.
2 Using gloves or a dry cloth, remove the bulb by pulling it straight out.
To replace:
Use a new 120/130-volt halogen bulb, not to exceed 50 watts. Replace the bulb with the same type of bulb that was removed. Your model will have one of the two types shown on the left. To determine the correct replacement bulb, check the bulb terminals. Bulbs with 2 straight pin terminals are G6.35 bulbs. Bulbs with 2 looped terminals are G9 bulbs. (Do not interchange.) Be sure the replacement bulb is rated 120 volts or 130 volts (NOT 12 volts).
2 Using gloves or a dry cloth, remove the bulb from its packaging. Do not touch the bulb with bare fingers. Oil from skin will damage the bulb and shorten its life.
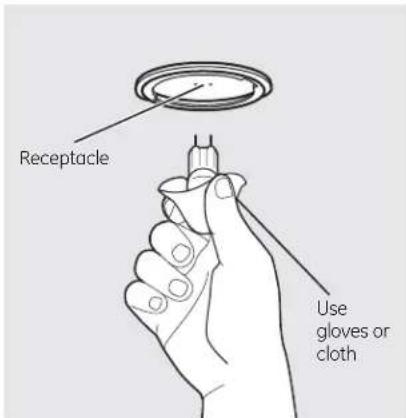
3 Push the bulb straight into the receptacle all the way.
4 Place the tabs of the glass cover into the grooves of the socket. Turn the glass cover clockwise 1/4 turn.
For improved lighting inside the oven, clean the glass cover frequently using a wet cloth. This should be done when the oven is completely cool.
5 Reconnect electrical power to the oven.
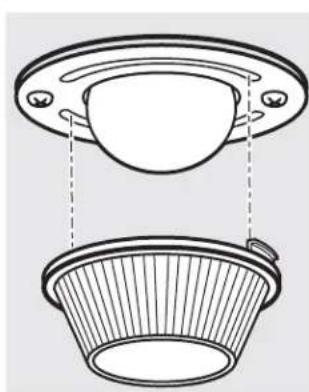
natural_image
Technical line drawing of a mechanical component with two views: top shows a circular opening, bottom shows a wide-brimmed bowl (no text or symbols)Oven Light Replacement (on some models)
To remove:
7 Turn the glass cover counterclockwise 1/4 turn until the tabs of the glass cover clear the grooves of the socket. Wearing latex gloves may offer a better grip.
2 Remove the bulb by turning it counterclockwise.
To replace:
1 Replace bulb with a new 40-watt appliance bulb. Insert the bulb and turn it clockwise until it is tight.
2 Place the tabs of the glass cover into the grooves of the socket. Turn the glass cover clockwise 1/4 turn.
For improved lighting inside the oven, clean the glass cover frequently using a wet cloth. This should be done when the oven is completely cool.
3 Reconnect electrical power to the oven.
Care and cleaning of the range.
natural_image
Simple line drawing of a microwave oven with no text or symbolsThe gasket is designed with a gap at the bottom to allow for proper air circulation.
Do not rub or clean the door gasket—it has an extremely low resistance to abrasion.
If you notice the gasket becoming worn, frayed or damaged in any way or if it has become displaced on the door, you should have it replaced.
Cleaning the Oven Door
To clean the inside of the door:
Because the area inside the gasket is cleaned during the self-clean cycle, you do not need to clean this by hand.
The area outside the gasket and the door liner can be cleaned with a soap-filled or plastic scouring pad, hot water and detergent. Rinse well with a vinegar and water solution.
To clean the outside of the door:
Use soap and water to thoroughly clean the top, sides and front of the oven door. Rinse well. You may also use a glass cleaner to clean the glass on the outside of the door. Do not let water drip into the vent openings.
If any stain on the door vent trim is persistent, use a soft abrasive cleaner and a sponge-scrubber for best results.
Spillage of marinades, fruit juices, tomato sauces and basting materials containing acids may cause discoloration and should be wiped up immediately. When surface is cool, clean and rinse.
Do not use oven cleaners, cleaning powders or harsh abrasives on the outside of the door.
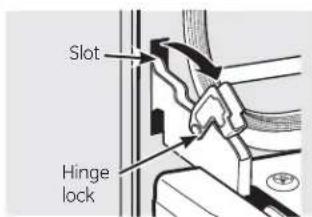
Pull hinge locks down to unlock.
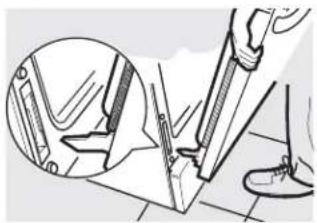
natural_image
Illustration of a hand using a tool to cut or mark a mechanical component, with an inset showing the same part (no text or symbols present)Removal position
Lift-Off Oven Door (on some models)
The door is very heavy. Be careful when removing and lifting the door.
Do not lift the door by the handle.
To remove the door:
1 Fully open the door.
2 Pull the hinge locks down toward the door frame, to the unlocked position. A tool, such as a small flat-blade screwdriver, may be required.
3 Firmly grasp both sides of the door at the top.
4 Close door to the door removal position, which is halfway between the broil stop position and fully closed.
5 Lift door up and out until the hinge arm is clear of the slot.
To replace the door:
1 Firmly grasp both sides of the door at the top.
2 With the door at the same angle as the removal position, seat the indentation of the arm into the bottom of the hinge slot. T in the hinge arm is bottom of the slot
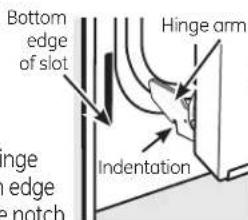
3 Fully open the door. If the door will not fully open, the indentation is not seated correctly in the bottom edge of the slot.
4 Push the hinge locks up against the front frame of the oven cavity to the locked position.
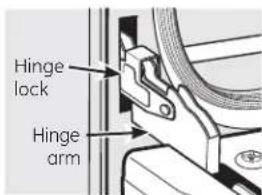
Push hinge locks up to lock.
5 Close the oven door.
Oven Racks
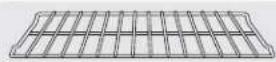
All oven racks may be cleaned by hand with an abrasive cleaner or steel wool. After cleaning, rinse the racks with clean water and dry with a clean cloth. Gray porcelain-coated oven racks may remain in the oven during the self-cleaning cycle without being damaged. The nickel-plated oven racks may remain in the oven during the self-cleaning cycle, but they will lose their luster
and become hard to slide. It will be necessary to grease all oven rack side edges with a light coating of vegetable oil after cleaning them by hand or in the oven. This will help maintain the ease of sliding the racks in and out of the oven.
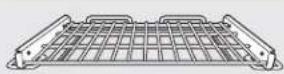
Extension Rack (on some models)
Extension racks may be cleaned by hand with an abrasive cleaner or steel wool. During cleaning, be careful not to allow water or cleaner to enter the extension slides on the sides of the rack.
NOTE: Do not clean in a dishwasher.
If the rack becomes hard to remove or replace, lightly wipe the oven rack supports with cooking oil. Do not wipe cooking oil on the slides.
If the rack becomes difficult to slide or if the paddle is difficult to actuate, the rack may need to be lubricated using the Graphite Lubrication shipped with your oven. To order additional Graphite Lubrication, call our National Parts Center at 800.626.2002 and reference WB02T10303.
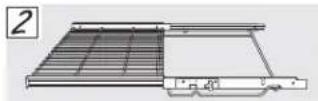
To lubricate the slides:
NOTE: Do not spray extension rack with cooking spray or other lubricant sprays.
Remove the rack from the oven. See Extension Rack in the Using the oven section.
2 Fully extend the rack on a table or countertop. Newspaper may be placed underneath the rack for easy cleanup.
3 If there is debris in the slide tracks, wipe it away using a paper towel.
NOTE: Any graphite lubricant wiped away must be replaced - see steps 4 through 7.
4 Shake the graphite lubricant before opening it. Starting with the left slide mechanism of the rack, place four (4) small drops of lubricant on the two (2) bottom tracks of the slide close to the bearing carriers.
5 Repeat for the right slide mechanism of the rack.
6 Open and close the rack several times to distribute the lubricant.
7 Replace the cap on the lubricant and shake it again. Turn the rack over and repeat steps 3, 4, 5 and 6.
8 Close the rack, turn rack right-side-up and place in the oven. See Extension Rack in the Using the oven section.
To lubricate the paddle:
Shake lubricant and apply to the moving parts of the paddle mechanisms as shown.
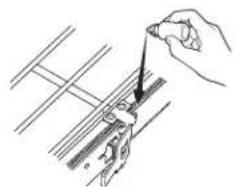
natural_image
Line drawing of a hand using a tool to adjust or install a mechanical component (no text or symbols present)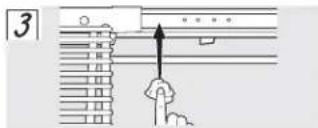
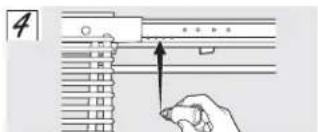
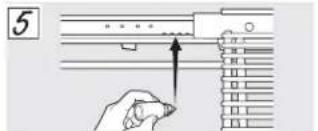
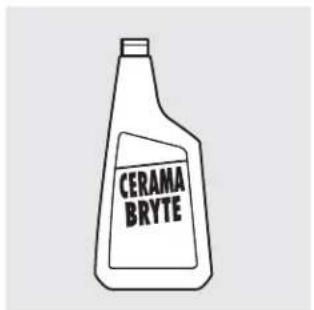
Clean your cooktop after each spill. Use CERAMA BRYTE® Ceramic Cooktop Cleaner.
Normal Daily Use Cleaning
ONLY use CERAMA BRYTE® Ceramic Cooktop Cleaner on the glass cooktop. Other creams may not be as effective.
To maintain and protect the surface of your glass cooktop, follow these steps:
Before using the cooktop for the first time, clean it with CERAMA BRYTE® Ceramic Cooktop Cleaner. This helps protect the top and makes cleanup easier.
2 Daily use of CERAMA BRYTE® Ceramic Cooktop Cleaner will help keep the cooktop looking new.
3 Shake the cleaning cream well. Apply a few drops of CERAMA BRYTE® Ceramic Cooktop Cleaner directly to the cooktop.
4 Use a paper towel or CERAMA BRYTE® Cleaning Pad for Ceramic Cooktops to clean the entire cooktop surface.
5 Use a dry cloth or paper towel to remove all cleaning residue. No need to rinse.
NOTE: It is very important that you DO NOT heat the cooktop until it has been cleaned thoroughly.
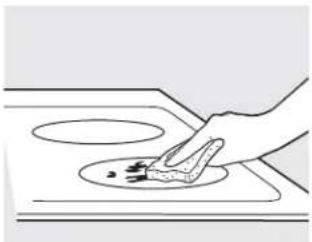
natural_image
Simple line drawing of a hand using a tool to clean or store food on a stove (no text or symbols)Use a CERAMA BRYTE® Cleaning Pad for Ceramic Cooktops.
Burned-On Residue
NOTE: DAMAGE to your glass surface may occur if you use scrub pads other than those recommended.
1 Allow the cooktop to cool.
2 Spread a few drops of CERAMA BRYTE® Ceramic Cooktop Cleaner on the entire burned residue area.
3 Using the included CERAMA BRYTE® Cleaning Pad for Ceramic Cooktops, rub the residue area, applying pressure as needed.
4 If any residue remains, repeat the steps listed above as needed.
For additional protection, after all residue has been removed, polish the entire surface with CERAMA BRYTE® Ceramic Cooktop Cleaner and a paper towel.
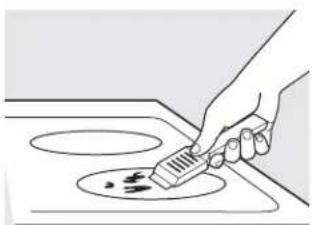
natural_image
Line drawing of a hand using a tool to clean or store food on a stove (no text or symbols)The CERAMA BRYTE® Ceramic Cooktop Scraper and all recommended supplies are available through our Parts Center. See instructions under "To Order Parts" section on next page. NOTE: Do not use a dull or nicked blade.
Heavy, Burned-On Residue
1 Allow the cooktop to cool.
2 Use a single-edge razor blade scraper at approximately a 45^ angle against the glass surface and scrape the soil. It will be necessary to apply pressure to the razor scraper in order to remove the residue.
3 After scraping with the razor scraper, spread a few drops of CERAMA BRYTE® Ceramic Cooktop Cleaner on the entire burned residue area. Use the CERAMA BRYTE® Cleaning Pad to remove any remaining residue.
4 For additional protection, after all residue has been removed, polish the entire surface with CERAMA BRYTE® Ceramic Cooktop Cleaner and a paper towel.
Metal Marks and Scratches

Be careful not to slide pots and pans across your cooktop. It will leave metal markings on the cooktop surface.
These marks are removable using the CERAMA BRYTE® Ceramic Cooktop Cleaner with the CERAMA BRYTE® Cleaning Pad for Ceramic Cooktops.

If pots with a thin overlay of aluminum or copper are allowed to boil dry, the overlay may leave black discoloration on the cooktop.
This should be removed immediately before heating again or the discoloration may be permanent.
NOTE: Carefully check the bottom of pans for roughness that would scratch the cooktop.
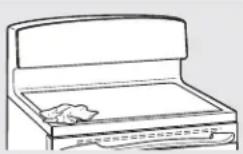
Cooktop Seal
To clean the cooktop seal around the edges of the glass, lay a wet cloth on it for a few
minutes, then wipe clean with nonabrasive cleaners.
Glass surface—potential for permanent damage.
Sugary spillovers (such as jellies, fudge, candy, syrups) or melted plastics can cause pitting of the surface of your cooktop (not covered by the warranty) unless the spill is removed while still hot. Special care should be taken when removing hot substances.
Be sure to use a new, sharp razor scraper.
Do not use a dull or nicked blade.
Damage from Sugary Spills and Melted Plastic

Turn off all surface units. Remove hot pans.

Wearing an oven mitt: a. Use a single-edge razor blade scraper (CERAMA BRYTE® Ceramic Cooktop Scraper) to move the spill to a cool area on the cooktop.
b. Remove the spill with paper towels.

Any remaining spillover should be left until the surface of the cooktop has cooled.

Don't use the surface units again until all of the residue has been completely removed.
NOTE: If pitting or indentation in the glass surface has already occurred, the cooktop glass will have to be replaced. In this case, service will be necessary.
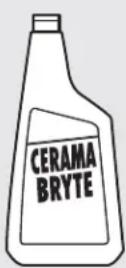
To Order Parts
To order CERAMA BRYTE ^® Ceramic Cooktop Cleaner and the cooktop scraper, please call our toll-free number:
National Parts Center 800.626.2002
CERAMA BRYTE® Ceramic
Cooktop Cleaner .....#WX10X300
CERAMA BRYTE® Ceramic
Cooktop Scraper ......#WX10X0302
Kit #WB64X5027
(Kit includes cream and cooktop scraper)
CERAMA BRYTE® Cleaning Pads for
Ceramic Cooktops .....#WX10X350
Care and cleaning of the range.
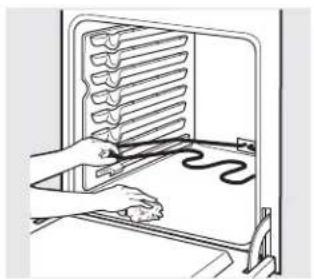
natural_image
Illustration of a hand inserting a rack into a refrigerator (no text or symbols visible)Oven Heating Elements
Do not clean the bake element or the broil element. Any soil will burn off when the elements are heated.
To clean the oven floor, gently lift the bake element. On some models, the bake element is not exposed and is under the oven floor. Clean with warm, soapy water.
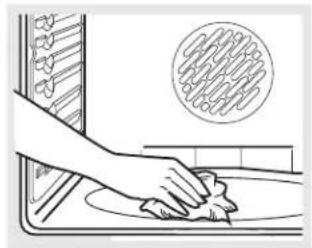
natural_image
Illustration of a hand cleaning a kitchen sink with a circular diagram showing food arrangement (no text or symbols)Wipe up heavy soil on the oven bottom.
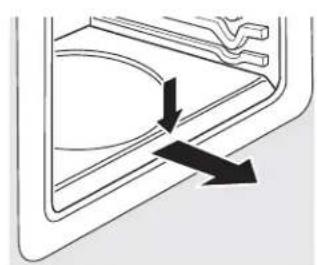
natural_image
Pure diagram of a door handle with arrows indicating direction (no text or symbols)Press down and pull out.
Removable Oven Floor (on some models)
To remove the oven floor for easier cleaning:
Remove the oven door using the instructions in the Lift-Off Oven Door section.
2 Press down and pull out the removable oven floor.
3 Clean the oven floor with warm soapy water.
4 When reinstalling the oven floor, be sure to slide it all the way to the back of the oven.
IMPORTANT: Always replace the removable floor before the next use.
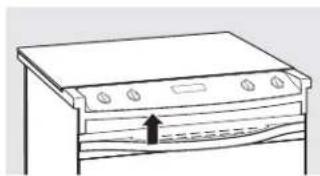
natural_image
Simple line drawing of a kitchen appliance with a handle and ventilation slots (no text or symbols)Oven Vent
The oven vent is above the left side of the door. This area could become hot during oven use.
It is normal for steam to come out of the vent.
The vent is important for proper air circulation. Never block this vent.
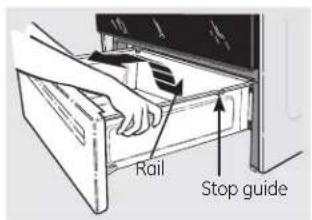
Storage Drawer Removal
To remove the drawer:
1 Pull the drawer out until it stops.
2 Lift the front of the drawer until the stops clear the guides.
3 Remove the drawer.
To replace the drawer:
1 Place the drawer rails on the guides.
2 Push the drawer back until it stops.
3 Lift the front of the drawer and push back until the stops clear the guides.
4 Lower the front of the drawer and push back until it closes.

Troubleshooting Tips
Save time and money! Review the charts on the following
pages first and you may not need to call for service.
| Problem Possible Causes What To Do | ||
| Surface units will not maintain a rolling boil or cooking is not fast enough (voltage) | Improper cookware being used. | Use pans which are flat and match the diameter of the surface unit selected. |
| In some areas, the power may be low. | Cover pan with a lid until desired heat is obtained. | |
| Surface units do not work properly | A fuse in your home may be blown or the circuit breaker tripped. | Replace the fuse or reset the circuit breaker. |
| Cooktop controls improperly set. | Check to see the correct control is set for the surface unit you are using. | |
| Surface unit stops glowing when turned to a lower setting | This is normal. The unit is still on and hot. | |
| Scratches (may appear as cracks) on cooktop glass surface | Incorrect cleaning methods being used. | Scratches are not removable. Tiny scratches will become less visible in time as a result of cleaning. |
| Cookware with rough bottoms being used or coarse particles (salt or sand) were between the cookware and the surface of the cooktop. | To avoid scratches, use the recommended cleaning procedures. Make sure bottoms of cookware are clean before use, and use cookware with smooth bottoms. | |
| Cookware has been slid across the cooktop surface. | ||
| Areas of discoloration on the cooktop | Food spillovers not cleaned before next use. | See the Cleaning the glass cooktop section. |
| Hot surface on a model with a light-colored cooktop. | This is normal. The surface may appear discolored when it is hot. This is temporary and will disappear as the glass cools. | |
| Plastic melted to the surface | Hot cooktop came into contact with plastic placed on the hot cooktop. | See the Glass surface—potential for permanent damage section in the Cleaning the glass cooktop section. |
| Pitting (or indentation) of the cooktop on the cooktop. | Hot sugar mixture spilled on the cooktop. | Call a qualified technician for replacement. |
| Frequent cycling off and on of surface units | Improper cookware being used. | Use only flat cookware to minimize cycling. |
| Oven light does not work | Light bulb is loose. | Tighten or replace the bulb. |
| Oven will not work | Plug on range is not completely inserted in the electrical outlet. | Make sure electrical plug is plugged into a live, properly grounded outlet. |
| A fuse in your home may be blown or the circuit breaker tripped. | Replace the fuse or reset the circuit breaker. | |
| Oven controls improperly set. | See the Using the oven section. | |
| Oven too hot. | Allow the oven to cool to below locking temperature. | |

Troubleshooting Tips
| Problem Possible Causes What To Do | ||
| Food does not bake or roast properly or the rack is not level.cookware of improper size being used.adjustment. section. | Oven controls improperly set. | • See the Using the oven section. |
| Position is incorrect • See the Using the oven section. | ||
| Incorrect cookware or | • See the Using the oven section. | |
| Oven thermostat needs section. | • See the Adjust the oven thermostat—Do it yourself! | |
| Food does not broil properly being used.for broiling.into the outlet in the oven.(on some models) | Oven controls improperly set. | • Make sure you touch the BROIL HI/LO pad. |
| Improper rack position | • See the Broiling Guide. | |
| Cookware not suited | • For best results, use a pan designed for broiling. | |
| The probe is plugged | • Unplug and remove the probe from the oven. | |
| In some areas the power (voltage) may be low.in the Broiling Guide. | • Preheat the broil element for 10 minutes.Broil for the longest period of time recommended | |
| Oven temperature too hot or too cold | Oven thermostat needs adjustment. | • See the Adjust the oven thermostat—Do it yourself!section. |
| Storage drawer is crooked | Rear drawer support is on top of the guide rail. | • Reposition the drawer. See the Storage Drawer Removal instructions in the Care and cleaning of the range section.Check to make sure drawer is properly seated if removed. |
| Storage drawer won't close of the range. | Power cord may be obstructing drawer in the lower back | • Reposition the drawer and power cord. See the Storage Drawer Removal instructions in the Care and cleaning of the range section. |
| Rear drawer support is on top of the guide rail. | • Reposition the drawer. See the Storage Drawer Removal instructions in the Care and cleaning of the range section. | |
| Oven door is crooked | The door is out of position. | • Because the oven door is removable, it sometimes gets out of position during installation.To straighten the door, push down on the high corner. |
| Clock and timer do not workmay be blown or the circuit breaker tripped.34 | Plug on range is not completely inserted in the electrical outlet. | • Make sure electrical plug is plugged into a live, properly grounded outlet. |
| A fuse in your home | • Replace the fuse or reset the circuit breaker. | |
| Oven controls improperly set. | • See the Using the kitchen timer section. | |
| Oven will not self-clean too high to set a self-clean operation. | The oven temperature is | Allow the range to cool and reset the controls. |
| Oven controls improperly set. | See the Using the self-cleaning oven section. | |
| The probe is plugged into the outlet in the oven.(on some models) | Remove the probe from the oven. | |
| "Crackling" or This is the sound of the "popping" sound metal heating and cooling during both the cooking and cleaning functions. | This is normal. | |
| Excessive smoking during a clean cycle | Excessive soil.the clean cycle. | Touch the CLEAR/OFF pad. Open the windows to rid the room of smoke. Wait until LOCKED goes off. After the oven cools, wipe up the excess soil and reset |
| Oven door will not open after a clean cycle | Oven too hot. | Allow the oven to cool below locking temperature. |
| Oven not clean after a clean cycle | Oven controls not properly set. | See the Using the self-cleaning oven section. |
| Oven was heavily soiled. | Clean up heavy spillovers before starting the clean cycle. Heavily soiled ovens may need to be cleaned again. | |
| "LOCKED" flashes in the display closed. | The self-clean cycle has been selected but the door is not | Close the oven door. |
| "LOCKED" is on when you want to cook dropped below the locking temperature. | The oven door is locked because the temperature inside the oven has not | Touch the CLEAR/OFF pad. Allow the oven to cool. |
| "F—" and a number or letter flash in the display | You have a function error code. | Disconnect all power to the range for at least 30 seconds and then reconnect power. If the function error code repeats, call for service. |
| Control signals after entering cooking time or start time | You forgot to enter a bake temperature or cleaning time. | Touch the BAKE pad and desired temperature or the SELF CLEAN pad and desired clean time. |
| Display goes blank blown or the circuitblack-out mode. | A fuse in your home may be breaker tripped. | Replace the fuse or reset the circuit breaker. |
| The clock is in the | See the Special features of your oven control section. | |

Troubleshooting Tips
| Problem Possible Causes What To Do | ||
| Display flashes Power failure. | Reset the clock. | |
| Unable to get the display to show "SF" | Oven control pads were not touched properly. | The BROIL HI/LO and BAKE pads must be touched at the same time and held for 3 seconds. |
| "Probe" appears in the display (on some models) | This is reminding you to enter a probe temperature after plugging in the probe. | Enter a probe temperature. |
| Power outage, clock flashes | Power outage or surge. | Reset the clock. If the oven was in use, you must reset it by touching the CLEAR/OFF pad, setting the clock and resetting any cooking function. |
| Steam from the vent | When using the ovens, it is normal to see steam coming out of the oven vents. As the number of racks or amount of food being cooked increases, the amount of visible steam will increase. | This is normal. |
| "Burning" or "oily" odor emitting from the vent | This is normal in a new oven and will disappear in time. | To speed the process, set a self-clean cycle for a minimum of 3 hours. See the Using the self-cleaning oven section. |
| Strong odor | An odor from the insulation around the inside of the oven is normal for the first few times the oven is used. | This is temporary. |
| Fan noise (on some models) | A convection fan may automatically turn on and off. | This is normal. The fan is designed to operate intermittently to maximize cooking evenness.The convection fan will operate during preheat of the bake cycle. The fan will turn off after the oven is heated to the set temperature. This is normal. |
| A cooling fan may automatically turn on and off. | This is normal on some models. The cooling fan will turn off and on to cool internal parts. It may run after the oven is turned off. | |
| Oven racks are difficult to slide | The shiny, silver-colored racks were cleaned in a self-clean cycle. | Apply a small amount of vegetable oil to a paper towel and wipe the edges of the oven racks with the paper towel. Do not spray with Pam® or other lubricant sprays. |
| Drawer does not slide smoothly or drags | The drawer is out of alignment. | Fully extend the drawer and push it all the way in.See the Care and cleaning of the range section. |
| Drawer is over-loaded or load is unbalanced. | Reduce weight. Redistribute drawer contents. | |
Looking For Something More? (Not all accessories are available for all models.)
You can find these accessories and many more at GEAppliances.com (U.S.) or www.GEAppliances.ca (Canada), or call 800.626.2002 (U.S.) or 800.661.1616 (Canada) (during normal business hours). Have your model number ready.
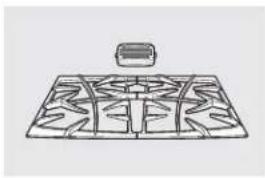
natural_image
Line drawing of a grid pattern with a small object on top (no text or symbols)Grates
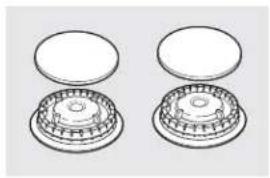
natural_image
Two identical mechanical components with circular bases and central grooves, shown from different angles (no text or symbols)Surface Burner Heads and Caps
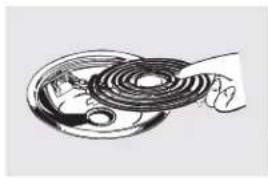
natural_image
Illustration of a hand holding a coiled cable or coil component (no text or symbols visible)Surface Elements and Drip Pans
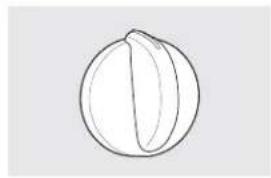
natural_image
Simple line drawing of a sphere with vertical ridges and a small protrusion (no text or symbols)Knobs
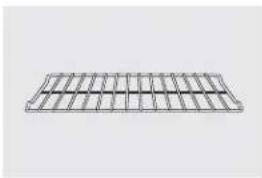
natural_image
Pure structural grid pattern without any text, numbers, or symbolsOven Racks
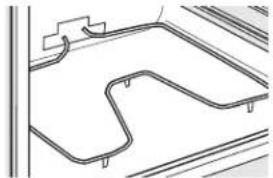
natural_image
Pure architectural line drawing of a curved road or embankment (no text or symbols)Oven Elements
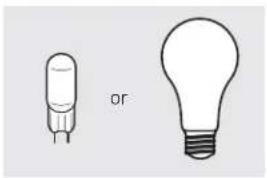
natural_image
Two simple light bulb illustrations, one with a small filament and the other a large bulb (no text or symbols)Light Bulbs
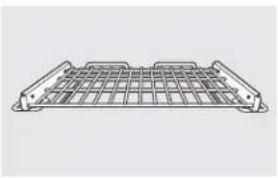
natural_image
Line drawing of a metal grate or rack structure with no text or symbolsExtension Rack!*
"If your model included an extension rack, you can increase the functionality of your range when you purchase additional extension racks. Visit www.geapplianceparts.com or call 800-626-2002, and order part number WB48T10071. Please note, extension racks do not fit all model ranges."
Experience these other great products to keep your kitchen looking great!
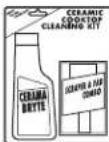
Ceramic
Cooktop
Cleaning Kit: Includes cleaner, scraper and pad
WX10X117GCS
Ceramic Cooktop
Cleaning Wipes
WX10X305
Stainless Steel
Appliance Polish
Wipes
WX10X10001
Stainless Steel Appliance Cleaner
PM10X311
Get the most out of your Broiler Pan! (Not for use with Broiler Drawer models.)
Use your pan and grid cover to broil hamburgers, seafood, steaks, vegetables, bacon, chops and so much more! The pan below catches the excess fats and oils.
- Genuine GE Part
- Easy To Clean
• One-Year Warranty
Limited Time Offer! Free Shipping!
When you order your broiler pan within 30 days of purchasing your GE cooking product.
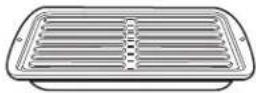
U.S. Part #
Dimensions
Small
WB48X10055
8-3/4"W×1-1/4"H×13-1/2"D
Large*
WB48X10056
12-3/4"W×1-1/4"H×15-1/4"D
XL**
WB48X10057
15-1/2"W×1-1/4"H×19"D
* The large (standard) broil pan does not fit in 20"/24" ranges.
** The XL pan does not fit in 24" wall ovens, 27" drop-ins or 20"/24" ranges.
To place your order, call 800.626.2002 (U.S.), 800.661.1616 (Canada) or mail this form to:
In the U.S.: GE Parts, P.O. Box 221027, Memphis, TN 38122-1027. In Canada: GE Parts, 1 Factory Lane, Moncton, N.B. E1C 9M3

Broiler Pan Order Form
Quantity.
Part Number
Model Number
Serial Number
Brand
Date of Purchase
First Name
Last Name
Address
City
Phone
Check
Money Order
Call 800.626.2002 in the U.S. or 800.661.6161 in Canada for current pricing. All credit card orders must be called in.
Notes.
All warranty service provided by our Factory Service Centers, or an authorized Customer Care® technician. To schedule service, visit us on-line at GEAppliances.com, or call 800. GE.CARES (800.432.2737). Please have serial number and model number available when calling for service.
Staple your receipt here. Proof of the original purchase date is needed to obtain service under the warranty.
| For The Period Of: | GE Will Provide: |
| One YearFrom the date of the original purchase | Any partof the range which fails due to a defect in materials or workmanship.During thislimited one-year warranty, GE will also provide,free of charge, all labor and in-home service to replace the defective part. |
| For Profile Models:Five YearsFrom the date of the original purchasein-home service. | For Profile Models:A replacement glass cooktopif it should crack due to thermal shock, discolor or if the pattern wears off.A replacement radiant surface elementif it should burn out.During thislimited additional four-year warranty, you will be responsible for any labor or |
What GE Will Not Cover:
■ Service trips to your home to teach you how to use the product.
- Improper installation, delivery or maintenance.
■ Product damage or failure of the product if it is abused, misused, modified, used for other than the intended purpose, or used commercially.
■ Damage to the glass cooktop caused by use of cleaners other than the recommended cleaning creams and pads.
Damage to the glass cooktop caused by hardened spills of sugary materials or melted plastic that are not cleaned according to the directions in the Owner's Manual.
■ Replacement of house fuses or resetting of circuit breakers.
■ Damage to the product caused by accident, fire, floods or acts of God.
■ Incidental or consequential damage caused by possible defects with this appliance.
■ Damage caused after delivery.
■ Product not accessible to provide required service.
EXCLUSION OF IMPLIED WARRANTIES—Your sole and exclusive remedy is product repair as provided in this Limited Warranty. Any implied warranties, including the implied warranties of merchantability or fitness for a particular purpose, are limited to one year or the shortest period allowed by law.
This warranty is extended to the original purchaser and any succeeding owner for products purchased for home use within the USA. If the product is located in an area where service by a GE Authorized Servicer is not available, you may be responsible for a trip charge or you may be required to bring the product to an Authorized GE Service location for service. In Alaska, the warranty excludes the cost of shipping or service calls to your home.
Some states do not allow the exclusion or limitation of incidental or consequential damages. This warranty gives you specific legal rights, and you may also have other rights which vary from state to state. To know what your legal rights are, consult your local or state consumer affairs office or your state's Attorney General.
Warrantor: General Electric Company. Louisville, KY 40225
Consumer Support.
GE Appliances Website
GEAppliances.com
Have a question or need assistance with your appliance? Try the GE Appliances Website 24 hours a day, any day of the year! For greater convenience and faster service, you can now download Owner's Manuals, order parts or even schedule service on-line.
Schedule Service GEAppliances.com
Expert GE repair service is only one step away from your door. Get on-line and schedule your service at your convenience any day of the year! Or call 800.GE.CARES (800.432.2737) during normal business hours.
Real Life Design Studio GEAppliances.com
GE supports the Universal Design concept—products, services and environments that can be used by people of all ages, sizes and capabilities. We recognize the need to design for a wide range of physical and mental abilities and impairments. For details of GE's Universal Design applications, including kitchen design ideas for people with disabilities, check out our Website today. For the hearing impaired, please call 800.TDD. GEAC (800.833.4322).
Extended Warranties GEAppliances.com
Purchase a GE extended warranty and learn about special discounts that are available while your warranty is still in effect. You can purchase it on-line anytime, or call 800.626.2224 during normal business hours. GE Consumer Home Services will still be there after your warranty expires.
Parts and Accessories GEAppliances.com
Individuals qualified to service their own appliances can have parts or accessories sent directly to their homes (VISA, MasterCard and Discover cards are accepted). Order on-line today, 24 hours every day or by phone at 800.626.2002 during normal business hours.
Instructions contained in this manual cover procedures to be performed by any user. Other servicing generally should be referred to qualified service personnel. Caution must be exercised, since improper servicing may cause unsafe operation.

Contact Us GEAppliances.com
If you are not satisfied with the service you receive from GE, contact us on our Website with all the details including your phone number, or write to: General Manager, Customer Relations GE Appliances, Appliance Park Louisville, KY 40225
Register Your Appliance GEAppliances.com
Register your new appliance on-line—at your convenience! Timely product registration will allow for enhanced communication and prompt service under the terms of your warranty, should the need arise. You may also mail in the pre-printed registration card included in the packing material.
Cocinas
En Canadá: www.GEAppliances.ca
Impreso en los Estados Unidos
eléctricas independientes, empotrables y encastrables
Instrucciones de Seguridad....2-5
Instrucciones de Operación
Horno 10-25
Temporizador de la Cocina 11
Ajuste del termostato del horno 15
Asado, Guía de asado 14
Auto-limpieza 20,21
Funciones para Probar y Calentar 22
Características especiales 23, 24
Controles 10, 11
Función Sabbath 25
Horneado o rostizado 13
Horneado y rostizado con temporizador .....19
Horno de convección .....16, 17
Precalentamiento....13
Sonda 18
Temporizador de cocina 19
Unidades de superficie 6-9
Área para Calentar 7
Estufa de Vidrio Radiante 9
Quemador del Puente 7
Seleccionar tipos de utensilios....9
Cuidado y limpieza
Bandejas 29
Cajón de almacenamiento 32
Elementos calentadores del horno 32
Estufa de vidrio 34, 35
Luz 27
Panel de control 26
Papel de aluminio....3,4,5,13,22
Perillas de control 26
Piso del horno....31
Puerta del horno desmontable 30
Superficies 26
Ventilación 32
Consejos para la identificación
y solución de problemas 33-36
Accesorios.... 37
Apoyo al cliente
Apoyo al cliente 40
Garantía 39
Escriba los números de modelo y de serie aquí:
Modelo #
Serie #
Puede encontrarlos en una etiqueta ubicada detrás del cajón o detrás de la puerta del horno inferior en el frente del marco de la cocina.
Manual del Propietario
Quick Set V
Quick Set VI

Impreso en papel reciclado
49-80651SP 02-12 GE
INFORMACIÓN IMPORTANTE DE SEGURIDAD. LEA TODAS LAS INSTRUCCIONES ANTES DE SU USO.
ADVERTENCIA
Lea todas las instrucciones de seguridad antes de utilizar este producto. No seguir estas instrucciones puede generar un incendio, una descarga eléctrica, lesiones corporales o la muerte.
DISPOSITIVO ANTI-VOLCADURAS
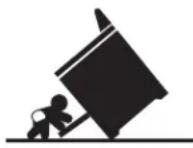
ADVERTENCIA
Riesgo de Volcaduras
Un niño o adulto pueden volcar la cocina y morir.
Verifique que el soporte anti-volcaduras se haya instalado y ajustado correctamente.
Verifique que el soporte anti-volcaduras se haya instalado y ajustado correctamente.
No utilice la cocina sin que el soporte anti-volcaduras esté colocado y ajustado.
Si estas instrucciones no se siguen, como resultado se podrá producir la muerte o quemaduras graves de niños y adultos.
Para reducir el riesgo de volcar la cocina, ésta debe sujetarse mediante un soporte anti-volcaduras con una adecuada instalación. Ver las instrucciones de instalación enviadas con el soporte para obtener detalles completos antes de iniciar la instalación.
Para Cocinas Sin Apoyo y Deslizableless
Para controlar si el soporte es instalado y ajustado de forma apropiada, mire que debajo de
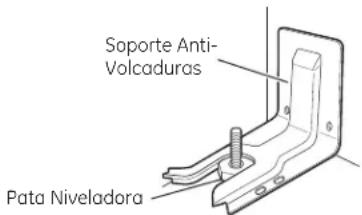
Cocinas Sin Apoyo y Deslizables
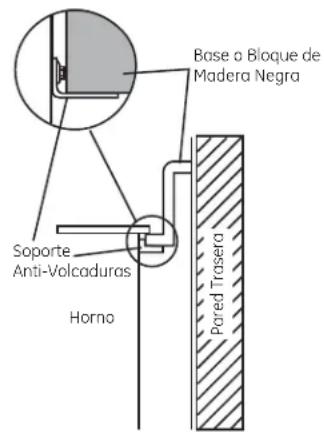
Cocinas Empotrables
la cocina la pata niveladora trasera esté ajustada al soporte. En algunos modelos, el cajón de almacenamiento o el panel de protección se pueden retirar para una fácil inspección. Si no es posible realizar una inspección visual, deslice la cocina hacia adelante, confirme que el soporte anti-volcaduras esté ajustado de forma segura al piso o la pared, y deslice la cocina hacia atrás de modo que la pata niveladora trasera se encuentre debajo del soporte anti-volcaduras.
Si la cocina es expulsada de la pared por alguna razón, siempre repita este procedimiento a fin de verificar que esté asegurado de forma correcta con un soporte anti volcaduras.
Nunca quite las patas de nivelación por completo ya que la cocina no quedará bien sujeta al dispositivo anti-volcaduras.
Cocinas Empotrables
Para controlar si el soporte está instalado y conectado correctamente, deslice la cocina hacia adelante, confirme que el soporte anti-volcaduras esté adherido de forma segura a la parte trasera de la cocina, y deslice esta última hacia atrás de modo que el soporte anti-volcaduras se deslice por debajo del mostrador o bloque de madera adjunto a la pared trasera.
Si usted no recibió un soporte anti-volcaduras con su compra, llame al 1.800.626.8774 para recibir uno sin costo alguno (en Canadá, llame al 1.800.561.3344). Para consultar instrucciones de instalación del soporte, visite GEAppliances.com (en Canadá, GEAppliances.ca).
ADVERTENCIA
NOTIFICACIÓN IMPORTANTE DE SEGURIDAD
La ley de California sobre aguas potables y tóxicos exige que el Gobernador de California publique una lista de sustancias que según el estado provoquen cáncer, defectos congénitos u otros daños reproductivos, y exige a las empresas que adviertan a los clientes sobre la exposición potencial a dichas sustancias.
La aislación de fibra de vidrio de los hornos auto-limpiantes emite una pequeña cantidad de monóxido de carbono durante el ciclo de limpieza. La exposición puede minimizarse ventilando con una ventana abierta o usando una campana o ventilador.
ADVERTENCIA
INSTRUCCIONES GENERALES DE SEGURIDAD
Use este aparato sólo con el objetivo para el que fue creado, como se describe en este Manual del Propietario.
Asegúrese de que un técnico calificado realice una correcta instalación y puesta a tierra del artefacto de acuerdo con las instrucciones de instalación provistas.
No intente reparar o cambiar ninguna pieza de su cocina a menos que esté específicamente recomendado en este manual. Cualquier otro servicio debe realizarlo un técnico calificado.
Antes de realizar cualquier clase de reparación, desenchufe la cocina o desconecte el suministro eléctrico desde el panel de distribución doméstico quitando el fusible o desconectando el interruptor de circuitos.
No deje a los niños solos; éstos no deben quedar solos o sin atención en un área donde un aparato esté en uso. Nunca debe permitirse que se suban, sienten o paren en cualquier parte de este aparato.
■ PRECAUCION: No almacene elementos de interés para niños sobre una cocina o en la protección trasera de una cocina: los niños que se trepan a la cocina para alcanzar elementos pueden resultar gravemente heridos.
Sólo use agarraderas secas: las agarraderas húmedas o mojadas colocadas en superficies calientes pueden provocar quemaduras de vapor. No permita que las agarraderas entren en contacto con unidades de superficie o los elementos calentadores calientes. No utilice toallas u otras telas gruesas en lugar de una agarradera.
Nunca use su electrodoméstico para calentar la habitación.
No toque las unidades de superficie, los elementos calentadores o la superficie interior del horno. Estas superficies pueden estar lo suficientemente calientes para quemar aún cuando tengan un color oscuro. Durante y después del uso, no toque o deje que su vestimenta u otros materiales inflamables entren en contacto con unidades de superficie, áreas cercanas a las unidades de superficie o cualquier área interior del horno; deje pasar un tiempo prudencial para que se enfríen. Otras superficies del aparato pueden calentarse lo suficiente como para provocar quemaduras. Las superficies potencialmente calientes incluyen la estufa, las áreas orientadas hacia la estufa, la abertura de ventilación del horno, las superficies cercanas a la abertura y las hendiduras ubicadas alrededor de la puerta del horno.
No caliente recipientes cerrados de alimentos. Podría haber una acumulación de presión en el recipiente y éste podría explotar, provocando lesiones.
No utilice papel de aluminio para revestir las bandejas colectoras o ninguna parte del horno, con excepción de lo descripto en este manual. Un uso inadecuado puede provocar daños a la cocina y una descarga eléctrica o un riesgo de incendio.
Trate de no rayar o golpear las puertas, estufas o paneles de control de vidrio. Si lo hace podría romperse el vidrio. No cocine si un producto tiene un vidrio roto. Puede provocarse una descarga, un incendio o heridas.
Cocine carnes de res y de ave por completo: Las carnes de res hasta alcanzar una temperatura interna de por lo menos 160°F (71°C) y las carnes de ave a una temperatura interna de por lo menos 180°F (82°C). La cocción a estas temperaturas generalmente protege de enfermedades transmitidas por los alimentos.
ADVERTENCIA
MANTENGA LOS MATERIALES INFLAMABLES ALEJADOS DE LA COCINA.
No almacene o utilice materiales inflamables dentro de un horno o cerca de la estufa, tales como papel, plástico, agarraderas, telas, recubrimientos de pared, cortinas y gasolina u otros vapores y líquidos inflamables.
Nunca use vestimentas holgadas o amplias mientras utilice el aparato. Estas vestimentas pueden prenderse fuego si entran en contacto con superficies calientes, provocando quemaduras graves.
No permita que la grasa de la cocción u otros materiales inflamables se acumulen dentro de la cocina o en su cercanía. La grasa dentro del horno o sobre la estufa puede encenderse.
Limpie las campanas de ventilación con frecuencia. No debe permitirse la acumulación de grasa en la campana o en el filtro.
ADVERTENCIA
EN CASO DE INCENDIO, SIGA LOS SIGUIENTES PASOS PARA EVITAR LA PROPAGACIÓN DEL FUEGO:
No utilice agua en incendios de grasa. Nunca levante una sartén en llamas. Apague los controles. Apague una sartén en llamas sobre una unidad de superficie cubriendo la sartén por completo con una tapa que ajuste bien, una plancha para galletas o una bandeja plana. Utilice un químico seco multiuso o un extintor de incendios de espuma.
Si hay un incendio en el horno durante el horneado, apáguelo cerrando la puerta del horno y apagando el control o usando un químico seco multiuso o un extintor de incendios de espuma.
Si hay un incendio en el horno durante la auto-limpieza, apague el horno y espere a que el incendio se consuma. No abra la puerta del horno a la fuerza. El ingreso de aire fresco a temperaturas de auto-limpieza puede provocar una explosión de llamas desde el horno. No seguir esta instrucción puede provocar quemaduras graves.
INFORMACIÓN IMPORTANTE DE SEGURIDAD. LEA TODAS LAS INSTRUCCIONES ANTES DE SU USO.
ADVERTENCIA
INSTRUCCIONES DE SEGURIDAD DE LA ESTUFA
Nunca deje las unidades de superficie sin atención en configuraciones de calor media o alta. Los alimentos que hierven y se derraman pueden provocar humo y derrames grasosos que pueden prenderse fuego.
Nunca deje aceite sin atención mientras fríe. Si se deja calentar más allá del punto de humeo, el aceite puede encenderse, provocando un incendio que podría propagarse a los gabinetes cercanos. Utilice un termómetro para grasa cuando sea posible para controlar la temperatura del aceite.
Para evitar el derrame de aceite y un incendio, utilice una cantidad mínima de aceite cuando fría en sartenes poco profundas y evite la cocción de alimentos congelados con una cantidad excesiva de hielo.
Utilice el tamaño de recipiente adecuado: Elija recipientes con bases planas lo suficientemente grandes para cubrir el elemento calentador de superficie. La utilización de recipientes más pequeños dejará expuesta una porción de la unidad de superficie al contacto directo, lo que puede provocar el encendido de sus vestimentas.
Una relación adecuada del recipiente con la unidad
de superficie también mejorará la eficiencia.
Sólo ciertos tipos de recipientes de vidrio, vidrio/cerámico, cerámica, u otros recipientes vidriados pueden utilizarse sobre la estufa; otros pueden romperse debido al cambio repentino de temperatura.
Para minimizar la posibilidad de quemaduras, el encendido de materiales inflamables y los derrames, la manija de los recipientes deben girarse hacia el centro de la cocina sin extenderse sobre ninguna unidad de superficie cercana.
Si flambea alimentos bajo la campana, encienda el ventilador.
Si se produce un corte de luz en una cocina eléctrica mientras la unidad superficial está en ON (Encendido), la unidad se volverá a encender cuando regrese la luz. En caso de falta de corriente, si no se giran todas las perillas de la unidad de superficial a la posición OFF (Apagado) se podrán incendiar artículos en o cerca de la estufa, lo cual podrá producir lesiones graves o la muerte.
ADVERTENCIA
INSTRUCCIONES DE SEGURIDAD DE LA ESTUFA RADIANTE (algunos modelos)
Tenga cuidado al tocar la estufa. La superficie de vidrio de la estufa retendrá calor después de que los controles se hayan apagado.
No cocine sobre una estufa rota. Si la estufa se rompe, las soluciones de limpieza y los derrames pueden penetrar en la estufa rota y crear un riesgo de descarga eléctrica. Comuníquese con un técnico calificado de inmediato.
Evite rayar la estufa de vidrio. La estufa puede rayarse con elementos tales como cuchillos, instrumentos filosos, anillos u otras joyas, y remaches de la ropa.
No coloque o almacene elementos que pueden derretirse o prenderse fuego sobre la estufa de vidrio, aún cuando no la esté usando. Si la estufa se enciende en forma accidental, pueden prenderse fuego. El calor proveniente de la estufa o de la ventilación del horno también puede prenderlos fuego, aún si el aparato está apagado.
Use el limpiador de estufas cerámicas CERAMA BRYTE® y la esponjilla de limpieza CERAMA BRYTE® para limpiar la estufa. Espere hasta que la estufa se enfríe y la luz indicadora se apague antes de limpiar. Una esponja o un paño húmedos sobre una superficie caliente pueden provocar quemaduras de vapor. Algunos limpiadores pueden producir humos tóxicos si se los aplica a una superficie caliente. NOTA: Los derrames de azúcar son la excepción. Éstos deben quitarse mientras están calientes utilizando una agarradera y un raspador. Para instrucciones detalladas, ver la sección Cómo limpiar la estufa de vidrio.
Lea y cumpla con todas las instrucciones y advertencias de la etiqueta de la crema de limpieza.
ADVERTENCIA
INSTRUCCIONES DE SEGURIDAD DE LA ESTUFA DE BOBINAS (algunos modelos)
No sumerja o remoje las unidades de superficie desmontables. No las coloque en el lavavajillas. No coloque las unidades de superficie dentro del horno cuando realice la auto-limpieza. Si lo hace pueden llegar a fallar, provocando un peligro de quemaduras o de incendio.
Para evitar la posibilidad de una quemadura o descarga eléctrica, siempre verifique que los controles de todas las unidades de superficie se encuentren en la posición OFF (apagado) y que todas las bobinas estén frías antes
de levantar o quitar una unidad de superficie de bobinas.
Asegúrese de que las bandejas colectoras no estén cubiertas y se encuentren en su lugar. Su ausencia durante la cocción podría dañar las piezas y el cableado de la cocina.
No use papel de aluminio para cubrir cacerolas en la parte inferior. El papel puede atrapar el calor o derretirse, ocasionando daños sobre el producto y riesgo de descarga eléctrica o incendio.
ADVERTENCIA
INSTRUCCIONES DE SEGURIDAD DEL HORNO
Manténgase alejado de la cocina cuando abra la puerta del horno. El aire y el vapor calientes que salen de la cocina pueden provocar quemaduras en manos, rostro y/o ojos.
■ Mantenga sin obstrucciones la ventilación del horno.
Mantenga el horno libre de acumulaciones de grasa. La grasa dentro del horno puede prenderse fuego.
Siempre coloque las bandejas del horno en la posición deseada mientras el horno esté frío. Si la bandeja debe quitarse cuando el horno todavía está caliente, no permita que la agarradera toque el elemento calentador del horno.
- Cuando utilice bolsas de cocción o de asado en el horno, siga
las instrucciones del fabricante.
Tire de la bandeja del horno hasta la posición de tope de detención cuando cargue o descargue alimentos del horno. Esto ayuda a evitar quemaduras por tocar superficies calientes de la puerta y las paredes del horno.
No deje productos como papel, utensilios de cocina o alimentos en el horno cuando no lo esté usando. Los elementos guardados en el horno pueden prenderse fuego.
No use papel de aluminio para cubrir el fondo del horno. El aluminio puede atrapar el calor o derretirse, lo cual puede dañar el producto y provocar riesgo de descarga eléctrica o un incendio.
ADVERTENCIA
INSTRUCCIONES DE SEGURIDAD DEL HORNO AUTO-LIMPIANTE (algunos modelos)
La característica de auto-limpieza funciona en el horno a temperaturas lo suficientemente elevadas como para quemar los restos de alimentos que quedaron dentro del horno. Siga estas instrucciones para una operación segura.
Antes de iniciar el ciclo de auto-limpieza, quite las ollas, bandejas del horno de metal brillante y otros utensilios del horno. Sólo pueden dejarse en el horno las bandejas revestidas de porcelana gris o negras. No utilice la auto-limpieza para limpiar otras piezas, como bandejas de goteo brillantes o tazones.
Antes de utilizar el ciclo de auto-limpieza, limpie la grasa y los derrames de alimentos del horno. Una cantidad excesiva de grasa puede encenderse, generando daños por el humo en su hogar.
Si el modo de auto-limpieza no funciona, apague el horno y desconecte el suministro de energía. Llame a un técnico calificado para solicitar el arreglo.
No limpie la empacadura de la puerta. La empacadura de la puerta es esencial para un buen sellado. Debe tenerse cuidado de no refregar, dañar o mover la empacadura.
No utilice limpiadores de horno. No debe utilizarse ningún limpiador comercial o revestimiento protector de ninguna clase dentro o alrededor de ninguna pieza del horno.
ADVERTENCIA
CAJÓN CALENTADOR/CAJÓN DEL HORNO INFERIOR INSTRUCCIONES DE SEGURIDAD
(algunos modelos)
El objetivo del cajón calentador es mantener alimentos cocidos calientes a la temperatura de servicio. Por debajo de los 140°F (60°C) puede producirse crecimiento de bacterias en los alimentos. No coloque alimentos fríos en el cajón calentador. No caliente alimentos por más de 2 horas. No seguir estas instrucciones puede provocar enfermedades transmitidas por los alimentos.
No deje productos de papel, plásticos, comida enlatada o materiales combustibles en el cajón. Pueden prenderse fuego.
No toque el elemento calentador o la superficie interna del cajón. Estas superficies pueden estar lo suficientemente calientes como para provocar quemaduras.
Tenga cuidado al abrir el cajón. Abra un poco el cajón y deje salir el aire caliente y el vapor antes de quitar o volver a colocar los alimentos. El aire y el vapor calientes que salen pueden provocar quemaduras en manos, rostro y/o ojos.
No use papel de aluminio para cubrir el cajón inferior. El papel atrapará en calor del fondo y alterará el funcionamiento del horno. El papel se podrá derretir y dañar de forma permanente la parte inferior del cajón. Cualquier daño por uso inadecuado del papel de aluminio no estará cubierto por la garantía del producto.
Uso de unidades de la superficie.
ADVERTENCIOZA
RIESGO DE INCENDIO: Nunca pierda de vista la cocina cuando la estufa esté en las configuraciones medio o alto. Mantenga los ítems inflamables alejados de la estufa. Apague todos los controles cuando finalice la cocción. Si no se
siguen estas instrucciones se podrá producir incendios, lesiones graves o la muerte.
Es posible que las funciones y apariencias varían con relación a su modelo a lo largo del manual.
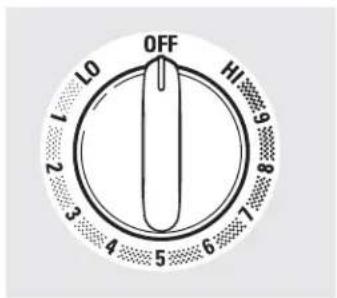
Tanto en OFF (Apagado) como en HI (Alto), el control se ajusta en la posición. Es posible que escuche leves sonidos de ajuste durante la cocción, indicando que el control está manteniendo su configuración deseada.
Asegúrese de girar la perilla de control a OFF (Apagado) cuando finalice la cocción.
Cómo Configurar
Presione la perilla hacia adentro y gire en cualquiera de las direcciones hasta la configuración que desee.
Una luz indicadora de de superficie en ON (Encendido) brillará cuando una unidad superficial esté encendida.
Para superficies de vidrio de la estufa:
Una luz indicadora de ESTUFA CALIENTE:
se encenderá cuando la unidad esté caliente al tact.
■ permanecerá encendida incluso luego de que la unidad esté apagada.
Permanecerá encendida hasta que la unidad se enfríe a aproximadamente 150° F.
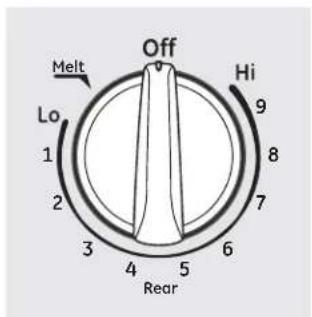
La configuración Melt (Derretir) (en algunos modelos) derretirá chocolate o manteca. La configuración Simmer (Hervor Lento) (en algunos modelos) hervirá salsas a fuego lento.
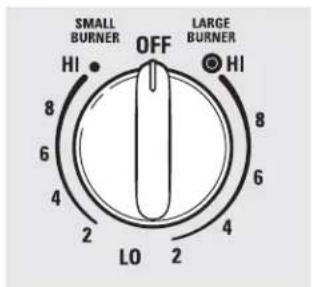
Modelos con un elemento superficial de Anillo-Doble únicamente
Unidades Superficiales Dobles y Triples y Perillas de Control (en algunos modelos)
La unidad de superficie posee 2 o 3 tamaños de cocción que se pueden seleccionar, de modo que pueda enlazar el tamaño de la unidad al tamaño del utensilio que esté usando.
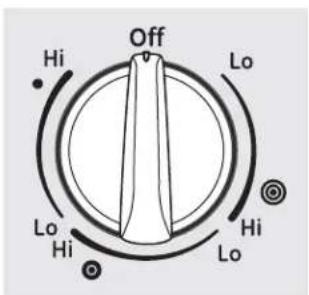
Modelos con un elemento superficial de Anillo-Triple únicamente.
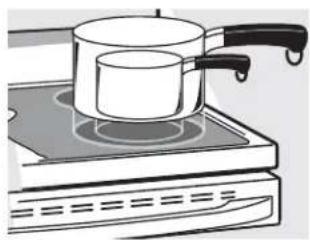
natural_image
Illustration of a cooking pot on an induction cooktop (no text or symbols)Es posible que las funciones y apariencias varían con relación a su modelo a lo largo del manual.
Modelos con un quemador del puente
Uso del Quemador del Puente (en algunos modelos)
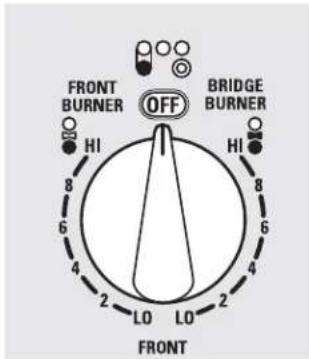
Para usar el quemador del puente, gire la perilla de control frontal izquierda a las configuraciones del QUEMADOR DEL PUENTE.
Para un uso completo de la unidad superficial del puente, también gire la unidad superficial trasera izquierda.
Para usar sólo la unidad superficial frontal, gire la perilla de control a las configuraciones del QUEMADOR FRONTAL
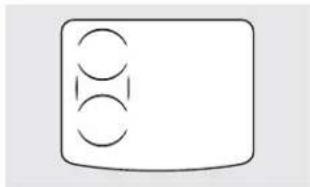
natural_image
Simple line drawing of a rectangular object with three circular cutouts on the top (no text or symbols)Warming Zone
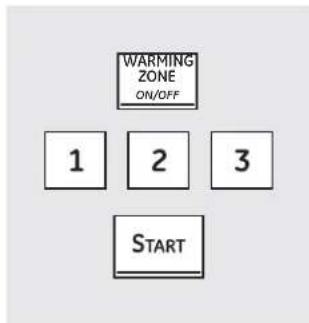
Uso del Área para Calentar
ADVERTENCIA
RIESGO DE ENVENENAMIENTO CON COMIDA:
Se pueden desarrollar bacterias cuando la comida esté a una temperatura inferior a los 140°.
Siempre comience con comida caliente. No use configuraciones en WARM (Caliente) para calendar comida fría.
No use la configuración WARM (Calentar) durante más de 2 horas.
Si no se siguen estas instrucciones, se podrán producir enfermedades generadas en la comida.
WARMING ZONE (Área para Calentar), ubicada en la parte central trasera de la superficie de vidrio, mantendrá la comida caliente y cocida a la temperatura para servir. Siempre comience con comida caliente. No use la función para calentar comida fría. Colocar comida que no está cocinada o fría en el Área para Calentar podría producir enfermedades desarrolladas por bacterias en la comida.
Para usar la función WARMING ZONE (Área para Calentar):
1 Presione la tecla WARMING ZONE ON/OFF (Encendido/ Apagado del Área para Calentar)..
2 Presione la tecla 1 (bajo), 2 (medio), o 3 (alto) para seleccionar la configuración de control deseada.
3 Presione la tecla START (Iniciar). En la pantalla de control se visualizará WARMER HOT ON (Más Caliente Activado).
Para apagar la función WARMING ZONE (Área para Calentar):
Presione la tecla WARMING ZONE ON/OFF (Encendido/ Apagado del Área para Calentar).
NOTA: La tecla CLEAR/OFF (Borrar/ Apagar) no apagará la función WARMING ZONE (Área para Calentar).
Para obtener mejores resultados, todas las comidas en el Área para Calentar deberían estar cubiertas por una tapa o papel de aluminio. Al calentar pasteles o panes, la tapa se deberá ventilar para dejar que la humedad salga.
Use la configuración más baja para panes y masas. Use una configuración media para verduras, salsas, guisos, sopas de crema, manteca y chocolate. Use la configuración más alta para sopas (líquidas) y bebidas calientes. Estas configuraciones iniciales sugeridas son para referencia únicamente. La temperatura, tipo y cantidad de comida, el tipo de olla y el tiempo afectarán la calidad de la comida.
Siempre use las manijas de las ollas o guantes para horno al retirar comida del Área para Calentar ya que los utensilios y platos estarán calientes.
NOTA: El calentador superficial emitirá un brillo rojo, al igual que los elementos de cocción.
Consejos para Productos Enlatados en el Hogar
Asegúrese que el producto enlatado se encuentre sobre la unidad superficial.
Asegúrese de que el producto enlatado sea plano en su parte inferior.
Para evitar quemadoras de vapor o calor, tenga cuidado al enlatar el producto.
Use recetas y procedimientos de fuentes confiables. Estos se encuentran disponibles a través de fabricantes como Ball® y Kerr® y el Department of Agriculture Extension Service (Servicio del Departamento de Agricultura).
El uso de enlatados cerrados a baño maría con fondos ondeados podrán extender el tiempo requerido para traer el agua al punto de hervor.
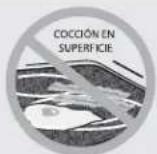
Nunca cocine directamente sobre el vidrio. Siempre utilice recipientes de cocción.
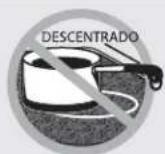
Siempre coloque el recipiente en el centro de la unidad de superficie sobre la que está cocinando.
Para Modelos con Estufa de Vidrio Radiante
La estufa radiante cuenta con unidades calentadoras debajo de una superficie lisa de vidrio.
NOTA: Un ligero olor es normal cuando una estufa nueva se utiliza por primera vez. Es provocado por el calentamiento de piezas nuevas y materiales aislantes y desaparecerá en poco tiempo.
NOTA: En modelos con estufas de vidrio de color claro, es normal que las zonas de cocción cambien de color cuando están calientes o enfriándose. Esto es temporal y desaparecerá a medida que el vidrio se enfríe a temperatura ambiente.
La unidad superficial seguirá un ciclo de encendido y apagado para mantener su configuración de control seleccionada.
Es seguro colocar utensilios calientes en la superficie de vidrio, incluso cuando la estufa esté fría.
Aunque las unidades de superficie se hayan apagado, la estufa de vidrio retiene suficiente calor para continuar la cocción. Para evitar la sobrecocción, quite las ollas de las unidades de superficie cuando los alimentos estén cocidos.
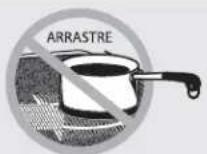
No deslice los recipientes de cocción a través del control y la superficie de la estufa porque puede rayar el vidrio. El vidrio es resistente a los rayones, pero no a prueba de los mismos.
No coloque nada sobre la unidad de superficie hasta que se haya enfriado por completo.
Las manchas de agua (depósitos minerales) pueden quitarse utilizando crema limpiadora o vinagre blanco sin diluir.
El uso de limpiador de ventanas puede dejar una película iridiscente sobre la estufa. La crema limpiadora quitará esta decoloración.
No almacene elementos pesados sobre la estufa. Si caen sobre la estufa, podrían provocar daños.
No utilice la superficie como una tabla para cortar.
Limitador de Temperatura en Estufas de Vidrio Radiante
Cada unidad de superficie radiante cuenta con un limitador de temperatura.
El limitador de temperatura evita que la estufa de vidrio se caliente en exceso.
El limitador de temperatura podrá apagar las unidades superficiales por ciclos durante un tiempo si:
■ la olla hierve hasta secarse.
■ el fondo de la olla no es plano.
la olla está fuera del centro.
no hay olla en la unidad.
Cómo seleccionar tipos de utensilios para
modelos de estufa de vidrio radiante.
GEAppliances.com
La siguiente información lo ayudará a elegir los recipientes de cocción que brindan un buen desempeño en estufas de vidrio. Ver el folleto sobre recipientes para usar con estufas de inducción.
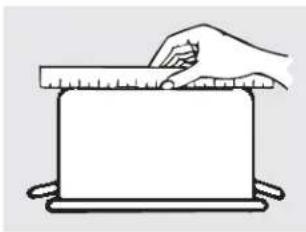
natural_image
Simple line drawing of a hand pressing a ruler on a flat surface (no text or symbols)Verifique que los recipientes tengan bases planas utilizando una regla.
Acero inoxidable:
Recomendado
Aluminio:
Se recomienda de capa gruesa
Buena conductividad. Los residuos de aluminio a veces parecen rayones sobre la estufa pero pueden quitarse si se los limpia de inmediato. Debido a su bajo punto de fusión, no debe utilizarse aluminio de capa fina.
Esmalte de porcelana sobre hierro fundido:
Se recomienda si la base de la olla se encuentra revestida
Esmalte de porcelana sobre acero:
No se recomienda
Calentar recipientes vacíos puede provocar daños permanentes al vidrio de las estufas. El esmalte puede derretirse y adherirse a la estufa cerámica.
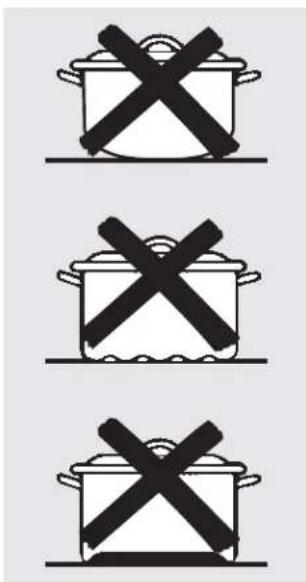
No se recomiendan recipientes con bases redondeadas, curvadas, con rebordes o torceduras.
Base de cobre:
Recomendado
El cobre puede dejar residuos que pueden parecer rayones. Los residuos pueden eliminarse, siempre y cuando la estufa se limpie de inmediato. Sin embargo, no permita que estas ollas hiervan en seco. El metal sobrecalentado puede adherirse a las estufas de vidrio. Si no se elimina de inmediato, una olla con la base de cobre sobrecalentado dejará un residuo que manchará la estufa en forma permanente.
Vidrio-cerámico:
No se recomienda
Desempeño pobre. Raya la superficie.
Cerámica:
No se recomienda
Desempeño pobre. Puede rayar la superficie.
Hierro fundido:
No se recomienda, a menos que se encuentre específicamente diseñado para estufas de vidrio Pobre conductividad y lentitud para absorber el calor. Raya la superficie de la estufa.
NOTA: Siga todas las recomendaciones del fabricante de recipientes cuando utilice cualquier clase de recipiente de cocción sobre la estufa cerámica.
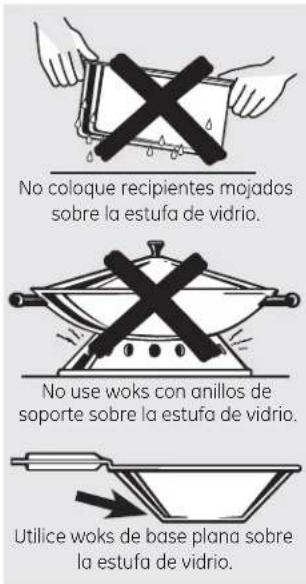
Para mejores resultados
Coloque sólo recipientes secos sobre los elementos de superficie. No coloque tapas sobre los elementos de superficie, en especial tapas mojadas.
No use woks con anillos de soporte. Esta clase de wok no se calienta sobre elementos de superficie de vidrio.
■ Recomendamos el uso de woks de base plana solamente. Se encuentran disponibles en su negocio minorista local. La base del wok debe tener el mismo diámetro que el elemento de superficie para asegurar un contacto adecuado.
Algunos procedimientos de cocción especiales requieren recipientes de cocción específicos, como ollas a presión, freidoras, etc. Todos los recipientes de cocción deben tener bases planas y ser del tamaño correcto.
No permita que los alimentos hiervan en seco ya que los recipientes de cocción pueden adherirse a la superficie de cocción, provocando daños permanentes a la estufa.
Uso de los controles del horno.
(Es posible que las funciones y apariencias varían con relación a su modelo a lo largo del manual.)
Tecla Asar Alto/ Bajo
Presione para seleccionar la función asar. Lea la sección Cómo Configurar el Horno para Asar.
Tecla de Horneado
Presione para seleccionar la función hornear. Lea la sección Cómo Configurar el Horno para Hornear.
Tecla de HORNEADO POR CONVECCIÓN
Use un ventilador para hacer circular aire en el horno. Lea la sección sobre Uso del horno por convección.
Tecla de Tostado por Convección (en algunos modelos)
Touch to roast large tender cuts of meat. See the Using the convection oven section.
Tecla WARM (Calentar)
Presione para mantener calientes las comidas ya cocinadas. Lea la sección Cómo Configurar el Horno para Calentar.
Tecla PROBE (Sonda)
Presione al usar la sonda para cocinar de forma automática en la temperatura de comida interna deseada. Consulte la sección Uso de la Sonda.
Tecla SELF CLEAN (Auto Limpieza)
Presione la auto limpieza del horno. Consulte la sección Uso del Horno con Auto Limpieza.
Tecla de Tiempo de Cocción
Presione para cancelar TODAS las operaciones del horno excepto el reloj y el temporizador.
Tecla de Prueba (en algunos modelos)
Presione para seleccionar un ambiente cálido que sea útil para la elevación de productos fermentados a base de levadura.
Tecla WARMING ZONE (Área para Calentar)
Presione esta tecla para mantener calientes las comidas ya cocinadas. Consulte la sección de Uso del Área para Calentar.
Tecla OVEN LIGHT (Luz del Horno)
Presione para encender o apagar las luces del horno.
Tecla TIMER ON/ OFF (Encender/ Apagar Temporizador)
NOTA: Al configurar los tiempos, sólo se realizan ajustes de horas y minutos. El tiempo mínimo que se puede configurar es de un minuto.
Presione para configurar el temporizador de la cocina. Consulte la sección de Uso del Temporizador de la Cocina.
Tecla COOKING TIME (Tiempo de Cocción) NOTA: Al configurar los tiempos, sólo se realizan ajustes de horas y minutos. El tiempo mínimo que se puede configurar es de un minuto.
Presione esta tecla y luego presione las teclas numéricas para configurar la cantidad de tiempo durante el cual desee que su comida se cocine. El horno se apagará cuando el tiempo de cocción se haya terminado.
Luz del Horno Encendida/ Apagada
Touch this pad to set the oven to start automatically at a time you set.
Tecla Borrar/ Apagar
El reloj se deberá configurar en la hora correcta del día para que las funciones automáticas del temporizador del horno funcionen de forma adecuada. La hora del día no se puede cambiar durante un horneado por tiempo o el ciclo de limpieza automática.
Consulte la sección Para configurar el reloj.
Si su horno fue configurado para un funcionamiento por tiempo y se produce un corte de corriente, el reloj y las funciones programadas serán reiniciadas. La hora del día titilará en la pantalla cuando haya habido un corte de corriente.
BLOQUEO DEL CONTROL
Las teclas de control se podrán bloquear de modo que no se puedan activar si se presiones. Consulte la sección Cómo Bloquear los Controles.
Tecla PROOF (Prueba)
Presione esta tecla para elevar productos fermentados a base de levadura. Consulte la sección Cómo Configurar el Horno para Realizar Pruebas.
Uso del reloj, temporizador de la cocina, y bloqueo del control. GEAppliances.com
Para Configurar el Reloj
El reloj se deberá configurar en la hora correcta del día para que las funciones Delay Start (Inicio Demorado) funcionen de forma adecuada. La hora del día no se puede cambiar durante una cocción demorada o durante el ciclo de auto limpieza.
1 Presione la tecla Clock (Reloj).
2 Presione las teclas numéricas hasta que la hora correcta del día aparezca en la pantalla. Si las teclas numéricas no se tocan dentro de un minuto luego de haber tocado la tecla CLOCK (Reloj), la pantalla
vuelve a la configuración original. Si esto sucede, presione la tecla CLOCK (Reloj) y vuelva a ingresar la hora del día.
3 Presione la tecla Start (Iniciar) hasta que la hora del día aparezca en la pantalla. Esto ingresa la hora e inicia el reloj.
Para controlar la hora del día cuando la pantalla muestra otra información, simplemente presione la tecla CLOCK (Reloj). La hora del día aparece hasta que otra tecla es presionada. Para cambiar el formato de la hora o apagar la pantalla del reloj, consulte la sección Special Features (Funciones Especiales).
Para Programar el Contador de Tiempo
1 Presione la tecla KITCHEN TIMER ON/OFF (Temporizador de la Cocina Encendido/Apagado)
2 Presione las teclas numéricas hasta que la cantidad de tiempo que desea aparezca en la pantalla. Por ejemplo, para programar 2 horas y 45 minutos, toque 2, 4 y 5 en ese orden. Si comete un error, presione la tecla KITCHEN TIMER ON/OFF (Temporizador de la Cocina Encendido/ Apagado) y vuelva a comenzar.
3 Presione la tecla START (Iniciar).
minuto. Los segundos no se mostrarán en la pantalla hasta que se realice la cuenta regresiva del último minuto.
4 Cuando el contador de la cocina llegue a :00, el control hará 3 pitidos agudos seguidos de un pitido agudo cada 6 segundos hasta que se presione la tecla KITCHEN TIMER ON/OFF (Temporizador de la Cocina Encendido/ Apagado).
El tono de 6 segundos se puede cancelar siguiendo los pasos en la sección de control de funciones Especiales de su horno, en Tones at the End of a Timed Cycle (Tonos al Final de un Ciclo por Tiempo).
El Temporizador de la Cocina cuenta en horas y minutos.
El Temporizador de la Cocina no controla las operaciones del homo. La configuración máxima del Temporizador de la Cocina es de 9 horas y 59 minutos.
Luego de presionar la tecla START (Iniciar), SET (Configuración) desaparece; esto le indica que el tiempo está en cuenta regresiva, aunque la pantalla no cambia hasta que haya pasado un
Para Reiniciar el Temporizador de la Cocina
Si la pantalla aún muestra el tiempo restante, la puede cambiar presionando la tecla KITCHEN TIMER ON/OFF (Temporizador de la Cocina Encendido/ Apagado) y luego presionando las teclas numéricas hasta que el tiempo que desea aparezca en la pantalla.
Si el tiempo restante no se encuentra en la pantalla (reloj, inicio demorado o tiempo de cocción aparecen en la pantalla), recuerde el tiempo restante presionando la tecla KITCHEN TIMER ON/OFF (Temporizador de la Cocina Encendido/Apagado) y luego presionando las teclas numéricas para ingresar el nuevo tiempo que desee.
Para Cancelar el Temporizador de la Cocina
Touch the KITCHEN TIMER ON/OFF pad twice.
CONTROL LOCKOUT
HOLD 3 SEC.
Cómo Bloquear los Controles
Control Lockout (Bloqueo del Control) le permitirá bloquear las teclas táctiles, de modo que no se puedan activar al ser tocadas. Para bloquear/ desbloquear los controles:
1 Mantenga presionadas las teclas 9 y 0 al mismo tiempo durante 3 segundos. La pantalla mostrará LOC ON (Bloqueo Encendido).
Para desbloquear el control, mantenga presionadas las teclas 9 y 0 al mismo tiempo durante 3 segundos. La pantalla mostrará LOC OFF (Bloqueo Apagado).
Cuando esta función esté encendida, las teclas táctiles no responderán excepto la tecla Clear/Off (Borrar/ Apagar).
Los ajustes se guardarán en la memoria luego de un corte de corriente.
Cómo usar el horno.
Para evitar posibles quemaduras, coloque las bandejas en la posición deseada antes de encender el horno.
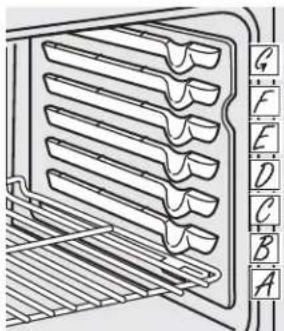
natural_image
Technical line drawing of a multi-tiered rack with labeled letter indicators (A–G) on the right side, no readable text or symbols beyond labels.La cantidad de posiciones de la bandeja puede variar en relación al modelo.
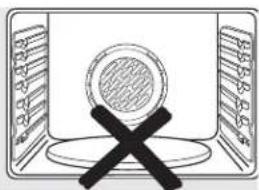
natural_image
Simple line drawing of a computer monitor with a circular screen and a cross symbol on the stand (no text or symbols)Nunca coloque utensilios de cocina, piedras para pizza, ni otros artículos en el piso del horno.
Antes de comenzar...
Las bandejas tienen topes, de modo que cuando se las coloca correctamente en los soportes se detendrán antes de salirse del todo, y no se volcarán.
Cuando coloque o quite recipientes de cocción, tire de la bandeja hasta que se detenga.
En algunos modelos, el elemento calentador para horneado se encuentra debajo del piso del horno. Nunca coloque utensilios de cocina, piedras para pizza, ni otros artículos en el piso del horno.
Para quitar una bandeja, tire de ella, incline el extremo frontal hacia arriba y sáquela.
Para volver a colocarla, deposite el extremo de la bandeja (topes de detención) sobre el soporte, incline el frente hacia arriba y presione la bandeja hacia adentro.
PRECAUCIÓN
Cuando utilice la bandeja en la posición más baja (A), necesitará tener cuidado cuando la quite. Recomendamos que deslice la bandeja varias pulgadas y luego, utilizando dos agarraderas, la quite sosteniendo de ambos lados. La bandeja se encuentra muy abajo y usted puede quemarse si coloca la mano en la mitad de la bandeja y tira hacia afuera. Tenga mucho cuidado de no quemarse la mano con la puerta cuando utilice la bandeja en la posición más baja (A).
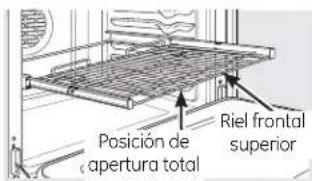
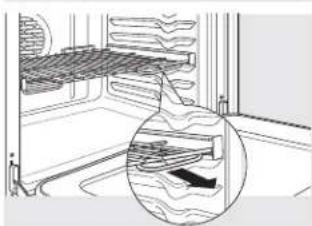
natural_image
Diagram of a kitchen interior showing a grater rack and a magnified view of wood grain (no text or labels)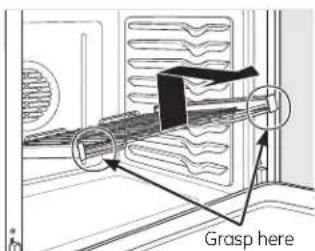
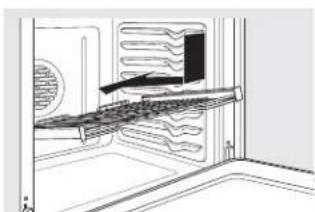
natural_image
Line drawing of an oven interior showing a rack-mounted shelf and vented dish (no text or symbols)Parrilla de extensión (en algunos modelos)
Cuando coloque o quite recipientes de cocción, siempre tire de la parrilla hacia afuera desde el riel frontal superior hasta alcanzar la posición de apertura total.
No extienda la parrilla rápidamente. Los alimentos pueden deslizarse desde el frente de la parrilla.
Para quitar la parrilla:
Asegúrese de introducir la parrilla hasta el fondo del horno, de modo que las paletas laterales del armazón de la parrilla se desenganchen de la cavidad.
2 Deslice la parrilla hacia usted hasta que llegue al tope (posición detenida) del soporte de la parrilla.
3 Incline el extremo frontal hacia arriba y quitelo.
NOTA: Cuando manipule la parrilla de extensión, no permita que la porción deslizable se abra. Esto puede dañar los deslizadores.
Para volver a colocar la parrilla:
Tome firmemente ambos lados del armazón de la parrilla y la parrilla deslizable.
2 Coloque el extremo curvo del estante en la posición deseada, incline el frente hacia arriba y presione la parrilla hacia adentro.
PRECAUCIÓN:
Nunca utilice la parrilla cuando su armazón no se encuentra completamente introducido en el horno y trabado en su posición.
Cuando la parrilla se encuentra bien instalada y trabada en su lugar, las paletas laterales de bloqueo del armazón de la parrilla se trabarán en su lugar en los soportes del horno. Si las paletas laterales no se trabaron en su posición, repita los pasos anteriores y verifique que las paletas laterales se hayan limpiado y lubricado correctamente. Ver Parrilla de extensión en la sección Cuidado y limpieza.
Papel de aluminio
No use papel de aluminio para cubrir el fondo del horno. El aluminio atrapará el calor en la parte inferior y alterará el funcionamiento del horno. El aluminio se puede derretir y dañar de forma permanente el fondo del horno. Cualquier daño por uso inadecuado del aluminio no estará cubierto por la garantía del producto.
El aluminio se puede usar para retener derrames, colocando una hoja en el estante inferior, varias pulgadas por debajo de la comida. No use más aluminio que el necesario y nunca cubra totalmente un estante del horno con papel de aluminio. Mantenga el aluminio por lo menos a una pulgada y media de las paredes del horno para evitar una mala circulación del calor.
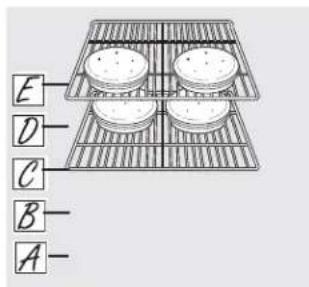
Precalentamiento y colocación de recipiente
Para evitar posibles quemaduras, coloque las bandejas en la posición deseada antes de encender el horno.
Precaliente del horno si así lo indica la receta. El precalentamiento es necesario para obtener buenos resultados cuando hornee pasteles, galletas, pastelitos y panes.
Si va a hornear cuatro capas de pastel al mismo tiempo, coloque dos capas en la bandeja C y dos capas en la bandeja E. Distribuya los recipientes de modo que no queden directamente uno encima del otro.
Los resultados de horneado serán mejores si los alimentos se centran bien dentro del horno. El pastel "Angel food" es la excepción y debe colocarse en la bandeja inferior del horno (posición A). Siga las instrucciones del paquete de alimentos preempaquetados o congelados para la ubicación de los recipientes. Los recipientes no deben tocarse entre sí o tocar las paredes del horno. Si necesita utilizar dos bandejas, distribuya los recipientes de modo que no queden directamente uno encima del otro. Deje aproximadamente 1½" (3,8 cm) entre recipientes y desde el frente, parte trasera y lados de las paredes del horno.
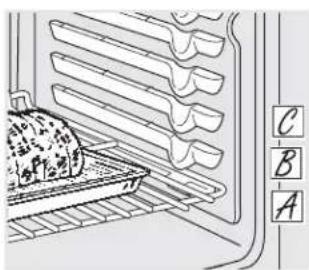
Cómo configurar el horno para horneado o rostizado
1 Presione el botón BAKE (hornear).
2 Presione las almohadillas numéricas hasta que aparezca la temperatura deseada.
3 Presione el botón START (iniciar).
El horno se iniciará automáticamente. La pantalla mostrará PrE mientras realiza el precalentamiento. Cuando el horno alcanza la temperatura seleccionada, el control del horno emitirá varios pitidos y la pantalla mostrará la temperatura del horno.
NOTA: Usted escuchará el ventilador de convección (en algunos modelos) mientras el horno realiza el precalentamiento. El ventilador se detendrá cuando el horno se
haya precalentado y la pantalla mostrará la temperatura configurada. Esto es normal.
Para cambiar la temperatura del horno durante el ciclo BAKE (hornear), presione el botón BAKE y luego las almohadillas numéricas para configurar la nueva temperatura.
4 Verifique el nivel de cocción de los alimentos cuando haya alcanzado el tiempo mínimo indicado en la receta. Cocínelos más si fuese necesario.
5 Presione el botón CLEAR/OFF (borrar/apagado) cuando se haya finalizado el horneado y luego quite los alimentos del horno.
Guía para Dorar
| Carnes | Temperatura del Horno | Temperatura Interior | |||
| Bife Asado de Costilla (4 a 8 lb.)Deshuesada y Con Huesos | Jugoso | 325°F 145°F | |||
| A Punto | 625°F 160°F | ||||
| Bife de Lomo (4 a 6 lb.) Jugoso 425°F | 145°F | ||||
| Bife de Lomo (2 a 3 lb.) Jugoso 425°F | 145°F | ||||
| Cerdo Con Huesos, Deshuesada (3 a 5 Lbs.) 325°F 160°F | |||||
| Cordero Con Huesos (5 a 9 Lbs.) A Punto 325°F | |||||
| Deshuesada (4 a 7 lb.) A Punto 375°F | 165°F | ||||
| Ave Pollo Entero (5 a 7 lb.) | 350°F 170°F | ||||
| Pavo, Entero*Sin Relleno (10 a 16 lb.)Sin Relleno (18 a 24 lb.) | 325°F325°F170-180°F170-180°F | ||||
| Pechuga de Pavo (4 a 6 lb.) | 325°F 170°F | ||||
*Las aves con plumas generalmente requieren de un tiempo de asado adicional de 30 a 45 minutos. Cubra las patas y la pechuga con papel de aluminio para evitar un dorado excesiva y que se seque la piel.
Cómo usar el horno.
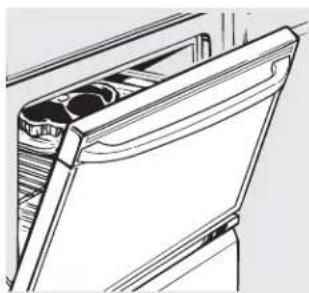
natural_image
Line drawing of a mechanical component with internal cavities (no text or symbols)Deje la puerta abierta en la posición de detención de asado. La puerta queda abierta, y aún así se mantiene la temperatura adecuada en el horno.
Cómo configurar el horno para asar
Si su cocina está conectada a 208 voltios, pueden asarse filetes jugosos precalentando el asador y colocando la bandeja del horno en una posición más elevada.
Utilice LO Broil (asar bajo) para cocinar por completo alimentos como aves o cortes gruesos de carne sin dorarlos de más.
Coloque la carne o pescado sobre una asadera dentro de una rejilla diseñada para asar.
2 Siga las posiciones de las bandejas sugeridas en la Guía de asado.
3 Presione el botón BROIL HI/LO (asar alto/bajo) una vez para configurar HI Broil (asar alto).
Para cambiar a LO Broil (asar bajo), presione el botón BROIL HI/LO (asar alto/bajo) de nuevo.
4 Presione el botón START (iniciar).
5 Cuando haya finalizado de asar, presione el botón CLEAR/OFF (borrar/apagado).
El tamaño, peso, grosor, temperatura inicial y el punto de cocción preferido afectarán los tiempos de asado. Esta guía está basada en carnes a temperatura de refrigerador.
† El Ministerio de Agricultura de los EE.UU, afirma: "la carne de res jugosa es popular, pero debe saberse que al cocinarla a sólo 140°F (60°C) algunos organismos que provocan intoxicación alimentaria pueden sobrevivir". (Fuente: Safe Food Book, Your Kitchen Guide. USDA Rev. Junio 1985.)
Guía de asado
Precaliente la asadera durante 2 minutos para mejorar el desempeño.
| Nivel Alimento | Posición de cocción Tipo o grosor de la bandeja | Comentarios | |
| Carne de res | Jugosa140°F (60°C) | Filetes -Grosor de 1" (2,5 cm) | E o F (los alimentos deben estar 1" a 3" [2,5 cm a 7,6 cm] del elemento de asado)Es difícil cocinar filetes de menos de la 1" (2,5 cm) de grosor y que queden jugosas. Se cocinan por completo antes de dorarse. cocinan por completoPara evitar que la carna se enrosque, corte la grasa a se enrosque, intervalos de 1" (2,5 cm). |
| A punto160°F (71°C) | Filetes -3/4" a 1" (1,9 cm a 2,5 cm) de grosor | E (los alimentos deben estar de 3" a 4" [7,6 cm a 10,2 cm] del elemento de asado) | |
| Bien cocida170°F (77°C) | Filetes -3/4" a 1" (1,9 cm a 2,5 cm) de grosor o patties de carne picado | D o E (los alimentos deben estar de 3" a 5" [7,6 cm a 12,7 cm] del elemento de asado) | |
| Pollo | Pechuga, sin hueso | C (los alimentos deben estar de 8" a 9" [20,3 cm a 22,9 cm] del elemento de asado)Asar sobre el lado de la piel primero. | |
| Pechuga, con hueso | C (los alimentos deben estar de 7" a 8" [17,8 cm a 20,3 cm] del elemento de asado) | ||
| Filetes de pescado | 1/2" a 1" (1,3 cm a 2,5 cm) de grosor | D o E (los alimentos deben estar 3" a 6" [7,6 cm a 15,2 cm] del elemento de asado)Manipule y gire con mucho cuidado. | |
| Chuletas | Bien cocida170°F (77°C) | 3/4" (1,9 cm) de grosor | D (los alimentos deben estar de 6" a 7" [15,2 cm a 17,8 cm] del elemento de asado)Para evitar que la carna de cerdo se enrosque, corte la grasa a intervalos de 1" (2,5 cm). |
Si su cocina está conectada a 208 voltios, los bistecs vuelta y vuelta se pueden asar precalentando el asador y posicionando el estante del horno una posición más arriba.
Es posible que su nuevo horno cocine de manera diferente a la que usted se encuentra acostumbrado. Utilícelo durante algunas semanas para familiarizarse con sus funciones. Si luego de este período considera que la temperatura del horno es demasiado baja o demasiado alta, usted puede regular el termostato.
No utilice termómetros, como los que se venden en las tiendas, para verificar la configuración de temperatura del horno. Esos termómetros pueden variar entre 20–40 grados.
NOTA: Este ajuste sólo afecta las temperaturas de horneado y rostizado; no afecta las temperaturas de asado o de auto-limpieza. El ajuste se conservará en la memoria aún después de un corte de energía.
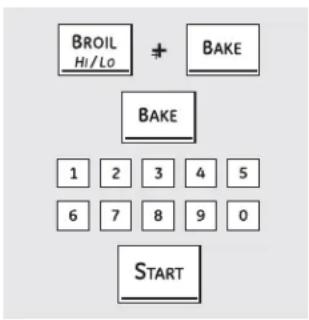
Cómo ajustar el termostato
1 Presione los botones BROIL HI/LO (asar alto/bajo) y BAKE (hornear) al mismo tiempo hasta que en la pantalla pueda verse SF.
2 Presione la tecla BAKE (Hornear). En la pantalla se muestra un número.
3 La temperatura del horno puede subirse en (+) 35°F (19°C) o bajarse en (-) 35°F (19°C). Presione las almohadillas numéricas de la misma manera en que las lee. Por ejemplo, para cambiar la temperatura del horno 15°F (8°C), presione 1 y 5.
Presione la tecla BAKE (Hornear), nuevamente, para alternar entre incrementar y reducir la temperatura del horno.
4 Cuando haya finalizado el ajuste, presione el botón START (iniciar) para volver a la pantalla de la hora. Utilice el horno de la manera normal.
¡El tipo de margarina utilizado modifica el horneado!
La mayoría de las recetas de horneado incluyen productos de alto contenido graso tales como la manteca o la margarina (80% de grasa). Si se reduce el contenido de grasa, el resultado final puede ser diferente al esperado.
Si se utilizan productos de bajo contenido graso en tortas, pasteles, masas, galletas o dulces, la receta puede fracasar. A menor contenido graso, mayores diferencias en el resultado final.
Las normas federales exigen que los productos con denominación de "margarina" tengan un contenido graso de al menos 80% en relación al peso. Los productos de bajo contenido graso contienen menos grasa y más agua. El elevado contenido de humedad de estos productos afecta la textura y el sabor de los alimentos horneados. Para obtener los mejores resultados con sus recetas tradicionales favoritas, utilice margarina u otros productos con un contenido de por lo menos 70% de aceite vegetal.
Cómo usar el horno de convección. (en algunos modelos)
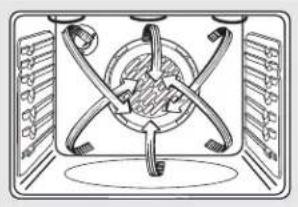
natural_image
Diagram of a kitchen interior showing a central bowl with handles and surrounding walls (no text or symbols)Funcionamiento del ventilador de convección
En un horno de convección, un ventilador hace circular aire caliente sobre, por debajo y alrededor de los alimentos.
Esta circulación de aire caliente se distribuye de manera pareja a través de la cavidad del horno. Como resultado, los alimentos se cocinan y doran en forma pareja, a menudo en menos tiempo.
NOTA: En algunos modelos, el ventilador fue diseñado para girar en ambas direcciones, con una pausa intermedia. Esto es normal.
El ventilador de convección se apaga cuando se abre la puerta de horno. NO DEJE la puerta abierta durante períodos prolongados mientras utiliza la cocción por convección ya que puede acortar la vida útil del elemento calentador de convección.
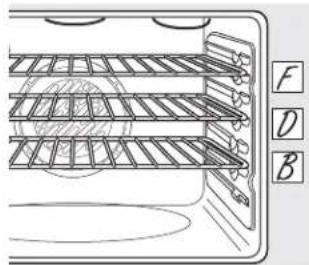
Posición de bandejas múltiples.
Horneado por convección con bandejas múltiples
Debido a que el aire caliente circula en forma pareja en todo el horno, los alimentos pueden hornearse con excelentes resultados usando bandejas múltiples.
El horneado con bandejas múltiples puede incrementar un poco los tiempos de cocción de algunos alimentos, pero el resultado total es el ahorro de tiempo. Las galletas, muffins, bizcochos y otros panes rápidos logran resultados muy buenos con el horneado con bandejas múltiples.
Cuando hornee con 3 bandejas, coloque una en la segunda (B) posición, otra en la cuarta (D) posición y la tercera en la sexta (F) posición.
Para horneado con dos bandejas, coloque una en la segunda (B) posición. Coloque la otra bandeja en la quita (E) posición.
Horneado por convección con 1 bandeja (en algunos modelos)
Cuando realice un horneado por convección con sólo 1 bandeja, coloque los alimentos en el centro del horno.
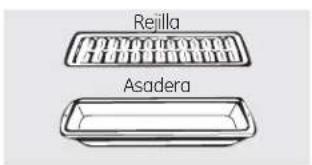
Rostizado por convección (en algunos modelos)
- Bueno para grandes cortes de carne tierna, sin cubrir.
El ventilador de convección hace circular el aire caliente en forma pareja sobre y alrededor de los alimentos. Las carnes de res y de ave se doran por completo como si se hubiesen cocinado con un rostizador giratorio. El aire caliente sella los jugos rápidamente para lograr un producto jugoso y tierno mientras, al mismo tiempo, se crea una rica capa externa marrón dorada.
Cuando esté rostizando por convección, resulta importante que utilice la asadera y la parrilla para mejores resultados de rostizado por convección. La asadera se utiliza para retener los derrames de grasa y la parrilla se usa para prevenir salpicaduras de grasa.
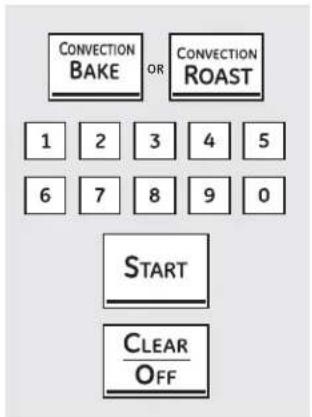
flowchart
graph TD
    A["CONVECTION BAKE"] --> B["1"]
    C["CONVECTION ROAST"] --> D["2"]
    B --> E["3"]
    D --> F["4"]
    E --> G["5"]
    F --> H["6"]
    G --> I["7"]
    H --> J["8"]
    I --> K["9"]
    J --> L["0"]
    M["START"] --> N["CLEAR/OFF"]
Cómo configurar el horno para horneado o rostizado por convección
1 Presione la tecla CONVECTION BAKE (Horneado por Convección) (en algunos modelos) una veces para hornear por convección con múltiples parrillas. Consulte la sección de Horneado por Convección con Múltiples Parrillas.
Presione la tecla CONVECTION BAKE (Horneado por Convección) una vez para hornear por convección dos 1 parrilla. Consulte la sección de Horneado por Convección con 1 Parrilla..
Presione el botón CONVECTION ROAST (rostizado por convección) para rostizado por convección (en algunos modelos).
2 Presione las almohadillas numéricas para configurar la temperatura del horno.
3 Presione el botón START (iniciar).
NOTA: Si la Función de Conversión Auto Recipe™ se encuentra activada, automáticamente reducirá la temperatura de horneado regular en aproximadamente 25° F hasta la temperatura de convección apropiada en el modo de horneado por convección. Lea Conversión con Auto Recipe™ en la sección de Características Especiales.
Para cambiar la temperatura del horno, presione el botón CONVECTION BAKE (horneado por convección) o CONVECTION ROAST (asado por convección) y luego las almohadillas numéricas para configurar la nueva temperatura.
Cuando el horno comienza a calentar, podrá verse la temperatura cambiante, comenzando a 100°F (38°C). Cuando el horno alcanza la temperatura con figurada, sonarán 3 pitidos.
4 Presione el botón CLEAR/OFF (borrar/apagado) cuando haya finalizado.
Mientras cocine por convección se oirá un ventilador. El ventilador se detendrá cuando se abra la puerta pero el calor no se apagará.
Durante el horneado, pueden escucharse chasquidos provenientes del horno. Esto es normal.
Cuando hornee galletas, obtendrá mejores resultados si usa una plancha plana para galletas en lugar de un recipiente de lados bajos.
Recipientes para cocción por convección
Antes de utilizar el horno de convección, verifique que sus elementos de cocción dejen espacio suficiente para la circulación de aire en el horno. Si va a hornear con varios recipientes, deje un espacio entre ellos. Además, asegúrese de que los recipientes no se toquen entre sí o toquen las paredes del horno.
Papel y plástico
Los recipientes de papel y plástico resistentes al calor recomendados para utilizar en horneado normal también pueden utilizarse para horneado por convección, pero no deben utilizarse a temperaturas más elevadas que la temperatura recomendada por el fabricante de los elementos de cocción. También pueden utilizarse elementos de cocción plásticos resistentes a temperaturas de 400°F (204,4°C).
Metal y vidrio
Cualquier tipo de recipiente de cocción funciona en su horno de convección; sin embargo, los recipientes de metal se calientan más rápidamente y se recomiendan para horneado por convección.
Las bandejas oscuras o con acabado mate hornean alimentos más rápido que las brillantes.
Los recipientes de vidrio o cerámica cocinan más despacio.
Para recetas como pollo horneado, utilice un recipiente con lados bajos. El aire caliente no puede circular bien alrededor de los alimentos en un recipiente de lados altos.
En muchos alimentos, especialmente asados y carnes de ave, la temperatura interna de los alimentos es la mejor prueba para verificar el grado de cocción. Mediante la sonda de temperatura se evita tener que adivinar el grado de cocción y se logra el punto de cocción exacto.
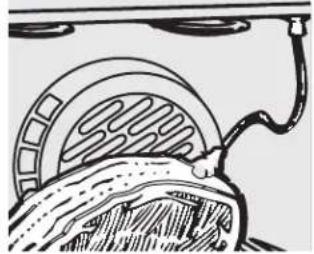
natural_image
Diagram of a car wheel assembly with a connecting rod and gear (no text or labels)La sonda de temperatura cuenta con una sonda similar a un pincho en un extremo y un enchufe en el otro extremo que se introduce en la boca de salida del horno.
PRECAUCIÓN
Para evitar quemaduras, no desenchufe la sonda de la boca de salida del horno hasta que éste se haya enfriado.
El uso de sondas distintas a las provistas con este producto puede provocarles daños a las mismas o al control del horno.
Utilice las manijas de la sonda y el enchufe cuando las introduzca y quite de los alimentos y de la boca de salida.
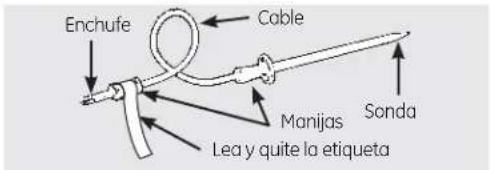
Nunca deje la sonda dentro del horno durante un ciclo de auto-limpieza o de asado.
No guarde la sonda dentro del horno.
Para asados sin hueso, introduzca la sonda dentro de la parte más carnosa. Para jamón o cordero con hueso, introduzca la sonda en el centro del músculo grande más bajo.
Introduzca la sonda en el centro de platos tales como pan de carne o estofados.
Introduzca la sonda dentro de la parte más carnosa del muslo interno desde abajo y en forma paralela a la pata de un pavo entero.
NOTA: No se podrán utilizar las configuraciones de auto-limpieza ni de asado si la sonda de temperatura se encuentra enchufada.
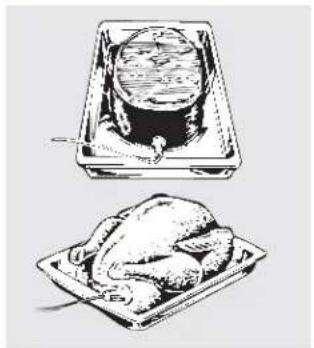
natural_image
Illustration of a roasted chicken and its cooking pot (no text or symbols)Después de preparar la carne y colocarla en un posafuentes o sobre la rejilla de la asadera, siga estas instrucciones para una colocación adecuada de la sonda.
Introduzca la sonda completamente en la carne. No debe tocar hueso, grasa o cartilago.
NOTA: No insertar por completo la sonda dentro de la carne puede provocar un pobre desempeño de cocción porque la sonda detectará el aire del horno y no la temperatura de los alimentos.
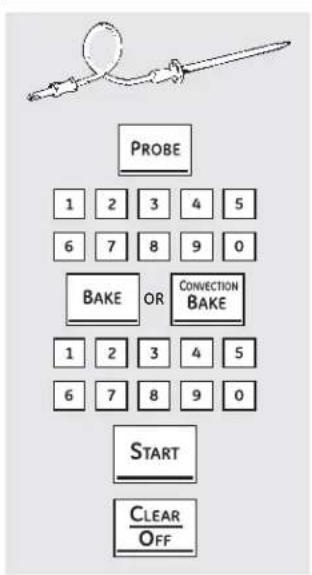
flowchart
graph TD
    A["PROBE"] --> B["1 2 3 4 5"]
    B --> C["6 7 8 9 0"]
    C --> D["BAKE OR CONVECTION BAKE"]
    D --> E["1 2 3 4 5"]
    E --> F["6 7 8 9 0"]
    F --> G["START"]
    G --> H["CLEAR OFF"]
Cómo configurar el horno para horneado/rostizado cuando usa la sonda
(en algunos modelos)
1 Introduzca la sonda por completo en los alimentos.
Enchufe la sonda dentro de la boca de salida del horno. Verifique que esté introducida hasta el fondo. Cierre la puerta del horno. Verifique que el cable de la sonda no toque el elemento asador.
3 Presione el botón PROBE (sonda). La pantalla mostrará "Set Probe." (Temperatura de la Sonda).
4 Presione las almohadillas numéricas para configurar la temperatura interna deseada de los alimentos o de la carne. La temperatura interna máxima a la que pueden configurarse los alimentos es 200°F (93°C).
5 Presione la tecla BAKE (Hornear) o CONVECTION (Convección)
6 Presione las almohadillas numéricas para configurar la temperatura deseada del horno.
7 Presione el botón START (iniciar).
La pantalla destellará si la sonda se encuentra enchufada dentro de la boca de salida y usted no ha configurado una temperatura de sonda y presionado el botón START (iniciar).
Presione la tecla PROBE (Sonda) para recordar la
temperatura de la sonda o la tecla BAKE (Hornear) o CONVECTION (Convección) para recordar la temperatura del horno. Para la temperatura de la sonda, luego de que la temperatura interna de la comida alcance los 100º F, los cambios de la temperatura interna aparecerán en la pantalla.
8 Cuando la temperatura interna de los alimentos alcanza la cifra que usted ha configurado, la sonda y el horno se apagan y los controles del horno comienzan a destellar. Para detener el destello, presione el botón CLEAR/OFF (borrar/apagado). Utilice guantes de cocina para quitar la sonda de los alimentos. No utilice pinzas para quitarla, porque podrían dañarla.
Si la sonda se quita del horno mientras se estaba cocinando, el horno no se apagará automáticamente.
Para cambiar la temperatura del horno durante el ciclo de horneado/rostizado, presione el botón BAKE (hornear) o CONVECTION (convección) y luego las almohadillas numéricas para configurar la nueva temperatura.
Puede utilizar el temporizador de cocina aunque no pueden usarse operaciones del horno con temporizador mientras se utilice la sonda.
Cómo utilizar las características de horneado y rostizado con temporizador. GEAppliances.com
NOTA: Los alimentos que se echan a perder con facilidad—como leche, huevos, pescado, rellenos, carne de ave y cerdo—no deben dejarse reposar por más de 1 hora antes y después de la cocción. La temperatura ambiente promueve el crecimiento de bacterias dañinas. Verifique que la luz del horno esté apagada porque el calor proveniente de la bombilla puede acelerar el crecimiento de bacterias.
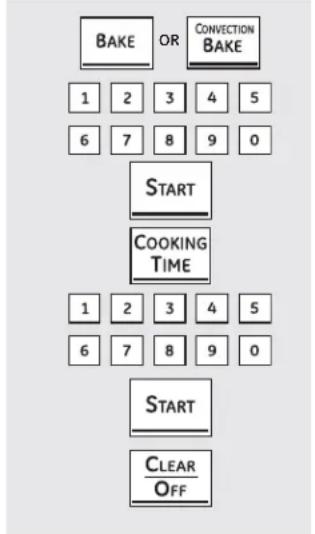
flowchart
graph TD
    A["BAKE"] --> B["1"]
    C["OR"] --> D["2"]
    E["CONVECTION BAKE"] --> F["3"]
    G["START"] --> H["4"]
    I["COOKING TIME"] --> J["5"]
    K["START"] --> L["6"]
    M["CLEAR OFF"] --> N["7"]
    O["0"] --> P["8"]
    Q["9"] --> R["9"]
    S["0"] --> T["0"]
Cómo configurar un inicio inmediato y un apagado automático
El horno se enciende inmediatamente y cocina los alimentos durante un período de tiempo seleccionado. Al finalizar el tiempo de cocción, el horno se apaga automáticamente.
1 Presione el botón BAKE (hornear) o CONVECTION BAKE (Horneado por Convección).
2 Presione las almohadillas numéricas para configurar la temperatura deseada del horno.
3 Presione la tecla START (Iniciar).
4 Presione el botón COOKING TIME (tiempo de cocción).
NOTA: Si su receta requiere precalentamiento, puede necesitar agregar tiempo adicional al tiempo de cocción.
5 Presione las almohadillas numéricas para configurar el tiempo de cocción deseado. El tiempo de cocción mínimo que usted puede configurar es 1 minuto. La temperatura del horno que ha configurado y el tiempo de cocción ingresado aparecerán en la pantalla.
6 Presione el botón START (iniciar).
El horno estará en la posición ON (Encendido) y en la pantalla aparecerá el conteo de la cocción y el cambio de temperatura a partir de los 100°F. (La pantalla de temperatura comenzará a cambiar una vez que la temperatura del horno alcance los 100°F). Cuando el horno alcance la temperatura que programó, sonarán 3 pitidos. El horno continuará cocinando durante la cantidad de tiempo configurada, y luego de apagará de forma automática, a menos que la función WARM (Calentar) haya sido configurada. Lea la sección Cómo Configurar el Horno para Calentar.
7 Si fuera necesario, presione el botón CLEAR/OFF (borrar/apagado) para borrar la pantalla. Quite los alimentos del horno. Recuerde, aunque el horno se apaga automáticamente, los alimentos que se dejen en el horno seguirán cocinándose después de apagado el mismo.
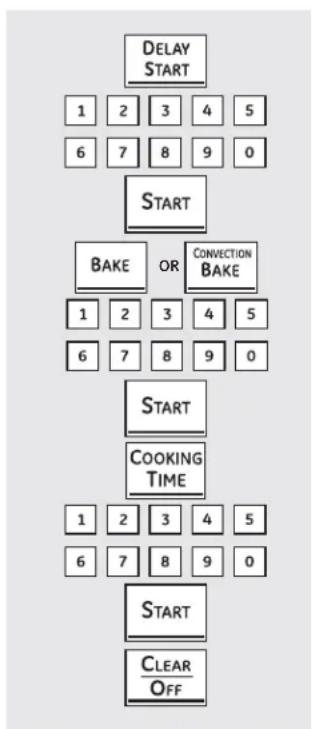
flowchart
graph TD
    A["DELAY START"] --> B["1 2 3 4 5"]
    B --> C["6 7 8 9 0"]
    C --> D["START"]
    D --> E["BAKE OR CONVECTION BAKE"]
    E --> F["1 2 3 4 5"]
    F --> G["6 7 8 9 0"]
    G --> H["START"]
    H --> I["COOKING TIME"]
    I --> J["1 2 3 4 5"]
    J --> K["6 7 8 9 0"]
    K --> L["START"]
    L --> M["CLEAR OFF"]
Cómo configurar un inicio retardado y un apagado automático
El horno se encenderá en el horario que usted haya configurado, cocinará alimentos durante un período de tiempo específico y luego se apagará automáticamente.
Asegúrese de que el reloj muestre la hora correcta.
1 Presione la tecla DELAY START (Inicio Retrasado).
2 Presione las almohadillas numéricas para configurar la temperatura deseada del horno.
3 Presione la tecla START (Iniciar).
4 Presione la tecla BAKE (Hornear) o CONVECTION BAKE (Horneado por Convección) u otra función de cocción deseada.
5 Toque los las teclas numéricas para programar la temperatura del horno deseada.
6 Presione la tecla START (Iniciar).
7 Presione la tecla COOKING TIME (Tiempo de Cocción).
NOTA: Si su receta requiere precalentamiento, puede necesitar agregar tiempo adicional al tiempo de cocción.
8 Presione las almohadillas numéricas para configurar el tiempo de cocción deseado. El tiempo de cocción mínimo que usted puede configurar es 1 minuto.
La temperatura del horno que ha configurado y el tiempo de cocción ingresado aparecerán en la pantalla..
9 Presione el botón START (iniciar).
NOTA: Si desea verificar los horarios que ha configurado, presione el botón DELAY START (inicio retardado) para controlar la hora de inicio configurada o presione el botón COOKING TÍME (Tiempo de Cocción) para verificar la extensión de cocción que ha configurado.
Cuando el horno se enciende (ON) en el horario que ha configurado, la pantalla mostrará la cuenta regresiva del tiempo de cocción y la nueva temperatura comenzando en 100°F (38°C). (La pantalla de temperatura comenzará a cambiar cuando la temperatura del horno llegue a los 100°F [38°C].) Cuando el horno alcanza la temperatura configurada, sonarán pitidos. El horno seguirá cocinando durante un período de tiempo determinado y luego se apagará automáticamente, a menos que la función WARM (Calentar) haya sido configurada. Lea la sección Cómo Configurar el Horno para Calentar.
10 Si fuera necesario, presione el botón CLEAR/OFF (borrar/apagado) para borrar la pantalla. Quite los alimentos del horno. Recuerde, aunque el horno se apaga automáticamente, los alimentos que se dejen en el horno seguirán cocinándose después de apagado el mismo.
Uso del horno con auto limpieza
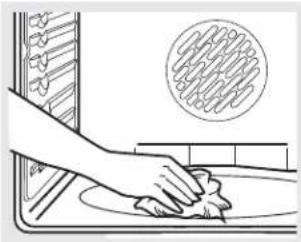
natural_image
Illustration of a hand cleaning a kitchen sink with a circular inset showing a textured surface (no text or symbols)Limpie con un paño los desechos rebeldes acumulados en el piso del horno.
Antes de un ciclo de Auto Limpieza
ADVERTENCIA
PELIGRO DE INCENDIO: Limpie la grasa y la suciedad rebelde del piso del horno antes de la auto-limpieza. No hacerlo puede provocar un incendio en el horno.
Recomendamos ventilar su cocina con una ventana abierta o utilizando un ventilador o campana durante el primer ciclo de auto-limpieza.
Quite la asadera, rejilla, s onda, todos los recipientes de cocción y cualquier trozo de papel de aluminio del horno.
NOTAS:
Si el horno se encuentra equipado con parrillas para horno brillosas y de color plateado, se recomienda retirar las mismas antes de comenzar con el ciclo de auto limpieza. Podrán permanecer en el horno durante el ciclo de auto limpieza, pero se oscurecerán, perderán su lustre y será difícil deslizarlas.
Si su horno está equipado con bandejas revestidas de porcelana gris pueden dejarse dentro del horno durante el ciclo de autolimpieza.
La suciedad ubicada en el marco frontal de la cocina y fuera de la junta de la puerta deberá limpiarse a mano. Limpie estas áreas con agua caliente, esponjillas de lana de acero embebidas en jabón o limpiadores tales como Soft Scrub®. Enjuague bien con agua limpia y seque.
No limpie la junta. El material de fibra de vidrio de la junta de la puerta del horno no resiste productos abrasivos. Es esencial que la junta se mantenga intacta. Si usted nota que está desgastada, reemplácela.
Verifique que la tapa de la bombilla de luz del horno esté en su lugar y que la luz del horno esté apagada.
IMPORTANTE: Las emanaciones producidas por el ciclo de autolimpieza de cualquier horno afectan la salud de algunas aves de manera notoria. Procure llevar sus aves a otra habitación bien ventilada.
Modelos canadienses solamente
Las unidades de superficie se desactivan automáticamente durante el ciclo de auto-limpieza. Verifique que todos los controles de unidades de superficie estén apagados en todo momento durante el ciclo de auto-limpieza. Cualquier unidad de superficie configurada en una posición "on" (encendido) mientras funciona el ciclo de auto-limpieza se accionará automáticamente después de terminado el ciclo, y puede provocar el encendido de una unidad de superficie y quedar sin atención. Espere hasta que termine el ciclo de auto-limpieza para configurar y usar las unidades de superficie.
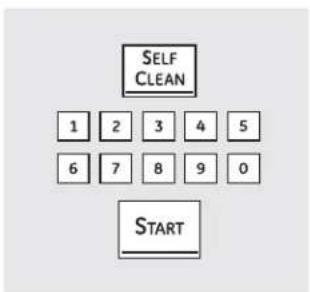
Cómo configurar el horno para una auto-limpieza
Las puerta del horno debe estar cerradas y todos los controles deben estar correctamente configurados para que el ciclo funcione en forma adecuada.
1 Presione el botón SELF CLEAN (auto-limpieza).
Se recomienda un ciclo de 3 horas para limpiar derrames pequeños y contenidos. Se recomienda un ciclo de auto-limpieza de 5 horas para un horno más sucio.
2 Si necesita un ciclo diferente de 5 o 3 horas, utilice las almohadillas numéricas e ingrese el tiempo de limpieza deseado.
El tiempo de limpieza puede configurarse entre 3 horas y 5 horas, de acuerdo con el grado de suciedad del horno.
3 Presione el botón START (iniciar).
Las puertas del horno superior e inferior se bloquean automáticamente. Los elementos de la estufa también se bloquean durante la limpieza. La pantalla mostrará el tiempo de limpieza restante. No podrán abrirse las puertas del horno o utilizar la estufa hasta que la temperatura descienda por debajo de la temperatura de bloqueo y se apague LOCKED (Bloqueado) de la pantalla de control.
Si usted configura el ciclo de limpieza y se olvida de cerrar las puertas del horno, destellaró LOCKED (Bloqueado) y la palabra door (puerta) aparecerá en la pantalla.
Para detener el ciclo de limpieza, presione el botón CLEAR/OFF (borrar/apagado). Cuando se apaga LOCKED (Bloqueado) (puerta bloqueada), indicando que la temperatura de los hornos ha descendido por debajo de la temperatura de bloqueo, usted podrá abrir las puertas.
Las puertas del horno debe estar cerradas y todos los controles deben estar correctamente configurados para que el ciclo funcione en forma adecuada.
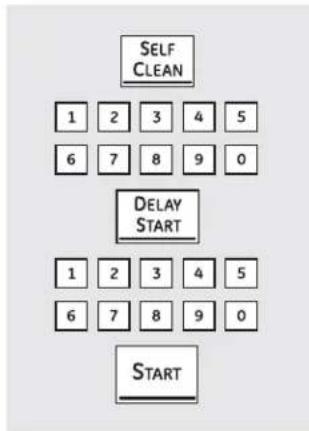
flowchart
graph TD
    A["SELF CLEAN"] --> B["1 2 3 4 5"]
    A --> C["6 7 8 9 0"]
    D["DELAY START"] --> E["1 2 3 4 5"]
    D --> F["6 7 8 9 0"]
    G["START"] --> H["End"]
Cómo configurar un inicio retardado de limpieza
1 Presione el botón DELAY START (inicio retardado).
2 Mediante las almohadillas numéricas, ingrese la hora en que desea iniciar el ciclo de limpieza.
3 Presione el botón START (iniciar).
4 Presione el botón SELF CLEAN (auto-limpieza).
5 Si es necesario un tiempo diferente al preconfigurado, utilice las teclas numéricas e ingrese el Nuevo tiempo deseado.
El tiempo de limpieza puede configurarse entre 3 horas y 5 horas, de acuerdo con el grado de suciedad del horno.
6 Presione el botón START (iniciar).
La puerta del horno se cierra automáticamente. Los elementos de la estufa también se bloquean durante la auto-limpieza. La pantalla mostrará la hora de inicio.
No podrán abrirse las puertas del horno o utilizarse la estufa hasta que la temperatura descienda por debajo de la temperatura de bloqueo y se apague LOCKED/DOOR 🔒 (puerta bloqueada) de la pantalla de control.
Después de un ciclo de limpieza
Es posible que observe algunas cenizas blancas en el horno. Límpielas con un paño húmedo después de que el horno se enfríe.
Si las manchas blancas permanecen, remuévalas con un estropajo de acero lleno de jabón y enjuague generosamente con una mezcla de vinagre y agua. Estos depósitos son usualmente residuos de sal que el ciclo de limpieza no puede eliminar.
Si el horno no queda limpio después de un ciclo de limpieza, repita el ciclo.
Usted no puede configurar el horno para cocción hasta que el horno esté lo suficientemente frío como para que la puerta se desbloquee.
■ Mientras el horno esté en autolimpieza, usted puede presionar el botón RELOJ para mostrar en pantalla la hora del día. Para volver a la cuenta regresiva de limpieza, presione el botón AUTOLIMPIEZA.
Parrillas estándar
Si resulta difícil deslizarlas, pase aceite de cocción con un paño en sus costados laterales y en los soportes de las parrillas del horno.
Parrilla de extensión
Si deslizar la misma resulta difícil, ver Parrilla de extensión en la sección Cuidado y limpieza. No rocíe la parrilla de extensión con pulverizador para cocción u otros lubricantes en spray.
Si resulta difícil quitarla o colocarla, pase aceite de cocción con un paño en los soportes de las parrillas del horno. No pase aceite de cocción en los deslizadores.
NOTA: Luego del primer ciclo de limpieza automática, las superficies de acero inoxidable gris cambiarán de color en los estantes extensibles esmaltados. Esto es normal. No se recomienda la limpieza automática de estantes extensibles de níquel, ya que todo el estante perderá color debido a las temperaturas de la limpieza automática.
Uso de las funciones para realizar pruebas y calentar.
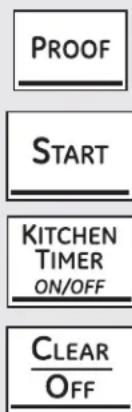
(En algunos modelos)
Cómo configurar el horno para leudar (en algunos modelos)
La característica de leudado mantiene un medio caliente útil para leudar productos con levadura.
Coloque la masa cubierta en un recipiente dentro del horno en las bandejas B o C.
NOTA: Para mejores resultados, cubra la masa con un paño o un envoltorio plástico enmantecado (el plástico puede colocarse debajo del recipiente para que el ventilador del horno no lo desplace).
2 Presione el botón PROOF (leudar) y luego el botón START (iniciar).
En la pantalla podrá verse PrF (leudar).
La luz interna del horno se enciende y continúa encendida durante el leudado.
La característica de leudado automáticamente brinda la temperatura óptima para el proceso de leudado, y por lo tanto no existe un ajuste de temperatura.
3 Configure el temporizador para el tiempo de leudado mínimo.
4 Cuando haya finalizado de leudar, presione el botón CLEAR/OFF (borrar/apagado).
Para evitar bajar la temperatura del horno y prolongar el tiempo de leudado, no abra la puerta del horno innecesariamente.
Verifique antes de tiempo los productos panificados para que no leuden de más.
NOTAS:
No utilice el modo leudar para calentar alimentos o para mantener los calientes. La temperatura de leudado del horno no es lo suficientemente caliente para conservar alimentos a temperaturas seguras. Use la característica WARM (caliente) para mantener los alimentos calientes.
El leudado no funciona cuando el horno tiene una temperatura mayor a 125°F (51,7°C). En la pantalla podrá verse "HOT" (caliente).
Cómo Configurar el Horno para Calentar
La función WARM (Calentar) mantiene calientes las comidas cocinadas. Esta función no fue diseñada para volver a calentar comida fría.
Para usar la función WARM (Calentar), presione la tecla WARM (Calentar) y luego la tecla START (Iniciar).
Para usar la función WARM (Calentar) luego del Tiempo de Horneado o Dorado, siga los siguientes pasos:
1 Presione el modo de cocción que desee usar (HORNEADO, HORNEADO MÚLTIPLE POR CONVECCIÓN EN 1 PARRILLA o DORADO POR CONVECCIÓN).
2 Presione las teclas numéricas para configurar la temperatura del horno.
3 Presione la tecla COOKING TIME (Temporizador de Cocción).
4 Presione las teclas numéricas para configurar el período de tiempo de cocción deseado.
5 Presione la tecla WARM (Calentar).
6 Presione la tecla START (Iniciar).
Para que Ítems Duros queden Crocantes
Coloque comida en platos o cacerolas en la parte inferior.
Para obtener mejores resultados, coloque las comidas en una sola capa. No las amontone.
No las cubra.
Controle si están crocantes luego de entre 20 y 30 minutos. Agregue tiempo según sea necesario.
NOTAS IMPORTANTES:
La comida se debería mantener caliente en su envase de cocción o transferirla a un plato con protección térmica para servir.
Para comidas húmedas, cubra las mismas con una tapa segura para el horno o papel de aluminio.
No es necesario cubrir las comidas fritas o crocantes, pero es posible que se sequen demasiado si se calientan durante demasiado tiempo.
La apertura repetida de la puerta permite que el aire caliente salga y que la comida se enfríe.
- Deje transcurrir un tiempo adicional para que la temperatura interior del horno se estabilice luego de agregar los ítems.
- Con grandes cantidades es posible que sea necesario cubrir algunas de las comidas cocinadas.
- Retire las cucharas para servir, etc., antes de colocar recipientes en el horno.
No use recipientes, tapas ni envoltorios de plástico.
PRECAUCIÓN:
Los envases, tapas y envoltorios de plástico se derretirán si se colocan en el horno. Es posible que el plástico derretido no se pueda retirar y esto no está cubierto por la garantía.
Los nuevos controles con botones de toque cuentan con características adicionales. Las siguientes son las características y la manera en que usted puede activarlas.
Los modos de características especiales sólo pueden activarse mientras la pantalla muestra la hora. Se conservan en la memoria de los controles hasta que se repitan los pasos.
Para ingresar una función especial para cada horno, primero deberá presionar las teclas BROIL HI/LO (Asar Alto/ Bajo) al mismo tiempo.
Cuando la pantalla muestra su opción, presione el botón START (iniciar). Las características especiales se conservarán en la memoria después de un corte de energía, con excepción del Sabbath, que debe reconfigurarse.
flowchart
graph TD
    A["BROI Hi/Lo"] --> B["+"]
    C["COOKING TIME"] --> D["+"]
    E["BAKE"] --> F["+"]
    G["BROI Hi/Lo"] --> H["+"]
    I["START"] --> J["+"]
Selección de temperatura en Fahrenheit o Celsius
Su control de homo está configurado para utilizar las selecciones de temperatura Fahrenheit, pero puede modificarse para usar selecciones en Celsius.
1 Presione los botones BROIL HI/LO (asar alto/bajo) y BAKE (homear) del horno al mismo tiempo hasta que en la pantalla pueda verse SF.
2 Presione los botones COOKING TIME (tiempo de cocción) y BROIL HI/LO (asar alto/bajo) al
mismo tiempo. En la pantalla podrá verse F (Fahrenheit).
3 Presione los botones COOKING TIME (tiempo de cocción) y BROIL HI/LO (asar alto/bajo) de nuevo al mismo tiempo. En la pantalla podrá verse C (Celsius).
4 Presione el botón START (iniciar).
flowchart
graph TD
    A["BROIL\nHi/Lo"] + B["BAKE"]
    C["KITCHEN\nTIMER\nON/OFF"]
    D["START"]
Señales sonoras al finalizar un ciclo con temporizador
Al finalizar un ciclo con temporizador se escuchan 3 pitidos cortos seguidos por un pitido cada 6 segundos hasta que se presione el botón CLEAR/OFF (borrar/apagado). Este pitido continuo de 6 segundos puede cancelarse. Para cancelar el pitido continuo de 6 segundos:
1 Presione los botones BROIL HI/LO (asar alto/bajo) y BAKE (homear) del horno superior al mismo tiempo hasta que en la pantalla pueda verse SF.
2 Presione el botón KITCHEN TIMER (Temporizador de la Cocina). La pantalla muestra CONTI BEEP (pitido continuo). Presione el botón KITCHEN TIMER (Temporizador de la Cocina) de nuevo. La pantalla muestra SINGLE BEEP (pitido único). (Esto cancela el pitido cada 6 segundos.) 3 Presione el botón START (iniciar).
Características especiales de los controles del horno.
flowchart
graph TD
    A["BROIL\nHi/Lo"] --> C["CLOCK"]
    B["BAKE"] --> C["CLOCK"]
    C["CLOCK"] --> D["START"]
12 horas, 24 horas o bloqueo del reloj
Sus controles están configurados para usar un reloj de 12 horas.
Si prefiere tener un reloj de estilo militar de 24 horas o anular la visualización del reloj, siga los siguientes pasos.
1 Presione los botones BROIL HI/LO (asar alto/bajo) y BAKE (hornear) del horno al mismo tiempo hasta que en la pantalla pueda verse SF.
2 Presione el botón CLOCK (reloj) una vez. En la pantalla podrá verse 12 hr. Si esta es la opción que desea, presione el botón START (iniciar).
Presione el botón CLOCK (reloj) de nuevo para cambiar al reloj estilo militar de 24 horas. En la pantalla podrá verse 24 hr. Si esta es la opción que desea, presione el botón START (iniciar).
Presione el botón CLOCK (reloj) de nuevo para anular la visualización del reloj. En la pantalla podrá verse OFF (apagado). Si esta es la opción que desea, presione el botón START (iniciar).
NOTA: Si el reloj se encuentra en el modo sin visualización, usted no podrá utilizar la función de inicio retardado.
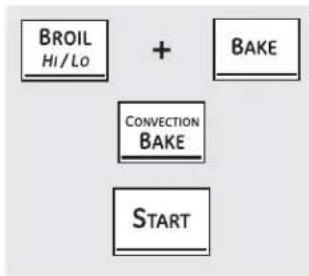
flowchart
graph TD
    A["BROIL Hi/Lo"] --> C["CONVECTION BAKE"]
    B["BAKE"] --> C
    C --> D["START"]
Conversión Automática de Recetas™ (en algunos modelos)
Al usar el horneado por convección, la función de Conversión Auto Recipe® podrá automáticamente convertir temperaturas de horneado regular ingresadas a temperaturas de horneado por convección. La pantalla mostrará la temperatura convertida (reducida). Por ejemplo: si usted ingresa una temperatura regular de 350° para una receta y presiona la tecla START (Iniciar), la pantalla mostrará CON (Convertir) y la temperatura convertida de 325° F.
Para activar o desactivar la función:
1 Presione los botones BAKE (hornear) y BROIL HI/LO (asar alto/bajo) del horno al mismo tiempo hasta que en la pantalla pueda verse SF.
2 Presione la tecla CONVECTION BAKE (Horneado por Convección), hasta que la pantalla muestre CON ON (Conversión Encendida) o CON OFF (Conversión Apagada) según se desee.
3 Presione el botón START (iniciar).
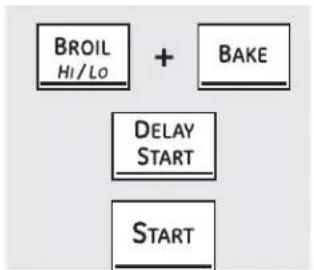
flowchart
graph TD
    A["BROIL Hi/Lo"] + B["BAKE"]
    C["DELAY START"]
    D["START"]
Apagado luego de 12 horas
Con esta opción, en caso de dejarse el horno encendido accidentalmente, el control lo apaga en forma automática luego de 12 horas durante funciones de homeado o después de 3 horas durante la función de asado.
Si desea apagar (OFF) esta función, siga los pasos siguientes.
1 Presione los botones BROIL HI/LO (asar alto/bajo) y BAKE (hornear) del horno al mismo tiempo hasta que en la pantalla pueda verse SF.
2 Presione el botón DELAY START (inicio retardado) hasta que aparezca no shdn (no apagado) en la pantalla.
3 Presione el botón START (iniciar) para activar la característica de no apagado y dejar el control configurado en este modo de características especiales.
Cómo usar la función Sabbath.
(Diseñada para utilizarse durante el Sabbath u otras Fiestas Judías) (en algunos modelos)
GEAppliances.com
La función Sabbath solamente puede utilizarse para hornear/rostizar. No es posible utilizarla para convección, asado, auto-limpieza o cocción con inicio retardado.
NOTA: La luz interior del horno se enciende automáticamente (en algunos modelos) cuando se abre la puerta y se apaga cuando se la cierra. Puede quitarse la bombilla de luz. Ver la sección de Reemplazo de bombilla de luz. En los modelos con interruptor de luz en el panel de control, la luz del horno puede encenderse y dejarse así.
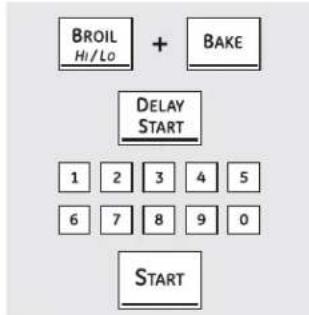
flowchart
graph TD
    A["BROIL Hi/Lo"] + B["BAKE"] --> C["DELAY START"]
    C --> D["1 2 3 4 5"]
    C --> E["6 7 8 9 0"]
    C --> F["START"]
Cuando la pantalla muestra ⊃, el horno está configurado para Sabbath. Cuando la pantalla muestra ⊃⊂, el horno está horneando/rostizando.
Asegúrese de que el reloj muestre la hora correcta y que el horno esté apagado.
1 Presione y sostenga los botones BROIL HI/LO (asar alto/bajo) y BAKE (hornear) al mismo tiempo hasta que en la pantalla pueda verse SF.
NOTA: Si en la pantalla aparecen Bake (hornear) o Broil (asar), los botones BROIL HI/LO (asar alto/bajo) y BAKE (hornear) no se presionaron al mismo tiempo. Presione el botón CLEAR/OFF (borrar/apagado) y comience de nuevo.
2 Presione el botón DELAY START (inicio retardado) hasta que aparezca SAb bAtH en la pantalla.
3 Presione el botón START (iniciar) y ⊃ aparecerá en la pantalla. El horno se encuentra ahora en el modo Sabático.
4 Presione el botón BAKE (homear). No se dará una señal.
5 Mediante las almohadillas numéricas, ingrese la temperatura deseada entre 170°F (77°C) y 550°F (288°C). No se dará ninguna señal o temperatura. No hay una temperatura predeterminada. 6 Presione el botón START (iniciar).
6 Presione el botón START (iniciar).
7 Después de un período aleatorio de aproximadamente 30 segundos a 1 minuto, ⊃c aparecerá en la pantalla indicando que el horno está horneando/rostizando. Si ⊃c no aparece en la pantalla, comience de nuevo en el paso 4.
Para ajustar la temperatura del horno, presione el botón BAKE (hornear), ingrese la nueva temperatura usando las almohadillas numéricas y presione el botón START (iniciar).
NOTA: Los botones CLEAR/OFF (borrar/apagado) y COOKING TIME (tiempo de cocción) se encuentran activos durante la función Sabbath.
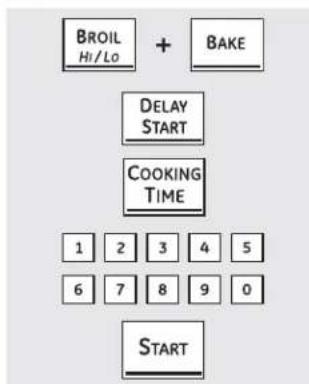
flowchart
graph TD
    A["BROIL Hi/Lo"] + B["BAKE"] --> C["DELAY START"]
    C --> D["COOKING TIME"]
    D --> E["1 2 3 4 5"]
    D --> F["6 7 8 9 0"]
    D --> G["START"]
Cuando la pantalla muestra ⊃, el horno está configurado para Sabbath. Cuando la pantalla muestra ⊃⊂, el horno está horneando/rostizando.
Cómo configurar horneado/rostizado con temporizador: Inicio inmediato y apagado automático
Asegúrese de que el reloj muestre la hora correcta y que el horno esté apagado.
1 Presione y sostenga los botones BROIL HI/LO (asar alto/bajo) y BAKE (hornear) al mismo tiempo hasta que en la pantalla pueda verse SF.
NOTA: Si en la pantalla aparecen Bake (hornear) o Broil (asar), los botones BROIL HI/LO (asar alto/bajo) y BAKE (hornear) no se presionaron al mismo tiempo. Presione el botón CLEAR/OFF (borrar/apagado) y comience de nuevo.
2 Presione el botón DELAY START (inicio retardado) hasta que aparezca SAb bAtH en la pantalla.
3 Presione el botón START (iniciar) y aparecerá en la pantalla. El horno está ahora en el modo Sabbath.
4 Presione el botón COOKING TIME (tiempo de cocción). No se dará una señal.
5 Presione las almohadillas numéricas para configurar el tiempo deseado de cocción entre 1 minuto y 9 horas y 99 minutos.
6 Presione el botón START (iniciar).
7 Presione el botón BAKE (hornear). No se dará una señal.
8 Presione las almohadillas numéricas para configurar la temperatura deseada. No se dará ninguna señal o temperatura. No hay una temperatura predeterminada.
9 Presione el botón START (iniciar).
70 Después de un período aleatorio de aproximadamente 30 segundos a 1 minuto, ⊃ ⊂ aparecerá en la pantalla indicando que el horno está horneando/rostizando. Si ⊃ ⊂ no aparece en la pantalla, comience de nuevo en el paso 7.
Para ajustar la temperatura del horno, presione el botón BAKE (hornear), ingrese la nueva temperatura usando las almohadillas numéricas y presione el botón START (iniciar).
Cuando se haya terminado la cocción, la pantalla cambiará de a y aparecerá 0:00, indicando que el horno se ha apagado (OFF) pero sigue configurado en Sabbath. Retire los alimentos del horno.
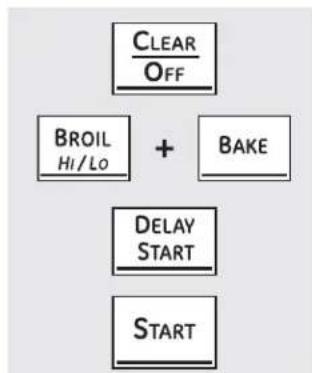
flowchart
graph TD
    A["CLEAR/OFF"] --> B["BROIL/Hi/Lo"]
    B --> C["+"]
    C --> D["BAKE"]
    D --> E["DELAY START"]
    E --> F["START"]
Cómo desactivar la función Sabbath
1 Presione el botón CLEAR/OFF (borrar/apagado).
2 Si el horno está cocinando, espere un período aleatorio de aproximadamente 30 segundos a 1 minuto, hasta que sólo ⊃ aparezca en la pantalla.
3 Presione y sostenga los botones BROIL HI/LO (asar alto/bajo) y BAKE (hornear) al mismo tiempo hasta que en la pantalla pueda verse SF.
4 Presione el botón DELAY START (inicio retardado) hasta que 12 shdn o no shdn aparezcan en la pantalla.
Elija 12 shdn, indicando que el horno se apagará automáticamente después de 12 horas o no shdn, indicando que el horno no se apagará automáticamente después de 12 horas.
5 Presione START (iniciar) cuando la opción deseada aparece en la pantalla (12 shdn o no shdn).
NOTA: En caso de corte de energía con la función de Sabbath activada, dicha función se apagará automáticamente aún cuando vuelva la energía. El control del horno debe volver a configurarse. Algunos modelos continuarán el modo Sabbath; sin embargo, si se abre la puerta, se activará la luz del horno.
Cuidado y limpieza de la cocina.
Asegúrese de que todos los controles estén apagados y que las superficies estén frías antes de limpiar cualquier parte de la cocina.
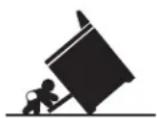
ADVERTENCIA
Si se quita la cocina para efectuar una limpieza, reparaciones o cualquier otra razón, verifique que
el dispositivo anti-volcaduras se coloque de manera adecuada cuando vuelva a instalarse la cocina.
Si no toma esta precaución, la cocina puede volcarse y provocar lesiones.
Cómo quitar el envoltorio de protección y la cinta de embalaje
Con cuidado, tome una punta del envoltorio de protección con sus dedos y lentamente quítelo de la superficie del aparato. No use elementos filosos para quitar el envoltorio. Quite todo el envoltorio antes de usar el aparato por primera vez.
Para asegurarse de no dañar el acabado del producto, la mejor forma de quitar el pegamento de la cinta de empaque de los aparatos nuevos consiste en aplicar detergente para vajillas líquido. Aplique con un paño suave y deje remojar.
NOTA: Debe retirarse el adhesivo de todas las partes. Si se calienta, será imposible de quitar.
Perillas de control
Las perillas de control se pueden retirar para facilitar la limpieza. Asegúrese de que las perillas estén en las posiciones OFF (Apagado) y empuje las mismas desde los soportes de forma derecha para su limpieza.
Las perillas pueden limpiarse en el lavavajillas o también pueden lavarse con jabón y agua. Asegúrese de que la parte interna de las perillas esté seca antes de volver a colocarse.
Verifique que las perillas estén en la posición OFF (apagado) y sáquelas de los vástagos para la limpieza.
Vuelva a colocar las perillas en la posición OFF (apagado) para asegurar una colocación correcta.
Panel de control
Si así lo desea, puede desactivar los botones de toque antes de la limpieza.
También puede utilizar un limpiador de vidrios.
Ver la información sobre Bloqueo de controles en la sección Cómo usar el reloj, el temporizador y el bloqueo de controles de este manual.
Quite suciedades más rebeldes con agua tibia jabonosa. No utilice abrasivos de ninguna clase.
Limpie los derrames con un paño húmedo.
Vuelva a activar los botones de toque después de la limpieza.
Superficies pintadas
Las superficies pintadas incluyen los lados de la cocina y la puerta, la parte superior del panel de control y el frente del cajón. Límpielas con jabón y agua o con una solución de agua y vinagre.
No utilice limpiadores de horno comerciales, polvos limpiadores, esponjillas de acero o abrasivos potentes sobre cualquier superficie pintada.
Superficies de acero inoxidable (en algunos modelos)
No utilice almohadillas de acero porque rayan la superficie.
Para limpiar la superficie de acero inoxidable, utilice agua tibia jabonosa o un limpiador o lustrador de acero inoxidable. Siempre limpie la superficie en dirección de la veta. Siga las instrucciones del producto para limpiar la superficie de acero inoxidable.
Para consultar sobre la compra de limpiadores o lustradores de aparatos de acero inoxidable, o para encontrar la ubicación del distribuidor más cercano a su domicilio, llame a nuestro número gratuito:
Centro nacional de repuestos 1.800.626.2002
GEAppliances.com
Estufa de esmalte de porcelana (en algunos modelos)
El acabado de esmalte de porcelana es resistente pero puede romperse si se utiliza incorrectamente. Este acabado es resistente al ácido. Sin embargo, no debe permitirse que algunos alimentos ácidos que se derraman (como jugos de fruta, tomate o vinagre) permanezcan en el acabado.
secos para limpiarlo en el momento. Cuando la superficie se haya enfriado, limpie con agua jabonosa. Enjuague bien.
En el caso de otros derrames, como salpicaduras de grasa, etc., limpie con agua jabonosa o polvos limpiadores cuando la superficie se haya enfriado. Enjuague bien. Pula con un paño seco.
ADVERTENCIA
PELIGRO DE DESCARGA ELÉCTRICA O QUEMADURAS: Antes de reemplazar la bombilla del horno, desconecte la alimentación de energía al horno desde el panel principal de fusibles o del interruptor de circuitos. No hacerlo puede provocar una descarga eléctrica o una quemadura.
PRECAUCIÓN
PELIGRO DE QUEMADURAS: La tapa de vidrio y la lámpara de luz se deberán retirar cuando estén frías. Tocar el vidrio caliente sin protección en las manos o con un trapo húmedo puede ocasionar quemaduras.
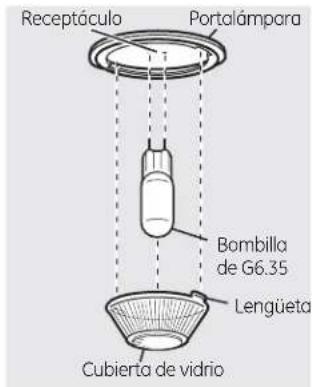
(en algunas modelos)
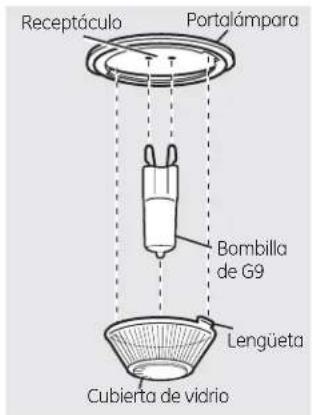
(en algunas modelos)
Reemplazo de la bombilla del horno (en algunos modelos)
Para retirar:
7 Gire la cubierta de vidrio en sentido contrario a las manecillas del reloj 1/4 de vuelta hasta que las lengüetas de la cubierta de vidrio liberen los surcos del portalámparas. Colocarse guantes de látex puede brindar un mejor agarre.
2 Utilizando guantes o un paño seco, remueva la bombilla jalándola en línea recta.
Para reemplazar:
7 Utilice una nueva bombilla halógena de 120/130 voltios, no exceda 50 vatios. Reemplace la lámpara de luz con el mismo tipo de lámpara que se retiró. En su modelo corresponderá uno de los dos tipos que figuran a la izquierda. Para determinar cuál es la lámpara correcta, controle las terminales de la lámpara. Las lámparas con 2 terminales con clavijas rectas son lámparas de G6.35. Las lámparas con 2 terminales con clavijas con curvas son lámparas de G9. (No las intercambie.) Asegúrese al reemplazar la lámpara que sea de 120 volts o 130 volts (NO de 12 volts).
2 Utilizando guantes o un paño seco, remueva la bombilla de su paquete. No toque la bombilla con los dedos desnudos. El aceite para piel dañará la lámpara y acortará su tiempo de duración.
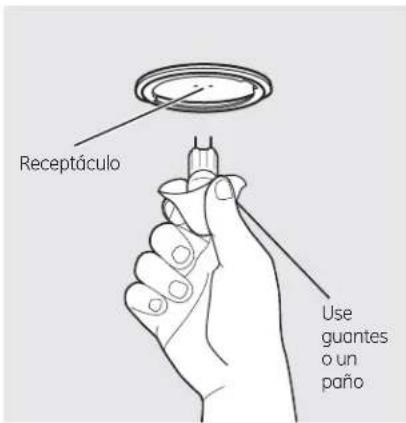
3 Empuje la bombilla en línea recta dentro del receptáculo hasta el tope.
4 Coloque las lengüetas de la cubierta de vidrio dentro de los surcos del portalámparas. Gire la cubierta de vidrio en sentido de las manecillas del reloj 1/4 de vuelta.
Para una mejor iluminación dentro del horno, limpie frecuentemente la cubierta de vidrio utilizando un paño húmedo. Esto debería hacerse cuando el horno está completamente frío.
5 Conecte nuevamente el suministro eléctrico al horno.
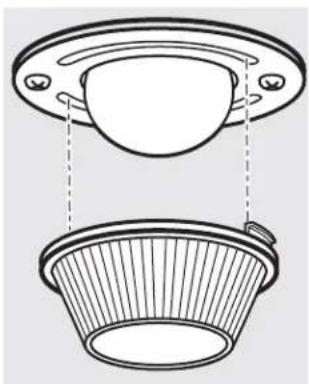
natural_image
Technical line drawing of a mechanical component with a flanged top and a circular base, showing internal structure (no text or symbols)Reemplazo de la bombilla del horno (en algunos modelos)
Verifique que la tapa de la lámpara y la bombilla se hayan enfriado por completo.
Para quitar la tapa:
1 Haga girar la lente en 14 de vuelta en sentido antihorario para quitarla.
No quite ningún tornillo para sacar la tapa.
2 Coloque una bombilla de 40 vatios o una bombilla halógena de dos espigas, según corresponda.
Para volver a colocar la tapa:
1 Alinee las lengüetas de la lente frente a las lengüetas de la carcasa y gire en sentido horario para trabar.
Cuidado y limpieza de la cocina.
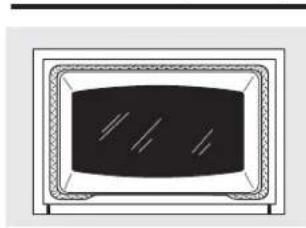
natural_image
Simple line drawing of a microwave oven with no text or symbolsLa junta está diseñada con un espacio en la parte inferior para permitir una adecuada circulación de aire.
No frote o limpie la junta de la puerta porque tiene una resistencia muy baja a la abrasión.
Si se advierte que la junta está desgastada, raída o dañada, o si se ha desplazado de su lugar, se la debe reemplazar.
Cómo limpiar la puerta del horno
Para limpiar la parte interna de la puerta:
Debido a que el área que se encuentra dentro de la junta se limpia durante el ciclo de autolimpieza, no es necesario limpiarla a mano.
El área que se encuentra fuera de la junta y el burlete de la puerta pueden limpiarse con una esponjilla plástica con jabón, agua caliente y detergente. Enjuague bien con una solución de agua y vinagre.
Para limpiar la parte externa de la puerta:
Utilice jabón y agua para limpiar cuidadosamente la parte superior, los lados y el frente de la puerta del horno. Enjuague bien. También es posible utilizar un limpiador de vidrios para limpiar la parte exterior de la puerta. No permita que caiga agua sobre las aberturas de ventilación.
Si queda alguna mancha persistente en
la sección de ventilación de la puerta, utilice un limpiador abrasivo suave y una esponja para obtener los mejores resultados.
Las salpicaduras de salsas, jugos de frutas, salsas de tomate y jugos de alimentos que contienen ácidos pueden decolorar la superficie, por lo que se debe enjuagarlos de inmediato. Cuando la superficie esté fría, limpie y enjuague.
No utilice limpiadores para hornos, polvos limpiadores o abrasivos potentes en la parte externa de la puerta.
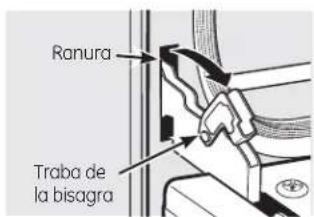
Tire las trabas de la bisagra hacia abajo para destrabar.
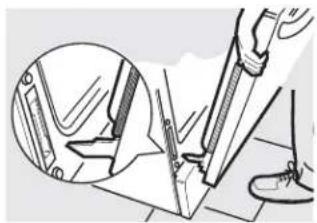
natural_image
Illustration of a person using a tool to cut or mark a mechanical component, with a magnified inset showing the detail (no text or symbols present)Posición de remoción
Puerta del horno desmontable (en algunos modelos)
La puerta es muy pesada. Tenga cuidado al quitar y levantar la puerta.
No levante la puerta de la manija.
Para quitar la puerta:
1 Abra la puerta por completo.
2 Presione las trabas de la bisagra hacia abajo en dirección del marco de la puerta hasta destrabarlas. Puede necesitarse una herramienta, como un destornillador plano pequeño.
3 Tome con firmeza ambos lados de la puerta de la parte superior.
4 Cierre la puerta hasta la posición de remoción de puerta, que es a mitad de camino entre la posición de asado y la puerta cerrada.
5 Levante la puerta hasta que el brazo de la bisagra haya salido de la ranura.
Para volver a colocar la puerta:
Tome con firmeza ambos lados de la puerta de la parte superior.
2 Con la puerta en el mismo ángulo de la posición de remoción, introduzca la muesca del brazo de la bisagra dentro del extremo inferior de la ranura de la bisagra. La ranura del brazo de la bisagra debe estar bien colocada en la parte inferior de la ranura.
Extremo inferior de la ranura
Brazo de la bisagra
Muesca
3 Abra la puerta por completo. Si la puerta no se abre por completo, la muesca no está bien colocada en el extremo inferior de la ranura.
4 Presione las trabas de la bisagra hacia arriba contra el marco frontal de la cavidad del horno, hasta alcanzar la posición de bloqueo.
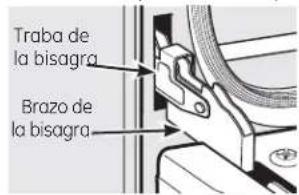
Presione las trabas de la bisagra hacia arriba para bloquear.
5 Cierre la puerta del horno.
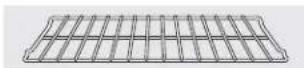
Bandejas del horno
Todas las bandejas del horno pueden limpiarse a mano con un limpiador abrasivo o una esponjilla de acero. Después de limpiar, enjuague las bandejas con agua limpia y séquelas con un paño limpio. Las bandejas revestidas de porcelana gris pueden permanecer en el horno durante el ciclo de auto-limpieza sin sufrir daños. Las bandejas del horno de níquel pueden permanecer en el horno durante el ciclo de auto-limpieza, pero perderán el
lustre y resultará difícil deslizarlas. Será necesario engrasar todos los extremos de las bandejas con una capa de aceite vegetal suave después de limpiarlas a mano o en el horno. Esto ayudará a mantener el fácil deslizamiento de las bandejas.
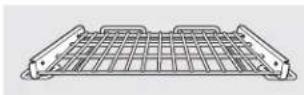
Parrilla de extensión (en algunos modelos)
Las parrillas de extensión se podrán limpiar a mano con un limpiador abrasivo o estropajo. Durante la limpieza, evite que ingrese agua o limpiador en las barras deslizantes de extensión a los costados de la parrilla.
Si resulta difícil deslizar la parrilla o si resulta difícil accionar la paleta, debe lubricarse la parrilla utilizando el lubricante de grafito enviado con su horno. Para solicitar lubricante de grafito adicional, llame a nuestro centro nacional de repuestos al 800.626.2002 con la referencia WB02T10303.
NOTA: No la lave en el lavavajillas.
Si retirar o reemplazar la parrilla resulta difícil, limpie ligeramente los soportes de la parrilla con aceite de cocina. No pase aceite de cocción en los deslizadores.
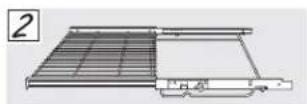
Para lubricar los deslizadores:
NOTA: No rocíe la parrilla de extensión con pulverizador para cocción u otros lubricantes en spray.
6 Abra y cierre la guía varias veces para distribuir el lubricante.
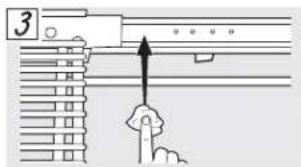
1 Quite la parrilla del horno. Ver Parrilla de extensión en la sección Uso del horno.
2 Extienda por completo la parrilla sobre una mesa o mostrador de encimera. Puede colocarse papel de diario debajo de la parrilla para una limpieza sencilla.
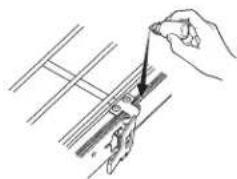
natural_image
Line drawing of a hand using a tool to draw parallel lines on a grid (no text or symbols)3 Si hay residuos en las guías de deslizamiento, limpielas con una toalla de papel. NOTA: Todo el lubricante de grafito eliminado durante la limpieza debe volver a colocarse - see steps 4 through 7.
7 Vuelva a colocar la tapa del lubricante y agítelo nuevamente. Dé vuelta la parrilla y repita los pasos 3, 4, 5 y 6.
8 Cierre la parrilla, gire la parrilla dejando el lado derecho hacia arriba y colóquela en el horno. Ver Parrilla de extensión en la sección Uso del horno.
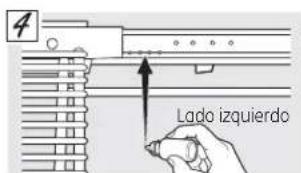
4 Agite el lubricante de grafito antes de abrirlo. Comenzando con el mecanismo de deslizamiento izquierdo de la parrilla, coloque cuatro (4) gotas de lubricante sobre las dos (2) guías traseras cercanas a los cojinetes de apoyo.
Para lubricar la paleta:
Agite el lubricante y aplique el mismo a las partes móviles de los mecanismos de las paletas como se muestra.
Guía lado derecho arriba
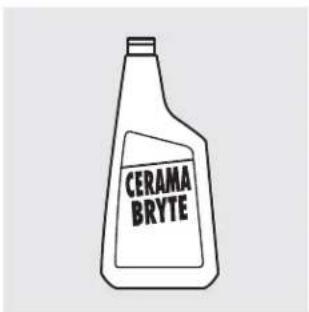
Limpie la estufa después de cada derrame. Utilice el limpiador de estufas cerámicas CERAMA BRYTE®.
Limpieza normal de uso diario
SÓLO utilice el limpiador de estufas cerámicas CERAMA BRYTE® en la estufa de vidrio. Otras cremas pueden no ser tan efectivas.
Para mantener y proteger la superficie de su estufa de vidrio, siga estos pasos:
1 Antes de usar la estufa por primera vez, limpiela con el limpiador de estufas cerámicas CERAMA BRYTE®. Esto ayuda a proteger la estufa y hace la limpieza más sencilla.
2 El uso diario del limpiador de estufas cerámicas CERAMA BRYTE® ayudará a que la estufa quede como nueva.
3 Agite bien la crema de limpieza. Aplique unas gotas del limpiador de estufas cerámicas CERAMA BRYTE® directamente sobre la estufa.
4 Utilice una toalla de papel o un paño de limpieza CERAMA BRYTE® para estufas cerámicas para limpiar toda la superficie de la estufa.
5 Use un paño seco o una toalla de papel para quitar los restos del limpiador. No hace falta enjuagar.
NOTA: Es muy importante que NO CALIENTE la estufa hasta que la haya limpiado por completo.
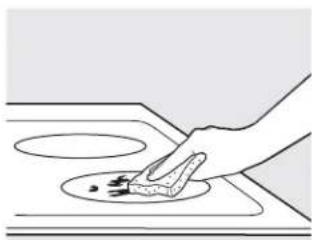
natural_image
Line drawing of a hand cleaning a circular object on a stove (no text or symbols)Utilice un paño de limpieza CERAMA BRYTE® para estufas cerámicas.
Residuos pegados
NOTA: Usted puede DA—AR la superficie de vidrio si utiliza esponjillas que no sean las recomendadas.
1 Deje enfriar la estufa.
2 Coloque unas gotas del limpiador de estufas cerámicas CERAMA BRYTE® sobre toda el área de residuos pegados.
3 Utilizando el paño de limpieza CERAMA BRYTE® para estufas cerámicas incluido, frote el área sucia aplicando presión según sea necesario.
4 Si quedan restos, repita los pasos indicados con anterioridad.
5 Para protección adicional, después de haber quitado todos los restos, pula toda la superficie con limpiador de estufas cerámicas CERAMA BRYTE® y una toalla de papel.
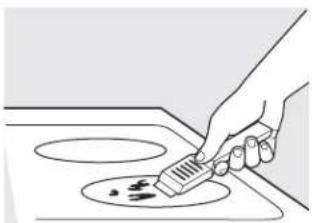
natural_image
Line drawing of a hand using a brush to clean or store food on an induction cooktop (no text or symbols)El raspador de estufas cerámicas CERAMA BRYTE® y todos los insumos recomendados se encuentran disponibles en nuestro Centro de Repuestos. Ver instrucciones bajo la sección "Para solicitar repuestos" en la página siguiente.
NOTA: No utilice hojas desafiladas o dañadas.
Residuos pegados rebeldes
1 Deje enfriar la estufa.
2 Utilice el raspador de filo único a un ángulo aproximado de 45 degrees contra la superficie del vidrio y raspe la suciedad. Puede ser necesario aplicar presión al raspador para quitar la suciedad.
3 Después de utilizar el raspador, coloque unas gotas de limpiador de estufas cerámicas CERAMA BRYTE® sobre toda el área de suciedad quemada. Utilice el paño de limpieza CERAMA BRYTE® para quitar la suciedad restante.
Para protección adicional, después de haber quitado todos los restos, pula toda la superficie con limpiador de estufas cerámicas CERAMA BRYTE® y una toalla de papel.
Marcas de metal y rayones
Tenga cuidado de no deslizar ollas y sartenes a través de su estufa. Dejará marcas de metal sobre la superficie de la estufa.
Estas marcas pueden quitarse utilizando limpiador de estufas cerámicas CERAMA BRYTE® con el paño de limpieza CERAMA BRYTE® para estufas cerámicas.
2 Si se permite que ollas con una capa fina de aluminio o cobre hiervan en seco, la capa puede dejar una decoloración negra en la estufa.
Esto debe quitarse de inmediato antes de calentar de nuevo o la decoloración puede llegar a ser permanente.
NOTA: Verifique con detenimiento que la base de las ollas no sea áspera para no rayar la estufa.
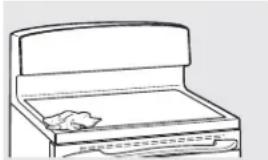
natural_image
Line drawing of a closed drawer with a piece of paper placed on top (no text or symbols)Sellado de la estufa
Para limpiar el sellado de la estufa alrededor de los bordes de vidrio, coloque un paño húmedo sobre los mismos durante unos
minutos y luego limpie con limpiadores no abrasivos.
Superficie de vidrio: posibilidades de daño permanente.
Los derrames azucarados (como gelatinas, dulce, caramelo, jarabes) o plásticos derretidos pueden marcar la superficie de la estufa (no cubierto por la garantía) a menos que el derrame se quite mientras está caliente. Debe tenerse mucho cuidado al remover sustancias calientes.
Asegúrese de utilizar un raspador nuevo y afilado.
No utilice hojas desafiladas o dañadas.
Daños por derrames azucarados y plástico derretido
Apague todas las unidades de superficie. Quite las ollas calientes.
2 Utilizando un guante de cocina: a. Use un raspador de filo único (raspador para estufas cerámicas CERAMA BRYTE®) para desplazar el derrame a un área fría de la estufa.
b. Quite el derrame con toallas de papel.
3 Cualquier derrame restante debe dejarse hasta que la superficie de la estufa se haya enfriado.
4 No use las unidades de superficie de nuevo hasta que todos los restos se hayan eliminado por completo.
NOTA: Si la superficie de vidrio ya ha sufrido marcas o hendiduras, el vidrio de la estufa deberá cambiarse. En ese caso, será necesaria la atención de un técnico.
Para solicitar repuestos
Para solicitar el limpiador de estufas cerámicas CERAMA BRYTE® y el raspador de estufas, llame a nuestro número gratuito:
Centro nacional de piezas 800.626.2002
Limpiador de estufas cerámicas CERAMA BRYTE® ....#WX10X300
Raspador de estufas cerámicas CERAMA BRYTE® ......#VX10X0302
Kit ....#WB64X5027 (El kit incluye la crema y el raspador de estufas)
Paños de limpieza CERAMA BRYTE® para estufas cerámicas .....#WX10X350
Cuidado y limpieza de la cocina.
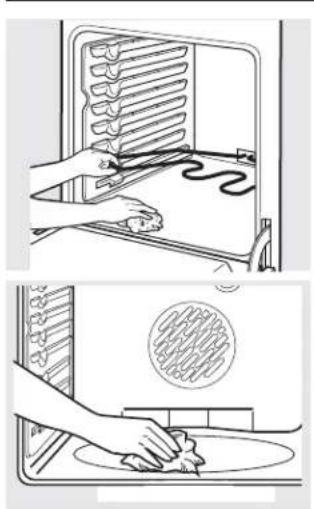
natural_image
Illustration showing two steps of a kitchen appliance: top-down view with hands cleaning a rack, bottom-down view with hand cleaning a dish (no text or symbols)Limpie con un paño los desechos rebeldes acumulados en el piso del horno.
Elementos calentadores del horno
No limpie el elemento para hornear o el elemento para asar. Las suciedades se quemarán cuando se calienten los elementos.
Para limpiar el piso del horno, eleve suavemente el elemento a hornear. En algunos modelos, el elemento a hornear no está expuesto y se encuentra debajo del piso del suelo. Limpie con agua caliente y jabón.
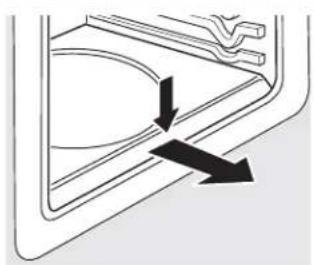
natural_image
Pure diagram of a door handle with arrows indicating direction (no text or symbols)Presione hacia abajo y quite.
Piso del horno desmontable (en algunos modelos)
Cómo quitar el piso del horno para una limpieza más fácil:
7 Quite la puerta del horno utilizando las instrucciones de la sección Puerta del horno desmontable.
2 Presione hacia abajo y quite el piso desmontable del horno.
3 Limpie el piso del horno con agua tibia jabonosa.
4 Cuando vuelva a colocar el piso del horno, asegúrese de deslizarlo bien hasta la parte trasera del horno.
IMPORTANTE: Siempre vuelva a colocar el piso desmontable antes del próximo uso.
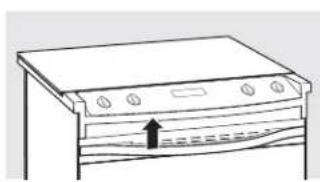
natural_image
Line drawing of a kitchen appliance with a handle and ventilation slots (no text or symbols)Ventilación del horno (en algunos modelos)
La ventilación del horno se encuentra encima del lado izquierdo de la puerta. Esta área puede calentarse durante el uso del horno.
Resulta normal que salga vapor de la ventilación. La ventilación es importante para lograr una adecuada circulación de aire. Nunca bloquee esta ventilación.
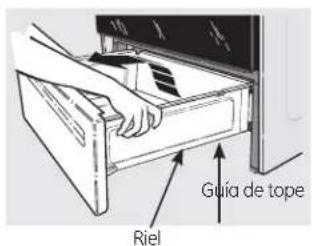
Remoción del cajón de almacenamiento
Para quitar el cajón:
Tire del cajón hacia fuera hasta que se detenga.
2 Levante el frente del cajón hasta que las trabas salgan de las guías.
3 Retire el cajón.
Para volver a colocar el cajón:
1 Coloque los rieles del cajón en las guías.
2 Empuje el cajón hasta que se detenga.
3 Levante el frente del cajón y empuje hasta que las trabas superen las guías.
4 Baje el frente del cajón y empuje hacia abajo hasta que cierre.

Consejos para identificación y solución de problemas ¡Ahorre tiempo y dinero! Lea las tablas de las siguientes páginas y quizás no necesite llamar al servicio técnico.
| Problema Causas posibles Qué hacer | ||
| Las unidades de superficie no mantienen un hervor constante o la cocción es lenta (voltaje) puede ser baja. | Se están utilizando recipientes de cocción inadecuados. | • Use recipientes de base plana y que se ajusten al diámetro de la unidad de superficie elegida. |
| En algunas regiones la energía | • Cubra el recipiente con una tapa hasta obtener el calor | |
| Los elementos de superficie no funcionan bien | El fusible puede haberse quemado o el interruptor de circuitos puede haber saltado. | • Cambie el fusible o vuelva a configurar el interruptor de circuitos. |
| Los controles de la estufa están mal configurados. | • Verifique que se haya configurado el control correcto para el elemento de superficie que está utilizando. | |
| La unidad de superficie deja de resplandecer cuando se cambia a una configuración menor | Esto es normal. La unidad sigue encendida y caliente. | |
| Rayones (pueden parecer como roturas) en la superficie de vidrio de la estufa | Se están usando métodos de limpieza incorrectos. | • Los rayones no pueden removerse. Los rayones más pequeños se volverán menos visibles como resultado de la limpieza. |
| Se están usando recipientes con bases ásperas o hay partículas gruesas (sal o arena) entre el recipiente y la superficie de la estufa. | • Para evitar rayones, use los procedimientos de limpieza recomendados. Verifique que las bases de los recipientes estén limpias antes del uso, y utilice recipientes con bases lisas. | |
| Se ha deslizado un recipiente a través de la superficie de la estufa. | ||
| Áreas de decoloración en la estufa | No se limpiaron los derrames de alimentos antes del uso siguiente. | • Ver la sección Cómo limpiar la estufa de vidrio. |
| Superficie caliente en un modelo con una estufa de color claro. | • Esto es normal. La superficie puede parecer decolorada cuando está caliente. Esto es temporal y desaparecerá a medida que se enfría el vidrio. | |
| Plástico derretido sobre la superficie | La estufa caliente entró en contacto con plástico colocado sobre la misma. | • Ver la sección Superficie de vidrio: posibilidades de daño permanente en la sección Cómo limpiar la estufa de vidrio. |
| Marcas (o hendiduras) en la estufa | Se ha derramado una mezcla azucarada caliente en la estufa. | • Llame a un técnico calificado para el reemplazo. |
| Las unidades de superficie se encienden y apagan con mucha frecuencia | Se están utilizando recipientes de cocción inadecuados. | • Use sólo recipientes de base plana para minimizar el encendido y apagado. |
| La luz del horno no funciona | La bombilla de luz está floja. | • Ajuste o cambie la bombilla. |
| El horno no funciona | El enchufe de la cocina no está introducido del todo en el tomacorriente. | • Verifique que el enchufe eléctrico esté conectado a un tomacorriente con tensión y adecuada conexión a tierra. |
| El fusible puede haberse quemado o el interruptor de circuitos puede haber saltado. | • Cambie el fusible o vuelva a configurar el interruptor de circuitos. | |
| Los controles del horno están mal configurados. | • Ver la sección Cómo usar el horno. | |
| El horno está muy caliente. | • Deje que el horno se enfríe por debajo de la temperatura de bloqueo. | |
Antes de llamar al servicio técnico...

Consejos para identificación y solución de problemas
| Problema Causas posibles Qué hacer | ||
| Los alimentos no se hornean o rostizan correctamente incorrecta o no está nivelada. de cocción incorrectos o de tamaño inapropiado. | Los controles del horno están mal configurados. | Ver la sección Cómo usar el horno. |
| La posición de la bandeja es incorrecta o no está nivelada. | Ver la sección Cómo usar el horno. | |
| Se están utilizando recipientes de tamaño inapropiado. | Ver la sección Cómo usar el horno. | |
| El termostato del horno debe ajustarse. | Ver la sección Ajuste el termostato del horno usted mismo. | |
| Los alimentos no se asan de manera adecuada de bandeja inadecuada. dentro de la salida del horno (en algunos modelos). | Los controles del horno están mal configurados. | Asegúrese de presionar el botón BROIL HI/LO (asar alta/baja). |
| Se está usando una posición de bandeja inadecuada. | Ver la Guía de asado. | |
| Los recipientes no son adecuados para asar. | Para mejores resultados, utilice un recipiente diseñado para asado. | |
| La sonda está enchufada horno | Desenchufe y quite la sonda del horno. | |
| En algunas regiones la energía (voltaje) puede ser baja. | Precaliente el elemento para asar durante 10 minutos.Ase por el período de tiempo más prolongado que se recomiende en la Guía de asado. | |
| La temperatura del horno es muy alta o muy baja | El termostato del horno debe ajustarse. | Ver la sección Ajuste el termostato del horno usted mismo. |
| El cajón de almacenamiento está torcido | El soporte de cajón trasero se encuentra sobre el riel de la guía. Verifique que el cajón esté bien colocado si se lo quita. | Vuelva a colocar el cajón. Ver las instrucciones de Remoción del cajón de almacenamiento en la sección Cuidado y limpieza de la cocina. |
| El cajón de almacenamiento no cierra | El cable de energía puede estar obstruyendo el cajón en la parte trasera inferior de la cocina. | Cambie la ubicación del cajón y del cable de energía. Ver las instrucciones de Remoción del cajón de almacenamiento en la sección Cuidado y limpieza de la cocina. |
| El soporte de cajón trasero se encuentra sobre el riel de la guía. | Vuelva a colocar el cajón. Ver las instrucciones de Remoción del cajón de almacenamiento en la sección Cuidado y limpieza de la cocina. | |
| La puerta del horno alineada. | La puerta no está bien superior. | Dado que la puerta del horno es desmontable, a veces está torcida se desequilibra durante la instalación.Para enderezar la puerta, presione hacia abajo sobre la esquina |
| El reloj y el temporizador no funcionanquemado o el interruptor de circuitos puede haber saltado.mal configurados. | El enchufe de la cocina no está introducido del todo en el tomacorriente. | Verifique que el enchufe eléctrico esté conectado a un tomacorriente con tensión y adecuada conexión a tierra.Cambie el fusible o vuelva a configurar el interruptor |
| El fusible puede haberse de circuitos. | ||
| Los controles del horno están | Ver la sección Cómo usar el temporizador de cocina. | |
| El horno no realizala auto-limpieza la función de auto-limpieza.mal configurados.La sonda está enchufadadentro de la boca de salidadel horno. (en algunos modelos) | La temperatura del horno está muy elevada para configurar | Deje que la cocina se enfríe y vuelva a configurar los controles. |
| Los controles del horno están | Ver la sección Uso del horno con auto limpieza. | |
| Quite la sonda del horno. | ||
| Ruido de “crujidos” Es el sonido del metalo “chasquidos” durante las funciones de cocción y limpieza. | Es el sonido del metal calentándose y enfriándose | Esto es normal. |
| Humo excesivo en el horno durante ciclo de limpieza | Suciedad excesiva. | Presione el botón CLEAR/OFF (borrar/apagado).Abra las ventanas para que salga el humo. Espere el hasta que se apague LOCKED. Después de que se enfríe el horno, limpie el exceso de suciedad y vuelva a configurar el ciclo de limpieza. |
| La puerta del horno no se abre después del un ciclo de limpieza | El horno está muy caliente. | Deje que el horno se enfríe por debajo de la temperatura de bloqueo. |
| El horno no está limpio después de un ciclo de limpieza | Los controles del horno no están configurados correctamente. | Ver la sección Uso del horno con auto limpieza. |
| El horno estaba muy sucio. de limpieza. Los hornos muy sucios pueden necesitar una nueva auto-limpieza o una limpieza más prolongada. | Limpie los derrames más rebeldes antes de iniciar el ciclo | |
| La luz de bloqueo (“LOCKED”) destella en la pantalla del horno | Se ha seleccionado el ciclo de auto-limpieza pero la puerta no está cerrada. | Cierre la puerta del horno. |
| La luz de bloqueo (“LOCKED”) está encendida cuando desea cocinar debajo de la temperatura de bloqueo. | La puerta del horno está bloqueada porque la temperatura dentro del mismo no ha descendido | Presione el botón CLEAR/OFF (borrar/apagado).Deje enfriar el horno. |
| “F—” y un número o letra destellan en la pantalla | Hay un código de error de función. | Desenchufe el horno por lo menos 30 segundos y luego vuelva a enchufarlo. Si el código de error de función se repite, llame al servicio técnico. |
Antes de llamar al servicio técnico...

Consejos para identificación y solución de problemas
| Problema Causas posibles Qué hacer | ||
| El control emite una señal después de ingresar un tiempo de cocción o de inicio | Olvidó ingresar un temperatura de horneado o un horario de limpieza. | Presione el botónBAKE(hornear) y la temperatura deseada o el botónSELF CLEAN(auto-limpieza) y el tiempo de limpieza deseado. |
| La pantalla queda en blanco puede haber saltado. | El fusible puede haberse quemado o el interruptor de circuitos | Cambie el fusible o vuelva a configurar el interruptor de circuitos. |
| El reloj se encuentra en los controles del horno. | Ver la sección de Características especiales de | |
| La pantalla destella | Corte de energía. | Reconfigure el reloj. |
| La pantalla no muestra "SF" | Los botones de control del horno no se presionaron correctamente. y sostenerse durante 3 segundos. | Los botonesBROIL HI/LO(asar alto/bajo) yBAKE(hornear) deben presionarse al mismo tiempo |
| Aparece "Probe" (sonda) en la pantalla (algunos modelos) | Esto le recuerda de ingresar una temperatura de sonda después de enchufarla. | Ingrese una temperatura de sonda. |
| Corte de energía, el reloj destella | Corte de energía o subida de tensión. | Reconfigure el reloj. Si el horno estaba en uso, usted debe reconfigurarlo presionando el botónCLEAR/OFF(borrar/apagado), configurando el reloj y reconfigurando cualquier función de cocción. |
| Emisión de vapor desde la ventilación | Cuando se utilizan los hornos, es normal ver una emisión de vapor de la ventilación del horno. A medida que el número de bandejas o la cantidad de alimentos a cocinar se incrementa, la cantidad de vapor visible se elevará. | Esto es normal. |
| Un olor a "quemado" o "aceitoso" sale de la ventilación | Esto es normal en un horno nuevo y desaparece con el tiempo. | Para acelerar el proceso, configure un ciclo de auto-limpieza durante un mínimo de 3 horas. Ver Ver la secciónUso del horno con auto limpieza. |
| Olor penetrante se utiliza el horno es normal del aislante que recubre la parte interna del horno. | Las primeras veces que sentir un olor proveniente | Esto es temporal. |
| Se oye un ventilador (en algunos modelos) | Un ventilador de convección puede encenderse y apagarse automáticamente. | Esto es normal. Para potenciar al máximo una cocción pareja, el ventilador está diseñado para girar en ambas direcciones, con una pausa entre ellas.El ventilador de convección funciona durante el precalentamiento del ciclo de horneado. El ventilador se apagará después de que el horno haya alcanzado la temperatura configurada. Esto es normal. |
| Un ventilador de refrigeración puede encenderse y apagarse automáticamente. | Esto es normal. Se encenderá y apagará un ventilador de refrigeración para enfriar las piezas internas. Puede funcionar aún después de que el horno se haya apagado. | |
| Resulta difícil deslizar las bandejas del horno | Las parrillas de color plateado brillante se limpiaron en un ciclo de auto limpieza. | Aplique una pequeña cantidad de aceite vegetal en una toalla de papel y frote los bordes de las bandejas del horno. No rocíe con Pam® u otro lubricante en spray. |
| El cajón no se desliza bien o hay que tirar de él | El cajón no está bien alineado. | Extienda el cajón por completo y presiónelo hasta el fondo. Ver la sección Cuidado y limpieza de la cocina. |
| El cajón está muy cargado | Reduzca el peso. Redistribuya el contenido del cajón. | |
36 o la carga no está equilibrada.
¿Desea algo más? (No todos los accesorios se encuentran disponibles para todos los modelos)
Usted puede encontrar estos accesorios y muchos más en GEAppliances.com, o llame al 800.626.2002 (en horario de trabajo normal). Tenga listo el número de modelo.
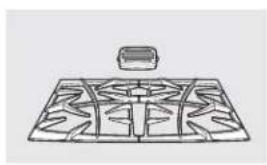
natural_image
Line drawing of a grid-patterned object with a small rectangular object above it (no text or symbols)Rejillas
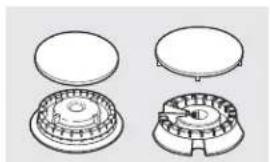
natural_image
Technical line drawing of four views of a mechanical component with no visible text or symbolsCabezales o tapas de quemadores de superficie
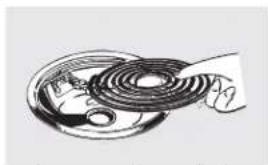
natural_image
Illustration of a hand holding a coiled cable or wire component (no text or symbols visible)Elementos de superficie y bandejas colectoras
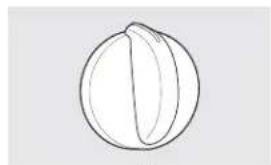
natural_image
Simple line drawing of a round, segmented object resembling a fruit or seed (no text or symbols)Perillas
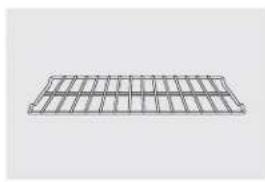
natural_image
Pure structural grid diagram without any text, numbers, or symbolsBandejas del horno
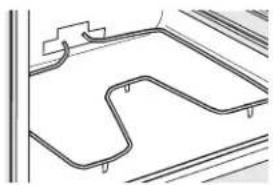
natural_image
Pure architectural line drawing of a curved road or embankment (no text or symbols)Elementos del horno
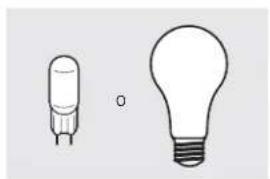
natural_image
Two simple line drawings of fluorescent bulbs, one with a bulb and the other with a bulb (no text or symbols)Bombillas de luz
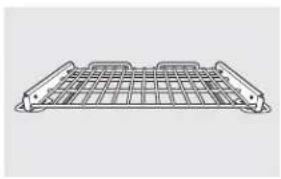
natural_image
Line drawing of a grid-like structure with two side brackets and a central rectangular element (no text or symbols)Parrilla de extensión
Si su modelo incluye una parrilla de extensión, puede incrementar la funcionalidad de su alcance al adquirir parrillas de extensión adicionales. Visite www.geapplianceparts.com a llame al 800-626-2002, y ordene la pieza número WB48T10071. Se debe tener en cuenta que las parrillas de extensión no corresponden a todos los tipos de modelos.
¡Pruebe estos otros excelentes productos para que su cocina se vea estupenda!
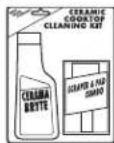
Kit de limpieza
de anafes
vitrocerámicos:
Incluye limpiador,
rasqueta y paño
WX10X117GCS
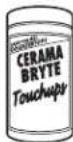
Toallitas
de limpieza
de anafes
vitrocerámicos
WX10X305
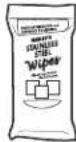
Toallitas para
pulir artefactos
de acero
inoxidable
WX10X10001
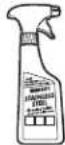
Limpiador
de artefactos
de acero
inoxidable
PM10X311
¡Aproveche al máximo su bandeja para asar! (No para usar con modelos de cajón asador.) ¡Utilice su bandeja y tapa de rejilla para asar hamburguesas, frutos de mar, filetes, vegetales, panceta, costillas y mucho más! La bandeja inferior retiene el exceso de grasas y aceites.
- Pieza GE genuina
- Fácil de limpiar
• Garantía de un año
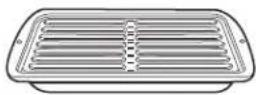
¡Oferta de tiempo limitado! ¡Envío sin cargo!
Cuando solicite la bandeja para asar dentro de los 30 días de haber adquirido su producto de cocina GE.
Pequeña Grande\* Extra grande\*\*
N° de pieza WB48X10055 WB48X10056 WB48X10057
Dimensiones 8-3/4"A x 1-1/4"A x 13-1/2"P 12-3/4"A x 1-1/4"A x 15-1/4"P 15-1/2"A x 1-1/4"A x 19"P
* La bandejo para asar grande (estándar) no entra en cocinas de 20/24 pulgadas.
** La bandeja extra grande no entra en hornos de paredes de 24 pulgadas, empotradas de 27 pulgadas o cocinos de 20/24 pulgadas.
Llame al 800.626.2002 o utilice este formulario para enviar su solicitud por correo:
GE Parts, P.O. Box 221027, Memphis, TN 38122-1027.

Formulario de solicitud de la bandeja para asar
Cantidad ____ Número de pieza ____
Número de modelo ____ Número de serie ____ Marca ____ Fecha de compra ____
Nombre ____ Apellido ____
Dirección
Ciudad ____ Estado ____ Código Postal ____
Teléfono ____ Correo electrónico ____
Check ____ Giro postal ____
Para consultar sobre los precios actuales llame al 800.626.2002. Todas las órdenes con tarjeta de crédito se deberán realizar en forma telefónica.
Notas.
Todos los servicios técnicos de garantía son otorgados por nuestros Centros de Servicio de Fábrica, o un técnico autorizado por Customer Care®. Para programar el servicio técnico, visítenos on-line en GEAppliances.com, o llame al 800.GE.CARES (800.432.2737). Tenga el número de serie y de modelo a mano cuando llame para solicitar un servicio técnico.
Abroche su recibo aquí. Se necesita una prueba de la fecha de compra original para obtener servicio técnico cubierto por la garantía.
| Por el período de: | GE otorgará: |
| Un añoDesde la fecha decompra original | Cualquier pieza de la cocina que falle debido a un defecto de los materiales o mano de obra.Durante esta garantía limitada de un año, GE también ofrece, en forma gratuita, la mano deobra y trabajos en el hogar para reemplazar la pieza defectuosa. |
| Para los Modelos Profile:Cinco AñosDesde la fechado de la compra originalDurante esta garantía limitada adicional de cuatro años por cualquier trabajo o reparación en el hogar. | Para los Modelos Profile:El reemplazo de una estufa de vidriosi se agrieta debido a un choque térmicoEl reemplazo de la unidad de la superficie radiantesi se quemara. |
GE no cubrirá:
- Visitas a su hogar para enseñarle a usar el producto.
■ Instalación, entrega o mantenimiento inadecuados.
Daño o fallas del producto en caso de abuso, uso inadecuado, uso para otros propósitos que no sean el adecuado, o uso comercial.
Daños a la estufa de vidrio provocados por el uso de limpiadores distintos de las cremas y paños recomendados.
Daños a la estufa de vidrio provocados por derrames endurecidos de materiales azucarados o plástico derretido que no se limpiaron de acuerdo con las instrucciones del Manual del Propietario.
■ Reemplazo de fusibles domésticos o la reconfiguración de interruptores de circuito.
- Daños al producto provocados por accidentes, incendios, inundaciones o fuerza mayor.
- Daños incidentales o resultantes provocados por posibles defectos en este artefacto.
■ Daños provocados después de la entrega.
- Un producto no accesible para prestar el servicio técnico solicitado.
EXCLUSIÓN DE GARANTÍAS IMPLÍCITAS—Su único y exclusivo recurso es la reparación del producto como se establece en la presente Garantía Limitada. Las garantías implícitas, incluyendo garantías de comerciabilidad y aptitud para un objetivo particular, se encuentran limitadas a un año o al período más corto permitido por la ley.
Esta garantía se extiende al comprador original y cualquier dueño posterior para productos adquiridos para uso doméstico dentro de los EE.UU. Si el producto se encuentra en una región donde no hay Servicio Técnico autorizado de GE, usted será responsable del costo del viaje o usted puede tener que llevar el producto a un Servicio Técnico Autorizado de GE para efectuar la reparación. En Alaska, la garantía excluye el costo de envío o visitas para efectuar arreglos en su hogar.
Algunos estados no permiten la exclusión o limitación de daños incidentales o resultantes. Esta garantía le otorga derechos legales específicos y usted puede contar con otros derechos, que pueden variar de estado a estado. Para conocer sus derechos legales, consulte a su oficina del consumidor local o estatal o al Fiscal General de su estado.
Apoyo al cliente.
Página Web de GE Appliances GEAppliances.com
¿Tiene alguna pregunta sobre su electrodoméstico? ¡Pruebe la página Web de GE Appliances, 24 horas al día, cualquier día del año! Para mayor conveniencia y servicio más rápido, ya puede descargar los Manuales de los Propietarios, pedir piezas o incluso hacer una cita en línea para que vengan a realizar una reparación.
Solicite una reparación GEAppliances.com
El servicio de expertos GE está a tan sólo un paso de su puerta. ¡Entre en línea y solicite su reparación cuando le venga cualquier día del año! O llame al 800.GE.CARES (800.432.2737) durante horas normales de oficina.
Real Life Design Studio (Estudio de diseño para la vida real) GEAppliances.com
GE apoya el concepto de Diseño Universal—productos, servicios y ambientes que pueden usar gente de todas las edades, tamaños y capacidades. Reconocemos la necesidad de diseñar para una gran gama de habilidades y dificultades físicas y mentales. Para más detalles cobre las aplicaciones de GE Diseño Universal, incluyendo ideas de diseño para la cocina para personas con discapacidades, mire nuestra página Web hoy mismo. Para personas con dificultades auditivas, favor de llamar al 800.TDD.GEAC (800.833.4322).
Garantías ampliadas GEAppliances.com
Compre una garantía ampliada y obtenga detalles sobre descuentos especiales disponibles mientras su garantía está aún activa. Puede comprarla en línea en cualquier momento, o llamar al 800.626.2224 durante horas normales de oficina. GE Consumer Home Services estará aún ahí cuando su garantía termine.
Piezas y accesorios GEAppliances.com
Aquellos individuos con la calificación necesaria para reparar sus propios electrodomésticos pueden pedir que se les manden las piezas o accesorios directamente a sus hogares (aceptamos las tarjetas VISA, MasterCard y Discover). Haga su pedido en línea hoy, 24 horas cada día o llamar por teléfono al 800.626.2002 durante horas normales de oficina.
Las instrucciones descritas en este manual cubren los procedimientos a seguir por cualquier usuario. Cualquier otra reparación debería, por regla general, referirse a personal calificado autorizado. Debe ejercerse precaución ya que las reparaciones incorrectas pueden causar condiciones de funcionamiento inseguras.

Póngase en contacto con nosotros GEAppliances.com
Si no está satisfecho con el servicio que recibe de GE, póngase en contacto con nosotros en nuestra página Web indicando todos los detalles así como su número de teléfono o escribanos a:
General Manager, Customer Relations
GE Appliances, Appliance Park
Louisville, KY 40225
Registre su electrodoméstico GEAppliances.com
¡Registre su nuevo electrodoméstico en línea—cuando usted prefiera! El registrar su producto a tiempo le proporcionará, si surgiera la necesidad, una mejor comunicación y un servicio más rápido bajo los términos de su garantía. También puede enviar su tarjeta de registro pre-impresa que se incluye en el material de embalaje.
- Free-Standing, Slide-In, and Drop-In Electric Range
- Español
- Safety Instructions 2-5
- Owner's Manual
- Operating Instructions
- Care and Cleaning
- Troubleshooting Tips 33-36
- Accessories 37
- Consumer Support
- Write the model and serial numbers here:
- Model # \_\_\_\_
- Serial #
- WARNING
- ANTI-TIP DEVICE
- For Freestanding and Slide-In Ranges
- For Drop-In Ranges
- IMPORTANT SAFETY NOTICE
- GENERAL SAFETY INSTRUCTIONS
- KEEP FLAMMABLE MATERIALS AWAY FROM
- THE RANGE.
- IN THE EVENT OF A FIRE, TAKE THE FOLLOWING STEPS
- TO PREVENT THE FIRE FROM SPREADING:
- COOKTOP SAFETY INSTRUCTIONS
- RADIANT COOKTOP SAFETY INSTRUCTIONS
- (some models)
- COIL COOKTOP SAFETY INSTRUCTIONS
- OVEN SAFETY INSTRUCTIONS
- SELF-CLEANING OVEN SAFETY INSTRUCTIONS
- WARMING DRAWER SAFETY INSTRUCTIONS (some models)
- Using the surface units.
- How to Set
- For glass cooktop surfaces:
- Dual and Triple Surface Units and Control Knobs (on some models)
- Using the Bridge Burner (on some models)
- Using the Warming Zone
- To use the WARMING ZONE:
- To turn off the WARMING ZONE:
- Home Canning Tips
- For Models With a Radiant Glass Cooktop
- Temperature Limiter on Radiant Glass Cooktops
- Selecting types of cookware for radiant glass cooktop models.
- Stainless Steel:
- Porcelain Enamel on Cast Iron:
- Aluminum:
- Porcelain Enamel on Steel:
- Copper Bottom:
- Glass-ceramic:
- Stoneware:
- Cast Iron:
- For Best Results
- Using the oven controls.
- Using the oven.
- Before you begin...
- CAUTION
- Extension Rack (on some models)
- To remove the rack:
- To replace the rack:
- Aluminum Foil
- Preheating and Pan Placement
- How to Set the Oven for Baking or Roasting
- How to Set the Oven for Broiling
- Broiling Guide
- To Adjust the Thermostat
- The type of margarine will affect baking performance!
- Using the convection oven. (on some models)
- Convection Fan Operation
- Multi-Rack Convection Baking (on some models)
- 1-Rack Convection Baking (on some models)
- Convection Roast (on some models)
- How to Set the Oven for Convection Baking or Roasting
- Cookware for Convection Cooking
- Paper and Plastic
- Metal and Glass
- How to Set the Oven For Baking/Roasting When Using the Probe
- How to Set an Immediate Start and Automatic Stop
- How to Set a Delayed Start and Automatic Stop
- Before a Self-Clean Cycle
- NOTE:
- Canadian Models Only:
- How to Set the Oven for Self-Cleaning
- How to Delay the Start of Self-Cleaning
- After a Self-Clean Cycle
- Standard Racks
- Extension Rack
- Using the proofing and warming features.
- How to Set the Oven For Proofing (on some models)
- NOTES:
- How to Set the Oven For Warming
- To Crisp Stale Items
- IMPORTANT NOTES:
- Fahrenheit or Celsius Temperature Selection
- Tones at the End of a Timed Cycle
- Special features of your oven control.
- 12-Hour, 24-Hour or Clock Blackout
- Auto Recipe™ Conversion (on some models)
- 12-Hour Shutdown
- Using the Sabbath feature.
- How to Set for Regular Baking/Roasting
- How to Set for Timed Baking/Roasting—Immediate Start and Automatic Stop
- How to Exit the Sabbath Feature
- Care and cleaning of the range.
- How to Remove Protective Shipping Film and Packaging Tape
- Control Knobs
- Control Panel
- Painted Surfaces
- Stainless Steel Surfaces (on some models)
- Do not use a steel wool pad; it will scratch the surface.
- Porcelain Enamel Cooktop (on some models)
- Oven Light Replacement (on some models)
- To remove:
- To replace:
- Cleaning the Oven Door
- To clean the inside of the door:
- To clean the outside of the door:
- Lift-Off Oven Door (on some models)
- The door is very heavy. Be careful when removing and lifting the door.
- To remove the door:
- To replace the door:
- Oven Racks
- To lubricate the slides:
- To lubricate the paddle:
- Normal Daily Use Cleaning
- Burned-On Residue
- Heavy, Burned-On Residue
- Metal Marks and Scratches
- Cooktop Seal
- Glass surface—potential for permanent damage.
- Damage from Sugary Spills and Melted Plastic
- To Order Parts
- Oven Heating Elements
- Removable Oven Floor (on some models)
- Oven Vent
- Storage Drawer Removal
- To remove the drawer:
- To replace the drawer:
- Troubleshooting Tips
- Looking For Something More? (Not all accessories are available for all models.)
- Experience these other great products to keep your kitchen looking great!
- Limited Time Offer! Free Shipping!
- Broiler Pan Order Form
- Notes.
- What GE Will Not Cover:
- Consumer Support.
- GE Appliances Website
- GEAppliances.com
- Schedule Service GEAppliances.com
- Real Life Design Studio GEAppliances.com
- Extended Warranties GEAppliances.com
- Parts and Accessories GEAppliances.com
- Contact Us GEAppliances.com
- Register Your Appliance GEAppliances.com
- Cocinas
- eléctricas independientes, empotrables y encastrables
- Instrucciones de Operación
- Cuidado y limpieza
- Consejos para la identificación
- Apoyo al cliente
- Manual del Propietario
- INFORMACIÓN IMPORTANTE DE SEGURIDAD. LEA TODAS LAS INSTRUCCIONES ANTES DE SU USO.
- ADVERTENCIA
- DISPOSITIVO ANTI-VOLCADURAS
- Riesgo de Volcaduras
- Para Cocinas Sin Apoyo y Deslizableless
- Cocinas Empotrables
- NOTIFICACIÓN IMPORTANTE DE SEGURIDAD
- INSTRUCCIONES GENERALES DE SEGURIDAD
- MANTENGA LOS MATERIALES INFLAMABLES ALEJADOS DE LA COCINA.
- EN CASO DE INCENDIO, SIGA LOS SIGUIENTES PASOS PARA EVITAR LA PROPAGACIÓN DEL FUEGO:
- INSTRUCCIONES DE SEGURIDAD DE LA ESTUFA
- INSTRUCCIONES DE SEGURIDAD DE LA ESTUFA RADIANTE (algunos modelos)
- INSTRUCCIONES DE SEGURIDAD DE LA ESTUFA DE BOBINAS (algunos modelos)
- INSTRUCCIONES DE SEGURIDAD DEL HORNO
- INSTRUCCIONES DE SEGURIDAD DEL HORNO AUTO-LIMPIANTE (algunos modelos)
- CAJÓN CALENTADOR/CAJÓN DEL HORNO INFERIOR INSTRUCCIONES DE SEGURIDAD
- Uso de unidades de la superficie.
- ADVERTENCIOZA
- Cómo Configurar
- Para superficies de vidrio de la estufa:
- Unidades Superficiales Dobles y Triples y Perillas de Control (en algunos modelos)
- Uso del Área para Calentar
- RIESGO DE ENVENENAMIENTO CON COMIDA:
- Para usar la función WARMING ZONE (Área para Calentar):
- Para apagar la función WARMING ZONE (Área para Calentar):
- Consejos para Productos Enlatados en el Hogar
- Para Modelos con Estufa de Vidrio Radiante
- Limitador de Temperatura en Estufas de Vidrio Radiante
- Cómo seleccionar tipos de utensilios para
- modelos de estufa de vidrio radiante.
- Acero inoxidable:
- Aluminio:
- Esmalte de porcelana sobre hierro fundido:
- Esmalte de porcelana sobre acero:
- Base de cobre:
- Vidrio-cerámico:
- Cerámica:
- Hierro fundido:
- Para mejores resultados
- Uso de los controles del horno.
- Uso del reloj, temporizador de la cocina, y bloqueo del control. GEAppliances.com
- Para Configurar el Reloj
- Para Programar el Contador de Tiempo
- Para Reiniciar el Temporizador de la Cocina
- Para Cancelar el Temporizador de la Cocina
- Cómo Bloquear los Controles
- Cómo usar el horno.
- Antes de comenzar...
- PRECAUCIÓN
- Parrilla de extensión (en algunos modelos)
- Para quitar la parrilla:
- Para volver a colocar la parrilla:
- PRECAUCIÓN:
- Papel de aluminio
- Precalentamiento y colocación de recipiente
- Cómo configurar el horno para horneado o rostizado
- Cómo configurar el horno para asar
- Guía de asado
- Cómo ajustar el termostato
- ¡El tipo de margarina utilizado modifica el horneado!
- Cómo usar el horno de convección. (en algunos modelos)
- Funcionamiento del ventilador de convección
- Horneado por convección con bandejas múltiples
- Horneado por convección con 1 bandeja (en algunos modelos)
- Rostizado por convección (en algunos modelos)
- Cómo configurar el horno para horneado o rostizado por convección
- Recipientes para cocción por convección
- Papel y plástico
- Metal y vidrio
- Cómo configurar el horno para horneado/rostizado cuando usa la sonda
- Cómo utilizar las características de horneado y rostizado con temporizador. GEAppliances.com
- Cómo configurar un inicio inmediato y un apagado automático
- Cómo configurar un inicio retardado y un apagado automático
- Uso del horno con auto limpieza
- Antes de un ciclo de Auto Limpieza
- NOTAS:
- Modelos canadienses solamente
- Cómo configurar el horno para una auto-limpieza
- Cómo configurar un inicio retardado de limpieza
- Después de un ciclo de limpieza
- Parrillas estándar
- Parrilla de extensión
- Uso de las funciones para realizar pruebas y calentar.
- Cómo configurar el horno para leudar (en algunos modelos)
- Cómo Configurar el Horno para Calentar
- Para que Ítems Duros queden Crocantes
- NOTAS IMPORTANTES:
- Selección de temperatura en Fahrenheit o Celsius
- Señales sonoras al finalizar un ciclo con temporizador
- Características especiales de los controles del horno.
- horas, 24 horas o bloqueo del reloj
- Conversión Automática de Recetas™ (en algunos modelos)
- Apagado luego de 12 horas
- Cómo usar la función Sabbath.
- Cómo configurar horneado/rostizado con temporizador: Inicio inmediato y apagado automático
- Cómo desactivar la función Sabbath
- Cuidado y limpieza de la cocina.
- Cómo quitar el envoltorio de protección y la cinta de embalaje
- Perillas de control
- Panel de control
- Superficies pintadas
- Superficies de acero inoxidable (en algunos modelos)
- No utilice almohadillas de acero porque rayan la superficie.
- Estufa de esmalte de porcelana (en algunos modelos)
- Reemplazo de la bombilla del horno (en algunos modelos)
- Para retirar:
- Para reemplazar:
- Para quitar la tapa:
- Para volver a colocar la tapa:
- Cómo limpiar la puerta del horno
- Para limpiar la parte interna de la puerta:
- Para limpiar la parte externa de la puerta:
- Puerta del horno desmontable (en algunos modelos)
- La puerta es muy pesada. Tenga cuidado al quitar y levantar la puerta.
- Para quitar la puerta:
- Para volver a colocar la puerta:
- Bandejas del horno
- Para lubricar los deslizadores:
- Para lubricar la paleta:
- Limpieza normal de uso diario
- Residuos pegados
- Residuos pegados rebeldes
- Marcas de metal y rayones
- Sellado de la estufa
- Superficie de vidrio: posibilidades de daño permanente.
- Daños por derrames azucarados y plástico derretido
- Para solicitar repuestos
- Elementos calentadores del horno
- Piso del horno desmontable (en algunos modelos)
- Cómo quitar el piso del horno para una limpieza más fácil:
- Ventilación del horno (en algunos modelos)
- Remoción del cajón de almacenamiento
- Para quitar el cajón:
- Para volver a colocar el cajón:
- Antes de llamar al servicio técnico...
- ¿Desea algo más? (No todos los accesorios se encuentran disponibles para todos los modelos)
- ¡Pruebe estos otros excelentes productos para que su cocina se vea estupenda!
- ¡Oferta de tiempo limitado! ¡Envío sin cargo!
- Pequeña Grande\* Extra grande\*\*
- Formulario de solicitud de la bandeja para asar
- Notas.
- GE no cubrirá:
- Apoyo al cliente.
- Página Web de GE Appliances GEAppliances.com
- Solicite una reparación GEAppliances.com
- Real Life Design Studio (Estudio de diseño para la vida real) GEAppliances.com
- Garantías ampliadas GEAppliances.com
- Piezas y accesorios GEAppliances.com
- Póngase en contacto con nosotros GEAppliances.com
- Registre su electrodoméstico GEAppliances.com
Marque : GE
Modèle : JS630SFSS
Catégorie : Four