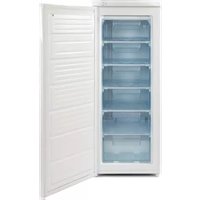
F170H - Congélateur White Knight - Notice d'utilisation et mode d'emploi gratuit
Retrouvez gratuitement la notice de l'appareil F170H White Knight au format PDF.


| Type de produit | Congélateur |
| Marque | White Knight |
| Modèle | F170H |
| Capacité utile | 170 L (estimation) |
| Alimentation électrique | 220-240 V ~ 50 Hz |
| Mise à la terre | Obligatoire |
| Classe climatique | SN, N, ST, T (10 °C à 43 °C) |
| Réfrigérant | R134a ou R600a (voir plaque signalétique) |
| Thermostat | Réglable (MIN, NORMAL, MAX) |
| Nombre de tiroirs | 3 |
| Dégivrage | Manuel |
| Porte réversible | Oui (gauche/droite) |
| Pieds réglables | Oui |
| Fonction congélation rapide | Oui (position MAX du thermostat) |
| Fabrication de glaçons | Oui (bac à glaçons fourni) |
| Nettoyage | À l'eau tiède et détergent neutre |
| Dégivrage recommandé | 1 à 2 fois par an |
FOIRE AUX QUESTIONS - F170H White Knight
Questions des utilisateurs sur F170H White Knight
0 question sur cet appareil. Repondez a celles que vous connaissez ou posez la votre.
Poser une nouvelle question sur cet appareil
Téléchargez la notice de votre Congélateur au format PDF gratuitement ! Retrouvez votre notice F170H - White Knight et reprennez votre appareil électronique en main. Sur cette page sont publiés tous les documents nécessaires à l'utilisation de votre appareil F170H de la marque White Knight.
MODE D'EMPLOI F170H White Knight

White Knight
Freezer
F085H
F170H
BEFORE USING THE APPLIANCE
- Your new appliance is designed exclusively for domestic use.
To get the most out of your new appliance, read the user handbook carefully. It contains a description of the appliance as well as useful tips.
Keep this handbook for future consultation.
I. After unpacking the appliance, make sure that it is undamaged and that the doors close correctly. Any damage must be reported to the dealer within 24 hours of delivery of the appliance.
-
Wait at least two hours before switching the appliance on, to ensure that the refrigerant circuit is fully efficient.
-
Installation of the appliance and electrical connections must be carried out by a qualified electrician, in accordance with the manufacturer's instructions and local safety regulations.
-
Clean the inside of the appliance before use.
WARNING
This appliance can be used by children aged from 8 years and above and persons with reduced physical, sensory or mental capabilities or lack of experience and knowledge if they have been given supervision or instruction concerning use of the appliance in a safe way and understand the hazards involved.
Children shall not play with the appliance. Cleaning and user maintenance shall not be made by children without supervision
PRECAUTIONS AND GENERAL RECOMMENDATIONS
- The appliance must be handled and installed by two or more persons.
- Be careful not to damage the floors when you move the appliance (e.g. parquet flooring).
- During installation, make sure the appliance does not damage the power cable.
- Check the appliance is not positioned near a heat source.
- To guarantee adequate ventilation, leave a space on both sides and above the appliance and follow the installation instructions.
- Keep the appliance vent outlets free.
- Do not damage the appliance refrigerant circuit pipes.
• Install and level the appliance on a floor strong enough to take its weight and in a place suitable for its size and use.
• Install the appliance in a dry and well ventilated area. The appliance is intended for operation in environments where ambient temperatures fall within the following ranges, depending on the climatic class indicated on the data plate. The appliance may not work properly if it is left for a long time at a temperature outside the specified range.
| Climatic Class | Amb. temp. (°C) | Amb. temp. (°F) |
| SN | From 10 to 32 | From 50 to 90 |
| N | From 16 to 32 | From 61 to 90 |
| ST | From 18 to 38 | From 64 to 100 |
| T | From 18 to 43 | From 64 to 110 |
- Ensure that the voltage indicated on the appliance data plate corresponds to the domestic supply voltage.
- Do not use single/multiple adapters or extension cables.
- Power cable modification or replacement must only be carried out by qualified personnel.
- Electrical disconnection must be possible either by unplugging the appliance or by means of a double-pole switch located upline from the socket.
SAFETY
- Do not store or use petrol, flammable liquids or gas in the vicinity of this or other electrical appliances. The fumes can create a fire hazard or explosion.
- Do not use mechanical, electric or chemical means other than those recommended by the Manufacturer to speed up the defrost process.
- Do not use or place electrical appliances inside the product if they are not of the type expressly authorised by the Manufacturer.
- Do not swallow the contents (non-toxic) of the ice packs (in some models).
- Do not eat ice cubes or ice lollies immediately after taking them out of the freezer since they may cause cold burns.
USE
- Before carrying out any maintenance or cleaning, always unplug the appliance or disconnect the power supply.
- Use the freezer compartment to store frozen food, to freeze fresh food and to make ice cubes only
- Do not store glass containers with liquids in the freezer since they may burst.
The Manufacturer declines any liability if the above advice and precautions are not respected
SAFEGUARDING THE ENVIRONMENT
I. Packaging

The packaging material is 100% recyclable and carries the recycling symbol. Follow local regulations for scrapping.
Keep packing materials (plastic bags, polystyrene parts, etc.) out of the reach of children, as they are a potential source of danger.
2. Scrapping/Disposal
The appliance is manufactured using recyclable material.
This appliance is marked according to the European directive 2002/96/EC on Waste Electrical and Electronic Equipment (WEEE). By ensuring that this appliance is scrapped suitably, you can help prevent potentially damaging consequences for the environment and health.
The symbol 📁 on the appliance, or on the accompanying documents, indicates that this appliance should not be treated as domestic waste but must be taken to a special collection centre for the recycling of electrical and electronic equipment.
When scrapping the appliance, make it unusable by cutting off the power cable and removing the doors and shelves so that children cannot easily climb inside and become trapped. Scrap the appliance in compliance with local regulations on waste disposal, taking it to a special collection centre; do not leave the appliance unattended even for a few days, since it is a potential source of danger for children. For further information on the treatment, recovery and recycling of this product, contact your competent local office, the household waste collection service or the shop where you purchased the appliance.
Information:
This appliance does not contain CFCs.
The refrigerant circuit contains R134a (HFCs) or R600a (HCs), see the rating plate inside the appliance.
Appliances with isobutane (R600a): Isobutane is a natural gas of low environmental impact.
Caution is required, however, since isobutane is flammable. Therefore, ensure that refrigerant circuit pipelines are not damaged.
Declaration of conformity
This product has been designed for preserving food and is manufactured in compliance with Regulation (CE) No. 1935/2004.
CE
This product has been designed, manufactured and marketed in compliance with:
• the safety objectives prescribed in the Low Voltage Directive 2006/95/EC
• the protection requirements of the EMC Directive 2004/108/EC
Electrical safety of the appliance can only be guaranteed if it is correctly connected to an approved earthing system.

PRODUCT INTRODUCTION


- Cabinet
- Thermostat Knob
3.Freezer Drawers - Adjustable Feet
- Door Assembly
- Door Gasket
- Top Cover
INSTALLATION
- Ventilation Requirements
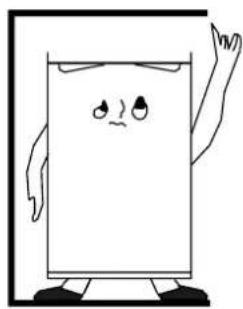
Good ventilation is required around the freezer to allow for dissipation of heat, high efficiency of refrigeration and low power consumption. To achieve this, sufficient space must be left around the freezer. It is recommended that a minimum of 50mm is left between the wall and the back of the appliance, 100mm clearance at both sides and 200mm clearance above the top cover. Space is required to allow the door to open to 160°
• Power Supply
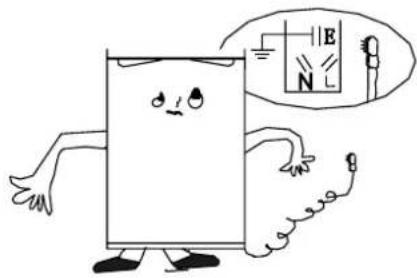
The freezer should be powered from a 220-240V 50Hz supply. The freezer should be plugged into its own socket. WARNING! This appliance must be earthed.

• Supply Cord
The supply cord should neither be lengthened nor coiled up during use. Ensure that the supply cord is kept well clear of the compressor at the back of the machine; as the compressor casing gets hot when it is running.
• Protection from Moisture
Do not install the appliance in a humid location. Ensure that the appliance is not sprayed with water.

• Protection from Heat
Ensure that the appliance is installed well away from any heat source and out of direct sunlight.
- Stability
The floor beneath the appliance must be flat and solid. Do not place the appliance on soft material or deep pile carpet. Adjust the feet to level the appliance. The appliance must not be placed near anything which may echo.
- Keep Away from Danger
Do not place the appliance near any volatile or combustible materials, such as gas, petrol, alcohol, or lacquer. These substances must not be stored in the appliance.
- Moving
Never tilt the appliance beyond 45°. Do not turn upside down.


USING THE FREEZER
The freezer can be used for storing food that is already frozen and for freezing fresh food.
Switching on the freezer for the first time
- The freezer temperature is already factory-set so the thermostat should not have to be adjusted for normal operation.
- Plug in the appliance.
- Only place food in the freezer after it has been switched on for 2 hours.
Temperature adjustment
The thermostat knob can be set from MIN to MAX:
The higher the setting the cooler the temperature.
• Thermostat setting:
MIN - storing food for short periods;
NORMAL - storing food for longer periods;
MAX - storing food for long periods and for freezing fresh food
Note:
The room temperature, how often the door is opened and the position of the appliance can all affect the temperature inside the freezer.
Take these factors into account when setting the thermostat.
Check the internal temperature with a suitable thermometer.
Freezing fresh food
Place up to the maximum amount of fresh food, indicated on the rating plate, in the middle compartment; taking care not to place it in contact with food that is already frozen.
If a large amount of food is to be frozen it is recommended that the thermostat knob is turned to the MAX setting, for around 24 hours to ensure that the food is thoroughly frozen. After this time the thermostat knob should be returned to the NORMAL setting.
Important:
When freezing small amounts of food, the food can be placed in any compartment except the bottom drawer.
There is no need to adjust the thermostat knob from its NORMAL setting in this case.
Control unit

Advice for freezing and storing fresh food.
- Before freezing, wrap and seal fresh food in: aluminium foil, transparent film, waterproof plastic bags, polyethylene containers with lids or freezer containers suitable for the food being frozen.
- Food must be fresh and of prime quality.
- If possible, fresh vegetables and fruit should be frozen immediately after being picked, to preserve the nutritional substances, structure, consistency, colour and flavour.
Note:
• Always leave hot food to cool before placing in the freezer.
- Consume fully or partially thawed foods immediately. Do not refreeze unless the thawed food is used to prepare a ready meal. Once cooked, the thawed food can be refrozen.
Important:
The table opposite gives the recommended storage times for frozen fresh foods.
Classification of frozen foods
Put the frozen products in the freezer and classify them. It is advisable to indicate the storage date on the packs, to ensure their use before the expiry dates.
Advice for storing deep-frozen food
When purchasing deep-frozen food products:
- Make sure the packaging is not damaged, otherwise the food can deteriorate. If the package is swollen or has damp patches, it has not been stored in optimum conditions and may have started to thaw.
• Purchase frozen food last and use thermal bags to carry it. - Place frozen foods in the freezer as soon as you get home.
- Do not refreeze partially thawed food products; consume them within 24 hours.
- Avoid or reduce temperature variations to a minimum. Respect the expiry date on the pack.
• Always follow the instructions given on the pack for storing frozen foods.

| MONTHS | FOOD | ||
| 1-3 | |||
| 4-7 | |||
| 8-12 | |||
Removing the drawers
- Pull out the drawers as far as they go, then lift slightly and remove.
Note:
The drawers can be removed in order to obtain more space. Make sure that the load does not exceed the limit (if present) indicated on the side walls of the appliance.
Making ice cubes
- Fill the ice cube tray 2/3 full and place it in the special freezer compartment.
- Do not use sharp or pointed instruments to detach the tray if it is stuck to the bottom of the freezer.
- Bend the ice tray slightly to remove the cubes.
Note:
The freezer door will not re-open easily immediately after closing. Wait a few minutes before opening again in order to allow for compensation of the vacuum created.
DEFROSTING AND CLEANING
THE FREEZER
Before any cleaning or maintenance operation, always unplug the appliance or disconnect it from the power supply.
Defrost the freezer once or twice a year, or when the frost on the refrigeration grills is excessive.
It is perfectly normal for frost to form on the grills. The amount of frost and the speed at which it accumulates depend on room conditions how often the door is opened, and tends to accumulate more on the upper grills.
It is advisable to defrost the freezer when it is nearly empty.
- Open the door and remove all food products, wrapping them close together in newspaper and place in a very cool place or in a portable cooler.
- Leave the freezer door open to allow the frost to melt.
- Clean the inside of the freezer with a sponge soaked in lukewarm water and/or neutral detergent. Do not use abrasive substances.
- Rinse and dry thoroughly.
- Put the food back into the freezer.
- Close the freezer door.
- Plug in the appliance.
- Switch the freezer on.
CLEANING AND MAINTENANCE
Periodically clean at the back of the appliance with a vacuum cleaner or brush.
For long vacations
• Empty the freezer.
- Disconnect the freezer from the power supply.
• Defrost and clean the inside.
- Leave the door open to prevent the formation of unpleasant odours and to eliminate the moisture inside.
REVERSING THE DOOR OPENING
This freezer has the capability of having the door open from the left or right side. The unit is delivered to you with the door opening from the left side. Should you desire to reverse the opening direction, please follow these instructions.
NOTE:
Before reversing the door, the power must be shut off.
All parts removed must be saved for the reinstallation of the door.
Now follow the instructions below:
- Remove the two plastic caps in the top cover (if fitted). Remove the two screws (6) which fix the top cover (7) and then remove the top cover.
- Remove the two screws (1) that hold the upper hinge (5) (right side) to the frame. Take away the upper hinge (5).
- Lift the door and place it on a padded surface to prevent scratching it.
- Remove the two screws(8) that hold the lower hinge(2) and Make sure to Remove the lower hinge(2).
- Remove the left front leg (4) and transfer it to the right side.
- Before placing this lower hinge(2), remove the bolt-pin (9) and reverse the direction of the lower hinge(2). Then install the lower hinge (2) onto the left side of the lower frame with two screws (8).
- Insert the bolt-pin(9) to the lower hinge (2).
- Locate the door onto the hinge pin and position the door to the appliance
- Whilst holding the door in the closed position secure the upper hinge (5) in the left side of the top frame with two screws (1). Please remember not to tighten these two screws until the top of the door is level with the counter top.
- Install the worktop onto the top of the cabine t with screws(6).

FIGURE 1
Door opening from left side

FIGURE 2
Door opening from right side
TROUBLESHOOTING GUIDE
When you hear these noises
I. The appliance is not working.
• Is there a power failure?
• Is the power cord in perfect condition?
• Is the plug properly inserted in the socket?
- Has the fuse blown?
2. Temperature inside the compartments is not low enough.
• Is the door shut properly?
- Is there an excessive frost build-up in the low temperature compartment?
• Is the appliance installed near a heat source?
• Is the thermostat setting correct?
3. The appliance is excessively noisy.
- Has the appliance been installed correctly?
- Are the pipes at the back touching or vibrating?
Notes:
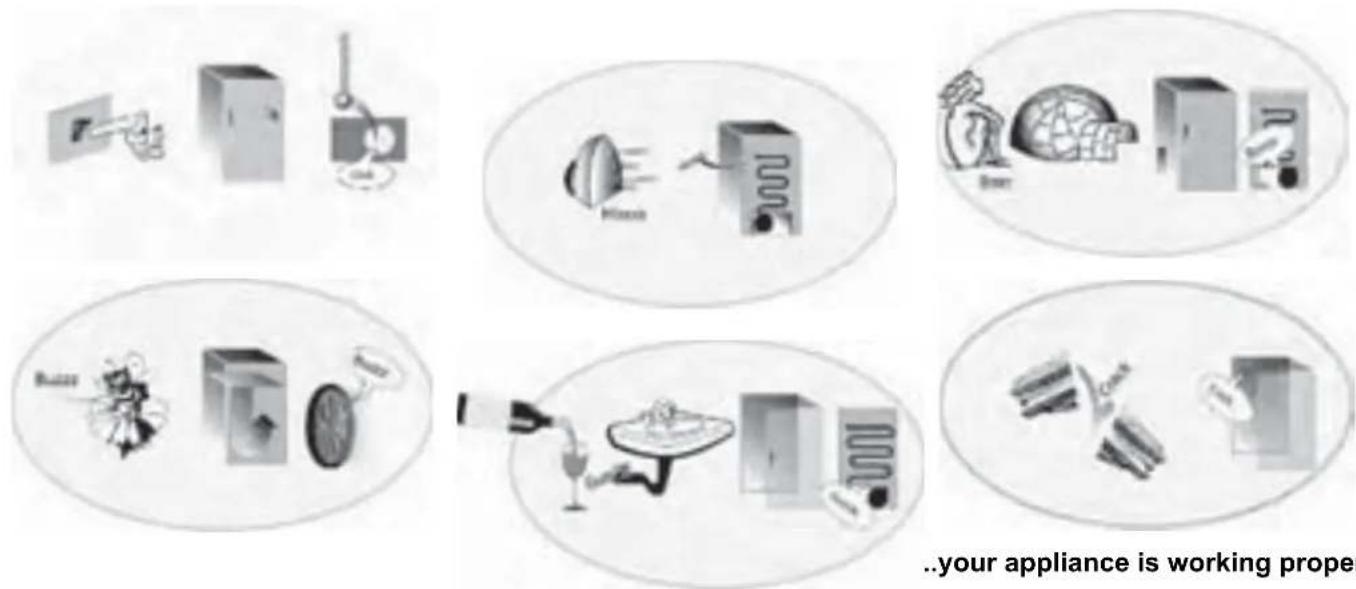
Gurgling and hissing noises due to expansion in the refrigerant circuit are normal.

- WHITE KNIGHT
- BEFORE USING THE APPLIANCE
- WARNING
- PRECAUTIONS AND GENERAL RECOMMENDATIONS
- SAFETY
- USE
- SAFEGUARDING THE ENVIRONMENT
- PACKAGING
- SCRAPPING/DISPOSAL
- INFORMATION
- DECLARATION OF CONFORMITY
- CE
- PRODUCT INTRODUCTION
- INSTALLATION
- VENTILATION REQUIREMENTS
- POWER SUPPLY
- SUPPLY CORD
- PROTECTION FROM MOISTURE
- PROTECTION FROM HEAT
- STABILITY
- KEEP AWAY FROM DANGER
- MOVING
- USING THE FREEZER
- SWITCHING ON THE FREEZER FOR THE FIRST TIME
- TEMPERATURE ADJUSTMENT
- NOTE
- FREEZING FRESH FOOD
- IMPORTANT
- ADVICE FOR FREEZING AND STORING FRESH FOOD
- THE TABLE OPPOSITE GIVES THE RECOMMENDED STORAGE TIMES FOR FROZEN FRESH FOODS
- CLASSIFICATION OF FROZEN FOODS
- ADVICE FOR STORING DEEP-FROZEN FOOD
- REMOVING THE DRAWERS
- MAKING ICE CUBES
- DEFROSTING AND CLEANING
- THE FREEZER
- CLEANING AND MAINTENANCE
- FOR LONG VACATIONS
- REVERSING THE DOOR OPENING
- ALL PARTS REMOVED MUST BE SAVED FOR THE REINSTALLATION OF THE DOOR
- TROUBLESHOOTING GUIDE
- THE APPLIANCE IS NOT WORKING
- TEMPERATURE INSIDE THE COMPARTMENTS IS NOT LOW ENOUGH
- THE APPLIANCE IS EXCESSIVELY NOISY
- NOTES
Marque : White Knight
Modèle : F170H
Catégorie : Congélateur