
Young FH1130 - Appareil multi-cuisson DELONGHI - Notice d'utilisation et mode d'emploi gratuit
Retrouvez gratuitement la notice de l'appareil Young FH1130 DELONGHI au format PDF.


| Type de produit | Appareil multi-cuisson |
| Marque | DeLonghi |
| Modèle | Young FH1130 |
| Dimensions (L x P x H) | 30 cm × 30 cm × 25 cm |
| Poids net | 4 kg |
| Alimentation électrique | 230 V ~ 50 Hz |
| Puissance nominale | 1000 W |
| Capacité de la cuve | 5 litres |
| Matériau de la cuve | Acier inoxydable avec revêtement antiadhésif |
| Fonctions principales | Cuisson vapeur, mijotage, cuisson lente, cuisson du riz, réchauffage |
| Programmes automatiques | 10 programmes préréglés |
| Minuterie | Jusqu'à 24 heures avec arrêt automatique |
| Maintien au chaud | Oui, automatique après la cuisson |
| Écran | LED avec affichage de l'heure et de la température |
| Commandes | Tactiles et bouton rotatif |
| Sécurité | Verrouillage de sécurité, protection contre la surchauffe, soupape de sécurité |
| Nettoyage | Cuve amovible compatible lave-vaisselle, joint amovible |
| Entretien | Essuyer l'extérieur avec un chiffon humide; détartrer régulièrement |
| Accessoires inclus | Cuve, panier vapeur, cuillère doseuse, verre doseur |
| Pièces détachées disponibles | Cuve, joint, soupape, panier vapeur (références sur le site DeLonghi) |
| Réparabilité | Indice de réparabilité : 7.5/10 (selon l'échelle française) |
| Couleur | Blanc et noir |
| Usage | Intérieur uniquement |
FOIRE AUX QUESTIONS - Young FH1130 DELONGHI
Questions des utilisateurs sur Young FH1130 DELONGHI
0 question sur cet appareil. Repondez a celles que vous connaissez ou posez la votre.
Poser une nouvelle question sur cet appareil
Téléchargez la notice de votre Appareil multi-cuisson au format PDF gratuitement ! Retrouvez votre notice Young FH1130 - DELONGHI et reprennez votre appareil électronique en main. Sur cette page sont publiés tous les documents nécessaires à l'utilisation de votre appareil Young FH1130 de la marque DELONGHI.
MODE D'EMPLOI Young FH1130 DELONGHI
IMPORTANT SAFEGUARDS
Read all the Instruction for Use carefully before using the appliance. Keep this Instructions for Use.
- If the power cable is damaged, it must be replaced by the manufacturer or the manufacturer's Customer Experience order to avoid all risk.
- Never immerse the appliance in water.
- When in operation, accessible external surfaces and the lid can become hot. Always use the handgrip, h and buttons.
Use oven gloves if necessary.
- This electrical appliance operates at high temperatures which could cause burns. - This appliance can be used by children aged from 8 years and above and persons with reduced physical, sensory mental capabilities or lack of experience and knowledge if they have been given supervision or instruction concerning use of the appliance in a safe way and understand the hazards involved. Children should be supervised to ensure that they do not play with the appliance.
Cleaning and user maintenance should not be carried out by children they are more than eight years old and under constant supervision.
Keep the appliance and power away from children under eight years of age.
- Do not preheat the appliance when empty. - Do not use the appliance without food, you might damage it.
- This is household appliance only. It is not intended to be used in kitchen areas in shops, offices and other working environments; farm houses; by clients in hotels, motels and residential type environments; bed and breakfast type environments.
The appliance must not be operated by a timer or a separate remote control sys- come very hamlles
Danger!
Failure to observe the warning may result in life threat injury by electric shock.
- Before using the appliance, check that the voltage of the mains power supply corresponds to the value indicated on the appliance rating plate.
- Connect the appliance to an efficiently earthed socket with a minimum current rating of 10A only. The manufacturer declines all liability in the event that this important accident-prevention rule is not respected.
Danger of burns!
Failure to observe the warnings could result in scalds or burns. While in operation, the appliance becomes hot. DO NOT LEAVE WITHIN REACH OF CHILDREN.
- Move the appliance by the handles only.
Never move the appliance using the bowl handgrip. - Never leave the power cable hanging from the surface the appliance is resting on where it could be grasped by a child or get in the way of the user.
Hot steam may come out of the vents. Take great care!
Id! Important!
Failure to observe the warnings may result in life threatening injury or damage to the appliance.
• Never locate the appliance near sources of heat.
• The bowl fits automatically onto the central pin.
To a cold damage, never rotate it manually to find the right position.
- Never insert anything into the ventilation openings. Make sure they are unobstructed.
- Do not fill the bowl with liquid above the MAX level (R).
- Do not put more oil in the bowl than the maximum level on the oil measure (level 5)
i Please note:
This symbol identifies important advice or information for the user.
- Before using the appliance for the first time, remove any paper and other material inside the oven such as protective cardboard, booklets, plastic bags, etc.
- Before using the appliance for the first bowl, paddle and lid in hot water and washing up liquid. At the end of the operation, dry all components thoroughly and remove any water left in the bottom of the bowl.
- It is normal for the appliance to give when used for the first time. Ventilate the room.
- The appliance must be kept at a distance of at least 20 cm from the mains power socket to which it is connected.
TECHNICAL DATA
size (LxHxD): 395x325x270mm
weight: 4,6kg
For further information, see the rating plate on the appliance.

The appliance complies with the following EU direc- es:
- Low Voltage Directive 2006/95/EC and subsequent amendments;
- This appliance complies with EC directive 2004/108/EC on electromagnetic compatibility and European no. 1935/2004 of 27/10/2004 on food contact materials.
• European Stand-by Regulation 1275/2008.
DISPOSAL
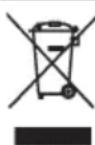
In compliance with European directive 2002/96/EC, the appliance must not be disposed of with household waste, but taken to an authorised waste separation and recycling centre.
DESCRIPTION OF APPLIANCE
A Lid
B Hot air discharge grille
C Removable viewing window
D Maximum level MAX
E Paddle
F Ceramic coated bowl
G Handgrip slide
H Bowl handgrip
I Oil measure (level from 1 to 5)
L Handle for lifting the appliance
M Appliance body
N Removable timer
0 Viewing window release buttons
P ON/OFF button with light
Q Lid open button
R Condensate tray
SETTING UP THE APPLIANCE

Please note: Before using the appliance for the first time, wash the bowl (F), paddle (E) and removable viewing window time. Wash the (C) in hot water and neutral washing up liquid.
Proceed as follows:
- Open the lid (A) by pressing button (Q) (fig. 1).
- Release the removable viewing window (C) by pressing the new smell two buttons (S) (fig. 2).
- Lift the bowl handgrip (H) until you hear a "click" (fig. 3).
• Extract the bowl (F) by pulling upwards (fig. 4).
• Extract the paddle (E) from its housing (fig. 5). - Wash the bowl (F), paddle (E) and removable viewing window (C) (fig. 6).
- At the end of the operation, dry all components thoroughly and remove any water left in the bottom of the bowl (F).
COOKING WITH THE PADDLE

Please note: This type of cooking is particularly suitable oking potatoes.
- Put the bowl (F) back in the appliance body (M), making sure it is correctly positioned.
regulation
• Lower the bowl handgrip (H) using the slide (G) (fig. 7). - Insert the paddle (E), making sure it is correctly positioned on the pin at the bottom of the bowl.
- Place the ingredients to be cooked in the bowl (F), respecting the quantities given in the cooking tables/recipes.
If required by the cooking procedure, add oil, referring to the quantities indicated in the cooking tables/recipes and using the measure (I). - Close the lid (A).
• Plug the appliance into the mains socket. - Press the ON/OFF button (P). The light in the button comes on. The lower heating element activates immediately. The upper heating element will turn on when the lid is closed.
- Cooking begins.
- Set the cooking countdown by pressing the button on the timer (N) (fig. 8). The minutes set appear on the display.
- Immediately afterwards, the numbers begin to flash. This means the cooking time has begun.
The last minute is displayed in seconds. - If you make a mistake, you can set the new cooking time by holding the button down for more than two seconds. When the display has reset, repeat the operation.
- The timer indicates the end of cooking time with two series of beeps separated by a 20 second gap.
To turn off the signal, just press the timer button.

Please note: the timer does not turn the appliance off.

Please note: To guarantee best results, the paddle
begins to turn a few minutes after cooking begins.
i Please note: During cooking, you can lift up the lid (A) to add ingredients or check cooking progress. Ventilation stops briefly, then starts again when you close the lid.
i Please note: If the ON/OFF button is on, extracting the bowl turns the appliance off. It starts working again when the bowl is reinserted.
- Turn the appliance off by pressing the ON/OFF button (P) again;
COOKING WITHOUT THE PADDLE
- Put the bowl (F) back in the appliance (M), making sure it is correctly positioned.
• Lower the bowl handgrip (H) using the slide (G) (fig. 7). - Place the ingredients to be cooked in the bowl (F), respecting the quantities given in the cooking tables/recipes.
- If required by the cooking procedure, add oil, referring to the quantities indicated in the cooking tables/recipes and using the measure (I).
- Close the lid (A).
• Plug the appliance into the mains socket. - Press the ON/OFF button (P). The light in the button comes on. The lower heating element activates immediately. The upper heating element will turn on when the lid is closed.
- Cooking begins.
- Set the cooking time by pressing the button on the timer (N) (fig. 8). The minutes set appear on the display.
- Immediately afterwards, the numbers begin to flash. This means the cooking time has begun. The last minute is displayed in seconds.
- If you make a mistake, you can set the new cooking time by holding the button down for more than two seconds. When the display has reset, repeat the operation.
- The timer indicates the end of cooking time with two series of beeps separated by a 20 second gap.
To turn off the signal, just press the timer button.
i Please note: The timer does not turn the appliance off.
i Please note: When cooking without the paddle, the pin on the bottom of the bowl still turns a few minutes after cooking begins.
i Please note: During cooking, you can lift up the lid (A) to add ingredients or check cooking progress.
Ventilation stops briefly, then starts again when you close the lid.
i Please note: If the ON/OFF button is on, extracting the bowl turns the appliance off. It starts working again when the bowl is reinserted.
- Turn the appliance off by pressing the ON/OFF button (P) again;
EXTRACTING THE TIMER
- To extract the timer (N) from its housing, press the left side of the display, then turn (fig. 9) and pull off (fig. 10).
- To put the timer back, thread it onto the pins in the housing and push as far as it will go until it catches (fig. 11), then turn as shown in fig. 12.
i Please note: To replace the timer battery, contact manufacturer's authorised Customer Experience.
CLEANING AND MAINTENANCE
Danger! Before cleaning the appliance, always unplug from the mains socket and allow to cool.
Never immerse the appliance in water and never place under running tap water.
If water gets into the appliance, it could cause electric shock.
- Wash the bowl (F), paddle (E) and viewing thoroughly with hot water and neutral washing up liquid. The bowl is dishwater safe. Frequent washing could reduce the properties of the ceramic coating.
- Clean the hot air discharge grille (B) without removing it.
i Please note: Do not use sharp, abrasive or metallic utensils to remove food from the bowl as this can damage the ceramic coating. Clean with a soft cloth and neutral detergent only.
| Fault Cause/solution | |
| The appliance does not heat up The thermal cutout may have tripped. Contact the manufacturer's Customer Experience (the device must be replaced). | |
| The bowl is not positioned correctly and the appliance does not work | Position the bowl correctly |
| The lid is not properly closed and the appliance does not work | Close the lid |
| The paddle (E) does not turn | Wait for a few minutes after cooking begins |
COOKING TABLES
Potatoes
| Recipe Type | Quantity Oil | Cooking time (min) | Paddle | ||
| Standard potatoes cut to 1x1cm thick chips | Fresh | 1.5 kg (*) level 4 40-42 YES | |||
| 1.25 kg(*) level 3 35-37 YES | |||||
| 1 kg (*) level 2 30-32 YES | |||||
| 750 gr (*) level 1 25-27 YES | |||||
| Frozen | 1.25 kg without 36-38 YES | ||||
| 1 kg without 30-32 YES | |||||
| 750 gr without 26-28 YES | |||||
| 500 gr without 20-22 YES | |||||
| Roast potatoes | Fresh | 1 kg | level 3 | 37 | YES |
| Potato wedges | Frozen | 1 kg | without | 32 | YES |
| New potatoes | Frozen | 1 kg | without | 40 | YES |
| Croquettes | Frozen | 750 gr | without | 26 | YES |
(*) un-peeled potato weight
Meat - poultry
| Recipe Type | Quantity Oil | Cooking time (min) | Paddle Tips | |||
| Chicken nuggets | Frozen 750 gr | without 20 | YES - | |||
| Chicken drumsticks | Fresh 650 gr without 35 NO turn 2-3 times | |||||
| Chicken breast | Fresh 300 gr without 20 YES - | |||||
| Braised veal | Fresh 600 gr level 2 27 YES - | |||||
| Veal chops | Fresh 3 pcs without 25 NO | turn over after 15 min | ||||
| Veal spare ribs | Fresh 1200 gr without 35 NO turn 2-3 times | |||||
| Kebabs | Fresh 800 gr without 22 NO turn 2-3 times | |||||
| Hamburger | Fresh 4 pcs without 25 NO | turn over after 15 min | ||||
| Meatballs | Fresh 450 gr without 27 YES - | |||||
Fish - shellfish
| Recipe Type | Quantity | Oil | Cooking time (min) | Paddle | Tips | |
| Fish fingers | Frozen | 18 pz | without | 19-22 NO | turn over after 12 min | |
| Salmon steak | Fresh | 400 gr | without | 17-20 NO | turn over after 11 min | |
| Salmon fillet | Fresh | 350 gr | without | 12-15 NO | turn over after 9 min | |
| Scallops | Fresh | 4 pcs | without 12-15 NO | - | ||
| Cuttlefish | Fresh | 8 pcs | level 1 | 17-20 | NO | - |
| Tiger prawns | Fresh | 600 gr | level 1 | 17-20 | YES | - |
| Prawns | Fresh | 800 gr | level 1 | 17-20 | YES | - |
Vegetables - Fruit
| Recipe | Type Quantity | Oil | Cooking time (min) | Paddle | ||||
| Courgettes | Fresh | 600 gr | level | 5 | 20-25 | YES | ||
| Aubergines | Fresh | 600 gr | level | 3 | 20-25 | YES | ||
| Mushrooms | Fresh | 600 gr | level 2 | 15-20 | YES | |||
| Asparagus | Fresh | 800 gr | level | 5 | 25-30 | YES | ||
| Fruit | Fresh | 300 gr | without | 15-18 | NO | |||
Other
| Recipe | Type | Quantity | Oil | Cooking time (min) | Paddle | Tips |
| Paella Frozen | 600 gr | without | 15-17 | YES | mix once | |
| Gnocchi alla sorrentina | Frozen | 550 gr | without | 13-15 | YES | mix once |
| Onion rings | Frozen | 12/15 pcs | without | 15-17 NO | spread evenly on the bottom of the bowl. Turn over after 10 min |
For more recipes download the Delonghi fryer app.


Marque : DELONGHI
Modèle : Young FH1130
Catégorie : Appareil multi-cuisson