
EK-RES X3 - Refroidissement informatique EK Water Blocks - Notice d'utilisation et mode d'emploi gratuit
Retrouvez gratuitement la notice de l'appareil EK-RES X3 EK Water Blocks au format PDF.


| Type de produit | Réservoir pour refroidissement liquide PC |
| Dimensions (modèle 250) | Diamètre 60 mm, hauteur 250 mm |
| Poids | Environ 200 g (acrylique) |
| Alimentation | Aucune (passif) |
| Fonctions principales | Réservoir de liquide avec anticyclone intégré, 5 ports G1/4 en bas + 1 en haut, support de montage inclus |
| Entretien et nettoyage | Ne pas utiliser d'alcool ni de dérivés ; nettoyer avec un chiffon doux et eau claire. Utiliser un liquide de refroidissement avec inhibiteur de corrosion. |
| Sécurité | Installation réservée aux experts ; ne pas utiliser d'alcool (risque de fissure du tube acrylique). Porter des gants lors de la manipulation du liquide. |
| Pièces détachées et réparabilité | Joints toriques, bouchons G1/4, mousse anti-vortex polyéther, supports de réservoir. Pièces disponibles sur le site EK Water Blocks. |
| Informations générales | Marque : EK Water Blocks, modèle : EK-RES X3, catégorie : Refroidissement informatique. Garantie : voir conditions au dos de l'emballage. |
FOIRE AUX QUESTIONS - EK-RES X3 EK Water Blocks
Questions des utilisateurs sur EK-RES X3 EK Water Blocks
0 question sur cet appareil. Repondez a celles que vous connaissez ou posez la votre.
Poser une nouvelle question sur cet appareil
Téléchargez la notice de votre Refroidissement informatique au format PDF gratuitement ! Retrouvez votre notice EK-RES X3 - EK Water Blocks et reprennez votre appareil électronique en main. Sur cette page sont publiés tous les documents nécessaires à l'utilisation de votre appareil EK-RES X3 de la marque EK Water Blocks.
MODE D'EMPLOI EK-RES X3 EK Water Blocks
Installation and mounting manual for EK-RES X3 series reservoir
This product is intended for installation only by expert users. Please consult with a qualified technician for installation. Improper installation may result in damage to your equipment. EK Water Blocks assumes no liability whatsoever, expressed or implied, for the use of these products, nor their installation. The following instructions are subject to change without notice. Please visit our web site at www.ekwb.com for updates. Before installation of this product please read Important notice, disclosure and warranty conditions printed on the back of the box.
Before you start using this product please follow these basic guidelines:
- Please carefully read the manual before through before beginning with the installation process!
- The EK High Flow and EK-PSC type fittings require only a small amount of force to screw them firmly in place since the liquid seal is ensured by the rubber o-ring gaskets.
- The use of corrosion inhibiting coolants is always recommended for any liquid cooling system.
- DO NOT USE any kind of alcohol or alcohol derivate with this reservoir or the acrylic tube may crack and fail! Do not clean it using alcohol either!
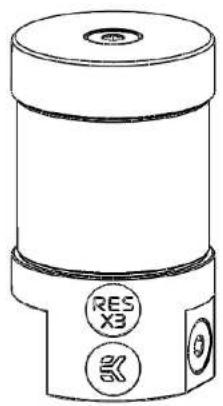
STEP 1: GENERAL INFORMATION. Factory provided EK-RES X3 series reservoir
Congratulations on your purchase of EK-RES X3 series reservoir! By default the EK-RES X3 series reservoir comes with the following:
- EK-RES X3 series reservoir with preinstalled EK-RES X3 - Anticyclone
- EK-Multioption RES X2 Holder 60mm (2 pcs)
- Polyether anti-vortex foam (H=15mm)
- Mounting mechanism:
- 4x G1/4 Plug
- 2x EK-G1/4 Extender
○ Allen Key 6mm
natural_image
Technical line drawing of a cylindrical mechanical component with two labeled buttons (RES X3 and 25) and a top circular feature (no text or symbols beyond labels)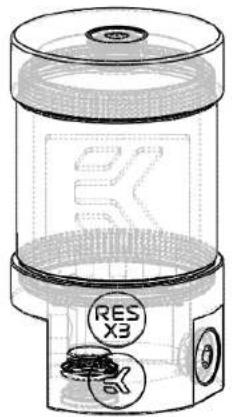
natural_image
Technical line drawing of a cylindrical device with internal components and no visible text or symbols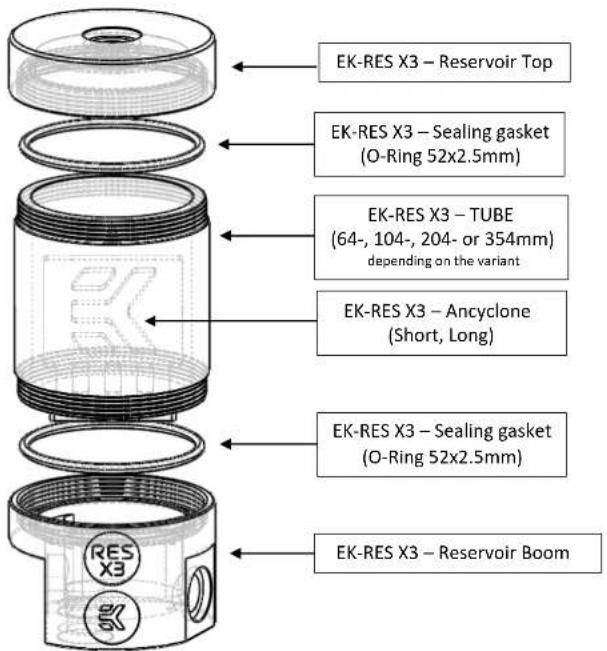
STEP 2: INSTALLING THE RESERVOIR HOLDERS
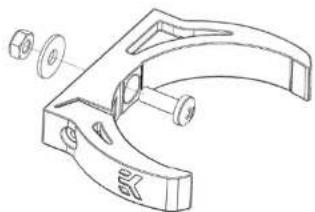
EK-RES X3 series reservoirs comes with a pair of special EK-Reservoir holders. These holders are meant to be installed directly on the computer chassis. User may need to drill 2 (two) Φ4mm holes through chassis metal using electric power drill if there are no appropriate mounting holes available.
STEP 2.1
natural_image
Technical line drawing of a mechanical bracket with multiple circular components (no text or symbols)Use enclosed M4 screw, washer and nut to mount the reservoir holder through the pre-drilled hole to the computer chassis.
STEP 2.2
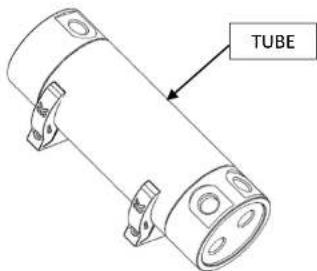
Install reservoir onto reservoir holders. Using a gentle force the reservoir will easily 'click' into position. The clamps should always hold onto acrylic tube and not the acetal top or bottom.
STEP 2.3
natural_image
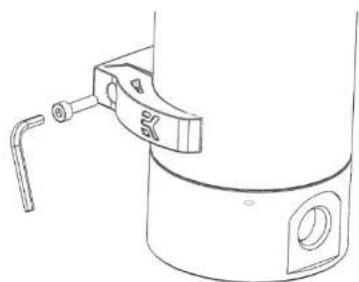
Technical line drawing of a mechanical clamp or bracket assembly (no text or symbols)Once the reservoir is positioned please use enclosed 2.5mm Allen key to tighten the hex head screw in order to clamp the reservoir. Do not use high force. Partially unscrew the aforementioned screw when removing the reservoir.
Alternatively one can purchase various reservoir holders, such as EK-UNI Holder 50/70 (EAN: 3830046997715): One can use the EK-UNI Holder 50/70 if the chassis lack the appropriate holes to install the reservoir and the drilling is out of the question. EK-UNI Holder 50/70 can be install on 5.25" Drive Bay cage and fixated with M4 screws and nuts to carry the Reservoir Holders.
For more reservoir add-ons please EK Webshop!
STEP 3 (optional): USING POLYETHER ANTI-VORTEX FOAM:
EK-RES X3 series reservoir comes preinstalled with EK-RES X3 – Anticyclone by default (long or short – depending on the variant). In case your system suffers from excessive vortex issues, air bleeding problems or if the pump is sucking in air you may replace the anticyclone with the enclosed polyether foam. There are two ways to use the polyether anti-vortex foam:
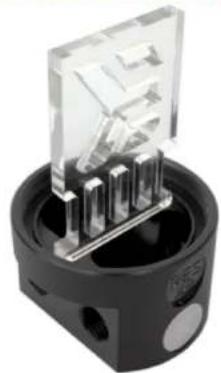
Default configuration
natural_image
Close-up of a black plastic electrical connector with transparent top and internal components (no visible text or symbols)This is the default configuration of EK-RES X3 series reservoir.
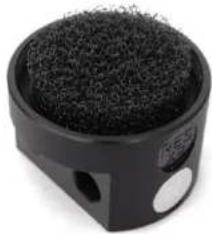
PE foam – use whole
natural_image
Close-up of a black cylindrical container with a textured surface and two circular cutouts (no visible text or symbols)Use the foam as a whole to replace EK-RES X3 - Anticyclone.
PE foam – trim to fit recess
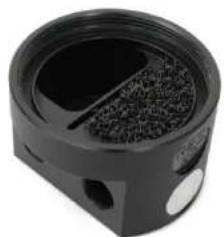
natural_image
Close-up of a black cylindrical mechanical component with internal grooves and mounting holes (no visible text or symbols)Trim the foam to size to fit into the desired recess on the Reservoir Bottom.
STEP 4: RECOMMENDED RESERVOIR CONFIGURATION
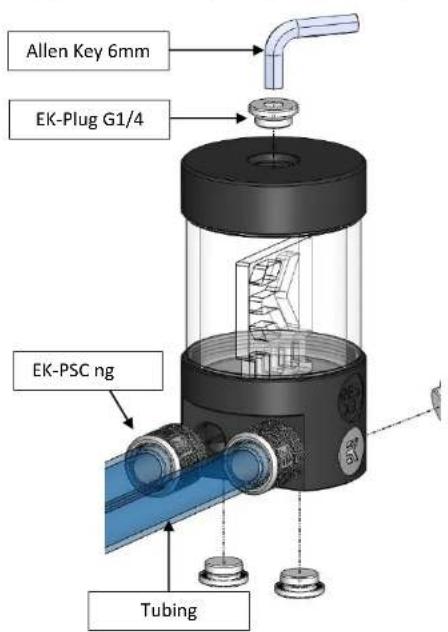
EK-RES X3 series reservoir features 5 (five) G1/4 threaded inlet/outlet openings on the Reservoir Bottom plus additional one on the Reservoir Top. In order for reservoir to function properly one port must be used as an inlet and one as an outlet. Unused ports must be closed with plugs using enclosed 6mm Allen key!
GENERAL OVERVIEW OF ALL G1/4 THREADED PORTS:
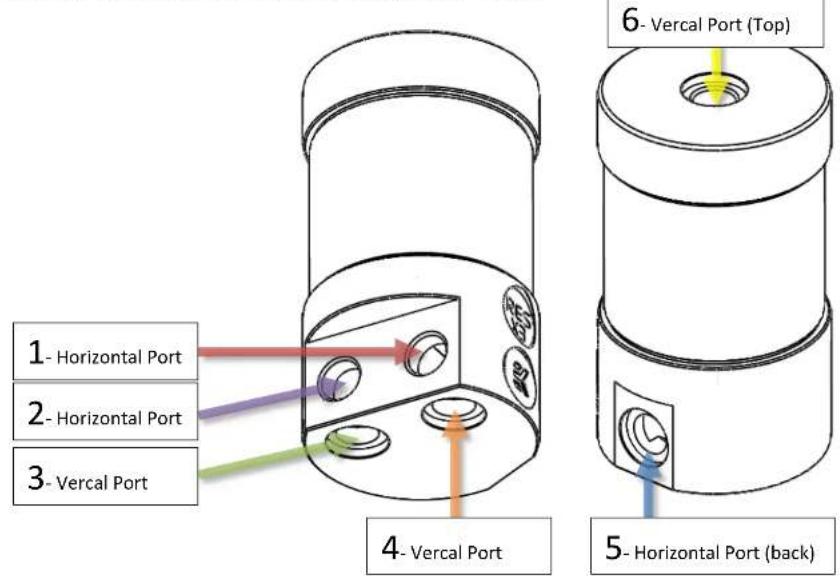
RECOMMENDED RESERVOIR CONFIGURATION:
IMPORTANT NOTES:
- When using ports #3, #4 or #6 it is mandatory to use the enclosed EK-Extender G1/4 (EAN: 3831109845165) due the ports being recessed into the plastic Reservoir Bottom.
- When using EK-Extender G1/4 make sure not to use fittings or barbs with G1/4 thread longer than 5mm! All EK-PSC and High Flow fittings are compatible!
- When using ports #1 and #2 make sure not to use fittings or barbs with diameter larger than 25mm! All EK-PSC and High Flow fittings are compatible!
- EK recommends the use of EK-PSC fittings. When using fittings other than EK-PSC series please use hose clamps or appropriate substitute to secure the tubing to the barb. The use of biocide containing and corrosion inhibiting coolant is always recommended for any liquid cooling system.
- Port #6 of EK-RES X3 series reservoir should only be used to connect this reservoir with external fill port!
TIPS AND ADVICES:
- Using a horizontal pass-through configuration (using ports #1 and #5 as inlet/outlet) will yield in most optimal hydraulic conditions but may result in difficult initial bleeding of air in low restriction- or high pumping power water cooling systems.
- When using a bottom feeding vertical configuration (using ports #3 and #4 as inlet/outlet) you may experience severe vortex issues. Using a PE foam as a whole to replace the EK-RES X3 Anticyclone will remedy this issue. Please see STEP 3!
- Visit EK Webshop to purchase various add-ons (such as reservoir holders, tube extenders, alternative reservoir tops and many more) for your EK-RES X3 series reservoir!
REQUIRED TOOLS AND ACCESSORIES:
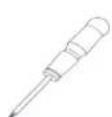
philips screwdriver

power drill with 4mm drill bit (oponal)
- Installation and mounting manual for EK-RES X3 series reservoir
- STEP 1: GENERAL INFORMATION. Factory provided EK-RES X3 series reservoir
- STEP 2: INSTALLING THE RESERVOIR HOLDERS
- STEP 3 (optional): USING POLYETHER ANTI-VORTEX FOAM:
- STEP 4: RECOMMENDED RESERVOIR CONFIGURATION
- IMPORTANT NOTES:
- TIPS AND ADVICES:
Marque : EK Water Blocks
Modèle : EK-RES X3
Catégorie : Refroidissement informatique