
Z9 Plus - Unite Centrale ZALMAN - Notice d'utilisation et mode d'emploi gratuit
Retrouvez gratuitement la notice de l'appareil Z9 Plus ZALMAN au format PDF.


| Type de produit | Boîtier d'ordinateur (unité centrale) |
| Format de la carte mère | ATX, Micro-ATX, Mini-ITX |
| Dimensions | 200 x 450 x 480 mm (L x H x P) |
| Poids | 6,5 kg |
| Alimentation incluse | Non (ATX standard, en option) |
| Emplacements d'extension | 7 slots |
| Baies de lecteur | 3 x 5,25" externes, 5 x 3,5"/2,5" internes |
| Système de refroidissement avant | 2 x 120 mm ou 1 x 140 mm (non inclus) |
| Système de refroidissement arrière | 1 x 120 mm (non inclus) |
| Système de refroidissement haut | 2 x 120 mm ou 1 x 140 mm (non inclus) |
| Connectique du panneau avant | USB 3.0 x 2, USB 2.0 x 1, audio (micro/casque) |
| Fenêtre latérale | Oui, en acrylique |
| Filtre à poussière | Oui (amovible, face avant et alimentation) |
| Gestion des câbles | Oui (espace de passage et attaches) |
| Matériaux | Acier SECC / ABS |
| Hauteur maximale du ventirad CPU | 160 mm |
| Longueur maximale de la carte graphique | 300 mm |
| Entretien et nettoyage | Dépoussiérage régulier avec chiffon doux et souffle d'air comprimé |
| Sécurité | Débrancher l'alimentation avant toute manipulation interne |
| Pièces détachées et réparabilité | Vis de montage, filtres, panneaux latéraux (pièces disponibles) |
| Garantie | 2 ans (selon revendeur) |
FOIRE AUX QUESTIONS - Z9 Plus ZALMAN
Questions des utilisateurs sur Z9 Plus ZALMAN
0 question sur cet appareil. Repondez a celles que vous connaissez ou posez la votre.
Poser une nouvelle question sur cet appareil
Téléchargez la notice de votre Unite Centrale au format PDF gratuitement ! Retrouvez votre notice Z9 Plus - ZALMAN et reprennez votre appareil électronique en main. Sur cette page sont publiés tous les documents nécessaires à l'utilisation de votre appareil Z9 Plus de la marque ZALMAN.
MODE D'EMPLOI Z9 Plus ZALMAN
1 Cautionary Notes
1) Please read this manual thoroughly prior to installation.
2) Before installing, check the components and condition of the product, and if any problem is found, contact the retailer.
3) Avoid inserting objects or hands into the system while it is in operation to prevent product damage and injuries.
4) Check the manual when connecting cables. Incorrect connections may cause short circuits leading to fire hazards.
5) Do not block the front intake vent or the rear exhaust vent.
6) Keep this unit away from heat sources, direct sunlight, water, oil, and humid environments, and place the unit on a flat, stable, vibration-free, and well-ventilated area.
7) Do not clean the product surface with chemicals or wet cloth. (chemicals: industrial brightener, wax, benzene, alcohol, paint thinner, mosquito repellent, aromatics, lubricant, detergent etc.)
8) Please wear gloves while handling this product to prevent injuries.
9) Product design and specifications may be revised to improve quality and performance.
Disclaimer) Zalman Tech Co., Ltd. is not responsible for any damages due to external causes, including but not limited to, improper use, problems with electrical power, accident, neglect, alteration, repair, improper installation, or improper testing.
The diagrams used in this manual are based on model Z9 Plus. Installation for the Z9 follows the exact installation procedure.
2 Product Details
(1) Specifications
| Models | Z9 Plus / Z9 | ||
| Type | ATX Mid Tower | ||
| Dimensions (W×H×D) | 207 × 464 × 504mm (8.1 × 18.2 × 19.8") | ||
| Weight | Z9 Plus | 7.2kg(15.8 lb) | |
| Z9 | 7.0kg(15.4 lb) | ||
| Materials | Plastic, Steel | ||
| Color | Black | ||
| Motherboard Compatibility | Standard ATX / m-ATX | ||
| Power Supply Compatibility | Standard ATX / ATX12V | ||
| PCI/AGP Compatibility | Full Size 290mm (11.4") | ||
| Drive Bays | 5.25" | External Bay x 3 | |
| 3.5" | External Bay x 1, Internal Bay x 5 | ||
| 5.25"/3.5"/2.5" | 1 (3in-1) | ||
| Hot-swap | - | ||
| Expasion Card Solts | 7 Slots | ||
| Cooling Components | Front | 120mm/140mm Fan Vent x 1 (1 Fan included) | |
| Top | Z9 Plus | 120mm/140mm Fan Vent x 2(1 Fan included, 1 optional) | |
| Z9 | 120mm/140mm Fan Vent x 2(Fans optional) | ||
| Bottom | 120mm or 140mm Fan × 1(Optional) | ||
| Rear | 120mm/140mm Fan Vent x 1 (Fan optional) | ||
| Side | Z9 Plus | 120mm Fan Vent x 2(1 Fan included, 1 optional) | |
| Z9 | 120mm Fan Vent x 2(Fans optional) | ||
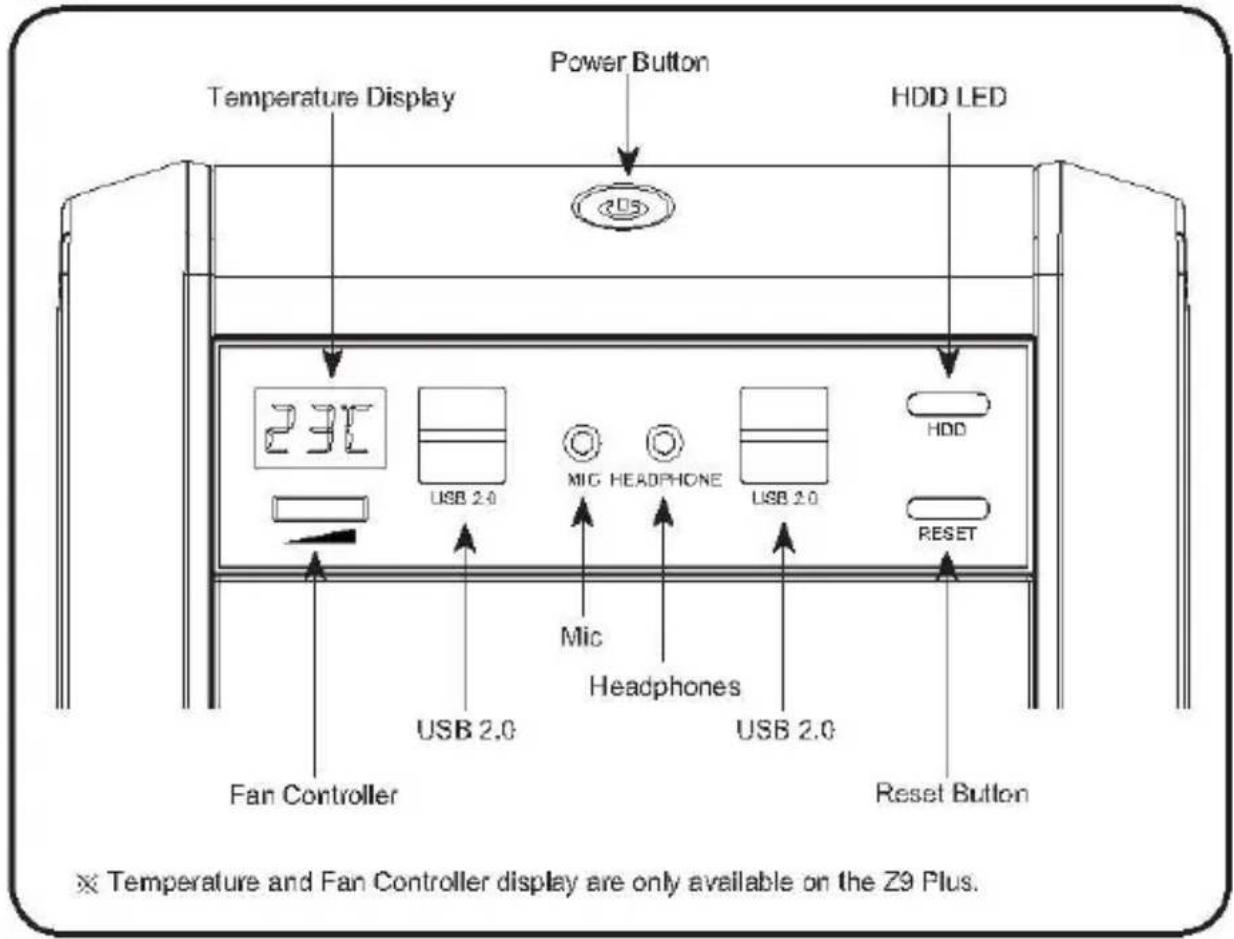
| Front Panel I/O Port | Z9 Plus | Headphones x 1, Mic x 1, USB 2.0 x 4 | |
| Z9 | |||
(2) Product Information
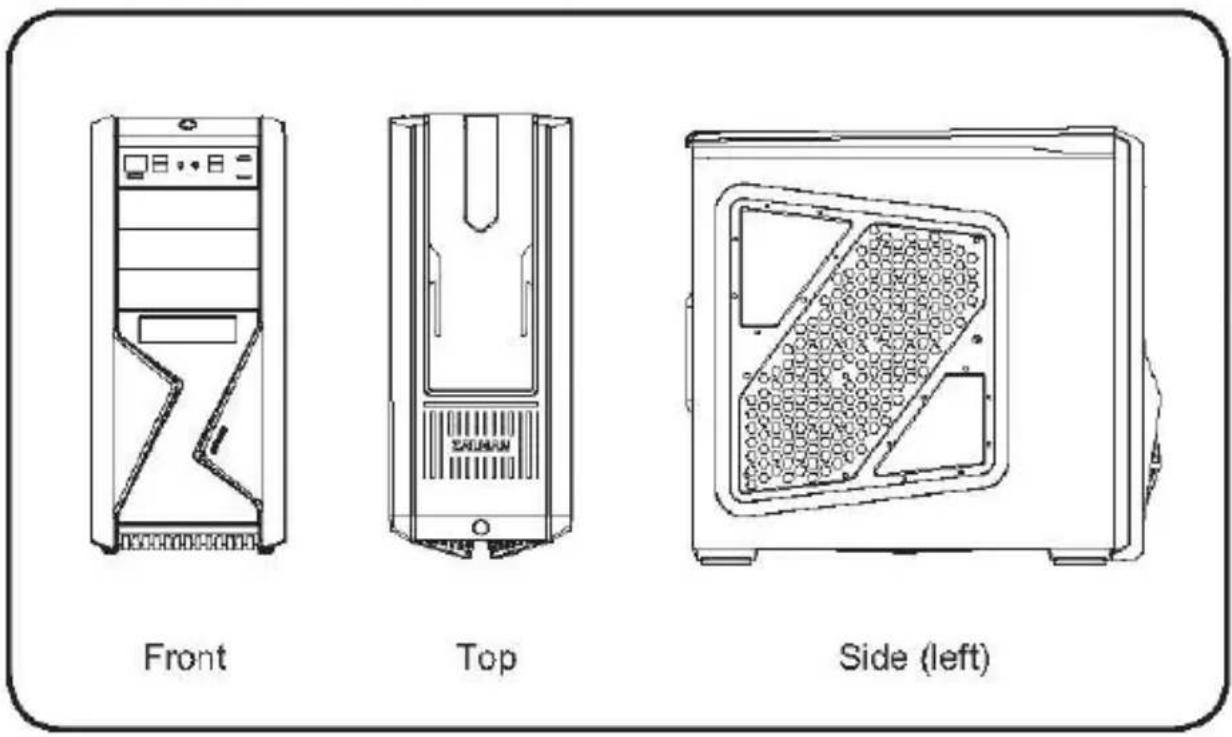
(3) Front Panel I/O Ports
(4) Exploded View
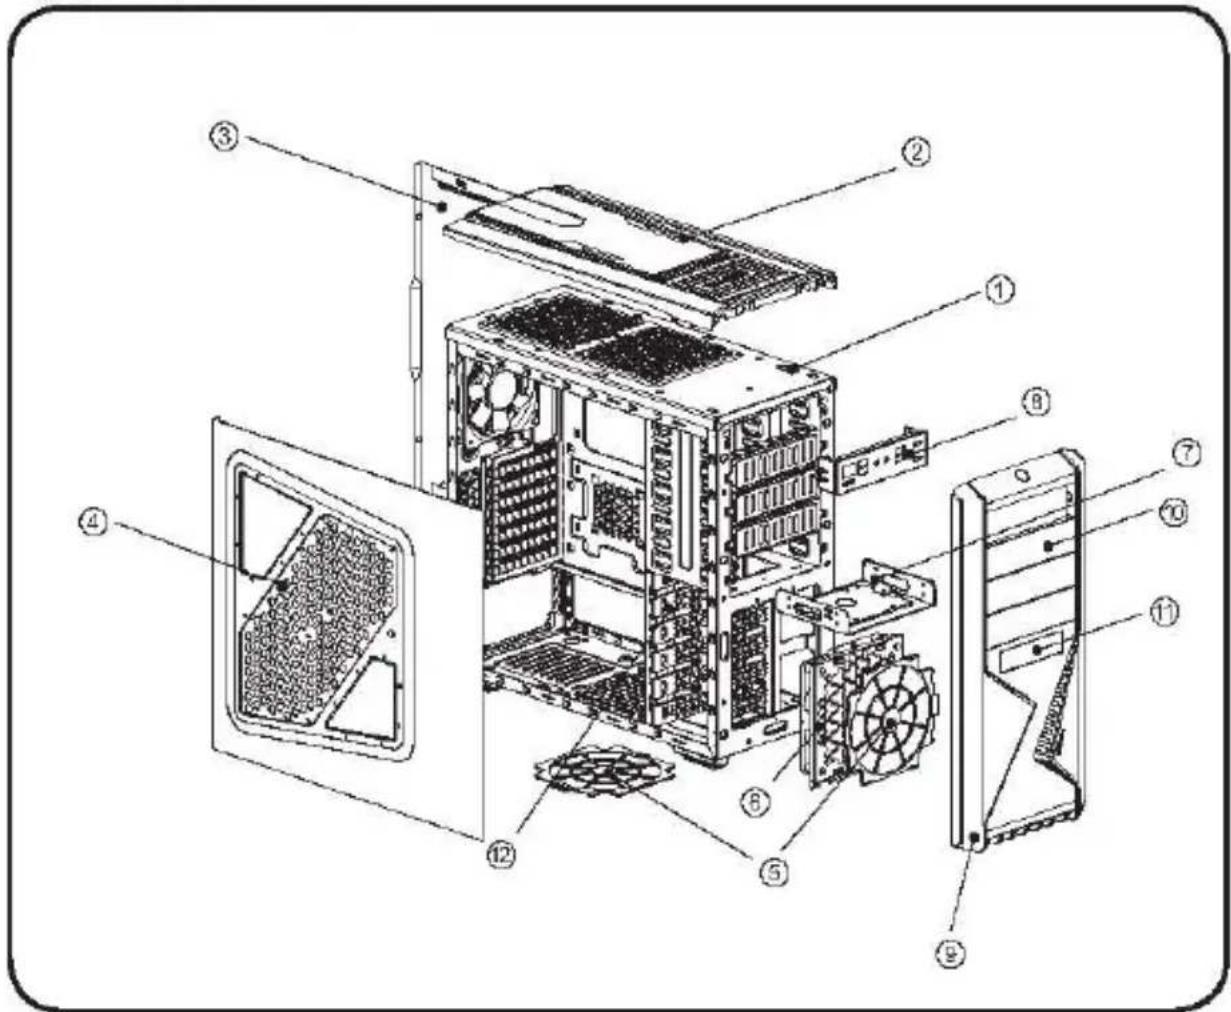
| # | Part Name | Units |
| 1 | Chassis | 1 |
| 2 | Top Cover | 1 |
| 3 | Side Panel (Right) | 1 |
| 4 | Side Panel (Left) | 1 |
| 5 | Dust Filter | 2 |
| 6 | Fan Bracket | 1 |
| # | Part Name | Units |
| 7 | 3.5" / 2.5" Tray | 1 |
| 8 | Front I/O Module | 1 |
| 9 | Front Cover | 1 |
| 10 | 5.25" Bay Cover | 3 |
| 11 | 3.5" Bay Cover | 1 |
| 12 | 3.5" HDD Bracket | 5 |
※ The Tuning Side Panel (left) is only available on the Z9 Plus.
(5) Parts
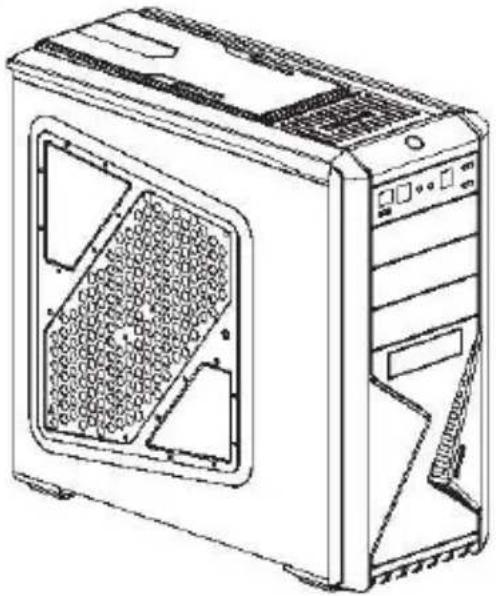
Main Unit

User's Manual
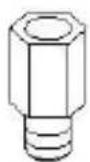
Stand-Off × 5

A Bolt (#6-32*6mm) × 11
[PSU, PCI]

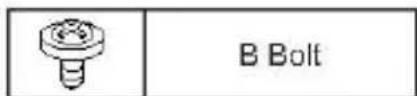
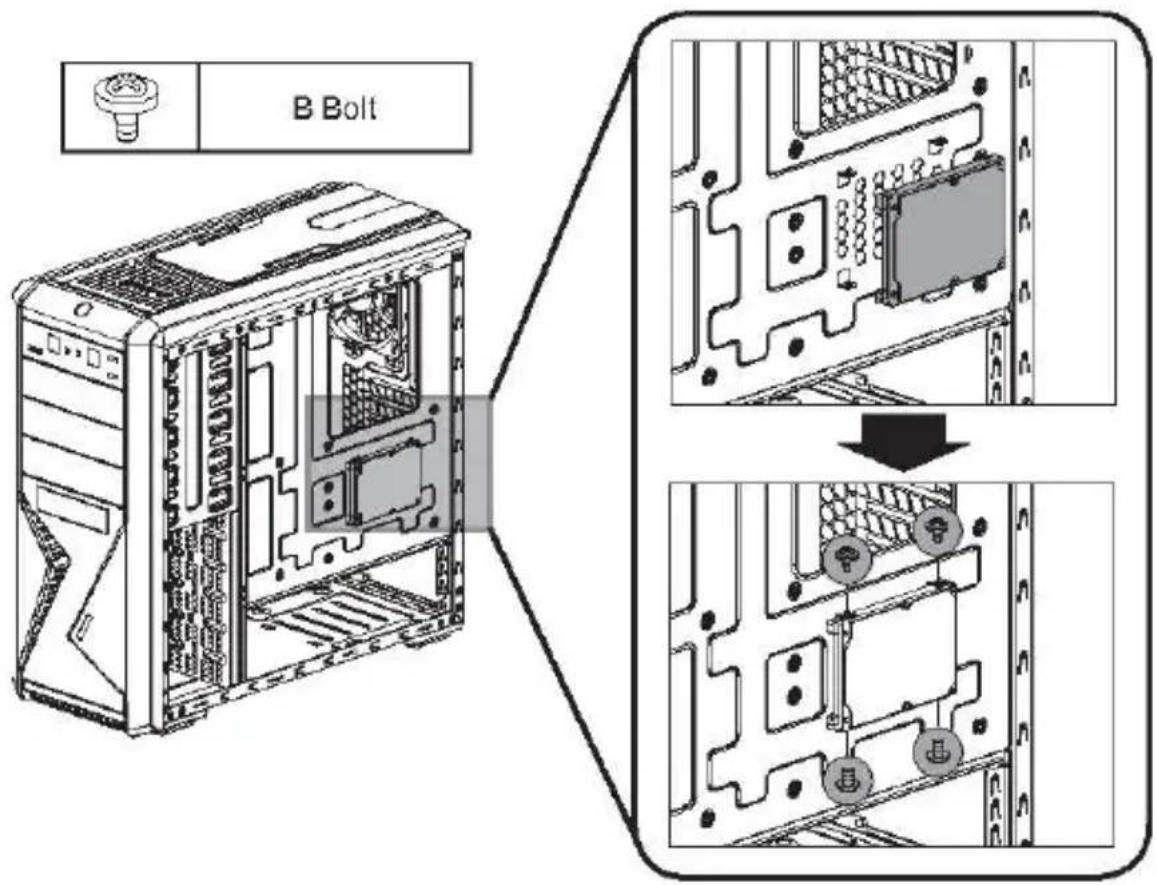
B Bolt (M3*5mm) × 17 [M/B, FDD, SSD]

C Bolt (M3*6mm) × 12 [5.25"Bay ODD]
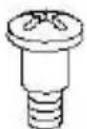
D Bolt (#6-32*4mm) × 20
[3.5" Bay HDD]

E Bolt (#6-32*6mm) × 5
[3.5" HDD]
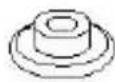
HDD Anti-static rubber × 20
[3.5" Bay HDD]

Cable Tie × 5

CPU 12V Extension Cable × 1
3 Installation
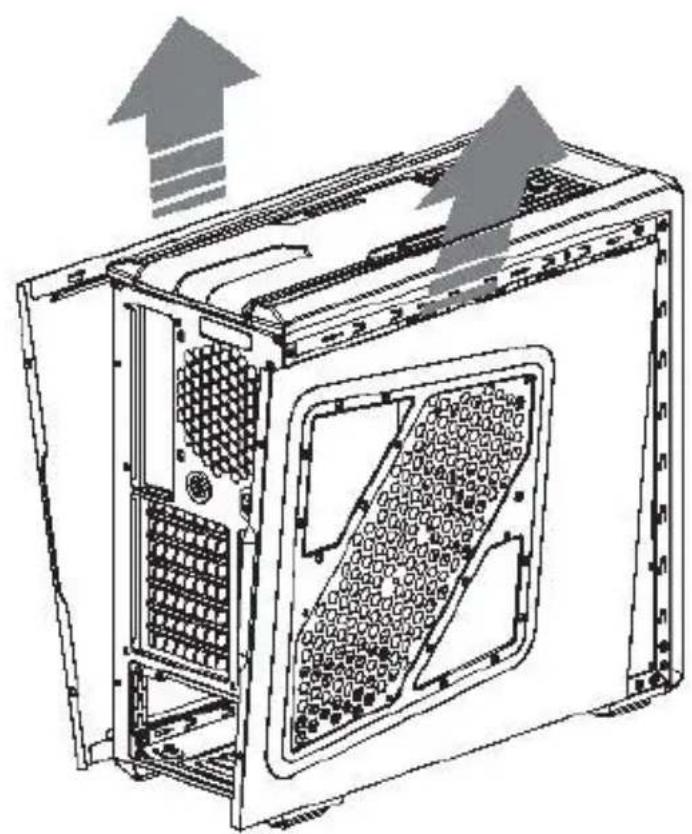
(1) Side Panel Removal

(2) PSU Installation
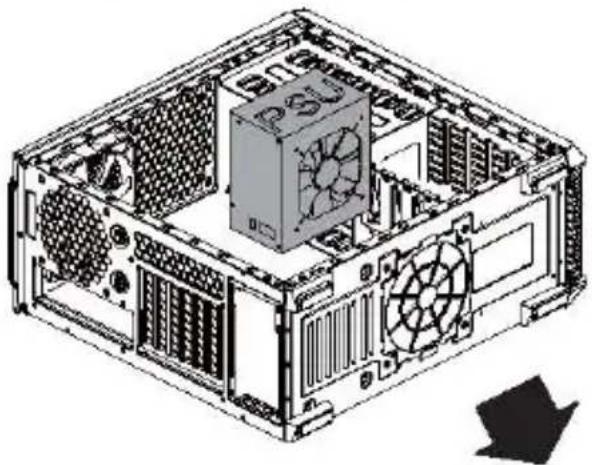

 | A Bolt |


Tip

- Type A (PSU independent cooling) If the PSU's fan points downwards, the PSU's cooling performance is enhanced.
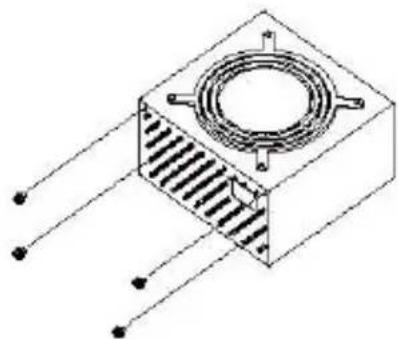
- Type B (Case Air Circulation Type) If the PSU's fan points inwards, the PSU's cooling performance is enhanced.
※ When using the case in a dusty environment, use Type B.
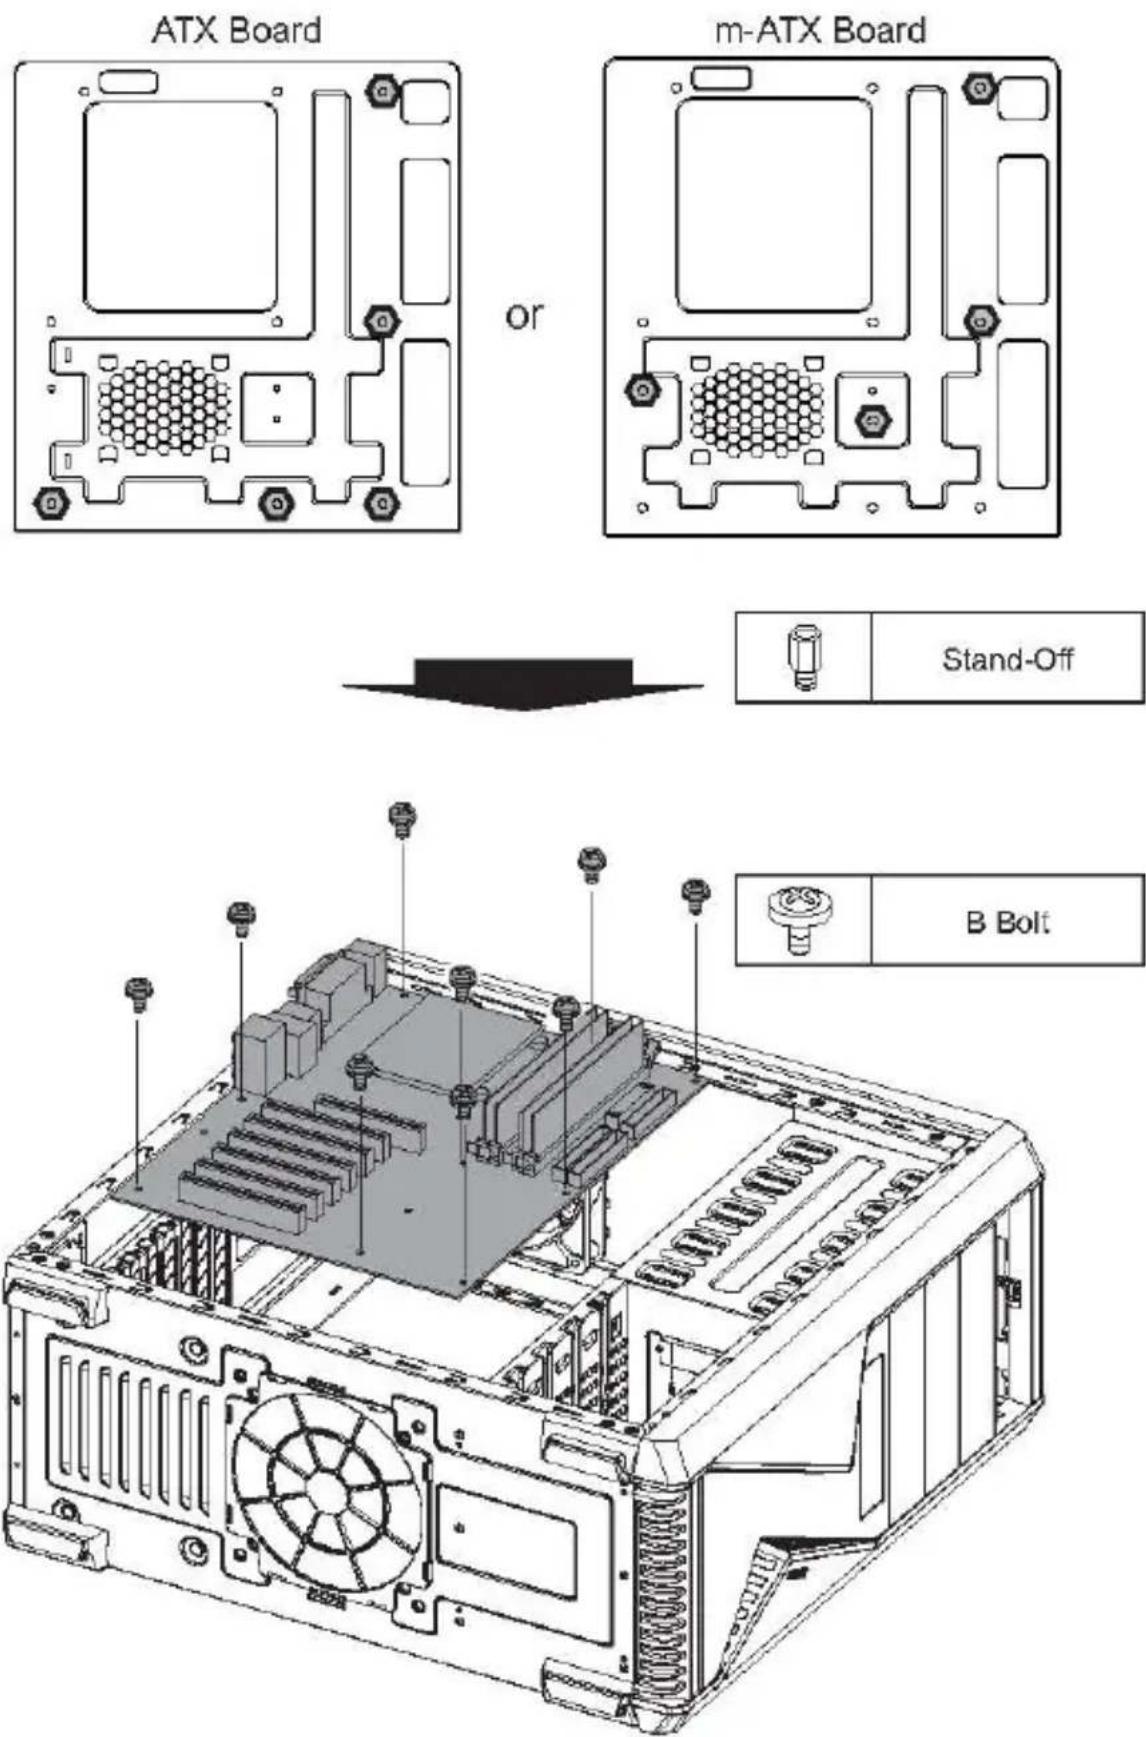
(3) Motherboard Installation
There are 4 Stand Offs preinstalled. Please refer to the diagrams below for additional Stand Off positions (based on motherboard type).
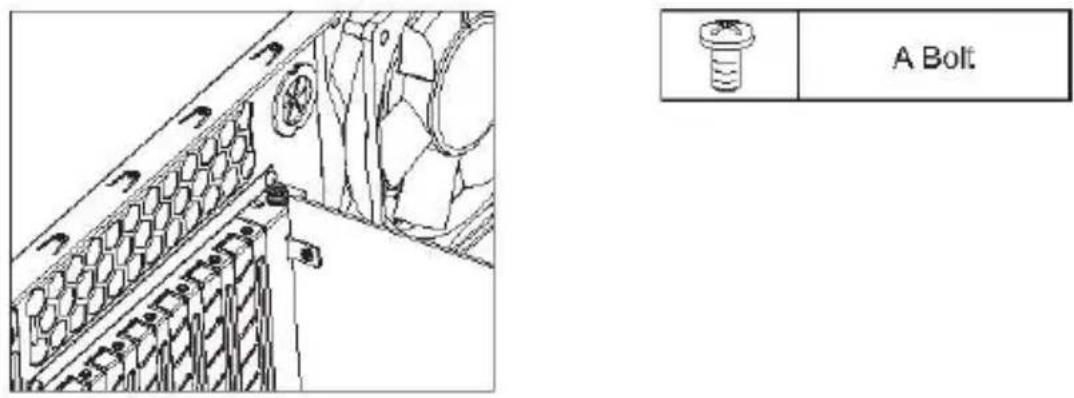
(4) VGA Card Installation


(5) 5.25" and 3.5" Drive Installation
1) Front Cover Removal

2) ODD Installation


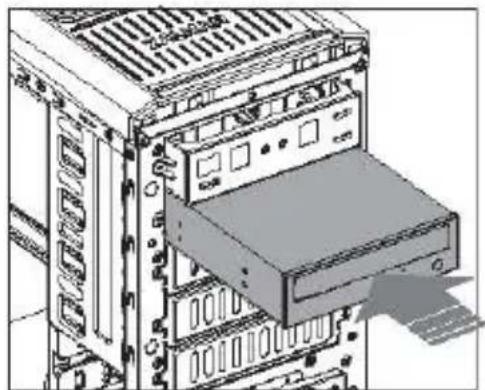
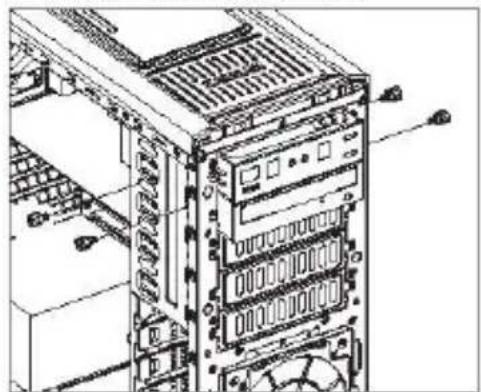
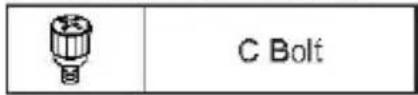
3) 2.5" / 3.5" Tray Installation
① Tray Removal
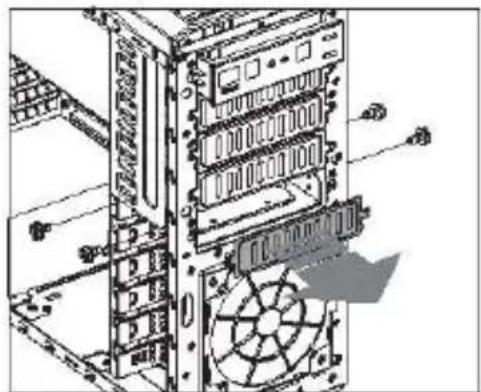


Caution
When fastening the Tray, Type A Bolts must be used.
② Attach Drive to Tray
A. 3.5" FDD Installation
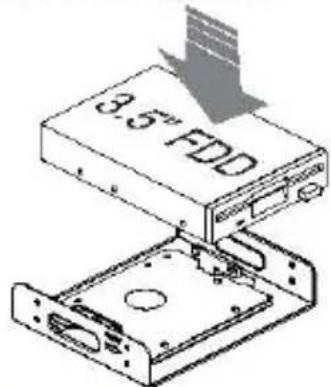


B. 3.5" HDD Installation

| A Bolt |

C. 2.5" SSD Installation


| B Bolt |
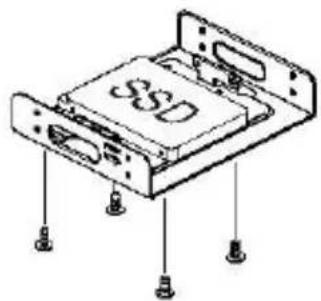
(6) Front Cover Installation
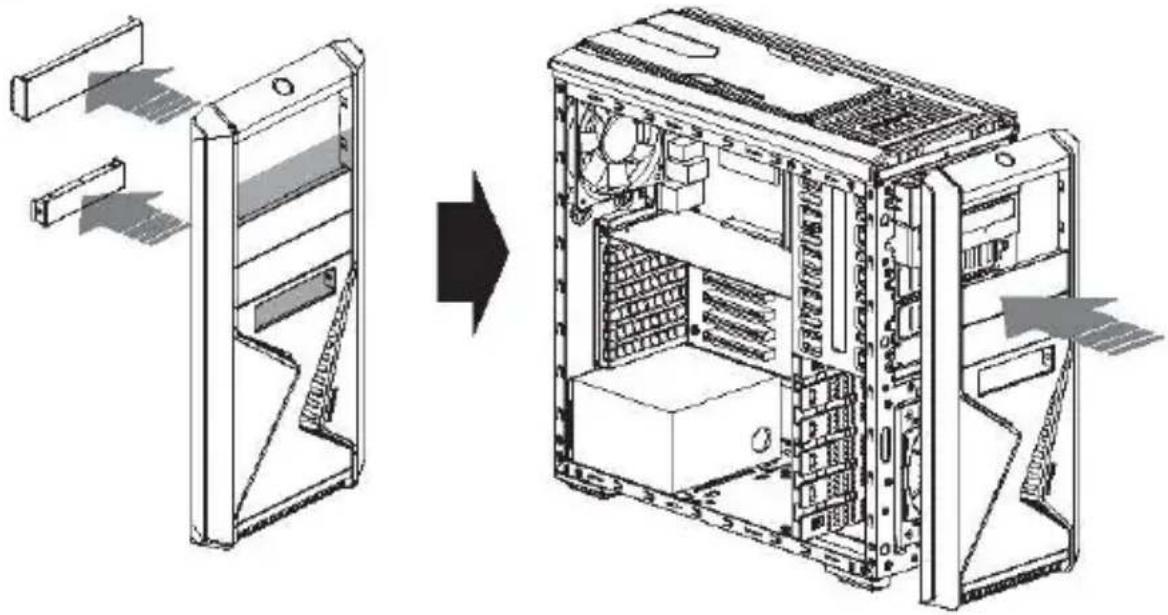

Caution
When removing the front cover, the power switch and extension cable are separated to prevent disconnection. Be sure to connect them before installing the front cover.
(7) 3.5" HDD Installation
1) Installation of HDD Anti-static rubber and Bolt
| D Bolt | |
| HDD Anti-static rubber |
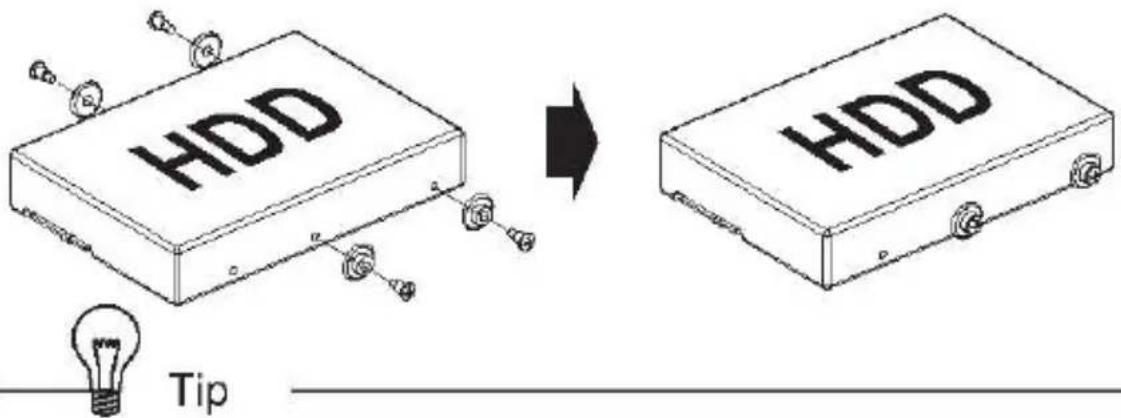
The HDD can be installed in 2 different directions, according to your desired Cable Management style.

2) HDD Installation
Push into the 3.5" Bay until a "click" sound is heard.
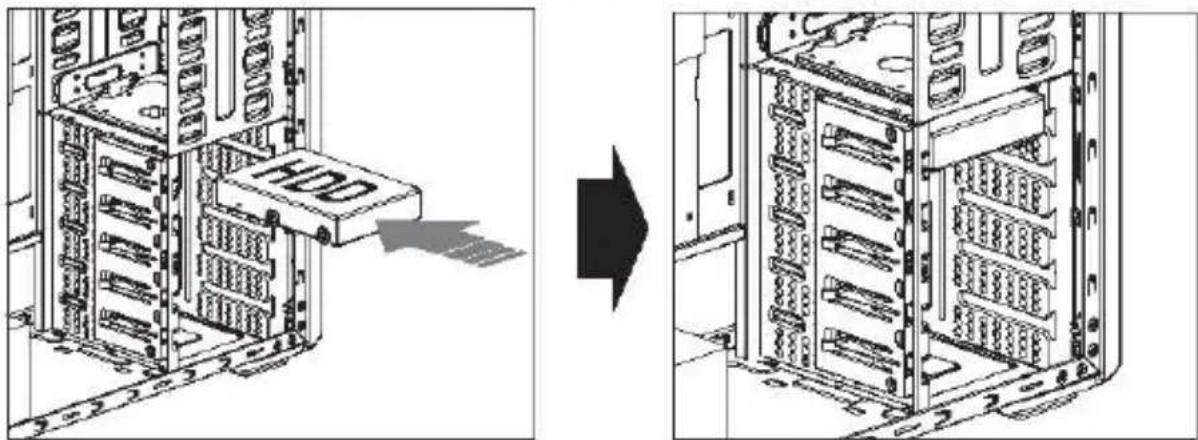

Tip
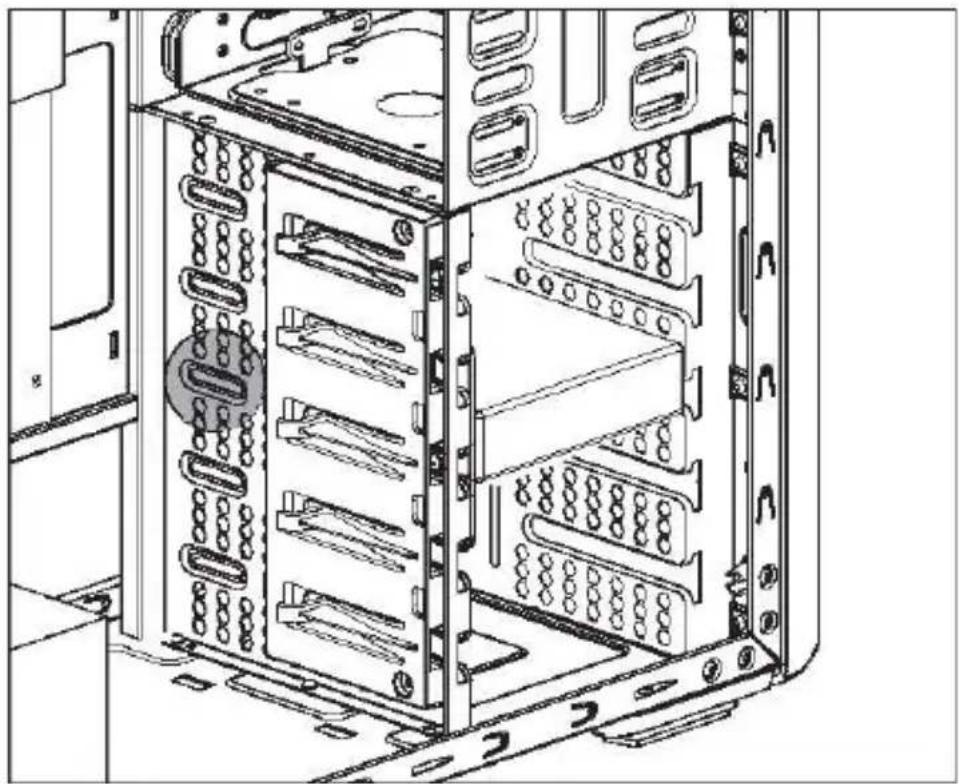
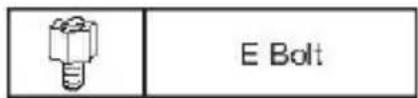
When transporting an assembled system, please secure the HDD with Bolt E as shown above.
3) HDD Removal
When removing HDD, pull the fastening lever outwards and then remove it.

(8) SSD Installation
SSDs can be installed on the right side of case as shown in the diagram below.
(9) Cable Connection
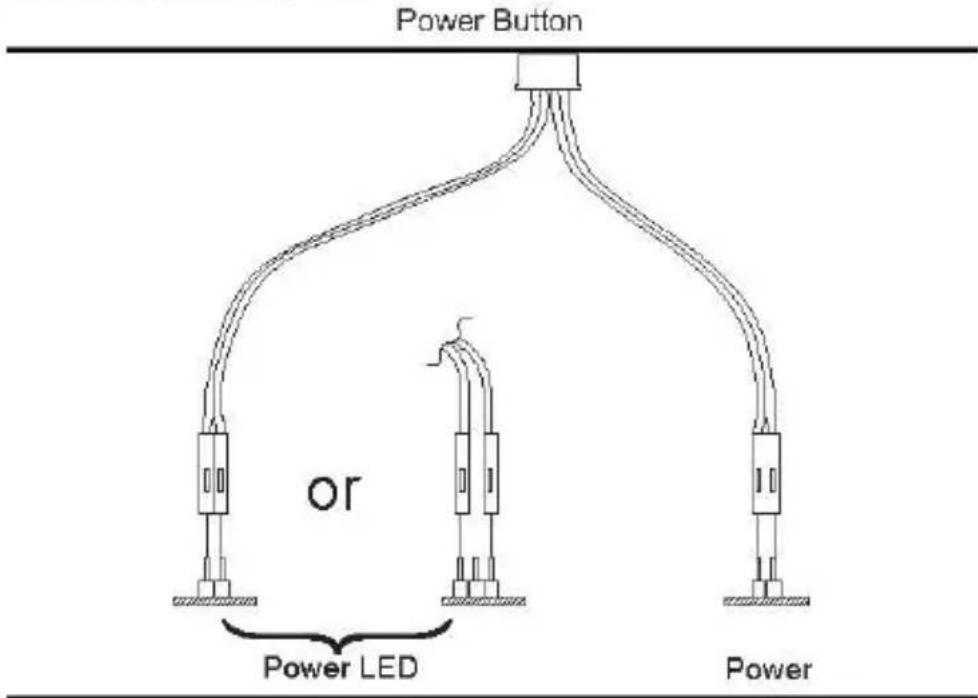
1) Power Button Cable
Motherboard
2) Front Panel I/O Port Cable
① Front Panel I/O Port connection
Front Panel I/O Port


Motherboard

Tip
To connect USB 2.0 audio cables, please refer to the motherboard manual.
- When the +/- polarities are reversed, the LED's will not function.
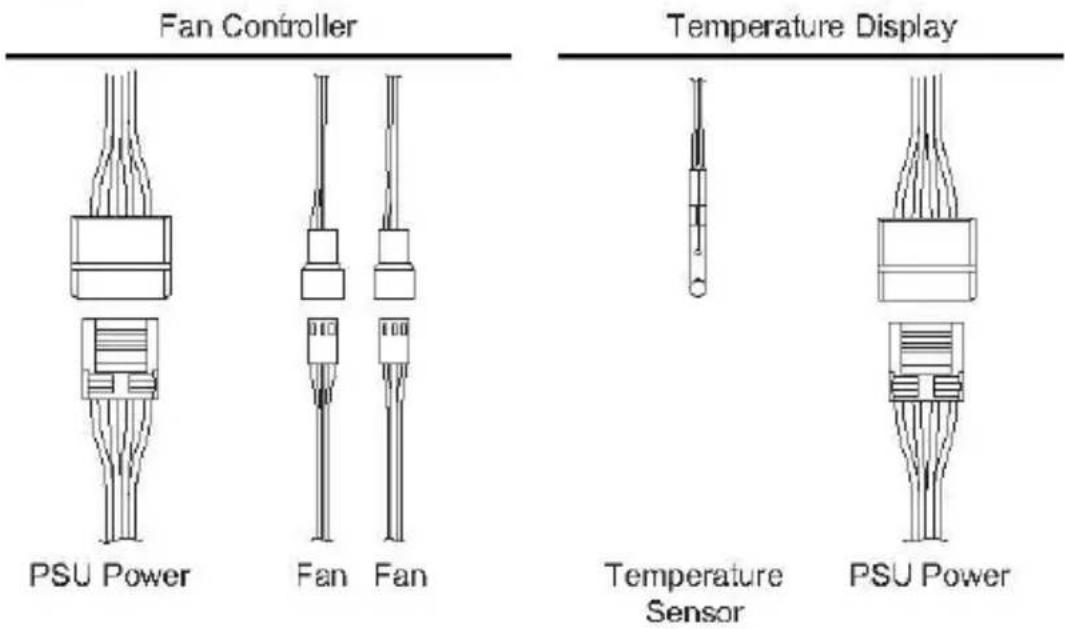
② Fan Control, Temperature Display connection
▶ Fan Controller: After connecting the 4-Pin Power cable, connect Fans to Fan Connector.
- Temperature Display: After connecting 4-Pin Power, locate temperature sensor in desired location. (The sensor is for the case's internal temperature readings.)
(10) Optional Fan Installation and Replacement
1) Optional Side Panel Fan (120mm) Installation
The Z9 Plus comes with one 120mm Side Panel Fan pre-installed.

2) Top Panel Fan (120/140 mm) Installation
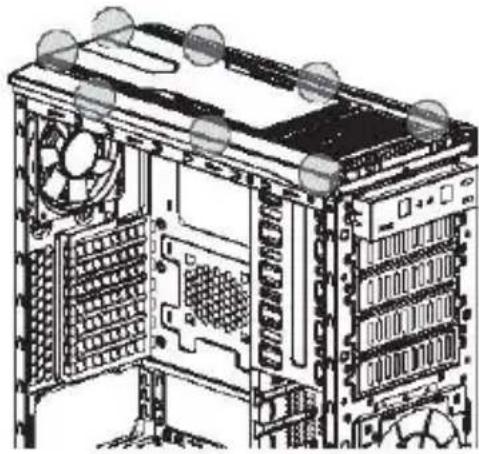
When installing fan, press the Top Panel's eight Hook's towards each other to remove and install as shown in diagram below. The Z9 Plus comes with one 120mm Fan pre-installed.


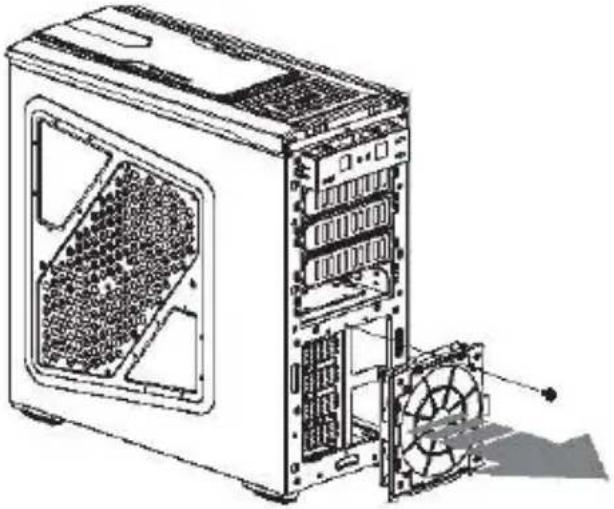
3) Front Panel Fan (120/140mm) Replacement One 120mm Fan is pre-installed.


- 1 CAUTIONARY NOTES
- 2 PRODUCT DETAILS
- 3 INSTALLATION
- TIP
- MOTHERBOARD INSTALLATION
- 3.5" HDD INSTALLATION
- HDD INSTALLATION
- HDD REMOVAL
- SSD INSTALLATION
- CABLE CONNECTION
- FRONT PANEL I/O PORT CABLE
- OPTIONAL FAN INSTALLATION AND REPLACEMENT
- OPTIONAL SIDE PANEL FAN (120MM) INSTALLATION
- TOP PANEL FAN (120/140 MM) INSTALLATION
Marque : ZALMAN
Modèle : Z9 Plus
Catégorie : Unite Centrale