
SDM 60 Hugi - Lecteur/enregistreur de cd SCOTT - Notice d'utilisation et mode d'emploi gratuit
Retrouvez gratuitement la notice de l'appareil SDM 60 Hugi SCOTT au format PDF.


| Type de produit | Lecteur/enregistreur de CD |
| Marque | SCOTT |
| Modèle | SDM 60 Hugi |
| Dimensions (L x H x P) | 430 x 100 x 330 mm |
| Poids | 4,5 kg |
| Alimentation | 230 V ~ 50 Hz |
| Consommation | 20 W |
| Formats CD pris en charge | CD audio, CD-R, CD-RW |
| Fonctions principales | Lecture, enregistrement, programmation, répétition, lecture aléatoire |
| Connectiques | Sortie audio RCA, entrée audio RCA, prise casque |
| Entretien et nettoyage | Nettoyer le boîtier avec un chiffon doux et sec. Utiliser un disque de nettoyage pour la lentille laser. |
| Sécurité | Ne pas exposer à l'humidité, ne pas obstruer les fentes de ventilation, débrancher avant nettoyage. |
| Pièces détachées et réparabilité | Contactez le service après-vente SCOTT pour les pièces de rechange. |
| Informations générales | Appareil de la série Hugi, design compact idéal pour une utilisation domestique. |
FOIRE AUX QUESTIONS - SDM 60 Hugi SCOTT
Questions des utilisateurs sur SDM 60 Hugi SCOTT
0 question sur cet appareil. Repondez a celles que vous connaissez ou posez la votre.
Poser une nouvelle question sur cet appareil
Téléchargez la notice de votre Lecteur/enregistreur de cd au format PDF gratuitement ! Retrouvez votre notice SDM 60 Hugi - SCOTT et reprennez votre appareil électronique en main. Sur cette page sont publiés tous les documents nécessaires à l'utilisation de votre appareil SDM 60 Hugi de la marque SCOTT.
MODE D'EMPLOI SDM 60 Hugi SCOTT
GB
SCOTT®
SDM60
PORTABLE MP3/USB BOOM BOX
Instruction Manual
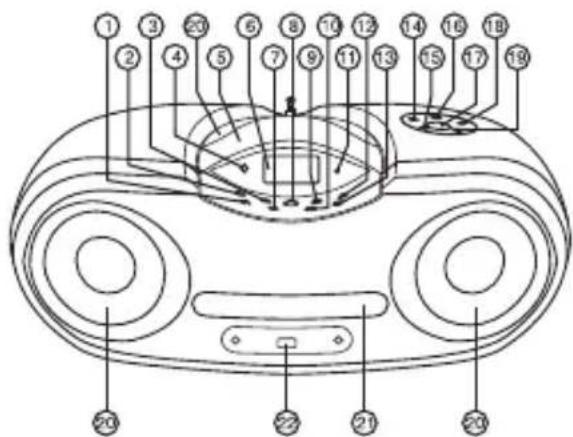

CONTROLS
- STOP ■/BAND/CLEAR BUTTON
- ID 3/DISPLAY BUTTON
- B-SKIP/DOWN BUTTON
- REMOTE SENSOR INDICATOR
- CARRYING HANDLE
- LCD DISPLAY
- MONO/STEREO/PLAY MODE BUTTON
- CD PLAY / PAUSE ▶
-
F-SKIP / UP BUTTON
-
MEMORY/CLOCK ADJ. BUTTON
-
STANDBY INDICATOR
- M-UP/FOLDER UP BUTTON
- TIMER/SLEEP BUTTON
REMOTE CONTROL UNIT
- STANDBY BUTTON
- OPEN/CLOSE BUTTON
- FUNCTION BUTTON
- PRESET EQ BUTTON
- VOLUME CONTROL +
- VOLUME CONTROL -
- SPEAKER
- CD DOOR
- USB PORT
- TELESCOPIC ANTENNA
- BATTERY COMPARTMENT
- PHONES JACK
- AC SOCKET
- AUX IN JACK

WARNING
CLASS 1 LASER PRODUCT
CLASS 1 LASER PRODUCT APPAREIL Á LASER DE CLASSE 1 PRODUCTO LASER DE CLASE 1
CAUTION INVISIBLE LASER RADIATION WHEN OPEN AND INTERLOCKS DEFEATED. AVOID EXPOSURE TO BEAM

This product contains a low power laser device.
Warning: Do not touch the lens. DO NOT THROW BATTERIES IN FIRE!
PRECAUTIONS
Follow the advice below for safe and appropriate operations.
ON PLACEMENT
- Do not use the unit in places which are extremely hot, cold, dusty, or humid.
- Place the unit on a flat and even surface.
- Do not restrict the air flow of the unit by placing it in a place with poor air flow, by covering it with a cloth, or by placing it on a carpet.
ON SAFETY
- When connecting and disconnecting the AC cord, grip the plug and not the cord itself. Pulling the cord may damage it and create hazard.
- When you are not going to use the unit for a long period of time, disconnect the AC power cord.
ON AC VOLTAGE
• Before use, check that the rated voltage of your unit matches your local voltage.
ON CONDENSATION
- When left in a heated room where it is warm and damp, water droplets or condensation may form inside the CD player.
- When there is condensation inside the unit, the unit may not function normally.
- Let it stand for 1 to 2 hours before turning the power on, or gradually heat the room up and dry the unit before use.
* Ensure a minimum distance of 5 cm around the apparatus for sufficient ventilation.
* Ensure that the ventilation is not impeded by covering the ventilation openings with items, such as newspapers, table-cloths, curtains, etc..
* Do not place naked flame sources, such as lighted candles on the apparatus.
* Take attention to the environmental aspects of battery disposal.
* Use the apparatus only in moderate climates (not in tropical climates).
* Do not expose the apparatus to dripping or splashing.
* Do not place objects filled with liquids, such as vases, on the apparatus.
- Mains plug is used as the disconnect device. It shall remain readily operable and should not be obstructed during intended use. To be completely disconnected the apparatus from supply mains, the mains plug of the apparatus shall be disconnected from the mains socket outlet completely.
Should any trouble occur, disconnect the AC power cord and refer servicing to qualified personnel.

The lightening flash with arrowhead symbol within the triangle is a warning alerting the user of "dangerous voltage" inside the unit.
CAUTION
RISK OF ELECTRIC SHOCK DO NOT OPEN
ATTENTION : To reduce the risk of electric shock, do not remove the cover. There are no user serviceable parts inside the unit. Refer all servicing to qualified personnel.

The exclamation point within the triangle is a warning sign alerting the user of important instructions accompanying the product.
In case of misfunction due to electrostatic discharge the apparatus has to be reset by disconnecting it from mains supply.
THE MARKING PLATE IS LOCATED AT THE BACK OF ENCLOSURE OF THE APPARATUS.
POWER SUPPLY
USING HOUSE CURRENT
Before use, check that the rated voltage of your unit matches your local voltage.
USING BATTERIES
Disconnect the AC power cord from the AC inlet of the unit. Battery power is cut automatically by the cord while it is connected.

When the volume decrease, or the sound distorts, replace all of the batteries with new ones.
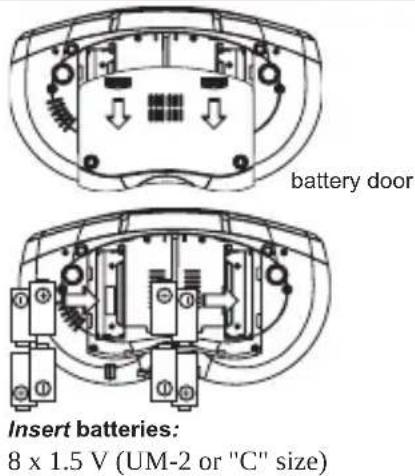
8 x 1.5 V (UM-2 or "C" size)
POWER ON/OFF AND FUNCTION CHANGE
- Power is on/off by pressing STANDBY button.
- The function is changed cyclically
□ by [pushing]FUNCTION button:
CD



STANDBY
AUX IN
Connect an external LINE OUT to AUX. IN socket at the back of the unit. Press the FUNCTION button and select AUX mode. (AUX IN CABLE NOT INCLUDED)


(Plug other end into external source)
ADJUSTING THE SOUND
TO ADJUST THE VOLUME

Press VOLUME +/- to adjust volume level. Volume level is shown on the display.
FOR PRIVATE LISTENING
VOL.+
VOL.-
Plug-inheadphones(ø3.5mmstereomini-plug)tothePHONESjack.
When headphones are plugged in, the speakers are automatically disconnected.
PRE-SET EQ

PRESET EQ
Preset EQ : FLAT, JAZZ, ROCK, CLASSIC, POP.
Press PRESET EQUALIZER button to select your preferred sound, preset mode is shown on the display.
MUTE ON/OFF
MUTE

The mute on/off is changed cyclically by pressing MUTE button.
The "mute" mark is on during mute is on.
The mute on is cancelled in case as shown below.
a. The power is off/on
b. The Volume is adjusted by the VOL +/- button.
CLOCK ADJUSTMENT
- The clock is displayed on CD display at power off condition.
- Press the MEMORY CLOCK-ADJ. button, hour of clock flash.
- Press the ▶▶▶F-SKIP/UP or ◀◀◀B-SKIP/DOWN to adjust hour digit.
- Press the MEMORY CLOCK-ADJ. button, the minute digit flash.
- Press the ▶▶▶F-SKIP/UP or ◀◀◀B-SKIP/DOWN to adjust minute digit.
- Press the MEMORY CLOCK-ADJ. button again, the correct time is shown on display.
MEMORY/CLOCK-ADJ.


LISTENING TO THE RADIO
- Press the FUNCTION button and select Radio mode.
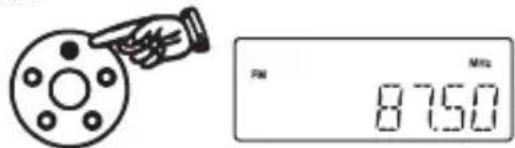
- Turn in a station by pressing the UP/ DOWN button.

- The FM stereo indicator (Stereo) will appear on the LCD display panel when an FM Stereo Broadcast is received.

- Select AM or FM by pressing the STOP/BAND/CLEAR button.

- Release the button as soon as the frequency starts to change. The tuner will search up or down the selected band and stop at the next receivable station. When scanning stops, the frequency of the received station will be displayed.

RADIO MEMORY FUNCTION
Maximum 20 preset stations can be memorized, each in FM and AM.
- Press the "▶▶▶ F-SKIP/UP or ◀◀◀ B-SKIP/DOWN" button to selected the desired frequency.
- Press the "MEMORY" button.
- Press the "M-UP/FOLDER UP" on radio or on remote control to select the memory number.
- Press the "MEMORY" button again to confirm the selection.
- Press the "M-UP/FOLDER UP" button to read the desired frequency.
FOR BETTER RECEPTION
FM AM

FM : Extend and change position of the antenna.
MEMORY / CLOCK-ADJ.


AM : Rotate the unit from side to side. After Listening: Press the STANDBY button off.
COMPACT DISC PLAYBACK
- Press the FUNCTION button and select CD mode.
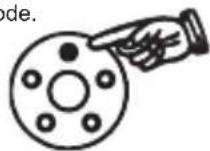

- Press OPEN/CLOSE button to open CD door.
CD display


-
Insert a disc with the label side facing up.
-
Press OPEN/CLOSE button to close the CD door.
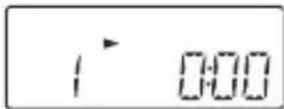
For CD: Total number of tracks and time will be shown on the display.
For MP3: Total number of folder and tracks will be shown on the display.
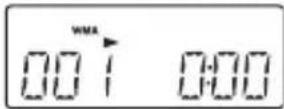
For WMA: Total number of folder and tracks will be shown on the display.
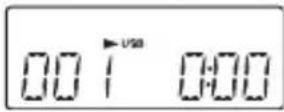
For USB: Total number of folder and tracks will be shown on the display.

- Press the PLAY/PAUSE ▶ button.
Track number "1" & the symbol " ▶" will be shown during normal compact disc playback. Track number "001", the symbol " ▶" & "MP3" will be shown during MP3 playback. Track number "001", the symbol " ▶" & "WMA" will be shown during WMA playback. Track number "001", the symbol " ▶" & "USB" will be shown during USB playback.

CD display
MP3 display

WMA display
USB display
TO INTERRUPT PLAYBACK
Press the PLAY/PAUSE ▶ button and the symbol
" ▶ " and current time will flash. Press the button again to resume playback.
CD display
MP3 display
WMA display
USB display

TO STOP PLAYBACK
Press the STOP/BAND/CLEAR button.
For CD: Total number of track and time will be shown.
For MP3: Total number of folder and track will be shown.
For WMA: Total number of folder and track will be shown.
For USB: Total number of folder and track will be shown.
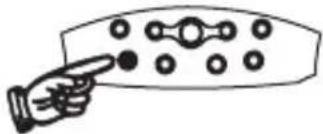
TO SKIP TO THE BEGINNING OF A TRACK
- Press either one of the |◀◀▶▶| skip buttons according to the desired skip direction.
- Play/back resumes from the selected track.
- When the ◀ button is pressed once during play, the previous track starts again.
- When the button is pressed once during play, the next track plays.
SEARCHING FOR A PASSAGE WITHIN A TRACK
- Keep the ◀◀◀ or ▶▶▶ button pressed during playback, and release the button as soon as you recognise the desired passage.
Then normal CD playback will resume from this point.

REPEAT, REPEAT FOLDER AND MIX PLAYBACK
Press PLAY MODE button during stop mode. CD plays with a single track repeat, all tracks repeat or randomly.
FOR NORMAL COMPACT DISC PLAYBACK
Mode sequence REPEAT >> REPEAT ALL >> RANDOM >> REPEAT OFF.
During Repeat 1 mode, display shows
During Repeat 2 mode, display shows
During Mix mode, display shows
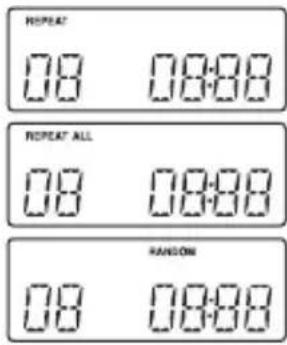
CD display
FOR MP3/WMA/USB PLAYBACK
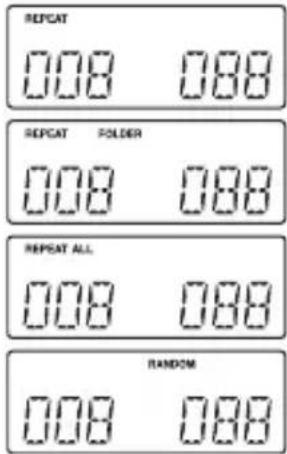
Mode sequence REPEAT >> REPEAT FOLDER > REPEAT ALL >> RANDOM >> REPEAT OFF.
During Repeat 1 mode, display shows
During Repeat 2 mode, display shows
During Repeat 3 mode, display shows
During Mix mode, display shows
MP3/WMA/USB display
Note on CD-R/RW discs
- Because of non-standardized format definition/
production of CD-R/RW, playback quality and performance are not guaranteed. - Manufacturer is not responsible for the playability of CD-R/RW due to recording conditions, such as PC performance, writing software, media ability, etc.
- Do not attach a seal or label to either side of the CD-R/RW disc. It may cause a malfunction.
- It is recommended to record only audio files on CD-R/RW discs for easy reading.
FOLDER UP / DOWN
- Press FOLDER UP/DOWN to select desired folder.
- Press UP/DOWN to select desired songs.
- Press PLAY/PAUSE button to start playing. The word "MP3/WMA/USB" will show on display.
Press FOLDER UP/DOWN to select desired folder. Press UP/DOWN to select the desire track. The operations of buttons of PLAY/PAUSE, UP/DOWN and STOP/BAND/CLEAR are the same as CD disc.


+10 / -10 BUTTON
During playback, press 10+ or 10- button to select the next or previous 10 tracks.

USB OPERATION
- Connect USB disk or MP3 player into the USB port.
- Press the FUNCTION button and select USB mode.
- Press PLAY/PAUSE button to start playback.
note: USB connector does not support connection with USB extension cable and it is not designed for communication with computer directly.
Manufacturer is not responsible for the playability of USB disk or MP3 player due to recording condition, capacity, interface compatibility, etc.
Due to different formats, some USB disks or MP3 players may take longer time to be read.
USB display

ID 3 DISPLAY
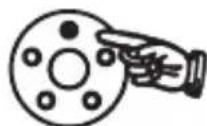
- Song name, Singer name and album name can be displayed cyclically by pressing ID3 button during playing MP3.
- Title-song name → Artist-singer name → Album-Album name
- Press ID3 again to cancel ID3 display.

PROGRAM PLAYBACK
FOR NORMAL COMPACT DISC PLAYBACK
Programmed playback enables tracks on a disc to be played in the desired order. Up to 60 tracks can be programmed.
-
Press the "MEMORY" button.
-
Press the |◀◀▶▶| skip buttons to select the desired track number.
-
Press "MEMORY" button again to memorize the track.
-
Repeat steps 2 and 3 until all desired tracks are programmed.
-
Press the "PLAY/PAUSE" button to start. "MEMORY" is shown on the CD display.
-
Press "STOP" button to stop programmed playback.
-
Press "MEMORY" and "PLAY/PAUSE" buttons to resume programmed playback.
-
Press "STOP/BAND/CLEAR" button to clear the programmed memory.
CD display

FOR MP3/WMA/USB PLAYBACK
Programmed playback enables folders/albums or tracks on a disc to be played in the desired order. Up to 60 folders/albums or tracks can be programmed.
-
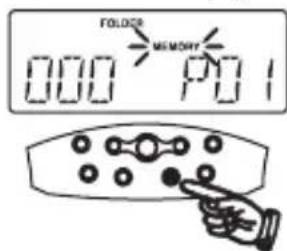
Press the "MEMORY" button.
-
Press the M-UP/FOLDER UP button to select the desired folder.
-
Press "MEMORY" button again to memorize the folder.
-
Press the |◀◀▶▶| skip buttons to select the desired track number.
-
Press "MEMORY" button again to memorize the track.
-
Repeat steps 2 and 5 until all desired tracks are programmed.
-
Press the "PLAY/PAUSE" button to start. "MEMORY" is shown on the CD display.
-
Press "STOP" button to stop programmed playback.
-
Press "MEMORY" and "PLAY/PAUSE" buttons to resume programmed playback.
-
Press "STOP/BAND/CLEAR" button to clear the programmed memory.
Note : Programming can only be made when the player is in stop mode.
MP3/WMA/USB display
TO SET SLEEP FUNCTION
-
If you want to fall asleep to music, press and hold SLEEP button.
-
You may adjust the radio or CD player's sleep function to play from 90, 80, 70 up to 10 minutes of music before shutting itself off automatically.

CD display


TIMER SETTING
-
Press the STANDBY button to put the machine in the standby mode.
-
Press and hold the "TIMER/SLEEP" button, "ON TIME" will display, "TIMER" and the hour digits flash. Press the |◀◀▶▶| skip buttons to set the hour. Press the "TIMER/SLEEP" button to confirm, the minutes digits flash, press the |◀◀▶▶| skip buttons to set the minutes. Press the "TIMER/SLEEP" button to confirm and "OFF TIME" will display. Follow same procedure of setting "ON TIME" to set the "OFF TIME".
-
After setting the "OFF TIME", you can also select the FUNCTION (CD, USB, TUNER, AUX) for TIMER by pressing . Press the "TIMER/SLEEP" to confirm.
-
Then, press |◀◀▶▶| skip buttons to select the volume of the sound, press the "TIMER/SLEEP" to confirm.

MAINTENANCE
CLEANING CD
If the CD skips or will not play, the disc may need cleaning. Before playing, wipe the disc from the centre out with a cleaning cloth. After playing, store the disc in its case.

CLEANING THE UNIT
Do not use volatile chemicals on this unit. Clean by lightly wiping with a soft cloth.
IMPORTANT NOTE
If an abnormal display indication or an operating problem occurs, disconnect the AC power cord and remove the batteries. Wait at least 5 seconds, then reconnect the AC power cord or reinstall the batteries.
WARNING
Should the CD door be opened before the reading of the CD completed, a jamming noise may occur. This is resolved by closing the CD door.
SPECIFICATIONS
CD SECTION
Channels: 2 channels
S / N ratio: 60 dB
Wow & Flutter: undetectable
Sampling frequency: 44.1 kHz 8 x over sampling
Quantization: 16 bits DA converter
Pick up light source: Semi - conductor laser
Pick up wave length 790 nm
RADIO SECTION
Tuning ranges: FM 87.5 - 108 MHz
AM 522 - 1620 kHz
Antennas: AM Built - in ferrite bar
FM Rod antenna
GENERAL
Output power: 2 W + 2 W
Power consumption: 13 WATTS
Speaker: 4" 8 OHM
Phones jack: 3.5MM
Power source: AC : 230V \~ 50Hz
DC : 12V 8 x 1.5V (UM2 / "C" SIZE)
Dimensions: 420 (L) x 238 (D) x 174 (H)mm
Weight 3.15 Kgs
Due to continuing improvement, the features and the design are subject to change without notice.
Where to place the item :
Today's furniture is coated with a wide variety of lacquers and synthetic-coatings that are treated with an extensive range of cleaning products. Therefore, the possibility that some of these substances contain components that react adversely to the rubber feet of the item and soften them, cannot be completely excluded. The rubber feet of the appliance can cause discoloring to furniture surfaces. If necessary, place the appliance on a non-slide surface.
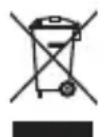
If at any time in the future you should need to dispose of this product please note that Waste electrical products should not be disposed of with household waste. Please recycle where facilities exist. Check with your Local Authority or retailer for recycling advice. (Waste Electrical and Electronic Equipment Directive)


- GB
- SCOTT®
- SDM60
- PORTABLE MP3/USB BOOM BOX
- INSTRUCTION MANUAL
- CONTROLS
- WARNING
- CLASS 1 LASER PRODUCT
- PRECAUTIONS
- ON PLACEMENT
- ON SAFETY
- ON AC VOLTAGE
- ON CONDENSATION
- CAUTION
- POWER SUPPLY
- USING HOUSE CURRENT
- USING BATTERIES
- POWER ON/OFF AND FUNCTION CHANGE
- AUX IN
- ADJUSTING THE SOUND
- TO ADJUST THE VOLUME
- PRE-SET EQ
- MUTE ON/OFF
- CLOCK ADJUSTMENT
- LISTENING TO THE RADIO
- RADIO MEMORY FUNCTION
- FOR BETTER RECEPTION
- COMPACT DISC PLAYBACK
- TO INTERRUPT PLAYBACK
- TO STOP PLAYBACK
- TO SKIP TO THE BEGINNING OF A TRACK
- SEARCHING FOR A PASSAGE WITHIN A TRACK
- REPEAT, REPEAT FOLDER AND MIX PLAYBACK
- FOR NORMAL COMPACT DISC PLAYBACK
- FOR MP3/WMA/USB PLAYBACK
- FOLDER UP / DOWN
- 10 / -10 BUTTON
- USB OPERATION
- ID 3 DISPLAY
- PROGRAM PLAYBACK
- TO SET SLEEP FUNCTION
- TIMER SETTING
- MAINTENANCE
- CLEANING CD
- CLEANING THE UNIT
- IMPORTANT NOTE
- SPECIFICATIONS
- CD SECTION
- RADIO SECTION
- GENERAL
Marque : SCOTT
Modèle : SDM 60 Hugi
Catégorie : Lecteur/enregistreur de cd