
VC-F1402 - Aspirateur AKIRA - Notice d'utilisation et mode d'emploi gratuit
Retrouvez gratuitement la notice de l'appareil VC-F1402 AKIRA au format PDF.


| Marque | AKIRA |
| Modele | VC-F1402 |
| Type de produit | Aspirateur traineau |
| Puissance nominale | 1400 W |
| Capacite du reservoir | 2 L |
| Poids | 4,5 kg |
| Dimensions (L x l x h) | 35 x 25 x 30 cm |
| Alimentation | Secteur 220-240 V |
| Longueur du cordon | 5 m |
| Rayon d action | 8 m |
| Type de filtration | Filtre HEPA lavable |
| Niveau sonore | 78 dB |
| Accessoires inclus | Suceur meubles, brosse parquet, suceur fentes |
| Fonction soufflerie | Non |
| Entretien | Nettoyer le filtre regulierement |
| Securite | Arret automatique en cas de surchauffe |
| Pieces detachees et reparabilite | Disponibles aupres du SAV |
| Garantie | 2 ans |
FOIRE AUX QUESTIONS - VC-F1402 AKIRA
Questions des utilisateurs sur VC-F1402 AKIRA
0 question sur cet appareil. Repondez a celles que vous connaissez ou posez la votre.
Poser une nouvelle question sur cet appareil
Téléchargez la notice de votre Aspirateur au format PDF gratuitement ! Retrouvez votre notice VC-F1402 - AKIRA et reprennez votre appareil électronique en main. Sur cette page sont publiés tous les documents nécessaires à l'utilisation de votre appareil VC-F1402 de la marque AKIRA.
MODE D'EMPLOI VC-F1402 AKIRA
AKIRA makes life better
Vacuum Cleaner Service Manual
MODEL: VC-F1402
CONTENTS
IMPORTANT SAFEGUARDS ....4
PRECAUTIONARY MEASURES 5
IMPORTANT SAFETY INSTRUCTIONS....6
DESCRIPTION PRODUCT 8
ASSEMBLY VACUUM CLEANER....9
INTRODUCTION FOR USE....10
OPERATIONS....11
CLEANING TOOLS 12
CLEANING AND MAINTENANCE....13
DUST DISPOSAL....14
SPECIFICATION....15
TROUBLESHOOTING....16
EXPLODED VIEW....18
PART LIST....19
CIRCUIT DIAGRAM....21
IMPORTANT SAFEGUARDS
When using an electrical appliance, basic safety precautions should always be observed, including the following.
READ ALL INSTRUCTIONS BEFORE USING YOUR TURBO VACUUM.
WARNING: To reduce the risk of fire, electrical shock, or injury.
-
Do not leave the appliance when plugged in. Unplug the cord from the outlet when not in use and before servicing.
-
Do not use outdoors or on wet surfaces.
-
Do not allow to be used as a toy. Close attention is necessary when used by or near children.
-
Use only as described in this manual. Use only manufacturer's recommended attachments.
-
Do not use with damaged cord or plug. Do not use vacuum if it has been dropped, damaged, left outdoors, or dropped in water. Return it to an authorized service center.
-
Do not pull or carry by cord, use cord as a handle, close a door on cord, or pull cord around sharp edges or corners.
-
Do not run appliance over cord. Keep cord away from heated surfaces.
-
Do not unplug by pulling on cord. Keep cord away from heated surfaces.
-
Do not unplug by pulling on cord. To unplug, grasp the plug, not the cord.
-
Do not handle plug or appliance with wet hands.
-
Do not put any object into openings. Do not block the openings that may reduce the airflow.
-
Keep hair, loose clothing, fingers, and all parts of body away from openings and moving parts.
-
Turn off the control before unplugging.
-
Use extra care when cleaning on stairs.
-
Do not use to pick up flammable or combustible such as gasoline or use in areas where they may be present.
-
Look on your vacuum and follow all labels and marking instructions.
-
Use only extension cords UL rated 15 amperes. Extension cords rated for less amperage may overheat. Care should be taken to arrange the cord so that the cord cannot be pulled or tripped over.
-
Keep end of hose, wands and other openings away from your face and body.
-
Do not use the vacuum cleaner without dust cup filter in place.
-
Always unplug the appliance before connecting or disconnecting vacuum hose.
-
Store the vacuum indoors. Put the vacuum away after use to prevent tripping accidents.
-
Use improper voltage may result in damage to the motor and possible injury to the user. Correct voltage is listed on the rating label.
-
Use only on dry, indoor surfaces.
-
Do not use for any purpose other than described in this user guide.
PRECAUTIONARY MEASURES
If the opening that sucks in the air, the suction pipe or the telescopic wand stick on pipe are blocked, you should switch off the vacuum cleaner at once. First clear the blocked substance before you attempt to start the vacuum cleaner again.
-
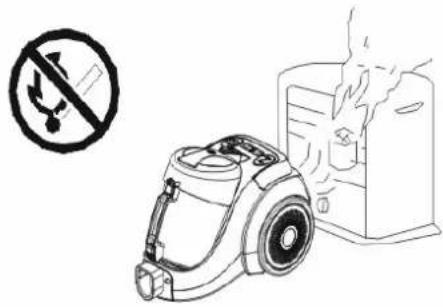
Do not operate the vacuum cleaner too close to heaters and like radiators, cigarette butts etc.
-
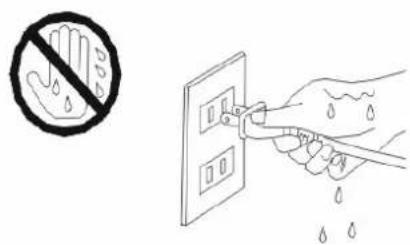
Before you insert the plug into the wall contact, make sure your hand is dry.
-
Before you start using the vacuum cleaner, please remove large or sharp objects from the floor in order to prevent the vacuum is damaged.
-
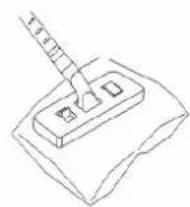
When you want to pull the plug from the wall contact, please do this at the plug itself and not by means of the electrical cable.

natural_image
Line drawing of a hand holding a pen above a rectangular object (no text or symbols)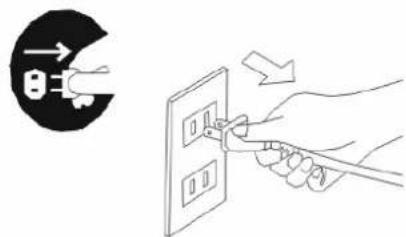
This vacuum cleaner is equipped with a plug and a cable which rolls up automatically. If anything gets damaged, both the plug and the cable must be repaired by a qualified repairman or electrician.
IMPORTANT SAFETY INSTRUCTION
If the supply cord is damaged, it must be replaced by the manufacturer or its service agent or a similarly qualified person in order to avoid a hazard. For household use only.
 | Do not for absorbing detergent, kerosene,glass,needle,cigarette ash,water,match etc. |  |
| Forbid | ||
 | The appliance should not be exposed to heat. | 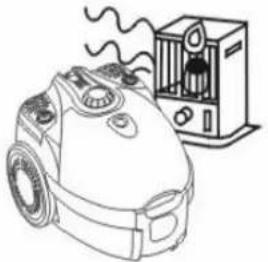 |
| Forbid | ||
 | Do not vacuum any moist or liq substances.Never immerse the appliance in water. | 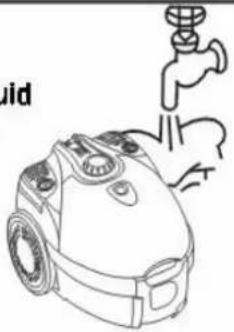 |
| Forbid | ||
 | Unplug the appliance form the mains supply socket after use and before every cleaning.Pull the mains cable,In order to disconnect the appliance from the mains. |  |
| Forbid | ||
| Forbid | Do not put any object into opening Do not use with any opening block Keep the appliance free of dust, hair etc. |  |
| Forbid | Do not use the vacuum cleaner without dust container or dust filter in place. |  |
| Forbid | Do not vacuum any flour, cement eti in order to avoid the overloads. |  |
| Forbid | The appliance should only be cleaned with a dry or damp cloth,It should never be immersed in water. Do not use any solvents for cleaning. | 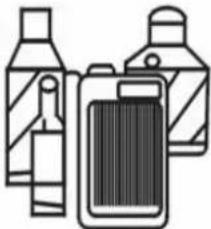 |
DESCRIPTION PRODUCT

ASSEMBLING VACUMM CLEANER
Connect the hose with the vacuum cleaner
Insert flexible hose Into the air- intake: Press the knob until it clicks into the position.
Remove the flexible hose: Unplug the appliance and press the knob at the end of the hose. Remove it from the air-intake opening.

natural_image
Line drawing of a vacuum cleaner with attached hose (no text or symbols)Fit the extension tube to the angled pipe

Fit the floor brush to the extension tube

INTRODUCTIONS FOR USE
Before using appliance, unwind a sufficient length of cable and insert the plug into the power socket. A yellow mark on the power cable shows the ideal cable length. Don't expend the cable beyond the red mark.
- Insert the power plug into the socket. Press the ON/OFF button to open the appliance.

- To rewind the power cord, press the rewind button with one hand and guide the cable with the other hand to ensure that it does not whip causing damage.

- For DV-3288E, slide the Electronic Power Switch to control the suction of the cleaner.

OPERATIONS
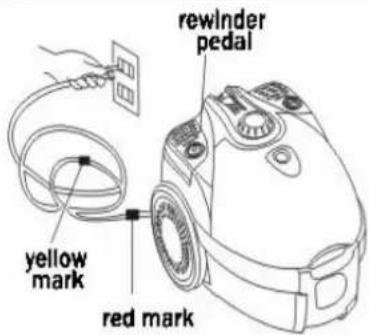 | ● A yellow mark on the power cord shows the ideal cable length. Do not extend the cable beyond the red mark. ● To rewind the power cord ,press the rewinder pedal with one hand and guide the cord with the other hand. |
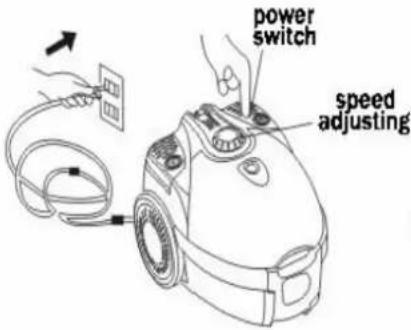 | ● Press the power switch to switch the appliance on. ● Use the electronic speed adjusting to control the suction power of the cleaner. |
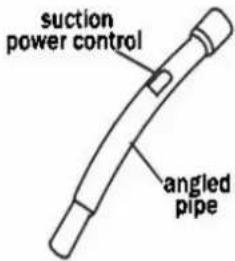 | ● The suction power can be adjusted with the sliding control on the angled pipe too. |
 | Put the extension tube into the fixing hook of the appliance when you have a break. Caution: Do not transfer the appliance when the fixing hook is used. |
CLEANING TOOLS
 | Crevice tool:For cleaning corner edge and draws etc,where is difficult to reach, such as gapsand the keyboard, bookshelf and windows. |
 | Convertible brush:Turn the crevice tool 90° and attach it onthe extension tube for cleaning bed, sofa,couch etc. |
Use of the selector on the floor brush:Bristles extended for hard floors.Bristles retracted for carpets.  | |
| If the angled pipe has blockage,insert it into the air-intake andswitch the appliance on. |  |
CLEANING AND MAINTENANCE
Empty the dust container:
1) After removing the flexible hose, press the cover lock button and open the dust container
2) Remove the dust filter from the container.
3) Replace the dust filter in the container
4) Close the dust container until it is locked in the position.
Change filter
motor filter

natural_image
Technical line drawing of a mechanical device with internal components (no text or symbols)Replace the motor filter: Open the dust container and remove the motor filter. Fix the new filter in the position.


natural_image
Technical line drawing of a vacuum cleaner with internal components and a separate panel (no text or symbols)Replace the outlet filter: Detach the grille by pulling firmly away from the appliance, remove the outlet filter and replace the new filter. Fix the grille again.
Clean the filter

natural_image
Two simple line drawings: one showing a faucet with water droplets, the other showing a cleaning board with raindrops (no text or symbols)Clean the filter in water and allow them to dry completely before replace them.
Clean the cloth dustbag
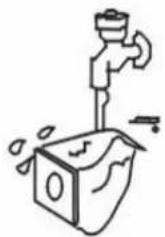
Clean the cloth dustbag with water and a little detergent(if needed). Allow the filter to dry completely before replacing.
DUST DISPOSAL
After the unit is stop, disconnect the host and proceed as follows:
Replace dust bag
When the bag is full of dust, the bag should be replaced. Open the front cover and change the paper bag for new one. If the cloth bag is used, clean and then put it back into the machine.

Clean Filter
When the motor filter is dirty, remove the filter and wash carefully in luke warm water. Allow the filter to dry completely before replace it. Don't clean with washing machine. Don't dry it with hair dryer.
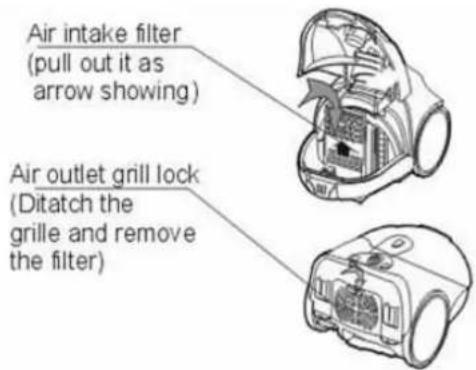
Cleaning Filter
*A) severely soiled or clogged filter should be thoroughly washed with fresh tepid water.
*B) neutral detergent could be used if required.
- Washing.
2.Drying
Note
Never insert the cloth filter into the body of the unit unless it is completely dry.
Never wash the filter with boiling water or expose it to an open flame to dry.
SPECIFICATION
| ITEM | SPECIFICATION |
| Power | 1200W |
| Voltage | 220-240V~ |
| Frequency | 50/60Hz |
TROUBLESHOOTING
Before you contact our service center, please check the following points:
| Problem | Possible reason | Advice |
| Motor does not start | - Power cord not firmly plugged into outlet.- Outlet damaged.- Cleaner not switched on. | - Plug unit firmly.- Check the outlet.- Switch on the appliance. |
| Suction power is weaker | - Unit clogged.- Dust filter needs cleaning.- Dust container not in position.- Filter blocked. | - Remove the blockage.- Clean the dust filter.- Close the dust container.- Clean the filter. |
| The wire can not be winded completely | The wire may diverge the wire wheel. | Draw the wire a little then rewind. |
| The wire can not be draw out | The wire may wid disorder. | Press the rewinder button and try again. |
| Speed adjusting does not work | Appliance is defective. | Repair the appliance (only specialist). |
| Power cord winds unwanted back | Rewinder mechanisms is defective. | Repair the appliance (only specialist). |
| The dust container can not be closed | Dust filter is not in the position. | Fix the dust filter and try again. |
Warning:
If the supply cord is damaged, it must be replaced by the manufacturer or its service agent of a similarly qualified person in order to avoid a hazard.
| PROBLEM | POSSIBLE | REASON |
| Motor not working | The plug is not tight to the socket | Tight the plug |
| Weak absorption | The filter is blocked. There is much dust in the bag. There is something in the flexible hose or in the connect. | Clean the filter. Replace the bag and simply get rid of it. |
| Wire not winding | Wire has separated from the wire-reel | Press wire-winding button |
| Appliance heats Little heating is normal NIL | ||
| Breakage of the flexible hose | If there is any breakage on both ends of flexible hose. | Change the hose |
ADVISE
EXPLODED VIEW

PART LIST
| NO. | Component Quantity |
| 1 | Speed adjusting 1 |
| 2 | Rear cover 1 |
| 3 | Reel button |
| 4 | Speed adjusting plate |
| 5 | Button spring |
| 6 | PCB plate |
| 7 | Front cover |
| 8 | Connector for hose |
| 9 | Connector button |
| 10 | Connector button plate |
| 11 | Connector spring |
| 12 | Cord reel group |
| 13 | Dust box seal |
| 14 | Dust bag frame |
| 15 | Dust bag frame spring |
| 16 | Air inlet filter |
| 17 | Air inlet support |
| 18 | Dust bag |
| 19 | Connector seal |
| 20 | Base body plate |
| NO. | Component Quantity | |
| 21 | Base Body 1 | |
| 22 | Turn wheel stand 1 | |
| 23 | Turn wheel | 1 |
| 24 | Turn wheel cover 1 | |
| 25 | Accessory fixer stand | 1 |
| 26 | Cord outlet window | 1 |
| 27 | Motor seal | 1 |
| 28 | Cord outlet axis | 1 |
| 29 | Cord outlet axis sleeve | 1 |
| 30 | Panel-big wheel | 1 |
| 31 | Big wheel | 1 |
| 32 | Motor | 1 |
| 33 | Air indicator body | 1 |
| 34 | Air indicator seal | 1 |
| 35 | Mark of air indicator | 1 |
| 36 | Air indicator spring | 1 |
| 37 | Fixation for motor | 1 |
| 38 | Dust of indicator | 1 |
| 39 | Switch | 1 |
| 40 | Motor cover | 1 |
| 41 | On/off switch button | 1 |
| 42 | Wire of seal | 1 |
| 43 | Air outlet filter | 1 |
| 44 | Air outlet plate | 1 |
CIRCUIT DIAGRAM
VL-602E circuit diagram
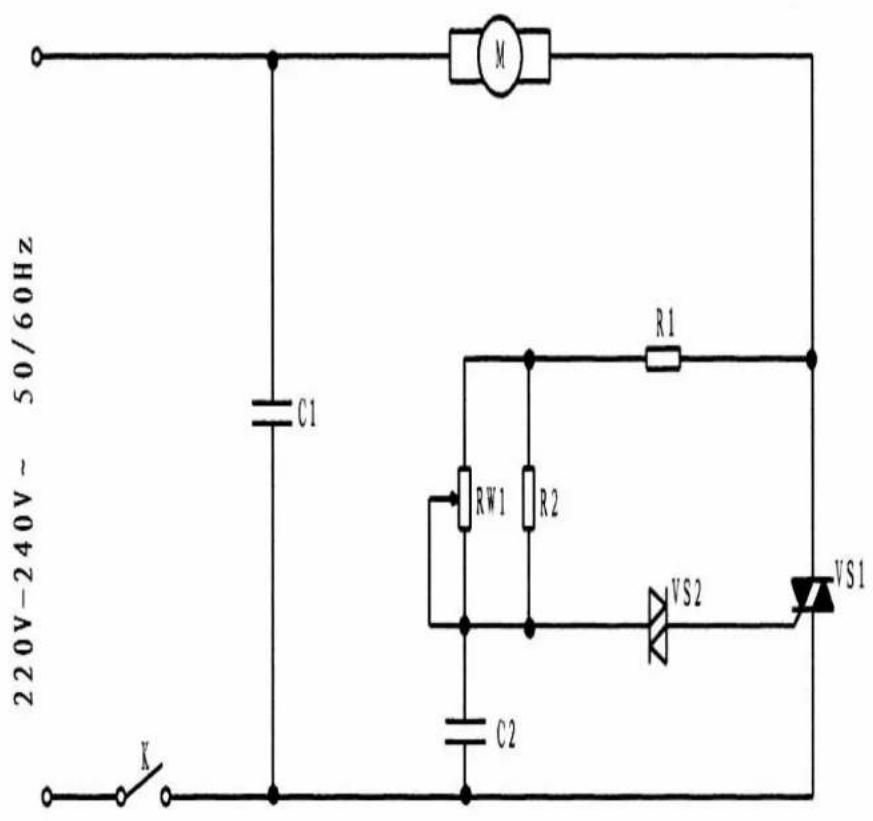
K: 250V - 7(7)A 10E3 T85 switch
C1: 0.15/0.22uF 275V\~X2
C2: 2J683J X2
R1: 510Ω 碳膜电阻 Resistance
R2: 510K-5M 碳膜电阻调整低档功率 Resistance
RW1: 470K 电位器 Potentiometer
VS1: 12A-16A600B 可控硅 Controllable silicon
VS2: DB3 触发二极管 Trigger diode
M: 220-240V\~1200W motor


- AKIRA makes life better
- Vacuum Cleaner Service Manual
- MODEL: VC-F1402
- CONTENTS
- IMPORTANT SAFEGUARDS
- READ ALL INSTRUCTIONS BEFORE USING YOUR TURBO VACUUM.
- PRECAUTIONARY MEASURES
- IMPORTANT SAFETY INSTRUCTION
- DESCRIPTION PRODUCT
- ASSEMBLING VACUMM CLEANER
- INTRODUCTIONS FOR USE
- OPERATIONS
- CLEANING TOOLS
- CLEANING AND MAINTENANCE
- Empty the dust container:
- DUST DISPOSAL
- TROUBLESHOOTING
- Warning:
- EXPLODED VIEW
- CIRCUIT DIAGRAM
Marque : AKIRA
Modèle : VC-F1402
Catégorie : Aspirateur