
Spectra5 (2003) - Voiture KIA - Notice d'utilisation et mode d'emploi gratuit
Retrouvez gratuitement la notice de l'appareil Spectra5 (2003) KIA au format PDF.


| Type de produit | Voiture compacte |
| Marque | Kia |
| Modèle | Spectra5 (2003) |
| Catégorie | Voiture |
| Dimensions (L x l x H) | 4500 mm x 1735 mm x 1480 mm |
| Empattement | 2610 mm |
| Poids à vide | Environ 1200 kg |
| Motorisation | Essence, 4 cylindres 1.6 L ou 2.0 L |
| Puissance maximale | 105 ch (1.6 L) / 138 ch (2.0 L) |
| Transmission | Manuelle 5 vitesses ou automatique 4 vitesses |
| Capacité du réservoir | 55 L |
| Consommation mixte | Environ 8,5 L/100 km |
| Émissions CO2 | Environ 200 g/km |
| Sécurité | Airbags frontaux, ABS, ceintures 3 points |
| Fonctions principales | Direction assistée, vitres électriques, climatisation, radio CD |
| Entretien recommandé | Vidange tous les 15 000 km, révisions tous les 30 000 km |
| Nettoyage | Lavage extérieur à l'eau savonneuse, intérieur aspiré |
| Pièces détachées | Disponibles en concession Kia et en ligne |
| Réparabilité | Indice de réparabilité élevé, pièces courantes |
| Garantie constructeur | 3 ans ou 100 000 km (à l'origine) |
FOIRE AUX QUESTIONS - Spectra5 (2003) KIA
Questions des utilisateurs sur Spectra5 (2003) KIA
0 question sur cet appareil. Repondez a celles que vous connaissez ou posez la votre.
Poser une nouvelle question sur cet appareil
Téléchargez la notice de votre Voiture au format PDF gratuitement ! Retrouvez votre notice Spectra5 (2003) - KIA et reprennez votre appareil électronique en main. Sur cette page sont publiés tous les documents nécessaires à l'utilisation de votre appareil Spectra5 (2003) de la marque KIA.
MODE D'EMPLOI Spectra5 (2003) KIA
KIA MOTORS
SPECTRA
2003 Owner's Manual
Now that you are the owner of a Kia Vehicle, you'll probably be asked a lot of questions about your vehicle and the company like "What is a Kia?", "Who is Kia?", "What does 'Kia' mean?".
Here are some answers. First, Kia is the oldest car company in Korea. It's a company that has thousands of employees focused on building high-quality vehicles at affordable prices.
The first syllable, Ki, in the word "Kia" means "to arise from to the world" or "to come up out of to the world." The second syllable, a, means "Asia." So, the word Kia, means "to arise from" or "to come up out of Asia to the world."
Enjoy your Vehicle!
FOREWORD
Thank you for choosing a Kia vehicle.
When you require service, remember that your authorized Kia dealer knows your vehicle best. Your dealer has factory-trained technicians, recommended special tools, genuine Kia replacement parts, and is dedicated to your complete satisfaction.
Because subsequent owners require this important information as well, this publication should remain with the vehicle if it is sold. This manual covers all 2002 Spectra models and will familiarize you with operational, maintenance and safety information about your new vehicle. It is supplemented by a Warranty and Consumer Information Manual that provides important information on all warranties regarding your vehicle: New Vehicle Limited Warranty, Powertrain Limited Warranty, Limited Warranty Covering Perforation from Corrosion, and Emission Control System Warranty. If your vehicle is equipped with an audio system, you will also have a Kia Integrated Audio Systems manual explaining its operation. We urge you to read these publications carefully and follow the recommendations to help assure enjoyable and safe operation of your new vehicle.
Kia offers a great variety of options, components and features for its various models.
Therefore, the equipment described in this manual, along with the various illustrations, may not all be applicable to your particular vehicle. The information and specifications included in this manual were accurate at the time of printing. Kia Motors reserves the right to discontinue or change specifications or design at any time without notice and without incurring any obligation. If you have questions, always check with your Kia Dealer.
We assure you of our continuing interest in your motoring pleasure and satisfaction in your Kia vehicle.
© 2002 Kia Canada, Inc.
All rights reserved. May not be reproduced or translated in whole or in part without the written consent of Kia Motors Corp. Printed in Korea
TABLE OF CONTENTS
| INTRODUCTION | 1 |
| YOUR VEHICLE AT A GLANCE | 2 |
| KNOWING YOUR VEHICLE | 3 |
| DRIVING YOUR VEHICLE | 4 |
| DRIVING TIPS | 5 |
| IN CASE OF AN EMERGENCY | 6 |
| MAINTENANCE | 7 |
| SPECIFICATIONS | 8 |
| INDEX | 9 |
INTRODUCTION
1
How To Use This Manual 1-2
Vehicle Break-In Process 1-3
HOW TO USE THIS MANUAL
We want to help you get the greatest possible driving pleasure from your vehicle. Your Owner's Manual can assist you in many ways. We strongly urge you to review the entire manual. However, in order to prevent death or injuries, at the very least, you must review the WARNING and CAUTION sections spread throughout the manual, which are easily recognized by their special markings indicated below.
Illustrations complement the words in this manual to help explain the best way to enjoy your vehicle. By reading your manual, you can find out about features, important safety information, and driving under various road conditions.
Layout of the manual is provided in the Table of Contents.
Index: A good place to start is the index; it has an alphabetical listing of all information in your manual.
Sections: This manual has nine sections plus an index. Each begins with a brief list of contents so you can tell at a glance if that section has the information you want.
You'll find various WARNINGS, CAUTIONs, and NOTICEs in this manual. These WARNINGS, CAUTIONs and NOTICEs were prepared to enhance your personal safety and continued satisfaction with your Kia vehicle. You should carefully read and follow ALL procedures and recommendations provided in these WARNINGS, CAUTIONs and NOTICEs.
WARNING
A WARNING indicates a situation in which serious bodily injury or death could result if the warning is ignored.
CAUTION
A CAUTION indicates a situation in which personal injury, perhaps severe, could result if the caution is ignored.
*NOTICE
A NOTICE indicates a situation in which damage to your vehicle could result if the notice is ignored.
INTRODUCTION
VEHICLE BREAK-IN PROCESS
No special break-in period is needed. By following a few simple precautions for the first 1000 km (600 miles) you may add to the performance, economy and life of your vehicle.
- Do not race the engine.
- Do not maintain a single speed for long periods of time, either fast or slow. Varying engine speeds are beneficial for proper engine break-in.
- Avoid hard stops, except in emergencies, to allow the brakes to seat properly.
- Avoid full-throttle starts.
YOUR VEHICLE AT A GLANCE
2
Interior and Exterior Overview 2-2
Instrument Panel Overview 2-3
INTERIOR AND EXTERIOR OVERVIEW
4 Door Coupe

BS402001
INSTRUMENT PANEL OVERVIEW

KNOWING YOUR VEHICLE KNOWING YOUR VEHICLE
3
Keys 3-2
Door Locks 3-3
Windows 3-5
Seats 3-8
Safety Belts....3-12
Airbags 3-31
Trunk Lid....3-38
Hood 3-40
Fuel Filler Door 3-42
Steering Wheel 3-43
Mirrors....3-44
Interior Lights 3-46
Cup Holders and Console Storage Compartment .... 3-47
KEYS

The key code number is stamped into the plate attached to the key set. If you should lose your keys, this number will enable an Authorized Kia Dealer to duplicate the keys easily. Remove the plate and store it in a safe place. Also, record the code number and keep it in a safe and handy place, but not in the vehicle.
WARNING - Ignition Key
Leaving children unattended in a vehicle with the ignition key is dangerous even if the key is not in the ignition. Children copy adults and they could place the key in the ignition. The ignition key would enable children to operate power windows or other controls, or even make the vehicle move which could result in serious bodily injury or even death. Never leave the keys in your vehicle with unsupervised children.
DOOR LOCKS

Manual Door Locks
Operating door locks - with key
- Both front doors can be locked and unlocked with the key.
- Turn the key toward front of vehicle to unlock and toward rear of vehicle to lock the door.
- Once a door is unlocked, it may be opened by lifting the door handle.
Two turn unlock system
At the driver's door, if you would unlock the other doors, you must turn the key to the left twice within 3 seconds, but all four doors and rear hatch can be locked by turn the key once.

Operating door locks - without key
To lock a door without the key, push the inside door lock button to the "LOCK" position and close the door.
*NOTICE
Always remove the ignition key, engage the parking brake, close all windows and lock all doors when leaving your vehicle unattended.

Operating door locks from Inside the vehicle
- To lock a door, push the door lock button to the "LOCK" position.
- To unlock a door, push the door lock button to the "UNLOCK" position.
• To open a door, pull the door handle towards the middle of your vehicle.
The door ajar warning light will illuminate if a door is not fully closed. Close the door completely and the light will go out.
WARNING
Never leave children or animals unattended in the vehicle. An enclosed vehicle can become extremely hot, causing death or severe injury to children or to animals who cannot escape the vehicle.
CAUTION
The doors should always be fully closed and locked while the vehicle is in motion to prevent accidental opening of the doors. Locked doors will also discourage potential intruders when the vehicle stops or slows.
Central Door Locks (optional)
When the driver's door is locked or unlocked with a key or with the door lock button, all the other doors will lock or unlock automatically. (When unlocking the driver door with a key, refer to "Two turn unlock system" on page 3-3.)

Rear Door Child Safety Lock
The child safety lock is provided to help prevent children from accidentally opening the rear doors from inside the vehicle.
- To lock a rear door so that it cannot be opened from the inside, push the child safety lock located on the rear edge of the door to the "LOCKED" position (toward rear of vehicle) before closing the door.
- To open a rear door while the child safety lock is engaged, push the door lock knob to the "UNLOCK" position (red mark is visible) then lift the outside door handle.
WARNING - Rear Door Locks If children accidentally open the rear doors while the vehicle is in motion, they could fall out and be seriously or fatally injured. To prevent children from opening the rear doors from the inside, the rear door safety locks should be used whenever children are in the vehicle.
WINDOWS
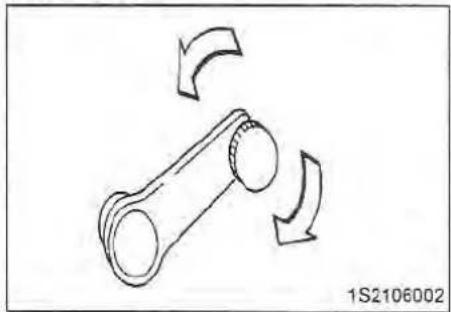
Manual Windows
Use the window crank to open and close each window.
Power Windows (If Equipped)
The ignition switch must be in the ON position for power windows to operate. Each door has a power window switch that controls that door's window.
However, the driver has a power window lock switch which can cancel the operation of the three passenger window switches.
*NOTICE
To prevent the power window fuse from malfunctioning and the power window system from being damaged, do not open or close more than two windows at the same time.

Driver's door power window controls
All windows can be opened or closed using the power window master control on the driver's door. To open a window, press down on the corresponding power window switch. To close a window, pull up on the corresponding power window switch.
Driver's window automatic-down window switch
The driver's window has an "Automatic-Down" feature. To activate the express-down feature, momentarily depress the front of the switch to the second detent position. To cancel this feature, pull up on the front of the switch and then release it.
Driver's power window switch
The driver's power window switch provides two (2) separate window-down functions.
- Depressing the driver's power window switch completely, automatically lowers (Automatic-Down) the driver's window. To cancel this function, pull up on the front of the switch and release it.
- Depressing the driver's power window switch partially (to the first detent) provides precise control of the window-down position.
To raise/close the driver's window, pull up on the power window switch.
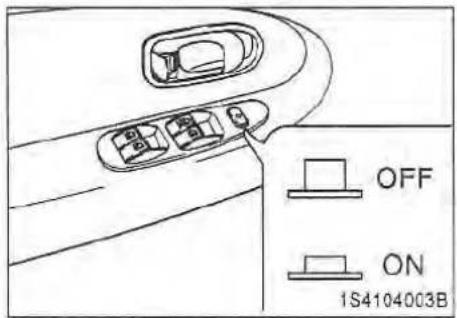
Power window lock switch feature
The driver can disable the power window switches on all passenger doors by depressing the power window lock switch located on the driver's door to ON. When the power window lock switch is ON, the driver's master control can not operate the passenger door power windows either.
Power window timer (If Equipped)
The power windows can be operated for approximately 30 seconds after the ignition key is turned to the ACC or LOCK position.
WARNING - Passengers
- Keep the power window lock switch on the driver's door in the ON (depressed) position except when someone is operating a passenger door window. Serious injury can result from unintentional window operation, especially to children.
• Always double check to make sure all arms, hands, and other obstructions are safely out of the way before closing a window.
*NOTICE
If you experience buffeting and pulsation (wind shock) with either side window open, you should open the opposite window slightly to reduce the condition.

Passenger door power window controls
To open a window, press the front portion of the switch down. To close a window, pull the front portion of the switch up.
WARNING - Passengers
Do not allow children to play with the power windows. They may seriously injure themselves or others.
SEATS
WARNING - Drivers
- Never adjust the driver's seat or seatback when the vehicle is moving. Doing so could cause loss of control, and serious personal injury or death.
- Do not allow packages or other objects to interfere with the normal position of a seat-back. These objects may prevent the seat-back from locking, which could result in serious injury or death in the event of a sudden stop or collision.
• Always drive and ride with your seatback upright and the lap portion of the safety belt snug and low across the hips. - If a child is riding in the front passenger seat, they should always ride with the seatback in the fully upright position.
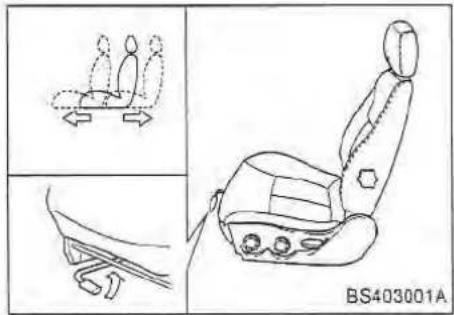
Front Seat Adjustment
Moving the front seat forward and backward
To move the seat forward or backward;
- Pull the seat slide adjustment lever under the front edge of the seat cushion up and hold it.
- Slide the seat to the position you desire.
- Release the lever and make sure the seat is locked in place.
CAUTION
Do not place anything under the front seats. Loose objects might interfere with the seat slide mechanism or possibly roll out from under the seat and interfere with the operation of the brake, clutch or accelerator foot pedals.
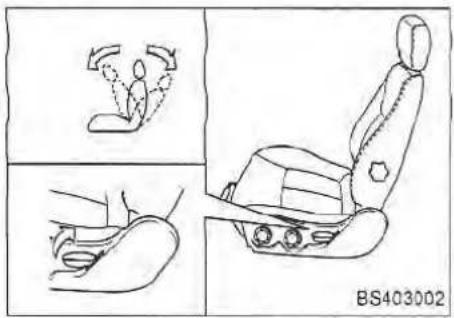
Adjusting the front seatback recliner
To recline the seatback;
- Lean forward slightly and lift up on the seatback recline lever located on the outside of the seat, toward the rear.
-
Lean back on the seat and adjust the back of the seat to the position you desire.
-
Release the lever and make sure the seatback is located in place. (The lever MUST return to its original position for the seatback to lock.)
WARNING - Passengers
To reduce the risk of sliding under the lap portion of the lap/shoulder belt, and potentially suffering serious personal injury or death in the event of a collision, do not use the front seatback in a reclined position while the vehicle is in motion. If a seat is reclined, the occupant's hip could slide under or out of the lap portion of the lap/shoulder belt during a collision. If that occurs, the occupant may no longer be properly restrained, and the safety belt could apply restraint forces to the unprotected abdomen resulting in serious personal injury or death. Therefore, keep the seatbacks in a comfortably upright position whenever the vehicle is in motion.

Adjusting the height of driver's seat cushion
To change the height of the seat cushion, rotate the knob located on the outside of the seat cushion.
• To lower the seat cushion, rotate the knob toward the front of the vehicle.
• To raise the seat cushion, rotate the knob toward the rear of the vehicle.

Lumbar support (driver's side)
You can adjust the lumbar support by moving the lever on the side of the driver's seatback. Pivoting the lever toward the front of the vehicle increases the lumbar support. Pivoting the lever toward the rear of the vehicle decreases the lumbar support.

Heating the Front Seats (If Equipped)
The front seats are electrically heated individually when the applicable switches are depressed and the ignition is ON. A thermostat regulates seat temperature when the corresponding switch (shown above) is depressed. To deactivate the front seat heating system, depress the corresponding switch once again.

Adjustable headrest
To raise the headrest, simply pull it up to the desired position. To lower the headrest, press the release lever on the left side grommet, while pushing the headrest down to the desired position. To remove the headrest, raise it as far as it can go then press the release lever while pulling upward.
WARNING - Headrests
• To reduce the risk of head and neck injuries, do not operate the vehicle with the headrest removed or improperly positioned.
- Do not attempt to adjust the driver's headrest while driving.
- Adjust the top of the headrest so that it is even with the top of your ears in order to reduce the chance of injury in the event of a collision.
WARNING
Before starting the vehicle, adjust the driver's seat and headrest to the proper position. After doing so, you should adjust the day/night rearview mirror and the outside rearview mirror.

Split Folding Rear Seat (If Equipped)
The rear seatbacks fold forward to provide additional cargo space and to provide an access to the trunk area.
• To fold the rear seatback(s) down, press the unlock button located in the top of the seatbacks, then fold the seatback forward and down.
• To raise the seatback, lift and push it firmly until it clicks into place.
- When you return the seatback to its upright position, reposition the rear safety belts so that they can be used by rear seat passengers.
WARNING - Cargo
Cargo should always be secured to prevent it from shifting and causing injury to the vehicle occupants.
CAUTION
Do not remove the floor carpet in your vehicle, emission control system components cause high exhaust temperatures under the floor.
*NOTICE
When returning the rear seatbacks to the upright position, remember to return the rear shoulder belts to their proper position. Routing the safety belt webbing through the rear safety belt guides will help keep the belts from being trapped behind or under the seats.
SAFETY BELTS

Pre-tensioner Seat Belt
Your vehicle is equipped with driver's and front passenger's pre-tensioner seat belts. The purpose of the pre-tensioner is to make sure that the seat belts fit tightly against the occupant's body in certain frontal collisions.
The pre-tensioner seat belts can be activated where the frontal collision is severe enough, together with the airbags.

The pre-tensioner seat belt operates in the same way as an Emergency Locking Retractor (ELR) type of seat belt. When the vehicle stops suddenly, or if the occupant tries to lean forward too quickly, the seat belt retractor will lock into position. However, in certain frontal collisions, the pre-tensioner will activate and pull the seat belt into tighter contact against the occupant's body.
The seat belt pre-tensioner system consists mainly of the following components.
Their locations are shown in the illustration.
- SRS airbag warning light
- Seat belt pre-tensioner assembly
- SRS control module
WARNING
To obtain maximum benefit from a pre-tensioner seat belt:
- The seat belt must be worn correctly.
- The seat belt must be adjusted to the correct position.
*NOTICE
- Both the driver's and front passenger's pre-tensioner seat belt will be activated in certain frontal collisions. When the frontal collision is severe enough, the pre-tensioners will be activated together with the airbags. The pre-tensioners will be activated under these conditions even if the seat belts are not being worn at the time of the collision.
- When the pre-tensioner seat belts are activated, a loud noise may be heard and fine dust that may appear to be smoke, may be visible in the passenger compartment. These are normal operating conditions and are not hazardous.
- Although it is harmless, the fine dust may cause skin irritation and should not be breathed for prolonged periods. Wash your hands and face thoroughly after an accident in which the pre-tensioner seat belts were activated.
CAUTION
- Because the sensor that activates the SRS airbag is connected with pre-tensioner seat belt, the SRS airbag warning light AIR BAG on the instrument panel will illuminate for approximately 6 seconds after the ignition key has been turned to the "ON" position, and then it should turn off.
- If the pre-tensioner seat belt is not working properly, this warning light will illuminate even if there is no malfunction of SRS airbag system. If the SRS airbag warning light does not illuminate when the ignition key is turned to "ON" or if it remains illuminated after illuminating for approximately 6 seconds, or if it illuminates while the vehicle is being driven, please have an authorized Kia dealer inspect the pre-tensioner seat belt or SRS airbag system as soon as possible.
WARNING
- Pre-tensioners are designed to operate only one time. After activation, pre-tensioner seat belts must be replaced. All seat belts, of any type, should always be replaced after they have been worn during a collision.
- The pre-tensioner seat belt assembly mechanisms become hot during activation. Do not touch the pre-tensioner seat belt assemblies for several minutes after they have been activated.
- Do not attempt to inspect or replace the pre-tensioner seat belts yourself. This must be done by an authorized Kia dealer.
- Do not strike the pre-tensioner seat belt assemblies.
- Do not attempt to service or repair the pre-tensioner seat belt system in any manner.
(Continued)
(Continued)
- Improper handling of the pretensioner seat belt assemblies, and failure to heed the warnings to not strike, modify, inspect, replace, service or repair the pretensioner seat belt assemblies may lead to improper operation or inadvertent activation and serious injury.
• Always wear the seat belts when driving or riding in a motor vehicle.
Safety Belt Restraint System
WARNING
The driver and all passengers should always use the safety belts provided in order to minimize the risk of severe bodily injury.
We strongly recommend that the driver and all passengers be properly restrained at all times by using the safety belts provided with the vehicle. Proper use of the safety belts decreases the risk of severe injury or death in accidents or sudden stops. In most states and in Canada, the law requires their use.
Safety belts provide the best restraint when:
• the seatback is upright
• the occupant is sitting upright (not slouched)
- the lap belt portion of the safety belt is snug and low on the hips
- the shoulder belt portion of the safety belt is snug against the chest
• the knees are straight forward
To help you remember to fasten your safety belt, a warning light may come on and a chime may sound.
All seats, except the center rear seat, have lap/shoulder belts. The center rear seat has a lap belt.
Inertial locks in the safety belt retractors allow all of the lap/shoulder safety belts to remain unlocked during normal vehicle operation. This allows the occupants some freedom of movement and increased comfort while using the safety belts. If a force is applied to the vehicle, such as a strong stop, a sharp turn, or a collision, the safety belt retractors will automatically lock the safety belts.
Since the inertial locks do not require a collision in order to lock-up, you may become aware of the safety belts locking while braking or going around sharp corners.
The center rear seat safety belt does not have an inertial lock so it is always in a locked condition. Whenever possible, use the center rear seat position to install your child restraint. The center rear seat is the best position to install your child restraint. However, if the center seat is unavailable, a child restraint may be installed in the rear outboard seats The rear outboard safety belts have been designed to allow a child restraint to be used in these positions without an added locking clip.
WARNING - Twisted Safety Belts
Never drive or ride with a twisted or jammed safety belt. If you cannot untwist or unjam the safety belt, see your Kia dealer immediately.
WARNING - Safety Belt Usage Each seating position in your vehicle has a specific safety belt assembly which includes a buckle and tongue that are designed to be used together. 1) Use the shoulder belt on the outside shoulder only. Never wear the shoulder belt under the arm. 2) Never swing the safety belt around your neck to fit over the inside shoulder. 3) Never use a single belt for more than one person.
WARNING - After a Collision Lap/shoulder belt assemblies may be stretched or damaged when subjected to the stress and forces of a collision. The entire restraint system should be inspected following any collision. All belts, retractors, anchors and hardware damaged by a collision should be replaced before the vehicle is operated again.
WARNING - Safety Belt Care Safety belts should be inspected periodically for excessive wear or damage. Pull out each belt fully and look for excessive fraying, cuts, burns or other damage. Make sure that the lap/shoulder belts return smoothly and easily into the retractor. Check the latches to make sure they latch and release without interference or delay. Any belt not in good condition or in good working order should be promptly replaced.
CAUTION - Damage to Safety Belts
Never close the doors on any part of the lap or shoulder belt. It can damage the safety belt or buckle which could increase the risk of injury in case of an accident.
Restraint of Pregnant Women
Pregnant women should wear lap/shoulder belt assemblies whenever possible according to specific recommendations by their doctors. The lap portion of the belt should be worn AS SNUGLY AND AS LOW AS POSSIBLE.
WARNING - Pregnant Women
Pregnant women must never place the lap portion of the safety belt over the area of the abdomen where the fetus is located or above the abdomen.
Restraint of Infants and Small Children
Small children and infants should be restrained by an approved child restraint system to help protect them while riding in a vehicle.
Never allow a child to stand or kneel on the seat of a moving vehicle. Never allow a safety belt to be placed around both a child and an adult or around two children at the same time.
WARNING - Children on Laps
Never hold a child on your lap or in your arms in a moving vehicle. Even a very strong person cannot hold onto a child in the event of even a minor collision.
Many companies manufacture child restraint systems (often called child seats) for infants and small children. An acceptable child restraint system must always satisfy Canadian Motor Vehicle Safety Standards. Make sure that any child restraint system you use in your vehicle is labeled as complying with those safety standards.
The child restraint system should be chosen to fit both the size of the child and the size of the vehicle seat. Be sure to follow any instructions provided by the child restraint system manufacturer when installing the child restraint system.
CAUTION - Hot Metal Parts
Safety belts and seats can become hot in a vehicle that has been closed during warm/hot weather; they could burn a child. Check seat covers and buckles before you place a child anywhere near them.
Restraint of Large Children
As children grow, they may need to use new child restraint systems, including larger child seats or booster seats, which are appropriate for their increased size.
A child who has outgrown available child restraint systems should use the belts provided in the vehicle. When seated in the rear outboard seats, the child should be restrained by the lap/shoulder belt.
If the shoulder belt portion touches the child's neck or face, you can use some after-market devices made by independent manufacturers which help pull the shoulder belt down and away from the child's face or neck.
WARNING - Shoulder belts on Small Children
- Never allow a shoulder belt to be in contact with a child's neck or face while the vehicle is in motion.
- If safety belts are not properly worn and adjusted, the risk of death or serious injury to such a child is high.
WARNING - Child Restraints
- All child restraint systems are designed to be secured in vehicle seats by lap belts or the lap-belt portion of a lap/shoulder belt. Children will be endangered in a crash if their child restraint systems are not properly secured by the safety belts in the vehicle.
- According to accident statistics, children are safer when properly restrained in the rear seating positions rather than the front seating positions.
- When a child restraint system is not secured by a safety belt, store it in the trunk so that it will not be thrown forward in the event of a sudden stop or accident.
Placement of a Child Restraint System
We recommend that, whenever possible, you put the child restraint system in the center position of the rear seat and secure it to the vehicle with the lap belt.
If the center rear seat is not available, or you are using more than one child restraint system in the vehicle at the same time, rear outboard safety belts have been designed to allow a child restraint system to be used in these positions.
WARNING - Restraint Instructions
Failure to observe this manual's instructions regarding child restraint systems and the instructions provided with the child restraint system itself could increase the chance and/or severity of injury in an accident.

Installing a child restraint in the rear center seat
Use the following procedure to install a child restraint in the rear center seat:
- Place the child restraint in the desired position. Route the lap belt through the restraint according to the seat manufacturer's instructions.
- Insert the tongue plate into the buckle.
- Adjust the lap safety belt for a snug hold on the child restraint by pulling on the loose end of the belt.

Installing a child restraint system in rear outboard seats
WARNING
Children can be killed or injured by the passenger airbag. The rear seats are the safest place for children 12 and under. Make sure all children use seat belts, or the applicable child restraint system.
WARNING - Child Restraint Placement
NEVER use a child restraint in the front passenger seat. A child in a child restraint installed in the front passenger seat can be severely or fatally injured by an airbag which could impact the child restraint with great force when the airbag inflates.
Placing a passenger safety belt into the "Auto Lock" mode (if equipped)
The use of the auto lock mode will ensure that the normal movement of the child in the vehicle does not cause the safety belt to be pulled out and loosen the firmness of its hold on the child restraint.
To secure a child restraint in the front passenger seat or rear outboard seats, follow the procedure below.
- Place the child restraint system in the seat and route the lap/shoulder belt around or through the restraint, following the restraint manufacturer's instructions. Be sure the belt webbing is not twisted.
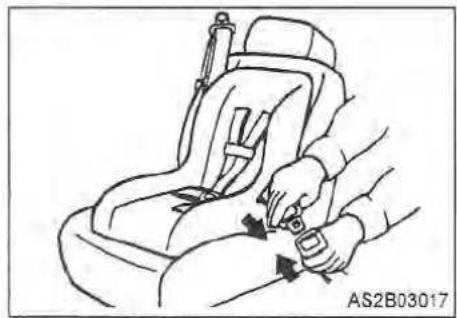
- Insert the lap/shoulder belt latch into the buckle. Listen for the distinct "click" sound.
Position the release button so that it is easy to access in case of an emergency.

- Grasp the shoulder portion of the belt and pull downward until the entire belt is extracted. When the belt is fully extracted, the retractor changes to the automatic locking mode (child restraint mode).

- Slowly allow the belt to retract. Pull up on the shoulder webbing. A "clicking" or "ratcheting" sound will be heard as the belt retracts. This indicates the retractor is now in the automatic locking mode. Push down on the child restraint while you pull up on the belt in order to remove any slack in the belt.
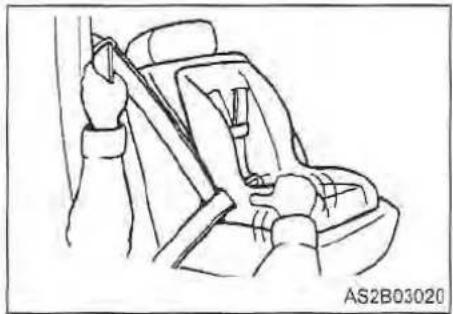
- Before placing the child in the child restraint, forcibly try to push the seat from side to side and forward to make sure that the seat is securely held in place.
- Double check that the retractor is in the automatic locking mode by trying to pull the shoulder portion of the safety belt out of the retractor. If you cannot pull the belt out of the retractor, it is in the automatic locking mode. If you can, repeat step 4.
To remove the child restraint, press the release button on the buckle and then pull the lap/shoulder belt out of the restraint and allow the safety belt to retract fully.
WARNING - Auto Lock Mode The lap/shoulder belt automatically returns to the "emergency lock mode" whenever the belt is allowed to retract fully. Therefore, the preceding six steps must be followed each time a child restraint is installed. If the safety belt is not placed in the "auto lock" mode, severe injury or death could occur to the child and/or other occupants in the vehicle in a collision, since the child seat will not be effectively held in place.
To return the safety belt retractor to the emergency lock mode, allow the seat belt to retract fully to its stowed position and the retractor will automatically switch back to the emergency lock mode for normal adult usage.
Child seat anchorage position
For small children and babies, the use of a child seat or infant seat is strongly recommended. This child seat or infant seat should be of appropriate size for the child and should be installed in accordance with the manufacturer's instructions. It is further recommended that the seat be placed in the vehicle's rear seat since this can make an important contribution to safety. Your vehicle is provided with three child restraint hook holders on the package tray behind the rear seat for installing the child seat or infant seat.

WARNING - Child Restraint Placement
Never use a child restraint in the front passenger seat. A child in a child restraint installed in the front passenger seat can be severely or fatally injured by an air bag which could impact the child restraint with great force when the air bag inflates.

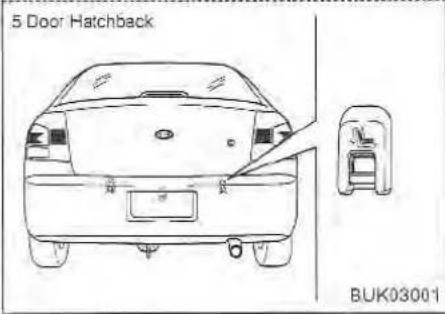
Tether anchor installation
The child restraint anchor fittings are installed on the shelf behind the rear seat or in the trunk on the inboard side of the rear bumper in the 5-door hatchback.

WARNING
If the tether strap is clipped incorrectly, the child restraint seat may not be restrained properly in the event of a collision.
Installing a child restraint seat
- Position the child restraint seat on the rear passenger seat cushion.
- Route the child restraint seat tether strap over the back of the seat. For vehicles with adjustable head restraints, route the tether strap under the head restraint and between the head restraint posts, otherwise route the tether strap over the top of the seatback.
- Locate the correct anchor on the package tray behind the rear seat for the selected seating position.
4.Open the tether anchor cover. - Clip the tether strap hook to the tether strap hook holder.
- Tighten the tether strap to secure the seat.
WARNING - Child Restraint Anchorage
- Child restraint anchorages are designed to withstand only those loads imposed by correctly fitted child restraints. Under no circumstances are they to be used for adult seat belts or harnesses or for attaching other items or equipment to the vehicle.
• The tether strap may not work properly if attached somewhere other than the correct tether anchor. - Check that the child restraint system is secured by pushing and pulling it in different directions. Incorrectly fitted child restraint may swing, twist, tip or come away causing death or injury.

Child seat lower anchors
Some child seat manufacturers make child restraint seats that are labeled as ISOFIX or ISOFIX-compatible child restraint seats. These seats include two rigid or webbing mounted attachments that connect to two ISOFIX anchors at specific seating positions in your vehicle. This type of child restraint seat eliminates the need to use seat belts to attach the child seat for forward-facing child restraint seats.
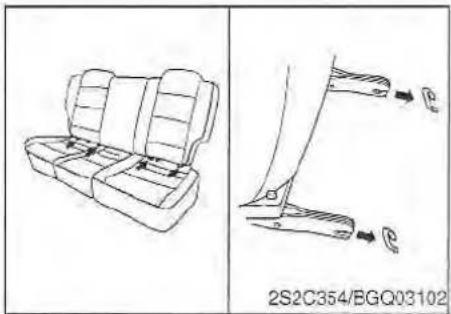
ISOFIX anchors have been provided in your vehicle. The ISOFIX anchors are located in the left and right outboard rear seating positions. Their locations are shown in the illustration. There is no ISOFIX anchor provided for the center rear seating position.
The ISOFIX anchors are located between the seatback and the seat cushion of the rear seat left and right outboard seating positions.
Follow the child seat manufacturer's instructions to properly install child restraint seats with ISOFIX or ISOFIX-compatible attachments.
Once you have installed the ISOFIX child restraint, assure that the seat is properly attached to the ISOFIX and tether anchors. Also, test the child restraint seat before you place the child in it. Tilt the seat from side to side. Also try to tug the seat forward. Check to see if the anchors hold the seat in place.
WARNING
• If the child restraint is not anchored properly, the risk of a child being seriously injured or killed in a collision greatly increases.
- Do not mount more than one child restraint to a single tether or to a child restraint lower anchorage point. The improper increased load may cause the anchorage points or tether anchor to break, causing serious injury or death.
- Do not install a child restraint seat at the rear center seating position using the vehicle's ISOFIX anchors. The ISOFIX anchors are only provided for the left and right outboard rear seating positions. Do not misuse the ISOFIX anchors by attempting to attach a child restraint seat in the middle rear seating position position to the ISOFIX anchors. In a crash, the child restraint seat ISOFIX attachments may not be strong enough to secure the child restraint seat improperly in the rear center seating position and may break, causing serious injury or death.
- Attach the ISOFIX or ISOFIX-compatible child restraint seat only to the appropriate locations shown in the illustration.
• Always follow the installation and use instructions provided by the manufacturer of the child restraint.
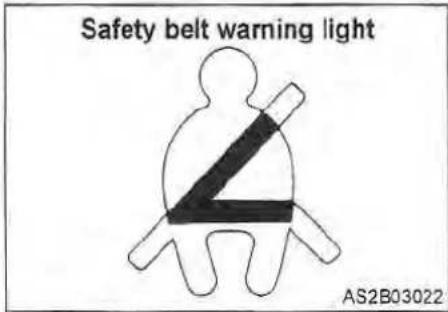
Safety Belt Warning Light and Chime
If the driver's lap/shoulder belt is not fastened when the key is turned ON, the safety belt warning chime sounds for approximately six seconds and the safety belt warning light illuminates for approximately six seconds.

Front lap/shoulder belt
To fasten the front lap/shoulder belt:
- Grasp the buckle and tongue plate.
- Slowly pull the lap/shoulder belt out from the retractor.
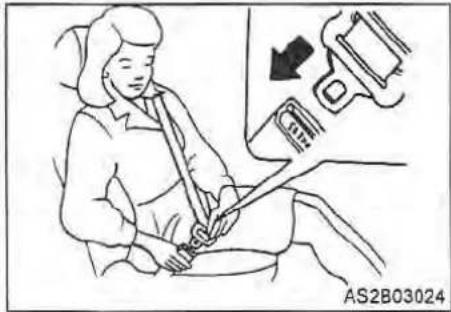
- Insert the tongue plate into the open end of the buckle until an audible "click" is heard, indicating the belt is locked in the buckle.
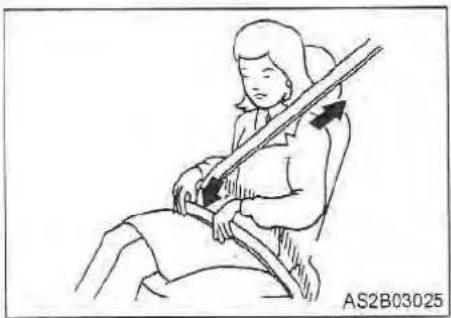
- Position the lap portion of the belt across your lap as LOW ON THE HIPS as possible to reduce the risk of sliding under it during an accident. Adjust the belt to a SNUG FIT by pulling up on the shoulder portion of the safety belt. The belt retractor applies tension to the belt in order to take up excess webbing automatically and to maintain tension on the belt. For maximum safety, do not put any excess slack into the safety belt.

- Adjust the shoulder anchor position to your size. To raise the anchor position, push the anchor up. To lower the anchor position, press the button and slide the anchor down. After adjustment, make sure the anchor is locked in position.
WARNING - Front Safety Belts
• The front seatbacks should always remain in a comfortable, upright position while the vehicle is in motion. The safety belt system will provide the most protection with the seatbacks in an upright position.
- Never wear the shoulder portion of the safety belt under the outside arm or behind the back.
- Never wear the shoulder portion of the safety belt across the neck or face.
- Wear the lap portion of the safety belt as low on the hips as possible. Be sure the lap belt fits snugly around the hips. Never wear the lap belt over your waist.
- Never drive or ride with a twisted or jammed safety belt. If you cannot untwist or unjam the safety belt, see the nearest Kia dealer immediately.
- Never use a single belt to restrain more than one person at a time. Failure to follow these warnings will increase the risk and severity of injury in an accident.

To unfasten the front lap/shoulder belt: Press the release button on the buckle.
Rear Safety Belts
Two kinds of safety belts are provided:
- Lap/shoulder belts for people who sit on the outboard sides of the vehicle.
- A lap belt for people who sit in the center of the rear seat.
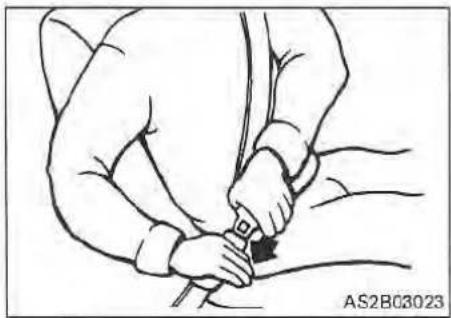
Rear lap/shoulder belt
To fasten:
- Grasp the buckle with one hand and the tongue plate with the other.
- Slowly pull the lap/shoulder belt out.
- Insert the tongue plate into the open end of the buckle until an audible "click" is heard, indicating the belt is locked.

- Position the lap portion of the belt across your lap as LOW ON THE HIPS as possible to reduce the risk of sliding under it during an accident.
Adjust the belt to a SNUG FIT by pulling up on the shoulder portion of the safety belt. The belt retractor is designed to take up excess webbing automatically and to maintain tension on the belt. This is for your safety. Do not put excess slack into the safety belt.
To unfasten:
Press the release button on the buckle.

WARNING - Rear
Lap/Shoulder Safety Belts
- Never wear the shoulder portion of the safety belt under the outside arm or behind the back.
- Never wear the shoulder portion of the safety belt across the neck or face.
- Wear the lap belt or the lap portion of the belt as low as possible. Be sure the lap belt fits snugly around the hips. Never wear the lap belt over your waist.
- Never ride or drive with a twisted or jammed safety belt. If you cannot untwist or unjam the safety belt, see the nearest Kia dealer immediately.
- Never use a single belt to restrain more than one person at a time.
Failure to follow these warnings could increase the chance and severity of injury in an accident.

Lap belt (rear center seat)
To fasten the rear lap belt:
- Grasp the buckle end and pull it low over the abdomen.
- Insert the tongue plate into the open end of the buckle until an audible "click" is heard, indicating the latch is locked. Make sure the belt is not twisted.
- To lengthen the belt, hold the latch plate tongue at a right angle to the safety belt webbing and pull.
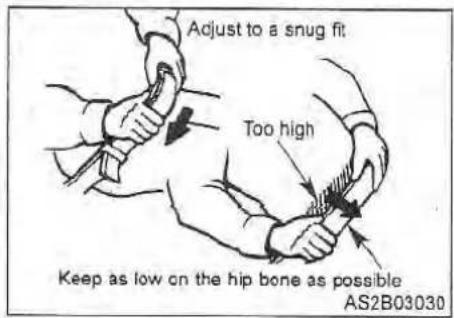
- To shorten the belt, hold the latch plate tongue at a right angle to the safety belt webbing and pull on the loose end of the belt until the desired belt length is reached.
- Grasp the free portion of the belt webbing and pull until the belt is snug over the hips and as low on the abdomen as possible.
- Make sure that the belt is placed as LOW ON THE HIPS as possible.

To unfasten the rear lap belt:
Press the release button on buckle.

WARNING - Center Rear Lap Belt
Be sure the center rear lap belt is positioned snugly around the hips, and not on the waist. Failure to position the center rear lap belt snugly around the hips and not on the waist will increase the chance and severity of injury in the event of a collision.
Proper Use and Care of the Safety Belt System
To ensure that the safety belts provide the maximum protection, please follow these instructions:
- Use the belts at all times - even on short trips.
- If the safety belt is twisted, straighten it prior to use.
-
Keep sharp edges and damaging objects away from the belts.
• Periodically inspect belt webbing, anchors, buckles, and all other parts for signs of wear and damage. -
Replace damaged, excessively worn or questionable parts immediately.
• To clean the belt webbing, use any mild soap solution recommended for cleaning upholstery or carpets.
Follow the instructions provided with the soap. Do not bleach or dye the webbing because this may weaken the webbing fibers and allow them to fail when loaded in a collision. - Do not make modifications or additions to the safety belt.
• After wearing a safety belt, make sure it fully retracts to the stowed position. Do not allow the belt to get caught in the door when you close it
AIRBAG - SUPPLEMENTAL RESTRAINT SYSTEM
What your airbag system does
Your vehicle is equipped with a dual Supplemental Restraint System (SRS), which includes an airbag for the driver and another airbag for the front passenger.
What your airbag system does not do
The airbag system is designed to supplement or add to the protection provided to properly belted occupants in moderate to severe frontal collisions. It is not a substitute for the driver's or front passenger's safety belt and it does not provide restraint to the lower body.
Why didn't my airbag go deploy in a collision?
There are many types of accidents in which the airbag would not be expected to provide additional protection. These include side or rear impacts, rollovers, and second or third impacts in multiple-impact accidents as well as low speed impacts.
Remember: airbags are only designed to inflate when the impact would throw the occupant into the airbags - generally from a little to the left to a little to the right of straight ahead.
In other words, just because your vehicle is damaged and even if it is totally unusable, don't be surprised that the airbag(s) did not inflate.
The importance of using safety belts
There are four very important reasons to use safety belts even with an airbag system, they:
• help keep you in the proper position (away from the airbag) when it inflates.
- reduce the risk of harm in rollover, side or rear impact collisions, because an airbag is not designed to inflate in such situations.
- reduce the risk of harm in frontal collisions that are not severe enough to activate the supplemental restraint system.
- reduce the risk of being thrown from your vehicle.

WARNING - Airbags & Safety Belts
Even in vehicles with airbags, you and your passengers must always wear the safety belts provided in order to minimize the risk and severity of injury in the event of a collision or rollover.
• Always wear your safety belt. It can help keep you away from the airbags during heavy braking just before a collision.
• Airbags are designed to inflate only in severe frontal collisions and will generally not provide protection in side or rear impacts, rollovers or less severe frontal collisions. They will also not provide protection from later impacts in a multi-impact collision.
- If your vehicle has been subjected to flood conditions (e.g. soaked carpeting/standing water on the floor of the vehicle, etc.) or if your vehicle has become flood damaged in any way, do not attempt to start the vehicle or put the key in the ignition before disconnecting the battery. This may cause airbag deployment, which could result in serious personal injury or death. Have the vehicle towed to an authorized Kia dealer for inspection and necessary repairs.

Airbag System Components
The main components of your vehicle's SRS are:
• One airbag in the steering wheel for the driver, and another in the dashboard for the front passenger.
• A diagnostic system that continually monitors system operation.
• An indicator light to warn you of a possible problem with the system.
• Emergency power backup in case your car's electrical system is disconnected in a crash.
To indicate that your vehicle is equipped with airbags, the airbag covers on the steering wheel and on the dashboard are marked with "SRS AIRBAG."
How the Airbag System Works
The driver's airbag is stored in the center of the steering wheel. The passenger side airbag is stored in the front instrument panel above the glove box.
If you ever have a severe frontal collision, your airbags will instantly inflate to help protect you from serious physical injury.
There is no single vehicle speed at which the airbags will inflate. Generally, airbags are designed to inflate in severe frontal collisions. The airbag Supplemental Restraint System (SRS) reacts to the severity of a collision and its direction. These two factors determine whether the sensors send out an electronic deployment or inflation signal. Whether the airbags will inflate depends on a number of factors including vehicle speed, angle of impact and the density and stiffness of the vehicles or objects that your vehicle hits in the collision.
The airbags will completely inflate and deflate in less than 1/10 of one second. The speed of inflation and deflation protects the driver's ability to operate the vehicle. This is important in crashes where a vehicle continues to move after an impact and the driver still has some control of the vehicle's steering, braking, throttle and/or transmission systems.
It is virtually impossible for you to see the airbags inflate during an accident. It is much more likely that you will simply see the deflated airbags hanging out of their storage compartments after the collision.
In order to help provide protection in a severe collision, the airbags must inflate rapidly. However, that speed also causes the airbags to expand with a great deal of force. The speed of this inflation has been determined by the Canadian Motor Vehicle Safety Standards (CMVSS) to reduce the likelihood of serious or life-threatening injuries and is thus a mandatory part of airbag design.

Thus, airbag inflation could also cause injuries which normally can include facial abrasions, bruises and broken bones. However, there are even circumstances under which contact with the steering wheel airbag can cause fatal injuries, especially if the occupant is positioned excessively close to the steering wheel.
YOU MUST ALWAYS SIT AS FAR BACK FROM THE STEERING WHEEL AIRBAG AS POSSIBLE, WHILE STILL MAINTAINING A COMFORTABLE SEATING POSITION FOR GOOD VEHICLE CONTROL, IN ORDER TO REDUCE THE RISK OF INJURY OR DEATH IN A COLLISION.
WARNING - Airbag Injuries
- Sit as far back from the steering wheel as possible without interfering with your control of the vehicle. Positioning yourself too close to the steering wheel can result in serious or even fatal injuries if the airbag deploys.
- Never place objects over the airbag storage compartments or between the airbags and yourself. Due to the speed and force of the airbag inflation, such objects could hit your body at high speed and cause severe bodily injury and even death.
Noise and Smoke
When the airbags inflate, they make a loud noise and they leave smoke and powder in the air inside of the vehicle. This is normal and is a result of the ignition of the airbag inflator.
After the airbags inflate, you may feel substantial discomfort in breathing due both to the contact by your chest with both the safety belt and the airbag, as well as from breathing the smoke and powder.
We strongly urge you to open your doors and/or windows as promptly as possible after impact in order to reduce discomfort and prevent prolonged exposure to the smoke and powder.
WARNING - Hot Metal Parts When the airbags deploy, the airbag inflators in the steering wheel and/or in the dashboard are very hot. To prevent injury, do not touch the airbag storage area's internal components immediately after an airbag has inflated.
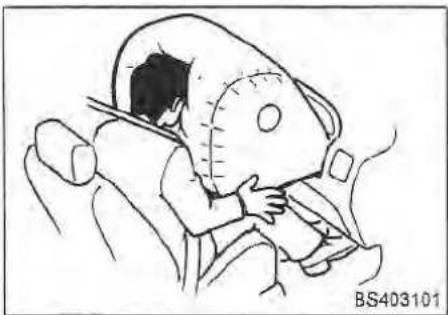
The Importance of The Passenger Being Properly Seated
The front seat passenger's airbag is much larger than the driver's airbag and inflates with considerably more force. It can seriously hurt or kill a passenger who is not in the proper position and wearing the safety belt properly. The front passenger should always move their seat as far back as practical and sit well back in the seat.
It is essential that the front passenger always wear their safety belt, even when mounting in a parking lot or up a drive way into a garage.
The reason for this is that in most frontal impacts there is substantial pre-impact braking which tends to throw the occupants forward. If the right front passenger is not using their safety belt, they will be directly in front of or even touching the airbag storage compartment when inflation occurs. In that situation, death or severe injury is possible.
WARNING - Right Front Seat Pre-impact braking could throw an unbelted passenger toward or onto the airbag storage compartment. Upon impact in a collision, the airbag would rapidly inflate and possibly serverly injure or kill that occupant who failed to wear their safety belt.
Because of the airbag, you must NEVER INSTALL A REAR-FACING CHILD RESTRAINT SYSTEM IN THE FRONT PASSENGER SEAT. There is a very significant risk of serious or fatal injuries to a child in a rear-facing child restraint if the right front passenger airbag inflates. We also strongly recommend that you do not put a front-facing child restraint system in the front passenger seat. If a front-facing child restraint system must be used in the front passenger seat, the vehicle seat should be moved as far back as possible. If the passenger's airbag inflates, it could seriously or fatally hurt a child who is not in the proper position or properly restrained.

WARNING - Front
Passengers
- NEVER use a child restraint in the front seat. In the front seat, a child restraint would be positioned too close to where the airbags are stored and in the event an airbag deploys, the airbag would impact the rear-facing child restraint and cause serious injuries or death.
- Failure to observe the instructions provided with the child restraint system could increase the risk and/or severity of injury in an accident.
Airbag Warning Light
The purpose of the airbag warning light in your instrument panel is to alert you of a potential problem with your Airbag - Supplemental Restraint System (SRS).
AIRBAG WARNING LIGHT
AIR BAG
Have the system checked if:
• The light does not illuminate when you turn the ignition ON.
- The light stays on after the engine starts.
• The light comes on or flashes while you are driving.
Supplemental Restraint System Service
Your Supplemental Restraint System is virtually maintenance-free. There are no parts which you can service.
You must have the system serviced under the following circumstances:
- If an airbag ever inflates, the airbag must be replaced. Do not try to remove or discard the airbag by yourself. This must be done by an authorized Kia dealer.
- If the airbag warning indicator light alerts you of a problem, have the airbag system checked as soon as possible. Otherwise, your airbag might not inflate when you need it.

WARNING - Airbag (SRS) Malfunctions
- Do not modify your steering wheel or any other part of the Supplemental Restraint System. Modification could make the system ineffective.
- Do not work on the system's components or wiring. This could cause the airbags to inflate inadvertently, possibly seriously injuring someone. Working on the system could also disable the system so that the airbags did not deploy in a collision.
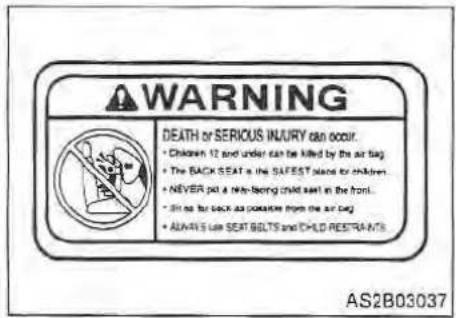
Airbag warning label (sunvisor - front side)
To remind you of the dangers of the airbag, airbag warning labels which are now required by the Canadian Motor Vehicle Safety Standards (CMVSS) are adhered to the driver's and passenger's sunvisors and attached to the glove box.
Note that these government warnings focus on the risk to children, Kia also wants you to be aware of the risks which adults are exposed to. Those have been described in previous pages.
TRUNK LID
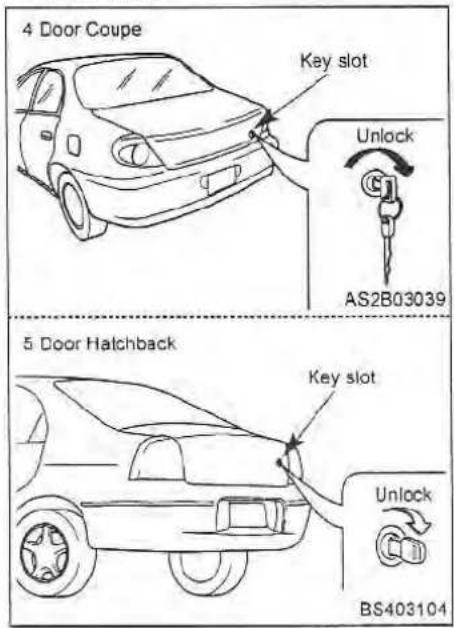
- To open the trunk, insert the key into the lock and turn it clockwise until an audible "click" is heard.
- To close the trunk, use both hands to push the trunk lid down until the lock "snaps" shut.
- Do not slam the trunk lid.
• Pull up on the trunk lid to make sure it is securely latched.
To prevent premature wear or damage to the trunk lid lift cylinders and attaching hardware, the trunk lid must be fully closed before you drive your vehicle.

WARNING - Exhaust Fumes
If you drive with the trunk lid open, you will draw dangerous exhaust fumes into your vehicle.
If you must drive with the trunk lid open, keep the air vents open so that additional outside air comes into the vehicle.

Remote Trunk Lid Release
The release is located at the left front corner of the driver's seat on the floor. To open the trunk, pull up on the lever.

Emergency Trunk Safety Release (if equipped)
You vehicle is equipped with an emergency trunk release cable located inside the trunk. When pulled, this cable will release the trunk latch mechanism and open the trunk.
WARNING
No one should be allowed to occupy the trunk of the vehicle at any time. If the trunk is partially or totally closed and the person is unable to get out, severe injury or death could occur due to lack of ventilation, fumes and rapid heat build-up, or because of exposure due to cold weather conditions. The trunk is also a highly dangerous location in the event of a crash because it is not a protected occupant space and is instead part of the vehicle's crush zone.
KNOWING YOUR VEHICLE
HOOD

Opening the Hood
- Inside the vehicle, pull the hood release handle located at the bottom left corner of the instrument panel.
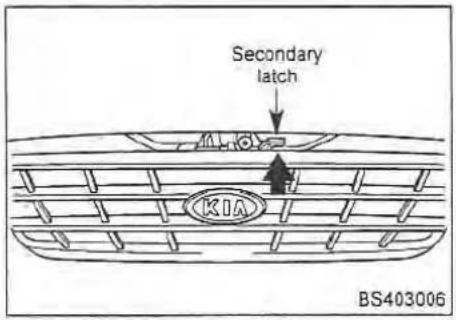
- Go to the front of the vehicle, raise the hood until the secondary latch catches then pull the secondary latch up (located under the hood at the center of the vehicle).

- Lift the hood and hold it open with the prop rod by inserting the free end of the rod into the slot.
CAUTION
Handle the support rod in the area wrapped in rubber. The rubber will help prevent you from being burned by hot metal when the engine is hot.
KNOWING YOUR VEHICLE
Closing the Hood
- Before closing the hood, secure the prop rod in its retainer to prevent it from rattling.
- Check the underhood area to make certain all filler caps are in place and that all loose items have been removed.
- Close the hood firmly so that it latches securely. Do not slam it shut.
CAUTION
Before closing the hood, make sure that all parts and tools have been removed from the engine area and that everyone is clear of the hood opening.
FUEL FILLER DOOR

Remote Fuel Filler Door Release
Pull up on the release lever (located on the floor) at the left front corner of the driver's seat to open the filler door.
WARNING - Fuel Filling
- Fuel may be under pressure. Always remove the fuel cap carefully and slowly. If the cap is venting fuel or if a hissing sound is heard, wait until the condition stops before completely removing the cap. If these precautions are not followed, fuel may spray out and cause serious personal injury.
- Fuel vapor is extremely hazardous and can explode. When refueling, always stop the engine and never allow sparks or open flames near the filler neck. Always extinguish cigarettes and other smoking materials before refueling.

• To remove the cap, turn it counterclockwise.
- To install the cap, turn it clockwise until it "clicks." This indicates that the cap is securely tightened.
*NOTICE
A loose fuel filler cap may cause the OBD-II Malfunction Indicator Light ( ) light in the instrument panel to illuminate unnecessarily. Always ensure that the fuel filler cap is tight.
The fuel filler neck is designed to prevent filling the fuel tank with anything but unleaded fuel.
*NOTICE
If the fuel filler cap requires replacement, use only a genuine Kia cap for your vehicle. An incorrect fuel filler cap can result in a serious malfunction of the fuel system or emission control system. Correct replacement caps are available at Authorized Kia Dealers.
If the fuel filler lid will not open in cold weather because the area around it is frozen, push or lightly tap the lid.
*NOTICE
Do not spill fuel on the exterior surfaces of the vehicle. Any type of fuel on painted surfaces may damage the paint.
STEERING WHEEL
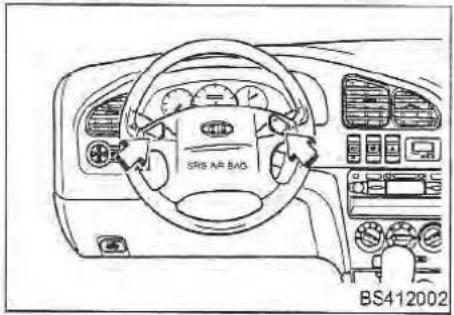
Horn
To sound the horn, push the horn button on either side of the steering wheel. Check the horn regularly to be sure it operates properly.
MIRRORS
Outside Rearview Mirror
Your vehicle is equipped with both left-hand and right-hand outside review mirrors. The mirrors can either be adjusted remotely with the control levers or remote switch, depending on the type your vehicle has. The mirror heads can be folded rearward to prevent damage when using on automatic car wash.

CAUTION
- The right outside rearview mirror is convex. Objects seen in the mirror are closer than they appear.
- When changing lanes, use your interior rearview mirror or direct observation to determine the actual distance of following vehicles behind you.
*NOTICE
Do not scrape ice off the mirror face; this may damage the surface of the glass. If ice should restrict movement of the mirror, do not force the mirror to adjust it.
To remove ice, use a de-icer spray, or a sponge or soft cloth with very warm water.

Manual control
To adjust an outside mirror, move the control lever which is located at the forward inside area of the window frame.

Electric remote control (If Equipped)
This switch, located on the left side of the instrument panel, controls the adjustments for both right and left outside mirrors. To adjust the position of either mirror:
-
Move the selector switch to the right or left to activate the adjusting mechanism for the corresponding mirror.
-
Adjust the mirror angle by depressing the mirror adjustment control switch in the desired direction.
*NOTICE
The mirrors stop moving when they reach the maximum adjusting angles, but the motor continues to operate while the switch is depressed. Do not depress the switch longer than necessary or the motor may be damaged.
Outside rearview mirror heater (If Equipped)
The outside rearview mirror heater is actuated in conjunction with the rear window defroster. To heat the outside rearview mirror glass, push in the switch for the rear window defroster. The rearview mirror glass will be heated for defrosting or defogging and will provide improved rear visibility during inclement weather. Push the switch again to turn the heater off. The outside rearview mirror heater automatically turns itself off after 15 minutes.
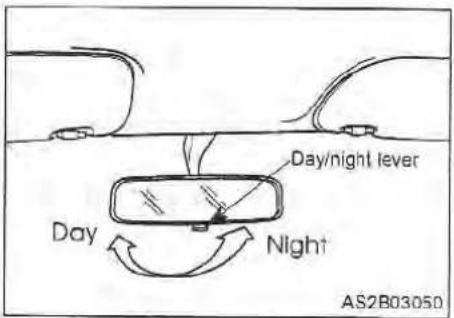
Day/Night Rearview Mirror
Adjust the rearview mirror to center on the view through the rear window. Make this adjustment before you start driving and while the day/night lever is in the day position.
Pull the day/night lever toward you to reduce glare from the headlights of vehicles behind you during night driving.
Remember that you lose some rearview clarity in the night position.
CAUTION
Do not allow objects in the rear seat to interfere with your line of vision through the rear window.
INTERIOR LIGHTS
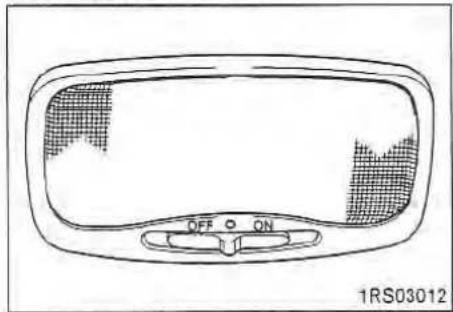
Dome Light
The dome light switch, located in the light assembly, has three positions:
OFF - The light stays off even when a door is open.
- The light turns on or off when a door is opened or closed. After a door is closed the light remains ON for approximately 5 seconds and goes OFF slowly.
ON - The light turns on and stays on even when the doors are all closed.
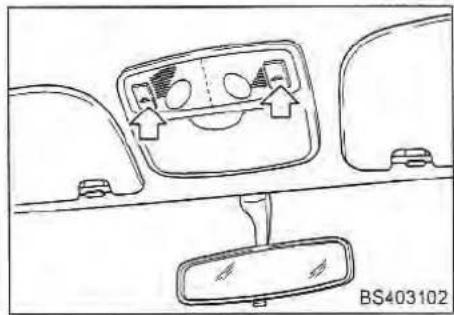
Map Lights
The map lights are switched ON or OFF by pressing the corresponding switches.
CUP HOLDERS AND CONSOLE STORAGE COMPARTMENT
The cup holders and console storage compartment are located in the center console.
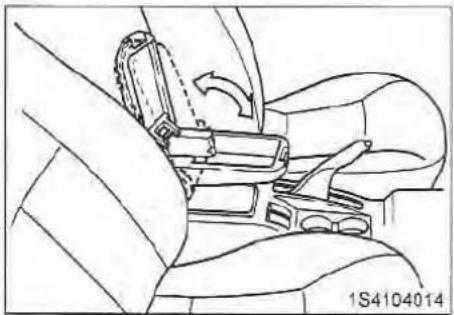
Console Storage Compartment
To use the console storage compartment, depress the release button located on the cover and pull the cover up.
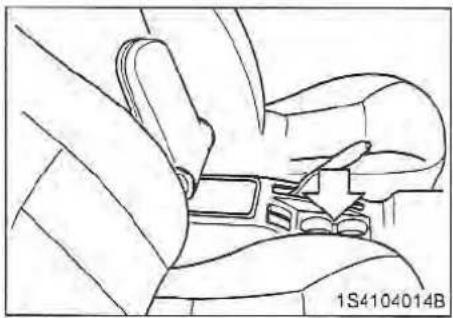
Cup Holders
WARNING
- Do not place uncovered cups of hot liquid in the cup holder while the vehicle is in motion. If the hot liquid spills, you could be burned and lose control of the vehicle. Moreover, the spilled liquid could cause the failure of the transaxle change lever.
• To reduce the risk of personal injury in the event of a sudden stop or collision, do not place bottles, drinking glasses, cans, etc., in the cup holder while the vehicle is in motion.
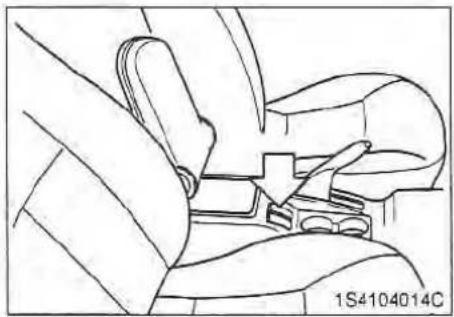
Coin Holder
Coin holder slots are located in the center console compartment. Do not use this as ashtray.
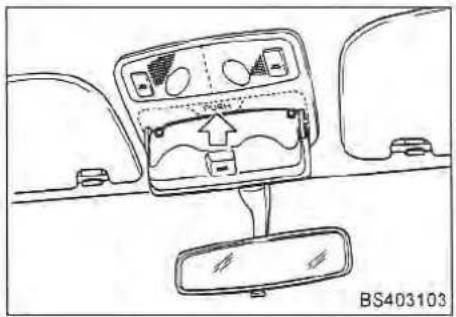
Sunglass Holder
A compartment is provided on the overhead console for the storage of sunglasses. To open the sunglass holder, press the cover and the cover will slowly open. Place your sunglasses in the compartment door with the lenses facing out.
DRIVING YOUR VEHICLE DRIVING YOUR VEHICLE
4
Ignition Switch 4-2
Starting the Engine....4-4
Manual Transaxle 4-6
Automatic Transaxle 4-7
Brake System 4-12
Power Steering 4-16
Tilt Steering (If Equipped). 4-17
Cruise Control (If Equipped)....4-18
Instrument Cluster 4-21
Gauges 4-23
Warnings and Indicators....4-25
Lighting 4-31
Wipers and Washers....4-33
Front Fog Lights (If Equipped) 4-35
Rear Window Defroster....4-36
Interior Features 4-37
Climate Control System 4-39
Windshield Defrosting and Defogging....4-44
IGNITION SWITCH

Illuminated ignition switch
Whenever a door is opened, the ignition switch will be illuminated for your convenience, provided the ignition switch is not in the "ON" position. The light will go off approximately 10 seconds after closing the door or when the ignition switch is turned on.
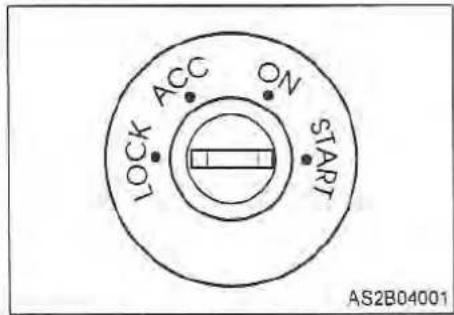
Ignition Switch and Anti-Theft Steering Column Lock
Ignition switch position
LOCK
The steering wheel is locked to protect against theft. The ignition key can be removed only in the LOCK position. For vehicle equipped with an automatic transaxle, it also locks the gear shift lever in the P (Park) position.
ACC (Accessory)
Turning the ignition switch to this position unlocks the steering wheel and will allow some of your vehicle's electrical accessories such as the radio and the windshield wipers to operate when the engine is OFF.
ON
Turning the ignition switch to this position allows you to test your vehicle's warning lights to make sure they work before you start the engine. The ignition key returns to the ON position once the engine is started and remains in this position while the engine is running.
Do not leave the ignition switch in the ON position for extended periods with the engine OFF because the battery will discharge.
START
Turn the ignition key to the START position to start the engine. The engine will crank until you release the key, then it returns to the ON position. Also, the brake warning indicator illuminates to check the bulb in this position.
Difficulty in turning the ignition key to the START position can be caused by pressure on the switch from the steering column. To allow the ignition key to turn, move the steering wheel right or left to release the tension and then turn the key.
WARNING
- Never turn the ignition switch to LOCK or ACC while the vehicle is moving. This could result in loss of directional control and braking function, which could cause an immediate accident.
- Never reach for the ignition switch, or any other controls, through the steering wheel while the vehicle is in motion. Failure to observe this warning can result in loss of vehicle steering and braking control, which may result in an accident.
Automatic transaxle
When turning the ignition switch to the LOCK position, the shift lever must be in the P (Park) position.
Manual transaxle
When turning the ignition switch to the LOCK position, push the key inward at the ACC position and turn the key toward the LOCK position.
STARTING THE ENGINE
- Make sure the parking brake is applied.
- Manual Transaxle - Depress the clutch pedal fully and shift the transaxle into NEUTRAL. Keep the clutch pedal depressed while cranking the engine. The starter will not operate if the clutch pedal is not fully depressed.
Automatic Transaxle - Place the transaxle shift lever in P (Park). Depress the brake pedal fully. You can also start the engine if the shift lever is in the N (Neutral) position. - Turn the ignition switch to START and hold it there until the engine starts (a maximum of 10 seconds), then release the key.
In extremely cold weather, below 0°F (minus 18°C), or after the vehicle has not been operated for several days, let it warm up without depressing the accelerator.
Whether the engine is cold or warm, it should be started without depressing the accelerator.
CAUTION
If the engine stalls while you are in motion, do not attempt to move the shift lever to P (Park).
If it is safe to do so considering traffic and road conditions, you may put the shift lever in the N (Neutral) position while still moving and turn the ignition switch to the START position in an attempt to restart the engine.
If the engine fails to start using this procedure, attempt the following.
The engine fails to start when the engine is cold (engine coolant temperature is below 32°F/0°C):
A no start condition may be caused by an engine that has become flooded (has excessive fuel in the cylinders). If this is the case, follow the starting procedure below.
-
Make sure the parking brake is applied.
-
Manual Transaxle - Depress the clutch pedal fully and shift the transaxle into N (Neutral). Keep the clutch pedal depressed while cranking the engine. The starter will not operate if the clutch pedal is not fully depressed.
Automatic Transaxle - Place the transaxle shift lever in P (Park) or N (Neutral). Depress the brake pedal fully.
-
Depress the accelerator fully and hold it.
-
While holding the accelerator fully depressed, turn the ignition switch to the START position and hold it (a maximum of 10 seconds) to discharge the excess fuel. If the engine starts, the engine speed will increase suddenly; immediately release the ignition key and the accelerator. If the engine has not yet started, release the accelerator after cranking the engine.
-
Without depressing the accelerator, crank the engine until it starts (a maximum of 10 seconds).
If the engine fails to start when the engine is warm:
If the engine is unusually difficult to restart when it is warm (fails to start after repeated attempts without depressing the accelerator):
- Make sure the parking brake is applied.
- Manual Transaxle - Depress the clutch pedal fully and shift the transaxle into N (Neutral). Keep the clutch pedal depressed while cranking the engine. The starter will not operate if the clutch pedal is not fully depressed.
Automatic Transaxle - Place the transaxle shift lever in P (Park) or N (Neutral). Depress the brake pedal fully. - While depressing the accelerator pedal about halfway down, turn the ignition switch to the START position and hold it (a maximum of 10 seconds).
- After the engine has started, let it idle for about 10 seconds before driving.
*NOTICE
Do not engage the starter for more than 10 seconds. If the engine stalls or fails to start, wait 5 to 10 seconds before re-engaging the starter. Excessive or improper use of the starter may damage it.
The starter will not operate if:
- In an automatic transaxle, the shift lever is NOT in P (Park) or N (Neutral).
- In a manual transaxle, the clutch pedal is not fully depressed. Excessive engine noise (from valve tappets) may occur if the engine has not been operated for an extended period.
The noise should stop after the engine has reached normal operating temperature.
If the noise does not stop, have the vehicle inspected by an Authorized Kia Dealer.
*NOTICE
This spark ignition system complies with Canadian ECES-002
MANUAL TRANSAXLE

Manual Transaxle Operation
The shift pattern is conventional for five forward gears, as shown below.
Press the clutch pedal down fully while shifting, then release it slowly.
A special safety feature prevents inadvertent shifting from 5 (Fifth) to R (Reverse). The gearshift lever must be returned to the Neutral position before shifting into R (Reverse).
*NOTICE
Make sure the vehicle is completely stopped before shifting into R (Reverse).
*NOTICE
To avoid premature clutch wear and damage, do not drive with your foot resting on the clutch pedal. Also, don't use the clutch to hold the vehicle stopped on an upgrade (while waiting for a traffic light, etc).
WARNING - Manual Transaxle
Before leaving the driver's seat, always set the parking brake fully and shut the engine off, then make sure the transaxle is shifted into 1st gear. Unexpected and sudden vehicle movement can occur if these precautions are not followed in the order identified.
Downshifting
When you must slow down in heavy traffic or while driving up steep hills, downshift before the engine starts to "labor". Downshifting reduces the chance of stalling and gives better acceleration when you again need to increase your speed. When the vehicle is traveling down steep hills, downshifting one gear level helps maintain safe speed and prolongs brake life.
AUTOMATIC TRANSAXLE
O/D (Overdrive) System

Automatic Transaxle Operation
All normal forward driving is done with the shift lever in the D (Drive) position. To move the shift lever from the P (Park) position, the ignition switch must be in the ON position, the brake pedal must be depressed, and the lock release button must be depressed.
For smooth operation, depress the brake pedal when shifting from N (Neutral) to a forward or Reverse gear.
CAUTION
- Do not accelerate the engine in R (Reverse) or any of the forward positions with the brakes on.
- When stopped on an upgrade, do not hold the vehicle stationary with engine power. Use the service brake or the parking brake.
- Do not shift from N (Neutral) or P (Park) into 1 (1st), 2 (2nd), D (Drive) or R (Reverse) when the engine is above idle speed.
WARNING - Automatic Transaxle
Before leaving the driver's seat, always make sure the shift lever is in the P (PARK) position; then set the parking brake fully and shut the engine off. Unexpected and sudden vehicle movement can occur if these precautions are not followed in the order identified.
Transaxle Ranges
O/D (overdrive) system
Pressing the O/D system button cancels and engages the overdrive system. When the O/D system is cancelled (button is depressed), the O/D off indicator illuminates and the transaxle gear range is limited to 1st through 3rd. The transaxle will not shift to 4th gear until the O/D system button is again depressed.
When the ignition is switched OFF, the O/D OFF mode is automatically cancelled.
O/D OFF indicator
This indicator light illuminates in the instrument panel when the O/D mode is cancelled.
*NOTICE
If the Malfunction Indicator Light flashes, it indicates an electrical problem with the transaxle. Should this occur, have the vehicle checked by an Authorized Kia Dealer as soon as possible.
Normal operation P (Park)
This position locks the transaxle and prevents the front wheels from rotating. Always come to a complete stop before shifting into this position.
WARNING
Shifting into P (Park) while the vehicle is in motion will cause the front wheels to lock and you will lose driving control of the vehicle.
*NOTICE
The transaxle may be damaged if you shift into P (Park) while the vehicle is in motion.
WARNING
- Do not use the P (Park) position in place of the parking brake when leaving the vehicle. Always make sure the shift lever is latched in the P (Park) position so that it cannot be moved unless the lock release button is pushed in AND the parking brake is fully set.
- Turn the ignition switch off whenever you leave the vehicle unattended. Never leave the vehicle unattended while the engine is running. Unexpected and sudden vehicle movement may occur if these precautions are not taken.
- Never leave a child unattended in a vehicle.
R (Reverse)
Use this position to drive the vehicle backward.
CAUTION
Always come to a complete stop before shifting into or out of R (Reverse). You may damage the transaxle if you shift into R while the vehicle is in motion, except as explained in "Rocking the Vehicle."
N (Neutral)
In this position, the wheels and transaxle are not locked. The vehicle will roll freely even on the slightest incline unless the parking brake or service brakes are applied.
D (Drive)
This is the normal forward driving position. The transaxle will automatically shift through a four-gear sequence, providing the best fuel economy and power.
For extra power when passing another vehicle or climbing steep grades, depress the accelerator fully, at which time the transaxle will automatically downshift into the next lower gear.
2 (2nd)
Move shift lever to this position for driving in heavy, slow-moving traffic or when climbing hills. This position also provides engine braking when going down hills and helps reduce wheel spin on slippery surfaces.
1 (1st)
Move the shift lever to this position in hard pulling situations and for climbing or descending steep grades.
Moving up a steep grade from a standing start
To move up a steep grade from a standing start, depress the brake pedal, shift the shift lever to D (Drive), 2 (2nd), or 1 (1st). Select the appropriate gear depending on load weight and steepness of the grade, and release the parking brake. Depress the accelerator gradually while releasing the service brakes.
Shift lock System
For your safety, the Automatic Transaxle has a shift lock system which prevents shifting the transaxle out of P (Park) unless the brake pedal is depressed.
To shift the transaxle out of P (Park):
- Depress and hold the brake pedal.
- Start the engine or turn the ignition key to the ON position.
- Depress the lock release button and move the shift lever.
When the ignition switch is in the ACC or LOCK position, the transaxle cannot be shifted from P (Park).
If the brake pedal is repeatedly depressed and released with the shift lever in the P (Park) position, a chattering noise near the shift lever may be heard.
This is a normal condition.
Also, the ignition key cannot be removed unless the shift lever is in the P (Park) position. If the ignition switch is in any other position, the key cannot be removed.
Shift lock override
If the shift lever should fail to move from the P (Park) position with the brake pedal depressed, continue depressing the brake, then do the following:

- Carefully remove the cap covering the emergency override access hole which is located on the right side of the shift lever.

- Insert a screwdriver (cross or flat blade) into the access hole, then depress the screwdriver.

- Press the brake pedal.
- Depress the lock release button and move the shift lever.
- Have your vehicle inspected by an Authorized Kia Dealership immediately.
BRAKE SYSTEM
Power Brakes
Your vehicle has power-assisted brakes that adjust automatically through normal usage.
In the event that brake system power assist is lost because of a stalled engine or some other reason, you can still stop your vehicle by applying greater force to the brake pedal than you normally would. The stopping distance, however, will be longer.
When the engine is not running, the reserve brake power is partially depleted each time the brake pedal is depressed. Do not pump the brake pedal when the power assist has been interrupted, except when necessary to maintain steering control on slippery surfaces.
Anti Lock Brakes (ABS) (If Equipped)
The anti-lock brake system is designed to prevent lock-up of the wheels during sudden braking or braking on slippery surfaces. Compared to a conventional brake system, the anti-lock brake system provides greater steering control during braking in such situations.
WARNING - ABS Brakes
• The anti-lock brake system (ABS) cannot compensate for bad road conditions, for unsafe or reckless driving or for bad judgement.
- The ABS is designed to improve maximum braking effectiveness on typical highways and roads in good condition. On road surfaces which are in poor condition, the ABS may actually reduce braking effectiveness.
- Always operate your vehicle at reasonable speeds that are safe for weather and traffic conditions.
During normal driving conditions, the anti-lock brake system operates the same as a conventional brake system. When the anti-lock brake system is engaged due to imminent loss of traction, a pulsation of the brake pedal will result and you may hear or feel "chattering". This is a normal condition and indicates the system is functioning properly.
When driving a vehicle equipped with anti-lock brakes, adjust your driving according to the road and traffic conditions and keep the following in mind.
- Do not pump the brakes as you would when driving a vehicle not equipped with an anti-lock brake system (ABS). In order for the ABS to function normally, press the brake pedal firmly, without pumping the pedal.
• Even with the anti-lock brake system, your vehicle still requires a sufficient stopping distance. Always maintain a safe distance from the vehicle in front of you.
• Always slow down when cornering. The anti-lock brake system cannot prevent accidents resulting from excessive speeds.
- On loose or uneven road surfaces, operation of the anti-lock brake system may result in a longer stopping distance than for vehicles equipped with a conventional brake system.
- Avoid high speeds on wet roads. The anti-lock brake system cannot eliminate the risk of hydroplaning. If the anti-lock brake system should fail, the brake system will function as a conventional brake system. Have your vehicle checked by an authorized Kia dealer as soon as possible.
*NOTICE
- If the ABS warning light is on and stays on, you may have a problem with the ABS system. In this case, however, your regular brakes will work normally.
- The ABS warning light will stay on for 2-3 seconds after the engine starts. During that time, the ABS will go through self-diagnosis and the light will go off if everything is normal. If the light stays on you may have a problem with your ABS system. Contact an authorized Kia dealer for service as soon as possible.
*NOTICE
- If the battery is discharged and the engine is jump started, the ABS warning light may come on. This condition occurs because of a discharged battery and not because there is an anti-lock brake system malfunction.
- Have the battery recharged before driving the vehicle.
In the Event of Brake Failure
If the service brakes should fail to operate while the vehicle is in motion, you can make an emergency stop with the parking brake. The stopping distance, however, will be much greater than normal.
WARNING - Parking Brake
Pulling on the parking brake while the vehicle is moving at normal speeds can cause a sudden loss of control of the vehicle. If you must use the parking brake to stop the vehicle, use great caution in applying the brake.
WARNING
- Do not drive with your foot resting on the brake pedal. This will create abnormally high brake temperatures, excessive brake lining and pad wear, and increased stopping distances.
- When descending a long or steep hill, shift to a lower gear and avoid continuous application of the brakes. Continuous brake application will cause the brakes to overheat and could result in a temporary loss of braking performance.
- Wet brakes may result in the vehicle not slowing down at the usual rate and/or pulling to one side when the brakes are applied. Applying the brakes lightly will indicate whether they have been affected in this way. Always test your brakes in this fashion after driving through deep water. To dry the brakes, apply them lightly while maintaining a safe forward speed until brake performance returns to normal.
Disc Brake Wear Indicators
Your vehicle has front disc brakes. When your front brake pads are worn and it's time for new pads, you will hear a high-pitched warning sound from your front brakes. You may hear this sound intermittently or constantly.
WARNING - Brake Wear
This brake-wear warning sound means your vehicle needs service. If you ignore this audible warning, you will eventually lose braking performance, which could lead to a serious accident.
*NOTICE
To avoid costly brake repairs, do not continue to drive with worn brake pads.
Some driving conditions or climates may cause a brake squeal when you first apply, or lightly apply, the brakes. This is normal and does not indicate a problem with your brakes.
Rear Drum Brakes
Your rear drum brakes don't have wear indicators. Have the rear brake linings inspected if you hear a rear brake rubbing noise. Also, have your rear brakes inspected each time you change or rotate your tires and when you have the front brakes replaced.
CAUTION
Always replace brake linings or front pads as complete front or rear axle sets.

Parking Brake
To set the parking brake, pull the parking brake handle fully and firmly upward while applying the service brake.
CAUTION
Driving with the parking brake on will cause excessive wear of the brake linings and pads.

To release the parking brake, pull the handle up slightly and push the button. Then lower the handle to the released position while holding the button in.
CAUTION
When stopped, do not use the gearshift lever in place of the parking brake. Always set the parking brake fully AND make sure the gearshift lever is securely positioned in P (Park) with an automatic transaxle or in 1st (First) or R (Reverse) gear with a manual transaxle.

AS2B04009
Check the brake warning light each time you start the engine. The light is located in the instrument panel. This warning light will be illuminated with the ignition switch in ON or START and the parking brake set.
Before driving, be sure the parking brake is fully released and the brake warning light is off.
If the brake warning light remains on after the parking brake is released, there may be a malfunction in the brake system. Immediate attention is necessary.
KNOWING YOUR VEHICLE
If at all possible, cease driving the vehicle immediately. If that is not possible, use extreme caution in operating the vehicle and only drive it until you reach the first safe location or a repair shop.
POWER STEERING
Power steering uses energy from the engine to assist you in steering the vehicle. If the engine is off or if the power steering system becomes inoperative, the vehicle may still be steered, but it will require increased steering effort.
Should you notice any change in the effort required to steer during normal vehicle operation, have the power steering system checked by an Authorized Kia Dealer.
*NOTICE
Never hold the steering wheel against a stop (extreme right or left turn) for more than five seconds with the engine running. Holding the steering wheel for more than five seconds in either position may cause damage to the power steering pump.
If the power steering drive belt breaks or if the power steering pump malfunctions, the steering effort will become greatly increased.
*NOTICE
If the vehicle is parked for extended periods outside in cold weather (below -10°C/14°F), the power steering may require increased effort when the engine is first started. This is caused by increased fluid viscosity due to the cold whether and does not indicate a malfunction.
When this happens, increase the engine RPM to 1500rpm then release the accelerator or let the engine idle for two or three minutes to warm up the fluid.
TILT STEERING (IF EQUIPPED)
A tilt steering wheel allows you to adjust the steering wheel before you drive. You can also raise it to the highest level to give your legs more room when you exit and enter the vehicle.
To tilt the wheel, hold the steering wheel and pull the lock release lever down. Move the steering wheel to a comfortable level, then push the lock release lever up to lock the steering wheel in place.
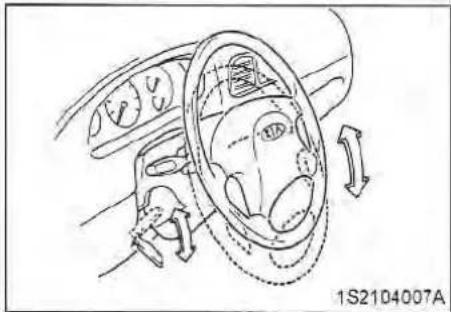
WARNING
Never adjust the angle of the steering wheel while driving. You may lose your steering control and cause severe personal injury or accidents.
CRUISE CONTROL (IF EQUIPPED)
The cruise control system can maintain a constant cruising speed of more than 25 mph (40 km/h) without manual control of the accelerator. A slight fluctuation in vehicle speed (2-3 mph) while the cruise control system is active is normal. The cruise control system is useful when cruising on freeways, toll roads or other non-congested highways where frequent deceleration and acceleration are not required.

WARNING - Cruise Control
Using cruise control in the following conditions could cause you to lose control of the vehicle:
• Heavy or unsteady traffic
- Slippery or winding roads
- Situations that involve varying speeds
Do not use cruise control in these situations.

To set the cruise:
- Push in the cruise control main switch. This turns the system on.
- Accelerate to desired cruising speed above 25 mph (40 km/h).
- Push the "COAST/SET" control switch and release it. The "CRUISE" indicator light in the instrument cluster will illuminate after you have set the vehicle speed at the desired vehicle speed.
- Remove your foot from the accelerator pedal and the desired speed will automatically be maintained.

- To increase speed, temporarily depress the accelerator pedal enough for the vehicle to exceed the preset speed. When you remove your foot from the accelerator pedal, the vehicle will return to the speed you have set.

WARNING
If the CRUISE switch is left on, the cruise control can be turned on accidentally. Keep the CRUISE switch off when cruise control is not in use.
*NOTICE
The SET function cannot be activated until approximately 2 seconds after the CRUISE MAIN switch has been engaged.
On a steep grade, the vehicle may momentarily slow down after the SET function has been engaged.
Cruise control will cancel at about 11 mph (18 km/h) below the preset speed.

To increase cruise control set speed:
Follow either of these procedures.
- Depress the RES/ACCEL switch and hold it. Your vehicle will accelerate. Release the switch at the new speed you want to maintain.
- Depress and immediately release the RES/ACCEL switch. Vehicle speed will be increased only 1 mph. Using this technique provides for small vehicle speed increases.
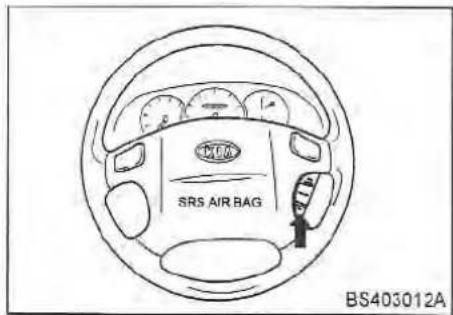
To decrease the cruising speed:
Follow either of these procedures.
- Depress the COAST/SET switch and hold it. Your vehicle will gradually slow down. Release the switch at the speed you want to maintain.
- Depress and immediately release the COAST/SET switch. Vehicle speed will be decreased 1 mph (1.6 km/h). Using this technique provides for small vehicle speed decreases.
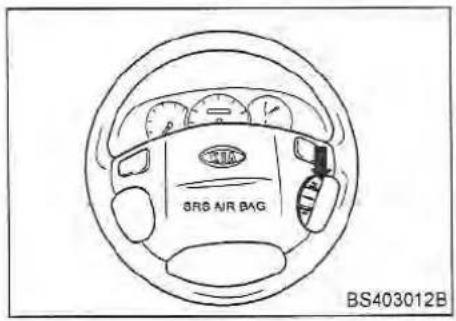
To resume cruising speed at more than 25 mph (40 km/h)
If something besides the CRUISE switch was used to cancel cruising speed and the system is still activated, the most recent set speed will automatically resume when the RES/ACCEL function is activated by briefly depressing the switch. It will not resume, however, if the vehicle speed has dropped below 25 mph (40 km/h).

To cancel cruise control do one of the following:
• Depress the brake pedal.
- Shift into N (Neutral).
- Depress the CANCEL switch located on your steering wheel.
- Depress the COAST/SET and RES/ACCEL switches at the same time.
Each of these actions will cancel cruise control operation, but it will not turn the system off. If you wish to resume cruise control operation, depress the RES/ACCEL switch located on your steering wheel. You will return to your previously preset speed.
To turn cruise control OFF:
- Depress the CRUISE switch (OFF position).
- Turn the ignition off.
Both of these actions also cancel cruise control operation. If you want to resume cruise control operation, repeat the steps provided in "To Set Cruise
Control Speed" on the previous page.
INSTRUMENT CLUSTER


GAUGES
Speedometer
The speedometer indicates the forward speed of the vehicle.
Odometer/Tripmeter
You can choose the odometer, tripmeter A and tripmeter B by pressing the mode selection button.
Odometer
The odometer indicates the total distance the vehicle has been driven.
Tripmeter
TRIP A: Tripmeter A
TRIP B: Tripmeter B
The tripmeter indicates the distance of individual trips selected by the driver. Tripmeter A and B can be reset to zero by pressing the reset button for one second or more, and then releasing.
*NOTICE
Do not operate the engine within the tachometer's RED ZONE.
This may cause severe engine damage.

Tachometer (If Equipped)
The tachometer indicates the approximate number of engine revolutions per minute (rpm).
Use the tachometer to select the correct shift points and prevent lugging the engine and/or over-revving it.
The tachometer pointer may move slightly when the ignition switch is in the ACC or ON position with the engine OFF. This movement is normal and will not affect the accuracy of the tachometer once the engine is running.

Fuel Gauge
The fuel gauge indicates the approximate amount of fuel remaining in the fuel tank.
Fuel tank capacity: 13.2 gal. (50 L)
The fuel gauge is supplemented by a low fuel warning light located in the instrument panel.
This gauge is designed to continue indicating the amount of fuel remaining in the fuel tank even after the ignition switch has been turned to OFF.

Engine Temperature Gauge
This gauge shows the temperature of the engine coolant when the ignition switch is ON.
If the gauge pointer moves beyond the normal range area toward the H position, it indicates overheating that may damage the engine.
Do not continue driving with an overheated engine.
If your vehicle overheats, refer to "Overheating" in the Index.

Instrument Panel Illumination
When the vehicle's parking lights or headlights are on, rotate the illumination control knob to adjust the instrument panel illumination intensity.
WARNINGS AND INDICATORS
Warning Lights/Audible Indicators Checking operation
All the warning lights are checked by turning the ignition switch ON (you do not need to start the engine). Any light that does not come on should be checked by an Authorized Kia Dealer. After starting the engine, check to make sure that all warning lights are off. If any are still on, this indicates a situation that needs attention. When releasing the parking brake, the brake system warning light should go off.
Parking Brake and Brake Fluid Warning

Parking brake warning
This light comes on when the parking brake is applied with the ignition switch in the START or ON position. The warning light should go off when the parking brake is released.
Low brake fluid level warning
If the warning light remains on when the parking brake is released, it may indicate that the brake fluid level in the reservoir is low.
If the warning light remains on:
- Drive to the nearest safe location and carefully stop your vehicle.
- With the engine stopped, check the brake fluid level immediately and add fluid as required. All brake components should also be checked immediately for fluid leaks.
- If leaks are found, if the warning light remains on, or if the brakes do not operate properly, do not drive the vehicle. Have it towed to an Authorized Kia Dealer for a brake system inspection and necessary repairs.

WARNING - Brake Warning Lights
Driving the vehicle with a warning light ON is dangerous. If the brake warning light remains ON, have the brakes checked and repaired immediately.
To check bulb operation, the warning light illuminates when the ignition switch is in the ON position.
Safety Belt Warning
If the driver's lap/shoulder belt is not fastened when the key is turned ON, a chime sounds for approximately six seconds and the safety belt warning light illuminates for approximately six seconds. If the system does not operate as described, see an Authorized Kia Dealer for assistance.
Airbag Warning

AIR BAG
This warning light will remain on for approximately 6 seconds each time you turn the ignition switch ON. If the system does not operate as described or if the light comes on while the vehicle is being driven, see an Authorized Kia Dealer for immediate assistance.
Charging System Warning

This warning light indicates a malfunction of either the generator or electrical charging system.
If the warning light illuminates while driving:
- Drive to the nearest safe location and carefully stop your vehicle.
- With the engine off, check the generator drive belt for looseness or breakage.
- If the belt is adjusted properly, a problem exists somewhere in the electrical charging system. Have an Authorized Kia Dealer correct the problem as soon as possible.
*NOTICE
Do not drive the vehicle with a loose or broken generator belt; the engine could be damaged by overheating because this belt also drives the water pump.
Engine Oil Pressure Warning

This warning light indicates the engine oil pressure is low.
If the warning light comes on while driving:
- Drive safely to the side of the road and stop.
- With the engine off, check the engine oil level. If the level is low, add oil as required.
If the warning light remains on after adding oil or if oil is not available, call an Authorized Kia Dealer.
*NOTICE
Do not drive the vehicle when the Enging oil Pressure Warning Light is ON.
If the engine is not stopped as soon as possible, severe engine damage could result.
Low Fuel Level Warning

This warning light indicates the fuel tank is near empty. The warning light will come on when the fuel level has dropped to about 2.4 US gal. (9 liters). Refuel as soon as possible.
Key Reminder Warning Chime
If the driver's door is opened and the ignition key is left in the ignition switch, the key reminder warning chime will sound. This is to remind you to remove your keys from the ignition before you lock the vehicle.
Lights-On Warning Chime
The lights-on warning chime will sound if the headlight switch is left in the 1st or 2nd position and the door is opened.
Rear Window Defroster Indicator

This light comes on when the rear defroster is on.
Headlight High Beam Indicator

This indicator illuminates when the headlights are on and in the high beam position or when the turn signal lever is pulled into the Flash-to-Pass position.
O/D OFF Indicator (automatic transaxle)

This indicator comes on when the O/D system is deactivated.
Door Ajar Warning

This warning light comes on when a door is not closed securely with the ignition switch in any position.
Auto Cruise Indicator
AUTO CRUISE
The cruise indicator light is illuminated only when the vehicle cruising speed has been set using the control switch. The indicator light does not illuminate when the main cruise control switch is activated.
Anti-Lock Brake System (ABS) Warning Light (If Equipped)

This light illuminates when you start the engine. The light will go off if the ABS system is operating normally. Also, this light comes on if the key is turned to ON, and then goes off in 2-3 seconds if the system is operating normally.
If this warning light illuminates while the vehicle is being driven, have the vehicle checked by an authorized Kia Dealer or other competent repair shop as soon as possible.
Tail-gate Ajar Warning (5 door hatchback)

This warning light comes on with ignition switch in any position when tail gate is not closed securely.
Malfunction Indicator

The CHECK ENGINE or malfunction indicator light is installed in your vehicle's instrument panel and responds to signals from the vehicle's On Board Diagnostic (OBD-II) System. The OBD-II System monitors the performance of the vehicle's Emission Control System (ECS), which is designed to reduce the amount of air pollutants in engine exhaust to the levels required by government regulations.
When you first start the engine, the check engine light will illuminate briefly as a system check to confirm that the OBD-II System is operating properly. As the engine starts, this light turns off. However, if at any time the OBD-II system detects a faulty signal or determines that the ECS is not performing to specification, the CHECK ENGINE light will illuminate continuously or flash.
Continuously ON :
If the CHECK ENGINE light comes ON while driving and illuminates continuously, a potential problem has been discovered in the ECS or one of the exhaust system components. Generally, the vehicle will continue to be driveable but it should be checked by an authorized Kia dealer as soon as possible. This condition is unlikely to lead to engine damage unless a decrease in vehicle power or poor running conditions is immediately apparent.
Flashing ON and OFF :
If the CHECK ENGINE light begins to flash ON and OFF, a more serious problem with the ECS or exhaust system component has been detected. If this happens, and there is no degradation to performance, the vehicle is still driveable (avoid high speeds) but should be checked by an authorized Kia dealer at your earliest possible convenience. If the flashing CHECK ENGINE light is accompanied by a decrease in power or poor running conditions, safely stop the vehicle and immediately contact Kia Roadside Assistance.
Note that the CHECK ENGINE light will illuminate for a problem like a loose or missing gas cap, but will not illuminate as a result of low engine oil or coolant, low automatic transaxle fluid or engine overheating. The driver will be alerted to these conditions by other indicators on the instrument panel
CAUTION
- Prolonged driving with the On Board Diagnostic System Malfunction Indicator Light (HCITCK) illuminated may cause damage to the emission control systems which could effect driveability and/or fuel economy.
- If the On Board Diagnostic System Malfunction Indicator Light (HORCL) begins to flash ON and OFF, potential catalytic converter damage is possible which could result in loss of engine power. Have the On Board Diagnostic System inspected as soon as possible by an authorized Kia dealer.
*NOTICE
A loose fuel filler cap may cause the On Board Diagnostic System Malfunction Indicator Light (CHECK) in the instrument panel to illuminate unnecessarily. Always make sure that the fuel filler cap is tight.
LIGHTING
* NOTICE - Battery Saver Function
-
This feature prevents the battery from being discharged by automatically turning off small lights (except the headlights) when the driver removes the ignition key and opens the driver-side door.
• The battery saver function will also automatically turn off the taillights if the ignition key is removed. In order to keep the taillights on when the ignition key is removed: -
Open the driver-side door.
- Turn the multi function switch off and on again.
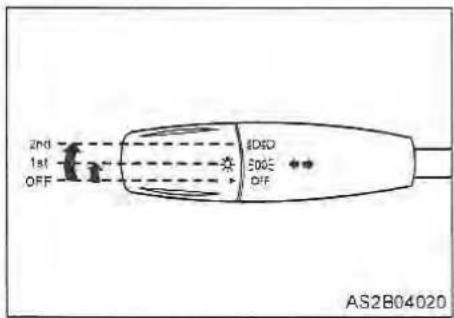
Lighting Control
To turn the lights on, twist the knob on the end of the control lever which is located on the steering column to the left of the steering wheel.
First position
Tail, parking, license and sidemarker lights and instrument panel lights ON
Second position
Head, tail, parking, license and sidemarker lights and instrument panel lights ON.

For high beam headlights, push the lever away from you. Pull it back for low beams.
The high-beam indicator will illuminate when the headlight high beams are switched ON.
To prevent the battery from being discharged, do not leave the lights on for a prolonged time while the engine is not running.

Flashing Headlights
To flash the headlights, pull the lever toward you. It will return to the normal position when released. The headlight switch does not need to be on to use this flashing feature.
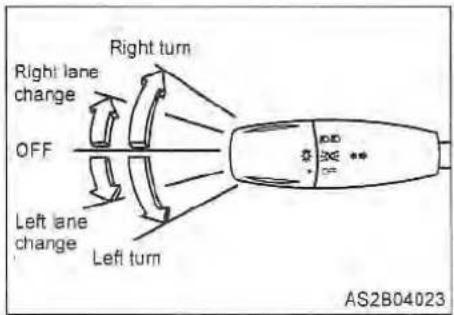
Turn Signals
The same lever that controls the headlights also controls the turn signals.
The ignition switch must be on for the turn signals to function. Move the lever up or down to activate the turn signals. The turn signals will self-cancel after a turn is completed. If the indicator continues to flash after a turn, manually return the lever to the OFF (middle) position.
Lane change signals
To signal a lane change, move the turn signal lever slightly and hold it in position. The lever will return to the OFF (middle) position when released.
Green arrow indicators on the instrument panel indicate which turn signal is operating. If an indicator stays on and does not flash or if it flashes abnormally, one or more of the turn signal bulbs may be burned out and will require replacement.
Daytime Running Lights(DRL)
Daytime Running Lights (DRL) can make it easier for others to see the front of your vehicle during the day. DRL can be helpful in many different driving conditions, but they can be especially helpful in the short periods after dawn and before sunset.
The DRL system will make your low-beam headlights turn OFF when:
• The headlight switch is ON.
• The parking brake is engaged.
• The taillights switch is ON.
WIPERS AND WASHERS

Windshield Wipers
The ignition switch must be ON. To turn the wipers on, pull the windshield wiper control lever down. INT*- Intermittent wiper operation
1 - Normal wiper speed
2 - Fast wiper speed

Variable-Speed intermittent wipers (If Equipped)
Set the knob to the INT position and choose the desired speed of the wipers by turning the ring.
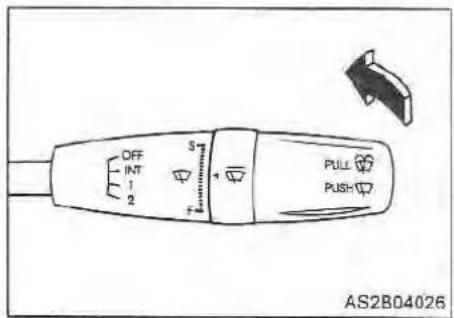
One-Touch wipers
For a single wiping cycle, push the lever forward and release it with the lever in the OFF position.
*NOTICE
• To prevent possible damage to the wipers or windshield, do not operate the wipers when the windshield is dry.
• To prevent damage to the wiper blades, do not use gasoline, kerosene, paint thinner, or other solvents on or near them.
• To prevent damage to the wiper arms and other components, do not attempt to move the wipers manually.
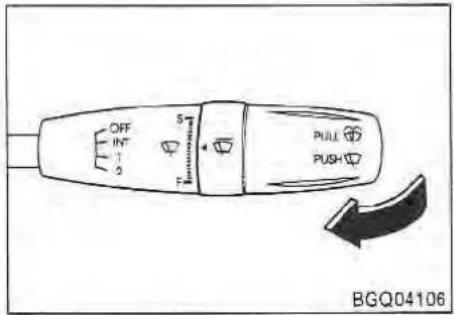
Windshield Washers
This vehicle is equipped with either of two types of washer systems. The ignition switch must be ON for either washer system to operate.
Windshield washer (with intermittent wipe)
Pull the lever toward you and hold it to activate the washer. If the wipers are in the OFF or INT position, they will automatically turn on and wipe for 1 to 3 cycles after the lever is released.
Windshield washer (without intermittent wipe)
Pull the lever toward you and hold it to activate the washer. To activate the wipers, pull the lever down.
If the washer does not work, check the washer fluid level. If the fluid level is not sufficient, add an appropriate, non-abrasive, windshield washer fluid to the washer reservoir. The reservoir filler neck is located in the front of the engine compartment, on the passenger's side.
CAUTION
Do not use the washer in freezing temperatures without first warming the windshield with the defrosters; the washer solution could freeze on contact with the windshield and obscure your vision.
*NOTICE
To prevent possible damage to the washer pump, do not operate the washer when the fluid reservoir is empty.
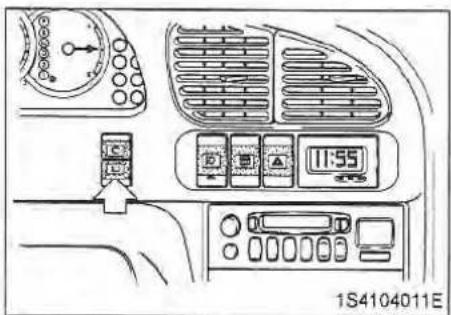
Rear Windshield Wiper and Washer (5 door hatchback, if equipped)
The rear window wiper and washer can be activated by depressing the corresponding switch.
If you want to activate the rear wiper and washer simultaneously, depress the upper switch. To activate the rear wiper only, depress the lower switch.
FRONT FOG LIGHTS (IF EQUIPPED)

To turn the front fog lights on, turn the headlights on and then depress the front fog lights switch.
To turn the front fog lights off, depress it again or turn the headlights off.
REAR WINDOW DEFROSTER
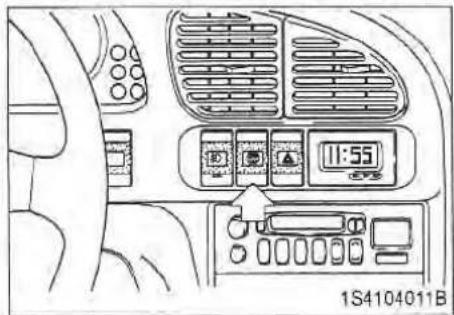
The defroster heats the window to remove frost, fog and thin ice from the interior and exterior of the rear window. The ignition switch must be ON for the defroster to operate.
To activate the rear window defroster, press the rear window defroster button located in the center console switch panel. The instrument panel rear window defroster indicator illuminates when the defroster is ON.
The rear window defroster automatically turns OFF after 15 minutes or when the ignition switch is turned OFF. To turn off the defroster, press the rear window defroster button again. If there is heavy accumulation of snow on the rear window, brush it off before operating the rear defroster.
*NOTICE
To prevent damage to the conductors bonded to the inside surface of the rear window, never use sharp instruments or window cleaners containing abrasives to clean the window.
*NOTICE
To prevent the battery from being discharged, operate the defroster only while the engine is running.
INTERIOR FEATURES

Cigarette Lighter
To operate the cigarette lighter, press it in and release it. When it is heated, it automatically pops out ready for use. If the engine is not running, the ignition switch must be in the ACC position for the lighter to operate.
*NOTICE
- Do not hold the lighter in because it will overheat.
- Only a genuine Kia lighter should be used in the cigarette lighter socket. The use of plug-in accessories (shavers, hand-held vacuums and coffee pots, for example) may damage the socket or cause electrical failure.
- If the lighter does not pop out within 30 seconds, remove it to prevent overheating.
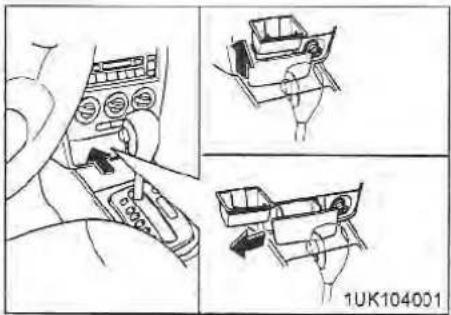
Ashtray
To use the ashtray press the front face and the ashtray will slide out. To remove the ashtray, grasp the bucket and pull it up carefully.
WARNING - Ash Tray Use
- Do not use the vehicle's ashtrays as waste receptacles.
- Putting lit cigarettes or matches in an ashtray with other combustible materials may cause a fire.

Glove Box
To open the glove box door, pull the latch toward you.
CAUTION
To reduce the risk of injury in case of an accident or sudden stop, always keep the glove box door closed while driving.
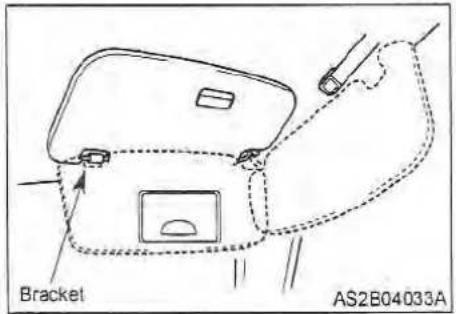
Sunvisors
To use a sunvisor, pull it downward. To use a sunvisor for a side window, pull it downward, unsnap it from the bracket and swing it to the side.
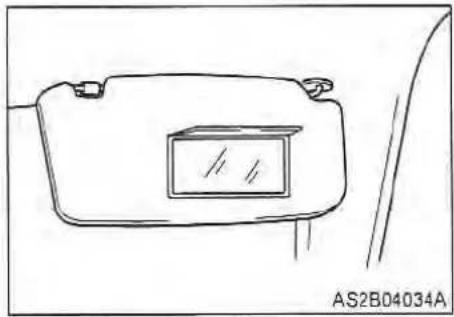
Vanity mirror
To use the vanity mirror, rotate the sunvisor downward.
And pull up the mirror cover.
CLIMATE CONTROL SYSTEM

Controls
Fan speed control knob
The fan speed control knob (A) is the knob closest to the driver. Four (4) adjustable fan speeds are provided which increase as the number increases. The ignition switch must be in the ON position for fan operation.
O - Fan off
1 Low speed
II - Medium speed
III - High speed
III - Maximum speed
Mode selection
The mode selection knob (B) is the center knob in the ventilation control panel. It controls the direction of air flow through the ventilation system.
Face position
Air flow is directed toward the upper body and face through all four (4) center instrument panel ventilation outlets. Additionally, each outlet can be adjusted to direct the air discharged from the outlet.
Warm, cool, or fresh air is directed through the vents.
Face-Floor position
Air flow is directed toward the face and the floor. The air to the floor is warmer than to the face (except when the temperature lever is set to the extreme cold position).
Floor position
Most of the air flow is directed to the floor, with a small amount being directed to the windshield and side window defrosters.


Floor-Defrost position
Most of the air flow is directed to the floor and the windshield with a small amount directed to the side window defrosters.


Defrost position
Most of the air flow is directed to the windshield with a small amount of air directed to the side window defrosters.
When you select 📋 (Floor-Defrost) or 📌 (Defrost) position, the system automatically turns on the air-conditioning system (If so equipped) and outside (fresh) air mode. After that, when you select any position except 📋 (Floor-Defrost) and 📌 (Defrost), the air-conditioning system and air intake mode return original state.
*NOTICE
If you don't want air-conditioning or outside (fresh) air when operating in either of these modes, press the air-conditioning switch or air intake control switch once again, then the air-conditioning or outside (fresh) air mode is deactivated.
Temperature control knob
The temperature control knob (C) is the round knob closest to the passenger side of the ventilation control panel.
Whenever you start the engine, the air flow control will be set at outside (fresh) air position. If you want the recirculated air position, press the corresponding button.
Air intake control switch
The air intake control switch is located on the right lower side of the ventilation control panel.
Whenever you start the engine, the air flow control will be set at outside (fresh) air position. If you want the recirculated air position, press the corresponding button.
Recirculated air position


When the air intake control switch is depressed (switch indicator illuminates), almost all outside air flow into the vehicle is shut off and air inside the vehicle is recirculated.
This position can be used temporarily for maximum heating or cooling (If Equipped with air conditioning) and to help prevent undesirable outside air flow into the vehicle.
WARNING
Continued climate control system operation in the recirculated air position may allow humidity to increase inside the vehicle which may fog the glass and obscure visibility.
Outside (fresh) air position (with air quality control system)


When the air intake control switch is not illuminated, air enters the ventilation system from outside the vehicle. Use this position for normal ventilation and heating.
Outside (fresh) air position (without air quality control system)


When the air intake control switch is depressed (switch indicator illuminates), air enters the ventilation system from outside the vehicle. Use this position for normal ventilation and heating.
Air conditioning switch (If Equipped)
Depress the switch to turn the air conditioning system on. An indicator light in the switch will illuminate when the fan switch is on indicating air conditioning system operation. Depress the switch again to turn the air conditioning system off.
System Operation
Ventilation
- Set the mode selection knob to the position.
- Set the air intake control switch to the outside air position (switch indicator OFF).
- Set the temperature control knob to the desired position.
- Set the fan speed control knob to the desired speed.
Heating
- Set the mode selection knob to the position.
- Set the air intake control switch to the recirculated air position (switch indicator ON).
CAUTION
Continued climate control system operation in the recirculated air position may allow humidity to increase inside the vehicle which may fog the glass and obscure visibility.
- Set the temperature control knob to the desired position.
- Set the fan speed control knob to the desired speed.
- If dehumidified heating is desired, turn the air conditioning system (If Equipped) ON.
- If cool air is desired at face level for bi-level operation, set the mode selection knob to the 🔒 position.
- If the windshield fogs up, set the mode selection knob to the position.
Air conditioning (If Equipped)
All Kia Air Conditioning Systems are filled with environmentally friendly R134a refrigerant which is not damaging to the ozone layer.
- Start the engine. Depress the air conditioning switch.
- Set the mode selection knob to the face position.
- Set the air intake control switch to the outside air or the recirculated air position (switch indicator ON).
- Set the temperature control knob to the desired position.
- Set the fan speed control knob to the desired speed.
-
Adjust the fan speed control knob and temperature control knob to maintain maximum comfort.
-
If warmer air is desired at floor level for bi-level operation, set the mode selection knob to the ↗ position and adjust the temperature control knob to maintain maximum comfort.
- When maximum cooling is desired, set the temperature control knob to the extreme left position and set the air intake control switch to the recirculated air position (switch indicator ON), then set the fan speed control knob to the highest speed.
*NOTICE
When using the air conditioning system, monitor the temperature gauge closely while driving up long hills or in heavy traffic when outside temperatures are high. Air conditioning system operation may cause engine overheating. Continue to use the blower fan but turn the air conditioning system off if the temperature gauge indicates engine overheating.
Air conditioning system operating tips:
-
If the vehicle has been parked in direct sunlight during hot weather, open the windows for a short time to let hot air inside the vehicle escape.
• To help reduce moisture on the inside of windows on rainy, humid days, decrease the humidity inside the vehicle by operating the air conditioning system. -
During air conditioning system operation, you may occasionally notice a slight change in engine speed at idle as the A/C compressor cycles on. This is a normal system operating characteristic.
- Use the air conditioning system every month if only for a few minutes.
• After air conditioning system use, you may notice clear water dripping (or even puddling) on the ground under the passenger side of the vehicle. This is a normal system operating characteristic. -
The air conditioning system includes a function that will automatically turn the A/C compressor off if engine coolant temperature approaches an overheating level. A/C compressor operation will resume once engine coolant temperature returns to the "normal" range. Also, the A/C compressor is automatically turned off for a few seconds when the accelerator is fully depressed.
-
When operating the air conditioning system, use the outside (fresh) air position.
- Operating the air conditioning system in the recirculated air position does provide maximum cooling, however, continual operation in this mode may cause the air inside the vehicle to become stale.
Rear heating duct
Whenever the ventilation controls are in the face-floor or floor position, air is directed to the rear seat passenger floor area.
Air Quality Control System (If Equipped)
The air inflow from outside vehicle can be automatically controlled. Press the ( ) button to activate the "Air Quality Control System". To deactivate the system, press the ( ) button again, the air intake control button or set mode selection knob to the ( ) position.
CAUTION
- Prolonged driving with the "Air Quality Control System" ON will cause the windows to fog inside the vehicle.
• To defog the interior of the vehicle, set the mode selection knob to ( ) Defrost position or air intake button to the outside position. - The air quality control sensor is located at the side of radiator, be careful to avoid damaging the sensor.
WINDSHIELD DEFROSTING AND DEFOGGING
![graph TD A["Top Left: Internal Control Valve"] --> B["Left: Rotation Arrow"] B --> C["Right: Adjustment Arrow"] C --> D["Bottom Right: Reverse Rotation Arrow"]](/content/2026/06/1254039/images/e430061dc310a51c846cfcfa89036476270aab3df1088b32d3f93048be62cd39.jpg)
To defog inside windshield
- Set the mode selection knob to the 🎨 or 📌 position.
When you select 📋 or 📌 position, the system automatically turns on the A/C and outside (fresh) air mode. - Set the temperature control knob to the desired position.
- Set the fan speed control knob to any desired speed except "O". For maximum defogging, set the fan speed control knob to the "III" or "III" position.
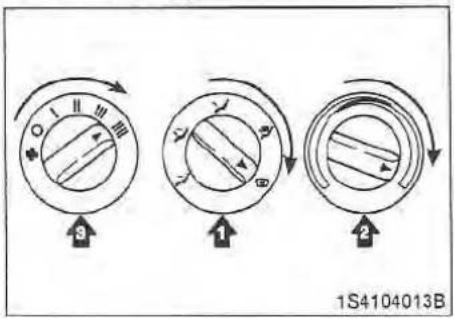
To defrost outside windshield
- Set the mode selection knob to the position.
When you select ☐ position, the system automatically turns on the A/C and outside (fresh) air mode. - Set the temperature control knob to the extreme right/hot position
- Set the fan speed control knob to the "III" or "III" position.
WARNING
Do not use the 📋 or 🌐 position during cool operation in extremely humid weather. The difference between the temperature of the outside air and that of the windshield could cause the outer surface of the windshield to fog up, causing loss of visibility. In this case, set the mode selection knob to the 🔍 position and fan speed control knob to the lower speed.
- For maximum defrosting, set the temperature control knob to the extreme right/hot position and the fan speed control knob to the highest speed.
- If warm air to the floor is desired while defrosting or defogging, set the mode selection knob to the position.
- Before driving, clear all snow and ice from the windshield, rear window, outside rear view mirrors, and all side windows.
- Clear all snow and ice from the hood and the air inlet in the cowl grille to improve heater and defroster efficiency and to reduce the probability of fogging on the inside of the windshield.
*NOTICE
If you don't want air-conditioning or outside (fresh) air when operating in either of these modes, pressing the air-conditioning switch or air intake control switch again will deactivate the air-conditioning or outside (fresh) air mode.

How to cancel automatic air-conditioning operation and the outside (fresh) air position in the Floor-Defrost and Defrost position:
When you select the Floor-Defrost or Defrost position, the system automatically turns on the air-conditioning system and the outside (fresh) air position will be selected.
DRIVING TIPS DRIVING TIPS
5
Fuel Requirements 5-2
Emission Control System....5-3
Before Driving....5-5
Suggestions for Economical Operation....5-6
Special Driving Conditions....5-7
Trailer Towing 5-10
Overloading....5-10
Label Information 5-11
FUEL REQUIREMENTS
Your new Kia Vehicle must use only unleaded fuel having an octane rating of 87 or higher. Your new Kia is designed to obtain maximum performance with unleaded fuel. Unleaded fuel will minimize exhaust emissions and spark plug fouling.
*NOTICE
NEVER USE LEADED FUEL. The use of leaded fuel is detrimental to the catalytic converter. Never add any fuel system cleaning agents to the fuel tank other than what Kia has specified or the equivalent. (Consult an Authorized Kia Dealer for details.)
Leaded fuel will damage the engine control system's oxygen sensor and affect the emission control system.
Gasoline containing alcohol and methanol
Ethanol (also known as grain alcohol) is a mixture of ethanol and gasoline marketed as gasohol. Do not use gaschol containing more than 10% ethanol.
Methanol (also known as wood alcohol) is a mixture of gasoline and methanol marketed as gasohol. Do not use gasoline or gasohol containing methanol.
Either of these fuels may cause driveability problems and damage to the fuel system.
Discontinue using gasohol of any kind if driveability problems occur.
Vehicle damage or driveability problems may not be covered by the manufacturer's warranty if they result from the use of:
- Gasohol containing more than 10% ethanol,
• Gasoline or gasohol containing methanol, or - Leaded fuel or leaded gasohol
*NOTICE
Never use gashol which contains methanol. Discontinue use of any gashohol product which impairs driveability.
EMISSION CONTROL SYSTEM
The vehicle emission control system is covered by a written limited warranty. Please see the warranty information contained in the Warranty and Consumer Information Manual in your vehicle.
Vehicle Modifications
This vehicle should not be modified. Modification of your Kia could affect its performance, safety or durability and may even violate governmental safety and emissions regulations. In addition, damage or performance problems resulting from any modification may not be covered under warranty.
Engine Exhaust Gas Precautions (carbon monoxide)
Engine exhaust gases contain carbon monoxide. Though colorless and odorless, it is dangerous and could be lethal, if inhaled.
- Carbon monoxide can be present with other exhaust fumes. Therefore, if you smell exhaust fumes of any kind inside your vehicle, have it inspected and repaired immediately by an Authorized Kia Dealer. If at all possible, do not drive with exhaust fumes present. If you must, do so only with all windows fully open. Have your vehicle checked and repaired immediately.
-
Do not operate the engine in confined or closed areas (such as garages) any more than what is necessary to move the vehicle in or out of the area.
-
When the vehicle is stopped in an open area for more than a short time with the engine running, adjust the ventilation system to draw outside air into the vehicle. Turn the engine off if you smell any exhaust fumes.
- Never sit in a parked or stopped vehicle for an extended time with the engine running.
DRIVING TIPS
Operating Precautions for Catalytic Converters
Your vehicle is equipped with a catalytic converter emission control device.
Therefore, the following precautions must be observed:
• Use only UNLEADED FUEL.
- Do not park the vehicle over or near flammable objects, such as dry grass, paper, leaves, etc. Under certain conditions, they could be ignited by a hot exhaust system.
- Do not operate the vehicle when there are signs of engine malfunction, such as misfire or a noticeable loss of performance.
- Do not misuse or abuse the engine. Examples of misuse are coasting with the ignition off and descending steep grades in gear with the ignition off.
- Do not operate the engine at high idle speed for extended periods (5 minutes or more).
- Do not modify or tamper with any part of the engine or emission control system. All inspections and adjustments must be made by a qualified technician.
Failure to observe the above precautions could result in damage to the catalytic converter and to your vehicle and could void your warranties.
BEFORE DRIVING
Before entering vehicle:
- Be sure that all windows, outside mirror(s), and outside lights are clean.
- Check the condition of the tires.
- Check under the vehicle for any sign of leaks.
- Be sure there are no obstacles behind you if you intend to back up.
Necessary Inspections
Fluid levels, such as engine oil, engine coolant, brake/clutch fluid, and washer fluid should be checked on a regular basis, with the exact interval depending on the fluid. Further details are provided in Maintenance, Section 7.
Before Starting
- Close and lock all doors.
- Position the seat so that all controls are easily reached.
- Adjust the inside and outside rearview mirrors.
- Be sure that all lights work.
-
Check all gauges.
-
Check the operation of warning lights when the ignition switch is turned to the ON position.
- Release the parking brake and make sure the brake warning light goes out.
For safe operation, be sure you are familiar with your vehicle and its equipment.
Drunk Driving
Drinking and driving is dangerous. Drunk driving is the number one contributor to the highway death toll each year. Alcohol impairs a driver's judgment, vision and muscular coordination. Even a small amount of alcohol will affect a driver's reflexes, perceptions and judgment.
Please don't drink and drive, or ride with a driver who has been drinking. Choose a designated driver if you're with a group, or if you're alone, call a cab.
Drugs and Driving
Driving while under the influence of drugs is as dangerous or more dangerous than driving under the influence of alcohol, depending on the drug(s) used and the quantity consumed. Don't take drugs and drive.
If you are taking a prescription medicine, check with your doctor or pharmacist regarding whether you may operate a motor vehicle.
Suggestions for Economical Operation
Your vehicle's fuel economy is mainly dependent on your style of driving, how you drive, where you drive and when you drive.
Each of these factors has an effect on how many miles (kilometers) you can get from a gallon (liter) of fuel. To operate your vehicle as economically as possible, use the following driving suggestions to help save money in both fuel and repairs:
- Avoid lengthy warm-up idling. Once the engine is running smoothly, begin driving. Remember, though, that on cold days, engine warm-up may take a little longer.
- Save fuel by accelerating slowly after stopping.
- Keep the engine in tune and follow the recommended periodic maintenance schedule.
This will increase the life of all parts and lower your operating costs. - Do not use the air conditioner unnecessarily.
-
Slow down when driving on rough roads.
-
For longer tire life and better fuel economy, always keep the tires inflated to the recommended pressures.
- Maintain a safe distance from other vehicles to avoid sudden stops. This will reduce wear on brake linings and pads and save fuel because extra fuel is required to accelerate back to driving speed.
- Do not carry unnecessary weight in the vehicle.
- Do not rest your foot on the brake pedal while driving. This can cause needless wear, possible damage to the brakes, and poor fuel economy.
- Improper wheel alignment causes the tires to roll at excessive angles, which results in faster tire wear. It takes more power to overcome this improper alignment, which wastes fuel.
- Open windows at high speeds can reduce fuel economy.
• Crosswinds and headwinds reduce fuel economy. To help offset some of this loss, slow down when driving in these conditions.
Keeping a vehicle in good operating condition is important both for economy and safety. Therefore, have an Authorized Kia Dealer perform scheduled inspections and maintenance.

WARNING - Engine OFF Motion
Never turn the engine off to coast down hills or anytime the vehicle is in motion. The power steering and power brakes will not function without the engine running. Instead, downshift to any appropriate gear for engine braking effect.
SPECIAL DRIVING CONDITIONS
Hazardous Driving
When hazardous driving is encountered because of water, snow, ice, mud, sand, or similar hazard, follow these suggestions:
- Drive cautiously and allow extra distance for braking.
- Avoid sudden movements in braking or steering.
- When braking in vehicles without anti-lock brakes, depress the brake pedal with a controlled up-and-down motion until the vehicle is stopped.
- When starting from a stop in snow, mud, or sand, use second gear and accelerate slowly to avoid spinning the front wheels. Low gear may be used, if necessary.
- Use sand, rock salt, tire chains, or other non-slip material under the front wheels to provide traction when stalled on ice, snow, or mud.
WARNING - Downshifting
Downshifting into first gear with a manual transaxle or into low with an automatic transaxle while driving on slippery surfaces can cause an accident. The sudden change in tire speed could cause the tires to skid. Be careful when downshifting on slippery surfaces.
Rocking the Vehicle
If it is necessary to rock the vehicle to free it from snow, sand, or mud, move the shift lever of an automatic transaxle from D (Drive) to R (Reverse) in a repeat pattern while depressing the accelerator gently. With a manual transaxle, move the shift lever back and forth from 1 (First) to R (Reverse).
Do not race the engine. If you are still stuck after a couple minutes of rocking, have the vehicle pulled out by a tow vehicle to avoid engine overheating and possible damage to the transaxle.
*NOTICE
Prolonged rocking may cause engine overheating, transaxle damage or failure, and tire damage.
WARNING - Spinning Tires Do not spin the wheels especially at speeds more than 35 mph (56 km/h). Spinning the wheels at high speeds when the vehicle is stationary could cause a tire to overheat, explode and injure bystanders.
Driving at Night
Because night driving presents many more hazards than driving in the daylight, here are some important tips to remember:
- Slow down and keep more distance between you and other vehicles as it may be more difficult to see at night, especially in rural areas where there may not be any street lights.
- Adjust your mirrors to reduce the glare from other driver's headlights.
- Keep your headlights clean and properly aimed. Dirty or misaimed headlights will make it much more difficult to see at night.
- Avoid staring directly at the headlights of oncoming vehicles. You could be temporarily blinded and it will take several seconds for your eyes to readjust to the darkness.
Driving in the Rain
Rain and wet roads can make driving dangerous, especially if you're not prepared for the slick pavement. Here are a few things to consider when driving in the rain:
- Be sure your windshield wipers are in good condition.
- A heavy rainfall will make it harder to see and will increase the distance needed to stop your vehicle, so slow down.
- If your tires aren't in good condition, making a quick stop on wet pavement can cause a skid and possibly lead to an accident. Be sure your tires and windshield wipers are in good shape.
- Turn on your headlights to make it easier for others to see you.
- Driving too fast through large puddles can affect your brakes. If you must go through puddles, try to drive through them slowly.
- If you believe you may have gotten your brakes wet, apply them lightly while driving until normal braking operation returns.
Winter Driving
• We recommend that you carry emergency equipment. Some things you might include are tire chains, a window scraper, windshield de-icer, a bag of sand or salt, flares, a small shovel and jumper cables.
• Make sure you have sufficient ethylene glycol coolant in the radiator.
- Check the battery condition and cables. Cold temperatures reduce the capacity of any battery, so it must be in top shape to provide enough winter starting power.
• Make sure the engine oil viscosity is suitable for cold weather.
- Check the ignition system for loose connections and damage.
- Use antifreeze-formulated windshield washer fluid and make sure you have sufficient fluid for your trip. (Do not use engine coolant antifreeze.)
- Do not use the parking brake if it might freeze. This is most likely to happen after driving in slushy or wet conditions and temperatures drop into the freezing range. When parking, shift to P (Park) with automatic transaxle, or to 1 (First) or R (Reverse) with a manual transaxle and block the rear wheels.
Snow tires
When snow tires are used, select the size and construction specified on the Tire Pressure Label. It is strongly recommended that snow tires be used on all four wheels, or poor handling may result. Snow tires should not be operated at speeds exceeding 75 mph (120 km/h).
These tires should be inflated 4 psi (28 kPa,
0.3 kg/cm2) above the recommended pressures shown on the Tire Specification/Pressure Label, but inflation should never exceed the maximum cold-tire pressure shown on the tire sidewalls.
WARNING - Snow Tire Size
Snow tires should be equivalent in size and type to the vehicle's standard tires. Otherwise, the safety and handling of your vehicle may be adversely affected.
Do not install studded tires without first checking local, state and municipal regulations for possible restrictions against their use.
Tire chains
Tire chain selection
Regulations regarding the use of tire chains vary according to location or type of road, so always check them before installing chains.
Use only SAE Class "S" tire chains. Chains must be the proper size for the vehicle, as recommended by the chain manufacturer.
Chain installation
When installing chains on your tires, carefully follow the instructions of the chain manufacturer.
The chain bands will scratch the wheel covers. Remove the covers before installing the chains.
WARNING - Tire Chains
- The use of chains may adversely affect vehicle handling.
- Do not exceed 20 mph (30 km/h) or the chain manufacturer's recommended speed limit, whichever is lower.
- Drive carefully and avoid bumps, holes, sharp turns and other road hazards, which may cause the vehicle to bounce.
- Avoid sharp turns or locked-wheel braking.
- Do not attempt to use a tire chain on the temporary spare tire because it may impair vehicle handling and result in damage to the vehicle and the tire.
DRIVING TIPS
Install the chains on the front tires as tightly as possible. The use of chains on the rear tires is not recommended. Retighten the chains after driving 1/4-1/2 mile (0.5-1.0 km).
Driving in Flooded Areas
Avoid driving through flooded areas unless you are sure the water is no higher than the bottom of the wheel rims. Drive through any water slowly. Allow adequate stopping distance because brake performance may be affected.
After driving through water, dry the brakes by gently applying them several times while the vehicle is moving slowly.
Trailer Towing
We do not recommend using this vehicle for trailer towing.
Overloading
CAUTION
The gross axle weight rating (GAWR) and the gross vehicle weight rating (GVWR) for your vehicle are on the manufacturer's label attached to the driver's door or are listed in the "Specifications" section of this Owner's Manual. Exceeding these ratings can cause an accident or vehicle damage. You can calculate the weight of your load by weighing the items (or people) before putting them in the vehicle. Be careful not to overload your vehicle.
Label Information
There are several important labels and identification numbers located on your vehicle. The label locations are identified in the illustrations on the following pages.

Vehicle Identification Number (VIN)
This is the legal identifier for your vehicle. It appears on a plate attached to the left side of the forward portion of the instrument panel. The VIN plate can easily be seen from the outside of the vehicle through the windshield on the driver's side.
The VIN also appears on the vehicle's certification label which is attached to the driver's door jamb and is stamped into the center of the engine compartment bulkhead, the engine cylinder block and the cover of transaxle.

Vehicle Certification Label
DRIVING TIPS

Vehicle Emission Control Information and Vacuum Hose Routing Diagram
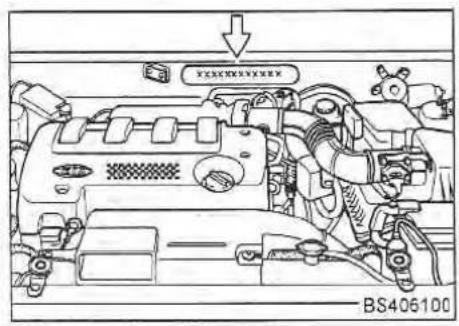
Chassis number

Tire specification/pressure label
IN CASE OF EMERGENCY IN CASE OF AN EMERGENCY
6
Road Warning 6-2
Overheating....6-3
Emergency Starting 6-4
Electrical Circuit Protection....6-7
Towing....6-12
If You Have a Flat Tire. 6-14
ROAD WARNING

Hazard Warning Flasher
The hazard warning flasher serves as a warning to other drivers to exercise extreme caution when approaching, overtaking, or passing your vehicle. It should be used whenever emergency repairs are being made or when the vehicle is stopped near the edge of a roadway.
Depress the flasher switch with the ignition switch in any position. The flasher switch is located in the center console just below the center vents. All turn signal lights will flash simultaneously.
• The hazard warning flasher will operate whether your vehicle is running or not.
• The tum signals do not operate when the hazard flasher is on.
- Care must be taken when using the hazard warning flasher while the vehicle is being towed. Local regulations may prohibit using it in this manner.
Overheating
If your temperature gauge indicates overheating, if you experience a loss of power, or if you hear a loud knocking or pinging noise, the engine has probably overheated. You should follow these procedures if you experience any of these symptoms.
- Turn the hazard warning flasher on, then drive to the nearest safe location and stop your vehicle; set the automatic transaxle in P (Park), or shift the manual transaxle to neutral and apply the parking brake.
- Make sure the air conditioner is off.
- If coolant or steam is boiling out of the radiator, stop the engine, then turn the ignition switch to the ON position. Do not restart the engine. The radiator cooling fan will automatically operate with the ignition switch in the ON position. If the cooling fan does not operate, call an Authorized Kia Dealer for assistance.
If coolant is not boiling out, allow the engine to idle and open the hood to permit the engine to cool gradually. If the temperature does not go down with the engine idling, stop the engine and allow sufficient time for it to cool.
- The coolant level should then be checked. If the level in the reservoir is low, look for leaks at the radiator hoses and connections, heater hoses and connections, radiator, and water pump. If you find a major leak or another problem that may have caused the engine to overheat, do not operate the engine until the problem has been corrected. Call an Authorized Kia Dealer for assistance. If you do not find a leak or other problem, carefully add coolant to the reservoir.
WARNING - Removing Radiator Cap
Do not remove the radiator cap when the engine and radiator are hot. Scalding hot coolant and steam may blow out under pressure. This could cause serious injury.
If the engine frequently overheats, have the cooling system checked and repaired.
EMERGENCY STARTING
Jump Starting
Jump starting can be dangerous if done incorrectly. Therefore, to avoid harm to yourself or damage to your vehicle or battery, follow the jump starting procedures on the next page. If in doubt, we strongly recommend that you have a competent technician or towing service jump start your vehicle.
*NOTICE
Use only a 12volt jumper system. You can damage a 12volt starting motor, ignition system, and other electrical parts by using a 24-volt power supply (two 12-volt batteries in series or a 24-volt motor generator set).
WARNING - Battery
- Keep all flames or sparks away from the battery. The battery produces hydrogen gas which may explode if exposed to flame or sparks.
- Do not attempt to jump start vehicle if the discharged battery is frozen or if the electrolyte level is low; the battery may rupture or explode.
Jump starting procedure
- Make sure the booster battery is 12 volts and that its negative terminal is grounded.
- Check the electrolyte level of each of the battery cells.
- If the booster battery is in another vehicle, do not allow the vehicles to touch.
CONNECTING JUMPER CABLES
Connect cables in numerical order and disconnect in reverse order.
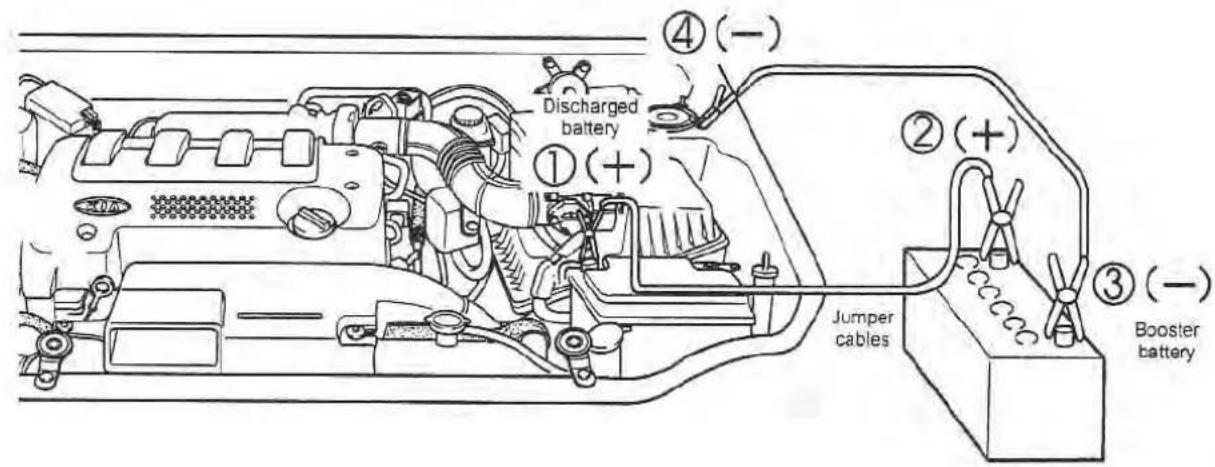
BS406002
- Turn off all unnecessary electrical loads.
-
Connect the jumper cables in the exact sequence shown in the illustration on the previous page. First, connect one end of a jumper cable to the positive terminal (+) of the discharged battery ①, then the other end of the same cable to the positive terminal (+) on the booster battery .. Next, connect one end of the other jumper cable to the negative terminal (-) of the booster battery f, then the other end to a solid, stationary, metallic point (for example, the engine lifting bracket) , away from the battery. Do not connect the jumper cable to or near any part that moves when the engine is cranked. Do not connect the jumper cable from the negative terminal (-) of the booster battery to the negative terminal (-) of the discharged battery. Do not allow the jumper cables to contact anything except the correct battery terminals or the correct ground. Do not lean over the battery when making connections.
-
Start the engine of the vehicle with the booster battery and run it at 2,000 rpm. Then, start the engine of the vehicle with the discharged battery.
If the cause of your battery discharging is not apparent (for example, having left the lights on accidentally), you should have your vehicle checked by an Authorized Kia Dealer.
Push-Starting
A vehicle equipped with an automatic transaxle cannot be started by pushing. A vehicle equipped with a manual transaxle should not be push-started because it could damage the emission control system. Follow the directions for jump starting.
CAUTION
Never tow a vehicle to start it. A sudden surge forward when the engine starts could cause a collision with the tow vehicle.
ELECTRICAL CIRCUIT PROTECITION.

Fuses
A vehicle's electrical system is protected from electrical overload damage by fuses.
This vehicle has two fuse panels, one located in the driver's side kick panel, the other in the engine compartment near the battery. A fuse panel chart is provided later in this section.
If any of your vehicle's lights, accessories, or controls do not work, check the appropriate circuit fuse. If a fuse has blown, the element inside the fuse will be melted.
Always replace a blown fuse with one of the same rating.
If the replacement fuse blows out, this indicates an electrical problem. Avoid using the system involved and Immediately consult an Authorized Kia Dealer.
Two kinds of fuses are used: standard for lower amperage rating, and main for higher amperage ratings.
Fuse replacement
WARNING - Fuse Replacement
- Never replace a fuse with anything but another fuse of the same type and rating.
- A higher capacity fuse could cause damage and possibly a fire.
- Never install a wire in place of the proper fuse - even as a temporary repair. It may cause extensive wiring damage and possibly a fire.
- Do not use a screwdriver or any other metal object to remove fuses because it may cause a short circuit and damage the system.
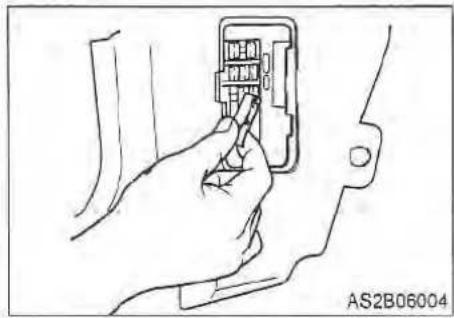
If the electrical system does not work, first check the driver's side fuse panel.
- Turn the ignition switch and all other switches off.
-
Pull the suspected fuse straight out. Use the removal tool provided on the main fuse box in the engine compartment. Refer to the fuse panel chart on the fuse panel cover to identify the likely problem fuse or electrical circuit.
-
Check the removed fuse; replace if it is blown.
Three (3) spare fuses are provided in the engine compartment fuse panel cover. - Push in a new fuse of the same rating, and make sure it fits tightly in the clips.
If it fits loosely, consult an Authorized Kia Dealer.
If you do not have a spare, use a fuse of the same rating from a circuit you may not need for operating the vehicle, such as the radio or clock (Room) fuse.

If the headlights or other electrical components do not work and the fuses are OK, check the fuse box in the engine compartment. If a fuse is blown, it must be replaced.
- Turn the ignition switch and all other switches off.
- Remove the fuse box cover by pressing the plastic knob located under the cover until the cover can be removed.
- Check the fuses. If one is blown, replace it with a new one of the same rating.
CAUTION
After checking the fuse box in the engine compartment, please securely install the fuse box cover. If not, some electrical failures may occur causing from the water.
Fuse Panel Description
Driver-side kick panel
| ECU B+ 10A | AUDIO 10A | (ABS) 10A | TURN LAMP 10A |
| STOP LAMP 15A | CIGAR LIGHTER 15A | (AIR) (BAG) 10A | METER 10A |
| (DRL ILL) 10A | (SEAT) WARM 15A | FRONT WIPER 20A | (TCU) (IG1) 10A |
| DESCRIPTION | FUSE RATING | PROTECTED COMPONENT |
| ECU B+ | 10 A | ECU, ECAT, Shift lock, Data link connector, Check connector |
| AUDIO | 10 A | Audio, Auto clock, ETWIS |
| ABS | 10 A | ABS |
| TURN LAMP | 10 A | Trun lamp |
| STOP LAMP | 10 A | Stop light |
| CIGAR LIGHTER | 15 A | Cigar lighter |
| AIR BAG | 10 A | Airbag |
| METER | 10 A | Meter, Inhibitor S/W, Speed sensor, Back-up light, ETWIS |
| DRL ILL | 10 A | Daytime running light, Illuminated ignition switch |
| SEAT WARM | 15 A | Seat warmer |
| FRONT WIPER | 20 A | Front wiper & Washer |
| TCU IG 1 | 10 A | ECAT, DRL |
Engine compartment
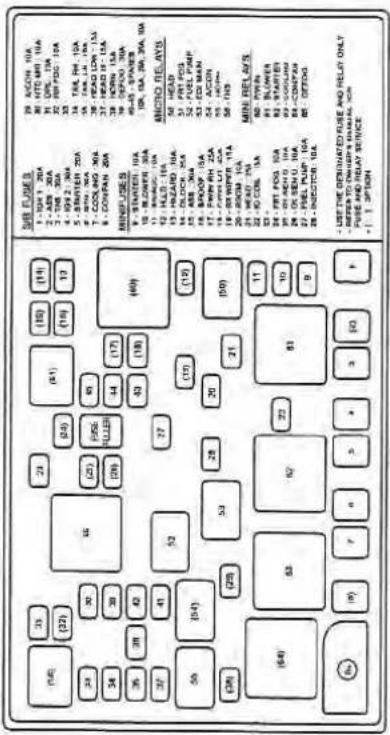
| 1. IGN 1 | 20A | Ignition S/W (IG1, ACC) |
| 2. ABS | 30A | ABS |
| 3. TNS | 30A | TNS relay |
| 4. IGN 2 | 30A | Ignition S/W (IG2, ST) |
| 5. STARTER | 20A | Starter |
| 6. BTN | 30A | Stop, ECU B+Fuse |
| 7. COCLING | 30A | Cooling fan |
| 8. CON/FAN | 20A | Condenser fan |
| 9. STARTER | 10A | Starter, ECU, ECAT, Cruise control |
| 10. BLOWER | 30A | Blower relay |
| 11. SR/ACC | 10A | Intake SW, ACS, DRL, Cruise control |
| 12. HLLD | 10A | Headlight leveling device |
| 13. HAZARD | 15A | Hazard switch |
| 14. D/LOCK | 25A | Door lock, Power window |
| 15. ABS | 30A | ABS |
| 16. S/ROOF | 15A | Sunroof |
| 17. P/WIN RH | 25A | Power window RH |
| 18. P/WIN LH | 25A | Power window LH |
| 19. RR WIPER | 15A | Rear wiper & Washer |
| 20. ROOM | 10A | Room lamp, ETWS, Audio, Auto clock |
| 21. HEAD | 25A | Headlight, Generator |
| 22. IG COIL | 15A | ECU, IG coil, Data link connector, Check connector |
| 23. | - | - |
| 24. FRT FOG | 10A | Front fog lamp |
| 25. OX SEN D | 10A | 02 Sensor down |
| 26. OX SEN U | 10A | 02 Sensor up |
| 27. FUEL PUMP | 10A | Fuel pump |
| 28 INJECTOR | 10A | Injector, ECU, Fuel pump relay |
| 29. A/CON | 10A | A/CON relay (magnet clutch) |
| 30. HTD MIR | 10A | Outside rearview mirror heater |
| 31. DRL | 10A | Daytime running light |
| 32. RR FOG | 10A | Rear fog lamp |
| 33. | - | - |
| 34. TAIL RH | 10A | ECU, Position lamp RH, Tail lamp RH, License light |
| 35. TAIL LH | 10A | Position lamp LH, Tail lamp LH, Illumination lamp |
| 36. HEAD LOW | 15A | Headlight low |
| 37. HEAD HI | 15A | Headlight hi |
| 38. HORN | 15A | Horn |
| 39. DEFOG | 30A | Rear defroster |
TOWING
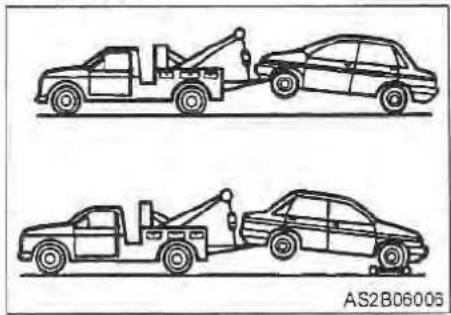
If emergency towing is necessary, we recommend having it done by an Authorized Kia Dealer or a competent tow-truck service. Proper lifting and towing procedures are necessary to prevent damage to the vehicle. State and local laws applicable to towing vehicles must be followed.
As a general rule, towed vehicles should be pulled with the driving wheels off the ground. If excessive damage or other conditions prevent towing the vehicle with the driving wheels off the ground, use wheel dollies.

With either an automatic or manual transaxle:
- Set the ignition switch in the ACC position;
- Place the shift lever in N (Neutral);
- Release the parking brake.
*NOTICE
Do not tow the vehicle backward with the front wheels on the ground. This may cause internal damage to the transaxle.
*NOTICE
Do not tow with sling-type equipment. Use wheel lift or flatbed equipment.
CAUTION
Do not use the hooks under the front or rear of the vehicle for towing purposes. These hooks are designed ONLY for transport tie-down. If the tie-down hooks are used for towing, the front/rear bumper will be damaged and the vehicle may break free from the tow vehicle.
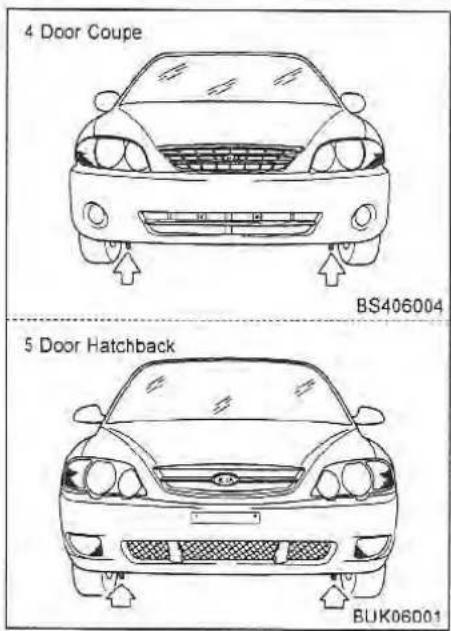
Tie-Down hooks (for flatbed towing)
IF YOU HAVE A FLAT TIRE
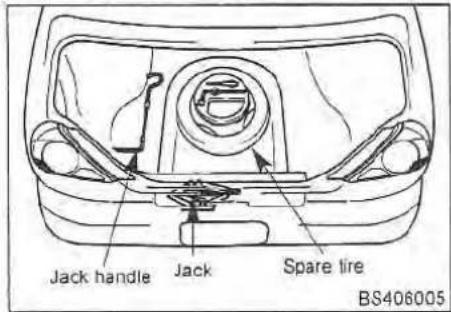
Storing the Spare Tire, Jack and Tools
The spare tire, tool bag, jack and jack handle are stored in the trunk compartment. Move the carpeting out of the way to reach this equipment.
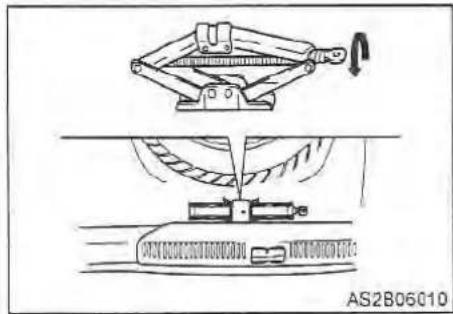
To Remove The Jack:
Turn the jack socket counterclockwise.
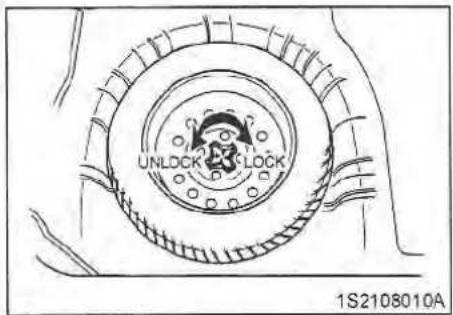
To Remove Spare Tire:
Remove the cover from the spare tire. Turn the tire hold-down wing bolt counterclockwise.
Store the jack and tire in the reverse order of removal.
To prevent the jack, jack handle, and tool bag from "rattling" while the vehicle is in motion, store them properly.
Important - Use of compact spare tire your vehicle is equipped with a compact spare tire. This compact spare tire takes up less space than a regular-size tire. This tire is smaller than a conventional tire and is designed for temporary use only.
CAUTION
- You should drive carefully when the compact spare is in use. The compact spare should be replaced by the proper conventional tire and rim at the first opportunity.
• The operation of this vehicle is not recommended with more than one compact spare tire in use at the same time.
CAUTION
This spare tire should be used only for VERY short distances. Compact spares should NEVER be used for long drives or extended distances.
*NOTICE
Check the inflation pressure after installing the spare tire. Adjust it to the specified pressure, as necessary.
When using a compact spare tire, observe the following precautions:
• Under no circumstances should you exceed 50 mph (80 km/h); a higher speed could damage the tire.
- Ensure that you drive slowly enough for the road conditions to avoid all hazards. Any road hazard, such as a pothole or debris, could seriously damage the compact spare.
- Any continuous road use of this tire could result in tire failure, loss of vehicle control, and possible personal injury.
- Do not exceed the vehicle's maximum load rating or the load-carrying capacity shown on the sidewall of the compact spare tire.
- Avoid driving over obstacles. The compact spare tire diameter is smaller than the diameter of a conventional tire and reduces the ground clearance approximately 1 in. (25 mm), which could result in damage to the vehicle.
- Do not take this vehicle through an automatic car wash.
- Do not use tire chains on this tire. Because of the smaller size, a tire chain will not fit properly. This could damage the vehicle and result in loss of the chain.
- This tire should not be installed on the front axle if the vehicle must be driven in snow or on ice.
- Do not use the compact spare tire on any other vehicle because this tire has been designed especially for your vehicle.
- The compact spare's tread life is shorter than a regular tire. Inspect your compact spare tire regularly and replace worn compact spare tires with the same size and design, mounted on the same wheel.
Changing Tires
Jacking instructions
The jack is provided for emergency tire changing only.
Follow jacking instructions to reduce the possibility of personal injury.

WARNING - Changing Tires
- Never attempt vehicle repairs or a tire change in the traffic lanes of a public road or highway. Always move the vehicle completely off the road and onto the shoulder before trying to change a tire. If you cannot find a firm, level place off the road, call a towing service company for assistance.
- Do not exceed the maximum permissible load of the jack: 1,320 lbs. (600 kg).
-
Be sure to use the correct front or rear jacking positions on the vehicle; never use the bumpers or any other part of the vehicle for jack support.
-
Never allow any portion of your body to get beneath the vehicle while using the jack.
- Do not start or run the engine while the vehicle is supported by the jack.

Tire replacement
- Park on a level surface and set the parking brake firmly.
- Set the automatic transaxle in P (Park), or shift the manual transaxle into R (Reverse).
- Activate the hazard warning flasher.
- Remove the wheel lug nut wrench, jack, jack handle, and spare tire from the vehicle.
- Block both the front and rear of the wheel that is diagonally opposite the jack position.

WARNING - Changing a Front Tire
When one front wheel is lifted off the ground, neither the automatic transaxle P (Park) position nor the manual transaxle R (Reverse) position will prevent the vehicle from moving and possibly slipping off the jack, even if these positions are properly engaged. To prevent vehicle movements while changing a tire, always set the parking brake fully, and always block the wheel diagonally opposite the wheel being changed.
- For models with alloy wheels, remove the center cap.
- Loosen the four lug nuts counterclockwise one turn each, but do not remove any nut until the tire has been raised off the ground.
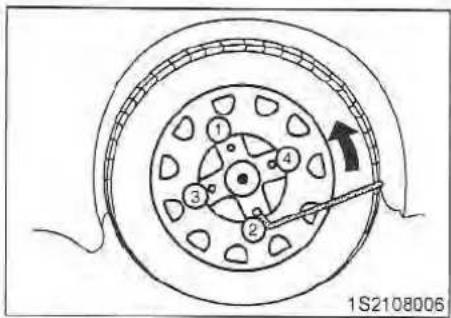
- Place the jack at the front or rear jacking position closest to the tire you are changing. Place the jack under the side sill at the designated location.
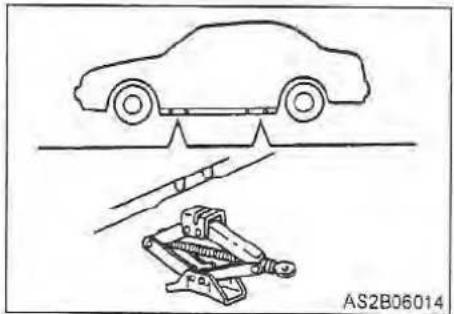
WARNING - Jack Location
To reduce the possibility of injury, be sure to use only the jack provided with the vehicle and in the correct jack position; never use any other part of the vehicle for jack support.
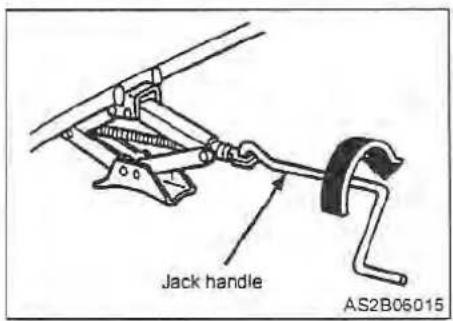
- Insert the jack handle into the jack and turn it clockwise, raising the vehicle until the tire just clears the ground, approximately 1.2 in. (30 mm). Before removing the lug nuts, make sure the vehicle is stable and that there is no chance for it to slip or move.

- Remove the lug nuts by turning them counterclockwise, then remove the wheel.
- Mount the spare tire into position and tighten the nuts by hand. Install the lug nuts with the beveled edge inward.
- Turn the jack handle counterclockwise and lower the vehicle until it touches the ground. Tighten the lug nuts firmly in an "X" pattern.
Once the lug nuts have been tightened, lower the vehicle fully to the ground and continue to tighten the lug nuts until they are completely secured. If you are unsure of the tightness of the wheel lug nuts, have them checked at the nearest service station. The specified tightening torque is 103 Nm. (76 ft. lb).
CAUTION
Your vehicle has metric threads on the wheel studs and nuts. During wheel removal, make certain that the same nuts removed are reinstalled - or, if replaced, that nuts with metric threads and the same configuration are used. Installation of a non-metric thread nut on a metric stud or vice-versa will not secure the wheel to the hub properly and will damage the stud so that it must be replaced. Note that most U.S. lug nuts do not have metric threads. Be sure to use extreme care in checking for thread style before installing aftermarket lug nuts or wheels. If in doubt, consult an Authorized Kia Dealer. Damaged studs may result in wheel loss and personal injury.
WARNING - Wheel Studs
If the studs are damaged, they may lose their ability to retain the wheel. This could lead to the loss of the wheel and a collision.
*NOTICE
Check the inflation pressures as soon as possible after installing the spare tire. Adjust it to the specified pressure, if necessary.
To prevent the jack, jack handle, wheel lug nut, wrench and spare tire from rattling while the vehicle is in motion, store them properly.
MAINTANANCE MAINTENANCE
7
Maintenance Services....7-2
Maintenance Schedule 7-4
Owner Maintenance 7-8
Engine Compartment 7-10
Engine Oil and Oil Filter 7-11
Engine Cooling System 7-13
Brakes and Clutch 7-16
Parking Brake 7-17
Power Steering 7-18
Automatic Transaxle....7-19
Lubricants and Fluids....7-21
Air Cleaner 7-22
Wiper Blades....7-23
Battery....7-25
Tires and Wheels 7-27
Bulb Replacement....7-33
Lubricant Specifications....7-45
Exterior Care....7-47
Interior Care 7-50
MAINTENANCE
MAINTENANCE SERVICES
You should exercise the utmost care to prevent damage to your vehicle and/or injury to yourself whenever performing any maintenance or inspection procedures.
Should you have any doubts concerning the inspection or servicing of your vehicle, we strongly recommend that you have an Authorized Kia Dealer perform this work.
An Authorized Kia Dealer has factory-trained technicians and genuine Kia parts to service your vehicle properly. For expert advice and quality service, see an Authorized Kia Dealer.
Inadequate, incomplete or insufficient servicing may result in operational problems with your vehicle that could lead to vehicle damage, an accident or personal injury.
MAINTENANCE
Owner's Responsibility
Maintenance service and record retention are the owner's responsibility. You should retain documents to show that proper maintenance has been performed on your vehicle in accordance with the scheduled maintenance service charts shown on the following pages. You need this information to be able to establish your compliance with the servicing and maintenance requirements of your Kia warranties.
Detailed warranty information is provided in your Warranty and Consumer Information Manual. Repairs and adjustments required as a result of improper maintenance or a lack of required maintenance are not covered.
We recommend that such maintenance be performed by an Authorized Kia Dealer using genuine Kia parts. However, such maintenance may be performed by any competent automotive repair establishment using automotive parts equivalent to those with which your vehicle or engine was originally equipped.
Whenever we recommend that you have service or maintenance performed by an Authorized Kia Dealer, you may have a competent automotive repair establishment using proper parts perform that work as well.
Scheduled Maintenance Service
After 60 months or 96,000 miles (60,000 km) continue to follow the prescribed maintenance intervals.
MAINTENANCE
MAINTENANCE SCHEDULE
Engine Control system
| MAINTENANCEINTERVALSMAINTE-NANCE ITEM | Kilometers or Time in Months, Whichever Comes First | ||||||||||||||||
| Months | 6 | 12 | 18 | 24 | 30 | 36 | 42 | 48 | 54 | 60 | 66 | 72 | 78 | 84 | 90 | 96 | |
| km x 1,000 | 12 | 24 | 36 | 48 | 60 | 72 | 84 | 96 | 108 | 120 | 132 | 144 | 156 | 168 | 180 | 192 | |
| Engine oil & Engine oil filter (1) | change every 6,000 km or 3 months, whichever comes first | ||||||||||||||||
| Drive belt (tension) | I | I | I | I | I | ||||||||||||
| Cooling system hoses & connections | I | I | I | I | I | I | I | I | |||||||||
| Engine coolant (1) | I | I | I | R | I | I | I | R | I | I | I | R | I | I | I | R | |
| Fuel filter | R | R | |||||||||||||||
| Fuel tank cap, lines and hoses | I | I | I | I | |||||||||||||
| Air cleaner element (2) | I | I | I | R | I | I | I | R | I | I | I | R | I | I | I | R | |
| Ignition wires | I | I | I | I | |||||||||||||
| Spark plugs | R | R | R | R | |||||||||||||
I: Inspect these items and their related parts. If necessary, correct, clean, refill, adjust or replace.
R : Replace or change.
NOTE
Check the engine oil and coolant levels every week.
MAINTENANCE
MAINTENANCE SCHEDULE
Engine Control system (cont.)
| MAINTENANCEINTERVALSMAINTE-NANCE ITEM | Kilometers or Time in Months, Whichever Comes First | ||||||||||||||||
| Months | 6 | 12 | 18 | 24 | 30 | 36 | 42 | 48 | 54 | 60 | 66 | 72 | 78 | 84 | 90 | 96 | |
| km x 1,000 | 12 | 24 | 36 | 48 | 60 | 72 | 84 | 96 | 108 | 120 | 132 | 144 | 156 | 168 | 180 | 192 | |
| Idle speed | 1 | 1 | 1 | 1 | 1 | 1 | 1 | 1 | |||||||||
| Evaporative emission canister & vapour lines | 1 | 1 | 1 | ||||||||||||||
| PCV valve | 1 | 1 | |||||||||||||||
| Engine timing belt | Replace every 102,000 km | ||||||||||||||||
I: Inspect these items and their related parts. If necessary, correct, clean, refill, adjust or replace.
R : Replace or change.
(1) Refer to the lubricant and coolant specifications in the Owner's Manual.
(2) More frequent maintenance is required if driving under dusty conditions.
MAINTENANCE SCHEDULE
Chassis and Body
| MAINTENANCEINTERVALSMAINTE-NANCE ITEM | Kilometers or Time in Months, Whichever Comes First | ||||||||||||||||
| Months | 6 | 12 | 18 | 24 | 30 | 36 | 42 | 48 | 54 | 60 | 66 | 72 | 78 | 84 | 90 | 96 | |
| km x 1,000 | 12 | 24 | 36 | 48 | 60 | 72 | 84 | 96 | 108 | 120 | 132 | 144 | 156 | 168 | 180 | 192 | |
| Air conditioner compressor operation & refrigerant amount | I | I | I | I | I | I | I | I | |||||||||
| Air conditioner air filter | Replace every 15.000 km | ||||||||||||||||
| Exhaust pipes, heat shield & mounting | I | I | I | I | I | I | I | I | |||||||||
| Front suspension ball joints | I | I | I | I | I | ||||||||||||
| Brakes / clutch fluid (1) | I | I | I | I | R | I | I | I | I | R | I | I | I | I | R | I | |
| Front brake pads & discs (3) | I | I | I | I | I | I | I | I | I | I | I | I | I | I | I | I | |
| Rear brake pads & discs / drums (3) | I | I | I | I | I | I | I | I | I | I | I | I | I | I | I | I | |
| Parking brake | I | I | I | I | I | I | I | I | |||||||||
| Brake line & connections (including booster) | I | I | I | I | I | I | I | I | |||||||||
| Manual transaxle oil | I | I | I | I | I | I | I | R | I | I | I | I | I | I | I | R | |
| Clutch & brake pedal free play | I | I | I | I | I | I | I | I | I | I | I | I | I | I | I | I | |
| Automatic transaxle fluid (1) | I | I | R | I | I | R | I | I | R | I | I | R | I | I | R | I | |
| Chasis & underbody bolts & nuts | I | I | I | I | I | I | I | I | I | I | I | I | I | I | I | I | |
| Tire condition & inflation pressure | I | I | I | I | I | I | I | I | I | I | I | I | I | I | I | I | |
I: Inspect these items and their related parts. If necessary, correct, clean, refill, adjust or replace.
R : Replace or change.
MAINTENANCE SCHEDULE
Chassis and Body (cont.)
| MAINTENANCEINTERVALSMAINTE-NANCE ITEM | Kilometers or Time in Months, Whichever Comes First | ||||||||||||||||
| Months | 6 | 12 | 18 | 24 | 30 | 36 | 42 | 48 | 54 | 60 | 66 | 72 | 78 | 84 | 90 | 96 | |
| km x 1,000 | 12 | 24 | 36 | 48 | 60 | 72 | 84 | 96 | 108 | 120 | 132 | 144 | 156 | 168 | 180 | 192 | |
| Wheel alignment (4) | Inspect when abnormal condition noted | ||||||||||||||||
| Tire rotation | Rotate the tires every 12,000 km | ||||||||||||||||
| Steering operation & linkage | I | I | I | I | I | I | I | I | I | I | I | I | I | I | I | I | |
| Power steering fluid & lines | I | I | I | I | I | I | I | I | |||||||||
| Driveshaft dust boots | I | I | I | I | I | ||||||||||||
| Seat belts, buckles & anchors | I | I | I | I | I | I | I | I | I | I | I | I | I | I | I | I | |
| Locks, hinges & hood latch | L | L | L | L | L | L | L | L | L | L | L | L | L | L | L | L | |
1: Inspect these items and their related parts. If necessary, correct, clean, refill, adjust or replace.
L : Lubricate.
(1) Refer to the lubricant and coolant specifications in the Owner's Manual.
(3) More frequent maintenance is required if the vehicle is operated under any of the following conditions:
a. Short-distance driving.
b. Driving on dusty roads.
c. Extensive idling or slow-speed driving in stop-and-go traffic.
(4) If necessary, rotate and balance the wheels.
MAINTENANCE
OWNER MAINTENANCE
Owner Maintenance Schedule
A qualified service technician should perform these vehicle inspections at the indicated intervals to ensure safe and dependable operation.
Bring any problem to the attention of an Authorized Kia Dealer as soon as possible.
When refueling, check:
- Engine oil level
• Engine coolant level
CAUTION
Be careful when checking your engine coolant level. The engine compartment will be hot and you could be burned.
- Brake and clutch fluid level
- Washer fluid level
At least monthly
- Tire inflation pressures
Every 6 months, check:
• Power steering fluid level
• Automatic transaxle fluid level
You can do the following scheduled maintenance items if you have some mechanical ability, a few basic tools and if you closely follow the directions in this manual.
Owner Maintenance Precautions
Improper or incomplete service may result in problems. This section gives instructions only for the maintenance items that are easy to perform.

WARNING - Maintenance Work
Performing maintenance work on a vehicle can be dangerous. You can be seriously injured while performing some maintenance procedures. If you lack sufficient knowledge, experience or the proper tools and equipment to do the work, have it done by a qualified technician.
As explained earlier in this section, several procedures can be done only by a qualified service technician with special tools.
Improper owner maintenance during the warranty period may affect warranty coverage. For details, read the separate Kia Warranty and Consumer Information Manual provided with the vehicle. If you're unsure about any servicing or maintenance procedure, have it done by an Authorized Kia Dealer.
MAINTENANCE

WARNING - Loose
Clothing/Jewelry
Working under the hood with the engine running is dangerous. It is even more dangerous when you wear jewelry, long hair or loose clothing. These can become entangled in moving parts and result in injury. Therefore, if you must run the engine while working under the hood, make certain that you pull hair back, remove all jewelry (especially rings, bracelets, watches, and necklaces) and all neckties, scarves, and similar loose clothing before getting near the engine or cooling fans.

WARNING - Engine Cooling
Fans
Because your engine cooling fans are electrically controlled, they will run if the ignition switch is on, even if the engine is not running. This could cause serious injury. To prevent this, be sure the ignition is off, unless you must run the engine while performing maintenance or an inspection.
MAINTENANCE
ENGINE COMPARTMENT

ENGINE OIL AND OIL FILTER
Checking the Engine Oil Level
- Be sure the vehicle is on level ground.
- Start the engine and allow it to reach normal operating temperature.
- Turn the engine off and wait a few minutes for the oil to return to the oil pan.
- Pull out the dipstick, wipe it clean, and re-insert it fully.
- Pull the dipstick out again and check the level. The level should be between F and L.
If it is near or at L, add enough oil to bring the level to F. Do not overfill. The distance between L and F on the dipstick represents 0.7 liter (0.85 US qt.).

Use only the specified engine oil. (Refer to "Recommended Lubricants" in the Index.)
Changing the Engine Oil and Filter
Change engine oil and filter according to the Scheduled Maintenance earlier in this section.
WARNING - Engine Oil
• Continuous contact with USED engine oil has caused skin cancer in laboratory mice. Protect your skin by washing with soap and water.
- Keep all engine oil out of the reach of children.
- Warm the engine up for a few minutes and then turn it off. Remove the oil filler cap.
- Drain the oil into a suitable container after removing the oil filler cap and drain plug.
CAUTION
Both the oil and engine are hot. Do not burn yourself.
- Remove the engine oil filter with an oil filter wrench.
MAINTENANCE
*NOTICE
When installing the replacement oil filter, do not allow the oil filter gasket to remain on the oil filter mounting surface. This will cause oil leakage and engine damage. Remove the old gasket completely so that a new gasket will properly seat and seal.
- Use a clean rag to clean the oil filter mounting surface on the engine.
- Apply a small amount of engine oil to the new oil filter O-ring seal.
- Install the oil filter and tighten it. (Refer to the oil filter caution label for tightening instructions.)
- Replace the drain plug tightly after the oil has thoroughly drained.
- Refill the engine with new oil to the F mark on the dipstick. Do not overfill.
-
Re-install the oil filler cap securely.
-
Start the engine and inspect around the oil filter seal for leaks. Stop the engine. Check the oil level and fill to the F mark, if necessary.
Oil capacity
Use only the specified engine oil. (Refer to "Recommended Lubricants" in the Index.)
*NOTICE
- Follow these instructions carefully. An improper oil filter installation can cause oil leakage and engine damage.
- Although oil filters may have the same external appearance, their internal designs differ significantly. These filters are not interchangeable. To avoid potential engine damage, use only the specified filter. Consult an Authorized Kia Dealer.
MAINTENANCE
ENGINE COOLING SYSTEM
The cooling system is a high-pressure type with a reservoir and is filled with year-round antifreeze coolant at the factory.
Check the antifreeze protection and coolant level at least once a year, at the beginning of the winter season, and before traveling to a colder climate.
Checking the Coolant Level
WARNING - Removing Radiator Cap
- Never attempt to remove the radiator cap while the engine is operating. Doing so might lead to cooling system and/or engine damage and could result in serious personal injury from escaping hot coolant or steam. Turn the engine off and wait until it has cooled. Even then, use extreme care when removing the radiator cap. Wrap a thick towel around it, and turn it counterclockwise slowly to the first stop. Step back while the pressure is released from the cooling system. When you are sure all the pressure has been released, press down on the cap, using a thick towel, and continue turning counterclockwise to remove it.
• Even if the engine is not operating, do not remove the radiator cap or the drain plug while the engine and radiator are hot. Hot coolant and steam may still blow out under pressure, causing serious injury.

Check the condition and connections of all cooling system hoses and heater hoses. Replace any swollen or deteriorated hoses.
The coolant level should be full in the radiator
and between F (Full) and L (Low) on the coolant reservoir dipstick when the engine is cool.
Check the coolant level using the dipstick attached to the reservoir cap.
If the coolant level is low, add enough specified coolant to provide protection against freezing and corrosion and to bring the level to F in the coolant reservoir. Do not overfill. If frequent additions are required, see an Authorized Kia Dealer for a cooling system inspection.
Changing Coolant
Change coolant according to the Scheduled Maintenance.
• Use only soft (de-mineralized) water in the coolant mixture.
- The engine in your vehicle has aluminum engine parts and must be protected by an ethylene glycol-based coolant to prevent corrosion and freezing.
• DO NOT USE alcohol or methanol coolant and do not mix them with the specified coolant.
- Do not use a solution that contains more than 60 percent coolant, which would reduce the effectiveness of the solution.
For mixture percentages, refer to the following table.
| PROTECTION | Mixture Percentage (volume) | |
| Coolant Solution | Water | |
| Above 3°F(-16°C) | 35 | 65 |
| Above -15°F(-26°C) | 45 | 55 |
| Above -40°F(-40°C) | 55 | 45 |
MAINTENANCE
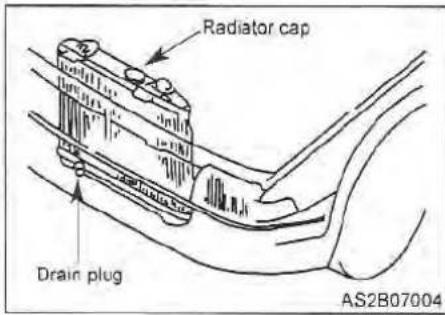
- Turn the radiator cap counterclockwise and remove it.
- Loosen the radiator drain plug and drain the coolant into a suitable container.
-
With the drain plug loose, flush the system with running water.
-
Drain the system completely and retighten the drain plug. Add the necessary amount of ethylene glycol-based coolant and water to provide the required protection against freezing and corrosion. In extremely cold climates, add the necessary amount of ethylene glycol-based coolant in accordance with the instructions of the coolant manufacturer.
- Run the engine at idle with the radiator cap off. Slowly add additional coolant if necessary.
- At this point, wait until the engine reaches normal operating temperature. Depress the accelerator two or three times; then add coolant if required. Be careful not to burn yourself.
- Install the radiator cap. Inspect all connections for leaks and recheck the coolant level in the reservoir. Recheck again after a few days of driving and add coolant as necessary.
BRAKES AND CLUTCH
Checking Brake/Clutch Fluid Level
Brake fluid reservoir
Before adding fluid, thoroughly clean the area around the reservoir cap to prevent brake fluid contamination. If you add brake/clutch fluid, fill the brake/clutch fluid reservoir to the MAX line. The brake/clutch fluid level will drop with accumulated mileage. This is a normal condition associated with brake/clutch lining wear.

Check the fluid level in the reservoir periodically; it should be between MAX and MIN on the side of the reservoir.
If the fluid level is excessively low, have the brake/clutch system checked by an Authorized Kia Dealer.
Use only the specified brake/clutch fluid. (Refer to "Recommended Lubricants" later in this section.)
Do not mix different types of fluid.
*NOTICE
In the event the brake/clutch system requires frequent additions of fluid, the vehicle should be inspected by an Authorized Kia Dealer.
MAINTENANCE
PARKING BRAKE
Checking the Parking Brake
Check the stroke of the parking brake by counting the number of "clicks" heard while fully applying it from the released position. Also, the parking brake alone should securely hold the vehicle on a fairly steep grade.

If the number of "clicks" is more or less than specified, have the parking brake adjusted by an Authorized Kia Dealer.
Stroke:
5-9 "clicks" at a force of 98N (22 lbs.).
MAINTENANCE
POWER STEERING
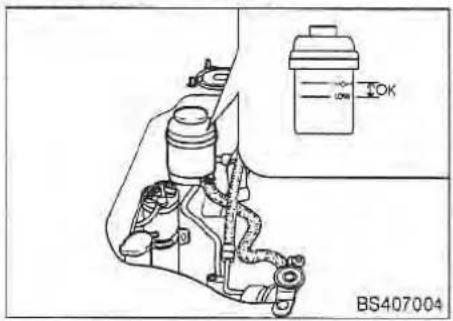
Checking the Power Steering Fluid Level
The power steering fluid level should be checked periodically.
With the engine off and the vehicle on level ground, check the fluid level in the power steering reservoir; it should be between the HIGH and LOW reservoir indicators.
Before adding power steering fluid, thoroughly clean the area around the reservoir cap to prevent power steering fluid contamination.
If the level is low, add fluid to the HIGH level.
In the event the power steering system requires frequent addition of fluid, the vehicle should be inspected by an Authorized Kia Dealer.
*NOTICE
To avoid damage to the power steering pump, do not operate the vehicle for prolonged periods with a low power steering fluid level.
Use only the specified power steering fluid. (Refer to "Recommended Lubricants" later in this section.)
MANUAL TRANSAXLE

Checking the Manual Transaxle Oil Level
- Raise and suitably support the vehicle.
- Remove the fill/check plug on the side of the transaxle.
WARNING - Raising Vehicle To help avoid personal injury when a vehicle is on a hoist, provide additional support for the vehicle at the opposite end from where you are working. The additional support will reduce the possibility of the vehicle falling off the hoist. Failure to follow these precautionary measures could result in vehicle damage and/or fatal injuries.
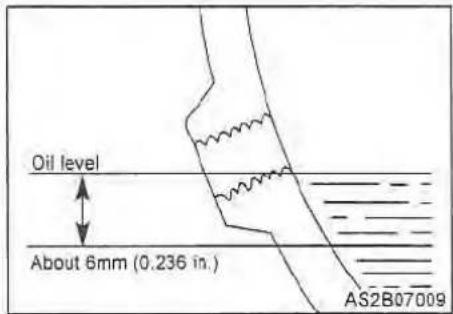
- Verify that the oil level reaches the bottom of the fill/check hole.
- Fill as necessary.
- If the oil level is low, check for leaks before adding oil. Do not overfill. Use only the specified manual transaxle oil (Refer to "Recommended Lubricants" later in this section).
- Install a new washer on the fill/check plug and tighten the plug to 22 lb-ft (30N·m).
AUTOMATIC TRANSAXLE
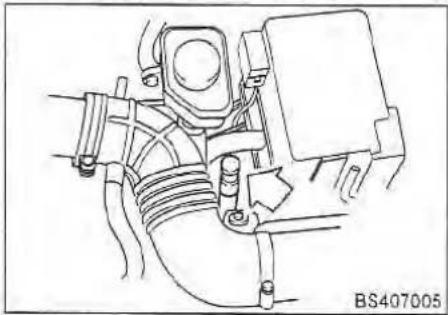
Checking the Automatic Transaxle Fluid Level
The automatic transaxle fluid level should be checked regularly. Take the following precautions to measure the fluid level properly.
The volume of the transaxle fluid changes with temperature. For that reason, it is best to check the level after having driven the vehicle for 30 minutes. If necessary, however, the fluid can also be checked when the vehicle has not been driven.
CAUTION
- Low fluid level causes transaxle slippage. Overfilling can cause foaming, loss of fluid, and transaxle malfunction.
- Use only SK ATF SP-III or Diamond ATF SP-III in the automatic transaxle. The use of a non-specified fluid could result in transaxle malfunction and failure.
WARNING - Parking Brake
To avoid sudden movement of the vehicle, set the parking brake and depress the brake pedal while shifting the shift lever.
- Park the vehicle on level ground and set the parking brake firmly.
- Allow the engine to idle for about 2 minutes, then depress the brake pedal. Move the shift lever slowly through all ranges then set it in the P (Park) position.

- With the engine still idling, pull the dipstick out, wipe it clean, and reinsert it fully.
- Pull the dipstick out again. The fluid level is checked as follows:
Using the hot fluid scale:
If the vehicle has been driven and the fluid is warmed to the normal operating temperature of approximately 65°F (149°C), the fluid level should be between Full and Low.
Using the cold fluid scale:
If the engine has not been running and the outside temperature is approximately 20°F (68°C), the fluid level should be between Full and Low.
- Use the cold scale as a rough reference only.
- If the outside temperature is lower than 20°F (68°C), start the engine and measure the fluid level after letting the engine reach operating temperature.
- If the vehicle has been driven for an extended period at high speeds or in city traffic in hot weather, it is usually best to measure the fluid level after stopping the engine and allowing the fluid to cool for 30 minutes.
When inserting the dipstick, be sure to insert it completely. When adding fluid, measure frequently with the dipstick to make sure the fluid level does not go above the Full mark. Do not overfill.
Use only the specified automatic transaxle fluid SK ATF SP-III or Diamond ATF SP-III. (Refer to "Recommended Lubricants" in the Index.)
LUBRICANTS AND FLUIDS
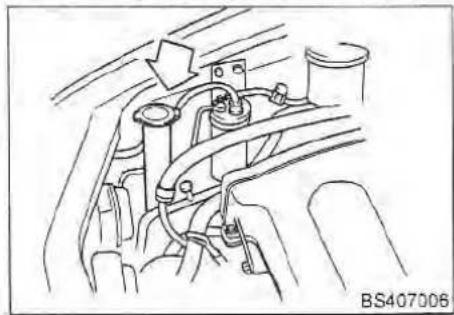
Checking the Washer Fluid Level
Check the fluid level in the washer fluid reservoir and add fluid if necessary. The washer fluid is checked using the dipstick attached to the reservoir cap.
Plain water may be used if washer fluid is not available. However, use windshield washer solvent with antifreeze characteristics in cold climates to prevent freezing.
CAUTION
- Do not use radiator coolant or antifreeze in the washer fluid reservoir.
- Radiator coolant can severely obscure visibility when sprayed on the windshield and may cause loss of vehicle control or damage to paint and body trim.
Body Lubrication
All moving points of the body, such as doors, hood hinges and locks, should be lubricated each time the engine oil is changed.
Use a non-freezing lubricant on locks during cold weather.
Make sure the engine hood secondary latch keeps the hood from opening when the primary latch is released.
AIR CLEANER

Element Replacement
A paper air cleaner filter is used. It must be replaced when necessary, and should not be cleaned and reused.
- Loosen the hose clamp and remove the intake air hose.
- Remove the four (4) air cleaner cover attaching bolts and a clip.
- Wipe the inside of the air cleaner housing with a clean, damp cloth.
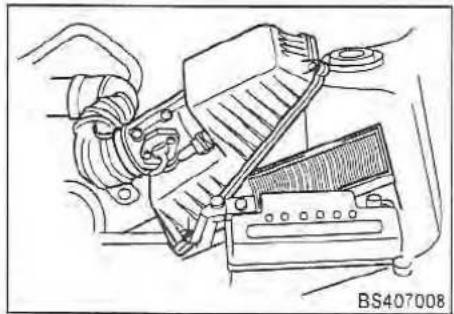
- Replace the air cleaner element.
- Re-install in the reverse order of removal.
Replace the element according to the Scheduled Maintenance.
CAUTION
- Do not drive with the air cleaner removed; this will result in excessive engine wear.
- Driving without an air cleaner encourages backfiring, which could cause a fire in the engine compartment.
WIPER BLADES
Wiper Blade Maintenance
*NOTICE
Commercial hot waxes applied by automatic car washes have been known to make the windshield difficult to clean.
Contamination of either the windshield or the wiper blades with foreign matter can reduce the effectiveness of the windshield wipers. Common sources of contamination are insects, tree sap, and hot wax treatments used by some commercial car washes. If the blades are not wiping properly, clean both the window and the blades with a good cleaner or mild detergent, and thoroughly rinse with clear water.
*NOTICE
To prevent damage to the wiper blades, do not use gasoline, kerosene, paint thinner, or other solvents on or near them.
Windshield Wiper Blade Replacement
When the wipers no longer clean adequately, the wiper blades may be worn or cracked, requiring replacement.
*NOTICE
To prevent damage to the wiper arms or other components, do not attempt to move the wipers manually.

- Raise the wiper arm and turn the wiper blade assembly to expose the plastic locking clip.
Compress the clip and slide the blade assembly toward the windshield, then slide it off the arm.
*NOTICE
Do not allow the wiper arm to fall against the windshield.
MAINTENANCE
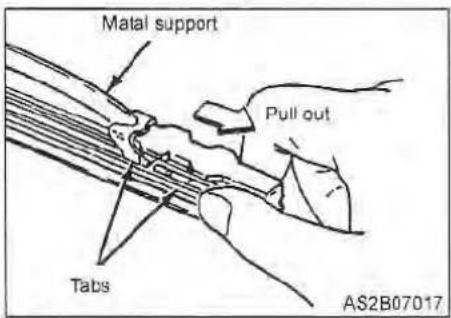
- Firmly grasp the end of the rubber blade and pull until the tabs are free of the metal support.
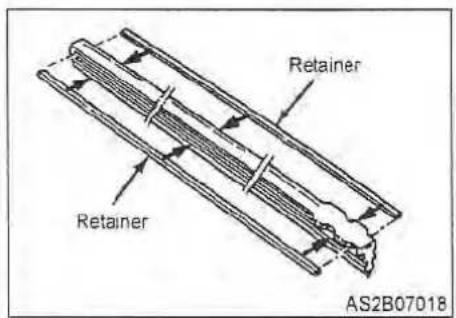
- Remove the metal retainers from the rubber blade and install them in the new rubber blade.

- Carefully insert a new rubber blade and re-install the blade assembly in the reverse order of removal.
*NOTICE
Do not bend the metal retainers.
Install the blade with the tabs facing towards the bottom of the wiper arm.
BATTERY
WARNING - Battery Dangers
- Keep lighted cigarettes and all other flames or sparks away from the battery. Hydrogen, which is a highly combustible gas, is always present in battery cells and may explode if ignited.
- Keep batteries out of the reach of children; batteries contain highly corrosive SULFURIC ACID. Do not allow battery acid to contact your skin, eyes, clothing or paint finish.
- If any electrolyte gets into your eyes, flush your eyes with clean water for at least 15 minutes and get immediate medical attention. If possible, continue to apply water with a sponge or cloth until medical attention is received.
-
If electrolyte gets on your skin, thoroughly wash the contacted area. If you feel a pain or a burning sensation, get medical attention immediately.
-
When charging a battery or working near a battery, wear eye protection.
• Always provide ventilation when working in an enclosed space. - When lifting a plastic-cased battery, excessive pressure on the case may cause battery acid to spew through the vent caps, resulting in personal injury. Lift with a battery carrier or with your hands on opposite corners. Never attempt to charge a battery when the battery cables are connected.

Battery Maintenance
For best battery service:
- Keep the battery securely mounted.
- Keep the battery top clean and dry.
- Keep the terminals and connections clean, tight, and coated with petroleum jelly or terminal grease.
- Immediately rinse any spilled electrolyte from the battery with a solution of water and baking soda.
- If the vehicle is not going to be used for an extended period of time, disconnect the battery cables.
Battery Recharging
Your vehicle has a maintenance-free, calcium-based battery and normally does not require additional water during its service life.
- If the battery becomes discharged in a short time (headlights or interior lights were left on while the vehicle was not in use), recharge it by slow (trickle) charging for 10 hours.
- If the battery gradually discharges because of high electric load while the vehicle is being used, recharge it at 20-30A for two hours.

WARNING - Recharging Battery
When recharging the battery, observe the following precautions:
-
Check the battery electrolyte level before charging.
• The battery must be removed from the vehicle and placed in an area with good ventilation. -
Do not allow cigarettes, sparks, or flame near the battery.
- Watch the battery during charging, and stop or reduce the charging rate if the battery cells begin gasing (boiling) violently or if the temperature of the electrolyte of any cell exceeds 49°F (120°C).
- Wear eye protection when checking the battery during charging.
- Disconnect the battery charger in the following order.
- Turn off the battery charger main switch.
- Unhook the negative clamp from the negative battery terminal.
- Unhook the positive clamp from the positive battery terminal.
*NOTICE
- Before performing battery maintenance or recharging, turn OFF all accessories and stop the engine.
- When removing battery, disconnect the negative (-) battery cable first. When re-installing the battery, reconnect the negative (-) battery cable last.
TIRES AND WHEELS
Tire Care
For proper maintenance, safety, and maximum fuel economy, you must always maintain recommended tire inflation pressures and stay within the load limits and weight distribution recommended for your vehicle.
Inflation Pressures
Check all tire pressures (including the spare) monthly when the tires are cold. "Cold tires" means the car has not been driven for at least three hours or driven less than one mile (1.6 km). Recommended pressures must be maintained to ensure ride quality, vehicle handling, and minimum tire wear.

All specifications (sizes and pressures) can be found on a label attached to the front passenger door sill.
The correct tire pressure is 200kPa (29psi). The compact spare should be at 420 kPa (60psi).
*NOTICE
- Warm tires normally exceed recommended cold tire pressures by 28 to 41 kPa (4 to 6 psi). Do not release air from warm tires to adjust the pressure. The tires will become underinflated when cold.
• Underinflation results in excessive wear, poor handling, reduced fuel economy, and the possibility of blowouts from overheated tires. Also, low tire pressure can cause poor sealing of the tire bead. If the tire pressure is excessively low, wheel deformation and/or tire separation are possible. Keep tire pressures at the proper levels. If a tire frequently needs refilling, have it checked by an authorized Kia dealer or a tire shop.
• Overinflation produces a harsh ride, handling problems, excessive wear at the center of the tire tread, and a greater possibility of damage from road hazards.
WARNING - Tire Inflation
Overinflation or underinflation can reduce tire life, adversely affect vehicle handling, and lead to sudden tire failure. This could result in loss of vehicle control.
![graph TD A[" "] --> B[" "] C[" "] --> D[" "] E[" "] --> F[" "] G[" "] --> H[" "] I[" "] --> J[" "] K[" "] --> L[" "] M[" "] --> N[" "] O[" "] --> P[" "] Q[" "] --> R[" "] S[" "] --> T[" "] U[" "] --> V[" "] W[" "] --> X[" "] Y[" "] --> Z[" "] AA[" "] --> AB[" "] AC[" "] --> AD[" "] AE[" "] --> AF["…](/content/2026/06/1254039/images/d949cf7c0bbf4e9455652db54e72df5444f0eb9a24a1f1632133798c6315713e.jpg)
Tire rotation
To equalize tread wear, it is recommended that the tires be rotated every 12,000km (7,500 miles), or sooner if irregular wear develops. During tire rotation, check the tires for correct balance.
Check for uneven wear and damage. Abnormal wear is usually caused by incorrect tire pressure, improper wheel alignment, an out-of-balance condition, severe braking or severe cornering. Look for bumps or bulges in the tread or side of tire. Replace the tire if you find either of these conditions. Also, replace the tire if you can see fabric or cord. After rotation, be sure to bring the front and rear tire pressures to specification and check lug nut tightness.
Disc brake pads should be inspected for wear whenever tires are rotated.
*NOTICE
Rotate radial tires that have an asymmetric tread pattern from front to rear only and not from right to left.
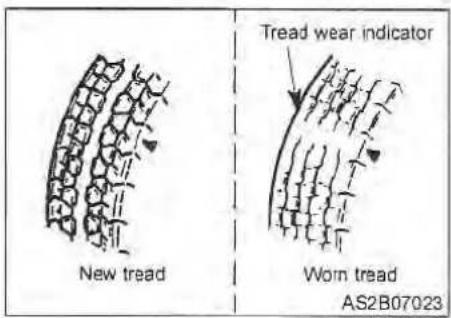
Tire replacement
If the tire is worn evenly, a tread wear indicator will appear as a solid band, 1/2 inch wide (12.7 mm) across the tread. This shows there is less than 1/16 inch (1.6mm) of tread remaining on the tire. Replace the tire when this happens.
Do not wait for this band to appear across the entire tread before replacing the tire.

Compact spare tire replacement
A compact spare tire has a shorter tread life than a regular size tire. Replace it when you can see the tread wear indicator bars on the tire. The replacement compact spare tire should be the same size and design tire as the one provided with your new Kia and should be mounted on the same compact spare tire wheel. The compact spare tire is not designed to be mounted on a regular size wheel, and the compact spare tire wheel is not designed for mounting a regular size tire.
Wheel Alignment and Tire Balance
In addition to proper tire inflation, correct wheel alignment helps to minimize tire wear. Your vehicle's alignment should be checked every 12 months or 24,000km (15,000 miles). Your tires were properly balanced at the factory, but they may need to be rebalanced before they wear out. If you notice a consistent vibration when driving, have your Kia Dealer inspect your tires. A tire should always be rebalanced if it has been removed from the wheel.
*NOTICE
Improper wheel weights can damage your vehicle's aluminum wheels. Use only approved wheel weights.
*NOTICE
- When replacing tires, never mix radial, bias-belted, and bias-type tires. All four tires should be of the same size, design and construction. Use only the tire sizes listed on the Tire Label attached to the passenger's door. Make sure that all tires and wheels are the same size and have the same load-carrying capacity. Use only tire and wheel combinations recommended on the Tire Label or by an Authorized Kia Dealer. Failure to follow these precautions can adversely affect the safety and handling of your vehicle.
- The use of any other tire size or type may seriously affect ride, handling, ground clearance, tire clearance, and speedometer calibration.
- Driving on worn-out tires is very hazardous and will reduce braking effectiveness, steering accuracy, and traction.
- It is best to replace all four tires on your vehicle at the same time. If that is not possible, then replace the two front or two rear tires as a pair. Replacing just one tire can seriously affect vehicle handling.
Wheel Replacement
When replacing the metal wheels for any reason, make sure the new wheels are equivalent to the original factory units in diameter, rim width and offset.
CAUTION
A wheel that is not the correct size may adversely affect wheel and bearing life, braking and stopping abilities, handling characteristics, ground clearance, body-to-tire clearance, snow chain clearance, speedometer calibration, headlight aim and bumper height.
Tire Size Designation
A tire's sidewall is marked with a tire size designation. You will need this information when selecting replacement tires for your car. The following explains what the letters and numbers in the tire size designation mean.
Example tire size designation: P185/65R14 85H
P - Applicable vehicle type (tires marked with the prefix "P" are intended for use on passenger cars; however, not all tires have this marking).
185 - Tire width in millimeters.
65 - Aspect Ratio. The tire's section height as a percentage of tire width.
R - Tire construction code (radial).
14 - Rim diameter in inches.
85 - Load Index: A numerical code associated with the maximum load the tire can carry.
H - Speed Rating Symbol. See the speed rating chart in this section for additional information.
- KIA MOTORS
- SPECTRA
- FOREWORD
- INTRODUCTION
- HOW TO USE THIS MANUAL
- WARNING
- CAUTION
- NOTICE
- VEHICLE BREAK-IN PROCESS
- YOUR VEHICLE AT A GLANCE
- INTERIOR AND EXTERIOR OVERVIEW
- KNOWING YOUR VEHICLE KNOWING YOUR VEHICLE
- WARNING - IGNITION KEY
- MANUAL DOOR LOCKS
- OPERATING DOOR LOCKS - WITH KEY
- TWO TURN UNLOCK SYSTEM
- OPERATING DOOR LOCKS - WITHOUT KEY
- OPERATING DOOR LOCKS FROM INSIDE THE VEHICLE
- CENTRAL DOOR LOCKS (OPTIONAL)
- REAR DOOR CHILD SAFETY LOCK
- MANUAL WINDOWS
- POWER WINDOWS (IF EQUIPPED)
- DRIVER'S DOOR POWER WINDOW CONTROLS
- DRIVER'S WINDOW AUTOMATIC-DOWN WINDOW SWITCH
- DRIVER'S POWER WINDOW SWITCH
- POWER WINDOW LOCK SWITCH FEATURE
- POWER WINDOW TIMER (IF EQUIPPED)
- WARNING - PASSENGERS
- PASSENGER DOOR POWER WINDOW CONTROLS
- SEATS
- WARNING - DRIVERS
- FRONT SEAT ADJUSTMENT
- MOVING THE FRONT SEAT FORWARD AND BACKWARD
- ADJUSTING THE FRONT SEATBACK RECLINER
- ADJUSTING THE HEIGHT OF DRIVER'S SEAT CUSHION
- WARNING - HEADRESTS
- SPLIT FOLDING REAR SEAT (IF EQUIPPED)
- WARNING - CARGO
- PRE-TENSIONER SEAT BELT
- (CONTINUED)
- SAFETY BELT RESTRAINT SYSTEM
- WARNING - TWISTED SAFETY BELTS
- RESTRAINT OF PREGNANT WOMEN
- RESTRAINT OF INFANTS AND SMALL CHILDREN
- CAUTION - HOT METAL PARTS
- RESTRAINT OF LARGE CHILDREN
- WARNING - SHOULDER BELTS ON SMALL CHILDREN
- WARNING - CHILD RESTRAINTS
- PLACEMENT OF A CHILD RESTRAINT SYSTEM
- WARNING - RESTRAINT INSTRUCTIONS
- INSTALLING A CHILD RESTRAINT IN THE REAR CENTER SEAT
- WARNING - CHILD RESTRAINT PLACEMENT
- CHILD SEAT ANCHORAGE POSITION
- TETHER ANCHOR INSTALLATION
- WARNING - CHILD RESTRAINT ANCHORAGE
- CHILD SEAT LOWER ANCHORS
- WARNING - FRONT SAFETY BELTS
- REAR SAFETY BELTS
- REAR LAP/SHOULDER BELT
- TO FASTEN
- TO UNFASTEN
- WARNING - REAR
- LAP BELT (REAR CENTER SEAT)
- TO FASTEN THE REAR LAP BELT
- TO UNFASTEN THE REAR LAP BELT
- WARNING - CENTER REAR LAP BELT
- PROPER USE AND CARE OF THE SAFETY BELT SYSTEM
- AIRBAG - SUPPLEMENTAL RESTRAINT SYSTEM
- WHAT YOUR AIRBAG SYSTEM DOES
- WHAT YOUR AIRBAG SYSTEM DOES NOT DO
- THE IMPORTANCE OF USING SAFETY BELTS
- WARNING - AIRBAGS & SAFETY BELTS
- AIRBAG SYSTEM COMPONENTS
- HOW THE AIRBAG SYSTEM WORKS
- WARNING - AIRBAG INJURIES
- NOISE AND SMOKE
- THE IMPORTANCE OF THE PASSENGER BEING PROPERLY SEATED
- WARNING - FRONT
- PASSENGERS
- AIRBAG WARNING LIGHT
- AIR BAG
- SUPPLEMENTAL RESTRAINT SYSTEM SERVICE
- WARNING - AIRBAG (SRS) MALFUNCTIONS
- AIRBAG WARNING LABEL (SUNVISOR - FRONT SIDE)
- WARNING - EXHAUST FUMES
- REMOTE TRUNK LID RELEASE
- EMERGENCY TRUNK SAFETY RELEASE (IF EQUIPPED)
- KNOWING YOUR VEHICLE
- OPENING THE HOOD
- CLOSING THE HOOD
- REMOTE FUEL FILLER DOOR RELEASE
- WARNING - FUEL FILLING
- HORN
- MIRRORS
- OUTSIDE REARVIEW MIRROR
- MANUAL CONTROL
- ELECTRIC REMOTE CONTROL (IF EQUIPPED)
- OUTSIDE REARVIEW MIRROR HEATER (IF EQUIPPED)
- DAY/NIGHT REARVIEW MIRROR
- DOME LIGHT
- MAP LIGHTS
- CUP HOLDERS AND CONSOLE STORAGE COMPARTMENT
- COIN HOLDER
- SUNGLASS HOLDER
- DRIVING YOUR VEHICLE DRIVING YOUR VEHICLE
- ILLUMINATED IGNITION SWITCH
- IGNITION SWITCH AND ANTI-THEFT STEERING COLUMN LOCK
- IGNITION SWITCH POSITION
- LOCK
- ACC (ACCESSORY)
- ON
- START
- AUTOMATIC TRANSAXLE
- MANUAL TRANSAXLE
- STARTING THE ENGINE
- MANUAL TRANSAXLE OPERATION
- WARNING - MANUAL TRANSAXLE
- DOWNSHIFTING
- AUTOMATIC TRANSAXLE OPERATION
- WARNING - AUTOMATIC TRANSAXLE
- TRANSAXLE RANGES
- O/D OFF INDICATOR
- NORMAL OPERATION P (PARK)
- R (REVERSE)
- N (NEUTRAL)
- D (DRIVE)
- 2 (2ND)
- 1 (1ST)
- MOVING UP A STEEP GRADE FROM A STANDING START
- SHIFT LOCK SYSTEM
- SHIFT LOCK OVERRIDE
- BRAKE SYSTEM
- POWER BRAKES
- ANTI LOCK BRAKES (ABS) (IF EQUIPPED)
- WARNING - ABS BRAKES
- IN THE EVENT OF BRAKE FAILURE
- WARNING - PARKING BRAKE
- DISC BRAKE WEAR INDICATORS
- WARNING - BRAKE WEAR
- REAR DRUM BRAKES
- PARKING BRAKE
- POWER STEERING
- TILT STEERING (IF EQUIPPED)
- CRUISE CONTROL (IF EQUIPPED)
- WARNING - CRUISE CONTROL
- TO INCREASE CRUISE CONTROL SET SPEED
- TO DECREASE THE CRUISING SPEED
- TO RESUME CRUISING SPEED AT MORE THAN 25 MPH (40 KM/H)
- TO CANCEL CRUISE CONTROL DO ONE OF THE FOLLOWING
- TO TURN CRUISE CONTROL OFF
- GAUGES
- SPEEDOMETER
- ODOMETER/TRIPMETER
- ODOMETER
- TRIPMETER
- TACHOMETER (IF EQUIPPED)
- FUEL GAUGE
- ENGINE TEMPERATURE GAUGE
- INSTRUMENT PANEL ILLUMINATION
- WARNINGS AND INDICATORS
- WARNING LIGHTS/AUDIBLE INDICATORS CHECKING OPERATION
- PARKING BRAKE AND BRAKE FLUID WARNING
- PARKING BRAKE WARNING
- LOW BRAKE FLUID LEVEL WARNING
- WARNING - BRAKE WARNING LIGHTS
- SAFETY BELT WARNING
- AIRBAG WARNING
- CHARGING SYSTEM WARNING
- ENGINE OIL PRESSURE WARNING
- LOW FUEL LEVEL WARNING
- KEY REMINDER WARNING CHIME
- LIGHTS-ON WARNING CHIME
- REAR WINDOW DEFROSTER INDICATOR
- HEADLIGHT HIGH BEAM INDICATOR
- O/D OFF INDICATOR (AUTOMATIC TRANSAXLE)
- DOOR AJAR WARNING
- AUTO CRUISE INDICATOR
- AUTO CRUISE
- ANTI-LOCK BRAKE SYSTEM (ABS) WARNING LIGHT (IF EQUIPPED)
- TAIL-GATE AJAR WARNING (5 DOOR HATCHBACK)
- MALFUNCTION INDICATOR
- CONTINUOUSLY ON
- FLASHING ON AND OFF
- LIGHTING
- NOTICE - BATTERY SAVER FUNCTION
- LIGHTING CONTROL
- FIRST POSITION
- SECOND POSITION
- FLASHING HEADLIGHTS
- TURN SIGNALS
- LANE CHANGE SIGNALS
- DAYTIME RUNNING LIGHTS(DRL)
- WINDSHIELD WIPERS
- VARIABLE-SPEED INTERMITTENT WIPERS (IF EQUIPPED)
- ONE-TOUCH WIPERS
- WINDSHIELD WASHERS
- INTERIOR FEATURES
- CIGARETTE LIGHTER
- ASHTRAY
- WARNING - ASH TRAY USE
- CLIMATE CONTROL SYSTEM
- CONTROLS
- FAN SPEED CONTROL KNOB
- MODE SELECTION
- FACE POSITION
- FACE-FLOOR POSITION
- FLOOR POSITION
- FLOOR-DEFROST POSITION
- DEFROST POSITION
- TEMPERATURE CONTROL KNOB
- AIR INTAKE CONTROL SWITCH
- RECIRCULATED AIR POSITION
- AIR CONDITIONING SWITCH (IF EQUIPPED)
- SYSTEM OPERATION
- VENTILATION
- HEATING
- AIR CONDITIONING (IF EQUIPPED)
- REAR HEATING DUCT
- AIR QUALITY CONTROL SYSTEM (IF EQUIPPED)
- WINDSHIELD DEFROSTING AND DEFOGGING
- TO DEFOG INSIDE WINDSHIELD
- TO DEFROST OUTSIDE WINDSHIELD
- DRIVING TIPS DRIVING TIPS
- FUEL REQUIREMENTS
- EMISSION CONTROL SYSTEM
- VEHICLE MODIFICATIONS
- ENGINE EXHAUST GAS PRECAUTIONS (CARBON MONOXIDE)
- DRIVING TIPS
- OPERATING PRECAUTIONS FOR CATALYTIC CONVERTERS
- BEFORE DRIVING
- NECESSARY INSPECTIONS
- BEFORE STARTING
- DRUNK DRIVING
- DRUGS AND DRIVING
- SUGGESTIONS FOR ECONOMICAL OPERATION
- WARNING - ENGINE OFF MOTION
- SPECIAL DRIVING CONDITIONS
- HAZARDOUS DRIVING
- WARNING - DOWNSHIFTING
- ROCKING THE VEHICLE
- DRIVING AT NIGHT
- DRIVING IN THE RAIN
- WINTER DRIVING
- SNOW TIRES
- WARNING - SNOW TIRE SIZE
- TIRE CHAINS
- TIRE CHAIN SELECTION
- CHAIN INSTALLATION
- WARNING - TIRE CHAINS
- DRIVING IN FLOODED AREAS
- TRAILER TOWING
- OVERLOADING
- LABEL INFORMATION
- VEHICLE IDENTIFICATION NUMBER (VIN)
- IN CASE OF EMERGENCY IN CASE OF AN EMERGENCY
- ROAD WARNING
- HAZARD WARNING FLASHER
- OVERHEATING
- WARNING - REMOVING RADIATOR CAP
- EMERGENCY STARTING
- JUMP STARTING
- WARNING - BATTERY
- JUMP STARTING PROCEDURE
- CONNECTING JUMPER CABLES
- PUSH-STARTING
- ELECTRICAL CIRCUIT PROTECITION
- FUSES
- FUSE REPLACEMENT
- WARNING - FUSE REPLACEMENT
- FUSE PANEL DESCRIPTION
- DRIVER-SIDE KICK PANEL
- STORING THE SPARE TIRE, JACK AND TOOLS
- TO REMOVE THE JACK
- TO REMOVE SPARE TIRE
- CHANGING TIRES
- JACKING INSTRUCTIONS
- WARNING - CHANGING TIRES
- TIRE REPLACEMENT
- WARNING - CHANGING A FRONT TIRE
- WARNING - JACK LOCATION
- WARNING - WHEEL STUDS
- MAINTANANCE MAINTENANCE
- MAINTENANCE
- MAINTENANCE SERVICES
- OWNER'S RESPONSIBILITY
- SCHEDULED MAINTENANCE SERVICE
- MAINTENANCE SCHEDULE
- NOTE
- OWNER MAINTENANCE
- OWNER MAINTENANCE SCHEDULE
- OWNER MAINTENANCE PRECAUTIONS
- WARNING - MAINTENANCE WORK
- WARNING - LOOSE
- WARNING - ENGINE COOLING
- ENGINE OIL AND OIL FILTER
- CHANGING THE ENGINE OIL AND FILTER
- WARNING - ENGINE OIL
- OIL CAPACITY
- ENGINE COOLING SYSTEM
- CHANGING COOLANT
- BRAKES AND CLUTCH
- CHECKING BRAKE/CLUTCH FLUID LEVEL
- BRAKE FLUID RESERVOIR
- CHECKING THE PARKING BRAKE
- CHECKING THE MANUAL TRANSAXLE OIL LEVEL
- CHECKING THE AUTOMATIC TRANSAXLE FLUID LEVEL
- USING THE HOT FLUID SCALE
- USING THE COLD FLUID SCALE
- CHECKING THE WASHER FLUID LEVEL
- BODY LUBRICATION
- AIR CLEANER
- ELEMENT REPLACEMENT
- WIPER BLADES
- BATTERY
- WARNING - BATTERY DANGERS
- BATTERY MAINTENANCE
- BATTERY RECHARGING
- WARNING - RECHARGING BATTERY
- TIRES AND WHEELS
- TIRE CARE
- INFLATION PRESSURES
- WARNING - TIRE INFLATION
- TIRE ROTATION
- COMPACT SPARE TIRE REPLACEMENT
- WHEEL ALIGNMENT AND TIRE BALANCE
- WHEEL REPLACEMENT
- TIRE SIZE DESIGNATION
Marque : KIA
Modèle : Spectra5 (2003)
Catégorie : Voiture