
AP-WX50 - Support écran plat LG - Notice d'utilisation et mode d'emploi gratuit
Retrouvez gratuitement la notice de l'appareil AP-WX50 LG au format PDF.


| Type de produit | Support mural inclinable pour écran plat |
| Marque | LG |
| Modèle | AP-WX50 |
| Compatibilité VESA | 600 x 400 mm |
| Dimensions (L x H x P) | 887 x 495 x 56 mm |
| Poids | 7.4 kg |
| Capacité de charge maximale | Environ 50 kg (selon modèle d'écran) |
| Matériaux | Acier |
| Angle d'inclinaison | Haut/bas et gauche/droite réglables |
| Type de fixation murale | Vis et chevilles fournies pour béton, brique, pierre naturelle |
| Sécurité | Boulons de verrouillage inclus, ne pas installer sur plaque de plâtre |
| Installation | Nécessite deux personnes, porter des gants de protection |
| Entretien | Nettoyer avec un chiffon sec, éviter l'humidité et les sources de chaleur |
| Accessoires fournis | Vis de fixation, chevilles, entretoises guide, boulons de sécurité, gabarit de perçage, autocollant guide |
| Garantie | 2 ans (estimation) |
| Utilisation | Intérieur uniquement, sur mur vertical |
FOIRE AUX QUESTIONS - AP-WX50 LG
Questions des utilisateurs sur AP-WX50 LG
0 question sur cet appareil. Repondez a celles que vous connaissez ou posez la votre.
Poser une nouvelle question sur cet appareil
Téléchargez la notice de votre Support écran plat au format PDF gratuitement ! Retrouvez votre notice AP-WX50 - LG et reprennez votre appareil électronique en main. Sur cette page sont publiés tous les documents nécessaires à l'utilisation de votre appareil AP-WX50 de la marque LG.
MODE D'EMPLOI AP-WX50 LG
AP-WX50
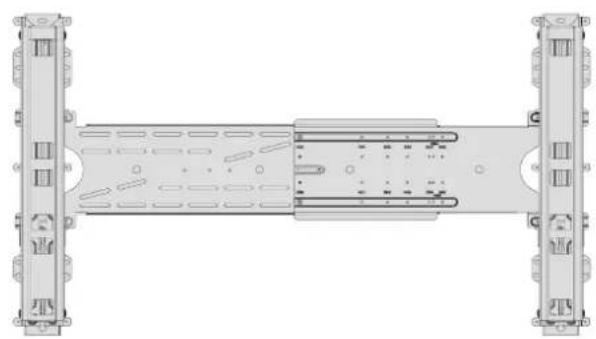
natural_image
Technical line drawing of a mechanical component with symmetrical supports and internal channels (no text or symbols)부속품 / Accessories
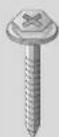
벽걸이 고정 볼트-10개
10-Bolts for tilt wall mounting bracket
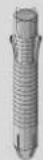
벽걸이고정 앱카-10개
10-Wall Anchor Bolt Sleeves
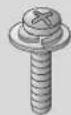
제품용 브라켓 고정 볼트(M5X35)-4개
4-Product Bracket Bolts
제품용 브라켓 고장 볼트(M6X35)-4개
4-Product Bracket Bolts

제품용 브라켓 고정 볼트(M8X35)-4개
4-Product Brackett Bolts(M8X35)

Guide Spacer-471
4-Guide Spacer

안전 고점 볼트(M4X6)-2개
2-Safety locking Bolts
크기 조절 브라켓 고정 몰트(M4X6)-7개
7-Bolts for tilt wall mounting
bracket
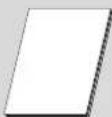
도면
Hole Drilling Template
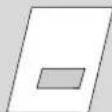
사용설명서
Installation and Setup Guide

Guide Sticker
각도 조절형 벽걸이 지지대 사용설명서
Tilt wall mounting bracket
Installation and Setup Guide
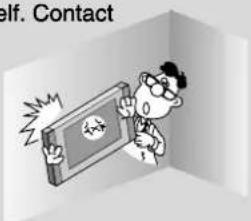
안전을 위한 주의사항 Safety Instructions

-전문 살치업지는 살치 전에 이 설명서를 잘 읽은 후 몰바른 살치를 해주세요.
-전문설치업지는이설명서를설치완료후고객에게전달해주시고.고객이잘읽은후보관할수 있도록의뢰해주세요.

- Qualified service technician should install the product properly after reading this manual thoroughly.
- Qualified service technician should hand this manual over to the customer after installation and ask him/her to read and keep it.
▶사용설명사를 임고 난 뒤에는 제품을 사용하는 사람이 항상 볼 수 있는 곳에 보관해 주세요.
▶ After reading this manual, keep it in the place that the user always can contact easily.

경고/WARNING
제품 설치는 반드시 관매점에서 지정한 전문 설치업자에게 의뢰해 주세요.
전문 설치업자가 아닌 사람이 설계하면 대단비 위험한 일이며,부상의 원인이 될 수 있습니다.
Do not install this product by yourself. Contact
the service technician qualified by the manufacturer.
It may cause injuries.
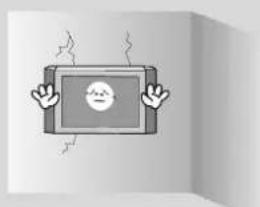
제품의 무게를 견디지 못하는 곳에는 설치하지 미세요
설치하는 곳의 강도가 약하면 제품이 덜어져 부상의 원인이 될 수 있습니다.
Do not install this product on the place where it cannot be supported.
It may cause the product to fall and could cause injuries.
natural_image
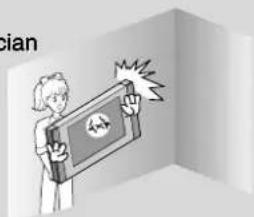
Illustration of a cartoon character on a tablet with arms and legs, surrounded by motion lines (no text or symbols)설치 후 제품을 이동시키거나, 교체할 경우에는 반드시 판매점에서 지정한전문 설치업자에게 문의 하세요.
설치는 기술을 요하는 작업이므로 개인이 임의료. 이동 및 설치할 경우 인천상의 문제가 발행할 수도. 있습니다.
Contact the qualified service technician
for moving or replacing this product after installing.
Installing the product needs specified technic, so it may cause safety problem to move or install it by yourself.
natural_image
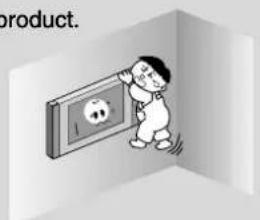
Illustration of a person holding a tablet with a small icon, no text or symbols present설치 후 제품에 매달리거나 심한 충격을주지 마세요
제품이 멀어져 부상의 원인이 됩니다.
Do not hang on or impact on this product.
It may cause the product to fall and could cause injuries.
natural_image
Cartoon illustration of a child reaching toward a wall-mounted screen with a panda face (no text or symbols)
주의 / NOTES
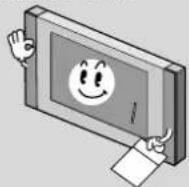
반드시 시용설명서의 지시에 따라 제품을 설치하세요
사용설명서의 지시를, 따르지 않을 경우, 잠못신 설치를, 인해 심한 부상 및 계품 파해의 원인이 될 수 있습니다.
Install this product followed by the instruction of the manual.
Otherwise it may cause serious injuries or damage of the product.
제품을 설치할 때는 반드시 두사람 이상이 함께 하세요
손자서 하게 되면 제품이 멀어져 부상의 원인이 필 수 있습니다.
Do not install this product by yourself. Get some help from others.
It may cause the product to fall and could cause injuries.
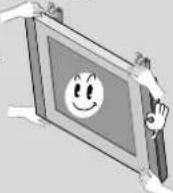
설치시에는 반드시 먼저 벽체 종류를 확인하고, 조건이 맞다면 동봉한 엕커와 볼트를 사용하세요.
지정되지 않은 애커와 불트를 사용할 경우 제품의 무게를 지방하지 못해 안전상의 문제가 발행한 수도 있습니다.
Before installing, check whether the material of wall satisfies the specifications and make sure to use enclosed anchors supplied with the product.
Otherwise it may cause safety problem.
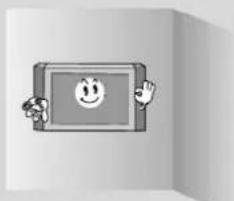
natural_image
Cartoon illustration of a smiling computer monitor with arms and legs, no text or symbols present벽에 친공시 반드시지정된직경의 드릴 비트 및 드릴을 사용하세요. 그리고 구멍 깊이도 지정된 사항을 따르세요.
지정리지 않은 방법으로 천공하여 설치한 경우에는 불이만하게 설치되어 인천상의 문제가 방법한 수도 있습니다.
When drilling use drill and drill bit specified by the manufacturer.
And the depth of the hole should satisfy the specifications.
Otherwise it may cause safety problem.
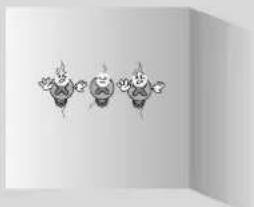
natural_image
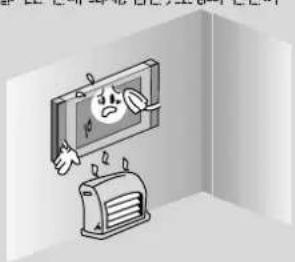
Abstract 3D illustration of three stylized figures with decorative elements, no text or symbols present제품을 물에 젖은 수건으로 닭지 미시고 제품이 설치된장소 이래에서 열기구 및 기습기 등을 사용하지 마세요
물가계품 안으로 들어가거나 수증기 및 열이로 인해 화제, 감편, 고장의 원인이 될 수 있습니다.
Do not place a heat source (radiator or heater) or a humidifier under the installed product.
It may cause a fire or could give an electric shock.
natural_image
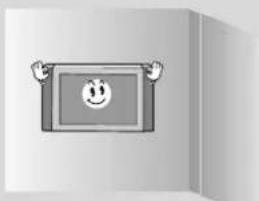
Illustration of a cartoon character peeking from behind a monitor and a toaster, both inside a corner (no text or symbols)제품을 수직벽 이외의 스프링클러나 감지기 멇,
진동이나 충격이 마칠 우려가 있는 곳, 고압 전선이나 동력원 근처에는 설치하지 미세요.
Do not install this product near a sprinkler, a sensor, a high voltage electric line, any power source or the place where impact or vibration can affect.
natural_image
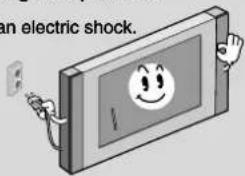
Cartoon illustration of a smiling face inside a rectangular frame (no text or symbols)제품 설치전 콘센트에서 전원코드를 뼐세요.
전원코드가 꽃힌 상태에서 제품을 설치할 경우 감턴, 화제의 원인이 될 수 있습니다.
Make sure to unplug before installing this product.
Otherwise it may cause a fire or could give an electric shock.
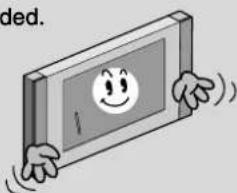
제품 살치시 만손으로 살치하지 말고, 반드시 직업용 장갑을 착용하세요.
부상의 원인이 될 수 있습니다.
Do not install this product barehanded.
It may cause injuries.
natural_image
Illustration of a smiling face inside a rectangular frame with hands pointing at it (no text or symbols)
설지 방법 / Installation
1 제품용 Bracket 분리
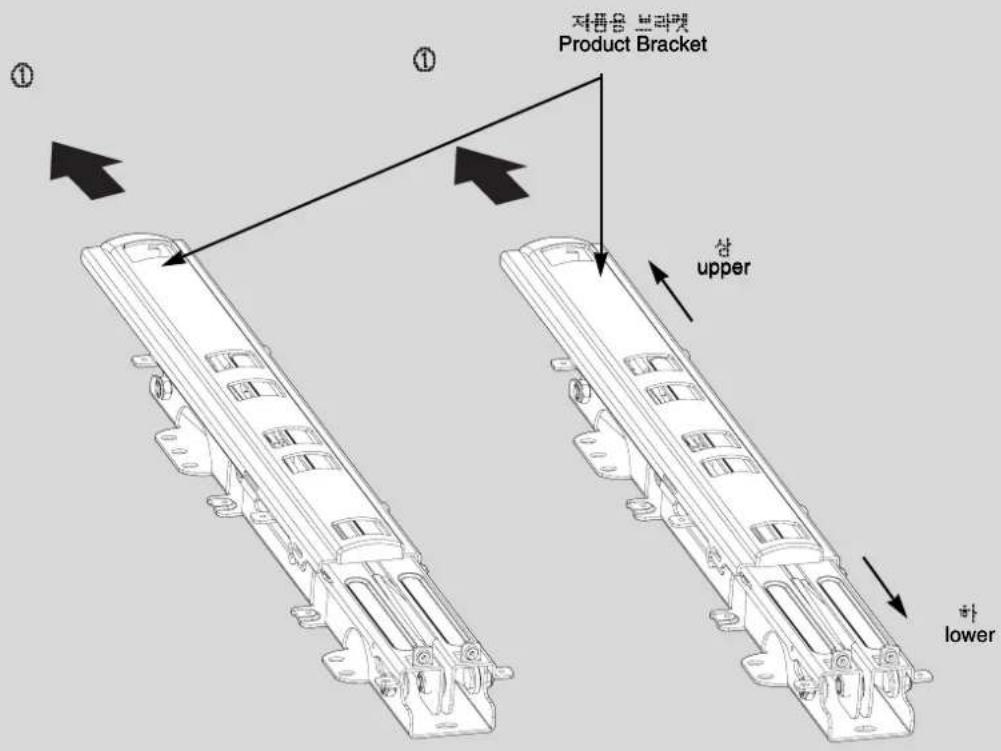
①번 화살표 방향과 같이 제품용 브라켓을 상록으로 밀어서 벽면용 각도 조절 장치에서 분리시키세요.
◆ Push the product brackets in the direction shown by arrow 1, then detach the product brackets from the wall mounting bracket.
2 제품 크기별 조립방법/Fixation of width adjustment bracket by size
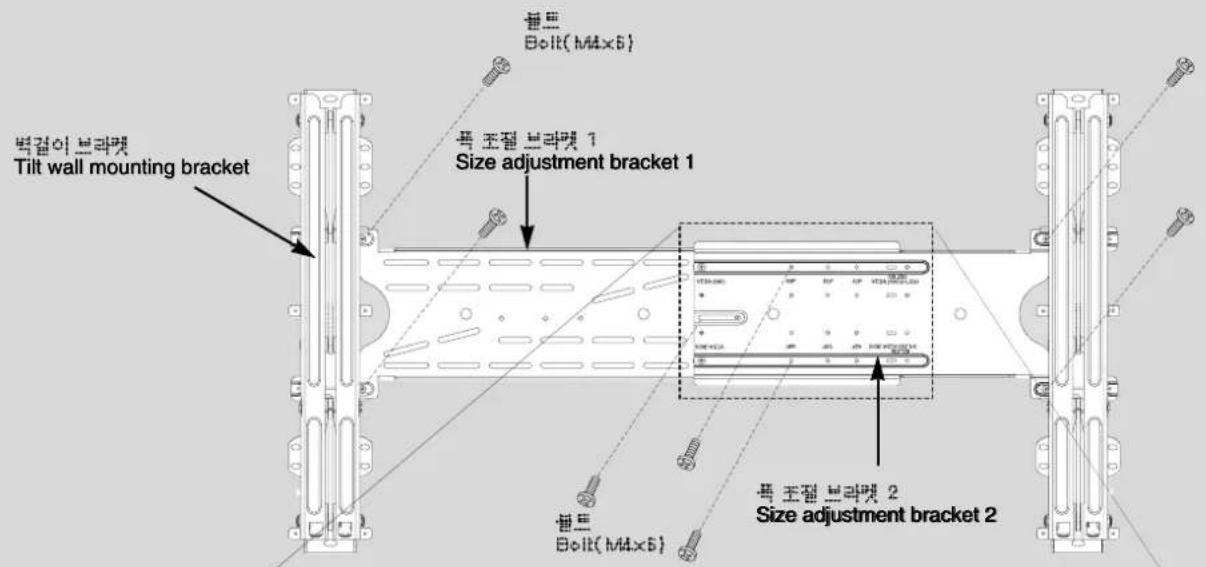
(∧)
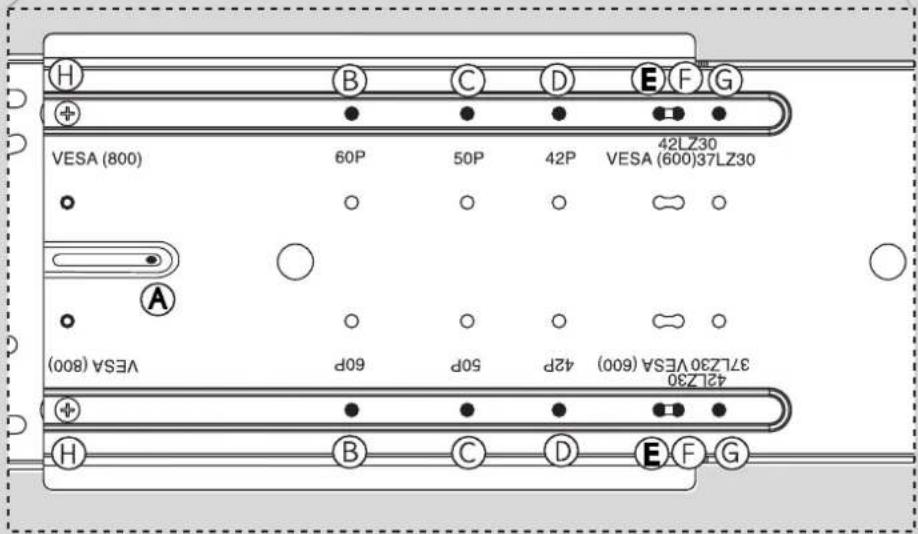
<볼트 결합위치(팔호 안 사용 볼트 갯수)/Bolt integrated spot/in the blank (Number of the bolt to be used)>
A+B고정(3개/3EA): 60명(152cm)Plasma(VESA 미대응 모델)/60inch Plasma(VESA Non-corresponding model)
A+◎고정(3개/3EA): 50명(127cm)Plasma (VESA 미대응 모델)/50inch Plasma (VESA Non-corresponding model)
④+⑩고정(3개/3EA): 42명(106cm)Plasma (VESA 미대응 모델)/ 42inch Plasma (VESA Non-corresponding model)
④+⑤正弦 (371/3EA): Plasma/LCD VESA (600x400)대응 모델(05년 이후 모델 설치 기준)The installation standard for the model after the year 2005)
A+①고정(3개/3EA): LCD 42LZ3 전용/LCD 42LZ3 only
A+⑥고정(3V/3EA): LCD 37LZ3 전용/LCD 37LZ3 only
⊕+⊕고정(2개/2EA): Plasma/LCD VESA(800×400) 대응 모델/Plasma/LCD VESA (800×400) Corresponding model
<설치방법/Installation method>
순서대로 설치하세요 Install the product in the following order.
- 결합할 제품의 크기 확인. ➡ 2. 폭 조절용 브라켓 조립 기준에 맞게 조립. ➡
- 폭조절 브라켓과 벽걸이 브라켓 좌/우를 볼트(M4×6) 4개로 조립.
- Check the product size. ➕ 2. Connect to inch indicated on the bracket for inch adjustment.
- Fixate 4 bolts (M4x6) on the width adjustment bracket and angle bracket for wall.
3
Guide Spacer결합방법
-테미블위나 바닥미 평평한 곳에 제품을 스크린미 아래로 향하도록 하며 놓으세요.
미때 스크린미 손상되지 않도록 방석이나 부드러운 천을 놓고 그 위에 두어야 합니다.
- As shown above, carefully place the Display screen side down on a cushioned surface that will protect the product and screen from damage.
-벽걸이 체결 부위에 볼트가 체결되어 있을 경우 볼트를 제거한 후, 벽걸이를 고정시키세요.
- If bolts are screwed on the wall mount, remove the bolts first to fasten the wall mount.
<1>
natural_image
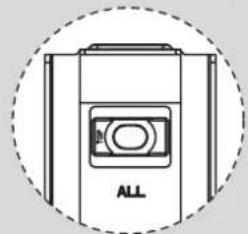
Diagram of a device with a circular label 'ALL' and a central screen icon, enclosed in a dashed circle (no text or symbols beyond the label)Guide spacer를 가로방향 ("TOP" 글자가 원쪽)으로 브라켓에 넣으세요.
Insert the guide spacer in the horizontal direction (with 'TOP' letter on left) to the bracket.
<2>
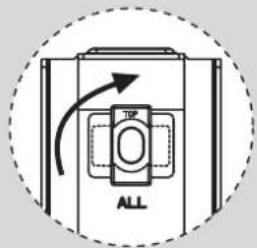
TOP'글자가위로오게Guide spacer를둘려직각으로맞추세요.
◄불트체결 후 Guide Spacer의 움직임이 없어야 합니다.
▶ 볼트 길아가 맞지 않을 경우 SVC Guide를 참고하세요.
Rotate the guide spacer so that 'TOP' letters are shown to the top. There should not be any movement of guide spacer after connecting. If the length of the bolt doesn't match, please refer to SVC Guide.
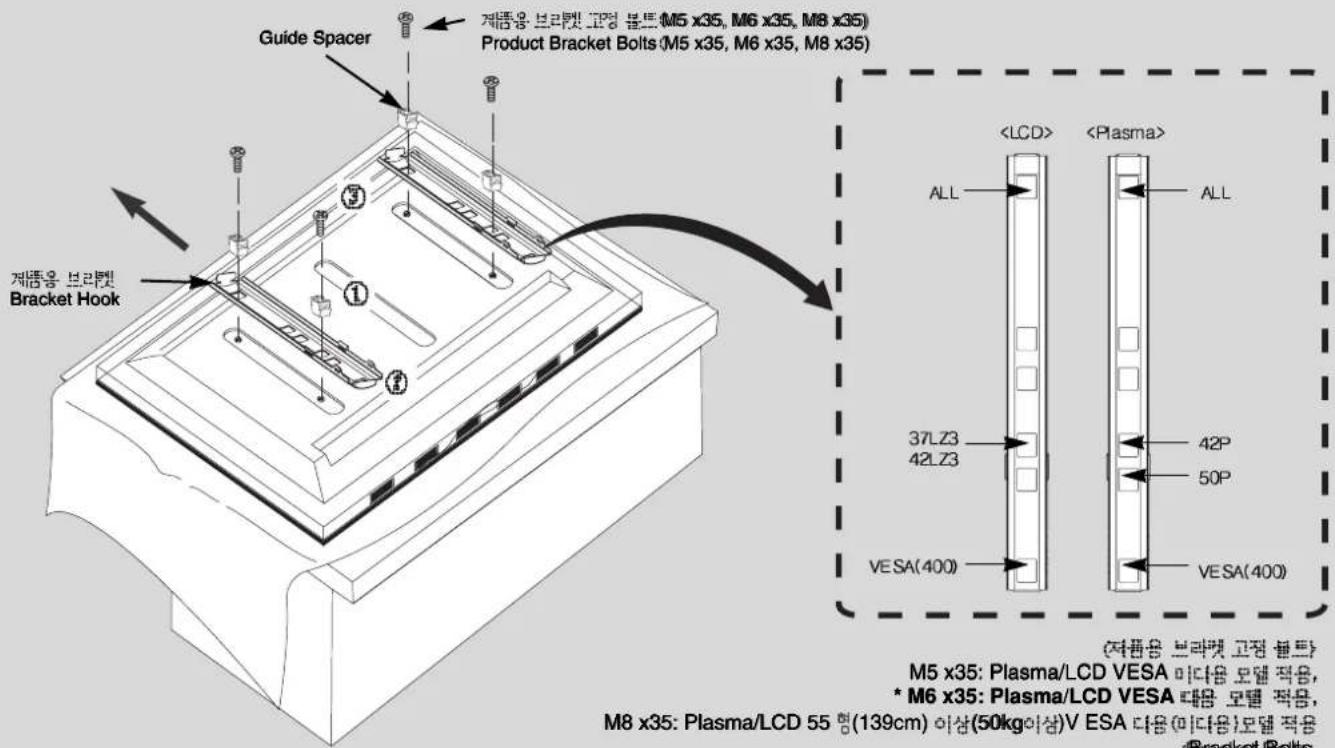
M5 x35: Plasma/LCD VESA Non-corresponding model application, ma/LCD VESA Corresponding model application, M8 x35: Plasma/LCD 55 (50kg or above) VESA Corresponding(Non-corresponding) model application
<작업방법/Work method>
그림의 ① ⑧ ③ 순서에 맞춰서 작업하세요 Work in the order of figure 1, 2 and 3.
①. Guide spacer를 브라켓에 결합 → ②. Guide spacer가 결합된 브라켓을 화살표 방향으로 당긴 후 조립 → ③. 브라켓과 세트를 볼트로 고정.
- Connect the guide spacer to the bracket. ➕ 2. Pull the bracket with guide spacer connected in the arrow direction to assemble it.
- Fixate the bracket and set with bolt.
5
도면 벽면 부작 주의사항/Precaution when attaching the drawing on the wall
반드시 지켜주세요 / Keep these instructions for future reference
-벽체의재질 및 마감재의 두께를 확인하세요.
- 벽체의 재질이 금가지 않는 콘크리트벽, 경량 콘크리트, 강한 자연석, 연한 자연석, 조적 벽들, 중공 블록일 때에는 동봉된 엉커 및 별트를 사용할 수 있습니다.
-마감재층의 두께가 10mm 이하일 경우에만 동봉된 엕커와 볼트의 사용이 가능합니다.
-석고보드로만들어진 벽체에는 절대로 설치하지 마세요
- 기타 지정 되지 않은 벽체에 살치 할 경우에는 고정부 1개소당 인발하중 686kgf/m² (70N), 전단하중 980kgf/m² (100N) 이상의 힘에견될 수 있도록 살치하세요.
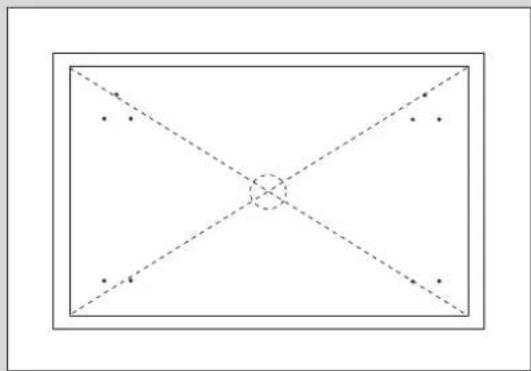
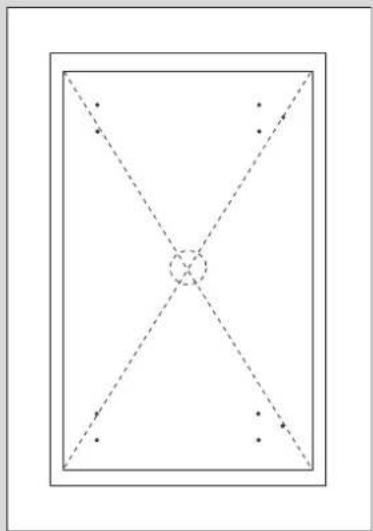
- Using the hole-drilling template provided, mark the positions of the anchor holes shown on the drawing in the wall; using a center-punch or other device to clearly identify the 10 drill hole positions.
Note: It is advisable to use a bubble level to make sure that the template is horizontally true. - Warning: The surface that the tilt wall mounting bracket is to be mounted on should be of sufficient strength to support the weight of the monitor and speakers typically; concrete, strong/weak natural rock, brick and hollow block.
- Warning: Plasterboard is not a sufficiently strong enough material; unless the bolts are anchored into standard construction type studs capable of supporting the weight of the monitor and speakers. If you can not determine the strength of the material, each drilled hole should be capable of supporting normal stress 686kgf/m² (70N) and shear stress 980kgf/m² (100N).
natural_image
Pure geometric diagram with intersecting dashed lines and a central circle, no text or symbols present<수정형>
natural_image
Pure geometric diagram with intersecting dashed lines and dots inside a rectangle (no text or symbols)<수직형>
제품이 부착될 벽면에 부속품의 도면을 수평미 맞게 불미세요.
도면에 나타나 있는 앱커 및 볼트의 위치를 벽면에 표시하세요.
In the proportion of horizontal, fix drawing of the accessories on the wall.
Mark position of anchors bolts on he wall.
6
도면 벽면 부작방법/ How to attach the drawing on the wall
1.벽걸미 설치할 위치에도면을 부착하세요
2.도면에 구입하신 모델의 부위를 표기하세요.
1. Attach the drawing on the location to install the wall mount.
2. Label the part of model purchased on the drawing.
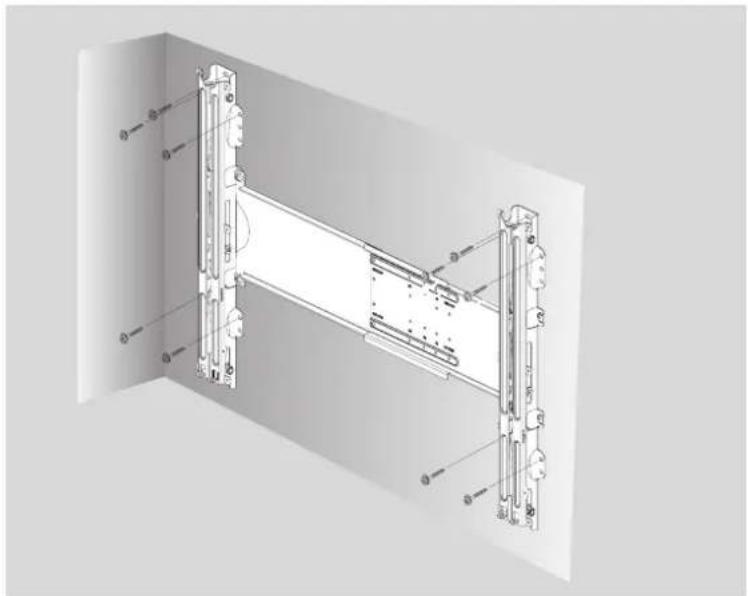
〈벽걸이고정 방법/How to fix bracket〉
natural_image
Technical diagram of a mechanical assembly with labeled components (no text or symbols present)벽걸이 장치는 도면에 표기된 번호(제품의 브라켓 체결 위치가로 치수: 37LZ3-①, 42LZ3-②, VESA(600)-③, 42P-④, 50P-⑤, 60P-⑥, VESA(800)-⑦)의 구멍에 고정시키세요.
불가피하게 지정된 위치에 불트를 체결하지못할 경우에는 가장 인접한 곳으로 대처하여 체결할 수도 있습니다.
단, 지정미외의 곳으로 2곳 미상을 변경하지는 마세요.
수직형으로 설치할 때는 수직형에 맞게 볼트를 체결하세요.
Bolt the tilt wall mounting bracket to indicated number of a drawing.37LZ3-①, 42LZ3-②, VESA(600)-③, 42P-④, 50P-⑤, 60P-⑥, VESA(800)-⑦
If it's impossible to bolt in indicated position, bolt it the closest position. Don't change the indicated position more 2 position.
When you install, vertically, insert the bolts in the proportion of vertical.
〈앵커 및 볼트의 고정 방법/How to fix anchors and bolts〉
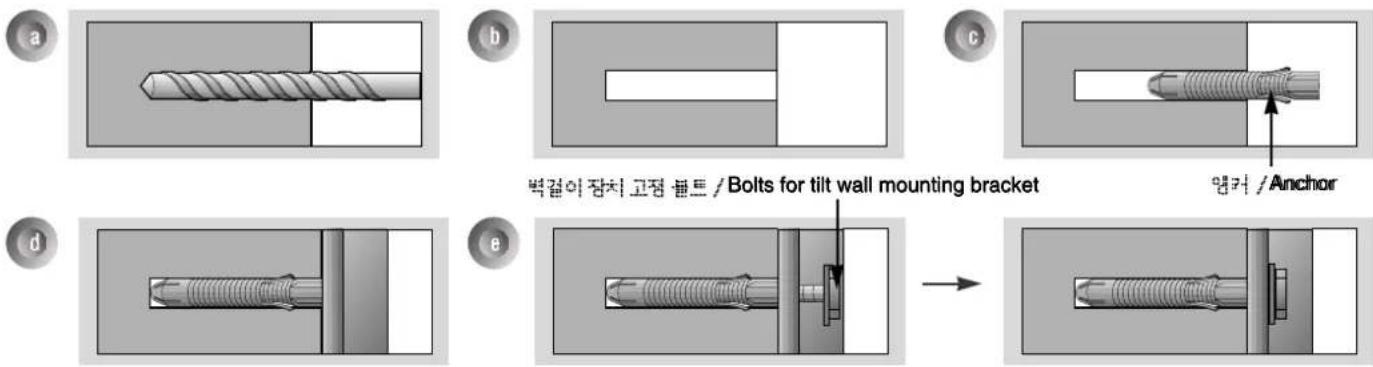
a. 도면을 떠어 니고 벽면에 표시된 앱커 위치어 구멍을 드릴 비트 직경 8mm를 사용하 깊이 80mm\~100mm 이니로 래르세요.
b. 땀은 구멍을 청소하세요.
c. 구멍어 둘병된 앱커를 삽입하세요.
d. 구멍 위치어 맞게 벽걸이 잠치를 벽쪽으로 밀착시키세요, 이띠 각도를 조절하는 부분이 상족으로 합하도록 하세요.
e. 밖걸이 잠치 고점 봄트를 구멍어 맞춰 체결하셔.EU.
a. Usisiggan88mmddillappropriate for the material about the wall, lddill each hole to a depth of 80mm - 100mm.
b. Odaareaabhdhiedchobe.
c. Insert a anchor supplied with the till wall mounting bracket into each hole.
d. Mount the lift wall mounting bracket on the wall using the 12 washers and bolts supplied.
e. Adjust the bolt head angle less as necessary, see above.
7
벽걸이 지지대와 제품 결합방법/제품 수평 (기울기) 조정 방법 How to connect the wall mount supporter and product/ Horizontal level adjustment method
-반드시 두사람 이상이 들어서 설치하세요./Always have more than 2 people hold the product for installation.
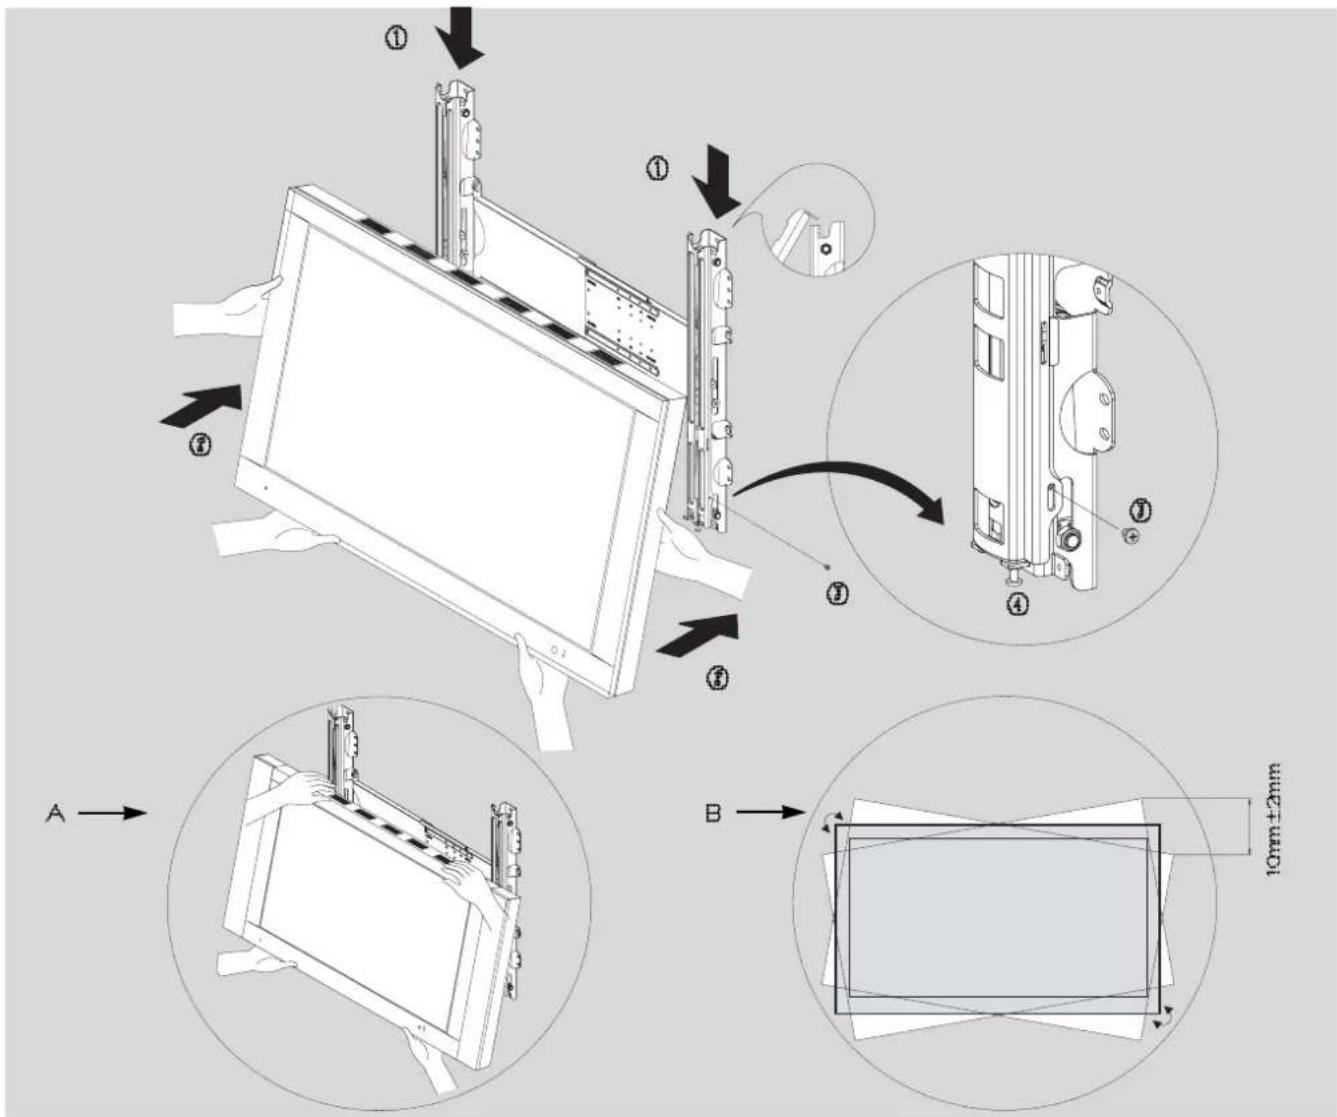
〈벽걸이 지지대와 제품 결합방법〉 순서대로 설치하세요.
1.제품용 브라켓과 결합한 세트를 벽에 부착된 벽걸이 브라켓에 세트 상측 걸기.(①번 화살표)
2. 세트 하록을 ①번 화살표 방향으로 "딸짝" 소리가 나도록 누르기.
3. 좌 우 안전 장치 고정 볼트(M4×6)를 이용하여 벽걸이 브라켓과 제품용 브라켓을 결합.(⑦번 참조)
- Carefully lift up the product and place it in position on the tilt wall mounting bracket securely as shown by arrow 1.
- Push the bottom of the product toward he wall as shown in arrow 2, so that the product will "click" into position onto the tilt wall mounting bracket.
- Assemble the tilt wall mounting bracket with the product bracket using the Safety locking bolt (M4x6) bolts (See 3).
반드시제품이 완전히 고정되어 있는지 세트 하층을 당겨서 체결 상태를 확인하세요.
제품과스피커가결합된 상태에서벽에 고정할 경우 스피커를 잡지 말고 제품을 잡고 들어올리세요.(A부 그림 참조)
Guide sticker를 눈에 잘뜨는 곳에 부착하여 제품과 벽특 브라켓을 분리시 참조하세요.
- Pull the bottom of the set to check the connected condition on whether the monitor is firmly fixed.
See A above, be sure to lift a product/speakers assembly by the product only, do not lift using only the speakers.
- Attach the guide sticker around the product. When separating the wall mounting bracket from the product, refer to the guide sticker.
제품 수평(기울기) 조정방법(부 그림 참조)》
제품 설치 후 좌우 수평미 마닐경우 ⑦번 볼트를 느슨하게풀고 ④번 볼트 (M4×12)로 수평을 조절한 후, ⑦번 볼트를 조여주세요.(볼트 회전 방향에 따라 제품이 울라가거나 내려입니다.)
If the product leans to one side, loose the bolt 3. Then, adjust the tilt with bolt 4 (M4x12) and tighten the bolt 3. The product tilt is changed according to bolt rotation direction.
9
각도 조절 방법 / Tilt Angle Adjustment
-각도조절을하여시청할경우에는아래그림과설명을참조해세요(각도조절은전문살치업자가아닌제품사용자가직절할수도있습니다)
-수직형살지 후각도 조절은할 수 없습니다.
- When you match product after adjusting tilt angle, refer to figure and explanation below. (Note: Tilt angle can be adjusted after installation and setup.)
- You cannot adjust the tilt angle after installation, vertically.
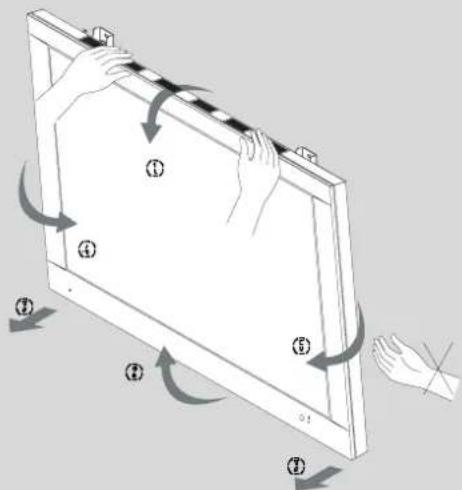
① 환복 각도 /Bottom Tilt
(###)
①〈상품 량도/Top Tilt〉
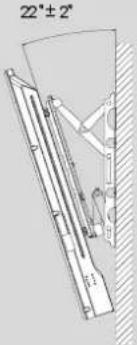
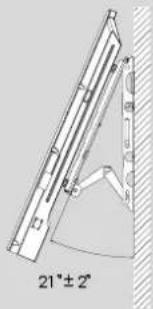
(점합민 세트 옆면)
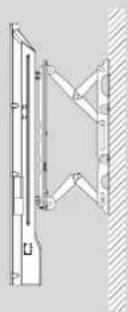
natural_image
Technical line drawing of a mechanical assembly with no visible text or symbols④(지복 각도/Left T10)
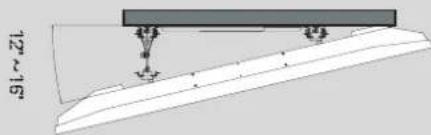
natural_image
Technical diagram showing a mechanical assembly with a curved base and two vertical supports, no text or symbols present.⑤ 〈우류리도/RightTill〉
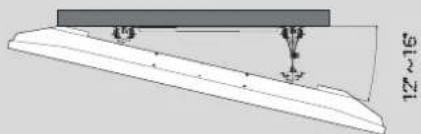
natural_image
Pure technical diagram of a mechanical component with no visible text, numbers, or symbols<결합된 세트윗면>
* 제품크기에 따라 각도조절이 변경될 수 있습니다. (위 그램은 42형(105cm) Plasma 기준입니다.)
* As size of the product, it may change the tilt angle adjustment. (Upper picture explains the features available on the 42inch Plasma.)
각도 조절중에는 다칠 수 있으므로 절대제품 뒷면 또는 벽걸이부에 손을 넣지 마세요.
제품크기에 따라 각도 조절하는 힘미 다릅니다.
제품을 ①번 그림의 각도로 조절하려면 반드시 양손으로 한 손은 제품의 마래쪽을 잡고 벽쪽으로 밀여주고, 다른 한 손은 제품의 위쪽을 잡고 바깥쪽으로 당기세요.
제품을 ⑧번 그림의 각도로 조절하려면 반드시 양손으로 한 손은 제품의 위쪽을 잡고 벽쪽으로 밀여주고, 다른 한 손은 제품의 아래쪽을 잡고 바깥쪽으로 당기세요.
제품을⑦번 그림의 각도로 조절하려면 먼저①번 그림의 각도로 조절한 후,⑧번 그림의 각도로 조절하세요.
제품을 ④번 그림의 각도로 조절하라면 제품의 우촉을 잡고 벽쪽으로 밀마주고, 다른 한 손은 제품의 좌촉을 잡고 바깥쪽으로 당기면 각도 조절이 됩니다.
제품을 ⑥번 그림의 각도로 조절하려면 제품의 좌측을 잡고 벽쪽으로 밀마주고, 다른 한 손은 제품의 우측을 잡고 바깥쪽으로 당기세요.
Do not place the hands in the product back side or wall mount. It may cause injury.
- Two adult people who are capable of adjusting the tilt angle to need excessive force.
When adjusting the number ① angle of the product, you must use both hands and then you can adjust the angle as shown above.
When adjusting the number ① angle of the product, you must use both hands and then you can adjust the angle as shown above.
When adjusting the number ① angle of the product, first you adjusting the number ① angle and then adjusting the number ② angle of the monitor.
When adjusting the number ④ angle of the product, you must use both hands and then you can adjust the angle as shown above.
When adjusting the number angle of the product, you must use both hands and then you can adjust the angle as shown above.

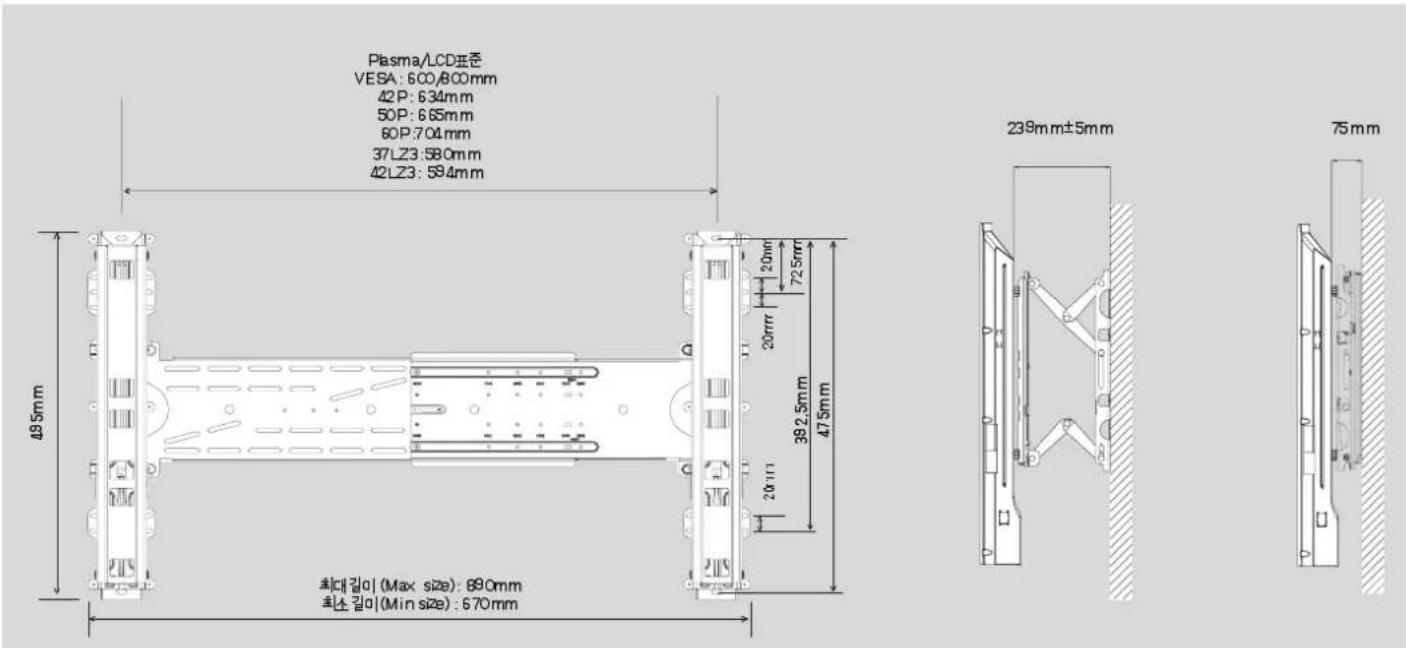
벽걸이 설치 표준크기/ Standard size for the installation of a wall-hanging TV

제품규격 / Specifications
| 폭/Width(mm) | 887 |
| 높이/Height(mm) | 495 |
| 깊이/Depth(mm) | 56 |
| 무게/Weight(kg) | 7.4 |
| 벽걸이Vesa규격/Wall mount Vesa specification | 600×400 |
$$ \frac{1}{2} = \frac{1}{2}\left(\frac{1}{2}\right)^{2} + \frac{1}{2}\left(\frac{1}{2}\right)^{2} + \frac{1}{2}\left(\frac{1}{2}\right)^{2} + \dots + \frac{1}{2}\left(\frac{1}{2}\right)^{2} + \dots + \frac{1}{2}\left(\frac{1}{2}\right)^{2} + \dots + \frac{1}{2}\left(\frac{1}{2}\right)^{2} + \dots + \frac{1}{2}\left(\frac{1}{2}\right)^{2} + \dots + \frac{\sqrt{1 - 2}}{2} + \sqrt{1 - 2}\left(\frac{1}{2}\right)^{2} + \sqrt{1 - 2}\left(\frac{1}{2}\right)^{2} + \sqrt{1 - 2}\left(\frac{1}{2}\right)^{2} + \sqrt{1 - 2}\left(\frac{1}{2}\right)^{2} + \sqrt{1 - 2}\left(\frac{1}{2}\right)^{2} + \sqrt{1 - 2} + \sqrt{1 - 2}\left(\frac{1}{2}\right)^{2} + \sqrt{1 - 2}\left(\frac{1}{2}\right)^{2} + \sqrt{1 - 2}\left(\frac{1}{2}\right)^{2} + \sqrt{1 - 2}\left(\frac{1}{2}\right)^{2} + \sqrt{1 - 2}\right) = \frac{\sqrt{1 - 2}}{2} + \sqrt{1 - 2}\left(\frac{1}{2}\right)^{2} + \sqrt{1 - 2}\left(\frac{1}{2}\right)^{2} + \sqrt{1 - 2}\left(\frac{1}{2}\right)^{2} + \sqrt{1 - 2}\left(\frac{1}{2}\right)^{3} + \sqrt{1 - 2}\left(\frac{1}{2}\right)^{3} + \sqrt{1 - 2}\left(\frac{1}{2}\right)^{3} + \sqrt{1 - 2}\left(\frac{1}{2}\right)^{3} + \sqrt{1 - 2}\left(\frac{1}{2}\right)^{3} + \sqrt{1 - 2}\left(-\frac{\sqrt{1 - 2}}{4}\right)^{-3} + \sqrt{1 - 2}\left(-\frac{\sqrt{1 - 2}}{4}\right)^{-3} + \sqrt{1 - 2}\left(-\frac{\sqrt{1 - 2}}{4}\right)^{-3} + \sqrt{1 - 2}\left(-\frac{\sqrt{1 - 2}}{4}\right)^{-3} + \sqrt{1 - 2}\left(\frac{\sqrt{1 - 2}}{4}\right)^{-3} + \sqrt{1 - 2}\left(-\frac{\sqrt{1 - 2}}{4}\right)^{-3} + \sqrt{1 - 2}\left(-\frac{\sqrt{1 - 2}}{4}\right)^{-3} + \sqrt{1 - 2}\left(-\frac{\sqrt{1 - 2}}{4}\text{1 - 2},\text{1 - 2},\text{1 - 2},\text{1 - 2},\text{1 - 2},\text{1 - 2},\text{1 - 2},\text{1 - 2},\text{1 - 2},\text\sqrt{1 - 2},\text\text\text\text\text\text\text{\text{\text{\text{\text{-}}}}}}}}\ $$
- 안전을 위한 주의사항 Safety Instructions
- 경고/WARNING
- 주의 / NOTES
- 반드시 시용설명서의 지시에 따라 제품을 설치하세요
- Install this product followed by the instruction of the manual.
- 제품을 설치할 때는 반드시 두사람 이상이 함께 하세요
- Do not install this product by yourself. Get some help from others.
- 설치시에는 반드시 먼저 벽체 종류를 확인하고, 조건이 맞다면 동봉한 엕커와 볼트를 사용하세요.
- Before installing, check whether the material of wall satisfies the specifications and make sure to use enclosed anchors supplied with the product.
- 벽에 친공시 반드시지정된직경의 드릴 비트 및 드릴을 사용하세요. 그리고 구멍 깊이도 지정된 사항을 따르세요.
- When drilling use drill and drill bit specified by the manufacturer.
- 제품을 물에 젖은 수건으로 닭지 미시고 제품이 설치된장소 이래에서 열기구 및 기습기 등을 사용하지 마세요
- Do not place a heat source (radiator or heater) or a humidifier under the installed product.
- 제품을 수직벽 이외의 스프링클러나 감지기 멇,
- 제품 설치전 콘센트에서 전원코드를 뼐세요.
- Make sure to unplug before installing this product.
- 제품 살치시 만손으로 살치하지 말고, 반드시 직업용 장갑을 착용하세요.
- Do not install this product barehanded.
- 설지 방법 / Installation
- 제품용 Bracket 분리
- 제품 크기별 조립방법/Fixation of width adjustment bracket by size
- 3
- Guide Spacer결합방법
- 5
- 도면 벽면 부작 주의사항/Precaution when attaching the drawing on the wall
- 반드시 지켜주세요 / Keep these instructions for future reference
- 6
- 도면 벽면 부작방법/ How to attach the drawing on the wall
- 7
- 벽걸이 지지대와 제품 결합방법/제품 수평 (기울기) 조정 방법 How to connect the wall mount supporter and product/ Horizontal level adjustment method
- 9
- 각도 조절 방법 / Tilt Angle Adjustment
Marque : LG
Modèle : AP-WX50
Catégorie : Support écran plat