MODE D'EMPLOI OPTIMA 150 HUSQVARNA
Operating Manual Sewing Machine Optima 150 E
Safety regulations for domestic sewing machines in conformity with "CEE Publication No. 10, Part II, Section C, Article 7.1".
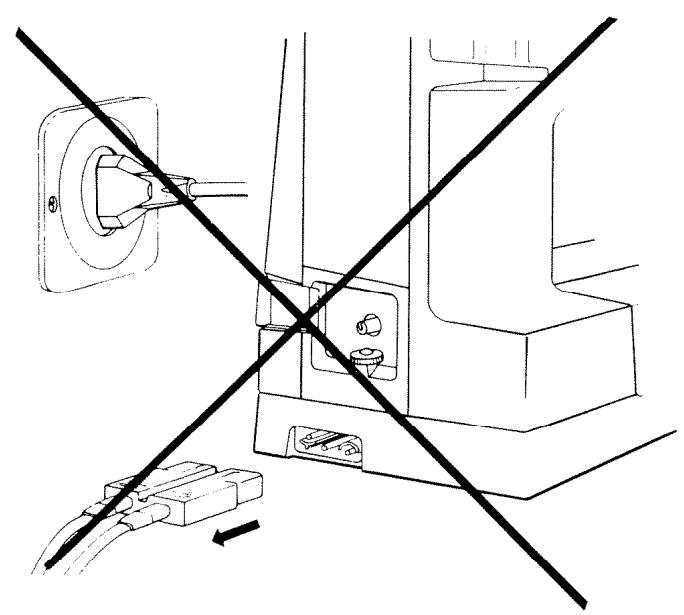
When the machine is not in use, or when servicing or adjusting mechanical parts or accessories, the machine must be disconnected from the power supply by removing the plug from the wall socket. Use bulbs designed for the voltage indicated under the base of the machine and max. 15 W.
The machine has an interference suppressor for radio and television, complying with Directive No. 82/499 E.E.C. and C.I.S.P.R.
For you and your new sewing machine
We have prepared this booklet to let you know how to operate this sewing machine and how to make use of all its sewing possibilities. We are quite sure that you will get many pleasant hours with your new sewing machine and that you will be successful in obtaining many fine results.
HUSQVARNA AB, Sweden
We reserve the right to change the machine equipment and the assortment of extra accessories without prior notice, or make modifications in the design or appearance of the machine, which do not negatively affect the function.
Table of contents
Instructions
Machine parts 5
Names of parts
Unpacking and putting away the machine 6
Accessory box Presser feet, needle and thread, etc.
Connecting the machine 9
Connecting the foot control, main switch,
thread guide for bobbin winding, reverse feed,
lowering the feed dog
Function Presser bar lever, presser foot pressure, thread cutters 9
Threading 11
Bobbin winding 12
Thread tension 13
Changing the presser foot, changing the needle 14
General hints 15
Various markings
Stitch settings 16
Stitches 17
35 Care of the machine, changing the light bulb
Fault-finding 36
Needleassortment 38
Extra accessories 39
Index 43
Sewing
Straight stitching 17 Needle positions, topstitching, basting, gathering, sewing in zippers, clearance plate
Reinforced straight stitch 22
Zig-zag stitching 23
Bound edges, sewing on lace, gathering, appliquées
Reinforced zig-zag (Ric-Rac) 25
Buttonholes 26 Ordinary buttonholes, reinforced buttonholes, corded buttonholes, cutting the buttonhole
Sewing on buttons 29
Overcast stitch, Overlock 30
Three-step zig-zag 31
Overcasting, terry cloth, sewing on belt carriers, mending
Blindstitching 33
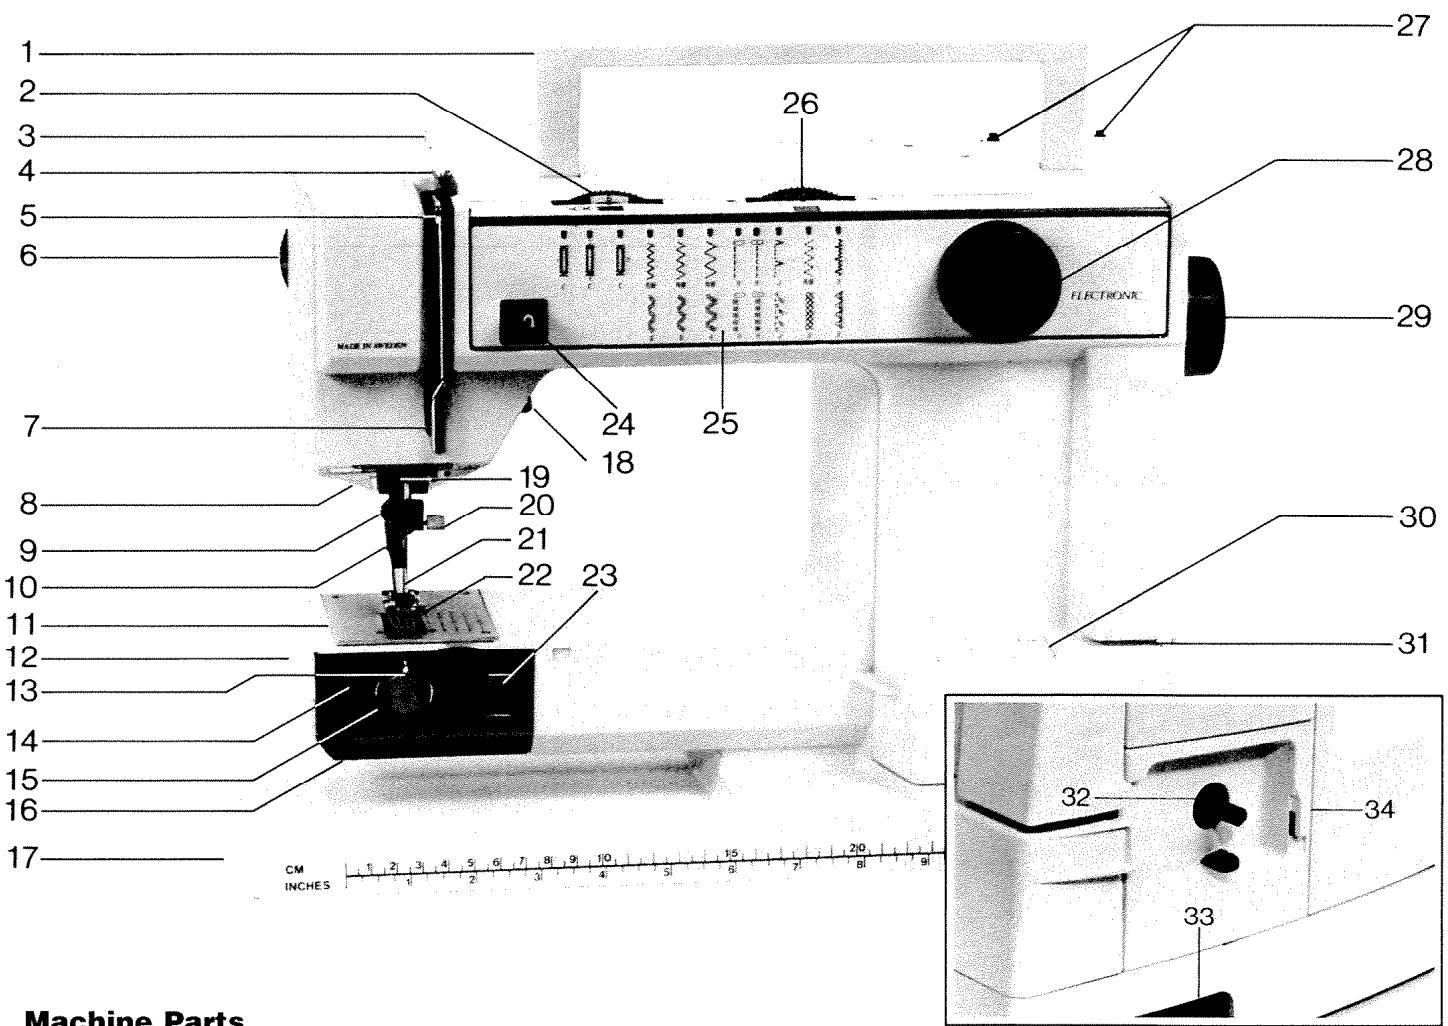
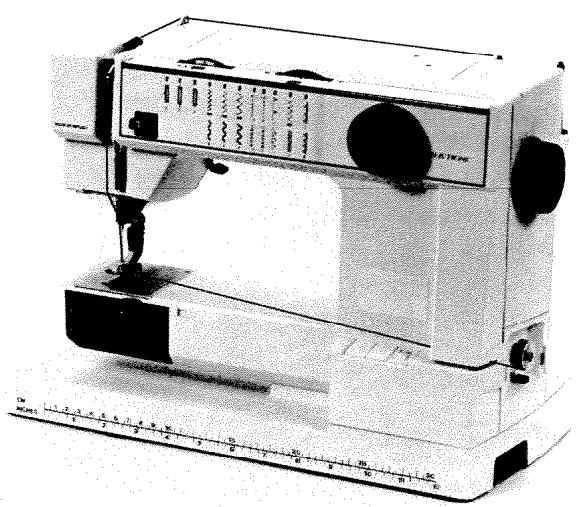
Machine Parts
- Handle
- Thread tension dial
- Thread guide
- Thread tension discs
- Thread take-up lever
- Presser foot pressure dial
- Front thread guide with thread take-up spring
- Sewing light
- Screw for edge guide
-
Presser bar
-
Needle plate (stitch plate)
12.Free arm
- Bobbin case
- Thread cutter
15.Shuttle (hook)
- Door for shuttle
- Base plate
- Presser bar lever
- Needle bar
-
Needle clamp screw
21.Needle
-
Presser foot
- Drop feed button
- Reverse feed button
- Stitch symbols
- Stitch length dial
- Spool pins
- Stitch selector
- Handwheel
- Main switch
-
Thread guide for bobbin winding
-
Bobbin winding spindle
- Socket for foot control
- Thread cutter
Unpacking
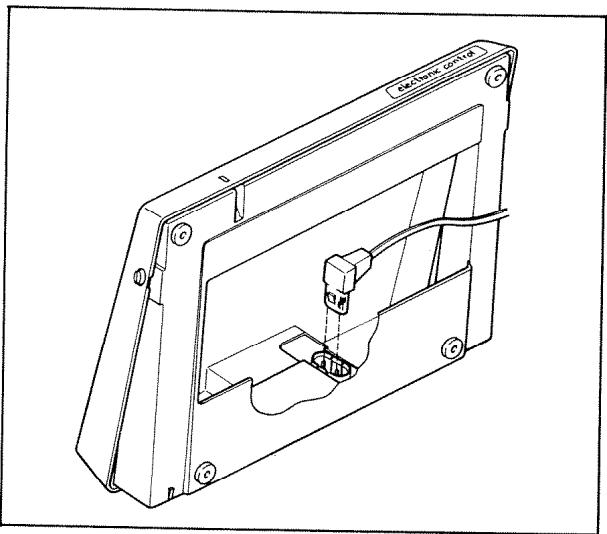
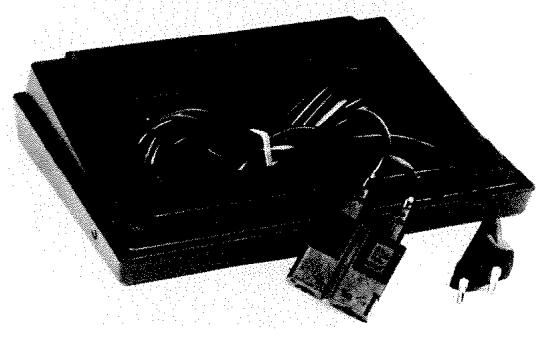
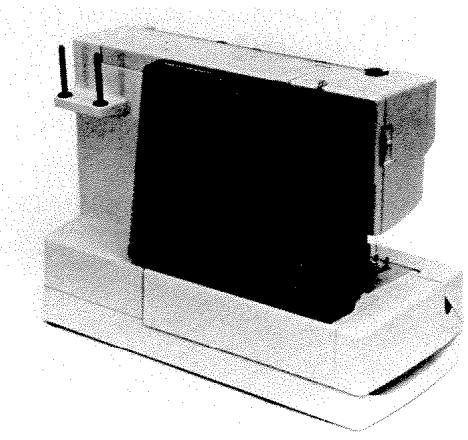
Place the machine on the table, with the recess for the handle furthest away from you, and fold down the handle. Lift off the cover and put it aside. Remove the foot control from the back of the machine.
In the plastic box you will find the cord which is to be connected to the foot control. Fit the smaller plug into the socket inside the foot control compartment, see picture. Give it a push to make sure it is properly connected. This operation is only necessary the very first time you unpack the machine.
Wipe the machine clean before you start sewing, and be especially careful with the stitch plate and the space around the needle.
Putting the machine away
Make sure that all accessories are correctly placed in the box. Slide the accessory box into place.
Pull the plugs out of the wall outlet and the socket of the machine. Wind the cords around your hand, starting at the foot control and push them into the control compartment.
Lower the presser foot and hang the foot control on the thread guide at the rear of the machine. The bottom of the foot control should be turned toward the machine.
Fold down the handle and put on the cover.
Accessory box
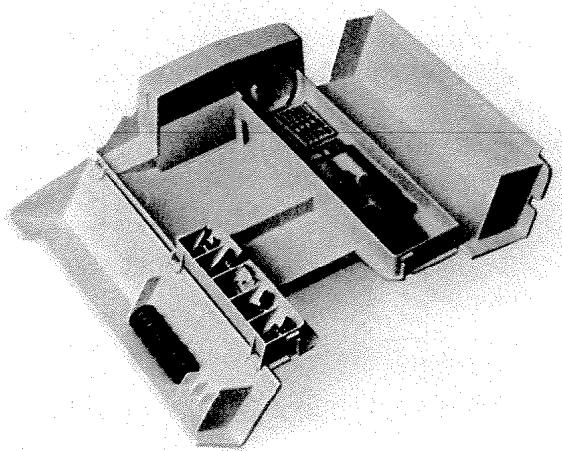
Pull the accessory box to the left and remove it.
The machine is equipped with a number of presser feet and other accessories and these are packed in two plastic bags.
Store the accessories in the box and place them as illustrated. Then it will be easier to remove and replace the box.
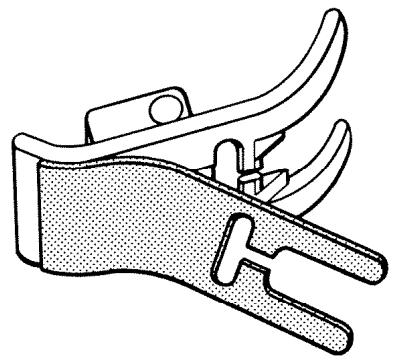
The presser feet are marked with letters and below each stitch on the pattern scale you will find the corresponding letter.
There are additional accessories to assist you with special work.
These will be found under "Extra accessories" on pages 39-42.
Glide Plate
The glide plate fits presser foot A. This plate can be used when sewing on foam plastic, plastic-coated fabric and leather imitations. It will minimize the risk of these materials sticking to the presser foot.
Peel off the protective paper and press the self-adhesive side of the glide plate against the underside of the presser foot.
Edge Guide
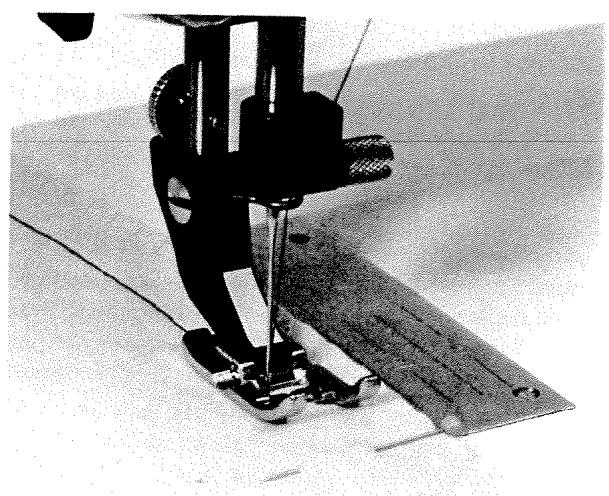
The stitch plate has markings for 1, 1.5, 2, 2.5 and 3cm , to simplify sewing seam allowances. If you require an even wider seam allowance, use the edge guide.
First loosen the screw at the rear of the presser bar as far as it will go. Insert the guide into the groove under the screw and adjust it to the required seam allowance. Tighten the screw, using the screwdriver.
Needle and Thread
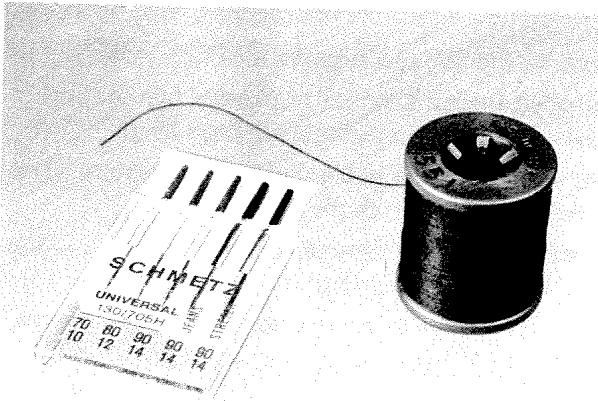
The machine is delivered with a spool of synthetic thread, which can be used for all types of fabrics and most seams.
Use a finer needle and thread when sewing lighter fabrics. You can produce a more pronounced seam in thicker fabrics by using a coarser needle and thread e.g. synthetic buttonhole thread or double upper thread.
Needle Design
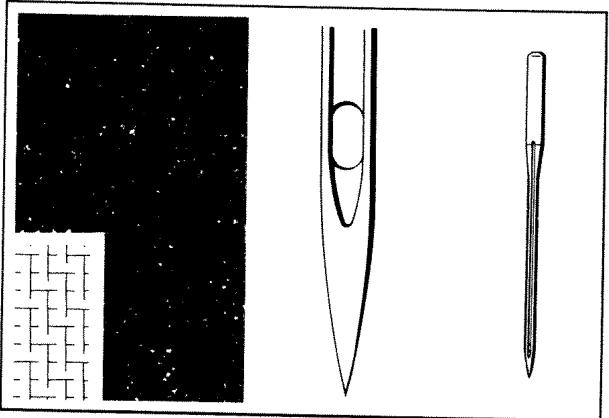
In most cases the standard needle is the most suitable.
Always use the recommended needles (code 130/705H). The size is denoted by a number. The needle fitted in the machine is No. 80.
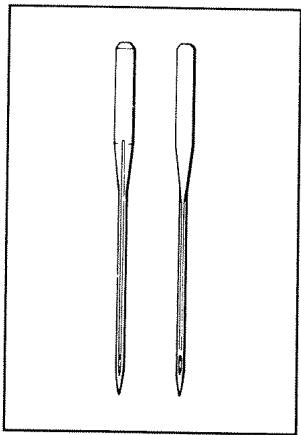
In the needle case there is also a needle described "Jeans" (top part blue). This has a sharper tip, enabling it to pass through thick seams more easily.
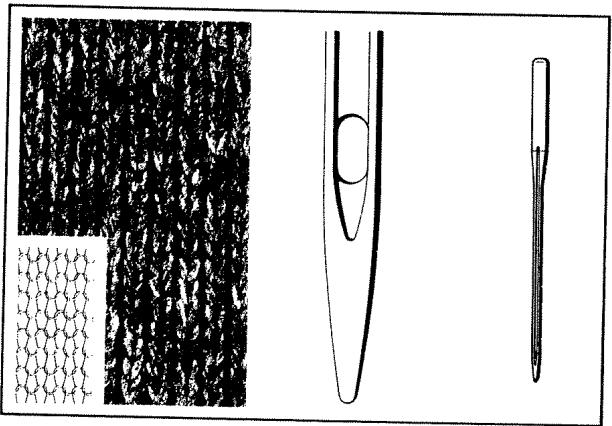
You will in the needle case find another needle, described "Stretch" (completely blue). This needle has a rounder tip and should be used when sewing light elastic fabrics.
Even if the needles look alike there can be slight variations which can affect the sewing result. Be sure to use high quality needles.
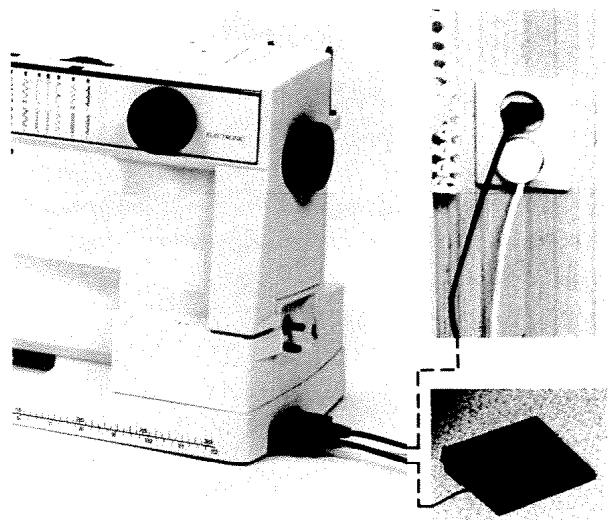
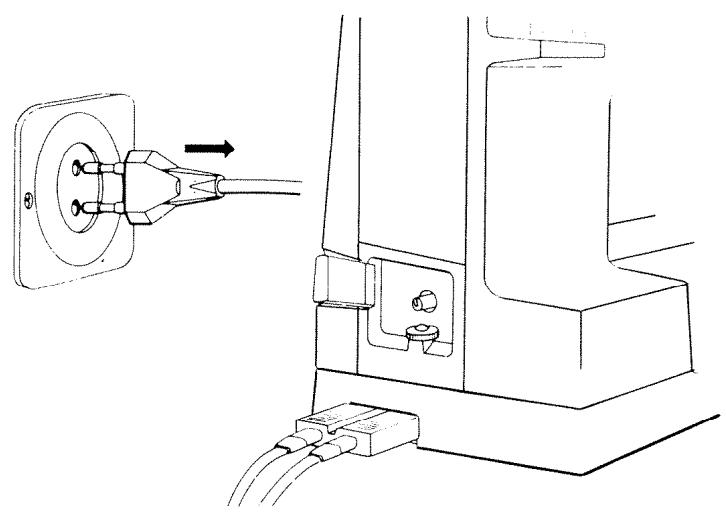
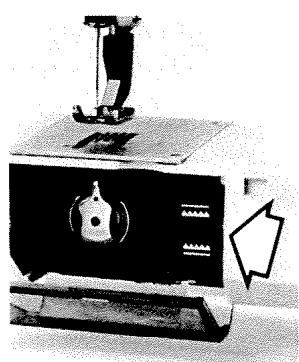
Remove the cord from the foot control and place the control under the table. Insert the foot control plug into the socket on the right-hand side of the machine. One side of the plug is marked "UP".
Connecting to the Wall Outlet
The voltage (V) and frequency (Hz) are indicated under the base of the machine. Check that these values correspond to those of the electricity source before connecting the machine.
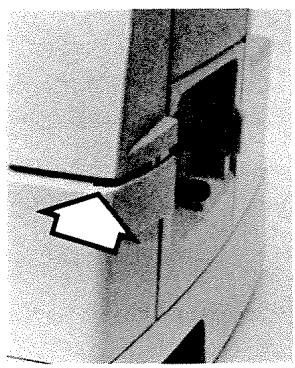
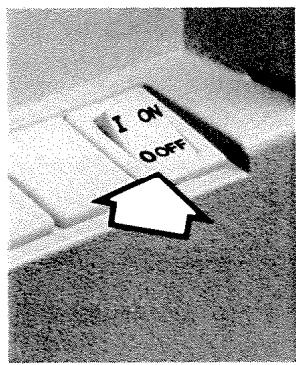
Main Switch
The light and the machine are turned on by pressing the outer part of the main switch. This makes it easy to see that the machine is ready for sewing.
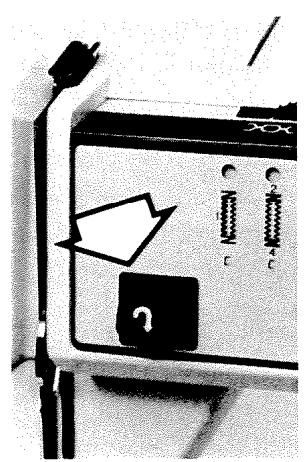
Thread Guide for Bobbin Winding
The thread guide is for use when bobbin winding. Read more about bobbin winding on page 12.
As long as you keep the reverse feed button depressed the machine will sew in reverse but will revert to ordinary sewing as soon as you release the button. Excellent for fastening off.
The longest stitch length when reverse feeding is 3mm
Lowering the Feed Dog
You lower the feed dog by pushing in the upper part of the pushbutton. In order to raise the feed dog again push in the lower part. The feed dog should be lowered for a certain type of darning and when sewing on buttons. It is also easier to get thick garments under the presser foot if the teeth of the feed dog are not above the level of the stitch plate. Do not, however, forget to raise the feed dog before you start sewing.
Presser Bar Lever
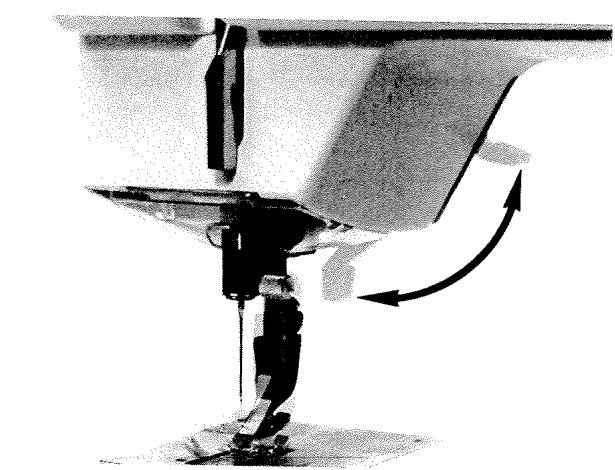
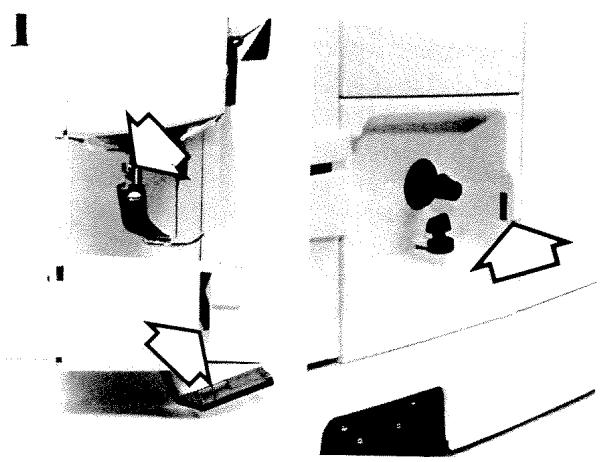
By means of the presser bar lever at the rear of the machine, the presser foot can be raised and lowered.
When raising, the presser foot will remain in the raised position, but the height can be increased by 3mm by pushing the presser bar lever upwards and holding it in this position. This is useful when you want to put garments with thick seams under the presser foot.
The presser foot should be lowered while sewing.
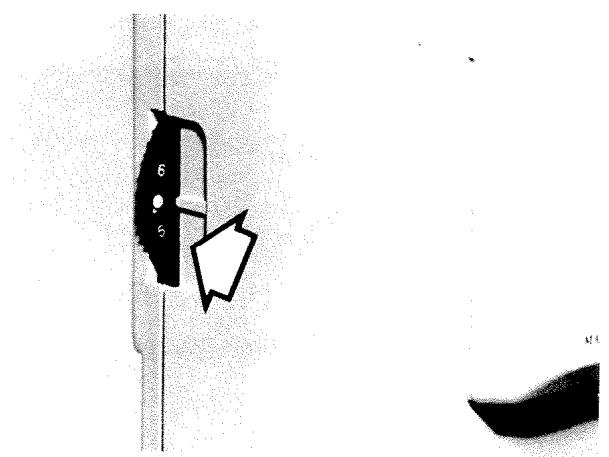
The presser foot pressure can be adjusted with the aid of a marked dial on the left side of the machine. Normal pressure is obtained by setting the dial at the white dot but for some fabrics it may be better to reduce or increase the pressure. The higher the number, the greater the pressure.
By setting the dial at the symbol the presser foot pressure is completely released. This setting should be used when free-hand sewing with the darning foot ("Extra accessory", see page 41).
Thread Cutters
On the back of the presser bar you will find a notch, the thread cutter, by means of which you can easily cut off the threads when you have finished sewing.
There is a special thread cutter for the bobbin thread, see page 13, "Insertion of the bobbin case".
In addition there is a thread cutter for use when bobbin winding. See page 12, "Bobbin winding".

Working Surface
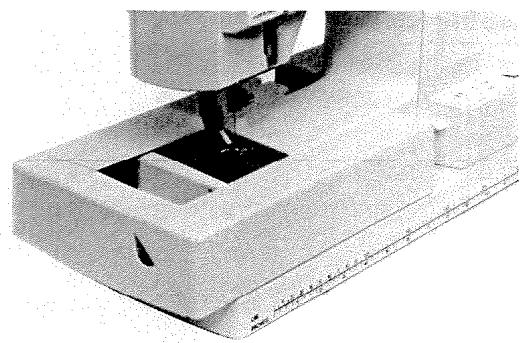
The working surface around the stitch plate consists partly of the upper side of the accessory box and partly of the machine itself, i.e. the free arm.
Retain the accessory box on the machine when you require a larger working surface.
Pull the accessory box to the left and remove it if you wish to use the free arm.
As "Extra accessory" and extension table is available, see page 40.
Free Arm
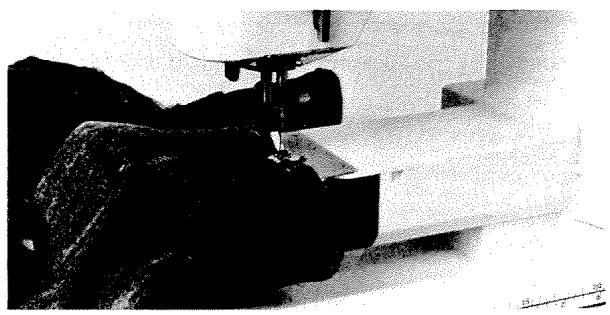
Pant legs and sleeves can be drawn onto the free arm, making it easy to sew, mend or patch these parts.
The free arm also makes it much easier to attach cuffs as well as to sew children's clothes or darn socks and stockings on the machine. See under "Mending", page 32.
Threading the Upper Thread
Raise the presser foot. Check that the needle is at its highest position. Place the spool of thread on the left spool pin and thread the machine for sewing.
Slide the thread into thread guide 1 on the upper arm and draw it upward. Then draw the thread to the front between the tension discs 2 and down around thread guide 3. Continue threading by drawing the thread from the right into the slot on the thread take-up lever 4 and draw it down to the needle, ensuring that it goes through thread guide 5.
Thread the needle from the front. Due to the white colour of the presser foot ankle the needle-eye is clearly seen and the threading of the needle is easier. Pull the thread under the presser foot about 15 cm toward the rear.
Removing the Bobbin Case
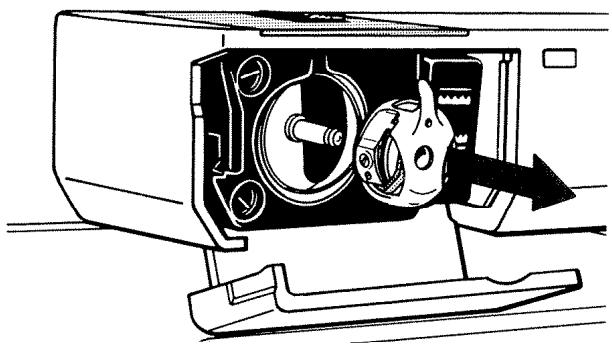
Open the door in front of the shuttle by means of the small recess of the left side.
Grip the bobbin case with the thumb and index finger so that the latch is depressed and pull the bobbin case out. The bobbin will remain in the case as long as the latch is depressed. When you release the latch, the bobbin will fall out.
Bobbin Winding
Turn the empty bobbin until the small mark on one side is outward. Slide the bobbin onto the bobbin winding spindle located on the right side of the machine.
Raise the presser foot and pull the thread from the thread guide by the needle clamp through the groove to the right. Wind the thread around the bobbin a couple of times, beginning from underneath. Pull the thread backward and insert it up through the thread cutter until it is cut.
If you are using a metal presser foot, allow the thread to go through the eye of the needle and under the presser foot. Never run the thread direct from the eye of the needle to the bobbin because you will then run the risk of bending the needle.
Press the foot control.
Threading the Lower Thread
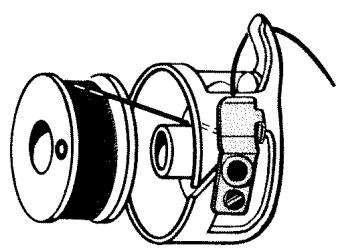
When the bobbin winding is finished, place the bobbin in the case with the marking upward.
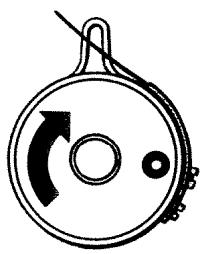
Slide the thread into the slot on the edge of the bobbin case. Pull the thread in under the tension spring. Check that the bobbin rotates in the direction of the arrow (clockwise) when the thread is pulled.
The thread must be pulled in the direction of the spring, otherwise the spring will be overloaded.
Insertion of the Bobbin Case
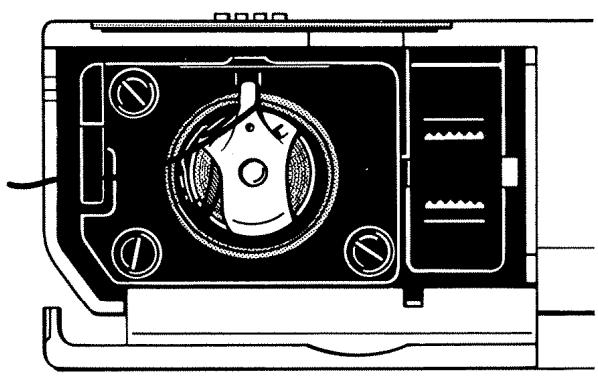
Slide the thread behind the projection of the bobbin case and to the right. Put the bobbin case into place. Press the bobbin case until it clicks to ensure that it fits properly.
The thread cutter is located to the left of the bobbin case. Hold the thread end and draw the thread from underneath and up toward the thread cutter. By doing so the thread will be cut off and kept in place. Shut the door.
The thread will automatically come up when you start sewing.
Tension of the Upper Thread
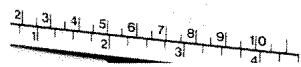
The dial which regulates the tension of the upper thread is graduated from 0-10. The higher the number, the tighter the tension. Normal thread tension is obtained by setting the dial within the white area.
Your machine has been tested using the thread which accompanies it and with the thread tension dial within the white area.
If using a coarser thread, it may be necessary to alter the thread tension slightly. Also the type of fabric may require that the tension should be adjusted.
Correct and Incorrect Thread Tension
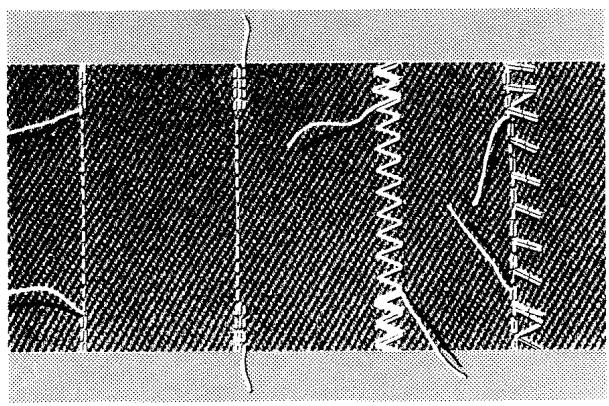
In order to easily understand the importance of correct thread tension, you can try different thread tensions by sewing on a scrap of fabric. Begin by using an excessively loose tension, i.e. set the thread tension dial near "0". Look at the fabric and you will find that the lower thread lies straight and the upper thread is drawn underneath the fabric.
If, however, you set the dial at the highest number, the opposite will occur, or the seam may pucker.
The thread tension is correct when the threads interlock in the middle of both layers of fabric.
Please note that even the best quality thread may vary in thickness. When sewing in fine fabrics, the knot may sometimes be visible.
Tension of the Lower Thread
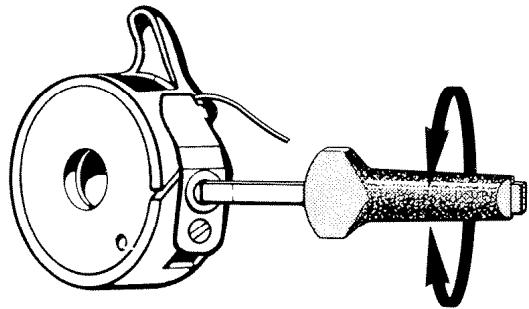
In most special sewing cases it is sufficient to adjust only the upper thread tension. Rarely do you need to adjust the lower thread tension. If it is necessary to adjust the tension of the lower thread, take the small screwdriver, fit it in the larger screw on the thread tension spring and turn it not more than 1/10 th of a turn to the left if the thread is too tight, to the right if it is too loose.
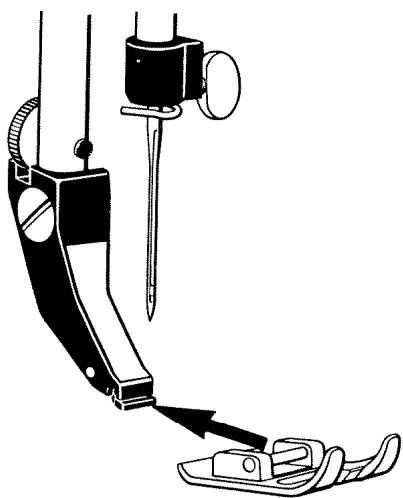
Check that the needle is at its upper position. Remove the presser foot by drawing it toward you while pressing slightly downward. Insert the new presser foot in such a way that the round, horizontal pin fits in between the spring and the presser foot ankle. Press slightly downward/backward until the foot snaps into place.
Changing the Needle
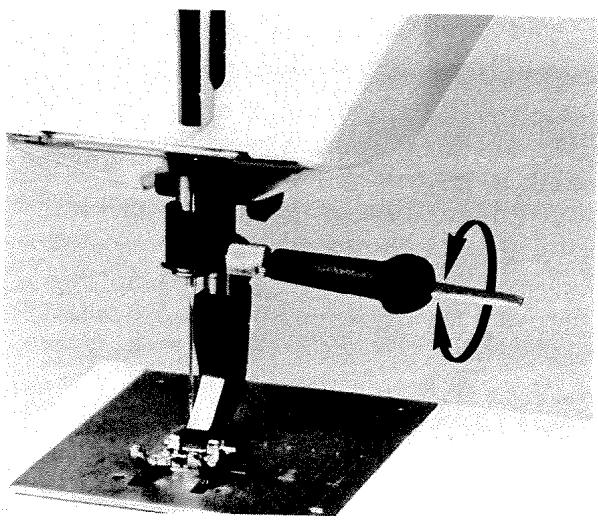
To remove the needle, loosen the screw in the needle clamp. With the flat side of the shank away from you, insert the new needle into the needle socket as far as it will go. Tighten the screw with the screwdriver.
Only a completely undamaged needle will give perfect sewing results. Therefore, change the needle if you have the slightest reason to believe that it is bent or that the point is damaged.
Even if the needles look alike there can be slight variations which can effect the sewing result. Be sure to use high quality needles.
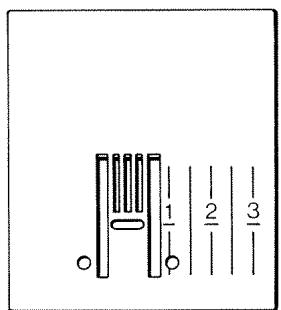
The stitch plate has markings for 1, 1.5, 2, 2.5 and 3 cm to simplify sewing seam allowances. If you require an even wider seam allowance, use the edge guide, see page 7.
General Hints
When you wish to straight stitch, place the work so that the needle goes down in the center of the marking for the seam. When sewing zig-zag and other wide stitches, e.g. overlock, place the marking for the seam along the left edge of the needle hole.
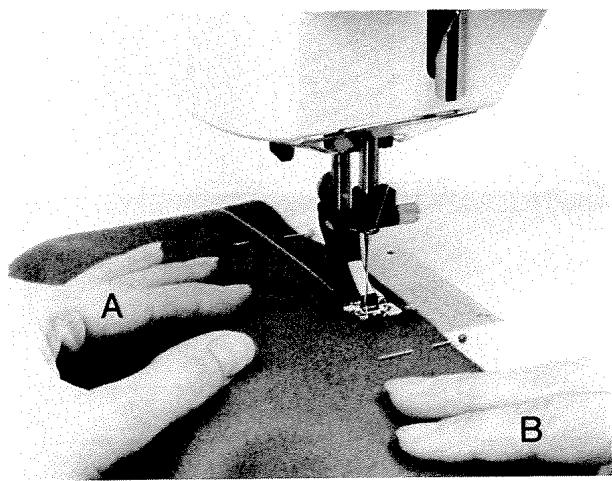
The best way to hold the fabric is to let your left hand rest lightly on the work at A. Hold the edge of the fabric at B with your right hand and guide the work. Do not pull the fabric – just guide it toward the presser foot and let the machine do the feeding.
Lower the presser foot, start the machine gently and increase the speed gradually.
When sewing fine and soft fabrics, start the seam a couple of mm from the edge of the fabric, to prevent it from being pulled down into the needle plate hole. If you wish to extend the seam out to the very edge of the fabric, sew a few reverse stitches and then hold the threads behind the presser foot when sewing forward again.
Fasten off the scam by depressing the reverse feed button and sewn a few reverse stitches.
When sewing short seams or when finishing off a seam, use the upper needle stop position.
When the seam is finished, raise the presser foot, remove the work from behind and cut off the threads leaving at least 15cm of thread behind the needle.
Various Markings
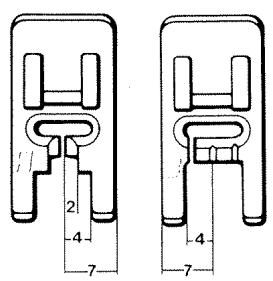
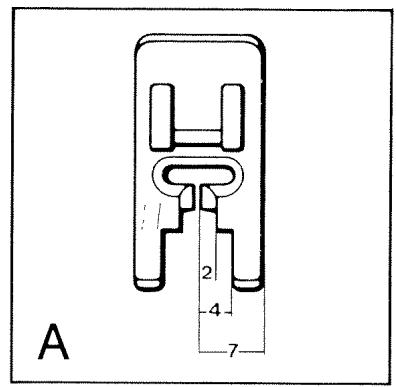
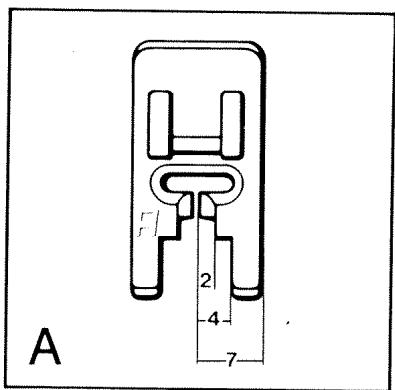
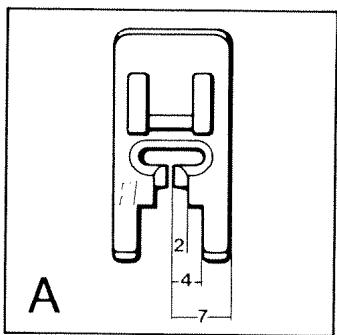
Some of the presser feet have notches or markings which can be used as guides when sewing. When straight stitching with the needle in the center position, you will have a 7mm seam allowance if you guide the fabric even with the outer edge of the foot; 4mm at the inner edge and 2mm at the innermost notch on presser foot A.
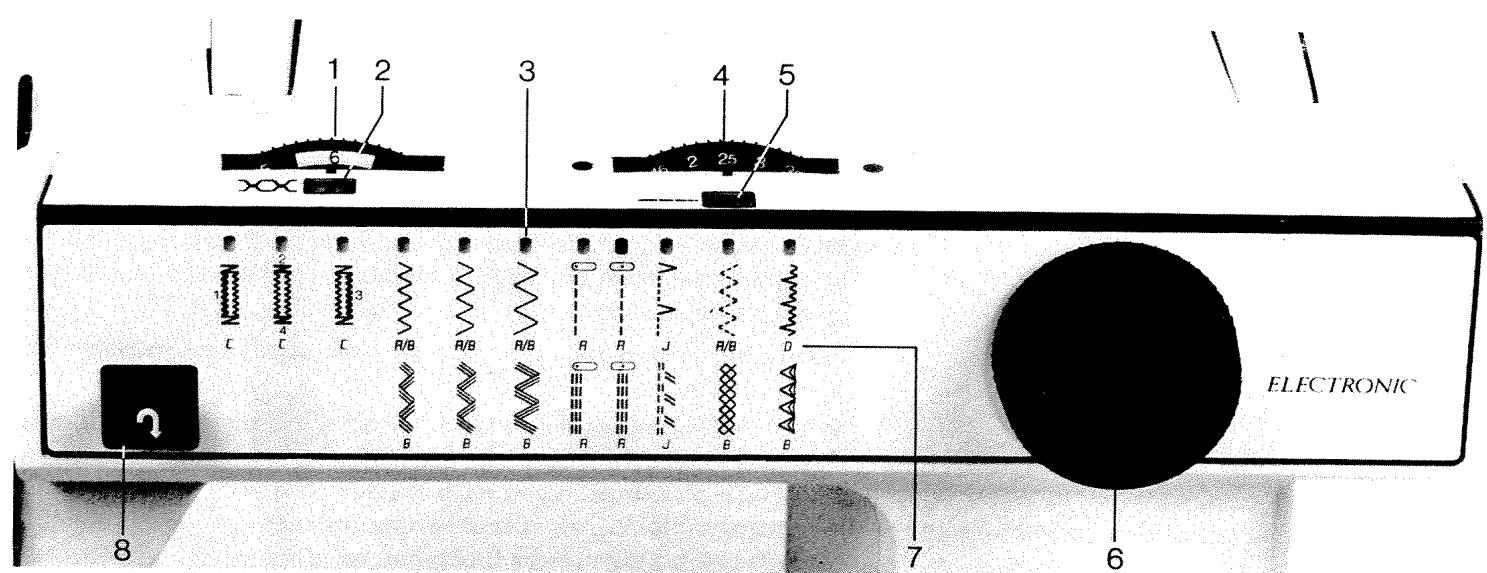
- Thread tension dial
- Recommended thread tension
-
Marker, showing the selected stitch
-
Stitch, length dial
-
Recommended stitch length for the upper group of stitches
-
Stitch selector
- Recommended presser foot
- Reverse feed button
Stitch Selection
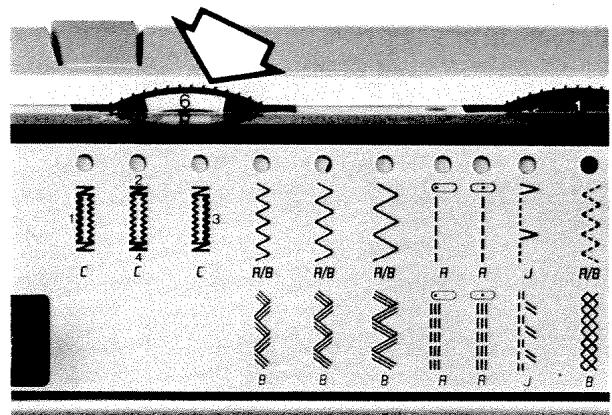
The pattern scale on the machine indicate which stitches you can sew. The required stitch is set by turning the stitch selector to the left or to the right. A coloured marker lines up while turning the stitch selector, showing which stitch is set.
The stitches are divided into two groups. The stitch length for the upper group can be varied between 0 and 5mm . Also the thread tension can, if necessary, be changed.
Recommendations for the suitable settings of each stitch will be given in the boxes in front of the dials.
You have the choice of three zig-zag widths.
When you wish to use one of the stitches in the lower group you turn the stitch selector to the required stitch. Then shift the stitch length dial to the right until it reaches the red area. The stitch length is fixed for the lower group of stitches and therefore you have to disregard the recommendation given for the stitch length. You can, however, still follow the recommendation regarding the thread tension.
The straight stitch and the reinforced straight stitch can be sewn with the needle in the left position as well as in the centre. See page 17.
Read more about the different stitches on the following pages.
Choice of Stitch Length
When you select a stitch, recommendations for the suitable settings when sewing normal fabrics will be given in the boxes in front of the dials.
Set the stitch length by means of the dial. Always use the recommended settings to start with but experiment until you find the best setting for the actual work you will be doing.
There are letters under the stitch symbols which indicate the most suitable presser foot for each stitch. The letter is also marked on the presser foot.
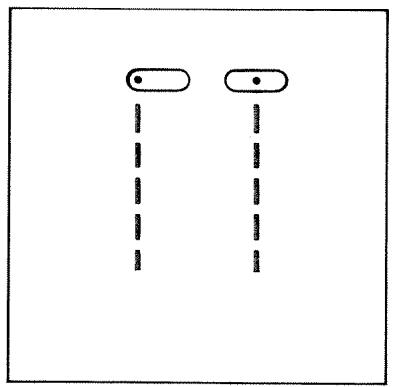
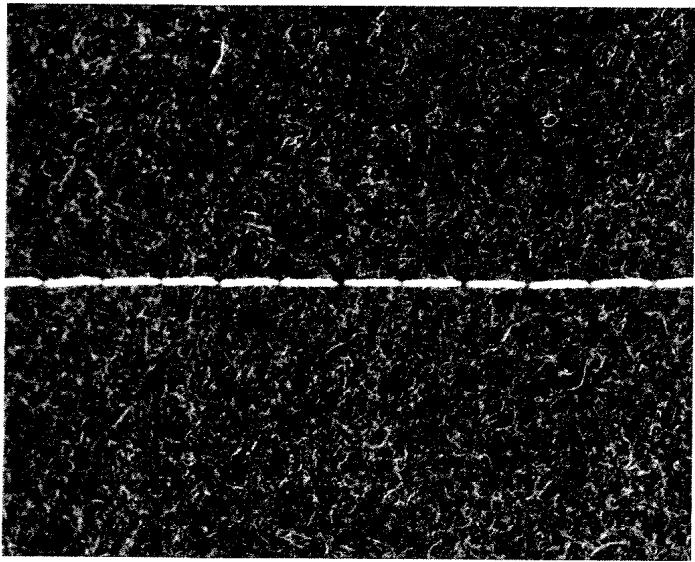
Straight Stitch
Check that the needle is in the highest position. Turn the stitch selector to the straight stitch symbol. Always use the recommended settings to start with but experiment then until you arrive at the exact stitch settings for the actual work you will be doing.
Straight stitching is used to join fabric which does not stretch and for seams which will not be subjected to great strain.
When an elastic stitch is required for sewing stretch fabrics, use the reinforced straight stitch, see page 22.
Needle Positions
Straight stitching is possible with the needle in the left position as well as in the centre.
If you choose the left position you will have a seam allowance of 1cm by letting the presser foot follow the edge of the fabric.
Top Stitching
Straight stitching is the most commonly used stitch for top-stitching partly as a utility stitch when sewing down seam allowances, partly as a decorative stitch on collars and pockets etc. Topstitching must be sewn on double fabric.
When topstitching on lighter fabrics, it is preferable to use a rather fine thread and needle and short stitch length. A coarser thread and needle will give more pronounced topstitching when sewing in heavier fabric. Use a slightly longer stitch length.
Edge Stitching
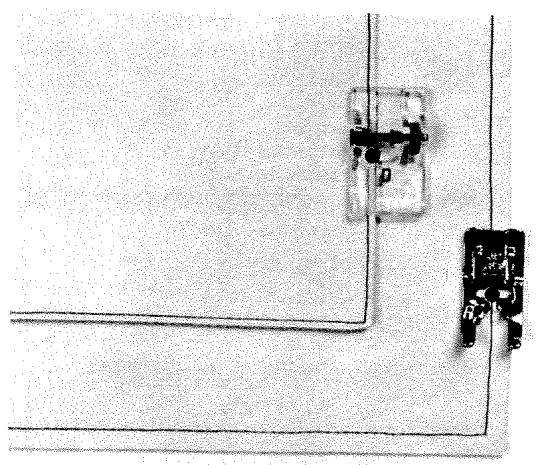
When you wish to edge stitch you should take advantage of the possibility to move the needle to the left side of the needle hole when sewing very close to the edge (1-2 mm). See "Needle positions", page 17.
Fit presser foot A when sewing light fabric and presser foot D and the left needle position when sewing thicker material. Foot D is designed with a groove underneath and you can utilize the edge of this groove as a guide along the edge of the fabric.
When edge stitching thick, heavy fabric you may have to increase the upper thread tension a couple of grades to get a nicer seam.
Basting
Machine basting allows you to try on the garment before sewing it together. Pin the seams by inserting pins at right angles to the seam. Set the stitch length to 5 and the thread tension at 3. Then sew the seam removing each pin as you come to it. If you are careful, use fine pins and you can sew right across the pins. However, this involves a risk of blunting or breaking the needle.
Remove the basting by pulling out the lower thread.
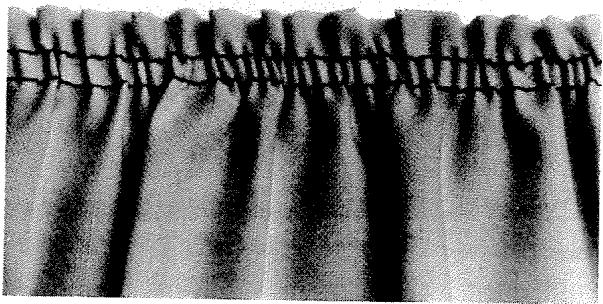
Gathering
Gathering with the straight stitch is the most common method. The best results are obtained if stitch length 3-3.5 is used and the upper thread tension decreased 1-2 grades.
Two rows of gathering stitches are sewn side by side – the lower threads from both rows are then pulled simultaneously to produce the gathering.
Sewing in Zippers
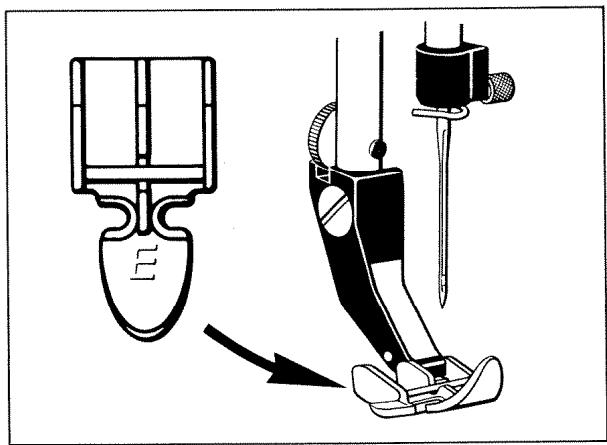
The zipper foot E can be attached so that it is located either to the right or to the left of the needle, making it easy to sew both sides of the zipper.
Lapped Zipper
The instructions below refer to a zipper for a lady's garment.
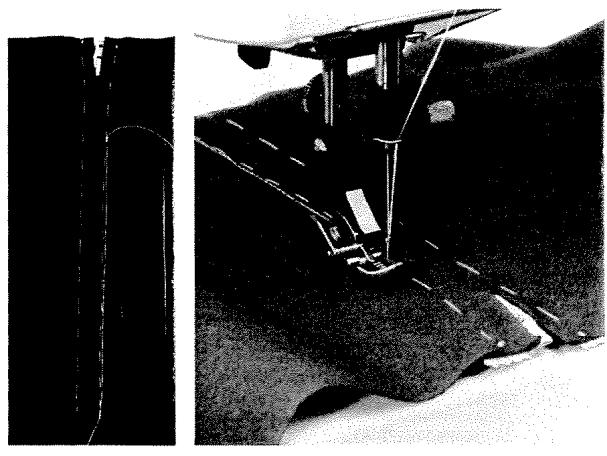
Baste the placket seam where the zipper will be. Leave approx. 2 cm open at the top. Press the seam allowance apart, forming a sharp fold.
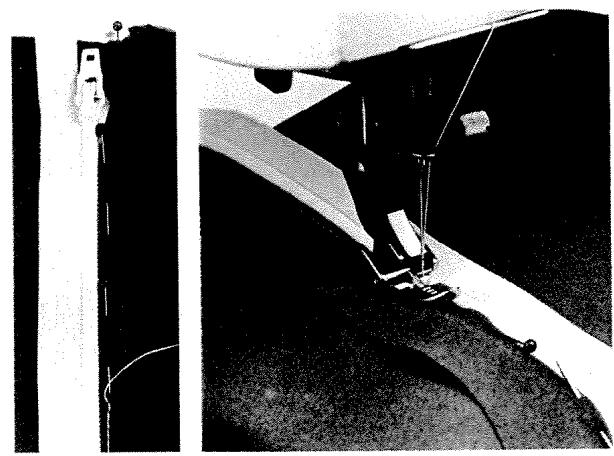
Fold under the right-hand side. Fold and press a new fold on the right-hand seam allowance, approx. 7mm from the basted seam. Pin the zipper under the folded, pressed edge so that the fold is as near the teeth as possible. Set zipper foot E to the left of the needle. Sew the zipper into place under the fold, close to the teeth. Start sewing at the bottom.
Turn to the right side and pin or baste the other half of the zipper to the fabric. Change over the zipper foot to the right-hand side of the needle.
Start at the bottom and sew at right angles, on the right side, straight over the lower edge of the zipper. Turn the work and continue sewing upward. Make sure that both the zipper and seam allowance are included in the seam.
Remove the basting threads.
Slot Zipper
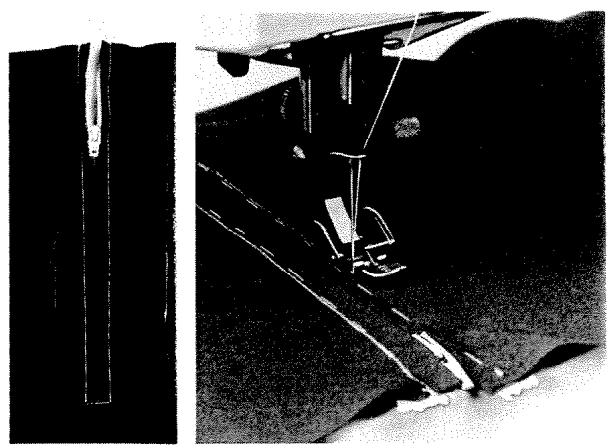
Baste the opening together. Leave about 2cm open at the top.
Press the seam open and baste or tape the zipper under the seam.
Place the zipper foot E to the left of the needle.
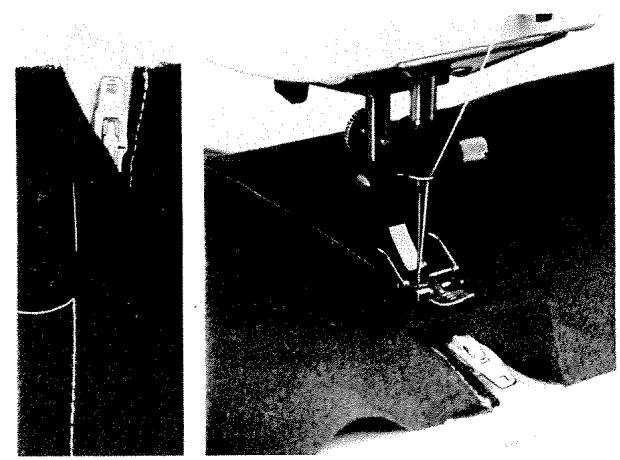
Start at the bottom and sew the left edge of the zipper as illustrated. Open the zipper before the seam is finished, raise the zipper foot and pull the tab behind the foot. Lower the foot and finish the seam.
Move the zipper foot to the right of the needle. Start with perpendicular stitching at the lower edge, turn the garment and sew the other edge of the zipper as illustrated.
Remove the basting.
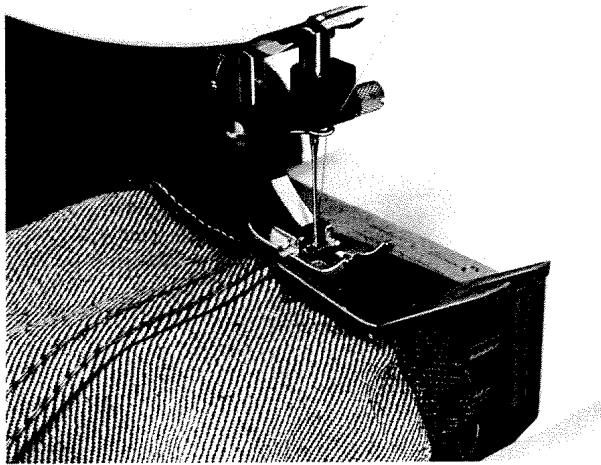
Clearance Plate
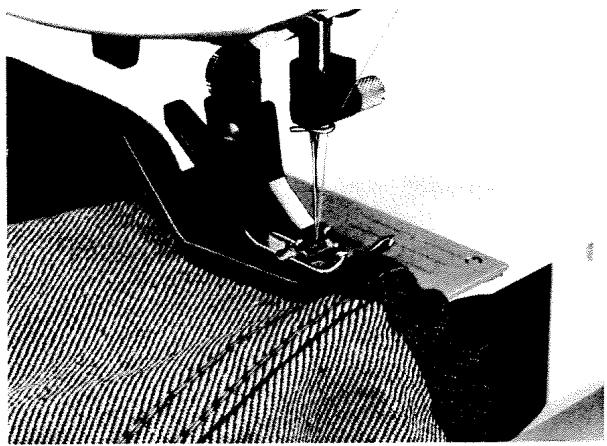
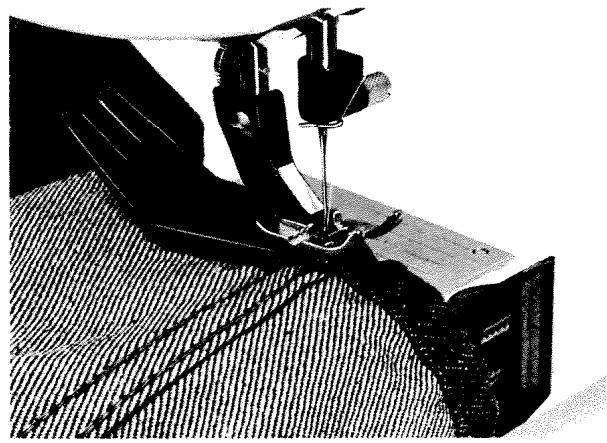
The clearance plate is mostly used when sewing on buttons with a shank but is also an excellent aid when sewing hems over extremely thick seams, e.g. on jeans.
Start sewing the hem with straight stitch. When you have sewn so far that the presser foot is touching the seam, stop the machine with the needle in the fabric. Lift the presser foot and insert the clearance plate from behind.
One side of the clearance plate is elevated. Use the side which corresponds best to the thickness of the seam.
Lower the presser foot and continue to sew over the thick seam.
Stop the machine again just in front of the seam with the needle in the fabric. Remove the clearance plate and re-insert it under the presser foot from the front.
Sew a few stitches further until the whole foot has passed the seam and is resting on the clearance plate. Stop the machine once again with the needle in the fabric. Lift the presser foot and remove the plate. Continue sewing until you reach the next thick seam and repeat the foregoing procedure.
Reinforced Straight Stitch
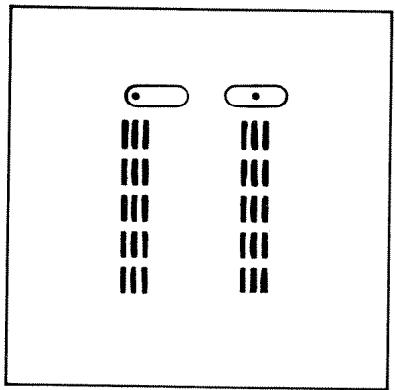
Check that the needle is in the highest position. Turn the stitch selector to the symbol and shift the stitch length dial to the red area on the left.
The seam may also be sewn in the left needle position.
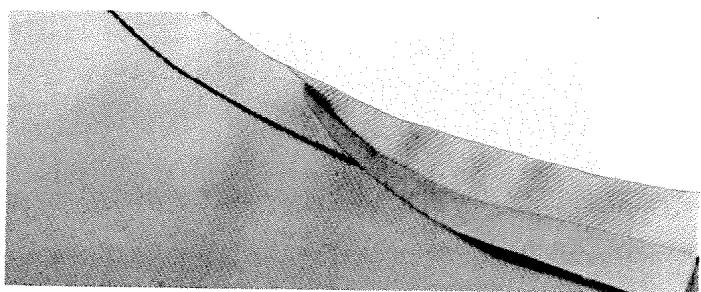
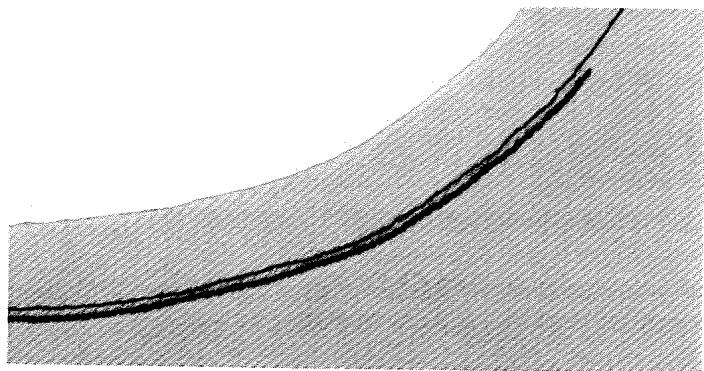
Reinforced straight stitching is stronger than ordinary straight stitching, due to the fact that it is a triple and elastic stitch. The reinforced straight stitch can be used for seams in stretch fabrics and for topstitching.
When sewing stretch fabric with seams to be pressed open, use reinforced straight stitching instead of ordinary straight stitch. Overcasting can be done with the three-step zig-zag.
Reinforced straight stitching is also preferable for sleeve insertion and for crotch seams which are subject to considerable strain, even in non-stretch fabrics.
A tip: baste the seams using ordinary straight stitch, length 4-5, and thread of the same colour as the fabric. When you have tried on the garment, the seams can be "sewn in" with elastic straight stitch. Theasting thread need not to be removed if you sew exactly along theasting seam.

Zig-Zag
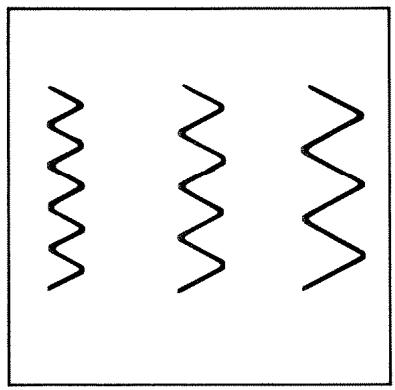
Zig-zag is used for sewing on lace, gathering, bound edging, appliqués etc.
Three-step zig-zag is recommended for overcasting, as it binds better and is more attractive. See page 31.
Check that the needle is in the highest position. You have the choice of three zig-zag widths, 1.5, 3 and 5mm .
Turn the stitch selector to the required zig-zag symbol. Set the stitch length dial to the recommended stitch length but experiment until you arrive at the best setting for the actual work you will be doing.
Bound Edges
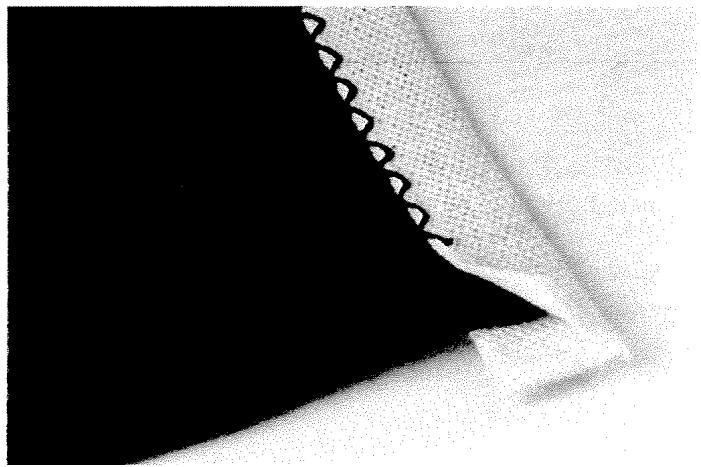
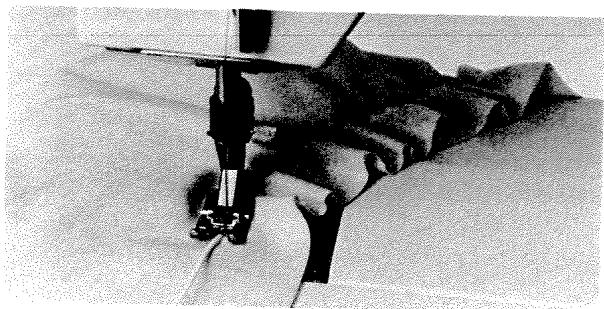
The simplest method to bind edges is to use ready-made bias binding. Sew with narrow zig-zag stitches or the intermediate zig-zag width. If the binding is to be sewn on to a curved edge it should be preshaped. Fold it over the edge of the fabric allowing the part which will be on the reverse side of the fabric to be slightly wider.

Sewing on Lace
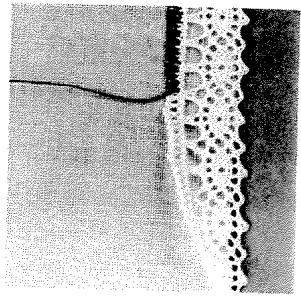
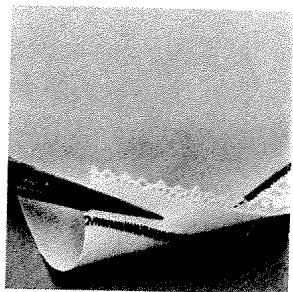
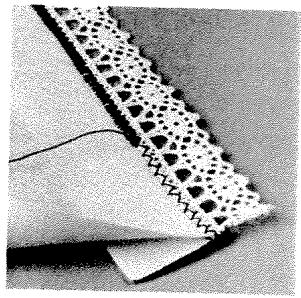
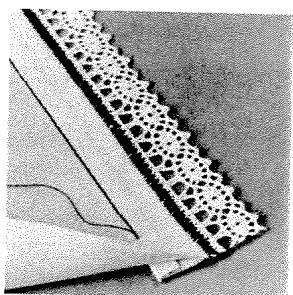
The simplest way to attach lase is to place it 1cm or so in on the fabric and sew with a fairly close zig-zag (stitch length 0.4 and the intermediate zig-zag width). Trim for the reverse side, close to the stitching.
The lace can be more firmly attached if it is first placed 1—3 cm in on the fabric, depending on how large you wish the hem to be, and sewn on with narrow, sparse zig-zag. Fold the fabric back against the reverse side and stitch again from the right side, this time using a little wider zig-zag and closer stitches.
Trim the fabric on the reverse side close to the stitching, or fold a hem and sew with straight stitching.
Gathering with Zig-zag
Gathering by zig-zagging over elastic cording gives soft, supple gathering for smocking and elastic in blouses and children's clothes. The elastic can be stretched while sewing or when the seam is finished. The latter method is particularly suitable when sewing several rows of gathering. If you sew and gather simultaneously, hold the elastic firmly both in front and behind the presser foot and stretch the elastic – not the fabric! The zig-zag stitch should be wide enough so that the elastic can glide within it and the gathers will be evenly spaced when the work is finished.
Appliques
When sewing appliqués you can either cut out the figues before sewing them on, or draw the figure, sew it onto the garment around the contours and then trim, cutting close to the stitching. Secure the pieces with pins. Use presser foot B.
Sew the figures on, using a long zig-zag stitch. Then stitch around the edges a second time with a closer and wider zig-zag. The stitch length should be adjusted according to the thickness of the fabric. If you use small cording when sewing the second stitching, you will have a raised contour outline.
Reinforced Zig-Zag (Ric-Rac)
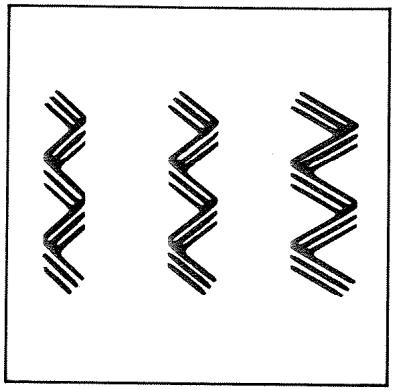
Check that the needle is in the highest position. Turn the stitch selector to the required symbol (the lower group of stitches). You have the choice of three different widths, 1.5, 3 and 5mm . Then shift the stitch length dial to the red area on the left.
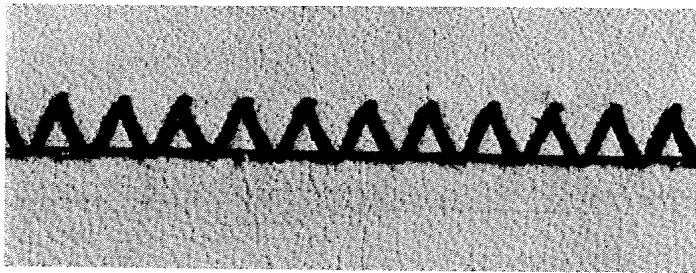
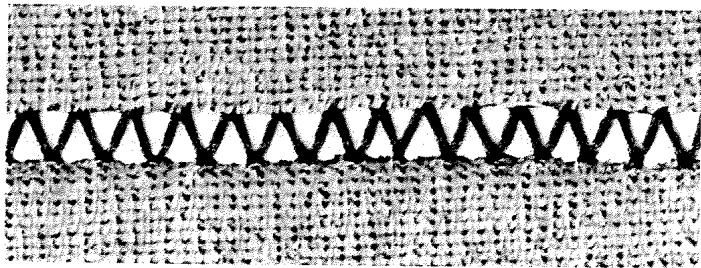
Ric-Rac is an elastic stitch, used for pronounced topstitching, overlapped seams and appliqués in stretch fabric and in leather.
Overlapped seam on leather.
Topstitching
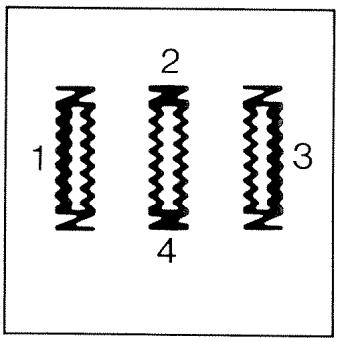
When you switch between the buttonhole symbols, make sure that the needle is in the highest position.
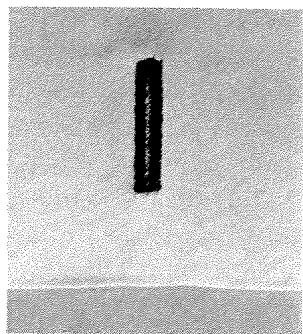
In the first place follow the recommendations in the boxes in front of the setting dials. Always make a test buttonhole first and adjust the stitch setting.
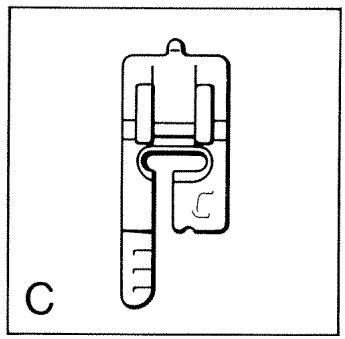
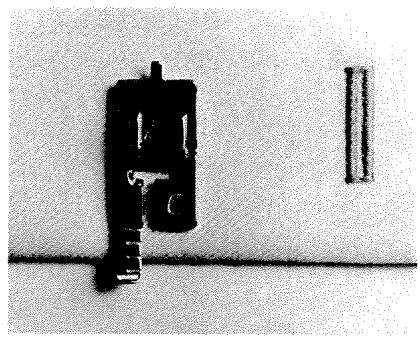
Mark the fabric where you wish to have the buttonhole. Attach presser foot C. This presser foot is graduated so that you can get the same length on the buttonholes. The graduations may also be used to obtain an even buttoning edge. The middle grade on foot C gives a 1.5cm buttoning edge.
When sewing smaller or normal-sized buttonholes, it is easy to decide how long to make the buttonholes by inserting the fabric under the presser foot, lowering the foot and then lowering the needle in the marking on the fabric. After that, place the button on the presser foot against the needle and you will be able to see which grade on the foot corresponds to the button. Start sewing moment 1 and stop when the column reaches the marking corresponding to the size of the button.
Remember that the machine will begin to sew in reverse.

Set the stitch selector to symbol 1. The machine sews the first column in reverse. Stop when you reach the correct column length.
Turn to symbol 2-4.
Now the machine will form the bar tack.
Sew three or four stitches.

Turn to symbol 3.
Sew the other column the same length as the first one.
Turn back to symbol 2-4. The machine will form the final bar tack. Sew three or four stitches. Turn to symbol 1 and lock the threads with a few stitches in the first column.
Heavy garments and those subject to hard wear may require reinforced buttonholes, which you can sew as follows:
Increase the stitch length slightly.
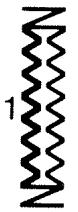
Set the stitch selector to symbol 1 and sew the first column in the same way as for an ordinary buttonhole. When the column is sufficiently long, stop the machine.
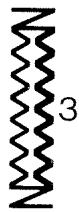
Turn to symbol 3. Sew the next column without the bar tack and stop the machine when the columns are equally long.
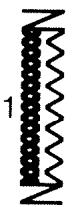
Return to symbol 1. Sew the first column once more. Stop when the correct length is reached.
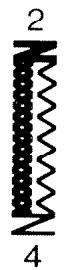
Turn to symbol 2-4. Sew the bar tack with three or four stitches.

Turn to symbol 3. Sew the second column once more.
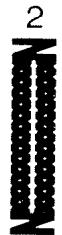
Turn back to symbol 2-4. The machine will form the final bar tack. Sew three or four stitches. Turn to symbol 1 and lock the threads with a few stitches in the first column.
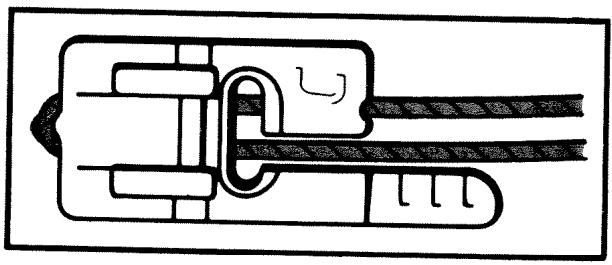
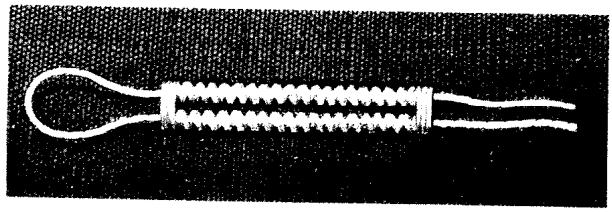
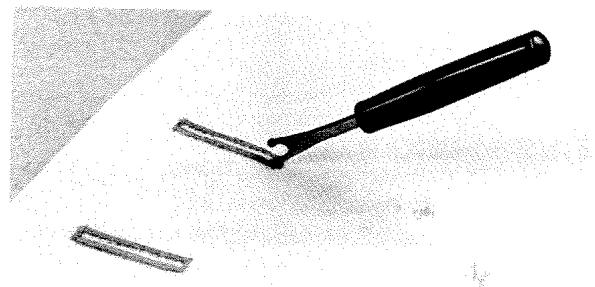
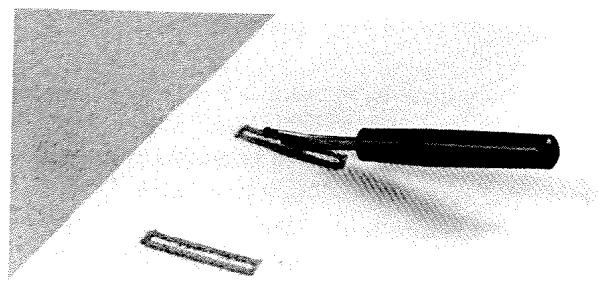
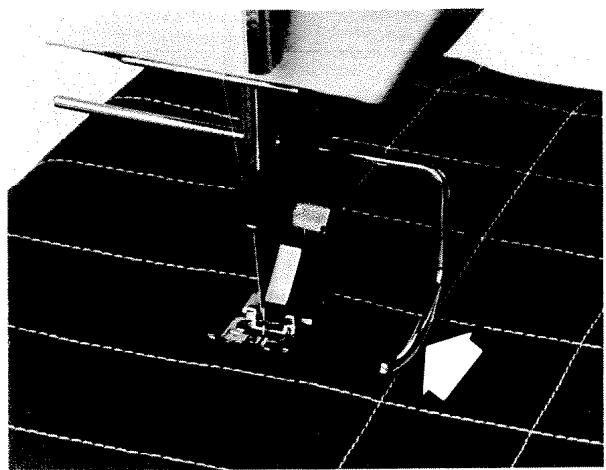
A small cord can be used to sew buttonholes in elastic material, in order to keep the shape better. Attach the cord around the projection at the heel of the buttonhole foot as shown in the illustration. Draw the threads toward you, one under each groove in the presser foot. Lower the foot and sew the buttonhole in the ordinary way. Note: Do not hold the threads.
When the buttonhole is finished, pull the cord to eliminate the loop which will act as a reinforcement at one end (the end which is most worn by the button) of the buttonhole. Bar tack and cut the cord close to the stitching or hand sew the loose ends through to the reverse side and tie them.
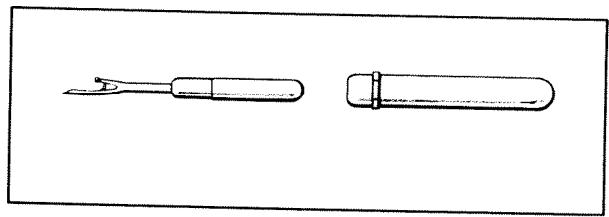
The buttonhole knife which you will find in the accessory box, is equipped with a safety cap. Push this onto the back of the knife and it will provide a good handle.
When you have finished sewing all the buttonholes, they must be cut open as follows:
Pierce the fabric at a right angle until the curved blade edge reaches down to the buttonhole.
With the knife more or less parallel to the fabric, push forward, taking care not to cut the columns of the buttonhole. The small red bead serves as a guide. Cut the buttonhole to the middle and then repeat the cut from the other direction.
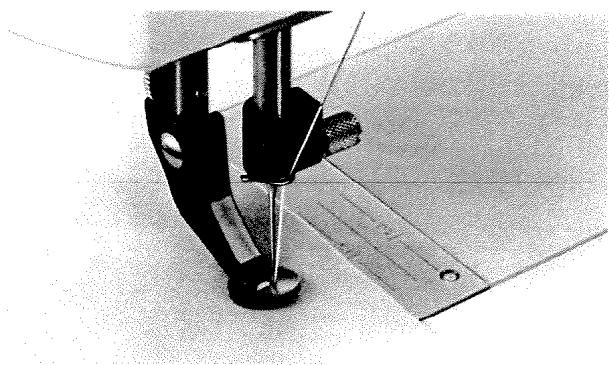
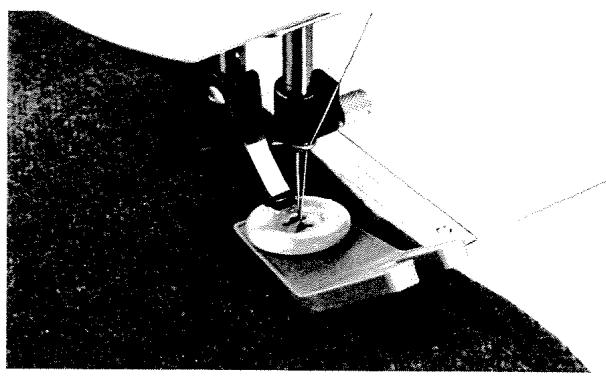
Lower the feed dog. Remove the presser foot, put the button in place and lower the presser bar. As most buttons have 3 - 4mm space between the holes, set the widest or intermediate zig-zag stitch. Turn the handwheel toward you and test carefully that the needle enters the first hole and then the other hole.
Depress the foot control gently without moving the button. Hold both thread ends behind the clamp and sew 5-6 stitches. Move to the other holes and repeat. Then set the needle in the left position, make a few straight stitches to fasten the threads. Raise the feed dog when you have finished.
When sewing button on, a shank is often required so that the button stands slightly away from the fabric. Use the clearance plate for this purpose, the thin end when sewing buttons on light fabric and the thick end for heavier fabrics. Fix the button with a stitch. Raise the presser bar and place the clearance plate between the button and the fabric. Lower the presser bar and sew on the button.
Remove the clearance plate, pull the threads between the button and the fabric, wind them a few times around the shank and tie the ends.
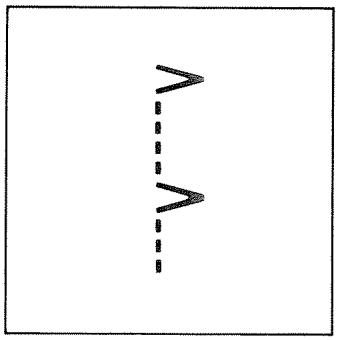
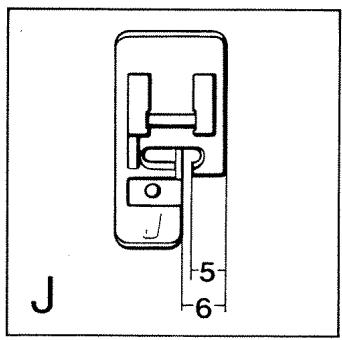
Overcast Stitch
Check that the needle is in the highest position. Turn the stitch selector to the symbol ·s ·s . Always follow the recommended settings to start with but experiment until you find the best setting.
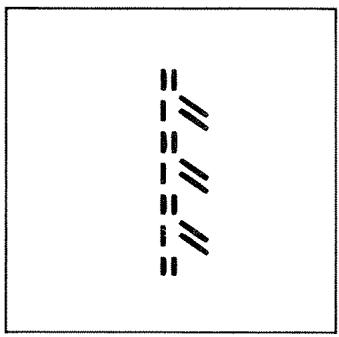
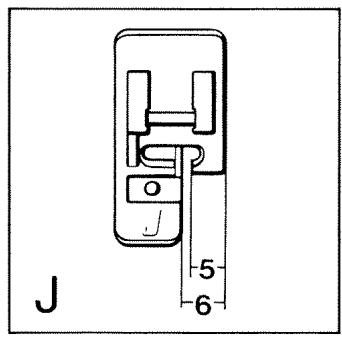
Overlock
With the same setting as for overcast stitch you will have the overlock stitch only by shifting the stitch length dial to the red area.
The overlock is used for joining many different fabrics but is particularly suitable for producing narrow, supple stretch seams in double-knit, ribbing, stretch terry cloth and other knitted fabrics.
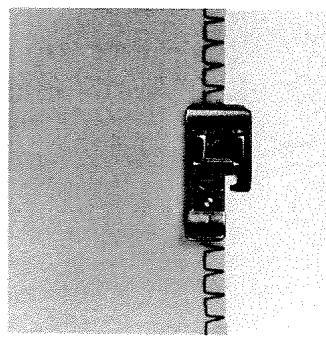
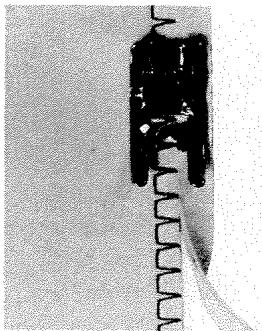
The overcast stitch can be used for joining and overcasting simultaneously in lightweight, woven and elastic materials, like chambray, taffeta, nylon cire and silky-knit (jersey).
Join and overcast directly on the edge where a 5mm seam is allowed, or cut out the garment with a wider seam allowance, sew with overcast stitch and then trim close to the stitching. Use the presser foot A when sewing with a wider seam allowance in lightweight fabrics.
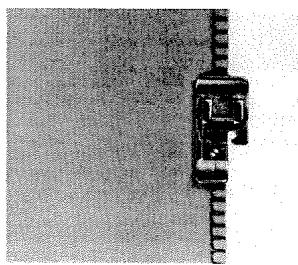
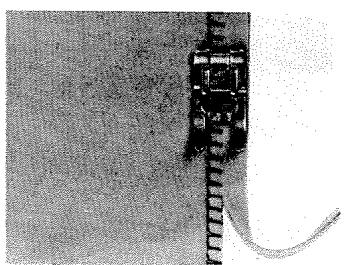
With the overlock stitch you join and overcast simultaneously. Use 5mm seam allowance. When sewing heavy knits, reduce the presser foot pressure slightly.
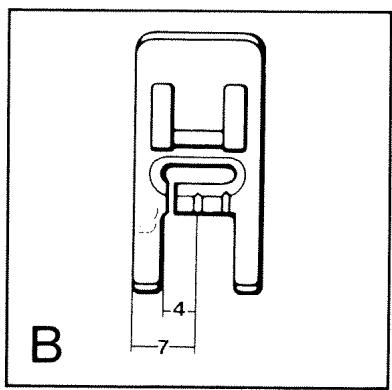
If you prefer, you can also cut the garment with a wider seam allowance and trim after you have finished the seam. Then use presser foot B. The left marking of the presser foot can be used as a guide.
Three-Step Zig-Zag
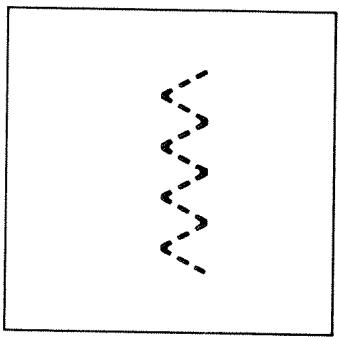
Check that the needle is in the highest position. Turn the stitch selector to the symbol 空 Always follow the recommended settings to start with but experiment until you find the best setting.
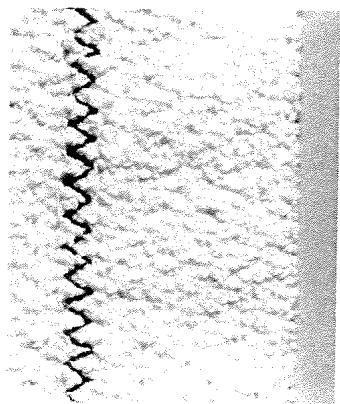
Three-step zig-zag is suitable for overcasting most fabrics. It has many advantages compared to ordinary zig-zag because it is more elastic and will not pucker the edge of the fabric.

Overcasting
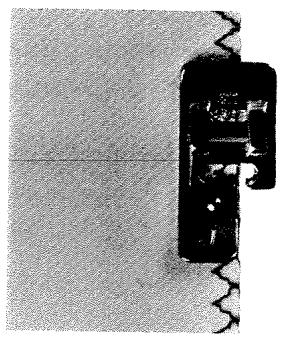
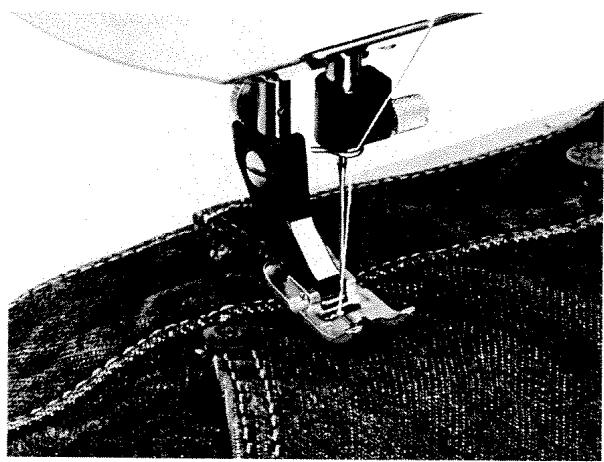
Trim the edges of the fabric before overcasting. Make sure that the needle sews over the edge of the fabric. Let the edge of the fabric follow the right marking of the presser foot. For ordinary fabrics use presser foot A. For overcasting light fabrics use presser foot J and when overcasting terry cloth use presser foot B.
Sewing Terry Cloth
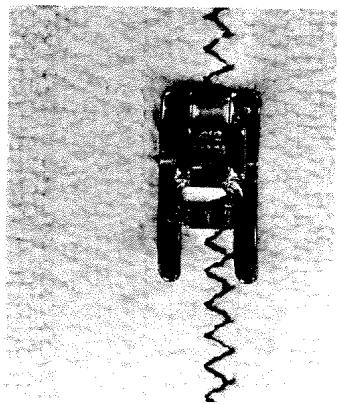
Use presser foot Band straight stitch the garment together, leaving 1.5 - 2cm seam allowance. Trim the edges so that they do not fray. Press the seam allowance open and sew the edges down against the garment on the wrong side with three-step zig-zag. Even though the stitching goes right through to the "right" side of the garment, it is almost invisible and the wrong side looks neat too.
When hemming you only have to fold a single hem and sew over the open edge with the three-step zig-zag. The hem will then be smooth and flexible. Necklines and armholes are finished in the similar way.
Sewing on Belt Carriers
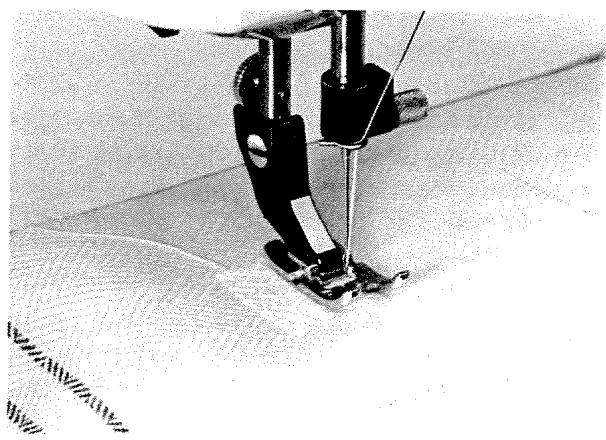
Set the machine for three-step zig-zag and lower the feeder. Sew the carrier across the upper and lower edges. If the carrier is wider than the sewn stitches, move the work sideways and sew once more to ensure that the whole carrier is sewn into place.
Mending
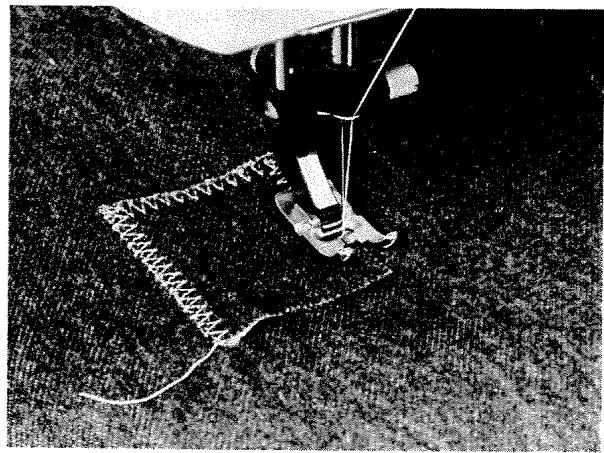
Three-step zig-zag is a versatile stitch which can be utilized for mending and darning the majority of materials. Use presser foot A. The thread should be of the same colour as the fabric.
A patch is sewn on around all edges with three-step zig-zag and relatively close stitching. By sewing round the patch several times, the mend will be stronger.
When mending a tear, place the edges of the fabric together and sew them with three-step zig-zag. If necessary, reinforce the tear with a piece of fabric on the reverse side and sew back and forth once or twice.
A threadbare spot is mended by sewing back and forth with three-step zig-zag using the reverse feed button. This method is called Quick-mend and is the quickest and easiest method of darning. For every row of stitching, guide the fabric slightly to the side so that the stitches cover the entire worn area. When reverse feeding the stitch length is max. 3mm in order to stop the needle from breaking.
If the fabric is very worn, a piece of fabric or lining may be attached to the reverse side as reinforcement. Use gauze as reinforcement when mending table-cloths, napkins and towels.
If you turn the graded dial for the presser foot pressure to the lowest number, it is possible to darn with presser foot A.
Lower the feed dog and move the fabric forward, backward and sideways by hand.
A special darning foot is available as "Extra accessories", see page 41.
Blindstitching
Check that the needle is in the highest position. Turn the stitch selector to the symbol Always follow the recommendations given in the boxes to start with but experiment until you find the best setting.
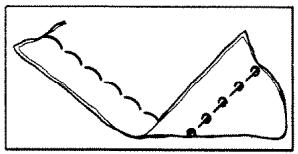
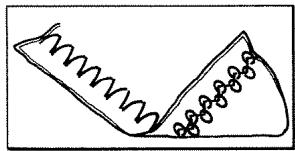
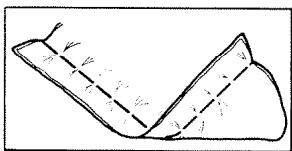
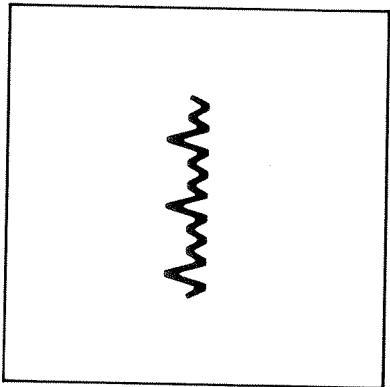
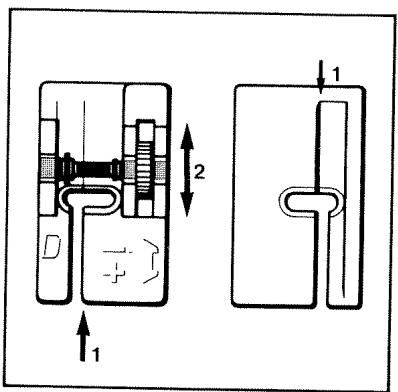
Blindstitching has small zig-zag stitches between the larger zig-zag stitches. You can reduce or increase the stitch length if you wish to vary the space between the fastening stitches. Snap on the presser foot D.
Blindstitching is used for hemming skirts made of woven and knitted fabrics without the stitches being visible on the right side.
Fold the fabric as illustrated and place it under the presser foot.
Test sew on a scrap of fabric and look at the right side. As fabrics vary in thickness the presser foot can be shifted sideways so that the edge guide 1 underneath may be set according to the thickness of the fabric. Move the presser foot by turning the red roller 2 forward +, or backward -. When sewing light fabrics turn the roller toward -. When sewing thick fabrics, turn the roller toward +. Experiment until you find a suitable setting.
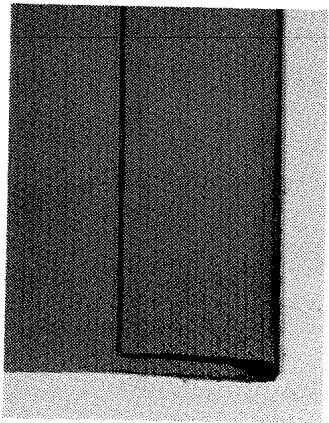
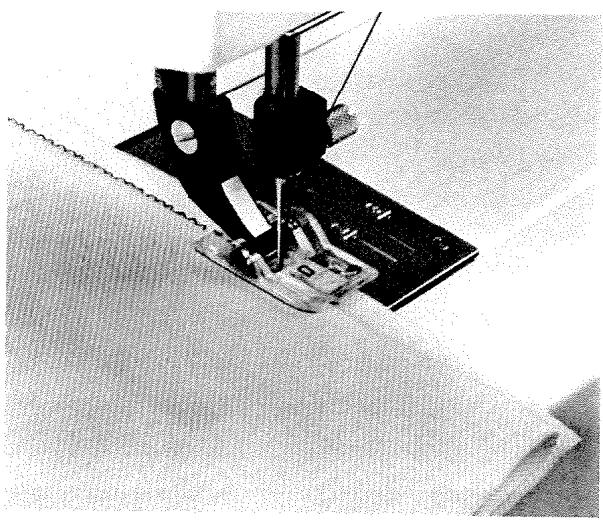
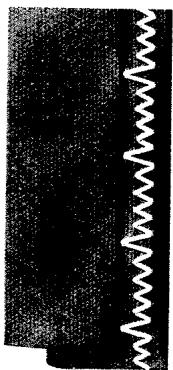

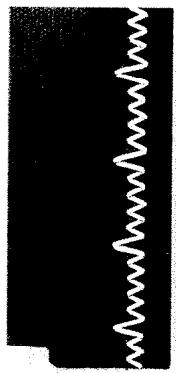
Be sure that the folded edge follows the edge guide 1 underneath the presser foot.
To avoid hard creasing when hemming certain fabrics, you can reduce the presser foot pressure one or two steps.
The thicker and softer the fabric, the less visible the stitches will be. When sewing light-weight wowen fabrics, it is unavoidable that a small stitch will show on the right side.
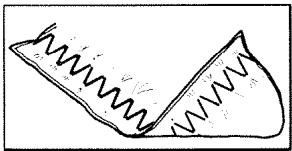
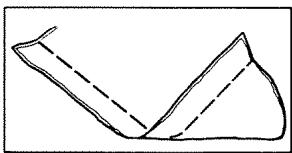
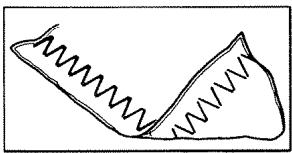
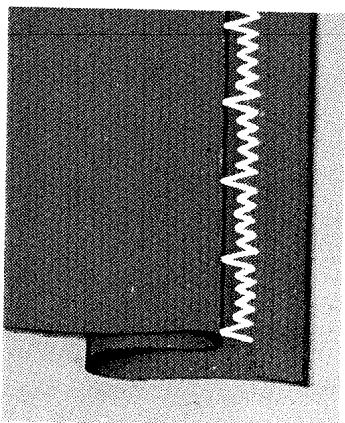
Sew a few stitches and compare the result with those in the illustration. The picture to the left shows how the stitches fail to reach the folded edge of the fabric. You should then check that the fabric edge exactly follows the edge of the edge guide or turn the red roller slightly toward + .
The stitch is too far in on the fabric fold in the center seam in the illustration and will be visible on the right side. Turn the roller toward -.
The seam to the right in the illustration shows invisible hemming. The stitches catches just one thread of the folded edge.

Care of the Machine
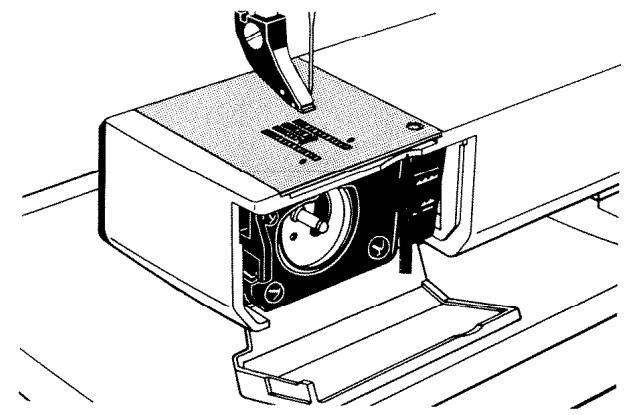
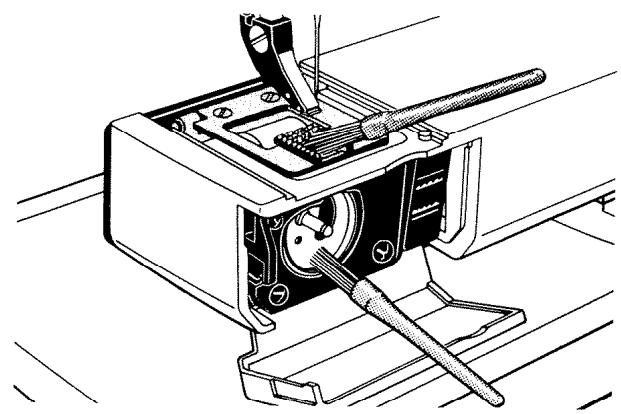
To keep your sewing machine operating satisfactorily it requires, like other precision machines, regular cleaning. It need not, however, be lubricated. The stitch plate should occasionally be removed. Remove the presser foot and lower the feed dog. There is a recess in the free arm to the right above the hook cover. Push the stitch plate straight up approx. 1mm and backward at the same time until it loosens. Clean between the teeth of the feed dog with the brush you will find in the accessory box.
Whenever necessary the bobbin case and hook should also be brushed clean. Sizing or finishing compounds from the fabric may adhere to the spindle of the hook. If this has happened, the spindle should also be cleaned with the brush. Remove any pieces of thread which may have become wound around the spindle.
When replacing the stitch plate, insert it from behind into the recess in the arm. Ease the front edge up onto the small pin and continue to push it forward until it snaps into place.
Belts
Belt adjustment is not required.
Changing the Light Bulb
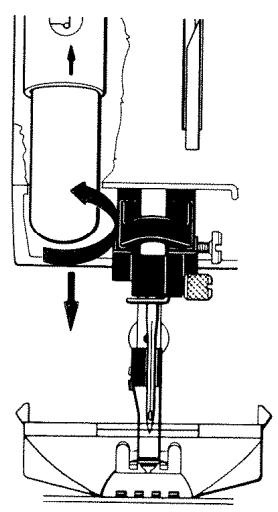
The lamp is located to the left of the needle. First remove the lamp guard. By inserting the small screwdriver in the recess at the left edge and applying slight downward leverage, you can slide the guard down to the stitch plate, as illustrated.
To remove, press the light bulb upward, turn a quarter turn in the direction of the arrow. To insert the new light bulb, push it upward and turn it a quarter turn in the direction of the arrow.
Use a light bulb of maximum 15 W, as indicated on the rear of the machine.
Why haven't I got the results I expected?
Very seldom does anything go wrong with this sewing machine. It is well constructed and can withstand very intensive use. Yes, generally it performs better the more it is used. However, below you will find some advice if, in spite of everything, you are not satisfied with your sewing results.
Always start by checking the needle
An important part which needs to be changed from time to time is the needle. Always start with a new needle as soon as you discover that a seam is not what you expected. Test sew on a scrap of the fabric you are sewing. Read about needles on page 8.
Check that you have chosen the correct needle and see that it is correctly inserted.
Unattractive stitches
The thread tension is not correct. See page 13.
The machine may be incorrectly threaded. The correct threading is shown on page 11.
The needle, thread and fabric do not correspond. See page 8.
Wrong lower thread. It should be of the same thickness at the upper thread.
Bobbin wrongly inserted in the bobbin case. See page 13.
The needle breaks
You may have helped the machine to feed by pulling the fabric. The needle can easily strike against the needle plate and break.
Check the thread spool to see that it has not caught in any way.
The needle eye may have sharp edges which cut the thread. If so, change the needle. See page 14.
The upper thread is incorrectly threaded. See page 11.
The upper thread may have too much tension. Refer to thread tension, page 13.
The thread is knotted.
The thread and needle do not correspond. See page 8.
The hole in the needle plate may be chipped and have sharp edges. Slight damage to the needle plate can possibly be polished or filed but we recommend that you replace it.
The bobbin case is incorrectly inserted. See page 13.
The lower thread may be incorrectly threaded. See page 12.
The needle plate hole is damaged. Slight damage to the needle plate can possibly be polished or filed but we recommend that you replace it.
Why haven't I got the results I expected? (cont.)
Uneven thread tension
This may be due to poor quality thread.
Irregular bobbin winding
The bobbin is not placed correctly. See page 13.
The machine is not correctly threaded for bobbin winding. See page 12.
The fabric puckers
The upper thread tension is too tight. See page 13 for correct thread tension.
The machine does not feed the fabric
The stitch length is too short. Shift the stitch length regulator to a higher number.
The feed dog may be lowered. Raise it by pressing the lower part of the feed dog button. See page 9.
The presser foot pressure is disengaged. See page 10.
The feed dog is full of dust and dirt. Clean with the brush. See page 35.
The seam is too loose - fabric layers not held together
The tread tension is far too loose. Page 13 shows how to adjust the thread tension.
Machine runs sluggishly
Dirt or lint has fastened under the needle plate. Loosen the needle plate and brush clean between the teeth of the feed dog. See page 35.
Dirt or lint has fastened in the hook. Remove the bobbin case and clean with the brush. See page 35.
Expert assistance
If you have followed the preceding points and still do not get satisfactory results, you should contact the dealer where you bought the machine.
The dealer will always be more than willing to give you advice and help as to what measures should be taken.
When the machine is being checked, it is a great help if it can be test sewn under as similar conditions as possible as when you used it.
Remember to take a sewing sample along with the thread you intend to use.
A sewing sample will often give much better information than words.

Needle assortment
| Standard Needles | Pin-pac | Needle Case | Pin-pac | | | |
| 401 60 86-01 | 411 31 00-01 | 5xNo. 60 | 401 60 96-01 | 411 31 06-01 | 5xNo. 90 | |
| 401 60 89-01 | 411 31 02-01 | 5xNo. 70 | 401 60 97-01 | 411 31 07-01 | 10xNo. 90 | |
| 401 60 92-01 | 411 31 04-01 | 5xNo. 80 | 401 60 98-01 | | 100xNo. 90 | |
| 401 60 93-01 | 411 31 05-01 | 10xNo. 80 | 401 60 99-01 | 411 31 08-01 | 5xNo. 100 | |
| 401 60 94-01 | | 100xNo. 80 | 401 61 02-01 | 411 31 10-01 | 5xNo. 110 | |
| Jeans Needles | Twin Needles | Limited width |
| 411 62 85-01 | 411 31 30-01 | 2xNo. 90, | 412 03 65-01 | 412 03 66-01 | 1,6 mm, 2xNo. 70 | 4 |
| | 2xNo. 100, | 411 42 35-04 | 412 03 58-01 | 1,6 mm, 2xNo. 80 | 4 |
| | 1xNo. 110 | 411 42 35-01 | 411 31 33-01 | 2 mm, 2xNo. 80 | 4 |
| Only for small and medium zig-zag stitching. |
| 411 62 85-02 | 411 31 29-01 | 5xNo. 90 | 412 03 69-01 | 412 03 70-01 | 2,5 mm, 2xNo.80 | 3 |
| 411 46 69-01 | 412 03 55-01 | 5xNo.100 | 412 03 59-01 | 412 03 60-01 | 4 mm, 2xNo. 80 | 2 |
| | | 411 42 35-03 | 411 31 35-01 | 4 mm, 2xNo. 90 | 2 |
| | | Only for small zig-zag stitching. |
| | | For parallel seams and raised seams. |
Stretch Needles
| 411 46 68-01 | 411 31 23-01 | 5xNo. 75 |
| 411 62 84-01 | 411 31 24-01 | 5xNo. 90 |
| 411 64 14-01 | | 1xNo. 70, 2xNo.80, 1xNo.90, twin needle, 2 mm: 1xNo.80, stretch needles: 1xNo.75, 1xNo.90, jeans needles: 1xNo.90, 1xNo.100. |
| 411 78 90-01 | | 1xNo.70, 1xNo.80, 1xNo.90, stretch needle 1xNo.90, jeans needle 1xNo.90. |
| 411 45 18-01 | 411 31 17-01 | 2xNo.70, 6xNo.80, 2xNo.90. |

Needles with rounded tip
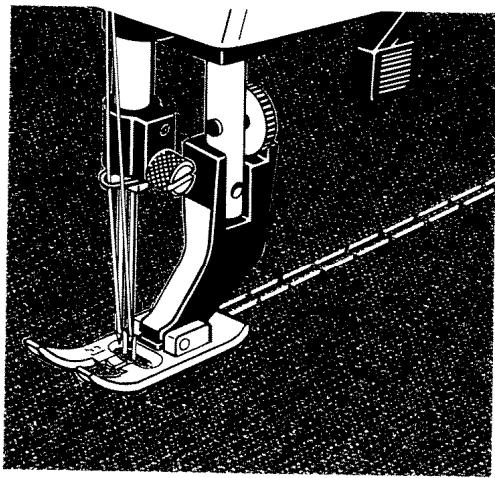
411 47 03-02 412 03 56-01 5xNo.70
411 47 03-03 412 03 57-01 5 × No.80
Double stretch needle
412 03 61-01 412 03 62-01 4mm,2xNo.75
Only for small zig-zag stitching. Max. stitch width 2
The above-mentioned needles are suitable for our sewing machines.
However, all types are not available on all markets.
Read more about needles on page 8 and the next page.
Only use needles of System 130/705 H.
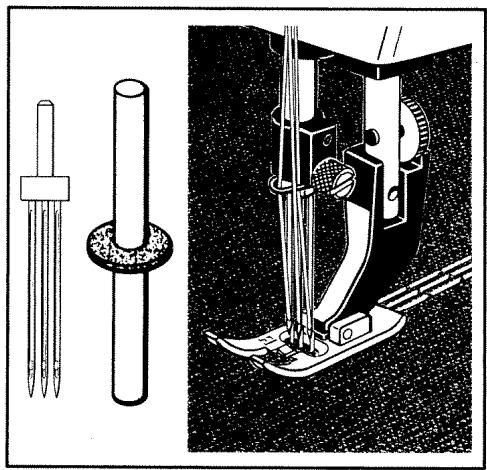
411 16 22-02. Triple needle No.80. For straight stitching and small zig-zag stitching.
401 56 00-01. Thread spool pin. To be used when necessary for a third thread spool.
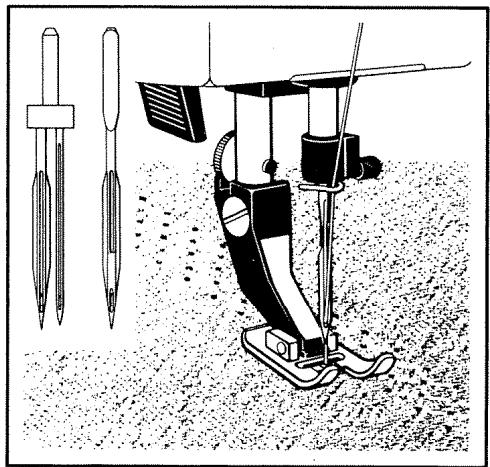
412 03 64-01. Double wing needle. For straight stitching and small zig-zag stitching. Max. stitch width 2mm
411 26 84-01. Wing needle produces a hem-stitch effect. For straight stitching, small and medium zig-zag. Max. stitch width 4mm
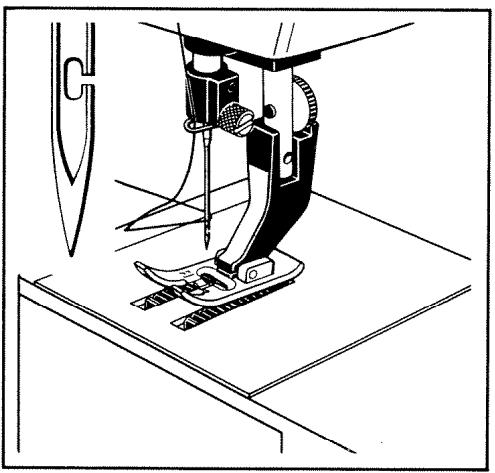
411 26 85-01, No. 80.
411 26 85-02, No. 90.
411 26 85-03, No. 100.
Slotted needles for people with impaired vision. When threading, pass the thread along the needle until it glides into the slot.
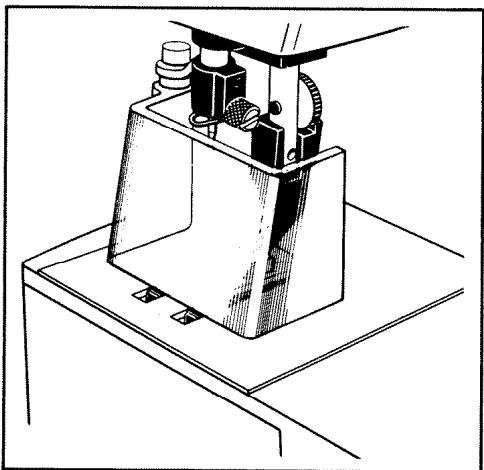
411 85 85-01. Finger guard, effectively protects your fingers while sewing.
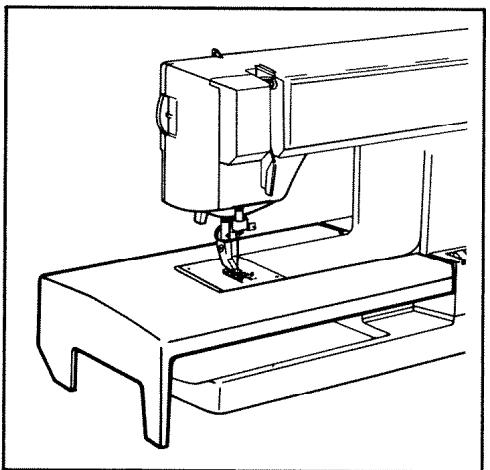
411 78 93. Extension table gives an even larger working surface.
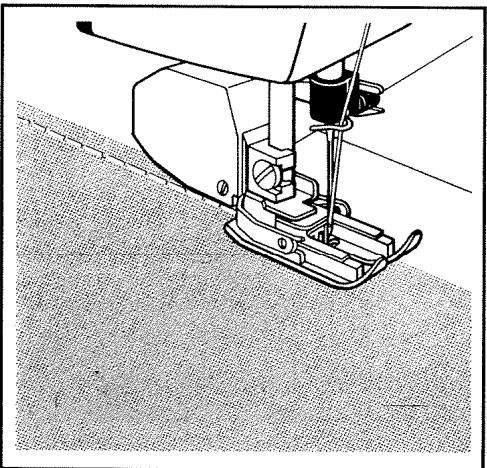
412 19 40-01. Dual feeder. To be used for materials which easily shift, e.g. plastic, velvet. Useful also for checked and striped fabrics.
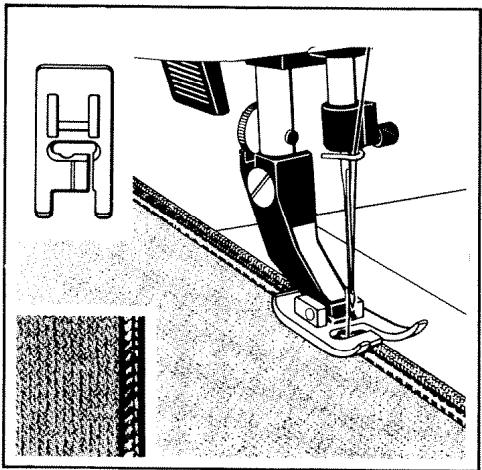
411 85 10-01. Piping presser foot for fastening tape with a flat and round part (piping). Only the round part will be visible when the tape is in place.
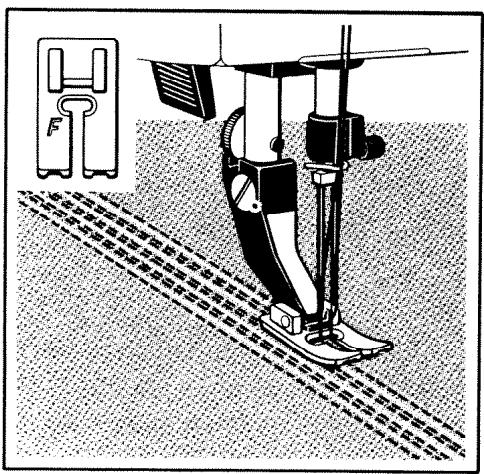
411 73 99-01. Raised seam presser foot for parallel raised seams with the twin needle. Use straight stitching or reinforced straight stitching.
411 39 25-01. Raised seam cord guide for use with or without cord.
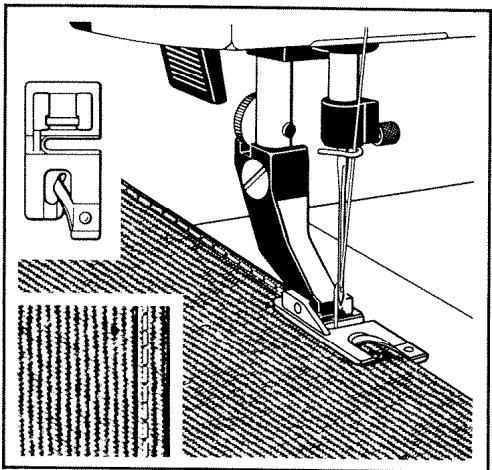
411 85 22-01. Presser foot for 2mm hemming. For straight stitching or small zig-zag stitching, stitch length 1.5.
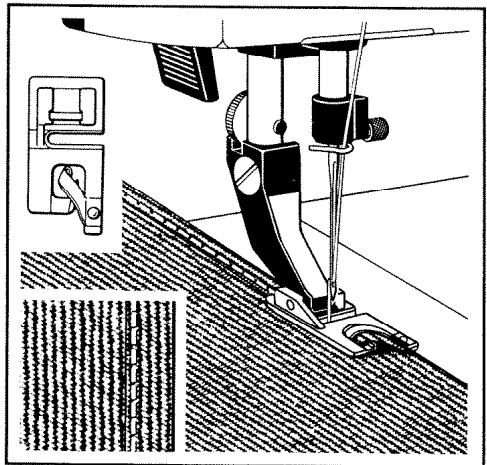
411 85 17-01. Presser foot for 5mm hemming. For straight stitch, zig-zag or decorative stitching.
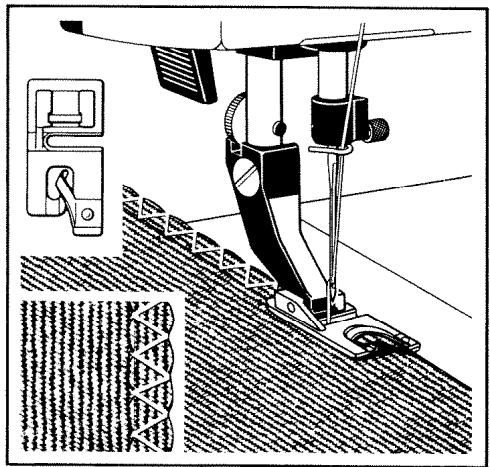
411 85 20-01. Presser foot for 3mm scalloped hem. For medium zig-zag stitching, stitch length 4.5 and tight thread tension. Suitable for soft fabrics.

411 85 24-01. Presser foot for 2mm rolled hem. For medium zig-zag stitching, stitch length 3. Suitable for light fabrics.
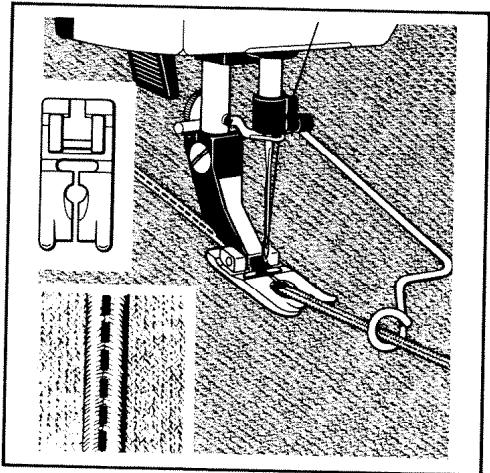
411 85 00-01. Presser foot for attaching braiding, which is inserted through a guide and attached with a straight stitch in the middle of the braiding.
411 85 01-01. Tape guide, facilitates guiding tape, cord etc.
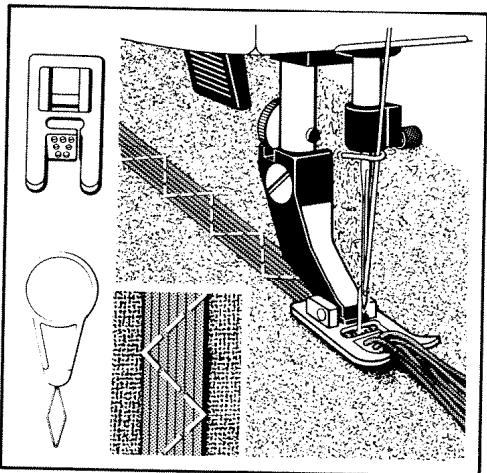
411 85 11-01. Presser foot with seven holes for decorative stitching over yarn or for satin stitching with wide zig-zag.
411 62 87-01. Thread the needle threads from underneath the presser foot and draw the threads down through the holes.
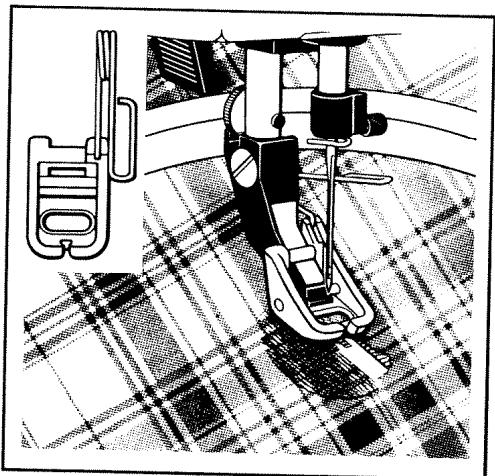
411 73 90-01. Darning foot. For darning with straight stitching - the work is stretched in a hoop. For darning socks use zig-zag stitching - the material is guided by hand. Set presser foot pressure at the darning symbol
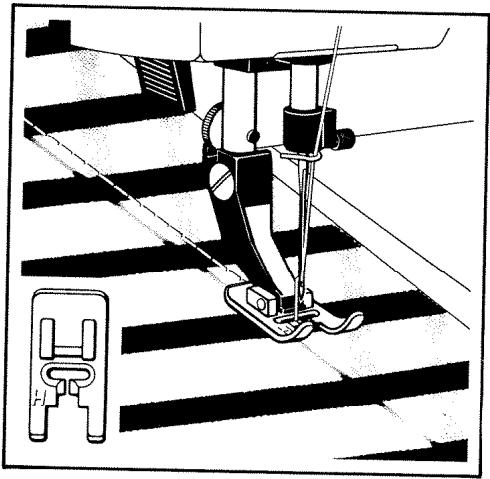
411 85 30-01. Presser foot with glide sole for sewing plastic-coated fabric, some leather imitations and other materials which tend to adhere to the metal presser feet.
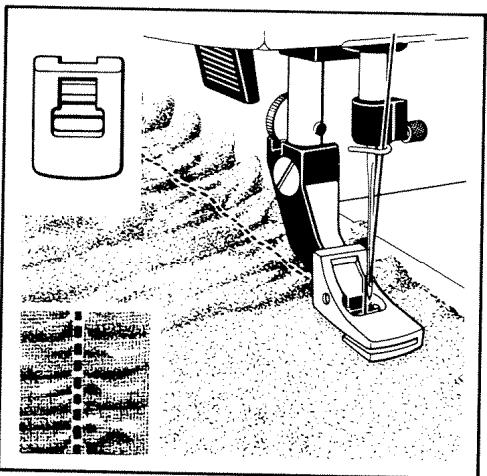
411 85 02-01. Presser foot for gathering. The fabric is gathered as it is sewn - the tighter the tension, the fuller the gathering. The gathered fabric can be sewn simultaneously to another ungathered fabric.
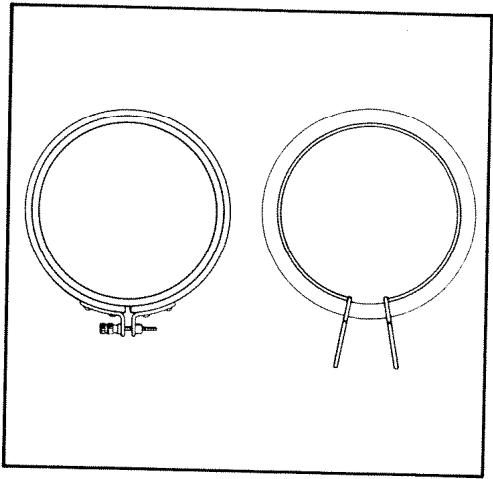
401 53 98-01, 5.5 cm diameter.
409 30 28-01, 10cm diameter.
409 30 29-01, 15 cm diameter.
409 30 30-01, 20 cm diameter.
Frames for darning and embroidery.
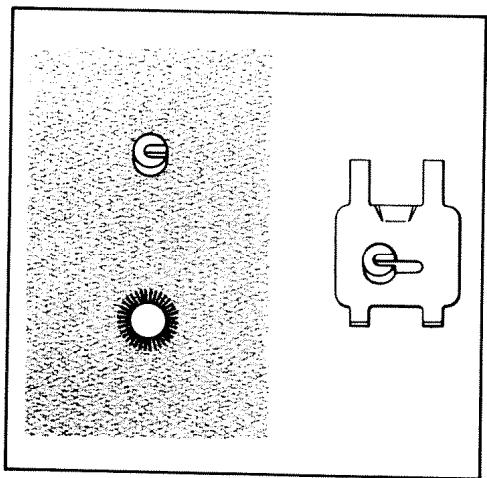
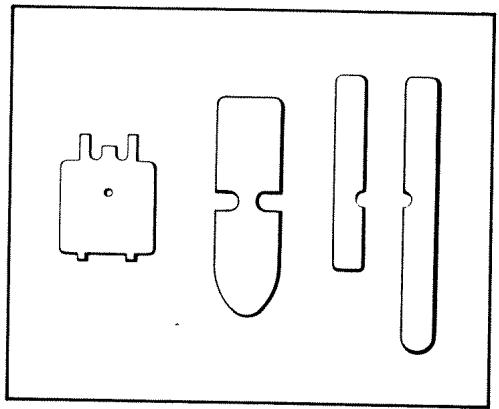
412 00 71-01. Plate for eyelet 4mm
412 00 71-02. Plate for eyelet 6mm
For making closing bars around holes, e.g. eyelets in belts, the feed dog is covered by a plate. Available for different hole-diameters.
412 00 68-01. Plate for darning and freehand embroidery especially in light fabrics. Only for straight stitching.
412 01 41-01. Glide plates for sewing plastic-coated fabrics, leather imitations etc. for presser feet C and E.
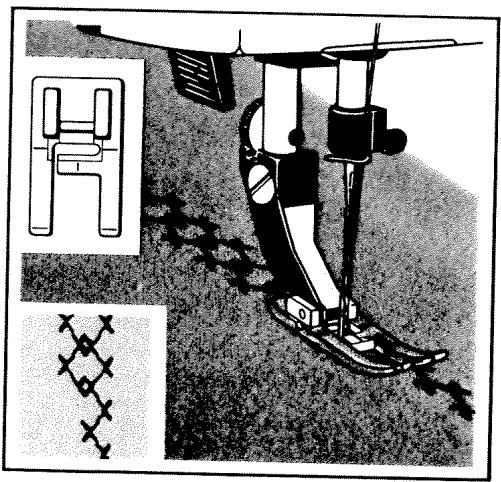
412 00 16-01. Presser foot for decorative stitching. Being completely transparent it is easy to match stitch patterns.
Index
Accessory box 7 Light, main switch 9
Appliquees 24 Lowering the feed dog 9
Basting 18 Lower thread, tension 14
Blindstitching 33-34 Lower thread, threading 12
Bobbin insertion 13 Machine parts 5
Bobbin winding 12 Main switch 9
Bound edges 23 Mending 32
Buttonhole knife 28 Needle and thread 8
Buttonholes 26-29 Needle assortment 38
Buttonholes, corded 28 Needle, changing 14
Buttonholes, reinforced 27 Needle, choice 8
Buttons, sewing on 29 Needle positions 17
Care of the machine 35 Open arm 11
Changing the light bulb 35 Overcast stitch 30
Changing the needle 14 Overcasting 31
Changing the presser foot 14 Overlock 30
35 16
Clearance plate 21 Plugging the machine to the
9 wall outlet 9
Connecting the machine to Precision setting of button-
the wall outlet 9 holing 29
Correct and incorrect thread Presser bar lever 10
tension 13 Presser foot, changing 14
Cutting buttonholes 28 Presser foot pressure 10
Edge guide 7 Putting the machine away 6
Edge stitching 18 Reinforced buttonholes 27
Elastic straight stitch 22 Reinforced straight stitch 22
Extra accessories 39-42 Reinforced zig-zag (Ric-Rac) 25
Fault finding 36-37 Removing the bobbin case 12
Feed dog, cleaning 35 Reverse feed button 9
Feed dog, lowering 9 Ric-Rac stitch (reinforced
Foot control 9 zig-zag) 25
Free arm 11 Seam ripper 28
Function switches 9-10 Sewing in reverse 9
Gathering with straight 19-20
18 Sewing on belt carriers 32
Gathering with zig-zag 24 Sewing on buttons 29
General hints 15 Sewing on lace 24
Glide plate 7 Sewing terry cloth 31
Insertion of bobbin case 13 16
Invisible hemming 33-34 16
Knit stitch (overlock) 30 Straight stitching 17
Lace, sewing on 24 Straight stitching, reinforced 22
Light, changing bulb 35 Tensions 13-14
Terry cloth 31
Thread and needle 8
Thread cutters 10
Thread guide for bobbin
winding 9
Threading lower thread 12
Threading upper thread 11
Thread tensions 13-14
Three-step zig-zag 31
Topstitching 17
Unpacking the machine 6
Upper thread tension 13
Upper thread, threading 11
Various markings 15
Why haven't I got the results
I expected? 36-37
Working surface 11
Zig-zag stitching 23
Zig-zag, three-step 31
Zig-zag, reinforced 25
Zippers, sewing in 19-20