RVCVW-73B - Ryggekamera CRUX - Gratis bruksanvisning og manual
Finn enhetens veiledning gratis RVCVW-73B CRUX i PDF-format.

Brukerspørsmål om RVCVW-73B CRUX
0 spørsmål om dette apparatet. Svar på dem du kjenner, eller still ditt eget.
Still et nytt spørsmål om dette apparatet
Last ned instruksjonene for din Ryggekamera i PDF-format gratis! Finn veiledningen din RVCVW-73B - CRUX og ta den elektroniske enheten tilbake i hendene. På denne siden er alle dokumenter som er nødvendige for bruken av enheten din publisert. RVCVW-73B av merket CRUX.
BRUKSANVISNING RVCVW-73B CRUX
PRODUCT FEATURES:
- Codes the factory radio to turn on the reverse camera function.
- OEM type license plate light camera with incandescent bulb included.
- Includes camera power down circuit to extend the life of the camera.
RADIO COMPATIBILITY:
- MFD3 or RNS-315 Navigation Radios.
SPECIAL NOTE:
In the event this unit is to be returned for any reason, the customer must "decode" the radio before doing so to receive a replacement or refund. See instructions on page 2 on how to decode the radio.
PARTS INCLUDED:
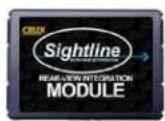
RVCVW-73B
MODULE
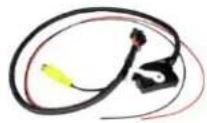
RVCVW-73B
HARNESS
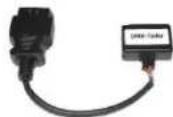
OBD II ENCODER
CVW-07B
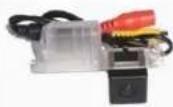
CAMERA
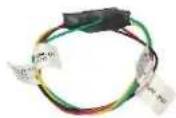
POWER DOWN
CIRCUIT
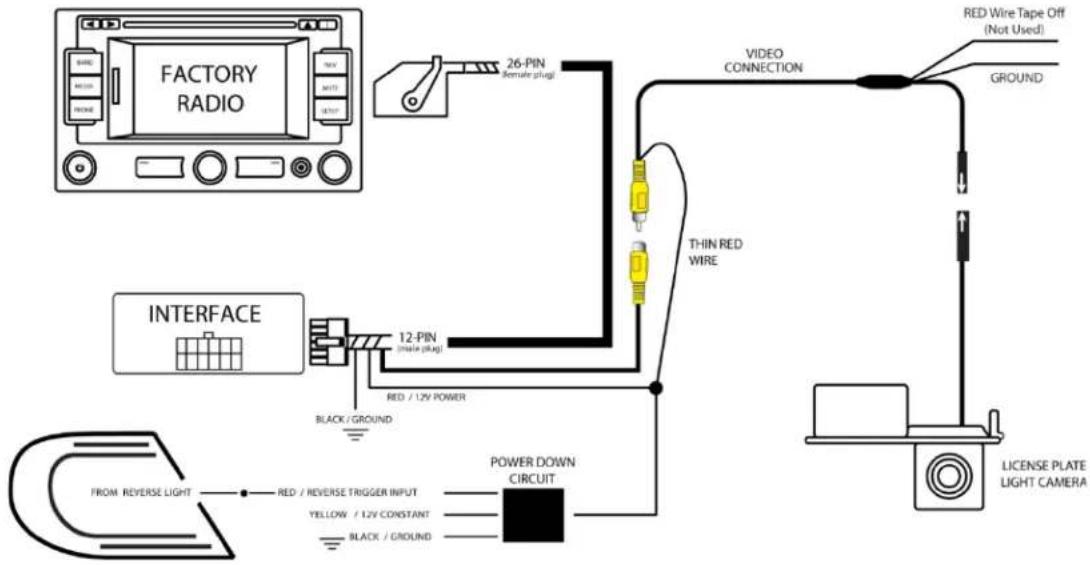
INSTALLATION DIAGRAM:
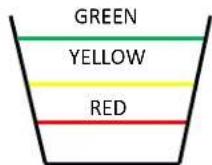
PARKING LINES:
The parking lines are there to assist you while reversing. To activate the parking lines simply cut/disconnect the WHITE loop wire located near the 4-pin camera connector.
What the Lines mean:
Green Line: CLEAR
Yellow Line: GETTING CLOSE
Red Line: WARNING - VERY CLOSE
rev.121819
INSTALLATION:
INSTALLING THE CAMERA AND INTERFACE
- Open the trunk and find a location that will allow you to access the license plate area.
- Remove the left side license plate light, disconnect and remove the light bulb from the assembly.
- Insert the light bulb into the new license plate light camera housing.
- Fish the camera cable through the license plate light and inside the cabin. You may need to drill a pass through hole if you cannot find one.
- Prepare to wire the Power Down Circuit provided in the kit. Please see diagram on the next page for wiring instructions.
- Place the new license plate light camera housing into the empty slot and snap it in place.
- Run the camera extension cable along the side of the vehicle towards the radio.
- Remove the radio to gain access to the factory connectors.
- Make the power and video connections
CODING PROCEDURE:
Please follow these steps to code the radio for reverse camera option:
- Close all the doors.
- Put the key to the ON position. (Do not start the car)
- Connect the OBD II coder to the vehicle's OBD II port.
- Look at the GREEN LED inside the OBD II coder. LED should be solid GREEN.
- Disconnect the OBD II coder.
- Turn the key OFF and remove key.
- Open and close the driver door, then lock the car.
- Wait for approximately 2 minutes.
- Start the car, put into reverse gear and confirm if reverse imager is on the screen.
- Keep the OBD II encoder stored in the vehicle in case the radio would need to be recoded.
To decode the radio, repeat steps above.
LED STATUS:
The RVCVW-73B module has 2 LEDs on the side of the Molex connector that confirms its functionality as follows:
Flashing LEDs = Coding vehicle
Solid GREEN = Activated
Solid RED = Deactivated
Solid RED and GREEN = Error
VEHICLE APPLICATIONS:
VOLKSWAGEN
2012 – 2015 Beetle