
V-C4242HD - Støvsuger LG - Gratis bruksanvisning og manual
Finn enhetens veiledning gratis V-C4242HD LG i PDF-format.


Brukerspørsmål om V-C4242HD LG
0 spørsmål om dette apparatet. Svar på dem du kjenner, eller still ditt eget.
Still et nytt spørsmål om dette apparatet
Last ned instruksjonene for din Støvsuger i PDF-format gratis! Finn veiledningen din V-C4242HD - LG og ta den elektroniske enheten tilbake i hendene. På denne siden er alle dokumenter som er nødvendige for bruken av enheten din publisert. V-C4242HD av merket LG.
BRUKSANVISNING V-C4242HD LG
natural_image
Line drawing of a mechanical device with no visible text or symbolsV-C426***
V-C425***
V-C424***
E | English
Р | Русский язык
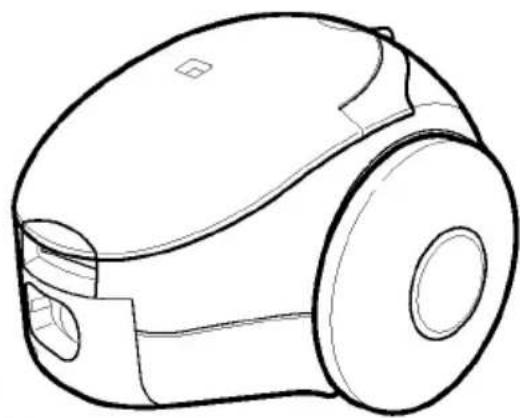
Basic Parts
Корпусные детали
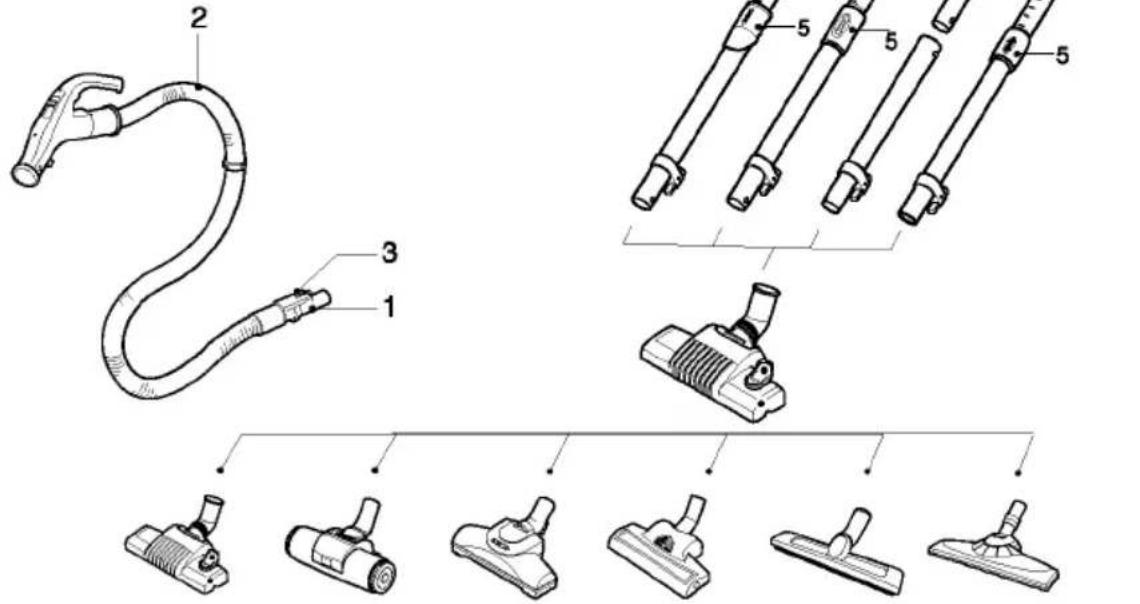
Optional Parts
■ The different figure and quantity of the following parts depend on the different models which you have bought.
Детали, приобретаемые дополнительно
■ Вид и количество следующих деталей зависит от приобретаемой вами модели.
Accessory
■ These specifications are subject to change according to the agent / buyer's request.
Вспомогательное оборудование
■ Данные технические условия изменяются в соответствии с заказом представителя покупателя /покупателя
natural_image
Diagram showing two mechanical components mounted on a grid surface with no visible text or symbols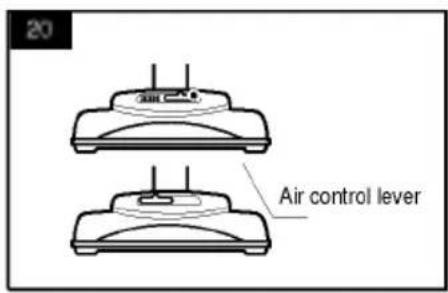

natural_image
Line drawing of a vacuum cleaner with attached tubing and labeled parts (no text or symbols)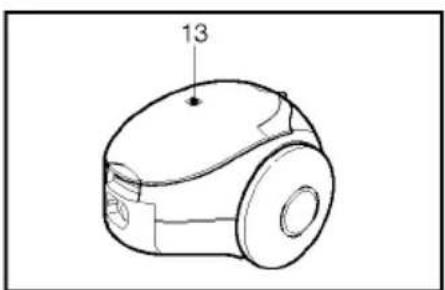
natural_image
Line drawing of a vacuum cleaner device with handle and base (no text or symbols)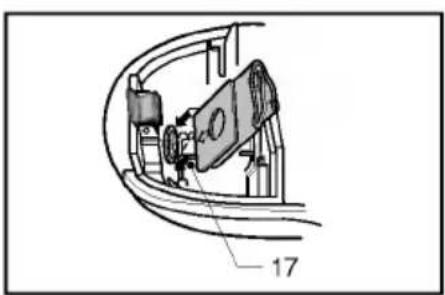
natural_image
Technical line drawing of a mechanical assembly with no visible text or symbols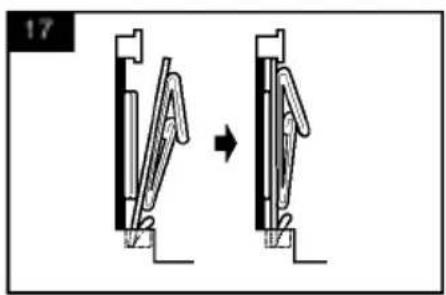
natural_image
Diagram showing a mechanical assembly or lifting process with two views of a device (no text or symbols present)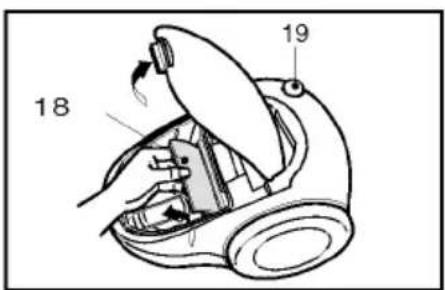
Information for your safety
Please read all the following information, which contains important instructions for the safety, the use and the maintenance of the appliance.
This appliance complies with the following EC Directives: -73/23/EEC, 93/68/EEC-Low Voltage Directive-89/336EEC -EMC Directive.
■ Never allow children to use the appliance unsupervised.
■ Do not use the appliance If the supply cord is damaged or faulty.
■ If the supply cord is damaged, it must be replaced by an approved LG Electronics Service Agent to avoid a hazard.
■ Always switch the vacuum cleaner off before :
- changing the dust bag
- changing or cleaning the filters.
■ If no dustbag is inserted, the cover cannot be closed. Please do not use force!
■ Do not vacuum flammable or explosive substances (liquids or gases).
■ Do not vacuum hot ash, embers etc. nor sharp objects.
■ Do not vacuum water or other liquids.
■ Please make sure when using the carrying starp that it is securely fitted.
■ The use of radio trans mitting devices close to the appliance may interfere the function of the appliance, input power may be vary.
■ When you vacuum with an attachment appliance that has a rotating brush roller:
• do not reach into the running brush roller.
■ Do not vacuum fine dust.
■ Do not expose vacuum cleaner to heat.
How to Use
Connecting the flexible hose
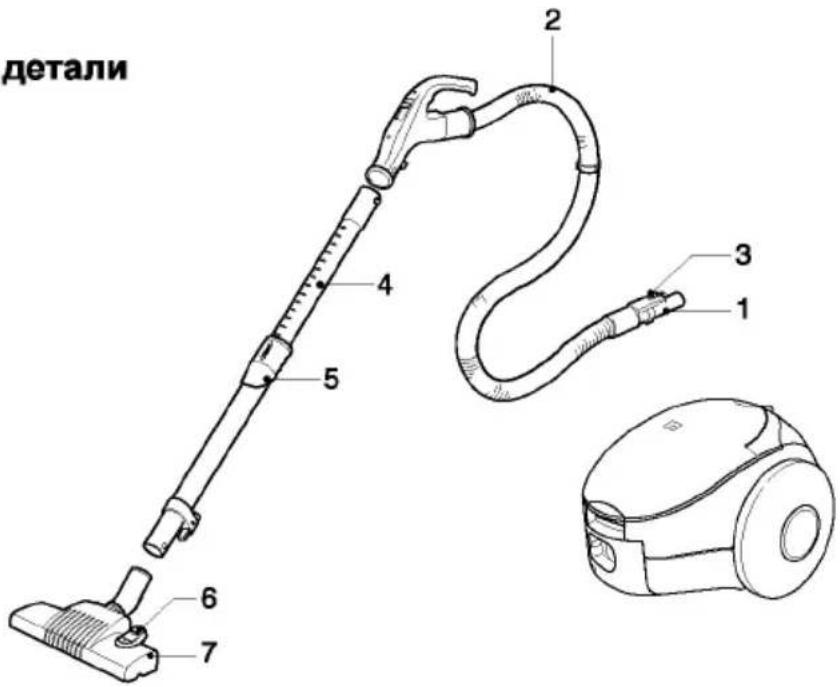
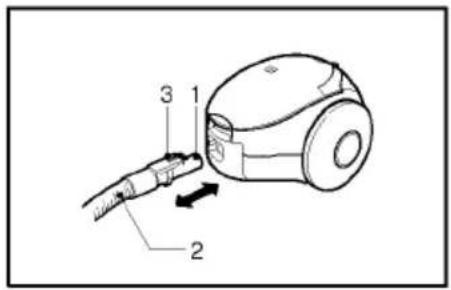
Insert the hose holder (1) into the suction opening.
When the hose (2) is to be disconnected
from the appliance, press the release button (3) and pull the hose holder out of the suction opening.
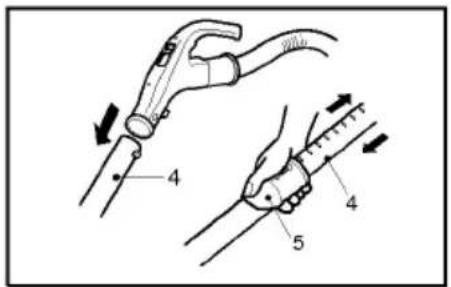
Assembling the tubes
- Telescopic tube (4)
- Hold spring latch (5)
- Pull out the tube to required length.
- Release spring latch to lock.
- Metal tube (4)
- Connect tubés to each other.
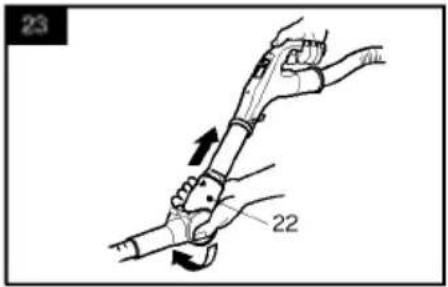
- Elbow tube is for cleaning under the sofa, table and bed easily. (23)
- Connect the elbow tube to the flexible hose and, connect the telescopic tube to the elbow tube. (You can also connect the telescopic tube to the flexible hose without the elbow tube.)
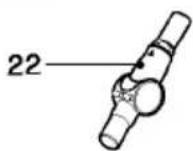
- If you pull the spring latch(22), the elbow tube is bended. (23)
- If you stretch the elbow tube, it is returned to its position.
Using the cleaning head and Accessory Nozzles
Fit the large cleaning head onto the end of the tube.
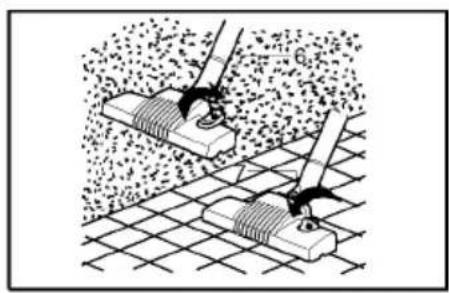
- The 2 position head (6) is equipped with a pedal (7) which allows you to alter its position according to the type of floor to be cleaned.
Hard floor position(tiles, parquet floors...). slide on the lever to lower the brush.
Carpet or rug position. slide on the lever to lift brush up.
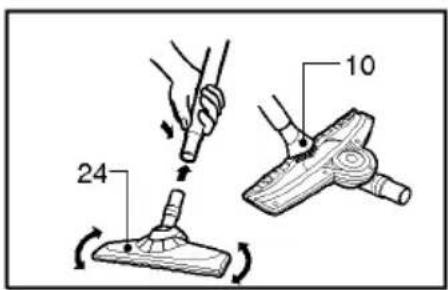
Turbine brush nozzle
- Air adjustment(20)
Slide the air control lever to the right for long type carpet and to the left for short type carpet.
- Cleaning turbine brush nozzle(21)
Press the button on the rear side of the nozzle to separate the air cover. Use the dusting brush & crevice tool to vacuum clean the brush and fan.
- This device (24) is used with the suction hole for device protection mounted. For the suction hole for device protection, its front, side and upper side is enclosed with a soft material in order to prevent damage of the device.
Connect the suction hole for device
protection to the extension pipe for length adjustment.
Remove dusts accumulated where the floor surface of the suction hole for device protection is dirty.
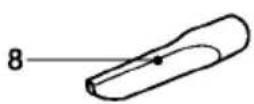
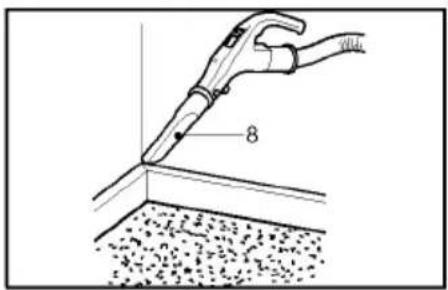
- Crevice Tool (8)
For vacuuming in those normally inaccessible places i.e. reaching cobwebs, or down the side of a sofa!
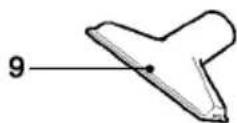
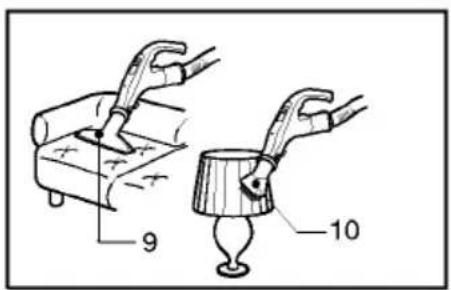
• Upholstery Nozzle (9)
For vacuuming upholstery, mattresses, etc. The thread collectors help to pick up the threads and fluff.
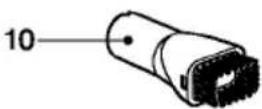
• Dusting brush (10)
For vacuuming picture frames furniture outlines, books and other uneven objects.
How to plug in and use
Pull out the mains lead to the desired length and plug into the socket.
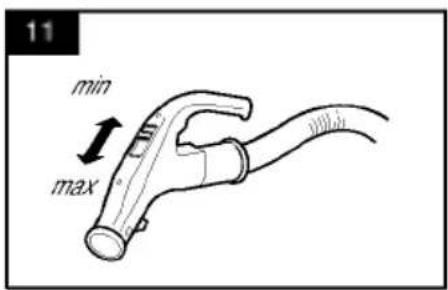
Adjusting the power level
• Electronic power control (11)
Suction capacity increases steplessly up to MAX.
String the cleaner
When you have switched off and unplugged the appliance, press on the button (19) to automatically rewind the cord.(depending on model)
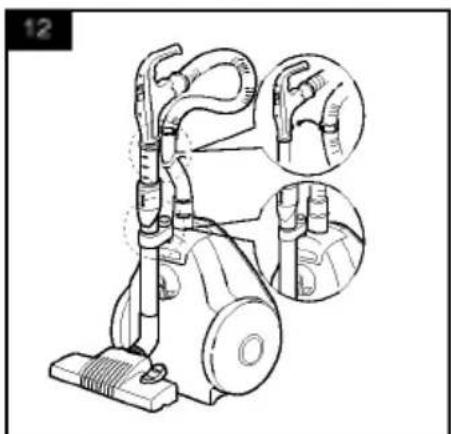
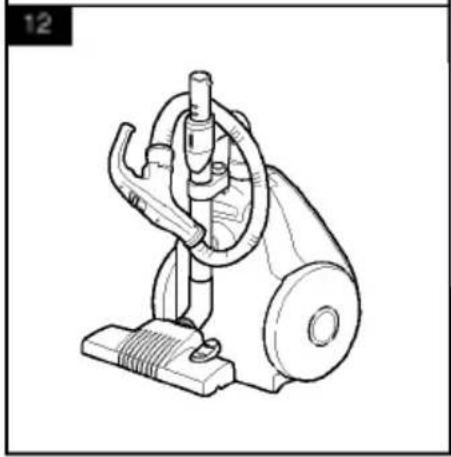
- Use storage clip as shown when storing the cleaner (12)
Changing the dust bag
The dustbag needs changing when the cleaner is set to maximum power and the cleaner head is off the floor but the "bag full" indicator window (13) is completely coloured red.
Even if the dustbag does not appear to be full at this stage, it should be changed.
It could be that a great deal of very fine dust has clogged up the pores of the dust bag.
- Turn off the appliance and unplug it.
- Remove hose.
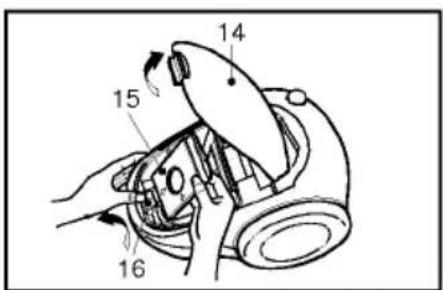
- Open the cover (14)
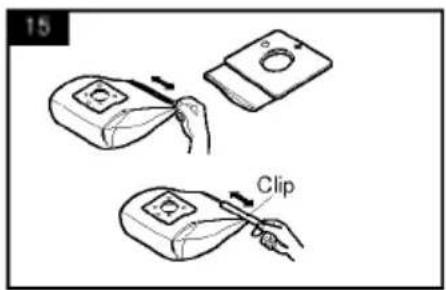
Your appliance is equipped with either a paper dust bag or a fabric dust bag (15)
- Push the lever forwards in the direction of the arrow (16), and pull off the full paper filter bag towards the rear. Remove the bag and throw it away.
- Insert the new paper filter bag into the unit with the arrow pointing downwards (17)
If your appliance is fitted with a dust bag, empty it and replace it.
Note: as the appliance is fitted with a safety device which checks that the bag is in place you cannot close the lid if the bag is not fitted correctly.
Cleaning the motor filter
The motor filter is situated inside the appliance between the dust bag and the motor. Each time that you change the air outlet filter we advise you to remove the motor filter (18) and to clean it by tapping to remove the dirt and then replacing it in the vacuum cleaner.
What to do if your appliance does not work
Check that the appliance is correctly plugged in and that the electrical socket is working.
What to do when the suction performance reduces?
- Stop the appliance and unplug it.
- Check that the tubes, flexible hose and cleaning tool are not blocked.
- Check that the dust bag is not full. Replace it if necessary.
- Check that the air outlet filter is not blocked. Replace it if necessary.
Меры предосторожности
Внимательно прочитайте все инструкции о мерах предосторожности, использованию и уходу за пылесосом.
Пылесос соответствует следующим стандартам
EC:-73/23/EEC, 93/68/EEC-Low Voltage Directive-89/336EEC-EMC Directive.
■ Не разрешайте детям пользоваться пылесосом без присмотра взрослых.
■ Не пользуйтесь пылесосом при поврежденном шнуре питания.
- Если шнур питания поврежден, во избежание опасных последствий его замену должен производить только специалист - работник службы сервиса LG Eletronics.
■ Всегда выключайте пылесос, прежде чем:
• Заменять мешок для пыли
- Заменять или чистить фильтры.
■ Если мешок отсутствует, крышка пылесоса не закроется. Не применяйте силу!
■ Запрещается всасывать пылесосом горючие и взрывчатые вещества (жидкости или газы).
■ Запрещается всасывать пылесосом горячий пепел, угольки и т.п., а также острые предметы.
■ Запрещается всасывать пылесосом воду и другие жидкости.
- Обязательно убедитесь, что ремень для переноски надежно закреппен.
■ При использовании насадки с вращающейся щеткой:
- Не допускайте попадания рук и подручных предметов в работающую щетку.
■ Не используйте пылесос для удаления мелкой пыли.
■ Не подвергайте пылесос воздействию высоких температур.
Использование пылесоса
Подсоединение гибкого шланга
Вставьте наконечник (1) шланга во всасывающее отверстие пылесоса.
Чтобы отсоединить шланг (2), нажмите кнопку (3) и вытяните его наконечник из всасывающего отверстия.
СОЕДИНЕНИЕ ТРУБОК
• Телескопическая трубка (4)
- Нажмите на пружинную защелку (5)
-Вытяните трубку на требуемую длину. - Отпустите пружинную защелку, чтобы зафиксировать трубку.
• Металлическая труба (4)
- Соедините трубки между собой.
- Шарнирная трубка позволит вам легко убраться под диваном, столом или кроватью (23).
- Присоедините шарнирную трубку к гибкому, а затем вставьте в неё раздвижную трубку. (Также можно соединить раздвижную трубу с гибким шлангом напрямую, без шарнирной трубки.)
- Отпустите пружинную защелку (22) чтобы зафиксировать трубку в нужном положении. (23)
- Растяните шарнирную трубку и она вернется в прежнее положение.
Использование чистящей насадки для пола и дополнительных насадк
Присоедините большую чистящую головку к концу трубки пылесоса.
• Двухпозиционная насадка (6) снабжена педалью (7), которая позволяет менять положение насадки в зависимости от типа пола.
Твердые полы (кафель, паркет...)
Передвиньте рычаг, чтобы опустить щетку.
Ковры. Передвиньте рычаг, чтобы поднять щетку.
Турбинная насадка
Регулирование воздушного потока (20)
Передвиньте рычаг регулирования воздушного потока вправо для ковров с длинным ворсом, влево - для ковров с коротким ворсом.
-Чистка турбинной насадки (21)
Нажмите кнопку сзади насадки для того, чтобы снять крышку.
Используйте щетку для удаления пыли и насадку для чистки в труднодоступных местах для очистки турбинной насадки и вентилятора.
- Данное изделие используется с всасывающей насадкой для защиты изделия. В целях защиты передняя,
боковая и верхняя стороны всавывающей насадки отделаны мягким материалом во избежание повреждения изделия. Соедините всасывавдущую насадку для защиты изделия с удлинительной трубкой для регулировки длины.
Удалите скопившуюся пыль, когда рабочая поверхность всасывающей насадки для защиты изделия загрязнится.
• Щетка для щелей (8)
Для уборки в труднодоступных местах, например, паутины в углах или под диваном.
• Щетка для мебели (9)
Для чистки обивки, матрасов и т.п. Щетки для ниток удобны для уборки ниток и ворсинок.
• Щетка для пыли (10)
Для читки рам картин, краев мебели, книг и других неровных предметов.
Включение и использование пылесоса
Вытяните щнур питания на требуемую длину и включите его в розетку.
Установка мощности
- Электронное управление мощностью (11) Мощность всасывания плавно увеличивается до MAX.
Хранение пылесоса
Выключив пылесос и вынув вилку из розетки, нажмите кнопку (19) для смотки шнура (зависит от модели).
- При хранении пылесоса пользуйтесь зажимом для хранения в соответствиис (12)
Смена мешка для пыли
Смена мешка требуется в том случае, когда при работе пылесоса на максимальной мощности индикатор «мешок заполнен» полностью красный (13), а чистящая насадка при этом даже не прикасается к полу.
В этом случае мешок необходимо сменить, даже если на ощупь он не кажется заполненным.
Возможно, поры мешка закупорила очень мелкая пыль.
- Выключите пылесос и выньте вилку
из розетки.
- Отсоедините шланг
- Откройте крышку (14)
Ваш пылесос оборудован либо бумажным, либо тканелвым мешком (15).
(в зависимости от модели).
- Надавите рычаг в направлении стрелки (16) и потяните мешок назад. Выньте мешок и выбросьте его.
- Вставьте новый мешок так, чтобы стрелка указывала вниз (17).
Если мешок для пыли заполнил пылесос, выньте его и замените.
Примечание: так как пылесос снабжен устройством, проверяющим наличие мешка для пыли, Вам не удастся закрыть крышку пылесоса, если мешок закреплен неправильно.
Очистка фильтра мотора.
Фильтр мотора расположен внутри пылесоса между мешком для пыли и мотором. Каждый раз при замене воздуного фильтра мы рекомендуем Вам снимать фильтр мотора (18), вытрахивать его, чтобы очистить от грязи, и устанавливать на место.
Что делать, если пылесос не работает
Проверьте правильность подключения пылесоса к сети и исправность розетки.
Что делать, если снижена всасывающая мощность?
- Выключите пылесос и выньте вилку из розетки.
- Проверьте, не забиты ли мусором трубки, гибкий шланг и чистящая насадка.
- Проверьте, не переполнился ли мешок для мусора. При необходимости смените мешок.
- Проверьте, не забит ли воздушный фильтр. При необходимости смените его.
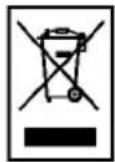
Disposal of your old appliance
- When this crossed-out wheeled bin symbol is attached to a product it means the product is covered by the European Directive 2002/96/EC.
- All electrical and electronic products should be disposed of separately from the municipal waste stream via designated collection facilities appointed by the government or the local authorities.
- The correct disposal of your old appliance will help prevent potential negative consequences for the environment and human health.
- For more detailed information about disposal of your old appliance, please contact your city office, waste disposal service or the shop where you purchased the product.
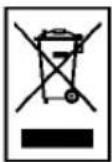
Утилизация старого оборудования
- Символ на устройстве, изображающий перечеркнутое мусорное ведро на колесах, означает, что на изделие распространяется Директива 2002/96/EC.
- Электрические и электронные устройства должны утилизовываться не вместе с бытовым мусором, а через специальные места, указанные правительственными или местными органами власти.
- Правильная утилизация старого оборудования поможет предотвратить потенциально вредное воздействие на окружающую среду и здоровье человека.
- Для получения более подробных сведений о старом оборудовании обратитесь в администрацию города, службу, занимающуюся утилизацией или в магазин, где был приобретен продукт.

LG Electronics Inc.
http://www.lg.ru/
- Basic Parts
- Корпусные детали
- Optional Parts
- Детали, приобретаемые дополнительно
- Accessory
- Вспомогательное оборудование
- Information for your safety
- How to Use
- Connecting the flexible hose
- Assembling the tubes
- Using the cleaning head and Accessory Nozzles
- Turbine brush nozzle
- - Crevice Tool (8)
- • Upholstery Nozzle (9)
- • Dusting brush (10)
- How to plug in and use
- Adjusting the power level
- • Electronic power control (11)
- String the cleaner
- Changing the dust bag
- Cleaning the motor filter
- What to do if your appliance does not work
- What to do when the suction performance reduces?
- Меры предосторожности
- Использование пылесоса
- Подсоединение гибкого шланга
- СОЕДИНЕНИЕ ТРУБОК
- Использование чистящей насадки для пола и дополнительных насадк
- Турбинная насадка
- Регулирование воздушного потока (20)
- -Чистка турбинной насадки (21)
- • Щетка для щелей (8)
- • Щетка для мебели (9)
- • Щетка для пыли (10)
- Включение и использование пылесоса
- Установка мощности
- Хранение пылесоса
- Смена мешка для пыли
- Очистка фильтра мотора.
- Что делать, если пылесос не работает
- Что делать, если снижена всасывающая мощность?
- Disposal of your old appliance
- Утилизация старого оборудования
- LG Electronics Inc.
Merke : LG
Modell : V-C4242HD
Kategori : Støvsuger