BLN2 - Blender Carlton - Gratis bruksanvisning og manual
Finn enhetens veiledning gratis BLN2 Carlton i PDF-format.

Brukerspørsmål om BLN2 Carlton
0 spørsmål om dette apparatet. Svar på dem du kjenner, eller still ditt eget.
Still et nytt spørsmål om dette apparatet
Last ned instruksjonene for din Blender i PDF-format gratis! Finn veiledningen din BLN2 - Carlton og ta den elektroniske enheten tilbake i hendene. På denne siden er alle dokumenter som er nødvendige for bruken av enheten din publisert. BLN2 av merket Carlton.
BRUKSANVISNING BLN2 Carlton

text_image
model BLN2Carlton
natural_image
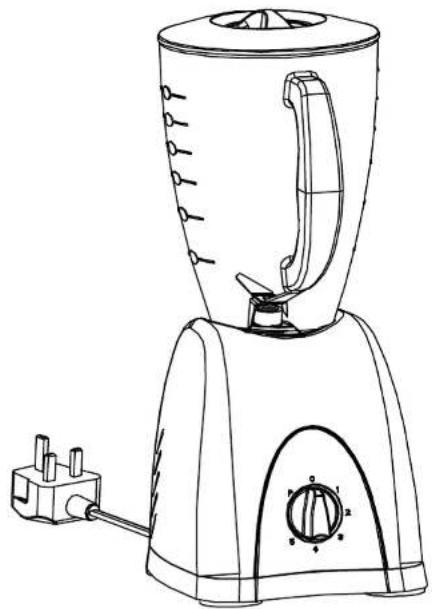
Line drawing of a blender with handle and control knob (no text or symbols)BLENDER
safety first
Always place the blender on a firm and level surface.
- Always remove the main plug from the socket when you have finish using the blender, before you clean the blender, before you put on or remove the container or if any faults occur.
- Wait until the blade have stopped rotating before you remove the jug. Never use this blender without a lid.
- Do not put your hands or any utensils such as forks or spoons into the jug while the blades are rotating.
• Do not immerse in water.
• Children should never be allowed to use this blender. - Never leave the appliance plugged in when there are young children around. Keep the mains lead away from heat.
- Do not use the blender if the mains lead or the housing are visibly damaged.
• Repairs must only be carried out by qualified electricians. - This blender has been designed for domestic quantities only and is not suitable for commercial use.
• This appliance complies with the appropriate EMC safety directives.
for the sake of the environment
Do not simply throw the packaging away. Cardboard packaging can be taken to your local waste paper collection point. Deposit plastic bags made of polyethylene (PE) at PE collection points. Please ask you local authority for the address of your nearest recycling depot.
Do not operate the blender with a damaged cord or plug or if the blender malfunctions or has been dropped or damaged in any way.
specifications
Mains supply: ....220-240V \~50Hz Power consumption: .... 600W
Max operating period: 2 minutes
Because we continually strive to improve our products we may change specifications and designs without prior notice.

Warning. This blender must NOT be earthed.
Cleaning
- Disconnect from the mains before cleaning the blender.
Make sure no water enter the inside of the appliance! Never immerse the blender or base in water and keep the electrical contacts dry! - Clean the blender exterior with a soft damp cloth.
Do not use abrasive cleaners or scouring pads which may damage the finish of the blender. - Rinse the jar under running water.


Should there be a need, the blade assembly can be cleaned separately. Turn the blade anti-clockwise and the part holding the blade in place clockwise.

Only use water and dishwashing liquid to clean the blender. Never put any parts in the dishwasher.
If the power cord becomes damaged, it must be replaced by your service agent or qualified person to prevent a hazard. Please contact the store where you bought your blender
Carlton
BLN2

natural_image
Line drawing of a blender with handle and control knob (no text or symbols)blender
using your blender
getting to know your blender
Fig. 1
text_image
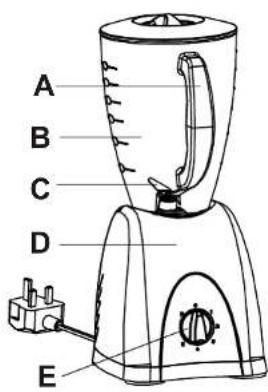
A B C D E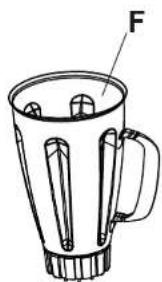
text_image
FDescription of the Appliance
A Handle
B Jug
C Blades
D Base
E Power dial
F Stainless Jug

Caution: Never use the blender without a lid.
natural_image
Line drawing of a blender with a handle and base, showing a drop in the nose (no text or symbols)fig. 2 fig. 3
natural_image
Line drawing of a kettle with lid and handle, showing internal structure (no text or symbols)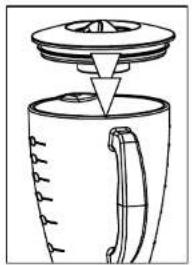
natural_image
Line drawing of a kitchen blender with lid and handle (no text or symbols)fig. 4

text_image
Pulse-Manual operation 0 - Stop 1 - Slowest speed 2 - Slow 3 - Medium speed 4 - Fast 5 - Fasterfig. 5
natural_image
Line drawing of a kettle with a circular object inserted into the top pan (no text or symbols)fig. 6
Assembling the blender
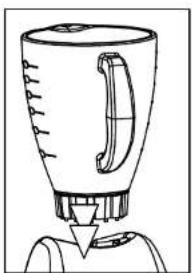
- Place the base on a dry, stable surface.
- Turn the power dial to 0-position.
- Place the jug to the base (fig.2)
Operating the blender
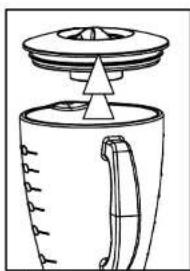
- Place the base on a stable surface.
- Remove the lid (fig. 3) with the ingredients you want to mix.
Note: The blender can be used for mixing liquids, crushed ice, grinding and grating of fruits and vegetables, whipping cream, etc.

Important: Do not exceed the maximum capacity!
- Replace the lid (fig. 4) back onto the jug.
- Connect the plug to the mains socket.
- Rest on hand on the top of blender jar to place lid securely in place.
- Switch on by turning the power dia (fig. 5) to one of the position. (1,2,3,4,5 or 6)
- For controlled cycle operation, press "pulse" button and hold down for about 2 seconds. release the "pulse" button to stop running of blade.
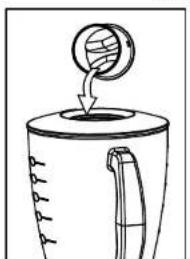
- Put the new ingredients into the refill lid and pour through the hole in the jug (fig. 6).
Place the refill lid back into the hole in the lid and turn it clockwise until it click into position. - When the blending is finished, switch the power dial (fig. 5)
back to the stop-position"0".
- Lift the jug off the base.

Important: Do not operate the blender longer than 2 minutes. After each 2 minutes session the blender must be allowed to cool down for at least 10 minutes.
troubleshooting
If the blender doesn't work please check:
- the power is switched on and the blender switch is on the setting except "0".
- the fuse in the plug.