SL236SPI - Support pour écran plat Chief - Gratis bruksanvisning og manual
Finn enhetens veiledning gratis SL236SPI Chief i PDF-format.

Brukerspørsmål om SL236SPI Chief
0 spørsmål om dette apparatet. Svar på dem du kjenner, eller still ditt eget.
Still et nytt spørsmål om dette apparatet
Last ned instruksjonene for din Support pour écran plat i PDF-format gratis! Finn veiledningen din SL236SPI - Chief og ta den elektroniske enheten tilbake i hendene. På denne siden er alle dokumenter som er nødvendige for bruken av enheten din publisert. SL236SPI av merket Chief.
BRUKSANVISNING SL236SPI Chief
SL-236 PRE-TEST INSTRUCTIONS
Unpack carton and verify kit contents. If any listed parts are missing, immediately contact a Chief Customer Service representative.
- Carefully inspect the SL-236 for any shipping damage. If any damage is apparent, do NOT continue with the installation. Instead, contact Chief for further instructions.
IMPORTANT ! : These Pre-Test Instructions are meant to provide an overview of the pre-test step. ALWAYS read the Installation Instructions in its entirety before beginning the Installation.
NOTE: Refer to the Installation Instructions for a complete list of parts included with the SL-236.
- Carefully place the SL-236 upside down on clean surface.
- Using a small screwdriver, carefully pry one corner of ceiling pan up to allow access to ceiling pan clips. (See Figure 1)
- Pull ceiling pan away from SL-236 until ceiling pan clip releases. Repeat on each corner of SL-236.
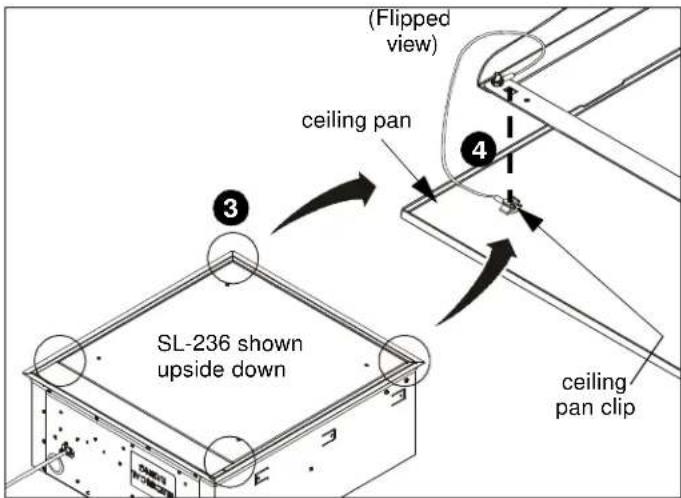
Figure 1
- Attach supports (not provided) using a lag bolt or nut and bolt through the top of lift (at attachment points). (See Figure 2)
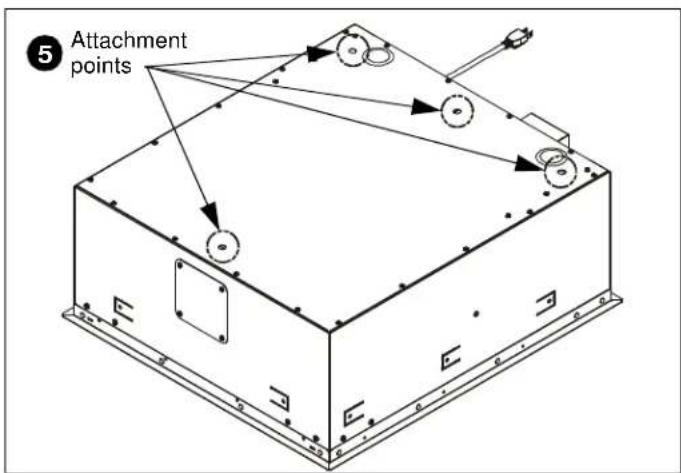
Figure 2
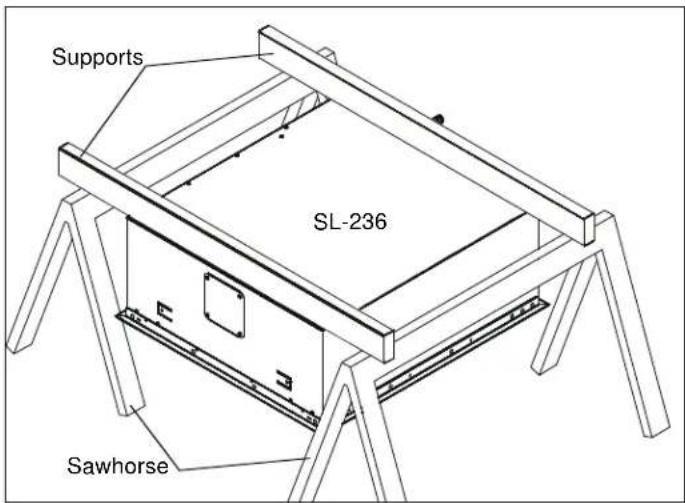
Figure 3
- Suspend the lift at least 3-1/2 ft. above a surface from a suitable structure such as saw horses, ladders or tables. (See Figure 3)
- Remove and save two screws holding side electrical cover in place. (See Figure 4)
- Remove electrical cover. (See Figure 4)
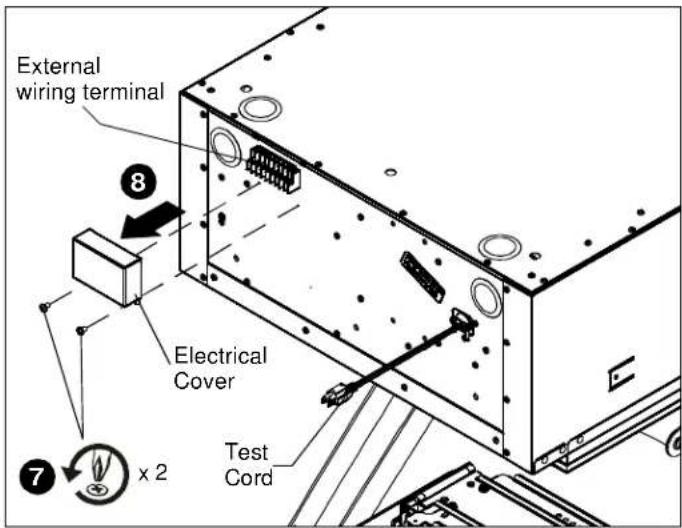
Figure 4
Continued...
- Place the jumper wire (E) on the external wiring terminal contacts labeled 2 and 5, and wire the push button assembly (B) to contacts 1 (red) and 6 (black). (See Figure 5)
- Plug in the SL236 test cord. (See Figure 4)
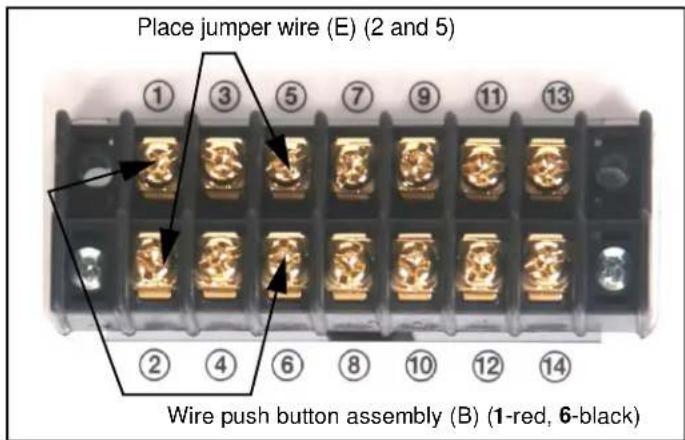
Figure 5
Power Requirements and Wiring
The SL236 requires 120VAC, 60 Hz and 12 amps power to operate.

WARNING: PINCH HAZARD! FINGERS OR HANDS BETWEEN MOVING PARTS CAN LEAD TO SEVERE PERSONAL INJURY! Keep fingers and hands away from mount when operating.
-
Press the push button (B) to test the SL236 while it is still in the pre-test position.
-
Press when the lift is at its top position and it will move down.
- Press when the lift is at its bottom position and it will move up.
- Press while the lift is moving and it will stop.
-
Leave SL236 in the closed position.
-
Continue with the installation steps listed in the Installation Instructions.
Chief® is a registered trademark of Milestone AV Technologies. All rights reserved.

Milestone AV Technologies, and its affiliated corporations and subsidiaries (collectively, "Milestone"), intend to make this manual accurate and complete. However, Milestone makes no claim that the information contained herein covers all details, conditions or variations, nor does it provide for every possible contingency in connection with the installation or use of this product. The information contained in this document is subject to change without notice or obligation of any kind. Milestone makes no representation of warranty, expressed or implied, regarding the information contained herein. Milestone assumes no responsibility for accuracy, completeness or sufficiency of the information contained in this document.

CHIEF®
Our Mounts. Your Vision.
Chief Manufacturing, a products division of Milestone AV Technologies 6436 City West Parkway, Eden Prairie, MN 55344
• P: 800.582.6480 / 952.225.6000 • F:877.894.6918 / 952.894.6918
8800-002174 Rev00
©2014 Milestone AV Technologies, a Duchossois Group Company
01/14