
RETRT700-1 - 보안 카메라 REVO - 무료 사용 설명서
기기 매뉴얼을 무료로 찾기 RETRT700-1 REVO PDF 형식.


| 제품 유형 | 보안 카메라 |
| 브랜드 | REVO |
| 모델 | RETRT700-1 |
| 이미지 센서 | 1/3" Sony Super HAD CCD |
| TV 시스템 | NTSC |
| 총 픽셀 | 976 (H) x 508 (V) |
| 유효 픽셀 | 976 (H) x 494 (V) |
| 주사 주파수 | 15.734 kHz (H) / 59.94 Hz (V) |
| 주사 시스템 | 2:1 인터레이스 |
| 동기화 | 내부 / 라인락 |
| 해상도 | 700 TV 라인 (컬러), 750 TV 라인 (흑백) |
| 최소 조도 | IR LED OFF: 0.15 Lux, IR LED ON: 0 Lux |
| 신호 대 잡음비 | 52 dB 이상 |
| 비디오 출력 | CVBS: 1.0 Vp-p / 75Ω |
| 렌즈 제어 | DC 아이리스 |
| SSDR (슈퍼 다이내믹 레인지) | 예, 조정 가능 |
| 화이트 밸런스 | ATW, 야외, 실내, 수동, AWC |
| 역광 보정 | 사용자 BLC, HLC, 끄기 |
| DNR3 (3D 노이즈 감소) | 예, 조정 가능 |
| 주야간 | 자동, 컬러, 흑백, 외부 |
| 특수 기능 | 움직임 감지, 프라이버시 마스크, DIS, PIP, 디지털 줌 |
| OSD 언어 (NTSC) | 한국어, 영어, 프랑스어, 스페인어, 일본어, 포르투갈어 |
| 전원 공급 | 12 V DC |
| 청소 | 부드럽고 깨끗한 천으로 렌즈와 유리를 닦으십시오. |
| 안전 | Class A 디지털 기기, FCC Part 15 |
자주 묻는 질문 - RETRT700-1 REVO
사용자 질문 RETRT700-1 REVO
0 질문 이 기기에 대해. 알고 있는 것에 답하거나 자신의 질문을 하세요.
이 기기에 대한 새로운 질문하기
기기 설명서 다운로드 보안 카메라 무료 PDF 형식! 매뉴얼 찾기 RETRT700-1 - REVO 전자 기기를 다시 손에 넣으세요. 이 페이지에는 기기 사용에 필요한 모든 문서가 게시되어 있습니다. RETRT700-1 브랜드 REVO.
사용 설명서 RETRT700-1 REVO
Operating Manual
USER'S INSTRUCTIONS
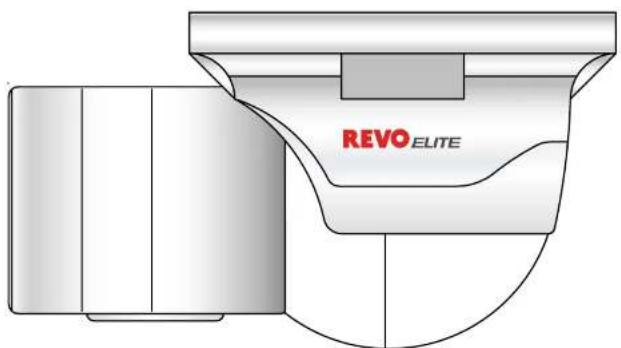
natural_image
Technical illustration of a REVO ELITE device component (no text or symbols on the diagram itself)USER'S MANUAL

CAUTION RISK OF ELECTRIC SHOCK DO NOT OPEN

CAUTION :
TO REDUCE THE RISK OF ELECTRIC SHOCK,
DO NOT REMOVE COVER (OR BACK),
NO USER SERVICEABLE PARTS INSIDE.
REFER SERVICING TO QUALIFIED
SERVICE PERSONNEL

The lightning flash with an arrowhead symbol, within an equilateral triangle is intended to alert the user to the presence of uninsulated dangerous voltage within the product's enclosure that may be of sufficient magnitude to constitute a risk of electric shock to persons.

The exclamation point within an equilateral triangle is intended to alert the user to the presence of important operating and maintenance (servicing) instructions in the literature accompanying the appliance.
INFORMATION - This equipment has been tested and found to comply with limits for a Class A digital device, pursuant to part 15 of the FCC Rules.
These limits are designed to provide reasonable protection against harmful interference when the equipment is operated in a commercial environment.
This equipment generates, uses, and can radiate radio frequency energy and, if not installed and used in accordance with the instruction manual, may cause harmful interference to radio communications.
USER'S MANUAL
Contents
Camera Features 4
Installing & Adjusting 5
Dimension & Specification 6
OSD Control Button 7
On Screen Dispaly (OSD) Menu 8
Accessing the OSD Menu Settings continued 9
Lens 10
Exposure 10
SSDR 12
White Balance.... 13
BLC 14
DNR3 16
Day/Night 17
Special 18
Image Adjust.... 18
Cam Title 19
Sync 20
11.10
USER'S MANUAL
Camera Features
- Ultra High Sensitivity
The built-in high sensitivity COLOR CCD produces a clear image even in 0.0001Lux(Sens-up x512) lower illumination.
700TV Lines
By adopting a diagonal 6mm(1/3") 520,000(NTSC) pixel, 610,000(PAL) pixel SONY CCD, the camera produces clear picture quality with a horizontal resolution of 700 TV lines for color and a horizontal resolution of 750 TV lines for BW mode.
DNR3
The high-performance SV-V DSP chip effectively removes low-light gain noise and ghosting to provide clear images even in dark environments.
Day&Night
The camera has a function that automatically selects the mode that is appropriate for daytime or night-time conditions. The COLOR mode operates in daytime conditions to provide optimum colors, and BW mode operates in night-time conditions to enhance the definition of the image.
- SSDR
For images with high contrast between bright and dark Areas from difficult lighting conditions such as backlighting, this camera selectively illuminates darker Areas while rataining the same light level for brighter Areas to even out the overall brightness.
USER'S MANUAL
Installing & Adjusting
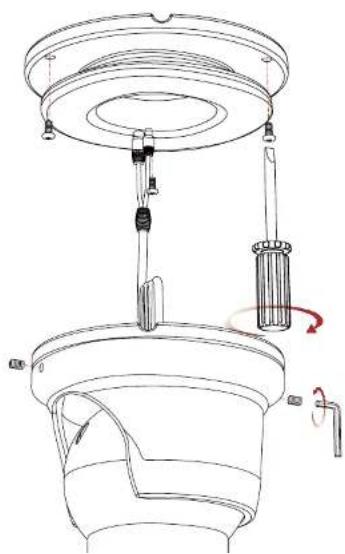
1. Installation
natural_image
Technical line drawing of a mechanical assembly with no visible text or symbols- Place the mounting plate on a flat installation surface and mount with the provided screws.
- Feed the cable through the center of the mounting plate.
- Place the camera body in the mounting plate socket and hold.
- Then place the outer plate over the camera body & mounting plate and tighten side screws to lock the camera into place.
- Loosen side screws to adjust camera angle as needed, then tighten the side screws to lock into place.
USER'S MANUAL
Dimension & Specification
1. Dimension & Connection
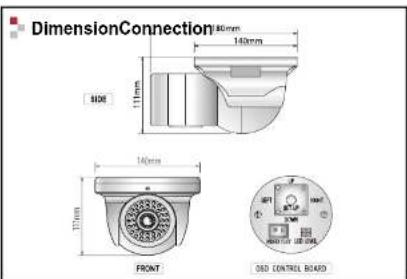
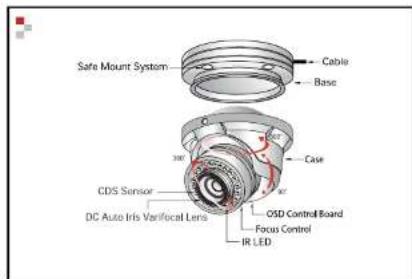
WARNING: To prevent electric shock and risk fire hazards, do not use power sources other than that specified.
2. Specification
| Image Pick-Up Device | 1/3" Sony Super HAD CCD |
| TV System | NTSC |
| Total Pixels | 976(H) * 508(V) |
| Effective Pixels | 976(H) * 494(V) |
| Scanning Frequency | 15.734KHz(H) & 59.94Hz(V) |
| Scanning System | 2:1 Interlace |
| Synchronization | Internal / Line-Lock |
| Resolution | 700TVLines |
| Minimum Illumination | IR LED OFF : 0.15Lux, IR LED ON : 0Lux |
| S/N Ratio | More than 52dB |
| Video Output | CVBS: 1.0Vpm / 75P |
USER'S MANUAL
OSD Control Button
- OSD Button could be used when it needs to OSD control.

▲ Up button : Moves the cursor upwards. Use this button to select an item or adjust the parameters.
USER'S MANUAL
On Screen Display (OSD) Menu
On Screen Display (OSD) Menu
Camera functions and settings can be adjusted or changed by activating the OSD manu.
When the OSD menu is activated text will display on the monitor. The user can then move the cursor to the desired function to change the setting.
SETUP Menu
| LENS | • DC | ||
| EXPOSURE | • BRIGHTNESS• SENS-UP | • SHUTTER• RETURN | • AGC |
| SSDR | • OFF | • ON | |
| WHITE BALANCE | • ATW• MANUAL | • OUTDOOR• ATW → SET | • INDOOR |
| BACKLIGHT | • OFF | • USER BLC | • HLC |
| DNR3 | • OFF | • ON | |
| DAY/NIGHT | • AUTO• EXTERN | • COLOR | • B/W |
USER'S MANUAL
Accessing the OSD Menu Settings continued
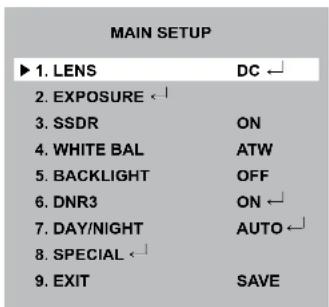
- Press the SETUP button.
- Settings can now be made. The SETUP menu is displayed on the monitor.
-
Select a menu item from the list available by using the Up and Down buttons.
-
Functions are selected using up and down buttons.
- Place the cursor over a desired item, the selected position is displayed.

USER'S MANUAL
■ Lens
Using this function, you can control the screen brightness.
- When the SETUP menu screen is displayed, select 'LENS' by using the Up and Down buttons so that the arrow indicates 'LENS'.
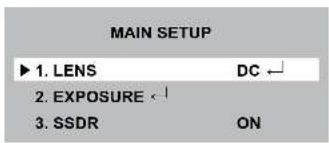
▶ DC : You can adjust the minimum shutter and maximum value of shutter when DC Lens mode is selected.
- Press SETUP to choose from the sub menu items as listed below.
▶ BRIGHTNESS : Adjusts the video brightness (selectable from 1 \~ 70).
▶ IRIS SPEED : Adjusts the iris control speed of the DC lens. If the control speed is too slow or fast, use this menu to adjusts the speed.
▶ FOCUS ADJ. : Press SET to enter focus menu. Then to adjust the lens focus correctly, ensure "MODE" is set to 'ON'. After lens focus has been adjusted, set "MODE" to 'OFF'
NOTE
- If color rolling occurs when using a DC lens, set Shutter to ---
- Some lenses may not work properly, depending on the setting of the BRIGHTNESS LEVEL.
USER'S MANUAL
- Select the desired mode using Up and Down buttons.
EXPOSURE SETUP
| ▶ 1/1 BRIGHTNESS | 25 |
| 2. SHUTTER | --- |
| 3. AGC | HIGH |
| 4. SENS-UP | OFF |
| 5. RETURN ← |
▶ BRIGHTNESS : Adjusts the exposure brightness.
▶ SHUTTER : You can select either auto or manual shutter.
- A.FLK : Select this when you experience picture flicker, which can happen when there is a clash with the frequency of the installed lighting.
- ESC : Select this to control the shutter speed automatically. If ESC is selected, the shutter speed is automatically controlled depending on the ambient illumination of the subject.
- MANUAL: You can control shutter speed manually. (1/60 \~ 1/120,000)
-
-
- : Shutter speed is fixed at 1/60 sec. (1/50 sec.)
-
▷ SHUTTER continued
NOTE
- When using a DC lens, set the shutter mode to A.FLK if color rolling occurs.
- When the SHUTTER is set to ESC after selecting Internal Synchronization Type, the picture
USER'S MANUAL
▶ RETURN : Select this to save the changes in the EXPOSURE menu and return to the SETUP menu.
NOTE
- If you press the SET button in 'AUTO' mode, you can adjust brightness by increasing or decreasing the shutter speed. (x2 \~x512)
- Note that the higher the zoom level, the brighter the screen, but the more likely it is that an after-image will appear.
- Although noise, spots and whitish symptoms may occur in SENS-UP operation when the zoom level is increased, this is normal.
■ SSDR (Super Dynamic Range)
SSDR illuminates darker areas of an image while retaining the same light level for brighter areas to even out the overall brightness of images with high contrast between bright and dark areas.
| MAIN SETUP | |
| 1. LENS | DC |
| 2. EXPOSURE | |
| 3. SSDR | ON |
| 4. WHITE BAL | ATW |
| 5. BACKLIGHT | OFF |
- When the SETUP menu screen is displayed, select 'SSDR' by using the Up and Down buttons so
USER'S MANUAL
■ White Balance control
Use the White Balance Function to adjust the screen color.
-
When the SETUP menu screen is displayed, select 'WHITE BAL' by using the Up and Down buttons so that the arrow indicates 'WHITE BAL'.
-
Select a desired mode using the Left and Right buttons.
| MAIN SETUP | |
| 1. LENS | DC ← |
| 2. EXPOSURE ← | |
| 3. SSDR | ON |
| 4. WHITE BAL | ATW |
| 5. BACKLIGHT | OFF |
Select one of the following 5 modes, as appropriate for your purpose.
▶ ATW : Select this when the color temperature is between 1,700°K and 11,000°K.
▶ OUTDOOR : Select this when the color temperature is between 1,700°K and 11,000°K. (sodium light inclusion)
▶ INDOOR : Select this when the color temperature is between 4,500°K and 8,500°K.
▶ MANUAL : Select this to fine-tune White Balance manually. Set White Balance first by using the ATW or AWC mode. After that switch to MANUAL mode, fine-tune the White Balance and then press the SET button.
▶ AWC → SET: To fine the optimal luminance level for the current environment, point the camera towards a sheet of white paper and press the Fuction Setup switch. If the environment changes, readjust it.
USER'S MANUAL
■ BLC (Back Light Compensation)
- When the SETUP menu screen is displayed, select 'BACKLIGHT' by using the Up and Down buttons so that the arrow indicates 'BACKLIGHT'.

- Select a desired mode using the Left and Right buttons depending on the camera purpose.
▶ USER BLC : Enables a user to select a desired area on a picture and view that area more clearly.
- LEVEL: Adjust level of the HLC function.
- TOP/BOTTOM/LEFT/RIGHT : Adjust the area to be enhanced.


USER'S MANUAL
HLC SETUP
| 1. LEVEL | MIDDLE |
| 2. LIMIT | NIGHT ONLY |
| 3. MASK COLOR | BLACK |
| 4. MASK TONE | 5 |
| 5. TOP | 10 |
| 6. BOTTOM | 105 |
| 7. LEFT | 10 |
| 8. RIGHT | 210 |
| 9. RETURN ← |
▷ HLC continued
HLC OFF
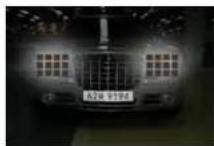
HLC ON
▶ OFF : Not being used.
3. Select a desired mode using the Left and Right buttons and press the SET button.
▶ BLC : Select 'BLC' to adjust the area to be enhanced then adjust the level.
| BLC SETUP | |
| ▶ LEVEL | MIDDLE |
| TOP | 27 |
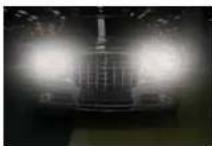
▶ HLC : Enable the user to change the level limit, mask color/tone and area.
| BLC SETUP | |
| LEVEL | MIDDLE |
| LIMIT | NIGHT ONLY |
| MASK COLOR | BLACK |
USER'S MANUAL
■ DNR3
This function reduces the background noise in a low luminance environment.
- When the SETUP menu screen is displayed, select 'DNR3' by using the Up and Down buttons so that the arrow indicates 'DNR3'.

- Select a desired mode using the Left and Right buttons.
▶ OFF : Deactivates DNR3. Noise is not reduced.
▶ ON : Activates DNR3 so that noise is reduced.
- Set the DNR3 mode to 'ON' and press the SET button. Then you can adjust the noise reduction level.

USER'S MANUAL
■ Day/Night
Yon can display pictures in color or black and white.
- When the SETUP menu screen is displayed, select 'DAY/NIGHT' by using the Up and Down buttons so that the arrow indicates 'DAY/NIGHT'.
| MAIN SETUP | |
| 1. LENS | DC ← |
| 2. EXPOSURE ← | |
| 3. SSDR | ON |
| 4. WHITE BAL | ATW |
| 5. BACKLIGHT | OFF |
| 6. DNR3 | ON ← |
| 7. DAY/NIGHT | COLOR |
- Select a desired mode using the Left and Right buttons according to the picture display you want.
▶ EXTERN : This mode allows you to apply a desired filter to external signals.
▶ COLOR : The picture is always displayed in color.
▶ B/W : The picture is always displayed in black and white.
You can turn on or off the burst signal on B/W mode.
▶ AUTO : The mode is switched to 'COLOR' in a normal environment, but switches to 'B/W' mode when ambient illumination is low. To set up the switching time for AUTO mode, press the SET button. You can turn on or off the burst signal on B/W mode.
| AUTO SETUP | |
| ▶ 1. BURST MODE | ON |
USER'S MANUAL
■ Special
- When the SETUP menu screen is displayed, select 'SPECIAL' by using the Up and Down buttons so that the arrow indicates 'SPECIAL'. Press SETUP to enter the 'SPECIAL' menu.

- Select a desired mode using the Up and Down buttons.
▶ IMAGE ADJ. :
1) When the SETUP menu screen is displayed, select 'IMAGE ADJ.' by using the Up and Down buttons so that the arrow indicates 'IMAGE ADJ.'. Press SETUP to enter 'IMAGE ADJ.'.

2) Select a desired mode using the Up and Down buttons.
USER'S MANUAL
- PIP (Picture-in-Picture) : Displays a full size image along with the thumbnail to provide more detailed information. The position of the thumbnail is adjustable.
- D-ZOOM: You can use a digital zoom of x1 \~ x16.
- FONT COLOR : You can change the OSD font color.
- LANGUAGE: You can select the menu language.
- NTSC : Korean, English, French, Spanish, Japanese, Portuguese.
- PAL : English, Chinese, German, Italian, French, Spanish, Russian, Serbian, Swedish, Danish, Turkish, Portuguese.
- SHARPNESS: As you increase this value, the picture outline becomes stronger and clearer. Adjust this value appropriately depending on the sharpness of the picture.
- RETURN : Select this to save the settings for the IMAGE ADJ. menu and to return to the SETUP menu.
NOTE
- When the REVERSE mode is enabled, the text on the screen will not flip.
- If you increase the SHARPNESS level too high, the picture may become distorted or noise may appear.
▶ CAM TITLE : If you enter a title, the title will appear on the monitor.
1) If the SPECIAL menu screen is displayed, use the Up and Down buttons so that the arrow indicates 'CAM TITLE'.
2) Set it to 'ON' by using the Left and Right buttons.
3) Press the SET button.
4) Use the 4 direction buttons to move to a desired letter and select the letter by pressing the SET button. Repeat this to enter multiple letters. You can enter up to 15 letters.
NOTE
- When the CAM TITLE menu is 'OFF', on title will be displayed on the monitor screen even if you enter one.
- Only English is available is this mode.
- If you move the cursor to CLR and press the SET button, all the letters are deleted. To edit a letter, change the cursor to the button left arrow and press the SET button. Move the cursor over the letter to be edited, move the cursor to the letter to be inserted and then press the SET button.
▶ SYNC : In areas where the supply is at 60Hz, you can synchronize the output phase of multiple cameras using the power synchronization function (Line-Lock) without using a synchronization signal generator.
- INT : Internal Synchronization Type.
• L/L : Power Synchronization Type, Line-Lock.
- Press the Function Setup switch.
- You can select a desired phase from 0 to 359 when select 'PHASE'.
SYNC
▶ PHASE 0

Press SET to Return
NOTE
- When using AC power at 60Hz frequency, you can use the L/L type synchronization.
- When the power is DC 12V, or when VPS is set to ON, the SYNC menu is fixed to the 'INT' mode.
USER'S MANUAL
▶ MOTION DET continued
MASK AREA
| 1. AREA | AREA1 | |
| 2. MODE | OFF | |
| 3. TOP | ||||*||||||||| | 30 |
| 4. BOTTOM | ||||*||||||||| | 110 |
| 5. LEFT | *||||||||||||| | 25 |
| 6. RIGHT | ||||*||||||||| | 110 |
| 7. RETURN ← | ||
- MASK AREA : Specify a detection exception area to mask. Select a mask area number and specify the size and position.
- AREA : Select up to 4 areas.
- MODE : Turn the selected area ON or OFF.
- TOP/BOTTOM/LEFT/RIGHT : Adjust the size and position of the selected area.
- RETURN : Select this to save the mask area menu setting, and return to the intelligence menu.
- SENSITIVITY: Set the sensitivity of the motion detection. The lower the level means the higher the sensitivity.
- DETECT SIZE : Selects an object size to detection on the screen. The higher the lwwwl means the larger the detection size.
- RETURN: Select this to save the motion menu settings and return to the special menu.
▶ PRIVACY : Mask an area you want to hide on the screen.
1) When the SPECIAL menu screen is displayed, press the Up and Down buttons so that the arrow indicates 'PRIVACY'.
USER'S MANUAL
▶ DIS (Digital Image Stabilizer): This function mitigates any picture movement due to external factors such as wind.
NOTE
- As the DIS function uses the digital zoom, the camera's resolution will decrease.
- DIS doesn't operate when background illumination is low, or then object pattern is monotonic (such as a white wall, or sky).
▶ PROFILE : Profile is a set of predefined settings for various conditions.
1) When the SPECIAL menu screen is displayed, press the Up and Down buttons so that the arrow indicates 'PROFILE'.
2) Set up the mode using the 4 direction buttons.
BASICDAY/NIGHTBACKLIGHTITSINDOORUSER
| SHUTTER | --- | --- | --- | MANUAL(1/250) | A.FLK | - |
| GAIN | HIGH | HIGH | HIGH | HIGH | HIGH | - |
| WHITE BAL | ATW | ATW | ATW | OUTDOOR | INDOOR | - |
| BACKLIGHT | OFF | OFF | USER BLC | OFF | OFF | - |
| SSNR3 | ON | ON | ON | ON | ON | - |
| DAY/NIGHT | AUTO | AUTO | AUTO | AUTO | AUTO | - |
- BASIC: Adjusts the settings for the most commonly found environment.
- DAY/NIGHT · Optimizes settings for the respective day/night conditions
USER'S MANUAL
■ Exit
Select a desired EXIT mode using the Left and Right buttons depending on the camera purpose.
▶ SAVE : Save the current settings and exit the MAIN SETUP menu.
▶ NOT SAVE : Do not save the current settings and exit the MAIN SETUP menu.
▶ RESET : Resets the camera settings to the factory defaults. Language and monitor settings are not initialized.
USER'S MANUAL
■ Trouble Shooting
| PROBLEM | POSSIBLE CAUSE |
| Northing appears on the screen. | Check the power cable, power supply output and video connection between the camera and monitor. |
| The image on the screen is dim. | Are the camera lens or the lens glass dirty?Clean the lens / glass with a soft clean cloth.Adjust the monitor controls, as required.If the camera is facing a very strong light, change the camera position.Adjust the lens focus. |
| The image on the screen is dark. | Adjust the contrast control of the monitor.If there is an intermediate device, correctly set the 75Ω/Hi-z. |
| The camera is not working properly and the surface of the camera is hot. | Check the camera is correctly connected to an appropriate regulated power source. |
| Motion Detection is not activated. | Has MOTION DET been set to ON in the menu?Has MD AREA been properly defined? |
| The color of the |
USER'S MANUAL
USER'S MANUAL
USER'S MANUAL
- Operating Manual
- USER'S INSTRUCTIONS
- USER'S MANUAL
- CAUTION RISK OF ELECTRIC SHOCK DO NOT OPEN
- CAUTION :
- Contents
- Camera Features
- - Ultra High Sensitivity
- 700TV Lines
- DNR3
- Day&Night
- - SSDR
- Installing & Adjusting
- Installation
- Dimension & Specification
- Dimension & Connection
- Specification
- OSD Control Button
- On Screen Display (OSD) Menu
- Accessing the OSD Menu Settings continued
- ■ Lens
- NOTE
- ■ SSDR (Super Dynamic Range)
- ■ BLC (Back Light Compensation)
- HLC SETUP
- ▷ HLC continued
- ■ DNR3
- ■ Day/Night
- ■ Special
- SYNC
- ■ Exit
브랜드 : REVO
모델 : RETRT700-1
카테고리 : 보안 카메라