
BE634LGS1W - Mikroaaltouunit SIEMENS - Ilmainen käyttöohje ja opas
Löydä laitteen käyttöohje ilmaiseksi BE634LGS1W SIEMENS PDF-muodossa.


Käyttäjien kysymyksiä aiheesta BE634LGS1W SIEMENS
0 kysymys tästä laitteesta. Vastaa tuntemiisi tai esitä omasi.
Esitä uusi kysymys tästä laitteesta
Lataa ohjeet laitteellesi Mikroaaltouunit PDF-muodossa ilmaiseksi! Löydä käyttöohjeesi BE634LGS1W - SIEMENS ja ota elektroninen laitteesi takaisin hallintaan. Tällä sivulla julkaistaan kaikki laitteidesi käyttöön tarvittavat asiakirjat. BE634LGS1W merkiltä SIEMENS.
KÄYTTÖOHJE BE634LGS1W SIEMENS
Table of contents
Intended use.... 4
Important safety information 4
General information. 4
Microwave 5
Causes of damage 6
Environmental protection 7
Environmentally-friendly disposal 7
Getting to know your appliance 7
Control panel....7
Controls. 7
Display....8
Operating modes menu. 8
Further information 8
Cooking compartment functions 8
Accessories 9
Before using for the first time.... 9
Initial use 9
Cleaning the cooking compartment and accessories . . . 9
Operating the appliance 10
Switching the appliance on and off 10
Operation. 10
Selecting an operating mode. 10
Microwave.... 11
Cookware 11
Microwave power settings.... 11
Setting the microwave.... 11
Grilling.... 12
Setting the grill. 12
Setting the microwave to combi-mode 13
Timer 14
Setting the timer 14
Programmes....14
Setting a programme.... 14
Information on the programmes 15
Resting time 15
Programme table.... 15
Basic settings.... 17
Changing settings 17
List of settings 17
Power cut 17
Changing the time 17
Cleaning 18
Cleaning agent 18
Trouble shooting 19
Customer service....20
E number and FD number.... 20
Technical specifications 20
Tested for you in our cooking studio.... 21
Defrosting 21
Defrosting, heating up or cooking frozen food. ..... 22
Heating 22
Cooking 23
Microwave tips. 24
Grilling 24
Combined grill and microwave 24
Test dishes 25
Cooking only using the microwave 25
Defrosting only using the microwave. 25
Cooking with the microwave and grill 25
Additional information on products, accessories, replacement parts and services can be found at www.siemens-home.bsh-group.com and in the online shop www.siemens-home.bsh-group.com/eshops

Intended use
Read these instructions carefully. Only then will you be able to operate your appliance safely and correctly. Retain the instruction manual and installation instructions for future use or for subsequent owners.
This appliance is only intended to be fully fitted in a kitchen. Observe the special installation instructions.
Check the appliance for damage after unpacking it. Do not connect the appliance if it has been damaged in transport.
Only a licensed professional may connect appliances without plugs. Damage caused by incorrect connection is not covered under warranty.
This appliance is intended for domestic use only. The appliance must only be used for the preparation of food and drink. The appliance must be supervised during operation. Only use this appliance indoors.
This appliance is intended for use up to a maximum height of 4000 metres above sea level.
This appliance may be used by children over the age of 8 years old and by persons with reduced physical, sensory or mental capabilities or by persons with a lack of experience or knowledge if they are supervised or are instructed by a person responsible for their safety how to use the appliance safely and have understood the associated hazards.
Children must not play with, on, or around the appliance. Children must not clean the appliance or carry out general maintenance unless they are at least 15 years old and are being supervised.
Keep children below the age of 8 years old at a safe distance from the appliance and power cable.
Always slide accessories into the cooking compartment the right way round.
→ "Accessories" on page 9

Important safety information
General information
⚠ Warning – Risk of fire!
Combustible items stored in the cooking compartment may catch fire. Never store combustible items in the cooking compartment. Never open the appliance door if there is smok inside. Switch off the appliance and unplug it from the mains or switch off the circuit breaker the fuse box.
⚠ Warning – Risk of burns!
- The appliance becomes very hot. Never touch the interior surfaces of the cooking compartment or the heating elements. Always allow the appliance to cool down. Keep children at a safe distance.
- Accessories and ovenware become very hot. Always use oven gloves to remove accessories or ovenware from the cooking compartment.
- Alcoholic vapours may catch fire in the hot cooking compartment. Never prepare food containing large quantities of drinks with a high alcohol content. Only use small quantities of drinks with a high alcohol content. Open the appliance door with care.
⚠ Warning – Risk of scalding!
- The accessible parts become hot during operation. Never touch the hot parts. Keep children at a safe distance.
- When you open the appliance door, hot steam may escape. Open the appliance door with care. Keep children at a safe distance.
- Water in a hot cooking compartment may create hot steam. Never pour water into the hot cooking compartment.
⚠ Warning – Risk of injury!
- Scratched glass in the appliance door may develop into a crack. Do not use a glass scraper, sharp or abrasive cleaning aids or detergents.
- The hinges on the appliance door move when opening and closing the door, and you may be trapped. Keep your hands away from the hinges.
⚠ Warning – Risk of electric shock!
- Incorrect repairs are dangerous. Repairs may only be carried out and damaged power cables replaced by one of our trained after-sales technicians. If the appliance is defective, unplug the appliance from the mains or switch off the circuit breaker in the fuse box. Contact the after-sales service.
- The cable insulation on electrical appliances may melt when touching hot parts of the appliance. Never bring electrical appliance cables into contact with hot parts of the appliance.
- Do not use any high-pressure cleaners or steam cleaners, which can result in an electric shock.
- A defective appliance may cause electric shock. Never switch on a defective appliance. Unplug the appliance from the mains or switch off the circuit breaker in the fuse box. Contact the after-sales service.
⚠ Warning – Hazard due to magnetism!
Permanent magnets are used in the control panel or in the control elements. They may affect electronic implants, e.g. heart pacemakers or insulin pumps. Wearers of electronic implants must stay at least 10 cm away from the control panel.
Microwave
⚠ Warning – Risk of fire!
- Using the appliance for anything other than its intended purpose is dangerous and may cause damage.
The following is not permitted: drying out food or clothing, heating slippers, grain or cereal pillows, sponges, damp cleaning cloths or similar.
For example, heated slippers and grain or cereal pillows may catch fire, even several hours after they have been heated. The appliance must only be used for the preparation of food and drinks.
- Food may catch fire. Never heat food in heat-retaining packages.
Do not leave food heating unattended in containers made of plastic, paper or other combustible materials.
Do not select a microwave power or time setting that is higher than necessary. Follow the information provided in this instruction manual.
Never use the microwave to dry food.
Never defrost or heat food with a low water content, e.g. bread, at too high a microwave power or for too long.
- Cooking oil may catch fire. Never use the microwave to heat cooking oil on its own.
⚠ Warning – Risk of explosion!
Liquids and other food may explode when in containers that have been tightly sealed. Never heat liquids or other food in containers that have been tightly sealed.
⚠ Warning – Risk of burns!
- Foods with peel or skin may burst or explode during, or even after, heating. Never cook eggs in their shells or reheat hard-boiled eggs. Never cook shellfish or crustaceans.
Always prick the yolk when baking or poaching eggs. The skin of foods that have a peel or skin, such as apples, tomatoes, potatoes and sausages, may burst. Before heating, prick the peel or skin. - Heat is not distributed evenly through baby food. Never heat baby food in closed containers. Always remove the lid or teat. Stir or shake well after the food has been heated. Check the temperature of the food before it is given to the child.
- Heated food gives off heat. The ovenware may become hot. Always use oven gloves to remove ovenware or accessories from the cooking compartment.
- Airtight packaging may burst when food is heated. Always observe the instructions on the packaging. Always use oven gloves to remove dishes from the cooking compartment.
- The accessible parts become very hot when in operation. Never touch hot parts. Keep children at a safe distance.
- Using the appliance for anything other than its intended purpose is dangerous.
You are not permitted to use it to dry food or clothing or to warm slippers, grain or cereal pillows, sponges, damp cleaning cloths or the like.
This is because, for instance, overheated slippers, grain or cereal pillows, sponges and damp cleaning cloths, etc., may cause burns to the skin.
⚠ Warning – Risk of scalding!
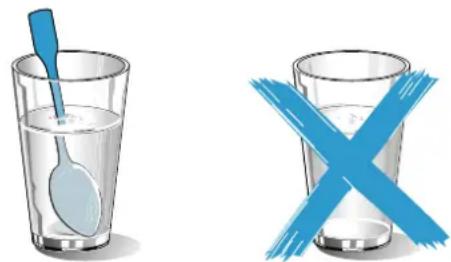
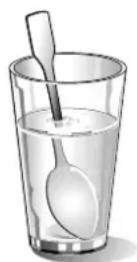
- There is a possibility of delayed boiling when a liquid is heated. This means that the liquid reaches boiling temperature without the usual steam bubbles rising to the surface. Even if the container only vibrates a little, the hot liquid may suddenly boil over and spatter. When heating, always place a spoon in the container. This will prevent delayed boiling.
⚠ Warning – Risk of injury!
- Unsuitable ovenware may crack. Porcelain or ceramic ovenware can have small perforations in the handles or lids. These perforations conceal a cavity below. Any moisture that penetrates this cavity could cause the ovenware to crack. Only use microwave-safe ovenware.
- If using the appliance in microwave mode only, placing cookware and containers made of metal or featuring metal detailing inside the appliance may cause sparks when the appliance is operating. This may damage the appliance. Never use metal containers when using the appliance in microwave mode only.
⚠ Warning – Risk of electric shock!
The appliance is a high-voltage appliance. Never remove the casing.
⚠ Warning – Risk of serious damage to health!
- The surface of the appliance may become damaged if it is not cleaned properly. Microwave energy may escape. Clean the appliance on a regular basis, and remove any food residue immediately. Always keep the cooking compartment, door seal, door and door stop clean. "Cleaning" on page 18
- Microwave energy may escape if the cooking compartment door or the door seal is damaged. Never use the appliance if the cooking compartment door or the door seal is damaged. Contact the after-sales service.
- Microwave energy will escape from appliances that do not have any casing. Never remove the casing. For any maintenance or repair work, contact the after-sales service.
Causes of damage
Caution!
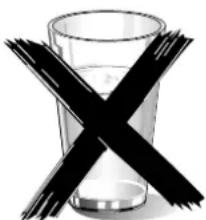
- Creation of sparks: Metal – e.g. a spoon in a glass – must be kept at least 2 cm from the cooking compartment walls and the inside of the door. Sparks can irreparably damage the glass on the inside of the door.
- Foil containers: Do not use foil containers in the appliance. They damage the appliance by producing sparks.
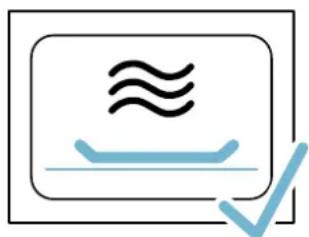
- Operating the microwave without food: Operating the appliance without food in the cooking compartment may lead to overloading. Never switch on the microwave unless there is food inside. The short crockery test is the exception to this rule.
→ "Microwave" on page 11
natural_image
Simple icon showing a speedometer with motion lines and a checkmark (no text or symbols)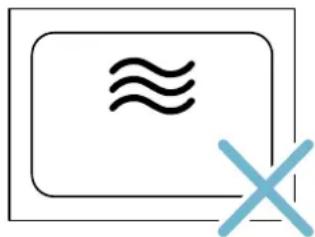
natural_image
Simple icon of a rectangular frame with a double-headed 'X' symbol, no text or labels present.- Moisture in the cooking compartment: Over an extended period of time, moisture in the cooking compartment may lead to corrosion. Allow the cooking compartment to dry after use. Do not keep moist food in the closed cooking compartment for extended periods of time. Do not store food in the cooking compartment.
- Cooling with the appliance door open: Following operation at high temperatures, only allow the cooking compartment to cool down with the door closed. Do not trap anything in the appliance door. Even if the door is only left open a crack, the front of nearby furniture may become damaged over time. Only leave the cooking compartment to dry with the door open if a lot of moisture was produced whilst the oven was operating.
- Extremely dirty seal: If the seal is very dirty, the appliance door will no longer close properly during operation. The fronts of adjacent units could be damaged. Always keep the seal clean. "Cleaning" on page 18
- Microwave popcorn: Never set the microwave output too high. Use a maximum microwave output of 600 watts. Always place the popcorn bag on a glass plate. The door panels may jump if overloaded.

Environmental protection
Environmentally-friendly disposal
Dispose of packaging in an environmentally-friendly manner.
This appliance is labelled in accordance with European Directive 2012/19/EU concerning used electrical and electronic appliances (waste electrical and electronic equipment - WEEE). The guideline determines the framework for the return and recycling of used appliances as applicable throughout the EU.

Getting to know your appliance
In this chapter, we will explain the indicators and controls. You will also find out about the various functions of your appliance.
Note: Depending on the appliance model, individual details and colours may differ.
Control panel
In the control panel, you can use the various buttons, touch fields and the rotary selector to set the required function of the appliance. The current settings are shown in the display.
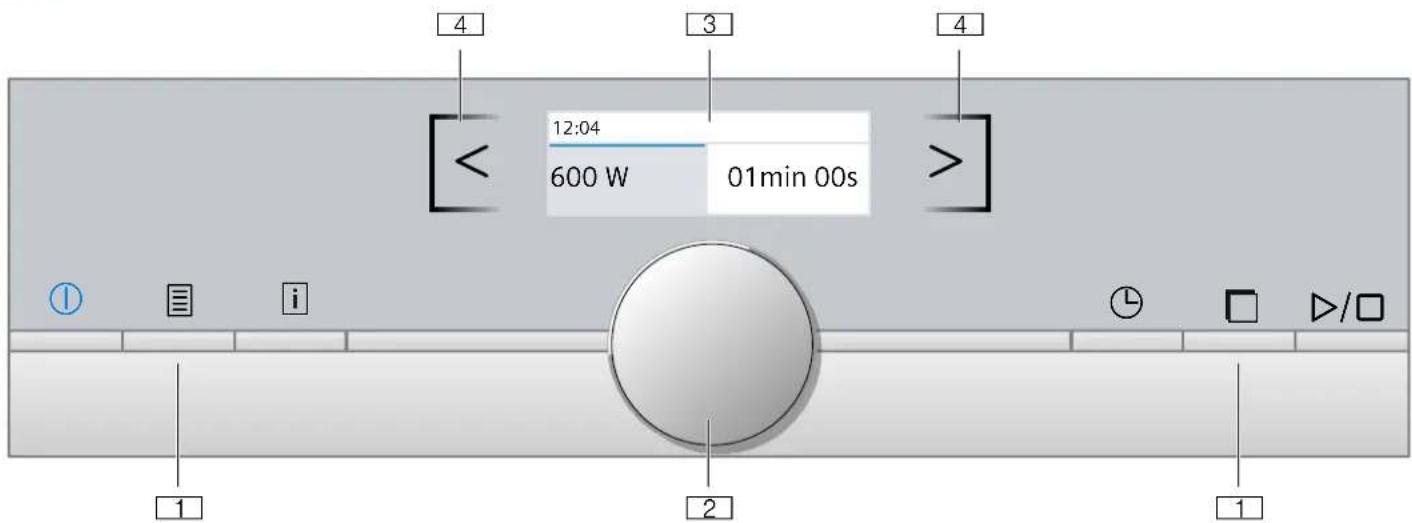
The overview shows the control panel when the appliance is switched on with a selected operating mode.
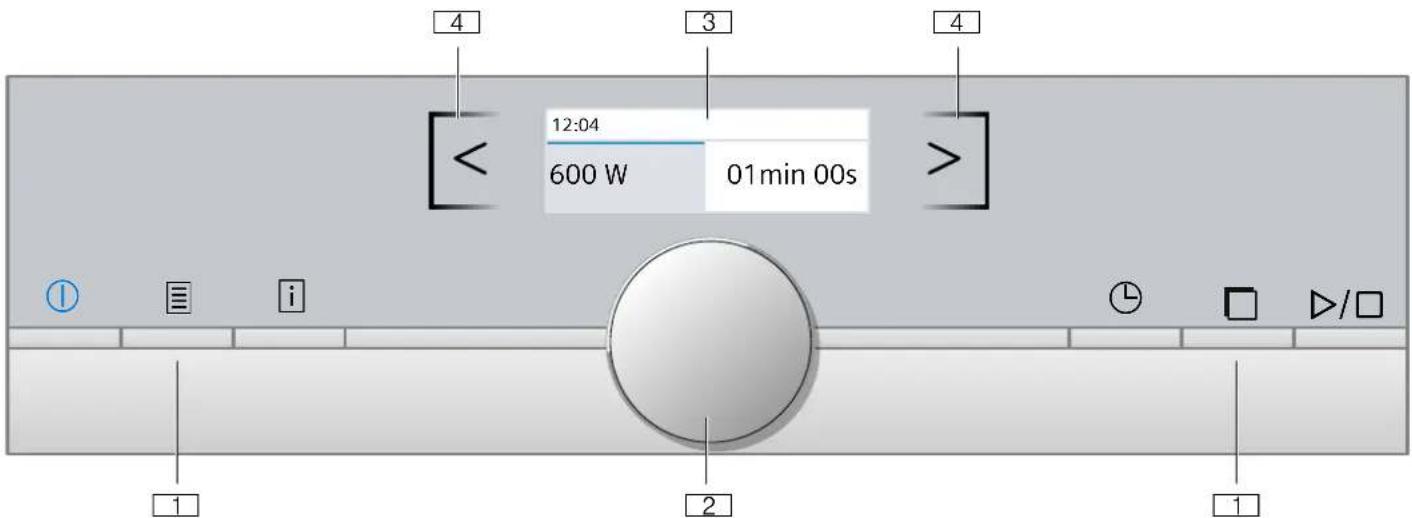
1 Buttons
The buttons to the left and right of the rotary selector have a pressure point. Press these buttons to activate them.
2 Rotary selector
You can turn the rotary selector clockwise and anticlockwise.
3 Display
You can see the current adjustment values, options or notes in the display.
4 Touch fields
There are sensors under the touch fields to the left < and right > of the display. Touch the respective arrow to select the function.
Controls
The individual controls are adapted for the various functions of your appliance. You can set your appliance simply and directly.
Buttons and touch fields
Here you can find a short explanation of the various buttons and touch fields.
Buttons Meaning
| 1 Switches the appliance on and off | |
| Menu Opens the operating modes menu | |
| Information Displays notes | |
| Time-setting setting the timer option | |
| Automatic door Opening Opens the appliance door | |
| ▷/□ | Starts or pauses the operation |
| Touch fields | |
| < | Field to the left of Navigates left the display |
| > | Field to the right of Navigates right of the display |
Rotary selector
Use the rotary selector to change the operating modes and adjustment values shown in the display.
In most selection lists, e.g. programmes, the first selection follows the last.
In some selection lists, e.g. duration, you have to turn the rotary selector back the other way when you reach the minimum or maximum value.
Display
The display is structured so that the information can be read at a glance.
The value that you can currently set is in focus. It is displayed in white lettering with a dark background.
Status bar
The status bar is at the top of the display. The time, duration and programme length are shown here.
Progress line
The progress line shows you how much time has elapsed, for example. The straight line below the setting values progresses from left to right, the longer the operation continues to run.
Operating modes menu
The menu is divided into different operation modes. In way, you can quickly access the required function.
Depending on the appliance type, there are a various number of operating modes.
| Operating mode Use | |
| Microwave Selects the microwave output | |
| Grill Selects the grill setting or grill setting with microwave output | |
| Programmes Automatic programmes | Prepares selected meals very easily |
| Settings → "Basic settings" on page 17 | You can adapt your appli-ance's basic settings to suit your needs. |
Further information
In most cases, the appliance provides you with notes and further information on the action that is being carried out. To view these, press the i button. The note is displayed for a few seconds. Use the rotary selector to scroll to the end of longer notes.
Some notes are displayed automatically, for example as confirmation, or to provide an instruction or warning.
The note can be cleared by pressing the ☐ button again.
Cooking compartment functions
The functions in the cooking compartment make your appliance easier to use. This, for example, enables the cooking compartment to be well lit and a cooling fan to prevent the appliance from overheating.
Automatic door opening
The appliance door springs open if you activate the automatic door opening. You can fully open the appliance door manually.
The automatic door opening does not work in the event a power cut. You can open the door manually.
Notes
er If you open the appliance door during operation, the operation is paused.
- When you close the appliance door, the operation does not continue automatically. You must restart the operation manually.
- If the appliance has been switched off for a long time, the appliance door will open after a time delay.
Interior lighting
When you open the appliance door, the interior lighting switches on. If the door remains open for longer than around five minutes, the cooking compartment lighting switches off again. When the automatic door opening is activated, the cooking compartment lighting switches on again.
For all operating modes, the cooking compartment lighting switches on as soon as the operation is started. When the operation has finished, the lighting switches off
Cooling fan
The cooling fan switches on as required. The hot air escapes above the door.
The cooling fan may continue to run for a certain time after the operation.
Caution!
Do not cover the ventilation slots. Otherwise, the appliance may overheat.
Notes
- The appliance remains cool during microwave operation. Despite this, the cooling fan will still switch on. The fan may run on even when the microwave operation has ended.
- Condensation may form on the door window, interior walls and floor. This is normal and does not adversely affect microwave operation. Wipe away the condensation after cooking.
Accessories
Your appliance is accompanied by a range of accessories. Here, you can find an overview of the accessories included and information on how to use them correctly.
Accessories included
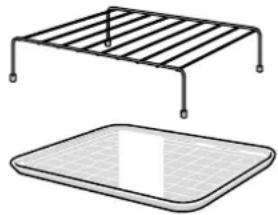
Your appliance is equipped with the following accessories:
natural_image
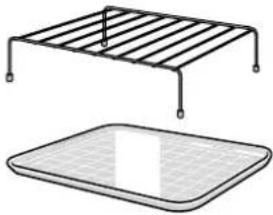
Illustration of a metal rack and a rectangular tray (no text or symbols)Wire rack
Use as a surface for setting down cookware or for grilling and browning.
Glass tray
This can act as a splash guard if you are grilling food directly on the wire rack. To do this, place the wire rack in the glass tray. The glass tray can also be used as cookware for microwave operation.
Only use original accessories provided by your appliance manufacturer. They are specially adapted for your appliance.
You can buy accessories from the after-sales service, from specialist retailers or online.
Before using for the first time
Before you can use your new appliance, you must make some settings. You must also clean the cooking compartment and accessories.
Initial use
After connecting the appliance to the power or following a power cut, the settings for initial use are shown in the display. It may take a few seconds for the instruction to appear.
Note: You can change these settings again at any time in the basic settings.
Setting the language
- Use the rotary selector to select the required language.
- Touch the > arrow.
The next setting appears.
Setting the time
- Turn the rotary selector to set the current time.
- Touch the > arrow.
Setting the date
- Use the rotary selector to set the current day.
- Touch the arrow > to confirm.
- Use the rotary selector to set the current month.
- Touch the arrow > to confirm.
- Use the rotary selector to set the current year.
- Touch the arrow > to confirm.
A note appears in the display confirming that the initial use has been completed.
Cleaning the cooking compartment and accessories
Before using the appliance to prepare food for the first time, you must clean the cooking compartment and accessories.
Cleaning the cooking compartment
To remove the new-appliance smell, heat up the cooking compartment when empty and with the oven door closed.
Make sure that the cooking compartment does not contain any leftover packaging, such as polystyrene pellets.
Before heating the appliance, wipe the smooth surfaces in the cooking compartment with a soft, wet cloth. Keep the kitchen ventilated while the appliance is heating up.
Make the settings indicated. You can find out how to set the grill and cooking time in the following chapter.
→ "Grilling" on page 12
Settings
Grill Level 3
Cooking time 15 minutes
Switch off the appliance after the cooking time indicated. After the cooking compartment has cooled down, clean the smooth surfaces with soapy water and a dish cloth.
Cleaning the accessories
Clean the accessories thoroughly using soapy water and a dish cloth or soft brush.

Operating the appliance
You have already learnt about the controls and how they work. Now we will explain how to set your appliance. You will learn about what happens when you switch the appliance on and off, and how to select the operating mode.
Pauses the operation
Use the ▷/□ button to pause and restart the operation.
Press the ① button to delete all settings.
Switching the appliance on and off
Before you are able to set the appliance, you must switch it on.
Note: The timer can also be set when the appliance is switched off. Some displays and notes remain visible in the display after the appliance has been switched off.
Switch off your device when it is not being used. If no settings are applied for a long time, the appliance switches itself off automatically.
Switching on the appliance
Press the ① button to switch on the appliance.
The ① symbol above the button is illuminated in blue.
The Siemens logo appears in the display, followed by the maximum microwave output.
The appliance is ready to use.
You can find out how to set the operating modes in the individual chapters.
Switching off the appliance
Use the ① button to switch off the appliance.
The lighting above the button goes out.
Any functions that may be running are cancelled.
The time and date appear in the display.
Note: You can set whether the time and date should be displayed when the device is switched off in the basic settings.
Notes
- Opening the appliance door also pauses the operation.
- The fan may continue to run after an operation is paused or cancelled.
Selecting an operating mode
After the appliance is switched on, the default operating mode is displayed. You can start this setting immediately.
If you want to select a different operating mode, you can find detailed descriptions of these modes in the appropriate chapters.
The following always applies:
- Press the ☐ button.
The operating modes menu opens. - Use the rotary selector to select the required operating mode. Depending on the operating mode, different options are available.
- Use the arrow > to navigate to the required operating mode.
- Use the rotary selector to change the selection. Depending on the selection, change further settings.
- Press the ▷/□ button to start. The elapsed time appears in the display. The settings and progress line can be seen.
Note: If you want to leave the current setting, you can navigate back to the operating modes level using the ☐ button.
Operation
Some operating steps are the same for all operating modes. In the following, you can learn about the basic operating steps.
Starting the operation
You must press the ▷/□ button to start each operation.
After the operation starts, your settings are shown in the display. The progress line shows you how much time has elapsed, for example.
Note: If the operation is paused due to the appliance door being opened, the operation must be restarted using the ▷/□ button after the door has been closed.

Microwave
You can use the microwave to cook, heat up or defrost food quickly. You can use the microwave on its own or in combination with the grill.
To ensure optimum use of the microwave, please observe the notes on cookware and familiarise yourself with the data in the application tables at the end of the instruction manual.
Cookware
Not all cookware is microwavable. So that your food is heated and the appliance is not damaged, only use microwavable cookware.
Suitable cookware
Heat-resistant cookware made of glass, glass ceramic, porcelain, ceramic or heat-resistant plastic are suitable. These materials allow microwaves to pass through.
You can also use serving dishes. This saves you having to transfer food from one dish to another. You should only use cookware with decorative gold or silver trim if the manufacturer guarantees that they are suitable for use in microwaves.
Unsuitable cookware
Metal cookware is unsuitable. Metal does not allow microwaves to pass through. Food in covered metal containers will remain cold.
Caution!
Creation of sparks: Metal – e.g. a spoon in a glass – must be kept at least 2 cm from the cooking compartment walls and the inside of the door. Sparks can irreparably damage the glass on the inside of the door.
Cookware test
Never switch on the microwave unless there is food inside. The short cookware test is the only exception to this rule.
Perform the following test if you are unsure whether your cookware is suitable for use in the microwave.
-
Heat the empty cookware at maximum power for 12 to 1 minute.
-
Check the temperature of the cookware during this time.
The cookware should remain cold or warm to the touch. The cookware is unsuitable if it becomes hot or sparks are generated.
In this case, stop the test.

Warning – Risk of burns!
The accessible parts become very hot when in operation. Never touch hot parts. Keep children at a safe distance.
Microwave power settings
The following microwave power settings are available.
The microwave power settings do not always correspond to the exact wattage that the appliance uses.
| Stufen Speisen maximale Dau-er | |
| 90 W zum Auftauen empfindlicher Spei-sen | 1 Std. 30 Min. |
| 180 W zum Auftauen und Weitergaren 1 Std. 30 Min. | |
| 360 W zum Garen von Fleisch und zum Erwärmen empfindlicher Speisen | 1 Std. 30 Min. |
| 600 W zum Erhitzen und Garen von Spei-sen | 1 Std. 30 Min. |
| 900 W zum Erhitzen von Flüssigkeiten 30 Min. | |
Vorschlagswerte:
Zu jeder Mikrowellen-Leistung schlägt das Gerät eine Dauer vor. Diese können Sie übernehmen oder im jeweiligen Bereich ändern.
Die maximale Einstellung ist nur zum Erhitzen von Flüssigkeiten vorgesehen, nicht zum Erwärmen von Speisen. Zum Schutz des Gerätes wird nach einiger Zeit die maximale Leistung der Mikrowelle schrittweise bis zur Stufe von 600W reduziert. Die volle Leistung steht nach einer Abkühlzeit wieder zur Verfügung.
Setting the microwave
Example: Microwave output 600 W, cooking time 5 minutes.
- Press the ① button.
The appliance is ready to use. The maximum microwave output and a cooking time are displayed as default values in the display – they can be changed at any time.
Use the rotary selector to select the required microwave output.
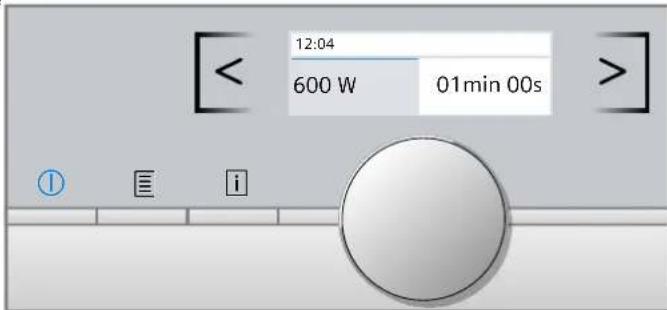
The microwave output and a default cooking time are shown in the display.
- Touch the > arrow.
e The cooking time can be set. - Use the rotary selector to set the required cooking time.
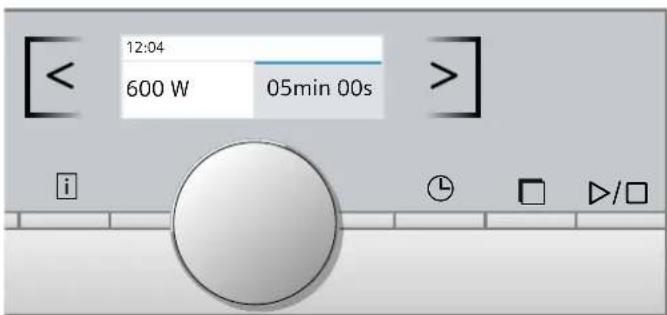
5. Press the ▷/□ button to start.
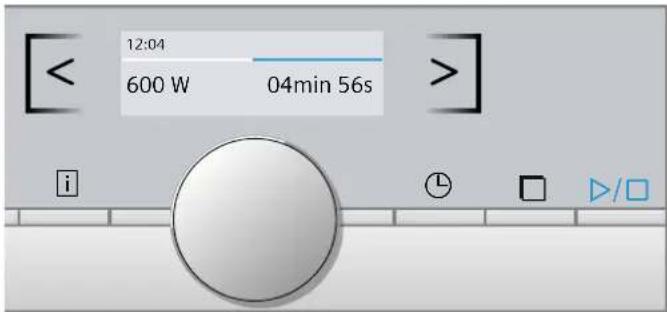
The appliance starts the operation. The cooking time counts down on the display.
Notes
- When you switch on the appliance, the highest microwave output always appears in the display as a suggestion.
- If you open the appliance door when the appliance is in use, the fan may continue to run.
Cooking time elapsed
An audible signal sounds.
Operation has finished.
Stopping the audible signal early:
Touch the ⏻ button.
Note: After touching the ⏻ button, the timer function appears; after a short time, it automatically disappears. If you touch the ⏻ button again, the timer function will disappear instantly.
Press the ① button to switch off the appliance.
Changing the cooking time
This can be done at any time.
Use the rotary selector to change the cooking time.
The operation continues.
Changing the microwave output
This can be done at any time.
Use the <arrow to change the microwave output.
Use the rotary selector to set the required microwave output.
The cooking time remains unchanged.
The operation continues.
Note: If the set cooking time exceeds the maximum time for the microwave output of 900 W, it is reduced automatically. The operation stops. Press the ▷/□ button to start the operation.

Grilling
You can brown your food nicely using the grill. You can use the grill on its own or in combination with the microwave.
The following grill settings are available:
| Power Food | |
| Grill Level 1 (low) For soufflés and deep casseroles | |
| Level 2 (medium) For shallow casseroles and fish | |
| Level 3 (strong) For steaks, sausages and toast | |
Setting the grill
Example: Grill 2, cooking time 12 minutes
- Press the ① button.
Das Gerät ist betriebsbereit. - Press the ☐ button.
The operating modes are shown. - Use the rotary selector to select the grill operating mode.
- Touch the > arrow.
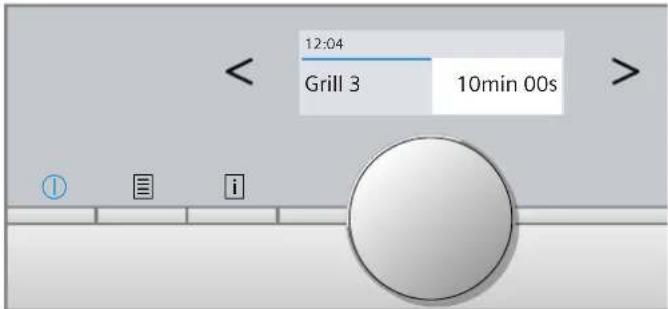
Grill 3 is displayed as the default value in the display it can be changed at any time.
- Use the rotary selector to set the required grill level. The grill level and default cooking time are shown in the display.
- Touch the > arrow.
The cooking time can be set. - Use the rotary selector to set the required cooking time.
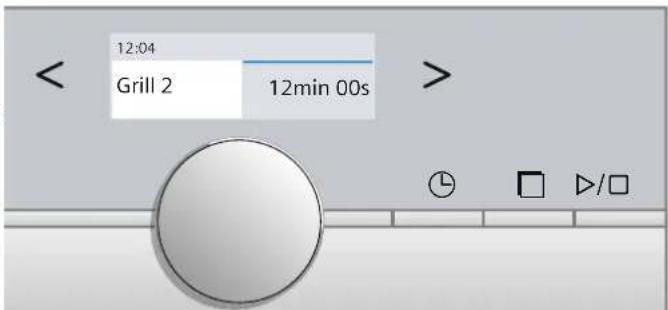
- Press the ▷/□ button to start.
The appliance starts the operation. The cooking time counts down on the display.
Notes
- The default value for the grill is Grill 3.
Turn the rotary selector to the left to set Grill 2 and 1. Turn the rotary selector to the right to select a combi mode; Grill 3 with 360 W, Grill 3 with 180 W and - If you open the appliance door when the appliance is in use, the fan may continue to run.
Cooking time elapsed
An audible signal sounds.
Operation has finished.
Stopping the audible signal early:
Touch the Ⓛ button.
Note: After touching the ⏻ button, the timer function appears; after a short time, it automatically disappears. If you touch the ⏻ button again, the timer function will disappear instantly.
Press the ① button to switch off the appliance.
Changing the cooking time
This can be done at any time.
Use the rotary selector to change the cooking time.
The operation continues.
Changing the grill setting
This can be done at any time.
Use the <arrow to change to the grill.
Use the rotary selector to set the required grill setting.
The cooking time remains unchanged.
The operation continues.
Note: When changing the operating mode from grill to combi mode, and vice versa, the appliance pauses. The operation stops. If you want to change the operating mode, continue the operation by pressing the ▷/□ button.
Setting the microwave to combi-mode
This involves simultaneous operation of the grill and the microwave. Using the microwave makes your dishes ready more quickly, but they are still nicely browned.
You can select all microwave power settings.
Exception: 900 and 600 watt.
Setting the microwave to combi-mode
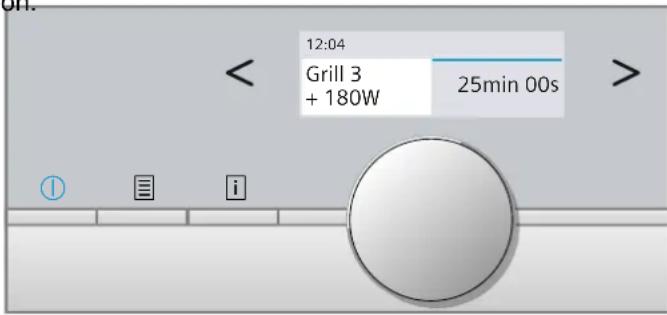
Example: Grill 3 and microwave output 180 W, cooking time 25 minutes.
- Press the ① button
The appliance is ready to use. - Press the ☐ button
The operating modes are shown. - Use the rotary selector to select the grill operating mode.
- Touch the > arrow.
Grill 3 is displayed as the default value in the display. -
Turn the rotary selector to the right and set the required combi mode.
The combi mode and the default cooking time are shown in the display. -
Touch the > arrow.
The cooking time can be set.
- Use the rotary selector to set the required cooking time.
on.
- Press the ▷/□ button to start.
The appliance starts the operation. The cooking time counts down on the display.
Notes
- The default value for the grill is Grill 3. Turn the rotary selector to the left to set Grill 2 and 1. Turn the rotary selector to the right to select a combi mode; Grill 3 with 360 W, Grill 3 with 180 W and so on
- If you open the appliance door when the appliance is in use, the fan may continue to run.
Cooking time elapsed
An audible signal sounds.
Operation has finished.
Stopping the audible signal early:
Touch the Ⓛ button.
Note: After touching the ⏻ button, the timer function appears; after a short time, it automatically disappears. If you touch the ⏻ button again, the timer function will disappear instantly.
Press the ① button to switch off the appliance.
Changing the cooking time
This can be done at any time.
Use the rotary selector to change the cooking time.
The operation continues.
Changing the combi mode
This can be done at any time.
Use the <arrow to change the combi mode.
Use the rotary selector to set the required combi mode.
The cooking time remains unchanged.
The operation continues.
Note: When changing the operating mode from grill to combi mode, and vice versa, the appliance pauses. The operation stops. If you want to change the operating mode, continue the operation by pressing the ▷/□ button.

Timer
You can use the timer as a kitchen timer. The timer runs alongside other settings. You can set it at any time, even if the device is switched off. It has its own audible signal so that you can tell whether it is the timer or a cooking time which has elapsed.
Setting the timer
The maximum setting is 24 hours.
The higher the value, the longer the time intervals.
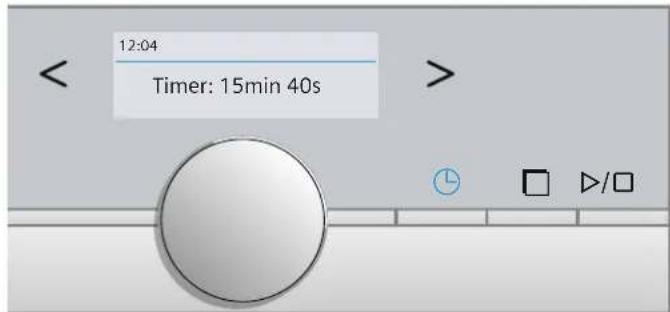
- Press the ⏻ button.
The timer is displayed.
- Use the rotary selector to set the timer duration.
- Press the ⏻ button to start.
Note: The timer will also start automatically after a few seconds.
The timer duration counts down. The display switches back after a short time. A timer symbol and the elapsed time are shown in the status bar.
An audible signal sounds once the timer duration has come to an end. Use the ⏻ button to cancel the audible signal early.
Notes
- The timer remains visible in the display if the appliance is switched off.
- If an operating mode is running, touch the ⏻ button to display the timer. The timer duration is displayed for a few seconds and can be altered.
Changing the timer
Touch the ⏻ button to change the timer duration. The timer duration is displayed – use the rotary selector to change it.
Cancelling the timer
If you want to cancel the timer, reset the duration on the timer to zero. Once the change has been applied, the symbol is no longer lit up.

Programmes
You can prepare food really easily using the various programmes. You select a programme and enter the weight of your food. The program then applies the most suitable settings.
Setting a programme
Example: "Defrost bread" programme, weight 250 g.
- Press the ① button.
The appliance is ready to use.
- Press the ☐ button.
The operating modes are shown.
-
Use the rotary selector to select "Programmes".
-
Touch the >arrow.
The first programme appears in the display.
- Use the rotary selector to set the required programme.
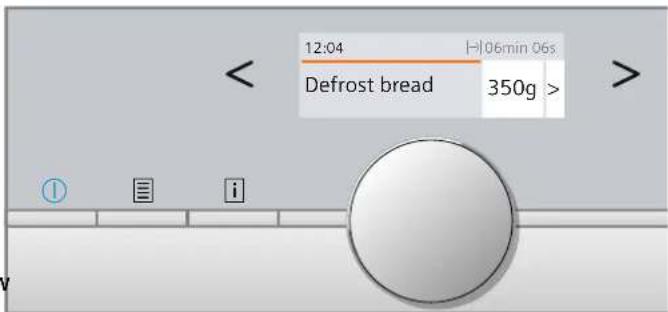
The required programme is selected. The default value for the weight appears in the display.
- Touch the > arrow.
The weight can be set.
- Use the rotary selector to set the required weight.
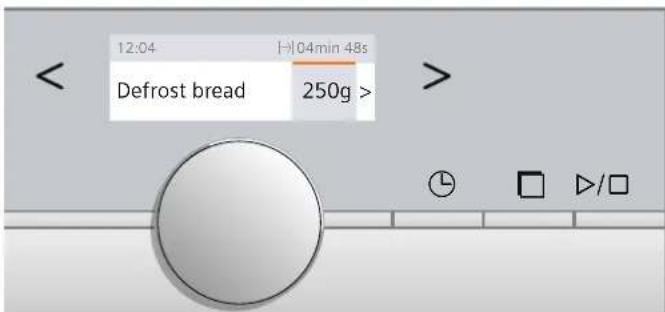
- Touch the > arrow.
The preparation instruction is displayed.
- Press the ▷/□ button to start.
The appliance starts the operation. The time counts down on the display.
Notes
■ The cooking time is calculated by the programmes.
- For some dishes, the display provides instructions for turning or stirring during preparation. Follow the information provided. Opening the appliance door pauses the operation. After closing the appliance door, restart the operation. If you do not turn or stir the dis the programme runs as normal until it reaches the en
Information on the programmes
Place the food in the cold cooking compartment.
Take the food out of its packaging and weigh it. If it is not possible to enter the exact weight, you should round it up, or down.
For the programmes, always use microwavable cookware, for example made of glass or ceramic. Observe the accessories tips in the programme table.
A table of suitable types of food with appropriate weight ranges and the accessories required can be found in the section after the notes.
It is not possible to set a weight outside the weight range.
With many dishes, a signal sounds after a certain time. Turn or stir the food.
Defrosting:
- As far as possible, freeze and store food flat and in portion-sized quantities at -18 °C.
- Place the frozen food in flat cookware, such as a glass or porcelain plate.
■ After defrosting in the appliance, leave the food to continue defrosting for a further 15 to 90 minutes until it reaches an even temperature. - Bread should only be defrosted in the required amounts, as it quickly becomes stale.
- Liquid will be produced when defrosting meat or poultry. Drain off this liquid when turning meat and poultry and under no circumstances use it for other purposes or allow it to come into contact with other foods.
■ After turning, remove any minced meat that has already defrosted. - Whole poultry should be placed in the cookware breast-side down and poultry portions skin-side down.
Vegetables:
- Fresh vegetables: Cut into pieces of an equal size. Add one tablespoon of water for every 100 g vegetables.
- Frozen vegetables: This programme is only suitable for blanched, not pre-cooked vegetables. It is not suitable for frozen vegetables in a cream sauce. Add 1 to 3 tablespoons of water. Do not add water to spinach or red cabbage.
Potatoes:
- Boiled potatoes: Cut into pieces of an equal size. Add two tablespoons of water per 100 g of potatoes, and salt to taste.
- Unpeeled boiled potatoes: Use potatoes of the same thickness. Wash the potatoes and prick the skin. Place the wet potatoes in a dish. Do not add water.
- Baked potatoes: Use potatoes of the same thickness. Wash, dry and prick the skin.
Rice:
- Do not use brown or boil-in-the-bag rice.
- Add two to two-and-a-half times the amount of water to rice.
Poultry:
- Place the chicken portions on the wire rack, skin side up.
Resting time
Some dishes need to rest in the cooking compartment after the programme has ended.
| Dish Resting time |
| Vegetables Approx. 5 minutes |
| Potatoes Approx. 5 minutes. First pour off the remaining water |
| Rice 5 to 10 minutes |
Programme table
| Programme | Suitable food | Weight range in kg | Cookware/accessories, | shelf position |
| Defrosting | ||||
| Bread* | Bread, whole, round or long; sliced bread; sponge cake, yeast cake, fruit flan, cakes without icing, cream or gelatine | 0.20-1.50 kg | Shallow cookware without lid | Cooking compartment floor |
| Meat* | Joints, flat pieces of meat, minced meat, chicken, poulard, duck | 0.20-2.00 kg | Shallow cookware without lid | Cooking compartment floor |
| Fish* | Whole fish, fish fillet, fish cutlet | 0.10-1.00 kg | Shallow cookware without lid | Cooking compartment floor |
| Cooking | ||||
| Fresh vegetables** | Cauliflower, broccoli, carrots, kohlrabi, leeks, peppers, courgettes | 0.15-1.00 kg | Cookware with lid | Cooking compartment floor |
| Frozen vegetables** | Cauliflower, broccoli, carrots, kohlrabi, red cabbage, spinach | 0.15-1.00 kg | Cookware with lid | Cooking compartment floor |
| *) Observe the signals given when it is time to turn the food**) Observe the signals given when it is time to stir the food | ||||
| Potatoes** | Boiled potatoes, unpeeled boiled potatoes, chopped potatoes of the same size | 0.20-1.00 kg Cookware with lid | Cooking compartment floor | |
| Rice** | Rice, long-grain rice | 0.05-0.30 kg Deep cookware with lid | Cooking compartment floor | |
| Baked potatoes | Waxy potatoes, predominantly waxy potatoes or floury potatoes, approx. 6 cm thick | 0.20-1.50 kg Wire rack | Cooking compartment floor | |
| Combi-mode | ||||
| Frozen lasagne | Lasagne bolognese | 0.30-1.00 kg Cookware without lid | Cooking compartment floor | |
| Chicken portions | Chicken thigh, half chicken | 0.50-1.80 kg Glass tray and wire rack | Cooking compartment floor | |
| *) Observe the signals given when it is time to turn the food**) Observe the signals given when it is time to stir the food | ||||

Basic settings
There are various settings available to you in order to help use your appliance effectively and simply. You can change these settings as required.
Changing settings
- Press the ① button.
- Press the ☐ button.
The operating modes menu opens. - Use the rotary selector to select "Settings".
- Touch the > arrow.
- Use the rotary selector to change the values.
- Use the arrow > to switch to the next settings, and change them if necessary.
- Press the ☐ button to save.
"Save" or "Discard" appears on the display. - Use the touch fields to select which option you require.
List of settings
This list tells you all the basic settings and how to change them. Depending on the model of the appliance you own, the display will show only those settings that apply to your appliance.
You can change the following settings:
| Setting Options | |
| Language Set the language | |
| Clock Set the current time | |
| Date Sets the current date | |
| Audible signal Short cooking timeMedium cooking time*Long cooking time | |
| Button tone Switched onSwitched off*(Button tone at 1 allways on) | |
| Display brightness Scale with 5 levelsLevel 3* | |
| Clock display Digital + date*DigitalOff | |
| Night-time dimming | Switched off**Switched on (Display dimmed between 22:00 and 6:00) |
| Demo mode | Switched off*Switched on(only displayed during the first 3 minutes after the appliance has been res or is used for the first time) |
| Factory settings | ResetDo not reset* |
* Factory setting (factory settings may vary depending on the appliance model)
Note: Changes to the language, button tone and display brightness settings take effect immediately. All other changes take effect after the settings have been saved.
Power cut
The changes you make to the settings are retained even after a power cut.
Only the settings pertaining to the initial use of the appliance need to be implemented once again following a power cut.
Changing the time
You can change the time in the basic settings.
For example: Changing from summer to winter time.
- Press the ① button.
- Press the ☐ button.
- Use the rotary selector to select "Settings".
- Touch the arrow > to move to "Time of day".
- Use the rotary selector to change the time.
- Press the ☐ button.
Save or Discard appears in the display.

Cleaning
With good care and cleaning, your appliance will retain its appearance and remain fully functioning for a long time to come. We will explain here how you should correctly care for and clean your appliance.

Warning – Risk of burns!
The appliance becomes very hot. Never touch the interior surfaces of the cooking compartment or the heating elements. Always allow the appliance to cool down. Keep children at a safe distance.

Warning – Risk of electric shock!
Do not use any high-pressure cleaners or steam cleaners, which can result in an electric shock.

Warning – Risk of injury!
Scratched glass in the appliance door may develop into a crack. Do not use a glass scraper, sharp or abrasive cleaning aids or detergents.
Note: Unpleasant odours, for example after fish has been prepared, can be removed very easily. Add a few drops of lemon juice to a cup of water. Always place a spoon in the container to prevent delayed boiling. Heat the water for 1 to 2 minutes at maximum microwave output.
Cleaning agent
To ensure that the different surfaces are not damaged by using the wrong cleaning agent, observe the information in the table.
Do not use:
- Harsh or abrasive cleaning agents.
■ Metal or glass scrapers to clean the door panels.
■ Metal or glass scrapers to clean the door seal. - Hard scouring pads or sponges.
■ Cleaning agents with a high alcohol content.
Wash new sponge cloths thoroughly before use.
Area Cleaning agent
| Appliance front Hot soapy water: Clean using a dish cloth and then dry with a soft cloth. Do not use a metal or glass scraper for cleaning. |
| Display Wipe down using a microfibre cloth or a slightly damp cloth. Do not wipe with a wet cloth. |
| Stainless steel Hot soapy water: Clean using a dish cloth and then dry with a soft cloth. Remove flecks of limescale, grease, starch and albumin (e.g. egg white) immediately. Corrosion can form under such flecks. Special stainless-steel cleaning agents are available from the after-sales service or from specialist retailers. |
| Area Cleaning agent | |
| Cooking compartment made of stainless steel | Hot soapy water or vinegar solution: Clean using a dish cloth and then dry with a soft cloth. Do not use oven spray or any other aggressive oven cleaners or abrasive materials. Scouring pads, rough sponges and pan cleaners are also unsuitable. These items scratch the surface. Allow the interior surfaces to dry thoroughly. |
| Door panels Glass cleaner: Clean with a dish cloth. Do not use a glass scraper. | |
| Door seal Do not remove. | Hot soapy water: Clean with a dish cloth and do not scour. Do not use a metal or glass scraper for cleaning. |
| Accessories Hot soapy water: Soak and clean with a dish cloth or brush. | |

Trouble shooting
If a fault occurs, there is often a simple explanation. Before calling the after-sales service, please refer to the fault table and attempt to correct the fault yourself.
Tip: If a dish does not turn out exactly as you wanted, refer to the following chapter, where you will find lots of tips and notes relating to the optimum
settings.→ "Tested for you in our cooking studio" on page 21

Warning – Risk of electric shock!
Incorrect repairs are dangerous. Repairs may only be carried out and damaged power cables replaced by one of our trained after-sales technicians. If the appliance is defective, unplug the appliance from the mains or switch off the circuit breaker in the fuse box. Contact the after-sales service.
Fault table
| Fault Possible cause Remedy/information | |
| The appliance does not work or display is not working | The plug is not plugged into the mains Connect the appliance to the electricity supply |
| Power cut Check whether other kitchen appliances are working | |
| The circuit breaker is faulty Check in the fuse box to make sure that the fuse for the appliance is OK | |
| Faulty operation Switch off the circuit-breaker for the appliance in the fuse box and switch it back on after approx. 60 seconds | |
| The appliance cannot be started The appliance door is not fully closed Close the appliance door | |
| Appliance does not heat up.The word "demo" is shown in the display. | The appliance is in demo mode Deactivate demo mode in the basic settings.To do this, briefly disconnect the appliance from the mains (switch off the household fuse or the circuit breaker in the fuse box). Then deactivate demo mode in the basic settings within 3 minutes. |
| The interior lighting is not working The interior lighting is faulty Call the after-sales service | |
| Error message "Exxx"* If an error message is displayed, switch the appli-ance off and on again; if the message disappears, it was a one-off problem. If the fault occurs again or the error message is still displayed, please contact the after-sales service and provide the fault code. | |
* Special features:
Error message "E0532": Open and close the appliance door.
Error message "E6501": Switch off the appliance. Wait for 10 minutes. Switch the appliance on again.

Customer service
Our after-sales service is there for you if your appliance needs to be repaired. We will always find an appropriate solution, also in order to avoid after-sales personnel having to make unnecessary visits.
E number and FD number
When calling us, please quote the full product number (E no.) and the production number (FD no.) so that we can provide you with the correct advice. The rating plate bearing these numbers can be found when you open the appliance door.
On some appliances with a steam-assisted cooking function, you will find the rating plate behind the control panel.

To save time, you can make a note of the numbers for your appliance and the telephone number of the after-sales service in the space below in case you need them.
E no. FD no.
After-sales service
Please note that a visit from an after-sales service engineer is not free of charge in the event that the appliance has been misused, even during the warranty period.
After-sales contact details for all countries can be found in the attached after-sales service directory.
This appliance corresponds to the standards EN 55011 and CISPR 11. It is a Group 2, Class B product.
Group 2 means that microwaves are produced for the purpose of heating food. Class B states that the appliance is suitable for private households.
Technical specifications
| Power supply 220 V ~, 50 Hz | |
| Max. total connected load 1815 W | |
| Microwave output 900 W (IEC 60705) | |
| Max. grill output power 1210 W | |
| Microwave frequency 2450 MHz | |
| Fuse 10 A | |
| Dimensions (H/W/D) | |
| - Appliance 382 x 594 x 318 mm | |
| - Cooking compartment | 220 x 350 x 270 mm |
| VDE approved | Yes |
| CE mark | Yes |
| Noise limit value | 42 dB (A) |
| Energy efficiency grade | 2 |
| Energy efficiency value | 56 % |
| Standby mode power consumption | 1.0 W |
| Barbecue mode power consumption | 1.2 W·h |

Tested for you in our cooking studio
Here, you can find a selection of dishes and the ideal settings for them. We show you which microwave output or grill setting is best for your dish. You can find information on what accessories are suitable. There are also tips about cookware and preparation methods.
Notes
- The values in the table always apply to the cooking compartment when it is cold and empty. Before using the appliance, remove all unnecessary accessories from the cooking compartment.
- The times specified in the tables are only guidelines. They=will=depend=on=the=quality=and=composition=of=the food.
■ Use the accessories provided. - Always use an oven cloth or oven gloves when taking hot accessories or cookware out of the cooking compartment.
Warning – Risk of scalding!
When pulling out the glass tray, hot liquid may overflow. Carefully pull the glass tray out of the cooking compartment.
The following tables provide you with numerous options and settings for the microwave.
The=times=given=in=the=tables=are=guidelines;=they=depend on the cookware used, and the quality, temperature and consistency of the food.
Time ranges are often specified in the tables. Set the shortest time first and then extend the time if necessary.
It may be that you have different quantities from those specified in the tables. There is a rule of thumb for operating=the=microwave:=Double=the=amount===double=the time, half the amount = half the time.
You=can=place=the=cookware=in=the=middle=of=the=wire=rack or on the cooking compartment floor. The food will then absorb the microwaves from all sides.
Defrosting
Place=the=frozen=food=in=an=open=container=on=the=cooking compartment floor.
Turn or stir the food once or twice during the defrosting time.=Large=pieces=of=food=should=be=turned=several=times. When turning, remove any liquid that has been produced during defrosting.
Leave=defrosted=items=to=stand=at=room=temperature=for=a further=10=to=60=minutes=so=that=the=temperature=can—even out. You can remove the giblets from poultry at this point.
Note: Place the ovenware on the cooking compartment floor.
| Dish Weight Microwave output in watts, time in minutes | Note | ||
| Whole pieces of beef, pork or veal (on the bone or boned) | 800 g=180=W, =15=mins=+=90=W, =15-25=mins=Turn several times | ||
| 1000 g=180=W, =20=mins=+=90=W, =20-30=mins | |||
| 1500 g=180=W, =25=mins=+=90=W, =25-30=mins | |||
| Meat in pieces or slices of beef, veal or pork | 200 g=180 W, 5-8 mins + 90 W, 5-10 mins=Separate the slices/pieces of meat when turning | ||
| 500 g=180 W, 8-11 mins + 90 W, 10-15 mins | |||
| 800 g=180=W, =10=mins=+=90=W, =10-15=mins | |||
| Minced meat, mixed=200 g=90 W, 10-15 mins=Freeze food flat if possible; | |||
| turn several times during defrosting and remove any minced meat that has already defrosted | |||
| Poultry or poultry portions | 600 g | 180 W, 8 mins + 90 W, 10-15 mins | Turn during defrosting; remove liquid that escapes during defrost-ing |
| 1200 g=180=W, =15=mins=+=90=W, =20-25=mins | |||
| Fish fillet, fish steak or slices | 400 g | 180 W, 5 mins + 90 W, 10-15 mins | Separate any defrosted parts |
| Whole fish | 300 g | 180 W, 3 mins + 90 W, 10-15 mins | Turn during defrosting |
| 600 g=180 W, 8 mins + 90 W, 15-20 mins | |||
| Vegetables, e.g. peas | 300 g | 180 W, 10-15 mins | Stir carefully during defrosting |
| Fruit, e.g. raspberries | 300 g | 180 W, 6-9 mins | Stir carefully during defrosting and sepa-rate any defrosted parts |
| 500 g=180 W, 8 mins + 90 W, 5-10 mins | |||
| Butter, defrosting | 125 g | 180 W, 1 min. + 90 W, 1-2 mins | Remove all packaging |
| 250 g=180 W, 1 min. + 90 W, 2-4 mins | |||
| Loaf of bread | 500 g | 180 W, 8 mins + 90 W, 5-10 mins | Turn during defrosting |
| 1000 g=180=W, =12=mins=+=90=W, =10-20=mins | |||
| Cakes, dry, e.g. sponge cake 500 g 90 W, 10-15 mins Separate the pieces of cake; | |||
| 750 g | 180 W, 5 mins + 90 W, 10-15 mins | only for cakes without icing, cream or crème pâtissière | |
| Cakes, moist, e.g. fruit flan, cheesecake | 500 g | 180 W, 5 mins + 90 W, 15-20 mins | Only for cakes without icing, cream or gelatine |
| 750 g | 180 W, 7 mins + 90 W, 15-20 mins | ||
Defrosting, heating up or cooking frozen food
Take ready meals out of the packaging. They will heat up more quickly and evenly in microwaveable cookware. The different components of the meal may not require the same amount of time to heat up.
Food which lies flat will cook more quickly than food is piled high. You should therefore distribute the food so that it is as flat as possible in the cookware. Food should not be placed in layers on top of one another.
Always cover the food. If you do not have a suitable lid your cookware, use a plate or special microwave foil.
Stir or turn the food 2 or 3 times during cooking.
After heating, allow the food to stand for a further 2 to 5 minutes to allow the temperature to even out.
This will help the food retain its own distinct taste, which
which means it will require less seasoning.
Note: Place the ovenware on the cooking compartment floor.
| Dish Weight Microwave output in watts, time in minutes | Note | ||
| Menu, plated meal, ready meal (2-3 components) | 300-400 g | 600 W, 8-13 mins Covered | |
| Soup 400 g 600 W, 8-12 mins Cookware with lid | |||
| Stew 500 g 600 W, 10-15 mins Cookware with lid | |||
| Slices or pieces of meat in sauce, e.g. goulash | 500 g | 600 W, 10-15 mins Cookware with lid | |
| Fish, e.g. fillet steaks | 400 g | 600 W, 10-15 mins Covered | |
| Bakes, e.g. lasagne, cannelloni | 450 g | 600 W, 10-15 mins | Use the wire rack and place the cookware on it |
| Side dishes, e.g. rice, pasta | 250 g | 600 W, 3-7 mins | Cookware with lid, add liquid |
| 500 g | 600 W, 8-12 mins | ||
| Vegetables, e.g. peas, broccoli, carrots | 300 g | 600 W, 7-11 mins | Cookware with lid, add 1 tbsp of water |
| 600 g | 600 W, 14-17 mins | ||
| Creamed spinach | 450 g | 600 W, 10-15 mins Cook without additional water | |
Heating
⚠ Warning – Risk of scalding!
There is a possibility of delayed boiling when a liquid is heated. This means that the liquid reaches boiling temperature without the usual steam bubbles rising to the surface. Even if the container only vibrates a little, the hot liquid may suddenly boil over and spatter. When heating, always place a spoon in the container. This will prevent delayed boiling.
natural_image
Simple illustration of a glass with a black X mark crossed out, no text or symbols present.Caution!
Creation of sparks: Metal – e.g. a spoon in a glass – m be kept at least 2 cm from the cooking compartment wall and the inside of the door. Sparks can irreparably damage the glass on the inside of the door.
Notes
- Take ready meals out of the packaging. They will heat up more quickly and evenly in microwaveable cookware. The different components of the meal may not require the same amount of time to heat up.
- Always cover the food. If you do not have a suitable cover for your cookware, use a plate or special microwave foil.
- Stir or turn the food several times during the heating time. Check the temperature.
■ After heating, allow the food to stand for a further 2 to 5 minutes to allow the temperature to even out. - Always use an oven cloth or oven gloves when removing plates from the appliance.
Note: Place the ovenware on the cooking compartment floor.
| Dish Amount Microwave output in watts, time in minutes | Note | ||
| Menu, plated meal, ready meal (2-3 components) | 600 W, 5-8 mins - | ||
| Beverages 125 ml 900 W, 1⁄2-1 min. Always place a spoon in the container, do | |||
| 200 ml 900 W, 1-2 mins | not overheat alcoholic drinks; check occasionally while heating | ||
| 500 ml 900 W, 3-4 mins | |||
| Baby food, e.g. baby bottles | 50 ml | 360 W, approx. 1⁄2 min | Bottles without teat or lid; shake or stir well after heating and ensure that you check the temperature |
| 100 ml 360 W, 1⁄2-1 min. | |||
| 200 ml 360 W, 1-2 mins | |||
| Soup, 1 cup 175 g each 600 W, 1-2 mins - | |||
| Soup, 2 cups | 175 g each 600 W, 2-3 mins - | ||
| Meat in sauce | 500 g | 600 W, 7-10 mins | - |
| Stew | 400 g | 600 W, 5-7 mins - | |
| 800 g | 600 W, 7-8 mins - | ||
| Vegetables, 1 portion | 150 g | 600 W, 2-3 mins | - |
| Vegetables, 2 portions | 300 g | 600 W, 3-5 mins | - |
Cooking
Notes
- Food which lies flat will cook more quickly than food which is piled high. You should therefore distribute the food so that it is as flat as possible in the cookware. Food should not be placed in layers on top of one another.
- Cook the food in cookware with a lid. If you do not have a suitable lid for your cookware, use a plate or special microwave foil.
- This will help the food retain its own distinct taste, which means it will require less seasoning.
■ After cooking, allow the food to stand for a further 2 to 5 minutes to allow the temperature to even out.
■ Always use an oven cloth or oven gloves when removing plates from the appliance.
Note: Place the ovenware on the cooking compartment floor.
| Dish Amount Microwave output in watts, | time in minutes | Note | |
| Whole chicken, fresh, no giblets | 1200 g | 600 W, 25-30 mins | Turn half way through the time |
| Fish fillet, fresh | 400 g | 600 W, 7-12 mins | - |
| Fresh vegetables | 250 g | 600 W, 6-10 mins | Cut the vegetables into pieces of equal size; add 1 to 2 tbsp water per 100 g of vegeta- bles; stir while heating |
| 500 g | 600 W, 10-15 mins | ||
| Potatoes | 250 g | 600 W, 8-10 mins | Cut the potatoes into pieces of equal size; add 1 tbsp water for every 100 g of pota- toes; stir while heating |
| 500 g | 600 W, 10-15 mins | ||
| 750 g | 600 W, 15-22 mins | ||
| Rice | 125 g | 600 W, 4-6 mins + 180 W, 12-15 mins | Add double the amount of liquid |
| 250 g | 600 W, 6-8 mins + 180 W, 15-18 mins | ||
| Sweet foods, e.g. blancmange (instant) | 500 ml | 600 W, 6-8 mins | Stir the blancmange thoroughly 2 to 3 times using an egg whisk while heating |
| Fruit, compote | 500 g | 600 W, 9-12 mins | Stir while heating |
| Microwave popcorn | 100 g | 600 W, 3-4 mins | Always place the popcorn bag on the glass tray; observe the manufacturer's instructions |
Microwave tips
| You cannot find any information about the settings for the quantity of food you have prepared. | Lengthen or shorten the cooking time according to the following rule of thumb: Double the amount = double the time, half the amount = half the time |
| The food has become too dry.=Next=time,=set=a=shorter=cooking | time=or=select=a=lower=microwave=power setting. Cover the food and add more liquid. |
| The time has elapsed but the food is not defrosted, hot or cooked. | Set a longer time. Large quantities and food which is piled high require longer times. |
| Time has elapsed but the food is overheated at the edge but not done in the middle. | Stir it during the cooking time and next time, select a lower microwave power setting and a longer cooking time. |
| After defrosting, the poultry or meat is defrosted on the outside but not defrosted in the middle. | Next time, select a lower microwave output setting. Turn large amounts of poultry or meat several times. |
Grilling
Notes
- All the values given are guidelines and can vary depending on the properties of your food.
- Rinse meat in cold water and dab it dry with kitchen towel. Do not add salt to the meat until it has been grilled.
-
Always close the door when grilling on the wire rack and do not preheat.
-
Place the wire rack on the glass tray so that this catches the meat juices.
- Use tongs to turn the pieces of food you are grilling. If you pierce the meat with a fork, the juices will run out and it will become dry.
- Dark meat, such as beef, browns more quickly than lighter-coloured meat, such as veal or pork. When grilling light-coloured meat or fish fillets, these often only brown slightly on the surface, although they are cooked and juicy on the inside.
| Dish Amount Weight Grill setting Time in minutes | |||
| Neck steaks approx. 2 cm thick=3 to 4 pieces=Approx. 120 g | each | 3 (high)=1st side: Approx. 15 mins2nd side: Approx. 10-15 mins | |
| Grilled sausages=4 to 6 pieces=Approx. 150 g | each | 3 (high)=1st side: Approx. 10-15 mins2nd side: Approx. 10-15 mins | |
| Fish steak*=2 to 3 pieces=Approx. 150 g | each | 3 (high)=1st side: Approx. 10 mins2nd side: Approx. 10-15 mins | |
| Fish, whole,* e.g. trout=2 to 3 pieces=Approx. 150 g | each | 3 (high)=1st side: Approx. 15 mins2nd side: Approx. 15-20 mins | |
| Bread (pre-toasting)2 to 6 slices | 3 (high) | 1st side: Approx. 4 mins2nd side: Approx. 4 mins | |
| Toast with topping2 to 6 slices | 3 (high) | Depending on topping: 5-10 mins | |
| * Grease the wire rack first with oil. | |||
Combined grill and microwave
Notes
- Use the wire rack and place the cookware on it.
- Use=a=deep=dish=when=roasting.=This=will=help=keep=the cooking compartment clean.
- Use large shallow cookware for bakes and gratins. Food takes longer to cook in narrow, deep containers and browns more on top.
-
Check that your cookware fits in the cooking compartment. It should not be too big.
-
Leave=the=meat=to=rest=for=another=5-10=minutes=beforecarving=it.=This=allows=the=meat=juices=to=be=distributedevenly so that they do not run out when the meat is carved.
- Bakes and gratins should be left to cook in the appliance for a further 5 minutes after the appliance has been switched off.
- Always=set=the=maximum=cooking=time.=Check=the=food after the shorter time specified.
| Dish Weight | Grill setting | Microwave output in watts, time in minutes | Note | ||
| Joint of pork, e.g. neck | Approx. 750 g | 1 (low) | 360 W, 35-40 mins | Turn after approx. 15 minutes | |
| Meat loaf Max. 7 cm deep | Approx. 750 g | 2 (medium) | 360 W, approx. 25 mins | ||
| Dish Weight Grill setting Microwave output in watts, time in minutes | Note | ||
| Chicken, halved Approx. | 1200 g | 3 (high) 360 W, 40 mins Place with the skin side up; do not turn | |
| Chicken portions,e.g. chicken quarters | Approx. 800g | 2 (medium) 360 W, 20-25 mins Place with the skin side up;do not turn | |
| Duck breast Approx. 800 | g | 3 (high) 180 W, 25-30 mins Place with the skin side up;do not turn | |
| Pasta bake(made from pre-cooked ingredients) | Approx.1000 g | 1 (low) 360 W, 25-30 mins Sprinkle with cheese | |
| Potato gratin(made from raw potatoes) max. 3cm deep | Approx.1000 g | 2 (medium) 360 W, approx. 35 mins | |
| Fish, scalloped Approx. 500 | g | 3 (high) 360 W, 15 mins Defrost frozen fish before cooking | |
| Quark bakeMax. 5 cm deep | Approx.1000 g | 1 (low) 360 W, 20-25 mins | |

Test dishes
The quality and performance of the appliances are tested by test institutes using the following dishes.
In accordance with EN 60705, IEC 60705 or DIN 44547, and EN 60350 (2009)
Cooking only using the microwave
| Dish Microwave output in watts, cooking time in minutes | Note | |
| Custard, 1000 g | 600 W, 11-12 mins + 180 W, 8-10 mins | Pyrex dish |
| Sponge, 475 g | 600 W, 7-9 mins | Pyrex dish, dia. 22 cm |
| Meat loaf, 900 g | 600 W, 25-30 mins | Pyrex cake dish, 28 cm long |
Defrosting only using the microwave
| Dish Microwave output in watts, defrosting time in minutes | Note | |
| Meat, 500 g | "Meat" programme, 500 g or 180 W, 8 mins + 90 W, 7-10 mins | Pyrex dish, dia. 24 cm |
Cooking with the microwave and grill
| Dish | Microwave output in watts, grill setting, cooking time in min-utes | Note |
| Potato gratin, 1100 g | 360 W + grill setting 2, 30-35 mins | Round Pyrex dish, dia. 22 cm |
| Cake | - | Not recommended |
| Chicken, halved approx. 1100 g | 360 W + grill setting 3, approx. 40-45 mins | Wire rack, glass tray |
目录

主要用途 27

重要安全信息 27
常规信息
27
微波
28

损坏原因.... 29

环境保护.... 29
环保
处理 29

了解您的电器 30
控制面板
30
控制按键
30
显示屏
30
操作模式菜单
30
更多信息
31
烹饪箱功能
31

附件 31

首次使用之前 32
首次使用
32
清洁烹饪箱和附件
32

操作电器.... 32
打开和关断电器
32
操作
32
选择操作模式.
32

微波 33
烹饪容器
33
微波功率设置
33
设置微波
33

烧烤 34
设置烧烤
34
设置微波为组合模式
35

定时器 36
设置定时器
36

程序 36
设置程序
36
有关程序的信息
36
静置时间
37
程序表
37

基本设置.... 38
更改 设置
38
设置列表
38
断电
38
更改时间
38

清洁 39
清洁剂
39

故障检修.... 39

客户服务.... 40
E 编号和 FD 编号
40
技术参数……
40

经由我们烹饪工作室测试过的菜谱 41
除霜
41
解冻、加热或烹饪冷冻食品
42
加热
42
厨具
43
微波使用技巧.
43
烧烤
44
烧烤和微波组合
44

测试菜谱.... 45
仅用微波烹饪.
45
仅用微波解冻.
45
用微波和烧烤组合烹饪
45
关于产品、附件、更换部件以及服务的更多信息请参见www.siemens-home.bsh-group.com 以及网上商店
www.siemens-home.bsh-group.com/eshops

主要用途
请认真阅读本手册。只有这样才能安全正确地使用电器。请保管好说明手册和安装说明,以备日后使用或供下一任所有者使用。专
本电器仅适合整体安装在厨房内。请遵守用的安装说明。
拆开包装后请检查电器是否有损坏。如果电器在运输过程中损坏,请勿连接电器。
仅限持有上岗证书的业人员才可以连接不带插头的电器。因不正确连接导致的损坏将不予保修。
本电器仅供家庭使用。本电器只能用于制备食物和饮料。电器工作时必须有人看管。本电器仅限室内使用。
本电器最高可在海拔 4000 米的高度使用。
8 岁以上儿童以及身体、感官或精神有缺陷的人员或缺乏相关经验和知识的人员,必须在有人监督的情况下或在其安全责任人给予电器使用安全指导并了解相关危险的情况下,方可使用本电器。
严禁儿童玩耍本电器及在电器周围玩耍。儿童除非年满15岁并有人监督,否则不得清洁本电器或执行一般维护操作。
8岁以下儿童请远离本电器和电源线。
必须将附件滑入烹饪箱最里面。→ "附件" 第 31 页

重要安全信息
常规信息
警告 - 有着火危险!
易燃物品保存在烹饪箱中可能导致着火危险。切勿将易燃的物品保存在烹饪箱中。切勿在内部起烟时打开电器门。关断电器,拔下电源插头,或关断熔断器盒中的断路器。
警告-有灼伤危险!
- 电器会变灼热。切勿触摸烹饪箱的内表面或加热元件。必须让电器冷却下来。请将小孩留在安全距离以外。
- 附件和烹饪容器会变得十分灼热。从烹饪箱中取出附件或烹饪容器时必须戴上烤箱手套。
- 酒精蒸汽可能会在热烹饪箱内着火。切勿烹饪混合了大量高浓度酒类的食物。只能使用少量高浓度酒类。打开电器门时需小心。
警告 - 有烫伤危险!
- 可接触的部位在使用期间可能会变得很烫。切勿触碰灼热部位。请将小孩留在安全距离以外。
- 在打开电器门时,可能会有热蒸汽逸出。打开电器门时需小心。请将小孩留在安全距离以外。
- 将水倒入高温烹饪箱会产生热蒸汽。切勿将水倒入高温烹饪箱中。
警告 - 有受伤危险!
- 电器门玻璃如果有刮伤,可能会导致裂开。请不要使用玻璃刮刀、剧烈或腐蚀性的清洁用品或洗涤剂。
- 电器门上的铰链会在开、关门时移动,您可能会被夹住。双手必须远离铰链。
警告 - 有电击危险!
- 修理不当是很危险的。只能由我们经过培训的售后服务人员来维修电器和更换损坏的电源线。如果电器发生故障,请拔下电器电源插头,或断开熔断器盒中的断路器。联系售后服务部门。
- 如果接触到电器的灼热部件,电器的电线绝缘层会熔化。切勿使电器电源线接触电器的灼热部件。
- 请勿使用高压清洁器或蒸汽清洁器,以防触电。
- 故障电器会导致电击危险。切勿接通发生故障的电器。拔下电器的电源插头或断开保险丝盒中的断路器。联系售后服务部门。
警告-磁性引起的危险!
控制面板或控制元件中带有永久磁铁。它们可能影响电子植入式器件,如心脏起搏器或胰岛素泵。佩戴电子植入式器件的人必须与控制面板保持至少10 cm的距离。
微波
警告 - 有着火危险!
- 将本电器用于预定用途以外的其他目的非常危险,可能导致损坏。
不允许以下行为:烘干食物或衣物,加热拖鞋或谷物枕头、海绵、湿的清洁布或类似物品。例如,加热的拖鞋和谷物或荞麦枕可能会着火,火灾甚至会在几小时以后发生。本电器只能用于制备食物和饮品。 - 食物可能着火。切勿在蓄热包装内加热食物。在无人看管的情况下,请勿将食物放在塑料、纸或其它易燃材料制成的容器中加热。
所选择的微波功率或时间设置不要高于实际需要。请遵循本说明手册中提供的信息。 切勿使用微波干燥食物。
解冻或加热含水量低的食物。如面包时,切勿选择过高的功率或过长的时间。 - 食用油有着火危险。切勿使用微波单独加热食用油。
警告 - 有爆炸危险!
将液体或其它食物放在密封的容器中有爆炸危险。切勿将饮品或其它食物放在密封的容器中加热。
警告 - 有灼伤危险!
- 带壳或带皮的食物在加热过程中或甚至在加热后都有可能爆裂或爆炸。切勿加热带壳的鸡蛋或重新加热白煮蛋。切勿烹饪贝类或甲壳类。在煎蛋或水煮蛋时,一定要刺破蛋黄。带壳或带皮的食物表皮会爆裂,如苹果、番茄、土豆和香肠。加热前,应先刺破表壳或表皮。
- 婴儿食品中热量分布不均。切勿在封闭的容器中加热婴儿食品。一定要取下盖子或奶嘴。食物经过加热后,要搅拌或摇晃均匀。在喂孩子食物之前要先检查食物的温度。
- 经过加热的食物会散发热量。烹饪容器会变热。从烹饪箱中取出烹饪容器或附件时必须戴上烤箱手套。
- 给食物加热时,密封的包装可能会爆炸。请遵守产品包装上的说明。将容器从烹饪箱中取出时一定要戴上烤箱手套。
- 可触及部件在电器运转时会变得灼热。切勿触碰灼热部件。请将小孩留在安全距离以外。
- 将本电器用于预定用途以外的其他目的非常危险。
不允许以下行为:烘干食物或衣物,加热拖鞋或谷物枕头、海绵、湿的清洁布或类似物品。这是因为过热的拖鞋、谷物枕头、海绵、湿的清洁布等类似物品可能导致烧伤皮肤。
警告 - 有烫伤危险!
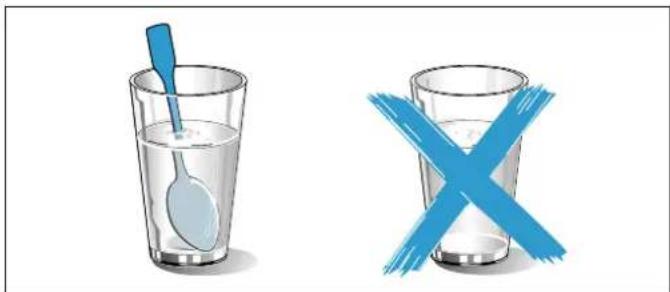
- 加热的液体有可能延时沸腾。即液体达到沸腾温度后,却没有常见的蒸汽气泡冒上液面。即使容器只是稍微振动,滚烫的液体也会突然沸腾溢出和飞溅。在加热时,一定要在容器内放一把汤匙。这会防止延时沸腾。
natural_image
Two glassware illustrations: a spoon inside and a blue X symbol crossed out (no text or symbols)警告 - 有受伤危险!
- 不合适的烹饪容器可能会开裂。瓷质或陶质烹饪容器在手柄或盖上会有小孔。这些小孔下方隐藏着空穴。渗入这些空穴的液体可能导致烹饪容器破裂。仅限使用耐微波烹饪容器。
若本电器仅在微波模式下运作,使用金属或含金属装饰的容器会导致电火花。这可能会导致电器损坏。在仅有微波运作的情况下切勿使用金属容器。
警告 - 有电击危险!
本电器为高压电器。切勿拆除外壳。
警告 - 有严重损害健康的危险!
- 如果清洁不当,电器表面可能会损坏。微波能可能会逸出。定期清洁电器,并即时除去食物积垢。时刻保持烹饪箱、门封、门和门碰清洁。→ "清洁"第 39 页
- 如果烹饪箱门或门封损坏,微波能可能会逸出。在烹饪箱门或门封损坏时,切勿使用本电器。联系售后服务部门。
- 如果电器没有配备任何外壳,微波能将会逸出。切勿拆除外壳。如有任何维护或维修工作,请联系售后服务部门。
损坏原因
注意!
- 产生火花:金属 (例如玻璃杯内的汤匙) 必须距离烹饪箱内壁和门内壁至少 2 cm。否则,火花会损坏门内壁的玻璃。
- 箔制容器:不要在电器中使用箔制容器。它们产生的火花会损坏电器。
- 在未放食物的情况下操作微波:烹饪箱中未放食物就操作电器会导致电器过载。除非烹饪箱内放有食物,否则切勿开启微波。对于此规则,唯一的例外是进行下面的简短的容器测试。→ "微波"第33页
natural_image
Simple icon showing a speedometer above a boat with a checkmark below (no text or symbols)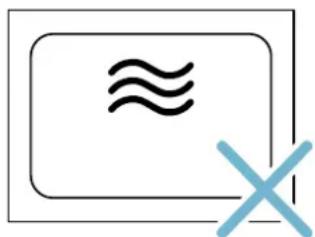
natural_image
Simple icon with a wavy line and a blue 'X' symbol, no text or labels present.- 烹饪箱中的水分:烹饪箱中长期有水分可能会导致腐蚀。让烹饪箱在使用后充分干燥。不要将潮湿的食物长期存放在密闭的烹饪箱内。不要将食物存储在烹饪箱内。
- 打开电器门进行冷却:高温操作之后,烹饪箱必须关门冷却。不要将任何东西夹在电器门中。否则,即使电器门只是略微开启,长时间下来,附近的橱柜表面也可能会损坏。 如果烤箱运行时产生大量水分,则只能打开电器门让烹饪箱干燥。
- 门封极为脏污:如果门封非常脏,电器门在操作过程中将无法正确关闭。附近橱柜的表面可能会损坏。应始终保持门封清洁。→ "清洁"第39页
- 微波爆米花:切勿将微波功率设置得过高。使用的最大微波功率为 600 W。爆米花袋必须放在玻璃盘上。门面板过载时可能会跳动。
环境保护
环保处理
按照环保要求处理包装材料。
本电器已经根据欧盟有关废弃电气和电子设备的法令2012/19/EU (waste electrical and electronic equipment - WEEE)进行了标记。该指令是在全欧盟范围内关于废弃设备回收处理和再生利用的有效法律依据。

了解您的电器
本节对指示符和控件进行说明。此外,您还会了解到电器的各种功能。
提示:根据电器型号,个别细节和颜色可能不同。
控制面板
在控制面板中,可以使用各种按键、触控区和旋转选择钮来设置电器所需的功能。当前设置出现在显示屏上。
该概述展示了在所选操作模式下打开电器时的控制面板。
1 按键
位于旋转选择钮左右两边的按键均有一个压力点。按下这些按键即可激活它们。
2 旋转选择钮
可以顺时针和逆时针转动旋转选择钮。
3 显示屏
您可以在显示屏中看到当前调节值、选项或说明。
4 触控区
显示屏左侧 <以及右侧 > 触摸区下方均设有传感器。触摸相应箭头即可选择功能。
控制按键
各个控件分别与电器的各种功能相对应。您可以简单、直接地设置电器。
按键和触摸区
您可以在此找到各种按键和触控区的简要说明。
| 按键含义 | ||
| 1开启和关断电器 | ||
| 菜单 打开操作模式菜单 | ||
| i | 信息 显示说明 | |
| 2时间设置选项 设置定时器 | ||
| 自动开门 打开电器门 | ||
| D/口 | 开始或暂停操作 | |
| 触控区 | ||
| < | 显示屏左侧区域 | 左侧导航 |
| > | 显示屏右侧区域 | 右侧导航 |
旋转选择钮
使用旋转选择钮更改出现在显示屏中的操作模式和调整值。
在大多数选项列表中(例如程序),第一个选项紧跟在最后一个选项之后。
在某些选项列表(例如持续时间)中,当旋转选择钮达到最小值或最大值时,您需要反方向旋转该选择钮。
显示屏
显示屏结构鲜明,所示信息一目了然。
当前可以设置的值重点显示。即以深色背景白色字体显示。
状态栏
状态栏位于显示屏的顶部。时间、定时器持续时间和程序长度在此处显示。
进度线
例如,进度线显示已经经过了多长时间。设置值下面的直线从左向右蔓延,直线越长,操作持续运行的时间越久。
操作模式菜单
该菜单分为不同的操作模式。您可以据此快速访问所需功能。
根据电器类型的不同,会有大量的操作模式。
| 操作模式 | 用途 |
| 微波 选择微波功率 | |
| 烧烤 选择烧烤设置或具有微波功率的 烧烤设置 | |
| 程序 自动烹饪程序 | 可以轻松制备所选菜肴 |
| 设置→"基本设置"第38页 | 您可以根据自己的要求调节电器的基本设置。 |
更多信息
在大多数情况下,电器上会提供给您有关正在执行的操作的说明和更多信息。要查看这些信息,请按下 i 按键。说明会持续显示几秒钟。使用旋转选择钮可滚动到较长说明的结尾。
某些说明将自动显示,例如作为确认信息,或提供指示或警告。
可以通过再按 i 按键清除说明。
烹饪箱功能
烹饪箱中的功能可以使您的电器更易于使用。例如,这可使烹饪箱内更加明亮,而冷却风扇则可防止电器过热。
自动开门
如果激活了自动开门,电器门弹簧会打开。您可以以手动的方式完全打开电器门。
在断电情况下不会自动开门。您可以手动开门。
提示
- 如果在操作期间打开电器门,则操作暂停。
- 在您关闭电器门时,操作不会自动继续。您必须手动重新启动该操作。
- 如果电器已经关断了很长时间,电器门将会在延时后打开。
内部照明
当您打开电器门时,内部照明将打开。如果门打开的时间超过5分钟左右,会再次关断烹饪箱照明。当自动开门已激活后,会再次开启烹饪箱照明。
对于所有操作模式,一启动操作,就会开启烹饪箱照明。当操作完成后,照明关断。
冷却风扇
冷却风扇按要求开启。热风从门上方逸出。
使用结束后,冷却风扇可能会继续运转一段时间。
注意!
不要覆盖通风槽。否则可能会导致电器过热。
提示
- 在微波操作过程中,电器保持冷却。尽管如此,冷却风扇仍将开启。在微波工作结束时,风扇还会持续运转一段时间。
- 门窗、内壁和底板上可能会形成冷凝液。这是正常现象,不影响微波工作。请在烹饪后擦去这些冷凝液。
附件
电器随附一系列附件。您可以在本章节找到有关随附附件的概览以及正确使用附件的信息。
随附附件
您的电器配备下列附件:
natural_image
Two simple electrical components: a metal rack and a rectangular tray, both without any text or symbols.烤架
用作放置烹饪容器的平面或用于烧烤和着色。
玻璃烤盘
如果直接在烤架上烧烤食物,可以作为防溅板。为此,要把烤架放在玻璃烤盘内。
在微波工作期间,也可将玻璃烤盘用作烹饪容器。
只能使用电器制造商提供的原始附件。这些附件是专门为电器定制的。
您可以在售后服务部、专卖店或在线商店购买附件。

首次使用之前
您必须先进行一些设置,才可使用新电器。您还必须清洁烹饪箱和附件。
首次使用
在给电器通电或在断电之后,显示屏上显示首次使用的设置。说明可能需要几秒钟时间才会出现。
提示:您可随时在基本设置中更改这些设置。
设置语言
-
使用旋转选择钮选择所需语言。
-
触摸 > 箭头。
将显示下一个设置。
设置时间
-
转动旋转选择钮,设置当前时间。
-
触摸 > 箭头。
设置日期
-
使用旋转选择钮设置当前日期。
-
触摸 > 箭头以确认。
-
使用旋转选择钮设置当前月份。
-
触摸 > 箭头以确认。
-
使用旋转选择钮设置当前年份。
-
触摸 > 箭头以确认。
显示屏上将出现用于确认已完成首次使用的备注。
清洁烹饪箱和附件
在第一次使用电器制备食物之前必须清洁烹饪箱和附件。
清洁烹饪箱
为了去除新电器的味道,可清空烹饪箱并关上电器门来加热烹饪箱。
确保烹饪箱中没有遗留任何包装物品,例如聚苯乙烯颗粒。在加热电器之前,使用柔软的湿布擦拭烹饪箱中的光滑表面。在电器加热时,保持厨房空气流通。
根据指示进行设置。您可以在以下章节中找到如何设置烧烤和烹饪时长。→ "烧烤"第 34 页
设置
烧烤 第3层
烹饪时长 15 分钟
在指示的烹饪时长之后关断电器。
在烹饪箱冷却之后,使用肥皂水和软布清洁光滑表面。
清洁附件
使用肥皂水和软布或软刷彻底清洁附件。

操作电器
您已经了解了各个控件及其工作原理。现在,我们将说明如何设置您的电器。您将了解打开和关断电器时的状态以及如何选择操作模式。
打开和关断电器
必须先接通电器电源,才可设置电器。
提示:在关断电器时,仍然还可以设置定时器。在关断电器后,某些会显示定时器并在显示屏上仍然可以看到说明。
不使用时,请关断您的设备。如果长期不应用设置,则电器将自动关断。
开机
按下 ① 按键,启动电器。
按键上的 ① 符号亮起蓝色。
西门子商标显示在显示屏中,其后为最大微波功率。
电器准备就绪。
您可以在单独的章节中查看操作模式设置方式。
关断电器
使用 ① 按键关断电器。
按键上的灯光会熄灭。
任何可能正在运行的功能都会被取消。
时间和日期出现在显示屏中。
提示:您可以在基本设置中设置在设备关断时是否显示时间和日期。
操作
某些操作步骤对于所有操作模式都是相同的。在下文中,您可以了解基本操作步骤。
开始操作
您必须按下 ▷/□ 按键才能开始每个操作。
在开始操作后,您的设置出现在显示屏上。例如,进度线显示已经经过了多长时间。
提示:如果由于电器门开启,操作暂停,在关闭电器门之后,必须使用 ▷/□ 按键重新启动该操作。
暂停操作
使用 ▷/□ 按键可以暂停和重新启动操作。
按下 ① 按键可以删除所有设置。
提示
- 打开电器门也会暂停操作。
- 在暂停或取消操作之后,风扇可能会继续运转。
选择操作模式
在开启电器之后,会显示默认操作模式。您可以立即启动该设置。
如果想要选择不同的操作模式,可以在适用章节中查看这些模式的详细描述。
以下始终适用:
- 按下目按键。
操作模式菜单打开。 - 使用旋转选择钮选择所需的操作模式。根据不同的操作模式,提供不同的选项。
- 使用箭头 > 导航到所需的操作模式。

微波
您可以使用微波快速烹饪、加热和解冻食物。您可以单独使用微波,也可以使用微波与烧烤组合。
要确保优化利用微波,请遵循有关烹饪容器的说明并熟悉指导手册后面的应用程序表中的数据。
烹饪容器
并非所有烹饪睿器都适用于微波。因此为了确保您的食物已被正确加热并电器未被损坏,请仅使用适合微波的烹饪容器。
合适的烹饪容器
用玻璃、玻璃陶瓷、陶瓷或耐热塑料制成的耐热烹饪容器。这些材料可使微波穿透。
也可以使用餐盘。这样就不用将食物从一个盘换到另一个盘。如果烹饪容器带有金饰边或银饰边,只有在制造商保证它们适用于微波时才能使用。
不适合的烹饪容器
金属烹饪器皿不适合。微波无法穿透金属容器,因此放在金属容器中的食物仍是冷的。
注意!
产生火花: 金属 (例如玻璃杯内的汤匙) 必须距离烹饪箱内壁和门内壁至少 2 ~cm 。否则, 火花会损坏门内壁的玻璃。
烹饪容器测试
除非烹饪箱内放有食物,否则切勿开启微波。唯一的例外是进行下面的简短的烹饪容器测试。
如果您不能确定自己的烹饪容器是否适合在微波中使用,则进行以下测试。
-
以最大功率加热空烹饪容器 12 到 1 分钟。
-
在这期间检查烹饪容器的温度。
烹饪容器摸起来应该仍是冷的或温的。
如果烹饪容器变热或产生火花,则不适用。
此时,请停止测试。
警告 - 有灼伤危险!
可触及部件在电器运转时会变得灼热。切勿触碰灼热部件。请将小孩留在安全距离以外。
微波功率设置
以下 微波功率设置可供选择。
微波功率设置并不总是与电器实际使用的功率完全对应。
-
使用旋转选择钮更改选项。根据选项,进一步改变设置。
-
按下 ▷/□ 按键,启动。
已用时间出现在显示屏上。可以看到设置和进度线。
提示:如果想要离开当前设置,可以使用目按键导航回操作模式级别。
设置 食物 最大烹饪时长
| 90 W 用于解冻精致食物 1 小时 30 分钟 |
| 180 W 用于解冻和连续烹饪 1 小时 30 分钟 |
| 360 W 用于烹饪肉类和加热精致食物 1 小时 30 分钟 |
| 600 W 用于加热和烹饪食物 1 小时 30 分钟 |
| 900 W 用于加热液体 30 分钟 |
默认值:
电器为每种微波功率设置都提供了默认的烹饪时长。您可以接受该值或进行适当更改。
最高设定用于加热液体。经过一段时间后,微波的功率输出将减小到低于最大值以保护电器。冷却一段时间后,微波的全功率将可再次使用。
设置微波
实例:微波功率 600 W,烹饪时长 5 分钟。
- 按下 ① 按键。
电器准备就绪。在显示屏中,最大微波功率和烹饪时长显示为默认值-可以随时对其进行更改。
- 使用旋转选择钮可以选择所需微波功率。
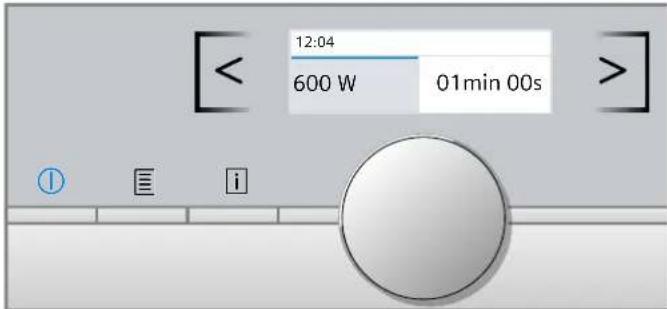
微波功率和默认烹饪时长显示在显示屏中。
- 触摸 > 箭头。
烹饪时长可以设置。
- 使用旋转选择钮设置所需烹饪时长。
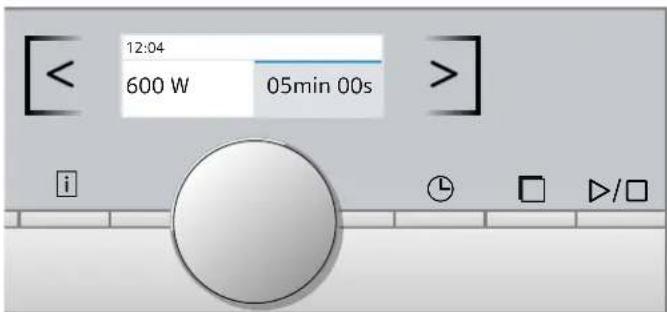
5. 按下 ▷/□ 按键,启动。
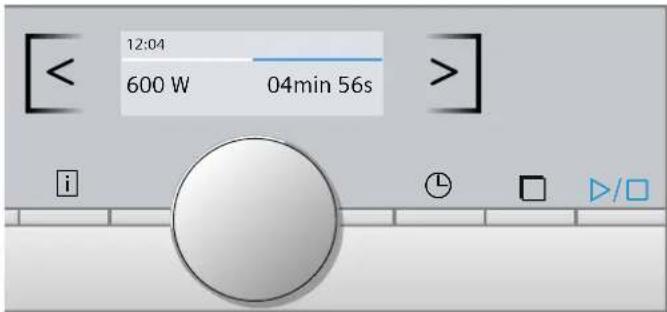
电器启动操作。在显示屏中的烹饪时间倒计时。
提示
- 当开启电器时,最高微波功率始终出现在显示屏中作为建议值。
- 如果在电器工作时打开电器门,风机可能会继续运行。
烹饪时间到时
响起一声信号音.
操作结束。
提前停止信号音:
触摸 ⏻ 按键。
提示: 在触摸 ⏱ 按钮之后, 会出现定时器功能, 在短时间之后, 其会自动消失。如果再次触摸 ⏱ 按钮, 定时器功能将会立即消失。
按下 ① 按键关断电器。
更改烹饪时间
这随时可以进行。
使用旋转选择钮可以更改烹饪时长。
操作继续。
改变微波功率
这随时可以进行。
使用 <箭头可以改变微波功率。
使用旋转选择钮可以设置所需微波功率。
烹饪时长保持不变。
操作继续。
提示:如果设置的烹饪时长超过微波功率 (900 W) 的最大时间,该时间将会自动减少。操作停止。按下 ▷/□ 按键,开始操作。
烧烤
您可以通过烧烤让您的食物很好地上色。您可以单独使用烧烤,也可以使用微波与烧烤组合。
可供使用的烧烤设置如下:
| 功率 食物 | |
| 烧烤 1 级(低火) | 用于蛋奶酥和深锅炖菜 |
| 2 级(中火) | 用于平底炖菜和鱼类 |
| 3 级(大火) | 用于肉排、香肠和吐司 |
设置烧烤
实例:烧烤2,烹饪时间12分钟
-
按下 ① 按键。
电器准备就绪。 -
按下 目按键。
显示操作模式。
-
使用旋转选择钮可以选择烧烤操作模式。
-
触摸 > 箭头。
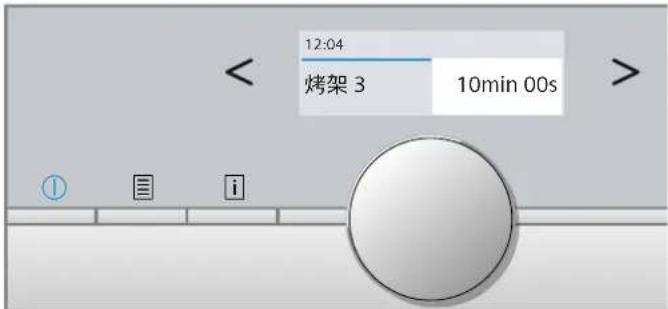
在显示屏中,烧烤 3 显示为默认值 - 可以随时对其进行更改。
-
使用旋转选择钮可以设置所需烧烤级别。烧烤级别和默认烹饪时长显示在显示屏中。
-
触摸 > 箭头。
烹饪时长可以设置。
- 使用旋转选择钮设置所需烹饪时长。
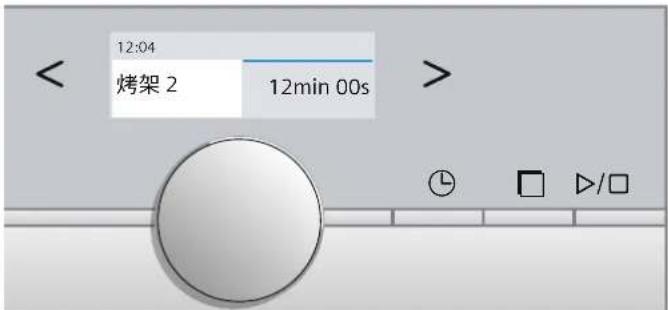
- 按下 ▷/□ 按键,启动。 电器启动操作。在显示屏中的烹饪时间倒计时。
提示
- 在显示屏上,烧烤 3 显示为默认值。
将旋转选择钮向左转,设置烧烤2和1.
将旋转选择钮向右转动,选择组合模式;烧烤 3 + 360 W,烧烤 3 + 180 W,等等。
- 如果在电器工作时打开电器门,风机可能会继续运行。
烹饪时间到时
响起一声信号音.
操作结束。
提前停止信号音:
触摸 Ⓛ 按键。
提示:在触摸 ⏻ 按钮之后,会出现定时器功能,在短时间之后,其会自动消失。如果再次触摸 ⏻ 按钮,定时器功能将会立即消失。
按下 ① 按键关断电器。
更改烹饪时间
这随时可以进行。
使用旋转选择钮可以更改烹饪时长。
操作继续。
更改烧烤设置
这随时可以进行。
使用 <箭头可以改变烧烤设置。
使用旋转选择钮可以设置所需烧烤设置。
烹饪时长保持不变。
操作继续。
提示:当将操作模式从烧烤更改为组合模式时,电器会暂停,反之亦然。操作停止。如果想要更改操作模式,可以通过按住 ▷/□ 按键继续操作。
设置微波为组合模式
这包括烧烤和微波功能同时作用。微波能够加快烹饪速度,同时仍然可以很好地上色。
您可以选择所有微波功率设置。
例外:900 和 600 W。
设置微波为组合模式
实例:烧烤 3,微波功率 180 W,烹饪时长 25 分钟。
- 按下 ① 按键
电器准备就绪。
- 按下 目 按键
显示操作模式。
-
使用旋转选择钮可以选择烧烤操作模式。
-
触摸 > 箭头。
在显示屏上,烧烤 3 显示为默认值。
- 将旋转选择钮转动到右侧,设置所需的组合模式。
组合模式和默认烹饪时长显示在显示屏中。
- 触摸 > 箭头。
烹饪时长可以设置。
- 使用旋转选择钮设置所需烹饪时长。
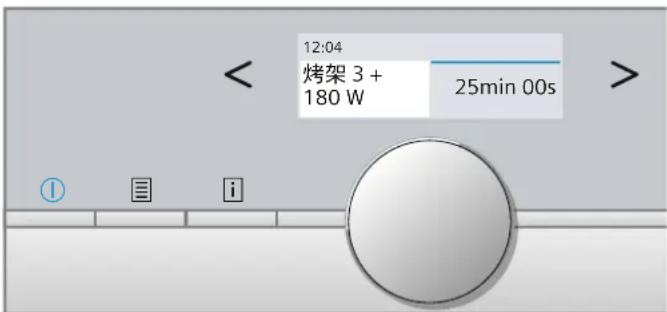
- 按下 ▷/□ 按键,启动。
电器启动操作。在显示屏中的烹饪时间倒计时。
提示
- 在显示屏上,烧烤 3 显示为默认值。
将旋转选择钮向左转,设置烧烤2和1.
将旋转选择钮向右转动,选择组合模式;烧烤 3 + 360
W,烧烤 3 +180 W,等等。
- 如果在电器工作时打开电器门,风机可能会继续运行。
烹饪时间到时
响起一声信号音.
操作结束。
提前停止信号音:
触摸 Ⓛ 按键。
提示:在触摸 ⏻ 按钮之后,会出现定时器功能,在短时间之后,其会自动消失。如果再次触摸 ⏻ 按钮,定时器功能将会立即消失。
按下 ① 按键关断电器。
更改烹饪时间
这随时可以进行。
使用旋转选择钮可以更改烹饪时长。
操作继续。
更改组合模式
这随时可以进行。
使用 <箭头可以更改组合模式。
使用旋转选择钮可以设置所需组合模式。
烹饪时长保持不变。
操作继续。
提示:当将操作模式从烧烤更改为组合模式时,电器会暂停,反之亦然。操作停止。如果想要更改操作模式,可以通过按住 ▷/□ 按键继续操作。

定时器
您可以将定时器作为厨房定时器,定时器与其它设置一起运行。即使设备关断,您仍然可以随时对其进行设置。它有自己的信号音,这样您就可以区别是定时器到时还是烹饪时间到时。
设置定时器
最大设置为 24 小时。
值越高,时间间隔就越长。
- 按下 ⏱ 按键。
显示定时器。
- 使用旋转选择钮设置定时器持续时间。
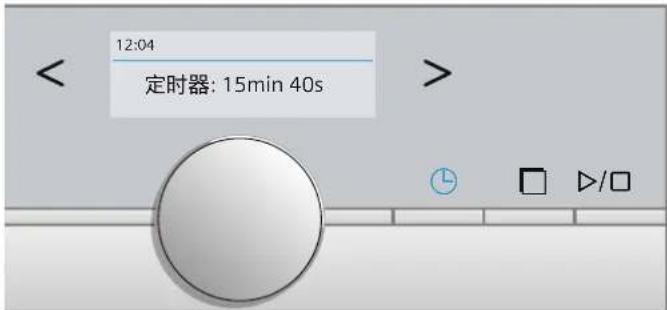
- 按下 ⏱ 按键,启动。
提示:几秒钟之后,定时器也会自动启动。
定时器开始倒计时。在短时间之后,显示屏会切回。定时器符号和经过的时间出现在状态条中。
一旦定时器持续时间到时,信号音就会响起。使用 ⏻ 按键可提前取消信号音。
提示
即使关断电器,在显示屏中,定时器仍然保持可见。
- 如果运行操作模式,触摸 ⏻ 按键可以显示定时器。定时器持续时间会持续显示几秒钟并可进行更改。
更改定时器
触摸 ⏻ 按键更改定时器持续时间。显示定时器持续时间 - 使用旋转选择钮对其进行更改。
取消定时器
如果想要取消定时器,请将定时器上的持续时间重置为 0。在应用更改之后,将不再点亮符号。

程序
您可以通过各种程序轻松烘焙食物。选择程序,然后输入食物的重量。随后程序会应用最适用的设置。
设置程序
实例:“解冻面包”程序,重量 250 g。
- 按下 ① 按键。
电器准备就绪。
- 按下 目按键。
显示操作模式。
-
使用旋转选择钮选择“程序”。
-
触摸 > 箭头。
第一个程序出现在显示屏中。
- 使用旋转选择钮设置所需的程序。
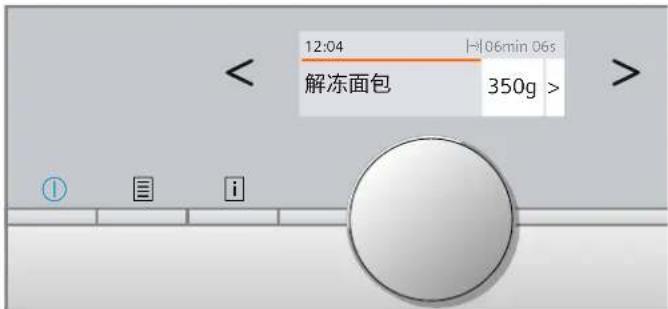
这样就选定了所需的程序。默认重量值出现在显示屏中。
- 触摸 > 箭头。
可以对重量值进行设置。
- 使用旋转选择钮设置所需重量。
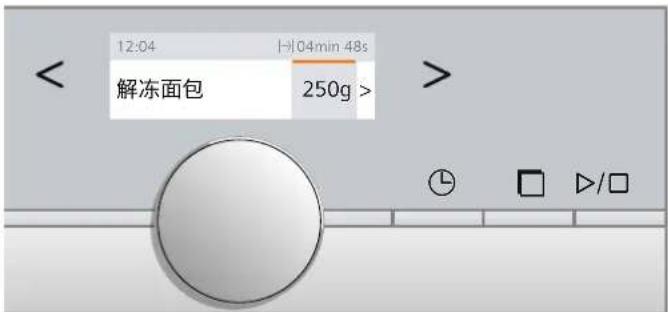
- 触摸 > 箭头。
会显示制备提示。
- 按下 ▷/□ 按键,启动。
电器启动操作。在显示屏中的时间倒计时。
提示
- 烹饪时长由程序进行计算。
- 在某些菜式的制备期间,显示屏上会显示翻转或搅拌提示。请按照显示信息进行操作。打开电器门会暂停操作。在关闭电器门之后,会重新启动操作。如果不翻转或搅拌菜肴,程序将照常运行直至结束。
有关程序的信息
将食物置于冷的烹饪箱中。
将食物从包装内取出并称重。如果无法输入精确的重量,应四舍五入。
各种程序务必使用适合微波的烹饪容器,例如用玻璃或陶瓷制成的容器。请遵循程序表中的附件提示。
烹饪说明后有一张适用食物表,其中有重量范围和所需要的附件。
不能设置超出重量范围的重量。
对于许多菜式,在经过一定时间后会发出一声信号声。请翻转或搅拌食物。
解冻:
- 尽可能将食物分成几份,在 -18 °C 下平放冷冻。
- 将冷冻食物放置在平底的烹饪容器中,例如玻璃或瓷盘。
- 在电器中解冻之后,让食物继续解冻 15 到 90 分钟,直至达到恒温。
面包应该需要多少解冻多少,因为面包很容易变质。
在解冻肉块、家禽时会有汁液产生。在翻转肉和家禽时要将这些汁液倒干净;禁止将这些汁液用作其它用途或让汁液接触其它食物。
■ 翻转后,要将已解冻的肉糜取出。 - 整只家禽应放在烹饪容器内,胸部朝下;家禽块则带皮的部分朝下。
蔬菜:
- 新鲜蔬菜:切成大小均匀的小块。每 100 g 蔬菜加入一大汤匙水。
- 冷冻蔬菜:此程序仅适合氽烫过但没有预先烹制过的蔬菜。不适合拌有奶油沙司的冷冻蔬菜。添加1至3大汤匙水。菠菜或红球甘蓝中不加水。
土豆:
- 熟土豆:切成相等大小的块。每 100 g 土豆加入两大汤匙水,并加盐调味。
- 去皮熟土豆:使用厚度相同的土豆。清洗土豆并将土豆皮刺破。将湿土豆放在盘子里。不要加水。
- 烤土豆:使用厚度相同的土豆。清洗,擦干并将土豆皮刺破。
米饭:
- 不要使用糙米或可煮袋装米。
- 向大米中加入 2 到 2.5 倍份量的水。
家禽:
- 将小鸡块放在烧烤架上,肉块带皮的一侧朝上。
静置时间
在程序结束后,有些菜式还需要在烹饪箱中静置一段时间。
| 餐点 | 静置时间 |
| 蔬菜 | 约5分钟 |
| 土豆 | 约5分钟。先倒出剩余的水 |
| 米饭 | 5-10分钟 |
程序表
| 程序 | 合适的食物 | 重量范围(kg) | 炊具/附件 | 烹饪层 |
| 解冻 | ||||
| 面包* | 整个圆形或长形面包、面包片、海绵蛋糕、发面饼、水果派、不含糖霜、奶油或卡士达酱的蛋糕 | 0.20-1.50 kg 浅炊具,不盖盖子 | 烹饪箱箱底 | |
| 肉* | 大肉块、切片肉、肉糜、鸡肉、母鸡、鸭 0.20-2.00 kg 浅炊具,不盖盖子 | 烹饪箱箱底 | ||
| 鱼* | 全鱼、鱼块、鱼片 0.10-1.00 kg 浅炊具,不盖盖子 | 烹饪箱箱底 | ||
| 烹饪 | ||||
| 新鲜蔬菜** | 花椰菜、椰菜、胡萝卜、大头菜、韭菜、胡椒、西葫芦 | 0.15-1.00 kg 带盖烹饪容器 | 烹饪箱箱底 | |
| 冷冻蔬菜** | 花椰菜、椰菜、胡萝卜、大头菜、红球甘蓝、菠菜 0.15-1.00 kg 带盖烹饪容器 | 烹饪箱箱底 | ||
| 土豆** | 熟土豆、去皮熟土豆、大小相同的土豆块 0.20-1.00 kg 带盖烹饪容器 | 烹饪箱箱底 | ||
| 米饭** | 大米、长粒大米 0.05-0.30 kg 带盖深烹饪容器 | 烹饪箱箱底 | ||
| 烤土豆 | 蜡质土豆、以蜡质土豆为主或粉质土豆,约6cm厚 | 0.20-1.50 kg 烤架 | 烹饪箱箱底 | |
| 组合模式 | ||||
| 冰冻意大利千层面 | 意大利千层面配番茄肉酱 | 0.30-1.00 kg 不带盖烹饪容器 | 烹饪箱箱底 | |
| 鸡块 | 鸡大腿,半只鸡 0.50-1.80 kg 玻璃烤盘和烤架 | 烹饪箱箱底 | ||
| *)观察给出的信号,了解何时翻转食物。**)观察给出的信号,了解何时搅拌食物 | ||||
基本设置
为了帮助您有效地使用电器,我们为您提供了各种设置。您可以根据需要更改这些设置。
更改设置
- 按下 ① 按键。
- 按下 目按键。
操作模式菜单打开。 - 使用旋转选择钮选择“设置”。
- 触摸 > 箭头。
- 使用旋转选择钮更改数值。
- 使用箭头 > 切换到下一个设置,然后根据需要对其进行更改。
- 按下 目 按键进行保存.
“保存”或“放弃”出现在显示屏上。 - 使用触控区选择所需的选项。
设置列表
该列表说明了所有基本设置及其更改方法。根据您自己的电器型号,显示屏将只显示适用于您电器的设置。
您可以更改以下设置:
设置 选项
| 语言 设置语言 | |
| 时钟 设置当前时间 | |
| 日期 设置当前日期 | |
| 声音信号 短烹饪时间 | 中烹饪时间*长烹饪时间 |
| 按键声音 开启 | 关断*(1 按钮声音始终处于打开状态) |
| 显示亮度 5 个等级 | 等级 3* |
| 时钟显示 数字 + 日期* | 数字式关 |
| 夜间照明调暗 关断** | 开启(在 22:00 到 6:00 之间显示调暗) |
| 演示模式 关断* | 开启(仅在电器复位之后的 3 分钟内或第一次使用电器时显示) |
| 出厂设置 复位 | 不复位* |
\* 出厂设置(出厂设置可能根据电器型号的不同而不同)
提示:对语言、按键声音和显示亮度设置的更改立即生效。所有其他更改将在设置保存后生效。
断电
对设置所进行的更改甚至在断电之后还会保留。
在断电之后,仅与首次使用电器相关的设置需要再次执行。
更改时间
您可在基本设置中更改时间。
例如:将时间从夏季时改为冬季时。
- 按下 ① 按键。
- 按下 目按键。
- 使用旋转选择钮选择“设置”。
- 触摸箭头 > 移动到“当日时间”。
- 使用旋转选择钮更改时间。
- 按下 目按键。
“保存”或“放弃”出现在显示屏上。

清洁
只要精心保养和清洁,您的电器将在未来的很长一段时间内保持其外观,并能正常工作。以下说明应如何正确保养和清洁电器。

警告 - 有灼伤危险! !
电器会变灼热。切勿触摸烹饪箱的内表面或加热元件。必须让电器冷却下来。请将小孩留在安全距离以外。

警告 - 有电击危险!
请勿使用高压清洁器或蒸汽清洁器,以防触电。

警告 - 有受伤危险!
电器门玻璃如果有刮伤,可能会导致裂开。请不要使用玻璃刮刀、剧烈或腐蚀性的清洁用品或洗涤剂。
提示:微波炉若有异味,例如在烹制鱼等食物之后,这很容易清除。将几滴柠檬汁滴入一杯水中。务必在容器中放一把汤匙,以防延时沸腾。以最大微波功率将水加热1至2分钟。
清洁剂
为了防止因清洗剂使用不当而损坏各种表面,请遵守下表中的信息。
请勿使用:
- 强烈的或腐蚀性的清洁剂。
金属或玻璃刮刀清洁门面板。
金属或玻璃刮刀清洁门封。
硬的清洗垫或海绵。
- 高酒精含量的清洗剂。
新海绵布使用前要彻底清洗。
区域 清洁剂
| 电器前面板 热肥皂水:用洗碗布清洁并用软布擦干。不要用金属或玻璃刮刀进行清洁。 | |
| 显示屏 使用微纤维布或微湿的抹布擦拭。不要用湿布擦拭。 | |
| 不锈钢 热肥皂水:用洗碗布清洁并用软布擦干。立即清除水垢、油脂、淀粉和蛋白(例如蛋清)形成的斑点。这类污渍可能会形成斑点。委锈钢用清洁用品可从我们的售后服务部门或业零售商处获取。 | |
| 不锈钢制成的烹饪箱 热肥皂水或醋溶液:用洗碗布清洁并用软布擦干。请勿使用烤箱喷雾剂或任何其他腐蚀性烤箱清洁剂或磨蚀性材料。擦洗片、粗糙的海绵和平底锅清洗物品均不适用。这些物品会刮伤表面。让内部表面彻底干燥。 | |
| 门面板 玻璃清洁剂:用洗碗布清洁。不要使用玻璃刮刀。 | |
| 门密封 热肥皂水:用洗碗布清洁,不要刷洗。不要用金属或玻璃刮刀 进行清洁。 | |
| 附件 热肥皂水:浸泡并用洗碗布或刷子清洁。 |

故障检修
如果发生故障,原因往往很简单。在给售后服务部打电话前,请阅读故障表,尝试自行解决故障。
建议:如果菜肴并未达到您的预期效果,请参见以下章节,您会在其中找到大量与优化设置相关的说明和提示。→ "经由我们烹饪工作室测试过的菜谱"第41页

警告 - 有电击危险!
修理不当是很危险的。只能由我们经过培训的售后服务人员来维修电器和更换损坏的电源线。如果电器发生故障,请拔下电器电源插头,或断开熔断器盒中的断路器。联系售后服务部门。
故障表
| 故障 可能的原因 纠正措施 / 信息 | ||
| 电器不工作或显示屏不工作 插头没有插入电源 将电器连接至电源 | ||
| 断电 检查其他厨房电器是否工作 | ||
| 断路器故障 检查保险丝盒,确保电器保险丝正常 | ||
| 操作故障 | 在保险丝盒中,关断电器的断路器,并在大约60秒后重新打开 | |
| 电器不能启动 | 电器门没有完全关闭 | 关闭电器门 |
| 电器不加热。单词“演示”出现在显示屏中。 | 电器处于演示模式 在基本设置中停用演示模式。 | 为此,将电器短暂断电(关断家用保险丝或保险丝盒内的断路器)。然后,在3分钟内在基本设置中停用演示模式。 |
| 内部照明不工作 | 内部照明发生故障 致电售后服务部门 | |
出错信息“Exxx”* 如果显示出错信息,请关断电器,然后重新开启;如
果该信息消失,说明这是一次性的问题。如果再次发生故障或仍然显示错误信息,请联系售后服务部门并提供故障代码。
* 特殊特性:
出错信息“E0532”:打开和关闭电器门。
出错信息“E6501”:关断电器。等待10分钟。重新开启电器。

客户服务
如果您的电器需要修理,我们为您提供售后服务。我们会找出合适的解决方法,并尽量避免售后人员不必要的上门服务。
E 编号和 FD 编号
联系我们时请您说明完整的 产品编号(E 编号)和生产编号 (FD 编号),以便我们为您提供高水平的服务。当您打开设备门后,就能看见带编号的型号铭牌。
在某些带蒸制功能的设备上,型号铭牌位于面板后。

为了避免您在需要时长时间寻找,请在这里记录设备数据和客户服务部门电话号码。
E 编号 FD 编号
客户服务部门
请注意,即使在保修期内,发生误操作后客户服务人员的现场服务也不是免费的。
各个国家的详细售后联系方式请在附带的售后服务目录中查找。
本电器符合标准 EN 55011 和 CISPR 11。它属于分组 2 中的 B 类产品。
分组 2 表示微波炉的生产目的是用于加热食物。B 类表示本电器适合私人家庭使用。
技术参数
| 电源 220 V~,50 Hz | |
| 最大总功率 1815 W | |
| 微波功率 900 W (IEC 60705) | |
| 最大烧烤输出功率 1210 W | |
| 微波频率 2450 Mhz | |
| 保险丝 | 10 A |
| 尺寸(高/宽/深) | |
| -电器 | 382 x 594 x 318 mm |
| -烹饪箱 | 220 x 350 x 270 mm |
| 噪音限值 42 dB (A) | |
| 微波能效等级 | 2 |
| 能效值 | 56 % |
| 待机模式功率消耗 1.0 W | |
| 烧烤模式功率消耗 1.2 W·h | |
经销商及原产地信息:
原产地: 英国
总经销商:博西家用电器(中国)有限公司
地址:南京市中山路129号中南国际大厦20、21楼
执行标准:
GB 4706.1-2005
家用和类似用途电器的安全 第1部分:通用要求
GB 4706.21-2008
家用和类似用途电器的安全 微波炉,包括组合型微波炉的特殊要求
GB 4706.22-2008
家用和类似用途电器的安全 驻立式电灶、灶台、烤箱及类似用途器具的特殊要求
GB 24849-2017
家用和类似用途微波炉能效限定值及能效等级
GB19606-2004
家用和类似用途电器噪声限值
经由我们烹饪工作室测试过的菜谱
这里提供了各种备选食谱及其理想设置。我们会向您说明菜肴采用哪种微波功率设置和烧烤设置最为理想。您可以找到有关合适附件的信息。对于烹饪容器和制备方法也给出了提示。
提示
表中的值总是适用于冷的空烹饪箱。在使用电器之前,先从烹饪箱中取出所有不必要的附件。
- 表格中规定的时间仅作为参考。确切时间取决于食物的质量和成分。
- 使用所提供的附件。
- 在从烹饪箱中取出灼热附件或烹饪容器时,一定要使用烤箱布或烤箱手套。
警告 - 有烫伤危险!
在拉出玻璃烤盘时,可能会溢出热的汁液。应小心地将玻璃烤盘拉出烹饪箱。
下面的表格为您提供了各种微波选项和设置。
表中给出的时间仅供参考,具体取决于使用的烹饪容器和食物的质量、温度以及均匀性。
表格中通常规定时间范围。请首先设置最短的时间,然后根据需要延长时间。
实际情况可能是,您要烹饪的食物量与表格中规定的不同。操作微波有一个经验法则:两倍量 = 两倍时间,一半量 = 一半时间。
可以将烹饪容器放在烤架的中间或放在烹饪箱底板上。这样,食物将从所有侧面吸收微波。
除霜
将冷冻食品放在不盖盖子的容器中,然后放在烹饪箱底。
在解冻期间翻转或搅拌食物一次或两次。大块食物应多翻转几次。翻转时,去除解冻产生的液体。
将解冻过的食物继续在室温下放置 10 到 60 分钟,让温度稳定下来。此时,可以去除家禽的内脏杂碎。
提示:将烹饪容器放在烹饪箱底板上。
| 餐点 重量 微波输出功率 (W) 时间(分钟) | 说明 | ||
| 整块牛肉、猪肉或小牛肉(带骨或去骨)=800 g=180 W, 15 分钟 + 90 W, 15-25 分钟 | 翻转几次 | ||
| 1000 g=180 W, 20 分钟 + 90 W, 20-30 分钟 | |||
| 1500 g=180 W, 25 分钟 + 90 W, 25-30 分钟 | |||
| 肉块或肉片(牛肉、小牛肉或猪肉)=200 g=180 W, 5-8 分钟 + 90 W, 5-10 分钟 | 翻转时将肉条/肉块分开 | ||
| 500 g=180 W, 8-11 分钟 + 90 W, 10-15 分钟 | |||
| 800 g=180 W, 10 分钟 + 90 W, 10-15 分钟 | |||
| 五花肉糜=200 g=90 W, 10-15 分钟=尽量平放冷冻食品; | 在解冻期间翻转几次,并将已解冻的肉糜取出。 | ||
| 500 g=180 W, 5 分钟 + 90 W, 10-15 分钟 | |||
| 1000 g=180 W, 15 分钟 + 90 W, 20-25 分钟 | |||
| 家禽或家禽块=600 g=180 W, 8 分钟 + 90 W, 10-15 分钟=在解冻期间翻转; | 去除解冻过程中产生的液体 | ||
| 1200 g=180 W, 15 分钟 + 90 W, 20-25 分钟 | |||
| 鱼块、鱼排或鱼片 | 400 g=180 W, 5 分钟 + 90 W, 10-15 分钟=将已解冻的部分分开 | ||
| 全鱼=300 g=180 W, 3 分钟 + 90 W, 10-15 分钟=在解冻期间翻转 | |||
| 600 g=180 W, 8 分钟 + 90 W, 15-20 分钟 | |||
| 蔬菜,例如豌豆 | 300 g=180 W, 10-15 分钟 | 在解冻期间认真搅拌 | |
| 水果,例如覆盆子 | 300 g=180 W, 6-9 分钟 | 在解冻期间小心地搅拌,将已解冻的部分分开 | |
| 500 g=180 W, 8 分钟 + 90 W, 5-10 分钟 | |||
| 黄油,解冻 | 125 g=180 W, 1 分钟 + 90 W, 1-2 分钟 | 去除所有包装 | |
| 250 g=180 W, 1 分钟 + 90 W, 2-4 分钟 | |||
| 条形面包=500 g=180 W, 8 分钟 + 90 W, 5-10 分钟 在解冻期间翻转 | |||
| 1000 g=180 W, 12 分钟 + 90 W, 10-20 分钟 | |||
| 干蛋糕,例如海绵蛋糕 | 500 g=90 W, 10-15 分钟=在翻转时将各个蛋糕块分开; | ||
| 750 g=180 W, 5 分钟 + 90 W, 10-15 分钟 | 仅适用于不含糖霜、奶油或卡士达酱的蛋糕 | ||
餐点 重量 微波输出功率 (W)
说明
时间 (分钟)
湿蛋糕,例如水果馅饼、干酪蛋糕 500 g 180 W,5 分钟 + 90 W,15-20 分钟 仅适用于不加糖衣、奶油或白明胶的蛋糕
750 g 180 W, 7 分钟 + 90 W, 15-20 分钟
解冻、加热或烹饪冷冻食品
将熟食从包装内取出。放入可以微波加热的烹饪容器,加热过程会更快、更均匀。菜肴中的不同成分所需要的加热时间可能不一样。
平摊食物的烹饪速度比堆放食物的烹饪速度快得多。因此,应摊开食物,使其在烹饪容器内尽量摊平。不应将食物相互叠放在一起。
一定要盖上食物。如果烹饪容器没有合适的盖子,请用盘子或用微波薄膜盖上。
烹饪期间应搅拌或翻转食物 2 到 3 次。
在加热后,继续让食物保持 2-5 分钟,以便温度均匀。
这样做有助于食物保持自己独特的味道,这表示食物需要更少的调味品。
提示:将烹饪容器放在烹饪箱底板上。
| 餐点 重量 微波输出功率 (W) 时间(分钟) | 说明 | |
| 套餐、点餐、即食餐(2-3个元器件) | 300-400 g 600 W,8-13 分钟 盖盖子 | |
| 汤 400 g 600 W,8-12 分钟 带盖烹饪容器 | ||
| 炖肉 500 g 600 W,10-15 分钟 带盖烹饪容器 | ||
| 带调味料的肉条或肉片,例如菜炖牛肉 500 g 600 W,10-15 分钟 带盖烹饪容器 | ||
| 鱼,如鱼排 400 g 600 W,10-15 分钟 盖盖子 | ||
| 烘焙,例如意式烤宽面和意式烤碎肉卷 450 g 600 W,10-15 分钟 使用烤架,将烤箱器皿放在烤架上 | ||
| 配菜,例如米饭、意大利面 | 250 g 600 W,3-7 分钟 | 带盖烹饪容器,加入汁液 |
| 500 g 600 W,8-12 分钟 | ||
| 蔬菜,如豌豆、椰菜、胡萝卜 | 300 g 600 W,7-11 分钟 带盖烹饪容器,加入 1 汤匙水 | |
| 600 g 600 W,14-17 分钟 | ||
| 菠菜奶油沙司 | 450 g 600 W,10-15 分钟 烹饪时不另外加水 | |
加热
警告 - 有烫伤危险!
加热的液体有可能延时沸腾。即液体达到沸腾温度后,却没有常见的蒸汽气泡冒上液面。即使容器只是稍微振动,滚烫的液体也会突然沸腾溢出和飞溅。在加热时,一定要在容器内放一把汤匙。这会防止延时沸腾。
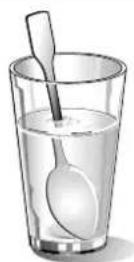
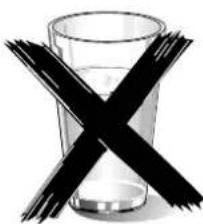
natural_image
Simple illustration of a glass with a black X mark, no text or symbols present.注意!
产生火花: 金属 (例如玻璃杯内的汤匙) 必须距离烹饪箱内壁和门内壁至少 2 ~cm 。否则, 火花会损坏门内壁的玻璃。
提示
- 将熟食从包装内取出。放入可以微波加热的烹饪容器,加热过程会更快、更均匀。菜肴中的不同成分所需要的加热时间可能不一样。
- 一定要盖上食物。如果烹饪容器没有合适的盖子,则用盘子或用微波薄膜盖上。
- 在加热期间搅拌或翻转食物几次。检查温度。
- 在加热后,继续让食物保持 2-5 分钟,以便温度均匀。
- 当从电器中取出盘子时,一定要使用烤箱布或烤箱手套。
提示:将烹饪容器放在烹饪箱底板上。
| 餐点数量微波输出功率(W) | 时间(分钟) | 说明 |
| 套餐、点餐、即食餐(2-3个元器件) | 600 W, 5-8 分钟 | - |
| 饮品125 ml 900 W, 1/2-1 分钟 | 务必将汤匙放入容器中;不要让酒类饮品过热 | ;在加热期间不时检查 |
| 200 ml 900 W, 1-2 分钟 | ||
| 500 ml 900 W, 3-4 分钟 | ||
| 餐点 数量 微波输出功率 (W) 时间(分钟) | 说明 | |
| 婴儿食品,例如奶瓶=50 ml=360 W,约 1⁄2 分钟=不带奶嘴或瓶盖的瓶子;在加热后彻底摇匀或100 ml=360 W,1⁄2-1 分钟200 ml=360 W,1-2 分钟 | 搅拌均匀,并确保检查过温度 | |
| 汤,1 杯=每杯 175 g=600 W,1-2 分钟=- | ||
| 汤,2 杯=每杯 175 g=600 W,2-3 分钟=- | ||
| 带酱汁的肉=500 g=600 W,7-10 分钟=- | ||
| 炖肉=400 g=600 W,5-7 分钟=- | ||
| 800 g=600 W,7-8 分钟=- | ||
| 蔬菜,1份=150 g=600 W,2-3 分钟=- | ||
| 蔬菜,2份=300 g=600 W,3-5 分钟=- | ||
厨具
提示
- 平摊食物的烹饪速度比堆放食物的烹饪速度快得多。因此,应摊开食物,使其在烹饪容器内尽量摊平。不应将食物相互叠放在一起。
-
在带有盖子的烹饪容器中烹饪食物。如果烹饪容器没有合适的盖子,请用盘子或用微波薄膜盖上。
-
这样做有助于食物保持自己独特的味道,这表示食物需要更少的调味品。
- 在烹饪后,继续让食物保持 2-5 分钟,以便温度均匀。
- 当从电器中取出盘子时,一定要使用烤箱布或烤箱手套。
提示:将烹饪容器放在烹饪箱底板上。
| 餐点数量微波输出功率(W) | 时间(分钟) | 说明 | |
| 去掉内脏杂碎的新鲜整鸡 | 1200 g | 600 W, 25-30 分钟 | 烹饪中途翻转一下。 |
| 新鲜鱼块 | 400 g=600 W, 7-12 分钟=- | ||
| 新鲜蔬菜 | 250 g=600 W, 6-10 分钟=将蔬菜切成大小均匀的小块; | ||
| 500 g=600 W, 10-15 分钟 | 每100g蔬菜加1到2汤匙水;在加热期间搅拌 | ||
| 土豆=250 g=600 W, 8-10分钟=将土豆切成大小均匀的小块; | |||
| 每100g土豆加入1汤匙水;在加热期间搅拌 | |||
| 米饭=125 g=600 W, 4-6分钟+ | 180 W, 12-15 分钟 | 加入双倍的汁液 | |
| 250 g=600 W, 6-8分钟+180 W, 15-18分钟 | |||
| 甜食,如牛奶冻(即食) | 500 ml=600 W, 6-8分钟=在加热期间,使用打蛋器彻底搅拌牛奶冻2到3次 | ||
| 水果,蜜饯=500 g=600 W, 9-12分钟=在加热期间搅拌 | |||
| 微波爆米花=100 g=600 W, 3-4分钟=爆米花袋必须放在玻璃盘上; | 请遵守制造商的说明 | ||
微波使用技巧
| 您无法找到准备烹饪的食物量的相应设置信息。 | 根据以下经验法则,延长或缩短烹饪时长:两倍量 = 两倍时间,一半量 = 一半时间 |
| 食物变得太干。 | 下一次,缩短烹饪时间或选择较低的微波功率设置。给食物盖上盖子,并加入更多的汁液。 |
| 到达时间,但是食物没解冻、没热或没熟。 | 设置更长的时间。量大、堆放的食物需要更长的时间。 |
| 到达时间,食物的边缘过热,但中部没熟。 | 在烹饪过程中搅拌,下次选择一个较低的微波功率设置和较长的烹饪时间。 |
| 在解冻之后,家禽或肉外部已解冻,但中部没解冻。 | 下次选择一个较低的微波功率设置。将大量家禽或肉多翻转几次。 |
烧烤
提示
所有给定值仅作为参考,这些数值会随着食物特性而发生变化。
- 用冷水洗肉,用厨巾将其轻轻擦干。烧烤结束前不要在肉上洒盐。且
当在烤架上烧烤时,务必关闭电器门,并请勿预热。
餐点 数量 重量 烧烤设置 时间 (分钟)
| 猪颈排约2cm厚3至4份每份约120g3(高火)第1面:约15分钟 | 第2面:约10-15分钟 |
| 烤香肠4至6份每份约150g3(高火)第1面:约10-15分钟 | 第2面:约10-15分钟 |
| 鱼排*2至3份每份约150g3(高火)第1面:约10分钟 | 第2面:约10-15分钟 |
| 全鱼*,如鳟鱼2至3份每份约150g3(高火)第1面:约15分钟 | 第2面:约15-20分钟 |
| 面包(预烘烤)2-6片3(高火)第1面:约4分钟 | 第2面:约4分钟 |
| 带浇头吐司2-6片3(高火)取决于配料:5-10分钟 |
* 首先用油涂抹烤架。
烧烤和微波组合
提示
- 使用烤架,将烹饪容器放在烤架上。
- 在烤制时,使用深盘子。这将有助于保持烹饪箱整洁。
-
用大号浅底烹饪容器烘焙和焗烤。食物在窄深的容器中需要烹饪更长时间,且顶部有更多的部分变成褐色。
-
将烤架放在玻璃烤盘上,以便接住肉汁。
- 用夹钳翻转正在烧烤的食物。如果用叉子刺穿烤肉,肉汁会流出来烤干。
-
深色的肉 (如牛肉) 比浅色的肉 (如小牛肉或猪肉) 上色更快。在烧烤浅色的肉或鱼片时,经常是表面略带褐色,但里面已熟而多汁。
-
检查烹饪容器尺寸与烹饪箱是否相称。器皿不应过大。
在切肉前继续将肉静置 5 - 10 分钟。这样肉汁分布比较均匀,在切肉时不会流出。 - 对于烘焙和焗烤食品,在电器关断后,应继续在电器中留5分钟。
- 一定要设置最大的烹饪时间。在经过规定的较短时间后检查食物。
| 餐点 重量 | 烧烤设置 | 微波输出功率 (W) | 时间(分钟) | 说明 | |
| 大块猪肉,例如猪颈肉 | 约750 g | 1(低火) | 360 W,35-40 分钟 | 在约15分钟后翻转 | |
| 肉饼最厚7 cm | 约750 g | 2(中火) | 360 W,约25分钟 | ||
| 半鸡 | 约1200 g | 3(高火) | 360 W,40分钟 | 将肉块带皮的一侧朝上;不翻转 | |
| 小鸡块,如1/4只鸡 | 约800 g | 2(中火) | 360 W,20-25分钟 | 将肉块带皮的一侧朝上;不翻转 | |
| 鸭胸肉 | 约800 g | 3(高火) | 180 W,25-30分钟 | 将肉块带皮的一侧朝上;不翻转 | |
| 烤通心粉(采用预先烹制过的配料烤制) | 约1000 g | 1(低火) | 360 W,25-30分钟 | 撒上奶酪 | |
| 法式焗烤土豆(用生土豆烤制)最厚3 cm | 约1000 g | 2(中火) | 360 W,约35分钟 | ||
| 鱼类,贝类 | 约500 g | 3(高火) | 360 W,15分钟 | 烤制前先对鱼进行解冻 | |
| 奶酪蛋糕最厚5 cm | 约1000 g | 1(低火) | 360 W,20-25分钟 | ||
测试菜谱
按照 EN 60705、IEC 60705 或 DIN 44547 和 EN 60350 (2009)
电器的质量和性能由测试机构使用以下菜肴进行测试。
仅用微波烹饪
| 餐点 | 微波功率 (W),烹饪时间(分钟) | 说明 |
| 奶油蛋羹,1000g 600 W,11-12分钟+180W,8-10分钟 耐热玻璃盘 | ||
| 海绵蛋糕,475g 600 W,7-9分钟 耐热玻璃盘,直径22cm | ||
| 肉糕,900g 600 W,25-30分钟 耐热玻璃蛋糕盘,28cm长 | ||
仅用微波解冻
| 餐点 微波功率 (W),解冻时间(分钟) 说明 | ||
| 肉,500 g “肉”程序,500 g 或 180 W,8 分钟 + 90 W,7-10 分钟 | 耐热玻璃盘,直径 24 cm | |
用微波和烧烤组合烹饪
| 餐点 微波功率 (W), 烧烤设置, 烹饪时间(分钟) 说明 | ||
| 法式焗烤土豆,1100 g 360 W + 烧烤设置2,30-35分钟 | 圆形耐热玻璃盘,直径22cm | |
| 蛋糕 - | 不推荐 | |
| 半鸡,约1100g | 360 W + 烧烤设置3,约40-45分钟 | 烤架,玻璃烤盘 |
食品接触用材料及制品信息
本产品中下列预期或可能与食品接触用材料及制品,符合 GB 4806.1-2016 及相应食品接触材料及制品的食品安全国家标准要求。
| 食品接触用材料 | 用途 | 执行标准 | 备注 | |
| 不锈钢10Cr17/搪瓷表面 | 内腔等 | GB 4806.3-2016GB 4806.9-2016 | ||
| 玻璃 | 玻璃板,玻璃盘,灯罩,玻璃棒,玻璃门等 | GB 4806.5-2016 | 可用于烹饪、可微波炉使用 | |
| 金属 | 钢FNiCrM3基材(镀铬) | 烤架 | GB 4806.9-2016 | 不得接触酸性食品 |
| 不锈钢10Cr17 | 内腔等 | |||
| 硅橡胶 | 密封条等 | GB 4806.11-2016 | 接触水性食品 | |
注1:上表包含了本公司生产的此类产品的预期或可能与食品接触的全部部件,本产品的部件以实际配置为准。
注2:请根据说明书要求正常使用本产品,限制使用条件见上表备注栏。
未按上述要求使用本产品所造成的食品污染以及相应的人身损害由使用人自行承担相应法律责任。
如您对此有任何疑问,请拨打本产品所提供的公司客服电话。
BSH Hausgeräte GmbH
Carl-Wery-Str. 34, 81739 München
GERMANY

西门子家电官方微信公众号
siemens-home.bsh-group.com
由BSH家用电器有限公司根据西门子股份公司的商标许可制造
Manufactured by BSH Hausgeräte GmbH under Trademark License of Siemens AG
- Table of contents
- Intended use
- Important safety information
- General information
- ⚠ Warning – Risk of fire!
- ⚠ Warning – Risk of burns!
- ⚠ Warning – Risk of scalding!
- ⚠ Warning – Risk of injury!
- ⚠ Warning – Risk of electric shock!
- ⚠ Warning – Hazard due to magnetism!
- Microwave
- ⚠ Warning – Risk of explosion!
- ⚠ Warning – Risk of serious damage to health!
- Causes of damage
- Caution!
- Environmental protection
- Environmentally-friendly disposal
- Getting to know your appliance
- Control panel
- Buttons
- Rotary selector
- Display
- Touch fields
- Controls
- Buttons and touch fields
- Rotary selector
- Display
- Status bar
- Progress line
- Operating modes menu
- Further information
- Cooking compartment functions
- Automatic door opening
- Notes
- Interior lighting
- Cooling fan
- Accessories
- Accessories included
- Wire rack
- Glass tray
- Before using for the first time
- Initial use
- Setting the language
- Setting the time
- Setting the date
- Cleaning the cooking compartment and accessories
- Cleaning the cooking compartment
- Settings
- Cleaning the accessories
- Operating the appliance
- Pauses the operation
- Switching the appliance on and off
- Switching on the appliance
- Switching off the appliance
- Selecting an operating mode
- Operation
- Starting the operation
- Cookware
- Suitable cookware
- Unsuitable cookware
- Cookware test
- Warning – Risk of burns!
- Microwave power settings
- Setting the microwave
- Press the ▷/□ button to start.
- Cooking time elapsed
- Changing the cooking time
- Changing the microwave output
- Grilling
- Setting the grill
- Changing the grill setting
- Setting the microwave to combi-mode
- Changing the combi mode
- Timer
- Setting the timer
- Changing the timer
- Cancelling the timer
- Programmes
- Setting a programme
- Information on the programmes
- Defrosting:
- Vegetables:
- Potatoes:
- Rice:
- Poultry:
- Resting time
- Basic settings
- Changing settings
- List of settings
- Power cut
- Changing the time
- Cleaning
- Warning – Risk of electric shock!
- Warning – Risk of injury!
- Cleaning agent
- Trouble shooting
- Customer service
- E number and FD number
- Tested for you in our cooking studio
- Warning – Risk of scalding!
- Defrosting
- Defrosting, heating up or cooking frozen food
- Heating
- Cooking
- Combined grill and microwave
- Test dishes
- 目录
- 主要用途
- 重要安全信息
- 常规信息
- 警告 - 有着火危险!
- 警告-有灼伤危险!
- 警告 - 有烫伤危险!
- 警告 - 有受伤危险!
- 警告 - 有电击危险!
- 警告-磁性引起的危险!
- 微波
- 警告 - 有爆炸危险!
- 警告 - 有灼伤危险!
- 警告 - 有严重损害健康的危险!
- 损坏原因
- 注意!
- 环境保护
- 环保处理
- 了解您的电器
- 控制面板
- 按键
- 旋转选择钮
- 显示屏
- 触控区
- 控制按键
- 按键和触摸区
- 旋转选择钮
- 显示屏
- 状态栏
- 进度线
- 操作模式菜单
- 更多信息
- 烹饪箱功能
- 自动开门
- 提示
- 内部照明
- 冷却风扇
- 附件
- 随附附件
- 烤架
- 玻璃烤盘
- 首次使用之前
- 首次使用
- 设置语言
- 设置时间
- 设置日期
- 清洁烹饪箱和附件
- 清洁烹饪箱
- 设置
- 清洁附件
- 操作电器
- 打开和关断电器
- 开机
- 关断电器
- 操作
- 开始操作
- 暂停操作
- 选择操作模式
- 烹饪容器
- 合适的烹饪容器
- 不适合的烹饪容器
- 烹饪容器测试
- 微波功率设置
- 默认值:
- 设置微波
- 按下 ▷/□ 按键,启动。
- 烹饪时间到时
- 更改烹饪时间
- 改变微波功率
- 烧烤
- 设置烧烤
- 更改烧烤设置
- 设置微波为组合模式
- 更改组合模式
- 定时器
- 设置定时器
- 更改定时器
- 取消定时器
- 程序
- 设置程序
- 有关程序的信息
- 解冻:
- 蔬菜:
- 土豆:
- 米饭:
- 家禽:
- 静置时间
- 基本设置
- 更改设置
- 设置列表
- \* 出厂设置(出厂设置可能根据电器型号的不同而不同)
- 断电
- 更改时间
- 清洁
- 警告 - 有灼伤危险! !
- 清洁剂
- 故障检修
- 客户服务
- E 编号和 FD 编号
- E 编号 FD 编号
- 客户服务部门
- 经销商及原产地信息:
- 执行标准:
- 经由我们烹饪工作室测试过的菜谱
- 除霜
- 餐点 重量 微波输出功率 (W)
- 说明
- 时间 (分钟)
- 解冻、加热或烹饪冷冻食品
- 加热
- 厨具
- 烧烤和微波组合
- 测试菜谱
- 食品接触用材料及制品信息
Merkki : SIEMENS
Malli : BE634LGS1W
Kategoria : Mikroaaltouunit