12.301286-04 - Kategooriata PIONEER - Tasuta kasutusjuhend
Leidke seadme juhend tasuta 12.301286-04 PIONEER PDF-formaadis.

Kasutajate küsimused teemal 12.301286-04 PIONEER
0 küsimus selle seadme kohta. Vastake nendele, mida teate, või esitage oma.
Esita uus küsimus selle seadme kohta
Laadige alla juhend oma Kategooriata PDF-formaadis tasuta! Leidke oma juhend 12.301286-04 - PIONEER ja võtke oma elektrooniline seade uuesti kätte. Sellel lehel on avaldatud kõik teie seadme kasutamiseks vajalikud dokumendid. 12.301286-04 kaubamärgi PIONEER.
KASUTUSJUHEND 12.301286-04 PIONEER
Pioneer
sound. vision. soul
Installation manual for:
Subaru Impreza 2008 --> / Forrester 2008-->
natural_image
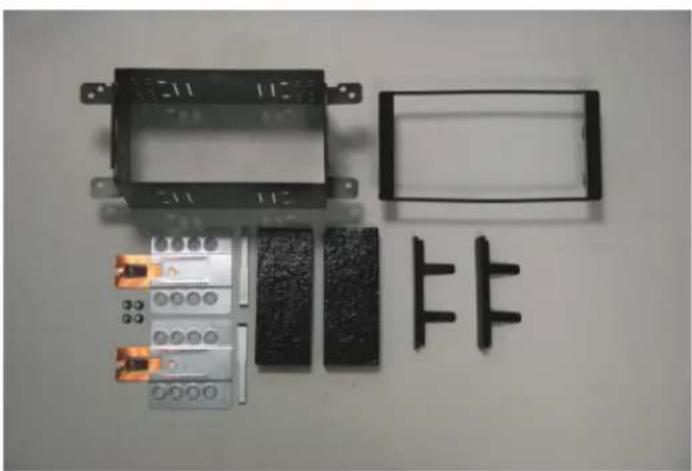
Disassembled electrical connector components including a box, panel, and terminal blocks (no text or symbols visible)Installation kit includes the following items:
* 1X 2-ISO 100 mm. metal bracket
* 1X Radio trim
* 1X Replacement panel
* 2X Mounting plates
* 2X Mounting spacers
* 2X Radio removal keys
* 4X Screws
* 2X Cushion

natural_image
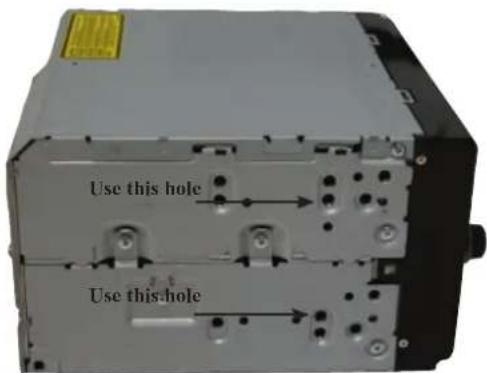
Pure electrical circuit lines without any symbolsPioneer HD1BT
We advice to use the following positions. Other positions are also possible.
Use position 1 marked with a cross. Use position 14 & 16 marked with an arrow. Measured from left to right.
natural_image
Close-up of a mechanical or electronic device with multiple ports and mounting holes (no visible text or symbols)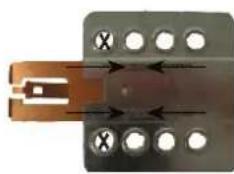
natural_image
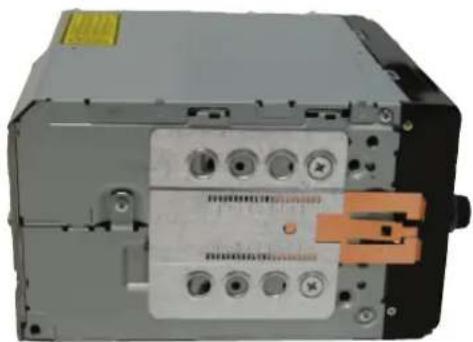
Close-up of a metallic component with copper contacts and circular holes, no visible text or symbolsPioneer Avic D3
We advice to use the following positions. Other positions are also possible.
Use position 1 marked with a cross. Use position 9 & 11 marked with an arrow Measured from left to right.
2-DIN 12.301286-04
Pioneer
sound. vision. soul
1
natural_image
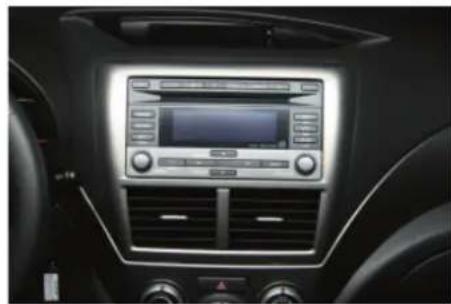
Interior view of a car dashboard with digital display and control panel (no visible text or symbols)2
natural_image
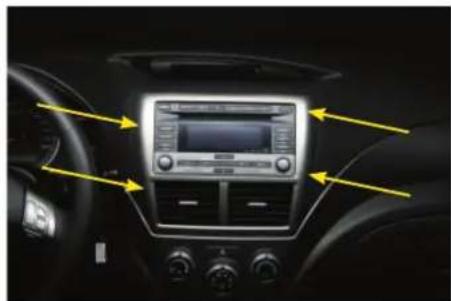
Interior view of a car dashboard with a digital display and control panel (no visible text or symbols)Remove the panel around the radio at the location of the arrows. Use a plastic wedge.
3
natural_image
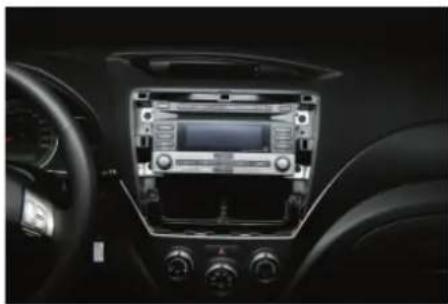
Interior view of a car dashboard with a digital display and control panel (no visible text or symbols)4
natural_image
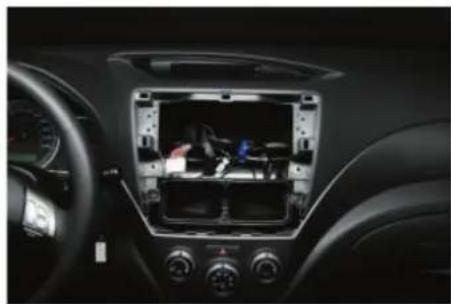
Interior view of a car dashboard with a car infotainment panel and steering wheel (no visible text or symbols)Remove the original radio. This is tighten by four screws.
5
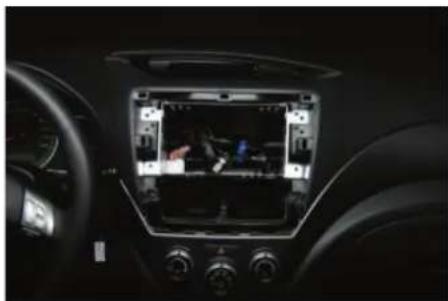
natural_image
Interior view of a car dashboard with a digital display showing a vehicle (no visible text or symbols)6
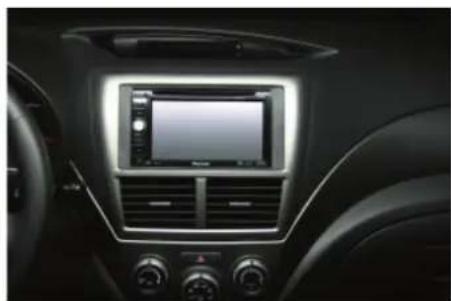
natural_image
Interior view of a car dashboard with illuminated touchscreen and control panels (no visible text or symbols)Place the 2-Din metal bracket.
Place the new heafdunit and the new radio trim.