12.301270-03 - Kategooriata PIONEER - Tasuta kasutusjuhend
Leidke seadme juhend tasuta 12.301270-03 PIONEER PDF-formaadis.

Kasutajate küsimused teemal 12.301270-03 PIONEER
0 küsimus selle seadme kohta. Vastake nendele, mida teate, või esitage oma.
Esita uus küsimus selle seadme kohta
Laadige alla juhend oma Kategooriata PDF-formaadis tasuta! Leidke oma juhend 12.301270-03 - PIONEER ja võtke oma elektrooniline seade uuesti kätte. Sellel lehel on avaldatud kõik teie seadme kasutamiseks vajalikud dokumendid. 12.301270-03 kaubamärgi PIONEER.
KASUTUSJUHEND 12.301270-03 PIONEER
Pioneer
sound. vision. soul
Installation manual for:
Saab 9.5 09 - 2005 -->
natural_image
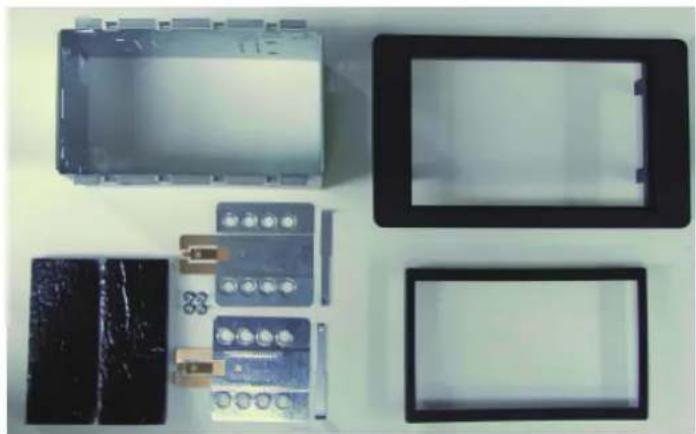
Disassembled electronic components including a battery pack, circuit board, and rectangular enclosures (no visible text or symbols)Installation kit includes the following items:
* 1X 2-ISO 110 mm. metal bracket
* 1X Radio trim
* 1X Replacement panel
* 2X Mounting plates
* 2X Mounting spacers
* 2X Radio removal keys
* 4X Screws
* 2X Cushion
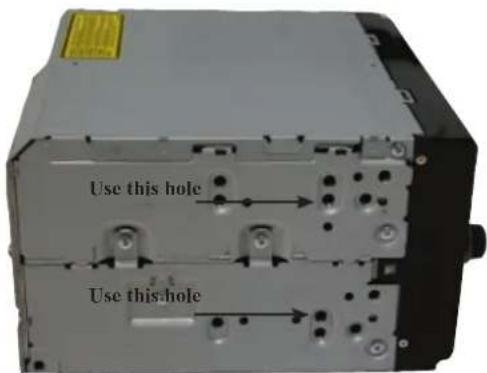
Pioneer HD1BT
We advice to use the following positions. Other positions are also possible.
Use position 1 marked with a cross. Use position 14 & 16 marked with an arrow. Measured from left to right.
natural_image
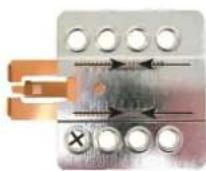
Close-up of a mechanical or electronic device with multiple ports and mounting holes (no visible text or symbols)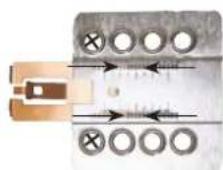
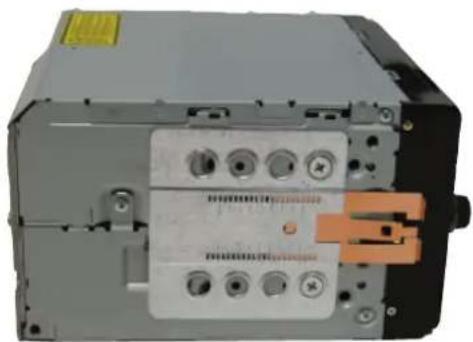
Pioneer Avic D3
We advice to use the following positions. Other positions are also possible.
Use position 1 marked with a cross. Use position 9 & 11 marked with an arrow Measured from left to right.
Pioneer sound. vision. soul
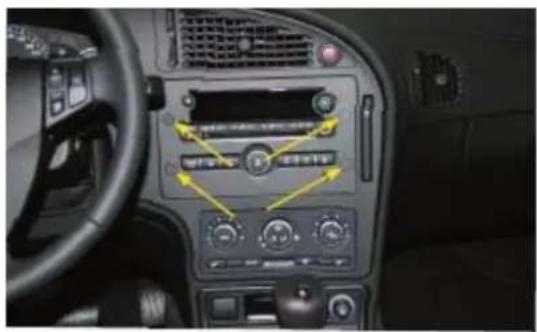
Remove the 4 caps at the location of the arrow.
2
natural_image
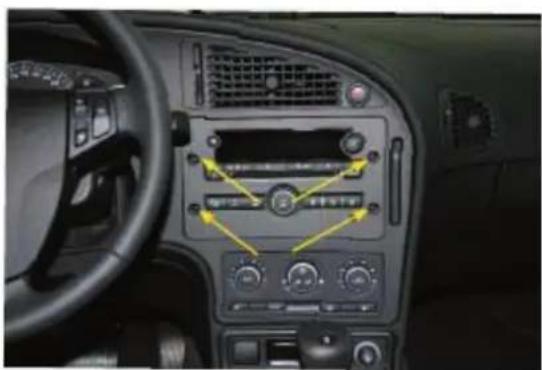
Interior view of a car dashboard with air conditioners and control panels (no visible text or symbols)Remove the screws at the location of the arrows
3
natural_image
Interior view of a car dashboard with air vent, steering wheel, and control panel (no visible text or symbols)Place the 2-Din metal bracket.
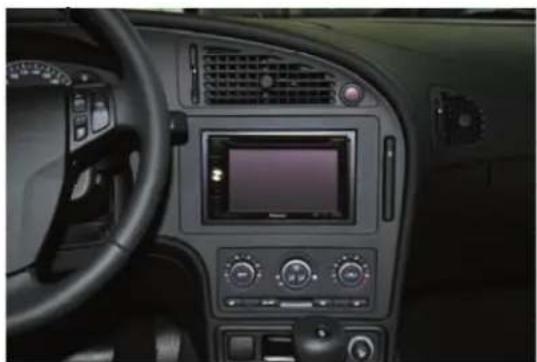
natural_image
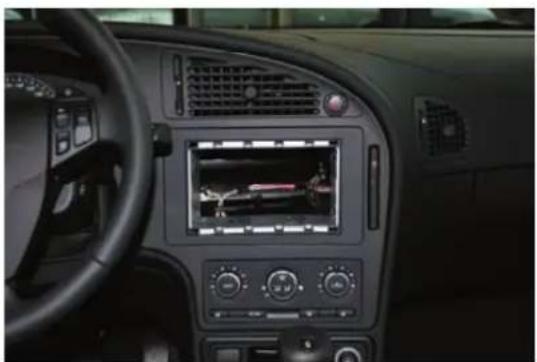
Interior view of a car dashboard with air conditioners and a central touchscreen display (no visible text or symbols)Place the head unit and connect all the wiring.