
TWV780WPS - Heat pump MIELE - Free user manual and instructions
Find the device manual for free TWV780WPS MIELE in PDF.


| Product Type | Heat pump tumble dryer |
| Brand | Miele |
| Model | TWV780WPS |
| Maximum Load Capacity | 9.0 kg (dry laundry) |
| Drum Volume | 120 L |
| Dimensions (H x W x D) | 850 x 596 x 643 mm |
| Depth with Door Open | 1077 mm |
| Weight | Approx. 62 kg |
| Condensed Water Container Capacity | 4.8 L |
| Drain Hose Length | 1.49 m |
| Connection Cable Length | 2.00 m |
| Voltage / Frequency / Fuse Rating | See data plate |
| Energy Consumption (Cottons Extra dry, 9 kg @ 1000 rpm) | 1.47 kWh |
| Programme Duration (Cottons Extra dry, 9 kg @ 1000 rpm) | Approx. 220 min |
| Wi-Fi Frequency Band | 2.4000 – 2.4835 GHz |
| Max Transmission Power | < 100 mW |
| Display | Touch display with sensor controls |
| Drying Levels | HygieneDry, Extra dry, Normal plus, Normal, Hand iron, Machine iron |
| Special Features | PerfectDry, FragranceDos, Wash2Dry, SmartStart, Miele@home, DryFresh, PowerFresh |
| Safety Features | Fluff filter cleaning indicator, plinth filter, cooling down phase, child lock via code |
| Installation Options | Under worktop, stackable with Miele washing machine (using stacking kit) |
| Door Hinging | Reversible (left/right) |
Frequently Asked Questions - TWV780WPS MIELE
User questions about TWV780WPS MIELE
0 question about this device. Answer the ones you know or ask your own.
Ask a new question about this device
Download the instructions for your Heat pump in PDF format for free! Find your manual TWV780WPS - MIELE and take your electronic device back in hand. On this page are published all the documents necessary for the use of your device. TWV780WPS by MIELE.
USER MANUAL TWV780WPS MIELE
Operating instructions Heat pump tumble dryer

natural_image
Close-up of a hand washing a baby in a plastic basin, with no visible text or symbols.It is essential to read these operating instructions before installing and using the appliance. This prevents both personal injury and damage to the appliance.
Caring for the environment 7
Warning and Safety instructions 8
Operating the tumble dryer 20
Control panel.... 20
Touch display and sensor controls.... 20
Main menu.... 21
Examples on how to operate the appliance.... 22
Moving programmes 23
Before using for the first time 25
Installation 25
Downtime after installation.... 25
Miele@home 25
Setting the language 26
Energy saving tips 29
Energy saving tips 29
Feedback....30
1. Notes on correct laundry care 31
Points to note regarding washed laundry.... 31
Preparing the laundry before drying.... 31
Drying 32
Care symbols 32
Selecting the correct drying level.... 32
2. Loading the tumble dryer 33
Loading the laundry.... 33
Checking the FragranceDos socket 33
3. Selecting a programme 34
Switching on the tumble dryer 34
Selecting a programme 34
4. Selecting programme settings.... 35
Selecting the drying level 35
Selecting Extras.... 36
5. Starting the programme 37
Starting a programme 37
6. End of programme - unloading the drum.... 38
At the end of the programme 38
Removing the laundry 38
Programme chart 39
Extras.... 46
DryFresh 46
PowerFresh 46
DryCare 40 47
Gentle tumble....47
Quick 47
ECO 47
Freshen up....47
Drying programme overview - Extras.... 48
Wash2Dry 49
Requirements for use 49
Selecting the Wash2Dry function 📋 49
Favourite programmes.... 50
Creating a Favourite programme.... 50
Option 1....50
Option 2....50
Entering a name 50
Changing a Favourite programme.... 50
Drying assistant.... 51
Timer 52
Setting the Timer 52
Changing the Timer....52
Deleting the Timer 52
Starting the Timer.... 52
SmartStart 53
Setting the timeframe.... 53
Changing the programme sequence.... 54
Adding or removing laundry 54
Condensed water container 55
Emptying the condensed water container 55
Filling the condensed water container 56
Fragrance flacon.... 57
FragranceDos 57
Removing the protective seal from the fragrance flacon.... 57
Inserting the fragrance flacon.... 58
Opening the fragrance flacon.... 59
Closing the fragrance flacon 59
Removing/replacing the fragrance flacon 60
Cleaning and care 61
Fluff filters.... 61
Removing the fragrance flacon 61
Removing visible fluff 61
Cleaning the fluff filters and air flow openings thoroughly 62
Cleaning the fluff filters with water 63
Cleaning the plinth filter.... 64
Removing the plinth filter 64
Cleaning the plinth filter.... 65
Cleaning the plinth filter flap.... 66
Cleaning the dryer 66
Problem solving guide 67
Fault messages shown in the display when a programme is cancelled ..... 67
Messages in the display.... 69
Unsatisfactory drying results.... 70
The drying process takes a long time. 71
General problems with the tumble dryer.... 72
Replacing the plinth filter.... 74
Regenerating the plinth filter 76
Checking the heat exchanger.... 76
Cleaning the fluff filter in the condensed water container.... 77
Replacing the condensed water spray jet 78
Service....79
Contact in case of fault 79
Optional accessories....79
Warranty 79
Installation.... 80
Front view 80
Rear view 81
Transporting the tumble dryer 81
Transporting the tumble dryer to its installation site 81
Installation 82
Levelling the dryer 82
Downtime after installation.... 82
Ventilation....82
Before moving the tumble dryer again (e.g. when moving house).... 83
Additional installation requirements 83
Externally draining condensed water 84
Installation conditions requiring a non-return valve 84
Arranging the drain hose 85
Examples....85
Changing the door hinging.... 87
Changing the hinging over 87
Refitting 92
Electrical connection 93
Technical data.... 94
Consumption data.... 95
Settings 96
Calling up settings.... 96
Operation/Display 97
Language 97
Code....97
Clock display....97
Consumption....97
Memory 98
Volume....98
Behaviour finish tone....98
Display brightness....98
Wash2Dry....98
Display switch-off status....99
Network 100
Miele@home 100
SmartGrid 101
Remote control.... 101
RemoteUpdate 102
Programme sequence 103
Anti-crease 103
Cooling down temperature.... 103
Drying levels 103
Appliance parameters 104
Airways indicator.... 104
Conductivity 104
Operating hours.... 105
Factory default.... 105
Legal information.... 105
Disposal of the packing material
The transport and protective packaging has been selected from materials which are environmentally friendly for disposal, and can normally be recycled.
Recycling the packaging reduces the use of raw materials in the manufacturing process and also reduces the amount of waste in landfill sites. Ensure that any plastic wrappings, bags etc. are disposed of safely and kept out of the reach of babies and young children. Danger of suffocation.
Disposing of your old appliance
Electrical and electronic appliances often contain valuable materials. They also contain specific materials, compounds and components, which were essential for their correct function and safety. These could be hazardous to human health and to the environment if disposed of with your domestic waste or if handled incorrectly. Please do not, therefore, dispose of your old appliance with your household waste.

Please dispose of it at your local community waste collection / recycling centre for electrical and electronic appliances. You are also responsible for deleting any personal data that may be stored on the appliance prior to disposal. Please ensure that your old appliance poses no risk to children while being stored prior to disposal.
It is essential to read these instructions.
This tumble dryer complies with all current local and national safety requirements. However, inappropriate use can lead to personal injury and damage to property.
Read the operating instructions carefully before using the tumble dryer. They contain important information on safety, installation, use and maintenance of the appliance. This prevents both personal injury and damage to the tumble dryer.
In accordance with standard IEC 60335-1, Miele expressly and strongly advises that you read and follow the instructions in “Installation”, as well as in the “Warning and Safety instructions”.
Miele cannot be held liable for injury or damage caused by non-compliance with these instructions.
Keep these operating instructions in a safe place and pass them on to any future owner.
Correct application
This tumble dryer is designed for domestic use and for use in similar environments by guests in hotel or motel rooms, bed & breakfasts and other typical living quarters. This does not include common/shared facilities or commercial facilities within hotels, motels or bed & breakfasts.
This tumble dryer is not suitable for outdoor use.
It must only be used to dry items which have been washed in a water solution and which are marked on the manufacturer's care label as being suitable for tumble drying. If using dry cleaning kits, do so at your own risk, and follow the instructions provided on the packaging.
Any other applications may be dangerous. Miele cannot be held liable for damage resulting from incorrect or improper use or operation.
This appliance is not intended for use by persons (including children) with reduced physical, sensory or mental capabilities, or lack of experience or knowledge, unless they are supervised whilst using it or have been shown how to use it by a person responsible for their safety.
Safety with children
▶ Young children must not be allowed to use this appliance.
▶ Older children may only use the appliance when its operation has been clearly explained to them and they are able to use it safely, recognising the dangers of misuse.
Children must not be allowed to clean or maintain the tumble dryer unsupervised.
▶ Please supervise children in the vicinity of the tumble dryer and do not let them play with it.
Technical safety
Before setting up the tumble dryer, check it for any externally visible damage.
Do not install or use a damaged tumble dryer.
Before connecting the tumble dryer, ensure that the connection data on the data plate (fuse rating, voltage and frequency) matches the mains electricity supply. If in any doubt, consult a qualified electrician.
▶ Temporary or permanent operation with a self-sufficient or non-mains synchronous energy supply system (e.g. isolated networks, back-up systems) is possible. A requirement for the operation is that the energy supply system complies with all current local and national requirements that apply to stand-alone, solar and/or battery systems.
The protective measures provided in the installation and in this Miele product must also be assured in their function and operation in isolated operation or in non-mains synchronous operation, or replaced with equivalent measures in the installation.
The electrical safety of this tumble dryer can only be guaranteed when correctly earthed. It is essential that this standard safety requirement is met. If in any doubt, please have the household wiring system tested by a qualified electrician. Miele cannot be held liable for the consequences of an inadequate earthing system (e.g. electric shock).
Do not connect the tumble dryer to the mains electricity supply by an extension lead. Extension leads do not guarantee the required safety of the appliance (e.g. danger of overheating).
If the connection cable is faulty, it must only be replaced by a Miele authorised technician to protect the user from danger.
▶ Unauthorised repairs could result in unforeseen dangers for the user, for which Miele cannot accept liability. Repairs should only be undertaken by a Miele authorised service technician, otherwise any subsequent damage will not be covered by the warranty.
▶ Faulty components must only be replaced by genuine Miele spare parts. Miele can only guarantee the safety of the appliance when Miele replacement parts are used.
In the event of a fault or for cleaning purposes, the tumble dryer is only completely isolated from the electricity supply when:
- it is switched off at the wall socket and the plug is withdrawn, or
- it is switched off at the mains circuit breaker.
This tumble dryer must not be installed and operated in mobile installations (e.g. on a ship).
Do not make any alterations to the tumble dryer, unless authorised to do so by Miele.
This tumble dryer is supplied with a special lamp to cope with particular conditions (e.g. temperature, moisture, chemical resistance, abrasion resistance and vibration). This special lamp must only be used for the purpose for which it is intended. It is not suitable for room lighting. Replacement lamps may only be replaced by a Miele authorised technician.
▶ Heat pump technology and refrigerant:
The heat pump in this tumble dryer uses a gaseous refrigerant. The refrigerant, which is brought to a higher temperature and liquefied by condensing, is transferred in a closed circuit through the heat exchanger unit where heat exchange takes place with the circulating drying air.

Damage to the tumble dryer by switching it on too soon.
This can damage the heat pump.
After setting up the tumble dryer, wait for at least one hour before switching it on.
- The humming noises caused by the heat pump during the drying process are normal. They do not impair the efficient functioning of the dryer.
- The refrigerant is not flammable or explosive.
▶ Please observe the instructions in “Installation” and “Technical data”.
The plug and socket must be accessible at all times in order to be able to disconnect the tumble dryer from the power supply.
Do not block the gap between the bottom of the tumble dryer and the floor with plinth facings, deep pile carpet etc. This would hinder a sufficient flow of air to the tumble dryer.
▶ Make sure the dryer door can be opened without hindrance after installation.
In areas which may be subject to infestation by cockroaches or other vermin, pay particular attention to keeping the appliance and its surroundings in a clean condition at all times. Any damage which may be caused by cockroaches or other vermin will not be covered by the warranty.
Correct use

WARNING: FLAMMABLE MATERIAL
Warning: Risk of fire / Flammable materials.
To avoid the possible danger of fire, please read these warnings carefully.
A clogged filter is a fire hazard!
The fluff filter must be cleaned after every programme.
The maximum load for this tumble dryer is 9.0 kg (dry weight). See the “Programme chart” for the maximum recommended loads for individual programmes.
To prevent the risk of fire, do not connect the tumble dryer via a controllable socket (e.g. a timer or a peak-load switch-off device). If the drying programme is interrupted before the end of the cooling down phase, this could cause the laundry to self-ignite.
To prevent the risk of fire, the following textiles must not be dried in this tumble dryer:
- Items which have not been washed.
- Items which have been cleaned using chemicals (e.g. professional dry-cleaning agents).
- Items, such as workwear, which have not been thoroughly cleaned and which are still soiled with grease, oil or other desposits (such as cosmetics, lotions etc). If items have not been thoroughly cleaned, there is a danger that these might ignite when heated, even after they have been removed from the dryer at the end of the programme.
- Items that have been soiled with substances such as cooking oil, acetone, petrol, kerosene, spot removers, turpentine, waxes, wax removers and other chemicals (e.g. mops and floor cloths).
- Items which have been splashed with hair lacquer, hair spray, nail varnish remover or similar substances.
- Fabrics which contain a large proportion of rubber, foam rubber or rubber-like materials. For example, products made from latex foam rubber, shower caps, waterproof textiles, rubberised articles and items of clothing and pillows with foam rubber filling.
- Damaged fabrics which contain padding or fillings (e.g. pillows, jackets). When damaged, the filling can get out with the risk of it igniting in the dryer.
When washing such heavily soiled items ensure that you use sufficient detergent and select a high temperature. If in doubt, wash the items several times.
▶ Oil-affected items can ignite spontaneously, especially when exposed to heat sources such as in a tumble dryer.
The items become warm, causing an oxidation reaction in the oil. Oxidation creates heat.
If the heat cannot escape, the items can become hot enough to catch fire. Piling, stacking or storing oil-affected items can prevent heat from escaping and so create a fire hazard.
If it is unavoidable that fabrics contaminated with vegetable or cooking oil, or hair care products, be placed in a tumble dryer, they should first be washed in hot water with extra detergent - this will reduce, but not eliminate, the hazard.
Remove all items from pockets (e.g. lighters, matches).
▶ Warning: Ensure that you always wait until the end of the programme before removing the laundry. If the drying programme is stopped prematurely, remove the laundry immediately and hang it up or spread it out to cool it down.
▶ Fabric softener and similar products must be used according to the instructions on the manufacturer's packaging.
In many programmes, the heating phase is followed by a cooling down phase to ensure that the items are not too hot to handle when you remove them (this also avoids the danger of the laundry self-igniting). The programme is not finished until the cooling down phase has been completed.
As soon as the programme has finished, remove all laundry from the drum.
Do not let anyone sit or lean on the door, as this can cause the tumble dryer to tip up.
▶ Always close the door after use. This way you will avoid the danger of:
- children climbing onto or into the dryer or hiding things in it.
- pets or other small animals climbing into it.
The tumble dryer must not be used
- without the fluff filters in place or with damaged fluff filters.
- without the plinth filter in place or with a damaged plinth filter.
This would cause an excessive build-up of fluff which in turn would cause a fault.
The fluff filters must be cleaned after every drying cycle.
Fluff must not be allowed to accumulate around the tumble dryer.
The fluff filters and the plinth filter must be thoroughly dried after cleaning. Do not replace them if they are damp or wet. Damp or wet filters could cause operational faults.
Do not install the tumble dryer in a room where there is a risk of frost occurring. At temperatures around freezing point the tumble dryer may not be able to operate properly. There is a risk of damage if the condensed water is allowed to freeze in the pump and hoses.
If the water is drained externally through the drain hose instead of being collected in the condensed water container, make sure the drain hose is securely attached if you hang it in a laundry tub to avoid the hose slipping and the water causing damage.
Condensed water is not drinking water.
It can cause health problems in both people and animals.
▶ Always keep the area around the tumble dryer free of dust and fluff.
Dust drawn into the tumble dryer can cause blockages in the heat exchanger over time.
The tumble dryer must not be hosed down.
Using a fragrance flacon (optional accessory)
▶ Only use genuine Miele original fragrance flacons.
The fragrance flacon must be stored in its packaging so please make sure you retain this.
▶ Caution. The fragrance can run out of the flacon. Make sure that you always keep the flacon, or the fluff filter with the flacon inserted in it, upright when carrying and do not tip it or place it down on any surface.
▶ Use an absorbent cloth immediately to wipe up any fragrance which has run out of the flacon onto the floor, the dryer or any dryer components (e.g. the fluff filter).
If fragrance which has run out of a flacon should come in contact with the skin - wash the skin thoroughly with soap and water; come in contact with the eyes - rinse the eyes with clean water for at least 15 minutes; be swallowed - rinse out the mouth thoroughly with clean water. Seek medical advice in the case of contact with the eyes or if fragrance has been swallowed.
If fragrance which has run out of a flacon comes in contact with clothing, change the clothing immediately. Wash the clothing or any cloths used for mopping up fragrance thoroughly with plenty of water and detergent.
There is the risk of fire or damage to the tumble dryer if the following instructions are not observed:
- Never refill a flacon with fragrance.
- Never use a faulty fragrance flacon.
▶ Dispose of an empty fragrance flacon with the household waste and never use it for any other purpose.
▶ Please also observe the information supplied with the fragrance flacon.
Accessories
▶ Only use genuine Miele spare parts and accessories with this appliance. If spare parts or accessories from other manufacturers are used, this will invalidate the warranty, and Miele cannot accept liability.
▶ A Miele tumble dryer can be stacked on top of a Miele washing machine using the appropriate stacking kit (available as an optional accessory). Please make sure you order the correct one for the Miele washing machine and Miele tumble dryer.

Miele cannot be held liable for damage caused by non-ance with these Warning and Safety instructions.
Control panel

① sensor
Takes you back one level in the menu.
② Touch display
③ Start/Stop sensor
Touching the Start/Stop sensor starts the selected programme or cancels a programme that has already started. The sensor flashes slowly as soon as it is possible for a programme to be started and then lights up constantly after the programme has started.
④ Optical interface
For service technicians.
⑤ ⏻ sensor
For switching the tumble dryer on and off. The tumble dryer switches off automatically to save energy. This occurs 15 minutes after the end of the programme/Anti-crease phase, or after being switched on if no further selection is made.
Touch display and sensor controls
The and Start/Stop sensors and the sensors in the display react to fingertip contact.
The touch display can be scratched by pointed or sharp objects, e.g. pens. Only touch the display with your fingertips.
Main menu
After switching on the tumble dryer, the main menu will appear in the display.
You can access all important sub-menus from the main menu.
Touch the △ sensor at any time to return to the main menu. Values that have not yet been confirmed are not saved when you return to the main menu.
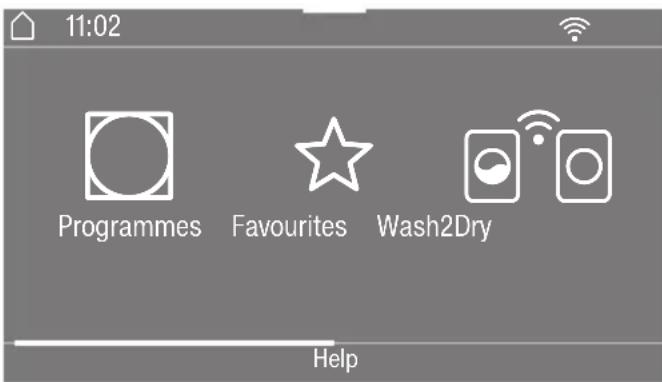
Main menu page 1
You can scroll to the second page of the main menu by swiping your finger across the display.

Main menu page 2
The ⚫ symbol next to the time of day is displayed when the tumble dryer is connected to a network.
Programmes
For selecting drying programmes.
☆ Favourites
You can save up to 12 of your own customised drying programmes (see "Favourite programmes").
Wash2Dry
A drying programme tailored to the laundry is set in conjunction with the connected washing machine.
Useful tip: The Wash2Dry function can only be used if the tumbler dryer is connected to a network.
MobileStart
With MobileStart you can operate your tumble dryer remotely with the Miele App.
The Remote control setting must be switched on.
Touch the MobileStart sensor and follow the instructions in the display.
Drying assistant
The Drying assistant guides you step by step so that you can select the optimum drying programme for your laundry (see “Drying assistant”).
Settings
You can alter the tumble dryer's electronics to suit changing requirements in the Settings menu (see "Settings").
Examples on how to operate the appliance
Selection lists
Programmes menu

You can scroll to the right or the left by swiping your finger across the screen. To do this, place your finger on the touch display and swipe it in the direction you want.
The orange bar under the pictures shows that there are further options to choose from.
Touch a programme name to select the drying programme.
The display will change to the standard menu for that programme.
Extras menu

You can scroll to the right or the left by swiping your finger across the screen. Place your finger on the touch display and swipe it in the direction you want.
The orange bar under the pictures shows that there are further options to choose from.
To select an Extra, touch the corresponding sensor.
The selected Extra will be highlighted in orange.
To deselect the Extra, simply touch the corresponding sensor again.
Touch the OK sensor to activate the highlighted Extra.
Moving programmes
You can move the programmes around in the menu to change the order in which they are displayed.

■ Place your finger on the programme you wish to move until a border is displayed around it.
■ To move the programme, swipe your finger in the required direction.
■ Remove your finger when the programme reaches the new location.
The programme has moved.
Setting numerical values
You can set numerical values in some menus.
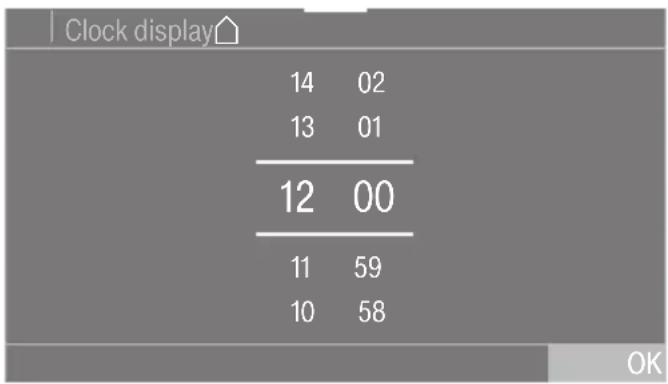
Enter the numbers by swiping upwards or downwards. Place your finger on the number that you want to change and move your finger in the direction you want. Use the OK sensor to accept all set numerical values.
Useful tip: Briefly touching an orange number between the two lines will bring up the numerical keypad. Once a valid number has been entered, the OK sensor will be highlighted green.
Pull-down menu
The pull-down menu can be used to display information, e.g. about a drying programme.

Touch the top edge of the screen in the middle and drag down with your finger.
Help display
With some menus Help appears along the bottom line of the display.
■ Touch the Help sensor to display the text.
■ Touch the Close sensor to return to the previous screen.
Exiting a menu
■ Touch the sensor to return to the previous screen.
Entries made before this which have not been confirmed with OK will not be saved.
Installation
Before using the appliance for the first time, check that you have followed all the instructions under "Installation".
Read these operating instructions, paying particular attention to the information provided under "Installation".
Removing the protective foil and advertising stickers
■ Remove:
- the protective foil from the door (if present).
- any advertising stickers from the front and the lid.
Please do not remove any labels (e.g. the data plate) which are visible when you open the door.
Downtime after installation

Damage to the tumble dryer by g it on too soon.
This can damage the heat pump.
After setting up the tumble dryer, wait for at least one hour before switching it on.
Miele@home
Your tumble dryer is equipped with an integrated Wi-Fi module.
In order to use it you need:
- a Wi-Fi network
- the Miele App
- a Miele user account. The user account can be created via the Miele App.
The Miele App will guide you as you connect your tumble dryer to your home Wi-Fi network.
Once your tumble dryer is connected to your Wi-Fi network, you can use the App, for example, to carry out the following activities:
- Operate the tumble dryer remotely
- Call up information on the operating status of your appliance
- Call up information on the programme sequence of your tumble dryer
Connecting your tumble dryer to your Wi-Fi network will increase energy consumption, even when the tumble dryer is switched off.
Before installing the tumble dryer in its final location, ensure the signal strength of your Wi-Fi network is sufficient.
Availability of the Wi-Fi connection
The Wi-Fi connection shares a frequency range with other appliances (including microwave ovens and remote control toys). This may result in sporadic or even complete connection failures. Therefore, a constant availability of featured functions cannot be guaranteed.
Miele@home availability
The ability to use the Miele App depends on the availability of the Miele@home service in your country.
The Miele@home service is not available in every country.
For information about availability, please visit www.miele.com.
Miele App
You can download the Miele App from the Apple App Store ^® or the Google Play Store ^™ free of charge (only functional in selected countries).


Switching on the tumble dryer
■ Press the Ⓘ sensor.
The welcome screen will light up.
The display will guide you step by step through the initial commissioning process.
Setting the language
You will be asked to select the language you require for the display. It is possible to change the language at any time via the Settings menu.
| Language | ||
| dansk | english (AU) | english (GB) |
| deutsch | english (CA) | english (US) |
■ Scroll to the left or the right until the language you want appears.
■ Touch the sensor for the language you want.
The selected language will be highlighted in orange and the display will change to the next setting.
Setting up Miele@home
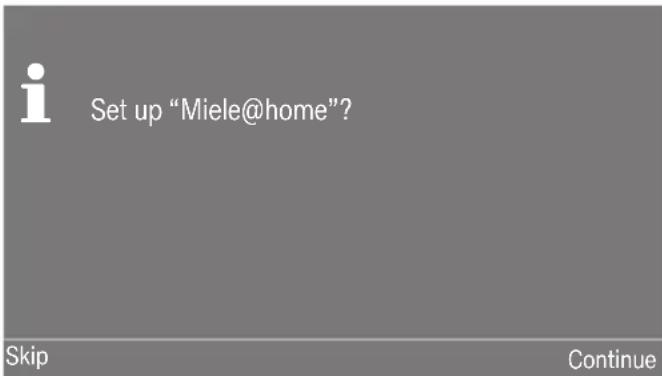
■ To set up Miele@home now: touch the Continue sensor.
Useful tip: To postpone set-up until later: touch the Skip sensor. The following message will then appear in the display:
i It is possible to set up later in "Settings" / "Miele@home". Confirm with OK.

■ Select the connection method you wish to use.
You will then be guided by the display and the Miele App.
You will require a WPS-compatible router for the Via WPS connection type.
■ Activate the WPS function on your router within 2 minutes.
Setting the clock format
The time of day can be displayed as a 24-hour or 12-hour clock.
■ Select the clock format you want and confirm this with the OK sensor.
The display will change to the next setting.
Setting the time of day
This message only appears if the tumble dryer has not yet been connected to a Wi-Fi network.
The time of day is set automatically if connection is established with a Wi-Fi network.
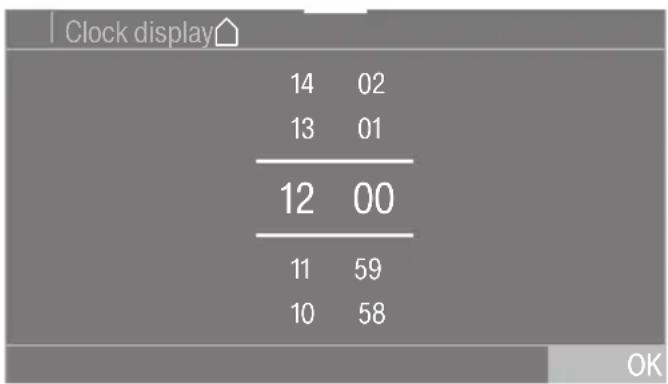
■ Place your finger on the number that you want to change and move your finger in the direction you want.
■ Confirm with the OK sensor.
Further information will appear in the display.
Continuing setup
■ Refer to “1. Notes on correct laundry care”.
- You can then load the tumble dryer and select a programme as described in “2. Loading the tumble dryer” and “3. Selecting a programme”.
The initial commissioning process is completed when a programme lasting longer than one hour has been carried out in full.
Energy saving tips
This dryer with heat-pump technology is designed for energy-saving drying cycles. You can save even more energy with the following measures, because the drying time is not extended unnecessarily.
- Make sure your laundry is spun at the maximum spin speed before drying. The higher the spin speed, the greater the savings that can be made in energy and time during drying, e.g. approx. 20% energy can be saved if spinning laundry at 1600 rpm instead of 1000 rpm.
- Use the maximum load quantity for the drying programme being used. This will mean that the energy consumption for the amount of laundry is the most economical.
- Make sure that the room temperature is not too high. If there are other heat producing appliances in the room in which the dryer is located, make sure the room is well ventilated and switch the other appliances off, if possible.
- Clean the fluff filters in the door opening after every drying cycle.
Please refer to “Cleaning and care” for information on cleaning the fluff filters and the plinth filter.
- If possible, make use of time-variable, low-cost electricity tariffs. Ask your energy supplier for information. Your tumble dryer's Delay start function will be useful as you can select when during the next 24 hours you want drying to start automatically.
Feedback
You can view information about the energy consumption of your tumble dryer in the pull-down menu.
The following information will appear in the display:
- An estimate of the energy consumption before the programme starts.
- The actual energy consumption during the programme or at the end of the programme.

■ Open the pull-down menu.
1. Estimate
The estimated energy consumption will be displayed as a bar chart before the start of the programme.

The more bars visible, the higher the energy consumption.
The estimate will vary depending on the drying programme, the drying level and any Extras selected.
2. Actual consumption
The actual energy consumption and the costs can be viewed during the programme or at the end of the programme.
If the energy consumption is too low to be measured, < 0.1 kWh and Cost 0.00 will be displayed. See “Settings - Consumption” for more detailed information on costs.
The consumption and cost will alter as the programme progresses.
At the end of the programme, before opening the door, you can also call up the filter soiling level as a %.
Filter soiling
0 % = Light
50 % = Normal
100 % = Heavy
With increased soiling, the programme duration is extended, which increases energy consumption.
If the door is opened or the appliance has switched off automatically at the end of the programme, the data will revert to the estimated consumption.
Useful tip: You can view the consumption data for the last drying programme and for total consumption (see “Settings - Consumption”).
Points to note regarding washed laundry
- When washing very heavily soiled items, ensure that you use sufficient detergent and select a high temperature. If in doubt, wash the items several times.
- Do not put soaking wet items into the tumble dryer. Make sure your laundry is thoroughly spun before drying. The higher the spin speed, the greater the savings that can be made in energy and time during drying.
- New dark coloured garments should be washed and dried separately from light coloured garments to avoid the risk of colours running and discolouring other garments or even plastic components in the dryer. Dark coloured fibres can also settle on light coloured garments and vice versa.
- Starched laundry can be dried in the tumble dryer. To achieve the usual finish, double the amount of starch should be used.
Preparing the laundry before drying
⚠️ Damage due to foreign objects which were not removed from the laundry.
Foreign objects can melt, burn, or explode.
Ensure that any foreign objects, e.g. detergent dispensing balls, lighters, etc. have been removed from the laundry.
⚠️ Risk of fire due to incorrect use and operation.
The laundry can burn and destroy the dryer and the surroundings.
See “Warning and Safety instructions” for further information.
- Sort the laundry according to the type of fibre and weave, size, garment care label symbol and the drying level required.
- Check seams and stitching to ensure that padding and linings are intact. This way you will avoid the danger of fillings coming out. These could catch fire when being dried.
- Untangle the laundry.
- Tie together textile belts and apron ties.
- Fasten duvet covers and pillow cases to prevent small items from being rolled up inside them.
- Fasten hooks and eyes.
- Leave jackets open and undo any long zips so that textiles dry evenly.
- Sew in or remove loosened underwiring from bras.
- Reduce the size of the load. Minimum iron fabric tends to crease more the larger the load. This is particularly the case for garments made from very fine weave fabric, such as shirts or blouses.
1. Notes on correct laundry care
Drying
Useful tip: See the “Programme chart”, which contains everything you need to know about programmes and load sizes.
- Always observe the maximum recommended load for each programme. This will mean that the energy consumption for the amount of laundry is the most economical.
- Down-filled garments have linings which have a tendency to shrink, depending on the quality of the item. Only use the Pre-ironing programme for these textiles.
- Pure linen should only be tumble dried if it is specified as suitable on the care label. The surface of the fabric may otherwise become rough. Only use the Pre-ironing programme for these textiles.
- Woollens and wool blends are susceptible to becoming matted or shrinking. Only use the Woollens handcare programme for these textiles.
- Loopknit garments (e.g. T-Shirts, underwear) have a tendency to shrink after the first wash. To prevent further shrinkage, avoid overdrying loopknit fabrics. If possible, choose a slightly bigger size when buying garments made from loopknit fabrics.
- If the fabrics are heat-sensitive or susceptible to creasing, reduce the load size. You should also select the Gentle tumble Extra and, for particularly delicate textiles, the DryCare 40 Extra.
Care symbols
| Drying | |
| Temperature | |
| Normal or higher | |
| Reduced* | |
| Do not tumble dry | |
* Recommendation: select DryCare 40 or Gentle tumble
| Ironing | |
| Temperature | |
| ••• hot, •• medium, • lower | |
| Do not iron | |
Selecting the correct drying level
- HygieneDry for special hygiene requirements when drying resilient fabrics
- Extra dry for multi-layered and very thick fabrics.
- Normal plus for all fabrics that are to be put away immediately.
- Normal for textiles that can shrink, or for light cotton or jersey textiles.
- Hand iron or Machine iron for fabrics that are going to be pressed or ironed after drying.
Useful tip: You can customise the drying levels (to be damper or drier) for the Cottons, Minimum iron and Automatic programmes. For further information, see “Settings – Programme sequence”.
2. Loading the tumble dryer
Loading the laundry
Textiles may be damaged. Before loading, read chapter "1. Notes on correct laundry care" first.

■ Open the door.
■ Remove any items that have been left inside the drum.
■ Unfold the laundry and load loosely into the drum.
Do not overload the drum. Doing so will cause unnecessary wear and tear to the laundry and affect the drying result. It is also likely to cause more creasing.
Laundry items may be damaged if they get trapped by the door.
Checking the FragranceDos socket
If you are not using a fragrance flacon, check that the 2 FragranceDos sockets are closed.
See the section "Fragrance flacon" for information on how to use fragrance flacons.

natural_image
Diagram showing a washing machine with a circular dial indicator and an arrow pointing to the dial (no text or symbols present)■ Push the tab down completely (see dark arrow) so that the socket is closed. Otherwise, fluff will accumulate here.
Closing the door

natural_image
Illustration of a hand opening a circular device into a machine (no text or symbols visible)■ Shut the door with a gentle swing.
3. Selecting a programme
Switching on the tumble dryer
■ To switch on, press the ⏻ sensor.
Useful tip: The condensed water can be recycled when certain programmes are used.
See “Condensed water container – Filling the condensed water container”. To find out when the condensed water can be used as part of certain programmes, see the “Programme chart” and “Extras”.
Selecting a programme
There are different ways to select a programme:
■ Touch the Programmes sensor.

■ Scroll to the right of the display until the programme you want appears.
■ Touch the sensor for that programme.
The display will change to show the Overview menu.

Useful tip: In the pull-down menu, you can display the maximum recommended load for the selected programme.
There are 4 further ways of selecting a programme.
- The Wash2Dry function
- Favourites
- Drying assistant
- MobileStart
Selecting the drying level
Check the “Programme chart” to see which programme you can select a drying level for and which drying level meets your requirements.

■ Touch the Drying level sensor.
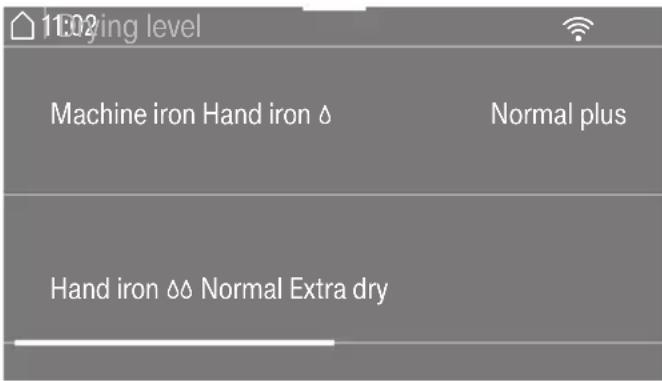
■ Scroll in the display until the drying level you want appears.
■ Touch the sensor for the drying level.
HygieneDry drying level
Useful tip: The HygieneDry drying level can be selected for some programmes. Specific hygiene requirements for robust garments with the ☐ care symbol are met.
HygieneDry dries items at a temperature that is constant over an extended period of time (extended temperature holding time). This kills off micro-organisms (such as germs or dust mites) and reduces allergens in the laundry.
Useful tip: Reduce the load size for the corresponding programme to half the maximum load size specified in these operating instructions.
Temperature holding time
- An estimated programme running time is displayed at the start of a programme for which the HygieneDry drying level has been selected.
- The programme completes the normal drying process for laundry care first. The drying time counts down to 0 minutes. Then the temperature holding time starts.
- At the start of the temperature holding time, the remaining programme running time is extended by 85 minutes to produce a hygienic drying result.
A programme for which the HygieneDry drying level has been selected should not be interrupted, as this would prevent the micro-organisms from being killed off. Do not cancel the drying programme.
4. Selecting programme settings
Selecting the running time for timed programmes
You can change the duration in 10-minute increments.
Programmes:
Cool air: 20 min – 1:00 h
Warm air: 20 min – 2:00 h
Basket programme: 40 min – 2:30 h
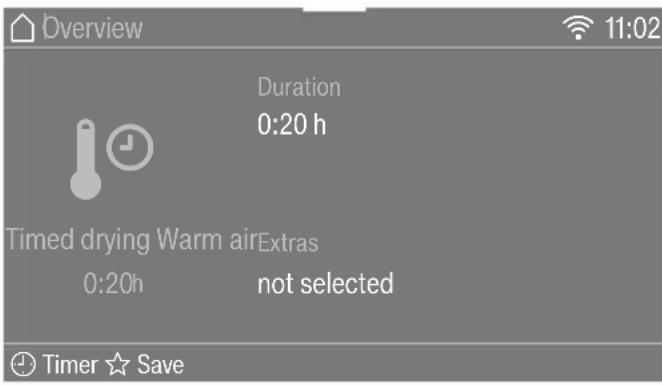
■ Touch the Duration sensor (only necessary in Warm air programme).

■ Place your finger on the number that you want to change and move your finger in the desired direction.
- Warm air
■ Confirm with the OK sensor.
■ Touch the Start/Stop sensor.
- Cool air, Basket programme
■ Touch the Start/Stop sensor.
The programme will start.
Selecting Extras
See “Extras” to find out which programmes allow you to select an Extra and which Extra is appropriate for your needs.
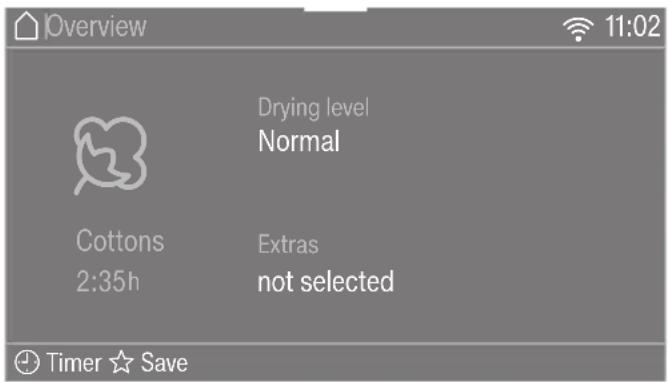
■ Touch the Extras sensor.

■ Touch the sensor for the Extra you want.
Useful tip: Touching the sensor for an Extra again allows you to deselect it.
■ Scroll through the display to see more Extras.
■ Confirm with the OK sensor.
The symbol for the selected Extra is displayed.
Starting a programme
The programme can be started when the Start/Stop sensor is flashing on and off.
■ Touch the Start/Stop sensor.
The Start/Stop sensor lights up constantly.
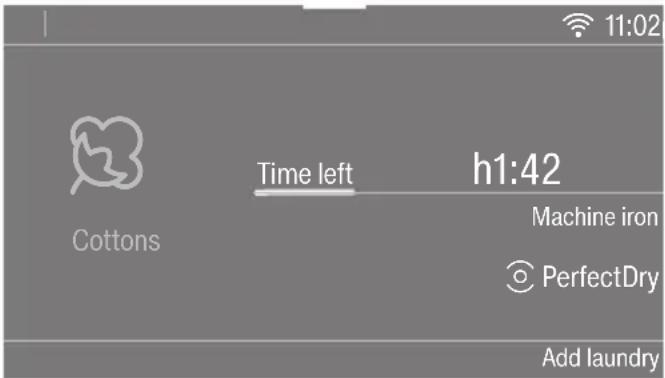
Drying and the programme duration remaining will light up in the display.
The laundry is cooled down shortly before the end of the programme.
Useful tip: In the pull-down menu you can view the selected drying level or duration and the energy consumption.
The PerfectDry display will only light up with programmes with selectable drying levels:
- Hollow dot Ⓞ after a programme has started
The drying level reached will still be shown later on.
- Solid dot ⚙ when the drying level is reached
PerfectDry measures the residual moisture of the laundry. In programmes with selectable drying levels, PerfectDry dries the laundry precisely, although the result is also influenced by the calcium
content of the water. PerfectDry continually adapts, constantly increasing the accuracy of the time left.
If you place very few items in the tumble dryer or load it with dry laundry, this will be sensed by the empty drum detection feature. The automatic load recognition function will restrict the running time of the selected programme once it has started and will continue to dry or air your laundry or textiles in a gentle manner.
Laundry items and fabrics can wear out unnecessarily.
Avoid over-drying laundry and garments.
Energy savings
After 10 minutes, the indicators dim and the Start/Stop sensor starts flashing.
■ Touch the Start/Stop sensor to switch the indicators on again (this does not have any effect on a running programme).
The drum lighting switches off once the programme has started.
Adding laundry
You can add laundry after the programme has started.
■ Follow the instructions in the sections "Changing the programme sequence" and "Adding or removing laundry".
6. End of programme - unloading the drum
At the end of the programme
The programme is finished when Finish/Anti-crease appears in the display. The Start/Stop sensor will no longer light up.
The dryer will switch off automatically 15 minutes after the end of the Anti-crease phase (or 15 minutes after the programme with programmes without an Anti-crease phase).
Removing the laundry
Only open the door when the drying process has finished. Otherwise, the laundry will not be properly dried and cooled down.
■ Pull the door open at the side with the orange marker.
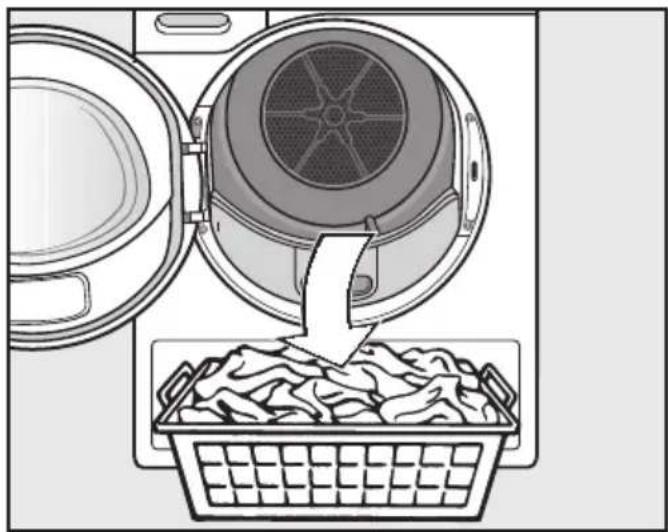
natural_image
Diagram showing a washing machine opening a basket of food, with a downward arrow indicating quantity or process (no text or symbols present)■ Remove the laundry.
Always remove all items from the drum.
Items left in the dryer could be damaged by overdrying when the dryer is used the next time.
■ Press the ⏻ sensor to switch the tumble dryer off.
■ Remove the fluff from the two fluff filters in the door opening (see "Cleaning and care - Fluff filters").
■ Shut the door with a gentle swing.
■ Empty the condensed water container.
We recommend that you drain the condensed water externally through the drain hose when drying a full load using the Cottons and Cottons <programmes. This will avoid having to empty the condensed water container during the programme.
Drum lighting
When you open the door of the tumble dryer, the drum is illuminated along with the area immediately in front of the dryer. This prevents you from accidentally leaving behind any items in the drum or in your laundry basket. The drum lighting will go out automatically to save energy.
Useful tip: To switch the lighting on again, open the pull-down menu from the overview menu and then touch the sensor.
All weights marked with * are based on the weight of dry laundry.
| Cottons Max. load 9.0 kg* | |
| HygieneDry | |
| Items - Cottons and linen fabric which will be in direct contact with the skin, e.g. underwear, baby clothes, bed linen, towelling.- Other hard-wearing fabrics with special hygiene requirements. | |
| Tip - Use for special hygiene requirements.- Reduce to half the maximum load amount. | |
| Extra dry, Normal plus, Normal | |
| Items Single and multi-layered cotton fabrics. For example: towelling, jerseywear, T-shirts, underwear, baby clothes, workwear, covers, aprons, jackets, bathrobes, and flannelette bed linen. | |
| Tip - Select Extra dry for multi-layered and very thick fabrics.- Do not use Extra dry for jersey fabrics (e.g. T-shirts, underwear, baby clothes), as they have a tendency to shrink. | |
| Set programme Cottons Extra dry for testing in accordance with AS/NZS 2442.1 & AS/NZS 2442.2. | |
| Hand iron △, Hand iron △△, Machine iron | |
| Items Cotton or linen fabric requiring further processing. For example: table linen, bed linen, or starched laundry. | |
| Tip Roll up laundry that you want to machine iron to prevent it from drying out until you are ready for ironing. |
Programme chart
| Cottons □ Max. load 9.0 kg* | |
| Items Cotton | items such as those described under Cottons Normal with normal residual moisture. |
| Notes Items | are dried to a Normal level only. |
| Minimum iron Max. load 4 kg* | |
| HygieneDry, Normal plus, Normal, Hand iron △, Hand iron △□ | |
| Items Minimum iron items made of cotton, synthetic, or mixed fibre. For example: workwear, overalls, pullovers, dresses, trousers, table linen and leggings. | |
| Tip - Use HygieneDry for hard-wearing fabrics with special hygiene requirements.- Reduce to half the maximum load amount. | |
| Delicates Max. load 2.5 kg* | |
| Normal, Hand iron △, Hand iron △□ | |
| Items Delicate items with the ☑ symbol on the care label made of synthetic fibre, mixed fibre, rayon, and easy care cotton. For example: shirts, blouses, lingerie, and appliquéd garments. | |
| Tip The load should be reduced further for a particularly crease-free drying result. | |
| Bed linen Max. load 4 kg* | |
| HygieneDry, Extra dry, Normal plus, Normal, Hand iron △, Hand iron △□, Machine iron | |
| Items Bed linen, pillowcases. | |
| Tip - Use HygieneDry for hard-wearing fabrics with special hygiene requirements.- Reduce to half the maximum load amount. | |
| Automatic Max. load 5 kg* | |
| Normal plus, Normal, Hand iron △, Hand iron △□ | |
| Items | Mixed loads of garments suitable for the Cottons and Minimum iron programmes. |
| Woollens handcare Max. load 2.0 kg* | |
| Items Woollen garments and fabric containing wool blends, e.g. pullovers, cardigans, stockings. | |
| Notes - Wool and wool blend items are only fluffed up; they are not dried completely.- Remove garments as soon as the programme has finished. | |
| Silks handcare Max. load 1.0 kg* | |
| Items Silk garments which are suitable for drying in a tumble dryer, e.g. blouses and shirts. | |
| Notes - This programme reduces creasing. Items are not dried completely.- Remove garments as soon as the programme has finished. | |
| Express Max. load 4 kg* | |
| Extra dry, Normal plus, Normal, Hand iron , Hand iron , Machine iron | |
| Items Fabrics with the symbol that are suitable for the Cottons programme. | |
| Notes The programme duration is shorter. | |
| Shirts Max. load 2 kg* | |
| Normal plus, Normal, Hand iron , Hand iron | |
| Items Shirts and blouses. | |
| Denim Max. load 3 kg* | |
| Normal plus, Normal, Hand iron , Hand iron | |
| Items Denim garments, e.g. jackets, jeans, shirts, and skirts. | |
Programme chart
| Steam care Max. load 1 kg* | |
| Normal, Hand iron ◇◇ | |
| Items - Cotton and linen fabric.- Minimum iron items made of cotton, synthetic or mixed fibre. For example: cotton trousers, jackets, anoraks, and shirts. | |
| Tip - For dampening items before ironing.- For smoothing items that are creased.- Select Hand iron if the items are to be ironed after drying.- This programme is also used to freshen up fabrics. To enhance the effect, you can use the DryFresh fragrance flacon (optional accessory). | |
| Notes | 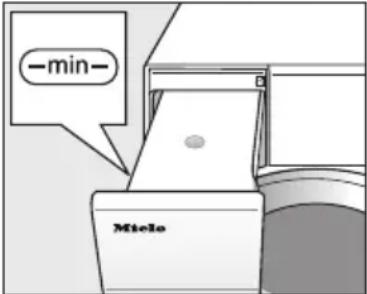 |
| - At the beginning of the programme, the condensed water collected in the condensed water container is sprayed into the drum via a spray jet. The condensed water container must therefore be filled with water to at least the —min— mark.- You may hear a humming noise when the water is sprayed into the drum. | |
| Sportswear Max. load 3 kg* | |
| Normal plus, Normal, Hand iron ◇, Hand iron ◇◇ | |
| Items Sportswear which is suitable for drying in a tumble dryer. | |
| Basket programme Max. load for basket 3.5 kg | |
Notes - This programme may only be used with the Miele tumble dryer basket TRK 555 (optional accessory) fitted.- It is essential to observe the operating instructions for the drying basket.- Make sure that no sleeves, straps, belt straps and boot legs (for example) come into contact with the tumble dryer drum or drum ribs. When the drum rotates, the laundry can become knotted, causing damage to the dryer basket and tumble dryer. | |
| Fabric type/Items | Use this programme to dry or air items which are suitable for drying in a tumble dryer but which are not suitable for drying using mechanical action. |
| Outerwear Max. load 2.5 kg* | |
| Normal, Hand iron △ | |
| Items Outerwear which is suitable for drying in a tumble dryer. | |
| Proofing Max. load 2.5 kg* | |
| Items Fabrics suitable for tumble drying, e.g. microfibre fabrics, skiwear, outerwear, fine, close-weave cotton garments (poplin), and tablecloths. | |
| Notes - This programme only dries to the Normal level.- This programme includes a proofing fixing phase.- Only use proofing agents which are stated by the manufacturer as being "suitable for use on membrane textiles". These agents contain fluorochemical compounds.- Do not dry items which have been treated with proofing agents containing paraffin. Fire hazard!Warm air Max. load 9.0 kg* | |
| Items - Multi-layered fabrics whose layers have different drying characteristics, e.g. jackets, pillows, sleeping bags and other bulky items.- For drying individual items, e.g. bath towels, bathing suits, tea towels and small loads. | |
| Tip Do not select the longest drying time to start with. Check the items as you are drying them to find the optimal time. | |
| Cool air Max. load 9.0 kg* | |
| Items Any item which only needs airing. | |
| Standard pillows 1-2 pillows 40 x 80 cm or Large pillows 1 pillow 80 x 80 cm | |
| HygieneDry, Normal | |
| Items Pillows suitable for drying in a tumble dryer, with feather, down or synthetic fillings. | |
| Tip HygieneDry for special hygiene requirements. | |
| Notes - Feathers are a natural product and may develop odours when exposed to heat. Allow bedding to air outside the dryer after drying.- Pillows can still feel damp after being dried. You can use this programme several times until the pillow feels dry. | |
| Cottons hygiene Max. load 4 kg* | |
| HygieneDry | |
| Items Cottons and linen fabric which will be in direct contact with the skin, e.g. underwear, baby clothes, bed linen, towelling. | |
| Notes - For hard-wearing fabrics with special hygiene requirements.- In this programme, the items will be dried with a temperature that is constant over an extended period. This temperature holding time kills off micro-organisms such as germs or dust mites and reduces allergens in the laundry. Therefore, this programme should not be interrupted as this would prevent the micro-organisms from being killed off.Extra quiet Max. load 9.0 kg* | |
| Normal plus, Normal, Hand iron △, Hand iron △△, Machine iron | |
| Items | Mixed loads of garments suitable for theCottons and Minimum iron programmes. |
| Tip Use to reduce the noise of the tumble dryer during quiet times. | |
| Pre-ironing Max. load 1 kg* | |
| Normal, Hand iron △△ | |
| Items - Cotton and linen fabrics.- Minimum iron items made of cotton, synthetic or mixed fibre. For example: cotton trousers, jackets, anoraks, and shirts. | |
| Tip - This programme smoothes out creasing caused during the spin cycle in the washing machine.- This programme is also suitable for dry fabrics.- Remove garments as soon as the programme has finished. | |
The drying programmes can be supplemented with various Extras. The table lists the selection options.
DryFresh
The Normal drying level can be used to freshen up clothing that is clean and dry without wetting it.
The function is slightly less effective when used with fabrics made of synthetic fibres.
Useful tip: To enhance the effect, you can also use the DryFresh fragrance flacon (optional accessory). Reduce the size of the load.
DryFresh is not available for all drying levels.
PowerFresh
This option can be used to freshen up clothing that is clean and dry by using steam.
The fabrics are moistened automatically. As the item is dried, the heat from the generated water vapour is transferred directly to the item so that odour molecules in the fabric can be freed more easily.
The function is slightly less effective when used with fabrics made of synthetic fibres.
Reduce the size of the load to 1 kg.
PowerFresh is not available for all drying levels.
Useful tip: To enhance the effect even further, you can also use the DryFresh fragrance flacon (optional accessory).
Condensed water from the condensed water container is sprayed into the drum. The condensed water container must therefore be filled to at least the —min— mark.

■ Fill the condensed water container.
See “Condensed water container – Filling the condensed water container”.
DryCare 40
This option dries fabrics gently by using a particularly low temperature.
It can be used for all fabrics that are free of wool and are washable at temperatures of 40^ C and above.
In order to achieve an optimal drying result, please note: For the respective programme, reduce the maximum load size specified in these operating instructions by half. Exceptions: you must reduce programmes with a maximum load size of 9 kg to 4 kg.
DryCare 40 is not available for all drying levels.
Gentle tumble
The items are dried at a gentle temperature.
Suitable for all items with the ☐ symbol, e.g. those made from acrylic.
The programme duration is extended.
Quick
Robust garments with the ☺ care symbol can be dried with a reduced drying time.
The compressor power is increased, which gives rise to more operating noise (buzzing/humming).
ECO
The compressor power is reduced which saves energy. This causes the programme duration to increase.
Freshen up
Odours are reduced in clean clothing.
The textiles are aired to the Normal drying level.
The function is slightly less effective when used with fabrics made of synthetic fibres.
Useful tip: Dampen the clothing and use a fragrance flacon to enhance the freshening effect.
Drying programme overview - Extras
| Cottons - - - - - - | |||||||
| Cottons X X X X X X X | |||||||
| Minimum iron X X X X X X X | |||||||
| Delicates -- √ - - - - | |||||||
| Bed linen - - - - - - - | |||||||
| Automatic X X X X X X X - | |||||||
| Woollens handcare - - - - - - | |||||||
| Silks handcare | -- √ - - - - | ||||||
| Express | - - - - - - | ||||||
| Shirts | X X X X X X X | ||||||
| Denim | X X X X X X X | ||||||
| Steam care | - - - - - - | ||||||
| Sportswear | - - X X X X - | ||||||
| Basket programme - - - - - - | |||||||
| Outerwear - - X X - - - | |||||||
| Proofing | - - - - - - | ||||||
| Timed drying Warm air | - - X X - - - | ||||||
| Timed drying Cool air | - - - - - - | ||||||
| Standard pillowsLarge pillows | - - - - - - | ||||||
| Cottons hygiene | - - - - - - | ||||||
| Extra quiet | - - - - - - | ||||||
| Pre-ironing | - | - | √ | - | - | - | - |
The Extras cannot be combined with one another.
| = DryFresh | = Quick | X = can be selected | ||
| = PowerFresh | = Eco | - = cannot be selected | ||
| = DryCare 40 | = Freshen up | √ = activated automatically | ||
| = Gentle tumble |
Once the wash programme has completely finished, the Miele washing machine transfers the programme data via the router to which the networked tumble dryer is also connected, as well as transferring it to the Miele Cloud.
The tumble dryer automatically sets a drying programme tailored to the laundry based on the transferred programme data.
All you need to do is start the drying programme once you have loaded the tumble dryer. No further programme settings are required on the tumble dryer.
The drying programme must be started within 24 hours of the end of the wash programme. The data will be kept available for the tumble dryer during this period, but will be overwritten when a new wash programme ends.
Useful tip: Do not disconnect the tumble dryer from the network. The programme data transferred by the washing machine will be received by the tumble dryer as soon as you select Wash2Dry.
If you have disconnected the appliance from the network beforehand, this will cause a delay in receiving the data.
Requirements for use
In order to use the Wash2Dry function, the Miele washing machine and tumble dryer must be networked using Miele@home services.
Useful tip: Set up Miele@home as described in “Before using for the first time”.
Selecting the
Wash2Dry function

Please wait lights up in the display of the tumble dryer while the wash programme is running.
Once the washing machine programme has completely finished, the drying programme tailored to the laundry will be displayed.
■ After the wash programme has ended, place the clean laundry in the tumble dryer and close the door.
■ To start the programme, all you need to do is press the Start/Stop sensor on the tumble dryer.
The programme will not start on this tumble dryer after washing delicate textiles (e.g. curtains) in special wash programmes.
Creating a Favourite programme
You can save your own customised programmes under names of your choice.
There are two ways to create a Favourite programme.
Option 1
■ The main menu must be visible in the display. Touch the Favourites sensor.
The display will change to show the Favourites menu.
■ Touch the Create sensor.
The display will change to show the Create Favourites menu.
■ Select the required programme.
■ Select all the programme settings you want.
■ Then select Save.
■ Enter a name.
Option 2
You can save a programme which has been selected as a Favourite programme before you start it.
■ Before the programme starts, touch the ☆ Save sensor.
■ Enter a name.
If 12 Favourites have already been saved, the Create or ☆ Save sensor will not be visible. Delete an existing Favourite if you wish to create a new one.
Entering a name
It is best to select short, memorable names.
■ Touch the letters or characters you want.
■ Confirm with the Save sensor.
The programme will then be saved to the Favourites programme list.
Changing a Favourite programme
You can rename, delete or move a Favourite programme.
■ Select Favourites from the main menu.
■ Touch the Favourite programme that you wish to change until the Context menu opens.
■ Select Rename, Delete or Move.
The Drying assistant helps you when drying a wide variety of items. The tumble dryer will use the list of items to put together a suitable drying programme.
■ Scroll to the second page in the main menu.
■ Touch the Drying assistant sensor.
A list will open. The drying purpose is grouped into different areas.

Useful tip: Touch the i sensor to find out more about each purpose.
■ Touch the sensor for the Purpose which matches your drying requirement.
A list of items will appear.
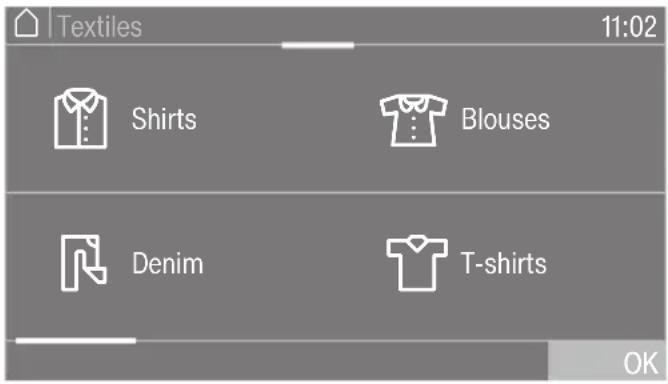
■ Touch the appropriate sensor for your item of laundry.
The item selected will be highlighted orange. You can select several items.
With some items, helpful information will also appear in the display when they are selected.
■ Confirm with the OK sensor.
■ Follow the instructions in the display.
A summary of the selected parameters will then appear in the display.
■ Confirm with the OK sensor or select Change if you would like to make any changes.
The programme which has been tailored to your laundry is ready to start.
Useful tip: You can add individual programme settings, e.g. Extras before you start the programme.
The Timer can be used to set the time at which a programme starts or finishes. The programme start can be delayed by up to 24 hours.
Setting the Timer
■ Touch the ⏻ sensor.
■ Select the Finish at or Start at option.
■ Set the hours and the minutes and confirm your entry with the OK sensor.
Changing the Timer
The selected Timer can be changed before the programme starts.
■ Touch the 📋 or 🔍 sensor.
■ Change the time set and confirm with the OK sensor.
Deleting the Timer
The selected Timer can be deleted before the programme starts.
■ Touch the 📋 or 🌐 sensor.
The selected Delay start time will appear in the display.
■ Touch the Delete sensor.
■ Confirm with the OK sensor.
The selected Delay start time is deleted.
Starting the Timer
■ Touch the Start/Stop sensor.
The time until the programme starts will appear in the display.
After the programme has started, the selected finish time can only be changed or cancelled by interrupting the programme.
The programme can now be started.
■ Touch the Start immediately sensor.
Adding laundry during the Delay start period
■ Follow the instructions in the sections "Changing the programme sequence" and "Adding or removing laundry".
With a longer delayed start time, the drum will rotate occasionally to untangle the laundry. This is not a fault.
SmartStart
The SmartStart function (only available in selected countries) lets you define a time period during which your tumble dryer will start automatically. The appliance will start on receipt of a signal, e.g. from your energy supplier, that indicates that the electricity rate is particularly economical.
This function is active when the SmartGrid setting is switched on.
The timeframe can be defined between 1 minute and 24 hours. During this period, the tumble dryer waits for the signal from the energy supplier. If no signal is sent during the defined period, the tumble dryer starts the drying programme.
Setting the timeframe
If you have activated the SmartGrid function in Settings, SmartStart by or SmartFinish by will appear in the display instead of Start at or Finish at when you touch the ⏻ sensor (see "Settings – SmartGrid").
The procedure for setting this is the same as for setting the Timer.
■ Set the time you want and confirm with the OK sensor.
■ Touch the Start/Stop sensor to start the drying programme with SmartStart.
The selected programme will start automatically, as soon as the energy provider has sent the signal, or the latest calculated start time has been reached.
The procedure for changing or deleting the SmartStart function is the same as described for the Timer function.
Changing a programme after it has started
You cannot change to another programme once a programme has started (this prevents unintentional alterations).
You will need to cancel the current programme before you can select a new one.
Cancelling a programme
■ Touch the Start/Stop sensor.
The following appears in the display:
i Cancel the programme?
■ Select yes.
The following appears in the display: Programme cancelled
■ Open the door.
Selecting another programme
■ Close the door.
■ Select the required programme.
■ Touch the Start/Stop sensor.
Adding or removing laundry
You have forgotten an item of laundry, but the programme has already started.
■ Touch the Add laundry sensor.
The following appears in the display: Add laundry and The door can be opened.. The Start/Stop sensor flashes slowly.
⚠️ Risk of burning when touching hot laundry in the drum! You could burn yourself.
■ Open the door.
■ Add or remove laundry.
■ Close the door.
■ Touch the Start/Stop sensor.
The programme will continue.
Exceptions to adding laundry
In some cases, e.g. during the cooling phase or in the Proofing programme, you cannot add laundry.
In exceptional cases, the door can be opened while the programme is running.
Emptying the condensed water container
The condensed water is collected in the condensed water container. Empty the condensed water container after every drying programme.
When the maximum level in the condensed water container is reached, the following message will light up in the display: Empty the container or check the drain outlet
■ To clear the message, open and close the door with the tumble dryer switched on.
⚠️ Damage to the door and the fascia panel when removing the condensed water container*. The door and the fascia panel can get damaged. Always close the door completely.
*This does not apply to right-hand hinged models.

■ Pull out the condensed water container.
■ To prevent water running out, keep it in a horizontal position when carrying it. Hold the condensed water container by the front panel and at the back.

natural_image
Illustration of a person pouring liquid from a cylindrical container into a funnel (no text or symbols)- Empty the container. - Replace the container in the dryer.
Condensed water can cause health problems in people and animals. Do not drink condensed water.
Useful tip: When certain programmes are being used, water is taken from the condensed water container and recycled. For this, the condensed water container must be filled to a certain level (see “Filling the condensed water container”).
Filling the condensed water container
When certain programmes are being used, condensed water generated during drying is recycled and sprayed into the drum via a spray nozzle.
The condensed water container must therefore be filled to at least the —min— mark. Otherwise, this could cause a fault.
The —min— mark is on the front left-hand side of the container. If you have set the appliance up so that condensed water is drained away, the condensed water container will be empty.

■ Check the fill level of the condensed water container.
■ Only fill it with commercially available condensed water (for ironing).
You should only use mains water in exceptional circumstances.
If mains water is used frequently, limescale can build up on the spray jet in the door opening.

1 spout, 2 rubber seal
■ Pour the condensed water through the rings on the spout 1.
The spray jet in the door opening may clog.
Only fill with clean water. Do not add fragrances, detergents or other substances.
Cleaning the rubber seal
If mains water is used frequently, limescale deposits can build up on the rubber seal 2.
■ Use a damp cleaning cloth to carefully remove any limescale deposits from the rubber seal 2.
FragranceDos
Fragrance flacons (optional accessories) can be used to give your laundry a pleasant scent.
This dryer has 2 places for inserting fragrance flacons. This gives you a choice of how to use them.
- You can use both positions if you wish to change from one scent to another. You can close the fragrance flacon that you are not using.
- Use both positions if you want a more intense scent of the same fragrance, or if you wish to conveniently switch between a scent for normal laundry and DryFresh to freshen up your laundry.
- Use one socket only if you only want to use the one fragrance.

Risk of fire and harm to health if fragrance flacons are used incorrectly.
Leaked fragrance can be harmful to your health if it comes into contact with your body. Leaked fragrance can cause a fire.
Before using a fragrance flacon, please read "Warning and Safety instructions - Using a fragrance flacon (optional accessory)".
Removing the protective seal from the fragrance flacon
Only hold the fragrance flacon as illustrated. Do not hold it at an angle or tip it as the fragrance will leak out.
■ Take the fragrance flacon out of its packaging.
Do not attempt to open the fragrance flacon.
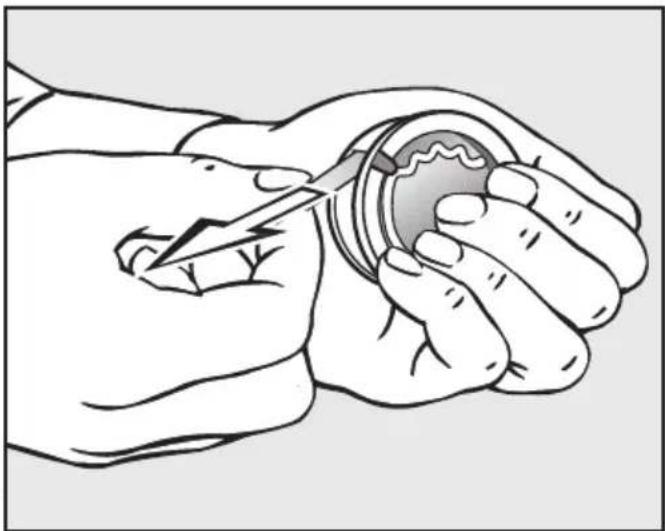
natural_image
Illustration of a hand holding a small object with a tool, no text or symbols present■ Hold the fragrance flacon securely so that you do not open it by mistake.
■ Pull off the protective seal.
Inserting the fragrance flacon
■ Open the door of the tumble dryer.
The fragrance flacon is inserted in the upper fluff filter. It can be inserted on the left or the right-hand side beside the grip.

natural_image
Diagram showing a circular device with an arrow pointing to its top panel, connected to a right-hand side view of the device (no text or symbols present)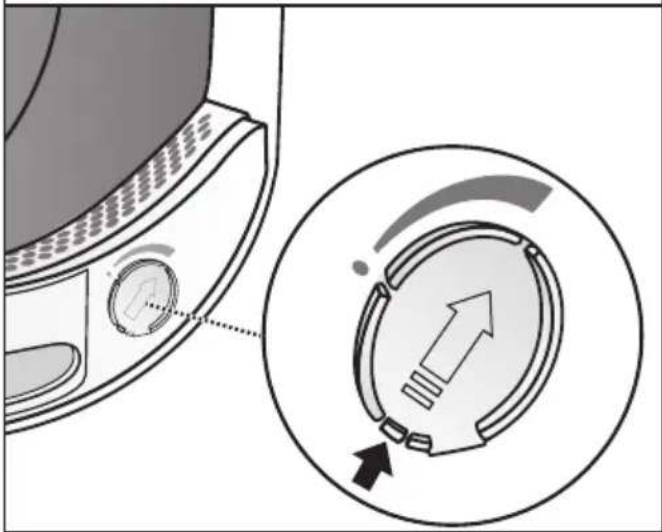
natural_image
Diagram showing a washing machine with control dial and circular dial, plus an arrow indicating direction (no text or symbols)■ Open the cover using the tab until the tab is right at the top as shown.
To prevent the accumulation of fluff, the cover of the unused socket must remain closed.
Push the tab of the cover to the bottom (see dark arrow), until you hear it click into position.
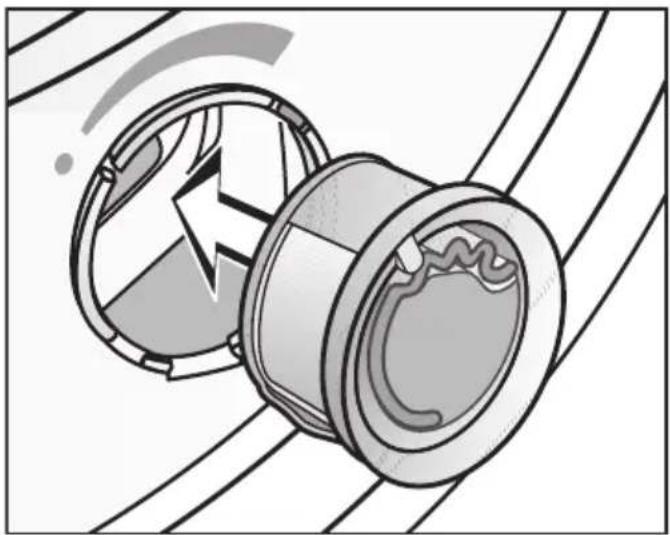
natural_image
Technical illustration of a mechanical component with no visible text or symbols■ Insert the fragrance flacon in the opening as far as it will go.
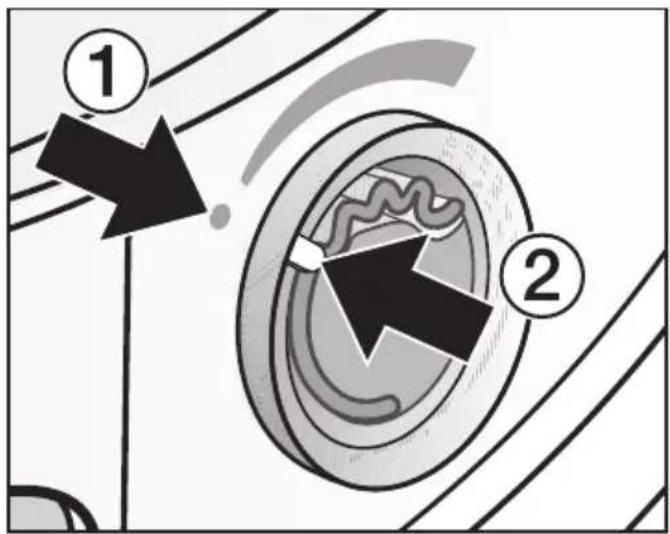
Markers ① and ② must line up with each other.

■ Turn the outer ring Ⓡ clockwise a little.
The fragrance flacon can slip out. Turn the outer ring so that markers ② and ⑩ line up.
Opening the fragrance flacon
Before drying, you can select the intensity of the fragrance.

natural_image
Diagram of a mechanical component with a circular feature and directional arrow, no text or symbols present■ Turn the outer ring clockwise: the further you open the fragrance flacon, the more intense the fragrance.
Damp laundry and longer drying durations with sufficient heat transfer are needed for the fragrance to be released into the laundry effectively.
The fragrance will also be noticeable in the room air during the process. The Cool Air programme will not generally apply fragrance.
Closing the fragrance flacon
After drying, the fragrance flacon should be closed to prevent the fragrance from escaping needlessly.

■ Turn the outer ring anti-clockwise until marker ② is in position ①.
If you wish to dry laundry without adding fragrance: remove the fragrance flacon and store it in its original packaging.
When the intensity of the fragrance is no longer sufficient, replace the fragrance flacon with a new one.
Removing/replacing the fragrance flacon

■ Turn the outer ring anti-clockwise until markers ① and ② line up.

natural_image
Mechanical component diagram showing a rotating shaft and housing with a directional arrow (no text or symbols)■ Replace the fragrance flacon with a new one.
When not in use, you can store the fragrance flacon in its original packaging.
Fragrance flacons are available to order from Miele or online at www.miele-shop.com.
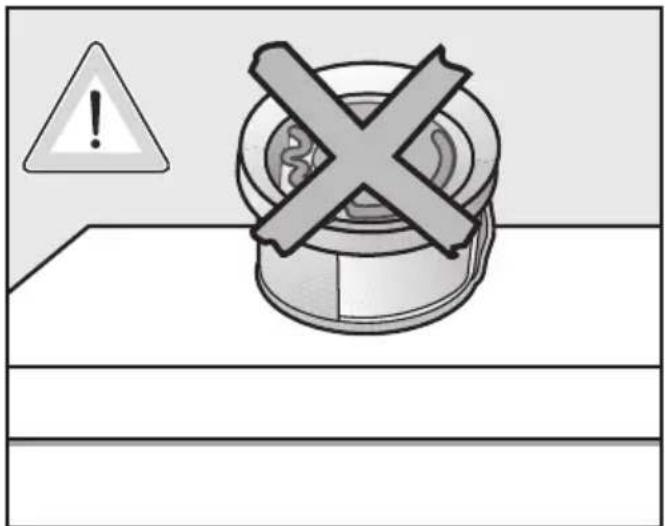
Fragrance can leak. Do not lay the fragrance flacon down.
natural_image
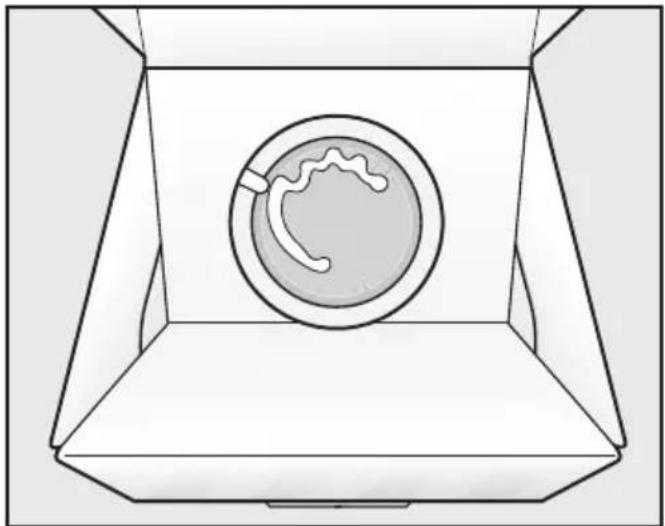
Simple line drawing of a box containing a circular object with internal lines, no text or symbols present.- If you are keeping the fragrance flacon in its original packaging, do not store the packaging upright on its edge or upside down. Otherwise, the fragrance will leak out.
- Always store in a cool, dry place away from direct sunlight.
- When purchasing new fragrance flacons, only remove the protective seal just before use.
Fluff filters
This tumble dryer has 2 fluff filters in the loading area of the door. Both fluff filters trap fluff produced during the drying process.
Clean the fluff filters after each drying programme. This prevents an extension of the programme duration.
Also clean the fluff filters when this message lights up in the display: Clean the fluff and plinth filters. See the operating instruction manual for more information.
■ To clear the message, confirm with OK.
Removing the fragrance flacon
The intensity of the fragrance will be diminished if the fluff filters and the plinth filter are not cleaned.
■ Remove the fragrance flacon. See "Fragrance flacon - Removing/ replacing the fragrance flacon".
Removing visible fluff
Useful tip: You can use a vacuum cleaner so that you can remove the fluff without touching it.
■ Open the door.
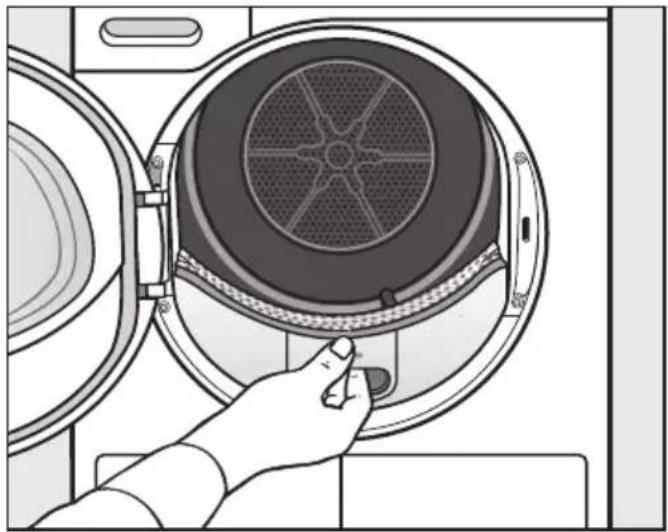
natural_image
Illustration of a hand inserting a fan into a washing machine (no text or symbols visible)■ Pull the upper fluff filter forwards to remove it.

natural_image
Illustration of hands installing or adjusting a mechanical component with arrows indicating motion (no text or symbols)■ Remove the fluff (see arrows).

natural_image
Diagram of a hand pressing down on a circular device with a mesh grille (no text or symbols)■ Remove the fluff from the filter surface of all the fluff filters and the perforated laundry deflector (see arrows).
■ Push the upper fluff filter back until it clicks into position.
■ Close the door.
Cleaning the fluff filters and air flow openings thoroughly
If the drying duration has become longer or the surface of the filters is visibly compacted with fluff, you should clean them thoroughly.
■ Remove the fragrance flacon. See "Fragrance flacon - Removing/ replacing the fragrance flacon".
■ Pull the upper fluff filter forwards to remove it.

natural_image
Diagram of a mechanical component with a circular arrow symbol, no text or labels present■ Turn the yellow dial on the lower fluff filter in the direction of the arrow (until you hear it click).
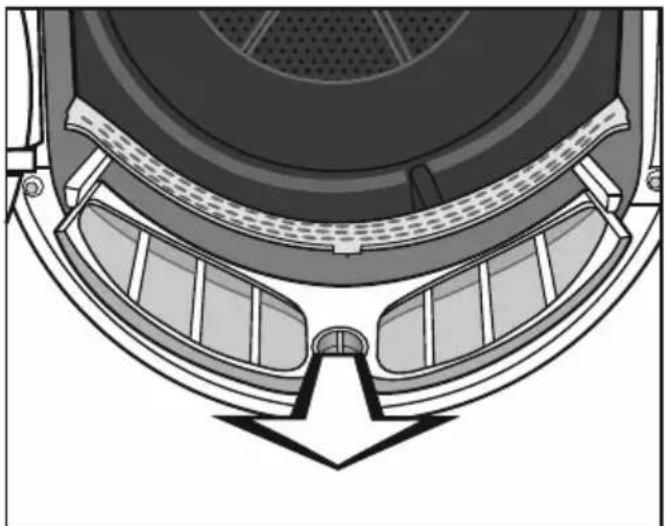
natural_image
Technical diagram of a mechanical component with internal structure and directional arrow (no text or symbols)■ Hold the dial and pull the fluff filter forwards to remove it.

natural_image
Technical diagram of a mechanical component with curved surfaces and a central plate (no text or symbols)■ Use a vacuum cleaner with a long crevice nozzle attached to remove any visible fluff from the upper air flow openings.
Finally, clean the fluff filters with water.
Cleaning the fluff filters with water
■ Wipe the smooth plastic surfaces of the fluff filters with a damp cloth to clean them.
■ Rinse the filters with warm running water.
■ Shake the fluff filters thoroughly and then dry them carefully.
Ensure the filters are dry before replacing them. Wet filters could cause operational faults.
■ Push the lower fluff filter in completely and lock it with the yellow dial.
■ Push the upper fluff filter in completely.
■ Close the door.
Cleaning the plinth filter
Clean the plinth filter when the programme duration has been extended or when this message appears in the display: Clean the fluff and plinth filters. See the operating instruction manual for more information.
■ To clear the message, confirm with OK.
Removing the plinth filter

natural_image
Simple line drawing of a stylized human figure inside a rectangular frame (no text or symbols)■ Press the round, indented area on the heat exchanger access panel to open it.
The panel will spring open.
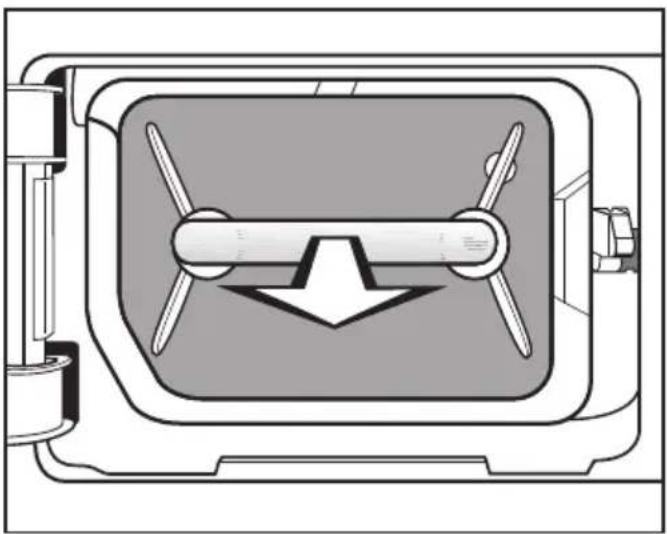
natural_image
Diagram of a mechanical component with a central shaft and four blades, showing a downward arrow (no text or symbols)■ Pull the plinth filter out by the handle.
When the plinth filter is pulled out, the right guide pin will slide out. The guide pin prevents the flap from being closed without the plinth filter in place.
Cleaning the plinth filter
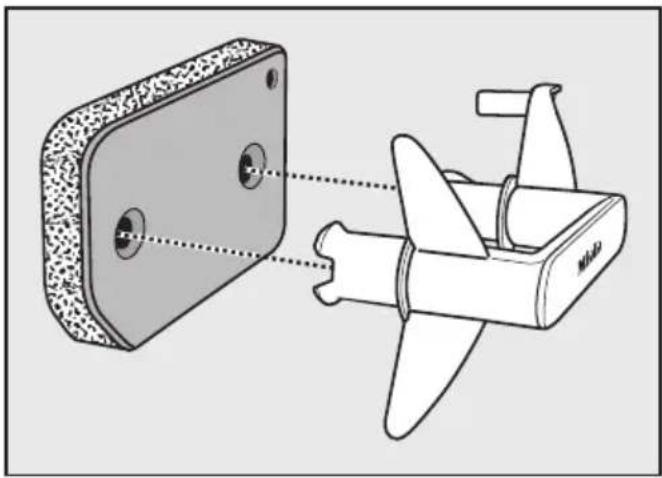
natural_image
Technical illustration of a mechanical component with a plate and pin, showing alignment between two parts (no text or symbols present)■ Pull the handle out of the plinth filter.
■ Clean the filter thoroughly under running water.
■ Squeeze the plinth filter very carefully several times as you rinse it.
■ Rinse the plinth filter until all visible residues have been removed.
■ Use a damp cloth to remove any fluff from the handle.
⚠️ Damage caused by a damaged or worn filter.
If the plinth filter is not functioning properly, the heat exchanger will be obstructed. A fault may occur. Check the plinth filter in accordance with the descriptions in "Problem solving guide - Replacing the plinth filter". If necessary, replace the plinth filter with a new one.

natural_image
Technical illustration of a mechanical component with a plate and pin assembly (no text or symbols)■ Fit the plinth filter back on the handle the right way round.

natural_image
Technical diagram of a mechanical component with internal grid structure and directional arrows (no text or symbols)■ Push the plinth filter in completely.
Insert the right guide pin at the same time.
Cleaning the plinth filter flap
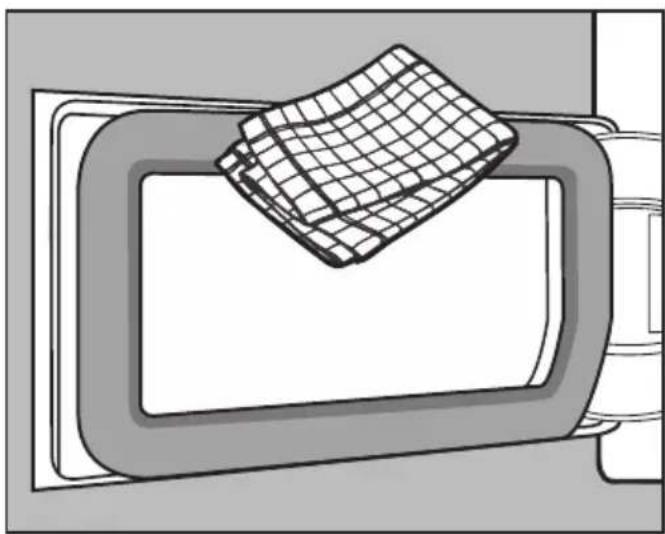
natural_image
Illustration of a 3D wireframe cube placed on a rectangular frame (no text or symbols)■ Use a damp cloth to remove any fluff. Make sure that you do not damage the rubber seal when doing this.
■ Close the heat exchanger access panel.
⚠️ Damage or ineffective drying when drying without a plinth filter or with the heat exchanger flap open. An excessive accumulation of fluff can damage the dryer in the long term. If the system is not leak-proof, this can lead to ineffective drying. Only operate the dryer with the plinth filter fitted correctly and the heat exchanger access panel closed.
Cleaning the dryer
Disconnect the dryer from the electricity supply.
⚠️ Damage due to the use of unsuitable care products. Unsuitable care products could damage plastic surfaces and other parts. Do not use solvents, abrasive cleaners, glass cleaners or all-purpose cleaners.

natural_image
Diagram of a washing machine with a cloth cover and fan blade, showing internal components (no text or symbols)■ Clean the dryer and the seal on the inside of the door only with a slightly damp, soft cloth and mild detergent or soapy water.
■ Dry all parts with a soft cloth.
With the help of the following guide, minor faults in the performance of the appliance, some of which may result from incorrect operation, can be remedied without contacting Miele. This will save you time and money because you won't need a service call.
Please note that a call-out charge will be applied to unnecessary service visits where the problem could have been rectified as described in these operating instructions.
Fault messages shown in the display when a programme is cancelled
| Message Possible cause | and remedy |
| Clean the fluff filter.Check the airways. | The system is clogged by fluff or detergent residues.■ To deactivate the message, confirm with OK.■ Clean the fluff filters and the plinth filter.Please see "Cleaning and care" for notes on cleaning. |
| The fluff and/or plinth filters are damaged or deformed.■ Check the fluff filters and the plinth filter. Replace them if necessary. | |
| The fluff and/or plinth filters are clogged. It is no longer possible to clean them.■ Check the fluff filters and the plinth filter. Replace them if necessary. | |
| For information on when to replace a plinth filter that is not functioning properly, refer to "Problem solving guide - Replacing the plinth filter". | |
| Clean the fluff filter.Check the airways. | The plinth filter looks clean after thorough cleaning.However, the programme is terminated again and the fault message appears again. There are probably still deeper residues which could not be removed.■ To deactivate the message, confirm with OK.■ Check all of the possible causes described below. |
| The heat exchanger is clogged.■ Check the heat exchanger. Follow the instructions in "Problem solving guide - Checking the heat exchanger". | |
| The plinth filter is clogged on a deeper level.■ Check the plinth filter. Follow the instructions in "Problem solving guide - Replacing the plinth filter".■ If the plinth filter is not deformed or defective, you can regenerate it in a washing machine. Follow the instructions in "Problem solving guide - Regenerating the plinth filter". | |
| Empty the container or check the drain outlet | The condensed water container is full or there is a kink in the drain hose.■ Open and close the door with the tumble dryer switched on to clear the message. Or switch the tumble dryer off and then on again.■ Empty the condensed water container.■ Check the drain hose. |
| Obstruction detected. Untangle laundry and restart. | The laundry is unevenly distributed or has rolled up.■ Open the door and loosen the laundry. If necessary, take out some of the laundry.■ Switch the dryer off and back on.■ Start a programme. |
| Fault F. If restart fails, call Service. | There is no obvious cause.■ Switch the dryer off and back on.■ Start a programme.If the programme terminates again with the same fault message, then there is a fault. Contact Miele. |
Messages in the display
| Message Possible cause | and remedy |
| 000 Access via a code has been activated.■ Enter the code and confirm the entry. Deactivate the code if you do not wish this message to appear in the display the next time the machine is switched on. | |
| Finish/Cooling down The laundry is cooled down at the end of the programme.■ Either remove the laundry and spread it out to cool down or leave it in the tumble dryer to cool down during the cooling phase. | |
| i Clean the fluff and plinth filters. See the operating instruction manual for more information. | The tumble dryer is not working correctly or economically. Possible causes could be clogging caused by fluff or detergent residues.■ To deactivate the message, confirm with OK.■ Please see "Cleaning and care" for notes on cleaning.■ Clean the fluff filters.■ Also check the plinth filter and clean it if necessary. |
| You can influence when the Clean the fluff and plinth filters. See the operating instruction manual for more information. message lights up.■ Follow the instructions in "Settings - Airways indicator". | |
| i Fill the condensate container with water | The condensed water container is empty. When certain programmes are being used, water is taken from the condensed water container and recycled.■ To deactivate the message, confirm with OK.■ Fill the condensed water container to at least the —min— mark. |
| i Please open and close the door | After selecting the Steam care programme, you are alerted to load laundry.■ Load the laundry in the drum. |
Unsatisfactory drying results
| Problem Possible cause | and remedy |
| The DryCare 40 Extra is not drying the laundry sufficiently. | The room in which the tumble dryer is located is too warm. This has caused the DryCare process to finish prematurely.■ Ventilate the room thoroughly.■ To fully dry the laundry, select Warm air with the DryCare 40 Extra. |
| The laundry is not sufficiently dry. | The load consisted of different types of fabric.■ Finish drying using the Warm air programme.■ Select a more suitable programme next time.Tip: You can alter the residual moisture level for some programmes. See “Settings - Drying levels”. |
| Laundry or feather filled pillows smell after drying. | The laundry was washed with insufficient detergent. Feathers are a natural product and this is quite normal.■ Laundry: use sufficient detergent next time.■ Pillows: take out of the tumble dryer and aerate.■ Use a fragrance flacon (available as an optional accessory). |
| Items made of synthetic fibres are charged with static electricity after drying. | Synthetic fibres tend to attract static charge.■ Static charge can be reduced by adding a fabric softener to the final rinse in the washing programme. |
| There is a build-up of fluff. | Fluff is principally the result of friction when garments are being worn and to some extent when they are being washed. Machine drying hardly causes any fluff to form.Fluff is collected by the fluff filters and the plinth filter and can be removed easily.■ See “Cleaning and care”. |
The drying process takes a long time.
| Problem Possible cause | and remedy |
| The drying process goes on for too long or even switches off.* | The room in which the tumble dryer is located is too warm.■ Ventilate the room thoroughly. |
| Detergent residues, hair and fine fluff can clog the filters.■ Clean the fluff filters and the plinth filter.■ Remove visible fluff from the heat exchanger. | |
| The laundry is unevenly distributed or has rolled up. The tumble dryer has been overloaded.■ Untangle the laundry and remove a few items, if necessary.■ Start a programme. | |
| The cool air intake (bottom right grille) is blocked.■ Move any objects, such as a laundry basket, away from the dryer. | |
| The laundry is too damp.■ Spin the laundry using a higher spin speed in the washing machine. | |
| Metallic components, e.g. zippers, have prevented the dryer from registering the correct moisture level.■ Open the zippers next time.■ If the problem recurs, dry these items using the Warm air timed drying programme. |
* Switch the tumble dryer off and on again before starting a new programme.
General problems with the tumble dryer
| Problem Possible cause | and remedy |
| You can hear buzzing or humming operating noises. | The compressor (heat pump) is operating. Or you have selected a programme which sprays condensed water into the drum.No action is required. These noises are quite normal and can be heard when the compressor or the condensed water pump is operating. |
| There is no fault. | |
| A programme cannot be started. | There is no obvious cause.Connect the tumble dryer to the mains electricity supplyTurn on the tumble dryer.Close the door.Check whether the mains fuse has tripped. |
| Has there been a power cut? When power is restored, any previously running programme will restart automatically. | |
| When the DryFresh, PowerFresh or DryCare 40 Extras are selected, the drying level “jumps back” to a different one. | The drying level you selected previously cannot be combined with the Extra. The closest possible drying level is selected automatically. |
| The display is dark and the Start/Stop sensor is flashing slowly. | The display has switched off automatically to save energy (Standby mode).The drum will rotate from time to time when the dryer is in the Anti-crease phase.Touch any sensor. This switches Standby off. |
| The dryer is switched off at the end of the programme. | The tumble dryer switches off automatically. This is not a fault, but a normal function. |
| The display is in a different language. | A different language has been selected in “Settings - Language ▶”.Set the language you want. The flag symbol serves as a guide. |
| The interior drum lighting does not come on. | To save energy, the drum lighting goes out automatically after a set time and after the programme starts.■ Switch the dryer off and then on again.■ To switch the drum lighting on, open the door of the tumble dryer. |
| The drum lighting is faulty.The drum lighting is designed to last a long time and should not normally need to be replaced.■ If you have tried the remedies above but the drum lighting still does not come on, please contact Miele. | |
| The spray jet for spraying condensed water into the drum is insufficient. | When certain programmes are being used, water is taken from the condensed water container and sprayed into the drum. The spray jet can sometimes stop working. |
| The fluff filter in the condensed water container is clogged.■ Clean the fluff filter in the condensed water container. See “Cleaning the fluff filter in the condensed water container” in this section. | |
| The spray jet in the door opening is heavily calcified.■ Replace the spray jet. See “Replacing the condensed water spray jet” in this section.■ Only use condensed water. Do not use tap water.Tap water leads to limescale deposits in the long run. |
Problem solving guide
Replacing the plinth filter
The heat exchanger can clog up. Replace the plinth filter immediately (replacement filters are available as an optional accessory) if you see the following signs of wear before or after cleaning.
Poor fit

natural_image
Cross-sectional diagram of a mechanical component with internal components and no visible text or symbolsThe edges of the plinth filter do not sit properly and the filter is deformed. Fluff will blow into the heat exchanger unfiltered through edges that do not sit properly. This will eventually cause obstruction in the heat exchanger.
Deformations

natural_image
Diagram of a spacecraft with a propeller and two circular components, no text or symbols presentDeformations indicate that the filter has become worn.
Cracks, tears, indentations

natural_image
Two-panel scientific illustration showing a biological structure with two circular elements and radiating lines, no text or symbols present.Fluff will blow into the heat exchanger unfiltered through cracks and tears and will cause obstruction. This will eventually cause obstruction in the heat exchanger.
White residues or residues of other colours

natural_image
Technical line drawing of a mechanical component with a textured top and two mounting brackets (no text or symbols)Residues arise from laundry fibres and residual detergent components. They can be found on the front and side edges of the plinth filter. In extreme cases, they can form stubborn crusts. Residues are a sign that the filter no longer has a snug fit at the sides, even if it appears to be perfect.
Fluff is getting in unfiltered at the edges.
Regenerate the plinth filter (see "Problem solving guide - Regenerating the plinth filter"). If the plinth filter shows these residues again soon, the plinth filter must be replaced.
Regenerating the plinth filter
You can regenerate one or more dirty plinth filters in the washing machine. The plinth filter will be ready for use again.
Before regenerating it, check whether the plinth filter is still in good condition. Check the plinth filter in accordance with the descriptions in "Problem solving guide - Replacing the plinth filter". If the plinth filter is worn, replace it.
■ Wash one or more plinth filters separately without garments. Do not add laundry detergent.
■ Select a short wash programme with a maximum temperature of 40^ C and a maximum spin speed of 600 rpm.
After washing and spinning, you can refit the plinth filter.
Checking the heat exchanger

Risk of injury from sharp cooling fins.
You could cut yourself.
Do not touch the cooling fins.
■ Look to see if fluff has accumulated. If fluff is present, it must be removed.

Damage due to incorrect cleaning of the heat exchanger.
The tumble dryer will not dry if the cooling fins are damaged or bent.
Clean using a vacuum cleaner with a dusting brush attached. Only pass the vacuum cleaner dusting brush over the fins lightly, without applying any pressure.

natural_image
Technical diagram of a mechanical component with a cable inserted into a grid-patterned chamber (no text or symbols)■ Carefully vacuum up any fluff and residues.
Cleaning the fluff filter in the condensed water container
When certain programmes are being used, water is taken from the condensed water container and sprayed into the drum. The spray jet can sometimes stop working. The fluff filter in the condensed water container is clogged.
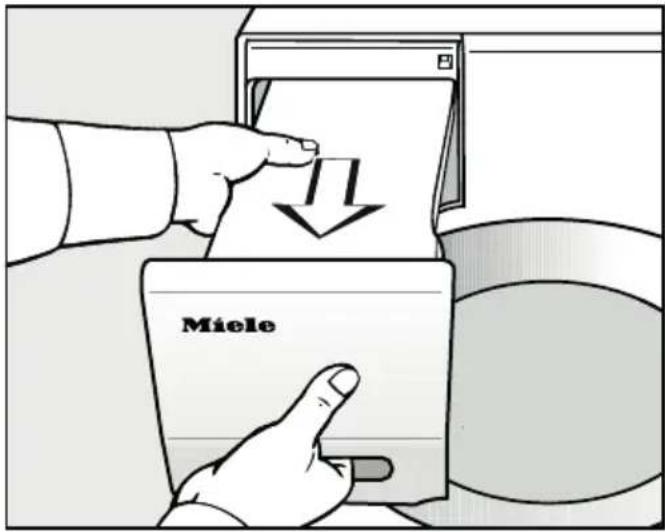
■ Pull out the condensed water container.

natural_image
Diagram showing mechanical assembly with a magnified inset of a component (no text or symbols)■ Reach under the side lug on the spout with your finger.
■ Pull out the spout.
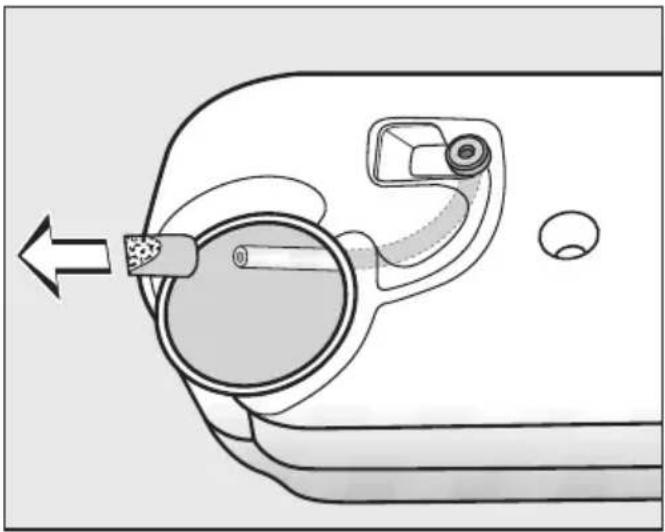
natural_image
Diagram of a car's seatbelt mechanism showing the wheel, seatbelt, and seat (no text or labels)Be careful not to tug on the hose to avoid detaching it.
■ Guide the end of the hose through the opening.
■ Hold it securely with one hand.
■ Use your other hand to pull the fluff filter off the hose.
■ Rinse the fluff filter with a jet of water until all the fluff has been removed.
■ Attach the clean fluff filter to the end of the hose.
■ Now feed the hose back into the condensed water container.
■ Refit the spout in the condensed water container ensuring that it is positioned correctly. Please refer to the image.
Problem solving guide
Replacing the condensed water spray jet
When certain programmes are being used, water is taken from the condensed water container and sprayed into the drum. The spray jet can sometimes stop working. Limescale deposits have built up on the spray jet.
Remove the spray jet and replace with a new one (optional accessory).
You can only replace the spray jet using a special tool. The special tool is supplied with the new spray jet.

Using the wrong tool can cause damage.
It can damage the spray jet or the tumble dryer.
Only use the tool supplied. Do not use any other tool.
■ Open the tumble dryer door.
The spray jet is located in the top left of the door opening.

natural_image
Illustration of a washing machine with a close-up of its handle and blade, showing mechanical components (no text or symbols)■ Attach the tool to the spray jet.
■ Turn the tool anti-clockwise to unscrew the spray jet.
■ Insert the new spray jet in the tool.
■ Turn the tool clockwise to screw the spray jet securely in position.
The tumble dryer must not be operated without the spray jet fitted.
Contact in case of fault
In the event of any faults which you cannot remedy yourself, please contact Miele.
You can book a Miele customer service call-out online at www.miele.com.au/service or www.miele.co.nz/service.
Contact information for Miele can be found at the end of this booklet.
Please quote the model and serial number of your appliance when contacting Miele. This information can be found on the data plate.
The data plate is visible when the door is open.

natural_image
Diagram of a washing machine interior showing the inner casing and door, with no text or symbols present.Optional accessories
Optional accessories for this tumble dryer are available from Miele (see contact details at the back of these instructions).
You also can order these and other useful products from the Miele online shop.
Drying basket
The drying basket is suspended in the drum and does not rotate with the drum. This enables items which must not be subjected to mechanical action to be dried or aired.
Fragrance flacon
Fragrance flacons can be used in your tumble dryer to add a pleasant fragrance to your laundry.
Warranty
The manufacturer's warranty for this appliance is 2 years.
For further information, please refer to your warranty booklet.
Front view

① Mains connection cable
② Control panel
③ Condensed water container
④ Door
⑤ Plinth filter access panel
⑥ 4 height-adjustable feet
⑦ Cooling air grille
⑧ Drain hose for condensed water
Rear view

① Protruding lid for holding when moving the machine
② Drain hose for condensed water
③ Hook for winding the mains connection cable around during transport
④ Mains connection cable
Transporting the tumble dryer
Danger of injury to people and damage to property caused by moving the appliance incorrectly. If the tumble dryer tips over, there is a danger of injury to people and damage to property. Ensure that the tumble dryer is stable during transportation.
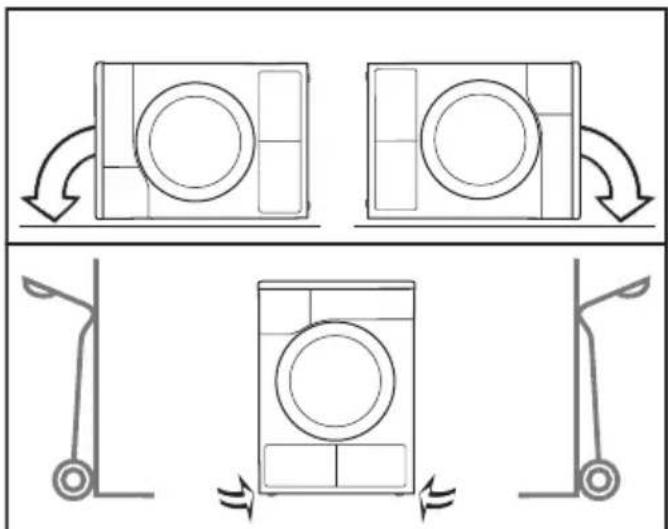
flowchart
graph TD
    A["Top Section"] --> B["Left Panel with circular components"]
    B --> C["Right Panel with circular components"]
    C --> D["Bottom Section with circular components"]
    D --> E["Left Panel with circular components"]
    E --> F["Right Panel with circular components"]
    style A fill:#f9f,stroke:#333
    style B fill:#ccf,stroke:#333
    style C fill:#ccf,stroke:#333
    style D fill:#cfc,stroke:#333
    style E fill:#cfc,stroke:#333
■ If the tumble dryer is being transported horizontally, it must only be tipped onto its left or right side.
If the tumble dryer is being transported upright and you are using a handcart or trolley, you must only transport it with its left or right side resting on the handcart or trolley.
Transporting the tumble dryer to its installation site
⚠️ Make sure the fixings at the back of the lid are secure.
Otherwise there is a danger of the lid being pulled off when carrying the appliance.
Before carrying the appliance, check that the lid is secure where it protrudes at the back of the appliance.
- Carry the tumble dryer by the front feet and by the lid where it protrudes at the back of the appliance.
Installation
Levelling the dryer
The appliance must not be installed behind a lockable door, a sliding door or a door with a hinge on the opposite side to that of the tumble dyer, in such a way that a full opening of the tumble dryer door is restricted.

natural_image
Line drawing of a front-loading washing machine with circular vent and side door (no text or symbols)To ensure proper operation, the tumble dryer must stand perfectly level. The screw feet on the tumble dryer can be adjusted to compensate for unevenness in the floor.

natural_image
Diagram showing a wrench and screwdriver working on a mechanical component with bidirectional arrows indicating rotation (no text or symbols)■ Turn the screw feet by hand or with a flat open spanner.
Downtime after installation
⚠️ Damage to the tumble dryer by switching it on too soon.
This can damage the heat pump. After setting up the tumble dryer, wait for at least one hour before switching it on.
Ventilation
The cool air intake at the front of the tumble dryer must not be blocked or covered. This would hinder a sufficient intake of cool air for the heat exchanger.
Do not block the gap between the bottom of the tumble dryer and the floor with plinth facings, deep pile carpet etc. This would hinder a sufficient flow of air to the tumble dryer.
Adequate ventilation has to be provided to avoid the backflow of gases into the room from appliances burning other fuels, including open fires.
Air which is taken in to cool the heat exchanger is then blown back out of the dryer and warms up the air in the room. Ensure sufficient ventilation of the room, e.g. by opening a window. The drying time will otherwise take longer (higher energy requirement).
Before moving the tumble dryer again (e.g. when moving house)
After each use a small quantity of condensed water will collect in the area of the pump. This water can run out if the tumble dryer is tipped up when it is being moved. Recommendation: Run the Warm air programme for approximately 1 minute without a load before moving the tumble dryer. Any remaining condensed water will then be fed into the condensed water container, which can then be emptied, or can drain out through the drain hose.
Additional installation requirements
Suitable for pushing under a worktop
This tumble dryer is suitable for pushing under a worktop.
Appliance defect due to a build-up of heat.
Make sure there is adequate room for warm air from the dryer to be directed away.
- The appliance lid cannot be removed.
- The electrical socket must be located in an accessible position near the appliance.
- Drying durations may increase slightly.
Optional accessories
- Washer-dryer stack
The tumble dryer can also be combined with a Miele washing machine in a washer-dryer stack. The appropriate Miele washer-dryer stacking kit is required.
- Plinth
The tumble dryer can be fitted with a plinth with drawer (please note the plinth may not be available in all countries).
Externally draining condensed water
Notes
When drying is in progress, condensed water is pumped into the condensed water container through the drain hose which is located at the back of the dryer.
The condensed water can also be drained away via the drain hose. The condensed water container will then not need to be emptied.
Hose length: 1.49 m Maximum delivery head: 1.00 m Maximum drain hose length: 4.00 m
Drainage accessories
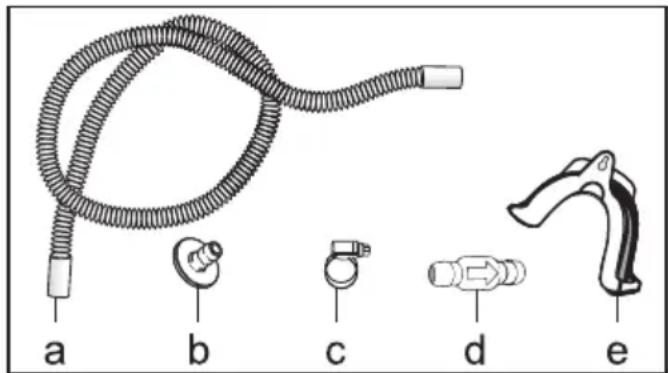
- Supplied: adapter (b), hose clip (c), hose holder (e);
- Available to purchase: “Non-return valve” kit for connection to an external water connection. Non-return valve (d), hose extension (a) and hose clips (c) are supplied with the kit.
Installation conditions requiring a non-return valve
Danger of condensed water backflow.
Water could flow back into the tumble dryer or be drawn into it. Backflow water could damage the tumble dryer and also the room in which it is located.
The non-return valve should be used if the end of the hose is immersed in water, or if other water connections are installed.
Maximum delivery head with non-return valve fitted: 1.00 m
Installation conditions requiring the fitting of a non-return valve:
- Drainage into a laundry tub or floor gully where the end of the hose is immersed in water.
- Connection to a sink drain outlet.
- Connection to a drainage system already in use by another appliance, e.g. a dishwasher or washing machine.
If the non-return valve is incorrectly fitted the appliance will not drain. The non-return valve has to be fitted with the arrow on it pointing in the direction of flow.
Arranging the drain hose
⚠️ Damage to the drain hose through incorrect handling.
The drain hose can suffer damage and leak.
Do not pull on the drain hose and do not stretch it or allow it to become kinked.
There will be a small amount of residual water left in the drain hose. Have a container ready to collect this.

natural_image
Diagram of a car interior showing rope routing and directional arrows (no text or symbols)■ Pull the drain hose off its connection (light arrow).
■ Pull the hose out of the holders (dark arrows) and unwind it.
■ Allow any residual water to run into a container.
Examples
Drainage into a laundry tub or floor gully Use the hose holder to secure the drain hose.
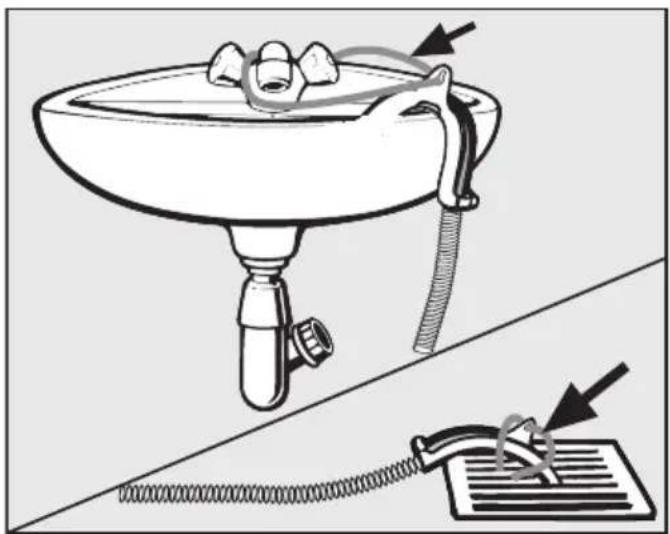
natural_image
Diagram showing a hand operating a sink with a hose and cable, connected to a grid device (no text or symbols present)Risk of water damage.
Should the end of the hose come loose, overflowing water can cause damage.
Secure the drain hose carefully (e.g., by tying it) to make sure it cannot slip.
The non-return valve can be fitted in the end of the hose.
Installation
Direct connection to a sink drain outlet
Use the hose holder, the hose clips and the non-return valve (available to purchase).

- Adapter
- Nut
- Hose clip
- End of the hose (secured with the hose holder)
- Non-return valve
- Tumble dryer drain hose
■ Fit the adapter 1 to the sink drain outlet using the nut 2.
The nut is usually fitted with a washer which must be removed.
■ Attach the end of the hose 4 to the adapter 1.
■ Use the hose holder.
■ Use a screwdriver to tighten the hose clip 3 up close to the nut.
■ Fit the non-return valve 5 to the tumble dryer drain hose 6.
The non-return valve 5 has to be fitted so that the arrow points in the direction of flow (i.e. towards the sink).
■ Secure the non-return valve using hose clips.
Changing the door hinging
You can change the door hinging on this tumble dryer yourself.
For safety reasons, the tumble dryer must be disconnected from the electricity supply before changing the door hinging.
You will need:
- a T20 and T30 Torx screwdriver
- a flat head screwdriver or pointed pliers
- the lock catch cover supplied
- the door hinge cover supplied
- a soft surface (e.g. a tablecloth)
Changing the hinging over
1. Remove the door from the dryer
■ Open the door.

■ Use a T30 Torx screwdriver to unscrew the two screws on the base plate of the door hinge Ⓐ.
The door cannot fall off as it is held in place by two pins.
■ Hold the door securely and pull it forwards: to remove the door you will need to pull the base plate of the hinge with its two pins out of the dryer.
To avoid scratching the door, place it outer side downwards on a soft surface (e.g. a tablecloth).
2. Change over the door lock on the dryer
■ Use a T30 Torx screwdriver to unscrew the two screws on the door lock Ⓑ.

natural_image
Close-up of a hand using a tool to adjust or install a mechanical component, no visible text or symbols■ Use the screwdriver to press the door lock upwards.
The door lock will spring out of its position and can then be removed.
Installation
■ Turn the door lock through 180°.

■ Press the door lock into the openings © on the opposite side of the door opening.
■ Adjust the position of the door lock so that the screw holes line up with those in the front panel of the dryer D.
- Secure the door lock with the two Torx screws.
- Remove the lock catch from the door

natural_image
Diagram of a helmet with an arrow pointing to the inner panel (no text or symbols present)■ First take the rubber seal off the door and place this to one side.

■ Use a T20 Torx screwdriver to remove the screw Ⓔ on the lock catch.
■ Pull off the lock catch together with the lock catch cover Ⓔ.

natural_image
Diagram showing a mechanical component with an arrow indicating direction, no text or symbols present■ Remove the lock catch from the cover.
This lock catch cover is no longer needed. However, please keep it in a safe place.
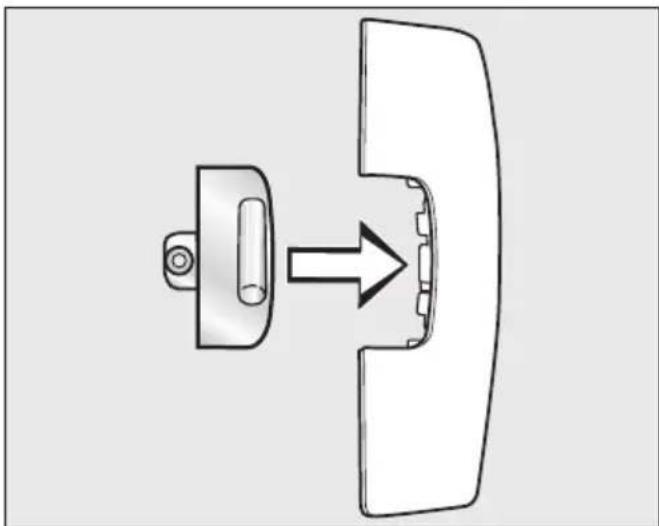
natural_image
Diagram of a mechanical component with a bracket and arrow indicating direction (no text or symbols)■ Insert the lock catch into the new cover supplied with the dryer.
■ Place this new cover to one side for now.
4. Dismantle the door hinge from the door
The door hinge cover must be unclipped from position Ⓖ and then removed.

■ Use a screwdriver to press down gently on position Ⓖ on the door hinge cover.
■ Using a little force, pull out the door hinge cover Ⓗ.
This door hinge cover is no longer needed. However, please keep it in a safe place.
The door hinge is secured to the door with 2 angled rods. These rods need to be removed with a screwdriver or pointed pliers.

natural_image
Technical diagram of a mechanical assembly with numbered component (1), no readable text or symbols present■ Insert the end of the screwdriver blade under the rod ① and rotate it so it is in an upright position. Do the same to the other rod.

■ Use the screwdriver or pointed pliers to guide first one then the other rod ② to the middle until each can be removed.
Useful tip: In some circumstances, the rods can be difficult to dislodge. Moving the screwdriver with a levering action while pulling at the same time may help to work the rods free.
■ Remove the door hinge and rotate it 180^ .
■ Refit the door hinge on the opposite side of the door.
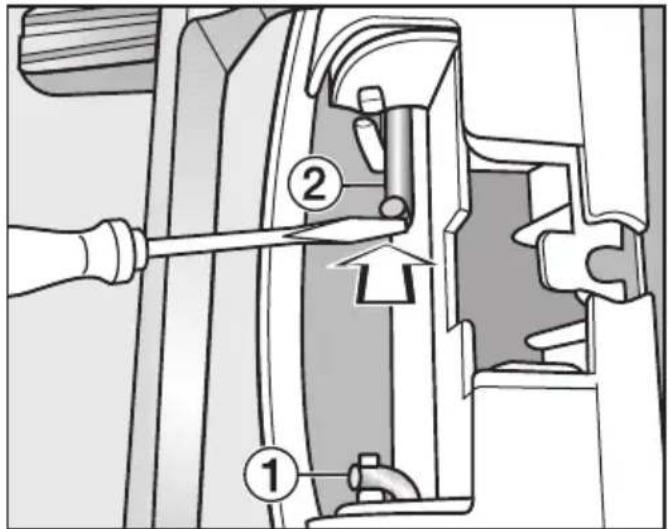
- Secure the door hinge with the two rods ②.
■ Position the tip of the screwdriver under the end of the rod and then push it into its resting position ①.
You now need the new door hinge cover supplied with the tumble dryer.
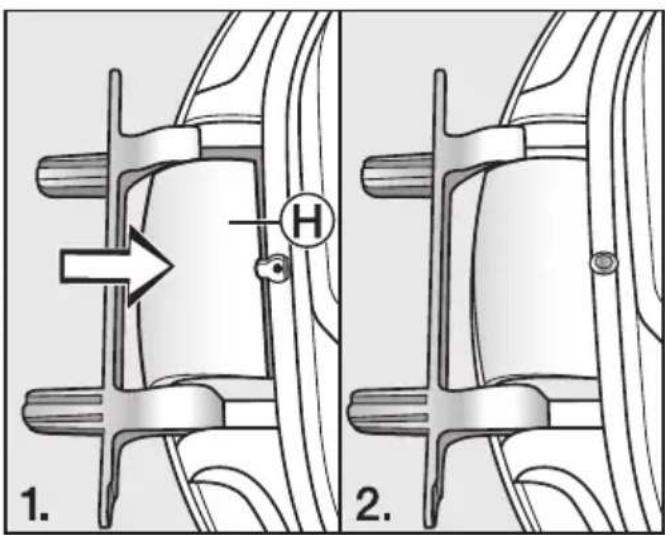
■ Fit the new door hinge cover Ⓗ and clip it into position.
6. Change the lock catch on the door
You now need the new lock catch cover supplied with the dryer which you have already fitted with the lock catch.

■ Push the lock catch cover Ⓔ with its lock catch into position.
■ Tighten the screw Ⓔ with a T20 Torx screwdriver.
Refitting
- Refit the door
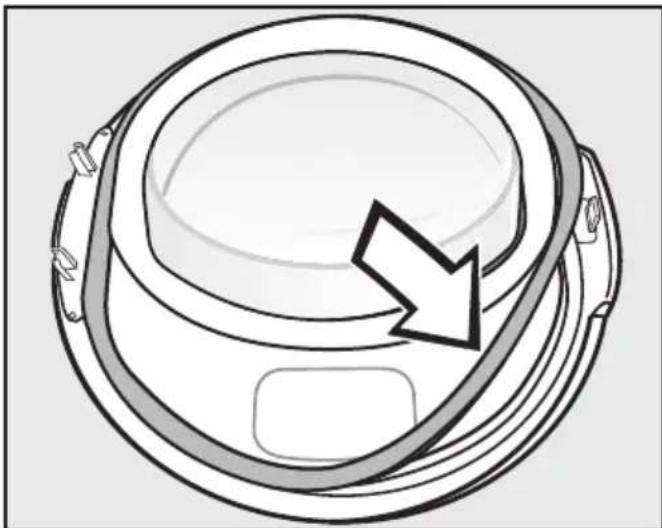
natural_image
Diagram of a mechanical component with a curved arrow indicating direction (no text or symbols)■ Press the rubber seal back into the groove on the door.
■ Position the door in front of the dryer.
■ Fit the base of the door hinge with its two pins into the openings on the dryer.
The base of the door hinge must be flush with the front panel of the dryer. The door cannot fall off in this position.

■ Screw the door securely to the dryer at the base of the door hinge Ⓐ with a T30 Torx screwdriver.
Now that you have changed the door hinging, the door will open from the opposite side.

natural_image
Circular mechanical component with concentric rings and a curved arrow indicating rotation (no text or symbols)■ Push the orange marker round to the other side so that you will see at which side to pull the door open.
Note
⚠️ Please keep the lock catch and door hinge covers which were no longer needed in a safe place. These will be required if, for example, you move house and need to change the door hinging back to its original position.
Electrical connection
The tumble dryer is supplied with a mains cable with moulded plug ready for connection to a socket.
The socket should be easily accessible after the tumble dryer has been installed. If the socket is not easily accessible, ensure that a suitable means of disconnection is provided on the installation side for each pole.

Risk of fire from overheating.
Connecting the tumble dryer to a multi-socket plug adapter or to an extension lead can overload the cable.
For safety reasons, do not use an extension cable or multi-socket adapter.
All electrical work must be carried out by a suitably qualified and competent person in strict accordance with national and local safety regulations.
For safety reasons, we recommend using a suitable residual current device (RCD) in the relevant electrical installation for connecting the tumble dryer.
If the mains connection cable is damaged, it must only be replaced with a specific mains connection cable of the same type (available from Miele). For safety reasons, such replacement may only be carried out by a suitably qualified and competent electrician or a Miele authorised service technician, in order to avoid a hazard.
The data plate indicates the nominal power consumption and the connection data. Compare this information with the data of the on-site electrical connection.
If in any doubt, consult a qualified electrician.
Temporary or permanent operation with a self-sufficient or non-mains synchronous energy supply system (e.g. isolated networks, back-up systems) is possible. A requirement for the operation is that the energy supply system complies with all current local and national requirements that apply to stand-alone, solar and/or battery systems.
The protective measures provided in the domestic installation and in this Miele product must also be assured in their function and operation in isolated operation or in non-mains synchronous operation, or replaced with equivalent measures in the installation.
| Height 850 mm | |
| Width 596 mm | |
| Depth 643 mm | |
| Depth with door open 1077 mm | |
| Suitable for pushing under a worktop Yes | |
| Height for pushing under a worktop 850 mm (+8/-2 mm) | |
| Width for pushing under a worktop 600 mm | |
| Depth for pushing under a worktop 600 mm | |
| Suitable for stacking Yes | |
| Weight Approx. 62 kg | |
| Drum volume 120 l | |
| Maximum capacity 9.0 kg (weight of dry laundry) | |
| Capacity of condensed water container 4.8 l | |
| Drain hose length | 1.49 m |
| Maximum delivery head | 1.00 m |
| Maximum drain hose length | 4.00 m |
| Length of connection cable | 2.00 m |
| Voltage | See data plate |
| Rated load | See data plate |
| Fuse rating | See data plate |
| Test certificates awarded | See data plate |
| Energy consumption | See “Consumption data” |
| LEDs | Class 1 |
| Frequency band | 2.4000 GHz – 2.4835 GHz |
| Maximum transmission power | < 100 mW |
| Load^1 kg rpm | Final spin speed in a domestic washing machine% kWh min. | Residual moisture | Energy Duration | ||
| Cottons 9.0 | 1,000 | 60 | 1.47 | 220 | |
| 4.5 | 1,000 | 60 | 0.78 | 131 | |
| Cottons Normal 9.0 | 1,200 | 53 | 1.30 | 199 | |
| 9.0 | 1,400 | 50 | 1.25 | 189 | |
| 9.0 | 1,600 | 44 | 1.10 | 168 | |
| Cottons Hand iron 9.0 | 1,000 | 60 | 1.16 | 176 | |
| 9.0 | 1,200 | 53 | 1.00 | 154 | |
| 9.0 | 1,400 | 50 | 0.95 | 144 | |
| 9.0 | 1,600 | 44 | 0.80 | 122 | |
| Minimum iron Normal 4.0 1,200 40 0.50 65 | |||||
| Delicates Normal 2.5 800 50 0.55 70 | |||||
| Woollens handcare 2.0 1,000 50 0.02 | 5 | ||||
| Shirts Normal | 2.0 600 | 60 0.45 60 | |||
| Express Normal | 4.0 1,000 | 60 0.80 80 | |||
| Denim Normal | 3.0 900 | 60 1.00 125 | |||
| Proofing Normal | 2.5 800 | 50 1.00 100 | |||
| ^1 Weight of dry laundry | |||||
| All data was calculated using EN 61121 unless otherwise stated. | |||||
Consumption data can vary from the nominal values given above depending on the size of the load, types of textiles, residual moisture levels after spinning and fluctuations in the electricity supply, or when water hardness levels differ from specified values.
Using the Cottons Extra dry programme is recommended for a mixed cotton load and is the programme used in energy consumption tests according to AS/NZS 2442 (Refer to http://www.energyrating.gov.au website for consumption data).
The consumption data displayed by the tumble dryer may differ from the consumption data listed in the table. The differences are due to how data is calculated in the tumble dryer. For instance, when the programme running time is calculated, it is influenced by the residual moisture and composition of the laundry load, which – in turn – has an impact on the amount of energy required.
Settings can be altered to adapt the electronics of the dryer to different requirements.
Settings can be altered at any time.
Calling up settings
■ Switch the tumble dryer on.
■ Scroll to the second page in the main menu.
■ Touch the Settings sensor.
Selecting settings
The settings are grouped into different areas.
■ Select the required area.
■ Scroll through the list until the setting you want appears.
■ Touch the sensor to edit the setting.
Editing settings
■ Change the value displayed and confirm with OK.
or
■ Touch an option to select it.
An option which is selected will be highlighted orange.
The option is saved. The display will then switch to the Settings menu, or go back to the previous menu level.
Exiting settings
■ Touch the sensor.
The display will then go back to the previous menu level.
■ Touch the ▲ sensor.
The display will change to show the main menu.
Operation/Display
Language
The display can be set to appear in one of several different languages.
The flag ▶ after the word Language (Sprache in German) acts as a guide in case a language which is not understood has been set.
The language selected is saved.
Code
The code prevents your machine being used without your knowledge.
Options
- Activate
When the code has been activated, you have to enter the code after switching the dryer on. Otherwise the dryer cannot be operated. The factory default code is 250.
- Change
You can enter a code of your own.
If you forget the code, only a Miele technician can unlock the tumble dryer.
Make a note of your new code.
- Deactivate
For using the dryer without entering the code. This only appears if the code has been activated previously.
Clock display
After selecting the clock format, you can set the time of day.
Options
- Clock format
For setting the clock format.
- 24 h (factory setting)
-12 h
- Set
For setting the current time.
Consumption
You can display the total consumption.
Options
- Previous programme
Energy consumption in the last programme run
- Total consumption
Previous total consumption
- Set the cost
Cost, price per kWh
Memory
The dryer saves the settings that were last selected for a drying programme (drying level and/or Extras, or the duration for some programmes).
The next time the programme is chosen the saved settings will appear in the display.
Options
- Off (factory default setting)
- On
Volume
The volume can be changed for the buzzer that sounds when the dryer is switched on and at the end of the programme. The volume of the tone that sounds when a sensor is touched can also be changed.
Options
- Finish tone
- Keypad tone
- Welcome tone
The tones can be set to one of 7 different settings or switched off altogether.
Behaviour finish tone
An audible tone sounds to let you know the programme has finished. You can decide how long the audible tone should sound for.
Options
- Only 3 times after finish The audible tone sounds 3 times at the end of a programme:
- Up to 1 h after finish The audible tone sounds at the end of the programme until the tumble dryer switches off automatically (for a maximum of 1 hour).
Display brightness
The brightness of the display can be altered.
It can be set to one of 7 different settings.
Factory setting: medium
Wash2Dry
You can deactivate the Wash2Dry function.
Options
- On (factory default setting)
Wash2Dry is enabled and lights up in the main menu.
- Off
Wash2Dry does not light up.
Display switch-off status
To save energy the display and sensor controls will go out after 10 minutes and the Start/Stop sensor will flash slowly. You can change this automatic switch-off function.
Options
- On
The display will go out (after 10 minutes):
- if no programme selection is made after switching the dryer on
– during the current programme
– after the end of a programme.
- On. Not in current prog.
(factory default setting)
The display will go out (as described above), but will remain on while the programme is running.
You can switch the display back on by touching any sensor.
Network
Miele@home
Control the networking of your dryer with your home Wi-Fi network.
The following points may appear in the submenu:
Set up
This message only appears if the dryer has not yet been connected to a Wi-Fi network.
Please refer to “Before using for the first time” for instructions on how to set up the connection.
Activate
(visible if Miele@home is deactivated)
The Wi-Fi function is reactivated.
Deactivate
(visible if Miele@home is activated)
Miele@home remains set up, the Wi-Fi function is switched off.
Connection status
(visible if Miele@home is activated)
The following values are displayed:
- the quality of the Wi-Fi reception
- the network name
- the IP address
Set up again
(visible if set up)
Resets the Wi-Fi login (network) to immediately re-establish a new connection.
Reset
(visible if set up)
- The Wi-Fi is switched off.
- The Wi-Fi connection will be reset to the factory default setting.
The network configuration should be reset whenever the dryer is being disposed of or sold, or if a used dryer is being put into operation. This is the only way to ensure that all personal data has been removed and, in the case of the latter situation, the previous owner will no longer be able to access the appliance.
A new connection setup has to be carried out in order to use the Miele@home setting again.
SmartGrid
The SmartGrid setting (available depending on country) is only visible if the Miele@home setting is set up and activated.
This function can be used for starting your dryer automatically at a time when energy rates are more economical.
Activating SmartGrid gives the Timer sensor a new function. You can set the SmartGrid via the Timer sensor. The tumble dryer will then start within the timeframe specified when it receives a signal from the energy supplier. If it has not received a signal from the energy supplier by the latest start time set, the tumble dryer will start automatically (see "Timer").
SmartGrid is deactivated as standard.
Remote control
The Remote control setting (available depending on country) is only visible if the Miele@home setting is set up and activated.
Once the Miele App has been installed on your mobile device, you can check the status of your tumble dryer from anywhere and start it remotely. You can also control it remotely via the MobileStart function.
You can switch off the Remote control setting if you do not want to operate the dryer with your mobile device.
If Remote control is not switched on the App can cause the programme to be cancelled.
Use the Timer sensor to set a time by when you want to start the tumble dryer (see "Timer").
The tumble dryer will then start within the specified timeframe when it receives your signal.
If it has not received a start signal by the latest start time set, the tumble dryer will start automatically.
Remote control is activated as standard.
RemoteUpdate
The RemoteUpdate function is used for updating the software in your tumble dryer.
RemoteUpdate is activated at the factory.
If you do not install a RemoteUpdate, you can continue to use your tumble dryer in the usual way. However, Miele recommends installing RemoteUpdates.
Activation
The RemoteUpdate menu option is only displayed and can only be selected if you have added your dryer to your Wi-Fi network (see “Settings - Miele@home”).
Miele's RemoteUpdate function can only be used if the tumble dryer is connected to a Wi-Fi network and you have an account in the Miele App. The dryer must be registered in the App.
See the Miele App for terms and conditions of use.
Some software updates can only be carried out by Miele Service.
Running a RemoteUpdate
If a RemoteUpdate is available for your dryer, it will be displayed automatically for you.
You can choose to start the RemoteUpdate immediately or wait until later. If you select “Start later”, the prompt to run the RemoteUpdate will be displayed again the next time you switch on the dryer.
The RemoteUpdate can take several minutes.
Please note the following information about the RemoteUpdate function:
- You will only receive a message when a RemoteUpdate is available.
- Once a RemoteUpdate has been installed, it cannot be undone.
- Do not switch off the dryer during a RemoteUpdate. Otherwise, the RemoteUpdate will be aborted and will not be installed.
Programme sequence
Anti-crease
The Anti-crease function reduces creasing after the end of the programme.
The drum will continue to rotate for up to 2 hours after the drying cycle has finished. This helps to reduce creasing.
Options
- Off
-1 h
- 2 h (factory setting)
Cooling down temperature
The laundry will be cooled down automatically before the end of the programme. The automatic cooling phase at the end of a programme can be set to a cooler level for all drying programmes. This extends the cooling phase.
Options
The level is set in increments of 1 ^ .
- 55 °C (factory setting)
- ...
- 40 °C
Drying levels
You can alter the drying levels for the Cottons, Minimum iron and Automatic programmes. The Cottons □ programme will remain unchanged.
It can be set to one of 7 different settings.
Factory setting: medium
Appliance parameters
Airways indicator
Fluff must be removed after every drying programme. In addition, this indicator will remind you to clean the filters when a certain amount of fluff has collected in them:
i Clean the fluff and plinth filters. See the operating instruction manual for more information.
You can decide at what level of fluff this reminder should be given.
Options
You will have an idea of how often this should be done after a few drying programmes.
- Off
The reminder does not appear. However, if there is a very severe blockage in the ducting, the programme will be cancelled and the fault message
Clean the fluff filter. Check the airways. will appear in the display regardless of this option.
- Heavy
The reminder only appears when there is a heavy build-up of lint.
- Normal (factory default setting)
- Light
The reminder appears when there is only a small build-up of fluff.
Conductivity
This setting is only relevant for regions with very soft water.
Very soft water can result in unsatisfactory drying results.
You should only select this setting if the water used for washing the laundry is extremely soft with a conductivity reading (electrical conductivity) of less than 150 S/cm. Contact your local water authority for the conductivity level of your mains water supply.
Options
- Normal (factory default setting)
- Low <150mS (only for regions with very soft water)
Operating hours
You can read off how many hours your tumble dryer has been in operation for.
The time is displayed as the total running time in hours.
Factory default
All settings except Operating hours are reset to the factory default settings.
Options
i Reset to factory settings?
- Yes
The settings are reset to the factory default settings.
- No
The settings are not reset to the factory default settings.
Legal information
Open source licences
You can view information here.
Copyright and licences for operating and control software
For the purpose of operating and controlling the appliance, Miele uses proprietary or third-party software that is not covered by open source licensing terms. These items of software/software components are protected by copyright. The copyright powers of Miele and third parties must be respected.
In addition, the appliance contains software components which are distributed under open source licensing terms. You can access these open source components along with the associated copyright notices, copies of the valid licensing terms and any further information in the appliance under the menu option Settings | Appliance parameters | Legal information | Open source licences. The liability and warranty arrangements for the open source licences displayed at this location only apply in relation to the respective rights holders.
Copyright and licences for the communication module
For the purpose of operating and controlling the communication module, Miele uses proprietary or third-party software that is not covered by open source licensing terms. These items of software/software components are protected by copyright. The copyright powers of Miele and third parties must be respected.
In addition, the communication module contains software components which are distributed under open source licensing terms. The open source components contained in the appliance along with the corresponding copyright notices, copies of the licensing terms valid at the time, and any further information can be accessed locally via IP using a web browser (http://
Miele Australia Pty. Ltd. Miele New Zealand Limited
ACN 005 635 398
ABN 96 005 635 398
Miele Head Office Melbourne:
Level 4, 141 Camberwell Road
Hawthorn East, VIC 3123
Miele Experience Centre Doncaster:
1136/7 Doncaster Shopping Centre
619 Doncaster Rd, Doncaster, VIC 3108
Miele Experience Centre South Melbourne:
206-210 Coventry Street
South Melbourne, VIC 3205
Miele Experience Centre and Office Sydney:
3 Skyline Place
Frenchs Forest, NSW 2086
Miele Experience Centre and Office Brisbane:
Tenancy 4C, 63 Skyring Terrace
Newstead, QLD 4006
Miele Experience Centre Gold Coast:
131 Ferry Road
Southport, QLD 4215
Miele Experience Centre and Office Adelaide:
83-85 Sir Donald Bradman Drive
Hilton, SA 5033
Miele Experience Centre and Office Perth:
205-207 Stirling Highway
Claremont, WA 6010
1300 464 353 (1300 4 MIELE)
www.miele.com.au
IRD 98 463 631
Miele Experience Centre
and Head Office Auckland:
8 College Hill
Freemans Bay, Auckland 1011
Miele Experience Centre
Wellington:
183 Featherston Street
Wellington 6011
0800 464 353 (0800 4 MIELE)
www.miele.co.nz
Miele Global Headquarters Germany
Miele & Cie. KG
Federal Republic of Germany
Miele
TWV 780 WP
- Operating instructions Heat pump tumble dryer
- Caring for the environment 7
- Warning and Safety instructions 8
- Operating the tumble dryer 20
- Before using for the first time 25
- Energy saving tips 29
- Notes on correct laundry care 31
- Loading the tumble dryer 33
- Selecting a programme 34
- Selecting programme settings.... 35
- Starting the programme 37
- End of programme - unloading the drum.... 38
- Programme chart 39
- Extras.... 46
- Wash2Dry 49
- Favourite programmes.... 50
- Drying assistant.... 51
- Timer 52
- Changing the programme sequence.... 54
- Condensed water container 55
- Fragrance flacon.... 57
- Cleaning and care 61
- Problem solving guide 67
- Service....79
- Installation.... 80
- Technical data.... 94
- Consumption data.... 95
- Settings 96
- Operation/Display 97
- Network 100
- Programme sequence 103
- Appliance parameters 104
- Disposal of the packing material
- Disposing of your old appliance
- Correct application
- Safety with children
- Technical safety
- Correct use
- Using a fragrance flacon (optional accessory)
- Accessories
- Control panel
- Touch display and sensor controls
- Main menu
- Programmes
- ☆ Favourites
- Wash2Dry
- MobileStart
- Drying assistant
- Settings
- Examples on how to operate the appliance
- Selection lists
- Moving programmes
- Setting numerical values
- Pull-down menu
- Help display
- Exiting a menu
- Installation
- Removing the protective foil and advertising stickers
- ■ Remove:
- Downtime after installation
- Miele@home
- Availability of the Wi-Fi connection
- Miele@home availability
- Miele App
- Switching on the tumble dryer
- Setting the language
- Setting up Miele@home
- Setting the clock format
- Setting the time of day
- Continuing setup
- Energy saving tips
- Feedback
- Estimate
- Actual consumption
- Points to note regarding washed laundry
- Preparing the laundry before drying
- Notes on correct laundry care
- Drying
- Selecting the correct drying level
- Loading the tumble dryer
- Loading the laundry
- Checking the FragranceDos socket
- Closing the door
- Selecting a programme
- Selecting a programme
- Selecting the drying level
- HygieneDry drying level
- Temperature holding time
- Selecting programme settings
- Selecting the running time for timed programmes
- Selecting Extras
- Starting a programme
- Energy savings
- Adding laundry
- End of programme - unloading the drum
- At the end of the programme
- Removing the laundry
- Drum lighting
- Programme chart
- DryFresh
- PowerFresh
- DryCare 40
- Gentle tumble
- Quick
- ECO
- Freshen up
- Requirements for use
- Selecting the
- Wash2Dry function
- Creating a Favourite programme
- Option 1
- Option 2
- Entering a name
- Changing a Favourite programme
- Setting the Timer
- Changing the Timer
- Deleting the Timer
- Starting the Timer
- Adding laundry during the Delay start period
- SmartStart
- Setting the timeframe
- Changing a programme after it has started
- Cancelling a programme
- Selecting another programme
- Adding or removing laundry
- Exceptions to adding laundry
- Emptying the condensed water container
- Filling the condensed water container
- Cleaning the rubber seal
- FragranceDos
- Removing the protective seal from the fragrance flacon
- Inserting the fragrance flacon
- Opening the fragrance flacon
- Closing the fragrance flacon
- Removing/replacing the fragrance flacon
- Fluff filters
- Removing the fragrance flacon
- Removing visible fluff
- Cleaning the fluff filters and air flow openings thoroughly
- Cleaning the fluff filters with water
- Cleaning the plinth filter
- Removing the plinth filter
- Cleaning the dryer
- Problem solving guide
- Replacing the plinth filter
- Regenerating the plinth filter
- Checking the heat exchanger
- Cleaning the fluff filter in the condensed water container
- Replacing the condensed water spray jet
- Contact in case of fault
- Optional accessories
- Drying basket
- Fragrance flacon
- Warranty
- Rear view
- Transporting the tumble dryer
- Transporting the tumble dryer to its installation site
- Levelling the dryer
- Ventilation
- Before moving the tumble dryer again (e.g. when moving house)
- Additional installation requirements
- Suitable for pushing under a worktop
- - Washer-dryer stack
- - Plinth
- Externally draining condensed water
- Notes
- Installation conditions requiring a non-return valve
- Arranging the drain hose
- Examples
- Changing the door hinging
- Changing the hinging over
- Remove the door from the dryer
- Change over the door lock on the dryer
- Dismantle the door hinge from the door
- Change the lock catch on the door
- Refitting
- Note
- Electrical connection
- Calling up settings
- Selecting settings
- Editing settings
- Exiting settings
- Operation/Display
- Language
- Code
- Options
- Clock display
- Consumption
- Memory
- Volume
- Behaviour finish tone
- Display brightness
- Display switch-off status
- Network
- Set up
- Activate
- Deactivate
- Connection status
- Set up again
- Reset
- SmartGrid
- Remote control
- RemoteUpdate
- Activation
- Running a RemoteUpdate
- Programme sequence
- Anti-crease
- Cooling down temperature
- Drying levels
- Appliance parameters
- Airways indicator
- Conductivity
- Operating hours
- Factory default
- Legal information
- Copyright and licences for operating and control software
- Copyright and licences for the communication module
- Miele Australia Pty. Ltd. Miele New Zealand Limited
- Miele
Brand : MIELE
Model : TWV780WPS
Category : Heat pump