
1113-1BKGA - Telephone RCA - Free user manual and instructions
Find the device manual for free 1113-1BKGA RCA in PDF.


| Product Type | Corded Landline Phone |
| Brand | RCA |
| Model | 1113-1BKGA |
| Dimensions (approx.) | 8.5 x 6 x 3.5 inches |
| Weight (approx.) | 1.2 lbs |
| Power Source | Telephone line power (no batteries required) |
| Caller ID | Yes, with call waiting support |
| Speakerphone | Yes, full-duplex |
| Handset Volume Control | Adjustable handset and ringer volume |
| Ringer Types | Selectable melodies (up to 10) |
| Memory/Redial | Up to 10 memory dials, last number redial |
| Display | Backlit LCD with time/date |
| Mounting Options | Desktop or wall mountable |
| Maintenance | Clean with a soft, dry cloth; avoid liquids |
| Safety | Use only with provided telephone line cord |
| Spare Parts & Repairability | No user-serviceable parts; contact RCA support |
| General Information | RCA corded telephone, model 1113-1BKGA, black |
Frequently Asked Questions - 1113-1BKGA RCA
User questions about 1113-1BKGA RCA
0 question about this device. Answer the ones you know or ask your own.
Ask a new question about this device
Download the instructions for your Telephone in PDF format for free! Find your manual 1113-1BKGA - RCA and take your electronic device back in hand. On this page are published all the documents necessary for the use of your device. 1113-1BKGA by RCA.
USER MANUAL 1113-1BKGA RCA
Call Waiting / Caller ID Speakerphone User's Guide
Please read this manual before operating product for the first time.
Visit the RCA web site at www.rca4phones.com
Equipment Approval Information
Your telephone equipment is approved for connection to the Public Switched Telephone Network and is in compliance with parts 15 and 68, FCC Rules and Regulations and the Technical Requirements for Telephone Terminal Equipment published by ACTA.
1 Notification to the Local Telephone Company
On the bottom of this equipment is a label indicating, among other information, the US number and Ringer Equivalence Number (REN) for the equipment. You must, upon request, provide this information to your telephone company.
The REN is useful in determining the number of devices you may connect to your telephone line and still have all of these devices ring when your telephone number is called. In most (but not all) areas the sum of the RENs of all devices connected to one lines should not exceed 5. To be certain of the number of devices you may connect to your line as determined by the REN, you should contact your local telephone company.
A plug and jack used to connect this equipment to the premises wiring and telephone network must comply with the applicable FCC Part 68 rules and requirements adopted by the ACTA. A compliant telephone cord and modular plug is provided with this product. It is designed to be connected to a compatible modular jack that is also compliant. See installation instructions for details.
Notes
This equipment may not be used on coin service provided by the telephone company.
Party lines are subject to state tariffs, and therefore, you may not be able to use your own telephone equipment if you are on a party line. Check with your local telephone company.
Notice must be given to the telephone company upon permanent disconnection of your telephone from your line.
If your home has specially wired alarm equipment connected to the telephone line, ensure the installation of this product does not disable your alarm equipment. If you have questions about what will disable alarm equipment, consult your telephone company or a qualified installer.
US Number is located on the cabinet bottom. RENNumber is located on the cabinet bottom.
2 Rights of the Telephone Company
Should your equipment cause trouble on your line which may harm the telephone network, the telephone company shall, where practicable, notify you that temporary discontinuance of service may be r equired. Where prior notice is not practicable and the circumstances warrant such action, the telephone company may temporarily discontinue service i mme diately. In case of such temporary discontinuance, the telephone company must: (1) promptly notify you of such temporary discontinuance; (2) afford you the opportunity to correct the situation; and (3) inform you of your right to bring a complaint to the Commission pursuant to procedures set forth in Subpart E of Part 68, FCC Rules and Regulations.
The telephone company may make changes in its communications facilities, equipment, operations or procedures where such action is required in the operation of its business and not inconsistent with FCC Rules and Regulations. If these changes are expected to affect the use or performance of you're telephone equipment, the telephone company must give you adequate notice, in writing, to allow you to maintain uninterrupted service.
Interference Information
This device complies with Part 15 of the FCC Rules. Operation is subject to the following two conditions: (1) This device may not cause harmful interference-; and (2) This device must accept any interference received including interference that may cause undesired operation.
This equipment has been tested and found to comply with the limits for a Class B digital device, pursuant to Part 15 of the FCC Rules. These limits are designed to provide reasonable protection against harmful interference in a residential installation.
This equipment generates, uses, and can radiate radio frequency energy and, if not installed and used in accordance with the instructions, may cause harmful interference to radio communications. However, there is no guarantee that interference will not occur in a particular installation. Privacy of Communications may not be ensured when using thisproduct.
If this equipment does cause harmful interference to radio or television reception, which can be determined by turning the equipment off and on, the user is encouraged to try to correct the interference by one or more of the following measures:
- Reorient or relocate the receiving antenna (thatis, the antenna for radio or television that is “receiving” the interference).
- Reorient or relocate and increase the separation between the telecommunications equipment and receiving antenna.
- Connect the telecommunications equipment into an outlet on a circuit different from that to which thereceiving antenna is connected.
If these measures do not eliminate the interference, please consult your dealer or an experienced radio/television technician for additional suggestions. Also, the Federal Communications Commission has prepared a helpful booklet "How To Identify and Resolve Radio/TV Interference Problems." This booklet is available from the U.S. Government Printing Office, Washington, D.C. 20402. Please specify stock number 004-000-00345-4 when ordering copies.
Notice: The changes or modifications not expressly approved by the party responsible for compliance could void the user's authority to operate the equipment.
Hearing Aid Compatibility (HAC)
This telephone system meets FCC standards for Hearing Aid Compatibility.
FCC RF Radiation Exposure Statement
This equipment complies with FCC RF radiation exposure limits set forth for an uncontrolled environment. This equipment should be installed and operated with a minimum distance of 20 centimeters between the radiator and your body. This transmitter must not be co-located or operated in conjunction with any other antenna or transmitter.
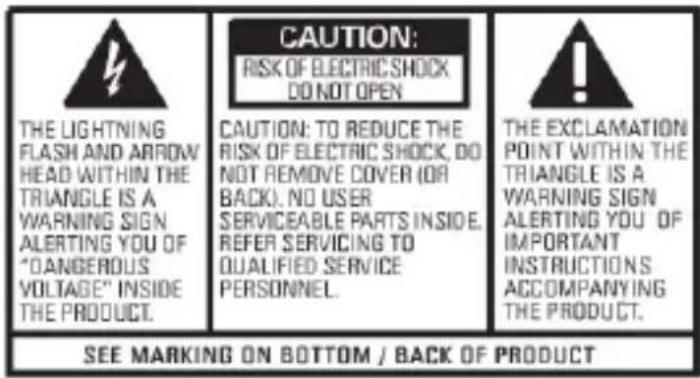
WARNING: TO PREVENT FIRE OR ELECTRICAL SHOCK HAZARD, DO NOT EXPOSE THIS PRODUCT TO RAIN OR MOISTURE.
Equipment Approval Information.....2
Interference Information......3
Hearing Aid Compatibility (HAC)......4
FCC RF Radiation Exposure
Statement 4
Introduction......6
Before You Begin....6
Telephone Jack Requirements......6
Important Installation Information.... 7
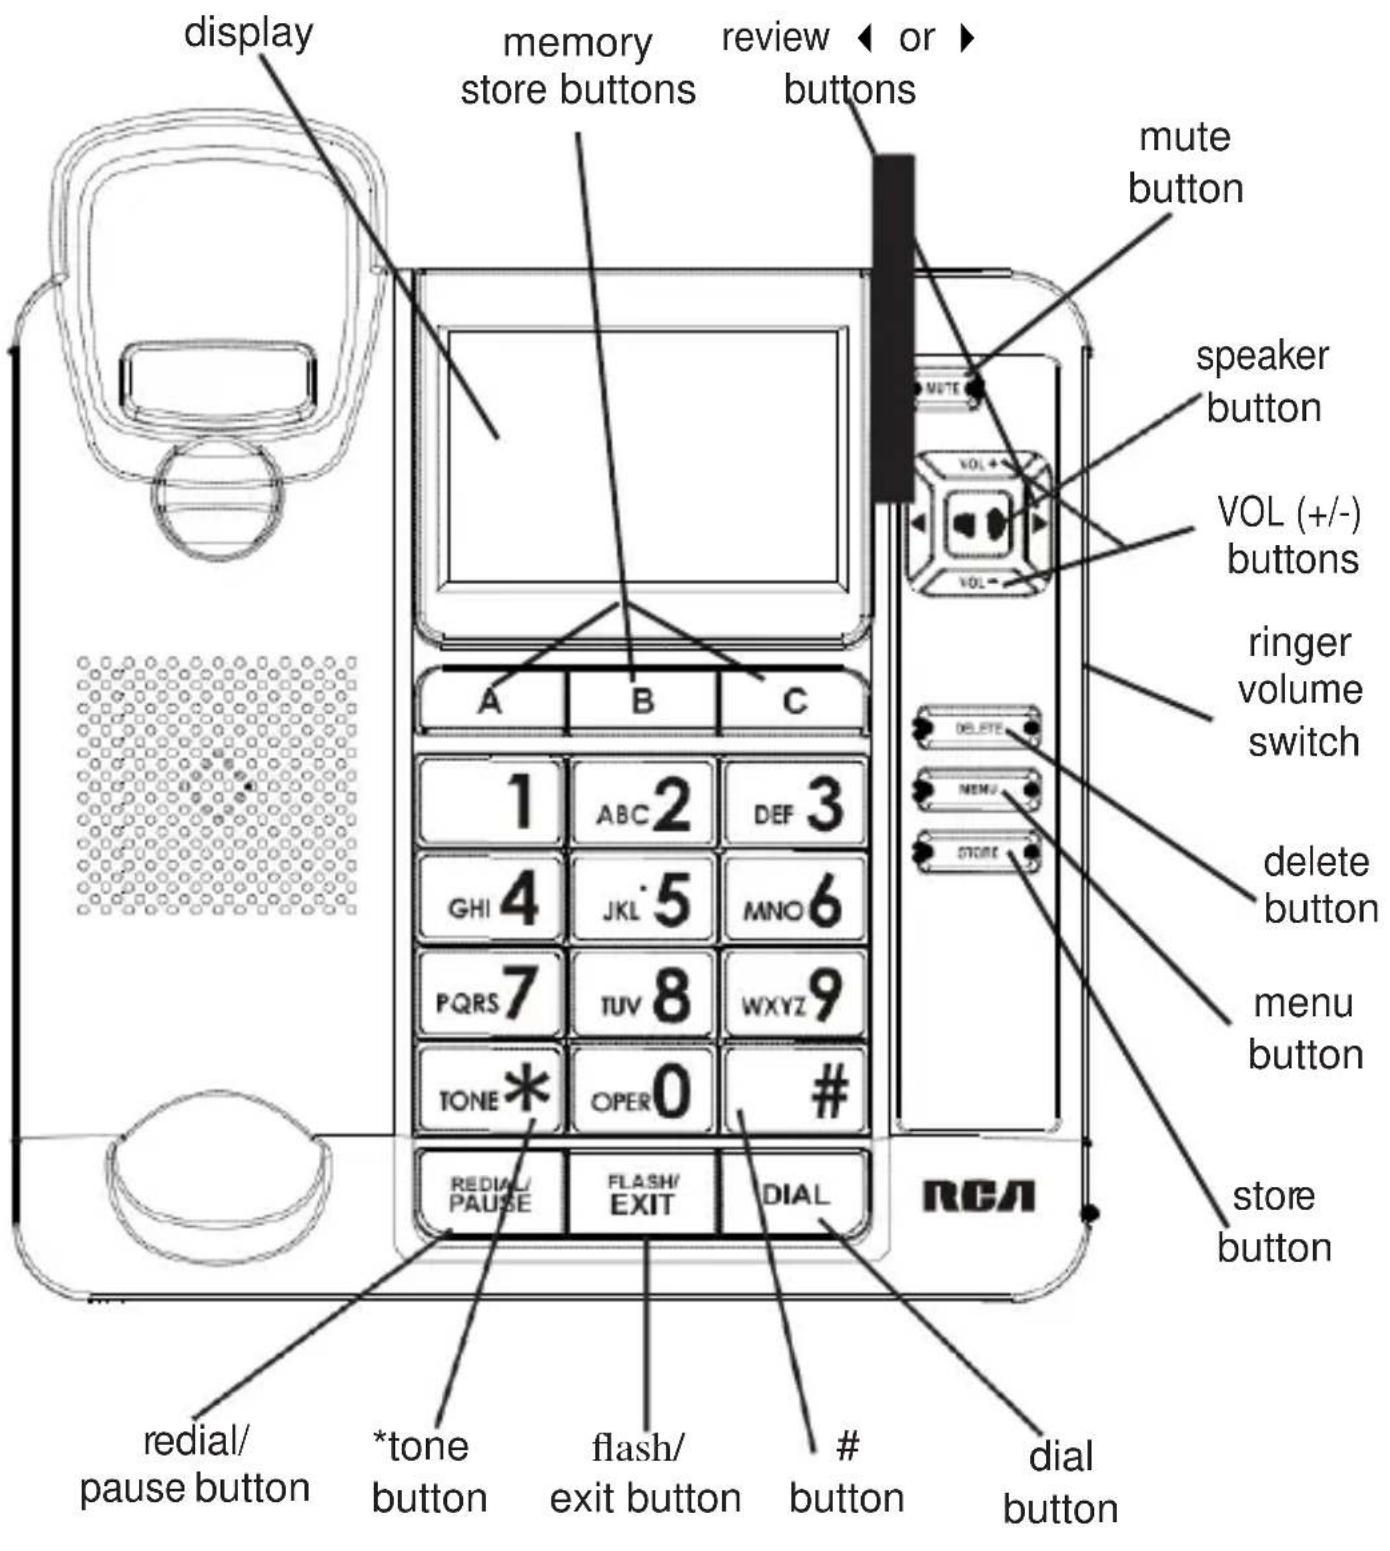
Base Layout......8
Installing and Replacing the
Batteries.... 9
Installing the Phone.... 9
Connecting the Handset 9
Connecting the Telephone Line.....10
Wall Mounting....1 0
Attaching the Wall Mounting
Pedestal....10
Receiving a Phone Call......1 1
Making a Phone Call....1 1
Volume....1 1
Adjusting the Handset R eceiver
Volume....1 1
Adjusting the Speakerphone
Volume....1 1
Redial....1 1
Mute....1 2
Flash....12
Temporary Tone Dialing......1 2
Speakerphone Basics....12
Location....12
Speakerphone Use....13
Caller ID (CID) Features....1 3
CID Summary Screen....13
Receiving and Storing CID Calls.....14
Reviewing CID Records......14
Deleting CID Records....1 4
Dialing Back 14
Setting Up the Caller ID Menu......15
Display Language....16
Contrast......1 6
Local Area Code....16
Dialing Mode....16
Memory 17
Storing a Name andNumber in
Memory....1 7
Changing a Stored Number......1 8
Erasing a Stored Number......18
Copying Caller ID Memories to User
Memory....1 8
Storing a Redial Number to
Memory....1 8
Dialing a Number Stored in
Memory While On-hook....19
Dialing a Number Stored in
Memory....1 9
Cascade Dialing....19
Storing a Pause in Memory......19
Pre-Dialing....2 0
Caller ID Display Messages......20
Troubleshooting Tips......20
General Product Care......21
Warranty Assistance....21
Limited Warranty....22
Industry Canada (I.C.) Notice
This product meets the applicable Industry Canada technical specifications.
The Ringer Equivalence Number is an indication of the maximum number of terminals allowed to be connected to a telephone interface. The termination on an interface may consist of any combination of devices subject only to the requirement that the sum of the Ringer Equivalence Numbers of all the devices does not exceed five.
This Class B digital apparatus complies with Canadian ICES-003.
IMPORTANT SAFETY INSTRUCTIONS
When using your telephone equipment, basic safety precautions should always be followed to reduce the risk of fire, electric shock and injury to persons, including the following: 1. Do not use this product near water, for example, near a bath tub wash bowl, kitchen sink, laundry tub, in a wet basement, or near a swimming pool. 2. Avoid using a telephone (other than a cordless type) during an electrical storm. There may be a remote risk of electric shock from lightning. 3. Do not use the telephone to report a gas leak in the vicinity of the leak.
Introduction

CAUTION: When using telephone equipment, there are basic safety instructions that should always be followed. Refer to the IMPORTANT SAFETY INSTRUCTIONS provided with this product and save them for future reference.
Short Glossary of Terminology Used in this Manual
Hook switch. The part of the phone that pops up to activate the phone line when the handset is lifted from the base.
Off-hook. A term used to describe the phone in its active mode when the handset is off of the base cradle or when the speaker button is pressed.
On-hook A term used to describe the phone in an inactive mode.
Parts Checklist
Make sure your package includes the following items:
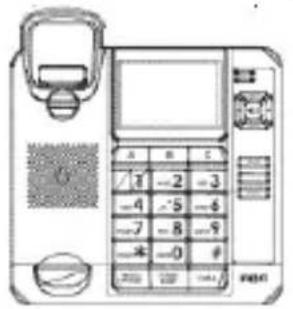
Base

Handset

natural_image
Simple line drawing of a coiled spring or cable with two connectors (no text or symbols)Handset cord
Desktop
pedestal

2-wire telephone
line cord
Telephone Jack Requirements
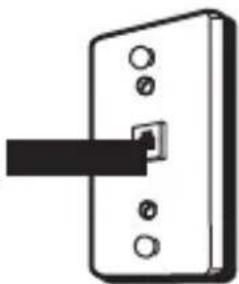
To use this phone, you need an RJ11C type modular telephone jack, which might look like the one pictured here, installed in your home. If you don't have a modular jack, call your local phone company to find out how to get one installed.
Wall plate
Modular telephone line jack
natural_image
Simple line drawing of a door with a handle and socket (no text or symbols)Important Installation Information

CAUTION: Disconnect the phone cord from the wall outlet before installing or replacing the batteries.
- Never install telephone wiring during a lightning storm.
- Never touchuninsulated telephone wires or terminals, unless the telephone line has been disconnected at the network interface.
- Use caution when installing or modifying telephone lines.
- Never install telephone jacks in wet locations unless the jack is specifically designed for wet locations.
- Temporarily disconnect any equipment connected to the phone, such as faxes, otherphones, or modems.
Installing and Replacing the Batteries
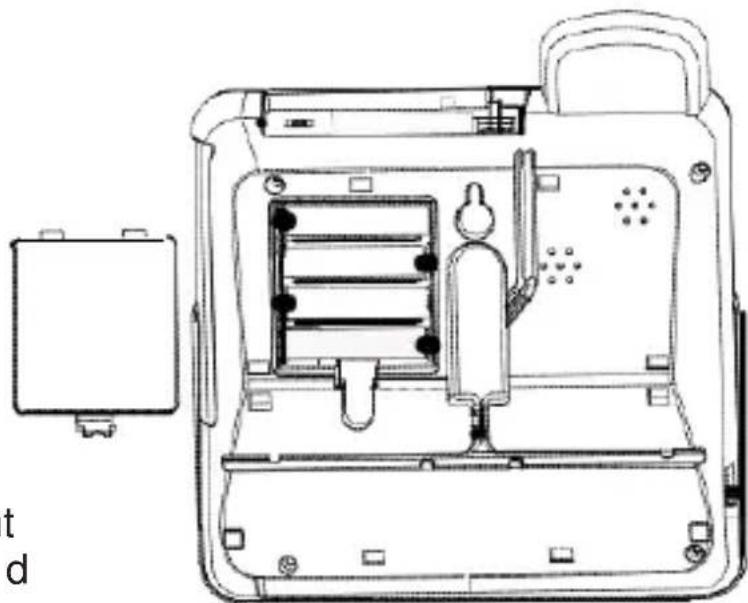
Your Caller ID phone uses 4 AA-size alkaline batteries for receiving and storing Caller ID records and for storing the numbers you use for memory dialing, pulse dialing, and redial.
IMPORTANT: You will have approximately 90 seconds to replace the batteries before the memories stored are lost. Please read the instructions before replacing the batteries and have the batteries ready to be inserted before ehand.
IMPORTANT: If you are not going to use the telephone for more than 30 days, remove the batteries because they may leak and damage the unit.
-
If the telephone line cord is connected, disconnect it from the base unit.
-
Release latch on battery compartments and remove cover.
-
Insert 4 AA-size alkaline batteries as shown on the diagram in the battery compartments.
-
Snap the battery compartment doorsback into place and replace the mounting bracket.
-
If the line cord was previously connected, re-attach it to the unit and check your memory locations.
natural_image
Technical line drawing of a device casing with internal components and mounting holes (no text or symbols)NOTE: If the low battery icon appears in the display, you need to replace the batteries. It is important that you replace the batteries as soon as possible in order to maintain Caller ID operation.
Installing the Phone
Your phone should be placed on a level surface, such as a desk or table top, or you can mount it on a wall. A wall mounting pedestal is packaged with your phone.
Connecting the Handset
-
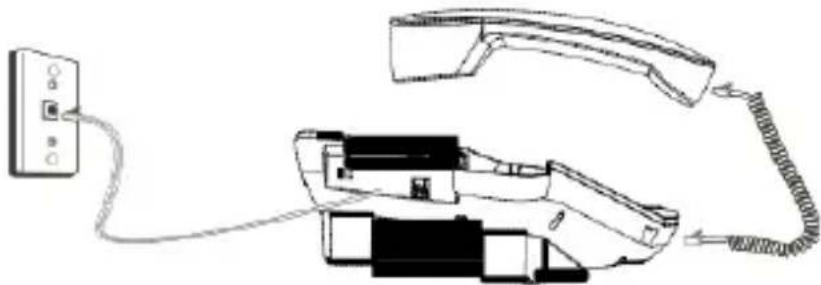
Connect one end of the coiled handset cord to the jack on the handset.
-
Plug the other end of the coiled handset cord to the jack on the base.
-
Place the handset in the cradle.
Connecting the Telephone Line
- Connect one end of the straight telephone line cord to the jack on the back of the base.
- Connect the other end to a wall phone jack.
- Set the ringer volume switch located at the back of the base to the desired loudness.
OFF- Telephone will not ring.
LO -Sound will be lowest.
HI - Sound will be loudest.
natural_image
Line drawing of a telephone handset connected to a device via cable (no text or symbols)NOTE: The unit is properly installed if you pick up the handset and hear the dial tone. Otherwise, recheck all installation steps.
Wall Mounting
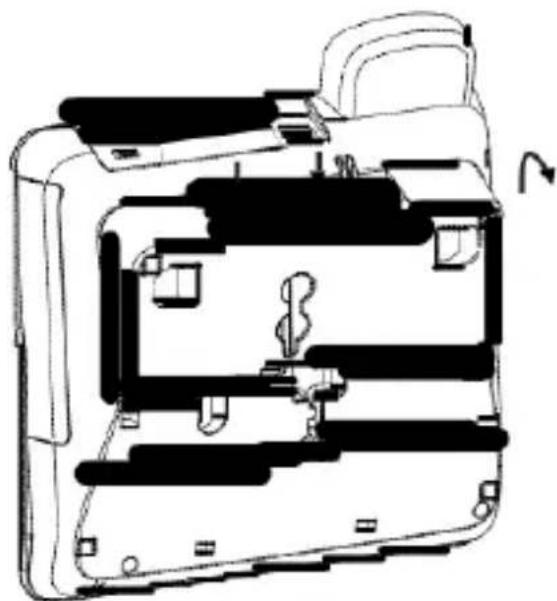
Your speakerphone can also be mounted on a wall plate(not included). NOTE: To prevent the handset from falling out of the cradle while the phone is hanging on the wall, you must rotate the handset hook 180° (located on the base). (See diagram below)
To detach the desktop pedestal:
natural_image
Cross-sectional diagram of a device casing with internal components and mounting holes (no text or symbols)Attaching the Wall Mounting Pedestal
- Rotate the hook 180°. (Refer to Dia. 1A)
- Turn the phone over so that the bottom of the base is facing up.
180°

(Dia.1A)
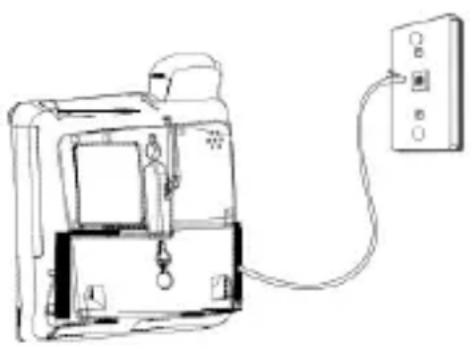
- Plug one end of straight telephone line cord into the jack on the bottom of the base.
- Feed the line code through the groove and plug the end into the modular telephone jack. Excess telephone line can be stuffed into the recess area on the bottom of the Base Unit.
- Slip the mounting holes (on the bottom of the base) over the wall plate posts and firmly slide the unit down into place.
natural_image
Line drawing of a device with cable and terminal block (no text or symbols)Telephone Basics
You can use the telephone by speaking into and listening through the handset, or by using the speakerphone.
Receiving a Phone Call
- Lift the handset or press the speaker button to answer the call.
- Replace the handset in the cradle or press the speaker button to hangup.
Making a Phone Call
- Lift the handset or press the speaker button. Wait for a dial tone.
- Dial the telephone number you want to call.
- Replace the handset in the cradle, or press the speaker button to hangup.
Volume
You may adjust the handset and speakerphone volume independently with the VOL(-or+) buttons. Both handset receiver volume level and speakerphone volume level aresaved in memory.
Adjusting the Handset Receiver Volume
While using the handset, you can adjust the speaker volume by pressing the VOL (- or +) buttons. The screen displays REC (Handset Receiver) volume.
Adjusting the Speakerphone Volume
While using the speakerphone, you can adjust the speaker volume by pressing the VOL (- or +) buttons. The screen displays SPK volume level.
NOTE: Both handset receiver and speakerphone volume return to the default setting (low) if the unit's power is reset.
Redial
You may redial the last number you called by pressing the redial button after
you hear a dial tone.
NOTE: The redial feature holds the last number (up to 32 digits) that you dialed in memory. If you pressed any other numbers after dialing the phone number (for example, when accessing a voice-menu system) then those numbers are also dialed.
Mute
Use the mute button to interrupt a phone conversation to talk privately with someone else in the room. A conversation can be muted while using the speakerphone or handset.
Press the mute button. The mute indicator illuminates.
Press the mute again to turn it off.
NOTE: Switching from speakerphone to handset cancels mute.
Flash
Press flash/ext to activate special features of your telephone network, such as call transfer, or special services from your local telephone company, such as call waiting.
Temporary Tone Dialing
If you have pulse (rotary) service and want to access customer calling services (such as telebanking and long distance services) that require tone dialing, you can use this feature to temporarily change from pulseto tone service.
After dialing the telephone number and connecting to the customer calling service,
- Press and release the *tone button.
- When you hang up, the telephone automatically returns to pulse dialing mode.
Speakerphone Basics
Location
Your phone features a speakerphone for ease of use and convenience during a phone conversation. At any time during a conversation, you can lift the handset to stop using the speakerphone. Likewise, when you are using the handset, press the speaker button and place the handset in the cradle to switch to the speakerphone.
For best speakerphone performance, avoid the following:
- Areas with high background noise .(The microphone might pick up these
sounds and prevent the speakerphone from going into thereceiving when you finish talking.)
• Surfaces affected by vibration.
- Recessed areas such as in acorner, under a cupboard, or next to acabinet, which can generate anecho effect.
Speakerphone Use
Note the following guidelines when using the speakerphone:
- The speakerphone works similar to a two-way radio in that you can only listen or talk at one time.
- Stay reasonably close to the phone so that you can be clearly heard by the person to whom you are talking.
- You can adjust the speaker volume by pressing the VOL (- or +) buttons.
- The speakerphone indicator light comes on when the speakerphone is in use.
NOTE: Batteries must be installed for the speakerphone to operate.
Caller ID (CID) Features
IMPORTANT: In order to use all of the features of this telephone, you must subscribe to two separate services available from your local telephone company : the standard Name/Number Caller ID Service to know who is calling when the phone rings and Caller ID with Call Waiting Service to know who is calling while you are on the phone.
CID Summary Screen
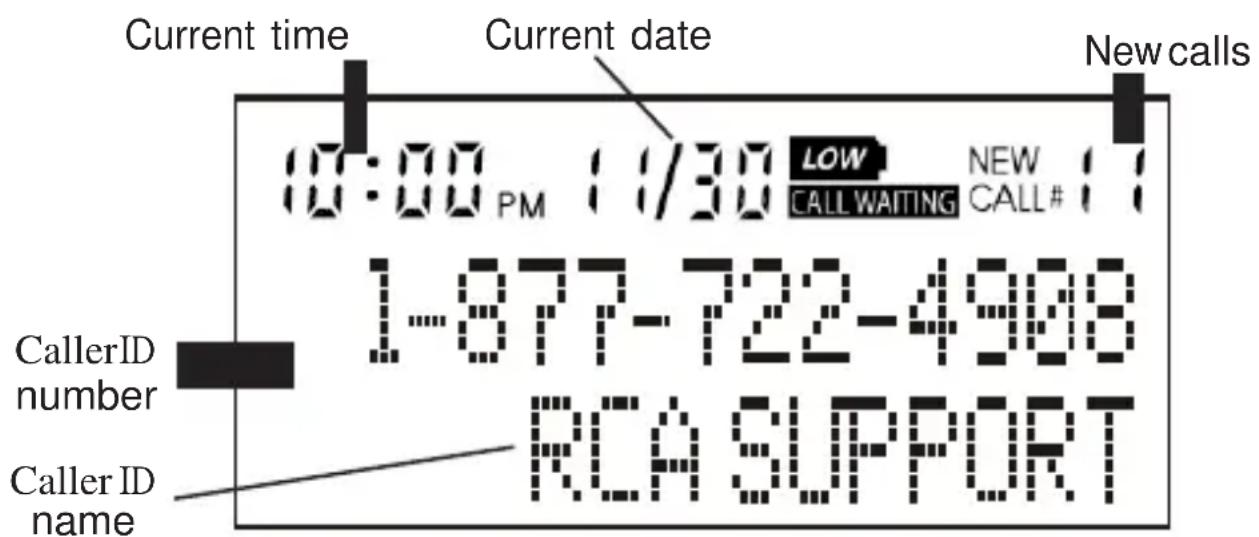
The Summary Screen shows the current time, date, and number of new calls to review. It is displayed until any button is pressed.
NOTE: The number of new calls is displayed until all new calls have been reviewed.
Receiving and Storing CID Calls
This unit receives and displays information transmitted by your local company. This information can include the phone number, date, and time; or the name, phone number, date, and time. The unit can store up to 75 calls for later review. When the number, date, and time. The unit can store up to 75 calls for later review. The displays reads NEW for calls received that have not been reviewed. The screen displays REPT for calls received more than once which have not been reviewed.
Reviewing CID Records
- Press the review ◀ or ▶ buttons to view the call records.
- Press the review ◀ or ▶ button to scroll through the callrecords from the most recent to the oldest.
- Press the review ◀ or ▶ button to scroll through the callrecords from the oldest to the newest.
- When all of the records have been viewed, The screen displays START/END.
Deleting CID Records
- To delete the record shown in the display, press the delete button once.
- To delete all records while reviewing, press and hold the delete button for about three seconds. The screen displays DELETE ALL? Press delete again to complete.
Dialing Back
When reviewing Caller ID records, you can dial back the numbers on the display by pressing the dial button.
NOTE: If the screen displays PICKUP PHONE, no other changes to the number can be made. The information sent from the telephone company is known to be a valid number for dialing back (used only in very limited areas). Once you pick up the phone, the number is automatically dialed.
If You Programmed Your Local Area Code
- Use the review ◀ or ▶buttons to display the number you want to dial.
- Press the dial button.
- If you see a number with seven digits (i.e. 555-1234), then the call is from within your area code. However, this does not guarantee the call is a local call.
- If you see a number with 11 digits (i.e. 1-234-555-1234), then the call is not from within your areacode.
NOTE: A timer (10 seconds on-hook and 3 seconds off-hook) located in the upper right side of the display will start, letting you know how much time is left until the unit returns to the Summary Screen.
- If you are at on-hook and the screen displays PICKUP OR A DJ, you can adjust the phone number format by pressing the dial button. If the phone is off-hook and the screen displays ADJUST, you can adjust the phone number format by pressing the dial button. For example, sometimes a 7-digit local number cannot be dated because it requires a 10-digit or 11-digit format. Press the dial button repeatedly to scroll through the 7, 10, and 11-digit numbers.
7-digits:
7-digit telephone number (i.e. 555-5555)
10-digits:
3-digit area code + 7-digit telephone number (i.e. 425-555-5555)
11-digits:
long distance code 1 + 3-digit area code + 7-digit telephone number (i.e. 1-425-555-5555)
- To dial the displayed number and the phone is on-hook, pick up the handset or press the speaker button before the timer reaches 0. If the phone is off-hook, wait until the time reaches 0. The screen displays NOW DIALING and thenumber is dialed.
If You Did Not Program Your Local Area Code
- Use the review ◀ or ▶ buttons to display the number you want to dial. You will only see 10-digit numbers (i.e. 234-555-1234).
- See steps 2 through 4 in the previous section to complete the dial back process.
Setting Up the Caller ID Menu
You should not plug the telephone into the modular jack while setting up the Caller ID menu.
- Press the menu button to enter the menu feature configuration mode.
# 1. ENG F RA ESP (CID language default English)
# 2. CONTRAST (default level is 3)
# 4. TONE PULSE (Default is tone dialing).
-
Press the menu button to scroll through the 4 menu screens.
-
Use the ◀ or ▶ buttons to select the desired setting.
NOTE: You have 20 seconds following an entry before the phone returns to the Summary Screen.
Display Language
This adjustment allows you to display the Caller ID prompts in English, French, or Spanish.
- Press the menubutton until the screen displays ENG FRA ESP.
- Use the review ◀ or ▶ buttons to select ENG, FRA or ESP.
- Press the button again to save.
Contrast
This adjustment allows you to adjust the contrast of the display.
- Press the menubutton until the screen displays CONTRAST.
- Use the review ◀ or ▶ buttons to select level 1, 2, 3, or 5.
- Press the menubutton again to save.
Local Area Code
The telephone uses the programmed area codes to determine the number format to display when a valid Caller ID signal is received. Numbers that match the local area code are displayed as seven digits and are used for dialing back previous numbers Entering your local area code will also help you immediately know if the call is local or long distance when viewing the CID records in the display.
NOTE: If you make a mistake and want to start over again, press the delete button to erase all of the digits.
- Press the menu button until the screen displays LOCAL AREA CODE.
- Use the number keys to enter the Local Area Code you want.
- Press the menu button to save.
Dialing Mode
This adjustment allows you to select tone(touch-tone) or pulse (rotary) dialing.
- Press the menu button until the screen displays TONE PULSE .
- Press the review ◀ or ▶ buttons to show the current dialing mode. The default is TONE dialing.
- To change the dialing mode, press the review ◀ or ▶ buttons. The display alternates between the two modes.
- Press the menu button again to save.
NOTE: The phone will exit Set Up after 20 seconds if no buttons are pressed.
REMINDER: The time and date are programmed automatically when the first Caller ID record is successfully received after set up.
Memory
You may store information in any of the following memory locations: 0 to 9, A, B, and C. See “Storing a Pause in Memory” and “Temporary Tone Dialing” for more information.
Storing a Name and Number in Memory
- Press the store button. The screen displays LOCATION?
- Press the desired memory location (0-9, A, B, C).
NOTE: You may select memory locations by pressing review ◀ or ▶ buttons to scroll through the memory locations or press the 0 - 9, A, B, C.
- Press the store button again to confirm the memory location.
NOTE: If necessary, to erase existing memories, or if you make a mistake, use the delete button.
- Use the number keys to enter the telephone number (up to 32 digits) and press the store button to save. (The unit will not dial aphone number in this mode.) The cursor automatically moves to the textline for name entry.
- Use the number keys to enter the name of the person associated with the telephone number you just entered. More than one letter is stored in each of the number keys. For example, to enter the name BILL SMITH, press the 2 key twice for the letter B. Press the 4 key 3 times for the letter I. Press the 5 key 3 times for the letter L.
NOTE: The flashing cursor automatically moves to the next position or you may press thereview ◀ or ▶ buttons to move the cursor to the next position.
Press the 5 key 3 times for the second letter L. Press the arrow key (4) two times to insert a space, and press the
7 key 4 times for the letter S. Press the 6 key once for the letter M. Press the 4 key 3 times for the letter I. Press the 8 key for the letter T. Press the 4 key twice for the letter H.
- Press the store button to save the name.
- To enter another name and number in a different memory location, return to step 1 and repeat the process.
Changing a Stored Number
Repeat the storage sequence under “Storing a Name and Number in Memory”, and use the delete button to delete the old number before entering the new number.
Erasing a Stored Number
- Press the store button.
- Press the memory location (0-9, A, B, C) to be erased.
- Press the delete button.
Copying Caller ID Memories to User Memory
- Press the review ◀ or ▶ buttons to view the caller number and name you want to copy.
- Press the store button.
- Press the memory location (0-9, A,B,C). The number flashes if there is a number already stored in the memory location.
- Press the store button to enter the edit mode, and then press the store button again to edit the name.
NOTE: You may select a different memory location by pressing review ◀ or ▶ buttons to scroll through the memories or press a number key (0-9, A, B, C).
- Press the store button to confirm and save, and wait for three seconds to exit.
NOTE: If the name you want to enter is longer than 12 characters, only the first 12 characters will be copied into memory.
Storing a Redial Number to Memory
- Press the store button.
- Press any key (0-9, or quick call buttons A, B, or C) for the memory location. If there is a number already stored in the memory location it will appear on the display. Use the review ◀ or ▶ button to select a different location.
- Press the store button again to confirm.
- Press the redial button, and thenpress the store button again.
- Enter name, if necessary, and thenpress the storebutton to confirm.
NOTE: If you want to edit the number, press the store button again within three seconds. When you are finished, wait three seconds to exit.
Dialing a Number Stored in Memory While On-hook
- Press the dial button.
-
To select a memory, press any number key (0-9, A, B, C). The number in that memory location displays.
NOTE: You may select a different memory location by pressing review ◀ or ▶ buttons to scroll through the memories or press a number key (0-9, A, B, C). -
Press the speaker button, or pick up the handset to dial the displayed number.
Dialing a Number Stored in Memory
- Lift the handset, or press the speaker button.
- Press the dial button then press a memorylocation button.
Cascade Dialing
This process allows you to dial a succession of stored numbers from separate memory locations. This is useful when you must dial several sequences of numbers, such as with frequent calls via a telephone company long distance provider.
| For example | Memory location |
| Local access number of long distance company | 6 |
| Authorization code (ID) | 7 |
| Long distance phone number | 8 |
- Pick up the handset or press speaker.
- Press dial button, thenpress number "6" for the memory location.
- Press dial button, then press number "7" for the memory location.
- Press dial button, then press number "8" for the memory location.
- The number dials automatically.
Storing a Pause in Memory
The redial button has dual functionality and becomes a pause button when the store button is pressed first. It is valid only when storing a number into memory locations.
Use the redial/pause button to insert a pause when a delay is needed in an automatic dialing sequence. For example, when you must dial a 9 to get an outside line or when you enter codes to access your long distance company.
Pre-Dialing
- With the handset on the cradle, enter the telephone number you wish to call. The telephone number shows in the display.
- Lift the handset or press the speaker button and the number automatically dials.
NOTE: Use the delete button to delete an incorrectly entered number.
Caller ID Display Messages
| The following special messages indicate the status of a message or the unit: | |
| BLOCKED CALL | The caller of the incoming call is registered as “Private Number” and their Caller ID information is withheld. |
| CALL WAITING | Indicates a call is waiting on the line. |
| LOW | Battery powerlevel is low. |
| NO CALLS | The caller memory is empty. |
| START/END | You are at the beginning or the end of the Caller ID memory log. |
| UNKNOWN CALLER | The incoming call does not have Caller ID service or their service area is not linked to you rs. If the screen displaysUNKNOWN CALLERalong with a calling number, the name information for that number was not available. |
TroubleshootingTips
No Dial Tone
- Check all cabling to make sure that all connections are secure and not damaged.
- Check hook switch: Does it fully extend when handset is lifted from cradle?
No Display
- Replace the batteries.
- Check for proper battery installation.
No Information is shown after the Phone Rings
- Are you subscribed to Caller ID service from your local telephone company?
- Be sure to wait until thesecond ring before answering.
Phone Dials in Pulse with Tone Service
• Make sure TONE PULSE is set to TONE DIAL.
Phone Won't Dial Out with Pulse Service
• Make sure TONE PULSE is set to PULSE DIAL.
Phone Does Not Ring
• Make sure ringer switch is set to LOW or HIGH.
- You may have too many extension phones on your line. Try unplugging some extension phones.
- Check for dial tone. See Troubleshooting Tips for No Dial Tone.
Incoming Voice Volume Low
- Are other phones off hook at same time? If so, this is normal condition as volume drops when additional phones are used at once.
- Check the handset receiver or speaker volume.
Memory Dialing
• Make sure you entered the numbers correctly into memory.
General Product Care
To keep your phone working and looking good, follow these guidelines:
- Avoid putting it near heating appliances and devices that generate electrical noise (for example, motors or fluorescent lamps.)
• DO NOT expose to direct sunlight or moisture. - Avoid dropping and other rough treatment to the unit.
- Clean with a soft cloth.
- Never use a strong cleaning agent or abrasive powder because this will damage the finish.
- Retain the original packaging in case you need to ship it at a later date.
Warranty Assistance
Your sales receipt will be required to demonstrate proof of purchase in order to validate your warranty eligibility. You may want to attach either the original, or a photocopy, of yoursales receipt to thisbooklet for future reference.
If this product was received as a gift, it is suggested you jot down the date of gift receipt, as this information will be valuable should service be required during the warranty period. If the equipment is causing harm to the telephone network, the telephone company may require that you disconnect the equipment until the problem is resolved.
Purchase Date or DateReceived as Gift ____
Name of Store
For instructions on how to obtain warranty service, you may call Customer Care at 1-877-722-4908 or you may visit our website at www.rca4phones.com. If you prefer, you may write tous at:
Supreme Power USA LLC
PO Box 501045
Indianapolis IN46250-1045
Please do not send products to this address as it only adds delays in service and may result in lost or damaged product. This PO BOX is for written communication only.
If the equipment is causing harm to the telephone network, the telephone company may require that you disconnect the equipment until the problem is resolved.
Limited Warranty
What your limited warranty covers:
• Defects in materials or workmanship.
For how long after your purchase:
- One year, from date of purchase. Please retain your sales receipt, as that will act as your proof of purchase in order to validate warranty status.
What we will do:
- Provide you with a new or, at our option, a refurbished exchange unit of same or similar model. The exchange model is under warranty for the remainder of the original product's one year warranty, or 90 days from the date the replacement product was shipped to you, whichever is longer.
How to get service:
- Call Customer Care at 1-877-722-4908. Please have your product with you and please have your model number and date code available when calling us. The model number and date code can be found on the underside of the base unit. 22
If you are within your limited warranty period and it is determined that service is required:
- We will ask that you properly pack your product to avoid shipping damage. We recommend that you use the original carton and packing materials.
• We will ask you to include with your product the following:
Your name, return shipping address and daytime phone number handwritten or typed on a sheet of paper
° A legible copy of your sales receipt (please do not send the original sales receipt)
- Ship your product prepaid, to the address we provide. We suggest shipping your product via a traceable carrier, as we are not responsible for lost, mis-directed or damaged shipments. You may want to write the date shipped, carrier and tracking number here:
- Upon receipt of your product we will validate your product is under warranty and if determined your product is warranty eligible, we will ship to you a new or, at our option, a refurbished exchange unit of same or similar model. This exchange unit will be shipped to you at no cost.
What your limited warranty does not cover:
- Customer Instruction. (Your Owner's Manual provides information regarding operating and install instructions. Additional information may be obtained by contacting the retailer)
• Installation and set-up service adjustments. - Batteries.
- Damage from misuse, neglect, unauthorized repair.
- Products which have been modified or incorporated into other products
- Products that have been serviced by an unauthorized servicer.
- Products purchased or serviced outside the USA or Canada.
- Acts of nature, such as but not limited to lightning damage.
Limitation of Warranty:
- THIS LIMITED WARRANTY IS THE ONLY WARRANTY APPLICABLE TO THIS PRODUCT. ALL OTHER WARRANTIES, EXPRESS OR IMPLIED (INCLUDING ALL IMPLIED WARRANTIES OF MERCHANTABILITY OR FITNESS FOR A PARTICULAR PURPOSE) ARE HEREBY DISCLAIMED. NO VERBAL OR WRITTEN INFORMATION GIVEN BY SUPREME POWER USA LLC, ITS AGENTS, EMPLOYEES, RETAIL DEALERS OR INDEPENDENT CONTRA CTORS SHALL CREATE A GUARANTY OR IN ANY WAY INCREASE THE SCOPE OF THIS WARRANTY.
- REPAIR OR REPLACEMENT AS PROVIDED UNDER THIS WARRANTY IS
THE EXCLUSIVE REMEDY OF THE CONSUMER. SUPREME POWER USA LLC SHALL NOT BE LIABLE FOR INCIDENTAL OR CONSEQUENTIAL DAMAGES RESULTING FROM THE USE OF THIS PRODUCT OR ARISING OUT OF A NY BREACH OF ANY EXPRESS OR IMPLIED WARRANTY ON THIS PRODUCT. THIS DISCLAIMER OF WARRANTIES AND LIMITED WARRANTY ARE GOVERNED BY THE LAWS OF THE STATE OF INDIANA EXCEPT TO THE EXTENT PROHIBITED BY APPLICABLE LAW, ANY IMPLIED WARRANTY OF MERCHANTABILITY OR FITNESS FOR A PARTICULAR PURPOSE ON THIS PRODUCT IS LIMITED TO THE APPLICABLE WARRANTY PERIOD SET FORTHABOVE.
How state law relates to this warranty:
Some states do not allow the exclusion nor limitation of incidental or consequential damages, or limitations on how long an implied warranty lasts so the above limitations or exclusions may not apply to you.
This warranty gives you specific legal rights, and you also may have other rights that vary from state to state.
If you purchased your product outside the USA or Canada:
This warranty does not apply. Contact your dealer for warranty information.
Product Registration:
- Please complete and mail the Product Registration Card packed with your product or visit www.rca4phones.com to register your new product. Product registration is not required for warranty coverage but does allow us to contact you should it be necessary.
Visit the RCA web site at www.rca4phones.com
Please do not send any products to the Indianapolis address listed in this manual or on the carton. This will only adddelays in service for your product.
1113
Printed in China
10-35
- Call Waiting / Caller ID Speakerphone User's Guide
- Equipment Approval Information
- Notification to the Local Telephone Company
- Notes
- Rights of the Telephone Company
- Interference Information
- Hearing Aid Compatibility (HAC)
- FCC RF Radiation Exposure Statement
- Industry Canada (I.C.) Notice
- IMPORTANT SAFETY INSTRUCTIONS
- Introduction
- Short Glossary of Terminology Used in this Manual
- Parts Checklist
- Telephone Jack Requirements
- Important Installation Information
- Installing and Replacing the Batteries
- Installing the Phone
- Connecting the Handset
- Connecting the Telephone Line
- Wall Mounting
- Attaching the Wall Mounting Pedestal
- Telephone Basics
- Receiving a Phone Call
- Making a Phone Call
- Volume
- Adjusting the Handset Receiver Volume
- Adjusting the Speakerphone Volume
- Redial
- Mute
- Flash
- Temporary Tone Dialing
- Speakerphone Basics
- Location
- For best speakerphone performance, avoid the following:
- Speakerphone Use
- Caller ID (CID) Features
- CID Summary Screen
- Receiving and Storing CID Calls
- Reviewing CID Records
- Deleting CID Records
- Dialing Back
- If You Programmed Your Local Area Code
- If You Did Not Program Your Local Area Code
- Setting Up the Caller ID Menu
- NOTE: You have 20 seconds following an entry before the phone returns to the Summary Screen.
- Display Language
- Contrast
- Local Area Code
- Dialing Mode
- Memory
- Storing a Name and Number in Memory
- Changing a Stored Number
- Erasing a Stored Number
- Copying Caller ID Memories to User Memory
- Storing a Redial Number to Memory
- Dialing a Number Stored in Memory While On-hook
- Dialing a Number Stored in Memory
- Cascade Dialing
- Storing a Pause in Memory
- Pre-Dialing
- TroubleshootingTips
- No Dial Tone
- No Display
- General Product Care
- Warranty Assistance
- Limited Warranty
- What your limited warranty covers:
- For how long after your purchase:
- What we will do:
- How to get service:
- If you are within your limited warranty period and it is determined that service is required:
- What your limited warranty does not cover:
- Limitation of Warranty:
- How state law relates to this warranty:
- If you purchased your product outside the USA or Canada:
- Product Registration:
- Visit the RCA web site at www.rca4phones.com
Brand : RCA
Model : 1113-1BKGA
Category : Telephone