
AIB2211 - Toilet PHILIPS - Free user manual and instructions
Find the device manual for free AIB2211 PHILIPS in PDF.


| Product Type | Smart Toilet with Bidet |
| Brand | Philips |
| Model | AIB2211 |
| Dimensions (W x D x H) | 38 x 68 x 52 cm |
| Weight | 22 kg |
| Power Supply | 220-240 V, 50/60 Hz |
| Power Consumption | 1150 W (max) |
| Water Pressure Range | 0.05 - 0.75 MPa |
| Functions | Heated seat, warm water bidet, air dryer, deodorizer, night light, remote control |
| Material | Ceramic bowl with plastic seat |
| Color | White |
| Installation | Floor-mounted, requires electrical and water connection |
| Cleaning | Removable seat, self-cleaning nozzle |
| Safety | IPX4 water resistance, child lock, temperature control |
| Spare Parts | Filter, remote control, seat cover, nozzle |
| Repairability | Modular design, easy access to components |
| Warranty | 2 years |
| Certifications | CE, RoHS |
Frequently Asked Questions - AIB2211 PHILIPS
User questions about AIB2211 PHILIPS
0 question about this device. Answer the ones you know or ask your own.
Ask a new question about this device
Download the instructions for your Toilet in PDF format for free! Find your manual AIB2211 - PHILIPS and take your electronic device back in hand. On this page are published all the documents necessary for the use of your device. AIB2211 by PHILIPS.
USER MANUAL AIB2211 PHILIPS
natural_image
White electronic device with 'PHILLIPS' branding and a small circular button labeled 'i', shown in a flat, rounded top (no additional text or symbols visible)User Manual
説明書
Directory
- Important 01
- Safety caution 02
- Preparations before installation 07
- Packing list 09
- Installation steps 10
- Main technical specifications 13
- About the the side button 14
- About the remote controller 15
- How to use 16
- Maintenance 18
- If a long idle period is expected 20
- SIAA antibacterial certification instructions 21
- Troubleshooting 22
- List of environmental protection 24
- Product Warranty Service Guide 25
Please read this installation instruction carefully and install this product correctly and safely.
Be sure to read pages 2 to 6 before installation (Safety Caution).
The manufacturer shall not be liable for any accident or injury caused by failure to install according to the instructions specified in the installation manual or failure to use specified parts during installation.
1. Important
Please read this instruction carefully before use.
- The product must be repaired by an authorized professional service personnel, otherwise the manufacturer will not be responsible for the corresponding warranty.
- The power supply component is coupled with the machine. If the power supply component is damaged, in order to avoid danger, it must be replaced by an authorized professional personnel from the manufacturer, otherwise the manufacturer will not be responsible for the corresponding warranty.
- Do not use non-original filter elements, which may cause health and safety risks. The water supply may become abnormal if non-original filter elements are used.
- The product is designed for domestic use, if it is used for commercial purposes, the service life of this product will be shortened.
- Do not install in outdoor.
- Users should check and maintain the product regularly. If there is any abnormality, users should stop using the product immediately and call the service hotline to report a repair.
- Before any maintenance or cleaning of the product, please be sure to disconnect the power supply.
- If any part has been soaked in water, it should be checked or repaired by an authorized service professional before use.
- Please do not cover the product with any object.
- Do not put heavy objects on the product.
- Do not use the product when the sewer is blocked.
- The company has the right to interpret the above terms and conditions as permitted by law.
2. Safety Caution
- Before use, please read the following safety precautions carefully.
- Improper use of the product may cause serious accidents.
- The following content is closely related to safety, please be sure to strictly comply with the requirements.

Warning: Refers to the contents that may cause serious personal safety or property damage.

Caution: Refers to the contents that may cause general personal safety or property damage.
 |  |  |
| This symbol is used with the above "Warning" and "Caution" contents to draw your attention. Please read it carefully and strictly follow it. | Refers to something that must not be performed. | This symbol indicates that please refer to operation instructions. |

WARNING

The power supply must be earthed with three-pin power plug.
- Otherwise it can be a cause of electrocution and so on.

- Once the power plug and turn off the faucet immediately when the product water inlet pipe leaks.
- Otherwise there will be electric shock, fire hazard, or indoor seeper.
- In cold winter, be sure to take anti-freezing measures.
- Otherwise, the internal water may freeze and will lead to fire hazard and indoor seeper.
- For long time sitting, please adjust the sitting temperature to "normal temperature" gear.
- There is a risk of cryogenic burns when using temperature other than "normal temperature" for a long time.
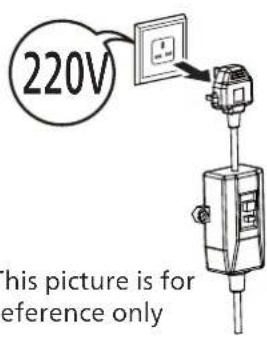
- When inserting and unplugging the power plug, hold the plug body.
- There is a risk of breakage of the plug or cable, electric shock or fire hazard if you handle the part of the wire.
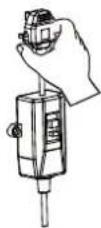
This picture is for reference only
- The power plug should be removed from the socket regularly and wiped with a dry cloth.
- Dust that accumulates in power plugs can cause a fire hazard.
- The power plug should be fully inserted.
- Otherwise there will be electric shock, fire hazard risk.
-
People with physical, sensory, intellectual disabilities or lack of experience and common sense (such as the following) should adjust the temperature of the seat to normal temperature.
-
Children
- The elderly
- The patient
• People who are unable to regulate their own temperature
• People who have weak skin
• People who take hypnotic drugs such as sleeping pills
• People who consumed too much alcohol
• People who are extremely tired - There is a risk of cryogenic burns when using temperature other than "normal temperature" for a long time.

- Please contact the after-sales service for repair, otherwise there is a risk of injury.
-
- Do not use broken plugs or faulty sockets.
-
Do not replace the power plug or power cord by yourself.
- If the power supply cord is damaged, to avoid danger, it must be replaced by an authorized service professional from the manufacturer.
-
Otherwise, it may cause electrical leakage, fire hazard and injury.
-
Do not scratch, damage, process, forcibly bend, stretch, tighten, bind, press, or shorten the power cable.
- Otherwise, the power cable will be damaged, which may lead to electric shock and fire hazard.
- To avoid the risk of accidental reset of the thermal circuit breaker, the product should not be installed in sockets with external switching devices, such as timers.
- Otherwise, the leakage circuit breaker cannot operate normally, which may lead to a fire hazard.
-
- Do not use voltage other than AC220V.
-
Do not overload the circuit.
- Otherwise there could cause a fire hazard.
- Do not use water to clean the fuselage and power plug.
- May cause malfunction or electric shock.

- Please use the installation accessories delivered with the product (old hose assembly cannot be reused).
- Otherwise there will be water leakage or failure to install.

Do not touch with wet hands
Do not remove or insert the power plug with wet hands.
- Otherwise it can be a cause of electrocution.

Do not disassemble
If the product is faulty, please immediately shut down and unplug the power plug. Bring it to the customer service center, do not dismantle or modify the product by yourself.
- Otherwise, it may cause electrical leakage, fire hazard and injury.

Do not touch water
The product and its power plug should be installed in a position where water or detergent can't be spilled.
- Otherwise, it may cause electrical leakage and fire hazard.

ATTENTION

- Do not use inappropriate cleaners when cleaning and maintaining plastic parts.
- Use of toilet detergent, residential detergent, bleach, gasoline, thinner, detergent, cresol, etc., will lead to plastic damage, injury, electric shock, or fire risk.
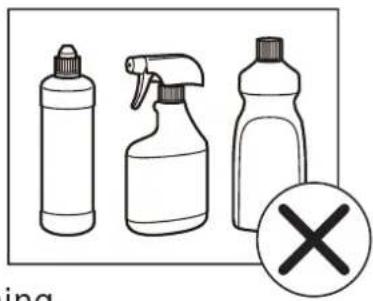
natural_image
Illustration of three spray bottles and a crossed-out plastic bottle with a cross symbol (no text or labels)- Always remove the power plug from the socket when cleaning.
- Otherwise, there will be the danger of electric shock.
- If the product will not be in use for a long time, drain the water and pull out the power plug from the socket.
- Otherwise, there will be danger of fire and indoor seeper caused by freezing damage.
- Otherwise, the water inside the product will be contaminated, which will lead to the risk of skin inflammation.
- When the following people use the product, please accompany them to prevent them from falling. (Children, the elderly, people who can't sit or stand on their own).
• Children should not play with this product. Do not let children use this product alone.
- Otherwise, people may be injured or the product cover may be damaged.
- In the room where the product is installed, a water supply switch should be installed in the accessible position. This switch can be used to cut off the water inlet of the product
without tools in case of emergency. Otherwise, the accidental failure of the product may cause personal injury or property loss.
- Otherwise, water leakage may occur in emergency situations, resulting in indoor seeper.

- Do not bend or break the inlet water pipe.
- Otherwise, water leakage will occur and lead to indoor seeper.
- Do not touch or step on the faucet.
- Otherwise, water leakage will occur and lead to indoor seeper.
- Do not lean your back against the bidet cover.
- Otherwise it may cause scratches or damage to the cover.

Do not place cigarettes and other combustible materials near the product.
- Otherwise, there will be the danger of fire.
3. Preparations before installation
Component identification
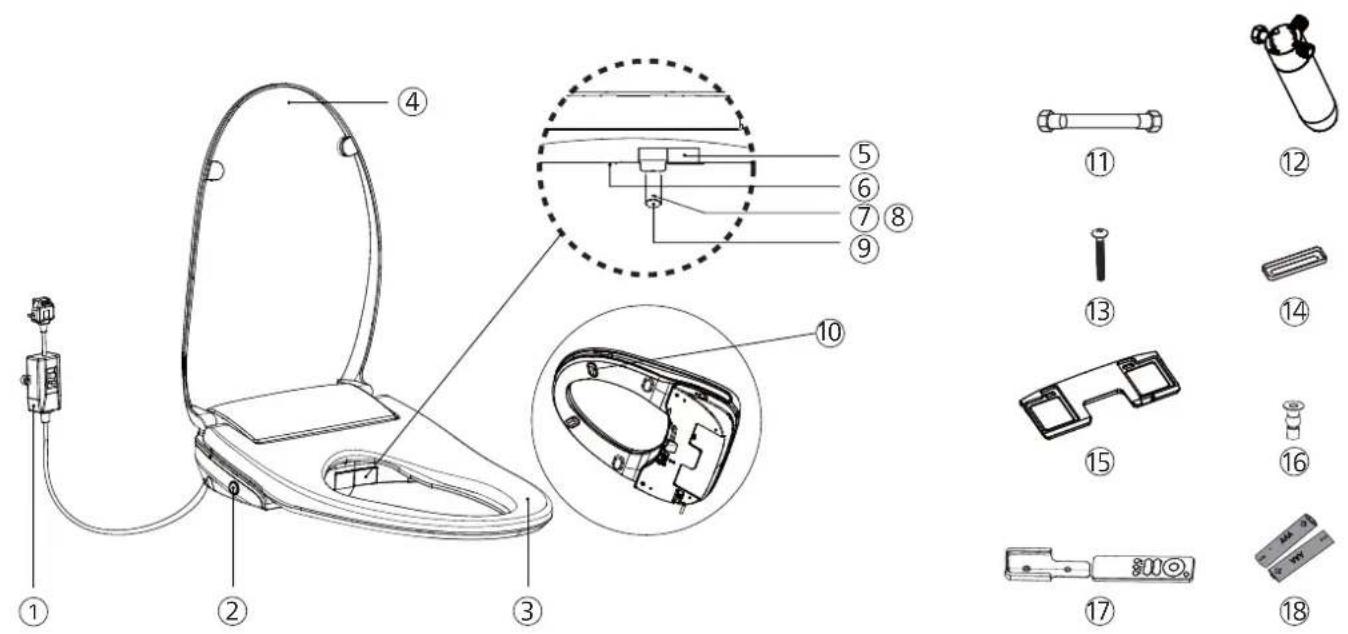
① Electric leakage protection plug
② The side button
③ Bidet seat
④ Upper cover
⑤ Warm dry
⑥ Night light
⑦ Front wash plughole
⑧ Rear wash plughole
⑨ Nozzle
⑩ Buffering pads
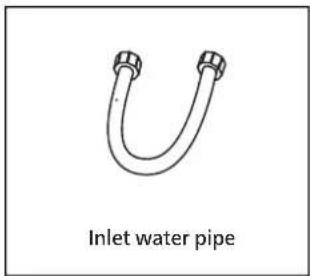
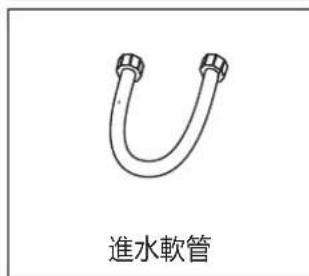
⑪ Inlet water pipe
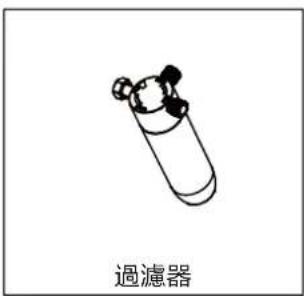
⑫ Filter
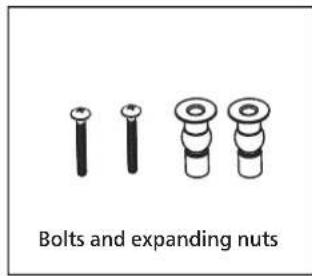
⑬ Bolts
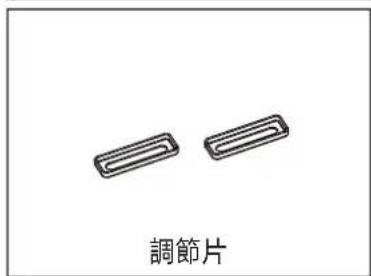
⑭ Adjustment sheet
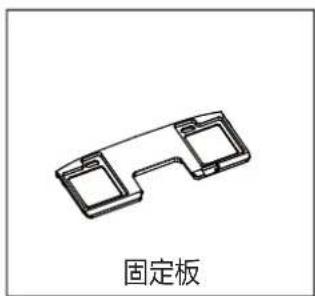
⑮ Fixed plate
⑯ Expanding nuts
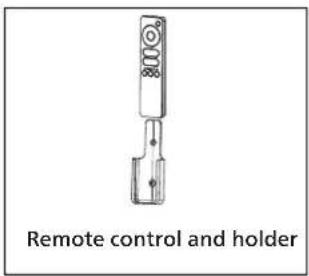
⑰ Remote control and holder
⑱ Battery
Preparations before installation
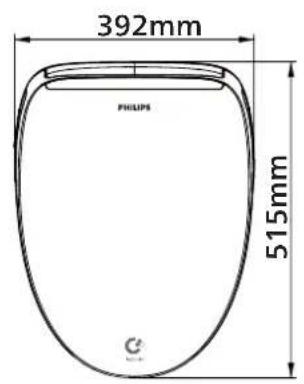
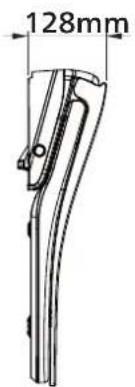
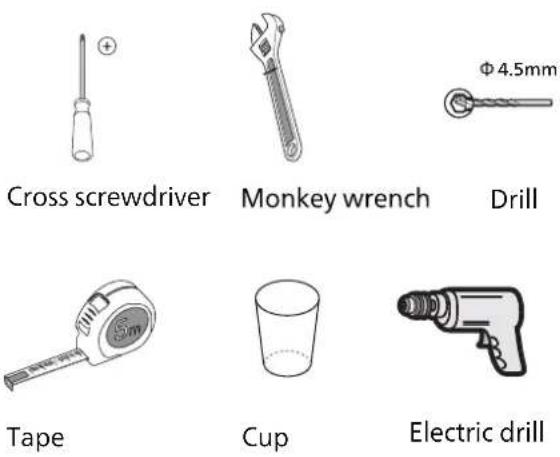
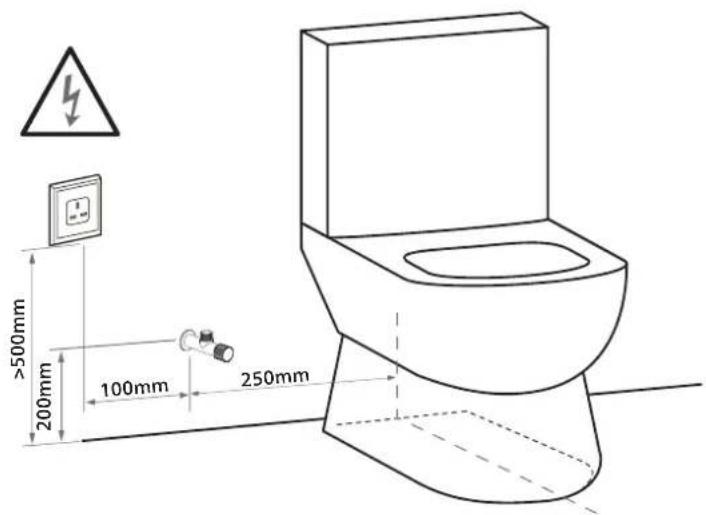
Suggestions for connecting power supply and water inlet.
In the room where the product is installed, a water supply switch should be installed in the accessible position. This switch can be used to cut off the water inlet of the product without tools in case of emergency. Otherwise, the accidental failure of the product may cause personal injury or property loss.
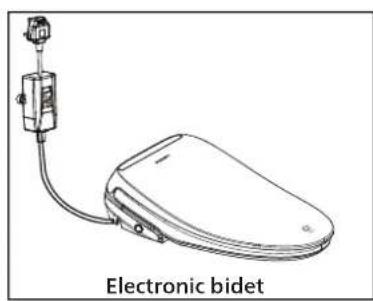
4. Packing list
natural_image
Line drawing of an electronic toilet with a vertical tube and base, labeled 'Electronic bidet' (no other text or symbols)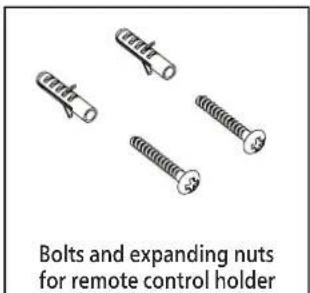
natural_image
Technical line drawing of a fixed plate component (no text or symbols on the diagram itself)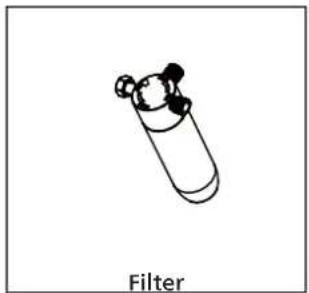
natural_image
Simple line drawing of a test tube with internal components, labeled 'Filter' below (no other text or symbols)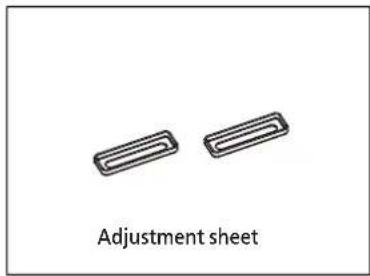
list
| Designation | Quantity | Remark |
| Electronic bidet | 1 set | |
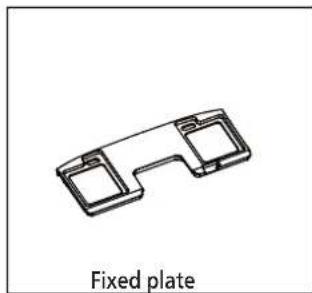
| Fixed plate | 1 pcs | Remove from bottom of product |
| Filter 1 pcs | ||
| Adjustment sheet | 2 pcs | |
| Inlet water pipe | 1 pcs | |
| Bolts and expanding nuts | 2 pairs | |
| Remote control and holder | 1 set | |
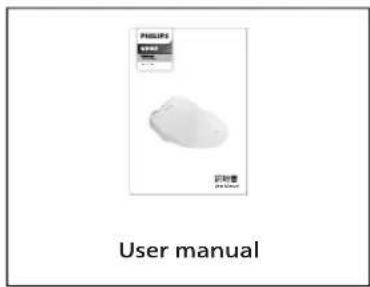
| User manual | 1 pcs | |
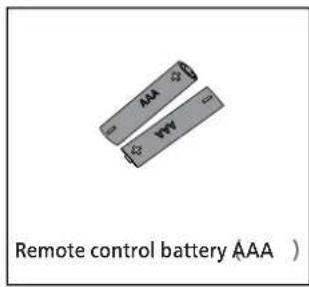
| Remote control battery (AAA) | 2 pcs | |
| Bolts and expanding nuts for remote control holder | 2 pairs | |
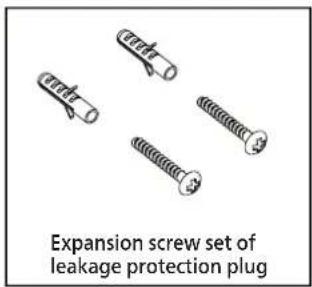
| Expansion screw set of leakage protection plug | 1 set |
5. Installation Steps
This product has been tested before delivered in the factory, there may be a small amount of residual water droplets when taking out the product, which is not a fault.
Remove the fixing plate from the host first.
- As shown in the picture, install the expanding nuts, fixed plate, adjustment sheet in order. Then fix the bolts of fixed plate but not completely tightened.
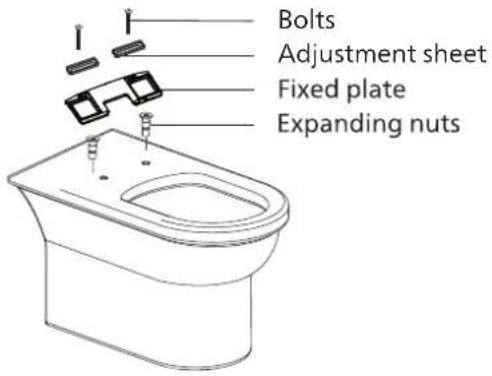
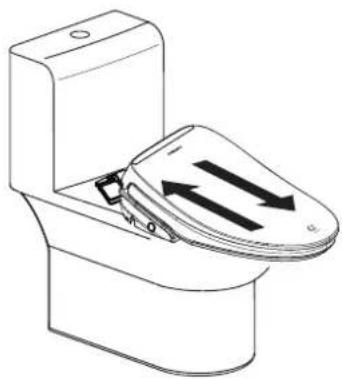
- Install the bidet into the fixed plate installed on the ceramic for trial installation, adjust the position, then press the side of the product push rod to remove the product, screw the bolts down.
natural_image
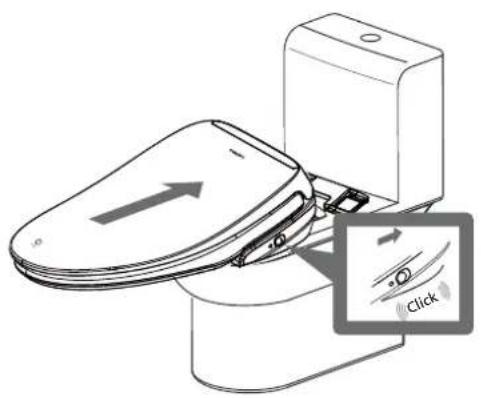
Line drawing of a toilet with a door seat and directional arrows indicating airflow or movement (no text or symbols)- Align the bottom of the product with the fixing plate slot, push it horizontally, till hear the "click" sound.
natural_image
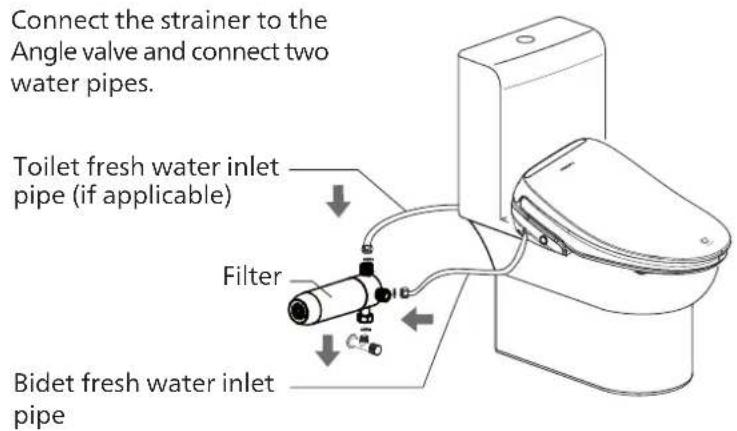
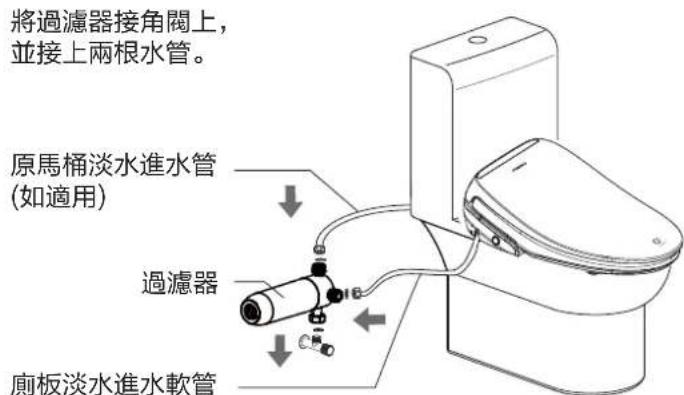
Line drawing of a toilet with a close-up inset showing a finger pointing to the button (no text or symbols present)- Note: Connect each water inlet pipe to the correct position of the filter.
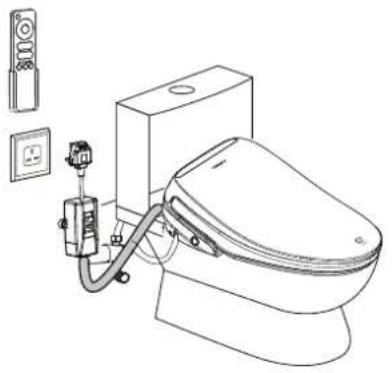
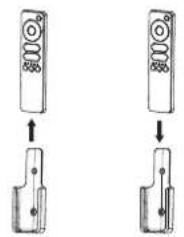
- Install the remote control.
natural_image
Line drawing of a toilet with attached electrical outlet and control panel (no text or symbols)Swipe up to remove the remote control. Swipe down to put the remote control back.
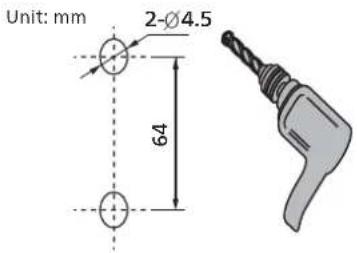
A. Drill two 4.5mm diameter holes with a depth of >20mm in appropriate positions on the wall according to the position dimensions shown.
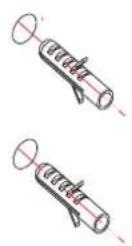
B. Install the expansion nut into the drilled hole.
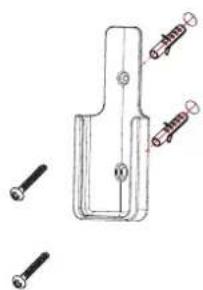
C. Secure the remote control holder with expansion screws.
D. Battery installation
natural_image
Technical line drawing of a mechanical bracket with multiple screws (no text or symbols)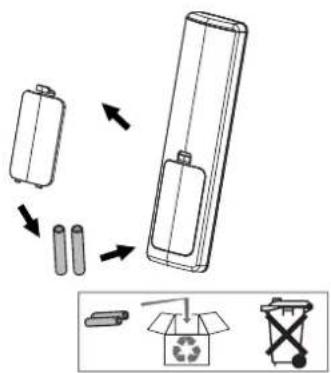
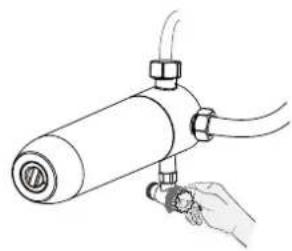
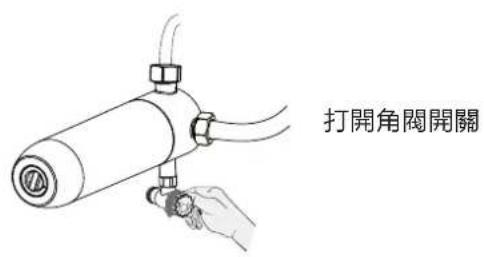
- Connect the water
natural_image
Line drawing of a hand holding a pressure gauge attached to a cylindrical device (no text or symbols)Turn on the tap
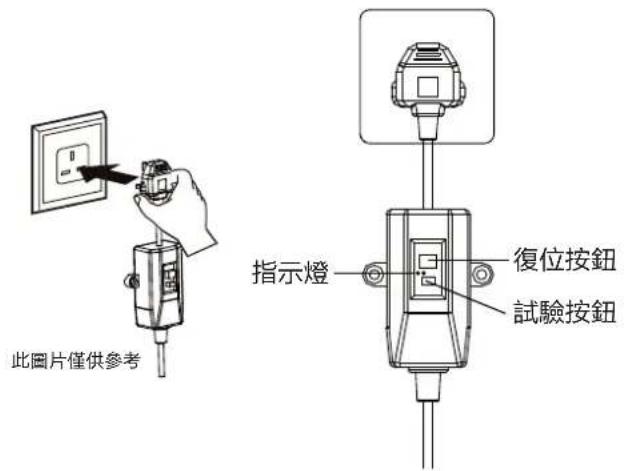
- Switch on the plug
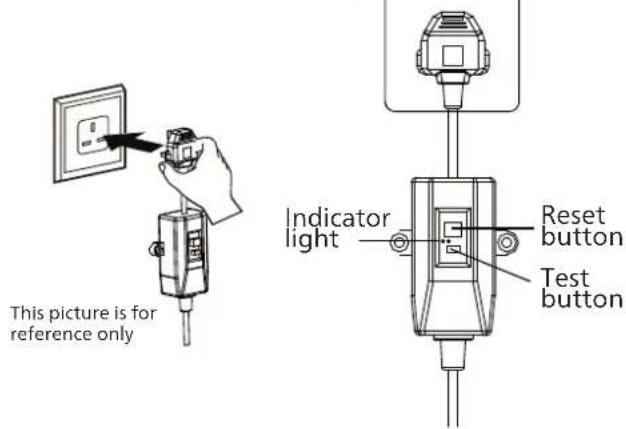
Leakage protection test
(1) Under normal condition, press the "RESET" button on the power plug, the plug indicator light will be green and the product will start to power on, enter the standby state;
(2) Press the "TEST" button on the power plug, the plug indicator light will be off and the product is powered off;
(3) Press the "RESET" button on the power plug again, the indicator light will be green, and the power supply of the product will be restored.
⚠ Warning
- Check if any leakage occurs when the power switch does not work properly.
- The leakage protection plug only protects the product connected to the power supply through the plug. When using other electrical appliances, the product does not guarantee the leakage protection of other products; similarly, the product does not replace the basic safety measures of other electrical appliances.
- Do not ground the live wire directly, test the leakage protection function of the product plug.
8. Function test
Test run
Gently cover the sensing position on the seat with your hand, and at the same time press the rear wash/front wash button to check whether the nozzle is working properly. Please block the nozzle outlet with a cup to prevent water from splashing on yourself or the floor.
- Fixing of leakage protection plug
A. Drill two 4.5mm diameter holes with a depth of >20mm in appropriate positions on the wall according to the position dimensions shown.
Unit: mm
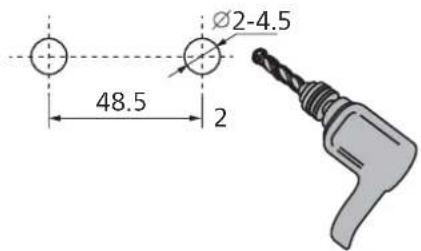
C. Fix the leakage protection plug with expansion screw.
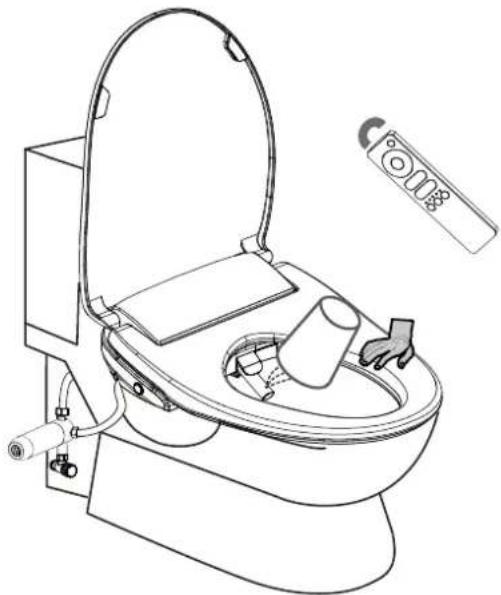
natural_image
Line drawing of a toilet with open lid, sink, and control panel (no text or symbols)B. Install the expansion nut into the drilled hole.
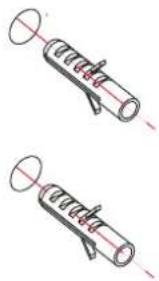
natural_image
Two identical mechanical components with red alignment lines, no text or symbols visible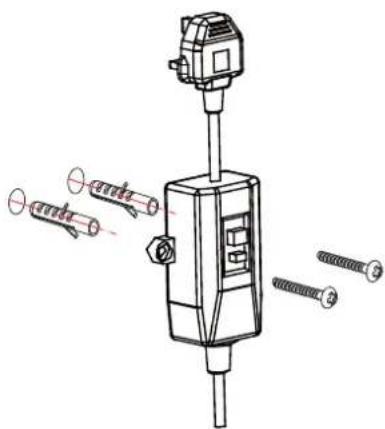
natural_image
Technical line drawing of a mechanical device with multiple screws and a sensor, no text or symbols present- Main technical specifications
| Designation | Electronic bidet | |
| Model | AIB2211/97 | |
| Wash | Rear wash | ● |
| Front wash | ● | |
| Child wash | ● | |
| Moving wash | ● | |
| Water pressure adjustment | 5 level setting | |
| Water temperature adjustment | 5 level setting + normal temperature level | |
| Nozzle position adjustment | 5 level setting | |
| Warm dry | Warm dry | ● |
| Air temperature adjustment | 3 level setting + normal temperature level | |
| Seat and cover | Seat temperature adjustment | 5 level setting + normal temperature level |
| Antibacterial seat | ● | |
| Soft closing seat and cover | ● | |
| Inductor Seat sensor | ● | |
| Clean and sanitary | Antimicrobial nozzle | ● |
| Nozzle self-cleaning | ● | |
| Else | Night light | ● |
| ECO ECO setting | ● | |
| The rated voltage | 220V~ | |
| Rated frequency | 50Hz | |
| Rated power | 820W | |
| Maximum input power | 1050W | |
| The environment temperature | 0°C~40°C | |
| Supply pressure | 0.07MPa~0.75MPa | |
| Water supply temperature | 3°C~35°C | |
| Waterproof level | IPX4 | |
| Wash flow | about 250~550ml/min (static pressure 0.2MPa) | |
| Warm water for wash | Water temperature | Inlet water temperature ~41 °C |
| Heater power | 1000W | |
| Warm seat | Seat temperature | Room temperature ~41 °C |
| Heater power | 50W | |
| Warm air | Warm air temperature | Room temperature ~60 °C |
| Maximum wind speed | ≥4m/s | |
| Heater power | 250W | |
| Sterilizations Function | IonShield | |
| Product dimension | 515X392X128mm | |
Explanation:
Rated power: Under the conditions of environmental temperature 23^ ± 2^ Static pressure of water inlet 0.2MPa ± 0.02MPa , water inlet temperature 15^ ± 0.5^ the function of buttock washing is opened and the flow is adjusted to the maximum, the seat temperature and water temperature are set to the highest grade, and the average power of buttock washing is immediately started after stopping and the complete work of a cleaning cycle is completed.
Maximum input power:
The average power of this product under the conditions of environmental temperature 23^ ± 2^ , inlet static pressure 0.2MPa ± 0.02MPa , inlet temperature 5^ ± 1^ , the flow is adjusted to the maximum, the seat temperature and water temperature are set to the highest grade, and the buttock washing is immediately started and the complete work of a cleaning cycle is completed.
Best cleaning performance:
To achieve the maximum cleaning performance, it is necessary to adjust the water pressure and water temperature to the highest grade, open the buttock washing function, adjust the spray position to the most front end, after cleaning for 1 minute, adjust the nozzle position to the rear end, until the end of the washing cycle.
7. About the the side button
Since the design of this product is mainly controlled by remote control, the side button has only common basic functions, as shown in the figure below.
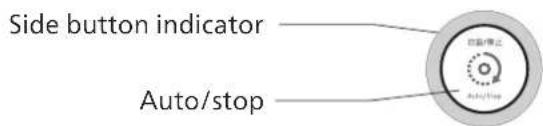
Introduction:
The side button contains two functions: automatic rear wash and front wash.
When seated, short press the button to activate automatic rear washing function:
rear wash + moving wash + rear wash + warm dry.
When seated, long press the button (above 3 seconds) to activate automatic front
washing function: front wash + moving wash + front wash + warm dry.
When unseated, long press the button (above 10 seconds), shut down all function, and the buzzer rings three times, the indicator light goes off and enters the standby state.
When pressing any key or sitting, exit the standby mode.
8. About the remote controller
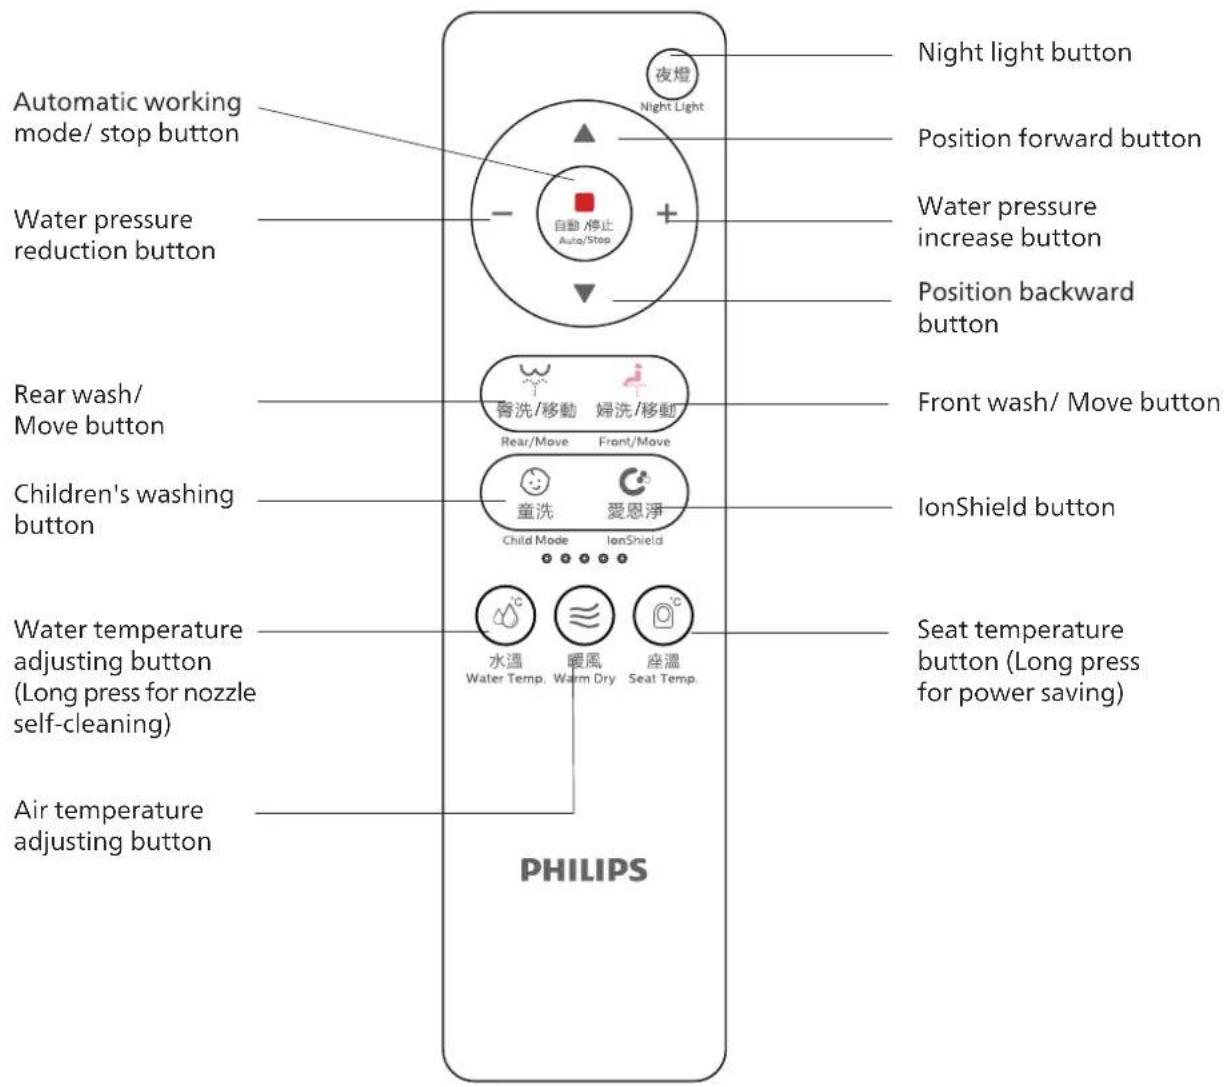
9. How To Use
1. Rear wash/ Move button
Press " ∪ " button to enter the rear wash mode. After the nozzle is extended, fixed wash then mobile wash, and then restored to the fixed wash. It will stop automatically after rear wash for about 3 minutes or leaving the seat, or press the " 🎨️ " button to stop working. In this mode, you may press " ∪ " button to enter the mobile wash. Press " ∪ " button again to stop the mobile wash.
2. Front wash/ Move button
Press" "button to enter the front wash mode. After the nozzle is extended, fixed wash then mobile wash, and then restored to the fixed wash. It will stop automatically after front wash for about 3 minutes or leaving the seat, or press the " button to stop working. In this mode, you may press" " button to enter the mobile wash. Press " " button again to stop mobile wash.
3. Children wash
When sitting, briefly press "工厂" to start children's washing. First, switch the water pressure, water temperature and air temperature to the lowest gear for hip washing for 1 minute, and then automatically turn on the warm air for 2 minutes. After that, restore the previous water pressure, water temperature and air temperature.
4. Water temperature adjustment
Press" "button, the indicator light shows the water temperature level; press " "button again, the water temperature level can be switched, each level can be switched circularly, and the corresponding level indicator light is shown in the figure below:

First gear Second gear

Third gear Fourth gear Fifth gear
5. Water pressure adjustment
In rear wash / front wash mode, press " + " button once to increase the water pressure by one gear, a total of five gears; Each time you press the " — " button, the water pressure will be reduced by one gear, and a total of five gears can be adjusted.

First gear Second gear

Third gear Fourth gear Fifth gear
6. Position adjustment
Under the rear wash/ front wash mode, Each time you press the " ▲ " button, the water pressure increases by one gear, a total of five gears; Each time you press the
"▼" button, the water pres-sure will be reduced by one gear, and a total of five gears can be adjusted.

First gear Second gear

Third gear Fourth gear Fifth gear
7. Nozzle Cleaning
If no people is sitting on the seat, long press " 🔍 " to automatically extend the nozzle for cleaning for about 2 minutes, operate the nozzle again to retract and self-clean.
8. Seat temperature setting
Press the " 🔍 " key, and the indicator light displays the seat ring temperature gear; press the " 🔍 " key again to cycle the seat ring temperature gear, and the indicator light is shown in the following figure:

flowchart
graph LR
    A["Normal temperature"] --> B["First gear"]
    B --> C["Second gear"]
    C --> D["Third gear"]
    D --> E["Fourth gear"]
    E --> F["Fifth gear"]
9. Night light
Press the "夜燈" button to turn on the night light, and then press the "夜燈" button to turn off the night light.
10. Warm air function
- When seated, press " ≡" button to start the warm air function; it will stop automatically for about 5 minutes or after leaving the seat, or press the " 🔊" button to stop working.
- In warm air mode, press the “ ≡” button, the indicator light shows the wind temperature level; The wind temperature gear can be switched cyclically, as shown in the figure below.

11. Power saving
Long press " 🔍 " button to turn on or off energy-saving mode.
12. Automatic working mode/stop button
- When sitting without other operations, press the " [REDACTED] " key of the remote control, enter the full automatic working mode. The working steps are as follows:
Rear wash→Oscillate wash→Rear wash→Warm air→stop.
- When the product function is in use, briefly press the key to stop the function.
13. IonShield
- In the off sitting state, press the "C" key to enter the nano water ion sterilization
function, short press for 1 hour and long press ( ≥ 3S) for 2 hours.
- When the IonShield is turned on, the aperture on the side button shows strong and weak breathing effect;
- Short press the aperture for blue breathing lamp effect, long press the aperture for purple breathing lamp effect; during the execution of IonShield, the lamp will remain on according to the above logic until the function is completed or stopped.
- After entering the IonShield sterilization function, if you press long / short to switch the sterilization time, the working time will be reset.
- During the operation of IonShield sterilization function, press " [REDACTED] " or sit down to automatically exit the nano water ion sterilization function.
10. Maintenance
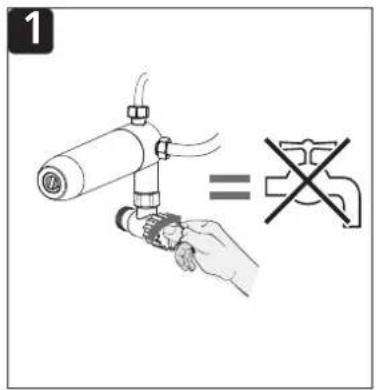
When cleaning and maintaining this product, please pull out the power plug first, close the angle valve switch and cut off the power supply to avoid water leakage, electric shock and other hazards.
Bidet cleaning
- Pull out the power supply, close the angle valve
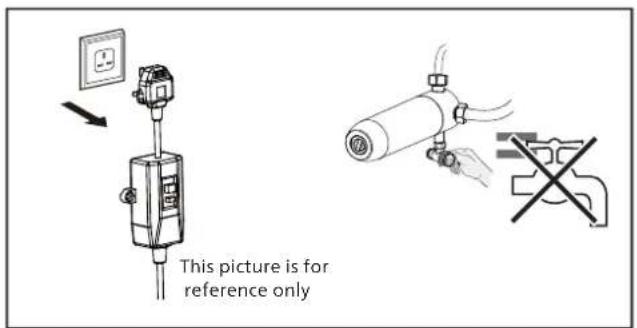
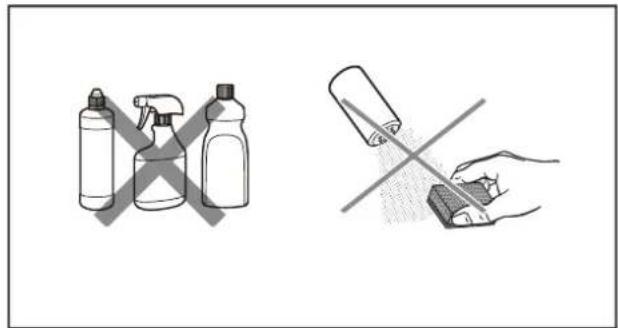
natural_image
Illustration showing three spray bottles and a hand holding a spray can, both without any text or symbols.- Bidet cover cleaning
Wipe with a soft cloth and water (to be wrung out)
Notes:
- The product surface is made of plastic. Do not wipe it with dry cloth or toilet paper. Otherwise, it may damage the appearance of the product;
- There are electronic components in the back cover of the product. Please pay attention to prevent water from seeping into it. Otherwise, it may lead to functional failure of the product;
- The transmitter and receiver of the remote control should be kept clean at all times.
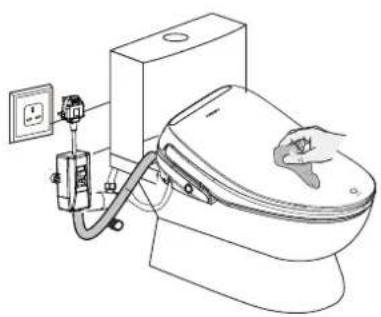
natural_image
Line drawing of a toilet with a hand operating the valve, showing electrical outlet and tubing (no text or symbols)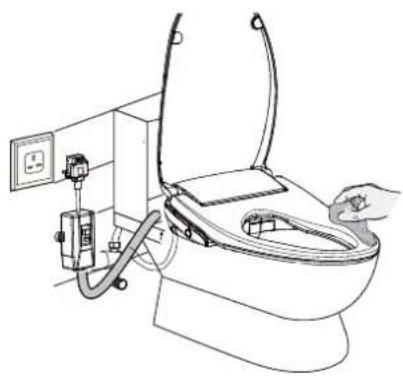
natural_image
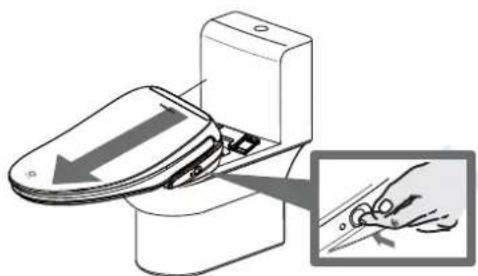
Line drawing of a toilet with tubing and a hand holding a tool, no text or symbols present- Remove the bidet
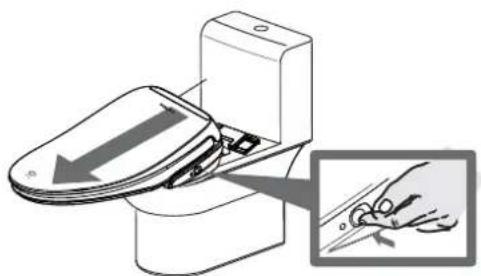
natural_image
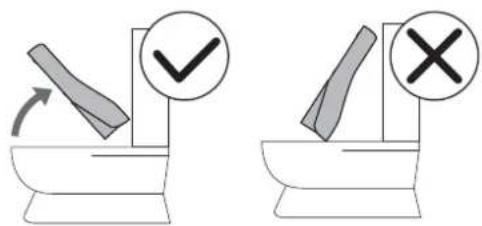
Diagram of a toilet with a hand holding a tool, showing a left-hand rule and a close-up of the tool tip (no text or symbols present)No more than 45 degrees
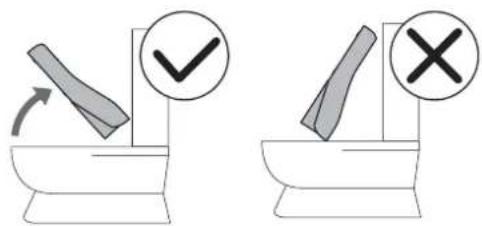
- Clean the bidet and ceramics
After removing the bidet body, you can clean the left and right sides and bottom of the bidet, as well as around the ceramic surface.
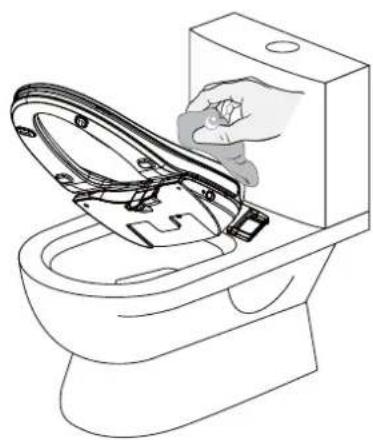
natural_image
Line drawing of a toilet sink with a hand inserting a plastic bag into the toilet (no text or symbols)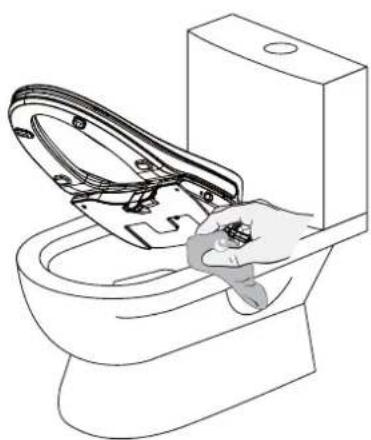
natural_image
Line drawing of a hand using a tool to clean or install a toilet (no text or symbols present)Nozzle Cleaning
When sitting away, long press the " 🔊 " button. After the nozzle extends, wear rubber gloves, remove the nozzle and clean it with a toothbrush.
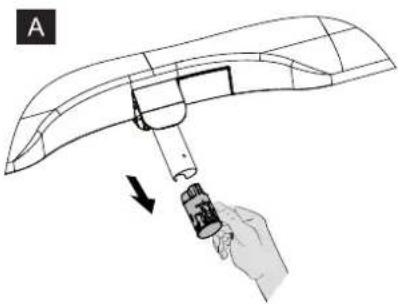
natural_image
Diagram of a hand holding a tool interacting with a curved mechanical component, labeled 'A' (no text or symbols on the diagram itself)B
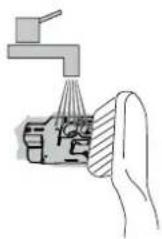
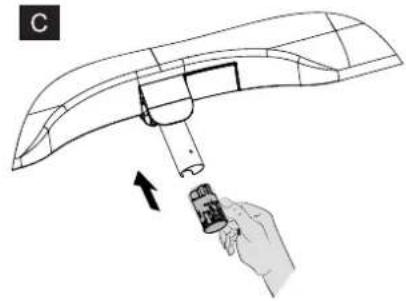
natural_image
Diagram of a hand holding a small object with an arrow indicating direction (no text or symbols present)Replace the filter element
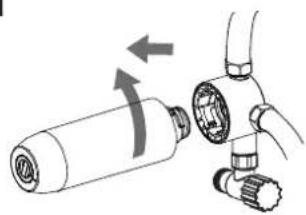
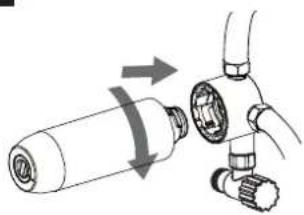
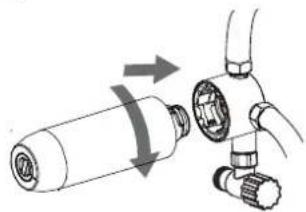
- It is recommended to replace the filter element once every 6 months (the specific service cycle depends on the water quality).
A
natural_image
Diagram showing a cylindrical device connected to a piping valve with directional arrows indicating motion (no text or symbols)Turn off the water source first, then unscrew and remove the filter element.
B
natural_image
Diagram of a gas cylinder being connected to a valve with directional arrows indicating motion (no text or symbols)Install a new filter element.
C
natural_image
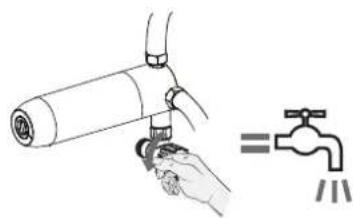
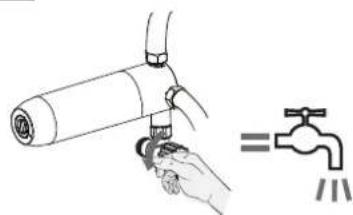
Illustration of a hand using a tool to clean a pipe fitting, with a water tap symbol nearby (no text or labels)Turn on the water source.
11. If a long idle period is expected
When the following two situations are encountered:
• Not used for a long time (more than a week).
- The room temperature is lower than 0^ to prevent the product from freezing crack.
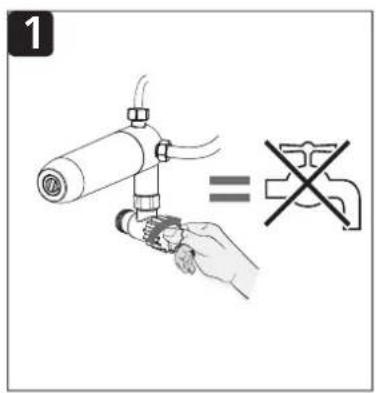
Please drain the water in the product pipeline according to the following steps:
Step 1: Tighten the water supply valve and cut off the water source.
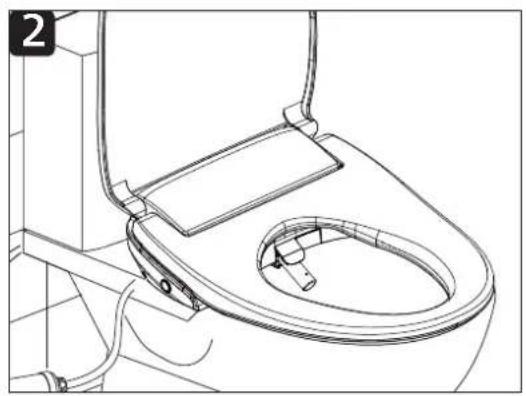
Step 2: Press and hold key " ⏻ " for internal drainage.
Step 3: Unplug the power cord.
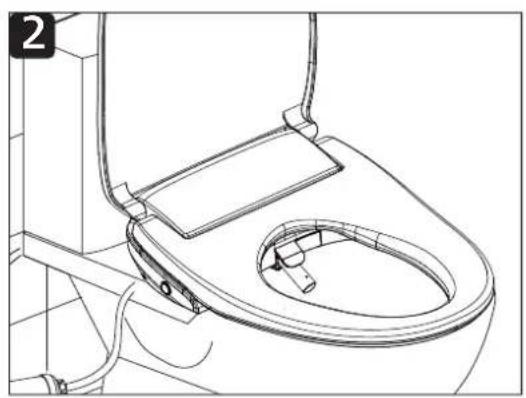
natural_image
Line drawing of a toilet seat with a handle and socket (no text or symbols)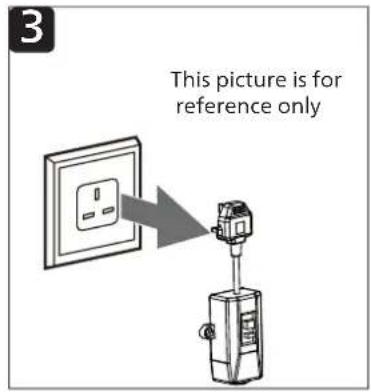
12. SIAA Antibacterial certification Instructions
The product seat ring material is certified by SIAA antibacterial Association, which can effectively inhibit the reproduction of Escherichia coli and Staphylococcus aureus, and the antibacterial rate is 99.9%
MICROKILLER®
Inorganic silver antibacterial agent
Mixing · Seat ring
CN0122781A0001O
13. Troubleshooting
| Phenomenon Cause Solution | The product is powered off. | Turn on the power supply. | |
| Night light function | Night light off | The night light is set to "off". | Reset the night light assembly to "turn on" the night light. |
| Night light on The night light is set to "on". | Reset the night light assembly to "turn off" the night light. | ||
| Manual cleaning nozzle mode | Automatic retracting of nozzle | The nozzle will be automatically retracted 2 minutes after manual cleaning. | This is a normal phenomenon. |
| Long press "Water temperature" button, the nozzle does not extend | There are conductive media on the seat, such as water droplets or wet paper, etc. The sensor will identify it as user. | Remove the conductive medium on the seat. | |
| Rear wash/ Front wash/ Children wash | The nozzle extends out too slowly | When the front or rear wash function is activated, the nozzle will be automatically cleaned at the outlet and then extended. The operation takes a few seconds. | This is a normal phenomenon. |
| Low water pressure | The water pressure is set to a lower mode. | Use the remote control to reset the water pressure to a stronger mode. | |
| The filter is clogged. | Clean the screen or replace the The filter. | ||
| The connecting nut of water supply hose is loosened. | Fasten the nut. | ||
| Low water temperature | The water temperature is set to "low" or "normal temperature". | Use the remote control to reset the water temperature to a "high" or "medium" state. | |
| The nozzle suddenly stops spraying water | After 3 minutes of cleaning, the nozzle stops spraying water and retracts automatically. | This is a normal phenomenon. | |
| Seat heating | The temperature of the seat is not high enough during use | The seat temperature is set to "normal temperature" or "low". | Reset the seat temperature to a higher state. |
| Over-temperature of seat | The seat temperature is set to a higher level. | Reset the seat ring temperature to a lower state. | |
| Warm air function | The warm air temperature is not high enough | Is the warm air temperature set to a lower state? | Reset the warm air temperature to a higher state. |
| The function of warm air is not working properly | Wash function activated. | Turn off all wash functions, and then start the warm air function. | |
| The function of warm air stops suddenly | The user suddenly leaves the seat; the sensor cannot detect the correct position. | Please sit back on the seat and start the warm air function. | |
| Indicator light and alarm function | The red light of the button on the product side flashes twice at one time | The water temperature is too high, and the water comes from the self-cleaning port constantly. | 1. Set the water temperature to room temperature, wait for about 20s, and turn on the power supply again.2. Stop using it when it cannot be eliminated. Please contact the service hotline. |
| The red light of the button on the product side flashes once at one time. | The water inlet is off. | Turn on the water inlet and turn on the power again . | |
| The blue light of the button on the product side flashes once at one time | Seat ring temperature fault . | Cut off the power supply and stop using the product. Contact the service hotline. | |
| The red light of the button on the product side flashes four times at one time. | Water temperature sensor fault. | ||
| The blue light of the button on the product side flashes three times at one time | Seat temperature sensor fault. | ||
| The leakage protection switch on the power plug often trips. | The leakage exceeds the normal value. | ||
| Remote control | The remote control doesn't work properly | Replace new batteriesBatteries ran o | |
| The positive and negative electrodes of batteries set wrongly. | Set the positive and negative electrodes of batteries correctly. | ||
| The remote control button is not sensitive | Replace new batteries.Batteries pow | ||
| The remote control is too far from the product or not within the range of the sensor. | Please use the remote control within the range of effective induction. | ||
14. List of environmental protection
According to the relevant provisions and requirements of the administrative measures for the restriction of the use of hazardous substances in electrical and electronic products of the people's Republic of China, the following forms including the name of electronic products and hazardous substances are provided.
Hazardous substances
This form is prepared in accordance with SJ / T11364.

○: Indicates that the content of the hazardous substance in all homogeneous materials of the component is below the limit specified in GB /T26572 standard.
x : Indicates that the content of the hazardous substance in at least one homogeneous material of the component exceeds the limit specified in GB /T26572 standard.
Above" × " The identified components have no replaceable technologies and components at this stage, and meet the regulatory requirements of the national measures for the administration of restrictions on the use of hazardous substances in electrical and electronic products.
Product recycling tips:
In order to protect the environment, according to the relevant provisions of the national regulations on the recycling of waste electrical and electronic products, when the user no longer needs this product or the service life of the product ends, the user is requested to send it to the recycling bin qualified for the disposal of waste electronic products for recycling.
15. Product Warranty Service Guide
- The product is guaranteed for two years from purchase date. If you need more information, please visit our website: www.philips.com/welcome.
- Within two years from the date of purchase, you will be guaranteed free of charge for any damage caused by manufacturing process or original parts under normal use confirmed by our service center.
- When repairing, please show the valid purchase certificate.
- This free service does not include consumable parts (cartridge, nozzle, ect.), auxiliary equipment, transportation costs and on-site service of maintenance personnel.
Free service will not be available in the following cases
- Artificial damage caused by improper use, such as improper connection of parts, improper installation, failure to follow instructions, misuse or negligence.
- Damage caused by transportation and other accidents.
- Repair and modification not approved by the manufacturer.
- Other damage caused by force majeure (such as natural disasters, abnormal voltage, etc.)
- Damage caused by general use outside the home (industrial, commercial, etc.)
- Product aging, wear and tear caused by normal use, but does not affect the normal use of the product.
The notice is an advertisement for free maintenance within the specified period and conditions, and does not limit the legal rights of consumers.
目錄
natural_image
Illustration of three spray bottles with different colors and a crossed-out X symbol (no text or labels)- 清潔時務必將電源插頭從插座拔下。
否則會有觸電的危險。
4. 裝箱清單
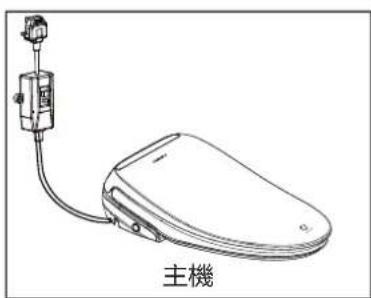
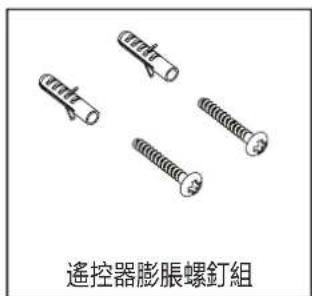
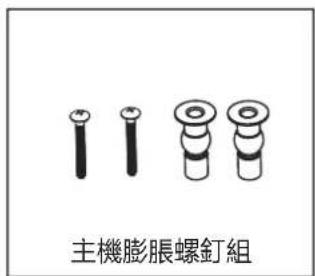
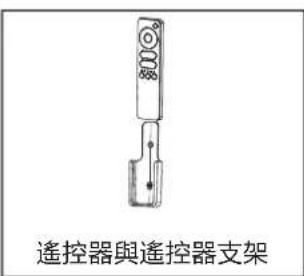
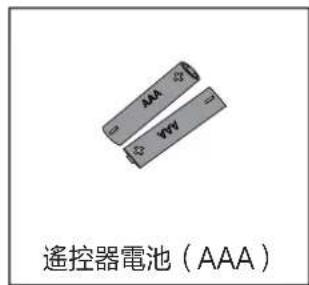
- 注意:將各進水管接到過濾器正確位置。
natural_image
Line drawing of a toilet with attached electrical outlet and wall-mounted control panel (no text or symbols)natural_image
Technical line drawing of a mechanical clamp or bracket component with multiple screws (no text or symbols)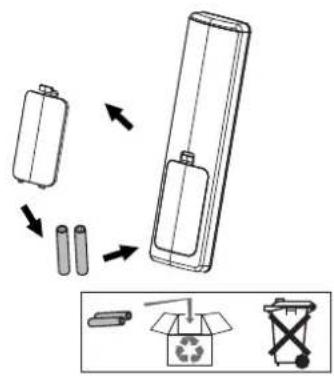
- 連接水源
- 連接電源
natural_image
Line drawing of a toilet with open lid, drawer, and control panel (no text or symbols)9. 漏電保護插頭固定
natural_image
Technical line drawing of a mechanical device with multiple screws and a top component (no text or symbols)- 主要技術規格
natural_image
Illustration showing three spray bottles and a hand holding a spray can, with no text or symbols present.2. 清潔潔淨廁板
用軟布加清水擦拭(要擰乾)
注意事項:
勿
natural_image
Line drawing of a toilet with attached medical device and electrical outlet (no text or symbols)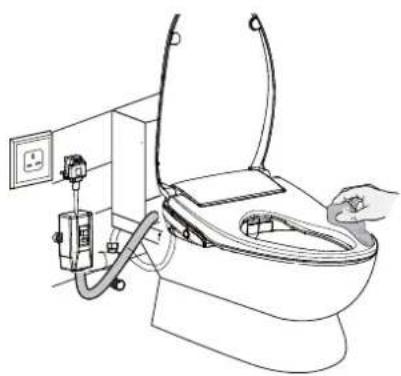
natural_image
Line drawing of a toilet with tubing and a hand adjusting the seat (no text or symbols)3. 拆下潔淨廁板
natural_image
Diagram of a toilet with a handle and screwdriver inserted, showing a magnified view of the tool tip (no text or symbols present)不能超過45度
4. 清潔潔淨廁板和陶瓷
natural_image
Line drawing of a toilet with a hand placing a bag into the sink (no text or symbols)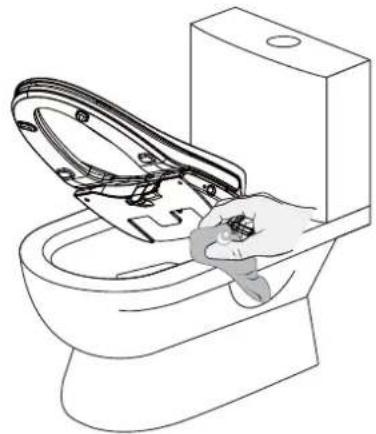
natural_image
Line drawing of a toilet sink with a hand holding the toilet, showing cleaning and cleaning process (no text or symbols)噴嘴清潔
natural_image
Diagram of a hand holding a small object with an arrow indicating direction (no text or symbols present)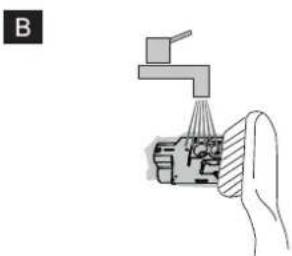
natural_image
Illustration of a hand holding a mechanical component with a lever and handle (no text or symbols)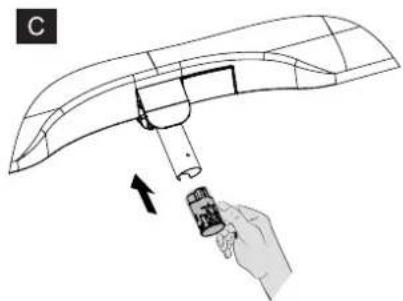
natural_image
Diagram of a hand holding a small object with an arrow indicating direction (no text or symbols present)更換過濾器濾芯
natural_image
Diagram showing a cylindrical device connected to a piping valve with directional arrows indicating motion (no text or symbols)先關閉水源,然後擰開並取下過濾器濾芯。
B
natural_image
Diagram showing a cylindrical device being connected to a piping valve, with arrows indicating motion (no text or symbols present)C
natural_image
Illustration of a hand using a tool to lift a pipe fitting, with a water tap symbol nearby (no text or labels)打開水源。裝上新過濾器濾
11. 長閒置期處理方式
當遇到如下兩種情況時:
長時間(一周以上)不使用。
室溫低於0℃,為防止產品凍裂。
請按以下步驟將產品管路內的水排光:
第一步:擰緊供水閥門,切斷水源。
第二步:長按“💡”鍵,進行內部排水。
第三步:拔出電源線插頭。
natural_image
Line drawing of a toilet seat with handle and seatbelt, no text or symbols present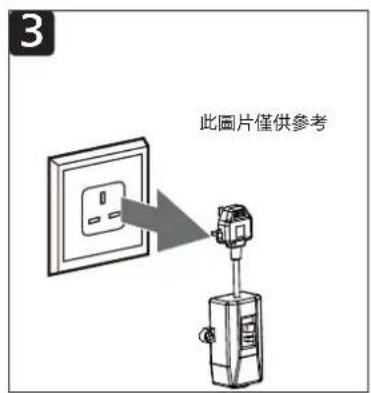
Register your product and learn more in the website link below: www.philips.com/welcome
Specifications are subject to change without notice
© 2021 AquaShield
All rights reserved.
The Philips trademark and the Philips Shield Emblem are registered trademarks of Koninklijke
Philips N.V. used under license.
This product has been manufactured by and is sold under the responsibility of Hong Kong
AquaShield Health Technology Company Limited and Hong Kong AquaShield Health Technology
Company Limited is the warrantor in relation to this product.
Rev A NOV 21

- Directory
- Important
- Safety Caution
- WARNING
- Do not touch with wet hands
- Do not disassemble
- Do not touch water
- ATTENTION
- Preparations before installation
- Preparations before installation
- Packing list
- Installation Steps
- Leakage protection test
- ⚠ Warning
- Function test
- Explanation:
- Maximum input power:
- Best cleaning performance:
- About the the side button
- Introduction:
- About the remote controller
- How To Use
- Rear wash/ Move button
- Front wash/ Move button
- Children wash
- Water temperature adjustment
- Water pressure adjustment
- Position adjustment
- Nozzle Cleaning
- Seat temperature setting
- Night light
- Warm air function
- Power saving
- Automatic working mode/stop button
- IonShield
- Maintenance
- Bidet cleaning
- Notes:
- Nozzle Cleaning
- Replace the filter element
- If a long idle period is expected
- SIAA Antibacterial certification Instructions
- Troubleshooting
- List of environmental protection
- Product recycling tips:
- Product Warranty Service Guide
- Free service will not be available in the following cases
- 目錄
- 裝箱清單
- 漏電保護插頭固定
- 清潔潔淨廁板
- 拆下潔淨廁板
- 清潔潔淨廁板和陶瓷
- 更換過濾器濾芯
- 長閒置期處理方式
Brand : PHILIPS
Model : AIB2211
Category : Toilet