
50TH1000 - Television THOMSON - Free user manual and instructions
Find the device manual for free 50TH1000 THOMSON in PDF.


| Product Type | Television |
| Brand | Thomson |
| Model | 50TH1000 |
| Screen Size | 50 inches (diagonal) |
| Resolution | 3840 x 2160 (4K UHD) |
| Refresh Rate | 60 Hz |
| Smart TV | Yes, with built-in apps (Netflix, YouTube, etc.) |
| Operating System | Android TV |
| Dimensions (with stand) | 1123 x 703 x 250 mm |
| Dimensions (without stand) | 1123 x 653 x 83 mm |
| Weight (with stand) | 11.5 kg |
| Weight (without stand) | 11.2 kg |
| Power Consumption | 100 W (typical), 0.5 W standby |
| Energy Class | A+ |
| HDMI Inputs | 3 |
| USB Ports | 2 |
| Audio Output | 2 x 10 W speakers |
| Wi-Fi | Yes, 802.11 b/g/n |
| Bluetooth | Yes, version 4.2 |
| VESA Mount | 200 x 200 mm |
| Tuner | DVB-T2/C/S2 |
| Maintenance | Clean with soft, dry cloth. Do not use solvents. |
| Safety | Ensure stable installation; do not cover ventilation slots. |
| Spare Parts & Repairability | Available from Thomson authorized service centers. |
Frequently Asked Questions - 50TH1000 THOMSON
User questions about 50TH1000 THOMSON
0 question about this device. Answer the ones you know or ask your own.
Ask a new question about this device
Download the instructions for your Television in PDF format for free! Find your manual 50TH1000 - THOMSON and take your electronic device back in hand. On this page are published all the documents necessary for the use of your device. 50TH1000 by THOMSON.
USER MANUAL 50TH1000 THOMSON
THOMSON
friendly technology
B9 Series & UD9 Series
CONTENTS
Introduction 1
Warnings & Safety Precautions 1
Features 2
Safety Information 2
Important Safety Precautions 3
Preparation Stand Installation 4
Functional Overview Front & Side Panel 5
Functions 6
Connections 7
Remote Control 8-10
Basic Operation 11
Menu Operation 12-18
Media Play 19
Network Setting 20
Instructions for Intelligent Platform Operation 21-24
Troubleshooting 25-27
INTRODUCTION
Thank you for choosing our product. To be able to make use of all application options we recommend that you should read this operation manual carefully and preserve it for quick access, if required.
Do not touch any parts in the set and do not make changes to any settings not described in this operating manual.
The LED Screen is a high-tech product which consists of more than 9,00,000 control elements. Any Non-active red, blue or green spots lines that might appear on the screen occasionally have no effect on the performance of the screen or television and may disappear over a short period of time.
WARNINGS AND SAFETY PRECAUTIONS
Warning:
- To prevent damage to the TV which may result in a fire or electrical shock hazard, do not expose the TV set to rain or excessive moisture.
- Do not rub or strike the Active matrix LED with any thing hard as this may scratch, mark or damage the active matrix LED permanently.
- For safety, do not place vessels or any container which contains fluids including water, on or near the TV.
- Do not insert any objects in the ventilation slots.
Service:
- Do not remove the back cover of the set as this can expose you to very high voltage and other hazards. If the set does not operate properly, unplug it and call THOMSON HD LED TV customer care.
Location:
- Position the set so that no bright light or sunlight falls directly on the screen. Reflections on the screen affects the picture quality & viewing television.
- Soft and indirect lighting is recommended for comfortable viewing.
- Care should be taken not to expose the set to any unnecessary vibration, moisture, dust or heat.
- Adequate ventilation is essential to prevent set failure. Ensure that the set is placed in a position to allow a free flow of air. Do not cover ventilation opening on the back cover. Do not place the set in an enclosure or very close to walls.
- Avoid excessively warm locations to prevent possible damages to the set.
- Place the television on a solid and flat surface, if not wall mounted.
FEATURES
- SMART LED TV
FHD / UHD 4K Resolution -
Extra Slim Design-
500000:1 Dynamic Contrast Ratio-
HDMI Connectivity-
Full Multimedia Interface-
Seven Picture Modes-
Five Sound Modes-
178°x178° Viewing Angle-
PC Connectivity-
Dynamic Noise Reduction-
LAN & Wi-Fi Connection for Internet-
Web Browsing-
SAFETY INFORMATION
CAUTION
RISK OF ELECTRIC SHOCK DO NOT OPEN
High voltages are used in the operation of this product. To reduce the risk of electric shock, do not remove cover of the cabinet, refer for servicing to qualified service personal.
If the LED TV require any changes or coarse adjustment, electric shocks are imminent. Do not attempt to open, contact customer support for needed overhual.

The exclamation point within an equilateral triangle is intended to alert the user to the presence of important operating & maintenance (servicing) instruction in the literature accompanying the appliance.

natural_image
Warning symbol of a lightning bolt inside a triangle (no text or numbers)Warning
The lightning flash with arrowhead symbol within an equilateral triangle, is intended to alert the user to the presence of uninsulated dangerous voltage within the products enclosure that may be of sufficient magnitude to constitute a risk of electric shock to persons.
IMPORTANT SAFETY PRECAUTIONS
- Read & keep this instruction manual.
- Keep these instructions.
- Heed all warnings & follow all instructions.
- Do not use this apparatus near water.
- Clean only with dry cloth.
- Do not block any ventilation openings. Install in accordance with the manufacturer's instructions.
- Do not install near any heat source such as radiators, heat registers, stoves or other apparatus (including amplifiers) that produce heat.
- If the provided plug does not fit into your outlet, protect the power cord from being walked on or pinched particularly at plugs, socket outlets and the point where they exit from the apparatus.
- Only use attachments / accessories specified by the manufacturer.
- Use with the bracket or table stand specified by the manufacturer or sold with the apparatus.
- Unplug this apparatus during lightning storms or when unused for long periods of time.
- To reduce the risk of fire or electric shock, do not expose this apparatus to rain or moisture.
- The apparatus should be disconnected from the mains by placing the power / standby switch in the standby position and unplugging the power cord of the apparatus from the AC main outlet.
- The socket outlet should be installed near the equipment & should be easily accessible.
- This product should never be placed in a built-in installation such as a bookcase or rack unless proper ventilation is provided or the manufacture's instructions have been adhered to.
- The apparatus should not be exposed to dripping or splashing & objects filled with liquid, such as vases, should be placed on the apparatus.
- Do not place any sources of danger on the apparatus (e.g. liquid filled objects, lighted candles).
- Wall or ceiling mounting - The appliance should be mounted to a wall or ceiling only as recommended by the manufacturer.
Servicing should be carried out by qualified service personnel only. To reduce the risk of electric shock do not perform any servicing other than that contained in the operating instructions.
PREPARATION
Stand Installation
The TV base will be separated with the TV unit. You should install the base before you use the TV unit.
- Place the TV with its front side facing down on a cushioned flat surface.
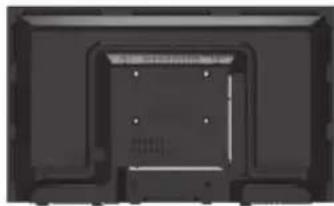
natural_image
Top-down view of a rectangular electronic device casing with mounting brackets and central slots (no visible text or symbols)- Place the base on the hinge of TV unit, with the base direction shown under the base. (See the picture)
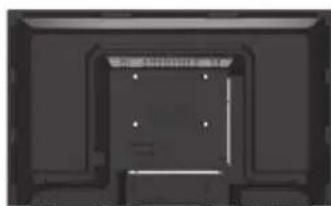
natural_image
Top-down view of a rectangular electronic component with internal channels and mounting holes (no text or symbols visible)- Tighten the supplied screws to fix the TV stand securely in place. (Screws - Provided with TV unit)
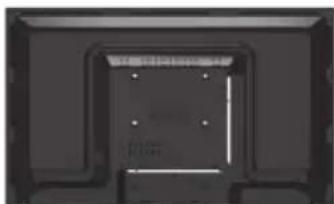
natural_image
Pure electrical circuit lines without any symbolsWARNING
- The TV stand may not be securely fixed in place after repeated tightening and loosening of screws.
- During assembling and disassembling the TV stand, please use your hand to support it. Failing to do so may cause the TV stand to fall and result in personal injury / damage to the product.
- After installing the TV stand, please ensure that the screws are tightened firmly. Failure to do so may cause the TV set to tip over or be damage.
FUNCTIONAL OVERVIEW
Front & Side Panel

natural_image
Front view of a black rectangular TV with two labeled buttons (1 and 2) pointing to the front panel (no text or symbols on the screen itself)1 Power Light
On Standby Mode, the light turns red.
2 Infrared Remote Sensor
Receives the signals from the remote control.

natural_image
Side view of a modern flat-screen TV with a curved base (no text or symbols visible)
3 Power
Press to turn TV on or turn to standby mode.
4 Menu
Press to display the setup menu on the TV screen.
5 CH-, CH+
Press to select desired channels. or press to select or adjust a menu item.
6 Vol-, Vol+
Press to adjust the volume level or Press to select and adjust a menu item.
7 Input
Press to select source of viewing and adjust all video input modes TV, AV, HDMI, USB, YPbPr, VGA
FUNCTIONAL OVERVIEW
- LAN (Local Area Network)
For Internet connection
- USB
Insert USB
- HDMI input Terminal
Connect to equipment with HDMI output
- VGA(PC IN) Input Terminal
Connect to PC.
- PC / HDMI Analog Audio Input Terminal
Connect to equipment using HDMI-DVI
connection or PC with audio output.
- AV 1 & AV 2 In / YPBPR
Connect the video output jack of DVD or Set-top Box
- Antenna Input Terminal
Connect to equipment with antenna output or wall antenna socket.
CONNECTIONS
You can connect DVD player, set-top box, computer, game console or other equipment to the TV. To view external source images, press ● to select the input source.
Connecting an AV Equipment with HDMI Connector

![[Example] DVD Player Set-Top Box Game Console](/content/2026/05/998233/images/90594865630139fb3227e515248dc8c4e7ed86ef6af52e7f2e178a0fe3f2cf13.jpg)
Connecting an AV Equipment with Composite Connector

natural_image
Pure electrical connector diagram showing three connected ports with a cable, no text or symbols presentConnecting an AV Equipment with VGA Connector

natural_image
Diagram of a device rear panel with ports, connectors, and an external resistor (no text or labels)![[Example] Computer](/content/2026/05/998233/images/8b40d230be8bfe8961c8794b056ccb113209e39b24946f4566d05d18236e425e.jpg)
Installing the remote control batteries


- Open the battery cover.
- Insert batteries (2x AAA size batteries) Place batteries with their terminals observing the (+) & (-) indications.
- Replace the cover & press down until the lock snaps closed. If the remote control is not used for an extended period of time, remove the batteries from the remote control as damage may result due to electrolyte leakage from the batteries.

Note: - The batteries shall not be exposed to excessive heat such as sunshine, fire or the like.
- Danger of explosion if battery is incorrectly replaced. Replace only with the same or equivalent type.
- Risk of explosion if battery is replaced by an incorrect type. Dispose of batteries according to the instructions.
- Do not dispose of batteries in a fire, danger of explosion.
- Batteries not covered under warranty.
- The remote may differ from the above picture.
FUNCTIONS
| POWER | Turns TV into STANDBY ON/OFF. | |
| FREEZE | Select to freeze the scene still on the screen. | |
| SOUND MODE | Different sound features. | |
| PICTURE MODE | Different picture features. | |
| Settings / FAV - | Press to open internet set-up. | |
| FAV+/Capture | Press to switch your favorite channels under TV menu.Press this key to capture video image | |
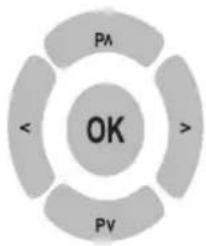 | P^Pv | - Navigates vertically Up/Down through the Menu/Sub Menus.- To enter character/numbers in program name parameter.- To navigate channel Up/Down through valid channels. |
| <> | - Navigates horizontally Right/Left through the Menu/Sub menus.- To enter in Menu/Sub menus & to adjust Vol +/- .- To navigate the letter in program name parameter.- To select the time.- To select Source by right arrow key.- Increase / Decrease the value of selected items & set the parameter On/Off. | |
| OK | - To enter in sub menu.- Enter to edit program name parameter. | |
| EXIT | Press to exit the OSD menu | |
REMOTE CONTROL
| MENU | To select menu OSD window and return to upper menu. |
| / CH. LIST | Change to cursor mode. |
| VOL +/- | Select to increase or decrease volume. |
| PA +/- Select to in | increase or decrease volume for power audio |
| ECO Vision | This key provides the different power saving modes. The current mode is displayed with ecovision symbol on the screen. In audio only mode display is off & only audio is on. Press any key to exit audio only mode. Note: VOL+/-, PA+/- & Mute can fuction even as panel is off. Note: Audio only mode is not available in models 32" and above. |
| MUTE | Turns sound OFF or ON |
  | Figures 0-9 are used to directly input channel number. |
| INPUT | To select the source of viewing. |
C  | Click to open internet browser. |
| SUBTITLE / COPY | - Press this key to display sub title list.- Press this key to rename channels in program edit function.- Press this key to copy / paste from USB to USB in USB Mode. |
| MEDIA / SPEAKER | - Press this key to switch On/Off internal speaker used in TV set.- Press this key to swap channel in program edit function.- Press this key to open media center. |
ASPECT |  | - Press this key to switch aspect ratio 16:9, 4:3, Zoom 1, Zoom 2, Auto scan- Press this key to skip channel in program edit function. |
| SLEEP / DELETE - | To set sleep timer except when in program edit menu or USB mode.- To select sleep timer except when you want seen next program after selected time, you can enjoy watch TV set.- Press this key to save channels when manual tuning or delete channel when editing TV program in program edit function. |
 | - Press this key to STOP in USB mode |
 | - Press this key to PLAY/PAUSE in USB mode |
 | - Press this key to FAST REVERSE in USB MODE |
 | - Press this key to FAST FORWARD in USB MODE |
 | - Press this key to select play time position |
 | When playing the Photo or Video or Mp3 or Text, if you select ROOT key it will stop playing & return to the current list in USB mode.Press to open home page. |
 | - Press this key to play the previous track. |
 | - Press this key to play the next track. |
Power On/Off
Turning on the TV
- Plug the TV's power cord into a wall outlet (after this step, the main unit will turn on and enter stanby mode automatically).
- Press the (Power) button on the TV, or press the (Power) button on the remote control. The TV will turn on.
Placing In Standby Mode
Your TV can be placed in Standby mode in order to reduce the power consumption. The standby mode can be useful when you wish to interrupt viewing temporarily (during a meal, for example).
- Press the Power Button.
- To switch back on, simply press power button.
Remark: Do not leave your TV in standby mode for long periods of time. (When you are away on holiday, for example). It is the best to unplug the set from the mains and aerial.
Changing Programmes
Using the programme selection buttons on the remote control to change programmes
To select a programme, press the corresponding programme selection button remote control. For example, to select programme 8, press the "8" programme selection button on the remote control.
Using the P+/- buttons to sequentially change programmes
Press P+/- buttons on the remote control or on the TV to sequentially select the TV programmes available in you area.
Using the G button to return to sequentially change programmes
To return to the previous viewed programme, press the ↗ button on the remote control.
Power On/Off
To turn on the TV
- Connect the power play into the wall outlet. The power indicator lights in red, indicating that the TV is in Standby Mode.
-Press
The Power indicator lights turns off & the TV turns on.
To turn off the TV
-Press
The power indicator lights in red & the TV turns off to standby mode.
- It takes approximately 10 sec. for the picture to appear after the TV is turned on.
- The TV will switch to standby mode automatically if there is no signal input for 10 minutes.
- If the TV will not be used for a long periods of time, unplug the TV from the wall outlet.
Channel Selection
To select channel
Press P+/- or Program Select buttons to select the channel number directly.
Input Source Selection
To select input "SOURCE".
- Press ▲/▼ to select the desired input source, then press ◀/▶ "enter" to enter. The selected input source image displays.
INPUT Source : TV, AV-1, PC, HDMI, USB, YPbPr, VGA
Volume Adjustment
To change the volume
- Press V+ to increase the sound volume level.
- Press V- to decrease the sound volume level.
To Mute the sound
- Press ☒ to temporarily turn off the sound.
- Press ✗ or V+ to restore the sound to previous level.
- You can decrease the sound volume by pressing V- while the sound is muted.
On-Screen Displays (OSD) Selection & Adjustment
- Press "MENU" to display the main menu.
- Press◀/▶ to select a menu. The selected menu page displays.
- Press▲/▼ to set your selection.
- Press▲/▼ to choose an item on the menu page & press ▶ to set your selection.
- Press◀/▶ to adjust an item value or choose options.
- Press "MENU" to return to the menu, press "MENU" again to exit.
The OSD menu screen will be closed automatically when no operation has been made for the set OSD menu display time.
CHANNEL :
Auto Tunning : You can tuto tune all RF channels in ATV input source only.
ATV Manual Tunning : Channel
CH1
: Color System
Auto/PAL/NTSC/SECAM
: Sound System
BG/DK/I/M
: Search
< >
: Frequency
62.25 MHz
MENU
Program Edit
1 S-00 ATV

Delete EditGove Skip


Picture : Standard / Soft / User / Vivid/Natural/Sports/Lightness
ATV Manual Tunning Contrast
rast : 0 - 100
Brightness : 0 - 100
Hue : 0 - 100
Sharpness : 0 - 100
Saturation : 0 - 100
ECO : Off/Low/Middle/High
back Light : 0 - 100
Color Temperature : Standard / Warm / Cool
Aspect Ratio : 16:9, 4:3, Zoom 1, Zoom 2
Image Noise
Reduction : Off/Weak/Middle/Strong
SOUND : Standard / Music / Movie / News / User
Bass : 0 - 100
Treble : 0 - 100
Balance : 0 - 100
AVC : Off / On
Surround : Off / On
SPDIF Output : PCM/RAQ/OFF
Screen Off : Music Only
(Press Ok, Only Sound, No Picture
TIME :
To exit, press any key.
Date : 2016 / 7 / 1
Current Time : 09:02:40
Off Time : Setting off Time Off / On
Hour 9 (0-23)
Minute 05 (0-59)
(Off Time must be more, than 1 minutes after the current time)
On Time : Setting Boot Time OFF/ON
Hour
Minute 43
Source ATV
(Schedule time must behind the current time)
Sleep Time : Off / 10 min / 20 min/ 30 min/ 60 min / 90 mibn / 120 min / 180 min / 240 min.
SETTING :
Menu Time : Always / 5 Sec / 10 Sec / 15 Sec / 20 Sec / 30 Sec.
Blue Screen : Off / On
HDMI CEC : Off / On
Stand by On : OFF / ON
ARC : OFF / On
Channel Setting (Use for TV)
At ATV input source, the first page showed is CHANNEL. At non ATV input source, the first page is PICTURE as default. Currently press ENTER to get in sub menu, submenu highlight fixed on press button key, the subtopic turns up with full screen.

- Press the "MENU" button on the remote control to enter the OSD menu. Then press ◀▶ buttons the "CHANNEL".
- Press ▲▼ buttons to select the desired item, then press ▶ or ENTER to enter.
- Press ◀▶ buttons on the remote control to adjust desired item.
- Press the "MENU" button on the remote control to return to upper menu.
Note: CHANNEL can be only selected under ATV condition, others can't be used.
- Auto Scan : Enter Auto, it shows the process of frequency & the number of channels.

Press to select country & Tune Type at first, press to select start or cancel, then press OK button to start or exit Auto Scan.

- TV Manual Tuning: Storage To : Current storage space shows, the following option are available : 1-200. System : Default option depends on country selection. The following option are available : BG, I, DK Current CH : Current channel shows. Search : Can be searched at full channel condition. Frequency : Show the current frequency & follow search or Fine-Tune to adjust.
NOTE : After tuning by hand, make sure to press red button for storage, otherwise all channels searched would not be stored after switching condition.
- Program edit :
There are 3 items in the Preference page : Skip, Type
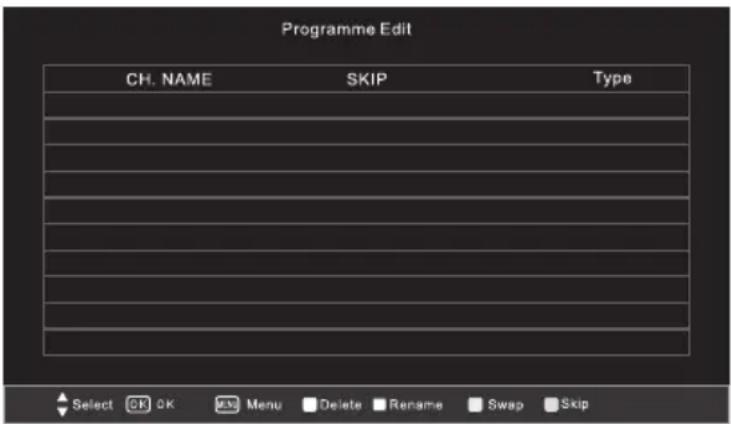
Select : Select your channel name by moving the cursor.
Delete : Delete current channel, as follows :
Press UP/DOWN buttons to choose the channel which you want to delete, then press RED button to delete the current channel.
GREEN Button(Optional):
Modify current channel name, only used in ATV mode.
- At normal condition, press GREEN button to enter RENAME mode.
- At RENAME Mode :
MENU : Press to exit RENAME mode, back to normal.
EXIT : Press to exit menu.
UP/DOWN : Press to switch letters, numbers or signs.
LEFT/RIGHT : Press to switch left & right, can select by circle.
GREEN : Press to exit RENAME mode, return normal condition.
Yellow Button (Optional) :
Channel switching function, ATV available as default.
- At normal condition, enter SWAP mode, & current selected channel is mobile channel X.
- At SWAP mode :
MENU : Press to exit SWAP mode, turn to normal condition.
EXIT : Press to exit menu.
UP/DOWN : Choose switch channels.
YELLOW : If current selected channel is what selected before X, no any other action,
Otherwise, the current channel is channel Y, need to exchange X&Y condition. But the channel number stays 1,2,3,..... order as before.
BLUE Button (Optional) :
Choose if skip the channel when CH+/- channel tuning.
At Non Skip channel, press BLUE button, & Skip the current channel
At skip channel, press blue button to cancel skip.
Picture Setting
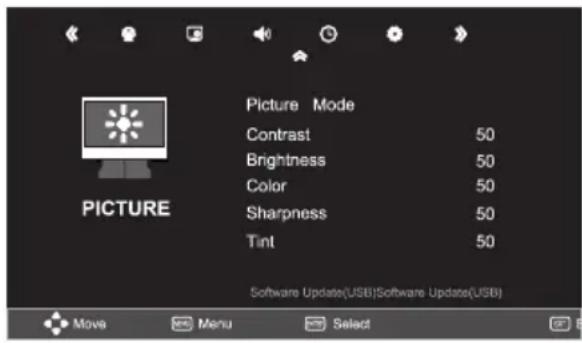
You can adjust picture effects here, such as contrast, brightness & etc.
- Press the "MENU" button on the remote control to enter the OSD menu.
Then press ◀▶ buttons to select the "PICTURE". - Press ▲▼ button to select the desired item to enter.
- Press ◀▶ buttons on the remote control to adjust desired item.
- Press the "MENU" button on the remote control to return upper menu.
Picture Mode : Press ◀▶buttons to select. The following option are available.
"Standard, Mild, User, Dynamic"
Contrast : Adjust image contrast.
Brightness : Adjust image brightness.
Color : Adjust the color saturation.
Sharpness : Adjust the sharpness level of image.
Tint : Determines the tint of the screen (This is only available with NTSC).
Color Temperature : Adjust the color temperature level of image. The following option are available, "Normal, Warm, User, Cool".
RED/GREEN/BLUE : Press ◀▶ buttons to adjust numeric size, Press MENU button to turn back picture main menu.
Aspect Ratio : Press ◀▶ buttons to select, 16:9, Zoom 1, Zoom 2, Panorama, 4:3
Noise Reduction : Press ◀▶buttons to select On/Off.
Color Temperature

You can select your favorite color temperature.
- Press the "MENU" button on the remote control to enter the OSD menu. Then press
◀▶ buttons to select the "PICTURE"
- Press ▲▼ button to select the "Color Temperature"
- Press ◀▶ buttons on the remote control to choose color temp's value.
- Press the "MENU" button on the remote control to return to upper menu.
User : Adjust the color value.
Normal : Keep the original white color
Warm : Adjust the white color to a little bit red.
Cool : Adjust the white color to a little bit blue.
Remark : The changes you made will be stored automatically.
PC Setting (Only for PC Mode)
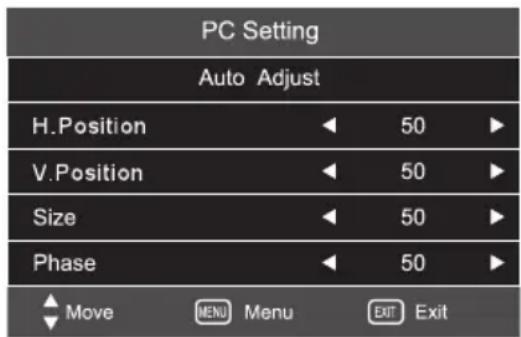
The function only used in PC port to adjust PC position. Enter the screen page with ◀▶ buttons or ENTER button.
- When input PC source, you can go to PC to set up menu.
- Press the "MENU" button on the remote control to enter the OSD menu. Then press ◀▶buttons to select the "PICTURE SETUP" in main menu.
- You can press ENTER buttons to enter PC setup mode after selecting PC setting, & the press ▲▼ buttons to select your desired item press ◀▶ buttons to adjust.
- Press the "MENU" button on the remote control to return to upper menu.
- In PC function operation will instruct more clear.
Auto Adjust : Press ◀▶buttons, TV system adjust by itself, it can adjust, H position, V position, Phase & so on that can make the image in center & display best.
H. Position : Adjust Horizontal Position of the PC Screen.
V. Position : Adjust the Vertical Position of the PC Screen.
Size : Adjust the size of the PC Screen.
Phase : When necessary, adjust the pixel phase of the picture to avoid picture interference.
Sound Setting

You can customize different sound mode to get best effect.
- Press the "MENU" button on the remote control to enter the OSD menu. Then press ◀▶ buttons to select the "SOUND"
- Press ▲▼ button to select the desired item to enter.
- Press ◀▶ buttons on the remote control to increase or decrease the value of desired item.
- Press the "MENU" button on the remote control to return to upper menu.
Sound Mode : Press ◀▶buttons to select one of the following options "Standard, Music, Movie, Sports User".
Treble : Adjust treble effect.
Bass : Adjust bass effect.
Balance : Adjust balance effect.
Auto Volume : (Auto volume control, when you turn on the TV, this feature allows the TV to automatically adjust the sound output from level to the previous level of last time when you turned off the TV) : On/Off.
Surround Sound : Select it to enter, then you can select Off or On.
SPDIF Output : Select it to enter, then you can select option PCM/RAW/OFF
For HD channel select only PCM
Music Only : Press OK (ENTER) only listen sound, no picture, to exit Press any key on remote control.
Time Setting
You can set the TV's time & you should set time if you use the automatic On/Off times.

- Press the "MENU" button on the remote control to enter the OSD menu.
Then press ◀▶ buttons to select the "TIME".
- Press ▲▼ button to select the desired item to enter.
- Press ▲▼ buttons on the remote control to adjust desired item.
- Press the "MENU" button on the remote control to upper menu.
Sleep Timer : Press◀▶ buttons to select your desired item (Off, 240 min., 180 min., 120 min., 90 min., 60 min., 30 min., & 10 min.)
Auto Sleep : Within 10 min. there is no signal, the TV will auto sleep
Clock
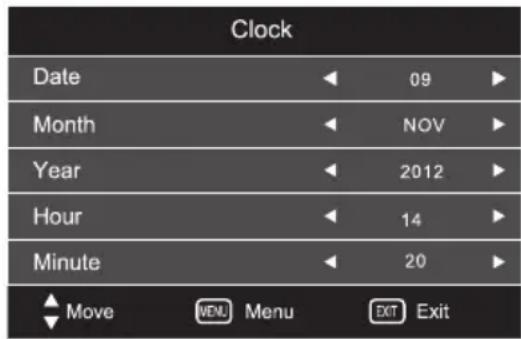
- Press the "MENU" button on the remote control to enter the OSD menu.
Then press ◀▶ buttons to select the "TIME". - Press ▲▼ button to select CLOCK, then press ENTER button to enter.
- Press ▲▼ buttons to select the desired item.
- Press the "MENU" button on the remote control to return upper menu.
Off Time

- Press the "MENU" button on the remote control to enter the OSD menu.
Then press ◀▶ buttons to select the "TIME".
- Press ▲▼ button to select Off Time, then press ENTER button to enter.
- Press ▲▼ buttons to select the desired item, then press ◀▶ buttons on the remote control to set the time.
- Press the "MENU" button on the remote control to return upper menu.
MENU OPERATION
On Time

- Press the "MENU" button on the remote control to enter the OSD menu.
Then press ◀▶ buttons to select the "TIME". - Press ▲▼ button to select On Time, then press ENTER to enter.
- Press ▲▼ buttons on the remote control to adjust desired item, then press ◀▶ buttons on the remote control to set the time.
- Press the "MENU" button on the remote control to return to upper menu.
Option Setting (ADVANCE)
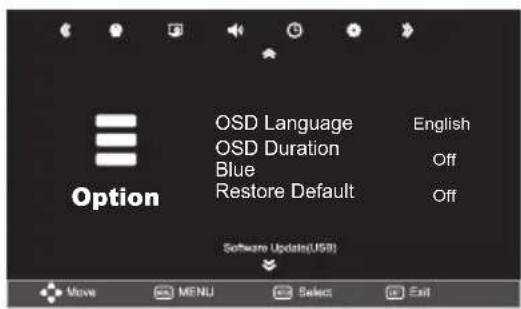
You can adjust the OSD language, OSD Duration
- Press the "MENU" button on the remote control to enter the OSD menu, then press ◀▶ buttons to select the "OPTION" (advance).
- Press ▲▼ button to select the desired item to enter.
- Press ▲▼ button on the remote on the remote control to return to upper menu.
OSD Lanugage : Press ◀▶ buttons to select the OSD language.
Menu Time : Press ◀▶ buttons to select your desired item (Off, 5S, 10S, 15S, 30S, 45S, 60S, Always).
Blue Screen : If no signal is being received or the signal is very weak, a blue screen automatically replaces the noisy picture background. Press◀▶ buttons to select On/Off.
Note : Restore factory default will clear all the programs & passwords
Remote Controller Media
| Button | Description |
| ■ | Stop / Playback |
| ▶I | Play / Pause |
| ◀◀ ▶▶ | Skip a scene or music |
| |◀◀ ▶▶| | Go back to the previous or skip to the next |
| ▲▼ ◀▶ | Press to select item |
| ENTER | Press to confirm an action (For example: copy, paste, etc.) |

Media Play
When selecting the USB input mode & input your USB, you can play the USB. There are 4 items in the preference page : PHOTO, MUSIC, MOVIE, TEXT.
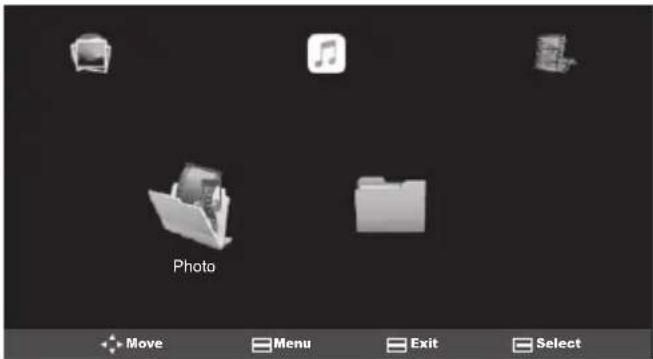
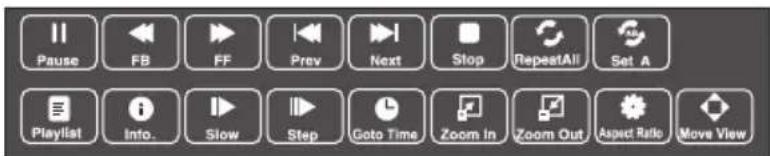
Note : Select the picture & press PLAY button to play after exiting music play mode. When playing a movie you can press the "ENTER" button, then the function menu will appear on the screen. You can select you desired item.
The supported file format of media playing:
| File Type | Supported File Format | File Name |
| PHOTO | BMP / JPEG / PNG | .jpeg / .bmp |
| MUSIC | WMA / Mp3 / Mp4 / AAC | .mp3 / .wma |
| MOVIE | MPEG1 / MPEG2 / MPEG4 / RM / RMVB | .mpg / .dat / .vob |
| TEXT | TXT | .txt |
Note: Not compatible with HDD. The file you played needs license for on external source (customer should check this point) or it will not be played.
Establishing a wireless Internet connection
Settings > Network > Open Network Settings > Wireless
Make sure that you have the wireless router's SSID (name) and password settings before attempting to connect, and then follow the directions on the screen.

The image on your TV may differ from the image above depending on your model and geographical area.
If there is no wireless router found, select Add Network at the bottom of the list and enter the network name (SSID).
If a wireless router has a WPS or PBC button, select Use WPS at the bottom of the list and click the button. Then the TV is automatically connected.
Checking the Internet connection status
Settings > Network > Network Status
View the current network and Internet status.
Press ⬆ key on the remote control to show the home page.
- Press ▲/▼,◀/▶ key to select an application.
- Press "OK" key to run the application.
- Press "Return(⃗)" key to return to previous page.
Special Tips
The operations in smart mode are complicated. The user can install Apps with different operation methods, & the operations described in this manual are for reference only. Certain functions are invalid from the remote control. For more convenient operation, please operate with USB mouse & keyboard.
Display Mode
If the signal from the system equals the standard signal mode, the screen is adjusted automatically. If the signal from the system does not equal the standard signal mode, adjust the mode by referring to your videocard user guide, otherwise there may be no video. For the display modes listed below, the screen image has been optimized by manufacturer.
| Resolution | Vertical Frequency (Hz) | Mode |
| 1024x768 | 60Hz | SVGA |
| 1366x768 | 60Hz | XGA |
| 800x600 | 60Hz | WXGA |
INSTRUCTIONS FOR INTELLIGENT PLATFORM OPERATION
Quick Start
Before using this device, please get familiar with the operations below for better experience.
Mouse Control (not this button in the remote but an externally connected mouse)
- Click the mouse & release immediately.
- Press & hold, Click the mouse & hold for at least three seconds.
- Clicking the left mouse key has the same effect as pressing "OK" key on the remote control.
- Clicking the right mouse key the same effect as pressing "Return" key on the remote control.
Language input setting (IME)
Language : Select the system language, select Settings > IME > Language Setting, & press "OK" key. press "▲/▼" key to select the desired language, & then press "OK" key.
Selecting Input Method : In the smart mode, select Settings > IME > Update Input Method, & integrated "Android Keyboard" & "Google play in Input Method", you can also download & install third party input method.
Setting System Time : In the smart mode, select Settings > Date & Time > Set Date & Time
Automatically from the internet, press "OK" key & the system update the clock from the network automatically, if the TV set isn't connected to the network, you can set the system time manually.
Screenshot : Before screen shooting, please insert the USB mass storage device into the USB interface, & press "SCREENSHOT" key. After screen shooting, the picture are saved in the ";\Pictures\Screenshots" folder in the USB mass storage device.
Smart Applications
Browser : You can use the browser to show text, video, audio & other information on the Internet. Before accessing the Internet, please connect the internet, please connect your TV set to the internet refer to "Settings > Manage Networks" for details

| 1. Back to the previous webpage | 5. Close the current webpage window | 9. Input option of URL |
| 2. Go forward to the next webpage | 6. Add a new webpage window | 10. Menu option of browser |
| 3. Refresh the webpage | 7. Input box for URL | 11. Option for viewing bookmark |
| 4. Webpage window of the browser | 8 Option for adding a bookmark |
- How to access web address? press ▲/▼ ◀ key to select the address bar, & type the web address in the address bar, then select 【Go】 icon in the input method, & press "OK" key to access the web address.
- How to save a page in the Bookmarks? Select the ☆ on the browser interface, & press "OK" key to enter the browser tab & web address. Select Account, & press "OK" key. Press "▲/▼" key to select the account for storage, & then press "OK" key. Select OK, & then press "OK" key to add the bookmark.
- How to copy & paste the text in the web page? Place the cursor on the text to copied, press & hold the left mouse key. When the pair of selecting cursors appears on the screen, drag the cursor to select the text. Select copy on the screen, & click the left mouse key. Select the target position, press & hold the left mouse key. Select the target position, press & hold the left mouse key, & click Paste in the popup dialog box.
INSTRUCTIONS FOR INTELLIGENT PLATFORM OPERATION
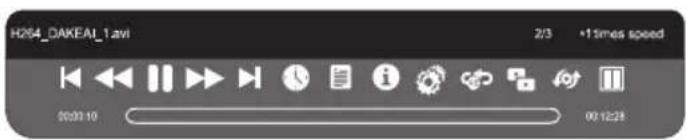
| Play the previous video. | |
| Select the speed of fast rewind | |
| Pause / Play the video | |
| Select the speed of fast forward | |
| Play the next video | |
| Select the starting time point of watching | |
| View the playing list | |
| Show details of the video |
| Playing setup, show/hide subtitle & adjust the audio progress in this option. | |
| Set A-B repeat playing, set point A & point B, & the video will repeat between A & B. | |
| A dual-screen display, start or off dual display function. | |
| Select playing screen. | |
| Select dual display window display mode. |
While playing press "OK" key to show the menu options as in the picture above, select an icon & press "OK" key to perform the operation, you can press "Return" key to exit playing, or ",",",",",",","," keys on the remote control to perform shortcut operation.
Settings
Manage Networks : In smart mode, select Network in settings, & press "OK" key to enter.
- Ethernet Setting : Before using wired network, connect one end of the network cable to the network interface of the TV set & connect the other end to the router.
- Select Ethernet Setting & press " ▶" key to enter.
- If the router setting enables obtaining IP address automatically, select The Automatic Acquisition IP
Address, press "OK" key & your TV will obtain the IP address automatically. If the router disables obtaining IP address automatically, you can connect to the network in the following steps.
- Select IPv6, & press "OK" key to enable / disable IPv6.
- Select IP Address, & assign a valid gateway for the device.
- Select Default Gateway, & assign a valid gateway for the device.
- Select First DNS & Second DNS & assign a valid DNS server address for the device.
- Select Save, press "OK" key & the system prompts setup is successful.
Wireless Setting
- Select Wireless, & press " " key.
- Select Wi-Fi, & press "OK" key to enable wireless network. If the scanned network has the icon, it doesn't require password to connect, if the scanned network has the icon, you need to enter the valid password to access the network.
- Select a network in the list & press "OK" key.
- Select passwords type the password in the input box. Select connect & press "OK" key.
- If the router setting enables obtaining IP address automatically, select The automatic acquisition IP Address, press
"OK" key & your TV will obtain the IP address automatically. If the router disables obtaining IP address automatically, you can connect to the network in the following steps.
- Select IP address, & assign a valid IP address for the device.
- Select Subnet Mask & assign a valid subnet mask for the device.
- Select Default Gateway & assign a valid gateway for the device.
- Select First DNS & Second DNS & assign a valid DNS server address for the devices.
- Select Save, press "OK" key & the system prompts setup is successful.
INSTRUCTIONS FOR INTELLIGENT PLATFORM OPERATION
Multimedia Player

In smart mode, select Multimedia in the main interface, & press "OK" key to run. Select the file type from all, picture, song & video in the left.
Playing files in local disk device :
Before playing files in the local disk, insert the USB mass storage device into the USB interface. Select local disk device in the file directory in the center, & press "OK" key to enter. Select Back in the directory, press "OK" key to return to previous folder. Select the target folder, press "Return" key to return to the desktop.
Attention :
- Non standard USB devices may not be recognized. In this case, please replace with a standard USB device.
- The stream media system has certain restrictions on the format of files. The viewing may be abnormal if it is out of the system restriction.
- Do not remove the USB device while playing or the system or device may have problem. Before removing USB device, please turn off power supply.
- The system supports standard USB 1.1, USB 2.0, USB 3.0 devices, such as USB mass storage devices & removable hard drives.
- The maximum output current of the USB port of this device is 500 mA & self-protection will be enabled if it is beyond this limit. Please use external power supply if an external device of higher current will be connected.
- The system is complicated, when it is reading or playing files, the screen may be still or certain functions may be invalid due to the compatibility & stability of the USB device, in this case please turn off the device & re-initialize the system.
Media Player UI icon introduction
Picture Player Menu Options

| Play the previous picture | |
| Pause / Play lantern slide | |
| Play the next picture | |
| Zoom in the picture |
| Zoom out the picture | |
| Rotate 90° left | |
| Rotate 90° right | |
| Show detail of the picture |
Music Player Menu Options

| Play the previous track | |
| Pause / resume music playing | |
| Play the next track |
| Set the repeat playing mode : All, Single, Random | |
| View the playing list. | |
| Show details of the music |
Video Player Menu Options
INSTRUCTIONS FOR INTELLIGENT PLATFORM OPERATION
Connecting a Mobile Device : View a mobile device's screen by connecting the mobile device to your TV or network.
Using Miracast (Screen Mirroring)
You can play media content saved on your mobile device on the TV's screen and share contents by connecting with the mirroring function.
-
Launch the Miracast (Screen Mirroring) function on your mobile device. The mobile device searches for available devices to connect to.
-
Select the TV from the list. The TV connects to the mobile device.
If your mobile device does not find your TV, turn the TV and the mobile device off and then on and try again.
If there are multiple TVs, you can easily select any of different TV names in ⓗ > ⚙ Settings > Network > Device Name
Backup / Update : Backup or update the device.
Remark : Before resetting, please back up your personal data, which will be lost after reset.
About : View the Models, System Version, Memory Information.
E-mail : You can log in private or business e-mail account, & receive & send e-mail.
Apk Installer : The Apk installer helps users manage applications, & allows users to install or uninstall apps in local disk.
Note : Select Settings > Application Manager > Settings to enable/disable Allow installation of non-market apps & set Default Installation Location, or operate All applications.
- How to install an application ? Enter Apk Installer, select install & press "OK" key to enter. Select the path of the target installation file in local disk, locate the installation package in the right panel, & then press "OK" key.
- How to uninstall an application ? Select manage, & press "OK" key to enter. Select the application to be removed, & press "OK" key. Select Uninstall, click "OK" key, & the system will uninstall the application automatically.
IMPORTANT STATEMENT ON NETWORK SERVICES
All contents & services obtained from this TV set belong to the third party & are protected by laws on copyright, patent right, trademark right and / or other intellectual property right. The said contents & services are only for your non-commercial purposes. It is not allowed to use any content or service without the authorization of the content owner or the service provider. Our company will undertake no liability for any direct, indirect & accidental losses or damages caused by you or a third party's access to any content or service or any information or any third party software through this set under any circumstances. Third party service may be changed, deleted or stopped without prior notice. Our company neither implies nor guarantees the continuous availability of some service or content within any period of time. Our company is not held responsible for services related to the said service & content. Besides, we will not bear any liability for client service. Please directly contact relevant content & service providers if you have any problem & service request concerning relevant service or content.
Note : This user manual is for reference only. Specifications are subject to change without notice.
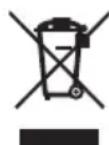
If at any time in the future you should need to dispose of this product please note that, Waste electrical products should not be disposed of with household waste. Please recycle where facilities exist. Check with your Local Authority or retailer for recycling advice. (Waste Electrical & Electronic Equipment)
TROUBLESHOOTING
The TV Won't Connect to the Internet
When the TV has difficulties connecting to the Internet, these steps may help resolve the problem.
| The problem Try this! | |
| The TV cannot connect to your network or apps (for Internet compatible models only). | Make sure the TV has a network connection Ⓜ (> ⚙ Settings Network > Network Status ).Contact your Internet service provider. |
| The wireless network connection failed. | Confirm your wireless modem/router is on and connected to the Internet. |
| The wireless network signal is too weak. | Position your wireless router, modem router, or access point in a central location.Avoid putting it in a corner.Use a wireless repeater to get an instant boost in your wireless signal strength.Place the repeater halfway between your wireless router and your TV.The most common wireless technology, 802.11g (wireless-G), operates at a frequency of 2.4 GHz. This frequency is widely used by many cordless phones, microwave ovens, baby monitors, garage doors, and other wireless devices. Reduce interference by not using or turning off wireless devices that use the 2.4 GHz frequency. Instead, use devices that communicate via the 5.0 GHz frequency. |
| The software update over the Internet has failed. | Check the network connection status Ⓜ ( ⚙ Settings Network Network Status ).If the TV is not connected to a network, connect it to a network.The upgrade stops if you already have the latest software version. |
Other Issues
Use these procedures to resolve other issues that may occur.
| The problem Try this! | |
| The TV is hot. | Watching TV for an extended period of time causes the panel to generate heat. The heat from the panel is dissipated through internal vents running along the top of the TV. The bottom, however, may feel hot to the touch after extended use. Children watching TV need constant adult supervision to prevent them from touching the TV. This heat, however, is not a defect and does not affect the TV's functionality. |
| The picture won't display in full screen. | HD channels will have black bars on either side of the screen when displaying upscaled SD (4:3) content.Black bars will appear at the top and bottom of the screen when you watch movies that have aspect ratios different from your TV.Adjust the picture size options on your external device or set the TV to full screen. |
| The "Mode Not Supported" message appears. | The output resolution of the attached device is not supported by the TV. Check the TV's supported resolutions and adjust the external device's output resolution accordingly. |
| The Captions item in the TV is grayed out. | When an external device is connected with an HDMI or Component cable, the Caption is unavailable. Adjust the caption setting on the external device. |
| The TV smells of plastic. | This smell is normal and will dissipate over time. |
TROUBLESHOOTING
| Problem Possible Causes Solutions | ||
| Snowflake spots occur in the TV images & there is noise in accompanying sound. | - The antenna connector is loose, or the cable damaged.- The antenna type is improper.- The antenna direction or position is inaccurate.- The signal is weak. | - Check if the antenna plug is loose or the cable is in good condition.- Check the antenna type (VHF/UHF).- Adjust the direction & position of the antenna.- Try to use signal enhancer. |
| There is neither display nor sound on the screen. The indication light is not on. | - The power plug is loose or the power supply is not connected.- The power switch is not turned on. | - Check if the power line is connected.- Press the “●” button on the panel. |
| Dotted line or strip disturbance occurs in TV images. | - The signal is disturbed by car, neon light, electric hair dryer, etc.. | - Do not use electric hair dryer aside the TV set & adjust the antenna direction to reduce disturbance. |
| Double images occur on the TV screen. | - TV singals are reflected by surrounding high mountains or mansions.- The direction of the antenna is inaccurate. | - Use high oriented antenna & use the Fine Tune function of “TV”.- Adjust the direction of the antenna. |
| The images are colorless. | - The color saturation is adjusted too low. | - Enter “PICTURE” setting to increase color saturation. |
| The TV has no accompanying sound. | - The volume is set too low.- The sound become mute. | - Adjust the volume to a proper degree.- Press “MUTE” key on the remote control to cancel mute mode. |
| There is no display on the PC, with the prompt of “No Signal Input”. The red indicator light is blinking. | - The signal connecting cable is loose or falls off. | - Check if the signal connecting cable is loose or falls off. Reconnect it. |
| Images displayed on the PC deviate. The screen is not full or is exceeded. The display is fuzzy. | - The adjustment is improper.- The display mode in inaccurate. | - Use automatic adjustment function.- Enter “PC Image Mode” adjustment level or vertical position.- Use the recommended mode. |
| The remote control distance is short or out of control. | - The remote control receiving window of the machine is blocked by some object.- The battery of the remote control is low. | - Remove the object to avoid blocking the remote control receiving window.- Replace the battery. |
| The browser cannot access any link. | - Errors occur in network parameter configuration.- The network connection is improper.- Network service is not activated. | - Ask the network administration to obtain available IP address & other parameters.- Check if the network connecting cable is normally connected.- Consult the network service provider. |
| Online video play is very slow. | - The network bandwidth is low.- Multiple films are buffered or other files are downloaded at the same time. Several PCs share one network. | - Please upgrade your network bandwidth to a higher one.- Please try to replace with other addressed to obtain better resources. |
| Machine is slow, system crash, can’t operate the machine. | - Too much to run the program.- The external environment (such as lighting, static electricity, etc.) Interfere with the normal work of the machine. | - Disconnect the power supply first, & connect the power supply after about 1-2 minutes, then turn on the TV again. |
| The problem Try this! | |
| The TV is tilted to the side. | Remove the base stand from the TV and reassemble it. |
| The stand is wobbly or crooked. | Make sure the indicator arrows on the stand and stand holder are properly aligned. |
| There is an intermittent loss of audio or video. | Check the cable connections and reconnect them.Loss of audio or video can be caused by using overly rigid or thick cables.Make sure the cables are flexible enough for long term use. If you are mounting the TV to a wall, we recommend using cables with 90-degree connectors. |
| There are small particles on the TV's bezel. | This is part of the product's design and is not a defect. |
| The TV is making a popping noise. | The expansion and contraction of the TV's outer casing may cause a popping noise.This does not indicate a product malfunction. The TV is safe to use. |
| The TV is making a humming noise. | Your TV utilizes high-speed switching circuits and high levels of electrical current.Depending on the TV's brightness level, the TV may seem slightly noisier than a conventional TV.Your TV has undergone strict quality control procedures that meet our demanding performance and reliability requirements.Some noise coming from the TV is considered normal and is not an acceptable cause for an exchange or refund. |

natural_image
Recycling symbol with a central monitor and four arrows indicating cycle (no text or symbols)This Product falls under e-waste (Management and Handling) Rules, 2011. For proper disposal method, visit our website www.thomsontv.in
thomsontv.in
Toll Free
1800-8438-777




- THOMSON
- CONTENTS
- INTRODUCTION
- WARNINGS AND SAFETY PRECAUTIONS
- Warning:
- Service:
- Location:
- FEATURES
- - SMART LED TV
- SAFETY INFORMATION
- CAUTION
- RISK OF ELECTRIC SHOCK DO NOT OPEN
- Warning
- IMPORTANT SAFETY PRECAUTIONS
- PREPARATION
- Stand Installation
- FUNCTIONAL OVERVIEW
- Front & Side Panel
- Power Light
- Infrared Remote Sensor
- Power
- Menu
- CH-, CH+
- Vol-, Vol+
- Input
- - LAN (Local Area Network)
- - USB
- - HDMI input Terminal
- - VGA(PC IN) Input Terminal
- - PC / HDMI Analog Audio Input Terminal
- - AV 1 & AV 2 In / YPBPR
- - Antenna Input Terminal
- CONNECTIONS
- Installing the remote control batteries
- REMOTE CONTROL
- Power On/Off
- Turning on the TV
- Placing In Standby Mode
- Changing Programmes
- Using the programme selection buttons on the remote control to change programmes
- Using the P+/- buttons to sequentially change programmes
- Using the G button to return to sequentially change programmes
- To turn on the TV
- To turn off the TV
- Channel Selection
- Input Source Selection
- Volume Adjustment
- To change the volume
- To Mute the sound
- On-Screen Displays (OSD) Selection & Adjustment
- CHANNEL :
- Channel Setting (Use for TV)
- - Program edit :
- GREEN Button(Optional):
- Yellow Button (Optional) :
- BLUE Button (Optional) :
- Picture Setting
- Color Temperature
- PC Setting (Only for PC Mode)
- Sound Setting
- Time Setting
- Clock
- Off Time
- MENU OPERATION
- On Time
- Option Setting (ADVANCE)
- Remote Controller Media
- Media Play
- Establishing a wireless Internet connection
- Checking the Internet connection status
- Special Tips
- Display Mode
- INSTRUCTIONS FOR INTELLIGENT PLATFORM OPERATION
- Quick Start
- Language input setting (IME)
- Smart Applications
- Settings
- Wireless Setting
- Multimedia Player
- Playing files in local disk device :
- Attention :
- Media Player UI icon introduction
- IMPORTANT STATEMENT ON NETWORK SERVICES
- TROUBLESHOOTING
- The TV Won't Connect to the Internet
- Other Issues
- thomsontv.in
Brand : THOMSON
Model : 50TH1000
Category : Television