XP702HP - Water pump DuroMax - Free user manual and instructions
Find the device manual for free XP702HP DuroMax in PDF.


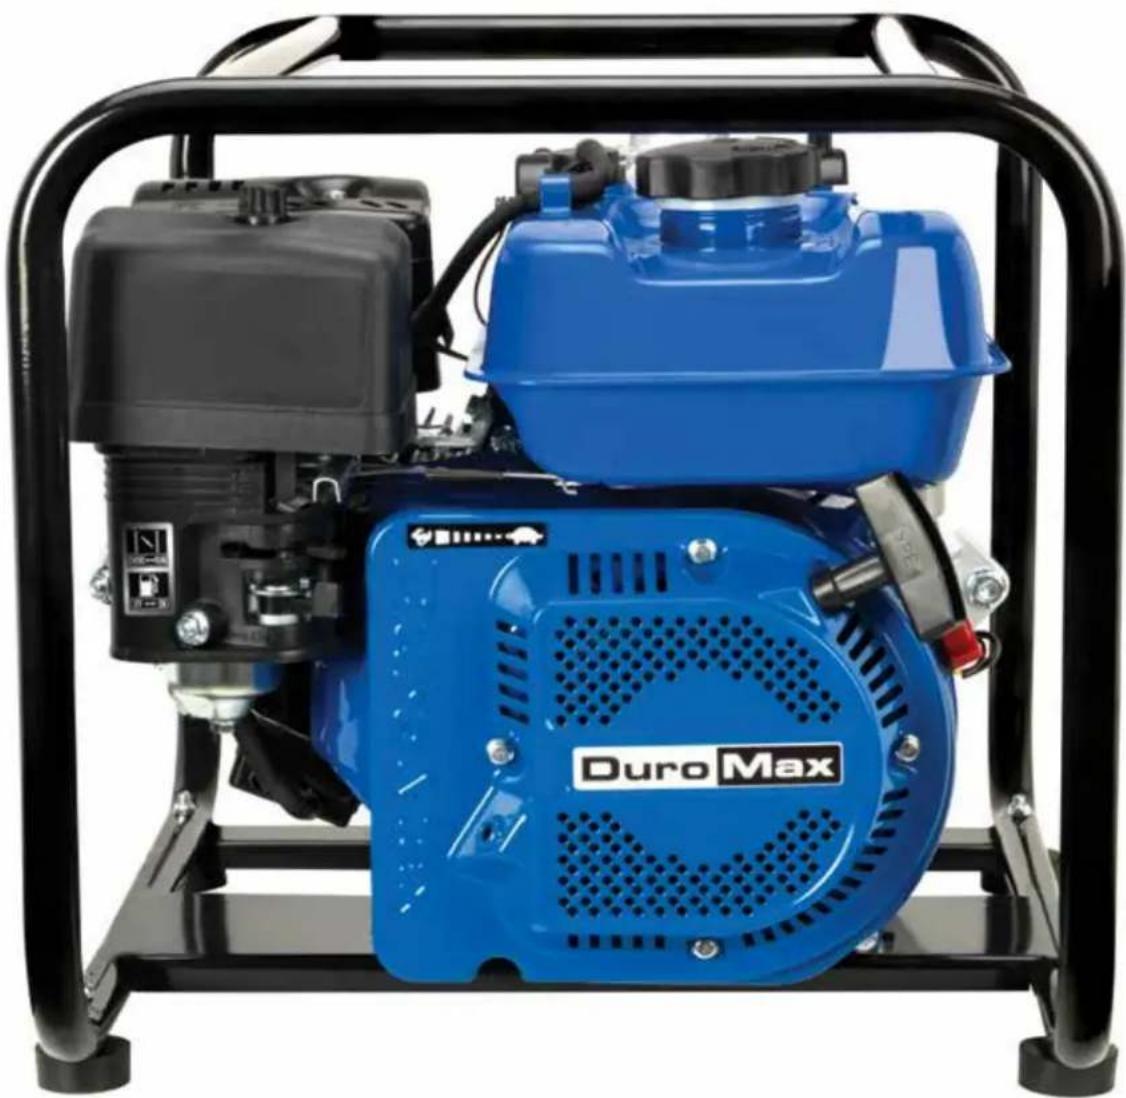
| Product Type | Water Pump |
| Brand | DuroMax |
| Model | XP702HP |
| Inlet Size | 2 inches |
| Discharge Size | 1.5 / 2 inches |
| Max Flow Rate | 70 GPM (265 L/min) |
| Max Delivery Lift | 252 ft (76.8 m) |
| Suction Distance | 23 ft (7 m) |
| Engine Displacement | 208 cc |
| Engine Type | 4-Stroke, OHV, Forced Air Cooling |
| Fuel Type | Unleaded Gasoline (87+ octane) |
| Fuel Tank Capacity | 0.95 US Gal (3.6 L) |
| Oil Capacity | 20 fl oz (0.6 L) |
| Recommended Oil | SAE 10W-30 (break-in: conventional, then synthetic optional) |
| Max Output Speed | 3600 rpm |
| Dimensions (L x W x H) | 29 x 16.5 x 16.5 inches (73.7 x 41.9 x 41.9 cm) |
| Net Weight | 50.7 lbs (23 kg) |
| Starting System | Recoil start |
| Emissions Compliance | EPA / CARB |
| Warranty | 3 years (residential), 1 year (commercial) |
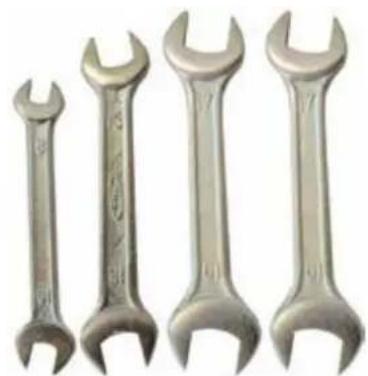
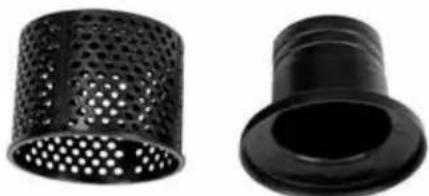
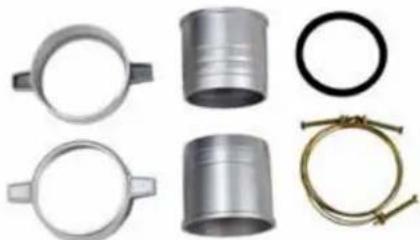
| Included Accessories | Oil funnel with hose, assorted wrenches, spark plug wrench, strainer, hose connectors & clamps |
| Safety Features | Low oil shutoff, carbon monoxide warning, hot surface labels |
| Maintenance Intervals | Oil check before each use; oil change every 3 months or 50 hours; air filter check/clean every 3 months |
| Spark Plug Type | F6RTC (e.g., NGK BPR6ES), gap 0.7-0.8 mm |
Frequently Asked Questions - XP702HP DuroMax
User questions about XP702HP DuroMax
0 question about this device. Answer the ones you know or ask your own.
Ask a new question about this device
Download the instructions for your Water pump in PDF format for free! Find your manual XP702HP - DuroMax and take your electronic device back in hand. On this page are published all the documents necessary for the use of your device. XP702HP by DuroMax.
USER MANUAL XP702HP DuroMax
natural_image
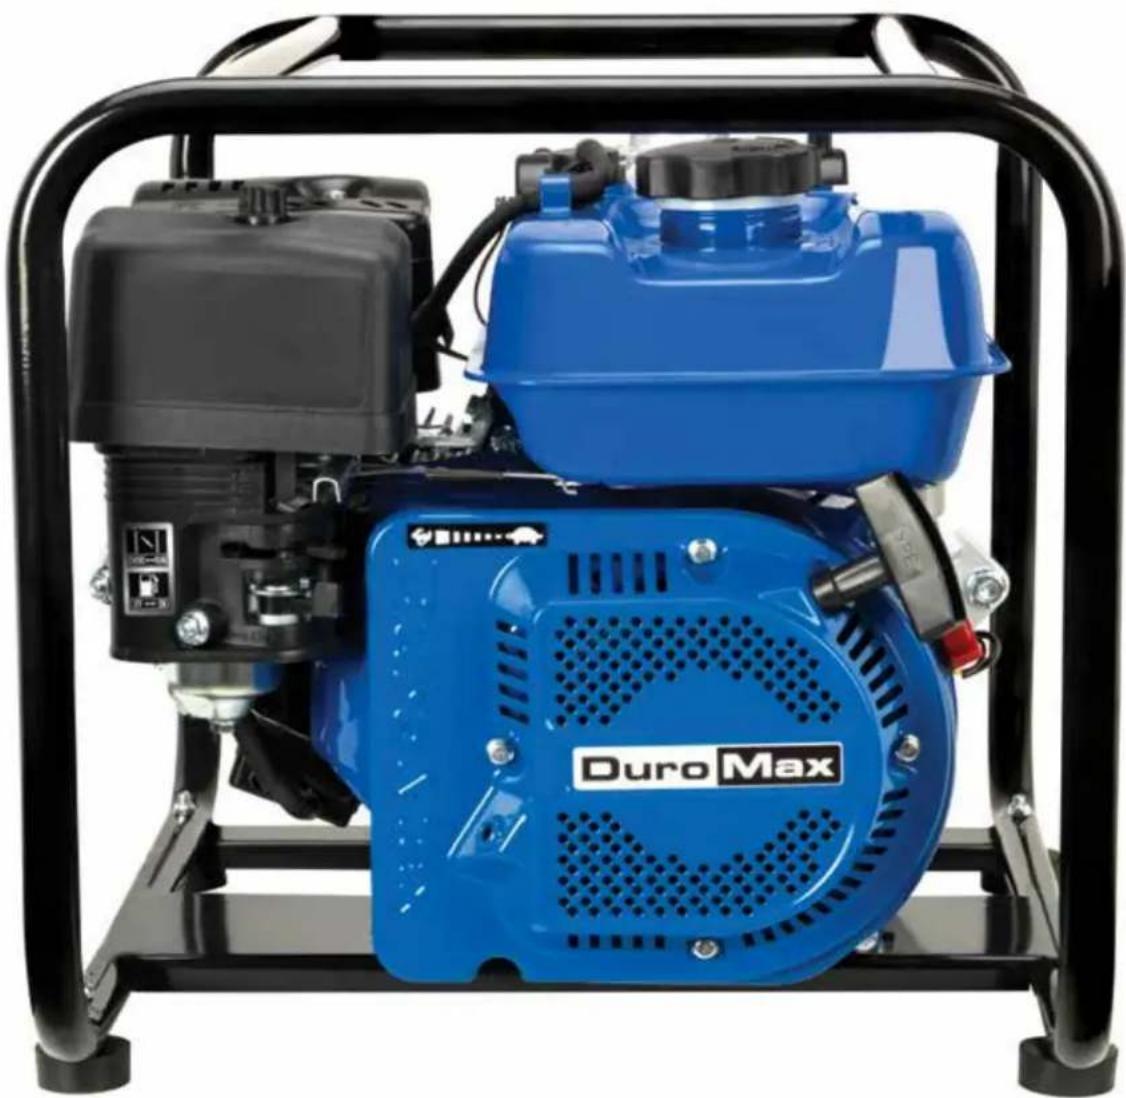
Blue Duro Max pump mounted on a black metal frame, no visible text or symbols on the device body.REV: XP702HP_rev04132023
This manual provides information regarding the operation and maintenance of these products. We have made every effort to ensure the accuracy of the information in this manual. We reserve the right to change this product at any time without prior notice.
5800 Ontario Mills Pkwy
Ontario, CA 91764 USA
www.duromaxpower.com
Call our Customer Care Team Toll Free 8-5 pm PST Mon-Fri
844-DUROMAX



natural_image
Pure blue square with no text, numbers, or symbols



natural_image
Pure blue square with no text, numbers, or symbols


natural_image
Pure blue square with no text, numbers, or symbols


natural_image
Pure blue square with no text, numbers, or symbolsCONTENTS
1. Introduction
Introduction...... 6
General Safety Procedures.... 8
Unit and Purchase Information.... 12
Package Contents 13
Water Pump Components 14
2. Water Pump Setup
Adding Oil 18
Adding Gasoline 19
3. Starting the Water Pump
Check the Oil 22
Check the Gas Level 23
Choose the Right Suction and Discharge Hose.... 24
Prime the Water Pump.... 25
Starting the Water Pump 26
4 Maintenance and Care
Maintenance Schedule.... 30
Break-In Period 31
Maintenance Log.... 31
Checking the Oil 32
Changing the Oil.... 33
Changing the Air Filter 34
Spark Plug Maintenance 36
Emptying the Gas Tank 38
Storing the Water Pump for Same Day Use 40
Storing the Water Pump for Use Within 30 Days.... 41
Storing the Water Pump for Longer Than 30 Days.... 42
Specifications.... 44
5. Troubleshooting
Basic Troubleshooting 47
CONTENTS
-
Warranty 50
-
Contact Information 54
For more information and resources on this model scan the QR code below to link to our website product information page.

Duro
NEXT GENERATION
Max
POWER SYSTEMS
POWERING EVERYONE...
ANYWHERE!

THE DUROMAX WAY
The DuroMax Way is more than just a brand, it is our understanding and appreciation of just how important power can be to someone without it...

natural_image
Family of four sitting on stone steps, smiling and interacting (no text or symbols visible)DUROMAX FOR HOME
Electricity in our home not only provides comfort but safety as well. From keeping the heat or A/C on to keeping our food cold, power is essential to our daily lives. Inevitability when disaster strikes and we are left without power for a prolonged period of time, our way of life is put at risk. This is by far the most critical time for reliable portable power.

natural_image
Two construction workers in hard hats and casual clothing working on a steel structure (no visible text or symbols)DUROMAX FOR WORK
On the job site, portable power allows you the ability to get work done in remote locations when traditional power sources are usually unavailable. Equipment like table saws, sanders, and work lights are a necessities and portable power can play a critical role in getting a job done successfully and efficiently.

natural_image
Family of four gathered outdoors near a campfire, with a camouflaged vehicle in the background (no visible text or symbols)DUROMAX FOR PLAY
Camping outdoors in a remote location can get one in touch with nature and allow them to forget the stress of the day-to-day grind. Here, portable power can provide comfort as well as safety. With portable power, you can keep your cellphone charged, light up your campsite, or even brew a cup of coffee, all while being miles from civilization..
The DuroMax Way is a commitment to excellence. This vision is focused on the quality, reliability, and durability of our products combined with outstanding customer service. We understand that having dependable power whenever and wherever you need it provides comfort, safety, and peace of mind. It is through this philosophy that DuroMax achieves our vision of...
POWERING EVERYONE... ANYWHERE!
INTRODUCTION
DuroMax Power Equipment is headquartered in Ontario, California and is the industry's leader in dual fuel portable water pump technology. In addition to a full assortment of generators ranging from digital inverters to large 15,000-watt portable standby units, our product line includes pressure washers, engines, pumps, and accessories.
The foundation of our company is built on quality, reliability, durability, and customer service. At DuroMax our vision is simple, we are committed to Powering Everyone... Anywhere!


STOP
Please do not return to the store.
DuroMax representatives are ready to help you with any questions, concerns, or issues about your new product. We can guide you through assembly, start up, and how to operate your new generator. We want you to be able to put your new generator to use right away!
CALL US BEFORE YOU CONSIDER RETURNING THE PRODUCT!
TOLL-FREE 1-844-DUROMAX
Notice Regarding Emissions
Engines that are certified to comply with U.S. EPA emission regulations for SORE (Small Off-Road Equipment), are certified to operate on regular unleaded gasoline and may include the following emission control systems: (EM) Engine Modifications and (TWC) Three-Way Catalyst (if so equipped).
GENERAL SAFETY PROCEDURES

SAFETY ALERT SYMBOL
The safety alert symbol is used with one of the safety words (DANGER, WARNING, or CAUTION) to alert you of hazards. Please pay attention to these hazard notices both in this manual and on the engine.
Please familiarize yourself with the following safety symbols and words:
- DANGER: Indicates a hazard that will result in serious injury or death if instructions are not followed.
- WARNING: Indicates a strong possibility of causing serious injury or death if instructions are not followed.
- CAUTION: Indicates a possibility of personal injury or equipment damage if instructions are not followed.

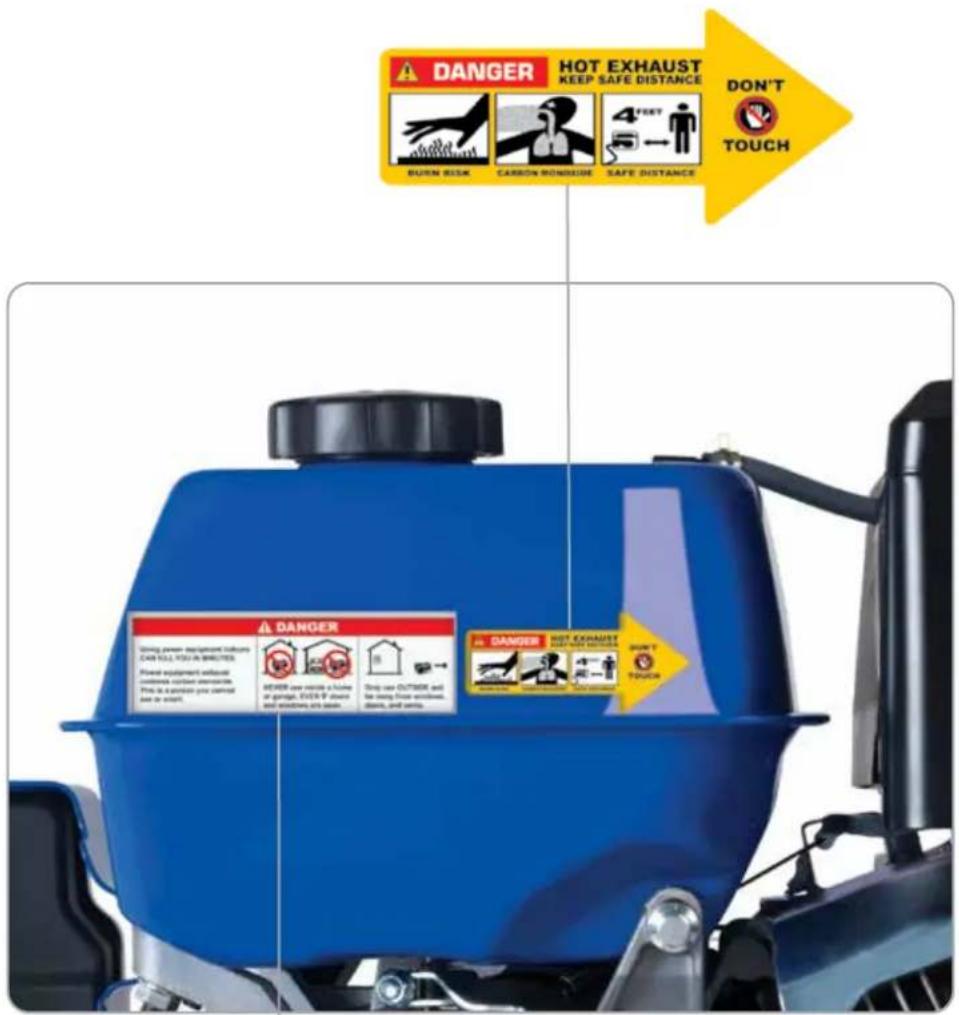
DANGER: This water pump produces poisonous carbon monoxide gas when running. This gas is both odorless and colorless. Even if you do not see or smell gas, carbon monoxide may still be present. Breathing this poison can lead to headaches, dizziness, drowsiness, and eventually death.
• Use outdoors ONLY in non-confined areas.
- Keep several feet of clearance on all sides to allow proper ventilation of the water pump.

WARNING: The exhaust from this product contains chemicals known to the State of California to cause cancer, birth defects, or other reproductive harm.

WARNING: This water pump produces heat when running. Temperatures near exhaust can exceed 150^ F ( 65^ C).
- Do not touch hot surfaces. Pay attention to warning labels on the water pump denoting hot parts of the machine.
- Allow water pump to cool several minutes after use before touching engine or areas which heat during use.

WARNING: This water pump may emit highly flammable and explosive gasoline vapors, which can cause severe burns or even death. A nearby open flame can lead to an explosion even if not directly in contact with gasoline.
- Do not operate near an open flame.
- Do not smoke near the water pump.
• Always operate on a firm, level surface.
• Always turn the water pump off before refueling.
- Allow water pump to cool for at least 2 minutes before removing the fuel cap. Loosen cap slowly to relieve pressure in the tank.
- Do not overfill the gas tank. Gas may expand during operation. Do not fill to the top of the tank.
• Always check for spilled gas before operating.
• Empty the gasoline tank before storing or transporting the water pump.
- Before transporting, turn the fuel valve to the off position and disconnect the spark plug.
GENERAL SAFETY PROCEDURES (CONTINUED)
In addition to the above safety notices, please familiarize yourself with the safety and hazard markings on the water pump.

DANGER
Using power equipment indoors CAN KILL YOU IN MINUTES.
Power equipment exhaust contains carbon monoxide. This is a poison you cannot see or smell.
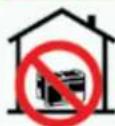
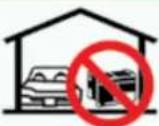
NEVER use inside a home or garage, EVEN IF doors and windows are open.

Only use OUTSIDE and far away from windows, doors, and vents.
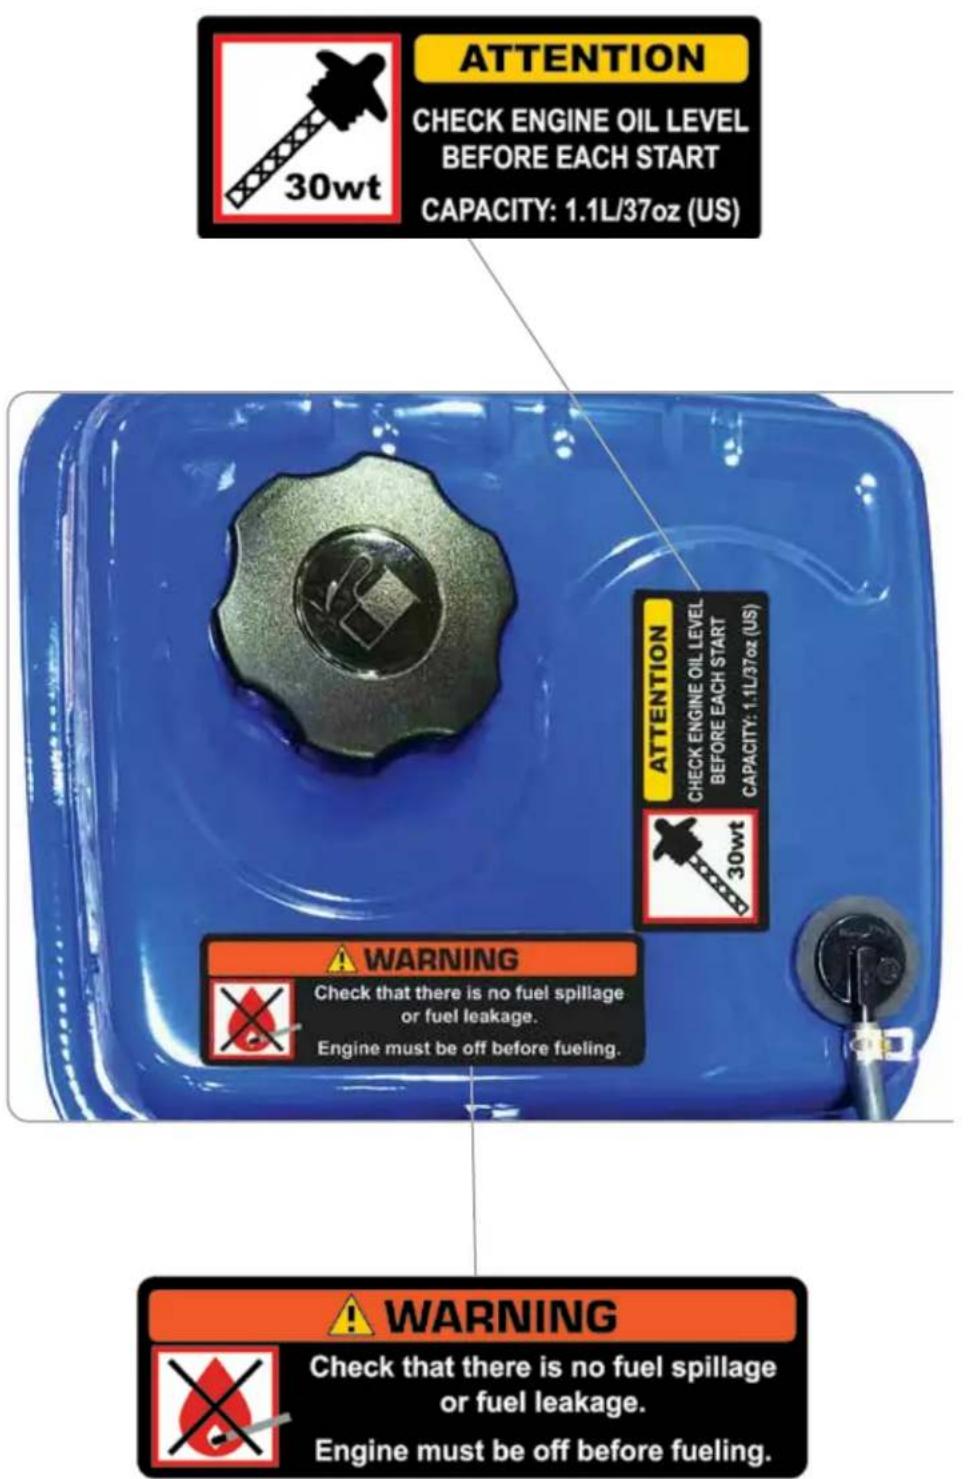
UNIT AND PURCHASE INFORMATION
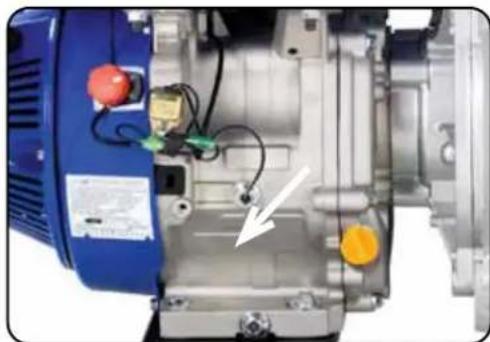
Serial Number
natural_image
Close-up of an electric motor internal components with visible wiring and a white arrow pointing to a component (no text or symbols)Serial number
The serial number is located on the engine block, above and to the left of the oil fill.
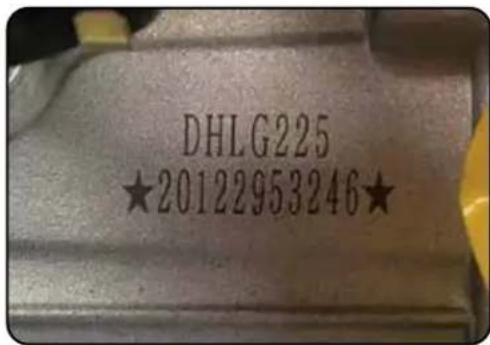
Serial number format
The serial number will be shown in two parts. The engine model, followed by the serial number.
Engine Model:
Serial Number:
STAPLE RECEIPT HERE
A purchase receipt may be necessary for warranty parts or service in the future. If you have a paper receipt, staple it here for easy reference.
If you purchased the unit online, save the email receipt where you can access it, and record your details here for convenience in the future.
Purchase Date: ____
Order Number: ____
Retailer Name: ____
PACKAGE CONTENTS
Your water pump comes with the items listed below. Please check to see that all of the following items are included with your water pump.
natural_image
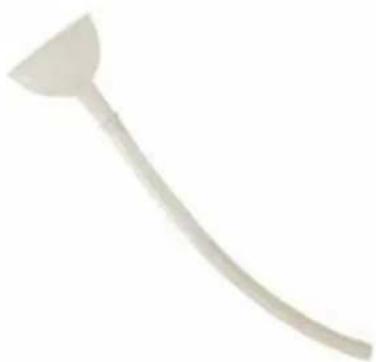
Simple white tool or tool with a curved handle and triangular tip, isolated on white background (no text or symbols)Oil Funnel w/ Hose
Used to add oil to the water pump without messy spills.
natural_image
Four metallic wrenches arranged in a row, no text or symbols visible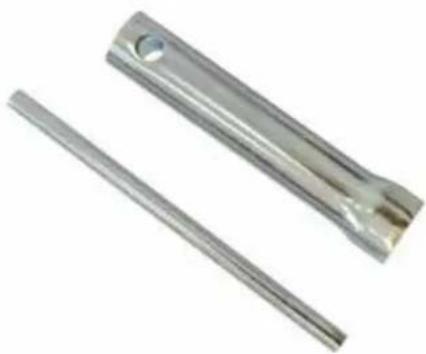
natural_image
Two metallic cylindrical metal rods, one upright and one straight, with no visible text or markings.Spanner Spark Plug Wrench
Assorted wrenches used in water pump maintenance and assembly. 10mm/12mm, 13mm/15mm, and 17mm/19mm.
Used in spark plug maintenance, inspection, and installation.
natural_image
Two black plastic mesh components with perforated and smooth surfaces (no text or symbols visible)Strainer
Used to help catch solid debris prior to entering the water pump.
natural_image
Collection of metallic mechanical components including rings, cylinders, and coiled springs (no text or symbols visible)Hose Connectors & Clamps
Used to secure the intake and discharge hose to the water pump.
Note: Actual tools may differ in appearance or design from the image shown.
WATER PUMP COMPONENTS
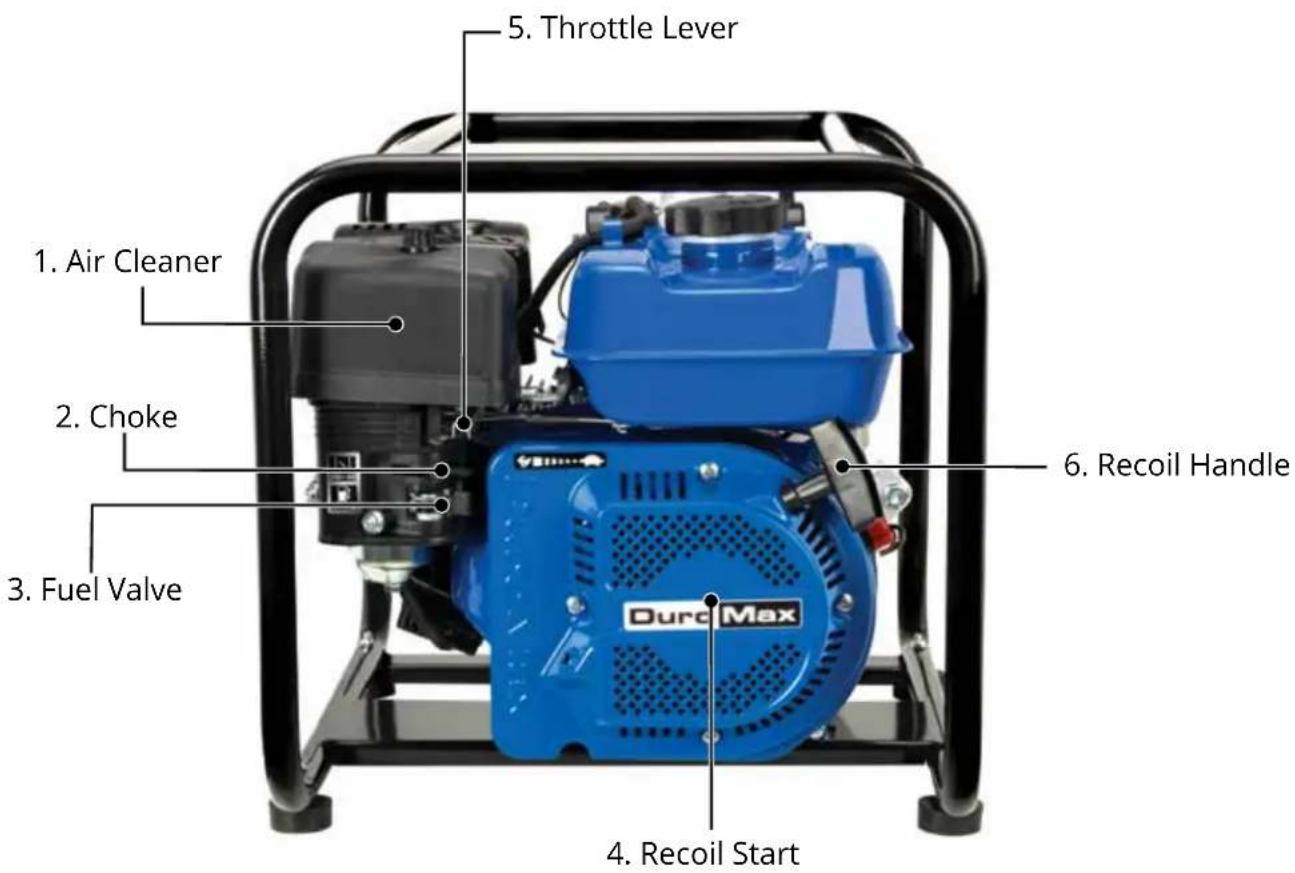
- Air Cleaner - A removable, cleanable, oiled, element that cleans the air going into the engine.
- Choke - An ON/OFF choke lever that controls the fuel air mixture.
- Fuel Valve - An ON/OFF valve that allows gasoline to the fuel switch.
- Recoil Start - Easy pull recoil start to start the engine.
- Throttle Lever - A throttle lever that controls the engine speed.
- Recoil Handle – Easy pull recoil handle used to engage the recoil start and start the engine.
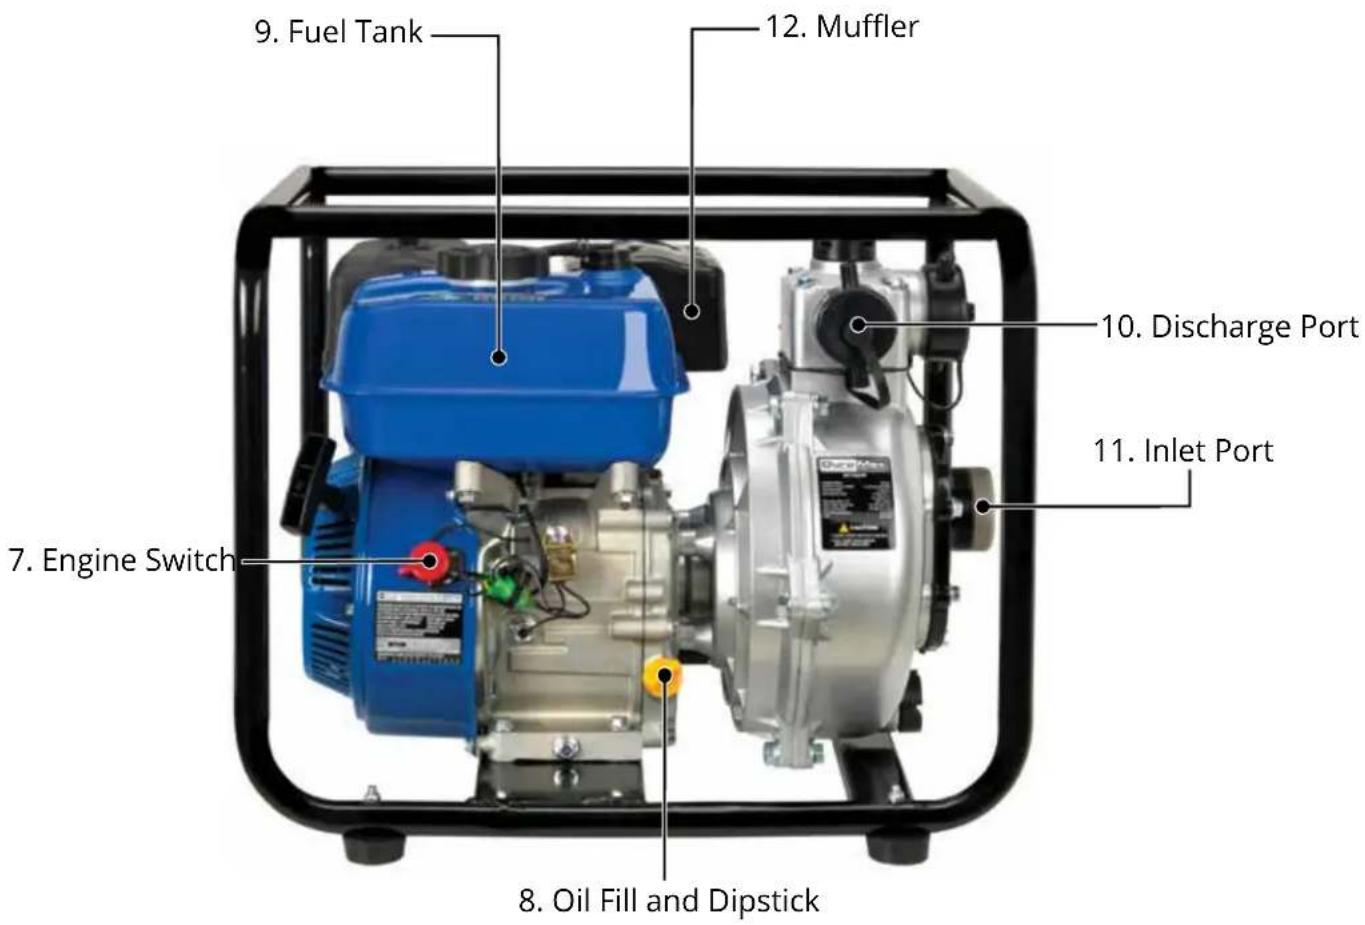
- Engine Switch – An easy to use switch used to turn the water pump ON or OFF.
- Oil Fill and Dipstick - Use to add or check the oil.
- Fuel Tank - All metal gasoline fuel tank.
- Discharge Port - A discharge port used for attaching the discharge hose.
- Inlet Port – An inlet port used for attaching the suction hose.
- Muffler - A noise dampening component that helps lower the engine decibel level.
Duro
NEXT GENERATION
Max
POWER SYSTEMS
POWERING EVERYONE...
ANYWHERE!
natural_image
Blue Duro Max pump mounted on a black metal frame, no visible text or symbols on the device body.WATER PUMP SETUP
Proper setup of your water pump will get you going as soon as possible while making sure you and your equipment are safe and cared for.
Step 1 - Adding Oil
The water pump requires engine oil to operate properly. The water pump, when new from the package, contains no oil in the crankcase*. You must add the proper amount of oil before operating the water pump for the first time. This amount is equal to the oil capacity of the engine crankcase:
| Model Number XP702HP | |
| Engine Oil Capacity 20 | fl. oz. (0.6 L) |

WARNING: Do not apply engine oils with additives or 2-stroke gasoline engine oils; they don't have enough lubrication and may shorten the engine's service life.
other
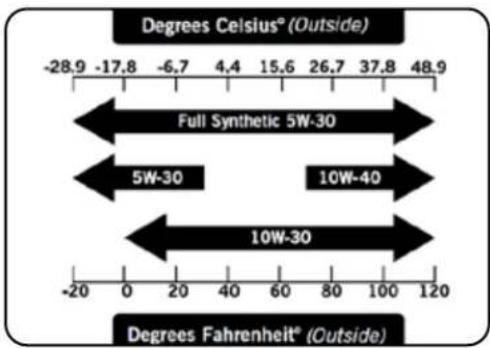
| Range | Value | |---|---| | -28.9 | -17.8 | | -6.7 | 4.4 | | 4.4 | 15.6 | | 15.6 | 26.7 | | 26.7 | 37.8 | | 37.8 | 48.9 | | Full Synthetic 5W-30 | | | 5W-30 | | | 10W-40 | | | 10W-30 | | | -20 | 0 | | 0 | 20 | | 20 | 40 | | 40 | 60 | | 60 | 80 | | 80 | 100 | | 100 | 120 | Degrees Celsius° (Outside) Degrees Fahrenheit° (Outside)Engine oil recommended: SAE 10W-30.
Viscosity varies with regions and temperatures. Choose your oil viscosity using the chart to the left.
* A small amount of oil from factory testing may be present on arrival.
* Synthetic oil may be used after the 8 hour initial break-in period. Using synthetic oil does not increase the recommended oil change interval. Full synthetic 5W-30 oil will aid in starting in cold temperatures < 5^ (41°F).
natural_image
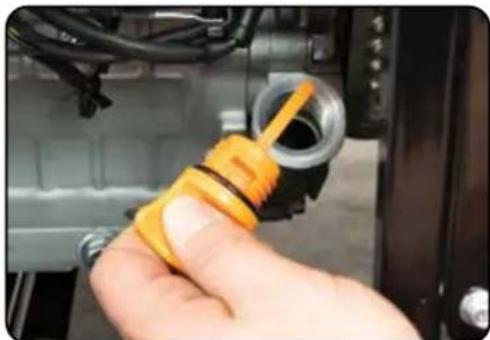
Close-up of a hand holding an orange plastic connector with a black handle, next to a car engine compartment (no visible text or symbols)Add oil
a. Make sure the water pump is on a level surface.
b. Unscrew the oil filler/dipstick cap from the engine.
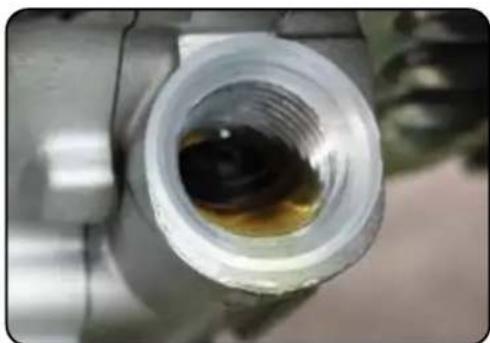
c. Using a funnel, add the appropriate amount of oil into the crankcase. You will know the crankcase is full when the oil level has reached the lower lip of the opening you have just poured the oil into.
d. Replace the oil filler cap.
natural_image
Close-up of a metallic pipe fitting with a dark liquid inside, no visible text or symbols
WARNING: DO NOT overfill the crankcase. This may damage the motor and shorten the overall life of your water pump.
Step 2 - Adding Gasoline
natural_image
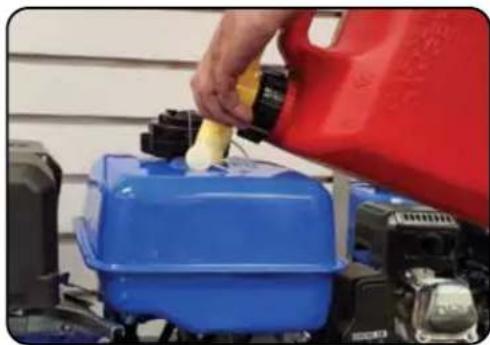
Person pouring liquid into a blue plastic container on a mechanical lift (no visible text or symbols)Add gasoline
a. Make sure the water pump is on a level surface.
b. Unscrew gas cap and set aside (NOTE: the gas cap may be tight and hard to unscrew).
c. Slowly add unleaded gasoline to the fuel tank. Be careful not to overfill. The fuel gauge on the top of the gas tank indicates how much gasoline is in the water pump gas tank.
d. Replace fuel cap and wipe up any spilled gasoline with a dry cloth.
| Model Number XP702HP |
| Fuel Tank Capacity 0.95 US Gal. |
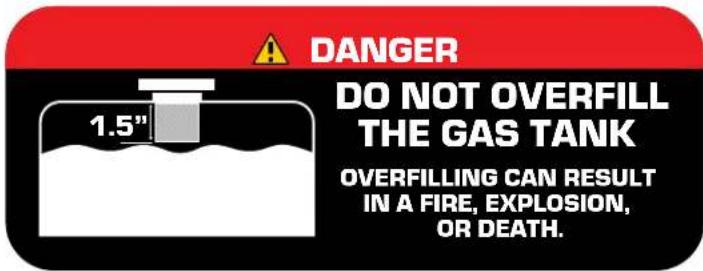

WARNING: Gas can expand. Do not fill the gas tank to the very top. Leave a minimum of 1.5 in open space. Gasoline and gas fumes are highly flammable. Do not fill the tank near an open flame. Always check for fuel spills.
IMPORTANT:
• To ensure that the engine runs smoothly use only FRESH, UNLEADED GAS WITH AN OCTANE RATING OF 87 OR HIGHER.
• Never use an oil/gasoline mixture. Never use old gas.
- Avoid getting dirt or water in the fuel tank.
Gas can age in the tank and make it hard to start up the water pump in the future.
• Never store water pump for extended periods of time with fuel in the tank.
Duro
NEXT GENERATION
Max
POWER SYSTEMS
POWERING EVERYONE...
ANYWHERE!
natural_image
Blue Duro Max pump mounted on a black metal frame, no visible text or symbols on the device body.STARTING THE WATER PUMP
If this is not your first time using the water pump, there are still steps you should take to prepare it for operation each time you use it.
IMPORTANT: At this point, you should be familiar with the procedures described in the first portion of this section entitled "WATER PUMP SETUP". If you have not yet read this section, go back and read it now.
natural_image
Close-up of a hand holding a yellow plastic connector attached to a mechanical component (no visible text or symbols)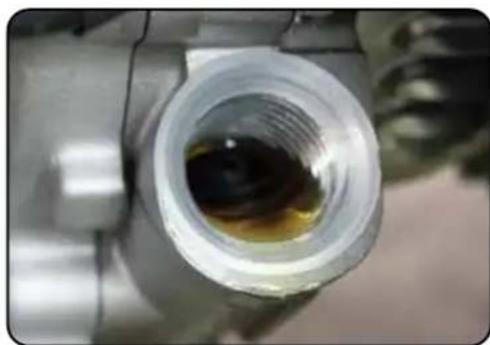
natural_image
Close-up of a metallic pipe fitting with a dark liquid inside, no visible text or symbolsCheck the oil
The water pump is equipped with an automatic shutoff to protect it from damage due to low oil. Nonetheless, you should check the oil level of the engine before each use to ensure that the engine crankcase has a sufficient amount.
To check the oil level:
a. Make sure the water pump is on a level surface.
b. Unscrew the oil filler/dipstick cap.
c. With a dry cloth, wipe the oil off of the stick on the inside of the cap.
d. Insert the dipstick as if you were replacing the cap and then remove it again. There should now be oil on the stick. If there is no oil on the stick, or oil only at the very end of the stick, you should add oil until the engine crankcase is filled (see "Adding Oil" portion of the "Maintenance" section).
e. Be sure to replace the cap when finished checking oil.
| Model Number XP702HP | |
| Engine Oil Capacity 20 | fl. oz. (0.6 L) |
Check the Gas Level
natural_image
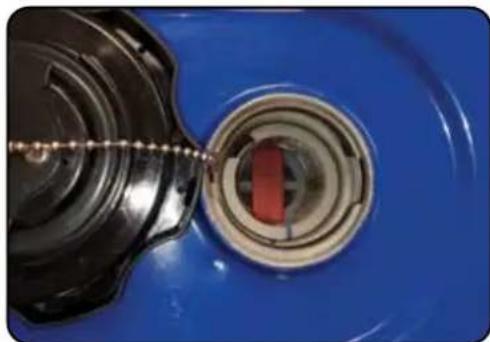
Close-up of a mechanical component with a red internal part and a metallic chain attached to a blue surface (no visible text or symbols)Check fuel level
If running the engine on gasoline check to see that there is sufficient gasoline in the fuel tank. The gasoline level should always be under the red fuel level indicator located on the bottom of the fuel filter cup.
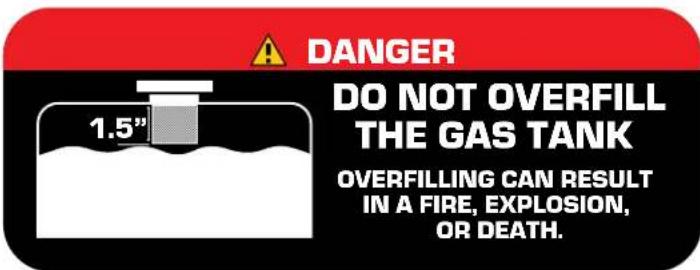

WARNING: Gasoline and gasoline fumes are highly flammable.
- Do not fill the tank near an open flame.
• Always allow the engine to cool for several minutes before refueling. - DO NOT overfill the fuel tank. Fuel expands when shaken or heated. ALWAYS leave 1^1/2 space or more at the top of the tank.
- ALWAYS use fresh fuel or stabilized fuel. Old gasoline (older than 30 days) can cause permanent damage to the fuel system.
• Always check for fuel spills.
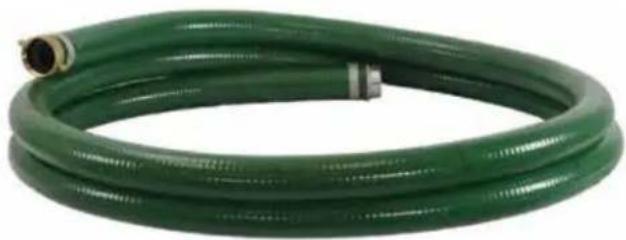
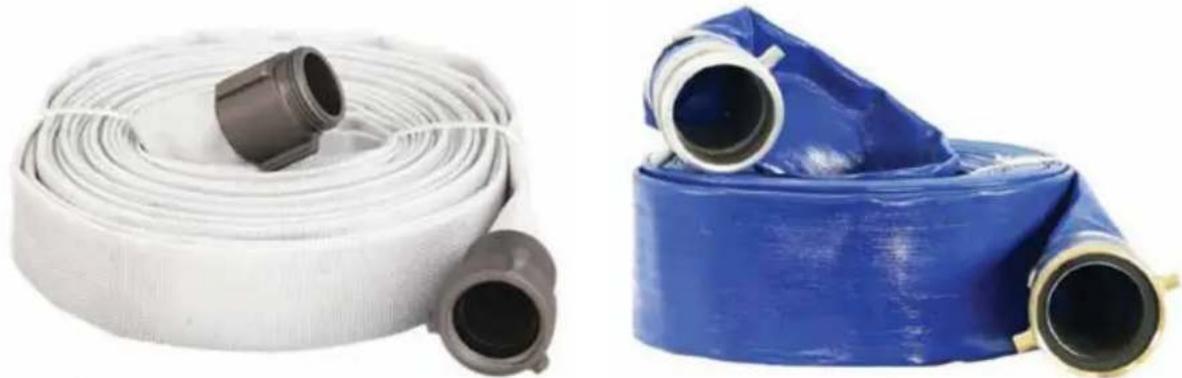
Choose the Right Suction and Discharge Hose
The water pump should have the appropriate discharge and suction hose attached based on model size. Please see the tables below for current models of DuroMax suction and discharge hoses.
| Model Number XP702HP | |
| Hose Diameter 2" | |
natural_image
Green plastic hose with a metallic connector, no visible text or symbols| Length | Suction Hose Diameter |
| 2" Suction Hose | |
| 10 ft XPH0210S | |
| 20 ft XPH0220S |
natural_image
Two types of fire hose components: white and blue, shown against a plain background (no text or symbols visible)| Length | Discharge Hose Diameter | |
| 1.5" Discharge Hose 2" Discharge Hose | ||
| 25 ft N/A XPH0225D | ||
| 50 ft XPH1550FH XPH0250D | ||
Prime the Water Pump
natural_image
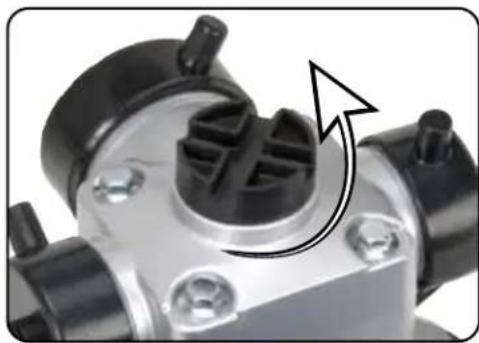
Close-up of a mechanical component with a black plastic housing and bolted joints, showing a curved arrow indicating rotation (no text or symbols visible)1. Remove priming port plug
Unscrew the priming port plug located on the top of the discharge port.
natural_image
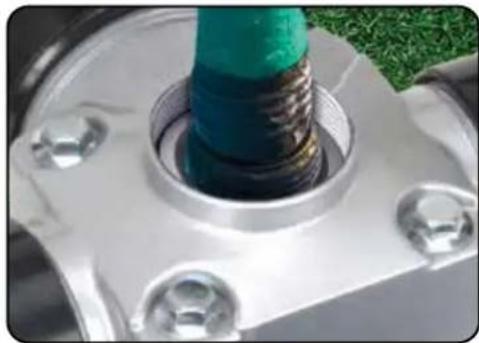
Close-up of a mechanical assembly with a green and blue component inserted into a metallic housing (no visible text or symbols)2. Fill the priming port with water
Fill up priming port with water until the water pump case is full.
natural_image
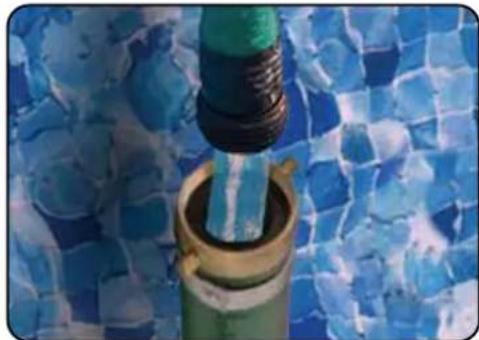
Close-up of a blue water tank with a green and black component inserted, against a patterned blue background (no text or symbols visible)3. Fill the suction hose with water
Fill the suction hose with water until full to finish priming the pump. NOTE: If the suction hose is on a steep incline its recommended to attach a check valve to the hose to allow easier priming.

CAUTION: Do not attempt to start pump without priming first. Attempting to start the pump without priming can damage the internal parts of the pump.
■ STARTING THE WATER PUMP
Starting the Water Pump
natural_image
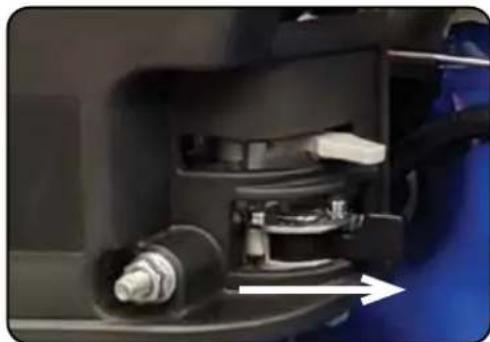
Close-up of a mechanical assembly with visible gears and shafts, no text or symbols present1. Move gas fuel valve to ON
The gas valve is located above the carburetor bowl. Move the gasoline fuel valve lever all the way to the right-hand position to allow gasoline to flow to the engine carburetor.
natural_image
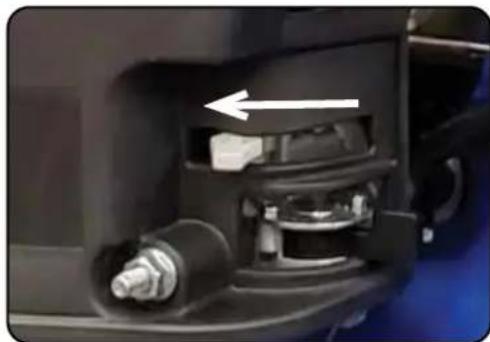
Close-up of a mechanical assembly with a white arrow indicating direction, no visible text or symbols2. Move choke lever ON
The choke lever is located above the gas valve. Move the choke lever to the left-hand side to the "ON" position to start. Please note that if the engine is hot, turning the choke on is unnecessary.
natural_image
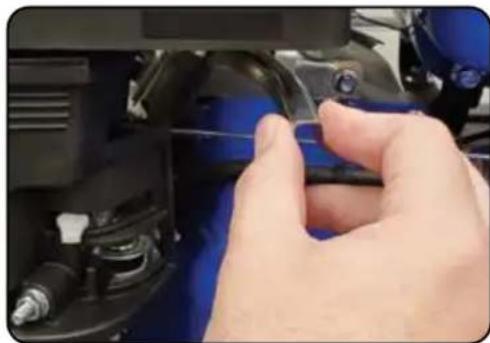
Close-up of a hand adjusting a mechanical component with a tool (no visible text or symbols)3. Adjust the throttle lever
The throttle lever is located above and to the right of the choke lever. Adjust the throttle lever to the low speed position.
natural_image
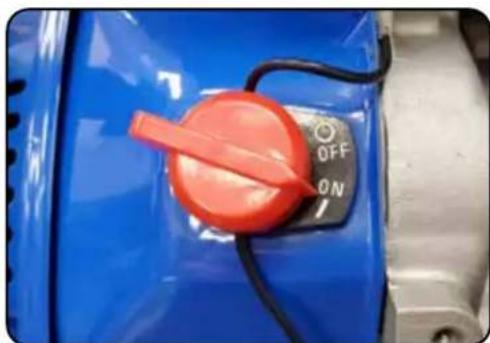
Close-up of a blue industrial component with a red rotary knob and black control switch labeled 'OFF ON' (no additional text or symbols visible)4. Turn switch ON
Turn the engine switch to the "ON" position.
natural_image
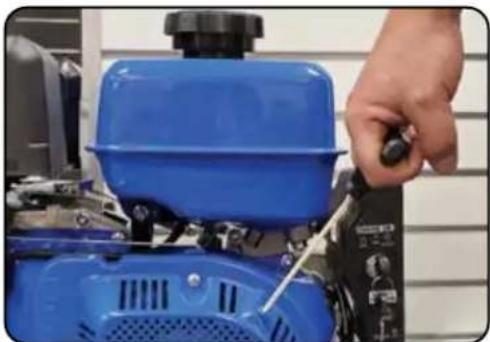
Close-up of a blue industrial machine with a hand adjusting its component (no visible text or symbols)5. Pull the recoil start handle
Pull the recoil handle slowly until resistance is felt, then quickly pull the recoil handle until fully extended. Continue this step until the engine starts as needed.

CAUTION: Release the recoil handle only after the cord has retracted. Releasing the recoil handle while extended may cause harm to yourself or your equipment.
natural_image
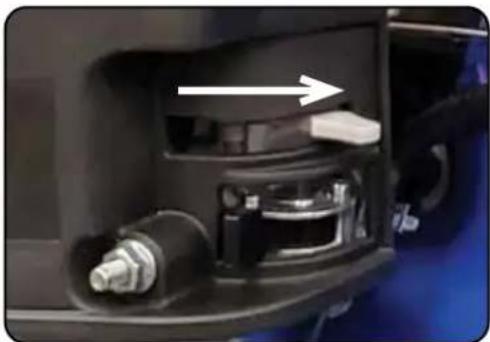
Close-up of a mechanical component with a white arrow indicating direction, no visible text or symbols6. Move the choke lever to RUN
After allowing the engine to preheat, move the choke lever to the right-hand side to the "RUN" position to steady the idle speed and run the engine.
natural_image
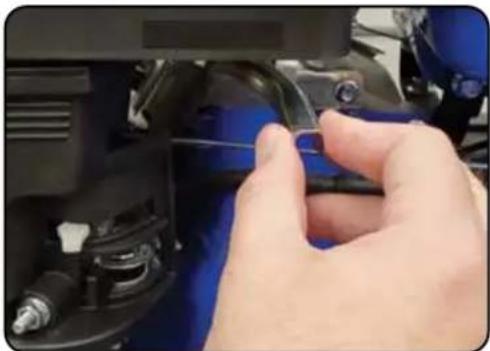
Close-up of a hand adjusting a mechanical component with a blue lever (no visible text or symbols)7. Adjust the throttle lever
Adjust the throttle lever to the proper position for the desired speed and the engine is ready for use.
Duro
NEXT GENERATION
Max
POWER SYSTEMS
POWERING EVERYONE...
ANYWHERE!
natural_image
Blue Duro Max pump mounted on a black metal frame, no visible text or symbols on the device body.MAINTENANCE AND CARE
Proper maintenance and storage of your water pump is essential to ensure trouble free use of your water pump when you need it.
By following the maintenance and care requirements, you can keep your engine running smooth and efficient for years to come.
MAINTENANCE AND CARE
Proper routine maintenance of your water pump is essential for safe, economical, and trouble-free operation. It will also help reduce air pollution.

WARNING: Improper maintenance, or failure to correct a problem before operation, can cause a malfunction in which you can be seriously injured or killed. Always follow the inspection, maintenance recommendations, and schedules in this instruction manual.
• Make sure the engine is off before you begin any maintenance or repairs.
- Let the engine and exhaust system cool before touching.
- To reduce the possibility of fire or explosion, be careful when working around gasoline. Use only a nonflammable solvent, not gasoline, to clean parts. Keep cigarettes, sparks, and flames away from all fuel-related parts.
Maintenance Schedule
Remember that this schedule is based on the assumption that your machine will be used for its designed purpose. Sustained high-load, high-temperature operation, or use in unusually wet or dusty conditions, will require more frequent service.
| SERVICE | EVERY USE | 1ST MO. OR 8 HRS. (BREAK IN) | EVERY 3 MO. OR 50 HRS. OF HEAVY USE | EVERY 6 MO. OR 100 HRS. OF NORMAL USE | EVERY 12 MO. OR 300 HRS. | EVERY 3 YRS. OR 500 HRS. |
| ENGINE OIL CHECK CHANGE CHANGE | ||||||
| AIR CLEANER CHECK CHECK CHANGE | ||||||
| SPARK PLUG CLEAN / | ADJUST | CLEAN / ADJUST | ||||
| SPARK ARRESTOR | CHECK CLEAN | |||||
| IDLE SPEED CHECK / | ADJUST | |||||
| VALVE CLEARANCE | CHECK / ADJUST | |||||
| FUEL TUBE CHECK CHECK / | REPLACE | |||||
| FUEL TANK / FILTER | CLEAN | |||||
| COMBUSTION CHAMBER | CLEAN | |||||
Break-In Period
As the best practice for any new combustion motor it's recommended to perform the break in procedure as follows:
- Run the engine for the first 6-8 hours on conventional oil, then change the oil. After the break-in period synthetic oil may be used.
- During the break in period of the first 6-8 hours keep the engine speed under 50% for optimal results.
- Check and clean the air filter if necessary after the break-in period.
Maintenance Log
As a best practice it's recommended to keep a log of the engine hours and maintenance to ensure your water pump is always operating to its full potential.
| Date Engine Hours Maintenance | Performed |
■ MAINTENANCE AND CARE (CONTINUED)
Checking the Oil
natural_image
Close-up of a hand holding an orange plastic plug attached to a car engine component (no visible text or symbols)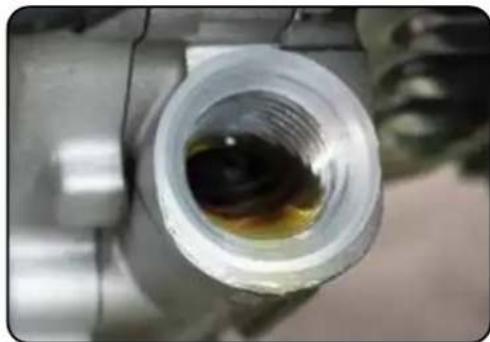
natural_image
Close-up of a metallic pipe fitting with a dark liquid inside, no visible text or symbolsCheck the oil
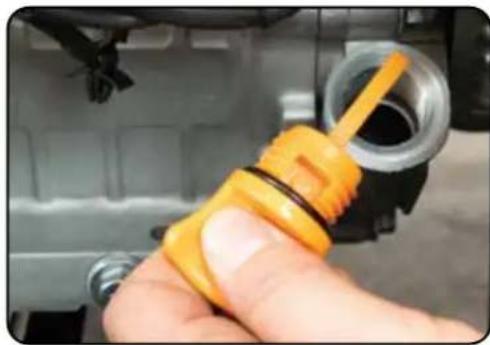
The engine is equipped with an automatic shutoff to protect it from damage due to low oil. Nonetheless, you should check the oil level of the engine before each use to ensure that the engine crankcase has a sufficient amount.
To check the oil level:
a. Make sure the engine is on a level surface.
b. Unscrew the oil filler/dipstick cap.
c. With a dry cloth, wipe the oil off of the stick on the inside of the cap.
d. Insert the dipstick as if you were replacing the cap and then remove it again. There should now be oil on the stick. If there is no oil on the stick, or oil only at the very end of the stick, you should add oil until the engine crankcase is filled (see "Adding Oil" portion of the "Maintenance" section).
e. The oil will be visible in the oil fill spout when full.
f. Be sure to replace the cap when finished checking oil.
| Model Number XP702HP | |
| Engine Oil Capacity 20 fl. oz. (0.6 L) |
Changing the Oil
natural_image
Gray plastic container with red lid and handle, no visible text or symbols
CAUTION: Worn out or dirty oil does not cool the engine properly and can lead to catastrophic engine damage.
In addition to regular oil changes, it is necessary to drain the oil from the crankcase if it has become contaminated with water or dirt.
natural_image
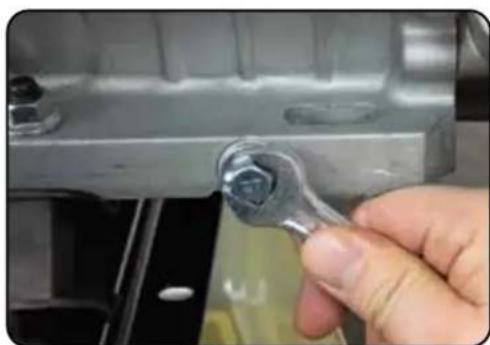
Close-up of a hand holding a wrench tool against a metal bracket (no text or symbols visible)1. Remove drain plug
Using a 12 mm hex wrench, unscrew the oil drain plug, which is located on the crankcase underneath the oil filler/dipstick cap.
Allow all the oil to drain from the engine.
natural_image
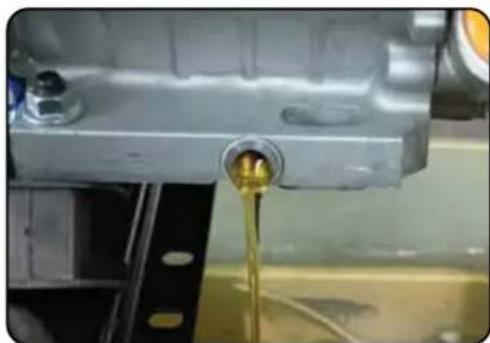
Close-up of a mechanical component with a yellow liquid being poured into it (no visible text or symbols)2. Drain oil
Drain oil into an approved oil disposal container. Contact your local auto parts store for information on oil disposal.
natural_image
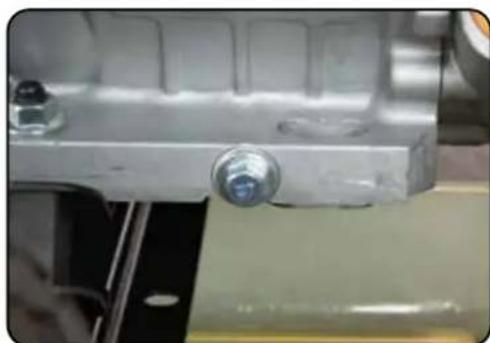
Close-up of a metallic mechanical component with a screw and mounting holes (no visible text or symbols)3. Replace drain plug
Replace the oil drain plug and tighten with a 12 mm hex wrench.
■ MAINTENANCE AND CARE (CONTINUED)
Changing the Air Filter
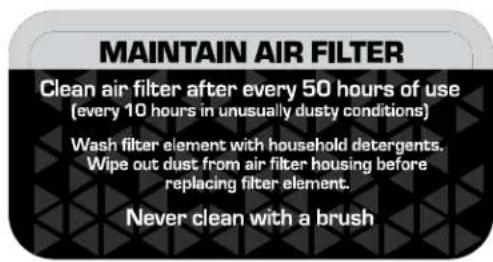
Routine maintenance of the air cleaner helps maintain proper airflow to the carburetor. Check that the air cleaner is free of excessive dirt after every use.

CAUTION: Improper maintenance may cause less air to enter the engine or dirty air to enter the engine causing overheating and engine wear.
natural_image
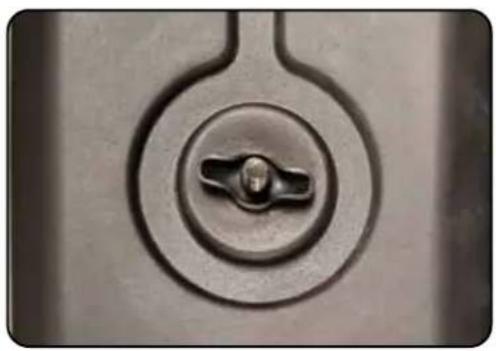
Close-up of a metallic switch knob with a central knob and circular dial (no text or symbols visible)1. Remove filter cover wing nut
Remove the wing nut located on the top of the air filter cover.
natural_image
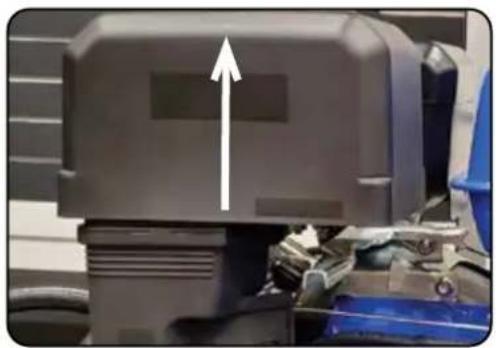
Close-up of a mechanical component with a white arrow pointing upward, no visible text or symbols2. Remove filter cover
Remove the plastic air filter cover by lifting the cover upwards to expose the air filter element.
natural_image
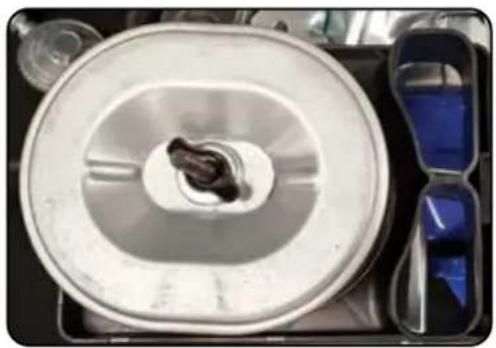
Close-up of a CD or DVD disc with a central hole and two side compartments filled with blue liquid (no visible text or symbols)3. Remove old filter element
Remove the wing nut on top of the air filter element and slide filter element off center bolt. This filter is paper and is not reusable. Please call 1-844-DUROMAX to order a replacement filter for your engine.
natural_image
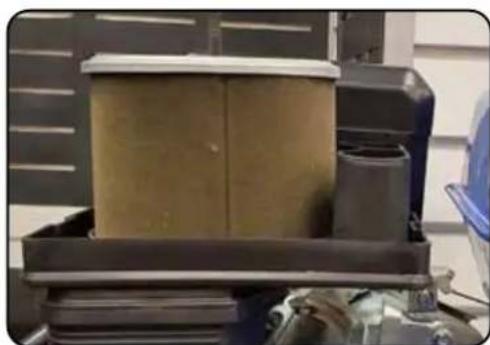
Stacked cardboard boxes on a metal tray, with a cylindrical container nearby (no visible text or symbols)4. Replace new filter element
Slide new filter element over center bolt, and replace wing nut. Tighten wing nut hand tight to keep filter in place.
natural_image
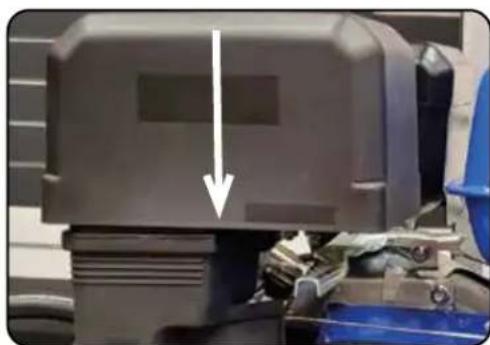
Close-up of a black mechanical component with a white arrow pointing downward, next to a blue tool (no visible text or symbols)5. Replace filter cover
Replace plastic air filter cover over the air filter base.
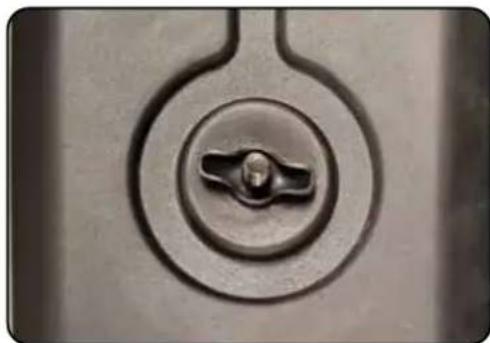
natural_image
Close-up of a mechanical switch component with a circular dial and central knob (no text or symbols visible)6. Secure filter cover
Fasten the air filter cover with the air filter cover wing nut and tighten about hand tight.
■ MAINTENANCE AND CARE (CONTINUED)
Spark Plug Maintenance
The spark plug is important for proper engine operation. A good spark plug should be intact, free of deposits, and properly gapped.

CAUTION: Improper maintenance may cause reduced fuel economy, misfires, trouble starting, or damage to the spark plug threads.
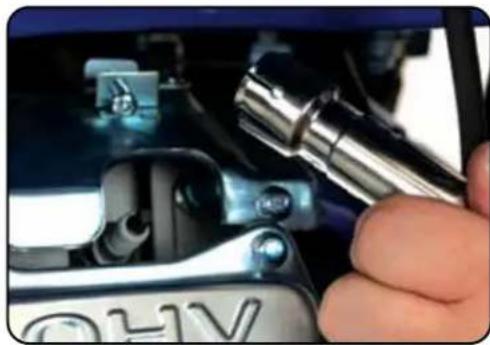
natural_image
Close-up of a hand using a tool to adjust or install a car body panel (no visible text or symbols)1. Remove spark plug cap
Pull on the spark plug cap to remove it.
natural_image
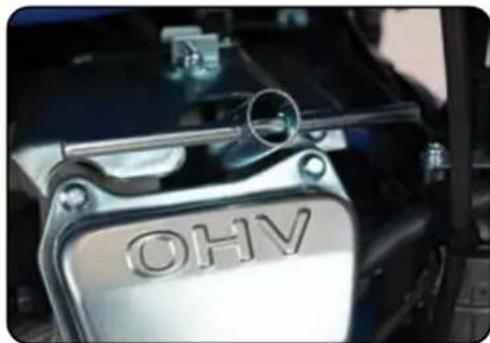
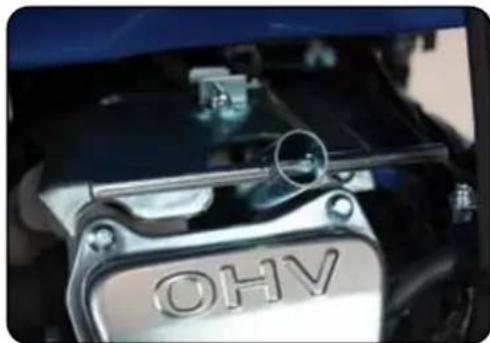
Close-up of a metallic automotive component labeled 'OHV' with a metal handle and circular lens (no readable text beyond label)2. Remove spark plug
Unscrew the spark plug from the engine using the spark plug wrench included with this product.
natural_image
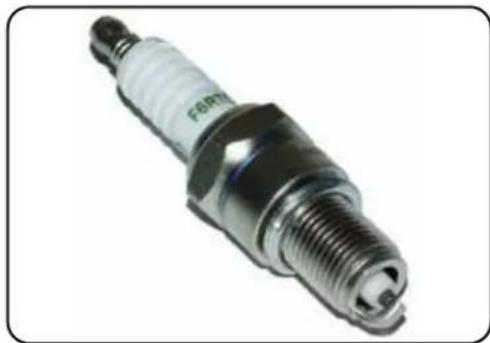
Close-up of a standard spark plug with metallic threaded body and white plastic cap (no visible text or symbols)3. Inspect spark plug
Visually inspect the spark plug. If it is cracked or chipped, discard and replace it with a new spark plug. We recommend using an F6RTC spark plug such as NGK BPR6ES.
natural_image
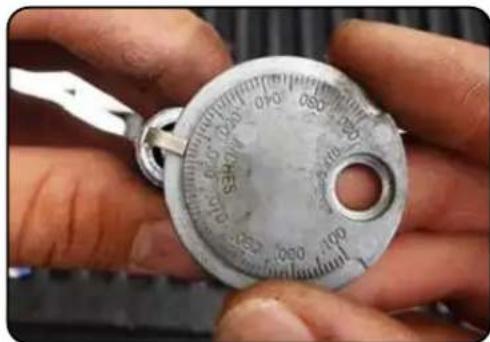
Close-up of hands holding a metallic analog dial with measurement markings (no readable text or symbols)4. Measure plug gap
Measure the plug gap with a gauge. The gap should be 0.7-0.8 mm (0.028-0.031 in).
natural_image
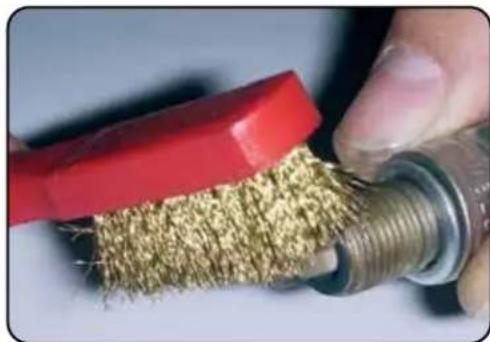
Close-up of a hand using a red tool to cut a textured, coiled metal component (no text or symbols visible)5. Clean and re-gap
If you are re-using the spark plug, use a wire brush to clean any dirt from around the spark plug base and then re-gap the spark plug.
natural_image
Close-up of a car engine bay with visible 'OHV' branding and mechanical components (no readable text beyond label)6. Install spark plug
Screw the spark plug back into its place on the engine using the spark plug wrench.
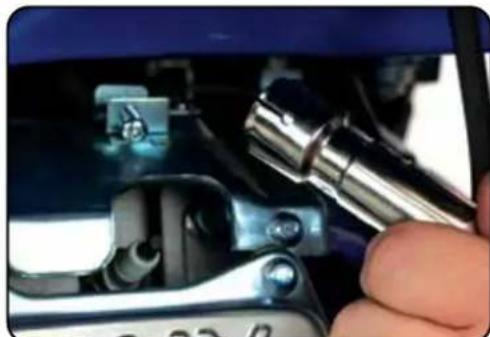
natural_image
Close-up of a hand using a tool to adjust or install electronic components (no visible text or symbols)7. Replace spark plug cap
Replace the spark plug cap.
■ MAINTENANCE AND CARE (CONTINUED)
Emptying the Gas Tank
natural_image
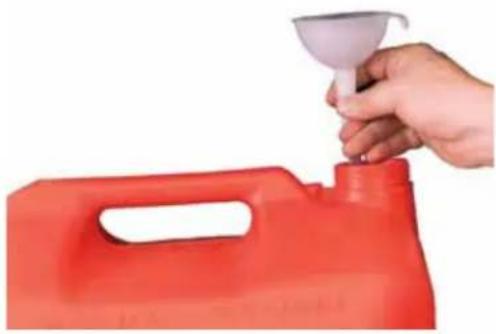
Hand pouring a white funnel into a red plastic container (no text or symbols visible)If you have been using gasoline in your water pump, before storing your water pump for extended periods of time you should drain your engine fuel tank of gasoline.

CAUTION: Do not store fuel from one season to another. Gasoline sold at the pump today contains additives such as ethanol that even when stored properly may damage the fuel system components.
natural_image
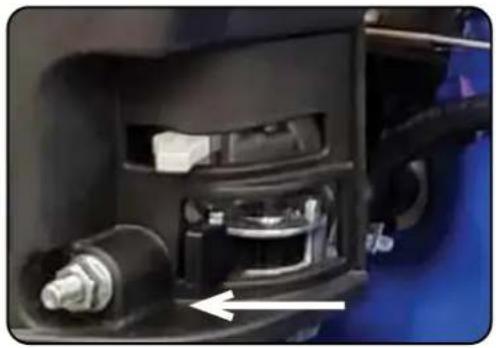
Close-up of a mechanical device interior with a white arrow pointing to a component (no visible text or symbols)1. Shut fuel valve OFF
Turn the fuel valve to the "OFF" position.
natural_image
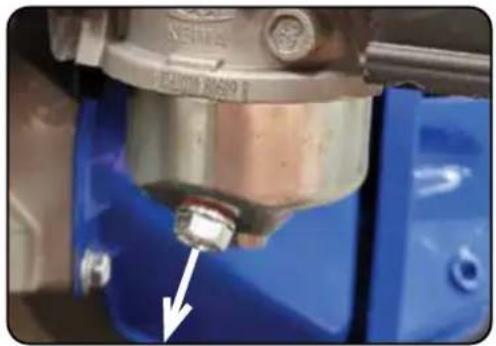
Close-up of a mechanical component with a white arrow pointing to a small bolt, no visible text or symbols.2. Remove carburetor drain bolt
Remove the outward angled bolt that is located on the bottom of the carburetor.
natural_image
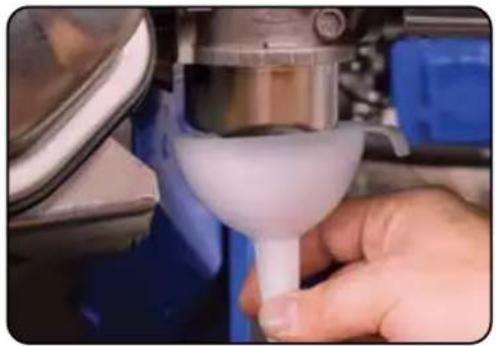
Close-up of a hand using a funnel to apply liquid into a container (no visible text or symbols)3. Place funnel below drain port
Place funnel with container to catch the gasoline under the drain port location.
natural_image
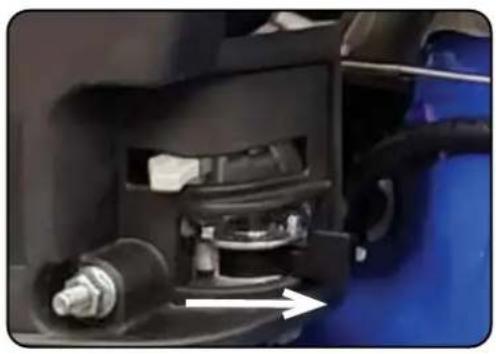
Close-up of a mechanical assembly with a blue component and white arrow indicating direction (no visible text or symbols)4. Turn fuel valve ON and drain
Turn the fuel valve to "ON" and allow gasoline to drain into the container until the gas tank is empty.
natural_image
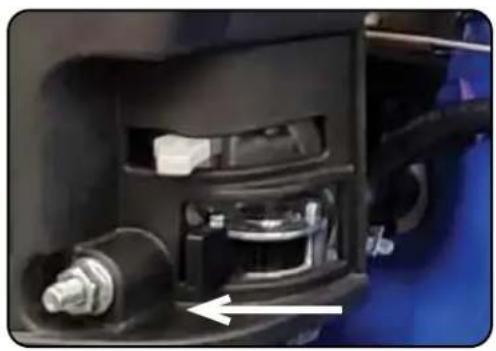
Close-up of a mechanical component with a white arrow pointing to a shaft (no visible text or symbols)5. Shut fuel valve OFF
Once the gasoline is fully drained, move the fuel valve back to the "OFF" position.
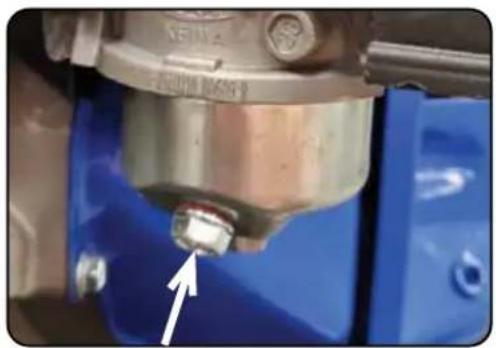
natural_image
Close-up of a mechanical component with a white arrow pointing to a bolt, no visible text or symbols.6. Replace carburetor drain bolt
Reinstall the carburetor drain bolt.
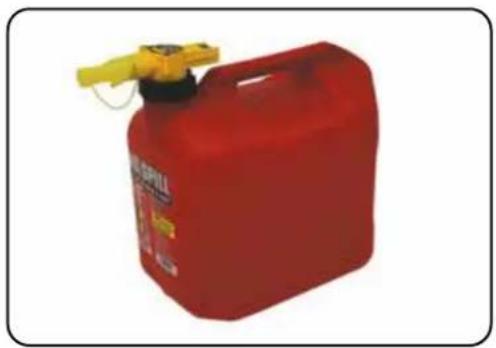
natural_image
Red safety jujet with yellow handle and label (no visible text or symbols on body)7. Store emptied gasoline
Store the emptied gasoline in a suitable place and add fuel stabilizer to keep fuel fresh and usable.
■ MAINTENANCE AND CARE (CONTINUED)
Storing the Water Pump for Same Day Use
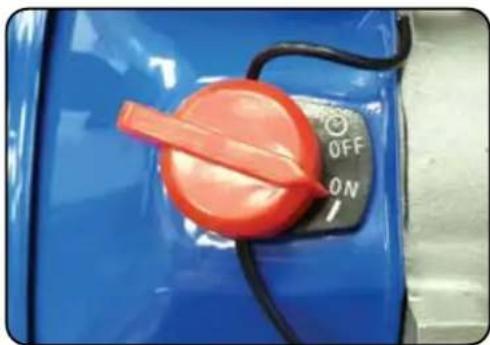
natural_image
Close-up of a blue industrial component with a red rotary knob and black control dial (no visible text or symbols)1. Run the water pump
Allow the engine to run for 3-5 minutes.
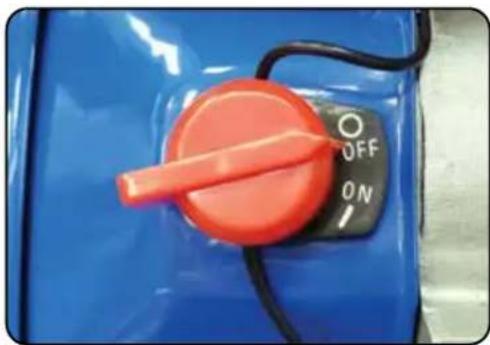
natural_image
Close-up of a blue industrial control panel with an orange rotary knob and black buttons labeled 'OFF' and 'ON' (no additional text or symbols visible)2. Turn engine switch to OFF
Move the engine switch to the "OFF" position to shut the engine off.
natural_image
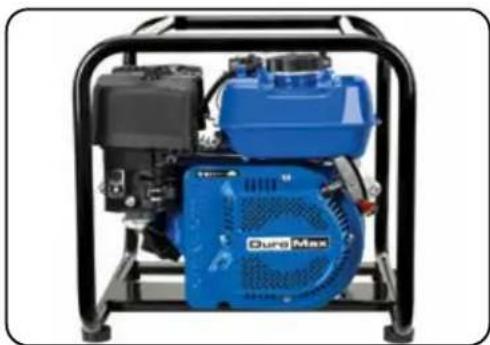
Blue Dura Max pump mounted on a black metal frame (no visible text or symbols)3. Store water pump
After the engine shuts off and cools, then you can store the water pump.

CAUTION: Do not obstruct any ventilation openings and keep the water pump in a cool dry area.
Storing the Water Pump for Use Within 30 Days
natural_image
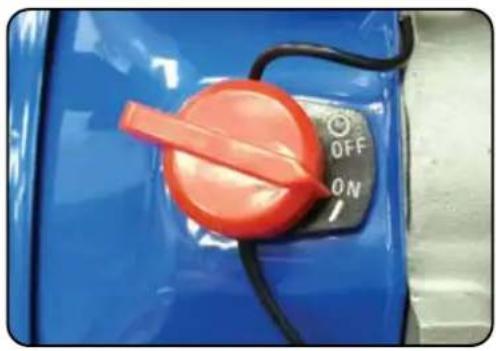
Close-up of a blue industrial vehicle's control panel with an orange rotary knob and 'OFF ON' button (no readable text beyond symbols)1. Run the water pump
Allow the engine to run for 3-5 minutes.
natural_image
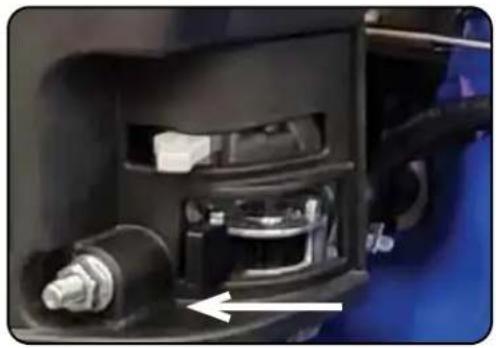
Close-up of a mechanical device interior with a white arrow pointing to a component (no visible text or symbols)2. Shut fuel valve OFF and run dry
Shut the fuel valve "OFF" and allow engine to run until it stalls out.
natural_image
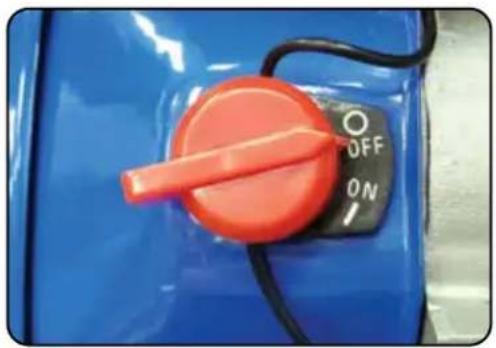
Close-up of a blue industrial component with a red circular knob and black control knob (no visible text or symbols)3. Turn the engine switch OFF
Move the engine switch to the "OFF" position to shut the engine off.
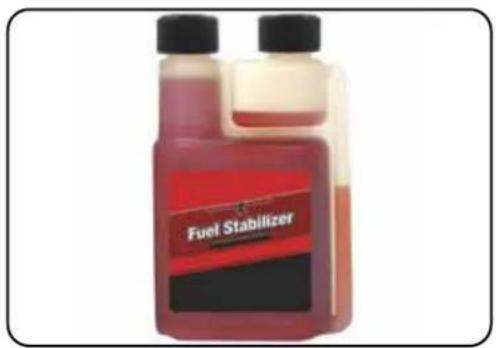
4. Add fuel stabilizer and store
Add fuel stabilizer to gas remaining in tank, and store the water pump.
■ MAINTENANCE AND CARE (CONTINUED)
Storing the Water Pump for Longer Than 30 Days
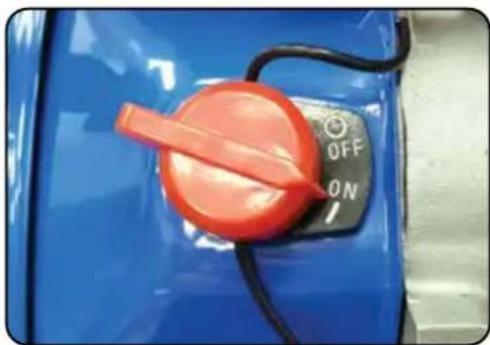
natural_image
Close-up of a blue industrial component with an orange circular knob and black control switch labeled 'OFF ON' (no additional text or symbols visible)1. Run the water pump
Allow the engine to run for 3-5 minutes.
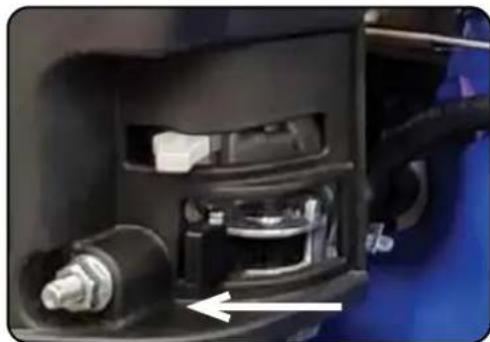
natural_image
Close-up of a mechanical component with internal components and a white arrow pointing to a feature (no visible text or symbols)2. Shut fuel valve OFF and run dry
Shut the fuel valve "OFF" and allow engine to run until it stalls out.
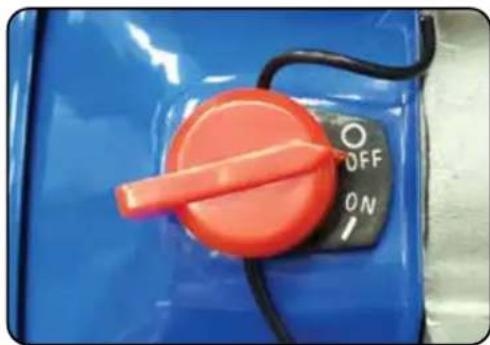
natural_image
Close-up of a blue industrial component with a red rotary knob and black control switch (no visible text or symbols)3. Turn the engine switch OFF
Move the engine switch to the "OFF" position to shut the engine off.
natural_image
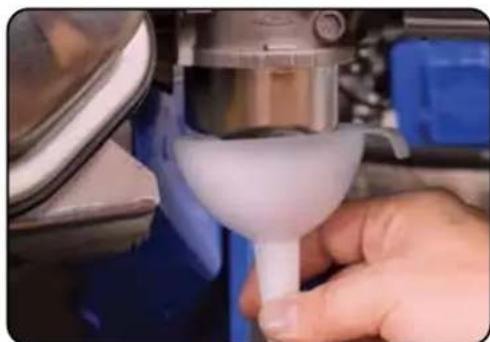
Close-up of a hand using a funnel to press or<|rotate_right|> a mechanical device (no visible text or symbols)4. Empty the gas tank
Fully drain your gas tank as shown in "Emptying the Gas Tank" on page 38-39.
natural_image
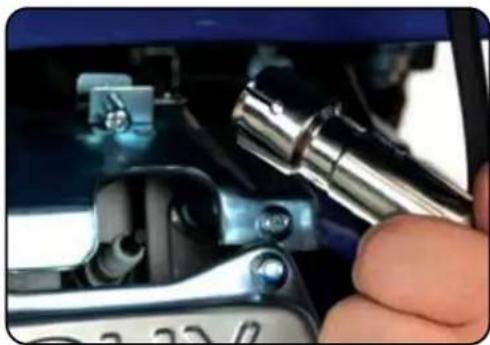
Close-up of a hand using a tool to adjust or install a mechanical component, no visible text or symbols5. Remove spark plug
Remove spark plug as shown in "Spark Plug Maintenance" on page 36.
natural_image
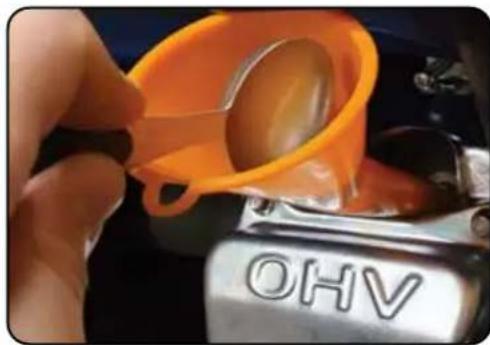
Close-up of a hand pouring orange liquid into a mechanical component labeled 'OHV' (no other text or symbols visible)6. Add oil to cylinder
Add 2 tablespoons of 10W-30 motor oil directly into the spark plug hole, and pull the recoil to lubricate cylinder. After lubricating cylinder reinstall the spark plug as shown in "Spark Plug Maintenance" on page 37.
natural_image
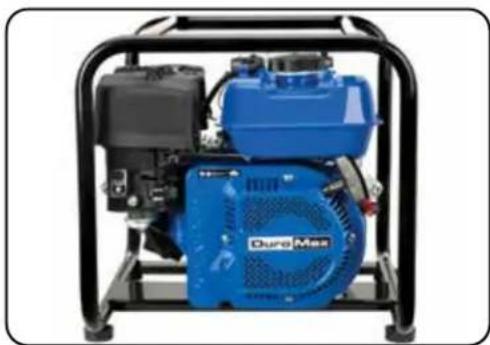
Blue Duro Max pump device mounted on a black metal frame (no visible text or symbols)7. Store water pump
The water pump is ready to be stored in a cool dry area.

CAUTION: Do not obstruct any ventilation openings and keep the water pump in a cool dry area.
SPECIFICATIONS
| Model Number XP702HP | |
| Inlet Size 2" | |
| Discharge Size 1.5"/2" | |
| Max Delivery Lift 252 ft | |
| Suction Distance 23 ft | |
| Max Flow Rate 70 GPM | |
| Dimensions 29"L x 16.5"W x 16.5"H | |
| Weight 50.7 lbs | |
| Recommended Oil 10W-30 | |
| Engine Displacement 208 cc | |
| Gasoline Capacity 0.95 gal | |
| Oil Capacity 20 fl. oz. (0.6 L) | |
| Bore 69 mm | |
| Stroke 55 mm | |
| Max Output 3600 rpm | |
| Oil Cooling Type Splash | |
| Bearing Type | Stainless steel ball bearing |
| Cylinder Sleeve | Cast iron sleeve |
| Fuel Delivery System | Carburetor |
| Valve Type | OHV |
| Engine Type | 4-Stroke |
| Engine Cooling Type | Forced air |
| Emissions Compliance | EPA/CARB |
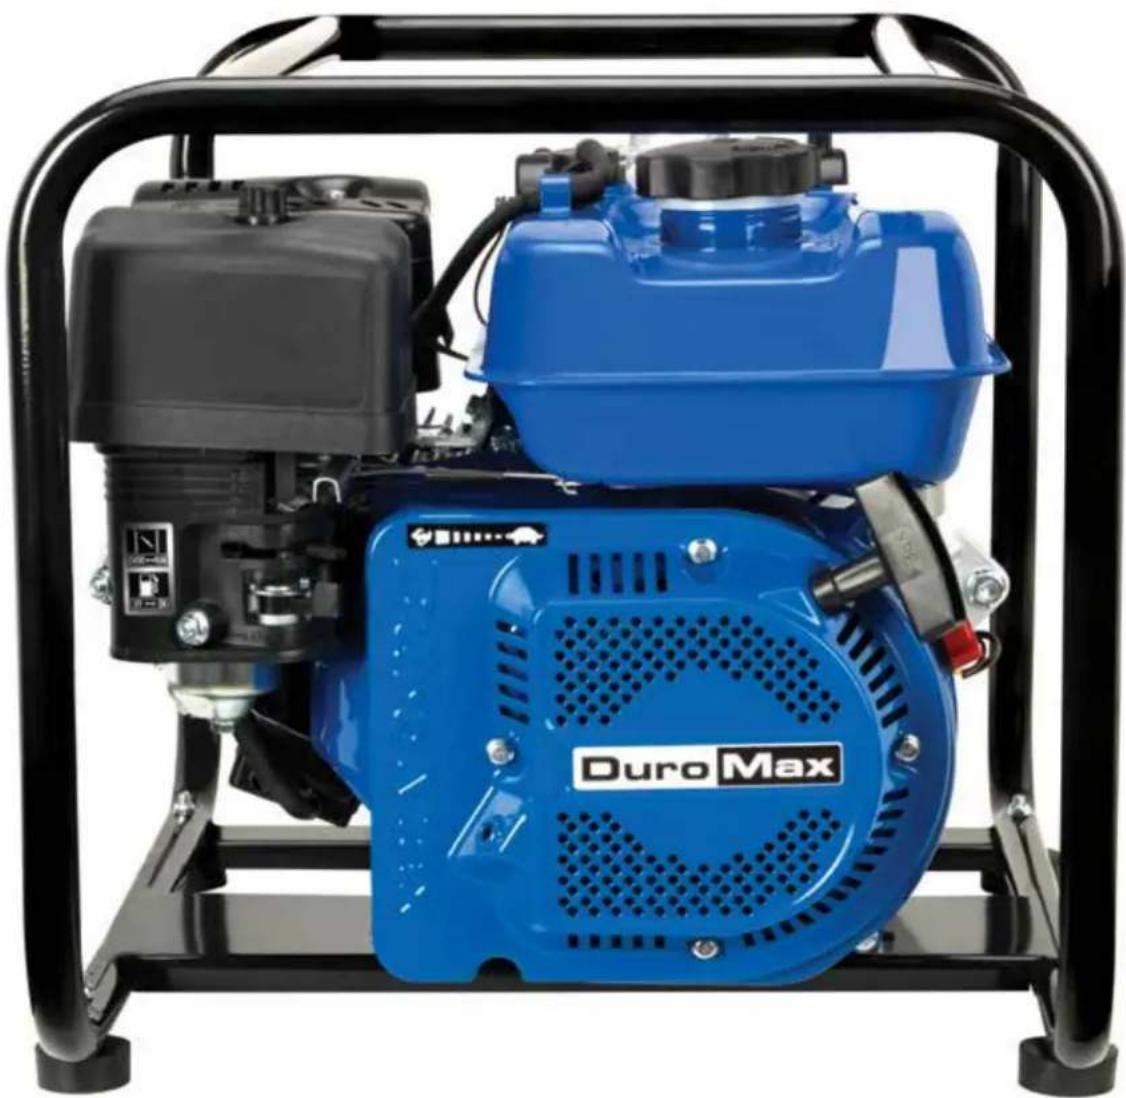
natural_image
Blue Duro Max pump mounted on a black metal frame, no visible text or symbols on the device body.TROUBLESHOOTING
This section of the manual is to help you troubleshoot problems with your water pump.
Duro
NEXT GENERATION
Max
POWER SYSTEMS
POWERING EVERYONE...
ANYWHERE!
TROUBLESHOOTING
| Mode Description | Solution | |
| Engine will not start | Engine switch is “OFF” Set engine | switch to “ON” |
| Fuel valve is “OFF” Turn fuel valve | to “ON” | |
| Choke is open Close the choke | ||
| Engine is out of fuel Add fuel | ||
| Fuel is old or contaminated Change fuel | ||
| Spark plug is dirty Clean spark plug | ||
| Spark plug is broken Replace spark plug | ||
| Engine is not level | Move engine to a level surface | |
| Oil is low Add/ change oil | ||
| Engine starts, but shuts off after running for short time | Oil level is low Add/ change oil | |
| Fuel is old or contaminated Change fuel | ||
| Engine is on incline exceeding 15° | Disconnect low oil sensor |
Duro
NEXT GENERATION
Max
POWER SYSTEMS
POWERING EVERYONE...
ANYWHERE!
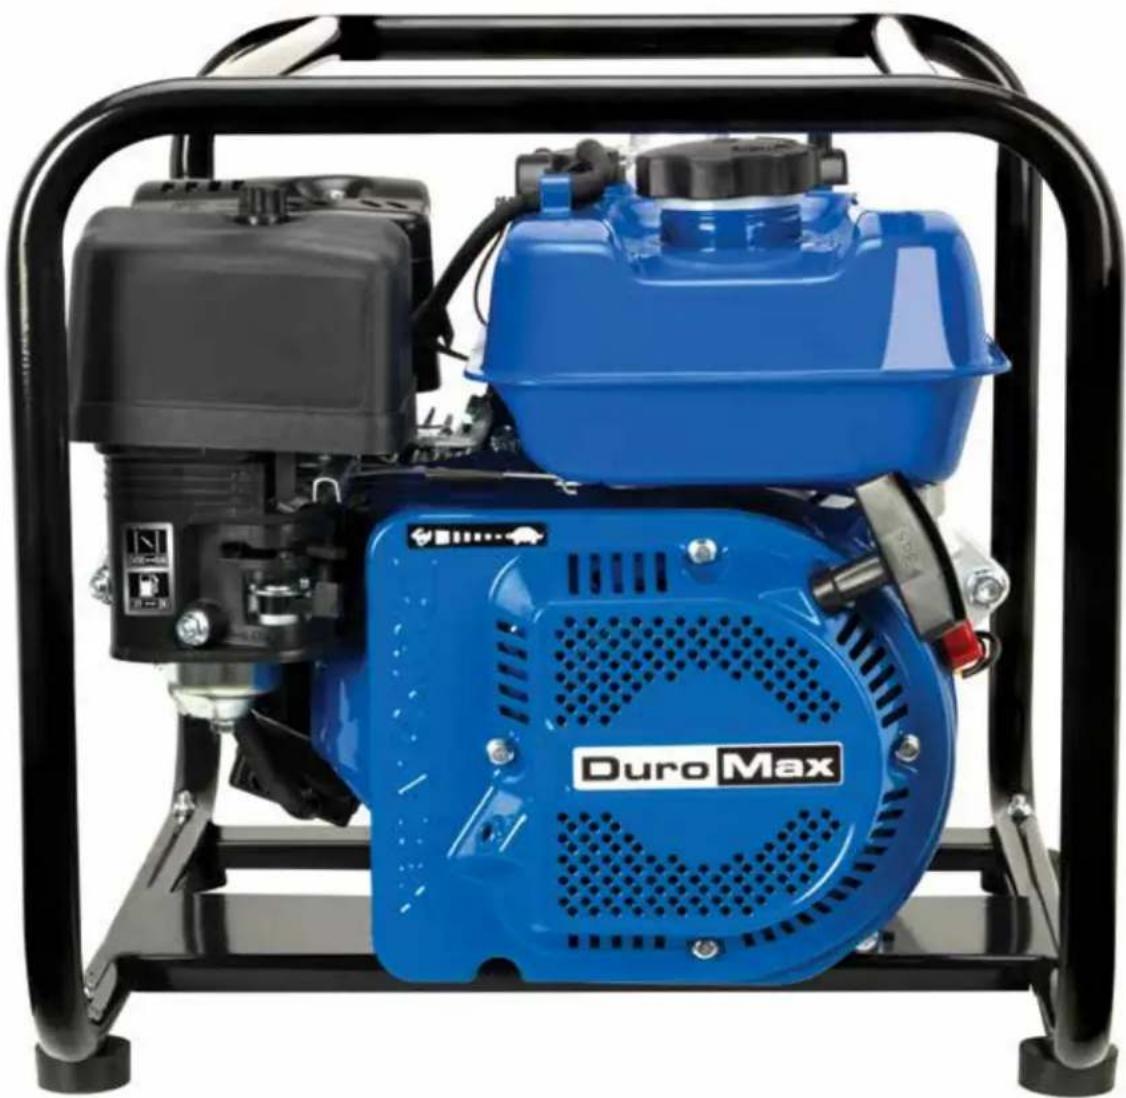
natural_image
Blue Duro Max pump mounted on a black metal frame, no visible text or symbols on the device body.WARRANTY
This section of the manual is to help you understand your warranty.
3-year Warranty
All DuroMax Power Equipment warrant the original purchasers to a 3-year Parts Warranty (Residential Use ONLY: Unusually heavy or commercial use is covered for a period of 1-year) in the event of failure due to defects in electrical or mechanical components. Freight on any items submitted for replacement or repair under the Warranty is the responsibility of the equipment owner. This warranty is non-transferable and only valid to the original purchaser.
Warranty Exclusions
The DuroMax Power Equipment warranty does not cover repairs or returns when the fault is: Normal Wear and Tear, Installation Use or Maintenance Services, Cosmetic defects, Accessories, Failures due to acts of God or Natural Disasters, or problems related to/from aftermarket or non-OEM parts.
Warranty Limitations
DuroMax Power Equipment does not claim or hold any obligation to loss of time, freight charges, use of the product, or any incidental damages from the use of this product. THIS WARRANTY IS IN LIEU OF ALL OTHER WARRANTIES, EXPRESSED OR IMPLIED.
U.S EPA AND CALIFORNIA EMISSION CONTROL WARRANTY STATEMENT YOUR WARRANTY RIGHTS AND OBLIGATIONS
The California Air Resources Board, The United States Environmental Protection Agency (US EPA) and DuroMax Power Equipment, are pleased to explain the emission control system warranty on your 2023-2024 year small off-road engine. In the United States and California, new small off-road engines must be designed built and equipped to meet the State's stringent anti-smog standards. DuroMax Power Equipment must warrant the emission control system on your small off-road engine for the periods of time listed below provided there has been no abuse neglect or improper maintenance of your small off-road engine.
Your emission control system may include parts such as the carburetor or fuel injection system, the ignition system, and a catalytic converter. Also included may be hoses, belts, connectors, and other emission-related assemblies.
Where a warrantable condition exists, DuroMax Power Equipment will repair your small off-road engine at no cost to you including diagnosis, parts, and labor.
MANUFACTURER'S WARRANTY COVERAGE:
As the small off-road engine owner, you are responsible for the performance of the required
maintenance listed in your owner's manual. DuroMax Power Equipment recommends that you retain all receipts covering maintenance on your small off-road engine, but DuroMax Power Equipment cannot deny warranty solely for the lack of receipts or for your failure to ensure the performance of all scheduled maintenance.
As the small off-road engine owner, you should, however, be aware that DuroMax Power Equipment may deny you warranty coverage if your small off-road engine or a part has failed due to abuse, neglect, improper maintenance or unapproved modifications.
You are responsible for presenting your small off-road engine to a DuroMax Power Equipment distribution center as soon as a problem exists. The warranty repairs should be completed in a reasonable amount of time, not to exceed 30 days.
If you have any questions regarding your warranty rights and responsibilities, contact DuroMax Power Equipment authorized warranty service facility:
TEL: 1-844-387-6629
WEBSITE: www.duromaxpower.com
ADDRESS: 5800 Ontario Mills Pkwy, Ontario CA 91764
This telephone number is only for the engines which the company name "DuroMax Power Equipment" on the emission label.
DEFECTS WARRANTY REQUIREMENTS:
(a) The warranty period begins on the date the engine or equipment is delivered to an ultimate purchaser.
(b) General Emissions Warranty Coverage. DuroMax Power Equipment warrants to the ultimate purchaser and each subsequent owner that the engine or equipment is:
(1) Designed, built, and equipped so as to conform with all applicable regulations adopted by US EPA & Air Resources Board; and
(2) Free from defects in materials and workmanship that causes the failure of a warranted part for a period of two years.
(c) The warranty on emissions-related parts will be interpreted as below:
(1) Any warranted part that is not scheduled for replacement as required maintenance in the written instructions required by subsection (d) must be warranted for the warranty period defined in Subsection(b)(2). If any such part fails during the period of warranty coverage, it must be repaired or replaced by DuroMax Power Equipment according to
WARRANTY (CONTINUED)
Subsection (4) below. Any such part repaired or replaced under the warranty must be warranted for the remaining warranty period.
(2) Any warranted part that is scheduled only for regular inspection in the written instructions required by subsection(d) must be warranted for the warranty period defined in Subsection(b) (2). A statement in such written instructions to the effect of "repair or replace as necessary" will not reduce the period of warranty coverage. Any such part repaired or replaced under warranty must be warranted for the remaining warranty period.
(3) Any warranted part that is scheduled for replacement as required maintenance in the written instructions required by subsection (d) must be warranted for the period of time prior to the first scheduled replacement point for that part. If the part fails prior to the first scheduled replacement, the part must be repaired or replaced by DuroMax Power Equipment according to Subsection (4) below. Any such part repaired or replaced under warranty must be warranted for the remainder of the period prior to the first scheduled replacement point for the part.
(4) Repair or replacement of any warranted part under the warranty must be performed at no charge to the owner at a warranty station. (5) Notwithstanding the provisions of Subsection (4) above, warranty services or repairs must be provided at all DuroMax Power Equipment distribution centers that are franchised to service the subject engines.
(6) The owner must not be charged for diagnostic labor that leads to the determination that a warranted part is, in fact, defective provided that such diagnostic work is performed at a warranty station. (7) DuroMax Power Equipment is liable for damages to other engine components proximately caused by a failure under warranty of any warranted part.
(8) Throughout the emissions warranty period defined in Subsection (b)(2), DuroMax Power Equipment must maintain a supply of warranted parts sufficient to meet the expected demand for such parts.
(9) Any replacement part may be used in the performance of any warranty maintenance or repairs and must be provided without charge to the owner such use will not reduce the warranty obligations of DuroMax Power Equipment
(10) Add-on or modified parts that are not exempted by the Air Resources Board may not be used. The use of any non-exempted add-on or modified parts will be grounds for disallowing a warranty claim. DuroMax Power Equipment will not be liable to warrant failures of warranted parts caused by the use of a non-exempted add-on or modified part.
(11) DuroMax Power Equipment issuing the warranty shall provide any documents that describe that manufacturer's warranty procedures or policies within five working days of a request by the US EPA & Air Resources Board.
Exhaust Emission Warranty Parts List.
(1) Fuel Metering System
(i) Carburetor and internal parts (and/or pressure regulator or fuel injection system).
(ii) Air/fuel ratio feedback and control system.
(iii) Cold start enrichment system.
(iv) Fuel tank.
(2) Air induction system
(i) Controlled hot air intake system.
(ii) Intake manifolds.
(iii) Air filter.
(3) Ignition System
(i) Spark Plugs.
(ii) Magneto or electronic ignition system.
(iii) Spark advance/retard system.
(4) Exhaust Gas Recirculation (EGR) System
(i) EGR valve body, and carburetor spacer if applicable.
(ii) EGR rate feedback and control system.
(5) Air Injection System
(i) An air pump or pulse valve.
(ii) Valves affecting the distribution of flow.
(iii) Distribution manifold.
(6) Catalyst or Thermal Reactor System
(i) Catalytic converter.
(ii) Thermal reactor.
(iii) Exhaust manifold.
(7) Particulate Controls
(i) Traps, filters, precipitators, and any other device used to capture particulate emissions.
(8) Miscellaneous Items Used in Above Systems
(i) Electronic controls
(ii) Vacuum, temperature, and time-sensitive valves and switches.
(iii) Hoses, belts, connectors, and assemblies.
DuroMax Power Equipment will furnish with each new engine written instructions for the maintenance and use of the engine by the owner
CUSTOMER SERVICE
DuroMax Power Equipment is committed to ensuring that our products perform when they need to. Our Water Pumps are your lifeline in the event of an emergency. Should you have any problems, please contact our customer service department:
DUROMAX POWER EQUIPMENT 5800 Ontario Mills Parkway Ontario, CA 91764
Customer Service: 844-DUROMAX Customer Service Hours: 8-5 pm PST Mon-Fri
Website: www.duromaxpower.com Email: customerservice@duromaxpower.com

natural_image
Woman wearing a headset and white shirt, smiling while holding a microphone, with a computer monitor in the background (no visible text or symbols)Duro
NEXT GENERATION
Max
POWER SYSTEMS
POWERING EVERYONE...
ANYWHERE!

5800 Ontario Mills Parkway
Ontario, CA 91764
United States
844-DUROMAX
- CONTENTS
- Introduction
- Water Pump Setup
- Starting the Water Pump
- Maintenance and Care
- Troubleshooting
- THE DUROMAX WAY
- POWERING EVERYONE... ANYWHERE!
- INTRODUCTION
- STOP
- Notice Regarding Emissions
- GENERAL SAFETY PROCEDURES
- SAFETY ALERT SYMBOL
- Please familiarize yourself with the following safety symbols and words:
- GENERAL SAFETY PROCEDURES (CONTINUED)
- DANGER
- UNIT AND PURCHASE INFORMATION
- Serial Number
- Serial number format
- STAPLE RECEIPT HERE
- PACKAGE CONTENTS
- WATER PUMP COMPONENTS
- WATER PUMP SETUP
- Step 1 - Adding Oil
- Engine oil recommended: SAE 10W-30.
- Add oil
- Step 2 - Adding Gasoline
- Add gasoline
- IMPORTANT:
- STARTING THE WATER PUMP
- Check the oil
- Check the Gas Level
- Check fuel level
- WARNING: Gasoline and gasoline fumes are highly flammable.
- Choose the Right Suction and Discharge Hose
- Prime the Water Pump
- Remove priming port plug
- Fill the priming port with water
- Fill the suction hose with water
- ■ STARTING THE WATER PUMP
- Move gas fuel valve to ON
- Move choke lever ON
- Adjust the throttle lever
- Turn switch ON
- Pull the recoil start handle
- Move the choke lever to RUN
- Adjust the throttle lever
- MAINTENANCE AND CARE
- Maintenance Schedule
- Break-In Period
- Maintenance Log
- ■ MAINTENANCE AND CARE (CONTINUED)
- Checking the Oil
- Changing the Oil
- Remove drain plug
- Drain oil
- Replace drain plug
- Changing the Air Filter
- Remove filter cover wing nut
- Remove filter cover
- Remove old filter element
- Replace new filter element
- Replace filter cover
- Secure filter cover
- Spark Plug Maintenance
- Remove spark plug cap
- Remove spark plug
- Inspect spark plug
- Measure plug gap
- Clean and re-gap
- Install spark plug
- Replace spark plug cap
- Emptying the Gas Tank
- Shut fuel valve OFF
- Remove carburetor drain bolt
- Place funnel below drain port
- Turn fuel valve ON and drain
- Shut fuel valve OFF
- Replace carburetor drain bolt
- Store emptied gasoline
- Storing the Water Pump for Same Day Use
- Run the water pump
- Turn engine switch to OFF
- Store water pump
- Storing the Water Pump for Use Within 30 Days
- Shut fuel valve OFF and run dry
- Turn the engine switch OFF
- Add fuel stabilizer and store
- Storing the Water Pump for Longer Than 30 Days
- Empty the gas tank
- Remove spark plug
- Add oil to cylinder
- Store water pump
- SPECIFICATIONS
- TROUBLESHOOTING
- WARRANTY
- 3-year Warranty
- Warranty Exclusions
- Warranty Limitations
- U.S EPA AND CALIFORNIA EMISSION CONTROL WARRANTY STATEMENT YOUR WARRANTY RIGHTS AND OBLIGATIONS
- MANUFACTURER'S WARRANTY COVERAGE:
- DEFECTS WARRANTY REQUIREMENTS:
- WARRANTY (CONTINUED)
- Exhaust Emission Warranty Parts List.
- CUSTOMER SERVICE
- DUROMAX POWER EQUIPMENT 5800 Ontario Mills Parkway Ontario, CA 91764
Brand : DuroMax
Model : XP702HP
Category : Water pump