
Jay - Tripod 3 Legged Thing - Free user manual and instructions
Find the device manual for free Jay 3 Legged Thing in PDF.


| Brand | 3 Legged Thing |
| Model | Jay |
| Product Type | Camera Tripod (Legs Only) |
| Material | Carbon Fiber |
| Maximum Height | 165 cm (65 in) |
| Folded Length | 50 cm (19.7 in) |
| Minimum Height | 30 cm (11.8 in) |
| Load Capacity | 15 kg (33 lbs) |
| Weight | 1.8 kg (4.0 lbs) |
| Leg Sections | 4 |
| Leg Lock Type | Twist Locks |
| Foot Type | Interchangeable Rubber Feet with Spikes |
| Column Type | Hook for Counterweight |
| Head Mount | Flat Base Plate (Arca-Swiss Compatible) |
| Leg Angle Adjustment | 3-Position Stop |
| Spreader | Built-in Retractable |
| Warranty | 5 Years (upon registration) |
| Country of Origin | United Kingdom |
| Included Accessories | Carry Bag, Universal Spanner, Strap |
| Maintenance | Clean with Damp Cloth; Avoid Salt Water |
| Storage Temperature | -20°C to 50°C (-4°F to 122°F) |
Frequently Asked Questions - Jay 3 Legged Thing
User questions about Jay 3 Legged Thing
0 question about this device. Answer the ones you know or ask your own.
Ask a new question about this device
Download the instructions for your Tripod in PDF format for free! Find your manual Jay - 3 Legged Thing and take your electronic device back in hand. On this page are published all the documents necessary for the use of your device. Jay by 3 Legged Thing.
USER MANUAL Jay 3 Legged Thing
MIKE, JAY & AIRHED CINE
INSTRUCTION MANUAL
IMPORTANT
DO NOT USE YOUR TRIPOD UNTIL YOU HAVE READ THESE INSTRUCTIONS. NO WARRANTY CLAIM WILL BE ENTERED INTO FOR THE MISUSE OR INCORRECT USE OF THESE PRODUCTS.
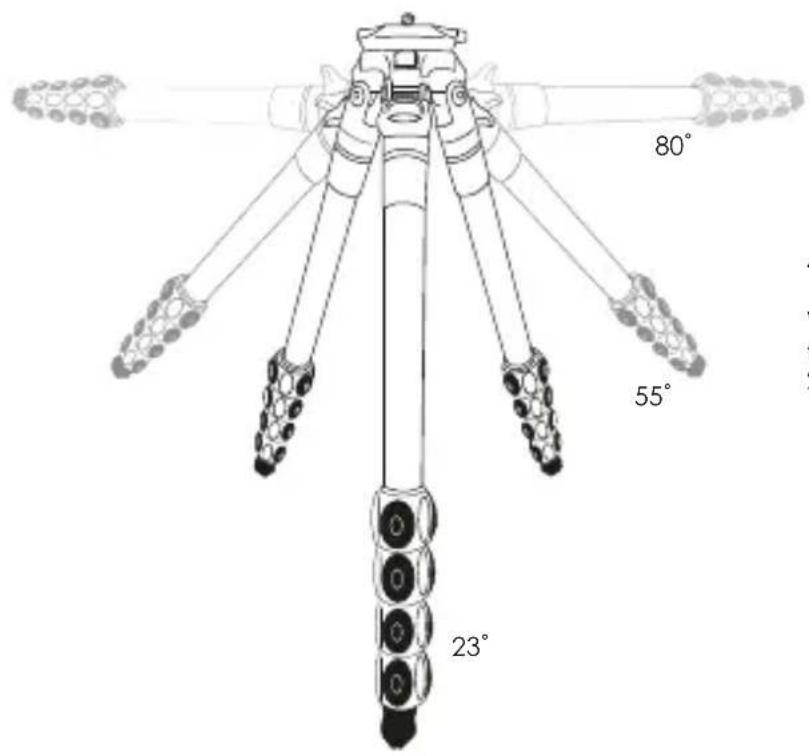
ANATOMY OF A TRIPOD:
We offer three leg angles that we consider to be optimum for using a tripod. They are 23^ , 55^ & 80^ .

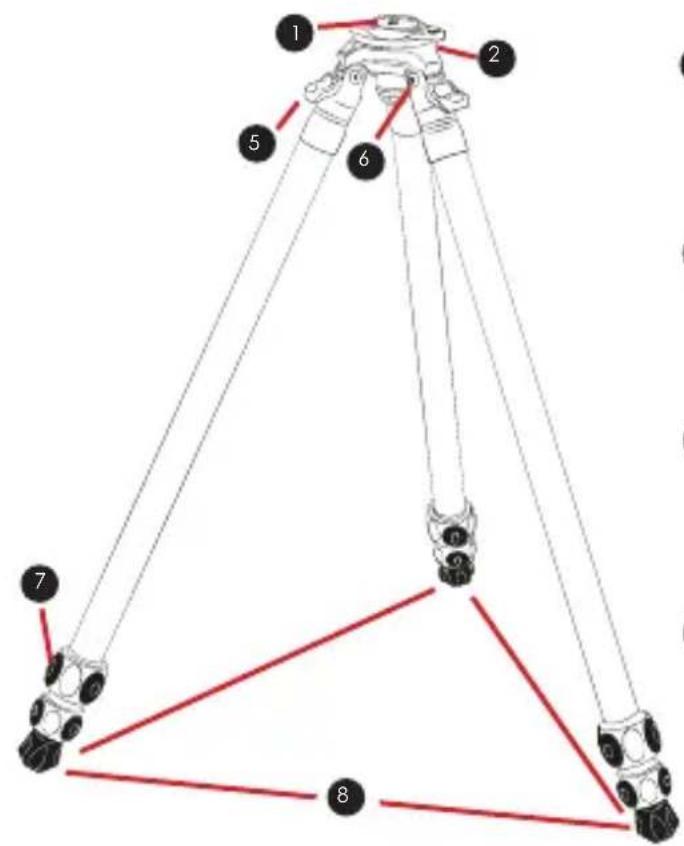
1 Dual 1/4"-20 mount with 3/8"-16 adapter sleeve
2 Levelling Base
3 Friction Adjustment / D-ring Levelling 4 Note Lock
5 Rapid Latch
6 Hinge
7 Twist Lock
8 Detachable Bootz / Footwear
ANATOMY OF AN AIRHED CINE

AirHeds and Release Plates
The clamp has an orange locking knob (2) for releasing the Plate.
NEVER undo any of the knobs without holding your camera.
IMPORTANT
The Release Plate included in the 3 Legged Thing Legends Tripod Kits has security bolts fitted. These fit into the cut-outs engineered in the AirHed Cine and are intended to give you an additional level of security.
It is important that you tighten your release plate onto the clamp completely and check, before use.
Your release plate may come with additional mounting screws you might not require. Unscrew these and put them somewhere for safekeeping.
The panning arm can be attached on the left or the right for either left or right-handed users. Simply rotate the screw head to ensure the handle is in the desired position and screw it into the panning arm threads located on the left or right side of the AirHed (a).
The AirHed Base features a ratchet function in the pan lock (7 above) which enables you to reposition the locking knob if it cannot turn due to its position. To adjust the position, pull the ratchet away from the base of the AirHed, turn it until it has space to move, then click it into place. Then you can turn it to loosen or tighten the lock as required.


natural_image
Illustration of a handheld device with geometric pattern and three circular buttons (no text or symbols)
natural_image
Technical line drawing of a mechanical device with gears and mounting holes (no text or symbols)Basic Functionality
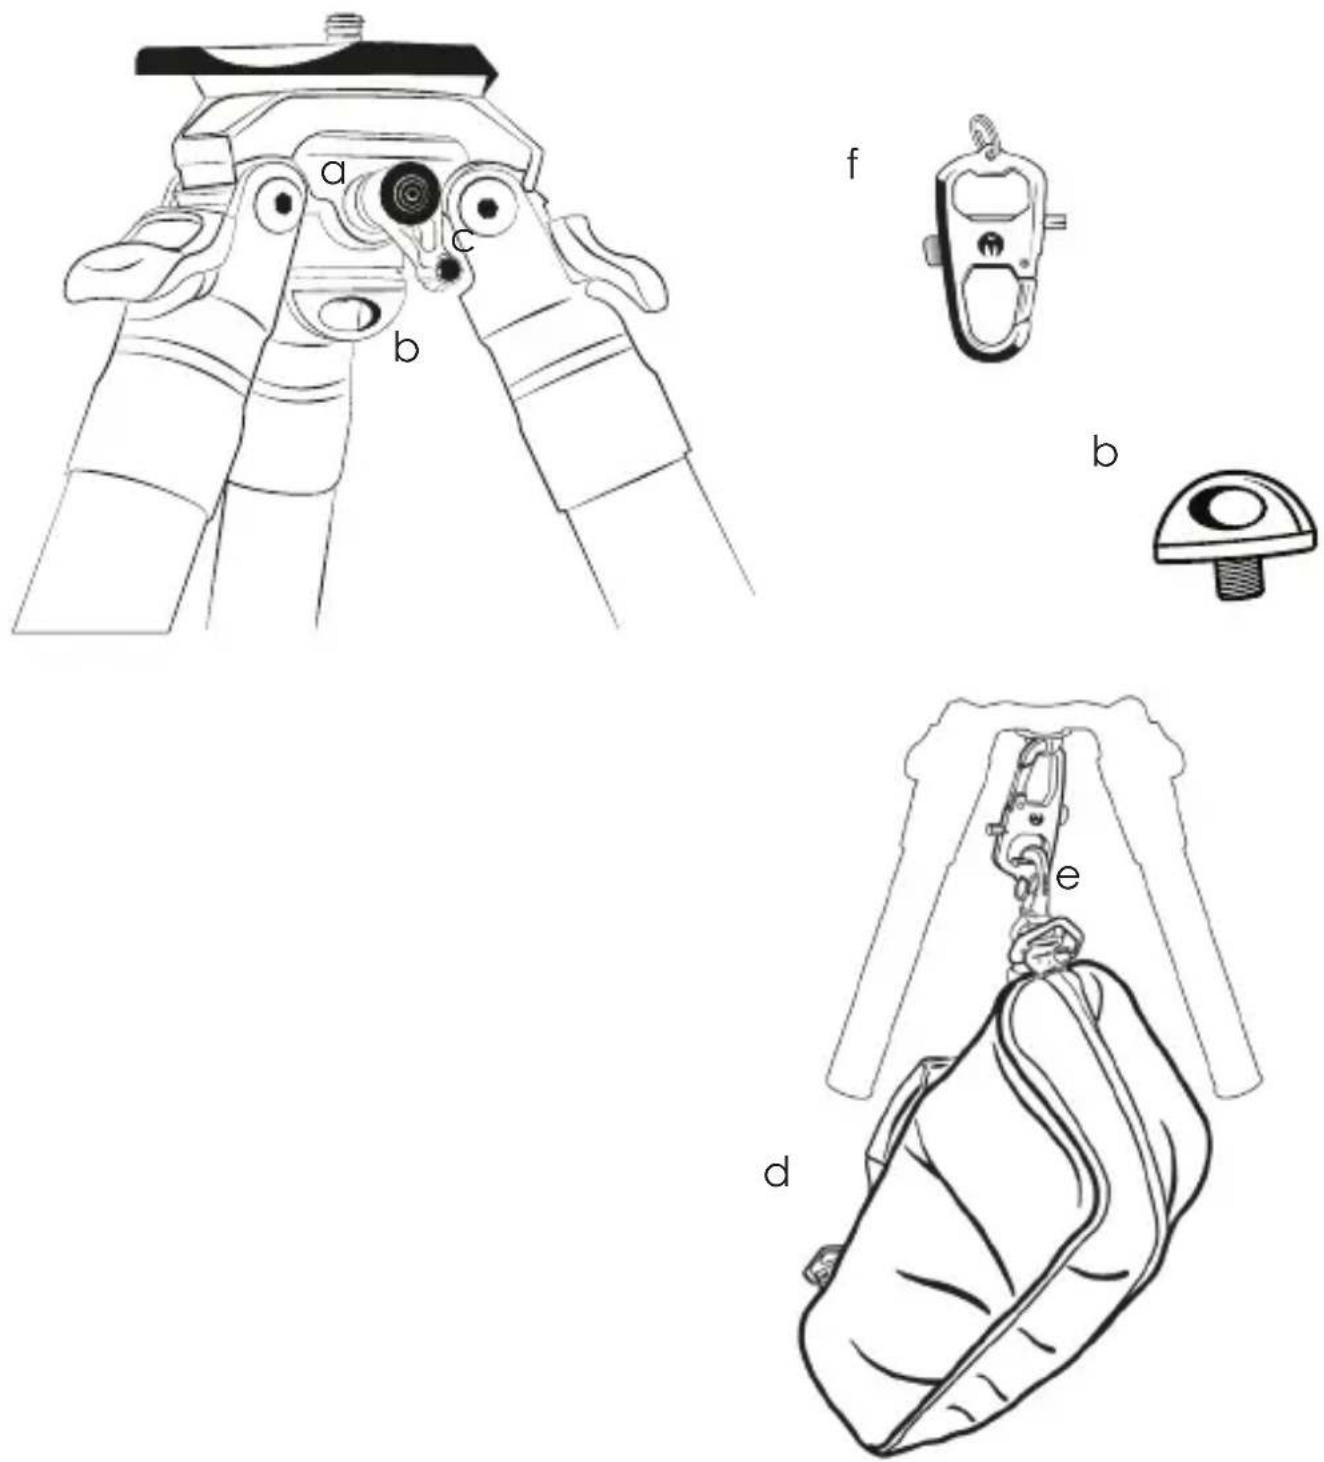
The levelling base has a locking knob on one side (a) to lock or unlock the leveller. The friction of the levelling base is controlled by the D-ring on the underside (b). To adjust the friction of the leveller, simply loosen or tighten the D-ring.
The Levelling base features a ratchet function in the knob which enables you to reposition the locking knob if it cannot turn due to its position(c). To adjust the position, pull the ratchet away from the tripod body, turn it until it has space to move, then click it into place. Then you can turn it to loosen or tighten the lock as required.
The friction lock/D-Ring (b) can be used to connect either your strap, for carrying, or the bag (d) for ballast, using the carabiner (e).
The carabiner clip can also be connected to the D-Ring via Toolz (f).
Legs, catches & locks
In order to change the leg angle you will need to press down on the Rapid Latch leg catch (a) manoeuvre the leg into the desired position and then release the catch. You don't need to press the Rapid Latch to stow your tripod.
To open and extend the tripod legs simply grip the twist locks in your hand, quarter turn (clockwise as you look down on it), loosening the legs allowing you to select a desired height. Once the required height has been obtained, lock the legs in place by rotating back anti-clockwise to the original position, which will fully engage the leg lock. The friction locks do not require to be undone further than a half turn, unless you intend to completely disassemble the legs for cleaning.

natural_image
Line drawing of a mechanical device with three arms and a labeled component 'a' (no text or symbols on the device itself)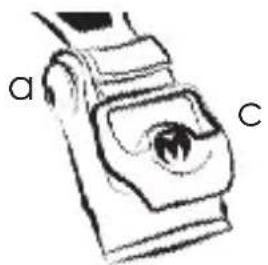
natural_image
Simple line drawing of a device with labeled parts 'a' and 'c' (no text or symbols beyond labels)
Detachable Legs
All three legs can be unscrewed directly from the leg hinge (a) and used as monopods or boom arms.
The levelling base canopy can be converted to a table-top tripod by removing the legs and screw Vanz* or Stillettoz* (d) into the leg hinges (a). To position the legs, use the Rapid Latch (c) to adjust. Mount your camera directly on to the levelling base using the 1/4"-20 thread, or add an AirHed using the supplied 3/8"-16 adapter.
To convert to a monopod with a foot stabiliser, unscrew all 3 detachable legs (b) from the leg hinges. Screw Vanz* or Stillettoz* (d) into the leg hinges and using the Rapid Latch, position the legs to the desired angle (e). Remove the 3/8-16" mount sleeve from the bottom of the detached leg using your Toolz to loosen it out and screw the detached leg onto the 1/4"-20 and 3/8"-16 thread mount until its secure.
Screw your AirHed onto the top of the leg to create your monopod head. Once your monopod is all set up loosen the friction lock / d-ring to release the base to create fluid movement. Adjust the friction lock to create your desired level of drag. The tighter the friction lock / d-ring is, the more drag will occur. To stop all movement, tighten both the friction lock and pan lock being cautious not to over tighten. (Over tightening may make it difficult to undo the locks once you have finished using it).
*Footwear sold separately
Warning - do not angle the monopod beyond the boundaries of the levelling base as you may damage the leg or levelling base.
Do not let go of your camera when mounted on to any monopod setup.
Cleaning
It is advised that you wash your tripod after using it in salt water, sand, dirt or mud and this can be done by undoing each leg. Take each individual leg lock and unscrew until completely undone, and gently pull the tubing (a) out, being careful not to lose the nylon shim (b) (chicken lips), allowing you to clean the threads of the legs. Once cleaned, dry all the parts with a clean cloth. Do not leave them to air dry. Then ensure that the chicken lips are in place and then carefully insert the leg, lining up the internal slot with the gap (c) in the chicken lips, and tighten the leg lock in place.
Never use WD40 on your tripod as it can be a solvent. Always use silicone grease.

natural_image
Illustration of a mechanical component with two circular holes and a threaded cap, no text or symbols present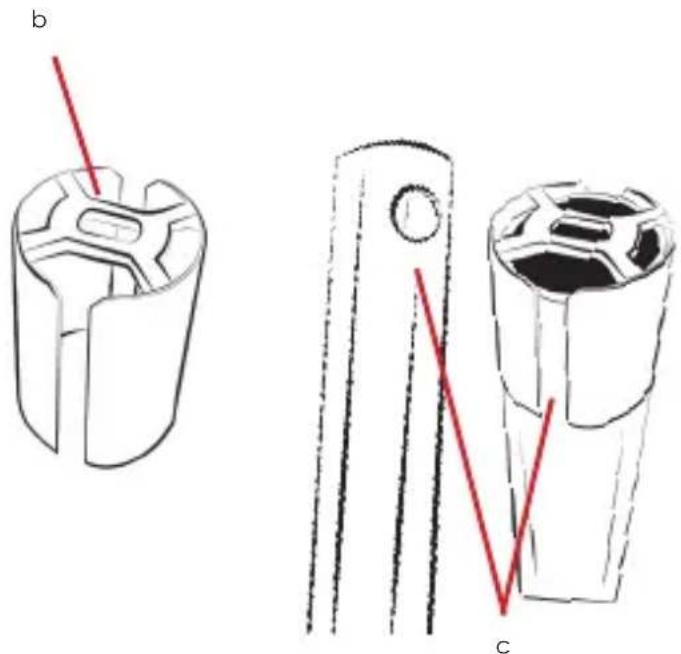
natural_image
Technical line drawing of two mechanical components labeled b and c, showing internal gear-like structures with no text or symbols.a
Warranty Information
Your 3LT product comes with a 5 Year Global Warranty. On the box you will find a sticker with a unique barcode and serial number. Use this serial number to register your products at www.3leggedthing.com/register.
Details of your warranty can be found at www.3leggedthing.com. Your warranty covers 3 Legged Thing products only.
If you have a question or suspect you have a fault, contact us first at www.3leggedthing.com/support.

natural_image
Abstract black and white circular logo with stylized eye and V-shaped elements (no text or symbols)3LT SOCIAL MEDIA



3LEGGEDTHING
/3LEGGEDTHING
@3LEGGEDTHING

3 Legged Thing®
UNIT 9 KINSBOURNE FARM
BURY END
STAGSDEN
BEDFORDSHIRE
MK43 8TS
UNITED KINGDOM OF FADELESS SPLENDOUR
Brand : 3 Legged Thing
Model : Jay
Category : Tripod