
VR200 - Car radio VOLVO - Free user manual and instructions
Find the device manual for free VR200 VOLVO in PDF.


| Product Type | Car Stereo with AM/FM Tuner, Cassette Player, and External CD Changer Capability |
| Brand | Volvo |
| Model | VR200 |
| Dimensions (Approx.) | 1-DIN (180x50mm) |
| Weight (Approx.) | 1.5 kg |
| Power Supply | 12V DC (vehicle battery) |
| Power Output | 4 x 20W (max) |
| Tuner Bands | AM, FM, LW (European), WX (US models) |
| Cassette Player | Logic-controlled with auto-reverse, Dolby B NR, music search, and tape tightening |
| CD Player | Not integrated; supports external CD changer (optional) |
| CD Changer Compatibility | Yes (external, not included) |
| RDS Features | AF, TP, PTY, Radio Text, News Interrupt (VR400 only), Variants/Region |
| Audio Controls | Volume, Balance, Fade, Treble, Bass, Loudness (auto), 2/4 Speaker Select |
| Security Code | 4-digit code, anti-theft, requires unlock after power loss |
| Remote Control | Infrared remote (optional accessory) |
| Steering Wheel Controls | Compatible with optional Volvo steering wheel controls |
| Additional Inputs/Outputs | 3 switched aux outputs, low-level audio outputs, 2 auxiliary audio inputs, cell phone mute |
| Country Frequency Selection | Americas, Europe, Australia, Japan, Argentina, Saudi Arabia |
| Display | LCD with illumination, dimmable with vehicle lights |
| Clock and Alarm | 12/24-hour format, alarm clock with snooze, one-hour timer |
| Loudness | Auto-loudness (cannot be turned off) |
| Dolby Noise Reduction | B-type for cassette playback |
| Speaker Select | 2 or 4 speakers |
| Cleaning | Tape player heads must be cleaned every 35 hours; cleaning cassette recommended |
| Repairability | Service by authorized Volvo dealer; no user-serviceable parts |
Frequently Asked Questions - VR200 VOLVO
User questions about VR200 VOLVO
0 question about this device. Answer the ones you know or ask your own.
Ask a new question about this device
Download the instructions for your Car radio in PDF format for free! Find your manual VR200 - VOLVO and take your electronic device back in hand. On this page are published all the documents necessary for the use of your device. VR200 by VOLVO.
USER MANUAL VR200 VOLVO
Operating Instructions Radio
VR100, VR200, VR300, VR400
VOLVO
HDT User Manual (v-12) 9/12/01 2:20 PM Page 2



Table of Contents
Table of Contents ......i
System Overview ....1
Using the Radio 2
Security Code 2
Power On/Off 2
Language 3
Country Frequency Selection ....3
Display Illumination....3
Clock....4
Displaying the Time ....4
Setting the Clock ....4
12- or 24-Hour Format ....4
Setting Time of Day 4
Alarm Clock and Timer....5
Setting the Alarm Clock ....5
Alarm Clock On / Off / Snooze....5
Alarm Volume....5
One Hour Timer....6
Audio Controls....7
Volume Control ....7
Dynamic Distortion Limiting ....7
Balance Control....7
Fade Control ....7
Treble Control 8
Bass Control 8
Midrange Control (Model VR 400 Only) 8
Loudness....8
2- or 4-Speaker Select ....9
Room Simulation (Model VR 400 Only)....9
Speed-Dependent Volume (Model VR 400 Only) ......10
Tuning the Radio ....11
Band Select....11
Weather Band ....11
Longwave Band ....11
Tune....11
Seek 12
Seek Sensitivity - FM and AM (U.S. Frequency bands only)...12
Scan 12
RDS (Radio Data System) Features....13
Alternate Frequency Switching (AF) 13
Setting FM Memory
(European programmed radio frequencies only)....13
Traffic Program (TP) 14
Program Type Function (PTY)....15
Program Type Interrupt 29
Program Type Seek....29
Program Type Scan....29
Variants/Region Function 29
Radio Text (RT) 20
NEWS Program Button (Model VR 400 only)....20
Presets....21
Store Preset Stations....21
Access the Preset Stations....21
Preset Scan 21
Auto-Store Presets....22
Emergency Broadcast (Alert/Alarm)....22
Emergency Broadcast Volume....22
Using the Cassette Player 23
Cassette Select....23
Model VR 100....23
Model VR 200 and VR 400....23
Cassette Tightening and Error Detection 23
Change Cassette Side 23
Model VR 100....23
Model VR 200 and VR 400....23
Stop and Eject 24
Model VR 100 ....24
Model VR 200 and VR 400....24
Pause....24
Model VR 100 ....24
Fast Forward and Rewind....24
Model VR 100 ....24
Model VR 200 and VR 400....24
Radio Monitor Function....24
Next Music Search (Except Model VR 100) ......25
Previous Music Search (Except Model VR 100) ......25
Canceling a Next/Previous Music Search ....25
Dolby Noise Reduction (Model VR 200 and VR 400)......26
Tape Player Care ....26
Cassette Tape Care 26
Cassette Clean Indicator....26
Compact Disc (CD) Player 28
CD Select....28
CD Eject 28
Next Track 28
Previous Track....28
Fast Forward....29
Fast Reverse....29
Repeat Play Function 29
Random Play Function....29
Scan Tracks Function (CD Player)....30
Using the CD Changer....31
CD Changer Select....31
CD Select....31
Repeat Track Function 31
Repeat CD Function....31
Random Track Function 32
Random CD/Track Function 32
Scan Tracks Function 33
Scan CDs Function....33
Infrared Remote 34
Power On/Off 34
Volume....34
Mute....34
Radio Select....34
Radio Tune 34
Radio Seek....34
Radio Presets 34
Cassette Select....35
CD Select (Single, Integrated CD)....35
Track Select 35
CD Changer Select....35
CD Select....35
Steering Wheel Controls....36
Volume....36
Radio Manual Tune 36
Radio Seek....36
Cassette Fast Forward/Rewind 36
CD Track Select 36
CD Select....36
Additional Inputs / Outputs ....37
Switched Auxiliary Outputs 37
Low-Level Audio Outputs....37
Auxiliary Audio Input 37
Selecting Speakers for Auxiliary Audio 37
Cell Phone Mute....37
System Overview 1
System Overview
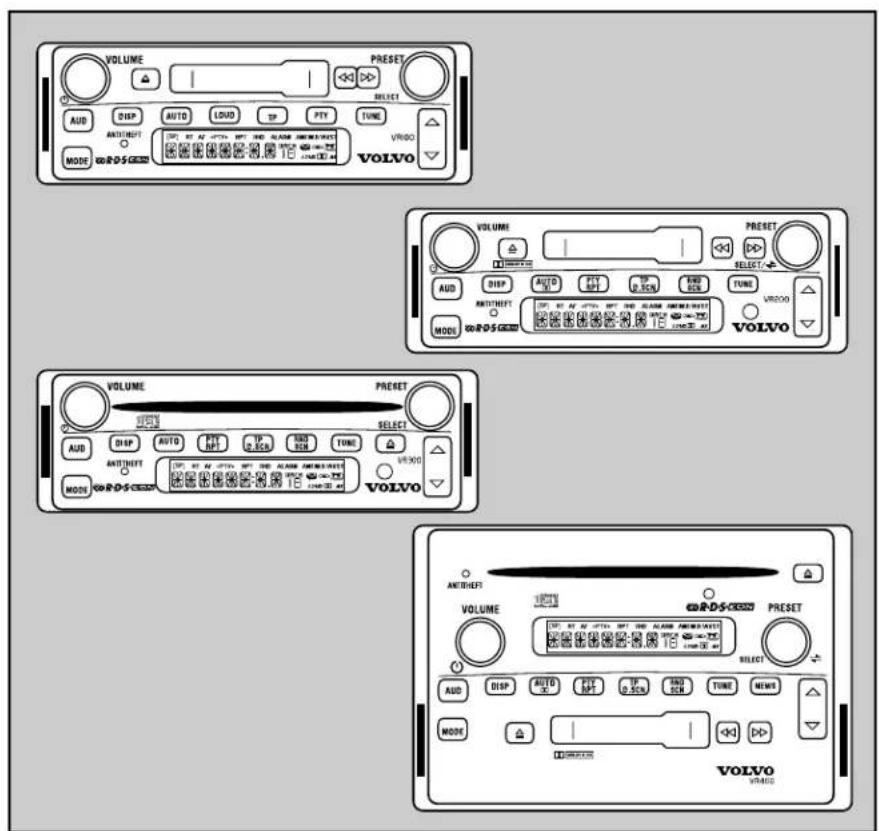
Four models of the radio are available:
• AM/FM/Mechanical Cassette – Model VR 100
- AM/FM/Logic cassette with external CD changer capability – Model VR 200
• 1-Din AM/FM/CD player with external CD changer capability — Model VR 300
- 2-Din AM/FM/Logic Cassette/CD player with external CD changer capability - Model VR 400
In addition to the front panel controls for these radios, most models can also be controlled using an optional remote wireless control or optional steering wheel-mounted controls.

Model VR 100

Model VR 200
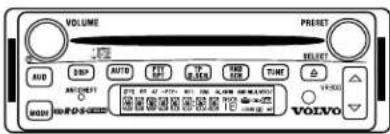
Model VR 300
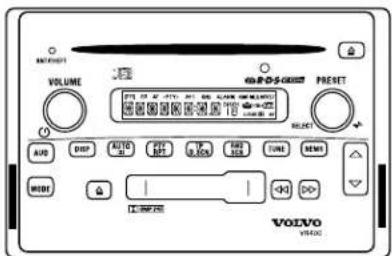
Model VR 400
2 Using the Radio
Using the Radio
Notice: Before using the manual, check to see what radio model is in your vehicle. Some system features described may not apply to your radio.
Security Code
Your radio is protected by a security code. The security code can be found on a label delivered with the radio. The security code cannot be changed.
Note: Certain vehicles have optional electronic devices that will automatically enter the security code if power is interrupted.
Note: Contact your local dealer regarding your security code if lost.
When the radio power is first turned on after power has been interrupted, "ID CHECK" and then "LOCK" is displayed for 3 seconds. Then "0000" is displayed. To unlock the radio, enter the four-digit security code found on the removable label by doing the following:

Turn to scroll for first number.
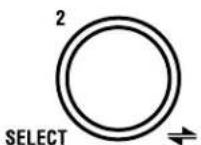
Press to select number.

Turn to scroll to second number.
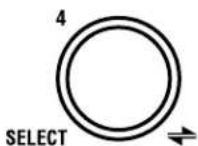
Press to select number.
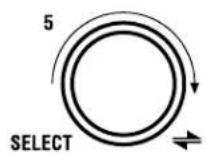
Turn to scroll to third number.

Press to select number.
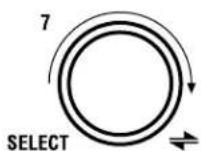
Turn to scroll to fourth number.

Press to select number.
If the code is entered correctly, the radio will switch to the last active mode (i.e. FM, CD, etc.) and is ready to use.
If the code is entered incorrectly, you can try 2 more times. After 3 incorrect entries, the radio will display "LOCK." You must turn the radio off, while leaving the ignition and battery on, for 1 continuous hour before attempting to unlock the radio again.
Power On/Off
Press to turn ON/OFF.
Using the Radio 3
Language
To select the desired Radio Data System (RDS) Program Type Function (PTY) display language, turn the radio off,

Press and hold for 2 seconds.

Turn to scroll through available languages.
(English, French, and Spanish in US-selected frequency bands, or English, French, German, Italian, and Spanish in European-selected frequency bands).
After the desired language is displayed for 5 seconds, the setting is saved and the display returns to the default.
Country Frequency Selection
Different countries broadcast on different sets of radio frequencies. You can select from several different country-specific radio frequency bands.
To select a country frequency band,

Press and hold for 3 seconds.
until the current country frequency band is displayed.

Press to scroll through available bands.
AMERICAS > EUROPE > AUSTRALI
JAPAN > ARGENTIN > SAUDI
The selected band will be saved after 5 seconds.
Note: When a new country is selected, all preset stations from the previous country are erased.
Display Illumination
All of the radio controls are illuminated for nighttime viewing. Dimming the vehicle interior lights will also dim the radio controls.
4 Clock
Clock
Displaying the Time
When the ignition is on, the time of day is displayed, even when the radio is off. When the ignition is off, you can display the time for 5 seconds.

Press to display the time.
While the radio is on and in any mode, press and release the DISP button to change the display from the current display to the time of day.
Note: If the radio is currently tuned to an RDS broadcast, it may require several presses to see the time of day.
Setting the clock
12- or 24-Hour Format
You can select either a 12-hour or 24-hour style time display.
To change the time format,

Press and hold for 3 seconds.
until "12/24" is displayed. The number shown after "12/24" indicates which format is selected (12-hour or 24-hour). To change this number, press the SELECT knob. After 5 seconds, the setting is saved and the display returns to default.
Note: When the European frequency is selected, 24-hour format is selected automatically; however, it can be changed by following the previous steps. Likewise, when Non-European frequency is selected, the 12-hour format is selected automatically, but can also be changed as described above.
Setting Time of Day
To change the time of day:
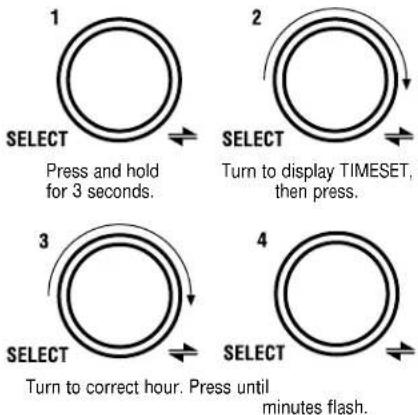
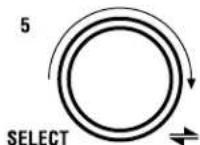
Turn to correct minutes.
After 5 seconds, the setting is saved and the display returns to the default.
Clock 5
Alarm Clock and Timer (Except Model VR 100)
Setting the Alarm Clock
To set the alarm clock,
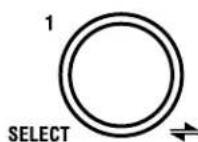
Press and hold for 3 seconds.

Turn to display ASET.
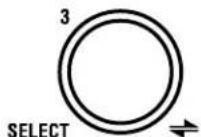
Turn to correct hour.
If the radio is set to the 12-hour format, "AM" or "PM" is also displayed.

Turn to change hour. Press until minutes flash.


Turn to change minutes.
After 5 seconds, the setting is saved and the display returns to the default.
Note: If the radio is in the 12-hour format, be sure the setting correctly shows AM or PM.
Alarm Clock On / Off / Snooze
To turn the alarm on or off, press and hold the SELECT knob for 3 seconds until "12/24" is displayed, then turn the SELECT knob until "ALARM" is displayed. Press the SELECT knob to choose between "Y" (On) or "N" (Off). After 5 seconds, the setting is saved and the display returns to the default. When the alarm is set, the alarm icon ALARM is displayed.
If the radio is on when the alarm time is reached, a beeping alarm sounds and the alarm time is shown. If the radio is off when the alarm time is reached, the last radio mode turns on.
In either case, if you press any of the radio buttons while the alarm is going off, the alarm "snoozes" for 9 minutes. After 9 minutes, the alarm turns on again and remains on until snooze is activated or the alarm is turned off, as described above.
Note: If the alarm is not turned off or the snooze mode is not activated, the alarm will stop after 18 minutes to avoid discharging the battery.
Alarm Volume
You can adjust the volume of the alarm by pressing and holding the SELECT knob for 3 seconds until "12/24" is displayed. Then turn the SELECT knob until "AL VOL" is displayed and turn the VOLUME knob to increase or decrease the volume of the alarm.
After 5 seconds, the setting is saved and the display returns to the default.
6 Clock
One-Hour Timer
You can set the radio to play for one hour and then automatically turn off.
To turn the radio on for another hour, with the ignition off, press the VOLUME knob. After 1 hour of play, the radio will turn off. To turn the radio on for another hour, press the VOLUME knob again.
Audio Controls 7
Audio Controls
The bass and treble audio settings apply to all radio modes (AM/FM, LW or WX, cassette and CD). A separate set of the following audio adjustments can be stored for each mode.
Note: LW (longwave) is available only on European models. WX (weather) is available only on U.S. models.
Volume Control
While listening in any mode,

Turn to adjust volume.
If you are currently adjusting the sound quality of the radio, (e.g., BASS, TREB, BAL, FADE), push the AUD button until "VOL" is displayed, then turn the VOLUME knob as described above.
Dynamic Distortion Limiting
Dynamic Distortion Limiting automatically limits the audio distortion level caused by playing the radio too loud. You do not need to set or adjust this feature.
Balance Control
To adjust the left/right balance,
1

Press AUD repeatedly to display BAL.

Turn VOLUME to adjust BALANCE.

Turn SELECT to adjust BALANCE.
After 5 seconds, the display returns to the default.
Fade Control
1

Press AUD repeatedly to display FADE.

Turn VOLUME to adjust sound between front and back speakers.

Turn SELECT to adjust sound between front and back speakers.
After 5 seconds, the display returns to default.
8 Audio Controls
Treble Control
1

Press AUD repeatedly to display TREB.
2
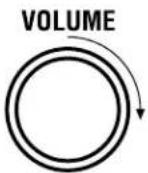
Turn VOLUME to adjust TREBLE.
OR
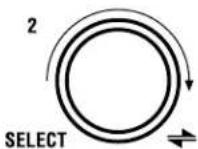
Turn SELECT to adjust TREBLE.
After 5 seconds, the display returns to the default.
Bass Control
1

Press AUD repeatedly to display BASS.
2

Turn VOLUME to adjust BASS.
OR

Turn SELECT to adjust BASS.
After 5 seconds, the display returns to the default.
Midrange Control (Model VR 400 only)
1

Press AUD repeatedly to display MID.
2

Turn VOLUME to adjust MIDRANGE.
OR

Turn SELECT to adjust MIDRANGE.
After 5 seconds, the display returns to the default.
Loudness
The Loudness feature boosts the low (bass) frequency response at low volume levels, improving the sound quality. The amount of boost automatically decreases as volume is increased. On the Model VR 100,

Press to LOUDNESS on. Press again to turn off.
The "LOUD" icon will be displayed.

Press to turn off.
All other Models have an Auto-Loudness function. The feature cannot be turned on or off.
Audio Controls 9
2- or 4-Speaker Select
Depending on the radio speaker installation in your vehicle, 2- or 4-speaker output can be selected. To change this selection,

Press for 3 seconds to display 12/24.

Turn to display SPKR.

Press to choose 2 or 4.
When the 2-speaker option is chosen, the rear speakers are disabled and the fade adjust setting is not available.
After 5 seconds, the setting is saved and the display returns to the default.
Room Simulation (Model VR 400 Only)
You can select one of 5 acoustic settings, simulating different listening environments and providing a variety of sound qualities:
TALK: This mode limits the frequency response and delays audio from the rear speakers compared to the front speakers. This effect is very useful on AM talk radio because it filters much of the noise and moves the audio image forward.
LIVE: Simulates the acoustics of live musical performance in a larger room.
AUDITORIUM: The same effect as LIVE, but more pronounced, giving the feeling of an even larger room.
ARENA: Creates the effect of being in a large arena.
DRIVER L or DRIVER R: The sound from the driver side front speaker is delayed with respect to the passenger side front speaker, creating the effect of shifting or moving the audio image (for left hand and right hand drive vehicles).
To select a Room Simulation,
1

Press AUD until RSIM is displayed.

Turn VOLUME to select sound effect.

Turn SELECT to select sound effect.
10 Audio Controls
To change the degree of effect for the selected simulation
3

Press AUD to scroll RSIM # to change the degree of effect.

Turn VOLUME to increase or decrease effect.
OR

Turn SELECT to increase or decrease effect.
from 0 (minimum) to 15 (maximum).
After 5 seconds, the setting is saved and the display returns to default as indicated on the display.
Speed-Dependent Volume (Model VR 400 only)
The Model VR 400 can automatically adjust the volume based on your vehicle's speed, turning the volume up as you travel faster and down as you travel slower. This adjustment helps the radio to be heard over vehicle and road noise.
To turn on Speed-Dependent Volume,

Press and hold to display 12/24.

Turn to display SCV.

Press to choose amount of volume.
change to "N" (off), "1" (low setting), "2" (medium setting) or "3" (high setting).
Note: The volume change is heard only while the vehicle is moving, but may not be noticeable due to the changes in road noise.
Tuning the Radio 11
Tuning the Radio
Band Select
You can select from several bands of entertainment and information radio services:
U.S. models: AM, FM, WX
European models: FM, AM_MW, AM_LW
To select a band, (AM, FM, WX):

Press MODE to display desired band.
To select AM_LW with the European model, first select AM_MW

flowchart
graph TD
    A["1 MODE"] --> B["2 MODE"]
    style A fill:#f9f,stroke:#333
    style B fill:#bbf,stroke:#333
First press and hold MODE for 3 seconds until beep to select AM_MW.
Press MODE to display AM_MW.
Weather Band
The National Oceanic and Atmospheric Administration (NOAA) of the U.S. Department of Commerce provides continuous broadcasts of taped weather messages. These messages are repeated every 4 to 6 minutes and routinely updated every 1 to 3 hours. Updates are more frequent during severe weather. Most NOAA weather stations broadcast 24 hours a day.
NOAA broadcasts on 7 channels. In some areas, more than one broadcast may be available. Select the broadcast location closest to your location for the best reception.
Note: The Weather Band option is only available when the country chosen is "Americas." See the Country Frequency Selection section.
Note: Severe weather condition broadcasts are not automatically broadcasted by these radios. You must have the weather band selected to hear weather condition information.
When the Weather band is selected, the radio will display "WX" and a channel number. The WX icon will also be illuminated.
Longwave Band
The longwave frequency band is a European AM broadcast in the frequency range of 153 to 279 kHz. It is only available when the European frequency band has been selected.
Tune
In any tuner mode (AM, FM, WX or LW)

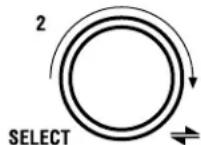
Press TUNE. Turn to manually tune.
If you reach the end of a frequency band, the radio will rollover or “wrap” to the opposite end of the band and continue through the band.
12 Tuning the Radio
If the select knob is not rotated within 5 seconds, the manual tune function is cancelled and the SELECT returns to its default function.
Seek
The radio can automatically seek stations, finding and stopping on the next station that exceeds the sensitivity level set.
To seek for a station in any tuner mode (AM, FM, WX, LW):

Briefly press up or down to SEEK.
the next higher or lower station on the current band. The radio mutes as it searches for the next station with a strong signal. When it finds a station, the radio stops seeking and the audio returns to the original volume.
Press again for next station.
Seek Sensitivity - FM and AM (U.S. Frequency bands only)
In FM and AM tuner modes, the sensitivity of the Seek function can be adjusted to stop at stations with weaker or stronger signals. To adjust this sensitivity,

Press and hold to display 12/24.

Turn to display SEEK.

Press to scroll between -2 (min) and +2 (max).
After selecting SEEK, you can also rotate the VOLUME knob to scroll between the settings.
After 5 seconds, the setting is saved and the display returns to the default. The “-2” setting will stop only on very strong signals. The “+2” setting will stop on weaker signals.
Scan
You can also scan for stations. During a Scan, the radio searches for the next station, pauses on it for a few seconds, and then searches again for the next station.
To scan while in any tuner mode (AM, FM, WX or LW), press and hold the UP/DOWN rocker button to search for the next higher or lower station on the current band. The radio displays
Tuning the Radio 13
“SCAN” and the audio mutes. The radio searches for and stops on the next station with a strong signal and the audio returns to the original volume. After 5 seconds, the audio mutes again and the radio continues the scan. To stop the scan, press the UP/DOWN rocker button.
If no station is found in 2 passes through the band, the scan will stop at the starting frequency.
RDS (Radio Data System) Features
RDS transmits additional information encoded on an FM station's regular signal. The RDS feature works only with FM broadcast stations transmitting this encoded information. RDS broadcast is widely available in Europe, but less common in North America.
RDS features include:
• Alternate Frequency switching
• Traffic Program announcements
- Program Type selections
- Radio Text
Alternate Frequency Switching (AF)
With the AF feature, the radio automatically switches to another station or frequency, if available, that is broadcasting the identical program materials as the original station, when the original station begins to fade. With AF turned on, you can drive across a country or continent while listening to the same program, without retuning your radio.
To turn the AF feature on,

While in FM Mode, press and hold TUNE for 3 seconds to display AF-ON.
To turn AF off,
Press and hold TUNE for 3 seconds to display AF-OFF.

Press UP/DOWN rocker button.
Note: AF networks are common in Europe, but rare in the US.
Setting FM Memory (European programmed radio frequencies only)
You can help the radio make faster Seeks and AF switches to new frequencies by using the FM Memory function. This function searches for and stores the frequencies of local RDS and non-RDS FM stations in memory. The radio uses this information so it can more quickly find and switch to a stronger station when the currently tuned station begins to fade or a stronger signal becomes available.
Note: The stations stored using the FM Memory function are separate from stored FM Presets.
To manually activate the FM Memory function and store local radio frequency information, press and hold the AUTO
14 Tuning the Radio
button for 5 seconds while in FM mode. The radio also will automatically start an FM Memory search any time you Seek a TP station when AF is off, or Seek a TP station when the radio is not tuned to an RDS station.
Note: You can't start an FM Memory search while the radio is receiving a TP broadcast.
The radio displays “MEMORY” and the audio mutes as it seeks for and stores FM station information.
Note: If TP is turned on when you start the FM Memory function, the radio display will indicate "SEARCH" instead of "MEMORY".
The FM memory process typically takes less than 30 seconds, but can take up to several minutes, depending on the number and type of stations available. You can cancel the FM memory search by turning AF off or pressing and holding the AUTO button.
To keep the stored FM Memory information current, you should occasionally repeat the FM Memory search to update the information about local frequencies. FM Memory information remains stored until another FM Memory store function occurs.
Traffic Program (TP)
When the Traffic Program feature is turned on and a traffic announcement is received, the radio will automatically interrupt the current mode to broadcast traffic condition announcements that are provided by some stations or networks.

Press to turn on. [TP] icon will display.

Press again to turn off.
Note: TP cannot be turned on in AM, WX or LW mode.
If TP is turned on and the radio is not tuned to a station broadcasting traffic announcements, it will begin to SEEK a station that broadcasts announcements. The radio will display “SEARCH”.
During a Traffic Announcement, the radio display shows "TRAFFIC".
There are 3 TP icons that may be displayed:
TP - Current station can broadcast traffic announcements, the function is not enabled.
[TP] Flashing – Current station can broadcast traffic announcements, the function is enabled.
[ ] – The function is enabled, but there are no stations/networks being received that broadcast traffic information. This can also occur if the TP function is enabled but the radio travels out of the broadcast area for the station/network that was broadcasting the traffic information.
Tuning the Radio 15
Traffic Announcement Volume
You can adjust the volume of all Traffic Announcements by adjusting the volume while an announcement is being heard. When the next announcement is received, the volume will automatically increase to this volume. When the announcement is over, the radio will return to the previous volume setting of whatever radio mode was playing.
The Traffic Announcement volume setting will be saved for all future announcements until it is adjusted again.
Program Type Function (PTY)
To select a particular type of music programming (Jazz, Sports, Country, etc.),

Press to display
Turn to scroll through available selections.

Press to SEEK or SCAN.
If a selection is not made within 10 seconds, no PTY will be saved and the radio will return to the default.
16 Tuning the Radio
European Program Type List
The PTY listing is shown below:
EUROPEAN PTY LISTING
| CODE | TYPE ENGLISH FRENCH | GERMAN | ||
| NO TYPE NO PTY RIEN TPY | KEIN PTY | |||
| 1 NEWS NEWS INFOS | NACHRICH | |||
| 2 | CURRENT AFFAIRS | AFFAIRS | MAGAZINE | AKTUELL |
| 3 INFORMATION INFO SERVICES INFO | ||||
| 4 SPORTS SPORT SPORT | ||||
| 5 | EDUCATION | EDUCATE | EDUCATIF | BILDUNG |
| 6 DRAMA DRAMA FICTION DRAMA | ||||
| 7 CULTURE CULTURE CULTURE KULTUR | ||||
| 8 SCIENCE SCIENCE SCIENCES WISSEN | ||||
| 9 VARIED VARIED DIVERS VERSCHIE | ||||
| 10 | POP MUSIC | POP M | M POP | POP |
| 11 | ROCK MUSIC | ROCK M | M ROCK | ROCK |
| 12 | EASY LISTENING MUSIC | EASY_M | CHANSONS | U-MUSIK |
| 13 | LIGHT CLASSICAL | LIGHT M | M CL LEG | LKLASSIK |
| 14 | SERIOUS CLASSICAL | CLASSICS | M CL SER | EKLASSIK |
| 15 | OTHER MUSIC | OTHER M | AUTRE M | ANDERE M |
| 16 | WEATHER | WEATHER | METEO | WETTER |
| 17 | FINANCE | FINANCE | FINANCE | FINANCE |
| 18 | CHILDREN'S PROGRAMS | CHILDREN | ENFANTS | KINDER |
| 19 | SOCIAL AFFAIRS | SOCIAL | SOCIETE | SOZIALES |
| 20 | RELIGION | RELIGION | RELIGION | RELIGION |
| 21 | PHONE-ON | PHONE IN | L OUVERT | ANRUFEN |
| 22 | TRAVEL | TRAVEL | VOYAGE FREIZEIT | |
Tuning the Radio 17
EUROPEAN PTY LISTING (continued)
| CODE TYPE ENGLISH FRENCH GERMAN | ||||
| 23 LEISURE LEISURE LOISIRS REISEN | ||||
| 24 MUSIC JAZZ MJAZZ JAZZ | ||||
| 25 MUSIC COUNTRY COUNTRY COUNTRY | ||||
| 26 | NATIONAL MUSIC | NATION M | M NATION | NATIONAL |
| 27 | OLDIES MUSIC | OLDIES | RETRO | OLDIES |
| 28 FOLK MUSIC FOLK_M FOLKLORE FOLKLORE | ||||
| 29 DOCUMENTARY DOCUMENT DOCUMENT FEATURE | ||||
| 30 | ALARM TEST | TEST | TEST | TEST |
| 31 | ALARM | ALARM! | ALERTE! | ALARM! |
| 32 | ANY | TOUS | ALLE | |
| 33 | OFF | ARRET | AUS | |
ITALIAN & SPANISH PTY LISTINGS
| CODE | TYPE | ITALIAN | SPANISH | |
| 0 | NO TYPE | NO PTY | NO PTY | |
| 1 | NEWS | NOTIZIE NOTICIAS | ||
| 2 | CURRENT AFFAIRS | AFFARI | TOPICOS | |
| 3 | INFORMATION | INFORM INFORMAC | ||
| 4 | SPORTS | SPORT | DEPORTES | |
| 5 | EDUCATION | EDUCAZ. | EDUC. | |
| 6 | DRAMA | TEATRO | TEATRO | |
| 7 | CULTURE | CULTURA | CULTURA | |
| 8 | SCIENCE | SCIENZA | CIENCIAS | |
| 9 | VARIED | VARIE | DIVERSOS | |
| 10 POP | MUSIC | POP | M. | POP |
| 11 ROCK | MUSIC | ROCK | M. | ROCK |
| 12 EASY LISTENING MUSIC | EASY_M G-EXITOS | |||
| 13 LIGIT CLASSICAL | CLASSICL | LIGERA. | ||
| 14 | SERIOUS CLASSICAL | CLASSIC2 | CLASICA | |
| 15 OTHER MUSIC | ALTRA M. | OTRAM | ||
| 16 WEATHER | TEMPO | TIEMPO | ||
| 17 FINANCE | FINANZA | ECONOMIA | ||
| 18 | CHILDREN'S PROGRAM | BAMBINI | INFANCIA | |
| 19 SOCIAL AFFAIRS SOCIALE | SOCIEDAD | |||
| 20 RELIGION | RELIG. | RELIGION | ||
18 Tuning the Radio
ITALIAN & SPANISH PTY LISTINGS (continued)
| CODE | TYPE | ITALIAN | SPANISH | |
| 21 | PHONE-ON | TELEF. | CONSULTA | |
| 22 | TRAVEL | VIAGGI | VIAJES | |
| 23 | LEISURE | HOBBY | OCIO | |
| 24 | JAZZ | JAZZ | JAZZ | |
| 25 | COUNTRY | COUNTRY | FOLKLORE | |
| 26 | NATIONAL | MUSIC | MUS.ITAL | M.NCNAL |
| 27 | OLDIES | MUSIC | OLDIES | M_AYER |
| 28 | FOLK | MUSIC | M_FOLK | M_FOLK |
| 29 | DOCUMENTARY | DOCUMENT | DOCUMENTAL | |
| 30 | ALARM | TEST | PRUEBA | |
| 31 | ALARM | ALLARME | ALARMA! | |
| 32 | ANY | TYPE | TUTTI | ALGUNO |
| 33 | OFF | SPENTO | APAGADO | |
North American PTY Listing:
NORTH AMERICAN PTY LISTING
| CODE | TYPE | ENGLISH | FRENCH | SPANISH | |
| 0 | NO | PROGRAM TYPE | NONE | AUCUN | NINGUNO |
| 1 | NEWS | NEWS | INFOS | NOTICIAS | |
| 2 | INFORMATION | INFO | SERVICES | INFORMAC | |
| 3 | SPORTS | SPORT | SPORT | DEPORTES | |
| 4 | TALK | TALK | CAUSERIE | CHARLA | |
| 5 | ROCK | ROCK_M | `M_ROCK | M._ROCK | |
| 6 | CLASSIC ROCK | CLS_ROCK | ROCK_CLA | ROK_CLAS | |
| 7 | ADULT HITS | ADLT_HIT | CONTEMP | HIT_ADTO | |
| 8 | SOFT ROCK | SOFT_RCK | SOFT_RCK | ROK_BLDO | |
| 9 | TOP 40 | TOP_40 | 40_HIT_P | 40_PRLES | |
| 10 | COUNTRY MUSIC | COUNTRY | COUNTRY | COUNTRY | |
| 11 | OLDIES MUSIC | OLDIES | OLDIES | OLDIES | |
| 12 SOFT | SOFT SOFT MUS_SUAV | ||||
| 13 | NOSTALGIA | NOSTALGA | BIG_BAND | NOSTLGIA | |
| 14 JAZZ MUSIC | JAZZ JAZZ JAZZ | ||||
| 15 | CLASSICAL | CLASSICL | CLASSIC | CLASICOS | |
| 16 | R & B | R AND B | R AND B | CONTMPOR | |
| 17 | SOFT R&B | SOFT R B | SOFT R B | CONT_SUA | |
NORTH AMERICAN PTY LISTING (continued)
| CODE | TYPE | ENGLISH | FRENCH | SPANISH | ||
| 18 | LANGUAGE | LANGUAGE | LANGUE | IDIOMAS | ||
| 19 | RELIGOUS | MUSIC | REL_MUSC | MUS_REL | MUS_REL | |
| 20 | RELIGOUS | TALK | REL_TALK | CAU_REL | CHRL_REL | |
| 21 | PERSONALITY | PERSNLTY | PERS | PRSONAJE | ||
| 22 | PUBLIC | PUBLIC | PUBLIC | PUBLICA | ||
| 23 | COLLEGE | COLLEGE | UNIV. | UNIVER | ||
| 24-28 | SPARE | BLANK | ||||
| 29 | WEATHER | WEATHER | METRO | TIEMPO | ||
| 30 | EMERGENCY TEST | TEST | TEST | PBA_EMRG | ||
| 31 | EMERGENCY ALERT | ALERT! | ALERTE | ALARMA! |
* NOTE: PTYs marked with * cannot be used for a PTY SEEK, but can (only) be shown in the display.
Program Type Interrupt
Program Type Interrupt (PTY) will interrupt all other modes (cassette, CD, etc.) if a radio station begins to broadcast the chosen PTY program.
To designate an interrupt, follow the previous instructions to choose the desired program type, then press and hold the PTY button for 2 seconds while the desired PTY is selected, until “*” is displayed and the chosen PTY icon is enclosed in
To cancel the interrupt, press the PTY button and then rotate the SELECT knob to display the PTY designated by the “*”. Press and hold the PTY button for 2 seconds until “*” is no longer displayed.
Note: An RDS interrupt can't interrupt another RDS interrupt. The first interrupt received will be played and any others
received during the playback of the first interrupt will be ignored.
Program Type Seek
If PTY is not active, press the PTY button. Then press the UP/DOWN rocker button to Seek for the currently selected program type.
Program Type Scan
If PTY is not active, press the PTY button. Then press and hold the UP/DOWN rocker button until a beep is heard and the radio begins to scan for the currently selected program type.
Variants/Region Function
With this function turned on, the radio will seek or scan for AF network stations that have the same programming with only slight differences, like different commercials. With this function off, the radio will not switch to a network with similar programming.
20 Tuning the Radio
To turn this function on or off, press and hold the SELECT knob until "12/24" is displayed. Then turn the SELECT knob until "ACPT VAR" is displayed. You can choose from the following options:
- To look for identical and similar stations, choose “ACPT VAR” (in US) or “REG OFF” (in Europe).
- To look for only identical stations choose "RJCT VAR" (in US) or "REG ON" (in Europe).
Press the SELECT knob to choose the desired option.
After the desired choice is displayed for 5 seconds, the setting is saved and the display returns to the default.
Radio Text (RT) (Except Model VR 100)
The Radio Text function allows you to read any text messages transmitted by the currently tuned radio station on your radio display. These messages could include song title and artist, station slogans, contest information, etc.
Messages are available when the RT icon [RT]s displayed. To view the messages, press the DISP button until "TEXT" is displayed. After 3 seconds, the first line of the message is displayed.
After 2 seconds, the next line of the message is automatically shown. To scroll through the message at a faster pace, press the DISP button. Three seconds after the last line of text is displayed, or when the DISP button is pressed, the default display returns.
NEWS Program Button (Model VR 400 only)
When this feature is active, the radio will automatically interrupt the current programming to broadcast news programming.
To enable a news interrupt, while in FM mode,

Press to enable a news interrupt.

Press to SEEK news programming.


Press again to turn off.
Presets 21
Presets
You can enter presets for your favorite radio stations on each of the radio's different bands.
Model VR 100 has 12 FM, 12 AM and 6 WX preset channels (U.S. models only) or 6 LW preset channels (European models only). All other models have 18 FM, 12 AM and 6 WX preset channels (U.S. models only) or 6 LW preset channels (European models only).
Storing Preset Stations
To store a station as a preset:
- Tune to the desired station.
Push and release until STORE and a flashing preset number display.

Turn to change preset number.

Push to store station at that number.
"STORE" is cleared from the display and the preset number stops flashing.
The audio returns to the original volume.
Note: If no preset is stored, the radio will return to the previous mode.
Accessing the Preset Stations
Press MODE until desired band is displayed (AM. FM, WX or LW).
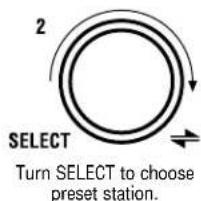
flowchart
graph TD
    A["2"] --> B["SELECT"]
    B --> C["2"]
    style A fill:#f9f,stroke:#333
    style B fill:#bbf,stroke:#333
    style C fill:#dfd,stroke:#333
Note: If currently tuned to the desired band, you only need to turn the SELECT knob.
Preset Scan (Except Model VR 100)
You can Scan through each of the preset stations in each of the bands.
To Scan through your presets,

Press SCN to display PSCN and begin scanning presets.
22 Presets
While scanning, the radio pauses for approximately 5 seconds on each preset.
To stop the scan,

Press SCN again.
The scan continues until it is stopped.
Note: When scanning through presets, the radio will only stop on presets where the station strength is strong enough.
Auto-Store Presets
To automatically store the strongest 18 stations available (12 stations for Model VR 100) as presets, (AM, FM, WX or LW):

Press AUTO to scan for strongest signals and store as presets.
The radio displays AS and "AUTO" as the radio searches for and stores stations.
Auto-Store will stop after 18 stations (12 for Model VR 100) are found and stored. If there are not enough strong stations to fill the presets, the stations discovered will be duplicated until all memory locations are filled. If no stations are found, Auto-Store will automatically cancel.
Press the AUTO button at any time to cancel the Auto-Store function.
Note: When Auto-Store is turned off, the presets that were saved will be lost and the radio will return to the presets stored before Auto-Store was enabled.
Emergency Broadcast (Alert/Alarm)
The feature will interrupt the current mode and switch to an emergency radio broadcast. The radio will display “ALERT” (U.S. models) or “ALARM” (European models).

Select any MODE to cancel EMERGENCY BROADCAST ALERT/ALARM.
Emergency Broadcast Volume
You can adjust the volume of all Emergency Broadcasts while a broadcast is being heard. When the next Emergency Broadcast is received, the volume will automatically increase to this volume. When the broadcast is over, the radio will return to the previous volume setting of whatever radio mode was playing.
The Emergency Broadcast volume setting will be saved for all future announcements until it is adjusted again.
Note: You will not be able to adjust the volume lower than the minimum preset alert/alarm volume.
You can cancel an alert/alarm by selecting any mode (AM, FM, CASS, CD, etc.).
Using the Cassette Player 23
Using the Cassette Player
Cassette Select
Model VR 100
Insert a cassette into the radio and it will automatically begin to play. “TAPE_A” or “TAPE_B” is displayed, depending on which side of the tape is playing.
Model VR 200 and VR 400
With a cassette inserted, press the MODE button until "CASS" is displayed. "TAPE_A" or "TAPE_B" is displayed, depending on which side of the tape is playing. If no cassette is loaded when pressing the MODE button, the radio will display "NO TAPE" and return to FM mode.
Cassette Tightening and Error Detection (Except Model VR100)
Each time a cassette is inserted into the radio, the player automatically checks for a loosely wound tape and tightens it before playing. The player also detects tapes that are too tightly wound or broken. If a tightly wound or bad tape is detected, "BAD TAPE" is displayed and the tape is ejected.
The Cassette Tightening and Error Detection feature may prevent cleaning cassettes from working properly. To use cleaning cassettes, you can override the error detection.
1 TUNE
If a cleaning tape is rejected,
press and hold TUNE for 5 seconds
(while the radio is OFF and the ignition is ON)
until BAD TAPE and DETECT OFF display
Then insert cleaning tape.
After "BAD TAPE" and "DETECT
OFF" are displayed, insert the cleaning tape.
2 TUNE
To turn CASSETTE TIGHTENING and
ERROR DETECTION back on,
press and hold TUNE until
BAD TAPE DETECTION is displayed.
Change Cassette Side
Model VR 100
To play the opposite side of a playing cassette, press the RW and FF buttons at the same time.
Model VR 200 and VR 400
To play the opposite side of a playing cassette,
Model 100

Press and hold RW and FF buttons at the same time.
Models 200 & 400

Press SELECT.
Note: For all models, the cassette is automatically reversed when it reaches the end of a side.
24 Using the Cassette Player
Stop and Eject
Model VR 100
To eject the cassette, press the EJECT button 📆 the tape is ejected and radio mode is activated. Tapes can be ejected even while the ignition is off.
Model VR 200 and VR 400
To stop play, press the EJECT button △. The radio will return to the last selected mode.
Press the EJECT button 📁 again to eject the cassette.
To eject the cassette when the radio is in another mode, press the EJECT button △.
Pause
(Model VR 100 only)
To pause a playing cassette, press the SELECT knob until "MUTE" is displayed. To begin playing the cassette again, press the SELECT knob again.
Fast Forward and Rewind
Model VR 100
To activate Fast Forward or Rewind, press the Fast Forward ▶▶ or Rewind ◀◀ button.
To cancel the Fast Forward or Rewind, press the opposite button, or
Model VR 200 and VR 400
To activate Fast Forward, press the Fast Forward button until "FWD >>" is displayed.
To activate Rewind, press the Rewind button until “<< REV” is displayed. To cancel Fast Forward or Rewind, press the same button again.
Note: If Radio Monitor (following section) is on, you may seek a different station while the cassette is in Fast Forward or Rewind mode. While seeking, the display shows "FWD" or "REV" and the frequency number.
Radio Monitor Function
The Radio Monitor function allows the radio to be heard while fast forwarding or rewinding a cassette. To turn Radio Monitor on or off,

Press for 3 seconds to display 12/14.

Turn to display MONI.

Press to change between ON and OFF.
After 5 seconds the selection is saved and the display returns to the default.
Using the Cassette Player 25
Next Music Search (except Model VR 100)
Most cassettes have blank space between each selection. You can use Next Music Search to find these pauses, allowing you to find the beginning of the next selection.
To fast forward to the next blank space on the cassette,
1

Press to display NEXT>1.
To fast forward past several blank spaces,
2

Press repeatedly to pass several blank spots.
The number on the display shows how many blank spaces will be skipped.
If the end of the side is reached during a Next Music Search, the cassette direction changes and begins to play the opposite side.
Previous Music Search (except Model VR 100)
To rewind to the previous blank space on the cassette,
1

Press to display <PREV 1.
2

Press repeatedly to pass several blank spots.
If the beginning of the side is reached during a Previous Music Search, the cassette begins to play at the beginning of the current side.
Note: If the current selection has been playing for less than 8 seconds, pressing the UP/DOWN rocker button will fast rewind to the blank space before the previous selection.
Canceling a Next/Previous Music Search
To cancel a music search,

Press until NEXT>1/<PREV 1 display is 0.
26 Using the Cassette Player
Dolby Noise Reduction (Models VR 200 and VR 400)
Enabling the Dolby B-type noise reduction function during cassette playback will reduce background noise on tapes that were recorded with this technology.
To turn on or turn off Dolby B-type noise reduction, press the button with the double-D logo ☐. The double-D icon will display while the noise reduction is on.
Manufactured under a license from Dolby Laboratories. Dolby and the double-D symbol are trademarks of Dolby Laboratories.
Tape Player Care
The tape player must be cleaned after every 35 hours of use.
Caution: Not cleaning the tape player can cause reduced sound quality and may ruin your cassettes or damage the player.
Clean the player with a scrubbing-action, non-abrasive cleaning cassette. These cassettes have a bottle of cleaning liquid that is applied to cleaning pads and scrubs the tape heads. To properly clean your tape player, follow the instructions with the cleaning cassette. Cleaning cassettes should be replaced regularly.
Note: The cleaning cassette is not included with your radio and must be purchased separately.
Never touch the cassette head with magnetic or hard objects.
Do not lubricate the player mechanism.
Do not use cassettes that are longer than 90 minutes (C-90). Longer cassettes, like C-120, tend to have thinner tape that may stretch or break and may damage your player.
Cassette Tape Care
Do not use cassettes that are deformed, dirty or contaminated.
Cassette tapes that are not properly stored in their plastic cases away from contaminants, direct sunlight and extreme heat may not operate properly and may damage your tape player.
Cassette tapes are subject to wear and the sound quality may degrade over time. Always verify the cassette tape is in good condition before use.
Cassette Clean Indicator
The tape player will alert you that it should be cleaned by displaying the message "TP CLEAN". After the player is cleaned,
AUD
Press AUD for 5 seconds to clear display. CLN RST will display for 3 seconds.
Then the display returns to the default.
Using the Cassette Player 27
Note: Do not release the AUD button before "CLN RST" is displayed to reset the clean condition.
If you experience poor sound quality from your cassette player, try playing a different cassette tape to see if the tape or tape player is at fault. If the second cassette tape also has poor sound quality, try cleaning the tape player, regardless of when the player was last cleaned.
28 Compact Disc (CD) Player
Compact Disc (CD) Player
CD Select
Insert a CD in the radio's CD slot and it will automatically begin to play. The track number and the CD icon are displayed.
If the radio is in another mode and a CD is already in the player,

Press MODE until CD is displayed.

Press UP/DOWN rocker button.
If you select the CD mode while no CD is loaded, the radio will display "NO CD" and return to FM mode.
CD Eject
Press the EJECT button to eject a CD from the player. CDs can be ejected even when the ignition is off.
If a CD is ejected but not removed within approximately 15 seconds, the CD automatically reloads but does not begin to play. The automatic reload feature helps protect the CD from possible damage.
Next Track
To skip forward to higher track numbers,

Turn clockwise to skip forward.
Continue to hold the knob and the player will continue to move forward through following tracks. The player will move through the tracks more quickly if the knob is turned further clockwise. Once the last track is reached, the player starts over at track 1 and continues to go up.
Previous Track
To skip backward to the beginning of the current track,
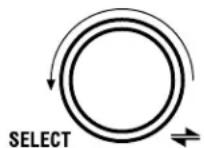
Turn counter clockwise to skip backward.
Continue to turn the knob and the player will continue to move backward through previous tracks. Once track 1 is reached, the player skips to the last (highest numbered) track and continues to go down.
Note: If the track has played for less than 8 seconds when the SELECT knob is turned, the player skips backward to the beginning of the previous track.
Compact Disc (CD) Player 29
Fast Forward
To activate Fast Forward,
Press and hold to FAST FORWARD.
After 3 seconds, the CD begins to fast forward until the rocker button is released. The elapsed time is displayed while the CD fast forwards.
Note: Because the audio disc is played at a faster rate when fast forwarding, you will be able to hear the audio but the quality will not be normal.
Fast Reverse
To activate Fast Reverse,

Press and hold to FAST REVERSE.
After 3 seconds, the CD begins to fast reverse until the rocker button is released. The elapsed time is displayed while the CD reverses.
Note: Because the audio disc is played at a faster rate when fast reversing, you will be able to hear the audio but the quality will not be normal.
Repeat Play Function
To repeat the current track,

Press until RPT is displayed to REPEAT current track.

Press to cancel
REPEAT.
Random Play Function
To play chosen tracks randomly,

Press RND to activate function.

Press RND again to cancel function.
30 Compact Disc (CD) Player
Scan Tracks Function (CD Player)
The Scan Tracks function plays the first 10 seconds of each track in order. To activate this function,

Press until SCN T# is displayed to scan tracks.
To cancel the scan,

Press and hold to cancel scan.
OR
OR

Press MODE.
OR

Press and hold.
Using the CD Changer 31
Using the CD Changer (CDX)
(CDX not compatible with Radio Model VR100)
CD Changer Select

Press MODE until CDX is displayed.
The last selected CD in the changer begins to play. The track number, and CD number are displayed.
If there is no CD in the cartridge or a cartridge has not been inserted into the changer, the radio will display "NO CDX" and return to the previous mode.
CD Select
To select a CD in the changer

Press MODE until CD is displayed.
Press UP/DOWN rocker button.
The CD number on the display changes to match the number of the CD selected and the CD begins playing.
Repeat Track Function
To replay the current track,

Press RPT once to REPEAT current track.
The RPT icon RPT is displayed. To cancel the Repeat CD function,

Press RPT twice to cancel REPEAT.
Repeat CD Function
To replay the current CD,

Press RPT twice to repeat CD.
The RPT icon and the flashing CDX icon RPT also displayed.

Press RPT once to cancel REPEAT.
OR

Press D.SCN to cancel REPEAT.
OR

Press SCN to cancel REPEAT.
OR

Press MODE to cancel REPEAT.
32 Using the CD Changer
Random Track Function
To play chosen tracks randomly on the current CD,
Press and hold SELECT until 12/24 displayed.

Turn to display RND. Press and hold SELECT until 12/24 displayed.
Random CD/Track Function
To play chosen tracks randomly from all CDs,


Turn to display RND.
Press to choose 1. After 5 seconds the selection is saved.

Press RND to activate function.

Press to choose 6. After 5 seconds the selection is saved.
Press RND to activate function.
The RND icon RND is displayed.
To cancel this function,

Press RND again to cancel function.
OR

Press D.SCN to cancel.
The RND icon RND is displayed.

Press RND again to cancel function.
OR

Press RPT to cancel.
OR
Press MODE to cancel.
Using the CD Changer 33
Scan Tracks Function
The Scan Tracks function plays the first 10 seconds of each track on the current CD. To activate this function,

Press until SCN T# is displayed to scan tracks.
To cancel this function,
Press and hold.
Scan CDs Function
The Scan CDs function plays the first 10 seconds of the first track of each CD in the changer. To activate this function,

Press and hold until DISCSCAN.
To cancel this function,

Press and hold.
OR
Press SELECT.
OR
Press MODE.
OR

Press and hold UP/DOWN rocker button.
34 Infrared Remote
Infrared Remote (Accessory)
The infrared remote can be used to control all models except Model VR 100.
Power On/Off
Press the POWER button Ⓞ to turn the receiver on or off. The vehicle must be turned on.
Volume
Press the “+” button to raise the volume or press the “-” button to lower the volume. “VOL” is displayed with the number that represents the volume level.
Mute
Press the MUTE button [1] to mute any mode. "MUTE" is displayed. To cancel the mute, press the MUTE button again. While muted, CDs and cassettes continue to advance.
Radio Select
Press the MODE button to change from a playback mode (cassette, CD, CD changer) to the radio mode. The radio plays the last selected band and station. To choose a different band, press the MODE button until the desired band is displayed.
Radio Tune
Press and hold the top or bottom of the SEEK button to slowly move through the frequencies on the current band. Continue to hold the SEEK button to activate a fast tune. Release the button to stop the tune.

Infrared Remote
Radio Seek
Press the top or bottom of the SEEK button to seek the next station. The audio mutes as the radio searches for and stops on the next station with a strong signal. After finding a station, the audio returns to the original volume.
Note: Seek will cancel if no signal is strong enough for the radio to recognize it.
Radio Presets
To listen to the preset stations, choose the desired band by pressing the MODE button. Then repeatedly press the P.SET button until the desired preset number is displayed.
Infrared Remote 35
Cassette Select
Press the cassette/CD button until "CASS" is displayed.
“TAPE_A” or “TAPE_B” is displayed, depending on which side of the tape is playing.

CD Select (Single, integrated CD)
Press the cassette/CD button until "CD" is displayed. The CD begins to play where it left off, and the track number and time elapsed are displayed.
Track Select
While in CD or CDX mode, rotate the SELECT knob to choose the desired track. The track number on the display increases or decreases depending on how many times the button is pressed.
CD Changer Select
Press the CD changer button until the CD changer symbol and track number are displayed. The last selected CD and track begin to play and the track number, DISC icon, and the CD number are displayed.

CD Select
To choose another CD, press the CD changer button until the desired CD number is displayed. You can also press and hold the CD changer button to quickly advance through the CDs in the changer. Release the button to stop on the currently displayed CD number.
36 Steering Wheel Controls
Steering Wheel Controls
The Steering Wheel Controls allow you to keep your hands on the wheel while controlling many radio functions. Steering Wheel Controls are not available with Model VR 100.
Volume
Press the “+” button to raise the volume or press the “--” button to lower the volume. “VOL” is displayed with the number that represents the volume level.
Radio Manual Tune
While in the radio mode, press the “▶” or “◀◀” button for 1 second to activate a slow tune. Press the “▶◀” or “◀◀” button for 3 seconds to activate a fast tune.
Radio Seek
Press the “▶” or “◀” button for less than 1 second to activate a Seek. The audio mutes. The radio searches and stops on the next station with a strong signal, and the audio returns to the original volume. The scan continues until a strong signal is found, but will cancel the Seek after passing through the band without finding a strong signal.
Cassette Fast Forward/Rewind
While in cassette mode, press the “▶” button to fast forward the cassette or press the “◀◀” button to fast rewind the cassette. To stop the fast forward or rewind, press the same button (“▶◀” or “◀◀”).

CD Track Select
While in CD mode, press the “▶” or “◀◀” button to choose the desired track. The track number on the display will increase or decrease depending on how many times the button is pressed.
CD Select
While in CDX changer mode, press and hold the “▶” and “◀” buttons at the same time until the desired CD number is displayed. The numbers will increase without stopping until the button is released.
Additional Inputs/Outputs 37
Additional Inputs/Outputs
Note: The features below are applicable only with certain optional equipment. See an authorized Volvo dealer for details.
Switched Auxiliary Outputs
Switched Auxiliary Outputs (SAOs) are available to power or control external devices such as a power antenna, external amplifier or rear seat audio. Model VR 100 has a single SAO. All other Models have 3 SAOs.
Low-Level Audio Outputs
All radios except Model VR 100 have single-ended connections for low level audio outputs for the right front, left front, right rear and left rear audio signals. An optional amplifier is typically used with low-level outputs.
Auxiliary Audio Input
All radios except Model VR 100 have 2 monaural external audio inputs. Input #1 can be used for applications like navigation while input #2 is useful as a telephone input. The auxiliary audio source is automatically selected by the telephone or navigation unit when properly connected through the control lines.
When either external audio source is selected, the radio will display “EX AUDIO” along with any appropriate icons. The radio’s audio functions can be adjusted in the same way as they are in other modes.
To override Auxiliary Audio mode,

Press and hold for at least 5 seconds.
The radio will return to the previous operating mode.
Selecting Speakers for Auxiliary Audio
Navigation audio can be directed to the left or right front speaker. To select the speaker for Navigation audio, press and hold the SELECT knob for more than 3 seconds. The display will show "12/24_XX." Then rotate the SELECT knob through the various options until the display shows "Nav. X," where X is either "L" for left or "R" for the right speaker. To change between the left and right speaker selection, press the SELECT knob.
Phone audio can be directed to either the front or all 4 speakers. To select the speakers for phone audio, press and hold the SELECT knob for more than 3 seconds. The display will show "12/24_XX." Then rotate the SELECT knob through the various options until the display shows "PH_X," where X is either "FRONT" or "ALL." To change between the front or all speaker selection, press the SELECT knob.
Cell Phone Mute
When equipped with the required optional equipment and properly connected, the radio will automatically mute audio and the display indicates "VOL 0" each time a call is made or received.
Index 39
A
Accessing the Preset Stations......21
Additional Inputs/Outputs ......37
Alarm Clock and Timer....5
Alarm Clock On/Off/Snooze......5
Alarm Volume....5
Alternate Frequency Switching (AF) 13
Audio Controls 7
Auto-Store Presets....22
Auxiliary Audio Input ....37
B
Balance Control....7
Band Select....11
Bass Control 8
C
CD Eject 28
CD Select....28
Canceling a Next/Previous Music Search ....25
Cassette Clean Indicator......26
Cassette Fast Forward/Rewind - Steering Wheel Control ....36
Cassette player - Using....23
Cassette Select....23
Cassette Select - Infrared Remote....35
Cassette Tape Care 26
Cassette Tightening and Error Detection....23
CD Select - CD Changer......31
CD Select - Infrared Remote......35
CD Select - Steering Wheel Control....36
CD Track Select - Steering Wheel Control....36
Change Cassette Side 23
CD Changer Select - CD Changer ...31
CD Changer Select - Infrared Remote....35
CD Changer - Using....31
Cell Phone Mute....37
Clock 4
Clock 12 or 24-Hour Format......4
Compact Disc Player (CD)......28
Country Frequency Selection......3
D
Display Illumination....3
Displaying the Time ....4
Dolby Noise Reduction 26
Dynamic Distortion Limiting......7
E
Emergency Broadcast (Alert/Alarm) 22
Emergency Broadcast Volume......22
F
Fade Control 7
Fast Forward and Rewind - Cassette....24
Fast Forward - CD....29
Fast Reverse - CD....29
FM Memory ....14
I
Infrared Remote....34
L
Language 3
Lock.....See Security code
Longwave Band....11
Loudness....8
Low-Level Audio....37
M
Midrange Control 8
Mute - Infrared Remote....34
N
News Program Button - VR400 .....20
Next Music Search 25
Next Track 28
North American PTY Listing.....18-19
0
One-Hour Timer 6
40 Index
P
Pause....24
Power On/Off 2
Power On/Off - Infrared Remote .....34
Presets....21
Preset Scan 21
Previous Track....28
Previous Music Search 25
Program Type Function (PTY)......15
Program Type Interrupt .....19
Program Type Seek ....19
Program Type Scan ....19
Program Type Listing......16-19
R
Radio Data System (RDS) .....13
Radio Manual Tune - Steering Wheel Control ....36
Radio Monitor Function......24
Radio Presets - Infrared Remote .....34
Radio Seek - Infrared Remote......34
Radio Seek - Steering Wheel Control....36
Radio Select - Infrared Remote......34
Radio Text (RT)......20
Radio Tune - Infrared Remote .....34
Radio - Using....2
Random CD/Track Function .....32
Random Play Function....29
Random Track Function....32
Repeat CD Function....31
Repeat Play Function - CD Player ....29
Room Simulation DSP- VR400 .....9
S
Scan 14
Scan CD Function 33
Scan Track Function - CD Changer.33
Scan Track Function - CD Player ....30
Security Code 2
Seek 12
Seek Sensitivity - FM and AM......12
Selecting Speakers for Auxiliary Audio ....37
Setting FM Memory (European).....13
Setting the Alarm Clock ....6
Setting the Clock 4
Setting Time of Day 4
Speaker Select 2 or 4....9
Speed-Dependent Volume - VR400 .10
Steering Wheel Controls ....36
Stop and Eject 24
Storing Preset Stations ....21
Switched Auxiliary Outputs ....37
System Overview....1
T
Tape Player Care 26
Track Select - Infrared Remote .....35
Traffic Announcement Volume......15
Traffic Programming (TP)......14
Treble Control 8
Tune 11
Tuning the Radio 11
V
Variants/Region Function .....19
Volume - Infrared Remote......34
Volume - Steering Wheel Control ....36
Volume Control 7
W
Weather Band 11
HDT User Manual (v-12) 9/12/01 2:20 PM Page 47



HDT User Manual (v-12) 9/12/01 2:20 PM Page 48
VOLVO
Volvo Truck Corporation
Göteborg, Sweden
20 146386 English 01.2002 Printed in Sweden
- Operating Instructions Radio
- Table of Contents
- Tuning the Radio ....11
- Presets....21
- Using the Cassette Player 23
- Infrared Remote 34
- Steering Wheel Controls....36
- Additional Inputs / Outputs ....37
- System Overview 1
- System Overview
- Using the Radio
- Using the Radio
- Security Code
- Power On/Off
- Using the Radio 3
- Language
- Country Frequency Selection
- Display Illumination
- Clock
- Clock
- Displaying the Time
- Setting the clock
- 12- or 24-Hour Format
- Setting Time of Day
- Clock 5
- Alarm Clock and Timer (Except Model VR 100)
- Setting the Alarm Clock
- Alarm Clock On / Off / Snooze
- Alarm Volume
- Clock
- One-Hour Timer
- Audio Controls 7
- Audio Controls
- Volume Control
- Dynamic Distortion Limiting
- Balance Control
- Fade Control
- Audio Controls
- Treble Control
- Bass Control
- Midrange Control (Model VR 400 only)
- Loudness
- Audio Controls 9
- 2- or 4-Speaker Select
- Room Simulation (Model VR 400 Only)
- Audio Controls
- Speed-Dependent Volume (Model VR 400 only)
- Tuning the Radio 11
- Tuning the Radio
- Band Select
- Weather Band
- Longwave Band
- Tune
- Tuning the Radio
- Seek
- Seek Sensitivity - FM and AM (U.S. Frequency bands only)
- Scan
- Tuning the Radio 13
- RDS (Radio Data System) Features
- Alternate Frequency Switching (AF)
- Setting FM Memory (European programmed radio frequencies only)
- Tuning the Radio
- Traffic Program (TP)
- Tuning the Radio 15
- Traffic Announcement Volume
- Program Type Function (PTY)
- Tuning the Radio
- European Program Type List
- Tuning the Radio 17
- Tuning the Radio
- Program Type Interrupt
- Program Type Seek
- Program Type Scan
- Variants/Region Function
- Tuning the Radio
- Radio Text (RT) (Except Model VR 100)
- NEWS Program Button (Model VR 400 only)
- Presets 21
- Presets
- Storing Preset Stations
- Accessing the Preset Stations
- Preset Scan (Except Model VR 100)
- Presets
- Auto-Store Presets
- Emergency Broadcast (Alert/Alarm)
- Emergency Broadcast Volume
- Using the Cassette Player
- Cassette Select
- Model VR 100
- Model VR 200 and VR 400
- Cassette Tightening and Error Detection (Except Model VR100)
- TUNE
- TUNE
- Change Cassette Side
- Using the Cassette Player
- Stop and Eject
- Pause
- (Model VR 100 only)
- Fast Forward and Rewind
- Radio Monitor Function
- Using the Cassette Player 25
- Next Music Search (except Model VR 100)
- Previous Music Search (except Model VR 100)
- Canceling a Next/Previous Music Search
- Using the Cassette Player
- Dolby Noise Reduction (Models VR 200 and VR 400)
- Tape Player Care
- Cassette Tape Care
- Cassette Clean Indicator
- Using the Cassette Player 27
- Compact Disc (CD) Player
- Compact Disc (CD) Player
- CD Select
- CD Eject
- Next Track
- Previous Track
- Compact Disc (CD) Player 29
- Fast Forward
- Fast Reverse
- Repeat Play Function
- Random Play Function
- Compact Disc (CD) Player
- Scan Tracks Function (CD Player)
- Using the CD Changer 31
- Using the CD Changer (CDX)
- (CDX not compatible with Radio Model VR100)
- CD Changer Select
- Repeat Track Function
- Repeat CD Function
- OR
- Using the CD Changer
- Random Track Function
- Random CD/Track Function
- Using the CD Changer 33
- Scan Tracks Function
- Scan CDs Function
- Infrared Remote
- Infrared Remote (Accessory)
- Volume
- Mute
- Radio Select
- Radio Tune
- Radio Seek
- Radio Presets
- Infrared Remote 35
- CD Select (Single, integrated CD)
- Track Select
- Steering Wheel Controls
- Steering Wheel Controls
- Radio Manual Tune
- Cassette Fast Forward/Rewind
- CD Track Select
- Additional Inputs/Outputs 37
- Additional Inputs/Outputs
- Switched Auxiliary Outputs
- Low-Level Audio Outputs
- Auxiliary Audio Input
- Selecting Speakers for Auxiliary Audio
- Cell Phone Mute
- Index 39
- A
- B
- C
- D
- E
- F
- I
- L
- M
- N
- 0
- Index
- P
- R
- S
- T
- V
- W
- VOLVO
- Volvo Truck Corporation
Brand : VOLVO
Model : VR200
Category : Car radio