
Voice Tracer VTR6080 - Dictaphone PHILIPS - Free user manual and instructions
Find the device manual for free Voice Tracer VTR6080 PHILIPS in PDF.


| Type | Digital Voice Recorder |
| Brand | Philips |
| Model | Voice Tracer VTR6080 |
| Dimensions (approx.) | 108 x 40 x 15 mm |
| Weight | 54 g (without battery) |
| Power Source | 1 x AAA battery or rechargeable |
| Battery Life | Up to 20 hours recording |
| Internal Memory | 8 GB (approx.) |
| Recording Format | MP3 (stereo/mono) |
| Recording Modes | High quality (PCM), standard, long play |
| Microphone | Built-in stereo microphone |
| Speaker | Built-in loudspeaker |
| Display | Backlit LCD screen |
| File Transfer | USB 2.0 via micro-USB port |
| Audio Jack | 3.5 mm headphone/earphone jack |
| Voice Activation | Yes (VOR function) |
| Noise Reduction | Intelligent noise reduction |
| Password Protection | Yes (file lock) |
| Compability | Windows and Mac |
| Accessories included | USB cable, carrying case, AAA battery |
| Cleaning | Wipe with dry cloth; avoid liquids |
| Storage | Keep in dry place; avoid extreme temperatures |
| Spare parts availability | Batteries and USB cables widely available |
Frequently Asked Questions - Voice Tracer VTR6080 PHILIPS
User questions about Voice Tracer VTR6080 PHILIPS
0 question about this device. Answer the ones you know or ask your own.
Ask a new question about this device
Download the instructions for your Dictaphone in PDF format for free! Find your manual Voice Tracer VTR6080 - PHILIPS and take your electronic device back in hand. On this page are published all the documents necessary for the use of your device. Voice Tracer VTR6080 by PHILIPS.
USER MANUAL Voice Tracer VTR6080 PHILIPS

提示
录音界面说明:

使用外置麦克风录音?
I.1 Product Features 32
2 Important Notices 33
2.1 Safety 33
2.2 Hearing Protection 33
3 Your Translator 34
3.1 Components Supplied 34
3.2 Overview 34
4 Start to Use 36
4.1 ON/OFF 36
4.2 Locked-In (HOLD Function) 36
4.3 Connecting to PC 37
5 Quick Recording Mode 38
6 Translation Function 40
6.1 WIFI 40
6.2 Translation Setting 43
6.3 Translation Mode 43
7 Audio Play Mode 45
7.1 Audio Play 45
7.2 Circular Mode 45
8 Music Play Mode 47
8.1 Music Play 48
8.2 Circular Mode 48
8.3 Musical Effect Mode 48
8.4 Delete File 49
9 System Settings 50
9.1 WLAN 50
9.2 Translation Setting 50
9.3 Play Mode Setting 51
9.4 Folder Selection 51
9.5 Recording Type 51
9.6 Backlight Time 51
9.7 Automatic Shutdown 52
9.8 Language Selection 52
9.9 Firmware Version 52
9.10 Restore Factory Setting 52
9.11 Memory formatting 53
9.12 System Time 53
10 Resource Manager 54
10.1 Play File 54
10.2 File Deleting 55
II FAQs 56
11.1 Recorder not able to record 56
11.2 Recorded file can not be played 56
11.3 Recorder not able to translate 56
11.4 Breakdown 56
12 Technical Parameters 57
12.1 Memory 57
12.2 Dimensions & Weight 57
12.3 System Requirements 57
12.4 Recording 57
12.5 Operating Conditions 57
I Welcome
Welcome to the World of Philips! We feel delighted that you have chosen to buy Philips products. You can always get technical support from Philips from our official website (including User Manual, software downloads and warranties) at www.philips.com.
1.1 Product Features
- Quick Recording: Push up the "Record" button to start recording or push down the "Record" button to get to the recorded clip at pause.
• Supports WIFI connection. - High quality recording with a maximum sampling rate of 192 Khz.
- Recorded in common WAV format.
- Uses high-speed USB 2.0 for quick recording and storing.
- It can be used as a large-volume USB storage device to ensure maximum compatibility.
- It supports the translation of multiple languages.
2 Important Notices
2.1 Safety
To avoid shorting, do not place the product in water or moist environment. Do not place the product near heating objects or places where there is direct sunlight. Please do not crush the cable, especially the connector. Special announcement: Please read the User Manual carefully before using this product. The Company shall not be held liable for any data loss caused by manual operation or force majeure. Users must operate carefully and make backup copies of the recordings.
2.2 Hearing Protection
When using the earphones, please follow the instructions below: adjust to proper volume and avoid excessive use of the earphones. Special warning: Do not adjust the volume to a level that is unbearable by human ears. Do not adjust the volume to a level that is higher than the sound of the ambient environment. In case of dangerous situations, please use your earphones carefully or do not use them temporarily. When you are driving a car or bicycle or using a scooter, do not use earphones. Otherwise, you might cause an accident while also violating the law.
3 Your Translator
3.1 Components Supplied
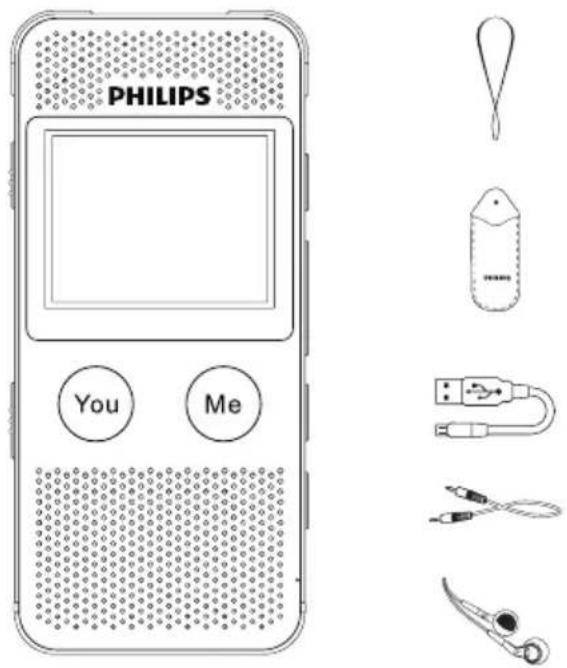
3.2 Overview

① Recorder Indicator
② Quick Recording Button
③ Switch mode button
④ Reset Hole
⑤ ON/OFF/LOCK Button
⑥ Other Person Talk & Translate Button
⑦ I Talk & Translate Button
⑧ PLAY/PAUSE/OK Button
⑨ Previous/Menu Selection/Volume Up
⑩ Next /Menu Selection/Volume Down
11 Menu/OK
⑫ Volume/Back
⑬ Line-In Jack
14 Earphone Jack
15 Right Built-in Mic
16 Left Built-in Mic
⑰ USB Port
⑱ Screen
4 Start to Use
4.1 ON/OFF
Down slide the ON button for 2-3 seconds and the recorder will be turned on or off. If turned on, the PHILIPS logo will appear as shown below.

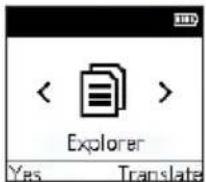
Then the device enters the main interface, including five modes, i.e. Translate Mode, Audio Mode, Resource Manager, Music Mode and Settings Mode.
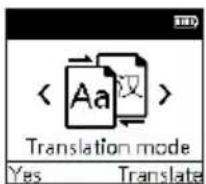
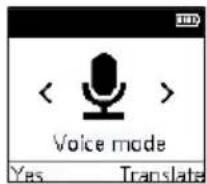
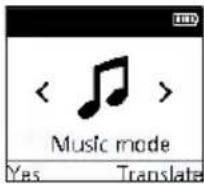


Note
- Please pay attention to the display screen when you use the device and follow the instructions to operate.
4.2 Locked-In (HOLD Function)
(I) Up push the ON/OFF button to the locked position, to lock all buttons except the recording button. Then the screen will display "Locked". The interface is shown below:
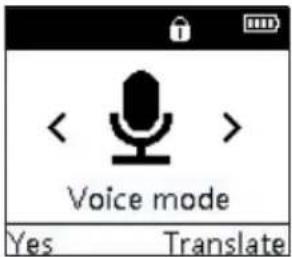
(2) If you want to unlock it, please push the ON/OFF button to the middle position.
4.3 Connecting to PC
Recorder can be used as a mass volume USB storage device which enable youto store, back up and transfer files. You can use the USB cable to connect the recorder with PC. Without the need to install software, the recorder can be displayed as a portable device connected to PC as shown below.


Reminder
- When importing or exporting recorded files, do not disconnect the recorder from PC.
- When the device is disconnected from the computer or charger, the device will re-start.
5 Quick Recording Mode
When you use the recorder for the first time, please pay attention to the instructions in this Manual.
(I) Up push the "Record" button to start recording; during recording, please adjust the inbuilt mic to the sound source.
(2) During recording, press "ME" to pause recording and the recording logo shows suspension status.
(3)Press "ME" button to resume recording.
(4) Down push "Record" button to end recording and return to the paused play status of the current file.
The recording interface is shown below:
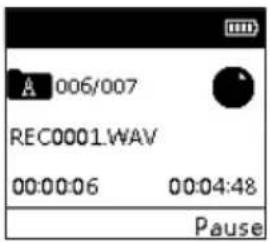
Recording Interface Instructions:
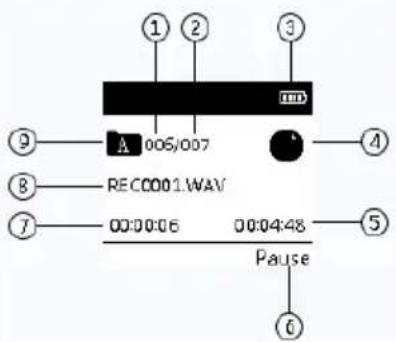
① Number of current file
③ Battery volume
⑤ Remaining time
⑦ Current time
⑨ Current file folder
② Total number of files
④ Recording mode
⑥ Pause
⑧ Current file name

Reminder
- Before recording, please set the recording type and storage path in Settings. Please note, in the menu of the System Settings, you can choose folder A, B, C, or D to save your recorded file. Each folder can contain 99 files. If one folder is full, the system will transfer the file into the next folder. If four folders are full, you need to delete some files to record again.
- Please first do a testing to ensure the settings are correct.
- The interface will back to main menu but not voice playing list when WIFI is connected. Please exit translation status if you need to make voice recording. Please note you can't record voice under the "WLAN" environment, please exit from "WLAN" if you need voice recording.
How to use the external mic for recording?
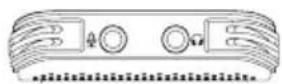
When you decide to use the external mic for recording, please insert the mic into Line In jacket, and then follow the inbuilt mic recording procedure for recording. When you connect to the external mic, the inbuilt mic will automatically shut down. Please note that the jacket for the external mic must be dual-track jacket.


Note
- The recording type for the external mic is 96Khz/24bit by default.
6 Translation Function
6.1 WIFI
When you use Translation Function, you must connect the device to WIFI before use. If you have already connected the device with WIFI, A quick press on "MODE" you will connect to WIFI.
If this is the first time you use WIFI, you must set the network as below:
(1)In the main menu, press "◀" or " "▶" and select the Settings Mode and press "YOU" to enter system settings. Press "◀" or " "▶" select WLAN. The WLAN setting page is shown below:


Note
- Include one notice: "when connection does not succeed 30 seconds after initiation, you need to exit and reconnect."
• Support WIFI Channel is 2.4G only.
Network Setting
(I)Press "◀" or " " ▶▶▶▶▶▶▶▶▶▶▶▶▶▶▶▶▶▶▶▶▶▶▶▶▶▶▶▶▶▶▶▶▶▶▶▶▶▶▶▶▶▶▶▶▶▶▶▶▶▶▶▶▶▶▶▶▶▶▶▶▶▶▶▶▶▶▶▶▶▶▶▶▶▶▶▶▶▶▶▶▶▶▶▶▶▶▶▶▶▶▶▶▶▶▶▶▶▶▶▶▶>

(2)Press "◀◀" or "▶◀" to select Manual Connection and press "YOU" to enter the WIFI password entry page as shown below:

The password digital cursor is on the first location originally. Press “” and “” choose letters or numbers from left to right, press "YOU" to select what you need, meanwhile the cursor will move to next position automatically. Press “” change to a new line, if you need a capital letter and special characters, first please press “” in the display screen and secondly choose “” change to capital letters, then press "YOU" to choose what you need. Currently supported special characters are: “\~”, “!”, “@”, “#”, “?”, “,” “.”/”, “-”, “+”. The reference interface is shown below:

If you have typed wrong/ repetitive characters by mistake, you can simply press "≡" to move cursor to " " and press "YOU" to delete the password from the last digit to left. For example your password is 8 numbers, you need to move the cursor 8 times to delete all of them.

(3)Press "ME" button to enter the password. The device will exit the WIFI password page and the WIFI icon will blink. When the WIFI icon has stopped blinking and the WIFI icon has become "C", it means the device is connected with the cellphone as shown below:

Note
- Name of WIFI should not include Chinese, Japanese or Korean characters. Otherwise, the name will contain unreadable characters.
• The password can only be 12 digits.
Smart phone hotspot connection
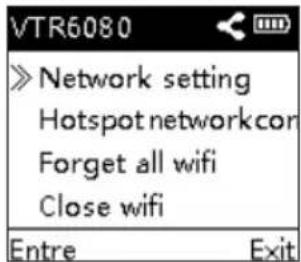
(1) Manual setting WIFI Name: VTR6080 Password: 12345678
(2)Long press "or "select Manual hotspot network and press "YOU" to confirm. Then the WIFI icon on the device will blink. When WIFI icon stops blinking, or if the WIFI icon turns "into it means the device has been connected with the cellphone as shown below:
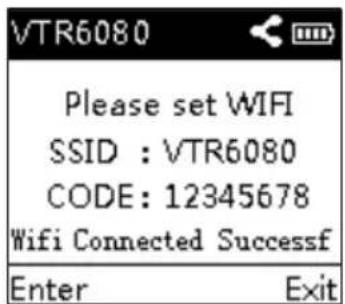
If WIFI icon keeps blinking more than 30 seconds, which means the attempted connection is not successful, please check whether your password is correct.
Cancel connected network
The device can erase all passwords of the WIFI networks connected before. Press "or " button to choose the network to be cancelled and press "YOU" to confirm the cancellation. The cancellation will take effect during next network connection attempt.
Shut down network
There are two methods for shutting down the network: Method One: When WIFI is turned on, select "Setting Mode" by pressing "or " " button and then press "YOU" to enter the system setting page. In system setting press "or " button to select WLAN and then press " " " " button on WLAN page to select "Forget all WIFI" option and then press "YOU" button to confirm shutdown, by then the "icon will also disappear. Method Two: When WIFI is turned on, select "Setting Mode" by pressing "or " " button and then press "YOU" to enter the system setting page. In system setting press "or " button to select WLAN and then press " " " " button on WLAN page to select "Turn off WIFI" option and then press "YOU" button to confirm shutdown, by then the "icon will also disappear.
6.2 Translation Setting
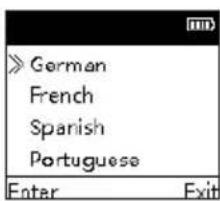
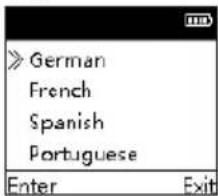
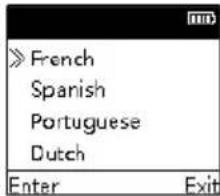
In Translation Setting, you can set Main Language and Translation Language. The Main Language is the language corresponding to YOU button translation while the Translation Language is the language corresponding to the ME button translation. The Main Language and the Translation Language can be set to the following languages: Chinese, English, Japanese, Korean, German, French, Spanish, Portuguese and Dutch as shown below:



Note
- Main Language and Translation Language as the same language.
- In case of bad network or signal, the translation speed or accuracy will be affected. We suggest that you use this function when internet connection is good.
6.3 Translation Mode
Press "Kor" "Daton to select Translation Mode and then short press "YOU" to wait for translation page as shown below:
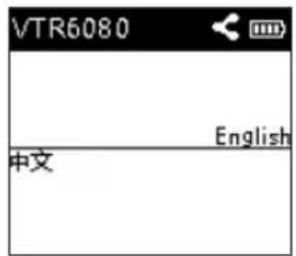
When waiting for translation page, long press YOU/ME button to initiate a countdown recording. The maximum duration is 10 seconds as shown below:

Release the button and then start translation as shown below:

After translation, the screen will show source language and translated language. The translated language will be played in audio as well as shown below:

(1) If the translated language is too long, short press "button to turn pages for viewing.
(2) Long press VOL button to display volume. Short press "or "button and long press VOL button again to exit volume adjustment.

Note
• Time of translation voice less than 10 second is advisable.
- If you see "Not clear" or "Translation error" for multiple times, please check if Translation Setting and Network Setting are correct.
7 Audio Play Mode
On the Main Page, press "I" or "B" button to select Audio Mode and then short press "YOU" to confirm entry. The audio mode page is shown below:
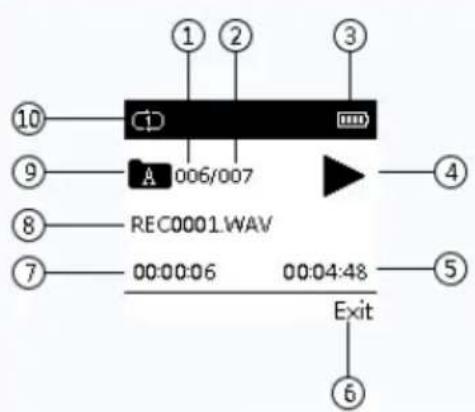
① Number of current file
③ Battery volume
⑤ Remaining time
⑦ Current time
⑨ Current folder name
② Total number of files
④ Playing mode
⑥ Exit
⑧ Current file name
⑩ Circular Mode
7.1 Audio Play
(I) During audio play, short press "button to pause playing and press again to resume playing.
(2) Short press "◀" or " " button to select the previous or next clip.
(3)Long press VOL button to display the volume icon. Short press "Ror" ▶ton to adjust the volume and press the VOL button again to exit volume adjustment.
(4) During play, long press "◀" or " "◀" button to rewind back or fast forward.
(5) During play short press "ME" button to stop playing and return to Main Page.
7.2 Circular Mode
On Main Page, press "or " " ton to select Settings Mode and then press "or " " button to select "Audio Play Setting" and press "YOU" to confirm entry. Press "or "button to select the Circular Mode and press "YOU" to confirm entry as shown below:
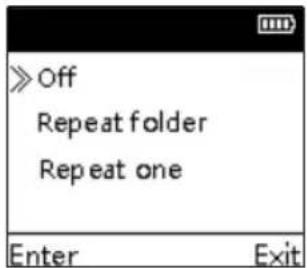
(1) Catalogue Circulation: Circular playing of all files in the catalogue.
(2) Single clip circulation: Circular playing of the current file.
8 Music Play Mode
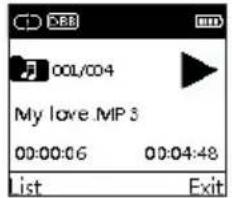
On the Main Page, press "or " button to select Music Mode and then short press "YOU" to enter the music playlist. Press "or " button to select the music file for playing and then short press "YOU" to enter the music play page as shown below:

Note
- All music files can only be played in the MUSIC folder.
Music fomat
| MP3 | Support |
| ACC | Support |
| DSF | Support |
| DFF | Support |
| OGG | Support |
| APE | Support |
| ALAC | Support |
Music Play Page Instructions :

① Number of current file
③ Battery volume
⑤ Remaining time
⑦ List
⑨ Current file name
⑪ Circular Mode
② Total number of files
④ Recording mode
⑥ Exit
⑧ Current time
10 Music folder
12 Musical Effect Mode
8.1 Music Play
(I) During audio play, short press "button to pause playing and press again to resume playing.
(2) Short press "or "button to select the previous or next clip.
(3)Long press VOL button to display the volume icon. Short press "K" or " " " button to adjust the volume and long press the VOL button again to exit volume adjustment.
(4) During play, long press "◀" or "▼" button to rewind back or fast forward.
(5) During play, short press "ME" button to return previous submenu.
(6)A quick press on "YOU" can review all files list.
8.2 Circular Mode
On Main Page, press “” or “” button to select Settings Mode and then press “” or “” button to select “Audio Play Setting” and press “YOU” to confirm entry. Press “” or “” button to select the Circular Mode and press “YOU” to confirm entry as shown below:
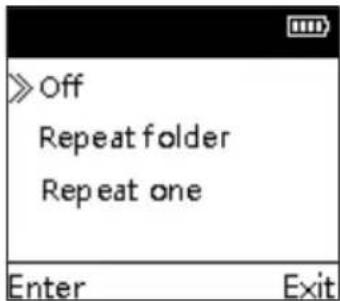
8.3 Musical Effect Mode
This device supports different musical effects. The music effects can be set in Settings. On the Main Page, press “” or “” button and choose Setting Mode, then press “” or “” button to select Audio Play Setting and press “YOU” to confirm entry. Then press “” or “” button to select Musical Effect and press “YOU” to enter the setting mode. The musical effects include the following: Natural, Heavy Metal, Heavy BASS, Popular, Jazz, etc.

8.4 Delete File
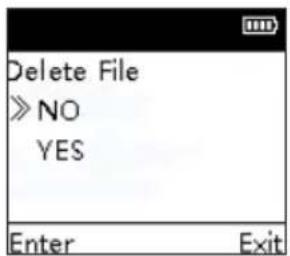
(1)In the music playlist, choose the song to be deleted and long press “≡” After 2-3 seconds, release it and you will see the Delete page. Press “◀or “ ”▶tton to choose whether or not to delete the file, and press “YOU” to confirm deletion.
9 System Settings
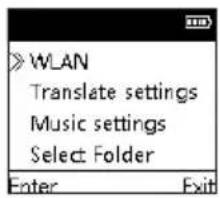
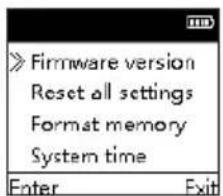
In the main menu, Press "K" and " " buttons and then choose Settings and press "YOU" button to enter the settings page. As shown below, the items include: WLAN, Translation settings, Music setting, Folder selection, Recording type, Backlight time, Automatic shutdown, Language selection, Firmware version, Restore factory settings, Formatting, System time.

9.1 WLAN
The detailed connection method for WLAN is shown in 6.1 Network Settings on page 41.
9.2 Translation Setting
In Translation Setting, you can choose Main Language or Translation Language. The Main Language is the language when you press "YOU" button for translation. The Translation Language is the language when you press ME button. The main and translation language can be set as: Chinese, English, Japanese, Korean, German, French, Spanish, Portuguese and Dutch. The interface page is shown below:


Note
- Please do not set Main Language and Translation Language to the same language.
9.3 Play Mode Setting
In Play Mode setting, you can set "Circular Mode" and "Musical Effect Mode", The Circular Mode include: Shutdown, Catalogue Circulation or Single Clip Circulation. The Musical Effects mode include the following: Natural, Heavy Metal, Mega Bass, Popular, Jazz".
9.4 Folder Selection
In the Folder Selection menu, you can choose the path for saving the recorded files, as shown below:

9.5 Recording Type
In the Recording Type, you can choose different recording types, including five types: 96Khz/24bit, 96Khz/16bit,
192Khz/16bit, 32Khz/24bit, 8Khz/16bit.

9.6 Backlight Time
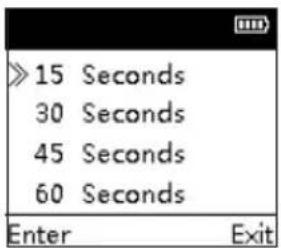
You can choose from 15 seconds, 30 seconds, 45 seconds, 60 seconds, and constant. If you have not set backlight, the backlight will be automatically turned off. If you choose constant backlight, the backlight will be constant. The backlight settings page is shown below.
EN 51
9.7 Automatic Shutdown
If you have not set the recorder within a given time, the system Will automatically be shut down as shown below:

9.8 Language Selection
In Language Selection, you can choose one language for system language as shown below:

9.9 Firmware Version
When you use this function, you can check on the firmware version information at any time.

9.10 Restore Factory Setting
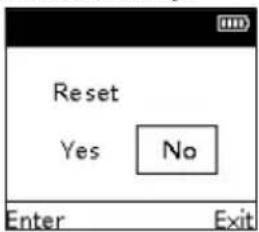
When you use this function, you can choose whether or not to restore to system default settings.
9.11 Memory formatting
With this function, you can format the device's memory and the device will restart after formatting.

9.12 System Time
The system time setting interface is shown below:

Short press “≡” to select the year, month, day, hour, minute and press “,” or “” to increase/decrease the value. Press
"YOU" to return to the previous menu.
10 Resource Manager
In this mode you can check and manage all the music files and recorded files. In the main menu, press "◀" or " "▶▶" buttons to select Resource Manager and then press "YOU" to enter the Resource Manager interface as shown below:

Short press "YOU" and you will see three folders: RECORD, MUSIC and TRANSL. The MUSIC folder contains all music files while the RECORDER file contains all recorded files. All the translation files are kept in the TRANSL folder. They are stored only as system translation information, inaccessible for play and reading.
10.1 Play File
In the file list press s "I" or " " } select the folder you need and then press "YOU" to enter the file list as shown below:
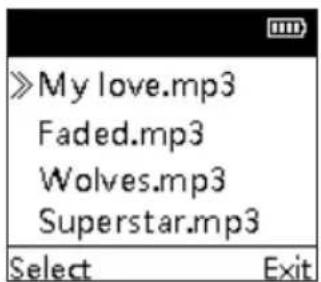
In the file list press "K" or " " " select the file for play and then press "YOU" to start playing.
10.2 File Deleting
In the file list press "I" or " " }▶ select the file for play and then press "YOU" to enter the file list as shown below:

Press "K" or " " " > select the file for deleting, and then long press "≡" to enter the deleting page as shown below:

Press "or "select whether or not to delete the file and then press "YOU" to confirm deletion.
II FAQs
This section has listed out the commonly asked questions to help the user in solving the most common problems. If the problem persists, however, please contact our dealer or visit our official website.
www.philips.com/support
11.1 Recorder not able to record
The number of files has exceeded the limit or the storage memory has been used up. Please delete some files or transfer some files to an external storage device.
11.2 Recorded file can not be played
The recorder may be in a Hold mode. Down push the ON/OFF button to the middle position.
11.3 Recorder not able to translate
If you see "Not clear" or "Translation error", please check if the Translation Settings or Network Settings are correct.
11.4 Breakdown
When the device can't be turned on or off, press a needle into the reset hole to reset the device.
12 Technical Parameters
12.1 Memory
Inbuilt Memory Type: EMMC Flash Memory Portable Memory: Yes
12.2 Dimensions & Weight
Width * Height * Length: 51.2×110.6×13.2 (mm) Weight (including battery): 85g
12.3 System Requirements
Operating System: Windows 10/8/7/Vista/XP/2000, Linux Interface: USB
12.4 Recording
96Khz/24bit: sampling rate is 96Khz, format is WAV 96Khz/16bit: sampling rate is 96Khz, format is WAV 192Khz/16bit: sampling rate is 192Khz, format is WAV 32Khz/24bit: sampling rate is 32Khz, format is WAV 8Khz/16bit: sampling rate is 8Khz, format is WAV
12.5 Operating Conditions
Temperature: 5° \~ -10°C
Air moisture: 10% – 90%, non-condensed
Warranty card
质保书

year warranty
一年质保
Type: VTR6080
Serial nr:
Date of purchase
购买日期
Dealer's name, address and signature
销售商名称、地址及签字
www.philips.com/welcome
This document is printed on chlorine free produced paper Data subject to change without notice
This product was brought to the market by Speech Processing Solutions GmbH or one of its affiliates, further referred to in this document as SPS, which is the manufacturer of the product. SPS is the warrantor in relation to the product with which this booklet was packaged.
For China only
只限中国地区
Printed in China


© 2018 Speech Processing Solutions GmbH.
Register your product and get support at
www.philips.com/welcome

- 提示
- 10.2 FILE DELETING 55
- II FAQS 56
- 12 TECHNICAL PARAMETERS 57
- I WELCOME
- 1.1 PRODUCT FEATURES
- 2 IMPORTANT NOTICES
- 2.1 SAFETY
- 2.2 HEARING PROTECTION
- 3 YOUR TRANSLATOR
- 4 START TO USE
- 4.1 ON/OFF
- NOTE
- 4.2 LOCKED-IN (HOLD FUNCTION)
- 4.3 CONNECTING TO PC
- REMINDER
- 5 QUICK RECORDING MODE
- 6 TRANSLATION FUNCTION
- 6.1 WIFI
- NETWORK SETTING
- SMART PHONE HOTSPOT CONNECTION
- CANCEL CONNECTED NETWORK
- SHUT DOWN NETWORK
- 6.2 TRANSLATION SETTING
- 6.3 TRANSLATION MODE
- 7 AUDIO PLAY MODE
- 7.1 AUDIO PLAY
- 7.2 CIRCULAR MODE
- 8 MUSIC PLAY MODE
- 8.1 MUSIC PLAY
- 8.2 CIRCULAR MODE
- 8.3 MUSICAL EFFECT MODE
- 8.4 DELETE FILE
- 9 SYSTEM SETTINGS
- 9.1 WLAN
- 9.2 TRANSLATION SETTING
- 9.3 PLAY MODE SETTING
- 9.4 FOLDER SELECTION
- 9.5 RECORDING TYPE
- 9.6 BACKLIGHT TIME
- 9.7 AUTOMATIC SHUTDOWN
- 9.8 LANGUAGE SELECTION
- 9.9 FIRMWARE VERSION
- 9.10 RESTORE FACTORY SETTING
- 9.11 MEMORY FORMATTING
- 9.12 SYSTEM TIME
- 10 RESOURCE MANAGER
- 10.1 PLAY FILE
- 10.2 FILE DELETING
- II FAQS
- 11.1 RECORDER NOT ABLE TO RECORD
- 11.2 RECORDED FILE CAN NOT BE PLAYED
- 11.3 RECORDER NOT ABLE TO TRANSLATE
- 11.4 BREAKDOWN
- 12 TECHNICAL PARAMETERS
- 12.1 MEMORY
- 12.2 DIMENSIONS & WEIGHT
- 12.3 SYSTEM REQUIREMENTS
- 12.4 RECORDING
- 12.5 OPERATING CONDITIONS
- WARRANTY CARD
- 质保书
Brand : PHILIPS
Model : Voice Tracer VTR6080
Category : Dictaphone