VARIA-ACS-810A - Video Conferencing System AMX - Free user manual and instructions
Find the device manual for free VARIA-ACS-810A AMX in PDF.


| Product Type | Video Conferencing System |
| Brand | AMX |
| Model | VARIA-ACS-810A |
| Dimensions (H x W x D) | 45 x 280 x 200 mm |
| Weight | 1.8 kg |
| Power Supply | 100-240V AC, 50/60Hz, external adapter (12V DC, 2A) |
| Main Functions | HD video conferencing, integrated microphone array, speaker, network connectivity (Ethernet/Wi-Fi), content sharing, remote management |
| Supported Video Resolutions | Up to 1080p at 30fps |
| Audio Features | Full-duplex echo cancellation, noise reduction, wideband audio |
| Connectivity | HDMI input/output, USB 2.0, RJ45, Wi-Fi 802.11 a/b/g/n/ac, Bluetooth 4.0 |
| Compatibility | Zoom, Microsoft Teams, Cisco Webex, Skype for Business |
| Mounting Options | Desktop placement, VESA mount (100x100mm) |
| Operating Temperature | 0°C to 40°C |
| Storage Temperature | -20°C to 60°C |
| Relative Humidity | 10% to 90% non-condensing |
| Power Consumption | 15W typical, 30W max |
| Maintenance | Clean with dry soft cloth; avoid liquids and abrasive cleaners |
| Safety | CE, FCC, RoHS certified; use only approved power adapter |
| Spare Parts and Repairability | Spare power adapters and cables available; repair by authorized service only |
| General Information | Includes remote control, quick start guide; software updates via AMX website |
Frequently Asked Questions - VARIA-ACS-810A AMX
User questions about VARIA-ACS-810A AMX
0 question about this device. Answer the ones you know or ask your own.
Ask a new question about this device
Download the instructions for your Video Conferencing System in PDF format for free! Find your manual VARIA-ACS-810A - AMX and take your electronic device back in hand. On this page are published all the documents necessary for the use of your device. VARIA-ACS-810A by AMX.
USER MANUAL VARIA-ACS-810A AMX
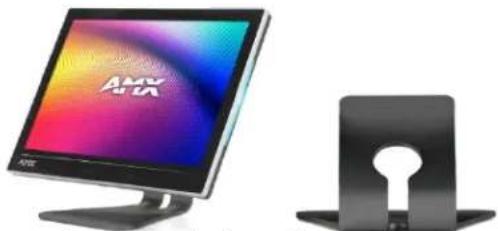
The Varia Angle-Select Tabletop stands are designed for 8" VARIA-80, 10.1" VARIA-100, & 15.6" VARIA-150 Touch Panels, and give them a sleek & modern tabletop solution that can be installed at one of three angles to best suit the users' needs.
natural_image
Two electronic devices: a desktop monitor with colorful gradient screen and a black keyhole device (no visible text or symbols)FIG. 1 Varia Touch Panel on Angle-Select Tabletop Stand
Model Availability & Compatibility
| ANGLE-SELECT TABLETOP STANDS | |
| VARIA-ACS-810A(AMX-UMT8111) | VARIA-80 Touch Panel (AMX-UTP0811)VARIA-100 Touch Panel (AMX-UTP1011)VARIA-100N Touch Panel (AMX-UTP1011N) |
| VARIA-ACS-150A(AMX-UMT1511) | VARIA-150 Touch Panel (AMX-UTP1511)VARIA-150N Touch Panel (AMX-UTP1511N) |
Other Models Available
| FIXED TABLETOP STANDS | |
| VARIAC-80F(AMX-UMT0801) | VARI-80 Touch Panel (AMX-UTP0811) |
| VARI-ACS-100F(AMX-UMT1001) | VARI-100 Touch Panel (AMX-UTP1011)VARI-100N Touch Panel (AMX-UTP1011N) |
Installation
Varia Fixed Tabletop Stands are easily installed with the supplied hardware and a Philips-head screwdriver.
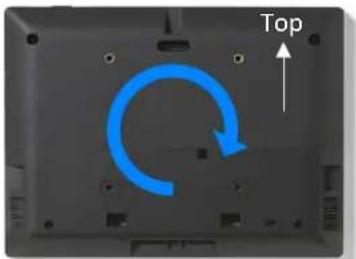
- Place the panel face-down on a soft cloth and arrange the panel so that the top of the touch panel is closest to you.
natural_image
Top view of a laptop back panel with a blue circular arrow indicating rotation (no text or symbols)FIG. 2 Varia Touch Panel, rear
- If they are installed, remove two small screws from the lower cover.
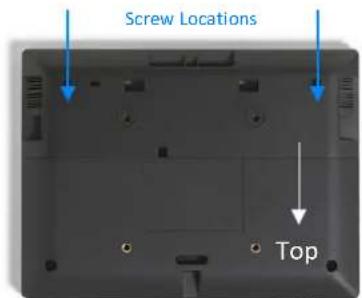
FIG. 3 Rear cover screws, if installed
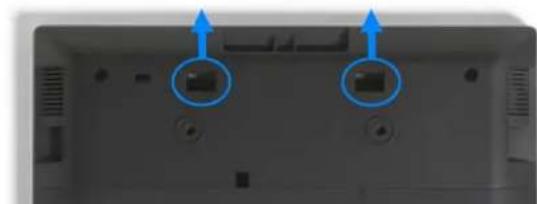
- Place your thumbs on the rectangular access holes, and push the lower cover away from you. Do not discard, this will be reinstalled later.
natural_image
Back view of a laptop chassis showing two ports with blue arrows pointing to them (no text or symbols visible)FIG. 4 Rear Cover Removal
- Rotate the panel back around so the bottom is closest to you.
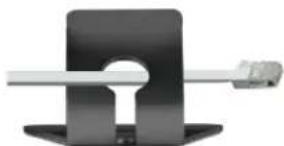
- Route the networking cable through the base first, and then plug the RJ-45 connector into the back of the touch panel.
natural_image
Close-up of a metallic mechanical clamp or bracket with a central hole and a protruding rod (no text or symbols visible)FIG. 5 Angle-Select Tabletop Stand Base
- Reinstall the lower cover, first snapping it into place. Optionally, two small screws supplied in the hardware accessory bag may be installed. Make sure the cable routes out the bottom of the lower cover.
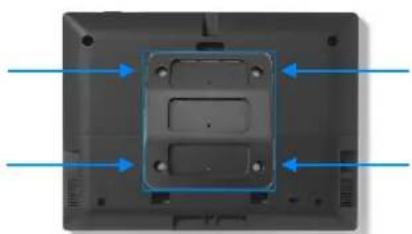
- Screw the mount to the rear of the panel using the supplied screws.
natural_image
Top-down view of a black electronic device with blue arrows pointing to internal components (no text or symbols visible)FIG. 6 Mounting Plate Installation
NOTE: The three slots should be oriented UP and the set screw holes should be oriented DOWN.
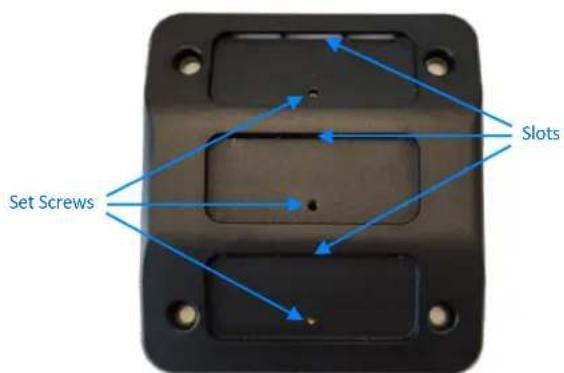
FIG. 7 Mounting Plate; Slot & Set Screw Locations
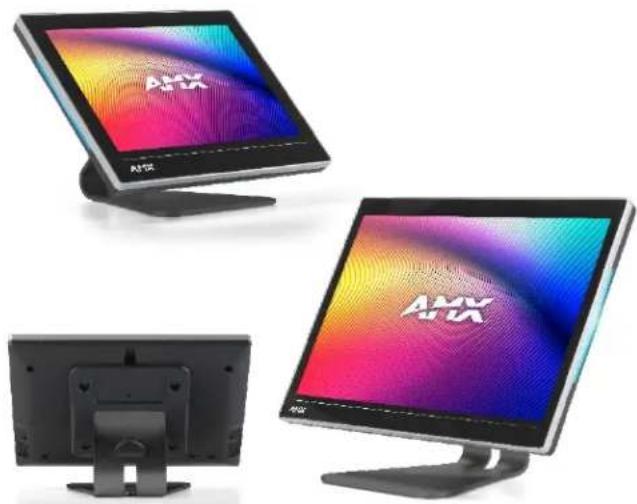
- Select the best angle for installation. The Angle-Select Tabletop Stand can be installed at one of three (3) angles:
a. Upright 60° angle
b. Mid 45° angle
c. Low 30° angle
![30° position [Most Horizontal] 45° position 60° position [Most Upright]](/content/2026/05/994242/images/7c54527f81e86f6d4fc9effd7019b991b0ac860e5cdcbad3f1e8e0d83a4d91e3.jpg)
FIG. 8 Mounting Plate; Install Angle Options
- Insert the base into the desired position. Insert the tab first and set flat against the mount.
- Install the supplied set screw to lock the base in the desired position.
natural_image
Three views of AMX monitor screens, showing front, side, and top views (no text or symbols on screens)FIG. 9 Varia Touch Panels on Angle-Select Tabletop Stand, various angles
Removing
To remove the panel, follow the installation directions in reverse.

Brand : AMX
Model : VARIA-ACS-810A
Category : Video Conferencing System