
Reamp HP - Audio effect pedal Radial Engineering - Free user manual and instructions
Find the device manual for free Reamp HP Radial Engineering in PDF.


| Product Type | Passive Reamp Box |
| Brand | Radial Engineering |
| Model | Reamp HP |
| Dimensions | 4.5 x 3.75 x 1.5 inches |
| Weight | 0.5 kg (1.1 lbs) |
| Power Supply | Passive (no power required) |
| Input Connector | XLR female |
| Output Connector | 1/4-inch TS female |
| Input Impedance | 10 kΩ (transformer isolated) |
| Output Impedance | 600 Ω |
| Transformer | Jensen JT-11P-1HPC |
| Pad | -15 dB switchable |
| Ground Lift | Yes, switchable |
| Chassis | 14-gauge steel with baked enamel finish |
| Warranty | 3 years (Radial limited warranty) |
| Country of Origin | Canada |
| Maintenance | Clean with a dry, lint-free cloth |
| Safety | Avoid moisture and use shielded cables |
| Spare Parts | Jensen transformer, Neutrik connectors |
| Repairability | Serviceable by authorized technicians |
Frequently Asked Questions - Reamp HP Radial Engineering
User questions about Reamp HP Radial Engineering
0 question about this device. Answer the ones you know or ask your own.
Ask a new question about this device
Download the instructions for your Audio effect pedal in PDF format for free! Find your manual Reamp HP - Radial Engineering and take your electronic device back in hand. On this page are published all the documents necessary for the use of your device. Reamp HP by Radial Engineering.
USER MANUAL Reamp HP Radial Engineering
User Guide
Radial Engineering Ltd.
1165-1845 Kingsway Ave, Port Coquitlam
British Columbia, Canada, V3C 1S9
Tel: 604-942-1001 • www.radialeng.com
Email: info@radialeng.com
Radial® Reamp HP User Guide
Table of Contents Page
Overview....1
Features 2
Getting Started ....3
Making Connections....4-6
The Mono Switch....6
The Level Control 6-7
The Lift Switch....7
Specifications 8
Warranty ....Back cover
Thank you for purchasing the Radial Reamp HP, a compact studio device designed to make it as easy as possible to add the power of Reamping into your workflow. With the Reamp HP, you can connect directly to the headphone output on an interface or a mobile device, and then use this signal to feed your guitar pedals and amplifiers to add a new creative element to your mixes.
We recommend you take a few minutes to read this short manual before you begin using the Reamp HP, as it covers the various features of the device and tips for setup and use. Should you have any questions about the Reamp HP or any other Radial devices, please visit our website at www.radialeng.com for additional resources and frequently asked questions.
OVERVIEW
Reamping is a powerful studio technique that uses a two-step process: The first step involves recording your original audio track, and the second step (which the Reamp HP is built for) is where you send the recorded audio track back through guitar pedals and amplifiers and record the results. Reamping can be used to try out a guitar DI track through a variety of amplifiers without altering the performance or tiring out the musician, or it can be used for experimenting with a track by layering effects pedals or trying new recording techniques.
As Reamping continues to gain in popularity, a growing number of home studios are employing this technique. However, one problem that arises in this scenario is that most small-format audio interfaces have a limited number of line-level outputs available to feed signal to a Reamp device. These outputs are usually already connected to a pair of studio monitors and outboard analog effects, meaning that in order to free up an output for Reamping, it might be necessary to power down some gear and re-patch cables at the back of the interface.
The Reamp HP was created to streamline this process by tapping the audio signal from a headphone output jack for Reamping, as this output is found on the front panel of most interfaces and is easily accessible when the inspiration to Reamp strikes. This simple but effective design makes it easy to get started with Reamping in any studio using just a few quick steps.

flowchart
graph TD
    A["Speaker 1"] --> B["Audio Mixer"]
    C["Speaker 2"] --> B
    D["Computer"] --> B
    B --> E["ReAMP HP STUDIO REAMPS"]
    E --> F["VOX"]
    F --> G["Output"]
    E --> H["Red Signal"]
    E --> I["Red Signal"]
    E --> J["Red Signal"]
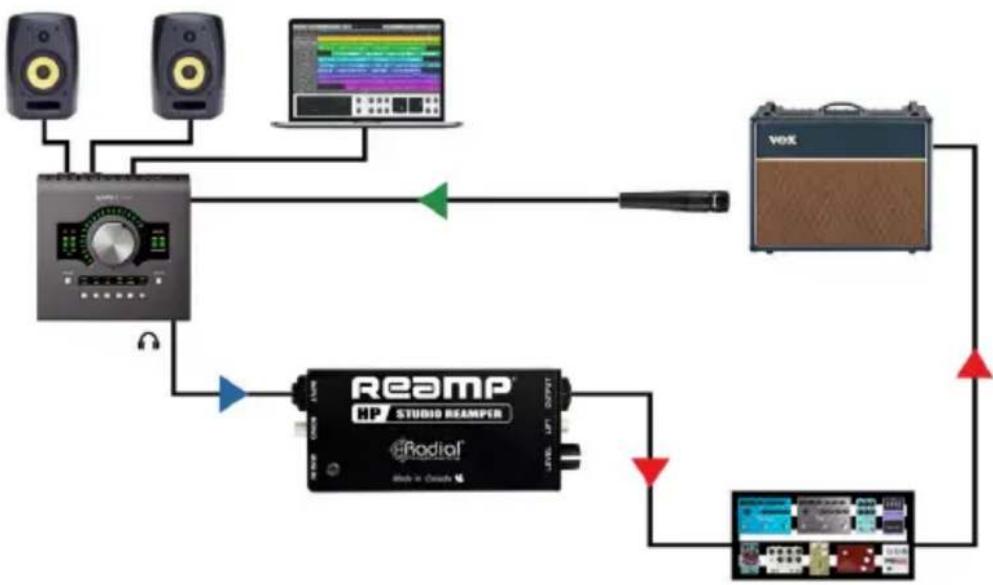
Using the Reamp HP in 3 steps
Connect the headphone output from your interface to the Reamp HP
▶ Feed the output of the Reamp HP into your pedalboard and amplifier
Record the output of your amp back into your audio interface
FEATURES

-
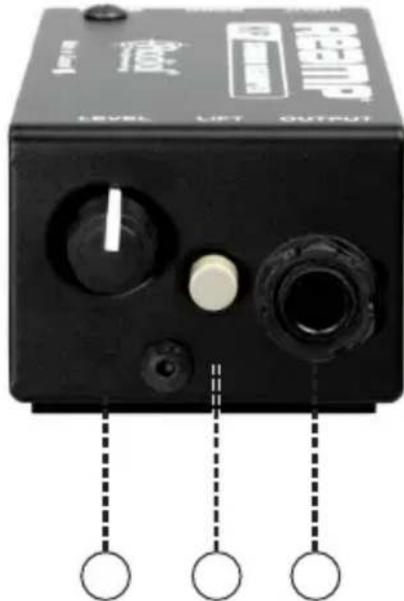
INPUT: 1/4" TRS stereo input jack accepts signals from the headphone output on an audio interface to use for Reamping.
-
MONO: Sums the left and right input channels together. When disengaged, only the right channel is used to feed the output of the Reamp HP.
-
MINI IN: 3.5mm input jack for easy connection to the outputs of smartphones, tablets, and laptops.
-
LEVEL: Controls the output signal level from the Reamp HP for optimal gain-staging through amplifiers and pedals.
-
LIFT: Disconnects pin-1 at the input connectors to remove buzz and hum caused by ground loops.
-
OUTPUT: 1/4" TS mono Reamp output used to feed guitar amps and effects pedals.
GETTING STARTED
The Reamp HP is completely passive, meaning it doesn't require any power to operate. As soon as you've made your connections it will be ready for use.
The output of the Reamp HP uses a standard 14 " TS instrument cable to connect a mono signal to your guitar effects pedals and amplifier. We recommend keeping your cable lengths under 15ft to minimize the possibility of noise and interference on your audio signal.
The inputs of the Reamp HP use 14 " TRS or 3.5mm (1/8") TRS cables. These cables have an extra conductor that allows them to transmit both the left and right channels from a headphone output jack to the Reamp HP.

Connecting to the Reamp HP Inputs
The Reamp HP is designed to connect directly to the headphone output jack on your audio interface. This allows you to get started as quickly and easily as possible, without having to unplug any cables at the back of your interface.
Use a TRS cable as shown above to connect the 1/4" INPUT or the 3.5mm MINI IN from the Reamp HP to your source device. You can use either of these inputs and get the exact same results, as both of these connector types are provided in order to make it easy to connect to the Reamp HP without the need for adaptor cables. Keep in mind that you should only send signal to one of the Reamp HP inputs at any given time.
In general, you'll find that most audio interfaces will have 14 " headphone outputs, while laptops and other playback devices like smartphones and tablets will be equipped with 3.5mm headphone jacks.
flowchart
graph TD
    A["Speaker"] --> B["Reamp HP STUDIO REAMPER"]
    C["Speaker"] --> B
    D["Computer"] --> B
    B --> E["Audio"]
    E --> F["VOX"]
    F --> G["Output"]
    B --> H["Radioiser"]
    H --> I["Radioiser"]
    I --> J["Radioiser"]
    J --> K["Output"]
Connecting the Reamp HP to your audio interface
It's more common to use a recording interface for Reamping, as this will allow you to select any audio track in your digital audio workstation (DAW) and send it through the Reamp HP, while simultaneously recording the results through your amplifier.
flowchart
graph TD
    A["Audio Input"] --> B["Reamp"]
    B --> C["Output Stage 1"]
    B --> D["Output Stage 2"]
    B --> E["Output Stage 3"]
    B --> F["Output Stage 4"]
    style A fill:#f9f,stroke:#333
    style B fill:#ccf,stroke:#333
    style C fill:#cfc,stroke:#333
    style D fill:#fcc,stroke:#333
    style E fill:#cff,stroke:#333
    style F fill:#ffc,stroke:#333
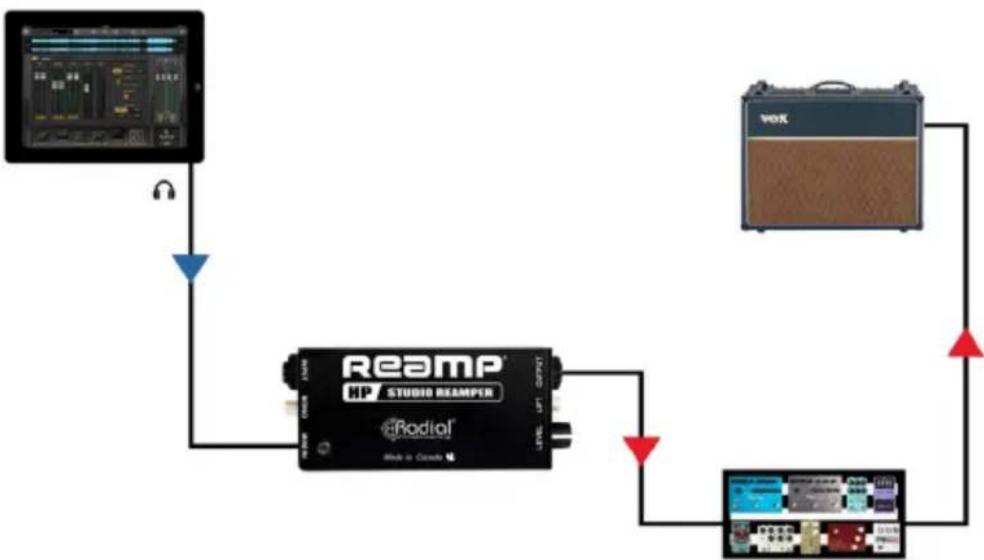
Connecting the Reamp HP to a mobile playback device (Microphone connected to an audio interface not shown)
The 3.5mm INPUT allows you to easily connect a mobile playback device like a smartphone or a tablet to the Reamp HP. This makes it easy to audition new ideas on the fly, or even take the output of your favorite music making app and feed it through your amp for to create a unique effect.
The Mono switch
The MONO switch, located between the input connectors, allows you to select whether the Reamp HP accepts a stereo or a mono input signal.

natural_image
Black industrial electrical switch with indicator lights and a red circular button (no visible text or symbols)The Mono switch
When this switch is pressed in, the Reamp HP accepts a stereo (left-right) input and sums both channels together equally to feed the 14 " OUTPUT for Reamping. When the MONO switch is left in the out position, the Reamp HP will ignore the left channel of your source device and only allow the right channel to pass through the Reamping circuit.
As a general rule of thumb, if you are sending a stereo audio track to the Reamp HP you should set the MONO switch to the in position. If you are sending a mono audio signal (like a guitar DI track) to the Reamp HP, leave the MONO switch set to the out position. Then in your recording software pan the source track all the way to the right, or assign it to the right output of your audio interface. An easy way to remember this rule is to send mono audio tracks to the Right output channel for Reamping.
Connecting to your pedals and amplifier
The 1/4" TS Output
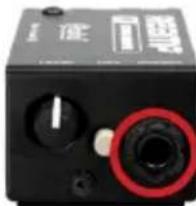
The OUTPUT jack provides an instrument-level, high-impedance, unbalanced signal that is optimized for connection to guitar pedals and amplifiers. Use a standard 1/4" TS instrument cable to connect this output to your guitar amplifier.
You can also insert effects pedals into the signal chain in between the Reamp HP and your amplifier to give you more ways to experiment with your audio signal.
To complete the Reamping process you will need to record the resulting signal from your amplifier, so the final connection required is to place a microphone on the amp and plug it into the mic input on your audio interface for recording.
The Level control and gain-staging
The LEVEL control on the Reamp HP sets the amount of attenuation applied to the signal before it feeds the OUTPUT for Reamping.
This is useful because the outputs on your audio interface may be capable of producing higher signal levels than a pedal or amplifier is designed to accept.
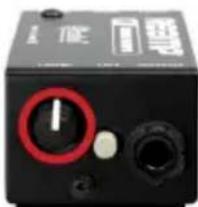
The Level control
The Level control and gain-staging (continued)
The LEVEL control allows you to reduce the output of the Reamp HP to prevent clipping or distorting the input of your amplifier or your effects pedals.
The Reamp HP itself is capable of handling very hot input levels, so for best results you will want to provide as much signal level as you can from your audio interface. Start by turning up the fader on the track you are using in your Digital Audio Workstation (DAW) until you have a healthy signal level just shy of clipping, then check any software associated with your interface itself to see if you have additional output level controls available. Finally, turn up the local headphone level control on the interface itself to approximately 80% of its maximum setting.
Note that the output from a mobile device like a smartphone or tablet will likely be somewhat lower than the outputs of an audio interface, so you may need to adjust the LEVEL control and the gain on your amplifier to compensate. Don't be afraid to turn the LEVEL control all the way up to the maximum setting if necessary: doing so will not increase the noise floor of the Reamp HP.
Tip: If you have a mono audio source but still need more signal level through your amplifier, you can assign your source track to both the left and right outputs of your interface, then set the MONO switch to the in position. The Reamp HP will sum both copies of this mono signal together and provide you with 3dB more signal from the OUTPUT of the Reamp HP.
The Lift switch
The LIFT switch on the Reamp HP helps to eliminate buzz and hum that is often caused by ground loops. When this switch is engaged, it disconnects the audio ground path between both inputs and the 1/4" OUTPUT jack.
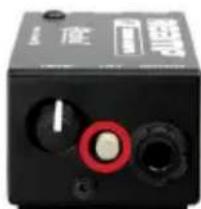
natural_image
Close-up of a black industrial control box with rotary dials and a red circular knob (no visible text or symbols)The Lift switch
The Reamp HP is equipped with an isolation transformer that will eliminate the vast majority of ground loops, but in some cases the LIFT switch can provide further assistance with this issue.
There is no right or wrong setting for this switch: once you've made your connections to the Reamp HP and your amplifier, turn on the amp toggle this switch and leave it in the position that results in the least amount of noise coming from the speaker cabinet.
SPECIFICATIONS\*
Audio Circuit Type: ......Passive, transformer isolated
Frequency Response: 20Hz to 20kHz (+/-0.5dB)
Dynamic Range:.....>96dB
Total Harmonic Distortion: 0.0015% @ 1kHz
Input Impedance: 11.8k Ω
Output Impedance: 1.5k Ω
Equivalent Input Noise:....-105dBu
Noise: -125dBu
Maximum Input:....>+20dBu
Features
Level Control, Mono, Ground Lift
Input connections: 1/4" TRS stereo, 3.5mm TRS stereo
Output Connectors: 1/4" TS
General
Construction: 16 gauge Steel Chassis & Outer Shell
Finish: Durable Powder Coat
Power: ......Passive, no power required
Conditions:......For use in dry locations only between 5C and 40C
Warranty: Radial 3-year, transferable
THREE YEAR TRANSFERABLE LIMITED WARRANTY
RADIAL ENGINEERING LTD. ("Radial") warrants this product to be free from defects in material and workmanship and will remedy any such defects free of charge according to the terms of this warranty. Radial will repair or replace (at its option) any defective component(s) of this product (excluding finish and wear and tear on components under normal use) for a period of three (3) years from the original date of purchase. In the event that a particular product is no longer available, Radial reserves the right to replace the product with a similar product of equal or greater value. In the unlikely event that a defect is uncovered, please call 604-942-1001 or email service@radialeng.com to obtain an RA number (Return Authorization number) before the 3 year warranty period expires. The product must be returned prepaid in the original shipping container (or equivalent) to Radial or to an authorized Radial repair centre and you must assume the risk of loss or damage. A copy of the original invoice showing date of purchase and the dealer name must accompany any request for work to be performed under this limited and transferable warranty. This warranty shall not apply if the product has been damaged due to abuse, misuse, misapplication, accident or as a result of service or modification by any other than an authorized Radial repair center.
THERE ARE NO EXPRESSED WARRANTIES OTHER THAN THOSE ON THE FACE HEREOF AND DESCRIBED ABOVE. NO WARRANTIES WHETHER EXPRESSED OR IMPLIED, INCLUDING BUT NOT LIMITED TO, ANY IMPLIED WARRANTIES OF MERCHANTABILITY OR FITNESS FOR A PARTICULAR PURPOSE SHALL EXTEND BEYOND THE RESPECTIVE WARRANTY PERIOD DESCRIBED ABOVE OF THREE YEARS. RADIAL SHALL NOT BE RESPONSIBLE OR LIABLE FOR ANY SPECIAL, INCIDENTAL OR CONSEQUENTIAL DAMAGES OR LOSS ARISING FROM THE USE OF THIS PRODUCT. THIS WARRANTY GIVES YOU SPECIFIC LEGAL RIGHTS, AND YOU MAY ALSO HAVE OTHER RIGHTS, WHICH MAY VARY DEPENDING ON WHERE YOU LIVE AND WHERE THE PRODUCT WAS PURCHASED.
To meet the requirements of California Proposition 65, it is our responsibility to inform you of the following:
WARNING: This product contains chemicals known to the State of California to cause cancer, birth defects or other reproductive harm.
Please take proper care when handling and consult local government regulations before discarding.

Made in Canada

www.radialeng.com
Radial Engineering Ltd.
1165-1845 Kingsway Ave, Port Coquitlam, British Columbia, V3C 1S9
Tel: 604-942-1001 • www.radialeng.com • info@radialeng.com
- User Guide
- Radial® Reamp HP User Guide
- Table of Contents Page
- OVERVIEW
- FEATURES
- GETTING STARTED
- Connecting to the Reamp HP Inputs
- The Mono switch
- Connecting to your pedals and amplifier
- The Level control and gain-staging
- The Level control and gain-staging (continued)
- The Lift switch
- SPECIFICATIONS\*
- General
- THREE YEAR TRANSFERABLE LIMITED WARRANTY
Brand : Radial Engineering
Model : Reamp HP
Category : Audio effect pedal