
PLML51DB - Subwoofer Pyle - Free user manual and instructions
Find the device manual for free PLML51DB Pyle in PDF.


| Product Type | Car Audio Subwoofer |
| Model | PLML51DB |
| Brand | Pyle |
| Subwoofer Size | 5.25 inches |
| Impedance | 4 ohms |
| Power Handling (RMS) | 200 Watts |
| Power Handling (Peak) | 400 Watts |
| Frequency Response | 30 Hz - 200 Hz |
| Sensitivity | 90 dB |
| Voice Coil Size | 1.5 inches |
| Magnet Weight | 30 oz |
| Cone Material | Polypropylene |
| Surround Material | Rubber |
| Mounting Depth | 3.5 inches |
| Mounting Hole Diameter | 4.5 inches |
| Dimensions (Overall) | 6.5 x 6.5 x 5.5 inches |
| Weight | 3.5 lbs |
| Enclosure Type | Sealed or Ported |
| Recommended Enclosure Volume | 0.35 - 0.5 cubic feet |
| Woofer Connection | Push terminals |
Frequently Asked Questions - PLML51DB Pyle
User questions about PLML51DB Pyle
0 question about this device. Answer the ones you know or ask your own.
Ask a new question about this device
Download the instructions for your Subwoofer in PDF format for free! Find your manual PLML51DB - Pyle and take your electronic device back in hand. On this page are published all the documents necessary for the use of your device. PLML51DB by Pyle.
USER MANUAL PLML51DB Pyle
AM/FM/MP3/USB/AUX Stereo Receiver, Single DIN,
30 Preset Memory Stations, LCD Display with Remote Control (Black)
USER GUIDE
INSTALLATION
Preparation
The preparation kit is necessary to mount the radio on the dashboard, this kit is available at electronics stores and car audio specialists, check the installation kit before using it to make sure it is the right one for your vehicle.
INSTALL THE DEVICE
- Lift the left or right top corner of the plastic outer trim ring then pull it out to remove it.
- Insert the two bracket keys into the left and right side of the chassis to separate the chassis from the housing.
- Install the mounting knob on the board. Check the opening size of the sliding panel to be mounted. If the measurement is not large enough, carefully cut it until it slips easily on the opening. Do not force the handle in the opening so as not to bend it. Locate the series of dubbing tabs above, below and all sides to be mounted. Completely insert it to the opening of the board, bend the tabs as necessary towards outside to ensure it fits the board.
- Slide the stereo into the opening in the dash, ensuring that the wires behind are tucked and not pinched.
- Follow the wiring diagram carefully. Verify you've connected them correctly. CAUTION! Connect the unit to a 12 Volt power source with adequate ground.
- Now that your wires are all completed, attach the front panel and turn ON the unit (the vehicle must be switched on). If the unit does not work, check the calibration again until the problem is solved. With the new car stereo secured into the bracket, all you need to do is plug the wiring harness back into the stereo and put the assembly back into place.
- Slide the stereo into the opening in the dash, ensuring that the wires behind are tucked and not pinched. Sometimes this may take a few times when the vehicle has a tight dash opening. Tuck the wires back into an opening behind the unit.
- Install the plastic outer trim ring
- Snap all the pieces of trim back into place over the stereo. Double check that all screws and trim pieces are securely in place. Try out the new stereo.
Turn the car power on again and play around with the stereo and its settings to be sure everything is in working order.
WIRING CONNECTIONS

HARDS FREE PUSH-TO-TALK PUSH-TO-TALK
- Allows you to access SIRI or GOOGLE voice via Wireless BT.
- Your phone must support SIRI or GOOGLE voice. Once connected to BT, your phone will ask for access to your contact list.
- Now you are ready to use PUSH-TO-TALK. Press the PUSH-TO-TALK icon. You are ready to talk. Call "(CONTACT NAME)", the system will call without having to use your phone.
CONTROL PANEL BUTTONS

CONTROL PANEL BUTTONS
- ⏻ (Power)/Mode (source) button
- SEL (select/menu) button and VOL (volume) knob
- ➕ Back to the previous configuration point;
Press ⊃/Bass enhances the pulse function
- Short press ☐ button display clock in all mode. In USB mode, Short press to select All info/Elapsed time/File info/Track info/clock operation.
Press and hold ☐ button turn off illumination on panel and touch any button to turn on illumination.
- ^Folder up
- √ Folder down
- RPT (repeat), button 3 preset
- RDM (random), button 4 preset
- ▶II(pause/start), preset station 5 button
- INT (intro), preset button 6 station
- Press and hold ⏻BND button to activate SIRI. Short press ⏻BND button to change band. Short press ⏻BND button to pick up/cut off phone call.
- (tune back, search back, crawl back, fast reverse)
-
(tune forward, search forward, crawl forward, fast forward)
- IR remote control sensor
- LCD screen
- AS (automatic storage/preset station search, automatic search)
- USB port
- AUX IN (auxiliary input)
- MIC input (integrated microphone)
- ✦ In power ON mode, press the MUTE button to toggle mute ON or OFF.
- Release front panel
- RESET
GENERAL OPERATION
Turn Unit ON/OFF
- Press the power ⏻/Mode button on the front panel to turn ON the unit, and press and hold it again to turn OFF the unit.
- Press the power ↓ button on the remote control to turn the unit ON or OFF.
Adjust Volume (VOL)
- Rotate the VOL knob on the front panel or press the VOL+ ▲/VOL- ▼button on the remote control to increase or decrease the volume level.
FUNCTION
Press the Volume knob and Rotate to select Audio/Display/Tuner/Clock/Beep/Animation/Demo mode function. Press the Volume knob again to select desire function mode.
AUDIO MODE
- Press the Volume knob and Rotate to select SW Level/Manual EQ/Q factor/Preset EQ/Bass boost/Loudness/Subwoofer set/Fader/Balance/X'Over/DTA Setting/Car type.
- Press and hold Volume knob to select 2 way/3 way X'Over mode.
SW LEVEL
Press the Volume knob and Rotate to select -13 \~ +13 level.
MANUAL EQ
Press the Volume knob and Rotate to select 25 band frequencies level.
Q FACTOR
Press the Volume knob and Rotate to select 1/1.5/2.5/3.5 different Q factor value.
PRESET EQ
Press the Volume knob and Rotate to select user/Natural/Rock/Pop/Easy/Top 40/Jazz/Powerful.
BASS BOOST
Press the Volume knob and Rotate to select Bass boost level.
LOUDNESS
Press the Volume knob and Rotate to select Loudness level.
SUBWOOFER SET
Press the Volume knob and Rotate to switch ON/OFF.
FADER
Press the Volume knob and Rotate to select Fader position.
BALANCE
Press the Volume knob and Rotate to select Balance position.
X'OVER
Press the Volume knob and Rotate to select Tweeter/Front HPF/Rear HPF/Subwoofer LPF.
TWEETER
Press the Volume knob and Rotate to select Frequency/Gain left/Gain right.
FRONT HPF
Press the Volume knob and Rotate to select Frequency/Gain.
REAR HPF
Press the Volume knob and Rotate to select Frequency/Gain.
SUBWOOFER LPF
Press the Volume knob and Rotate to select Frequency/Gain/Phase.
DTA SETTING
Press the Volume knob and Rotate to select Position/Distance/Gain/Data Reset/Delay Unit.
CAR TYPE
Press the Volume knob and Rotate to select Small/Medium/Large car type.
DISPLAY
Press the Volume knob and Rotate to select Color Select/Spectrum/ID3 tag/Version/Dimmer.
LANGUAGE SELECTION
Press Volume button to select language, turn the knob to select English/Russian.
COLOR SELECT
Press the Volume knob and Rotate to select custom R/G/B/Variable Scan/Red/Pink/Purple/Blue/Cyan/Green/Yellow/Orange.
SPECTRUM
Press the Volume knob and Rotate to switch ON/OFF.
ID3 TAG
Press the Volume knob and Rotate to switch ON/OFF.
VERSION
Press the Volume button to check software version.
TUNER
Press the Volume button to select Local Seek/Mono Set/Regional/RDS Set.
LOCAL SEEK
Press the Volume button to rotate switch ON/OFF.
MONO SET
Press the Volume button to rotate switch ON/OFF.
REGIONAL
Press the Volume button to rotate to select country regions.
RDS SET
Press the Volume button to rotate switch ON/OFF.
CLOCK
Press the Volume knob and Rotate to select Clock Format/Clock adjust/Date Format/Date Set.
BEEP
Press the Volume button to rotate switch ON/OFF.
ANIMATION
Press the Volume knob and Rotate to select ON/OFF and time interval of animation time.
DEMO MODE
Press the Volume button to rotate switch ON/OFF.
Set the clock (CLK)
- To display the Time press the CLK button.
- To set the time, press and hold the CLK button and the time will start flashing.
- Press the ◀◀ or ▶▶ button on the front panel or on the remote control to set the time.
- Press the CLK button and the minutes will start flashing.
- Press the ◀◀ or ▶▶ button on the front panel or on the remote control to set the minutes.
- Short Press to Increase Bass Level
Change the source mode (SRC)
Press the SRC button to switch between the button RADIO, BT (Wireless BT), USB (with a USB device inserted), AUX-IN mode (input assistant).
Loudness: LOUD ON/OFF
Press the LOUD button on the remote control to change the loud volume to boost the bass output frequency, press again, to turn it off.
DSP SMART ANDROID/IOS APP CONTROL
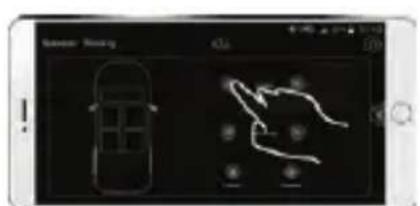

Subwoofer Control Time Alignment Control


25 EQ ControlX'Over Control
Press the EQ button on the front panel or on the remote control to switch between EQ, OFF, CLASS, ROCK, POP, FLAT.
USB port
The USB port on this stereo device is designed for playing media from USB memory devices.
GENERAL OPERATION
Integrated Microphone
For voice reception when making a call using the hands-free system.
Auxiliary Input Connector
3.5mm auxiliary input stereo is designed for devices with line output 3.5 mm or hearing aids.
Reset System
The RESET button is used to reset all factory settings parameters, this function can be used when the LCD screen does not work properly or if the sound is distorted, or when some of the controls are disable. Press the RELEASE button to release the front panel and remove it, use a thin object with a small tip to press the RESET button over 6 second.
Subwoofer Level Control
Select function to select audio, entry subwoofer, entry sw level, turn the knob to select level 0-8.
Subwoofer Frequency Control
Select function to select audio, entry subwoofer, entry sw frequency, turn the knob to select 80Hz/120Hz/160Hz.
RADIO OPERATION
Change Bands (BAND)
Press the BAND button to switch between the FM1, FM2, FM3 bands. Each band stores up to six preset stations.
Manual Tuning ( ◀◀/ ▶◀)
Press and hold the ◀◀ or ▶▶ button on the front panel or on the remote control to enter manual tuning mode. In manual tuning mode, press the ◀◀ or ▶▶ button to move the radio frequency number up or down one step.
Auto Seek Tuning ( ◀◀/▶◀ )
In standby mode or while not in manual tuning mode, quickly press the ◀◀or ▶◀ button to move to the next/previous available station automatically.
To Store/Recall Preset Stations
The radio can store 6 pre-set stations for each band (FM1, FM2 and FM3) for a total of 18 preset stations.
Memorize a station
- Turn the radio on and select the desired band and station.
- Select a station by ◀◀or ▶▶ button.
- Press and hold the desired preset button (numbered 1-6 on the face of the radio) for more than 2 seconds to save the station to that preset number.
To recall a preset station
- Select the desired band.
- Briefly press a preset button (numbered 1-6) to recall the corresponding preset station.
Automatic Store station/Preset station scan (AMS)
Press and hold the AMS button for more than 2 seconds to select six strong stations and store them in the current band. The radio will automatically scan the current frequency and enter the six strongest stations into the preset memory positions for that band. Briefly press the AMS button on the remote control to recall each preset station that saved in the memories in each band.
LOCAL/DX
In urban areas, most stations are strong enough and "LOCAL ON" mode should be selected. Switch to LOCAL OFF mode to search for stations with weaker signals. Press the LOC button on the remote control to choose local or distant reception mode.
STEREO/MONO
FM station is received in stereo mode. However, if the signal is weak or reception is not as good as you would like, switching to MONO mode usually improves the overall sound quality. Press the ST button on the remote control to choose FM STEREO or MONO audio effect.
USB OPERATION
Insert USB
To play files from a USB device, open the USB port cover and insert the USB device into the port, the songs will begin to play automatically.

EJECT/USB
To eject a USB device, press ▶II the button to stop playback, then remove the USB device.
Play/Pause
Press the ▶II (play/pause) button to pause or resume playback
Next/Previous Track
• To play the next track, press the ▶▶ button.
• To play the previous track, press the ◀ button.
Fast Forward/Backward
- To fast forward, press and hold the ▶▶ button.
• To fast backward, press and hold the ◀ button.
Introduction Scan
Press the INT button to play the first 10 seconds of each track, press again to stop the introduction scan, and play the current track.
Repeating the same track
Press the RPT button to repeat the current track, press again to stop repeat playback and resume normal playback.
Playing all tracks in random
Press the RDM button to play all tracks in random order, press again to cancel this function.
Track/Folder Navigation
- During a disc, USB mode, press the 5/-10 button to go backward 10 tracks. Press the 6/+10 button to jump forward 10 tracks.
- During a MP3 disc, USB mode, press and hold the 5/-10 button to go back the previous folder. Press and hold the 6/+10 button to go to the next folder. You can repeat this function depending on the number and level of folders.
• These buttons have no this function if the USB device has no folders.
Select the track or file to play in MP3 format
a. Press and hold the AMS button to direct select a music file. The "TRK0000" will appear on the display.
b. Turn the volume control to select the "first number". Then press the button to move the "first number" to the left and enter the next number.
c. When the desired track number appears, confirm your selection by pressing SEL button.
This receiver is equipped with an external auxiliary input jack (3.5mm) on the front panel which is compatible with audio output from an MP3 music player. Plug such a player into the AUX IN jack with a 3.5mm stereo audio cable and press the MODE button to switch to AUX input mode. "AUX IN" appears in the display. Listen to music from an external device through the speaker.
Note: Adjust the volume of the external device to a comfortable level with the receiver volume control.
Prior to using the Wireless BT device as a hands-free system for a Wireless BT enabled mobile phone for the first time, you must pair and connect the two devices as follows:
- In any mode, prior to pairing and connecting, the BT logo in the LCD indicating that no device is connected. To begin pairing, enable BT mode on your mobile phone.
- When the phone finds this ship/car audio system, the "PYLEAUDIO" name will be displayed.
-
Choose the "PYLEAUDIO" from the device list to pair and connect with this ship/car audio system. Upon confirming, the BT logo will stop flashing.
-
When pairing is complete, the mobile phone audio will automatically transfer to the ship/car audio system whenever a call is made or received, or when the mobile phone plays music.
Make a Call
• To make a call, dial the call directly from the paired mobile phone.
• To make a call with this Wireless BT hands free system:
a. When linking up the Wireless BT-enabled mobile phone to this BT handsfree system, press the 🔔 button to access the dial telephone number mode, then press the "0\~9", * and # button on remote control to input the telephone number, and the entered number will be shown on the LCD display.
b. If a number has been incorrectly inputted, press the ↗ button to delete it.
c. Press the ↗ button to make outgoing call.
Redial Last Dialed Number
- Press and hold the 🔔 button on the control panel to redial the last dialed phone number.
Answer a Call
- When the mobile phone is called, the incoming telephone number displays on the LCD.
- To receive the call, press the 🔔 button on the control panel.
Reject a Call or End a Call
To reject or end the call, press the 🔔 button on the control panel.
Switch Audio Between Car Audio and Mobile Phone
During a call, press the VOL knob button to switch the audio source from the car audio system back to your mobile phone.
Adjust Talk Volume
During a call, use VOL knob or VOL+ ▲/VOL-▼button to adjust the volume level.
Audio Streaming (A2DP)
- Press the ⏻/Mode button to enter BT mode and display pause in the LCD display.
- When a mobile device is paired, music played through that device will automatically be heard through the car audio system.
- Press the ◀◀ or ▶▶ button to play the next or previous on the mobile phone.
- Press the ▶ button to pause or resume music playback.
REMOTE CONTROL
Name of buttons and location
-
⏻ (Power ON/OFF) Button switched on
-
VOL +/VOL- (volume up/down)
-
Band button, ⊿ (reply call)
-
◀ button: Tune down, seek down; Track down, fast reverse
-
SEL (selection) button
-
▶ button: Tune up, seek up; Track up, fast forward
-
Mute/DEL (Delete) button
-
CLK (clock setting) 📋 button, (end call) button
-
▶ button: preset station 1 button, keypad 1
-
INT (intro) button, preset station 2 button, keypad 2
-
RPT (repeat) button, preset station 3 button, keypad 3
-
RDM (random), preset station 4 button, keypad 4
-
-10 (previous 10 tracks), preset station 5 button, keypad 5
-
+10 (next 10 tracks), preset station 6 button, keypad 6
-
ST (stereo) button, keypad 7
-
LOUD (loudness) button, keypad 8
-
AMS (automatic music search) button, keypad 9
-
MODE button, keypad *
-
EQ (Equalizer) button, keypad 0
-
LOC (local)/DX button, keypad #

Remove Insulating Sheet
The remote control comes with an insulating sheet attached to the underside of the remote control, as illustrated on the right. The remote control will not work until the insulating sheet is removed.
Replace Lithium Battery Cell
- When the lithium cell battery becomes weak, replace it as illustrated on the right.

natural_image
Line drawing of a rectangular electronic component with a zigzag arrow indicating direction (no text or symbols)- Press and hold the movable block in the direction indicated by arrow 1. At the same time, pull the cell holder out of the remote control in the direction indicated by arrow 2.

-
Replace the old cell with a new one, making sure the (+) polarity is facing upward.
-
Re-insert the cell holder into the remote control.

Remote Control Operation
Position the emitting window of the remote control toward the sensor window of the unit.

- The operation angle for front panel remote control reception is about 30 degrees.
- The distance between the emitting window of the remote control and the sensor window of the unit should remain less 5 meters.
- Cell leakage may cause damage to the remote control.
- Do not throw cells into as this may cause an explosion.
- Keep battery cells out of reach of children.
TROUBLESHOOTING
If you suspect something is wrong, immediately switch power off. Do not use the unit in abnormal condition, for example without sound, or with smoke or foul smell, can cause fire or electric shock. Immediately stop using it and call the store where you purchased it. Never try to repair the unit by yourself because it is dangerous to do so.
General
- Vehicle's engine switch is not on.
- Turn your Vehicle's key to ACC or ON.
- Cable is not correctly connected.
- Check the connection.
- Fuse is burnt.
- Replace fuse.
- Volume is in mute or minimum.
- Check volume or mute on/off, adjust volume to a desired level.
- Sound skips.
- The installation angle is more than 30^ . Adjust the installation angle less than 30^ .
- The operation keys do not work.
- The built-in micro-computer is not operating properly due to noise. Press the RESET button to restore the program to zero.
Radio
1. Much noise in broadcasts.
- Station or signal is too weak. Select other stations of stronger signal level.
2. The antenna cable is not connected.
- Insert the antenna cable firmly into the antenna socket of this receiver.
3. Preset station is reset.
- Battery cable is not correctly connected.
Connect the battery cable to the terminal that is always live.
Scan the QR code to download the PYLE App.

Android App

IOS App
Technical Specs:
- Remote Control Battery Operated, Requires (1) Coin-Type Battery
- Battery Type: 3V Lithium Bat. 240mAh Capacity
• Single DIN Universal Size Standard
• Night illumination: RGB
• MAX. Power: 4x75W (300 Watts)
• PLL Electronic Tuning Radio Tuner
• ISO with 4 Pin/8 Pin Wire Connector - Stereo/Mono Mode Selectable
• Audio Control: 25EQ/Fader/Balance, No Treble & Bass - Preset EQ: Flat/Pop/Rock/Class/Off
- Switchable USA/Europe Tuner Frequencies by Software
• Max. USB Support: 64GB - Power: DC 12V
• Current Consumption: 10A
• Product Dimension: 4.5" x 7.1" x 1.97" - inches
PYLE
PyleUSA.com

natural_image
Illustration of a laptop with a red checkmark on screen (no text or symbols)VISIT US ONLINE:
Have a question?
Need service or repair?
Want to leave a comment?
PyleUSA.com/ContactUs

Questions? Issues?
We are here to help!
Phone: (1) 718-535-1800
Email: support@pyleusa.com
California Prop 65 Warning
! WARNING:
This product contains Nickel carbonate which is known to the state of California to cause cancer birth defects and other reproductive harm. Do not ingest.
For more info go to: www.P65warnings.ca.gov
- INSTALLATION
- Preparation
- INSTALL THE DEVICE
- WIRING CONNECTIONS
- HARDS FREE PUSH-TO-TALK PUSH-TO-TALK
- CONTROL PANEL BUTTONS
- GENERAL OPERATION
- Turn Unit ON/OFF
- Adjust Volume (VOL)
- FUNCTION
- AUDIO MODE
- SW LEVEL
- MANUAL EQ
- Q FACTOR
- PRESET EQ
- BASS BOOST
- LOUDNESS
- SUBWOOFER SET
- FADER
- BALANCE
- X'OVER
- TWEETER
- FRONT HPF
- REAR HPF
- SUBWOOFER LPF
- DTA SETTING
- CAR TYPE
- DISPLAY
- LANGUAGE SELECTION
- COLOR SELECT
- SPECTRUM
- ID3 TAG
- VERSION
- TUNER
- LOCAL SEEK
- MONO SET
- REGIONAL
- RDS SET
- CLOCK
- BEEP
- ANIMATION
- DEMO MODE
- Set the clock (CLK)
- Change the source mode (SRC)
- Loudness: LOUD ON/OFF
- DSP SMART ANDROID/IOS APP CONTROL
- USB port
- Integrated Microphone
- Auxiliary Input Connector
- Reset System
- Subwoofer Level Control
- Subwoofer Frequency Control
- RADIO OPERATION
- Change Bands (BAND)
- Manual Tuning ( ◀◀/ ▶◀)
- Auto Seek Tuning ( ◀◀/▶◀ )
- To Store/Recall Preset Stations
- Memorize a station
- To recall a preset station
- Automatic Store station/Preset station scan (AMS)
- LOCAL/DX
- STEREO/MONO
- USB OPERATION
- Insert USB
- EJECT/USB
- Play/Pause
- Next/Previous Track
- Fast Forward/Backward
- Introduction Scan
- Repeating the same track
- Playing all tracks in random
- Track/Folder Navigation
- Select the track or file to play in MP3 format
- Make a Call
- Redial Last Dialed Number
- Answer a Call
- Reject a Call or End a Call
- Switch Audio Between Car Audio and Mobile Phone
- Adjust Talk Volume
- Audio Streaming (A2DP)
- REMOTE CONTROL
- Name of buttons and location
- Remove Insulating Sheet
- Replace Lithium Battery Cell
- Remote Control Operation
- TROUBLESHOOTING
- General
- Radio
- Much noise in broadcasts.
- The antenna cable is not connected.
- Preset station is reset.
- Technical Specs:
- PYLE
- PyleUSA.com
- Questions? Issues?
- California Prop 65 Warning
- ! WARNING:
Brand : Pyle
Model : PLML51DB
Category : Subwoofer