
WB750 - Digital Camera SAMSUNG - Free user manual and instructions
Find the device manual for free WB750 SAMSUNG in PDF.
Download the instructions for your Digital Camera in PDF format for free! Find your manual WB750 - SAMSUNG and take your electronic device back in hand. On this page are published all the documents necessary for the use of your device. WB750 by SAMSUNG.
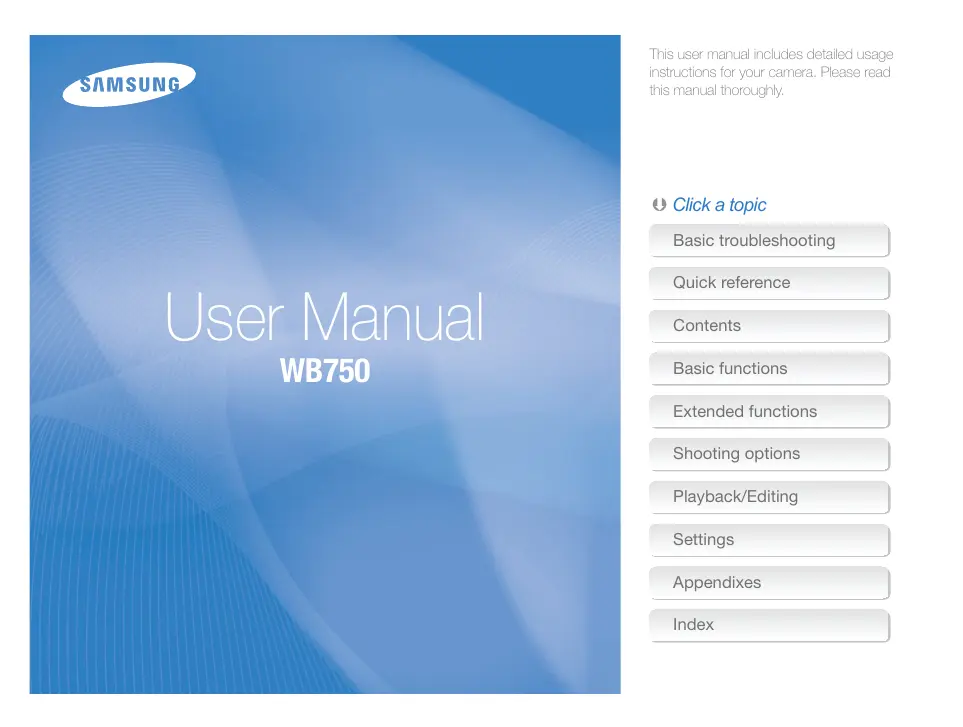
USER MANUAL WB750 SAMSUNG
This use instructions far your came: this manual thoroughh. © Click a topic User Manual — WB750 DR)
Health and safety information Always comply with the following precautions and usage tips to avoid dangerous situations and ensure peak performance of your camera. Waming=situations that could cause injury to yourself or oiers Do not disassemble or attempt to repair your camera. This may result in electric shock or damage to ihe camera. Do not use your camera near flammable or explosive gases and liquids. This may cause a fre or explosion. Do not insert flammable materials into the camera or store these materials near the camera. This may cause a fie or electric shock. Do not handle your camera with wet hands. This may result in electric shock Prevent damage to subjects’ eyesight. Do not use the flash in close proximity (doser than 1 vs ft) to people or animals. If you use the flash too close to your subjects eyes, this can cause temporary or permanent eyesight damage. Keep your camera away from small children and pets. Keep your camera and all accessories out of the reach of small chidren and animals. Small parts may cause choking or serious injury if swalowed. Moving parts and accessories may present physical dangers as well Do not expose the camera to direct sunlight or high temperatures for an extended period of time. Prolonged exposure ta sunlight or extreme temperatures can cause permanent damage to your cameras intemal components. Avoid covering the camera or charger with blankets or clothes. The camera may overheat, which may distort the camera or cause a fie. H liquid or foreign objects enter your camera, immediately disconnect all power sources, such as the battery or charger, and then contact a Samsung service center.
Caution—situations that could cause damage to your camera or other equipment Remove the batteries from your camera when storing it for an extended period of time. installed batteries may leak or corrode over time and cause serious damage to your camera. Use only authentic, manufacturer-recommended, Lithium-ion replacement batteries. Do not damage or heat the battery. Inauthentie, damaged, or heated batteries may cause a fire or personal injury. Use only Samsung-approved batteries, chargers, cables and accessories. + Using unauthorzed batteries, chargers, cables or accessories can cause batteries to explode, damage your camera, or cause injury + Samsung is not responsible for damage or injuries caused by unapproved batteries, chargers, cables, or accessories. Use the battery only for ts intended purpose. Misusing the battery may cause a fire or electric shack. Do not touch the flash while it fires. The fiash is very hot when fred and may bum our skin. When you use the AC charger, turn off the camera before you disconnect the power to the AC charger. Faïling to do so may result in fre or electric shock. Disconnect the charger from the wall socket when not in use. Faïing to do so may resuit in fe or electric shock. Do not use a damaged power supply cord, plug, or loose outlet when you charge batteries. This may cause a fire or electric shock. Do not allow the AC charger to come in contact with the +/- terminals on the battery. This may cause a fire or electric shock. Do not force the camera's parts or apply pressure to the camera. This may cause your camera to malfunction,
Health and safety information Exercise caution when you connect cables or adapters and install batteries and memory cards. I you force the connectors, improperiy connect cables, or improper install batteries and memory cards, you can damage ports, connectors, and accessories. Keep cards with magnetic strips away from the camera case. Information stored on the card may be damaged or erased. Never use a damaged charger, battery, or memory card. This may result in electric shock or camera maïfunction or cause afre. Check that the camera is operating properly before use. The manufacturer takes no responsibility for any loss of fles or damage that may result from camera malfunction or improper use. You must plug the small end of the USB cable into your camera. H the cable is reversed, i may damage your flles. The manufacturer is not responsible for any loss of data.
Copyright information + Microsoft Windows and the Windows logo are registered trademarks of the Microsoft Corporation. + Mac is a registered trademark of the Apple Corporation. + HDMI the HDMI logo and the term “High Definition Mufimedia Interface" are trademarks or registered! trademarks of HDMI Licensing LLC. + Trademarks and trade names used in this manual are the property of their respective owners. + Camera specfications or contents of his manual may be changed without prior notice due to upgrade of camera functions. + You are not alowed to reuse or distribue any part of this manual without prior permission. + For Open Source License infomation, refer ta the “OpenSourcelnfo.pdf" in the provided CD-ROM! Outline of the User Manual Basic functions
Leam about your camera layout, icons, and basic functions for shooting. Extended functions
Leam how to caplure a photo and record a video by selecting a mode. Shooting options
Leam how to play back photos or videos, and edit photos or videos, Also, lea how to connect your ‘camera to your computer, photo printer, TV, HDTV, or DV. Settings
Refer o options to configure your cameras settings. Appendixes
Get information about eror messages, specications, and maintenance.
Icons used in this manual Addïional information Camera buttons. For example, [Shutter) represents the shuïter button Page number of related information ‘The order of options or menus you must select to
L\ | Safety mamings and precautions
Expressions used in this manual Pressing the shutter + Haf-press [Shutterj: press the shutter halfway domn + Press [Shutterl: press the shuîter all the way down Halt-press [Shutter) Press [Shutter) Subject, background, and composition + Subject: the main object in a scene, such as a person, animal, or sil ife + Background: the objects around the subject + Composition: the combination of a subject and background Background —— Composition Exposure (Brightness) The amount of light that enters your camera determines the exposure. You can alter the exposure with shutter speed, aperure value, and ISO sensitity. By alterng the exposure, your photos wil be darker or lighter. A Overexposure [to bright) A Normal exposure
Basic troubleshooting Leam to soe common problems by setting shooting options: D The subjects eyes DA :ppoar red. Photos have dust spots. Photos are blurred. Photos are blurred when shooting at night. Subjects come out t00 dark because of backlighting. Red eye ocœurs when the subjects eyes reflect ight from the camera flash. + Set ihe flash option to © Red-eye or &$ Red-eye Fix. (p. 60) +_Hfthe photo has already been caplured, select @$ Red-eye Fix inthe edit menu. (p. 07) I dust parties are present in the a, you may capture them in photos when you use the flash. + Tum offîhe flash or avoid capturing photos in a dusty place. + Set 180 sensitiviy options. (p. 62} Bluring can occur if you capture photos in low light conditions or hold the camera incorrect. +_ Use the OIS function or half-press [Shutter] to ensure the subject is focused. (p. 31) + Use the tua mode. (p. 46) As the camera tes to let in more light, the shutter speed slaws. This can make it difficuit to hold the camera steadÿ long enough to take a clear picture and may result in camera shake. + Solect «} Night in SCN mode. (p. 36) + Tum on the flash. (. 60) + Set ISO sensitivity options. (p. 62) + Use a tripod to prevent your camera from shaking. ‘When the light source is behind the subject or when there is a high contrast between light and dark areas, tne subject may appear too dark. + Avoid shooïing toward the sun. + Select #4 Backlight in SCN mode. (p. 36) + Setthe flash option to & Fill in. (p. 60) + Adjust îne exposure. (p. 72) + Set the metering option to Ce] Spot if a subject is in the center of the frame. (p. 73)
Contents Basic functions Unpacking Camera layout Inserting the battery and memory card . Charging the battery and turning on your camera Charging the battery Tuning on your camera Perlorming the initial setup Learning icons Selecting options or menus . Using [MENU) Using [Fr Setting the display and sound Seting the dispi Setting the sound Capturing photos . Zooming Reducing camera shake (DIS) Tips for getting a clearer photo Extended functions . Using the Smart Auto mode Using the Scene mode .. Using the 8D Photo mode Using the HDR mode Using the Magic Frame mode Using the Beauty Shot mode Using the Zooming Shot mode Using the Program mode Using the Aperture Priority, Shutter Priority, or Manual mode Using the Aperture Priority mode Using the Shutter Prioiy mode Using the Manual mode. Using the DUAL IS mode Using the Panorama mode . Usng te 2D or 8D Panorama modo Using the Action Panorama mode. Using the Movie mode . Recording high-speed videos Usng the Smat Soeno Detection mode” Using the Creative Movie Maker mode Making a movie with the Creative Movie Maker . Vu a movie made h Creative Mae Meker mode
Contents Shooting option Selecting a resolution and quality Selectng a resolution Setting the photo quality Using the timer Shooting in the dark Preventing red-eye Using the flash Adjusting the ISO sensithity Changing the camera's focus . Using macro Using auto focus Focusing on a selected area Using tracking aute focus Adjusting the focus area 888888R8888 Using Face Detection Detecting faces Capturing a self portrait shot Capturing a smile shot .. Detecting eye binking . Using Smart Face Recognition ……. Regsleng faces as your favorites (My Ste) Adjusting brightness and color . Adjusting the exposure manual}, (EV) Changing the metering option Selecting a White Balance Seting Using burst modes Capting phots in he High-epeed Burst modo Capturing photos in the Precapture mode Capturing bracketed photos : Applying effects/Adjusting images Applying Smart Fiter effects Adjusing your photos
Contents Playback/Editing Viewing photos or videos in Playback mode . Starting Playback mode ee Vieming photos Playing a video Editing a photo . Resiäng photos Roaïing a photo Apphing Smart Fiter effect Adjusting your photos Creating a péint orcier (DPOF) . Viewing files on a TV, HDTV, or 8D TV Transfering files to your Windows computer ring fes with Intell-Studio fening fles by camnecting the camera as aremvable disk _ . 106 Disconnecting he camera (for Windows XP) . 107 Transferring files to your Mac computer 108 Printing photos with a PictBridge photo printer …… 109 Settings Settings menu . Accessing the setings menu Sound Display Settings Appendixes … Error messages Camera maintenance Ckaning your camera Using or storing he camera About memory cards About the battery Before contacting a service center Camera specifications Glossary . FCC notice index
Basic functions Learn about your camera's layout, icons, and basic functions for shooting, Unpacking Setting the display and sound Camera layout …. Setting the display type Inserting the battery and Setinglfhe sound Charging the battery andi Capturing photos Zooming . turning on your camera .1 Charging te battery … "18 MédUGngcamershake e OS Turing on your camera .. 18 Tips for getting a clearer photo Performing the initial setup 19 Learning icons ….......... Di Selecting options or menus Using [MENU] Using [Fn]
Unpacking The folowing items are included in your product box Rechargeable battery User Manual CD-ROM Optional accessories AC adapter/ USB cable
Stap Camera case HDM cable AN cable Battery charger Memory card Quick Start Guide 2 Te lustrtions may fer sight rom te era shinped with your prodet + You can purchase optional accessories at a retaler or à Samsung service center Samsung is not responsible for any problems. caused by using unauthorzec aocessoies, Basic functions 13
Camera layout Before you star, familiarize yourself with your cameras parts and their functions. POWER button Shutter button Microphone Speake Flash ——| paske AF-assist light/Timer lamp SAMSUNG USB and AW port Tripod mount Accepts USB cable and AW cable Battery chamber cover Insert a memory card and bat
Zoom button + In Shooting mode: Zoom in or out + In Playback mode: Zoom in on part of a photo ar view les as thumbnaïl, ar adjust the volume Status lamp + Blinking: Ven ine camera is saning a photo or video, being read by a computer or printer, or when he image is out of focus + Steady: Wen the camera is connected to a computer, charging the battery, or when the image is in focus Display Buttons (p.16) Basic functions 15
Camera layout ASM Smart Auto: Capture a photo with a scene mode selected! automatically by îne camera. Program: Capture a photo by setting options except ne shuñter speed and aperure value which the camera sets automatical}. Aperture Priority: Tne camera selecis a shutter A | speed based on he apeñure value you have set manual. Shutter Priority: The camera selects an S$ | aperre value based on the shutter speed you have set manualy. M Manual Act irons camera sotings inaluding shutter speed and apeñure value. DUAL IS: Capture a photo with options that reduce camera shake. Scene: Capture a photo with options preset for a specific scene. Panorama: Capture and combine a series of photos to create a panoramic image. Creative Movie Maker: Creaïe movies from photos and videos stored on the memory card. Movie: Customize settings to record a video. Buttons
Inserting the battery and memory card Learn how to insert the battery and an of gold-colored contacts facing up. Insert the battery with the Samsung logo facing up. Insert à memory card with the nai memory card into the camera. Removing the battery and memory card Push the card gentiy until it disengages from the camera, and then pul it out of the slot. Slide the lock down to release the battery. You can use the itemai meror or temporay stcrage f a memory cardis notre Basic functions 17
Charging the battery and turning on your camera Charging the battery Turning on your camera Before you use the camera for the frst time, you must charge the Press [POWER] to turn your camera on or off. battery. Plug the small end of the USB cable into your camera, + Theinitial setup screen appears when you tum on the camera and then plug the other end of the USB cable into the AC for the first time. (p. 19) adapter. Indicator light + Red light on: Charging + Red light off Fuly charged Tuming on your camera in Playback mode Press [E]]. The camera tums on and immediately accesses Playback mode.
2) Ve o1ÿ 070 air end USS cc ais your cam ya
use ancier AC acer (such es SAC 48e camera betlery may nat charge ar wok rope. you um on ur cames by presshg and hokdng [ET] for about 5 seoands, 1e carre does not emtany sou. Basic functions 18
Performing the initial setup Wen you tum on your camera for the first time, the initial setup screen appears. Follow the steps below to configure the cameraïs basic settings. 1 Verify that Language is highlighted, and then press 1ŸT or [OK]: age Time Zone. London > Date/Time Set 01/01/2011» Date Type MUDD. > &/Ÿ)] to select a language, and then press [OK] 3 Press [M] to select Time Zone, and then press [W)] or [OK]. 4 Press [DISP/®)] to select Home, and then press [DK]. + When you travel to another countny, select Visit, and then select a new time zone. 5 Press [/Ÿ)] to select a time zone, and then press [DK]. + To set dayight-savings time, press [DISP] London CLONE me Cor Basic functions 19
Going back to the previous menu Press [MENU] again to go back to the previous menu. Hs Sutton Soie Basic functions 22
Using [Fn] 3 Press [DISP/®] to scroll to D. Ve Een : Auto WE You can access shooting options by pressing [Fn], though some options wil not be available. For example, to select a White Balance option in Program mode: 1 Rotate the mode dial to P. 4° Rotate the navigation button or press [&/Ÿ)] to select a White Balance option. Ve Balance: Dayignt 2 Press [Fn]. Photo S2 : 4095K072
Le mem Din 1œe CEE + Hide al information about shooïng, + Hide information about shoofing, except the Shooting information on the bottom Ie. + Display all information about shooting + Display histogram Hide al information about the current fle + Display information about the curent fle, except Playback propre settings and histogram. L *_ Display all informaïon about he current fe. Ahistogram is a graph that ilustrates how light is distributed in your photo. f the histogram has a high peak on the left, the Photo is underexposed and will appear dark. À peak on the right of the graph means that the photo is overexposed and will appear washed out. The height of the peaks is related to color information, The more of a particular color, the taller the peak. A Undereposed A Wel-exposed À Over-exposed Basic functions 25
Setting the display and sound Setting the sound Tüm the sound your camera emits when you perform functions: on or off 1 In Shooting or Playback mode, press [MENU]. 2 Select d) > Beep Sound. 3 Select an option. of The camera does not emit any sounds. On The camera emits sounds. Basic functions 26
Capturing photos Leam how to capture photos easi and quick in Smart Auto mode: 1 Rotate the mode dial to SMART. 3 Half-press [Shutter] to focus. + A green frame means the subject is in focus. + Ared frame means the subject is out of focus. D rem 4 Press [Shutter] to capture a photo. 5 Press [1] to view the captured photo. + To delete the photo, press [Fn], and then select Yes. 6 Press [[]] to return to Shooting mode. @ svt tripstonetee pos Basic functions 27
Zooming You can capture close-up photos by adjusting the z00m. Zoom ratio
Zeomout “os Zoomin (re vicieryourots tre zoom buton, re taste the camera zooms inor out: PASMSCN The Digital zoom is supported by default in Shooting mode. f you 200m in on a subject in Shooïng mode and the zoom indicator is in the digital range, your camera is using the Digital zoom. By using both the 18X Optical zoom and 4X Digital zoom, you can 200m in up to 72 times. Optical range X120 Zoom indicator —| Oigrarrange . zoom is not avalable wih the Face detection option, @ * Teva ble with ne Face dk Sa Fier eflect, Tracking AF opin, Burst option, or Manual Fous. ‘+ Hyou capture a photo with the Digital zoom, the photo qualty may be lower nan nornal Basic functions 28
turing photos PASM You can use 24X Smart zoam which lets you Zoom in with less degradation of picture quality than the Optical zoom and Digital 200m. By using bath the Smart z00m and Digital zoam, you can 200m in up to 72 times. Smart range X1820 es | Zoom indicator —| Digital range GA * Sat zoom is ot avale une Face detection cpon, Smart Fiter let, Facking AF pion, Burst option, or Menu Focus. 2 Iyou capture a phofo win tre Smart zoom the photo qualty may be lower than nomma. 1° In Shooting mode, press [MENU]. 2 Select @ù > Smart Zoom. 3 Select an option. + | Off: The Smart zoom is deactivated % On: The Smart zoom is activated. Basic functions 29
Reducing camera shake (OIS) PA SM scNœ Q * 95 mey notion propaty uen: Reduce camera shake optically in Shooting mode. you move your camera to folow You use ne Digi zoom Here to much camera snake ie shuter speed lou (er example, en jou cage ri scenes) ebay low You care a dase-up shot + you use tne OI funcien in a bip, your images may be blured byhe raïon of the OI sensor. Deactvate ne OS notion uen A Before correction A After correction you use a tripod. + Iine camera hi er ropped he cspay vil be buy. Fi cour Am fe camera, and en lu on again moving subject 1 In Shooting mode, press [MENU] 2 Select 6 or @ + OI. 3 Select an option. di off. OS is deactivated We On:O is acivated. Basic functions 30
Tips for getting a clearer photo ® Holding your camera correctly Ensure nothing is blocking the lens, flash, or microphone. ® Half-pressing the shutter button
@ (run) (1 E————— The camera sets the aperure value and shuter speed automatic. Half-press [Shutter] and adust ne focus. The camera adjusts the focus and exposure automaticaly. Focus frame + Press [Shutter] to capture he photo ithe focus frame appears in green. + Change the composition and halfpress [Shutter) again if the focus frame appears in red ® Reducing camera shake + Setthe Optical mage Stabilzation option to reduce camera shake opticalÿ. (p. 30) + Selectthe tua. mode to reduce camera shake both optically and digital. (p. 46) 1 — Camera shake Wien you shoot in the dark, avoid setting the flash option to Slow Sync or Off. The apeñure remains open longer and it may be harder to hold the camera steady long enough to capture a clear photo. + Use a tpod or set the flash option to Fil in. (p. 60) + Set ISO sensithity options. (p. 62) Basic functions 31
It may be diffcuit to get your subject in focus when: - there is lle contrast between the subject and background (for example, when your subject is wearing clothing that is similar in color to the background) = thelight source behind ne subject is too bright = the subject is shiny or reflective - the subject includes horizontal pattems, such as binds - the subject is not positioned in the center of the frame Using the focus lock Halt-press [Shutter to focus. When the subject in focus, you can reposition the frame to change the composition. When you are ready, press [Shutter) to capture your photo. F3 - +_ When you capture photos in lou ight Tum on the flash. (p.60) Wien subjects are moving rap CS Use the High-speed nt: burst mode or Precapture function. (p.77 Basic functions 32
Extended functions Learn how to capture a photo and record a video by selecting a mode. Using the Smart Auto mode Using the Scene mode Using the 8D Photo mode Using the HDR mode Using the Magic Frame mode Using the Beauty Shot mode Using the Zooming Shot mode …… Using the Program mode Using the Aperture Priority, Shutter Priority, or Manual mode Using the Aperture Priority mode Using the Shutter Priority mode Using the Manual mode
Using the Smart Auto mode In Smart Auto mode, your camera automatically chooses the appropriate camera settings based on the type of scene it detects. The Smart Auto mode is helplul if you are not familiar with the camera settings for various scenes.
1. Botte ie mode dial to SMART.
2 Align your subject in the frame. Portraits with backighting + The camera automatical selects a scene. An appropriate scene icon appears at ne botiom left of the screen. The icons are listed below. Portraits Close-up photos of objects Close-up photos of text Sunsets Blue skies Forestedl areas Close-up photos of color subjects Camera is stabilized or on a tipod {when shooting in the dark Active moving subjects
Scenes with bright white backgrounds Fireworks {ahen using a tipod) Landscapes at night (ahen the flash is of) 3 Haï-press [Shutter to focus Portraits at night À Press [Shutter] to capture the photo. Landscapes with backighting Extended functions 34
Smart Auto m Nine camera does not recognize an appropriate scene made, uses ne defaut setings far ne SMART mode. Even fit detects a face, he camera may not select a portrait mode depending on ne subjects postion or ing ‘The carnera may no select the comect scene depending on tne shooig candiions, such as camera she, Kghüng, or cstance to te subpct Even # you use a ipod, te camera may not detecte À mode 1 the subject is moung In SMART mode, ne camera coneumes mere battery poer, because iohenges setings often to sect appropriate scene. Extended functions 35
Using the Scene mode In Scene mode, you can capture a photo with options that are preset for a specific scene. 1 Rotate the mode dial to SCN. 2 Select a scene. Clear capture text from printed or electronic Text documents. Capture scanes at sunset, win naluralookng reds Sunset and yelows Dawn | Capiure scones at sunrise Backight | Capture backit subjects. Beach & | Reduce underexposure of subjects caused by Snow sunight refected from sand or snow Zooming . , Sa Capture scenes with blurred ediges. Loto LD ml 2 To change a scene mode, press [MENU] and then Caplure soenes win a 8D eflect ne 3D effect select 1. You can select any of the scanes listed. SDPhoto | ke only on a 8D TV or 8D monitoi Nu on Caplure soenes wilh emphasis on midtones, by 3 Align your subject in the frame, and then half-press miniming the dark and bright areas IShutter to focus.
Fame Capture scenes with various frame effects. À. Press [Shutter] to capture the photo. Beauty | Capiure a portrait with options to hide facial Shot imperfections. Night Capture scenes at night or in low lighting (using a trpod is recommended) Landscape | Capture stil-lfe scenes and landscapes. Extended functions 36
Using the 3D Photo mode In 8D Photo mode, you can caf re scenes with a 8D Rotate the mode dial to SN. 2 Select 8D Photo. 3 Align your subject in the frame, and then half-press [Shutter] to focus. 4 Press [Shutter] to capture the photo. + The camera captures 2 photos in both JPEG and MPO fie fomats. solution is automatically, set to Ga] shooïng opions are not avalble. ns tre SD effect any on an Onyour
a you view an MPO fl on a 8D TV or 3D monter. Extended fur Using the HDR mode à (High Dynamic Range) mode photos with different exposures, and then overlays the bright area of sed photo and the dark area of the overexposed photo. You can capture photos with soft, rich colors.
your camera captures two fihoutHDR A affect 1 Rotate the mode dial to SCN. 2 Select HDR 3 Align your subject in the frame, and then half-press [Shutter] to focus. 4 Press [Shutter] to capture the photo. + The camera captures 2 photos, and then automatically merges them into a single photo.
‘The HDR éfiect may be affected by camera shake, lghing, movement fthe subject, and îne shootng environment ‘You cannot use the flash when you es the HDR mode. I may take longer to save a photo using ire HDR mode. Wen you use ie HDR mock, he preview image on the screen and ‘ne captured photo may appear sighty larger tnan a photo captured without this ef. Wen you capture a moung subject using the HDR mode, an afermage may appear. Using the Magic Frame mode In Magic Frame mode, you can apply various frame effects to: your photos. The shape and the feel of the photos will change according to the frame you select. 1 Rotate the mode dial to SCN. 2° Select Magic Frame. 3 Press [MENU] 4 Select @ > Frame. 5 Select an option. Oim Si Appe Œ Ful Moon 4 Oscar Gi Magaane Lu Sunny Day CES 6 Press [MENU] to return to Shooting mode. 7 Align your subject in the frame, and then half-press IShutter to focus. 8 Press [Shutter] to capture the photo. Mg Fanerece saone ct Extended functions 38
ene moc Using the Beauty Shot mode In Beauty Shot mode, you can capture a portrait with options to hide facial imperfections, 1 Rotate the mode dial to SCN. 2 Select Beauty Shot. 3 Press [MENU] 4 Select @ > Face Tone. 5 Select an option. + For example, increase the face tone seting to make skin appear ighter 6 Select Face Retouch. 7 Select an option. + For example, increase the face retouch seting to hide more imperfections. Woo DER 26 où @ fav Y Let Smart FR 2 Level 2 @ Pros: € Qy LA D sou ae @> (Bb Su Im
8. Press [MENU] to return to Shooting mode.
9 Aïgn your subject in the frame, and then half-press IShutter to focus. 10 Press [Shutter] to capture the photo. Wien you use tre Beauty Shot mode, te focus distance vil be set to Auto Mec. Extended functions 39
Using the Zooming Shot mode In Zooming Shot mode, you can emphasize the center of a photo by blurring 1 Rotate the mode dial to SCN. 2 Select Zooming Shot. 3 Align your subject in the frame, and then half-press [Shutter] to focus. 4 Press [Shutter] to capture the photo. oring Shot mode, the resolLion is autometicaly set to En) or ben: Extended fl
Using the Program mode In Program mode, yc can set most options, except the shutter speed and aperture value, which the camera sets automatically. 1 Rotate the mode dial to P. 2 Set the desired options. {For a list of options, refer to "Shooting options” starting on page 56.)
nm LT @ eu 3 Align your subject in the frame, and then half-press [Shutter] to focus. 4 Press [Shutter] to capture the photo. Extended functions 41
Using the Aperture Priority, Shutter Priority, or Manual mode Adjust the aperture value or shutte Shutter Priority, and Manual modes. Aperture value The aperiure is a hole that lets light into the camera. The aperture housing contains thin, metal plates that open and close, widening or narowing the aperure, and contrling the amount of light that enters the camera. The size of the aperiure is closely related to the brighiness of a photo: the larger the aperture, the brighter the photo; the smaller the aperture, the darker the photo. Note that the larger the aperlure value, the smaller the aperture size. For example, an apeñure set to 5.6 is larger than an aperure set to 11 A Sral apeñure value (The size A Large aperure value (The size ofthe aperure is large.) of he aperure is small) Extended funct speed to control the exposure of your photos. You c: n use these options in the Aperture Priority, Shutter speed hutter speed, which is an important factor in the brighiness of a photo, refers ta the amount of time it takes to open and close the Shutter. À slow shutter speed allows more time to let light in. Al things being equal, photos are brighter, but fast moving objects tend to blur. On the other hand, a tter speed alows less time to let light in. Photos are darker, but objects in moïion are captured more clear}. Jow shutter speed peed
Using the Aperture Priority mode 4 Set options. The Aperture Priority mode allows you to set the aperture value {For a list of options, refer to “Shooting options” starting manually while the camera automatically selects an appropriate on page 56.) shutter speed. 5 Align your subject in the frame, and then half-press 1 Rotate the mode dial to ASM. [Shutter] to focus. 2 Select Aperture Priority. 6 Press [Shutter] to capture the photo. + To select another mode when the mode dialis set to ASM, press [MENU], andthen select #8 > a mode: 3 Press [OK], and then rotate the navigation button or press [DISP/%)] to adjust the aperture value. mation about the aperture value. + See page 42 for mor in Extended functions 43
Using the Shutter Priority mode 4 Set options. The Shutter Priority mode allows you to set the shutter speed {For a list of options, refer to “Shooting options” starting manual} while the camera automatically selects an appropriate on page 56.) aperure value. 5 Align your subject in the frame, and then half-press 1 Rotate the mode dial to ASM. [Shutter] to focus. 2 Select Shutter Priority. 6 Press [Shutter] to capture the photo. + To select another mode when the mode dial is set to ASM, press [MENU]. and then select 8 + a mode. 3 Press [OK], and then rotate the navigation button or press [DISP/®] to adjust the shutter speed. + See page 42 for more information about the shutter speed. & [7 @ r2(81x) Extended functions 44
Using the Manual mode The Manual mode allows you to adjust both the aperture value and the shutter speed manually. 1 Rotate the mode dial to ASM. 2 Select Manual. + To select another mode when the mode dial is set to ASM, press [MENU], and then select #5 + a mode 3 Press [OK] to select the aperture value or shutter speed. Rotate the navigation button or press [DISP/%] to adjust the aperture value or shutter speed. Set options. {For a list of options, refer to “Shooting options” starting on page 56.) Align your subject in the frame, and then half-press [Shutter] to focus. Press [Shutter] to capture the photo.
Using the DUAL IS mode Reduce camera shake and prevent blurred photos with Optical and Digital mage Stabilzation functions: A Before correction À After correction 1 Rotate the mode dial to (ÉuaL. 2 Align your subject in the frame, and then half-press [Shutter] to focus. 3 Press [Shutter] to capture the photo. QG) * Te Dors 0m end Ga zoom ar nt va in a mode The camera vil comect photos opte en when te gt source is night than Auoreacent ge + Hyoureubectis moung ep, e phoio may be buy. + Setihe Opicalmage Siabäzation op to reduce camera snake n dilrent hong modes. (. 80) Extended functions 46
Using the Panorama mode In Panorama mode, you can capture a wide panoramie scene in a single photo. Capture and combine a series of photos to create a panoramic image. Using the 2D or 3D Panorama mode In Panorama mode, you can capture a normal or 8D panoramic photo. A Shooïng example
Rotate the mode dial to [Es] 2 Press [MENU]. 3 Select @ù > Panorama > Live Panorama or 3D Panorama. 4 Press [MENU] to return to Shooting mode. 5 Align your subject in the frame, and then half-press IShutter] to focus. + Align the camera with the far le orthe far right, or very top or botiom, of the scene you want to capture. 6 Press and hold [Shutter] to start shooting. 7 With [Shutter] pressed, slowly move the camera in the direction that wil let it capture the rest of the panorama. + In 8D Panorama mode, you can capiure a scene on in horizontal directions. + When the viewnder is algned with the next scene, the camera captures the next photo automatically. 8 When you are finished, release [Shutter]. + When you have captured al the necessary shots, îne camera combines them into one panoramic photo Extended functions 47
Panorama mode For best resus when capurng panoramio photos, avoid the olowing = moving he camera tc0 quicéy ar to slow = mong the camera 100 lt ta capture the next image = movng the camera at meguler speeds = shaking the camera changing the camera direction he capturing a photo = shooting h dk places Captuing moving subjects near = shooting conditions where the brigtness or color ofgn is changing Selecting Panorama mock wi disabl the cigal and opical 200m functions. you select Panorama mode while the lens is 2oomed à, the carners automatically zooms out ta the defaut poson. In Panorama mode, some shooting oplons are not avale. ‘The camera may Stop shooëng due to he shoong composition or movement within the scene: In Panorama mode, your camera may not capture he lat scene in its entre you stop moung the camera exact} where you want the scene to end. To capture the entre scene, move your camera slghty beyond the point where you want the scene to end In 8D Panorama mode, your camera may not caplur tre very beginning or end of a scene due ta the nature of he BD eflect, To capture the entre scene, move sighty beyond the beginning and end pants you want to capture. Extended functions 48 2 in 80 Panorama mode, photos re capued in bath JFEG and MPO fl formats
- You can vie an MPO fe ina supports he SD eflct only on an MPO-corrpatbl display, such 88 AD TV ar 8D mantor On your cameras display, you can ver any JPEG fs, + Use proper 8D glsses uen jou vien an MPO fe on a 8D TV or 8D monitor
the Panorama mode Using the Action Panorama mode 7 With [Shutter] pressed, slowly move the camera in the In Action Panorama mode, you can capture and combine à series: direction that wil let it capture the rest of the panorama. of photos of a moving subject. + ffthere is more than one moving subject, the camera may not p recognize the correct subject + Hsubjects are outside of he guide frame while capturing, the camera does not capture the movement of ne subjects. 8 When you are finished, release [Shutter. + The Camera automatically combines the shots into one photo A Shooïng example Rotate the mode dial to [si à : RS resuts when canturing panoramic photos, avoid the moving the camera 100 quicky ar 100 sk Press [MENU]. 1 as jo moving the camera 100 lite to capiure ne next image moving ie camera at ireguar speeds: Où À & ND Select 63 > Panorama + Action Panorama. RARE h changing the camera direction while capturng a photo Press [MENU] to return to Shooting mode. CR au . captug moung subjects neaby Algn your subject in the frame, and then half-press shooëng conditions where tn briginess or oo og [Shutter] to focus. changing à : «me camera may tale me to save pancram photos. Algn he camera with the far left or the far right side of the OUR ER soene you want to capture. 6 Press and hold [Shutter] to start shooting. Extended functions 49
Using the Movie mode In Movie mode, you can customize settings to record full HD videos of up to 20 minutes in length. The camera saves recorded videos as MP4 (H.264) îles. Q * “252 1VPEG4 parti o/AVC) 8 igh-compression do foret establshed by tn intraonal tend roanizaions SO-EC and TU-T. Some memory cars may not support high definition recoring. your card does not, st a lower resouton. + Memory crc win slow rie speeds wi not support high-resobtion videos and hig-speec videos. To record high-1esaution or high-speed videos, use memory cards win faster rie speed, you actate the OS function while recording a video, the camera may record the noise of ne OIS function operating. you uee the zoom function when recording a video, he camera may recerd the noie of the zo0m operating. To decrease zoom noise, use the Sound Ale function, See Sieps 3 and 4 below. 1 Rotate the mode dial to >. 2 Press [MENU]. 3 Select 8 > Voice. 4 Select a Sound Alive option. &, Sound Alive Off: Tum off the Sound Ale function to record the Zoom noise. &, … Sound Alive On: Tum on the Sound Alve function to reduce the zoom noise. % Mute: Do not record sounds. GA * 2°nctbockire microphone uen you use the Sound Ave function. + Recordings made wih Sound Ave may difer om actual sounds. 5 Set desired options. (For a list of options, refer to "Shooting options” starting on page 56.) 6 Press © (Video recording) to start recording.
7. Press © (Video recording) again to stop recording.
2 You can sta recording a édeoin some modes by pressing © Mideo recording whout han to rolae ie made chl to sMf. 2 The video flame size may apper smaller he you ar recording a video depending on fe Mdeo 1esolion and ame rat. 2 you perform no operations for apprœxümail} 5 minutes le recording a video, ne screen vil become dm, To acivale ne screen, pero any camera operalon. N you aperate POWER, Zoom, Shut, or Video reooring button, ne camera sil camy ou ne asalgnecl Aunon, even when the screen is dim: Extended functions 50
Pause recording The camera allows you to temporariy pause a video while recording. With this function, you can record separate scenes as a single video.
+ Press [OK] to pause wie recording + Press [OK] to resume. Capturing still images while recording a video You can capture stil images while recording a video without switching to the photo shooting modes (up to 6 photos]. This feature is avaïlable only when you use a memory card. Images captured while recording a video + Press [Shutter) to capture images while recording a video. + Captured images will be saved automatically. D) * Captued images vil be automatealy reed, depending on ne se @ mages ro oftne record video + You cannot capiure st mages wfile recording high-speed videos. + You cannot capiure st mages when you pause the video recording; The qualty of images captured while recording a video may be lower than those caplurec normal. Extended functions 51
Using the Movie mode Recording high-speed videos You can record high-speed videos by setting frame rates. High- speed videos will be played in slow motion at 30 FPS, regardiess of the frame rate of the video. (2) + Memory cards with slow unie speeds do not support highn-speed videce. + You cam set Sat Fiter effects or Smart Soene Detection mode when recording high-speed videce. The camera des not record audio when recording hign-speedl videce. The image quality of igh-speed video may be lower then normal speed vice. 1 Rotate the mode dial to 88. + mode ony alows you to record a high-speed video.
2. Press [Hi], and then select a frame rate.
Icon jpion un | 440fps: Record 440 frames per second (for up to #10 seconds] ago | 250fps: Record 250 frames per second (for up to % | 10 seconds 80fps: Record 80 frames per second [for up to Z 20 minutes}. 80fps is not a high-speed recording option
3. Press © Wideo recording) to start recording.
4 Press © Wideo recording) again to stop recording. Extended functions 52
Using the Movie mode Using the Smart Scene Detection mode In Smart Scene Detection mode, your camera automatically chooses the appropriate camera settings based an the scene it has detected. 1 Rotate the mode dial to >. 2 Press [MENU]. 3 Select @ > Smart Scene Detection + On. 4 Press [MENU] to return to Shooting mode. 5 Align your subject in the frame. + The camera automatical selects a scene. An appropriate scene icon wil appear at the bottom let of the screen. D lanoscapes B Sunsts D Buskes D Forsted areas 6 Press © (Video recording) to start recording.
7. Press © (Video recording) again to stop recording.
2 Iine camera does not recognize an appropnite soene mode, uses the defaut setings for the Smart Scene Detection mod. Te camera may not select ne comect scene depending on the shootng conions, such as camera she, lghing, and distance to the subpct + Simat Fiter flects ar not avañable in Smart Scene Detection mode. Extended functions 53
Using the Creative Movie Maker mode In the Creative Movie Maker mode, you can easily make movies from the photos and videos stored on your memory cardl Making a movie with the Creative Movie @ * Yo2czrn sec polos cagiued in Panorama mode, videos made Maker in Creative Movie Maker mode, videos recorded wi some Smart Fier eflects (Miniature, Vignetting, Half Tone Dot, Sketch, or 1 Rotate the mode dial to EX. Fishreye), cr eme hefr-epeec eos (4OIpe) + You can select up to 60 photos and 10 videos. 2° Select + Movie Creation. 3 Select Select, and then select flles. 4. Press [Fn] to confirm the selection. + You must select at least 2 fles 5 Press [Ÿ)] to select Theme, and then select a theme. +_ you select a folder, every photo in the folder wil be selected. + ffyou select a @ vicko, every photo captured while recording 6 Press [Ÿ)] to select Music, and then select music. the video will be selected + Select Shuffle to let the camera select photos and videos 7 Press [Ÿ)] to select Movie Size, and then select a movie random, The movie cannot exceed 2 minutes 30 seconds sie. in length. 8 Press [Ÿ] to select Creation, and then select Creation Start H your camera does not have enough avallable memory to store the movie, you cannot select Creation Start. Delete fies from the memory card to make more memory available. (p. 8) Ithe pop-up message appears when you select Creation Start, select a smaller movie sie in the Movie Size option The video rendering may take longer depending on the number and size of he selected îles + Press [MENU] to cancel the video rendeing, Extended functions 54
View a movie made in Creative Movie Maker mode 1° Rotate the mode dial to Ex. 2 Press [DISP/Y] to select a movie. 3 Press [DK] to play the movie. To verte move n Prs/back mode, press (EI. (p.84) Extended functions 55
- Shooting options Learn how to set the options in Shooting mode. Selecting a resolution and quality p. 57
- Capturing a smile shot Selecting a resolution rene 57 Detecting eye blinking Setting the photo quality p. 58
- Using Smart Face Preren Using the timer p. 50
- Registerng faces as your favorites Shooting in the dark mn. 60 MYStEN ee Preventing red-eye 60 Adjusting brighiness and color Using the flash p. 60
- Adjusting the exposure manually (EV) Adjusting the ISO senstity …………. 62 Changing the metering option Changing the cameras focus p. 62
- 20100 à Vino Eance Seting Using macro p. 68
- Using burst modes Using auto focus Capturing photos in the High speed burst Focusing on a selected area … p. 63
- … 65 EST) cansoeropnconnaccannoeooomnec open Using tracking auto focus … p. 66
- Capturing photos in the Precapture mode Adjusting the focus area p. 66
- Capturing bracketed photos Using Face Detection Detecting faces 07 Capturing a self portrait shot …… . 67 … Applying effects/Adjusting images Applying Smart Fiter effects: Adjusting your photos p. 68
Selecting a resolution and quality Learn how to change the image resolution and quality settings. Selecting a resolution AS you increase the resolution, your photo or video wil include more pixels, so it can be printed on larger paper or displayed on a larger screen. When you use a high resolution, the fle size wil also increase. SMART P À S M “Guu SCN 1 In Shooting mode, press [MENU]. 2 Select 6 > Photo Size. 3 Select an option. Æ) 4096X3072 Print on an A1 paper 9 4096X2736: Print on an A2 paper in wide ratio (3:2) 3648X2786: Print on an A2 paper 4096X2304: Print on an A2 paper in panorama ratio {16:9] or play back on an HDTV. 2592x1944: Pint on an A4 paper 1984X1488. Pint on an A5 paper 1920X1080: Print on an A5 paper in panorama ratio {16:9] or play back on an HDTV. 1024X768: Afiach io an emnail LE]
SMART P À S M x SON 1 1° In Shooting mode, press [MENU]. 2 Select 88 > Movie Size. 3 Select an option. Icon | Description eux 1920X1080: Hign-quaity HD fles to play back on an “um HOTV. HD 1280X720: HD îles to play back on an HDTV. VGA | 640480: SD iles to play back on an analog TV. Ia memory cards not eeted ie camera supports cn} VGA Shooting options 57
Selecting a resolution and quality Setting the photo quality PA $ M vu SCN Set the photo quality setting. Higher image quality settings will resul in larger fie sizes. The camera campresses and saves the photos you capture in the JPEG format. 1° In Shooting mode, press [MENU]. 2 Select 3 > Quality. 3 Select an option. ÆY+ Super Fine: Capture photos in super high quality. Æ Fine: Capture photos in high quality. Normal: Capture photos in normal quality. Shocting options 58
Using the timer sur p à s ma son a Learn how to set the timer ta delay shooting, 1 In Shooting mode, press [Ü)]. 3° Press [Shutter] to start the timer. + The AF-assist ighäimer lamp binks, The camera vil automatically capture a photo after the specified time has elapsed @ : °° Brute (D) 0 cena mer + Depending one Face Detection options you esected, he ümer Auncion may not be avaiable. 2 Select an option. ŸQ+ | Off: The timer is not active. VA 10 Sec: Capture a photo after a 10-second delay. 2 Sec: Capture a photo after a 2-second delay. Shooting options 59
Shooting in the dark Leam how to capture photos at night or in low light conditions. Preventing red-eye P scn Using the flash smart P À S M SCN Hthe flash fes when you capture a photo of a person in the dark, Use the flash when you capture photos in the dark or when you a red glow may appear in the person's eyes. To prevent this, need more light in your photos. select Red-eye or Red-eye Fix. Refer 10 flash options in “Using tre flash” 1 In Shooting mode, press [4].
Ç Flash Strength v + A Before correction A After correction OL EL TI 2 Select an option. off The flash will not fire. ® . The camera will display the shake waming ado when you are shooting in low light. a | Auto: In Smart Auño mode, the camera vil select a proper flash seting for the scene i deteci Shooïng options 60
Shooting in the dark
Q@ : Fes eptons are not avalabe you set rs options or select Auto: The fash wil fre automatically wnen the subject or Selt-Portrait or Blink Detection: background is dark. + Mke sur that your subjects are within the recommended distance Red-eye from the fish. (p. 181) à High from the flsh I relected or here is a substantl amount of +_ The flash wil fre twice when the subject or PR ee background is dark to reduce the red-eye effect +_ There is an interval between the 2 bursts of the flash Do not move unti the flash fres a second time. Fillin + The flash always fres + The camera automaticalÿ acjusts gt intensity Slow Sync +_ The flash fires and the shutter stays open longer. 1° In Shooting mode, press [4]. This option is recommended when you want to capture more ambient light ta reveal more detais in the background. Use a tripod to prevent your photos from blurring. 3 Press [wi]. +_ The camera wil display the shake waming ed» when you are shooting in low light Red-eye Fix +_ The fash fres ice when the subject or background is daxk, The camera corrects red-ayes through its advanced software analysis. +_ There is an interval between the 2 bursts of the flash Do not mave uni the flash fres a second time Adjust the flash intensity to avoid over-exposed or under-exposed photos. 2 Scrollto an option. Available options may difier depending on the shooting conditions. Shooting options 61
4° Rotate the navigation button or press [#/X)] to adjust Adjusting the ISO sensitivity PASM the intensity. The ISO sensitivity is the measure of a film's sensitivity to light as defned by the Intemational Organization for Standardization (SO) The higher ISO sensitvity you select, the more sensitive to light your camera becomes. Use a higher ISO sensitwity to capture better photos and reduce camera shake when not using the flash. 1 In Shooting mode, press [MENU]. 2 Select @ + IS0. 3 Select an option. + Select if to use an appropriate ISO sensitity based on the brightness of the subject and lighting. 5 Press [DK] to save your settings. 2 honore ten ere may note tac + “he abc a 0 se ove camea D an “Rss Her er maritime soso 1e expoeure value is 100 big or too small In some shoïng modes, you cannot use this function. Shocting options 62
Changing the camera's focus Leam how to adjust the camera's fous to suit the subject and the shooting conditions. Using macro PAS M @ux SCN @ Using auto focus PA S M @uu SCN @ Use macro to capture close-up photos of subjects, such as. To capture sharp photos, select the appropriate focus option flowers or insects. according to your distance from the subject. 1 In Shooting mode, press [@]. @ : 190 04e carera ii prevent buryphoics + Tum offthe flash fine distance to the subject is less han 181 AO om) Shooïng opions 63
Auto Focus (Normal): Focus on a subject fariher than 81 in. (80 cm) away. 188 in. (350 om} when you use the zoom. Manual Focus: Focus on a subject by adusting ne focus distance manual. (p. 64) Macro: Manual focus on a subject that is 2-31 in (5-80 cr) from the camera. 71-188 in. (180-350 om when you use the 200m. Auto Macro: Foous on a subject fartner than 2 in (6 cr) away. Farther than 71 in. (180 cm) away when YOU use the z00m. Available options may difier depending on the shooting conditions.
1° In Shooting mode, press [%]. 2 Scroll to Manual Focus. 3 Press [@]. 4 Rotate the navigation button or press [&/Ÿ)] to adjust the focus distance. 5 Press [OK] to save your settings. Wien you agust he focus distance manual and the subject à out of focus, tne photo may be buy.
- you use this function, you cam set foous area ophons and Face Detection options. Shooting options 64
Focusing on a selected area P A SM vu SCN You can focus on an area that you have selected. 1° In Shooting mode, press [MENU] 2 Select @ù > Focus Area > Selection AF. 3 Press [MENU] to return to Shooting mode. Æ Press [OK], and then rotate the navigation button or press [DISP/$/#/X)] to move the frame to a desired area.
5 Press (OKI. 6 Press [Shutter] to capture the photo. + Press [OK] to change the focus area you use ti unoion, you cannot set Face Detection options, Burst oplns,
f Smart zoom options, and Smart Flter effects. Using tracking auto focus PA SM ru SCN Tracking AF allows you to track and auto focus on your subject, even when you are moving, 1° In Shooting mode, press [MENU] 2 Select @ + Focus Area - Tracking AF. 3 Press [MENU] to return to Shooting mode.
Focus on the subject you want to track, and then press [OK]. + A focus frame appears on the subject and follows the subject as you move the camera.
© D x LA “ @ sevn ‘a The white frame means that your camera is tracking the: subject. Ven you hal-press [Shutter], ne green frame means that your subject is in focus 5 Press [Shutter] to capture the photo. Shocting options 65
's focus. Changing the ca GA * "ou do ot ska loue aa os ane il appari re Adjusting the focus area PA 5 M SCN center ofthe screen. You can get clearer photos by selecting an appropriate focus + Tecking a subject may fai when: area according to your subject location in the scene. = the subectis too sal -_ the subject moves exoessieh 1° In Shooting mode, press [MENU]. the subiectis backdt or you &re shooting in a daik place colors ar pates on the subject and the background are the same 2 Select @ù > Focus Area. the subit includes horizontal pattes, such as blind the camera shékes excesshel 3 Select an option. + Wen trackng a subject fl, he focus ame wl appear as a wie signe frame (C2) Icon | Description ° Lee fais to track the subject, you must reselect the subject @ Center AF: Focus on the center of the frame (suitable when subjects are located at or near the center. + Nine camera fl to focus, the focus frame wl change to a red singe-ine rame (CT. 1 you use this function, you cannot set Face Detection options, Burst ophons, Smart zoom, and Smart Fier efects, Multi AF: Focus on one or more of 9 possible areas. Es] E)] Selection AF: Focus on the area that you select, (p. 65) ‘Tracking AF: Focus on and track the subject. (p. 65) ‘Available shooting options may difler depending on the shooüng mode. Shooting options 66
Using Face Detection» a sm sen K you use Face Detection options, your camera can automatically detect a human face. When you foaus on a human face, the camera adjusts the exposure automatically. Use Blink Detection to detect closed eyes or Smile Shot to caplure a smling face. You can also use Smart Face Recognition {0 register faces and prortize the fous on them.
Wen your camera detects a face, it rack ine detected face aucmatcahy. Face Detection may not be eftectie when: the subjects far om the camera [The focus frame wl appear range far Smile Shot and Bink Detection.) His to brgh or too dk te subjects not facing the camera te subjectis wearing sunglasses or a mask the subjects facil expression changes drasticaly te subectis backit ar the Hghtng condiions are unstabie Face Detecion s not avalsble when you set Smart Fier effects, Image edjustment, Selection AF, Tracking AF, or Manual Focus. Depending en the shooting options you selected, avafable Face Detection options may cf. Dependig en the Face Detection options you selected, ie tmer function may not be avale. Wen you set Face Detection aplons, the AF areas automatically setto MutiAF. Dependng en the Face Detection options you selected, Bret options: may not be available. Wen you capture photos of detected faces, hey wil be registered inthe face Is. You can vieu regjstered faces in order of prothy in Playback mode. (p. 85) Even though faces are registered sucoess/ul, tney may not be clsssiied in Playback mode. AA face detected in Shooting mode may not appear in the face st or Sat Abu. Detecting faces Your camera automatically detects up to 10 human faces in one scene. 1° In Shooting mode, press [MENU] 2 Select @ + Face Detection + Normal. The face nearest the camera or nearest the center of ne soene appears in a white focus frame and the rest of ihe faces appear in gray focus frames. Q@ * Me cher you ae tire suieci, he quicker your camera val detect faces.
- I you have set Burt oprons, he camera may not register detected faces. Shooting options 67
Capturing a self portrait shot Capture photos of yourself. The camera sets the focus distance ta close-up, and then emits a beep when readh. 1 In Shooting mode, press [MENU]. 2 Select 6 > Face Detection > Self-Portrait 3 Press [MENU] to return to Shooting mode. 4° Compose your shot with the lens facing you.
5. When you hear a quick beep, press [Shutter].
When faces are located in the center, the camera beeps rapid. @ ‘r2inVoume of ne sad sets, te caremlnatent a be p.12 Capturing a smile shot The camera automatically releases the shutter when it detects a smilng face. 1 In Shooting mode, press [MENU]. 2 Select @ + Face Detection > Smile Shot. 3 Press [MENU] to return to Shooting mode. 4 Compose your shot. + The camera automatically releases the shutter when it detects a smiing face. When your subject smiles: broady, your camera can detect the smile more easih. Shooting options 68
q Face Detecting eye blinking H your camera detects closed eyes, it wil automatically capture 2 photos in succession. 1° In Shooting mode, press [MENU]. 2 Select à > Face Detection -> Blink Detection. @ : Hi your came sl il Caplurng' is displayed ont ren 2 1 Blrk Detection fs, re “Picture taken with eyes closed." message appears. Caplure another photo. Using Smart Face Recognition The camera automatically registers faces that you frequentiy photograph. The Smart Face Recognition feature will automatically prioritize the focus on those faces and on favorite faces. The Smart Face Recognition feature is available only when you use a memory card. 1 In Shooting mode, press [MENU]. 2 Select à > Face Detection > Smart Face Recognition. +]: Faces that you have registered as favorites. (To register faces as favorites, refer to page 70.) + [: Faces that the camera has automatically registered Shooting options 69
The camera may recognize and register faces incomecty depending Registering faces as your favorites (My Star) “on lighting conditions, drastic changes in the subjects pose or face, You can register your favorite faces to priaritize the focus and eniMnghenonobne secte Meerng passes. exposure on those faces. This feature is available onty when you The camera can automate regter up to 12 faces. ne camera use a memory card recognizes a ne face when 12 faces have aready been reglstered wi replace the lost priorty face with the new one. 1 In Shooting mode, press [MENU]. 2° Select à > Smart FR Edit > My Star. 3 Align your subject face with the oval guideline, and then press [Shutter] to register the face. ‘+ Capture photos of ane person at a time when registeing faces. + Capture 5 photos cf he subjects face for best resuits: one each from the front, le, right, above, and below. + When cepturng photos om the If, right, above, and below, instuct te subject no to tum his or her face more nan 0 degrees. You can register a face even you capture onÿy one photo of the subjects face. Shooting options 70
vorite faces are indicated with a %k on the face list Q@ : Yuan oil up 108 avoit taces +_Tne flash vil not fre when you register favorte face. you register the same face ice, you can delete ane of the faces inthe face Ist. Viewing your favorite faces 1° In Shooting mode, press [MENU] 2 Select @ > Smart FR Edit > Face List. @ * chance ne rank of your favori faces, press [Fn], and ihen select Edit Ranking, (p.85) + To delete a favorite face, press [Fn], and then select Delete. (p. 86) Shooting options 71
Adjusting brightness and color Learn how to adjust the brightness and color for better image quality. Adjusting the exposure manually (EV) 3 Select a value to adjust the exposure. P A S Ou + The photo will be brighter as the exposure value increases. Depending on the intensity of the ambient light, your photos: CS may be too bright or dark. In these cases, you can adjust the exposure to get a better photo. im Back mm Sa A Darker (+) A Neutral(0) A Brighter (+) 4 Press [OK] to save your settings. + Once you adjust the exposure, the setting wil be stered autometical. 1 In Shooting mode, press [MENU]. You may need o change ie expoaure lu ter to av oneremposure or underexposure 2° Select 6 or ff + EV. + Iyou cannot decide on an appropriate exposure, select ine AE BKT {Auto Exposure racket} option (p. 79), and then capture bracketed photos. The camera will capture 3 consecutive photos, each with a different exposure: normal, underexposed, and overexposed. (p. 78] Shooting options 72
Adjustng brightness and color Changing the meteing option PAS M “Guu SCN Spot The metering mode refers to the way in which a camera + Your camera measures only the light intensity at the measures the quantity of light. The brighiness and lighting of your eo very center of the frame. photos will vary depending on the metering mode you select. +_ffa subject is notin the center ofthe frame, your photo may be impropery exposad. 1 In Shooting mode, press [MENU]. + Suitable for a subject with backighting, 2 Select 63 or R > Metering. se sn ces the meter reading of the entire 3 Select an option. © frame with emphasis placed on the center. + Suitable for photos with subjects in the center of the Muiti mm 22 came chics ne famo int several res, and then measures the light intensity of each area. + Suitable for general photos. Shooting options 73
Selecting a White Balance Setting 1. In Shooting mode, press [MENU] PAS M Quu vf 2 Select Æù or @ + White Balance. The color of your photo depends on the type and quality of the light source. ff you want the color of your photo to be realistic, 3 Select an option. select a White Balance setting that is appropriate for the lighting [Desoniption conditions, such as Auto WB, Daylght, Cloud, or Tungsten: Dsusiten Cu] Auto WB: Automatically set the White Balance base: on the lighting conditions. Daylight: For outdoor photos on a sunny day æ Cioudy: For outdoor photos on a cloudy day orin shadow. à Fluorescent_H: For shoolng under a fluorescent or 3-way fluorescent light ax, Fluorescent L: For shooïng under white fuor light L&. | Tungsten: For shooïing indoor photos under incandescent bulbs or halogen lamps. m Custom Set To use White Blanc: 2 define. (p. 75) dayignt ings that you æ Cody the color temperature of Color Temp. To aci Li light source. (p. 76) Shooting options 74
3. Scroll to a desired option.
&/Ÿ)] to adjust the values on the + G Green + A: Amber + M: Magenta + BB 6 Press [DK] to save your settings Defining your own White Balance You can customize the White Balance by capturing a photo of a white surface, such as a piece of paper, under the lighting conditions in which you intend to capture a photo. The Wiite Balance feature wil help you to match the colors in your photo with the actual scene. 1° In Shooting mode, press [MENU] 2 Select 6 or @ + White Balance. 3 Scroll to Custom Set. 4 Am the lens at a piece of white paper, and then press IShutter) Shooting options 75
1 In Shooting mode, press [MENU] 2 Select 6 or @ > White Balance. 3 Scroll to Color Temp. À Press [@]
Rotate the navigation button or press [/Ÿ)] to adjust the color temperature to match your light source. + You can capture a warmer photo with a higher colar temperature seting {more yelow/red), and a cooler photo with a lower color temperature setting (more blue). We Eance : Cole Temp. 6 Press [DK] to save your settings. Shooting options 76
Using burst modes ras It can be dificult to capture photos of fast-moving subjects or capture natural facial expressions and gestures of your subjects in photos. Also, it can be difficult to adjust the exposure correctly and select a proper light source. in these cases, select one of he burst modes.
Capturing photos in the High-speed burst mode 1 In Shooting mode, press [Eu]. 2 Select an option.
1 … Tofps: Capture 10 photos per second continuous. # | (You can capture up to 8 photos in one burst.) S … Sfps: Caplure 5 photos per second continuous, #7 | (You can capture up to 8 photos in one burst.} 3 fps: Caplure 8 photos per second continuous, #° (You can capiure up to 8 photos in one burst.) @œ Single Capiue a sg photo Single is not ao speed burst option.
3 Align your subject in the frame, and then half-press IShutter to focus. 4 Press and hold [Shutter]. + Wie you are pressing [Shutter], the camera captures photos continuoushy.
- You can use the flash, Smart Zoom, Faoe Detection options, and ‘Smart Fiter options only when you select Single. + may take longer to save the phoïcs depending on the memory card capacity and perlormance. «The camera aays désplays caplured photos before retuming to Shooting mode. Shooïng opions 77
Capturing photos in the Precapture mode In Precapture mode, the camera starts shooïing before you even press the shutter al the way down. I you do not want to miss the first couple of important shots, simply use this mode and select the photo with the best results after shooting, 1 In Shooting mode, press [Eu] 2 Select Precapture. 3 Align your subject in the frame, and then half-press IShutter] to focus. + "The camera captures 7 photos continuoushy. f you release {Shutter too fast, the camera captures less than 7 photos. À Press [Shutter]. + The camera capture the last photo and then saves all of the captured photos while you are haï- pressing [Shutter) H you do not press [Shutter] al he way down, the photos captured whle you are haf-pressing [Shutteri wil not be saved Capturing bracketed photos You can use the automatic bracketing feature to capture multiple photos of the same subject with different setting values slightiy modified, such as exposure or white balance. 1 In Shooting mode, press [Bi] 2 Select Bracket. 3 Align your subject in the frame, and then half-press IShutter to focus. À Press [Shutter]. + The camera captures 3 photos continuous. @ ueeatodo prventury phote. Shoating options 78
1 In Shooting mode, press [MENU]. 2 Select @ + Bracket. 3 Select a bracketing option. Description WB BKT.: Capture 8 photos with different white balance. AE BKT: Capture 3 photos win selected exposures. 4 Adjust the color for the selected light source (white balance) or select an exposure value 5 Press [DK] to save your settings. Shocting options 79
Applying effects/Adjusting images Applying Smart Filter effects Appiy various filter ef to your ph unique imax PASM,@ s and videos ta create Miniature 1 In Shooting mode, press [MENU] 2 Select @ or @R > Smart Filter. 3 Select an effect. Available fiters in Program, Aperture Priority, Shutter Priority, and Manual modes CEE Œ Normal: No efios © Miniature Aopy a tit shift ft appear in miniature. Vignetting: Apply ne retro-looking color and strong vignette effect of Lomo came Soft Focus: Hide facial imp effects. 1 to make pp dreamy Old Film: Apply a vintage fim eff Half Tone Dot: Apply a haïoi #8 | Sketch: App a pen sketch offe Fish-eye: Distort close objects to imitate afsheye lens. Classic: App a black and white effect: Retro: Apply a sepia tone effect. Oil Painting: Appiy an oi painti
@ Ink Painting: Appiy a watercolor painting eflect {3 Cross Filter: Add nes tnt rade ouard from brin cbjects to imitate the visual effect of a cross filter. Available fiers in Movie mode CES G Normal: No efiect Palette Effect 1: Create a vivid look with sharp contrast and strong color. Palette Effect 2: \/ake scenes clean and clear. Palette Effect 3. Appiy a soft bronn tone. Palette Effect 4: Creaïe a cold and monotone effect. Miniature: App a tt-shift effect to make te subject appear in miniature. Vignetting: App} îne retro-looking colors, high contrast, and strong vigneïte effact of Lomo cameras. Half Tone Dot: Anpiy a haltone effect DBEO0+r+r+ CES Sketch: App} a pen sketch effect Fish-eye: Distort close objacts to imitate the visual effect of a fisheye lens. Classic: App a black and white effect: E)] Retro: Apply a sepia tone effect. + you esect Miniature en recoring a do, ie miniature recording time is displayed wi tre Miniature icon and is shorer than ie real recorcing me. 2 you esect Miniature shen recorcing a leo, you cannot record te video sound or capture sil mages while recording a vie. 2 you csect Miniature, Vignetting, Hal Tone Dot, Sketch, or Fish-eye wie recording a édeo, ne recording speed vil be set to LE and the recording resobtion vil be set to Vs. + Nyou esect Sketch, Oil Painting, Cartoon, Ink Painting, 0: (Gross Fler when caplung a photo, ne photo size wi auiomataly change to ED and below. + you get Smar Fier ects, you cannot set Smart Zoom, Face Recogniion options, mage Adjustment oplions, Burt pions, ackng AF, or Selection A. Shooting options 81
Aopbing effects/Adusting images Adjusting your photos PASM Adjust the sharpness, saturation, or contrast of your photos. 1° In Shooting mode, press [MENU]. 2 Select @ + Image Adjust. 3 Select an option. + Contrast + Sharpness + Saturation Image Aqust: Contrast 4 Rotate the navigation button or press [&/Ÿ)] to adjust each value. - Decreasa the color and brighiness. + Increase the color and brightness Description Soften the edges on your photos (suitable for edïing the photos on your computer) Shapen ihe edges to imprave the chaty of your + photos, Tris may also increase the noise in your photos. - Decrease the saturation. + Increase the saturation. 5 Press [OK] to save your settings. 2 Select O you do not went o app any flots (suiable fr printing) + you get ajustment functions, you cannot use Smar Fier opiens and Face Detection options. Shocting options 82
Playback/Editing Learn how to play back photos or videos, and edit photos or videos. Also, learn hour to connect your camera to your computer, photo printer, TV, HDTV, or 8D TV. Viewing photos or videos in Playback mode... 84 Starting Playback mode 84 Viewing photos … 90 Playing a video … 93 Editing a photo 95 Reszing photos . 95 Rotating a photo 95 Apphing Smart Filter effects 96 Adjusting your photos ere 97 Creating a print order (DPOF) ……..... 98 Viewing files on a TV, HDTV, or 8D TV … 100 Transfering files to your Windows computer … Transfering fles with Inteli-studio … TTransferring fles by connecting the camera as a removable disk Disconnecting the camera for Windows XP} Transfering files to your Mac computer Printing photos with a PictBridge photo printer ……
Viewing photos or videos in Playback mode Learn how to play back photos or videos and how to manage fles. Starting Playback mode View photos or play videos stored in your camera. 1 Press EI. 2 The most recent fle wil be displayed. + Hfihe camera is of, it wil tum on and display he most recent n2e 1 Histogram
fie. Pr para. | —-Fie hiomaton 2° Rotate the navigation button or press [&/Ÿ)] to scroll our 26e through files. CR + Press and hold [8/&)] to scrol through fles quick Memory in use D nano EE nes 100-0001 | Folder mame-Fie name The camera vil not proper play back les of uneupported ses or les at were capturedi with her cameras. Photo captured in 8D Photo mode Photo captured in a High-speed burst mode or in Precapture mode (See Viewing fles as a folder, p. 86) Protected fle
Print order has been set (DPOF) Photo includes a registered face (Avalable only when you use a memory card.) “ display île ifomaïen on the sœreen, press [DISP) Playback/Ecing 84
Ranking your favorite faces You can rank your favori faces. The favorite face feature is available onfy when you insert a memory card into the camera. 1 In Playback mode, press [MENU] 2 Select @ + Face List Edit -» Edit Ranking. Cle ] 3 Select a face from the list, and then press [OK]. CEE 100-0002 | Folder name-Fle name 00:00 Current playback time 00:20 Video length @ Vidcofe Video includes images caplured while recording 4 Rotate the navigation button or press [DISP/&] to Video made in Creative Movie Maker mode change the ranking of the face, and then press [Fn]
Le] On Proisctod île LE ] mage captured wie recoraing a video PlaybackEditng 85
in Playback Deleting favorite faces Viewing files as a folder You can delete your favorite faces, The favorite face feature is Photos captured in a High-speed burst mode ar in Precapture available oniy when you insert a memory card into the camera. mode appear as a folder 1 In Playback mode, press [MENU] 1° In Playback mode, rotate the navigation button or press 1$/] to scroll to a desired folder. Select -» Face List Edit» Delete. 2 s +__ The camera wil automatically play back photos in the folder. 3 Select a face, and then press [DK] À Press [Fn]. 5 When the pop-up message appears, select Yes.
Viewing files by category in Smart Album 4 Rotate the navigation button or press [&/Ÿ)] to scroll View les by category, such as date, face, or fe type. through the fes.
1. In Playback mode, olate [Zoom] to the 1. + Press and hold [$/)] to scroll through fles quick.
2 Press [MENU] 5. Press [OK] to return to the normal view. res . 2 Select a category ("my le some me fre camera open Sat Abu change tre category, ar recrgen fes. Type Viewfles by fle type. Date | View fles by the date they were saved Week | View fles by the day of the week iney were saved Face | View fes by recognized faces and favorite faces {Up to 20 people) PlaybeckEditng 87
Viewil ios or videos in Viewing files as thumbnails Scan thumbnaïs of îles.
In Playback mode, rotate [Zoom] to the left to vieu thumbnail (3 at a time). Rotate [Zoom] to îne left once or Mice more to display more thumbnails (9 or 20 at a time), Rotate [Zoom] to the right to retum to the previous vien. Roïate the navigation button or press IDISP/$/# À) Press [Fn], and then select Yes: Scroll through files Delete files A "er yeuscx a ce fe ar gere tunbrai vin, re carreau utorrecahy play back ie video ar ihe photos the foker, Protecting files Protect your files from accidental deletion. 1 In Playback mode, press [MENU] 2 Select @ + Protect > Select. + To protect al fles, select AI» Lock. 3 Scroll to the file you want to protect, and then press [OK]. + Press [OK] again to cancel your selection ET Protected fle icon
CEE À Press [Fn]. D et PlaybeckEditng 88
g files Select files ta delete in Playback mode. Deleting a single file You can select one file, and then delete it 1 In Playback mode, select a fill, and then press [Fn] 2 When the pop-up message appears, select Yes. Q * "ren veung fs n Smart Abu or humble ve, press [nl to delete a fl. + Wilevieuingfles as a folder, press [Fn ta delete al photos in the oder. To désete a specil photo in folder, apen te folder, select a fe, and'tnen press (Fn] Deleting multiple files You can select multiple files, and then delete them at once. 1° In Playback mode, press [Fn]. 2 When the pop-up message appears, select Multiple Delete. + You can also delete mufiple îles in Playback mode by pressing [MENU], and then selecting @B + Delete > Select 3 Scroll to each file you want to delete, and then press [OK]. +_ Press [OK] again to canoel your selection A Press [Fn]. 5 When the pop-up message appears, select Yes. PlaybackEditng 89
Deleting all files You can select all îles, and then delete them at once. 1 In Playback mode, press [MENU] 2 Select @ -+ Delete + All. 3 When the pop-up message appears, select Yes. + Allunprotected flls are deleted: Copying files to a memory card Copy fies from the internal memory to a memory card 1 In Playback mode, press [MENU] 2 Select @ + Copy to Card. 3 Select Yes. Viewing Eniarge part photos of a photo or view photos as a slide show. ETES
In Playback mode, rotate [Zoom] to the right to enlarge a portion of the photo. Rotate [Zoom] to the left to 200m out.
D Éniarged area (Cm Tam (Ex 2) ———— 70m ratio (ne maximum 200m ratio dffers depending on îhe photo resolution PlaybackEditng 90
Viewing photos or videos in PI Rotate the navigation buttan or press IDISP/% 4/0) Press [OK], and then select Yes. (The timmed photo will be saved as a new fl. The original photo is retained in its original form) Move the enlarged area Trim the enlarged photo Ven you veu phot tra were caplured by another camers, the 20cm raïio may die. Viewing panoramic ph View photos captured in Panorama mode. 1° In Playback mode, rotate the navigation button or press 1#/9)] to scrol to a desired panoramic photo. + _ The entire panoramic photo appears on the screen. 2 Press [DK]. + The camera automaticaly scroll through the photo horizontal or vertical, depending on the direction you moved when capturing the phate. The camera then switches to Prayback mode: Wie playing back a panoramic photo, press [OK] to pause or resume. After you have paused the playback of a panoramic photo, press [DISP/@/#/$) to move the photo horizontal or vericaly, depending on the direction you moved when capturing the photo. 3° Press [MENU] to return to Playback mode. The camera automatically scroll through the panorami photo any Hire longest ide of he photo is to or more times longer nan te shorts sie. + On your cameras spa, a photo captured in AD Panorama mode appears as a 2D panoramie photo. To see the 8D effect, connect your camera to a 8D TV or 8D monitor. (p. 102) PlaybackEcitng 91
Viewing photos or videos in Playback mode “Dour App sfiects and auio io a side show of your photos, The side show function does not work for videos. Set a scene change effect between photos, (Of, Calm, Shine, Relax, Lively, Sweet) Effect + Select Off lo cancel effects. 1 In Playback mode, press [MENU]. 2 Select @. + Wan you use the Effect opüon, the interval between photos will be set to 3 seconds. 3 Select a slide show effect option. Music | Set background audio. + Skip to step 4 to start a slide show with no effects. Dear À Select Start > Play. À eh Rapat ep on Set whether ar not to repeat the slide show. (Play, Repeat| 5 View the slide show. Press [OK] to pause the side show. Press [OK] again to resume the side show. Set the photos you want to view as a slide show. + Alf: View al photos in a side shox Images | Date: View photos caplured on a speciic date in a side show. + Select: View selected photos in a slide show. + Set the interval between photos. (1 sec, 3 sec, 5 sec, 10 sec) + You must set the Effect option to Off to set the interval Press [DK], and tnen press [$/Ÿ) to stop tne side show and eu to Playback mock.
Playing a video In Playback mode, you can view a video, and then capture or trim parts of the playing video. You an save the captured or timmed segments as new fles.
1. In Playback mode, select a video, and then press [OK]
2 View the video. D Ge 29) | Current playback time/ Video langth Ge (JS Press [#]. Each time you press [4] you change the scan speed in this order: 2X, 4X, EX Scan backward Pause or resume playback Press [OK] Press [W)]. Each time you press [Ô)] Scan fovard you change the scan speed in this order: 2X, 4X, EX. Adiust the volume level Roïate (Zoom) to the left or right Trimming a video 1 While viewing a video, press [OK] at the point where you want the trimming to begin. 2° Rotate [Zoom] to the right, and then press [OK]. 3 Press [OK] at the point where you want the timming to end. 4 Rotate [Zoom] to the right. 5 When the pop-up message appears, select Yes. 2 The ofnal video shouid be at sas 10 second eng, The camera wil save he edited video as a new Île andleave tre ofginal ide intact. PlaybackEding 93
in Playback Capturing an image from video 1 While viewing a video, press [OK] at the point where you want to capture an image. 2 Press [$] Q * = rssouion of te cpiured image wil be the same as the ofignal video. The cantured image is saved as a ne le. PlaybackEding 94
Editing a photo Learn how to edit photos. QA : Te came vil save ected photos as neue. + Wen you ect photos, ire camera vil automatically convert them to a lower resolution. Photos het you rotale or resize manualy are not autometicaly corverted to a kawer resolution. Resizing photos Rotating a photo Change the size of a photo and save it as a new file. 1 In Playback mode, select a photo, and then press 1 In Playback mode, select a photo, and then press [MENU] MENU] 2 Select Œ@ > Resize. 3 Select an option. 2 Select > Rotate. 3 Select an option. gt 80” Foie C3 1984x1488 Sr Fiter | ©91024%768 Image Adust » [rw] Meczrenwloenie te aire ci rte pire die dep he otre dire po Playback/Ecting 95
Editing Applying Smart Filter effects Apply special effects to your photos.
Sketch: App a pen sketch effect Fish-eye: Distor close objects to imitate the visual effect of a fshaye lens. Classic: Apply a black and white effect Retro: Apply a sepia tone effect Oil Painting: Appiy an oi painting effect Cartoon: Apply a cartoon painting effect Ink Painting: Appiy a watercolor painting eftect. e Cross Filter: Add lines that radiate outward from bright objects to imitate the visual effect of a cross fiter. Zooming Shot: Bur the eciges of a photo to emphasize the subjects in the center. PlaybackEding 96
Editing a phot Adjusting your photos Leam how to correct red-eye, adjust the skin tone, and adjust the brighiness, contrast, or saturation, The camera will save an edited photo as a new fe, but may convert it to a lower resolution Removing red-eye
1. In Playback mode, select a photo, and then press
MENU] 2 Select Œ > Image Adjust > Red-eye Fix. 3 Press [DK] to save your settings Playbx Retouching faces 1 In Playback mode, select a photo, and then press IMENU] 2 Select 3 Press [®]. 4 Rotate the navigation button or press [&/Ÿ)] to adjust the skin tone. + As the number increases, the skin tone becomes brighter. — Image Adjust + Face Retouch. 5 Press [DK] to save your settings JEditng 97
Adjusting brightness, contrast, or saturation
1. In Playback mode, select a photo, and then press
MENU]. 2 Select Œ -+ Image Adjust. 3 Select an adjusting option. CEE Bigniness @ Contas & Savaion À Press [&] 5 Rotate the navigation button or press [/Ÿ)] to adjust the option. 6 Press [DK] to save your settings. Adding noise to the photo 1 In Playback mode, select a photo, and then press IMENU] 2 Select Œ -+ Image Adjust -> Add Noise. 3 Press [DK] to save. Creating a print order (DPOF) Select photos to print and save print options in the Digital Print Order Format (DPOF). This information is saved in the MSC folder on your memory card for convenient printing an DPOF- compatible printers. 1 In Playback mode, press [MENU] 2 Select @ > DPOF + Standard > Select + Select A to print all photos. PlaybeckEding 98
Scrol to a photo you want to print, rotate [Zoom] to the left or right to select the number of copies, and then press [Fn]. + Hfyou select AI press [DISP/A®] to select ne number of copies, and then press [OK Press [MENU] Select @ -+ DPOF > Size -» Select + Select Al to choose the print size for all photos. Scroll to a photo you want to print, rotate [Zoom] to the left or right to select the print size, and then press [Fn] + Hyou select AI, press [DISP/Y] to select tne print size, and then press [OK] Printing photos as thumbnails Print photos as thumbnails to check all the photos at once. 1° In Playback mode, press [MENU] 2 Select @ > DPOF Index. 3 When the pop-up message appears, select Yes. + You can take the memory cer to à print shop that supports DPOF {Digi Pint Orler Format ar you can pit phots drecty Hrough a DPOF-compaitie printer at home. + Phoos with dimensions at re wir en the paper may be out of on te let an gt edges. Eneure tt your phoïo dimensions are compaile with the paper you sect. 2 You cannot set DROF options fr photos stored in he imemal memory,
- you speciytne print ie, ou can pint photos ok ut DPOF 1.1-compatbl prier. PlaybackEding 99
Viewing files on a TV, HDTV, or 3D TV Play back photos or videos by connecting your camera to a TV with the A cable.
In Shooting or Playback mode, press [MENU] 2° Select 4 > Video Out. 3 Select the video signal output for your country or region. (p.115) 4 Turn off your camera and TV.
5. Connect your camera to your TV with the AN cable.
6. Tum on your TV, and then select the AW video source
with the TV remote control 7° Turn on your camera. +__ The camera automatical} enter into Playback mode when you connect f to a TV. 8 View photos or play videos using the camera buttons. A * 2errana on ne TV moyeu may see some tal noke r pat fan mage may not appear. mages may not be centered on the TV screen depending on your TVeetings. PlaybackÆcing 100
on a TV, HDTV, or 3 Viewing files on an HDTV You can view high-quality and uncompressed photos or videos on an HDTV using the optional HDMI cable. HDMI (High Definition Multimedia Interface] is supported by most HDTVS.
3. Select an HDMI resolution. (p. 115)
4 Turn off your camera and HDTV. 5 Connect your camera to your HDTV with the optional HDMI cable.
6. Tum on your camera.
+_Hyou have an Anynet+ compatible Samsung HDTV and you have tumed on your cameras Anynet+ function, the HDTV tums on automatically and displays the camera screen, wiile the camera automaicaly enters Playback mode. + HAnynet is offin your camera or your TV does nat have Anynet+, the TV does not tum on automatically. Tum the TV on manual}.
7. View flls using the buttons on your camera or if the TV
has Anynet+, the remote control of your HDTV. (@) * "your HDTV supports tre Anynet+(CEO) profle, tum Anynet+ on in he cameras oefinga menu (p.114) to conal he camera and TV wi ie TV remote control. + Anmetet you control al connected Sameung AN devices win the TVremote control ete take for the camera to connect yeur HDTV may va win the Ype of SD, SDHC, or SDXC card you use. À faser SD, SDHC, or SOXC card not necessaire after HDMI Fanefr, because te main function of re card to improve the Fanefer rte duing Shooting PlybackEdiing 101
Viewing files on a 8D TV You can view photos captured in 8D Photo or 8D Panorama mode on a 8D TV.
3. Select an HDMI resolution. (p. 115)
À Turn off your camera and 3D TV. 5 Connect your camera to your 8D TV with the optional HDMI cable.
6. Tum on your camera.
+_Hyou have an Anynet+ compatiole Samsung 8D TV and you have tumed on your cameras Anynet+ function, the 8D TV tums on automatically and displays the camera screen, while the camera automaicaly enters Playback mode. I Anynet+ is off in your camera or your TV does not have Anynet+, the TV does not tum on automaticalÿ, Tum the TV on manualy:
7. Press [®] to switch to 8D TV Mode.
+ Press [@] again to switch 10 2D TV Mode.
8. Tum on your TV's 8D function.
+ Refer to your TV's user manual for more details. 9 View 3D photos with the buttons on your camera or, ifthe TV has Anynet+, the remote control of your 3D HDTV. You camot view en MPO fl in 8D on TVs that do not support the le format. *_Use proper D glasses vien you ve an MFO fle on a 8 TV. Do notuew the 2 images captured by your camera on a 8D TV or D manar far an extended pero ime. may cause urpleasant symptoms, Such eyesrain, ue, rauses, an czaness. PaybsckEdiing 102
Transferring files to your Windows computer Transfer îles to your Windows computer, edit them with Inteli-studio, and upload them to the web. GA * Te eauremeni ar recommendaion on els may not nok = property even when the computer mets the requirements, depending one conton of your computer. cpu Intel” Core 2 Duo® 1.68 GHz or higher’ 2 Hyour computer des not meet the requtements, videos may not play AMD Athlon X2 Dual-Core 2.2 GHz or higher corect}y or may take longer to edit videos. RAM Minimum 512 MB RAM (1 GB or more recommended) : etai Dre 840€ or above before you use Hi sul. 2 Your computer must be rurning Windows XF, Windows Wat, or os Windows XP SP2, Windows Vista, or Windows 7 Windows 7 for you to connect ne camera as a remowable disk. (82-bit editions) Hard disk capacity | 220 MB or mor (1 GB and above recommendec) De Eng + CD ROM dre urqualed vous euh es & oompu yau asser oursl + 1024 X 768 pixels, 16-bit color display compatible monitor (1280 X 1024 pixels, 82-bit color display où recommended) es + USB 2.0 part +_"MDIA Geforce 7600GT or higher/ ATIX1600 series or higher Microsoft DirectX 9.06 or higher The programs may not work proper on 64-bit editions of Windows XP; Windows Vista, and Windows 7. PlaybackÆdting 103
your Windows puiter Transferring files with Intelli-studio Inteli-studio wil start automatically when you connect the camera to your computer with the USB cable. Te battery wi charge ile the cameras oonnected to a computer tre USB cab.
1. In Shooting or Playback mode, press [MENU]
2 Select 4 > PC Software - On 3 Tum offthe camera. 4 Connect the camera to your computer with the USB cable. You must pg he sell end ofthe USE cable into your camera. Fine cab reverse, may damage your fe. The menufacturer à not response for any los of ta 5 Tum on the camera. +__ The computer recognizes the camera automatical\ and Inteli-studio launches automaticaly. Fyou set the USB pion Select, select Computerin te pop-up wind. 6 Select a destination folder on your computer, and then select Yes. + Newrfles stored on the camera vil automaticaly transfer to the selected folder. + Hfyour camera has no new îles, the pop-up window for saving newr Îles wl not appear. FonWincbns Veta end Wndous 7, select Run IStudio.exe from ne Auto Flayindow to stat tels. PayosckEdiing 104
Using Intelli-studio Intell-studio is a buit-in program that allows you to play back and edit fles. For detals, select Help -» Help from the program toolbar. (A * You can update the fm of your camera by seecing Web Support + Upgrade fimuware for the connected device from ie program toolbar. + HyouinstalIntal-studio on your computer the program wil launch more quick. To instal the program, select Tool Install Inteli-studio on PC. + You cam etes drect} on the camera, Transfer fles to a folle on your corouter + Inteñ-studio supports the foloning formats: Videos: MPA (Video: H.264, Audio: AAC), WMV (NM 7/8/9), AU (MUPEL Fhoios: JPG, GF, BMP, PNG, TFF Dax DRE DUUnx DR DAUREI Payba
Transfering fles to your Windows com 9 6600680000 © 000 Display les in the selected folder. Sitoh to the Photo ect mode. Switch to the Video edit mode. Switch to the Sharing mode (to send les by email or upload les to websites, such as Flickr or YouTube). Enfarge or reduce the thumbnails in the list. Select a fle type. View îles in the selected folder on your computer. Show or hide fles on the connected camera. View îles in the selected folder on the camera. View îles as thumbnals or on a map. Browse folders stored on te camera Browse folders stored on your computer. Move to the previous or next folder. Print îles, view fles on a map, store fles in My Folder, or register faces. Transferring files by connecting the camera as a removable disk Connect the camera to your computer as a removable disk. 1 In Shooting or Playback mode, press [MENU]. 2 Select + > PC Software -» Off. 3 Tum offthe camera.
Connect the camera to your computer with the USB cable. Yours plug sralend fe USB cab ro our camera. Fe cab reverse re damage vou fes. Te merufeciuer is not response for any ls o dt. PlybackEdiing 106
5 Tum on the camera. + "The computer recognizes the camera automatically. Kyousetine USB opion t Select, s2kct Computer ne pep-uo vin 6 On your computer, select My Computer > Removable Disk > DCIM _» 100PHOTO. 7 Drag or save files to your computer. Disconnecting the camera (for Windows XP) With Windows Vista and Windows 7, the methods for disconnecting the camera are similar. 1° lfthe status lamp on your camera is blinking, wait until it stops. 2 Cick PB on the tool bar at the bottom right of your computer screen. 3 Click the pop-up message. Æ Click the message box that indicates the camera can be removed safely. 5 Remove the USB cable. The camera may not disocnnect ef ile elec rurning End the pragambetcr decomecing re camera PayosckEdiing 107
Transferring files to your Mac computer Wen you connect the camera to a Macintosh computer, the computer will automatically recognize the device. You can transfer fles directly from the camera to the computer without instaling any programs. Me: O6 10. pote 1 Connect your camera to a Macintosh computer with the 2 Tum on the camera. USB cable. + The computer recognizes the camera automatically and displays a removable disk icon You must gg he srellend afthe USE cable into your camera. Fine cable Breersee, may damage cures. Me merufaciurer not response for any los of ta Fyouset he USE cpfen to Select, salect Computer ie pop-up wincon. 3 Double-click the removable disk icon. 4 Drag or save filles to your computer. PlaybackÆding 108
Printing photos with a PictBridge photo printer Print photos with a PictBrdge-compatible printer by connecting your camera direct to the printer. Configuring print settings Press [MENU] to configure print settings. 1 In Shooting or Playback mode, press [MENU] 2° Select 4 > USB -> Printer. 3 Turn on the printer, and then connect your camera to the printer with the USB cable. 4° Ifthe camera is off, press [POWER] or [El] to turn it on. + The printer recagnizes the camera automaticalh. 5 Press [&/Ÿ)] to select a file to print. + Press [MENU] to set printing options. See “Confguing print settings." 6 Press [OK] to print. + Printing starts. Press [$] to cancel printing, Images © One Photo » no Se Auto > Layout Auto > pe no» Qu Ado» Dao Ado» fie Nano no» Be men Lopion pes Images Select whether to print the current photo or all photos. Size Set the print size. Set the number of photos to be printed on a single Layout | shoot of paper. Type Setthe type of paper. Quality Set the print quality. Date Set to print the date. File Name | Get to print the fle name. Reset Reset settings to their default values,
- Defauit Volume Start Sound Shutter Sound Beep Sound AF Sound Set the volume of al sounds. (Off, Low, Medium, High) Set to emit a sound when you tum on your camera. (Off, On) Set to emit a sound when you press the shutter butin. (Off, On‘) Set to emit a sound when you press the buttons or switch modes. (Off, On'| Set to emit a sound when you hat-press the Shutter butin. (Of, On) Display
- Defauit Function Description Grid Line Date/Time Display Display Brightness Quick View Power Save Display a brief description of an option a menu. (Off, On') Select a guide to help you compose a scene. Off, 3X 3, 2X 2, Cross, Diagonal Set whether or not to display the date and time on the camera's display. (Off°, On) AAdustthe brigtness of he screen. (Auto, Dark, Normal, Bright)
7) Norma is bed n Peyback more exen you rene
saecied Auto. Set the duration for reviewing a captured image before retuming to the Shooting mode. (Off,
0.5 sec’, 1 sec, 3 sec)
I you perform no operations for 80 seconds, the camera automaticaly Switches to Power save mode. (Off, On) (GA * 1" Four save mode, pres any buton ner tan JPOWER to resume ueng te camera. + Even you do not setthe Por save mode, ne screen il dim 20 seconds ater he last operation to save pover. Setings 112
Settings menu Settings Hem : Défaut Language Set a language for the display text. Set the time zone for your location. When you Time Zone travel to another country, select Visit, and then select the appropriate time zone. (Home, Visit) Date/Time Set Set the date and time. Set à date format. (YYYY/MM/DD', MM/DD/YYYY, DD/MM/YYYY) Date Type “The defaut date type may difier depending on the File No. language sabot Setings 113 Défaut Specify hou to name fies. Reset: Set the fle number to start from 0001 when you inser a new memory card, format a memory card, or delete al files, Series”: Set the fle number to resume from the previous fle number when you insert a new memory card, format à memory card, or delete alfies. Q * Te de name fie rt folder is 100PHOTO) andithe defaut name of he fret le is SAM 000! + Trefle number increases one photo at a me from SAM. 0001 to SAM. 998 Te foider number increases one for at a time from 100PHOTO to SSPHOTO. Te maxnum number oies at can be stored in ane fakeris 1,000. Te camera deînes fl names according to ne Design rule for Garner Fi system (DCF) standarl fyou imenionely change fie names, ne camera may not play back te ie.
- Défaut Imprnt Auto Power Off AF Lamp Set whether or not to display the date and time on caplured photos. (Off, Date, Date & Time) GA * Te dûte and te wi be displayed one bottom right comer af tne phota. Some pinter models may not print the date and time proper. + The camera il not csplay tre date and ime = you select Text n SCN mode = you sect Panorama mode Set the camera to automaticalÿ tum off when you perform no operations for a specifed period. (Of, 1 min, 8 min’, 5 min, 10 min) Your setings il not change when you replace te better, The cerner vil ot automaticalytum of when te camera connected to a corauter or rer, encuhen you ae plan a side ghou or videos: Set a ight to automaticaly um on in dark places to help you focus. (Off, On‘) Format Reset Anynet+ (HDMI- CEC) Setings 114 Défaut Format the intemal memory and the memory card. Fomating wil delete al îles, including protected iles, (No, Yes) Erors con occur you use a memory card famatecl y anoiher brand of carera, a memory Garclreacr, oc cormpuier. Fe lommat mena car nine camera bebre ushg her to caplur photcs. Reset menus and shoo!ing options. Date and time, language, and video output settings wil not be reset. (No, Yes) um on to control ihe camera with a TV remote control when you connect it to an HDTV that Supports the Anynet+(CEC) profle. + Off: Viewrfles without using an HDTV remote control + On': Control he camera with an HDTV remote control
- Défaut HDMI Size Video Out Set the resolLtion of photos when the camera plays back îles on an HDTV via the HDMI cable. {NTSC: 1080, 720p, 480p/ PAL: 1080i, 720p, 576p) @ +_ffthe HDTV does not support the selected resolu, he HDTV eutomaïcaly seects he next lower resolu. 2 you select 480p or S76p. ie playback menus end Smar Album vil not be avalabie when you connect ie camera to a TL. Set the video signal output for your region. + NTSC: USA, Canada, Japan, Korea, Taïwan, Mexico + PAL (supports only BDGH}: Australia, Austria, Belgium, China, Denmark, England, Finland, Germany tal, Kuwait, Malaysia, Netherlands, New Zealand, Norway, Singapore, Spain, Sweden, Switzerland, Thailand us8 PC Software Défaut Select the mode to use when you connect the camera to a computer or printer with a USB cable. + Select: Manualy select the USB mode when ‘you connect your camera ta a device. + Computer‘: Connect your camera to a computer for transfering îles. + Printer: Connect your camera to a printer for printing îles. Set nteli-studio to launch automatically when you connect your camera to your computer. (Off, On') Setings 115
Error messages When the following error messages appear, try these remedies. Suggested remedies + Tum of your camera, and then tum it on again + Remove your memory card, and then insert it again. + Format your memory card. You can lock an SD, SDHC, or SDXC card to prevent fles from being deleted. Unlock the card when shooting The inserted memory card is not supported by your camera. Insert a SD, SDHC, or SDXC memory card. File names do not match the DCF standard Transfer the fles from the memory card to your computer and format the card, Then, open the Setings menu and select File No. -» Reset . 113) Card Error Card Locked Card not supported. DCF Full Error
File Error File system not supported. Low Battery Memory Full No Image File Deleta the damaged fle or contact a service center Your camera does nat support the FAT fle Structure of ne inserted memory card. Format the memory card on the camera Insart a charged battery or recharge the battery. Delete umecessary fles or insert a new memory card. Capture photos or insert a memory card that contains some photos. Appendres 117
Camera maintenance Cleaning your camera Camera body Wipe gentiy with a soft, dry cloth. Camera lens and display Use a blower brush to remove dust and wipe the lens gentiy with a soft cloh. any dust remains, apply lens cleaning liquid to a piece of lens cleaning paper and wipe gent. AN * ruse verzens tire, or ace den re dec exe souions can damage the camera or cause it to maluncüien + Do not press on the lens over ar use a blower brush on he lens cor Appendues 118
amera me aintenance Using or storing the camera + Avoid exposing the camera to very cold or very hot temperatures, + Avoid using your camera in areas with extremely high humidity or were the humidity changes drasticall. Avoid exposing the camera to direct sunlght and storing it in hot, pooriÿ-ventiated areas, such as in a car during summer time. Protect your camera and the display from impact, rough handing, and excessive vibration to avoid serious damage. Avoid using or storing your camera in dust, dirty, humid, or poory-ventlated areas to prevent damage to moving paris and internal components. Do not use our camera near fuels, combustibles, or flammable chemicals. Do not store or carry lammable liquids, gases, or explosive materials in the same compartment as the camera or its accessories. + Do not store the camera where there are mothball. + Protect your camera fram sand and chrt when you use it on beaches or in similar areas. + Your camera is not waterpraof. Da not handle the battery, adapter, or memory card with wet hands. Operating the camera with wet hands may cause damage to your camera. Storing for extended period of time + When you store the camera for an extended period, place it in a: sealed container with an absorbent material, such as siica gel + Remove the batteries from your camera when storing it for an extended period. installed batteries may leak or corode over time and cause serious damage to your camera! + Over time, unused batteries will discharge and must be recharged before use. When you transfer the camera from a cold environment to a warm one, condensation can form on the lens ar internal components ofthe camera. In this situation, tum off the camera and wait for at least 1 hour. lf condensation forms on the memory card, remove the memory card from the camera and wait until all moisture has evaporated before reinserting it. Appendhes 119
Camera mai nance + Do not swing your camera by the strap. This may cause injury to yourself or others or damage to your camera Do not paint your camera, as paint can clog moving paris and prevent proper operation. + Tum off he camera when not using it + Your camera contains delicate parts. Avoid impacts to the camera. Protect the display from extemal force by keeping in the case when not in use. Protect the camera from scraïches by keeping it away from sand, sharp implements, or loose change. Do not expose the lens to direct sunlight, as this may discolor the image sensor or cause it to malfunction. Protect the lens from fingerprints and scratches. Clean the lens with a sof, clean, debris-free lens cloth. The camera may tum off if stuck or dropped. This is to protect the memory card. Tum on the camera to use it again. While you use the camera, i may heat up. This is normal and should not affect your cameras lfespan or performance. + When you use the camera in low temperatures, it may take some time to tum on, the color of the display may be changed temporariy, or after-images may appear. These conditions are not mallunctions and they wil correct themseles when the camera is retumed to milder temperatures. + Paint or metal on the outside of the camera may cause allergies, itchy skin, eczema, or sweling for people with sensitive skin. If you experience any of these symptoms, stop using the camera immediately and consult a doctor. + Do not insert foreign objects into any of your cameras comparments, slots, ar access points. Damage due to improper use may not be covered by your warranty. + Do not allow unqualiied personnel to service the camera or attempt to service the camera yourself. Any damage that results from unqualiied service is not covered by your warranty. About memory cards Supported memory cards Your camera supports SD, SDHO, or SDXC memory cards. Terminal Wiite-protect snitoh
You can prevent îles from being deleted by using the: write-protect switch on an SD, SDHC, or SDXC card. Slide the Switch doun to lock or slide it up to unlock. Unlock the card when capturing photos and videos. Label front Appendues 120
Camera maintenance Approx. 08 40" Approx 1256" Approx. 25' 23" Memory card capacity Video The memory capacity may differ depending on shooting scenes 250/ps or shooting conditions. These capacities are based on a 1 GB __. SD card Din . . 1920X1080 Photo Ho (Se D Sugerne D me D toms re20k720 E] 151 187 244 VGA . 640X480 170 210 273 368 | pu @) 188 231 800 368X272 2159" (| 108 243 316 224 Apprax. 224X160 1445 E] 849 423 537 Te figures above are measured ihout using the 200m E] 547 651 804 recording time may vary if you use the zoom. Several vidé in succession to determine 1ne total recording time. 718 ga 1,017 (o] 1821 1,472 1,662 appendies 121 function. valable jeos were recorded
Camera maintenance + Avoid exposing memory cards to very cold or very hot temperatures (below O °C/32 F or above 40 °C/104 °F, Extreme temperatures can cause memory cards to malunction. Insert memory cards in the correct direction. Inserting a memory card in the wrong direction may damage your camera and memory card Do not use memory cards that have been formatted by other cameras or by a computer. Reformat the memory card with Your camera. Tum off the camera when you insert or remove the memory card Do not remoue the memory card or tum off your camera while the lamp is binking, as this may damage your data. Wen the Ifespan of a memory card has expired, you cannot Store any more photos on the card. Use a new memory card Do not bend, drop, or subject memory cards to heavy impact or pressure. Avoid using or storing memory cards near strong magnetic fields. Avoid using or keeping memory cards in areas with high temperature, high humidity, or corosive substances. + Prevent memory cards from making contact with liquids, dirt, or foreign substances. f din, wipe the memory card clean with a soft cloth before you insert the memory card in your camera. + Do not allow liquids, dir, or foreign substances to come in contact with memory cards or the memory card slot. Doing so may cause memory cards or the camera to malfunction + When you carry a memory card, use a case to protect the card from electrostatic discharges. + Transfer important data to other media, such as a hard disk, CD, or DVD. + When you use the camera for an extended period, the memory card may become warm. This is normal and does not indicate a mañunction. À Terrine noter trans ct Appendues 122
Camera maintenance About the battery Use oniy Samsung-approved batteries, Average shooting time/ | Test conditions (when the battery is fuly Number of photos charged) Bat ry fications The battery life was measured under — the following conditions: in P mode, in [Speciication | Descri darhness, @ resolution, Fine quality, Model SLB-10A OS on. pe Lihium-ion battery 1. Setthe flash option to Fil in, take a Cell capacity 1050 mAh ‘Approximatehy Single shot, and zoom in or out. Voltage A7V Photos | 110 niv 2. Set the flash option to Off, take a Charging time* (when the camera is ‘Approxmately Single shot, and zoom in or out. switched of) Approximately 150 min 220 photos
8. Parform steps 1 and 2, waiting
- Gharging the battery by connecting it to a computer may take langer. ‘30 seconds betngen each step. Repeat te process for 5 minutes, and then tum off the camera for 1 minute.
4. Repeat steps 1 to 3.
Videos | APPrO#mataly | Record videos at sf resolution and 85 min 80 FPS. + Te figures above are measured by Samsung standards. Your resus may fier, depending on your actual usage. + Several videos ere recorded in succession lo determine ne total recording time. Appendres 123
ra maintenance Low battery message Wen the battery has full cischarged, the battery icon will tum red and the ‘Low Battery' message wil appear. + Avoid exposing batteries to very cold or very hot temperatures {below 0 °C/82 °F or above 40 °C/104 °F). Extreme temperatures can reduce the charging capacity of your batteries. + When you use the camera for an extended period, the area around the battery chamber may become warm. This does not affect he nommal use of the camera. + Do not pul the power supply cord to disconnect the plug from the power outiet, as this may cause a fre or electric shock, + In temperatures below O °C/82 °F, battery capacity and battery lie may decrease. + Baïtery capacity may decrease in low temperatures but wil. retum to normal in milder temperatures. Protect batteries, chargers, and memory cards from damage Prevent batteries from making contact with metal objects, as this can create a connection between the + and — terminals of your battery and lead to temporary or permanent battery damage and may cause a fre or electric shock. + Ifthe indicator light is off, make sure that the battery is insertedl correct. I the camera is on while charging, the battery may not füly charge. Tum off the camera before charging the battery: Do not use your camera when you charge the battery. This may cause a fre or electric shock, Do not pul the power supply cord to disconnect the plug from the power outiet, as this may cause a fre or electric shock, Let the battery charge for at least 10 minutes before tuning on the camera. I you connect the camera to an extemal power source while the battery is depleted, using some high energy-consuming functions wil| cause the camera to tum off. To use the camera normaly, recharge the battery. Appendues 124
ntenance + Using the flash or recording videos depletes the battery quick. Charge the battery until the red indicator light tums of. + Ifthe indicator light does not iluminate, reconnect the cable, or remove the battery and insert it again + Overcharging batteries may shorten battery fe. After charging is finished, disconnect the cable from your camera + Do not bend or place heavy objects on the AC cable. Doing sa may damage the cable. + Use only the provided USB cable: + The battery may not charge when: = you use a USB hub - other USB devices are connected ta your computer - you connect the cable ta the por on the front sic af your computer the USB port of your computer does nat support the power output standard (5 V, 500 ma) Handling and disposing of batteries and chargers with care + Never dispose of batteries in a fre. Follow al local regulations when you dispose of used batteries. + Never place batteries ar cameras on or in heating devices, Such as microwave ovens, stoves, or radiators. Batteries may explode when they are overheated Appendues 125
ntenance Personal injury or death can occur if the battery is handled carelessly or impropery. For your safety, follow these instructions for proper battery handling: The battery can ignite or explode if not handied property. younolice any deformites, cracks, or other abnormalties in the battery, immediately discontinue use of the battery and contact a service center. Use only authentie, manufacturer-tecommend battery chargers and adapters and charge the battery only by the methods described in this user manual. Do not place the battery near heating devices or expose it to excessiely warm environments, such as he inside of an enclosed car in the summertime. Do not place the battery in a microwave ven. Avoid storing or using the battery in hot, humid places, such as spas or shower enclosures. Do not rest the device on flammable surfaces, such as bedeing, carpets, or electro lankets for a prolonged period. When the device is switched on, do not leave i in any confined space for a prolonged period. Do not alow battery teminals to come in contact with metalic objects, such as necHaces, coins, keys, or watches. Use only authentie, manufacturer-tecommended, Lithium ion replacement batteries. Appendues 126 +_ Do not disassemble the battery or puncture it with any sharp object: + Avoid exposing the battery to high pressure or crushing forces. + Avoid exposing the battery to major impacts, such as dropping from high places. + Do not expose the battery to temperatures of 60 {140 #F) or above. +_ Do not allow the battery to come in contact with moisture orliquids + Do not expose the battery to sources of excessive heat such as sunshine, fre or the like. osal guidelines + Dispose of the battery with care. + Do not dispose of he battery in a fre. + Disposal regulations may differ by country or region. Dispose of the battery in accordance wih al local and federal regulations. Guidelines for charging the battery Charge the battery only by the method described in this user manual, The battery can ignite or explode if not charged proper.
Before contacting a service center I you are having trouble with your camera, try these troubleshooting procedures before you contact a senice center. If you have attempted the suggested remedy and are stil having problems with your device, contact your local dealer or senvice center.
Cannot turn on the camera The power turns off suddenty The camera is losing battery power quickiy Ensure that the battery is insarted. Ensure that the battery is inserted corect}. (p. 17) Charge the battery. Charge the battery. Your camera may be in Power save mode. (p. 112) ‘The camera may tum off to prevent the memory card from being damaged due to an impact, Tum on your camera again The battery may lose power more quickiy in low temperatures (below O °C/82 °F Keep the battery warm by puting into your pocket Using the fish or recording videos depietes the batiery quicky. Recharge if needed. Batteries are consumable paris that must be replaced over time. Get a new battery ifthe battery life is diminishing quick. Cannot capture photos (The camera freezes ‘The camera heats up ‘The flash does not work Appendies 127 There is no space on the memory card. Delete umnecessary fles or insert a new card. Fomat the memory card. The memory card is defective. Get a new memory card. Make sure that the camera is switched on. Charge the battery. Make sure that the battery is inserted correct. Remove the battery and insert it again. While you use the camera, it may heat up. This is normal and should not affect your cameras ifespan or performance. +_ The flash option may be set to Of. (p.60) +_ You cannot use the flash in some modes.
Before contacting a service center The flash fes ‘The flash may fre due to static electioiy. unexpectediy ‘The camera is not malfunctioning, The date and time are | Set the date and time in îhe display settings. incorrect 6.113) ‘The display or buttons do not work Remove the battery, and then insert it again. I you use your camera at very low temperalures, it may cause the camera screen to malfunction or discolor. For better perfomance of your camera screen, use Your camera in moderate temperatures, + Tum of your camera, and then tum it on again. + Remove your memory card, and then insert it again + Format your memory card. See “Cautions when using memory cards” for more detail. (p. 122} I you change the name of a file, your camera may not play the fle (the name of Cannot play back files _| he fle should meet te DCF standard). I you encounter this situation, play back the fles on your computer. The camera display responds poorly The memory card has an error
+ Make sure that the focus option you set is suitable for close-up shots. (. 63) + Make sure that the lens is clean. f'not, clean the lens. (p. 118) + Make sure that the subject is wihin range ofthe flash. {p. 181] An incorrect White Balance can create unreaistic color. Select the proper Wnite Balance option to suit the light source. (p.74) Your photo is overexposed + Tum offthe fan. (p. 60) + Adjstthe ISO sensithih. (p. 62] +_Adjust the exposure value. (p. 72) Your photo is underexposed. + Tüm on the flash. (p. 60} + Adjstthe ISO sensithiy. (p. 62] +_Adjust the exposure value. (p. 72) ‘The colors in the photo do not match the actual ‘The photo is too dark Appendres 128
Before contacting a service center The TV does not display your photos Your computer does not recognize your camera Your computer disconnects the camera while transferring files. Your computer cannot play videos +_ Make sure that the camera is correct ‘connected to the TV with the AW cable. Make sure that your memory card contains photos. Make sure that the USB cable is ‘connected correct. Make sure that your camera is swtched on. Make sure that you are Using a supported operating system. ‘The le transmission may be intemupted by static electiciy, Disconnect the USB cable and connect it again Videos may not play on some video player programs. To play video îles caplured with your camera, instal and use the Inteli-studio program on your computer. (p. 104)
Inteli-studio is not functioning properiy Your TV or computer cannot display photos and videos that are stored on an SDXC memory card. Your computer does not recognize an SDXC memory card. + Endinteli-studio and restant the program. + You cannot use Inteli-studio on Macintosh computers. Make sure that PC Software is set to On in ine setings menu. (p. 115) + Depending on your computers speccations and environment, the program may not launch automaticalÿ. in this case, click Start» My Computer » Intelli-studio _» iStudio.exe on your computer. SDXC memory cards use the exFAT fle system. Ensure that the extemal device is ‘compatible with the exFAT fle system before ‘connecting the camera to the device. SDXC memory cards use the exFAT fle system. To use SDXC memory cards on a Windows XP computer, donrload and update the exFAT le system driver from the Microsoft webs. Appendies 129
- Smart Album category: Type, Date, Week, Face Edit: Resèe, Rotate, mage Adjust, Smart Fiter, Tim Effect: Image Adust (Red-eye Fix, Face Retouch, Brighness, Contrat, Satration, Add Noise), Smart Fiter (Normal, Miniature, Vigneting, Soft Focus, Old Fim, Ha Tone Dot, Sketch, Fist-aye, Classic, Retro, Ol Paintng, Cartoon Ink Painting, Cross Fiter, Zooming Shot Image sie Edit: Creative Movie Maker, Sil mage capture, Time témming Appendues 132 +_Intemal memory: Approximately 8.3 MB + Extemal memory (Optional: SD card (1-2 GB guaranteed), SDHC card (up to 32 GE guaranteed SDXC card (up to 64 GB guaranteed) Intemal memory capacity may not match these speciications, + Stilmage: JPEG (DOF), EXF 2.21, DPOF 1.1 PitBidge 1.0 + Movie Gi: MP4 (Mideo: MPEG-4AVO/H 264, Audio: AAC) For 1 GB SD: Number of photos SuwerFne| Fine | Nomal ® ao | 161 | 187 | 24 © sers 0 | 20 | 2 sors | 188 | 21 | D dose | 10 | 2e | 16 @ zou) wo | 4 | sw © iœuæe) 7 | er | eu ES igouoo 78 | ei | 107 CG iœuwves | an | 1472 | 108 These fgures are measured under Samsung standard conditions. Vour resuts may vary depending on the shoofng conditions and camera settings.
Camera speciications Digital output ares USB20 ‘Audio inputloutput |intemal speaker (Mono), Microphone (Stereo + AW: NTSC, PAL (selectable) Video output + HDMI 1.4: NTSC, PAL (sekectable) DCporerrpu |, py connecter Rechargeable . : de Lihiumion battery (SLB-104, 1050 mAh) Connecter pe | Micro USB (5 piri ‘The power source may differ depencing on your region.
105.3 X 59.4 X 24.9 mm (4.15 X 2.84 X 0.98 in (nthout protusions]
198.4 g (6.822 oz futhout battery and memory card)
Intel Specifcations may change without notice to improve perfommance. Appendhes 133
Glossary AEB (Auto Exposure Bracket) This feature automatically captures several images at different exposures ta help you capture a properly-expased image: AF (Auto Focus) A system that automatically focuses the camera lens on the subject. Your camera uses the contrast to focus automaticalh Aperture The apeñure controls the amount of ight that reaches the cameras sensor. Camera shake (Blur) the camera is moved while the shutter is open, the entire image may appear blured. This ocours more often when the shutter speed is slow. Prevent camera shake by raising the sensitiity, using the flash, or using a faster shuîter speed. Allemately, use a tipod, the DIS or OIS function to stabize the camera Composition Composition in photography means arranging objects in a photo. Usualÿ, abiding by the rule of hirds leads ta a good composition. DCF (Design rule for Camera File system) A speciication to define a file format and le system for digital cameras created by the Japan Electronics and Information Technology Industries Association (JETTA) Depth of field The distance between the nearest and farthest points that can be acceptab}y focused in a photograph. Depth of field varies with lens aperiure, focal length, and distance from the camera ta the subject. Selecting a smaller aperure, for example, will increase the depth of field and biur the background of a composition. Digital zoom A feature that artficialy increases the amount of zoom avalable with a zoom lens (Optical zoom). When using the Digital zoom, the image quality wil degrade as the magniication increases. DPOF (Digital Print Order Format) A format for writing printing information, such as selected images and number of prints, an a memory card. DPOF-compatible printers, sometimes available at phota shops, can read the information from the card for convenient printing Appendies 184
Glos EV (Exposure Value) Althe combinations of the cameras shutter speed and lens aperture that result in the same exposure. EV Compensation This fealure allows you to quicky adjust the exposure value measured by the camera, in Imited incremerts, to improve the exposure of your photos. Set the EV compensation to -1.0 EV to adjust the value one step darker and 1.0 EV to one step brighter. En (Exchangeable Image File Format) A specifcation to define an image fle format for digital cameras created by the Japan Electronic Industries Development Association (JEDA) Exposure The amount of light allowed to reach the cameras sensor. Exposure is controled by a combination of the shutter speed, the aperture value, and ISO sensiiity. Flash À speed light that helps to create adequate exposure in low-ight conditions. Focal length The distance from the middle of the lens to its focal point (in milimeters). Longer focal lengths result in narrower angles of viewr and the subject is magnifed. Shortar focal lengths result in wider angles of view. Histogram A graphical representation of the brighiness of an image. The horizontal axis represents the brighiness and the vertical axis represents the number of pixels. High points at the left (too dark) and right (too bright) on the histogram indicate a photo that is improperly exposed H.264/MPEG-4 Ahigh-compression video format established by international Standard organization ISO-IEC and ITU-T and developed by the Joint Video Team (JT). This codec is capable of providing good video quality at low bit rates. Image sensor The physical par of a digital camera that contains a photosite for each pixel in the image. Each photosite records the brighiness of the light that strikes it during an exposure. Common sensor types are CCD (Charge-coupled Device) and CMOS (Complementary Metal Oxide Semiconductor) Appendues 135
Glos 180 sensitivity The sensiti of the camera to light, based on the equivalent fim speed used in a fim camera. At higher ISO sensitiity settings, the camera uses a higher shutter speed, which can reduce blur caused by camera shake and low light. However, images captured with high sensiivity are more susceptible to noise. JPEG (Joint Photographic Experts Group) A lossy method of compression for digtal images. JPEG images are compressed to reduce their overall fle size with minimal deterioration of the image resolution. LCD (Liquid Crystal Display) A visual display commonty used in consumer electronics. This display needs a separate backight, such as CCFL or LED, to reproduce colors. Macro This feaiure allows you to capture close-up photos of very small objects. When using the macro feature, the camera can maintain a sharp focus on small objects at a near lfe-size ratio (1:1) Metering The metering refers to he way in which the camera measures the quantity of ight to set the exposure. MPEG (Motion JPEG) A video fommat which is compressed as a JPEG image. MPO (Multi Picture Object) An image le format that contains multiple images in a le. An MPO fle provides a 8D effect on MPO-compaïible displays, such as 8D TVs or 8D monitors Noise Misinterpreted pixels in a digital image that may appear as misplaced or random, bright pixels. Noise usually occurs when photos are shot with a high sensithity or when a sensitiity is automaticaly set in a dark place. Optical zoom This is a general zoom which can enlarge images with a lens and does not degrade the qualty of images. Appendues 136
Glos Quality An expression of the rate of compression used in a digital image. Higher quality images have a lower rate of compression, which usualÿ result in a larger fle size. Resolution The number of pixels present in a digital image. High resolution images contain more pixels and typicaly show more detail than low resolution images. Shutter speed Shutter speed refers to the amount of time it takes to open and close the shuttar, and i is an important factor in the brighiness of a photo, as it controls the amount of light which passes through the aperture before it reaches the image sensor. À fast shutter speed allows less time to let light in and the photo becomes darker and more easily feezes subjects in motion Smart zoom Smart zoom lets you 200m in with less degradation of picture quality than the optical zoom and digital zoom. Vignetting A reduction of an images brightness or saturation at the periphery louter edges) compared to the center of the image. Vignetting can draw interest to subjects positioned in the center of an image. White balance (color balance) An adjustment of the intensities of colors {picall the primary colors red, green, and blue) in an image. The goal of adjusting the white balance, or color balance, is to corectiy render the colors in an image. Appendues 137
Correct Disposal of This Product Correct disposal of batteries in this product (Waste Electrical & Electronic Equipment) {Applcable in the Europsan Union and other European {Applcable i the European Union and other European countries wih saparate battery relum systems) countries with saperate collection systems) = This marking on the battery, manual or packaging indicates that This markng on the product, accessories ar lferalure indicales that he baïtres h his product shauld not be dispased of wi olher the product and its lectronis accessories [.g. charger, headeet, USB housahold waste at the end of thai working lfs. Were marked, ho cable) should not be dispased of with other household waste at tne chemical symbols Hg, Gd or Pb indicate that he battery contains end of thar woñéng fe, To prevent possible ham to the envronment mercury, cadmium or lead above the refsrance level in EC Directive or human heal from uncantroled waste disposal, please separate 2006/66. f batries are not proper disposed of, nas substances these items from olher ypes of waste and recycl Ihem responsiiy to can cause harm to humen health ar he environment promate he sustainable reuse of metal resources. Household users should contact her ne retaler were they purchased this product, To protect nalral resources and to promote material feuse, please ar thar local govemment ofice, for detals of where and how they can Soparae battros from other ypes of waste and recycle tom through take these loms for envronmental safe recycing Business users your local, free battery retum system should contact their suppler and check the terms and conditions of ne purchase contract. This product and ts electronic accessories should not be mixed win other commercial wastes for cisposal This Ciass [BJ digital apparatus comples with Canadian ICES-008 PlanetFist represents Samsung Electronics" commiiment to sustainable development and social responsibility though eco-dfiven business and management actiiies. Dispose unanted electronics through an approved recycier. To fnd the nearest recyclng location, go to our website ww samsung.com/recycingdiect Or cal, (877) 278 - 0799 Appendies 138
FCC notice + NOTE: ‘This equipment has been tested and found to comply with the limits for a Class B chgjtal device, pursuant to part 15 ofthe FOC Rules. These imits are designed to provide reasonable protection against hammfulinterference in a residentil instalation. This equipment generates, uses and can radiate radio frequency energy and, if not instaled and used in accordance with the instructions, may cause harmiulinterlerence to racio communications. However, there is no guarantee that interference wo not occur in a particular installation. this equipment does cause hamiul interference to radio or television reception, which can be detemined by tuming the equipment of and on, the user is encouraged ta ty to corect he interference by one or more of the following measures: - Reorentate, ar relocate, the receiving antenna. - Increase the distance between the equipment and receive. - Connect the equipment into an outlet on a circuit different from that to which the receiver is connected. - Gonsu the dealer or an experenced radio / TV technician for he. CAUTIO! Changes or modifications nat expressly approved by the manufacturer responsible for complance could void ne users authority to operate the equipment. Declaration of Conformity Trade Name Samsung Electronics America, Inc. Model No. Samsung WB750 Responsible Par Samsung Electronics America, Inc. Adcress 85 Challenger Road, Ridgeeld Pak, NJ 07660 Telephone No. 1-800-SAMSUNG (726-7864) his device comples with Part 15 of ine FOC Rules. Operation is subject to the following to conditions: {1] This device may not cause hamrfulinterference, and [2] this device must accept any interference received, including interference that may cause undesired operation. Appendies 139
Date/Time Set 113 Deleting files 89 Digital Print Order Format (OF) 98 Digital zoom 28 Disconnecting the camera
Please refer to the warranty that came with your product or visit our website www.samsung.com for after-sales service or inquiries.